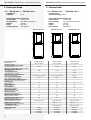
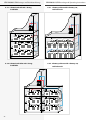
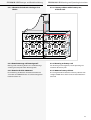
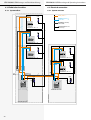
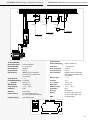
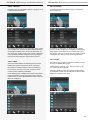
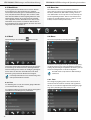
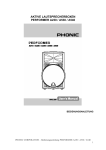
1
Montage- und Betriebsanleitung Mounting- and Operating Instructions Zentralbatteriesystem Central Battery System CPS 220 / 48.1 / J-SV / J-SKÜ CPS 220 / 48.1 / J-SV / J-SKÜ TFT Touch Steuerteil TFT Touch controller Sicherheitstechnik GmbH CPS 220/48.1/SV Montage- und Betriebsanleitung CPS 220/48.1/SV Mounting and Operating Instructions Contents Inhalt 1. Allgemeine Hinweise 7 1. General information 7 1.1. Symbolerklärung 7 1.1. Explanation of symbols 7 1.2. Haftung und Gewährleistung 7 1.2. Liability and warranty 7 1.3. Ersatzteile7 1.3. Spare parts 7 1.4. Entsorgung7 1.4. Disposal7 1.5. Fehlerbeseitigung 1.5. Correction of faults 7 7 2. Sicherheitshinweise8 2. Safety instructions 8 2.1. Bedienungsanleitung8 2.1. Operating instructions 8 2.2. Reparaturen8 2.2. Repairs8 3. Transport und Lagerung 8 3. Transport and storage 8 3.1. Kontrolle bei Anlieferung 8 3.1. Examination on delivery 8 3.2. Lagerung8 3.2. Storage8 4. Produktbeschreibung9 4. Product description 9 4.1. 4.1. 9 CPS 220 / 48.1, CPUS 220 / 48.1 9 Aufbau der CPS 220 / 48.1 11 4.1.1. 4.2. CPUSB 220 / 48.1 / 6, CPUSB 220 / 48.1 / 16 CPUSB 220 / 48.1 / 32, CPUSB 220 / 48.1 / 48 14 CPS 220/48.1, CPUS 220/64 4.1.1. 4.2. Layout CPS 220/20 and CPS 220/48.1 CPUSB 220 / 48.1 / 6, CPUSB 220 / 48.1 / 16 CPUSB 220 / 48.1 / 32, CPUSB 220 / 48.1 / 48 11 14 5. Technische Daten 16 5. Technical data 16 5.1. CPS 220 / 48.1 / ... , CPUS 220 / 48.1 / ... 16 5.1. CPS 220 / 48.1 / ... , CPUS 220 / 48.1 / ... 16 5.2. CPUSB 220 / 48.1/ ... 19 5.2. CPUSB 220 / 48.1 / ... 19 20 6. Assembly, connection 20 6. Aufstellung, Anschluss 6.1. Montage20 6.1.1. 6.2. CPS 220 / 48.1 …, CPUS 220 / 48.1 …, CPUSB 220 / 48.1 ... 20 Batterie21 6.2.1. 1 Batterieschrank mit 1 Strang á 18 Blöcke 22 6.2.2. 2 Batterieschränke mit 1 Strang á 18 Blöcke 22 6.2.3. 2 Batterieschränke mit 2 Strängen á 18 Blöcke 23 6.2.4. Batteriemontage auf Batteriegestell 23 6.2.5. Batterieschränke 2000mmm 23 6.3. 6.1. Assembly20 6.1.1. 6.2. CPS 220 / 48.1 …, CPUS 220 / 48.1 …, CPUSB 220 / 48.1 ... 20 Battery21 6.2.1. 1 battery cabinet with 1 battery set, 18 blocks each 22 6.2.2. 2 battery cabinets with 1 battery set, 18 blocks each 22 6.2.3. 2 battery cabinets with 2 battery sets, 18 blocks each 23 Elektrischer Anschluss 24 6.2.4. Mounting on battery rack 23 Systemaufbau 24 6.2.5. 2000 mm battery cabinets 23 6.3.1. 6.3.1.1. Netz-Ansschluss - X1 25 6.3. 6.3.1.2. Gerätebus IB2 - X2 25 6.3.1. 6.3.1.3. Externer Datenbus RTG - X2 25 6.3.1.1. Network connection — X1 25 6.3.1.4. Weitere Baugruppen - X2 25 6.3.1.2. Device bus IB2 — X2 25 6.3.1.5. Endstromkreise - X3 / X4 / X5 26 6.3.1.3. External databus RTG — X2 25 6.3.1.6. Electrical connection 24 System structure 24 Batterieanschluss26 6.3.1.4. Additional devices — X2 25 6.3.2. Stromkreisumschaltungen SKE 2x3A / SKE 1x6A 26 6.3.1.5. Final circuits - X3 / X4 / X5 26 6.3.3. CPUSB 220 / 48.1/6 6.3.1.6. Battery connection 26 28 6.3.3.1. Netzspannung28 6.3.2. Change-over devices SKE 2x3A / SKE 1x6A 26 6.3.3.2. Batteriespannung28 6.3.3. CPUSB 220/48.1/6 28 6.3.3.3. Gerätebus IB2 29 6.3.3.1. Supply voltage 28 6.3.3.4. Stromkreise29 6.3.3.2. Battery voltage 28 6.3.3.5. Adressierung29 6.3.3.3. Device bus IB2 29 6.3.3.4. Circuits29 6.3.3.5. Addressing29 3 CPS 220/48.1/SV Montage- und Betriebsanleitung 6.3.4. Zusätzliche Komponenten CPS 220/48.1/SV Mounting and Operating Instructions 29 6.3.4. Additional components 29 6.3.4.1. RIF 5 29 6.3.4.1. RIF 5 29 6.3.4.2. Batteriemanagementsystem BCS 33 6.3.4.2. Battery management system BCS 33 34 6.3.4.2.1. BCS-Modul34 6.3.4.2.2. 6.3.4.2.1. 6.3.4.2.2. 6.3.4.3. BCS Sensor LSA 3 / LSA 8.1 37 6.3.4.3. BCS sensor 34 BCS-Modul34 LSA 3 / LSA 8.1 37 6.3.4.3.1. LSA 3 37 6.3.4.3.1. LSA 3 37 6.3.4.3.2. LSA 8.1 38 6.3.4.3.2. LSA 8.1 38 6.3.4.4. Dreiphasenüberwachungen41 6.3.4.4. Three-phase monitors (DPÜs) 41 6.3.4.4.1. DPÜ41 6.3.4.4.1. DPÜs41 6.3.4.4.2. DPÜ/B.242 6.3.4.4.2. DPÜ/B.242 6.3.4.4.3. DPÜ/B.144 6.3.4.4.3. DPÜ/B.144 6.3.4.5. LOMO46 6.3.4.5. LOMO46 6.3.4.6. Fernmeldetableau – MTB 47 6.3.4.6. Remote mimic panel — MTB 6.3.4.7. CPS-MTB48 6.3.4.7. CPS-MTB48 6.3.4.8. INOWEB49 6.3.4.8. INOWEB49 6.3.4.9. Phasenauswahlschaltung – PAS 6.3.4.9. Phase selector switch — PAS 49 47 49 7. Inbetriebnahme50 7. Commissioning 50 7.1. Überprüfung der Verbindungen 50 7.1. Checking the connections 50 7.2. Isolationsmessung50 7.2. Insulation measuring 50 7.3. Einschalten des Zentralbatteriesystems 51 7.3. Energising the central battery system 51 7.4. Ausschalten des Zentralbatteriesystems 51 7.4. De-energise the central battery system 51 52 8. TFT Steuerteil Touchdisplay 52 8.1. 52 8. TFT Steuerteil Touchdisplay 8.1. Allgemeines52 General Information 8.1.1. Update52 8.1.1. Update52 8.1.2. Produktbeschreibung52 8.1.2. Product description Funktionen52 8.1.3. 8.1.3. 8.2. Begrifflichkeiten53 8.2. 52 Functions52 Concepts53 8.2.1. Symbole Gerätestatus 53 8.2.1. System status icons 53 8.2.2. Symbole Steuerteil 54 8.2.2. Controller icons 54 8.2.3. Symbolbeschreibung Komponenten 55 8.2.3. Explanation of components icons 55 8.2.4. Symbolbeschreibung untere Menüleiste 56 8.2.4. Explanation menu bar icons 56 8.3. Bedienung57 8.3. Operation57 8.4. Hauptmenü57 8.4. Main menu 57 8.4.1. Informationsbereich58 8.4.1. Information display 58 8.4.2. Statusanzeige58 8.4.2. Status display 58 8.4.3. Navigationsleiste (Breadcrumb) 58 8.4.3. Navigation bar (Breadcrumb) 58 8.4.4. Funktionsschaltflächen58 8.4.4. Function buttons 58 8.4.4.1. Leuchten 59 8.4.4.1. Luminaires59 8.4.4.1.1. Menü BUS-Ebene (IB1/IB2) 59 8.4.4.1.1. BUS-level menu (IB1/IB2) 59 8.4.4.1.2. Menü Stromkreiseinschübe: 60 8.4.4.1.2. Changeover device menu: 60 8.4.4.1.3. Menü Endstromkreise 61 8.4.4.1.3. Final circuit menu 61 8.4.4.1.4. Detailansicht Endstromkreis 62 8.4.4.1.4. Final circuit detailed view 62 8.4.4.1.5. Menü Leuchten 63 8.4.4.1.5. Luminaire menu 63 8.4.4.1.6. Detailansicht Leuchten 63 8.4.4.1.6. Detailed view of luminaires 63 44 CPS 220/48.1/SV Montage- und Betriebsanleitung 8.4.4.2. Batterie64 CPS 220/48.1/SV Mounting and Operating Instructions 8.4.4.2. Battery64 8.4.4.2.1. Batterie:65 8.4.4.2.1. Battery:65 8.4.4.2.2. BCS:65 8.4.4.2.2. BCS:65 8.4.4.2.3. Shunt:66 8.4.4.2.3. Shunt:66 Komponenten 67 8.4.4.3. Components 67 8.4.4.3.1. Menü SLÜ 67 8.4.4.3.1. SLÜ menu 67 8.4.4.3.2. Menü RIF 68 8.4.4.3.2. RIF menu 68 8.4.4.3.3. Menü LSA8 / LSA 3 69 8.4.4.3.3. LSA8 / LSA 3 menu 69 8.4.4.3.4. Menü DPÜ/B 71 8.4.4.3.4. DPÜ/B menu 71 8.4.4.3. 8.5. Menüleiste72 8.5. Menu bar 8.6. Menü72 8.6. Menu72 8.6.1. Test 72 8.6.1. Tests 72 72 8.6.1.1. Funktionstest (FT) starten 73 8.6.1.1. Start function test (FT) 73 8.6.1.2. Isolationstesteinrichtung prüfen (ISO Test) 73 8.6.1.2. 8.6.1.3. Betriebsdauertest (BT Test) 74 Testing the isolation test equipment (ISO test) 73 8.6.1.4. Tiefentladeschutz testen 74 8.6.1.3. Battery duration test (DT) 74 8.6.1.4. Test deep discharge protection 74 8.6.2. Funktionen75 8.6.2.1. Blockieren75 8.6.2.2. Freigeben75 8.6.2.3. Handrückschaltung quittieren 76 8.6.2.4. Tiefentladeschutz quittieren 76 8.6.2.5. Ladung einschalten 76 8.6.3. Info76 8.6.3.1. Störungsinfo77 8.6.3.2. Geräteinfo77 8.6.3.3. Prüfbuch ansehen 77 8.6.3.4. BCS Prüfbuch ansehen 78 8.6.3.5. System78 8.6.4. USB79 8.6.4.1. Verzeichnisstruktur USB Stick 79 8.6.4.2. Konfiguration laden 81 8.6.4.3. Konfiguration speichern 81 8.6.4.4. Prüfbuch / BCS Prüfbuch speichern 83 8.6.4.5. Update83 8.6.5. Einstellungen 84 8.6.5.1. Netzwerk85 8.6.5.2. Uhrzeit + Datum 8.6.5.3. Sprache88 8.6.5.4. Automatische Testeinstellungen 8.6.5.5. Learn-Mode88 8.6.5.6. Lüftersteuerung90 8.7. 86 88 Programmierung90 8.7.1. INOTEC Anlagen Konfigurator 8.7.2. Direktverbindung PC mit dem TFT Touch Steuerteil91 90 8.6.2. Functions75 8.6.2.1. Block75 8.6.2.2. Release75 8.6.2.3. Confirm manual reset 76 8.6.2.4. Exit deep discharge protection 76 8.6.2.5. Start charging 76 8.6.3. Info76 8.6.3.1. Failure info 77 8.6.3.2. Device info 77 8.6.3.3. Show logbook 77 8.6.3.4. Show BCS logbook 78 8.6.3.5. System78 8.6.4. USB79 8.6.4.1. Directory structure USB Stick 79 8.6.4.2. Load configuration 81 8.6.4.3. Save configuration 81 8.6.4.4. Save Logbook / BCS Logbook 83 8.6.4.5. Update83 8.6.5. Settings 84 8.6.5.1. Network85 8.6.5.2. Date + Time 8.6.5.3. Language88 8.6.5.4. Automatic test settings 88 8.6.5.5. Learn mode 88 8.6.5.6. Fan control 90 8.7. 86 Programming90 8.7.1. INOTEC Konfigurator 90 8.7.2. Direct connection PC with TFT touch controller 91 8.7.2.1. Konfiguration des TFT Touch Display Steuerteils91 8.7.2.1. Configuration of TFT touch controller 91 8.7.2.2. Konfiguration des PC für Windows 7 8.7.2.2. Configuration of PC at Windows 7 92 8.8. Return Button 8.9. Scroll94 92 8.8. Return Button 94 8.9. Scrollen94 8.10. Softwarestand94 8.10. Software version 94 94 5 CPS 220/48.1/SV Montage- und Betriebsanleitung 9. INOWEB 95 CPS 220/48.1/SV Mounting and Operating Instructions 9. INOWEB95 9.1. Bedienung95 9.1. Operation95 9.2. Störungsausdruck 96 9.2. Failure printout 96 9.3. Externe Verknüpfungen 97 9.3. External links 97 9.3.1. Einrichtung externer Verknüpfungen 97 9.3.1. Configuring external links 97 9.3.2. INOWeb E-Mail Setup 99 9.3.2. INOWeb E-Mail Setup 99 10. Tests 102 10.1. Erstprüfungen102 10.1. Initial tests 102 10.2. Wiederkehrende Prüfungen der elektrischen Anlagen für Sicherheitszwecke 102 10.2. Recurring safety tests on electrical systems 102 10.2.1. Tägliche Prüfungen 102 10.2.1. Daily tests 102 10.2.2. Wöchentliche Prüfung 102 10.2.2. Weekly test 102 10.2.3. Monatliche Prüfungen 103 10.2.3. Monthly tests 103 10.2.4. Halbjährliche Prüfungen 103 10.2.4. Six-monthly tests 103 10.2.5. Jährliche Prüfungen 103 10.2.5. Annual tests 103 10.2.6. 3-jährige Prüfungen 103 10.2.6. Three-year checks 103 10. Prüfungen 102 10.3. Batterieinspektion und –überwachung 104 10.4. Protokolle zu wiederkehrenden Prüfungen 104 10.3. Battery inspection and monitoring. 104 10.4. Protocols for repeat tests 104 Appendix105 Anhang105 A. Documentation 105 B. Wire lengths 105 C. Customer Service 106 D. Software version 107 Index108 66 A. Documentation 105 B. Wire lengths 105 C. Customer Service 106 D. Software version 107 Index108 CPS 220/48.1/SV Montage- und Betriebsanleitung 1. Allgemeine Hinweise 1.1. Symbolerklärung CPS 220/48.1/SV Mounting and Operating Instructions 1. General information 1.1. Explanation of symbols Sicherheitsrelevante Informationen sind durch nebenstehendes Symbol gekennzeichnet. Eine Nichtbefolgung der Anweisungen kann zu Personenschäden oder defektem Gerät führen! This symbol highlights important information that also concerns safety. Failure to follow the instructions may result in physical injury or breakage! Hinweise liefern wichtige Informationen und sind mit einem gelben Symbol markiert. Bitte lesen Sie diese sehr aufmerksam. Instructions marked by a yellow icon provide important information. Please read these very carefully. Dieses Symbol macht Sie auf zusätzliche Informationen aufmerksam. This icon provides additional information. 1.2. Haftung und Gewährleistung 1.2. Liability and warranty INOTEC übernimmt keine Gewährleistung oder Haftung für Schäden oder Folgeschäden, die entstehen durch •Nicht bestimmungsgemäßen Gebrauch •Nichteinhaltung von Vorschriften für den sicheren Betrieb •Betrieb von nicht zugelassenen oder ungeeigneten Komponenten am Notlichtsystem •Bei fehlerhafter Installation •Bei Eingriff in das Gerät INOTEC does not accept any responsibility or liability whatsoever for damage or consequential damage caused by: •Failure to operate devices according to their intended use •Failure to follow instructions relating to safe operation •The use of unauthorised or unsuitable components in conjunction with the emergency lighting system •Faulty installation •Opening the device 1.3. Ersatzteile 1.3. Spare parts Defekte Bauteile dürfen nur gegen INOTEC-OriginalErsatzteile ausgetauscht werden. Nur bei diesen Teilen gewährleisten wir, dass Sie die Sicherheitsanforderungen im vollen Umfang erfüllen. Garantie-, Service- und Haftpflichtansprüche erlöschen bei Verwendung nicht geeigneter Ersatzteile. Defective components must only be replaced with original INOTEC spare parts. We cannot guarantee that safety requirements are fully met if parts other than these are used. No warranty, service or liability claims will be acknowledged if unsuitable spare parts are used. Der Einsatz von fehlerhaften Ersatzteilen kann zu fehlerhaftem Betrieb oder einem nicht funktionierendem System führen. The use of defective spare parts may result in malfunction or cause the system to fail entirely. 1.4. Disposal 1.4. Entsorgung Von INOTEC gelieferte Batterien und Elektronikbauteile können an INOTEC zurückgegeben werden oder sind gemäß den nationalen Richtlinien und Vorschriften für die Entsorgung von Alt-Batterien und Elektronikbauteilen zu entsorgen. Batteries and electronic components supplied by INOTEC can be returned to INOTEC or should be disposed of in accordance with the national guidelines and regulations governing the disposal of used batteries and electronic components. 1.5. Correction of faults 1.5. Fehlerbeseitigung Nach jeder Fehlerbeseitigung der angeschlossenen Leuchten muss ein Funktionstest ausgelöst werden, um den angezeigten Fehler zu löschen. Whenever a fault associated with connected luminaires is corrected, a function test must be carried out to reset the fault indication. see 8.6.1.1. Start function test (FT) on page 73 siehe 8.6.1.1. Funktionstest (FT) starten - Seite 73 7 CPS 220/48.1/SV Montage- und Betriebsanleitung CPS 220/48.1/SV Mounting and Operating Instructions 2. Sicherheitshinweise 2. Safety instructions Die Installation darf nur durch Elektrofachkräfte erfolgen. Das Gerät ist bestimmungsgemäß und nur im einwandfreien, unbeschädigten Zustand zu betreiben. Für die Installation und den Betrieb dieses Gerätes sind die nationalen Sicherheits- und Unfallverhütungsvorschriften zu beachten. Vor Arbeiten an dem Gerät, insbesondere beim Austausch von Baugruppen, ist die Anlage spannungsfrei zu schalten (Netz- und Batteriespannung)! Installation should only be carried out by qualified and trained electricians. The device must not be used for anything other than its intended purpose and only in a perfect and undamaged condition. When installing and operating this device, please follow your national safety and accident prevention regulations at all times. Before carrying out any work on the device, in particular when replacing components, always disconnect the system from the power source (mains and battery)! siehe 7. Inbetriebnahme - Seite 50 see 7. Commissioning on page 50 2.1. Bedienungsanleitung 2.1. Operating instructions Lesen Sie vor der Montage und Inbetriebnahme die Montage- und Betriebsanleitung. Sie gibt wichtige Informationen für die Sicherheit, den Gebrauch und die Wartung des Gerätes. Dadurch schützen Sie sich und verhindern Schäden am Gerät. 2.2. Reparaturen Eventuelle Reparaturen oder Eingriffe dürfen ausschließlich durch INOTEC autorisierte Personen vorgenommen werden. Eingriffe durch andere Personen führen zum Verlust der Gewährleistung. 3. Transport und Lagerung 3.1. Kontrolle bei Anlieferung Überprüfen Sie das Gerät bei Anlieferung unverzüglich auf Vollständigkeit und äußere Beschädigungen. Melden Sie dem Spediteur offensichtliche Beschädigungen sofort, da wir spätere Reklamationen nicht anerkennen. 3.2. Lagerung Das Gerät ist bis zur Montage wie folgt zu lagern: •Nicht im Freien aufbewahren •Trocken und staubfrei lagern Für die Batterien gilt: •Batterien dürfen max. 3 Monate ohne Ladung gelagert werden •Bei längerer Unterbrechung der Netzversorgung muss der Batteriekreis durch entfernen der Batteriesicherung gemäß Betriebsanleitung freigeschaltet werden siehe 7. Inbetriebnahme - Seite 50 •Vor der ersten Funktionsprüfung sind die Batterien min. 24 Stunden zu laden Always read the mounting and operating instructions before installing and commissioning the device. These instructions contain important information on the safety, use and maintenance of the device, and will protect you and prevent damage to the system. 2.2. Repairs Any repairs which need to be carried out or which involve opening the device must ONLY be carried out by personnel authorised to do so by INOTEC. The guarantee becomes invalid if unauthorised personnel work on the system. 3. Transport and storage 3.1. Examination on delivery Please examine the device carefully at the point of receipt to ensure complete delivery and that no external damage exists. Please inform the carrier immediately if there are any signs of damage — we regret that we are unable to acknowledge complaints submitted after this point. 3.2. Storage Until assembly, please observe the following regarding storage of the device: •Do not store in the open air •Do store in a dry, dust-free environment The following applies to batteries that have already been fitted: •Batteries must not be stored for more than 3 months without being charged •If the mains supply is interrupted for an extended period of time, the battery circuit must be disconnected by removing the battery fuse in accordance with the operating instructions see 7. Commissioning on page 50 •Charge the batteries for at least 24 hours before carrying out the initial function test 88 CPS 220/48.1/SV Montage- und Betriebsanleitung 4. Produktbeschreibung CPS 220/48.1/SV Mounting and Operating Instructions 4. Product description Die Zentralbatteriesysteme CPS 220 / 48.1 ist ein batteriegestütztes Überwachungs- und Versorgungsgerät für den Notlichtbetrieb von Sicherheits- und Rettungszeichenleuchten. Die im Gerät integrierte und patentierte Jokertechnik ermöglicht den gleichzeitigen Betrieb von Dauer- und Bereitschaftsleuchten an einem Stromkreis. The central battery systems CPS 220/48.1 is a battery-supported monitoring and supply device for the emergency lighting operation of safety and emergency exit luminaires. The patented ‘Joker’ technology integrated into the device enables simultaneous operation of maintained and non-maintained lighting on one circuit. Eine modulare Aufbauweise und die Möglichkeit, das System durch Unterstationen und BUS-Unterstationen zu erweitern, bietet für jede Anforderung eine optimale Lösung. A modular structure and the option of expanding the system with sub stations and BUS sub stations offer an optimised solution for every requirement. 4.1. CPS 220/48.1, CPUS 220/64 4.1. CPS 220 / 48.1, CPUS 220 / 48.1 Das Zentralbatteriegerät CPS 220 / 48.1 ist mit seiner integrierten Ladeeinrichtung der Hauptbestandteil des Zentralbatteriesystems. Aufbauend auf diesem Gerätetyp kann durch Einsatz der Unterstation CPUS 220 / 48.1 die maximal anschließbare Leistung entsprechend erhöht werden. Der Einsatz unterschiedlicher Stromkreismodule (mit 3A und 6A), welche wahlweise innerhalb des Gerätes oder auch extern angeordnet werden können, ermöglicht für jede Anforderung eine optimale Lösung. Die Versorgung der externen Stromkreismodule erfolgt über eine dreiadrige Netzleitung, eine gesicherte zweiadrige Batterieleitung und eine dreiadrige Busleitung. Das Stromkreismodul schaltet bei Ausfall der Busleitung umgehend in den sicheren Betrieb (BL Ein). Die Schaltungsart für jeden einzelnen Stromkreis kann über das integrierte Steuerteil frei programmiert werden: •Dauerlicht •Bereitschaftslicht •Geschaltetes Dauerlicht •Jokerbetrieb •Geschalteter Jokerbetrieb Ebenso ist für jeden Stromkreis die Überwachungsart (Unüberwacht, Stromkreis-, Einzelleuchtenüberwachung) frei programmierbar. An jedem Stromkreis können bis zu 20 Leuchten angeschlossen und einzeln überwacht werden. In der maximalen Ausbaustufe überwacht das Steuerteil somit bei max. 96 Stromkreisen bis zu 1.960 Leuchten. Eine Kommunikation der Stromkreise mit den Leuchten geschieht ohne eine zusätzliche Datenleitung. Bei Jokerbetrieb wird die Schaltungsart (Bereitschafts- oder Dauerlicht) an dem Leuchtenmodul über einen Mikroschalter vergeben. Die entsprechende Leuchtenadresse wird an den Adressschaltern des Moduls vergeben. Über einen optionalen Senseeingang am Leuchtenmodul besteht die Möglichkeit die Leuchten lokal zu schalten. Die Bedienung der Zentralbatteriesysteme CPS 220 / 48.1, sowie der CPUS 220 / 48.1 erfolgt über das integrierte TFT Steuerteil. Die Programmierung des Gerätesteuerteils erfolgt über die komfortable INOTEC Konfigurator Software mittels USB Speichermedium oder direkter Verbindung über eine LAN-Schnittstelle. Das TFT Steuerteil bietet die Möglichkeit, Textinformationen zu Einschüben, Modulen und Leuchten zu speichern. The central battery device CPS 220/48.1 with its integrated charging system, are the main component of the central power system. The use of sub station CPUS 220/48.1 with these device types allows the maximum connectable power to be increased accordingly. The use of various circuit modules (with 3A and 6A), which can be arranged either within the device or externally, offers an optimised solution for every requirement. The external circuit modules are supplied via a three-wire mains supply, a fused two-wire battery lead and a threewire BUS data line. If the BUS data line fails, the circuit module switches to safe mode (NM On) immediately. The operation mode for each individual circuit can be freely programmed via the integrated controller: •Maintained lighting •Non-maintained lighting •Switched maintained lighting •Joker operation •Switched Joker operation For each circuit, the type of monitoring (unmonitored, circuit monitoring, individual luminaire monitoring) can also be programmed in accordance with your requirements. Up to 20 luminaires can be connected to each circuit and individually monitored. At the maximum expansion stage, the controller thus monitors up to 1960 luminaires on a maximum of 96 circuits. The circuits communicate with the luminaires without an additional data line. During joker operation, the operation mode (non-maintained or maintained lighting) is assigned to the luminaire module via a microswitch. The corresponding luminaire address is assigned to the address switches of the module. An optional sense input on the luminaire module enables the luminaires to be switched locally. The central battery systems CPS 220/48.1, and the CPUS 220/48.1, are operated via the integrated controller. The controller unit can be programmed with the comfortable “INOTEC Konfigurator” software. To transfer the configuration a USB pen drive or LAN interface can be used. The TFT controller provides the option of saving text information on change-over devices, modules and luminaires. The programmed configuration is stored in the non-volatile memory and is retained even if the power supply system fails. 9 CPS 220/48.1/SV Montage- und Betriebsanleitung Die Programmierung wird im nicht-flüchtigen Speicher abgelegt und bleibt auch bei Ausfall der Spannungsversorgung erhalten. Jederzeit können manuelle Tests zur Überprüfung ausgelöst werden. Ebenso sind automatische Tests zu frei programmierbaren Zeitpunkten möglich. Die Testergebnisse und Statusänderungen werden im integrierten Prüfbuch detailliert gespeichert und sind jederzeit abrufbar. Das Prüfbuch ist im nicht-flüchtigen Speicher abgelegt und somit bleiben die Einträge auch nach einem Spannungsausfall erhalten. Ein Meldemodul für potentialfreie Meldekontakte ist standardmäßig im Zentralbatteriesystem eingebaut und liefert bis zu fünf Statusinformationen (Betrieb, Batteriebetrieb, Störung, Optional 1, Optional 2). Über dieses Meldemodul kann das Zentralbatteriesystem auch von zentraler Stelle blockiert werden. Bei Einsatz eines MTBs erfolgt dieses über den im MTB integrierten Schlüsselschalter. Das Zentralbatteriesystem CPS 220 / 48.1, sowie die Unterstation CPUS 220 / 48.1 können mit optionalen Modulen um folgende Funktionen erweitert werden: •Anschluss von Dreiphasenüberwachungen (DPÜ) zur Überwachung des allgemeinen Versorgungsnetzes bzw. dessen Unterverteilern. Bei Ausfall einer Phase schaltet das Zentralbatteriesystem die Notbeleuchtung ein. Der Anschluss bei der DPÜ ohne Busanbindung erfolgt über eine 24 V Stromschleife, welche sowohl auf Unterbrechung als auch (optional) auf Kurzschluss überwacht wird. Die DPÜ/B mit Busanbindung kann den Ausfall einer Phase über Stromschleife oder mittels Busanbindung an das Zentralbatteriesystem melden. In der Meldung an das Zentralbatteriesystem ist die DPÜAdresse und ausgefallene Phase enthalten. •Lichtschalterabfragemodule ermöglichen entsprechend programmierte Stromkreise mittels Lichtschalter zu schalten. Die Anbindung erfolgt über den dreiadrigen Systembus. Die Zentralbatteriesysteme unterstützten maximal 3 Stück LSA 8 mit 8 Schalteingängen und 8 Stück LSA 3 mit drei Schalteingängen. Die LSA-Module sind in Versionen mit 24V- und 230V-Eingängen verfügbar. Je nach Projektanforderung sind die Zentralbatterie systeme CPS 220 / 48.1 und die CPUS 220 / 48.1 in unterschiedlichen Ausbaustufen verfügbar: •CPS 220 / 48.1 / 5, CPS 220 / 48.1 / 11 Maximale Anschlussleistung von 5,5kW mit 4 Modul plätzen für bis zu 8 Stromkreise bzw. 11 Modulplätzen für bis zu 22 Stromkreise. Keine Anschlussmöglichkeit für externe Stromkreismodule. 1010 CPS 220/48.1/SV Mounting and Operating Instructions Manual tests for checking can be activated at any time. Automatic tests can also be run at freely programmable times. The test results and status changes are detailed in the integrated logbook and can be retrieved at any time. The logbook is stored in the non-volatile memory, which means that the entries are retained even after a power failure. A signalling module for volt-free signalling contacts is built into the central battery system as standard and delivers up to five status messages (operation, battery operation, fault, option 1, option 2). Via this signalling module, the central battery system can also be blocked from a central position. If an MTB is used, this is done using the key switch integrated into the MTB. Optional modules can be used to enhance the central battery system CPS 220/48.1, as well as the sub station CPUS 220/48.1, with the following functions: •Connection of three-phase monitors (DPÜ) for monitoring the general supply network and/or its subdistribution boards. Should one phase fail, the central battery system switches on the emergency lighting. The connection on the DPÜ without bus connection is via a 24 V current loop, which is monitored for both interruption and also (optionally) for short circuits. The DPÜ/B with bus connection can report the failure of a phase to the central battery system via current loop or by bus connection. The message to the central battery system contains the DPÜ address and failed phases. •Light sequence switching modules allow programmed circuits to be switched via light switches. The connection is via the three-wire system bus. The central battery system supports a maximum of 3 LSA 8 with 8 input switches and 8 LSA 3 with three input switches. The LSA modules are available in versions with 24 V and 230 V inputs. Depending on project requirements, the central battery systems CPS 220/48.1 and CPUS 220/48.1 are available in various expansion levels: •CPS 220 / 48.1 / 5, CPS 220 / 48.1 / 11 Maximum connected load of 5.5 kW with 4 module slots for up to 8 circuits or 11 module slots for up to 22 circuits. No connection option for external circuit modules. CPS 220/48.1/SV Montage- und Betriebsanleitung CPS 220/48.1/SV Mounting and Operating Instructions •CPS 220 / 48.1 / 16 Maximale Anschlussleistung 22kW mit 8 internen Modulplätzen für bis zu 16 Stromkreise und 24 externe Modulplätze für bis zu 48 Stromkreise. Ausführungen 1- und 3-phasig. •CPS 220 / 48.1 / 32 Maximale Anschlussleistung 22kW mit 16 internen Modulplätzen für bis 32 Stromkreise und 24 externe Modulplätze für bis zu 48 Stromkreise. Ausführung 3-phasig. •CPS 220 / 48.1 / 48 Maximale Anschlussleistung 22kW mit 24 internen Modulplätzen für bis zu 48 Stromkreise und 24 externe Modulplätze für bis zu 48 Stromkreise. Ausführung 3-phasig. •CPUS 220 / 48.1 / 5 Unterstation mit eigener Steuereinheit für maximal 5,5kW ohne Ladeeinrichtung, mit 4 Modulplätzen für bis zu 8 Stromkreise. Keine Anschlussmöglichkeit für externe Stromkreismodule •CPUS 220 / 48.1 / 16, CPUS 220 / 48.1 / 32, CPUS 220 / 48.1 / 48 Unterstation mit eigener Steuereinheit, ohne Ladeeinrichtung. Ausführungen mit 8, 16 oder 24 internen Modulplätzen für bis zu 16, 32 oder 48 Stromkreisen und 24 externe Modulpätze für bis zu 48 Stromkreise. •CPS 220 / 48.1 / 16 Maximum connected load 22 kW with 8 internal module slots for up to 16 circuits and 24 external module slots for up to 48 circuits. 1- and 3-phase designs. •CPS 220 / 48.1 / 32 Maximum connected load 22 kW with 16 internal module slots for up to 32 circuits and 24 external module slots for up to 48 circuits. 3-phase design. •CPS 220 / 48.1 / 48 Maximum connected load 22 kW with 24 internal module slots for up to 48 circuits and 24 external module slots for up to 48 circuits. 3-phase design. •CPUS 220 / 48.1 / 5 Substation with separate control unit for a maximum of 5.5 kW without charging system, with 4 module slots for up to 8 circuits. No connection option for external circuit modules. •CPUS 220 / 48.1 / 16, CPUS 220 / 48.1 / 32, CPUS 220 / 48.1 / 48 Substation with separate control unit, without charging system. Designs with 8, 16 or 24 internal module slots for up to 16, 32 or 48 circuits and 24 external module slots for up to 48 circuits. Additional information on the various versions can be found in the section “Technical Data”. Weitere Informationen zu den unterschiedlichen Versionen sind im Kapitel „Technische Daten“ zu finden. 4.1.1. Aufbau der CPS 220 / 48.1 4.1.1. Layout CPS 220/48.1 CPS 220 / 48.1 / 5 CPS 220 / 48.1 / 11 Klemmen /Anschlußraum Terminals Batteriesicherungen Battery fuses 850 009 850 009 SKE 2x3A SKE 2x3A F 5 AT 1000 SKE 2x3A F 1 5 AT 1000 F 2 = BL/NM = DL/NM 5 AT 1000 F 2 = BL/NM = DL/NM 5 AT 1000 F 1 5 AT 1000 Steuerteil Controller SKE 2x3A F 1 5 AT 1000 F 2 = BL/NM = DL/NM 1 5 AT 1000 5 AT 1000 SKE 2x3A SKE 2x3A F SKE 2x3A F 1 5 AT 1000 F F 1 5 AT 1000 1 5 AT 1000 2 = BL/NM = DL/NM Netz Batterie 16AT 10AT 5 AT 1000 Stromkreismodule Circuit modules F 2 5 AT 1000 = BL/NM = DL/NM SKE 2x3A Ein SKE 2x3A 5 AT 1000 F 2 = BL/NM = DL/NM Ladeteil Charger 5 AT 1000 2 SKE 2x3A SKE 2x3A F 1 5 AT 1000 F = BL/NM = DL/NM F 1 5 AT 1000 2 5 AT 1000 = BL/NM = DL/NM F Ladeteil 220V/7,3A F F 2 5 AT 1000 = BL/NM = DL/NM SKE 2x3A F 1 5 AT 1000 F 2 = BL/NM = DL/NM 5 AT 1000 SKE 2x3A F 1 5 AT 1000 F 2 = BL/NM = DL/NM 5 AT 1000 SKE 2x3A F 1 5 AT 1000 F 2 = BL/NM = DL/NM 5 AT 1000 SKE 2x3A F 1 5 AT 1000 F 2 = BL/NM = DL/NM 5 AT 1000 F 1 5 AT 1000 F 2 1 5 AT 1000 5 AT 1000 = BL/NM = DL/NM F 2 = BL/NM = DL/NM Netz Batterie 16AT 10AT Ein Ladeteil 220V/7,3A 11 CPS 220/48.1/SV Mounting and Operating Instructions CPS 220/48.1/SV Montage- und Betriebsanleitung CPS 220 / 48.1 / 16 CPS 220 / 48.1 / 32 Klemmen /Anschlußraum Terminals Netzanschluß Mains 850 009 Batteriesicherungen Battery fuses 850 009 Steuerteil Controller SKE 2x3A SKE 2x3A F SKE 2x3A F 1 5 AT 1000 SKE 2x3A F 1 5 AT 1000 SKE 2x3A F 1 5 AT 1000 SKE 2x3A F 1 5 AT 1000 SKE 2x3A F 1 5 AT 1000 F 1 5 AT 1000 1 5 AT 1000 SKE 2x3A F Stromkreismodule Circuit modules SKE 2x3A F 1 5 AT 1000 SKE 2x3A 5 AT 1000 F 2 5 AT 1000 = BL/NM = DL/NM SKE 2x3A F 2 = BL/NM = DL/NM 5 AT 1000 F 2 5 AT 1000 = BL/NM = DL/NM F 2 = BL/NM = DL/NM 5 AT 1000 F 2 = BL/NM = DL/NM 5 AT 1000 F 2 = BL/NM = DL/NM 5 AT 1000 F 2 = BL/NM = DL/NM 5 AT 1000 F 5 AT 1000 2 = BL/NM = DL/NM F Ladeteil Charger Batterie 16AT 2 5 AT 1000 = BL/NM = DL/NM F 2 5 AT 1000 2 5 AT 1000 = BL/NM = DL/NM F 2 5 AT 1000 F 2 5 AT 1000 F 5 AT 1000 2 = BL/NM = DL/NM 2 = BL/NM = DL/NM F 1 5 AT 1000 F SKE 2x3A F 1 5 AT 1000 1 5 AT 1000 SKE 2x3A F 1 F 1 5 AT 1000 = BL/NM = DL/NM SKE 2x3A F 5 AT 1000 SKE 2x3A F 1 5 AT 1000 = BL/NM = DL/NM SKE 2x3A 1 5 AT 1000 SKE 2x3A F 1 5 AT 1000 F 1 5 AT 1000 F SKE 2x3A F 1 SKE 2x3A F 1 5 AT 1000 = BL/NM = DL/NM SKE 2x3A F 5 AT 1000 SKE 2x3A F 1 5 AT 1000 1 5 AT 1000 2 = BL/NM = DL/NM Netz F SKE 2x3A 1 5 AT 1000 SKE 2x3A F 1 5 AT 1000 F 5 AT 1000 SKE 2x3A F 1 5 AT 1000 5 AT 1000 F 2 = BL/NM = DL/NM 5 AT 1000 F 2 5 AT 1000 = BL/NM = DL/NM F 2 = BL/NM = DL/NM 5 AT 1000 F 2 = BL/NM = DL/NM 5 AT 1000 F 2 = BL/NM = DL/NM 5 AT 1000 F 2 5 AT 1000 = BL/NM = DL/NM F 5 AT 1000 2 = BL/NM = DL/NM F 2 = BL/NM = DL/NM 10AT Netz Batterie Ein Ladeteil 220V/7,5A 16AT 10AT Ein Ladeteil 220V/7,5A CPS 220 / 48.1 / 48 Klemmen Anschlußraum Terminals Netzanschluß Mains Batteriesicherungen Battery fuses 850 009 Steuerteil Controller SKE 2x3A SKE 2x3A F 5 AT 1000 F 2 5 AT 1000 SKE 2x3A 5 AT 1000 5 AT 1000 F 2 5 AT 1000 SKE 2x3A F 2 5 AT 1000 F 2 = BL/NM = DL/NM 5 AT 1000 = BL/NM = DL/NM F 2 5 AT 1000 F 2 5 AT 1000 = BL/NM = DL/NM F 2 5 AT 1000 F 2 = BL/NM = DL/NM 5 AT 1000 F 2 SKE 2x3A 5 AT 1000 F 2 = BL/NM = DL/NM 5 AT 1000 2 = BL/NM = DL/NM 5 AT 1000 2 2 5 AT 1000 SKE 2x3A F F 5 AT 1000 2 = BL/NM = DL/NM F 2 = BL/NM = DL/NM 5 AT 1000 F 2 F 1 5 AT 1000 F 5 AT 1000 2 = BL/NM = DL/NM F 2 = BL/NM = DL/NM Batterie 16AT 10AT Ein Ladeteil 220V/7,5A Stromkreismodule Circuit modules SKE 2x3A 1 Netz 1212 1 = BL/NM = DL/NM F 5 AT 1000 2 5 AT 1000 SKE 2x3A 1 1 F = BL/NM = DL/NM 1 5 AT 1000 F F 5 AT 1000 F F 5 AT 1000 F SKE 2x3A 1 SKE 2x3A 1 5 AT 1000 F 5 AT 1000 = BL/NM = DL/NM = BL/NM = DL/NM F 1 5 AT 1000 F 5 AT 1000 = BL/NM = DL/NM F 5 AT 1000 2 SKE 2x3A 1 5 AT 1000 F 1 5 AT 1000 = BL/NM = DL/NM F SKE 2x3A 1 2 5 AT 1000 SKE 2x3A F 1 5 AT 1000 = BL/NM = DL/NM = BL/NM = DL/NM F F SKE 2x3A 1 5 AT 1000 = BL/NM = DL/NM 5 AT 1000 2 5 AT 1000 SKE 2x3A F 1 5 AT 1000 F SKE 2x3A 1 F SKE 2x3A 1 5 AT 1000 F 5 AT 1000 5 AT 1000 F SKE 2x3A 1 2 SKE 2x3A 1 = BL/NM = DL/NM F F SKE 2x3A F 1 5 AT 1000 = BL/NM = DL/NM F 5 AT 1000 = BL/NM = DL/NM 5 AT 1000 2 SKE 2x3A 1 5 AT 1000 F SKE 2x3A F 1 5 AT 1000 = BL/NM = DL/NM F SKE 2x3A F 1 5 AT 1000 = BL/NM = DL/NM 5 AT 1000 SKE 2x3A F 1 5 AT 1000 Ladeteil Charger CPS 220/48.1/SV Montage- und Betriebsanleitung CPS 220/48.1/SV Mounting and Operating Instructions CPUS 220 / 48.1 / 16 CPUS 220 / 48.1 / 5 Anschlußklemmen Terminals Netzanschluß Mains Batteriesicherungen Battery fuses 850 009 SKE 2x3A SKE 2x3A F 5 AT 1000 2 = BL/NM = DL/NM F 1 5 AT 1000 F 5 AT 1000 2 = BL/NM = DL/NM Steuerteil Controller SKE 2x3A F 1 5 AT 1000 F 5 AT 1000 SKE 2x3A F 1 5 AT 1000 1 5 AT 1000 F 5 AT 1000 2 = BL/NM = DL/NM 850 009 F 2 = BL/NM = DL/NM Stromkreismodule Circuit modules SKE 2x3A SKE 2x3A F 5 AT 1000 F 5 AT 1000 2 SKE 2x3A F 1 5 AT 1000 = BL/NM = DL/NM CPUS 220 / 48.1 / 32 SKE 2x3A F 1 5 AT 1000 F 5 AT 1000 2 = BL/NM = DL/NM SKE 2x3A F 1 5 AT 1000 F 5 AT 1000 2 = BL/NM = DL/NM SKE 2x3A F 1 5 AT 1000 F 2 5 AT 1000 2 = BL/NM = DL/NM F 1 5 AT 1000 F 5 AT 1000 2 = BL/NM = DL/NM SKE 2x3A F 1 5 AT 1000 F 5 AT 1000 = BL/NM = DL/NM SKE 2x3A F 1 5 AT 1000 1 5 AT 1000 F 5 AT 1000 2 = BL/NM = DL/NM F 2 = BL/NM = DL/NM CPUS 220 / 48.1 / 48 Anschlußklemmen Terminals Netzanschluß Mains 850 009 Batteriesicherungen Battery fuses 850 009 Steuerteil Controller SKE 2x3A SKE 2x3A F SKE 2x3A SKE 2x3A F 5 AT 1000 SKE 2x3A F 1 5 AT 1000 F 2 5 AT 1000 SKE 2x3A F 1 5 AT 1000 F 2 5 AT 1000 SKE 2x3A F 1 5 AT 1000 F 2 5 AT 1000 SKE 2x3A F 1 5 AT 1000 F 2 5 AT 1000 SKE 2x3A F 1 5 AT 1000 F 2 5 AT 1000 SKE 2x3A F 1 5 AT 1000 F 2 5 AT 1000 F 1 5 AT 1000 F 2 1 5 AT 1000 5 AT 1000 F Stromkreismodule Circuit modules 5 AT 1000 = BL/NM = DL/NM = BL/NM = DL/NM = BL/NM = DL/NM = BL/NM = DL/NM = BL/NM = DL/NM = BL/NM = DL/NM SKE 2x3A SKE 2x3A SKE 2x3A SKE 2x3A SKE 2x3A SKE 2x3A F F F F F F F 1 1 5 AT 1000 2 = BL/NM = DL/NM 5 AT 1000 F 1 5 AT 1000 2 = BL/NM = DL/NM 5 AT 1000 F 1 5 AT 1000 2 = BL/NM = DL/NM 5 AT 1000 F 1 5 AT 1000 2 = BL/NM = DL/NM 5 AT 1000 F 1 5 AT 1000 2 = BL/NM = DL/NM 5 AT 1000 F 1 5 AT 1000 2 = BL/NM = DL/NM 5 AT 1000 F 2 = BL/NM = DL/NM = BL/NM = DL/NM 2 5 AT 1000 = BL/NM = DL/NM SKE 2x3A 2 5 AT 1000 = BL/NM = DL/NM F 2 5 AT 1000 F 2 5 AT 1000 2 = BL/NM = DL/NM F 1 5 AT 1000 F SKE 2x3A F 1 1 5 AT 1000 = BL/NM = DL/NM SKE 2x3A F 5 AT 1000 F 1 5 AT 1000 = BL/NM = DL/NM SKE 2x3A 1 5 AT 1000 SKE 2x3A F 1 5 AT 1000 F 1 5 AT 1000 F SKE 2x3A F 1 5 AT 1000 F SKE 2x3A F 1 5 AT 1000 2 5 AT 1000 = BL/NM = DL/NM SKE 2x3A F 2 5 AT 1000 = BL/NM = DL/NM SKE 2x3A F 2 5 AT 1000 = BL/NM = DL/NM SKE 2x3A F 2 5 AT 1000 = BL/NM = DL/NM SKE 2x3A F 2 5 AT 1000 = BL/NM = DL/NM SKE 2x3A F 2 5 AT 1000 = BL/NM = DL/NM SKE 2x3A F 1 5 AT 1000 2 5 AT 1000 = BL/NM = DL/NM SKE 2x3A F 2 = BL/NM = DL/NM SKE 2x3A 1 5 AT 1000 5 AT 1000 2 5 AT 1000 SKE 2x3A F 1 5 AT 1000 F 1 5 AT 1000 F SKE 2x3A F 1 F F F 1 5 AT 1000 F 2 5 AT 1000 = BL/NM = DL/NM SKE 2x3A F = BL/NM = DL/NM SKE 2x3A F 5 AT 1000 F SKE 2x3A F 1 5 AT 1000 2 SKE 2x3A 5 AT 1000 2 5 AT 1000 SKE 2x3A F 1 5 AT 1000 = BL/NM = DL/NM SKE 2x3A 5 AT 1000 = BL/NM = DL/NM F 5 AT 1000 SKE 2x3A F 1 5 AT 1000 F 1 5 AT 1000 F 1 5 AT 1000 F 1 5 AT 1000 F 1 5 AT 1000 F 1 5 AT 1000 F 1 5 AT 1000 1 5 AT 1000 F 2 = BL/NM = DL/NM 5 AT 1000 F 2 = BL/NM = DL/NM 5 AT 1000 F 2 = BL/NM = DL/NM 5 AT 1000 F 2 = BL/NM = DL/NM 5 AT 1000 F 2 = BL/NM = DL/NM 5 AT 1000 F 2 = BL/NM = DL/NM 5 AT 1000 F 2 = BL/NM = DL/NM 5 AT 1000 F 2 = BL/NM = DL/NM 5 AT 1000 F 2 = BL/NM = DL/NM 13 CPS 220/48.1/SV Montage- und Betriebsanleitung CPS 220/48.1/SV Mounting and Operating Instructions 4.2. CPUSB 220 / 48.1 / 6 CPUSB 220 / 48.1 / 16 CPUSB 220 / 48.1 / 32 CPUSB 220 / 48.1 / 48 4.2. CPUSB 220 / 48.1 / 6 CPUSB 220 / 48.1 / 16 CPUSB 220 / 48.1 / 32 CPUSB 220 / 48.1 / 48 Die BUS-Unterstationen CPUSB 220 / 48.1 / ... ermöglichen, externe Stromkreise an die Zentralbatteriesysteme CPS 220 / 48.1 anzuschließen. Über die 2-adrige Batterieleitung werden die BUS-Unterstationen auch bei Netzausfall mit Spannung versorgt. Die Überwachung und Programmierung erfolgt über das Steuerteil des Zentralbatteriesystems mittels der dreiadrigen Busleitung. Bei Ausfall der BUS-Kommunikation schalten die Stromkreismodule in den sicheren Betriebszustand. The BUS sub stations CPUSB 220/48.1/… enable external circuits to be connected to the central battery systems CPS 220/48. The BUS sub stations are supplied with power via the 2-wire supply lead, even if the power fails. Monitoring and programming is carried out via the central battery system controller by means of the three-wire BUS data line. If the BUS communication fails, the circuit modules switch to safe mode. Um die projektspezifischen Anforderungen optimal zu unterstützen, sind die BUS-Unterstationen ebenfalls in unterschiedlichen Ausbaustufen erhältlich: CPUSB 220 / 48.1 / 6 Auf einem Modulträger können bis zu 3 Stromkreismodule (2x3A) eingesetzt werden. Adressbereich über Adressschalter einstellbar siehe 6.3.3.5. Adressierung - Seite 29 CPUSB 220 / 48.1 / 16 In einem 19“ Modulträger können bis zu 8 Stromkreismodule mit unterschiedlicher Leistung (1x6A, 2x3A) eingesetzt werden. Adressbereich Modulträger: 1 bis 8, 9 bis 16, 17 bis 24, je nach Ausführung CPUSB 220 / 48.1 / 32 In zwei 19“ Modulträgern können bis zu 16 Stromkreismodule mit unterschiedlicher Leistung (1x6A, 2x3A) eingesetzt werden. Adressbereich Modulträger 1: 1 bis 8 Adressbereich Modulträger 2: 9 bis 16 CPUSB 220 / 48.1 / 48 In drei 19“ Modulträgern können bis zu 24 Stromkreismodule mit unterschiedlicher Leistung (1x6A, 2x3A) eingesetzt werden. Adressbereich Modulträger 1: 1 bis 8 Adressbereich Modulträger 2: 9 bis 16 Adressbereich Modulträger 3: 17 bis 24 Es ist darauf zu achten, dass jede Adresse je BUS nur einmal verwendet werden darf! 1414 In order to support project-specific requirements optimally, the BUS sub stations are also available in various expansion levels: CPUSB 220 / 48.1 / 6 Up to 3 circuit modules (2x3A) can be used on a module rack. Address range configurable via address switches see 6.3.3.5. Addressing on page 29 CPUSB 220 / 48.1 / 16 In a 19” module rack, up to 8 circuit modules with various power values (1x6A, 2x3A) can be used. Module rack address range: 1 to 8, 9 to 16, 17 to 24, depending on design CPUSB 220 / 48.1 / 32 In a 19” module rack, up to 16 circuit modules with various power values (1x6A, 2x3A) can be used. Module rack 1 address range: 1 to 8 Module rack 2 address range: 9 to 16 CPUSB 220 / 48.1 / 48 In a 19” module rack, up to 24 circuit modules with various power values (1x6A, 2x3A) can be used. Module rack 1 address range: 1 to 8 Module rack 2 address range: 9 to 16 Module rack 3 address range: 17 to 24 It is important to note that each address at every bus may only be used once! CPS 220/48.1/SV Mounting and Operating Instructions CPS 220/48.1/SV Montage- und Betriebsanleitung CPUSB 220 / 48.1 / 6 Klemmen Anschlußraum Terminals St.-Kreis2 N– L+ St.-Kreis3 N– L+ St.-Kreis4 N– L+ St.-Kreis5 N– L+ Batt. St.-Kreis6 N– L+ Batt. 8 3 6 SKE - 2 x 3A IB BB 1 2 SKE - 2 x 3A 0 7 9 5 St.-Kreis1 N– L+ 4 Netz L L Stromkreismodule Circuit modules SKE - 2 x 3A 24V/320mA + - Netz N N F 5 AT 1000 5 AT 1000 NN- INOTEC = BL / NM = DL / M = BL / NM = DL / M Eingang L+ ta: -15 ... 45°C EMC: gem. EN 55015 L+ Geeignet für Anlagen gem. DIN VDE 0108 / 10.89 860 012 ET 9/24 2 tc F 1 5 AT 1000 Temp.-Test tc=75°C max F 2 5 AT 1000 AC 230V 50 / 60Hz DC 176 - 260 V F 1 5 AT 1000 UN : F 2 5 AT 1000 Ausgang F 1 = BL / NM = DL / M CPUSB 220 / 48.1 / 16 CPUSB 220 / 48.1 / 32 Klemmen /Anschlußraum Terminals SKE 2x3A SKE 2x3A SKE 2x3A SKE 2x3A SKE 2x3A SKE 2x3A SKE 2x3A SKE 2x3A F F F F F F F F 1 5 AT 1000 5 AT 1000 F 2 1 5 AT 1000 5 AT 1000 F 2 1 5 AT 1000 5 AT 1000 F 2 1 5 AT 1000 5 AT 1000 F 2 1 5 AT 1000 5 AT 1000 F 2 1 5 AT 1000 5 AT 1000 F 2 1 5 AT 1000 5 AT 1000 F 2 1 5 AT 1000 5 AT 1000 Stromkreismodule Circuit modules SKE 2x3A SKE 2x3A F 5 AT 1000 F 2 5 AT 1000 2 = BL/NM = DL/NM = BL/NM = DL/NM = BL/NM = DL/NM = BL/NM = DL/NM = BL/NM = DL/NM = BL/NM = DL/NM SKE 2x3A = BL/NM = DL/NM 5 AT 1000 2 SKE 2x3A 5 AT 1000 F 2 = BL/NM = DL/NM 5 AT 1000 2 SKE 2x3A 5 AT 1000 F 2 = BL/NM = DL/NM 5 AT 1000 2 SKE 2x3A 5 AT 1000 F 2 = BL/NM = DL/NM 5 AT 1000 2 SKE 2x3A 5 AT 1000 F 2 = BL/NM = DL/NM 5 AT 1000 2 SKE 2x3A 5 AT 1000 F 2 = BL/NM = DL/NM 5 AT 1000 2 SKE 2x3A 5 AT 1000 F 2 = BL/NM = DL/NM 5 AT 1000 2 SKE 2x3A F 1 5 AT 1000 1 F = BL/NM = DL/NM F 1 5 AT 1000 F 5 AT 1000 = BL/NM = DL/NM F 1 5 AT 1000 F F 1 5 AT 1000 = BL/NM = DL/NM F 1 5 AT 1000 F SKE 2x3A F 1 5 AT 1000 = BL/NM = DL/NM F 1 5 AT 1000 F SKE 2x3A F 1 5 AT 1000 = BL/NM = DL/NM F 1 5 AT 1000 F SKE 2x3A F 1 5 AT 1000 = BL/NM = DL/NM F 1 5 AT 1000 F SKE 2x3A F 1 5 AT 1000 = BL/NM = DL/NM F = BL/NM = DL/NM SKE 2x3A F 1 5 AT 1000 = BL/NM = DL/NM F SKE 2x3A F 1 5 AT 1000 F 2 = BL/NM = DL/NM 1 5 AT 1000 5 AT 1000 F 2 = BL/NM = DL/NM CPUSB 220 / 48.1 / 48 Klemmen Anschlußraum Terminals SKE 2x3A SKE 2x3A F 5 AT 1000 F 2 5 AT 1000 5 AT 1000 = BL/NM = DL/NM F 2 5 AT 1000 SKE 2x3A F 2 5 AT 1000 F 2 = BL/NM = DL/NM 5 AT 1000 = BL/NM = DL/NM F 2 5 AT 1000 SKE 2x3A F 2 = BL/NM = DL/NM 5 AT 1000 F 2 5 AT 1000 F 2 = BL/NM = DL/NM 5 AT 1000 = BL/NM = DL/NM F 2 5 AT 1000 SKE 2x3A F 2 = BL/NM = DL/NM 5 AT 1000 F 2 5 AT 1000 F 2 = BL/NM = DL/NM 5 AT 1000 F 2 5 AT 1000 2 = BL/NM = DL/NM 5 AT 1000 Stromkreismodule Circuit modules F 2 = BL/NM = DL/NM SKE 2x3A F F 1 5 AT 1000 = BL/NM = DL/NM F 1 5 AT 1000 2 = BL/NM = DL/NM F SKE 2x3A 1 F SKE 2x3A 1 5 AT 1000 F 5 AT 1000 5 AT 1000 F SKE 2x3A 1 5 AT 1000 2 1 5 AT 1000 = BL/NM = DL/NM = BL/NM = DL/NM F 1 F SKE 2x3A 1 5 AT 1000 = BL/NM = DL/NM F 5 AT 1000 2 5 AT 1000 F 1 5 AT 1000 F 1 5 AT 1000 F SKE 2x3A F SKE 2x3A 1 5 AT 1000 2 5 AT 1000 SKE 2x3A F 1 5 AT 1000 = BL/NM = DL/NM = BL/NM = DL/NM F 1 F SKE 2x3A 1 5 AT 1000 = BL/NM = DL/NM F 5 AT 1000 2 5 AT 1000 SKE 2x3A F 1 5 AT 1000 F 1 5 AT 1000 F SKE 2x3A F SKE 2x3A 1 2 5 AT 1000 SKE 2x3A F 1 5 AT 1000 = BL/NM = DL/NM = BL/NM = DL/NM F F SKE 2x3A 1 5 AT 1000 = BL/NM = DL/NM 5 AT 1000 2 5 AT 1000 SKE 2x3A F 1 5 AT 1000 F 1 5 AT 1000 F SKE 2x3A F SKE 2x3A F 1 5 AT 1000 = BL/NM = DL/NM SKE 2x3A 5 AT 1000 SKE 2x3A F 1 5 AT 1000 F 2 = BL/NM = DL/NM 1 5 AT 1000 5 AT 1000 F 2 = BL/NM = DL/NM 15 CPS 220/48.1/SV Montage- und Betriebsanleitung CPS 220/48.1/SV Mounting and Operating Instructions 5. Technische Daten 5. Technical data 5.1. CPS 220 / 48.1 / ... , CPUS 220 / 48.1 / ... 5.1. CPS 220 / 48.1 / ... , CPUS 220 / 48.1 / ... Protection class: I Protection category: IP 20 I IP 20 Permissible ambient temperature: For the device: -5°C to +35°C For the battery: as per the battery datasheet Battery: 216 V DC Colour: RAL 7035 Base (option): 100/200 mm CPS 220 /48.1 / 32 1200 mm 1200 mm 830 mm 1030 mm CPS 220 / 48.1 / 48 CPS 220 / 48.1 / 16 830 mm Zulässige Umgebungstemperatur: für das Gerät: -5°C bis +35°C für die Batterie: gem. Batteriedatenblatt Batterie: 216V DC Farbe: RAL 7035 Sockel (optional): 100 / 200mm 1200 mm Schutzklasse: Schutzart: 800 mm 800 mm 800 mm Anschlussspannung Rated voltage Stromkreismodule Anzahl freier Baugruppenplätze Free module slots SKE 2x3A / SKE 1x6A max. intern / extern Anzahl freier TE für Optionen Space for options - bei Funktionserhalt - with function preservation Netzeinspeisung 3-ph (optional) Supply 3-phase (option) max. inst. Batterie Kapazität Max. installed battery capacity Max. Anschlussquerschnitt (mm²) für: Conductor cross section, max. (mm²) Netzzuleitung Mains supply Batteriezuleitung Battery supply Lichtstromkreise Outgoing to luminaires Datenleitung (RTG) Outgoing data line (RTG) 24V Stromschleife Outgoing 24V monitoring Netzleitung für Unterstation Outgoing mains to CPUS Batterieleitung für Unterstation Outgoing battery to CPUS Abmessungen: H x B x T (mm) Dimensions H x W x D (mm) Funktionserhalt (optional) With function preservation (option) - bei Funktionserhalt - with function preservation Kabeleinführungen Cable inlets 3~N/PE, 400V AC ±10%, 50/60Hz 3~N/PE, 400V AC ±10%, 50/60Hz 1~N/PE, 230V AC ±10%, 50/60Hz 24 / 24 16 / 24 8 / 24 6 TE 11 TE 19 TE - - 19 TE nur 3-ph /only 3-phase nur 3-ph /only 3-phase ja/ yes 75 Ah 75 Ah 75 Ah 35 35 35 35 35 35 4 4 4 4 4 4 4 4 4 35 35 35 35 35 35 2230 x 800 x 400 2030 x 800 x 400 2030 x 800 x 400 - *1 2346 x 894 x 586 BRS 10.1 *1 2346 x 894 x 586 22 x M 20 22 x M 20 22 x M 20 64 x M 25 64 x M 25 64 x M 25 6 x M 32 2 x M 50 1616 BRS 10.1 6 x M 32 2 x M 50 6 x M 32 2 x M 50 CPS 220/48.1/SV Mounting and Operating Instructions 600 mm CPUS 220 / 48.1 / 48 600 mm 1000 mm 800 mm 1000 mm 600 mm Sockel 100 mm 100 mm CPS 220 / 48.1 / 5 600 mm CPS 220 / 48.1 / 11 830 mm CPS 220/48.1/SV Montage- und Betriebsanleitung 800 mm Sockel 600 mm 600 mm 1~N/PE, 230V AC ±10%, 50/60Hz 1~N/PE, 230V AC ±10%, 50/60Hz 1~N/PE, 230V AC ±10%, 50/60Hz 11 / - 4/- 24 / 24 6 TE 9 TE 9 TE 6 TE 9 TE - - - ja/ yes 27,8 Ah 27,8 Ah - 16 16 35 35 35 35 4 4 4 4 4 4 4 4 4 Outgoing mains to CPUS Netzleitung für Unterstation - - - Outgoing battery to CPUS Batterieleitung für Unterstation - - - 1800 x 600 x 300 1600 x 600 x 300 830 x 800 x 400 Anschlussspannung Rated voltage Stromkreismodule Anzahl freier Baugruppenplätze Free module slots SKE 2x3A / SKE 1x6A max. intern / extern Anzahl freier TE für Optionen Space for options - bei Funktionserhalt - with function preservation Netzeinspeisung 3-ph (optional) Supply 3-phase (option) max. inst. Batterie Kapazität Max. installed battery capacity Max. Anschlussquerschnitt (mm²) für: Conductor cross section, max. (mm²) Netzzuleitung Mains supply Batteriezuleitung Battery supply Lichtstromkreise Outgoing to luminaires Datenleitung (RTG) Outgoing data line (RTG) 24V Stromschleife Outgoing 24V monitoring Abmessungen: H x B x T (mm) Dimensions H x W x D (mm) Funktionserhalt (optional) With function preservation (option) - bei Funktionserhalt - with function preservation Kabeleinführungen Cable inlets *1 max. 60 Ah BRS 10.1 *1 BRS 10.1 *1 BRS 08 2346 x 894 x 586 2346 x 894 x 586 1374 x 624 x 434 4 x M 32 4 x M 40 22 x M 20 33 x M 25 10 x M 20 33 x M 25 10 x M 20 64 x M 25 6 x M 32 2 x M 50 *1 max. 60 Ah battery 17 CPS 220/48.1/SV Mounting and Operating Instructions 830 mm 800 mm CPUS 220 / 48.1 / 5 600 mm 600 mm 1~N/PE, 230V AC ±10%, 50/60Hz 1~N/PE, 230V AC ±10%, 50/60Hz 1~N/PE, 230V AC ±10%, 50/60Hz 16 / 24 8 / 24 4/- 14 TE 8 TE 9 TE 2 TE 7 TE 8 TE ja / yes - - - - - 35 35 35 35 35 35 4 4 4 4 4 4 4 4 4 Outgoing mains to CPUS Netzleitung für Unterstation - - - Batterieleitung für Unterstation Outgoing battery to CPUS - - - 830 x 800 x 400 600 x 600 x 300 600 x 600 x 300 BRS 08 BRS 08 BRS 08 1374 x 624 x 434 1374 x 624 x 434 1374 x 624 x 434 22 x M 20 4 x M 40 4 x M 40 64 x M 25 6 x M 32 2 x M 50 33 x M 25 10 x M 20 33 x M 25 10 x M 20 Anschlussspannung Rated voltage Stromkreismodule Anzahl freier Baugruppenplätze Free module slots SKE 2x3A / SKE 1x6A max. intern / extern Anzahl freier TE für Optionen Space for options - bei Funktionserhalt - with function preservation Netzeinspeisung 3-ph (optional) Supply 3-phase (option) max. inst. Batterie Kapazität Max. installed battery capacity Max. Anschlussquerschnitt (mm²) für: Conductor cross section, max. (mm²) Netzzuleitung Mains supply Batteriezuleitung Battery supply Lichtstromkreise Outgoing to luminaires Datenleitung (RTG) Outgoing data line (RTG) 24V Stromschleife Outgoing 24V monitoring Abmessungen: H x B x T (mm) Dimensions H x W x D (mm) Funktionserhalt (optional) With function preservation (option) - bei Funktionserhalt - with function preservation Kabeleinführungen Cable inlets 1818 CPUS 220 / 48.1 / 16 600 mm CPUS 220 / 48.1 / 32 600 mm CPS 220/48.1/SV Montage- und Betriebsanleitung CPS 220/48.1/SV Mounting and Operating Instructions CPS 220/48.1/SV Montage- und Betriebsanleitung 5.2. CPUSB 220 / 48.1/ ... Protection class: I Protection category: IP 20 I IP 20 Permissible ambient -5°C to +35°C temperature: Cable inlets from top Zulässige Umge-5°C bis +35°C bungstemperatur: Kabeleinführung von oben 800 mm Anschlussspannung Rated voltage Stromkreismodule Anzahl freier Baugruppenplätze Free module slots SKE 2x3A / SKE 1x6A Anzahl freier TE für Optionen Space for options Netzeinspeisung 3-ph (optional) Supply 3-phase (option) Max. Anschlussquerschnitt (mm²) für: Conductor cross section, max. (mm²) Netzzuleitung Mains supply Batteriezuleitung Battery supply Lichtstromkreise Outgoing to luminaires BUS-Leitung IB2 BUS IB2 Abmessungen: H x B x T (mm) CPUSB 220/48.1/16 600 mm 830 mm 830 mm CPUSB 220/48.1/48 CPUSB 220/48.1/32 800 mm CPUSB 220/48.1/6 600 mm Schutzklasse: Schutzart: 5.2. CPUSB 220 / 48.1 / ... 600 mm 400 mm 1~N/PE, 230V AC ±10%, 50/60Hz 216V DC +10%/-15% 24 16 8 3 (nur 2x3A) 15 TE / 2TE (BRS08) 20 TE / 7 TE (BRS08) 13 TE / 12 TE (BRS08) - ja/ yes ja/ yes - - 35 35 35 10 35 35 35 10 4 4 4 4 4 4 4 4 830 x 800 x 400 830 x 800 x 400 600 x 600 x 300 600 x 400 x 150 Funktionserhalt (optional) BRS 08 BRS 08 BRS 08 BRS 06 - bei Funktionserhalt 1374 x 624 x 434 1374 x 624 x 434 1374 x 624 x 434 1074 x 624 x 334 22 x M 20 20 x M 20 10 x M20 13 x M25 64 x M 25 6 x M 35 2 x M 50 64 x M 25 6 x M 35 2 x M 50 33 x M 25 4 x M 35 4 x M 35 Dimensions H x W x D (mm) With function preservation (option) - with function preservation Kabeleinführungen Cable inlets 19 CPS 220/48.1/SV Montage- und Betriebsanleitung CPS 220/48.1/SV Mounting and Operating Instructions 6. Aufstellung, Anschluss 6. Assembly, connection 6.1. Montage 6.1. Assembly Beachten Sie für die Lagerung der Komponenten bis zur Montage die Hinweise in For storage of the components until assembly, observe the information in siehe 3.2. Lagerung - Seite 8 see 3.2. Storage on page 8 Bei der Montage des Gerätes ist auf ausreichende Tragfähigkeit des Bodens oder der entsprechenden Montagewand sowie auf geeignetes Montagematerial (Dübel) zu achten. When assembling the device, adequate load-bearing capacity of the floor or mounting wall and suitable assembly material (dowels) must be ensured. Bei der Auslieferung des Systems ist auf dem obersten Baugruppenträger des Elektronikschranks eine Abdeckung zum Schutz vor Eindringen von Fremdteilen (Verdrahtungsreste) aufgeklebt. Diese ist nach der Installation und vor dem Einschalten des Systems zu entfernen. When the system is shipped, a cover is taped onto the top rack of the electrical cabinet to prevent the entry of foreign bodies (wiring scraps). This must be removed after the installation and before activation of the system. 6.1.1. CPS 220 / 48.1 …, CPUS 220 / 48.1 …, 6.1.1. CPS 220 / 48.1 …, CPUS 220 / 48.1 …, CPUSB 220 / 48.1 ... CPUSB 220 / 48.1 ... Der Elektronik- und Batterieschrank werden am Aufstellungsort aufeinander gesetzt und mit den beiliegenden Schrauben verbunden. Um den notwendigen Abstand zur Wand zu gewährleisten, wird der Schrank mit den beigelegten Wandbefestigungslaschen an der Wand befestigt. Für die Batterieleitungen sind die zwei Verschraubungen (bei parallel geschalteten Batteriesätzen vier Verschraubungen) zwischen Elektronikund Batterieschrank zu montieren. Der Temperaturfühler ist in der dritten Bohrung zu montieren. Wird das BCS-System oder Temperatur-Switch (bei mehr als 1 Batterieschrank) eingesetzt, so ist die zusätzliche Verschraubung ebenfalls zwischen Elektronik- und Batterieschrank zu montieren. 4x 850 009 Kabelführung Cable gride Temperaturfühler Temperature sensor Elektronikschrank Electronic cabinet Temperaturfühler Temperature sensor 069 012 Unterlegscheibe Washer 007 938 2 x Mutter Nut 007 923 Batterie-Kabelkanal Cable duct Temperaturfühler Temperature sensor Batterieschrank Battery cabinet For the battery cables and the optional temperature sensor, the three screw connections (for battery sets connected in parallel, five screw connections) are to be mounted between the electronics cabinet and the battery cabinet. If no temperature sensor is used, the third screw connection must be sealed off with a blank plug (supplied). 850 009 Please see the relevant operating instructions for correct installation and assembly of devices in the E30 housing! Die korrekte Aufstellung und Montage von Geräten im E30-Gehäuse entnehmen sie bitte der entsprechendenKabelführung Bedienungsanleitung! Cable gride Temperaturfühler Temperature sensor Temperaturfühler Temperature sensor 069 012 Unterlegscheibe Washer 007 938 2 x 2020 The electronics and battery cabinets are placed on top of each other at the assembly site and connected with the screws supplied. To guarantee the required clearance to the wall, the cabinet is fastened to the wall with the wall-mounting straps provided. Mutter Nut 007 923 Elektronikschrank Electronic cabinet CPS 220/48.1/SV Montage- und Betriebsanleitung CPS 220/48.1/SV Mounting and Operating Instructions 6.2. Batterie 6.2. Battery Bitte überprüfen Sie die gelieferten Batterien, Polverbinder und Batteriekabel auf Vollständigkeit und mechanische Beschädigungen. Please check the supplied batteries, connector and battery cable for completeness and mechanical damage. Vor Anschluss der Batterien sind die Batteriesicherungen F1 und F2 zu entfernen. Die entsprechenden Sicherheitsbestimmungen betreffend hoher Gleichspannung sind zu beachten. Erst wenn die Installation des gesamten CPS-Systems abgeschlossen ist, sind die Batteriesicherungen F1 und F2 einzusetzen Before connecting the batteries, battery fuses F1 and F2 must be removed. The relevant safety regulations concerning high DC voltage must be observed. The battery fuses F1 and F2 may be inserted only when installation of the entire CPS system is complete siehe 7. Inbetriebnahme - Seite 50 see 7. Commissioning on page 50 Die Batterien gemäß der folgenden Abbildungen in den Schrank einsetzen, mit den Polverbindern verschalten und die Schutzkappen auf die Pole setzen. Für die Montage von Batterien im 2m Standschrank oder auf Batteriegestellen beachten Sie bitte die gesonderte Dokumentation. Insert the batteries in the cabinet as shown in the following diagrams, attach them to the connectors and place the protective caps over the pins. Please see the separate documentation for fitting batteries in the 2 m upright cabinet or onto battery racks. Für die Montage von Batterien in zwei oder mehr Batterieschränken sind für die Verdrahtung die seitlichen Flanschplatten gemäß Zeichnung zu entfernen. Die Flanschplatten bei Bedarf entfernen. Remove cover plate if required. Die Batterieschränke sind mit den mitgelieferten Erdungsleitungen zu verbinden. Die Batteriehinweise sind Bestandteil der Bedienungsanleitung und müssen aufbewahrt werden. Weitere Hinweise zur Inspektion und Pflege der wartungsfreien Batterien entnehmen Sie den mitgelieferten Batterieinstruktionen. Es dürfen nur Batterien verwendet werden, die eine angegebene Lebensdauererwartung von mindestens 10 Jahren bei 20°C Umgebungstemperatur haben. Beim Einsatz eines BCS-Systems sind die FastonAdapter gemäß Zeichnung unterhalb der Polverbinder zu befestigen. Die Adapter sind Bestandteil der BCS-Sensoren. Unsachgemäße Handhabung kann zu lebensgefährlichen Verletzungen führen! Die Batteiespannung beträgt 216V. Bei Anschluß der Batterie ist auf die richtige Polung zu achten! For fitting batteries in two or more battery cabinets, the side flange plates must be removed to enable wiring as shown in the diagram. The battery cabinets must be connected with the supplied earthing cables. The battery instructions are part of the operating instructions and must be kept in a safe place. Additional information on inspection and care of the maintenance-free batteries can be found in the battery instructions supplied. Only batteries may be used, which have a specified life time of at least 10 years at 20°C ambient temperature. When using a BCS system, the Faston adapters must be affixed below the cell connector as shown in the diagram. The adapters are part of the BCS sensors. Improper handling can cause potentially fatal injuries! The battery voltage is 216 V. Attention must be paid to correct polarity when connecting the battery! 21 CPS 220/48.1/SV Montage- und Betriebsanleitung 6.2.1. 1 Batterieschrank mit 1 Strang CPS 220/48.1/SV Mounting and Operating Instructions 6.2.1. 1 battery cabinet with 1 battery set, 18 blocks Montage 12Aheach Batterien á 18 Blöcke F1 F2 F1 F2 + - 6.2.2. 2 Batterieschränke mit 1 Strang 6.2.2. 2 battery cabinets with 1 battery set, á 18 Blöcke 18 blocks each INOTEC Sicherheitstechnik GmbH, 59 469 Ense F1 F2 2222 708 146 2010/06 CPS 220/48.1/SV Mounting and Operating Instructions CPS 220/48.1/SV Montage- und Betriebsanleitung 6.2.3. 2 Batterieschränke mit 2 Strängen á 18 6.2.3. 2 battery cabinets with 2 battery sets, Blöcke 18 blocks each B+ B+ B- B- 6.2.4. Batteriemontage auf Batteriegestell 6.2.4. Mounting on battery rack Montage und Anordnung finden Sie in der Bedienungsanleitung des entsprechenden Batteriegestells. For mounting and arrangement, see the operating instruction for the battery rack. 6.2.5. Batterieschränke 2000mmm 6.2.5. 2000 mm battery cabinets Die Anordnung der Batterien in Batterieschränken mit einer Höhe von 2000mm finden Sie auf der beiliegenden Dokumentations-CD. The arrangement of the batteries in battery cabinets with a height of 2000 mm is shown on the enclosed documentation CD. 23 CPS 220/48.1/SV Mounting and Operating Instructions CPS 220/48.1/SV Montage- und Betriebsanleitung 6.3. Elektrischer Anschluss 6.3. Electrical connection 6.3.1. Systemaufbau 6.3.1. System structure Batterieleitung (B+ / B-) Battery cable UVA L3 L2 DPÜ gem. VDE 0108 Gerätebus (BUS+/ ) Device bus L1 N L1 L2 L3 INOTEC 12 14 11 Netzleitung (L/N/PE) Mains cable 3 2 Stromschleife SL+/SLCurrent loop CPUSB 220 / 48.1 / 6 3 UVA 3 L3 L2 DPÜ gem. VDE 0108 2 L1 N L1 L2 L3 INOTEC 12 14 SKE 2x3A SKE 2x3A F 5 AT 1000 SKE 2x3A F 1 5 AT 1000 F 2 5 AT 1000 SKE 2x3A F 1 5 AT 1000 = BL/NM = DL/NM F 2 5 AT 1000 SKE 2x3A F 1 5 AT 1000 = BL/NM = DL/NM F 2 5 AT 1000 SKE 2x3A F 1 5 AT 1000 = BL/NM = DL/NM F 2 5 AT 1000 SKE 2x3A F 1 5 AT 1000 = BL/NM = DL/NM F 2 F 5 AT 1000 SKE 2x3A F 1 5 AT 1000 = BL/NM = DL/NM 2 5 AT 1000 F 1 5 AT 1000 = BL/NM = DL/NM 11 F 2 1 5 AT 1000 5 AT 1000 = BL/NM = DL/NM F 2 = BL/NM = DL/NM CPUSB 220 / 48.1 / 16 UVA 3 L3 L2 DPÜ gem. VDE 0108 UVA L1 N 3 L1 L2 L3 INOTEC 12 14 L3 L2 DPÜ gem. VDE 0108 L1 N L1 L2 11 L3 INOTEC 12 14 SKE 2x3A SKE 2x3A F 5 AT 1000 SKE 2x3A F 1 5 AT 1000 F 2 = BL/NM = DL/NM 5 AT 1000 SKE 2x3A F 1 5 AT 1000 F 2 = BL/NM = DL/NM 5 AT 1000 SKE 2x3A F 1 5 AT 1000 F 2 = BL/NM = DL/NM 5 AT 1000 SKE 2x3A F 1 5 AT 1000 F 2 = BL/NM = DL/NM 5 AT 1000 SKE 2x3A F 1 5 AT 1000 F 2 = BL/NM = DL/NM F 5 AT 1000 SKE 2x3A F 1 5 AT 1000 2 = BL/NM = DL/NM 5 AT 1000 F 1 5 AT 1000 11 F 2 = BL/NM = DL/NM 1 5 AT 1000 5 AT 1000 F 2 = BL/NM = DL/NM CPUSB 220 / 48.1 / 16 CPUSB 220 / 48.1 / 6 UVA L3 L2 3 DPÜ gem. VDE 0108 L1 N L1 L2 L3 INOTEC 12 14 3 3 UVA L3 L2 DPÜ gem. VDE 0108 2 USB CPUSB 220 / 48.1 / 6 3 Netzleitung Mains cable HVA Mains 2 UVA 2 L1 N L3 L2 L1 DPÜ gem. VDE 0108 L2 L3 INOTEC 12 14 2 11 Menue SKE 2x3A SKE 2x3A F SKE 2x3A F 1 5 AT 1000 SKE 2x3A F 1 5 AT 1000 SKE 2x3A F 1 5 AT 1000 SKE 2x3A F 1 5 AT 1000 SKE 2x3A F 1 5 AT 1000 F 1 5 AT 1000 USB SKE 2x3A F 1 5 AT 1000 1 5 AT 1000 Menue 5 AT 1000 F 2 5 AT 1000 F 2 5 AT 1000 F 2 5 AT 1000 F 2 5 AT 1000 F 2 5 AT 1000 F 2 5 AT 1000 F 5 AT 1000 2 F 2 SKE 2x3A = BL/NM = DL/NM SKE 2x3A = BL/NM = DL/NM SKE 2x3A F 5 AT 1000 = BL/NM = DL/NM SKE 2x3A F 1 5 AT 1000 F 2 5 AT 1000 = BL/NM = DL/NM SKE 2x3A F 1 5 AT 1000 F 2 5 AT 1000 = BL/NM = DL/NM SKE 2x3A F 1 5 AT 1000 F 2 5 AT 1000 = BL/NM = DL/NM SKE 2x3A F 1 5 AT 1000 F 2 5 AT 1000 = BL/NM = DL/NM F 2 5 AT 1000 F 2 5 AT 1000 SKE 2x3A F 1 5 AT 1000 F 5 AT 1000 2 5 AT 1000 F F 2 = BL/NM = DL/NM = BL/NM = DL/NM = BL/NM = DL/NM = BL/NM = DL/NM = BL/NM = DL/NM SKE 2x3A F 1 5 AT 1000 = BL/NM = DL/NM = BL/NM = DL/NM F 2 SKE 2x3A F 1 5 AT 1000 5 AT 1000 = BL/NM = DL/NM SKE 2x3A F 2 SKE 2x3A F 1 5 AT 1000 5 AT 1000 2 SKE 2x3A F 1 5 AT 1000 5 AT 1000 2 SKE 2x3A F 1 5 AT 1000 5 AT 1000 2 F 1 5 AT 1000 5 AT 1000 2 1 5 AT 1000 5 AT 1000 2 F 1 5 AT 1000 F = BL/NM = DL/NM SKE 2x3A F 1 5 AT 1000 F = BL/NM = DL/NM SKE 2x3A F 1 5 AT 1000 F = BL/NM = DL/NM SKE 2x3A F 1 5 AT 1000 F = BL/NM = DL/NM SKE 2x3A F 1 5 AT 1000 F = BL/NM = DL/NM SKE 2x3A F 1 5 AT 1000 F = BL/NM = DL/NM SKE 2x3A F 1 5 AT 1000 Netz 5 AT 1000 = BL/NM = DL/NM 2 SKE 2x3A = BL/NM = DL/NM SKE 2x3A F 1 F 1 5 AT 1000 5 AT 1000 SKE 2x3A F 1 5 AT 1000 = BL/NM = DL/NM SKE 2x3A F 1 5 AT 1000 1 5 AT 1000 Batterie 5 AT 1000 16AT F 2 5 AT 1000 F 2 5 AT 1000 F 2 5 AT 1000 F 2 5 AT 1000 F 2 5 AT 1000 F 2 5 AT 1000 F 2 5 AT 1000 F 2 10AT Ein = BL/NM = DL/NM = BL/NM = DL/NM = BL/NM = DL/NM = BL/NM = DL/NM = BL/NM = DL/NM = BL/NM = DL/NM = BL/NM = DL/NM = BL/NM = DL/NM Ladeteil 220V/7,5A CPUS 220 / 48.1 / 32 CPS 220 / 48.1 / 32 2424 11 L1 N L1 L2 L3 INOTEC 12 14 11 2 CPS 220/48.1/SV Montage- und Betriebsanleitung CPS 220/48.1/SV Mounting and Operating Instructions Das CPS 220 / 48.1 - System kann durch den Einsatz von Unterstationen (CPUS 220 / 48.1 / ...) und BUS-Unterstationen (CPUSB 220 / 48.1 / ...) um zusätzliche Endstromkreise erweitert werden. Additional final circuits can be added to the CPS 220/48.1 system using sub stations (CPUS 220/48.1 …) and BUS sub stations (CPUSB 220/48.1 …). Für den Betrieb der Unterstation CPUS 220 / 48.1 / ... und der BUS-Unterstation CPUSB 220 / 48.1 / ... wird eine Netzzuleitung und eine Batterieleitung vom Hauptgerät benötigt. Da im Notbetrieb die Batterieleitung die Unterstationen mit Spannung versorgt, ist diese in Funktionserhalt zu verlegen. Operation of the sub station CPUS 220/48.1/… and the BUS-substation CPUSB 220/48.1/... requires a feeder and a battery cable from the main device. Since the battery cable powers the sub stations in emergency operation, this must be laid with function preservation. Ja nach gültiger nationaler Vorschrift kann die Netzzuleitung für die Unterstation CPUS 220 / 48.1 und die BUS-Unterstation CPUSB 220 / 48.1 auch über den lokalen Unterverteiler erfolgen. Für die Kommunikation mit dem Steuerteil wird für die BUS-Unterstationen CPUSB eine dreiadrige BUS-Leitung benötigt. Bei Unterbrechung der BUS-Leitung schalten die angeschlossenen BUS-Unterstationen automatisch in den sicheren Betrieb. 6.3.1.1. Netz-Ansschluss - X1 •1-phasig: Anschluss der Spannungsversorgung an die Sicherung 1F1 und Klemmen N, PE - Klemmleiste X1. Bei Verwendung von 2 Ladestufen ist die zweite Sicherung den Ladenstufen zuzuordnen. 3-phasig: Anschluss der Spannungsversorgung an die Sicherungen 1F1 und Klemmen N, PE - Klemmleiste X1. Bei 3-phasiger Spannungsversorgung ist eine Dreiphasenüberwachung (DPÜ) im System integriert (nicht bei CPUSB ... ) und mit den Klemmen L und N des RIF 5 verdrahtet. Der Sicherungswert ist auf den max. Systemstrom, incl. Ladestufen, ausgelegt. Die Sicherung kann bei Bedarf, z. B. Selektivität der Absicherung der Netzzuleitung, auf den tatsächlichen Systemstrom angepasst werden. 6.3.1.2. Gerätebus IB2 - X2 Für den Anschluss von externen BUS-fähigen Komponenten sind die Klemmen IB2, ⊥, +24V auf der Klemmleiste X2 vorhanden. Maximale BUS Leitungslänge (IB + RTG) 500m bei einem Mindestquerschnitt von 0,5mm². 6.3.1.3. Externer Datenbus RTG - X2 Zum Anschluss von Unterstationen oder externer Überwachung sind die Klemmen R, T, G auf der Klemmleiste X2 vorhanden. Nicht kompatibel zur SVPC-Software! board. Depending on the relevant national regulation, the feeder for the sub station CPUS 220/48.1 can also be routed through the local sub-distribution Communication with the controller requires a three-wire BUS data line. If the BUS data line is interrupted, the connected BUS sub stations automatically switch to safe mode. 6.3.1.1. Network connection — X1 •1-phase: Connection of the power supply system to fuse 1F1 and terminals N, PE — terminal rail X1. Allocate the second fuse to the chargers, if 2 chargers are installed. •3-phase: Connection of the power supply system to fuse 1F1 and terminals N, PE — terminal rail X1. With a 3-phase power supply system, a three-phase monitor (DPÜ) is integrated into the system and wired to terminals L and N of the RIF5. The fuse value is designed for the maximum system current, including charging levels. If necessary, such as for selectivity in protecting the mains feeder, the fuse can be adapted to the actual system current. 6.3.1.2. Device bus IB2 — X2 To connect external BUS-compatible components, terminals +Bus, ⊥, +24 V are present on terminal rail X2. Maximum BUS cable length (IB + RTG) 500m when using 0.5mm². 6.3.1.3. External databus RTG — X2 To connect sub stations or external monitoring systems, terminal rail X2 accommodates terminals R, T, G. Not compatible to SVPC software! 6.3.1.4. Weitere Baugruppen - X2 6.3.1.4. Additional devices — X2 Die Anschlussklemmen für die Baugruppen RIF5, LSA8.1 und DPÜ befinden sich auf der Klemmleiste X2. Ein externes Fernmeldetableau (MTB) wird über die potentialfreien Kontakte des RIF5 angeschlossen. The terminals for the devices RIF5, LSA8.1 and DPÜ are located on terminal rail X2. An external remote mimic panel (MTB) is connected via the volt-free contacts of the RIF5. 25 CPS 220/48.1/SV Mounting and Operating Instructions CPS 220/48.1/SV Montage- und Betriebsanleitung 6.3.1.5. Endstromkreise - X3 / X4 / X5 6.3.1.5. Final circuits - X3 / X4 / X5 Die Leuchten werden an die Klemmen L, N, PE - Klemmleiste X3 / X4 / X5 angeschlossen: The luminaires are connected to terminals L, N, PE terminal strip X3 / X4 / X5: - X3 Stromkreise 1.1 / 1.2 / 2.1 / ... / 8.2 - X3 circuits 1.1 / 1.2 / 2.1 / ... / 8.2 - X4 Stromkreise 9.1 / 9.2 / 10.1 / ... / 16.2 - X4 circuits 9.1 / 9.2 / 10.1 / ... / 16.2 - X5 Stromkreise 17.1 / 17.2 / 18.1 / ... / 24.2 - X5 circuits 17.1 / 17.2 / 18.1 / ... / 24.2 F 1 128 mm 5 AT 1000 - Einzelstromkreiseinschub mit 2-poliger Absicherung je Stromkreis - Einzelleuchten- und Stromkreisüberwachung mit F JOKER Funktion - Betrieb jedes Endstromkreises der Stromkreisumschaltung (Einschubkarte) in einer anderen Schaltungsart (JOKER, Dauerlicht, Bereitschaftslicht und geschaltetes Dauerlicht) möglich - Überwachung ohne Datenleitung - LEDs in der Frontabdeckung zur Anzeige der Schaltungsart und des Stromkreisstatus - Einsatz in Zentralbatteriesystem CPS 220 / 48.1 = BL / NM - Einzelleuchtenüberwachung von max. 20 = DL / M Leuchten je Stromkreis - Verfügbare Varianten: o 2 Stromkreise á 3A 6.3.1.6. Battery connection Absicherung 5A (Art.-Nr. 080 005) The battery wires must be connected o 1 Stromkreise á 6A to the battery fuses Absicherung10A (Art.-Nr. 080 006) +/-. - Einschaltstrom je Stromkreis max. 250A / 500µs Note the following process when connecting the battery - Maximale Verlustleistung bei Volllast: 14W SKE 1x6A SKE 2x3A 10 AT 1000 F 5 AT 1000 2 = BL / NM = DL / M 50 mm Einschubtiefe 170 mm 6.3.1.6. Batterieanschluss Die Batterieleitungen sind mit den Batterieabsicherungen +/- zu verbinden. Folgendes Vorgehen ist beim Anschluss der Batterieleitung zu beachten: 1. Anlage blockieren siehe 8.6.2.1. Blockieren - Seite 76 siehe 8.7. Programmierung - Seite 91 2. Batteriesicherungen entfernen 3. Batterieleitung anschließen, auf die korrekte Polung ist dabei zu achten! Unsachgemäße Handhabung kann zu lebensgefährlichen Verletzungen führen! Die Batteiespannung beträgt 216V. 6.3.2. Stromkreisumschaltungen SKE 2x3A / SKE 1x6A In den Anlagen CPS 220 / 48.1 / ... können verschiedene Typen von Stromkreisumschaltungen eingesetzt werden: 50 mm wire: 1. Block the system see 8.6.2.1. Block on page 76 see 8.7. Programming on page 91 2. Remove the battery fuses 3. Connect the Name: batteryBecker wire. Ensure the correct polarity! Sachnummer: Datum: 02.02.2011 Änderung: Benennung: SKE 2x3A Blatt: 1 von 1 Improper handling can cause potentially fatal SKE 1x6A INOTEC Sicherheitstechnik GmbH injuries!Geprüft: The battery voltage is 216 V. 6.3.2. Change-over devices SKE 2x3A / SKE 1x6A The CPS 220/48.1 systems are able to accommodate various types of change-over device: SKE 2x3A with 2 final circuits up to 3A SKE 2x3A mit 2 Endstromkreisen bis 3A SKE 1x6A with 1 final circuit up to 6A SKE 1x6A mit 1 Endstromkreis bis 6A Je nach Ausführung der CPS-Anlage können im Steuerteil als Überwachungsarten Einzelleuchten- oder Stromkreisüberwachung eingestellt werden. Es ist möglich, jeden Endstromkreis der Stromkreisumschaltung (Einschubkarte) in einer anderen Schaltungsart (JOKER, Dauerlicht, Bereitschaftslicht und geschaltetes Dauerlicht) zu betreiben. 2626 Depending on the version of the CPS system the monitoring mode can be set to individual luminaire (SV) or circuit monitoring (SKÜ) at the controller unit. Each final circuit of the change-over device (card) can be operated in a different operation mode (Joker, maintained lighting, non-maintained lighting and connected maintained lighting). CPS 220/48.1/SV Montage- und Betriebsanleitung CPS 220/48.1/SV Mounting and Operating Instructions Die eingestellte Schaltungsart ist ausschließlich im Netzbetrieb aktiv. Bei Netzausfall an einem Unterverteiler der Allgemeinbeleuchtung, sofern dieser mittels einer DPÜ über die Stromschleife überwacht ist, werden sämtliche Verbraucher aller an die CPS-Anlage angeschlossenen Stromkreise eingeschaltet, unabhängig davon, welche Schaltungsart zuvor aktiv war. Dabei werden die Endstromkreise mit Netzspannung aus der CPS-Anlage versorgt. The operation mode set is active only in mains operation. If the power to one sub-distribution board of the general lighting fails, and this is monitored by a DPÜ via the current loop, all consumers of all circuits connected to the CPS system will be switched on, regardless of which operation mode was active beforehand. The final circuits are thus supplied with mains voltage from the CPS system. Bei Netzausfall am Hauptverteiler der Sicherheitsbeleuchtung werden alle Verbraucher in Batteriebetrieb geschaltet. If the power to the main distribution board of the safety lighting fails, all consumers will be switched to battery operation. An jeden Stromkreis mit Einzelleuchtenüberwachung können maximal 20 Leuchten angeschlossen werden. Anschlussklemmen für jeden Stromkreis (L, N, PE) stehen auf den Klemmleisten X3 / X4 / X5 zur Verfügung. Up to 20 luminaires can be connected to each circuit with individual luminaire monitoring. Terminals for each circuit (L, N, PE) are available on terminal rail X3 / X4 / X5. Die LEDs auf den Umschaltungen geben folgende Information: The LEDs on the change-over devices provide the following information: LEDs Meldung rot (Dauerleuchten) Leuchtenstörung F F rot (3 Sek. blinken Stromkreis hat Über1 LED) last rot (0,5 Sek. blitzen) keine Ausgangsspannung im Jokerbetrieb rot (blinken schnell Busstörung 2 LEDs) gelb Bereitschaftslicht eingeschaltet gelb Dauerlicht eingeschaltet SKE 1x6A 10A (Best.-Nr. 080 006) Red (3 sec. flashing 1 LED) Red (0.5 sec flashing) Red (flashing quickly 2 LEDs) Yellow Circuit overloaded No output voltage in joker operation Bus fault Non-maintained lighting on Maintained lighting on The maximum inrush current per circuit may not exceed 250 A for 500 µs. Für die Stromkreisumschaltungen nur Orginal sicherungen mit Löschmitteln verwenden. 5A (Best.-Nr. 080 005) Message Light fault Yellow Der maximale Einschaltstrom pro Stromkreis darf nicht mehr als 250A für 500µs betragen! SKE 2x3A LEDs Red (steady) Use only original fuses with extinguishing agents for the change-over devices. SKE 2x3A 5A (Order no. 080 005) jeweiliges Abschaltvermögen 1000A SKE 1x6A 10A (Order no. 080 006) Die Endstromkreise werden, abhängig von der verwendeten Stromkreisumschaltung, wie folgt angeschlossen: Breaking capacity in each case 1000 A SKE 2x3A: Anschlussklemmen der Endstromkreise: x.1/x.2 SKE 1x6A: Anschluss des Endstromkreises an x.1. Die Klemmen x.2 haben keine Funktion! (x=Einschubnr. - z.B. 4.1 = Einschub 4, Stromkreis 1) Depending on the change-over device used, the final circuits are connected as follows: SKE 2x3A: Connection terminals of the final circuits: x.1 / x.2 SKE 1x6A: Connection of the final circuit to x.1. The terminals x.2 have no function! (x=plug-in module no. - e.g. 4.1 = plug-in module 4, circuit 1) 27 CPS 220/48.1/SV Montage- und Betriebsanleitung 6.3.3. CPUSB 220 / 48.1/6 CPS 220/48.1/SV Mounting and Operating Instructions 6.3.3. CPUSB 220/48.1/6 Batterie 220V über CPS Hauptgerät St.-Kreis4 N– L+ St.-Kreis5 N– L+ Batt. St.-Kreis6 N– L+ Batt. IB BB BUS Netz N N Netz L L St.-Kreis1 N– L+ St.-Kreis2 N– L+ St.-Kreis3 N– L+ St.-Kreis4 N– L+ Adresse Stromkreis Stromkreis Stromkreis Platz 1 Platz 2 Platz 3 links mitte rechts 9 0 1.1 / 1.2 2.1 / 2.2 3. 1 / 3. 2 1 4.1 / 4.2 5.1 / 5.2 6. 1 / 6. 2 2 7.1 / 7.2 8.1 / 8.2 9. 1 / 9. 2 3 10. 1 / 10.1 11. 1 / 11.2 12. 1 / 12. 2 4 13. 1 / 13.2 14. 1 / 14.2 15. 1 / 15. 2 5 16. 1 / 16.2 17. 1 / 17.2 18. 1 / 18. 2 6 19. 1 / 19.2 20. 1 / 20.2 21. 1 / 21. 2 7 22. 1 / 22.2 23. 1 / 23.2 24. 1 / 24. 2 8 keine Funktion 9 keine Funktion 1 IB BB INO TEC 55 6 6 44 SKE - 2 x 3A SKE - 2 x 3A 9 Adresseinstellung Sic her heitstec hnik GmbH SKE - 2 x 3A 0 1 33 77 8 0 33 Sic her heitstec hnik GmbH SKE - 2 x 3A - Eingang F LEDs rot (Dauerleuchten) Meldung Leuchtenstörung rot (3 Sek blinkt 1 LED) Stromkreis hat Überlast rot (0,5 Sek. blitzen) keine Ausgangsspannung im Jokerbetrieb rot (blinken schnell alle Busstörung LEDs) gelb Bereitschaftslicht eingeschaltet gelb Dauerlicht eingeschaltet F 2 5 AT 1000 AC 230V 50 / 60Hz DC 176 - 260 V 5 AT 1000 tc F 1 860 012 F 2 5 AT 1000 5 AT 1000 ET 9/24 F 1 5 AT 1000 INOTEC = BL / NM = DL / M Die LEDs auf den Umschaltungen geben folgende Informationen: F 2 5 AT 1000 NN- NN= BL / NM = DL / M L+ ta: -15 ... 45°C EMC: gem. EN 55015 L+ Geeignet für Anlagen gem. DIN VDE 0108 / 10.89 860 012 ET 9/24 5 AT 1000 INOTEC = BL / NM = DL / M F 1 tc F 2 5 AT 1000 Temp.-Test tc=75°C max F 1 AC 230V 50 / 60Hz DC 176 - 260 V F 2 5 AT 1000 5 AT 1000 UN : F 1 5 AT 1000 Ausgang F 2 5 AT 1000 Ausgang F 1 + 24V/320mA + 24V/320mA SKE - 2 x 3A Batt. 2 Adresseinstellung 2 SKE - 2 x 3A Batt. St.-Kreis6 N– L+ Adresse Stromkreis Stromkreis Stromkreis Platz 1 Platz 2 Platz 3 links mitte rechts 0 1.1 / 1.2 2.1 / 2.2 3. 1 / 3. 2 1 4.1 / 4.2 5.1 / 5.2 6. 1 / 6. 2 2 7.1 / 7.2 8.1 / 8.2 9. 1 / 9. 2 3 10. 1 / 10.1 11. 1 / 11.2 12. 1 / 12. 2 4 13. 1 / 13.2 14. 1 / 14.2 15. 1 / 15. 2 5 16. 1 / 16.2 17. 1 / 17.2 18. 1 / 18. 2 6 19. 1 / 19.2 20. 1 / 20.2 21. 1 / 21. 2 7 22. 1 / 22.2 23. 1 / 23.2 24. 1 / 24. 2 8 keine Funktion 9 keine Funktion INO TEC St.-Kreis5 N– L+ = BL / NM = DL / M = BL / NM = DL / M UN : St.-Kreis3 N– L+ Eingang L+ ta: -15 ... 45°C EMC: gem. EN 55015 L+ Geeignet für Anlagen gem. DIN VDE 0108 / 10.89 St.-Kreis2 N– L+ 77 8 St.-Kreis1 N– L+ Temp.-Test tc=75°C max Netz L L 55 6 6 44 Netz N N Battery 220V via CPS main-station Mains 230V AC BUS - Netz 230V AC = BL / NM = DL / M The LEDs on the change-over devices provide the following information: F LEDs Red (steady) Message Light fault Red (3 sec. flashing 1 LED) Red (0.5 sec flashing) Circuit overloaded Red (flashing quickly all LEDs) Yellow Yellow No output voltage in joker operation Bus fault Non-maintained lighting on Maintained lighting on Der maximale Einschaltstrom pro Stromkreis darf nicht mehr als 250A für 500µs betragen! The maximum starting current per circuit may not exceed 250A for 500 µs! Für die Stromkreisumschaltungen nur Orginalsicherungen mit Löschmitteln verwenden. Use only original fuses with extinguishing agents for the change-over devices. CPUSB 220 / 48.1/6 5A (Best.-Nr. 080 005) CPUSB 220 / 48.1/6 5A (Order no. 080 005) Abschaltvermögen 1000A Breaking capacity in each case 1000 A Die Anschlussklemmen der Endstromkreise der BUSUnterstation sind für Leitungsquerschnitte bis max. 4mm² ausgelegt. The terminals of the BUS sub stations are designed for conductor cross-section areas of max. 4 mm². 6.3.3.1. Supply voltage 6.3.3.1. Netzspannung Die Netzspannung L, N, PE vom Hauptgerät oder vom Rangierverteiler wird auf die entsprechenden Klemmen der BUS-Unterstation verdrahtet. The supply lead L+, N-, PE from the main device or from the sub station termination and fuse box is wired to the corresponding terminals of the BUS sub station. 6.3.3.2. Battery voltage 6.3.3.2. Batteriespannung Die Batteriespannung vom Hauptgerät oder vom Ranguerverteiler wird auf die entsprechenden Klemmen + / - der BUS-Unterstation verdrahtet. 2828 The battery voltage from the main device or from the terminal block is wired to the corresponding terminals + / - of the BUS substation. CPS 220/48.1/SV Montage- und Betriebsanleitung CPS 220/48.1/SV Mounting and Operating Instructions 6.3.3.3. Gerätebus IB2 6.3.3.3. Device bus IB2 Eine Kommunikation mit dem Steuerteil im Hauptgerät erfolgt über den Gerätebus (IB2), welcher an die Klemmen B und angeklemmt wird. CPUSB CPS B--> IB2 --> Communication with the controller in the main device is via the device bus (IB2), which is connected to terminals B+ and B-. Bei Aufall der BUS-Kommunikation schaltet die Unterstation automatisch in den sicheren Betriebszustand. Es werden alle Stromkreise eingeschaltet. CPUSB CPS B+ IB2 B- If the BUS communication fails, the sub station automatically switches to safe mode. All circuits are switched on. 6.3.3.4. Stromkreise 6.3.3.4. Circuits Die Endstromkreise werden an die Klemmen L+, N-, PE des jeweiligen Stromkreises (St.-Kreis 1 - 6) der BUS-Unterstation angeschlossen. The final circuits are connected to terminals L+, N-, PE of the corresponding circuit (SK1–6) on the BUS sub station. 6.3.3.5. Adressierung 6.3.3.5. Addressing Zuordnung Adresse/Stromkreiszuordnung Steuerteil Assignment address/circuit at the controller unit Adresse 0 Adresse 1 Adresse 2 Adresse 3 Adresse 4 Adresse 5 Adresse 6 Adresse 7 Address 0 Address 1 Address 2 Address 3 Address 4 Address 5 Address 6 Address 7 Stromkreise Stromkreise Stromkreise Stromkreise Stromkreise Stromkreise Stromkreise Stromkreise 1.1 4.1 7.1 10.1 13.1 16.1 19.1 22.1 bis bis bis bis bis bis bis bis 3.2 6.2 9.2 12.2 15.2 18.2 21.2 24.2 IB2 IB2 IB2 IB2 IB2 IB2 IB2 IB2 Adresse 8 und 9 sind nicht zulässig Circuits Circuits Circuits Circuits Circuits Circuits Circuits Circuits 1.1 4.1 7.1 10.1 13.1 16.1 19.1 22.1 bis bis bis bis bis bis bis bis 3.2 6.2 9.2 12.2 15.2 18.2 21.2 24.2 IB2 IB2 IB2 IB2 IB2 IB2 IB2 IB2 Address 8 and 9 are not allowed Den BUS-Unterstationen CPUSB 220 / 48.1 muss mittels des Adressschalters eine eindeutige Adresse zugeordnet werden. Diese bestimmt die Stromkreisadressierung im Steuerteil. A unique address must be assigned to the BUS sub stations CPUSB 220/48.1 - … via the address switch. This determines the circuit addressing in the controller. Die eingestellte Adresse belegt die entsprechenden Plätze am Gerätebus des Steuerteils. The programmed address occupies the corresponding slot on the system bus in the controller. 6.3.4. Zusätzliche Komponenten 6.3.4. Additional components Zusätzliche Komponenten erweitern die Funktionalität des CPS 220 / 48.1 – Systems. Additional components enhance the functionality of the CPS 220/48.1 – system. 6.3.4.1. RIF 5 6.3.4.1. RIF 5 Das RIF 5 ist werksseitig in die Geräte CPS 220/48.1 und CPUS 220/48.1 eingebaut. Die Baugruppe stellt neben potentialfreien Meldekontakten noch Anschlüsse für den Fernschaltkreis und die Stromschleife zur Verfügung, sowie dient sie zur Überwachung des Hauptverteilers und der Batteriespannung. The RIF 5 is fitted into devices CPS 220/48.1 and CPUS 220/48.1 at delivery. The module provides volt-free signalling contacts and connections to the remote switching circuit and the current loops and also monitors the main distribution board and the battery voltage. An jedes CPS-Steuerteil kann max. ein aktives RIF 5 angeschlossen werden. Durch passive RIF 5 - Module lassen sich jedoch die Meldekontakte vervielfältigen. Dazu ist die Moduladresse „0“ einzustellen und die SLÜ-Funktion mittels Schalter zu deaktivieren. Bis auf die Meldekontakte sind die anderen Funktionen A maximum of one active RIF 5 can be connected to each CPS controller. However, the signalling contacts can be reproduced manifold using passive RIF 5 modules. This requires the module address "0" to be set and the monitoring loop function (SLÜ) to be deactivated. All other functions apart from the signalling contacts are deactivated! 29 CPS 220/48.1/SV Montage- und Betriebsanleitung CPS 220/48.1/SV Mounting and Operating Instructions deaktiviert! Die Überwachung des Hauptverteilers erfolgt über die Klemmen L / N und ist werksseitig verdrahtet. Mittels den Klemmen 24V, Masse und BUS wird das RIF 5 an den Gerätebus des Systems angeklemmt. Ein aktives RIF 5 ist immer am Gerätebus IB 1 zu betreiben! The main distribution board is monitored via the terminals L/N and is factory-wired. The RIF 5 is connected to the system device bus via terminals 24 V, W and BUS. An active RIF 5 must always be operated on device bus IB1! For temperature controlled charging, a sensor (type KTY or INOTEC sensor) must be connected inside the battery compartment to terminals T+/T- of the RIF 5 module. This must be activated for temperature-controlled charging in the controller. Für eine temperaturgeführte Ladung ist ein Temperaturfühler (Typ KTY oder INOTEC Sensor) innerhalb des Batterieraums an die Klemmen T+ / T- des RIF 5-Moduls anzuschließen. Dieser muss zur temperaturgeführten Ladung im Steuerteil aktiviert werden. see 8.7. Programmierung on page 90 siehe 8.7. Programmierung - Seite 90 see 8.4.4.3. Components on page 67 siehe 8.4.4.3. Komponenten - Seite 67 The system statuses can be forwarded to an external display via the five signalling contacts of the RIF 5 module. Two of these contacts can be assigned optionally during programming. Über die fünf Meldekontakte des RIF 5-Moduls können die Anlagenzustände an eine externe Meldeanzeige weitergeleitet werden. Zwei dieser Kontakte sind optional in der Programmierung belegbar. see 8.7. Programmierung on page 90 siehe 8.7. Programmierung - Seite 90 see 8.4.4.3. Components on page 67 siehe 8.4.4.3. Komponenten - Seite 67 potentialfreie Kontakte 24V/1A (DC) Volt free contacts 24V DC max. 100mA Fernschalter Remote switch 24V Stromschleife Monitoring loop Hinweis: Werkseitig ist das RIF 5-Modul auf Adresse 7 eingestellt! Bei nachträglichem Einbau Adresse 7 ggf. einstellen! The RIF-5 module is factory-set with address 7. If the module is installed at a later time, address 7 has to be set. 850 009 Phasenüberwachung einphasig single phase supply monitor SLÜ Schalter SLÜ switch Temperaturfühler Temp. sensor Adresse 7 einstellen set address 7 Interne Verdrahtung, Firmenseitig internal wiring, factory set 3030 CPS 220/48.1/SV Montage- und Betriebsanleitung The various statuses of the RIF 5 signalling contacts are shown in the table below: Gerätezustand Betrieb Störung Batteriebetrieb 1 – 2 Störung geschlossen offen geschlossen 3 – 4 Betrieb geschlossen offen offen 5 – 6 Batterieoffen offen geschlossen betrieb 7 – 8 Option 1 frei programmierbar (Öffner/Schließer) 9 – 10 Option 2 frei programmierbar (Öffner/Schließer) Über den Fernschaltereingang (Klemmen FS + / FS -) besteht die Möglichkeit je nach Programmierung Device status Closed Closed Open Open Battery operation Closed Open Open Open Closed Operation Failure Relay contacts Relaiskontakte Die verschiedenen Zustände der RIF 5-Meldekontakte sind der folgenden Tabelle zu entnehmen: CPS 220/48.1/SV Mounting and Operating Instructions 1–2 Failure 3–4 Operation 5–6 Battery operation 7–8 Option 1 9–10 Option 2 Freely programmable (NC/NO) Freely programmable (NC/NO) Depending on programming, see 8.7. Programming on page 90 siehe 8.7. Programmierung - Seite 90 see 8.4.4.3. Components on page 67 siehe 8.4.4.3. Komponenten - Seite 67 den Dauerlichtbetrieb oder den Dauer- und Notlichtbetrieb über einen externen Schalter zu blockieren. the remote switch input (terminals FS +/FS -) allows maintained lighting operation or maintained and emergency lighting operation to be blocked via an external switch. Die Öffner externer Phasenwächter der Unterverteilung werden an die Stromschleife SL+ / SL- angeschlossen. Bei Unterbrechung der Stromschleife schaltet das System die Sicherheitsleuchten ein. Bei Überwachung von mehreren Unterverteilern sind die Kontakte für die Stromschleife in Reihe zu schalten. Werkseitig sind diese Klemmen gebrückt. The NC-contact of external phase monitors of the subdistribution board are connected to the current loops SL+/SL-. If the current loop is interrupted, the system switches on the safety luminaires. When monitoring several sub-distribution boards, the contacts for the current loop must be switched in sequence. These terminals are jumpered at delivery. . Allgemeinbeleuchtung General lighting L1 L2 L3 N PE Allgemeinbeleuchtung General lighting L1 L2 L3 N PE L3 L2 DPÜ gem. VDE 0108 L1 N PE L1 N L3 L2 L1 DPÜ gem. VDE 0108 L2 L3 INOTEC 12 14 L1 N L3 L2 L1 DPÜ gem. VDE 0108 L2 L3 INOTEC 12 14 11 UVA 1 Allgemeinbeleuchtung General lighting L1 N L1 L2 L3 INOTEC 12 14 11 UVA 2 11 UVA 3 Anschlüsse bei Überwachung ein- und dreiphasiger Netze Supply monitoring in single- and three-phase installation. SL- SL+ 850 009 RIF5 Der Fernschaltkreis sowie die 24V-Stromschleife werden durch eine Schleifenüberwachung auf Kurzschluss und Unterbrechung überwacht. Hierzu wird eine Zenerabschlussklemme in die jeweilige Schleife geschaltet. Bei der Stromschleife muss die Zenerabschlussklemme am letzten Dreiphasenüberwachungsmodul in Reihe zum Schaltkontakt eingebaut werden. The remote switching circuit and the 24 V current loop can be monitored for short circuit and interruption by a monitoring loop function (module). A Zener terminal is switched in the loop concerned for this purpose. With the current loop, the Zener terminal must be fitted on the last three-phase monitoring module in series to the switching contact. 31 CPS 220/48.1/SV Mounting and Operating Instructions UV 2 SUB DB 2 3 2 2 4 5 6 3 4 Einer 6 2 gem. VDE 0108 ta: -15 bis 40°C 1 3 5 Letzte DPÜ Zenerabschluss Last DPÜ Zener diode termination Zehner Einer 3 3 T 2 Einer 2 3 2 Kontakte (1 / 2) + (3 / 4) öffnen bei Netzausfall T 9 0 1 3 4 INOTEC EMC: gem. EN 55015 +24V BUS 2 4 L3 Adresse 1 bis 31 890 414 Zehner 1 2 1 Zehner 0 9 1 0 T T IB 2 6 L2 8 8 +24V 5 L1 L1 L2 L3 7 4 gem. VDE 0108 ta: -15 bis 40°C 8 Kontakte (1 / 2) + (3 / 4) öffnen bei Netzausfall EMC: gem. EN 55015 N DPÜ / B.1 +24V BUS T 6 7 7 INOTEC 1 3 5 T 890 414 +24V BUS 2 4 4 0 6 L3 Adresse 1 bis 31 8 5 L2 8 8 4 gem. VDE 0108 ta: -15 bis 40°C L1 L1 L2 L3 7 7 INOTEC Kontakte (1 / 2) + (3 / 4) öffnen bei Netzausfall EMC: gem. EN 55015 N DPÜ / B.1 9 6 7 890 414 1 3 5 4 9 L3 Adresse 1 bis 31 1 L2 1 L1 L1 L2 L3 DPÜ / B.1 L1 L2 L3 N PE 0 N L1 L2 L3 N PE 0 L1 L2 L3 N PE UV ... SUB DB ... 9 UV 1 SUB DB 1 9 CPS 220/48.1/SV Montage- und Betriebsanleitung Adressprogrammierung zwingend notwendig Address setting is mandatory. SL+ 850 009 RIF5 RIF5 Klemmleiste terminal rail Besteht die Anforderung, dass weitere Geräte oder Unterstationen bei Netzausfall einer Unterverteilung mit einschalten, kann dies wie folgt realisiert werden. Dazu ist ein optionaler Meldekontakt des RIF 5-Moduls auf die Stromschleife des folgenden Gerätes zu verdrahten. In der Programmierung ist für diesen Kontakt die Meldung Netzausfall UV zu belegen. If additional devices or sub stations need to be switched on in the event of a power failure to a sub-distribution board, this can be realised as follows. An optional signalling contact on the RIF 5 module must be wired to the current loop of the subsequent device. The message ‘sub-db failure’ must be assigned for this contact during programming. siehe 8.7. Programmierung - Seite 90 see 8.4.4.3. Components on page 67 siehe 8.4.4.3. Komponenten - Seite 67 The contact must be programmed as an NC-contact. see 8.7. Programmierung on page 90 Der Kontakt ist als Öffner zu programmieren. Unterverteilung Sub-db Unterverteilung Sub-db L1 L2 L3 N PE L1 L2 L3 N PE DPÜ 3PO U< S+ DPÜ 3PO U< S+ S- Allgemeinbeleuchtung General lighting 850 009 CP 4x2A 1 2 2 2 F 3,15 A 3,15 A 2 F 3 F F CPUS 1 2 2 F 2 F 2 F 3,15 A 1 2 F 3 F F CPUS 1 2 2 F 2 F 2 F 3,15 A 3,15 A 1 2 F 3 F F CPUS 1 2 2 F 2 F 2 F Allgemeinbeleuchtung General lighting 3,15 A 3,15 A 3,15 A 3,15 A 3,15 A 3,15 A 3,15 A 3,15 A 3,15 A 3,15 A 3,15 A 3,15 A 3,15 A 3,15 A 3,15 A = BL / NM = DL / M = BL / NM = DL / M = BL / NM = DL / M = BL / NM = DL / M = BL / NM = DL / M = BL / NM = DL / M = BL / NM = DL / M = BL / NM = DL / M = BL / NM = DL / M = BL / NM = DL / M = BL / NM = DL / M = BL / NM = DL / M = BL / NM = DL / M = BL / NM = DL / M = BL / NM = DL / M 71,5 1 2 F F F 3,15 A 3 3,15 A CP 4x2A F 3,15 A 2 F 3 F F 3,15 A 4 F 3,15 A 59 3,15 A 1 F 3,15 A 3 F CP 4x2A F 3,15 A 2 F 3,15 A 3 3,15 A 1 3,15 A 2 F F CP 4x2A F 3,15 A 3 F 1 3,15 A 3,15 A 4 F CP 4x2A F 3,15 A 3 F 1 3,15 A 3,15 A 4 F CP 4x2A F 3,15 A 3 F 3,15 A 4 1 3,15 A 3,15 A 3 3,15 A CP 4x2A F 3,15 A 3,15 A F 3,15 A 4 F CP 4x2A F 3,15 A 3,15 A 3 F CP 4x2A F 3,15 A 2 F 1 S- 850 009 CP 4x2A F 3,15 A 3 F 1 3,15 A 2 F CP 4x2A F 3,15 A 3 3,15 A 1 3,15 A 2 F F CP 4x2A F 3,15 A 3 F 1 3,15 A 3,15 A 4 F CP 4x2A F 3,15 A 3 F 1 3,15 A 3,15 A 4 F CP 4x2A F 3,15 A 3 F 3,15 A 4 1 3,15 A 3,15 A 3 3,15 A CP 4x2A F 3,15 A 3,15 A F 3,15 A 4 F CP 4x2A F 3,15 A 3,15 A 3 3,15 A CP 4x2A F 3,15 A 2 F F 1 Allgemeinbeleuchtung General lighting 850 009 CP 4x2A F 3,15 A 3 F 1 3,15 A 2 F CP 4x2A F 3,15 A 3 3,15 A 1 3,15 A 2 F F CP 4x2A F 3,15 A 3 F 1 3,15 A 3,15 A 4 CP 4x2A F 3,15 A 3 F F 1 3,15 A 3,15 A 4 F CP 4x2A F 3,15 A 3 F 3,15 A 4 1 3,15 A 3,15 A 3 3,15 A CP 4x2A F 3,15 A 3,15 A F 3,15 A 4 F CP 4x2A F DPÜ 3PO U< S+ S- = BL / NM = DL / M 230V 50/60 Hz -15°C ... +40°C Thermoplast V0 I IP20 2,5mm² eindrähtig oder 1,5mm² Litze mit Aderendhülse Funkentstörung: gem. DIN EN 55015 3232 1 3,15 A 3,15 A 3 F CP 4x2A F 3,15 A 2 F 1 Allgemeinbeleuchtung General lighting 850 009 CP 4x2A F 3,15 A 3 3,15 A 1 3,15 A 2 F F CP 4x2A F 3,15 A 3 F 1 3,15 A 2 F CP 4x2A F 3,15 A 3 F 1 3,15 A 3,15 A 4 F CP 4x2A F 3,15 A 3 F 1 3,15 A 3,15 A 4 F CP 4x2A F 3,15 A 3 F 3,15 A 4 1 F 3,15 A 3 CP 4x2A F 3,15 A 2 F 3,15 A 3,15 A Technische Daten: Netzspannung: Temp.-Bereich: Gehäuse: Schutzklasse: Schutzart: Leiteranschluss: 1 3,15 A Unterverteilung Sub-db L1 L2 L3 N PE DPÜ 3PO U< S+ S- 90 CPS CP 4x2A F 3,15 A Unterverteilung Sub-db L1 L2 L3 N PE Technical data: Mains voltage: Amb. temp. range: Housing: Protection class: Protection category: Conductor connection: EMC protection: 230 V 50/60 Hz -15°C to +40°C Thermoplast V0 I IP20 2.5 mm² single-wire or 1.5 mm² cord with cable end sleeve as per DIN EN 55015 CPS 220/48.1/SV Mounting and Operating Instructions CPS 220/48.1/SV Montage- und Betriebsanleitung 6.3.4.2. Batteriemanagementsystem BCS 6.3.4.2. Battery management system BCS Das Batteriemanagementsystem BCS ist nur mit TFT-Steuerteil nutzbar. The battery management system BCS can only be used with a TFT controller. Das Batteriemanagementsystem BCS besteht aus einer Kontrolleinheit und max. 36 Sensoren für die Batterieblöcke, welche mit einem zweiadrigen BUS verbunden werden. Mittels dieser Komponente werden die Blockspannung und –temperatur überwacht und protokolliert. Bei Erkennung eines defekten Blocks wird die Ladung unterbrochen bzw. ein laufender Betriebsdauertest abgebrochen. Des Weiteren sind die Funktionen des RIF 5 integriert The battery management system consists of one control unit and max. 36 sensors for the battery blocks, which are connected to a two-wire BUS. This component monitors and logs the block voltage and temperature. Upon detection of a defective block, the charging is interrupted or any active battery duration test is stopped. In addition, the functions of the RIF 5 are integrated. see 6.3.4.1. RIF 5 on page 29 siehe 6.3.4.1. RIF 5 - Seite 29 Jedes Steuerteil unterstützt nur ein BCS-Modul! Each controller supports only one BCS module! Bitte lesen Sie das Kapitel Please read section siehe 6.3.4.1. RIF 5 - Seite 29 see 6.3.4.1. RIF 5 on page 29 für die Funktionalitäten Fernschalter, Stromschleife und potentialfreie Meldekontakte. Der Anschluss T+/T- für einen Temperaturfühler entfällt bei dem BCSModul. for the functionality of remote switches, current loop and potential-free signalling contacts. The T+/T- connection for a temperature sensor is not present on the BCS module. FSFS+ BCS 990 101 UB+ UB- B+ SLSL+ Failure BBUS Tastatur Die Batterieüberwachung erfolgt mittels der Sensoren, welche an die Klemmen B+ und B- angeschlossen werden. Die einzelnen Sensoren registrieren Spannung und Temperatur von jedem Batterieblock. The battery monitoring takes place via sensors that are connected to terminals B+ and B-. The individual sensors register the voltage and temperature of each battery block. Defekte Batterieblöcke können über das TFT-Steuerteil bzw. das BCS-Modul abgefragt werden. Ebenso wird der Status an den LEDs des Sensors angezeigt. Defective battery blocks can be queried via the TFT controller and/or the BCS module. The status is also indicated by the LEDs of the sensor. Sobald eine Störung am Sensor erkannt wird erfolgt ein Prüfbucheintrag und gegebenfalls wird die Ladung unterbrochen oder ein laufender Betriebsdauertest abgebrochen. As soon as a fault is detected on the sensor, a logbook entry is made and the charging is interrupted or any active battery duration test stopped. 33 CPS 220/48.1/SV Montage- und Betriebsanleitung CPS 220/48.1/SV Mounting and Operating Instructions Zustand Notlichtgerät Zustand BCSSensor Reaktion Emerg. light device state AC-Betrieb und Ladung eingeschaltet Unterspannung Ladung wird ausgeschaltet AC operation and Undervoltage charging switched on Überspannung - Overvoltage Grenztemperatur Ladung wird ausüberschritten geschaltet DC-Betrieb bei Betriebsdauertest Unterspannung BCS sensor state Betriebsdauertest wird abgebrochen Reaction Charging is switched off - Temperature Charging is switlimit exceeded ched off DC operation during battery duration test Undervoltage Battery duration test is stopped Es ist möglich die Ladung durch manuelle Bestätigung wieder einzuschalten, wobei ein entsprechender Eintrag in das Prüfbuch erfolgt. It is possible to switch the charging back on via manual confirmation, which creates a corresponding entry in the logbook. 6.3.4.2.1. BCS Sensor 6.3.4.2.1. BCS sensor Der Zustand des BCS-Sensors wird mittels zwei StatusLEDs signalisiert. Die gelbe LED (Power) leuchtet bei Abfrage des Sensors kurz auf. Das Abfrageintervall beträgt circa 40 Sekunden. Die rote LED signalisiert verschiedene Störungen. The status of the BCS sensor is indicated by two LEDs. The yellow LED (power) lights up briefly when the sensor is querying. The query interval is about 40 seconds. The red LED indicates various faults. LEDs Gelb Blinkt (40 sec.) Gelb LED blinkt (1 sec.) Gelb und rot blinken im Wechsel Rote LED an Rote LED an Rote LED blinkt (1,5 sec.) Rote LED blinkt (0,5 sec.) Rote LED an Meldung Normalbetrieb/ Abfrage Winkmodus LEDs Yellow flashing (40 sec.) Yellow LED flashing (1 sec.) Yellow and red flashing in alternation Red LED on Red LED on Red LED flashing (1.5 sec.) Red LED flashing (0.5 sec.) Red LED on Adressfehler Unterspannung U <= 10,3V Überspannung U > 15,0V Grenztemperatur 1 T > 50°C Grenztemperatur 2 T > 80°C Grenztemperatur 3 T > 85°C Message Normal operation / querying Identify mode Address error Undervoltage Overvoltage Temperature limit 1 U <= 10.3V U > 15.0V T > 50°C Temperature limit 2 T > 80°C Temperature limit 3 T > 85°C Die Sensoren werden gemäß der beiliegenden Anleitung mit dem Batterieblock verbunden. The sensors are connected to the battery block according to the enclosed instructions. Ein Taster am BCS-Sensor dient zur Adressierung. A button on the BCS sensor is used for addressing. 40 36 Technische Daten: Nennspannung: 7V DC - 20V C Stromaufnahme: 1,1mA Standby-Modus 1,5mA Abfragemodus Temp.-Bereich: -10°C ... +95°C Gehäuse: Thermoplast V0 Funkentstörung: gem. DIN EN 55015 Schutzklasse: III Schutzart: IP20 19 Technical data: Rated voltage: 7V DC - 20V C Power consumption: 1.1 mA standby mode 1.5 mA query mode Temp. range: -10°C ... +95°C Housing: Thermoplast V0 EMC protection: As per DIN EN 55015 Protection class: III Protection category: IP20 6.3.4.2.2. BCS-Modul 6.3.4.2.2. BCS-Modul Das Modul besitzt eine LCD-Anzeige und drei Taster zur Bedienung und Programmierung. Die rote LED signalisiert einen gestörten BCS-Sensor. Über den integrierten Tastaturstecker können Firmwareupdates eingespielt werden. The module has an LCD display and three buttons for operation and programming. The red LED indicates a faulty BCS sensor. Firmware updates can be installed via the integrated keyboard connector. 3434 CPS 220/48.1/SV Montage- und Betriebsanleitung CPS 220/48.1/SV Mounting and Operating Instructions Durch drücken der unteren Taste (Enter-Taste ) erscheint das Menü des BCS-Moduls. Mittels der Pfeiltasten kann durch das Menü geblättert werden. Der Befehl „Zurück“ wechselt wieder in die übergeordnete Ebene. Pressing the lower button (Enter button) calls up the menu of the BCS module. The arrow buttons can be used to page through the menu. The „Back“ command moves back to the higher menu level. a) Menü Info a) Info menu Im Menü „Info“ werden Informationen zu den Blocktemperaturen, -spannungen, und der Gesamtbatteriespannung angezeigt. Außerdem stellt das Menu den Zustand des Fernschaltereingangs, der Stromschleife, der Netzüberwachung (HV) und der potentialfreien Kontakte dar. Die Softwareversion des BCS-Moduls und der einzelnen BCS-Sensoren wird ebenfalls angezeigt. Information about the block temperatures and voltages and the total battery voltage is shown in the „Info“ menu. In addition, this menu displays the status of the remote switch input, the current loop, the mains monitoring (HV) and the potential-free contacts. The software version of the BCS module and the individual BCS sensors is also displayed. b) Menü Störung b) Fault menu Bei einer Störung (rote LED am BCS-Modul an) erscheint eine entsprechende Meldung im Menü „Störung“. Mit den Pfeiltasten wird – falls vorhanden - durch weitere Störungsmeldungen geblättert. In event of a fault (red LED on BCS module on), a corresponding message appears in the „Fault“ menu. The arrow buttons can be used to page through additional fault messages, if present. c) Menü Programmierung c) Programming menu Programming of the BCS module takes place in the „Program“ menu. Die Programmierung des BCS-Moduls erfolgt im Menü „Program.“. The number of monitored sensors is entered in the first menu „Number of Sensors“. A maximum of 36 BCS sensors can be monitored with the BCS module. Die Anzahl der überwachten Sensoren wird im ersten Menü „Anzahl Sensoren“ angegeben. Es sind maximal 36 BCS-Sensoren mit dem BCS-Modul zu überwachen. The BCS sensors are then addressed via the „Address Sensors“ menu. When the first address is shown in the display, the button on the sensor must be pressed. The BCS sensor confirms the programming by flashing the yellow LED. The BCS module automatically moves forward one address, and the button on the next sensor must be pressed. Repeat this for all sensors. Anschließend werden die BCS-Sensoren über das Menü „Adressen Sensoren“ adressiert. Wenn die erste Adresse im Display angezeigt wird, ist am ersten Sensor die Taste zu betätigen. Der BCS-Sensor bestätigt die Programmierung mit einem aufblinken der gelben LED. Das BCSModul wechselt automatisch eine Adresse weiter und der Taster am nächsten Sensor ist zu betätigen. Dieses ist für alle Sensoren zu wiederholen. The addressing can be checked with the „Identify“ menu, which puts the BCS sensor with the address into an identify mode. The yellow LED of the sensor indicates this by flashing. Eine Kontrolle der Adressierung erfolgt durch das Menü „Winken“, wodurch der BCS-Sensor mit der Adresse in einen Winkmodus schaltet. Die gelbe LED des Sensors zeigt dies durch Blinken an. The menu item „Address IB pass.“ currently has no function. The address 1 must always be set here. Der Menüpunkt „Adresse IB pass.“ hat zurzeit keine Funktion. Es muss hier immer die Adresse 1 eingestellt sein. The loop monitoring function for the BCS module can be activated or deactivated in the „Loop Mon. Function“ menu. This option must be activated when using the BCS module with address 1 without an additional loop monitoring module! Die SLÜ-Funktion für das BCS-Modul wird im Menü „SLÜ Funktion“ aktiviert bzw. deaktiviert. Diese Option muss bei Einsatz des BCS-Moduls mit Adresse 1 ohne zusätzliches SLÜ-Modul aktiviert sein! 230V 50Hz / 60Hz -15°C ... +40°C Thermoplast V0 2,5mm² eindrähtig oder 1,5mm² Litze mit Aderendhülse Funkentstörung: gem. DIN EN 55015 Schutzklasse: I Schutzart: IP20 Max. Sensoren: 36 59 71,5 90 Technische Daten: Netzspannung: Temp.-Bereich: Gehäuse: Leiteranschluss: Technical data: Mains voltage: Amb. temp. range: Gehäuse: Wire connection: 230V 50Hz / 60Hz -15°C ... +40°C Thermoplast V0 2.5 mm² single core or 1.5 mm² braided with cable end sleeve EMC protection: gem. DIN EN 55015 Protection class: I Protection IP20 category: Max. Sensors: 36 35 CPS 220/48.1/SV Montage- und Betriebsanleitung CPS 220/48.1/SV Mounting and Operating Instructions BCS BCS 3636 CPS 220/48.1/SV Montage- und Betriebsanleitung CPS 220/48.1/SV Mounting and Operating Instructions 6.3.4.3. LSA 3 / LSA 8.1 6.3.4.3. LSA 3 / LSA 8.1 Mit den LSA 3- und LSA 8.1-Modulen ist ein gemeinsames Ein- und Ausschalten von Netz- und Sicherheitsleuchten möglich. Den Endstromkreisen können in der Programmierung bis zu drei Schalteingänge zugewiesen werden. With the LSA 3 and LSA 8.1 modules, the main and safety luminaires can be switched on and off together. Up to three switch inputs can be assigned per circuit. siehe 8.7. Programmierung - Seite 90 see 8.4.4.3. Components on page 67 see 8.7. Programming on page 90 siehe 8.4.4.3. Komponenten - Seite 67 On the address switch, each module must be assigned a unique address, which has to be set as active. Am Adressschalter ist für jedes Modul eine eindeutige Adresse zu vergeben, die dann in der Einstellung als aktiv programmiert wird. 6.3.4.3.1. LSA 3 A maximum of 8 LSA 3 modules can be connected to each controller. Each module has three input channels. 6.3.4.3.1. LSA 3 Es können maximal 8 LSA 3-Module je Steuerteil angeschlossen werden. Jedes Modul besitzt drei Eingangskanäle. The LSA 3 modules may only be operated on the device bus IB2! Die LSA 3-Module dürfen nur am Gerätebus IB 2 betrieben werden! The module has a common N for the three input switches L1, L2 and L3! Das Modul besitzt für die drei Schalteingänge L1, L2 und L3 nur einen gemeinsamen N! PE N L Allgemeinbeleuchtung General lighting Allgemeinbeleuchtung General lighting Allgemeinbeleuchtung General lighting 850 010 Interne Verdrahtung Internal wiring 230 V AC -15°C ... +40°C IP 20 I Thermoplast V0 2,5mm² eindrähtig oder 1,5mm² Litze mit Aderendhülse Funkentstörung: gem. DIN EN 55015 Technical data: 59 17,5 90 Technische Daten: Nennspannung Abfrageeingänge: Temp.-Bereich: Schutzart: Schutzklasse: Gehäuse: Leiteranschluss: Rated voltage of the polling inputs: Amb. temp. range: Protection category: Protection class: Housing: Conductor connection: EMC protection: 230 V AC -15°C to +40°C IP 20 I Thermoplast V0 2.5 mm² single-wire or 1.5 mm² cord with cable end sleeve as per DIN EN 55015 37 CPS 220/48.1/SV Mounting and Operating Instructions CPS 220/48.1/SV Montage- und Betriebsanleitung 6.3.4.3.2. LSA 8.1 6.3.4.3.2. LSA 8.1 Pro Steuerteil sind bis zu 3 LSA 8.1-Module an den Gerätebus anschließbar. Die LSA 8.1 besitzt 8 galvanisch getrennte Eingänge, sowie eine integrierte BUS-fähige Dreiphasenüberwachung (DPÜ/B). Sie ist in zwei Ausführungen mit 24V DC- oder 230V AC -Schalteingängen verfügbar. Up to 3 LSA 8.1 modules can be connected to the device bus for each controller. The LSA 8.1 has 8 electrically isolated inputs and an integrated BUS-compatible three-phase monitoring unit (DPÜ/B). There are two versions available for 24 V DC or 230 V AC input switches. PE N L PE N L PE N L Allgemeinbeleuchtung General lighting PE N L Allgemeinbeleuchtung General lighting Allgemeinbeleuchtung General lighting Allgemeinbeleuchtung General lighting 850 008 Interne Verdrahtung Internal wiring LSA 8.1 230V T T T T +24V +24V +24V +24V Luminaire ID 24V– 24V– 24V– 24V– 24V– 24V– 24V– 24V– 850 007 Interne Verdrahtung Internal wiring 3838 LSA 8.1 24V CPS 220/48.1/SV Mounting and Operating Instructions CPS 220/48.1/SV Montage- und Betriebsanleitung Zur Nutzung der integrierten DPÜ/B muss diese per Microschalter am LSA 8.1-Modul aktiviert werden. To use the integrated DPÜ/B, this must be activated by microswitch on the LSA 8.1 module. Die eingestellte Adresse des LSA 8.1-Moduls ist auch die Adresse für die DPÜ/B! The set address of the LSA 8.1 module is also the address for the DPÜ/B! Die LSA 8.1 kann auch dazu genutzt werden, um selektiv Endstromkreise im Falle eines Netzausfalls einzuschalten. Dazu wird der Hilfskontakt (für LSA 8.1 / 24V) bzw. die Phase (LSA 8.1 / 230V) mit einem Schalteingang der LSA 8.1 verbunden. In der Programmierung des Stromkreises wird der Schalteingang dann auf „invertiert“ programmiert. Bei Ausfall der Phase wird nur dieser Stromkreis eingeschaltet. L1 N PE UV 1 The LSA 8.1 can also be used to selectively switch on final circuits in the event of a power failure. The auxiliary contact (for LSA 8.1/24 V) and/or the phase (LSA 8.1/230 V) are connected to an input switch on the LSA 8.1 for this purpose. During programming of the circuit, the input switch is then programmed to “inverted”. If the phase fail, only this circuit is switched on. L1 L2 L3 N PE UV 2 Allgemeinbeleuchtung General lighting U< Allgemeinbeleuchtung General lighting 850 008 Für eine Meldung des Netzausfalls UV bei Unterbrechung der Schleife am Eingangskanal ist dieses in der Steuerteilprogrammierung einzustellen. This must be set during controller programming to enable the message ‘sub-db failure’ if the loop on the input channel is interrupted. siehe 8.7. Programmierung - Seite 90 see 8.7. Programming on page 90 siehe 8.4.4.3. Komponenten - Seite 67 see 8.4.4.3. Components on page 67 Allerdings werden bei der Abfrage alle Kanäle der LSA 8.1 berücksichtigt. Die nicht belegten Kontakte sind entsprechend mit Spannung am Eingang zu versorgen! However, all channels of the LSA 8.1 are included in polling. Accordingly, the unoccupied contacts must be supplied with power at the input! 39 CPS 220/48.1/SV Mounting and Operating Instructions CPS 220/48.1/SV Montage- und Betriebsanleitung UV 1 L3 L2 DPÜ gem. VDE 0108 UV 2 L1 N L3 L2 L1 DPÜ gem. VDE 0108 L2 L3 INOTEC 12 14 L1 N L1 L2 L3 INOTEC 12 14 11 11 24V– 24V– 24V– 24V– 24V– 24V– 24V– 24V– 850 007 LSA 8.1 230V LSA 8.1 230 V Technische Daten: Nennspannung Abfrageeingänge: Temp.-Bereich: Schutzart: Schutzklasse: Gehäuse: Leiteranschluss: Technical data: 59 90 230 V AC -15°C ... +40°C IP 20 I Thermoplast V0 2,5mm² eindrähtig oder 1,5mm² Litze mit Aderendhülse Funkentstörung: gem. DIN EN 55015 71,5 Rated voltage of the polling inputs: Amb. temp. range: Protection category: Protection class: Housing: Conductor connection: EMC protection: LSA 8.1 24V LSA 8.1 24 V Technische Daten: Nennspannung Abfrageeingänge: Temp.-Bereich: Schutzart: Schutzklasse: Gehäuse: Leiteranschluss: Technical data: 90 24 V DC -15°C ... +40°C IP 20 I Thermoplast V0 2,5mm² eindrähtig oder 1,5mm² Litze mit Aderendhülse Funkentstörung: gem. DIN EN 55015 71,5 59 Rated voltage of the polling inputs: Amb. temp. range: Protection category: Protection class: Housing: Conductor connection: EMC protection: 4040 230 V AC -15°C to +40°C IP 20 I Thermoplast V0 2.5 mm² single-wire or 1.5 mm² cord with cable end sleeve as per DIN EN 55015 24 V DC -15°C to +40°C IP 20 I Thermoplast V0 2.5 mm² single-wire or 1.5 mm² cord with cable end sleeve as per DIN EN 55015 CPS 220/48.1/SV Montage- und Betriebsanleitung CPS 220/48.1/SV Mounting and Operating Instructions 6.3.4.4. Dreiphasenüberwachungen 6.3.4.4. Three-phase monitors (DPÜs) 6.3.4.4.1. DPÜ 6.3.4.4.1. DPÜ Zur Überwachung der Netzspannung an den Unterverteilern der Allgemeinbeleuchtung können die DPÜModule direkt in den Unterverteiler eingebaut werden. Bei Ausfall einer Phase schaltet das Modul den Kontakt zur Unterbrechung der 24V-Stromschleife. Der Anschluss des Kontaktes erfolgt an den Klemmen SL+ / SL- am RIF5 (Drahtbrücke entfernen). Bei Überwachung von mehreren Unterverteilern sind die Kontakte für die Stromschleife in Reihe zu schalten. To monitor the mains voltage at the general lighting subdistribution boards, the DPÜ modules can be integrated directly into the sub-distribution boards. If one phase fail, the module switches the contact to interrupt the 24 V current loop. The contact is connected to terminals SL+/SLon the RIF5 (remove jumpers). When monitoring several sub-distribution boards, the contacts for the current loop must be switched in sequence. Main Features: •LED display for L1/L2/L3 •Random phase sequence •Detection of undervoltage and power failure in the three-phase power system •Single-phase can also be connected in acc. with IEC 255/VDE 0435/T.303 •Suitable for DIN rail mounting Geräteeigenschaften: •LED-Anzeige für L1/ L2 / L3 •beliebige Phasenfolge •Erkennung von Unterspannung und Netzausfall im Drehstromnetz •auch einphasig anschließbar gem. IEC 255 / VDE 0435 / T.303 •für Hutprofilschienenmontage geeignet Nennbetrieb: Temp.-Bereich: Schutzart: Gehäuse: Leiteranschluss: Funkentstörung: 230 V AC, 400 V AC 1,1 UN dauernd ca. 3VA 50Hz / 60 Hz 0,85 UN 1 Wechsler 30V DC, 1A / 230V AC, 0,5A (ohmsche Last) Dauerbetrieb -20°C ... +60°C IP 20 (Klemme) IP 40 (Gehäuse) Thermoplast 2,5mm² eindrähtig oder 1,5mm² Litze mit Aderendhülse gem. DIN EN 55015 Bei Netzausfall an einem Unterverteiler schalten alle angeschlossenen Leuchten in Dauerlicht. Im Steuerteil erscheint die Meldung Netzausfall UV. Technical data: Rated voltage UN: Overload capacity Rated consumption: Rated frequency: Response value: Contacts Imax contact: 230 V AC, 400 V AC 1.1 UN continuous approx. 3 VA 50 Hz/60 Hz 0.85 UN 1 change-over contact 30 V DC, 1 A/230 V AC, 0.5 A (resistive load) Rating: Continuous operation Amb. temp. range: -20°C to +60°C Protection category: IP 20 (terminal) IP 40 (housing) Housing: Thermoplast Conductor connection: 2.5 mm² single-wire or 1.5 mm² cord with cable end sleeve EMC protection: as per DIN EN 55015 17,5 59 In the event of a power failure on one subdistribution board, all connected luminaires switch to maintained lighting. The controller displays the message ‘Sub-db failure’. 90 Technische Daten: Nennspannung UN: Überlastbarkeit: Nennverbrauch: Nennfrequenz: Ansprechwert: Kontaktbestückung: Imax Kontakt: 41 CPS 220/48.1/SV Montage- und Betriebsanleitung CPS 220/48.1/SV Mounting and Operating Instructions 6.3.4.4.2. DPÜ/B.2 6.3.4.4.2. DPÜ/B.2 Zur Überwachung der Netzspannung an den Unterverteilern der Allgemeinbeleuchtung werden die DPÜ/B.2- Module direkt in den Unterverteiler eingebaut. Die Abfrage der Module erfolgt über den BUS. To monitor the mains voltage at the general lighting subdistribution boards, the DPÜ/B.2 modules are integrated directly into the sub-distribution boards. The modules are polled via the BUS. Bei Ausfall einer Phase wird im Display der Notlichtanlage „Netzausfall UV“ angezeigt. Im Display des Hauptmenüs wechselt das Komponentensymbol in den roten Farbmodus. In der Statusanzeige wird die Information „Netzausfall UV“ angezeigt. The display will show „sub-DB failure“ in case of a power failure of one phase. The component symbol in the display of the main menu will change its color to red. The status display will show the information “sub-DB failure”. Nach Betätigen der Funktionsschaltfläche „Komponenten“ werden im Zuge von Untermenüs die dem System angebundenen DPÜ/B-Module und deren Standort angezeigt. Im Untermenü „DPÜ/B“ werden Module und deren ausgefallene Phase (n) die mit einer Störung behaftet ist (sind), durch rote LED’s angezeigt. siehe 8.4.4.3.4. Menü DPÜ/B - Seite 71 Anschluß nur an Gerätebus IB2. Befinden sich LSA8.1-Module im System, deren DPÜ/B-Funktion genutzt wird, so sind die Adressen des LSA8.1-Moduls und der integrierten DPÜ/B identisch (Adresse 1/2/3)! Die DPÜ / B.2 beinhaltet die Funktion einer wählbaren Nachlaufzeit nach Netzwiederkehr. Diese Nachlaufzeit ist in den Zeitintervallen 0 / 5 / 10 oder 15 Minuten einstellbar. Bei Netzwiederkehr werden die Meldekontakte und die Meldung „Netzausfall UV“ über den BUS um die eingestellte Zeit verzögert zurückgesetzt. Während der Nachlaufzeit blinken die LEDs der ausgefallenen Phasen. Mit der DPÜ / B.2 ist somit ein selektiver Notlichtnachlauf möglich. Geräteeigenschaften: •LED-Anzeige für L1, L2, L3 •beliebige Phasenfolge •2 Schließer •Erkennung von Unterspannung und Netzausfall im Drehstromnetz •auch ein-phasig anschließbar gem. IEC 255, VDE 0435, T.303 •für Schalttafeleinbau auf Hutprofilschienen geeignet •Einstellbare Nachlaufzeit 0/5/10/15 Minuten nach Netzwiederkehr 4242 Submenus will show information about all connected DPÜ/B modules including their locations when you activate the button “Components”. All phases which were detected as a power failure will be highlighted by red LEDs in the submenu “DPÜ/B”. see 8.4.4.3.4. DPÜ/B menu on page 71 Connection only to device bus IB2. If the system contains LSA8.1 modules whose DPÜ/B function is used, the addresses for the LSA8.1 module and for the integrated DPÜ/B are identical (address 1/2/3)! The DPÜ/B.2 includes a function of emergency light delay time in case of mains returns. The delay time can be set to 0 / 5 / 10 or 15 minutes. The dry contact of the DPÜ/B.2 and the message “sub-DB failure” will be reset with the adjusted delay in case of mains returns. The indicating LEDs of the phase with power failure will blink during the delay time. The DPÜ/B.2 can be used for delayed emergency operation of individual circuits. Unit attributes: •LED-indication for L1, L2, L3 •phases in any order •detection of failed or low voltage in three-phase-systems •suitable for single-phase monitoring to IEC 255, VDE 0435, part 303 •for distribution board / panel mounting (DIN rail profiles) •adjustable follow up time 0/5/10/15 minutes after mains return CPS 220/48.1/SV Mounting and Operating Instructions CPS 220/48.1/SV Montage- und Betriebsanleitung L1 L2 L3 N PE F1 Q1 FI 0,03A F2 F3 F11 F12 F13 F10 Schalter Schalter Schalter Schütz L1 N L2 L2 INOTEC 15 Min 3 0 12 2 3 EMC: acc. EN 55015 BUS IB2 +24V SL+ SL- +24V T 14 24 T 13 23 Allgemeinbeleuchtung 10 Min 4 5 6 9 0 1 x1 7 8 UN=3~ 400/230V AC US=UN x 0,85 acc. EN 50172 ta: -15 ... 40°C L3 5 Min 0 12 3 0 12 30 1 23 0 Min x10 (T) Allgemeinbeleuchtung Allgemeinbeleuchtung L1 890 417 Made in Germany N L3 DPÜ / B.2 850 009 RIF 5 Technical Data: Nominal Voltage UN: 230 V AC, 400 V AC Tolerance: 1,1 UN dauernd Nom.-frequency: 50/60 Hz Activation level: 0,85 UN Bus connection: INOTEC internal system BUS CPS 220/64, CPS 220/20 und CPS 220/48.1 Adress range: 1 ... 31 Contacts: 2 n/c Imax / Contact: 30 V DC, 1 A Operation: Permanent Ambient temp.: -15 °C ... +40 °C Protection: IP 20 Housing: Thermoplast Wiring: 2.5 mm² single solid wire or 1.5 mm² soldered flex-wire EMC: to DIN EN 55015 Technische Daten: Nennspannung UN: 230 V AC, 400 V AC Überlastbarkeit: 1,1 UN dauernd Nennfrequenz: 50/60 Hz Ansprechwert: 0,85 UN Busanschluss: INOTEC interner Gerätebus CPS 220/64, CPS 220/20 und CPS 220/48.1 Adressbereich: 1 ... 31 Kontaktbestückung: 2 Schließer Imax / Kontakt: 30 V DC, 1 A Nennbetrieb: Dauerbetrieb Temp.-Bereich: -15 °C ... +40 °C Schutzart: IP 20 Gehäuse: Thermoplast Leiteranschluss: 2,5 mm² eindrähtig oder 1,5 mm² Litze mit Aderendhülse Funkentstörung: gem. DIN EN 55015 45 48 58 36 90 Geräteeigenschaften: · LED-Anzeige für L1, L2, L3 · beliebige Phasenfolge · 2 Schließer 43 Ausgang Kontaktbestückung: 2 Schließer CPS 220/48.1/SV Montage- und Betriebsanleitung CPS 220/48.1/SV Mounting and Operating Instructions 6.3.4.4.3. DPÜ/B.1 6.3.4.4.3. DPÜ/B.1 Zur Überwachung der Netzspannung an den Unterverteilern der Allgemeinbeleuchtung werden die DPÜ/B.1- Module direkt in den Unterverteiler eingebaut. Die Abfrage der Module erfolgt über den BUS. To monitor the mains voltage at the general lighting subdistribution boards, the DPÜ/B.1 modules are integrated directly into the sub-distribution boards. The modules are polled via the BUS. Bei Ausfall einer Phase wird im Display der Notlichtanlage „Netzausfall UV“ angezeigt. Im Display des Hauptmenüs wechselt das Komponentensymbol in den roten Farbmodus. In der Statusanzeige wird die Information „Netzausfall UV“ angezeigt. The display will show „sub-DB failure“ in case of a power failure of one phase. The component symbol in the display of the main menu will change its color to red. The status display will show the information “sub-DB failure”. Nach Betätigen der Funktionsschaltfläche „Komponenten“ werden im Zuge von Untermenüs die dem System angebundenen DPÜ/B-Module und deren Standort angezeigt. Im Untermenü „DPÜ/B“ werden Module und deren ausgefallene Phase (n) die mit einer Störung behaftet ist (sind), durch rote LED’s angezeigt. Submenus will show information about all connected DPÜ/B modules including their locations when you activate the button “Components”. All phases which were detected as a power failure will be highlighted by red LEDs in the submenu “DPÜ/B”. see 8.4.4.3.4. DPÜ/B menu on page 71 siehe 8.4.4.3.4. Menü DPÜ/B - Seite 71 Connection only to device bus IB2. Anschluß nur an Gerätebus IB2. Befinden sich LSA8.1-Module im System, deren DPÜ/B-Funktion genutzt wird, so sind die Adressen des LSA8.1-Moduls und der integrierten DPÜ/B identisch (Adresse 1 / 2 / 3)! Geräteeigenschaften: •LED-Anzeige für L1, L2, L3 •beliebige Phasenfolge •2 Schließer •Erkennung von Unterspannung und Netzausfall •im Drehstromnetz •auch ein-phasig anschließbar •gem. IEC 255, VDE 0435, T.303 •für Schalttafeleinbau auf •Hutprofilschienen geeignet 4444 If the system contains LSA8.1 modules whose DPÜ/B function is used, the addresses for the LSA8.1 module and for the integrated DPÜ/B are identical (address 1/2/3)! Unit attributes: •LED-indication for L1, L2, L3 •phases in any order •detection of failed or low voltage in three-phase-systems •suitable for single-phase monitoring to IEC 255, VDE 0435, part 303 •for distribution board / panel mounting (DIN rail profiles) CPS 220/48.1/SV Mounting and Operating Instructions 3 2 2 4 5 6 3 4 Einer 6 2 gem. VDE 0108 ta: -15 bis 40°C 1 3 5 Zehner 3 Einer 2 3 INOTEC Zehner 3 Einer 2 0 1 3 2 T 9 2 4 Kontakte (1 / 2) + (3 / 4) öffnen bei Netzausfall EMC: gem. EN 55015 +24V BUS L3 Adresse 1 bis 31 890 414 T Zehner 1 9 0 T 1 T IB 2 1 +24V 6 L2 +24V BUS T 0 2 4 5 L1 L1 L2 L3 8 EMC: gem. EN 55015 N DPÜ / B.1 7 4 gem. VDE 0108 ta: -15 bis 40°C 8 INOTEC Kontakte (1 / 2) + (3 / 4) öffnen bei Netzausfall 1 3 6 8 890 414 5 T 4 7 8 +24V BUS L3 Adresse 1 bis 31 7 6 7 2 4 5 L2 8 8 4 gem. VDE 0108 ta: -15 bis 40°C EMC: gem. EN 55015 L1 L1 L2 L3 7 7 INOTEC Kontakte (1 / 2) + (3 / 4) öffnen bei Netzausfall N DPÜ / B.1 0 6 9 5 9 4 890 414 1 3 L3 Adresse 1 bis 31 1 L2 L1 L2 L3 L1 L2 L3 N PE 1 L1 L1 L2 L3 N PE 0 N DPÜ / B.1 UV ... SUB DB ... 0 L1 L2 L3 N PE UV 2 SUB DB 2 9 UV 1 SUB DB 1 9 CPS 220/48.1/SV Montage- und Betriebsanleitung Letzte DPÜ Zenerabschluss Last DPÜ Zener diode termination Adressprogrammierung zwingend notwendig Address setting is mandatory. SL+ 850 009 RIF5 RIF5 Klemmleiste terminal rail Technische Daten: Nennspannung UN: Überlastbarkeit: Nennverbrauch: Nennfrequenz: Ansprechwert: Busanschluss: 230 V AC, 400 V AC 1,1 U dauernd ca. 3VA 50/60 Hz 0,85 UN INOTEC interner Gerätebus Technical data: Rated voltage UN: Overload capacity Rated consumption: Rated frequency: Response value: Bus connection: 230 V AC, 400 V AC 1.1 U continuous approx. 3 VA 50/60 Hz 0.85 UN INOTEC internal device bus Adressbereich: 1 . . . 31 Address range: 1–31 Ausgang Kontaktbestückung: 2 Schließer Imax / Kontakt: 30 V DC, 1 A Output Contacts Imax / Contakt: 2 NO-contacts 30 V DC, 1 A Allgemeine Daten Nennbetrieb: Temp.-Bereich: Schutzart: General data Rating: Continuous operation Amb. temp. range: -15°C to +40°C Protection category: IP 20 (terminal) IP 40 (housing) Housing: Thermoplast Conductor 2.5 mm² single-wire or connection: 1.5 mm² cord with cable end sleeve EMC protection: as per DIN EN 55015 Funkentstörung: 36 45 48 58 Gehäuse: Leiteranschluss Dauerbetrieb -15°C ... +40°C IP 20 (Klemme) IP 40 (Gehäuse) Thermoplast 2,5mm² eindrähtig oder 1,5mm² Litze mit Aderendhülse gem. DIN EN 55015 90 45 CPS 220/48.1/SV Mounting and Operating Instructions CPS 220/48.1/SV Montage- und Betriebsanleitung 6.3.4.5. LOMO 6.3.4.5. LOMO Mittels des Loop-Monitoring-Moduls werden die Verbindungen zwischen Sicherheitslichtgerät und Dreiphasenüberwachungen auf Kurzschluss und Leitungsunterbrechung überwacht. Dabei ist für jeden Leitungsstrang (Stich) ein eigenes Loop-Monitoring-Modul einzusetzen und am entferntesten Punkt der Überwachungsschleife (SL+ /SL-) der DPÜs die mitgelieferte Zener-Abschlussdiode einzubauen. The loop monitoring module monitors the connections between the safety lighting device and three-phase monitors for short circuit and loop interruption. For each wire strand (stub), a separate loop monitoring module must be used and the final diode supplied must be fitted at the furthest point on the monitoring loop (SL+ SL-) of the DPÜ. Stich 1 Stub 1 Stich 2 Stub 2 Zenerdiode Zener diode SSL - DPÜ DPÜ DPÜ DPÜ DPÜ DPÜ S+ SL+ SSL - OK 850 009 S+ SL+ OK INOTEC INOTEC LOMO LOMO 850 014 - 24 V. 850 014 + + - 24 V. + + CPS 220/48.1 24 V Das Loop-Monitoring-Modul muss in das Sicherheitslichtgerät eingebaut werden! The loop monitoring module must be integrated into the safety lighting device! Bei Meldung eines Netzausfalls in der Unterverteilung mittels LOMO-Modul wird am Steuerteil die Meldung „Stromschleife hat Kurzschluss“ angezeigt! If a power failure in the sub-distribution board is reported via the LOMO module, the controller will display the message “Current loop has short circuit”! Technische Daten: Funkentstörung: 4646 24V ±20% -15°C ... +40°C IP 20 Thermoplast 2,5mm² eindrähtig 1,5mm² Litze mit oder Aderendhülse gem. DIN EN 55015 Technical data: 17,5 59 90 Nennspannung UN: Temp.-Bereich: Schutzart: Gehäuse: Leiteranschluss: Rated voltage UN: Amb. temp. range: Protection category: Housing: Conductor connection: EMC protection: 24 V ±20% -15°C to +40°C IP 20 Thermoplast 2.5 mm² single-wire 1.5 mm² cord with cable end sleeve as per DIN EN 55015 CPS 220/48.1/SV Mounting and Operating Instructions CPS 220/48.1/SV Montage- und Betriebsanleitung 6.3.4.6. Fernmeldetableau – MTB 6.3.4.6. Remote mimic panel — MTB Das Fernmeldetableau wird an das RIF5-Modul gem. nachfolgendem Schaltbild angeschlossen. Die Leitungslänge zwischen RIF5 und MTB darf bei einem Querschnitt von 0,5mm² maximal 500m betragen. The remote mimic panel is connected to the RIF5 module in accordance with the circuit diagram below. The wire length between RIF5 and MTB may be a maximum of 500m with a cross-section of 0.5 mm². Auf der Frontseite des MTB sind 3 Leuchtdioden und ein Schlüsselschalter angeordnet: •GrünBetrieb •GelbBatteriebetrieb •RotStörung Arranged on the front of the MTB are 3 LEDs and a key switch: •GreenOperation •Yellow Battery operation •RedFailure Schalterstellung EIN / AUS Switch position ON/OFF die Anlage wird blockiert / nicht blockiert The system is blocked/ not blocked Blockiert wird gemäß Einstellung in der Steuerteilprogrammierung DL oder DL + NL. M or M + E is blocked depending on the setting in the controller program. Die Programmierung des MTB in Verbindung mit RIF5 ist unter For programming of the MTB in conjunction with RIF5, siehe 8.7. Programmierung - Seite 90 see 8.7. Programming on page 90 siehe 8.4.4.3. Komponenten - Seite 67 see 8.4.4.3. Components on page 67 beirteB noitarepO + beirteBnoitarepO- 1 bei3rte5B F+ FgnurötS eruliaF nO/niE f fO/suA CETONI 850 009 Technical data: Mounting: Protection category: Housing: Technische Daten: Montage: Auf- / Unterputz Schutzart: IP 30 Gehäuse: Edelstahl/Aluminium velour lackiert Aufputz / Wall-mounted 43 mm 58 mm 74 mm 90 mm 50 mm 58 mm 90 mm Unterputz / Built-in Wall/recessed mounting IP 30 Stainless steel/aluminium, velour coated 6,5 mm 47 CPS 220/48.1/SV Mounting and Operating Instructions CPS 220/48.1/SV Montage- und Betriebsanleitung 6.3.4.7. CPS-MTB 6.3.4.7. CPS-MTB Mehrere CPS 220 / 48.1 -Geräte können über den 3-adrigen RTG-BUS auf ein zentrales Meldetableau aufgeschaltet werden. Dieses unterstützt zwei Stränge mit jeweils max. 8 Geräten je Strang. Über das Meldetableau können detaillierte Statusinformationen bis zur Leuchtenstörung im Klartext abgerufen, zentrale Tests gestartet und alle Systeme blockiert RTG werden. Several CPS 220/48.1 devices can be connected to one central mimic panel via the 3-wire RTG BUS. This supports two lines, each with a max. of 8 devices per line. The mimic panel is able to retrieve detailed status information up to the luminaire failure in plain text, start central testsand block all systems. Max. Leitungslänge bei 0,5mm² (Mindestquerschnitt) 500m. CP 4x2A 1 CP 4x2A 1 F 3,15 A 1 1 1 1 1 CP 4x2A 1 F 3,15 A 3,15 A 3,15 A 3,15 A 3,15 A 3,15 A 3,15 A 3,15 A 3,15 A 3,15 A 3,15 A = BL / NM = DL / M = BL / NM = DL / M = BL / NM = DL / M = BL / NM = DL / M = BL / NM = DL / M = BL / NM = DL / M = BL / NM = DL / M = BL / NM = DL / M = BL / NM = DL / M = BL / NM = DL / M 1 CP 4x2A 1 F CP 4x2A 1 F 1 1 1 1 CP 4x2A 1 F 3,15 A 3,15 A 3,15 A 3,15 A 3,15 A 3,15 A 3,15 A 3,15 A 3,15 A 3,15 A 3,15 A 3,15 A 3,15 A 3,15 A 3,15 A = BL / NM = DL / M = BL / NM = DL / M = BL / NM = DL / M = BL / NM = DL / M = BL / NM = DL / M = BL / NM = DL / M = BL / NM = DL / M = BL / NM = DL / M = BL / NM = DL / M = BL / NM = DL / M = BL / NM = DL / M = BL / NM = DL / M = BL / NM = DL / M = BL / NM = DL / M = BL / NM = DL / M Störung Failure Batt.-Betrieb 1 CP 4x2A 1 F 1 1 1 1 1 3,15 A 3,15 A 3,15 A 3,15 A 3,15 A 3,15 A 3,15 A 3,15 A 3,15 A 3,15 A 3,15 A 3,15 A = BL / NM = DL / M = BL / NM = DL / M = BL / NM = DL / M = BL / NM = DL / M = BL / NM = DL / M = BL / NM = DL / M = BL / NM = DL / M = BL / NM = DL / M = BL / NM = DL / M = BL / NM = DL / M = BL / NM = DL / M = BL / NM = DL / M CPS 220 / 64 R 1 1 2 F F F 3,15 A 3 3 F F 3,15 A 4 F CP 4x2A F 3,15 A 2 F 3,15 A 4 F 1 F 3,15 A 3 F 3,15 A 4 CP 4x2A F 3,15 A 2 F 3,15 A 3 F CP 4x2A F 3,15 A 2 F 3,15 A 4 4 F F 3,15 A 3,15 A 3,15 A 3,15 A 3,15 A = BL / NM = DL / M = BL / NM = DL / M = BL / NM = DL / M = BL / NM = DL / M = BL / NM = DL / M INOTEC Betrieb Batt.-Betrieb Störung La deStörung Key-Boa rd 1 F 3,15 A 3 F 3,15 A = BL / NM = DL / M CP 4x2A F 3,15 A 2 F 3,15 A 4 F 1 F 3,15 A 3 F 3,15 A 4 CP 4x2A F 3,15 A 2 F 3,15 A 3 F 3,15 A = BL / NM = DL / M Batt.-Betrieb Drucker Centronics Reset T CP 4x2A F 3,15 A 2 F 3,15 A 4 F 1 F 3,15 A 3 F 3,15 A 4 CP 4x2A F 3,15 A 2 F 3,15 A 3 F CP 4x2A F 3,15 A 2 F 3,15 A 4 F 1 F 3,15 A 3 F 3,15 A 4 CP 4x2A F 3,15 A 2 F 3,15 A 3 F CP 4x2A F 3,15 A 2 F 3,15 A 4 F 1 F 3,15 A 3 F 3,15 A 4 CP 4x2A F 3,15 A 2 F 3,15 A 3 F CP 4x2A F 3,15 A 2 F 3,15 A 4 F 1 F 3,15 A 3 F 3,15 A 4 CP 4x2A F 3,15 A 2 F 3,15 A 3 F CP 4x2A F 3,15 A 2 F 3,15 A 4 F 1 F 3,15 A 3 F 3,15 A 4 CP 4x2A 3,15 A 2 F 3,15 A 3 F F 3,15 A 2 F 3,15 A 4 F 1 F 3,15 A 3 F 3,15 A 4 CP 4x2A F 3,15 A 2 F 3,15 A 3 F Störung La deStörung R CP 4x2A F 3,15 A 2 F 3,15 A 4 3,15 A = BL / NM = DL / M Betrieb Störung CPS 220 / 64 1 F 3,15 A 3 F CP 4x2A F 3,15 A 2 F 3,15 A 4 3,15 A = BL / NM = DL / M INOTEC Betrieb Batt.-Betrieb Bat.-Operation 1 F 3,15 A 3 F 3,15 A = BL / NM = DL / M INOTEC CP 4x2A F 3,15 A 2 F 3,15 A 4 F 1 F 3,15 A 3 F 3,15 A 4 CP 4x2A 3,15 A 2 F 3,15 A 3 F F 3,15 A 2 F 3,15 A 4 F 1 F 3,15 A 3 F 3,15 A 4 CP 4x2A F 3,15 A 2 F 3,15 A 3 F CP 4x2A F 3,15 A 2 F 3,15 A 4 F 1 F 3,15 A 3 F 3,15 A 4 CP 4x2A F 3,15 A 2 F 3,15 A 3 F CP 4x2A F 3,15 A 2 F 3,15 A 4 F 1 F 3,15 A 3 F 3,15 A 4 CP 4x2A F 3,15 A 2 F 3,15 A 3 F CP 4x2A F 3,15 A 2 F 3,15 A 4 F 1 F 3,15 A 3 F 3,15 A 4 CP 4x2A F 3,15 A 2 F 3,15 A 3 F CP 4x2A F 3,15 A 2 F 3,15 A 4 F 1 F 3,15 A 3 F 3,15 A 4 CP 4x2A 3,15 A 2 F 3,15 A 3 F F 3,15 A 2 F 3,15 A 4 F 1 F 3,15 A 3 F 3,15 A 4 CP 4x2A 3,15 A 2 F 3,15 A 3 F F 3,15 A 2 F 3,15 A 4 F 1 F 3,15 A 3 F 3,15 A 4 CP 4x2A F 3,15 A 2 F 3,15 A 3 F 3,15 A CP 4x2A F 3,15 A 2 F 3,15 A 4 F 1 F 3,15 A 3 F 3,15 A 4 CP 4x2A 3,15 A 2 F 3,15 A 3 F F 3,15 A 2 F F 3,15 A 4 F CP 4x2A F 3,15 A 3 F 3,15 A 4 F 2 F 3,15 A 3 F 3,15 A 4 1 3,15 A 2 F 3,15 A 3 CP 4x2A F 3,15 A 2 F CP 4x2A F 3,15 A F F 3,15 A 4 F CP 4x2A F 3,15 A 3 F 3,15 A 4 F 2 F 3,15 A 3 F 3,15 A 4 1 3,15 A 2 F 3,15 A 3 CP 4x2A F 3,15 A 2 F CP 4x2A F 3,15 A F F 3,15 A 4 F CP 4x2A F 3,15 A 3 F 3,15 A 4 F 2 F 3,15 A 3 F 3,15 A 4 1 3,15 A 2 F 3,15 A 3 CP 4x2A F 3,15 A 2 3,15 A 3,15 A = BL / NM = DL / M Max. line length with 0.5 mm² (minimum cross-section) 500 m. Drucker Centronics La deStörung Key-Boa rd CPS 220 / 64 Reset T R Drucker Centronics Key-Boa rd Reset T Betrieb Operation Netz Netz Batterie 16AT 10AT Netz Batterie 16AT 10AT Ein Batterie 16AT 10AT Ein Ladeteil 220V/7,5A Ein Ladeteil 220V/7,5A Ladeteil 220V/7,5A max. 500m RTG max. 500m CPS 1 CP 4x2A 1 CP 4x2A 1 F 3,15 A 1 1 1 1 1 CP 4x2A 3,15 A 3,15 A 3,15 A 3,15 A 3,15 A 3,15 A 3,15 A 3,15 A 3,15 A 3,15 A = BL / NM = DL / M = BL / NM = DL / M = BL / NM = DL / M = BL / NM = DL / M = BL / NM = DL / M = BL / NM = DL / M = BL / NM = DL / M = BL / NM = DL / M = BL / NM = DL / M = BL / NM = DL / M 1 1 CP 4x2A 1 F 3,15 A 2 1 CP 4x2A 1 F 1 1 1 1 CP 4x2A 3,15 A 3,15 A 3,15 A 3,15 A 3,15 A 3,15 A 3,15 A 3,15 A 3,15 A 3,15 A 3,15 A 3,15 A 3,15 A 3,15 A 3,15 A = BL / NM = DL / M = BL / NM = DL / M = BL / NM = DL / M = BL / NM = DL / M = BL / NM = DL / M = BL / NM = DL / M = BL / NM = DL / M = BL / NM = DL / M = BL / NM = DL / M = BL / NM = DL / M = BL / NM = DL / M = BL / NM = DL / M = BL / NM = DL / M = BL / NM = DL / M = BL / NM = DL / M CP 4x2A 1 F CP 4x2A 1 F 1 1 1 1 CP 4x2A 3,15 A 3,15 A 3,15 A 3,15 A 3,15 A 3,15 A 3,15 A 3,15 A 3,15 A 3,15 A 3,15 A 3,15 A 3,15 A 3,15 A = BL / NM = DL / M = BL / NM = DL / M = BL / NM = DL / M = BL / NM = DL / M = BL / NM = DL / M = BL / NM = DL / M = BL / NM = DL / M = BL / NM = DL / M = BL / NM = DL / M = BL / NM = DL / M = BL / NM = DL / M = BL / NM = DL / M = BL / NM = DL / M = BL / NM = DL / M Batt.-Betrieb Störung La deStörung La deStörung T Drucker Centronics Key-Boa rd CPS 220 / 64 Reset T Drucker Centronics Key-Boa rd 10AT CPS 220 / 64 Reset Netz Batterie 16AT R Batterie 16AT Ein 10AT Ladeteil 220V/7,5A CPS 1 230 38 230V AC +/- 10% 176V DC - 260V DC Klemmenzuleitung: 2,5mm² (Spannungsversorgung + RTG) Klemmenabgänge: 1,5mm² (Relaiskontakte + 24V Ausgang) Zul. Umgebungstemp.: -5°C bis +30°C Schutzklasse: I Schutzart: IP 20 Abmessung: 230mm x 186mm x 38mm Gewicht: 1,7kg 186 1 2 F F F 3,15 A 3 3 F F 3,15 A 4 F CP 4x2A F 3,15 A 2 F 3,15 A 4 4 F F 3,15 A 3,15 A 3,15 A = BL / NM = DL / M = BL / NM = DL / M = BL / NM = DL / M R T Drucker Centronics Key-Boa rd Reset Batterie 16AT 10AT Ein Ladeteil 220V/7,5A CPS 2 Technische Daten: Anschlussspannung: 1 F 3,15 A 3 F CP 4x2A F 3,15 A 2 F 3,15 A 4 3,15 A = BL / NM = DL / M Netz Ein Ladeteil 220V/7,5A 1 F 3,15 A 3 F CP 4x2A F 3,15 A 2 F 3,15 A 4 3,15 A = BL / NM = DL / M INOTEC Betrieb Batt.-Betrieb Störung La deStörung R 1 F 3,15 A 3 F 3,15 A = BL / NM = DL / M CP 4x2A F 3,15 A 2 F 3,15 A 4 F 1 F 3,15 A 3 F 3,15 A 4 CP 4x2A F 3,15 A 2 F 3,15 A 3 F 1 F 3,15 A 2 F 3,15 A 4 F 1 F 3,15 A 3 F 3,15 A 4 CP 4x2A F 3,15 A 2 F 3,15 A 3 F CP 4x2A F 3,15 A 2 F 3,15 A 4 F 1 F 3,15 A 3 F 3,15 A 4 CP 4x2A F 3,15 A 2 F 3,15 A 3 F CP 4x2A F 3,15 A 2 F 3,15 A 4 F 1 F 3,15 A 3 F 3,15 A 4 CP 4x2A F 3,15 A 2 F 3,15 A 3 F CP 4x2A F 3,15 A 2 F 3,15 A 4 F 1 F 3,15 A 3 F 3,15 A 4 CP 4x2A F 3,15 A 2 F 3,15 A 3 F CP 4x2A F 3,15 A 2 F 3,15 A 4 F 1 F 3,15 A 3 F 3,15 A 4 CP 4x2A 3,15 A 2 F 3,15 A 3 F F 3,15 A 2 F 3,15 A 4 F 1 F 3,15 A 3 F 3,15 A 4 CP 4x2A 3,15 A 2 F 3,15 A 3 F F 3,15 A 2 F 3,15 A 4 3,15 A = BL / NM = DL / M Betrieb Batt.-Betrieb Störung Netz 4848 1 F 3,15 A 3 F CP 4x2A F 3,15 A 2 F 3,15 A 4 CPS 8 INOTEC Betrieb CPS 220 / 64 1 F 3,15 A 3 F 3,15 A = BL / NM = DL / M INOTEC CP 4x2A F 3,15 A 2 F 3,15 A 4 F 1 F 3,15 A 3 F 3,15 A 4 CP 4x2A F 3,15 A 2 F 3,15 A 3 F 1 F 3,15 A 2 F 3,15 A 4 F 1 F 3,15 A 3 F 3,15 A 4 CP 4x2A F 3,15 A 2 F 3,15 A 3 F CP 4x2A F 3,15 A 2 F 3,15 A 4 F 1 F 3,15 A 3 F 3,15 A 4 CP 4x2A F 3,15 A 2 F 3,15 A 3 F CP 4x2A F 3,15 A 2 F 3,15 A 4 F 1 F 3,15 A 3 F 3,15 A 4 CP 4x2A F 3,15 A 2 F 3,15 A 3 F CP 4x2A F 3,15 A 2 F 3,15 A 4 F 1 F 3,15 A 3 F 3,15 A 4 CP 4x2A F 3,15 A 2 F 3,15 A 3 F CP 4x2A F 3,15 A 2 F 3,15 A 4 F 1 F 3,15 A 3 F 3,15 A 4 CP 4x2A 3,15 A 2 F 3,15 A 3 F F 3,15 A 2 F 3,15 A 4 F CP 4x2A F 3,15 A 4 F 3,15 A 3 F 3,15 A 4 3,15 A 2 F 3,15 A 3 F 3,15 A F 3,15 A 2 F 3,15 A 3 F F CP 4x2A F 3,15 A 4 F 3,15 A CP 4x2A F F 3,15 A 3 F 3,15 A 4 F 2 F 3,15 A 3 F 3,15 A 4 1 3,15 A 2 F 3,15 A 3 3,15 A CP 4x2A F 3,15 A 2 F F 1 F 3,15 A 4 F CP 4x2A F F 3,15 A 3 F 3,15 A 4 F 2 F 3,15 A 3 F 3,15 A 4 1 3,15 A 2 F 3,15 A 3 3,15 A CP 4x2A F 3,15 A 2 F F CP 4x2A F 3,15 A 4 F CP 4x2A F F 3,15 A 3 F 3,15 A 4 F 2 F 3,15 A 3 F 3,15 A 4 1 3,15 A 2 F 3,15 A 3 3,15 A CP 4x2A F 3,15 A 2 F F CP 4x2A F 3,15 A 4 F CP 4x2A F F 3,15 A 3 F 3,15 A 4 F 2 F 3,15 A 3 F 3,15 A 4 1 3,15 A 2 F 3,15 A 3 3,15 A CP 4x2A F 3,15 A 2 3,15 A = BL / NM = DL / M CPS 2 CPS 8 Technical data: Supply voltage: Terminal feeder Terminal outputs: Permissible ambient temperature: Protection class: Protection category: Dimensions: Weight: 230 V AC +/- 10% 176V DC - 260 V DC 2.5 mm² (power supply system + RTG) 1.5 mm² (relay contacts + 24 V output) -5°C to +30°C I IP 20 230 mm x 186 mm x 38 mm 1.7 kg CPS 220/48.1/SV Mounting and Operating Instructions CPS 220/48.1/SV Montage- und Betriebsanleitung 6.3.4.8. INOWEB 6.3.4.8. INOWEB Über das im TFT Steuerteil integriert INOWEB-Modul kann der Zustand des CPS-Gerätes mittels Netzwerkverbindung abgefragt werden. Im Webbrowser wird der Zustand zu jeder überwachten Leuchte grafisch dargestellt. The INOWEB (integrated in TFT controller unit) module enables the status of the CPS device to be polled via the network connection. The web browser displays the status of each luminaire being monitored in graphic format. max. 100m HUB / Switch max. 100m max. 100m HUB / Switch max. 100m CP 4x2A 1 CP 4x2A 1 F 3,15 A CP 4x2A 1 F 1 1 1 1 1 1 CP 4x2A 1 F 1 CP 4x2A 1 F 1 1 1 1 1 1 1 CP 4x2A 1 F 1 1 CP 4x2A 1 F CP 4x2A 1 1 1 1 1 1 CP 4x2A 1 F CP 4x2A 1 1 1 CP 4x2A 1 F 1 1 1 1 1 CP 4x2A 1 2 F F F 3,15 A 3 3 F F 3,15 A 4 F CP 4x2A F 3,15 A 2 F 3,15 A 4 F 1 F 3,15 A 3 F 3,15 A 4 CP 4x2A F 3,15 A 2 F 3,15 A 3 F 1 F 3,15 A 2 F 3,15 A 4 F 1 F 3,15 A 3 F 3,15 A 4 CP 4x2A F 3,15 A 2 F 3,15 A 3 F CP 4x2A F 3,15 A 2 F 3,15 A 4 F 1 F 3,15 A 3 F 3,15 A 4 CP 4x2A F 3,15 A 2 F 3,15 A 3 F CP 4x2A F 3,15 A 2 F 3,15 A 4 F 1 F 3,15 A 3 F 3,15 A 4 CP 4x2A F 3,15 A 2 F 3,15 A 3 F CP 4x2A F 3,15 A 2 F 3,15 A 4 F 1 F 3,15 A 3 F 3,15 A 4 CP 4x2A F 3,15 A 2 F 3,15 A 3 F CP 4x2A F 3,15 A 2 F 3,15 A 4 F CP 4x2A F 3,15 A 3 F 3,15 A 4 F 3,15 A 2 F 3,15 A 3 F 3,15 A 4 F 3,15 A 2 F 3,15 A 3 F CP 4x2A F 3,15 A 2 F 3,15 A 4 F CP 4x2A F F 3,15 A 3 F 3,15 A 4 F 3,15 A 2 F 3,15 A 3 F 3,15 A 4 F 3,15 A 2 F 3,15 A 3 F 3,15 A 4 F 3,15 A 2 F 3,15 A 3 F CP 4x2A F 3,15 A 2 F 3,15 A 4 F 1 F 3,15 A 3 F 3,15 A 4 CP 4x2A F 3,15 A 2 F 3,15 A 3 F CP 4x2A F 3,15 A 2 F 3,15 A 4 F 1 F 3,15 A 3 F 3,15 A 4 CP 4x2A F 3,15 A 2 F 3,15 A 3 F CP 4x2A F 3,15 A 2 F 3,15 A 4 F 1 F 3,15 A 3 F 3,15 A 4 CP 4x2A F 3,15 A 2 F 3,15 A 3 F CP 4x2A F 3,15 A 2 F 3,15 A 4 F 1 F 3,15 A 3 F 3,15 A 4 CP 4x2A F 3,15 A 2 F 3,15 A 3 F CP 4x2A F 3,15 A 2 F 3,15 A 4 F 1 F 3,15 A 3 F 3,15 A 4 F CP 4x2A F 3,15 A 2 F 3,15 A 3 F 3,15 A 4 F 3,15 A 2 F 3,15 A 3 F 3,15 A 4 F 3,15 A 2 F 3,15 A 3 F CP 4x2A F 3,15 A 2 F 3,15 A 4 F CP 4x2A F 3,15 A 3 F 3,15 A 4 F 3,15 A 2 F 3,15 A 3 F 3,15 A 4 F 3,15 A 2 F 3,15 A 3 F CP 4x2A F 3,15 A 2 F 3,15 A 4 F 1 F 3,15 A 3 F 3,15 A 4 CP 4x2A F 3,15 A 2 F 3,15 A 3 F CP 4x2A F 3,15 A 2 F 3,15 A 4 F 1 F 3,15 A 3 F 3,15 A 4 CP 4x2A F 3,15 A 2 F 3,15 A 3 F CP 4x2A F 3,15 A 2 F 3,15 A 4 F 1 F 3,15 A 3 F 3,15 A 4 CP 4x2A F 3,15 A 2 F 3,15 A 3 F CP 4x2A F 3,15 A 2 F 3,15 A 4 F 1 F 3,15 A 3 F 3,15 A 4 CP 4x2A F 3,15 A 2 F 3,15 A 3 F CP 4x2A F 3,15 A 2 F 3,15 A 4 F 1 F 3,15 A 3 F 3,15 A 4 CP 4x2A F 3,15 A 2 F 3,15 A 3 F CP 4x2A F 3,15 A 2 F 3,15 A 4 F CP 4x2A F 3,15 A 3 F 3,15 A 4 F 3,15 A 2 F 3,15 A 3 F 3,15 A 4 F 3,15 A 2 F 3,15 A 3 F CP 4x2A F 3,15 A 2 F 3,15 A 4 F 1 F 3,15 A 3 F 3,15 A 4 CP 4x2A 3,15 A 2 F 3,15 A 3 F F 3,15 A 2 F 3,15 A 4 F 1 F 3,15 A 3 F 3,15 A 4 CP 4x2A F 3,15 A 2 F 3,15 A 3 F CP 4x2A F 3,15 A 2 F 3,15 A 4 F 1 F 3,15 A 3 F 3,15 A 4 CP 4x2A F 3,15 A 2 F 3,15 A 3 F CP 4x2A F 3,15 A 2 F 3,15 A 4 F 1 F 3,15 A 3 F 3,15 A 4 CP 4x2A F 3,15 A 2 F 3,15 A 3 F CP 4x2A F 3,15 A 2 F 3,15 A 4 F 1 F 3,15 A 3 F 3,15 A 4 CP 4x2A F 3,15 A 2 F 3,15 A 3 F CP 4x2A F 3,15 A 2 F 3,15 A 4 F 1 F 3,15 A 3 F 3,15 A 4 CP 4x2A F 3,15 A 2 F 3,15 A 3 F CP 4x2A F 3,15 A 2 F 3,15 A 4 F 1 F 3,15 A 3 F 3,15 A 4 CP 4x2A F 3,15 A 2 F 3,15 A 3 F CP 4x2A 3,15 A 2 F 3,15 A 4 F F 3,15 A F 3,15 A 3 F 3,15 A 4 F 2 F 3,15 A 3 F 3,15 A 4 1 3,15 A 2 F 3,15 A 3 3,15 A CP 4x2A F 3,15 A 2 3,15 A max. 100m 4 F F 3,15 A 3,15 A 3,15 A 3,15 A 3,15 A 3,15 A 3,15 A 3,15 A 3,15 A 3,15 A 3,15 A 3,15 A 3,15 A 3,15 A 3,15 A 3,15 A 3,15 A 3,15 A 3,15 A 3,15 A 3,15 A 3,15 A 3,15 A 3,15 A 3,15 A 3,15 A 3,15 A 3,15 A 3,15 A 3,15 A 3,15 A 3,15 A 3,15 A 3,15 A 3,15 A 3,15 A 3,15 A 3,15 A 3,15 A 3,15 A 3,15 A 3,15 A 3,15 A 3,15 A 3,15 A 3,15 A 3,15 A 3,15 A 3,15 A 3,15 A 3,15 A 3,15 A 3,15 A 3,15 A 3,15 A 3,15 A 3,15 A 3,15 A 3,15 A 3,15 A 3,15 A 3,15 A 3,15 A 3,15 A = BL / NM = DL / M = BL / NM = DL / M = BL / NM = DL / M = BL / NM = DL / M = BL / NM = DL / M = BL / NM = DL / M = BL / NM = DL / M = BL / NM = DL / M = BL / NM = DL / M = BL / NM = DL / M = BL / NM = DL / M = BL / NM = DL / M = BL / NM = DL / M = BL / NM = DL / M = BL / NM = DL / M = BL / NM = DL / M = BL / NM = DL / M = BL / NM = DL / M = BL / NM = DL / M = BL / NM = DL / M = BL / NM = DL / M = BL / NM = DL / M = BL / NM = DL / M = BL / NM = DL / M = BL / NM = DL / M = BL / NM = DL / M = BL / NM = DL / M = BL / NM = DL / M = BL / NM = DL / M = BL / NM = DL / M = BL / NM = DL / M = BL / NM = DL / M = BL / NM = DL / M = BL / NM = DL / M = BL / NM = DL / M = BL / NM = DL / M = BL / NM = DL / M = BL / NM = DL / M = BL / NM = DL / M = BL / NM = DL / M = BL / NM = DL / M = BL / NM = DL / M = BL / NM = DL / M = BL / NM = DL / M = BL / NM = DL / M = BL / NM = DL / M = BL / NM = DL / M = BL / NM = DL / M = BL / NM = DL / M = BL / NM = DL / M = BL / NM = DL / M = BL / NM = DL / M = BL / NM = DL / M = BL / NM = DL / M = BL / NM = DL / M = BL / NM = DL / M = BL / NM = DL / M = BL / NM = DL / M = BL / NM = DL / M = BL / NM = DL / M = BL / NM = DL / M = BL / NM = DL / M = BL / NM = DL / M = BL / NM = DL / M CP 4x2A 1 10AT Netz 10AT Ein Ladeteil 220V/7,5A Netz Batterie 16AT 10AT Ein 1 CP 4x2A 1 F 3,15 A CP 4x2A 1 1 1 1 1 1 1 CP 4x2A 1 F 3,15 A 2 1 1 CP 4x2A 1 F 1 1 1 1 1 1 2 F F F 3,15 A 3 3 F F 3,15 A 4 F CP 4x2A F 3,15 A 2 F 3,15 A 4 F 1 F 3,15 A 3 F 3,15 A 4 CP 4x2A F 3,15 A 2 F 3,15 A 3 F CP 4x2A F 3,15 A 2 F 3,15 A 4 F 1 F 3,15 A 3 F 3,15 A 4 CP 4x2A F 3,15 A 2 F 3,15 A 3 F CP 4x2A F 3,15 A 2 F 3,15 A 4 F 1 F 3,15 A 3 F 3,15 A 4 CP 4x2A F 3,15 A 2 F 3,15 A 3 F CP 4x2A F 3,15 A 2 F 3,15 A 4 F 1 F 3,15 A 3 F 3,15 A 4 CP 4x2A F 3,15 A 2 F 3,15 A 3 F CP 4x2A F 3,15 A 2 F 3,15 A 4 F 1 F 3,15 A 3 F 3,15 A 4 CP 4x2A F 3,15 A 2 F 3,15 A 3 4 F F 3,15 A 3,15 A 3,15 A 3,15 A 3,15 A 3,15 A 3,15 A 3,15 A 3,15 A 3,15 A 3,15 A 3,15 A 3,15 A 3,15 A 3,15 A 3,15 A 3,15 A 3,15 A 3,15 A 3,15 A 3,15 A 3,15 A 3,15 A 3,15 A 3,15 A 3,15 A 3,15 A 3,15 A 3,15 A = BL / NM = DL / M = BL / NM = DL / M = BL / NM = DL / M = BL / NM = DL / M = BL / NM = DL / M = BL / NM = DL / M = BL / NM = DL / M = BL / NM = DL / M = BL / NM = DL / M = BL / NM = DL / M = BL / NM = DL / M = BL / NM = DL / M = BL / NM = DL / M = BL / NM = DL / M = BL / NM = DL / M = BL / NM = DL / M = BL / NM = DL / M = BL / NM = DL / M = BL / NM = DL / M = BL / NM = DL / M = BL / NM = DL / M = BL / NM = DL / M = BL / NM = DL / M = BL / NM = DL / M = BL / NM = DL / M = BL / NM = DL / M = BL / NM = DL / M = BL / NM = DL / M = BL / NM = DL / M CPS 220 / 64 Ein Ladeteil 220V/7,5A Ladeteil 220V/7,5A CPS 220 / 64 Netz Batterie 16AT 10AT Batterie 16AT Ein CPS InoWeb 10AT Ein Ladeteil 220V/7,5A CPS InoWeb CP 4x2A F 3,15 A 2 F 3,15 A = BL / NM = DL / M 10AT Netz CPS InoWeb 1 F 3,15 A 4 F CP 4x2A F 3,15 A 3 F 3,15 A 4 F 3,15 A 2 F 3,15 A 3 F 3,15 A 4 F 3,15 A 2 F 3,15 A 3 F CP 4x2A F 3,15 A 2 F 3,15 A 4 F CP 4x2A F 3,15 A 4 F 3,15 A 3 F 3,15 A 4 3,15 A 2 F 3,15 A 3 F 3,15 A F 3,15 A 2 F 3,15 A 3 F F CP 4x2A F 3,15 A 4 F CP 4x2A F F 3,15 A 3 F 3,15 A 4 F 2 F 3,15 A 3 F 3,15 A 4 1 3,15 A 2 F 3,15 A 3 3,15 A CP 4x2A F 3,15 A 2 F F CP 4x2A F 3,15 A 4 F CP 4x2A F F 3,15 A 3 F 3,15 A 4 F 2 F 3,15 A 3 F 3,15 A 4 1 3,15 A 2 F 3,15 A 3 3,15 A CP 4x2A F 3,15 A 2 F F CP 4x2A F 3,15 A 4 F CP 4x2A F F 3,15 A 3 F 3,15 A 4 F 2 F 3,15 A 3 F 3,15 A 4 1 3,15 A 2 F 3,15 A 3 3,15 A CP 4x2A F 3,15 A 2 F F CP 4x2A F 3,15 A 4 F 1 F F 3,15 A 3 F 3,15 A 4 F 2 F 3,15 A 3 F 3,15 A 4 1 3,15 A 2 F 3,15 A 3 3,15 A CP 4x2A F 3,15 A 2 F F 3,15 A = BL / NM = DL / M Batterie 16AT Ein Ladeteil 220V/7,5A CP 4x2A F F 3,15 A 4 F 3,15 A = BL / NM = DL / M CPS 220 / 64 Netz Batterie 16AT 3 F 3,15 A 4 Batterie 16AT 2 F 3,15 A 3 Netz CPS 220 / 64 1 3,15 A 2 3,15 A CPS 220 / 64 CP 4x2A F 3,15 A 3,15 A CPS 220 / 64 max. 100m max. 100m max. 100m Ladeteil 220V/7,5A InoWeb Control CPS InoWeb CPS InoWeb Verkabelung Ethernet (min. CAT 5) Wiring CPS InoWeb 6.3.4.9. Phasenauswahlschaltung – PAS 6.3.4.9. Phase selector switch — PAS Die Phasenauswahlschaltung (Ausführungen 20A/63A/100A) schaltet auch bei Ausfall von zwei Phasen auf die noch intakte Phase weiter und stellt die Versorgung der CPS-Anlage sicher. Erst bei Ausfall der dritten Phase schaltet die Anlage in den Notbetrieb. Even if two phases fail, the phase selector switch (versions 20 A/63 A/100 A) continues to switch to the intact phase and guarantees the power supply to the CPS system. The system switches to emergency operation only if the third phase fails. Eingangsseitig ist die Phasenauswahlschaltung 3-phasig an die Klemmen L1, L2, L3, N und PE anzuschließen. Die Verbindungsleitung zur CPS-Anlage wird an L, N und PE angeschlossen. On the input side, the phase selector switch is to be connected 3-phase to the terminals L1, L2, L3, N and PE. The connecting wire to the CPS system is connected to L, N and PE. A2 A1 1 13 NO L1 1 L2 21 NC 5 22 2 T1 1 31 NC 43 NO 13 NO 32 44 22 DIL M 14 A2 A1 L3 L1 1 L2 21 NC 5 4 T2 6 T3 22 2 T1 1 31 NC 43 NO 13 NO 32 44 L1 1 L2 21 NC 5 L3 31 NC 43 NO 32 44 22 DIL M 22 DIL M 14 A2 A1 L3 4 T2 6 T3 14 22 2 T1 4 T2 6 T3 PE N L PE N L1 L2 L3 Zum CPS-Gerät To CPS device Zum Haupverteiler To main distribution board 49 CPS 220/48.1/SV Montage- und Betriebsanleitung CPS 220/48.1/SV Mounting and Operating Instructions Technische Daten: Für externe Montage im Wandgehäuse. Anschlussspannung: Eingangsseitig 400V 50Hz Ausgangsseitig 230V 50Hz Technical data: For external mounting in the wall housing. Supply voltage: Input side 400 V 50 Hz Output side 230 V 50 Hz Maximale Strombelastbarkeit: 20A Abmessungen (H x B x T): 300mm, 400mm, 187mm Schutzart: IP 54 Maximum current carrying capacity: Dimensions (H x W x D): Protection category: Maximale Strombelastbarkeit: 63A Abmessungen (H x B x T): 300mm, 400mm, 187mm Schutzart: IP 54 Maximale Strombelastbarkeit: 100A Abmessungen (H x B x T): 270mm, 540mm, 187mm Schutzart: IP 54 7. Inbetriebnahme Die Netz- oder Batterieversorgung sind niemals unter Last ein- bzw. auszuschalten. Die Endstromkreise sind vorher auszuschalten (z.B. Anlage blockieren)! Bei der Erst-Inbetriebnahme ist vor dem Einsetzen der Batteriesicherungen die richtige Batteriepolarität sicher zu stellen! Maximum current carrying capacity: Dimensions (H x W x D): Protection category: Maximum current carrying capacity: Dimensions (H x W x D): Protection category: 20 A 300mm, 400mm, 187mm IP 54 63 A 300mm, 400mm, 187mm IP 54 100 A 270mm, 540mm, 187mm IP 54 7. Commissioning The mains and battery power must never be switched on or off under load. The final circuits must be switched off beforehand (e.g. block system)! During commissioning, correct battery polarity must be checked before inserting the battery fuses! 7.1. Überprüfung der Verbindungen 7.1. Checking the connections Vor der Inbetriebnahme des Sicherheitlichtgerätes sind die Anschlüsse wie folgt zu prüfen: •Prüfung der BUS- und Datenleitungen auf korrekten Anschluss und richtige Polung laut Betriebsanleitung •Prüfung der Anschlüsse von externen Baugruppen gem. dieser Bedienungsanleitung •Prüfung des Anschlusses der 24V-Stromschleife (SL+/SL- am RIF5) Before the safety lighting device is commissioned, the connections must be checked as follows: •Check the BUS and data lines for correct connection and correct polarity as per the operating instructions •Check the connections of external assemblies as per these operating instructions •Check the connections of the 24 V current loop (SL+/SL- on the RIF5) 7.2. Isolationsmessung 7.2. Insulation measuring Gemäß VDE 0100 ist eine Isolationsmessung der Endstromkreise an den Klemmblöcken X3, X4, X5 vor Inbetriebnahme des Sicherheitslichtsystems durchzuführen. In accordance with VDE 0100, the insulation of the final circuits on the terminal blocks X3, X4, X5 must be measured before the safety lighting system is commissioned. Dazu ist das komplette System freizuschalten und vor einer unbefugten Einschaltung zu sichern. Erst nach Abschluss der Isolationsmessung darf das System wieder eingeschaltet werden. 5050 This requires the complete system to be isolated and secured to prevent unauthorised switch-on. The system can be switched on again only when the insulation measuring is complete. CPS 220/48.1/SV Mounting and Operating Instructions CPS 220/48.1/SV Montage- und Betriebsanleitung Die Isolationsmessung ist mit einer max. Messspannung von 500V DC und einem Messstrom von 1mA durchzuführen! Es dürfen nur Messgeräte verwendet werden, die den Anforderungen der DIN VDE 0413 genügen. The insulation must be measured with a max. measurement voltage of 500 V DC and a measurement current of 1mA! Only measuring devices that satisfy the requirements of DIN VDE 0413 may be used. Isolationsmessungen dürfen nur zwischen dem Schutzleiter PE und L sowie zwischen dem Schutzleiter PE und Neutralleiter N durchgeführt werden. •Brücken Sie L und N des Endstromkreises 1.1 •Führen Sie die Isolationsmessung für den Endstromkreis 1.1 durch. •Entfernen Sie die Brücke zwischen L und N im Endstromkreise 1.1 •Gleiche Messung ist für den Endstromkreis 1.2, 2.1, 2.2, etc. und die Endstromkreise der Unterstationen CPUS und CPUSB durchzuführen. Insulation measurements may be taken only between the protective earth conductor PE and L and the protective earth conductor PE and the neutral conductor N. •Bypass L and N in the final circuit 1.1 •Take an insulation measurement for the final circuit 1.1. •Remove the jumper between L and N in the final circuit 1.1 •The same measurement must be taken for final circuits 1.2, 2.1, 2.2, etc. and the final circuits in the sub stations CPUS and CPUSB. Um aktive Bauteile vor eventueller Zerstörung durch die Messung zu schützen, sind L und N miteinander zu verbinden! To protect active components from being destroyed during the measurement, L and N must be connected! Endstromkreis 1.2 Endstromkreis 1.1 Im Netzbetrieb wird der Batteriekreis auf Isolationsfehler überwacht. Bei einem Isolationswiderstand von <470 kΩ wird der im Display angezeigt. L N PE L N PE M ISO -Ω IN = 1mA 500V The battery circuit is monitored for ISO failures during mains operation. The display will indicate an ISO-failure if the isolation resistance is <470 kΩ. Im Batteriebetrieb, d.h. Funktionstest, Betriebsdauertest und Netzausfall sind alle angeschlossenen Stromkreise in die Isolationsüberwachung mit eingeschlossen. The isolation monitoring includes all final circuits during battery operation (function test, duration test and mains failure). 7.3. Einschalten des Zentralbatteriesystems 7.3. Energising the central battery system The following sequence must be observed when energise the central battery system! Beim Einschalten des Zentralbatteriesystems ist unbedingt folgende Reihenfolge zu beachten! 1. Netz einschalten 1. Switch on the mains power 2. Ladeteil einschalten 2. Switch on the charger 3. Batteriesicherungen einsetzen 3. Insert the battery fuses Nach dem Einschalten initialisiert sich das Steuerteil und zeigt den aktuellen Betriebszustand an. Entsprechend der Bedienungsanleitung sind die notwendigen Einstellungen in der Programmierung vorzunehmen. After switch-on, the controller initialises and shows the current battery status. In accordance with the operating instructions, the required settings must be configured during programming. 7.4. Ausschalten des Zentralbatteriesystems 7.4. De-energise the central battery system Beim Abschalten des Zentralbatteriesystems ist unbedingt folgende Reihenfolge zu beachten! The following sequence must be observed when de-energise the central battery system! 1. Anlage blockieren (Blockierung NL + DL) 1. Block system (block E + M) siehe 8.7. Programmierung - Seite 90 see 8.7. Programming on page 90 2. Batteriesicherungen entfernen 2. Remove the battery fuses 3. Netz abschalten 3. Switch off the mains power 51 CPS 220/48.1/SV Montage- und Betriebsanleitung CPS 220/48.1/SV Mounting and Operating Instructions 8. TFT Steuerteil Touchdisplay 8. TFT Steuerteil Touchdisplay 8.1. Allgemeines 8.1. General Information 8.1.1. Update 8.1.1. Update Die Software des TFT Steuerteils unterliegt stetigen Verbesserungen. Ein Software-Update sorgt für die Umsetzung von Aktualisierungen und beseitigt Fehler innerhalb des Softwarestands. Setzen Sie sich mit uns in Verbindung um ihre Software durch ein Update auf aktuellem Stand zu halten und neuste Funktionen anwenden zu können. The software of the TFT controller will be improved continuously. Performing a software update guarantees the availability of the newest features and removes software bugs. Don’t hesitate to get in contact with us to keep your software up-to-date and to get access to the newest features. Unsere Kontaktdaten sind dem Hilfemenü der Oberfläche zu entnehmen. 8.1.2. Produktbeschreibung Das TFT Steuerteil der CPS Anlage bietet eine übersichtliche und strukturierte Bedienoberfläche. Die intuitive Bedienung ermöglicht eine systematische Abfrage des Gerätezustandes sowie die gezielte Anwendung verschiedener Testmöglichkeiten. Das integrierte Prüfbuch gewährleistet einen normgerechten Nachweis der Systemzustände. Das Steuerteil der CPS 220 besteht aus einem TFT Bildschirm mit anwenderfreundlicher Touch-Oberfläche sowie einem USB Anschluss. Der Startbildschirm beinhaltet Informationen der Anlagentypenbezeichnung und dem Softwarestand der installierten Version. In einem Textfeld ist das aktuelle Tagesdatum mit Uhrzeit zu erkennen. Darunter angeordnet befindet sich ein gut sichtbares farbliches Anzeigefeld, das den Betriebsstatus der Anlage deutlich macht. Unterhalb des Anlagenzustandes wird in drei separaten Anzeigefelder der Status angemeldeter Leuchten, der Batteriezustand mit Batteriespannung, - strom und -kapazität sowie Informationen einzelner Komponenten dargestellt. Im unteren Bereich der Oberfläche befinden sich vier Schaltflächen, über die ein Menü, ein Funktionstest, abgelegte Favoriten oder ein Hilfemenü aufgerufen werden können. Markiert werden Menüs, Funktionen und Einstellungen durch Berühren der jeweiligen Schaltfläche. Hierbei wird das aktivierte Feld hellblau hinterlegt. An die USB Schnittstelle können externe Komponenten wie z.B. eine Tastatur oder Speichermedien angeschlossen werden. Ein Reset-Taster für einen möglichen Neustart des Steuerteils befindet sich zwischen dem INOTEC Logo und der USB Schnittstelle. 8.1.3. Funktionen Zum Zeitpunkt der Drucklegung dieser Bedienungsanleitung sind nicht alle beschriebenen Funktionen in der ausgelieferten Software enthalten. Somit stehen dem Bediener einzelne Anwendungen noch nicht zur Verfügung. 5252 You can find our contact details in the help menu of the user interface. 8.1.2. Product description The TFT controller provides a clearly structured user interface. The intuitive handling enables a systematic query of the device status as well as a specific use of various tests. The integrated logbook ensures an evidence of the system status, according to the standards. The TFT controller of the CPS220 consists of a TFT display with a user-friendly touch-screen and a USB interface. The start screen includes information about the device type, the installed software version as well as the current date and time. The clearly visible, coloured status display shows the status of the system. Three different displays are located beneath the status display. These displays provide status information about the connected luminaires, the battery (including battery voltage, -current and -capacity) and the connected components. The lower area of the user interface consists of four buttons to get access to the main menu, to a list of favourites, to start a function test and to open the help menu. Menus, functions and settings can be activated by touching on the respective button. The activated button is highlighted in light blue. The USB interface can handle external components like a keyboard, a printer or a memory stick. A reset-button, for performing a restart of the controller, is located between the INOTEC logo and the USB interface. 8.1.3. Functions The software didn’t include all described functions when this manual was printed. As a result, some applications are not yet available. CPS 220/48.1/SV Montage- und Betriebsanleitung CPS 220/48.1/SV Mounting and Operating Instructions 8.2. Begrifflichkeiten 8.2. Concepts 8.2.1. Symbole Gerätestatus 8.2.1. System status icons Der Status des Gerätes wird durch entsprechende Symbole und Farben in der Menüführung dargestellt. Zuordnungen und Bedeutungen sind nachfolgender Tabelle zu entnehmen. The system’s status is indicated by symbols and colours within the menu navigation. Please check the following table for their meaning and more detailed explanation. Farbe Color Icon Icon Bedeutung Meaning Erklärung Explanation Rot Red Isolationsfehler Isolation failure Gerät meldet Isolationsfehler. Device indicates isolation failure. Rot Red Tiefentladeschutz Deep discharge protection Tiefentladeschutzeinrichtung des Gerätes hat angesprochen. Deep discharge protection of system is active. Gelb Yellow Netzausfall Hauptverteilung Mains failure Es liegt ein Spannungsausfall im Hauptverteiler vor. There is a power failure of the main-DB. Gelb Yellow Netzausfall Unterverteilung Sub-DB failure Es liegt ein Spannungsausfall einer Unterverteilung vor. There is a power failure of the sub-DB. Gelb Yellow Handrückschaltung Manual reset Notlicht muss manuell zurückgesetzt werden. Emergency lighting is active until manual reset is done. Gelb Yellow Betriebsdauertest (aktiv) Battery duration test (active) Gerät ist im Betriebsdauertest. Device is running a battery duration test. Gelb Yellow Funktionstest (aktiv) Function test (active) Gerät ist im Funktionstest. Device is running a function test. Rot Red Gerät blockiert mit Störung Device blocked with failure Gerät wurde blockiert, es liegt eine Störung vor. Device was blocked; device has a failure. Grau Grey Gerät blockiert ohne Störung Device blocked without failure Gerät wurde ohne vorliegende Störung blockiert. Device was blocked; device has no failure. Rot Red Gerät gestört Device failure Es liegt eine Störung im Gerät vor. Device has detected a failure. Gelb Yellow Notlichtnachlauf Emergency lighting delay Netzversorgung wieder vorhanden, Notlicht für eine definierte Zeit noch aktiv. Mains supply available again; emergency lighting still active for a specified period of time. Grün Green Betrieb Operation Gerät meldet keine Störung. Device doesn‘t indicate any failures. 53 CPS 220/48.1/SV Montage- und Betriebsanleitung 8.2.2. Symbole Steuerteil 5454 CPS 220/48.1/SV Mounting and Operating Instructions 8.2.2. Controller icons Handrückschaltung quittieren Confirm manual reset Funktionstest Function test Batteriedauertest Battery duration test Funktionen Functions Batteriedauertest abbrechen Cancel battery duration test USB USB Batteriedauertest starten Start battery duration test Ladung einschalten Start charging Geräteeinstellungen Device settings Störungsinfo Failure info USB Update USB update Geräteinfo Device info USB Konfiguration speichern Save USB configuration BCS Prüfbuch ansehen Show BCS logbook USB Konfiguration laden Load USB configuration Gerät Device Blockieren Block Netzwerk Network Freigeben Release Uhr + Datum Date + time Funktionstest starten Start function test Service Service Prüfbuch speichern Save logbook Sprache Language Prüfbuch anzeigen Show logbook Automatische Testeinstellungen Automatic test settings Tiefentladeschutz Deep discharge protection Learn-Mode Learn mode Isolationsfehlermesseinrichtung prüfen Test isolation failure measuring equipment Lüftersteuerung Fan control Summer Buzzer Passwort Password CPS 220/48.1/SV Montage- und Betriebsanleitung 8.2.3. Symbolbeschreibung Komponenten CPS 220/48.1/SV Mounting and Operating Instructions 8.2.3. Explanation of components icons Bus: BUS: Interner Gerätebus zum Anschluss von INOTEC Modulen (Stromkreise, LSA, DPÜ/B, etc.) Internal device BUS for connecting INOTEC modules (change over devices, LSA, DPÜ/B, etc.) Stromkreiseinschub: Changeover device: Die Leuchten werden an jeweilige Stromkreiseinschübe angeschlossen. Einschubmodule: The luminaires are connected to changeover devices. Modules: •SKE 2 x 3A •SKE 1x 6A •SKE 2 x 3A •SKE 1x 6A Endstromkreis: Final circuit: Endstromkreise sind Komponenten, an welchen die Not- und Sicherheitsleuchten an das Notlichtgerät angeschlossen werden. Je nach Gerätetyp können die Typen und die Anzahl an Endstromkreisen variieren. Final circuits are components to which the emergency- and safety luminaires are connected. The type and amount of final circuits can vary depending on the device type. Leuchten: Luminaires: Überwachung und Statusmeldung jeder einzelnen Notleuchte im Endstromkreis. Adressierung jeder Notleuchte notwendig. Monitoring and status information of every individual emergency luminaire in a final circuit. Every emergency luminaire has to be addressed. Batterie: Battery: Zentrales Batteriesystem mit 1h, 3h oder 8h Nennbetriebsdauer. Central battery system with 1h, 3h or 8h rated duration. Batteriemanagementsystem (BCS): Battery management system (BCS): Das Batteriemanagementsystem BCS besteht aus einer Kontrolleinheit und max. 36 Sensoren für die Batterieblöcke, welche mit einem zweiadrigen Bus verbunden werden. Mittels dieser Komponenten werden die einzelnen Blockspannungen und -temperaturen überwacht. The battery management system BCS consists of a control unit and max. 36 sensors for the battery blocks, which are connected by a 2-core BUS cable. These components monitor the voltage and temperature of every individual battery block. SLÜ: SLÜ: Einrichtung zur Abfrage der 24V Stromschleife (SL+/SL-) und der Fernschaltung (FS+/FS-). Equipment to check the 24V current loop (SL+/SL-) and remote switch (FS+/FS-). RIF: RIF: Relaisinterface Modul mit 3 festen und 2 optionalen Kontakten. Relay interface module with 3 fixed and 2 optional contacts. LSA8: LSA8: Lichtschalterabfragemodul mit 8 Eingangs kanälen. Light switching module with 8 input channels. LSA 3: LSA 3: Lichtschalterabfragemodul mit 3 Eingangs kanälen. Light switching module with 3 input channels. 55 CPS 220/48.1/SV Montage- und Betriebsanleitung 8.2.4. Symbolbeschreibung untere Menüleiste 5656 CPS 220/48.1/SV Mounting and Operating Instructions 8.2.4. Explanation menu bar icons Menü Menu Über diese Schaltfläche gelangen Sie in eine Menüauswahl, in dem übergeordnete Funktionen wie Test, Funktionen, Info, USB und Einstellungen zu finden sind. Jede Funktion ist mit entsprechenden Unterfunktionen versehen. This button enables access to the main menu. Several options like tests, functions, info menu, USB and settings can be found here. Every option includes several suboptions. Funktionstest Function test Hier wird der Funktionstestmodus aufgerufen. Dieser schaltet das Gerät in den Batteriebetrieb und überprüft die angeschlossenen und angemeldeten Leuchten auf deren Funktionstüchtigkeit. This icon starts a function test. The device will be switched to battery operation to check the operability of all connected and activated luminaires. Favoriten Favourites Hier können benutzerdefinierte Direktfunktionen abgelegt und aufgerufen werden. User-defined direct functions can be stored and activated here. Hilfetexte Help texts Über diese Schaltfläche sind Hinweise und Hilfetexte zu den jeweils verfügbaren Funktionen zu finden. This button provides hints and help texts for the available functions. Zurück Back Das Betätigen dieser Schaltfläche führt Sie in der Bedienung jeweils einen Schritt zurück. Using this button takes you back to the previous menu. Filter Filter Hier ist es möglich, die angezeigten Informationen benutzerdefiniert zu filtern um diese somit schneller und übersichtlicher einzusehen. This function allows you to apply a userdefined filter. Shown information can be found more quickly and clearly. Scrollen Scroll Mit Hilfe dieser beiden Schaltflächen können die angezeigten Spalten auf der Bedienoberfläche nach oben oder unten gescrollt werden. Use these two buttons to scroll through the menus. CPS 220/48.1/SV Montage- und Betriebsanleitung CPS 220/48.1/SV Mounting and Operating Instructions 8.3. Bedienung 8.3. Operation Die Navigation der Software des INOTEC TFT Touch displays führt Sie durch Menüs, die Sie per Fingerdruck einzelner Symbole aufrufen können. You can navigate through the software of the INOTEC TFT touch controller by touching on the given icons. Durch Aktivieren verschiedener Symbole erhalten Sie Informationen, z.B. der Endstromkreise und der angemeldeten Leuchten oder gelangen in untergeordnete Menüs. Detaillierte Informationen der angemeldeten Komponenten sowie des verwendeten Batteriesystems werden übersichtlich dargestellt. Berühren Sie einzelne Symbole auf dem Touchdisplay mit der Fingerspitze, so werden die zuständigen Schaltflächen „Blau“ hinterlegt. Dieses ist eine Bestätigung dafür, dass ihre Eingabe erfolgreich angenommen wurde. Sobald der Finger von dem Display abgehoben wird, kann dieser Befehl zur Abfrage der gewünschten Funktion bearbeitet werden. If you want to get more detailed information, e.g. about connected luminaires or you want to enter sub-menus, you just have to activate the respective icon. Detailed information about the activated components as well as the battery system are clearly displayed. If you activate any icons on the touch display, the corresponding buttons are highlighted in blue. This confirms that your entry has been accepted. The command to call up the desired function will be processed as soon as you lift your finger from the display. 8.4. Main menu 8.4. Hauptmenü The user interface is divided into different areas: Die Programmoberfläche teilt sich in verschiedene Bereiche auf: Information display Informationsbereich Statusanzeige Funktionsschaltflächen Status display Function buttons Menu bar Menüleiste Informationsbereich Information display Statusanzeige Status display Funktionsschaltflächen Function buttons Menüleiste Menu Bar 57 CPS 220/48.1/SV Montage- und Betriebsanleitung CPS 220/48.1/SV Mounting and Operating Instructions 8.4.1. Informationsbereich 8.4.1. Information display Hier ist der Gerätetyp „CPS220/48.1“ mit dem Software stand zu erkennen. In der Mitte befindet sich das Tagesdatum mit aktueller Uhrzeit. Rechts ist das Firmenlogo von INOTEC abgebildet. The device type “CPS220/48.1” and the software version are shown here. Current date and time are displayed in the middle. The INOTEC company logo is illustrated on the right. 8.4.2. Statusanzeige 8.4.2. Status display Die Statusanzeige zeigt den jeweiligen Status der Anlage an. Dieser kann zum Beispiel zwischen Betrieb (Grün), einem Ausfall Haupt- oder Unterverteiler (Gelb) oder einer Störung (Rot) je nach Zustand wechseln. The status display shows the current status of the system. It can change between operation (green), mains or subDB failure (yellow) or a failure (red), depending on the current status. Beispiele: Examples: Betrieb (Grün) Operation (Green) Betrieb Ausfall Haupt.- oder Unterverteiler (Gelb) Operation Mains or sub-DB failure (Yellow) Netzausfall Hauptverteiler Störung (Rot) Mains failure Failure (Red) Störung Failure Platz Slot 8.4.3. Navigationsleiste (Breadcrumb) 8.4.3. Navigation bar (Breadcrumb) Die Breadcrumb-Navigation ist sichtbar, sobald eine Funktion über die Funktionsschaltflächen oder der Navi gationsleiste aufgerufen wird. The breadcrumb navigation is visible as soon as a function is called up by using the function buttons or the navigation bar. Die Breadcrumb-Navigation befindet sich oberhalb der Bedienoberfläche. Für jedes aktivierte Untermenü wird in der Breadcrumb-Navigation ein entsprechendes Symbol gesetzt. Sofern ein weiteres Menü aufgerufen wird, verlängert sich die Leiste um ein zusätzliches Symbol, welches den aktuellen Menüpunkt in Blau darstellt. The breadcrumb navigation is located on top of the user interface. Every activated sub-menu is shown as a separate icon within the breadcrumb navigation. If a further menu is called up, the bar is extended by another icon. The current menu position is highlighted in blue. Durch das Betätigen eines in der Navigationsleiste dargestellten Symbols kann direkt in das jeweilige Menü gesprungen werden. Über den Button ist es ohne Zwischenmenüs per Schnellzugriff möglich, direkt auf die Oberfläche des Hauptmenüs zu gelangen. 8.4.4. Funktionsschaltflächen Die „Funktionsschaltflächen“ sind in drei Bereiche (Leuchten-, Batterie - und Komponentenebene) unterteilt. Durch Betätigen der jeweiligen Schaltfläche gelangt der Anwender in entsprechende Untermenüs. Hier sind detaillierte Konfigurationen jeweiliger Bereiche einzusehen beziehungsweise vorzunehmen. 5858 You can directly “jump” to a particular menu by activating the corresponding icon in the navigation bar. You can directly reach the main screen by using the menu. button, without navigating through the whole 8.4.4. Function buttons The function buttons are divided into three areas: luminaires, battery and components. Activating the appropriate button takes the user to the corresponding sub-menu. Detailed configurations of the respective areas can be checked and/or set up here. CPS 220/48.1/SV Montage- und Betriebsanleitung CPS 220/48.1/SV Mounting and Operating Instructions 8.4.4.1. Leuchten 8.4.4.1. Luminaires Durch Auswahl der Leuchtenschaltfläche gelangen Sie in die BUS-Ebene. Hier lassen sich Informationen der angemeldeten Stromkreiseinschübe, sowie den zugehörigen Endstromkreisen anzeigen. Weiterhin ist es möglich, detaillierte Informationen heruntergebrochen bis zur Leuchtenebene abzurufen. Selecting the luminaire button guides you to the BUS level. Information about the activated changeover devices and the associated final circuits can be found here. It is also possible to call up more detailed information, right down to luminaire level. 8.4.4.1.1. Menü BUS-Ebene (IB1/IB2) 8.4.4.1.1. BUS-level menu (IB1/IB2) BUS BUS Endstromkreis Final Circuit Stromkreiseinschub Dem BUS untergeordnete Stromkreiseinschübe werden je nach Funktionszustand entsprechend grafisch dargestellt. Spezifikationen wie zum Beispiel die Anzahl einzelner Endstromkreise werden übersichtlich dargestellt. Angemeldete und störungsfreie Stromkreiseinschübe werden in „gelb“ angezeigt. Eine rote Umrandung signalisiert eine Platzstörung, die zum Beispiel durch eine fehlerhafte Kommunikation zwischen dem Einschub und Change over device Changeover devices (assigned to the BUS-lines) are represented by icons. The colour of these icons can vary, depending on their functional status. Specifications like the amount of final circuits are clearly depicted. Activated and failure-free changeover devices(SKÜs) are displayed in yellow. A red border indicates a slot failure. This could be a result of a communication error between 59 CPS 220/48.1/SV Montage- und Betriebsanleitung dem Slot hervorgerufen werden kann. the SKU and the slot, for instance. Sofern ein Endstromkreis mit einer Störung behaftet ist, wird dieser komplett in Rot hinterlegt, der übergeordnete Stromkreiseinschub ist komplett rot umrandet dargestellt. Sofern keine Störung vorliegt ist das BUSSymbol in grün dargestellt. Die BUS-Symbole sind keine aktiven Schaltflächen, sie dienen lediglich zur Menüorientierung. Durch Betätigen der Schaltfläche der Stromkreiseinschübe öffnet sich ein untergeordnetes Menü mit den zugehörigen einzelnen Endstromkreisen. 8.4.4.1.2. Menü Stromkreiseinschübe: Endstromkreismodule Endstromkreise Sie befinden sich jetzt in der Ebene der Stromkreiseinschübe . Die Einschübe sind in der linken Menüseite senkrecht angeordnet. Die jeweilige Steckplatznummer 6060 CPS 220/48.1/SV Mounting and Operating Instructions in case of no failures. If a final circuit has a failure, it is fully highlighted in red. The affected changeover device is entirely framed in red. The BUS icon would be displayed in green, The BUS icons are no active buttons. A sub-menu with the associated final circuits opens when the changeover device button is activated. 8.4.4.1.2. Changeover device menu: Final circuit module Final circuit You are now at the level of the changeover devices. The SKUs are arranged vertically on the left side of the menu. The module slot number and the type of SKU can be CPS 220/48.1/SV Montage- und Betriebsanleitung sowie Art des Einschubes sind rechts neben dem Symbol des Stromkreiseinschubes zu erkennen. Die Stromkreise befinden sich den Einschüben untergeordnet, in waagerechter Anordnung, im rechten Menübereich. Durch Betätigen der Schaltfläche des jeweiligen Stromkreiseinschubs öffnet sich ein untergeordnetes Menü der einzelnen Endstromkreise. In dieser Darstellung werden vorhandene Endstromkreise mit angemeldeten Leuchten dargestellt. CPS 220/48.1/SV Mounting and Operating Instructions found on the right, next to the changeover device icon. The circuits of the SKUs are arranged horizontally on the right of the menu. Clicking on the changeover device is opening a sub-menu of the final circuits. This display shows the available final circuits with all activated luminaires. 8.4.4.1.3. Final circuit menu Operation mode 8.4.4.1.3. Menü Endstromkreise Schaltungsart Circuit number Stromkreisnummer Anzahl angemeldeter Leuchten Die einzelnen Endstromkreise sind in separate Schaltflächen unterteilt. In den jeweiligen Schaltflächen wird die Anzahl der angemeldeten Leuchten, die Stromkreisnummer sowie die Schaltungsart dargestellt. Amount of activated luminaires The final circuits are divided into separate buttons. The amount of activated luminaires, the circuit number and the operation mode is shown on each button. The path of the navigation menu is extended by a “final circuit” icon . It is highlighted in blue. Der Pfad der Navigationsleiste ist um ein Symbol „Endstromkreis“ „blau“ dargestellt. erweitert worden. Dieses wird in 61 CPS 220/48.1/SV Montage- und Betriebsanleitung CPS 220/48.1/SV Mounting and Operating Instructions 8.4.4.1.4. Detailansicht Endstromkreis 8.4.4.1.4. Final circuit detailed view Durch Anwählen des Endstromkreissymbols gelangen Sie in das Untermenü des Stromkreises. You can reach the sub-menu of the final circuit by activating the final circuit icon. Das Untermenü des jeweiligen Endstromkreises beinhaltet Statusinformationen. Die Art der Überwachung und Schaltung sind in den beiden oberen Comboboxen einzustellen. Weiterhin sind Zielort, Status und „Ist“ Stromaufnahme des Endstromkreises zu erkennen. The sub-menu of each final circuit contains status information. The type of monitoring and operation mode can be selected in the two combo boxes on top. Furthermore, the destination text, the status and the actual current consumption of the final circuit can be found here. Direkt aus diesem Menü gelangen Sie über die Schalt fläche in das Untermenü „Leuchten“, das diesem Stromkreis zugeordnet ist. You can directly move to the “luminaires” submenu, associated with this circuit, by the button . In diesem Untermenü werden einzelne Leuchten eines Stromkreises in senkrechter Anordnung dargestellt. This sub-menu shows the luminaires within the circuit in a vertical order. Eine weitere Möglichkeit in das Untermenü „Leuchten“ zu gelangen ist, die Betätigung der Schaltfläche „Angemeldete Leuchten“ im Menü „Endstromkreise“. Another way to access the “luminaires” sub-menu is to select the “activated luminaires” button in the “final circuits” menu. 6262 CPS 220/48.1/SV Montage- und Betriebsanleitung CPS 220/48.1/SV Mounting and Operating Instructions 8.4.4.1.5. Menü Leuchten 8.4.4.1.5. Luminaire menu Sofern ein Zielort vergeben wurde, ist dieser in der jeweiligen Leuchtenschaltfläche zu erkennen. Sofern mehrere Leuchten in einem Endstromkreis angemeldet sind, werden diese untereinander angeordnet dargestellt. A destination text is shown on the respective luminaire button, if entered. If more than one luminaire is activated on a final circuit, they are displayed one below the other. Im Untermenü der Leuchte werden durch Betätigen der jeweiligen Leuchtenschaltfläche Detailinformationen aufgerufen. The luminaire‘s sub-menu can be called up by activating the respective luminaire button. More detailed information can be found here. 8.4.4.1.6. Detailansicht Leuchten 8.4.4.1.6. Detailed view of luminaires In diesem Menü können einzelne Leuchten an- oder abgemeldet werden. This menu allows you to activate or deactivate individual Dieses geschieht über die Buttons „Aktiv“ oder „Deaktiv“. Sofern ein Zielort vergeben wurde ist dieser im Anzeigefeld „Zielort“ dargestellt. In dem darunter angeordnetem Bereich Status, ist der aktuelle Betriebszustand zu erkennen. luminaires, by using the ted“ buttons. „activated” or „deactiva- If a destination text has been entered, it is displayed in the “destination text” area. The current operation mode is indicated in the status area below it. 63 CPS 220/48.1/SV Montage- und Betriebsanleitung CPS 220/48.1/SV Mounting and Operating Instructions 8.4.4.2. Batterie 8.4.4.2. Battery Durch Auswahl der Batterieschaltfläche im Hauptmenü werden in Untermenüs Daten der Batterie, dem BCS System und dem Shunt dargestellt. When the battery button in the main menu is selected, more detailed data of the battery, of the BCS system and the shunt are given in the sub-menus. Aktuelle Werte wie Spannung, Strom und Kapazität der Batterie sind direkt auf der Oberfläche zu erkennen. Durch Betätigen der Batterieschaltfläche wird folgendes Untermenü aufgerufen. Current values such as battery voltage, current and capacity can be found directly in the main menu. The following sub-menu is shown when the battery button is activated. Im unteren rechten Eckbereich befindet sich eine Schaltfläche, mit der Einstellungen des Menüs „Shunt“ durchgeführt werden können. The “Shunt” settings menu can be entered by the button in the lower right corner. 6464 CPS 220/48.1/SV Montage- und Betriebsanleitung CPS 220/48.1/SV Mounting and Operating Instructions 8.4.4.2.1. Batterie: 8.4.4.2.1. Battery: Nach Betätigen der Schaltfläche „Batterie“ gelangen Sie in nachfolgendes Untermenü. Activating the “Battery” button brings you into the following sub-menu. Hier werden Informationen der „Spannung“, dem „Strom“, der „Kapazität“, der „Dauer des letzten Betriebsdauertest“ und der „Batterietemperatur“ dargestellt. Weiterhin werden Status des „AC/DC-Schütz“ und „Ladeteil“ aufgeführt. In diesem Bereich werden lediglich Daten angezeigt, es können keine Einstellungen vorgenommen werden. The following information are displayed here: voltage, current, capacity, length of last duration test and battery temperature. Furthermore, the status of the “AC contactor” and the “Charger” are given. This sub-menu is only for information; the settings cannot be changed in here. 8.4.4.2.2. BCS: Sofern die Batterieblöcke des Notlichtgerätes mit dem INOTEC BCS-System überwacht werden, steht dieser Menüpunkt in der Batterieebene aktiv zur Verfügung. Die Daten der„Sensoren-1/18“ bzw. „Sensoren-19/36“ werden im BCS Prüfbuch protokolliert. Durch Betätigen der Schaltfläche BCS können Detailinformationen des BCS Systems abgerufen werden. Aktuelle Informationen einzelner Batterieblöcke stehen in diesem Menü zur Verfügung. 8.4.4.2.2. BCS: This menu is only available if the battery blocks are monitored by the INOTEC BCS system. All data from the “sensors 1–18” and/or “sensors 19–36” are saved in the BCS logbook. Activating the BCS button calls up detailed information about the BCS system. Current information of the battery blocks are available in this menu. 65 CPS 220/48.1/SV Montage- und Betriebsanleitung Jeder Sensor ist in einer separaten Tabellenspalte mit aktuellen Werten des zu überwachenden Batterieblocks dargestellt. Hier sind Daten zur Blockspannung und Temperatur der einzelnen Batterieblöcke aufgeführt. Die Tabellenspalten einzelner Sensoren sind nicht weiter zu öffnen. Sofern sich die überwachten Werte außerhalb eines festgelegten Toleranzbereiches befinden, wechselt das Symbol des „auffälligen Sensors“ von dem grünen in den roten Farbmodus. Im Prüfbuch zum BCS-System werden Zustandsänderungen des Batteriemanagementsystems, sowie einmal täglich alle Batterieblockwerte protokolliert. 8.4.4.2.3. Shunt: In der Menüführung der Schaltfläche „Shunt“ können mittels Infobutton verschiedene Konfigurationsdaten wie „Stromwerte“, „Anzahl der Ladeteile“ und „Nennkapazität“ aufgerufen werden. 6666 CPS 220/48.1/SV Mounting and Operating Instructions Each sensor is displayed in a separate column, showing the current values of the monitored battery block. The individual voltages and the temperature of the battery blocks are displayed here. It’s not possible to open the columns of the individual sensors. The icon of a sensor will change from green to red, if the monitored values are outside of a range of tolerance. The logbook of the BCS system logs all status changes of the battery management system, as well as all battery block values once a day. 8.4.4.2.3. Shunt: The sub-menu “Shunt” shows several configuration details such as “Shunt size”, “Amount of chargers” and “Nominal capacity”. CPS 220/48.1/SV Montage- und Betriebsanleitung CPS 220/48.1/SV Mounting and Operating Instructions 8.4.4.3. Komponenten 8.4.4.3. Components Durch Auswahl dieser Schaltfläche werden menügeführt detaillierte Informationen im Bereich angemeldeter Komponenten (SLÜ, RIF, LSA 8, LSA 3 oder DPÜ/B) dargestellt. More detailed information about activated components (SLÜ, RIF, LSA8, LSA 3 or DPÜ/B) are shown after selecting this button. 8.4.4.3.1. Menü SLÜ 8.4.4.3.1. SLÜ menu Durch Betätigen der Schaltfläche „SLÜ“ öffnet sich der Dialog der Stromschleife und des Fernschalter. In diesem Untermenü werden folgende Detailinformationen zum SLÜ-Modul (separates Modul oder integriert im RIF5-Modul) angezeigt. Diese beiden Checkboxen zeigen die Aktivierung oder Deaktivierung der jeweiligen Überwachung an. Activating the SLÜ button opens the dialogue window for the current loop and the remote switch. This sub-menu displays detailed information about the SLÜ module (separate module or integrated into the RIF5 module). Two check boxes indicate whether the respective monitoring mode is activated or deactivated. 67 CPS 220/48.1/SV Montage- und Betriebsanleitung CPS 220/48.1/SV Mounting and Operating Instructions Fernschalter: Remote switch: Dieses Menü dient zur Anzeige der in der Programmierung erfolgten Einstellungen. This menu indicates the setting, which was done in the programming. Fernschalter aktiviert Remote switch activated Fernschalter deaktiviert , Remote switch deactivated . , . Stromschleife: Current loop: Dieses Menü dient zur Anzeige der in der Programmierung erfolgten Einstellungen. This menu indicates the setting, which was done in the programming. Stromschleife aktiviert Current loop activated Stromschleife deaktiviert , . 8.4.4.3.2. Menü RIF Durch Betätigen des Symbols „RIF“ öffnet sich der Dialog des Relaisinterface-Moduls. In den oberen Anzeigefeldern wird der vergebene Zielort sowie der aktuelle Gerätestatus angezeigt. Für eine temperaturgeführte Ladung kann mittels Combobox zwischen folgenden Bereichen ausgewählt werden: •nicht aktiv - keine Temperaturüberwachung •KTY - Temperaturfühler (KTY) im Batterieschrank •Sensor - Temperatur switch •BCS - BCS System Das Relaisinterface ist vom Werk aus einprogrammiert und am internen Bus IB 1 angeschlossen. Die Meldungen der ersten drei Relaiskontakte sind fest programmiert (Störung, Betrieb , Batterie-Betrieb). Farbcodierungen: •Rot - Störung •Grün - Betrieb •Gelb - Batteriebetrieb 6868 Current loop deactivated , . 8.4.4.3.2. RIF menu Activating the “RIF” icon opens the dialogue window for the relay interface module. The upper area shows the allocated destination text and the current device status. A combo box offers you the following choices for a temperature-controlled charging: •inactive – no temperature monitoring •KTY – temperature probe (KTY) in battery cabinet •sensor – temperature switch •BCS – BCS system The relay interface module is programmed by factory and connected to the internal BUS IB1. The first three relay contacts are fix programmed (failure, operation, battery operation). Colour coding: •Red - Failure •Green – Operation •Yellow – battery operation CPS 220/48.1/SV Montage- und Betriebsanleitung Den Optionskontakten 4 und 5 können verschiedene Meldungsarten zugewiesen werden. Kontakte, die in den Meldungen variabel konfiguriert werden können, sind mit einer gestrichelten Linie unterhalb der jeweiligen Kontaktnummer gekennzeichnet. Durch Aktivieren der Schaltflächen Kontakt 4 oder 5 erscheint folgendes Konfigurationsmenü: In diesem Dialog kann die Schaltungsart (Schließer oder Öffner) des gewählten Kontaktes bestimmt werden. Weiterhin ist hier die Zuweisung der Meldungsarten möglich. Bei Auswahl mehrerer Optionen werden diese mit „Oder“ verknüpft. 8.4.4.3.3. Menü LSA8 / LSA 3 Durch Betätigen des Symbols „LSA8“/ „LSA 3“ öffnet sich der entsprechende Dialog. CPS 220/48.1/SV Mounting and Operating Instructions Various messages can be assigned to the optional contacts 4 and 5. Contacts that can be configured by these messages are indicated with a dotted line below the contact number. When the contact 4 or 5 button is activated, the following configuration menu appears: You can assign the switching mode (normally closed or normally opened) in this dialogue window. You can also assign the message type here. The messages will be linked with “or”, if more than one option is selected. 8.4.4.3.3. LSA8 / LSA 3 menu Activating the “LSA8” / “LSA 3” icon opens the corresponding dialogue window. 69 CPS 220/48.1/SV Montage- und Betriebsanleitung CPS 220/48.1/SV Mounting and Operating Instructions Mit den LSA8- und LSA 3-Modulen ist ein gemeinsames Ein- und Ausschalten von Netz- und Sicherheitsleuchten möglich. Den Endstromkreisen können in der Programmierung bis zu drei Schalteingänge zugewiesen werden. The LSA8 and LSA 3 modules can be used to switch the general- and emergency luminaires simultaneously on and off. Up to three switch inputs can be assigned to every final circuit. Am Adressschalter ist für jedes Modul eine eindeutige Adresse zu vergeben, die dann in der Steuerteileinstellung als aktiv programmiert wird. A unique address has to be assigned to each LSA module. Furthermore, the module has to be programmed as active in the controller settings. Es können bis zu drei LSA8- Module am Steuerteil angemeldet werden, welche entweder am Bus IB1 (interne Gerätekomponenten) oder Bus IB2 (externe Gerätekomponenten) angeschlossen sind. Dieses ist im Steuerteil entsprechend einzustellen. Up to three LSA8 modules, connected to IB1 (internal components) or IB2 (external components) BUS line, can be handled by one controller. This has to be set up in the programming of the controller. Sofern eine LSA 8 im Steuerteil angemeldet ist erscheint ein Menü, in dem die 8 Schalteingänge mittels Leuchtdioden angezeigt werden. Bei anliegender Spannung eines Einganges leuchtet die entsprechende LED grün. Durch Aktivierung der Schaltfläche der Komponentenschaltfläche öffnet sich ein Untermenü, in dem der Zielort sowie der angebundene Bus IB2 zu erkennen ist. Die Zuordnung der Kanäle wird in der Stromkreisprogrammierung vorgenommen. Auf die Kanäle einer LSA 8 können auch Hilfskontakte einer Dreiphasenüberwachung aufgeschaltet werden, um selektiv das Notlicht in Bereichen bei Netzausfall Unterverteiler (UV) einzuschalten. Damit das Steuerteil auch einen Netzausfall UV meldet, muss die entsprechende LSA8 mit Netzausfall UV-Meldung programmiert werden. Diese Einstellung betrifft alle Kanäle der LSA 8. Sobald ein Kanal geöffnet ist, erscheint die Meldung Netzausfall UV. Die Menüoberfläche für LSA 3 ist nach gleichem Schema aufgebaut und dementsprechend einzusehen. Die LSA 3-Module können nur am Bus IB2 betrieben werden. 7070 A menu appears in which the 8 input channels are represented by LEDs, if a LSA8 is activated in the controller. The LEDs glow green when voltage is detected at the input channels. Activating the component button opens a sub-menu, which shows the destination text and the connected BUS line. The channel allocation has to be done in the circuit programming. The auxiliary contacts of a three-phase monitoring relay can also be connected to the input channels of a LSA8, in order to selectively switch on the emergency lighting in specific areas in case of a sub-DB failure. If it’s needed that the controller also reports a sub-DB failure, the LSA8 has to be programmed with sub-DB failure message. This setting affects all LSA8 inputs. The sub-DB failure message appears, as soon as one channel is opened. The menu for LSA 3 modules is laid out in the same principle. LSA 3 modules can only be connected to the IB2 BUS line. CPS 220/48.1/SV Montage- und Betriebsanleitung 8.4.4.3.4. Menü DPÜ/B Durch Betätigen des Symbols DPÜ/B öffnet sich der entsprechende Dialog. Zur Überwachung der Netzspannung an den Unterverteilern der Allgemeinbeleuchtung werden die DPÜ/B-Module direkt in den Unterverteiler eingebaut. Die Abfrage der Module erfolgt über den Bus (IB2). Am Bus IB2 können bis zu 31 busfähige Dreiphasenüberwachungen angeschlossen werden. Bei Ausfall einer Phase wird diese im Steuerteil angezeigt. Sofern alle drei Phasen spannungsführend an den Eingängen der DPÜ/B anliegen, leuchten alle drei LED‘s grün. Bei Ausfall einer oder mehrerer Phasen ändert sich die jeweilige LED in den roten Farbmodus. Im Display des Hauptmenüs erscheint das Komponentensymbol in Rot, in der Statusanzeige wird die Information „Netzausfall UV“ angezeigt. Anschluss nur an Bus IB2. Befinden sich LSA8-Module im System, deren DPÜ/B- Funktion genutzt wird, so sind die Adressen des LSA8-Moduls und der integrierten DPÜ/B identisch (Adresse 1/2/3). CPS 220/48.1/SV Mounting and Operating Instructions 8.4.4.3.4. DPÜ/B menu Activating the DPÜ/B icon opens the corresponding dialogue window. The DPÜ/B modules are directly installed into the subdistribution boards to monitor the supply voltage of the general lighting. The modules are communicating by BUS line (IB2). Up to 31 pieces can be connected to the IB2. If a phase fails, this will be indicated at the controller. All three LEDs glow green, if all three phases are available at the DPÜ/B inputs. If one or more phases fail, the corresponding LED changes to red. The component icon is shown in red in the main menu and the message “sub-DB failure” appears in the status display. Connection only to IB2 BUS. If there are LSA8 modules connected to the system whose DPÜ/B function is in use, the addresses of the LSA8 module and the integrated DPÜ/B is identical (address 1/2/3). 71 CPS 220/48.1/SV Montage- und Betriebsanleitung CPS 220/48.1/SV Mounting and Operating Instructions 8.5. Menüleiste 8.5. Menu bar Die Navigationsleiste befindet sich im unteren Bereich des Hauptmenüs. In diesem Bereich ist es möglich, verschiedene Anwendungen wie Testfunktionen, Funktionen, Info, USB und Einstellungen über ein Menü aufzurufen. Benutzerdefinierte Filterungsmöglichkeiten sowie Hilfestellungen können über entsprechende Schaltflächen aufgerufen werden. Weiterhin sind in dieser Leiste zwei Button zum „Scrollen“ in einzelnen Menüs vorhanden, zuzüglich einem „Zurück“ Button, über den das zuvor aufgerufene Menü erreichbar ist. The menu bar is located at the bottom of the main menu. You can call up several applications such as tests, functions, information, USB and the settings menu. A user-defined filter and a help menu can be called up via the corresponding buttons. This bar also includes two buttons to scroll through the menus, as well as a “back” button, to return to the previous menu. 8.6. Menü 8.6. Menu Durch Betätigen der Schaltfläche Menü. öffnet sich das Hier stehen verschiedene Anwendungen für die systematische Abfrage des Gerätezustandes, Testmöglichkeiten oder Einstellungen des Gerätes zur Verfügung. Konfigurationen sowie das Einsehen des Prüfbuches sind durch Aktivierung entsprechender Untermenüs möglich. Der Menüpunkt USB ist nur bei Verwendung eines USB-Speichermediums sichtbar. The menu is opened by activating the button . It contains various applications for systematically querying of the device status, testing possibilities and device settings. By activating the respective sub-menus, you can load/save configurations or check the logbook. The USB menu is only visible if a USB memory is connected. 8.6.1. Tests 8.6.1. Test Das Notlichtgerät ist nach den national gültigen Richtlinien und Vorschriften zu prüfen. Die erfolgten Prüfungen werden mit Datum und Ergebnis im Prüfbuch des Notlichtgerätes protokolliert. 7272 The emergency lighting device has to be tested in accordance with the national standards and regulations. All tests are saved in the logbook of the emergency lighting device, including the date and the result. CPS 220/48.1/SV Montage- und Betriebsanleitung 8.6.1.1. Funktionstest (FT) starten Durch Betätigen der Schaltfläche test aktiviert. CPS 220/48.1/SV Mounting and Operating Instructions 8.6.1.1. Start function test (FT) wird ein Funktions- Im Funktionstestmodus schaltet das Gerät in den Batteriebetrieb und überprüft die angeschlossenen und angemeldeten Leuchten auf deren Funktionstüchtigkeit. Das Ergebnis des Funktionstest wird im Prüfbuch abgespeichert. Der aktuelle Status wird in der „Statusanzeige“ im Hauptmenü angezeigt. Sofern eine Leuchtenstörung vorliegt, wird diese als Störung angezeigt. Die Statusanzeige sowie das Leuchten symbol wechselt in den roten Farbmodus. A function test is activated by pressing the button . In FT mode, the device switches to battery operation and checks the operability of the connected and activated luminaires. The result of the FT is stored in the logbook. The current system status appears in the “status display” on the main screen. In case of a luminaire failure, the status display indicates a failure. The status display and the luminaire icon change their colour to red. 8.6.1.2. Testing the isolation test equipment (ISO test) 8.6.1.2. Isolationstesteinrichtung prüfen (ISO Test) Durch Betätigen der Schaltfläche startet ein Menüpunkt, der die Messeinrichtung zur Isolationsüberwachung, welche nach VDE 0108 gefordert ist, überprüft. Die Isolationsmessung der Endstromkreise erfolgt gegen „+“ und „-“. Der aktuelle Verlauf der Messung wird in der Statusanzeige angezeigt. Störung ISO + Störung ISO - Nach Beendigung des Test schaltet das Gerät wieder in den Betriebszustand. Sofern dieser fehlerfrei absolviert wurde, erscheint in der Statusanzeige im grünen Farbmodus „Betrieb“. Ersetzt keine Isolationsmessung vor der Inbetriebnahme gem. DIN VDE 0100! Dieser ISO Test führt lediglich eine Simulation einer Isolationsmessung durch! Activating the button starts a function to check the measuring equipment for monitoring the isolation, in accordance to DIN-VDE 0108. Isolation measurement of the final circuits is done against “+” and “-”. The current measurement status is given in the status display. Failure ISO + Failure ISO - Once the test has been finished, the device switches back to former operation status. If the test was passed without any failures, the message “Operation” appears in green in the status display. This doesn’t replace any pre-commissioning isolation measurement in accordance to DIN VDE 0100. This ISO test has to be seen as an isolation failure simulation. 73 CPS 220/48.1/SV Montage- und Betriebsanleitung CPS 220/48.1/SV Mounting and Operating Instructions 8.6.1.3. Betriebsdauertest (BT Test) 8.6.1.3. Battery duration test (DT) wird ein BatteDurch Betätigen der Schaltfläche riedauertest gestartet. Der Batteriedauertest schaltet das Zentralbatteriegerät in den Batteriebetrieb und ermittelt die maximale Laufzeit bis zum Tiefentladeschutz der Batterie. A battery duration test is activated by pressing the button. The battery duration test switches the central battery system to battery operation. The duration until the deep discharge protection is activated is measured by this test. Die ermittelte Batteriebetriebsdauerzeit ist für das Zentralbatteriesystem nur dann aussage kräftig, wenn ebenfalls von der Batterie versorgte Unterstationen vom Typ CPUS220/48.1 in den Betriebsdauertest geschaltet werden. Der aktive Betriebsdauertest wird in der Statusanzeige des Hauptmenüs wie folgt dargestellt. Nach Beendigung des BT-Test schaltet das Gerät wieder in den Betriebszustand. Durch Betätigen der Schaltfläche wird der aktive BT Test abgebrochen. Der Status wechselt wieder in den Betriebszustand. Da nach einem Betriebsdauertest die Batterie bis zur erneuten Wiederaufladung nicht ihre volle Leistungskapazität besitzt und die Gefahr eines Ausfalls der allgemeinen Stromversorgung besteht, sind Prüfungen von längerer Dauer nur zu Zeiten mit geringem Risiko durchzuführen bzw. entsprechend sichernde Maßnahmen zu treffen, bis die Aufladung der Batterie abgeschlossen ist. 8.6.1.4. Tiefentladeschutz testen wird die Messeinrichtung zur ErMit diesem Befehl kennung des Tiefentladeschutzes überprüft. Der Tiefentladeschutz ist eine Einrichtung , die ab einer bestimmten Batteriespannung die Versorgung der angeschlossenen Verbraucher aus der Batterie unterbricht, um eine Tiefentladung der Batterie zu verhindern. Zu Beginn der Testphase wechselt die Batterieschaltfläche in den gelben Farbmodus, der Spannungswert wird bis auf die Tiefentladung (185V) heruntergefahren. The measured battery duration is only significant if all CPUS220/48.1 sub-stations, which are connected to the same battery, are also performing the battery duration test at the same time. An active battery duration test is shown in the status display as follows: Once the DT has been concluded, the device switches back to normal operation mode. An active DT can be cancelled by activating the button. The status of the system changes back to normal operation mode. Please note that a DT discharges the batteries. Its capacity is limited if the batteries are not completely re-charged. This could lead to a short duration in case of a real mains failure. We recommend to perform all DTs only at times with a small risk of a mains failure or to take measures for possible mains failures. 8.6.1.4. Test deep discharge protection starts a test of the internal equipThe command ment for detecting the deep discharge protection. The deep discharge protection is a function which interrupts the battery supply of the connected luminaires, to avoid a deep discharge of the battery set. The colour of the battery icon changes to yellow at the start of the test. The voltage value is going down to the deep discharge level (185V). Once the test procedure has been completed, the lowest voltage value remains visible for a short period. The battery icon changes back to green if the interruption was OK. Nach Beendigung des Testvorganges bleibt die untere Spannungsgrenze für kurze Zeit sichtbar. Die Batterie wechselt, sofern die Abschaltung in Ordnung war, wieder zurück in den grünen Farbmodus. 7474 CPS 220/48.1/SV Montage- und Betriebsanleitung CPS 220/48.1/SV Mounting and Operating Instructions 8.6.2. Funktionen 8.6.2. Functions In dem Bereich Funktionen ist es möglich, das Gerät zu blockieren und wieder freizugeben, eine Handrückschaltung oder den erfolgten Tiefentladeschutz zu quittieren. Sofern dem Gerät ein INOTEC BCS System angebunden wurde, kann in diesem Menü durch eine manuelle Bestätigung die zuvor abgeschaltete Ladung wieder zugeschaltet werden. In the functions menu, you can block the device and release it again, perform a manual reset or exit the deep discharge protection. If the device includes an INOTEC BCS system and the charging has been switched off, you can activate the charging process by manual confirmation. 8.6.2.1. Block 8.6.2.1. Blockieren Das Gerät blockiert die angegebenen Betriebsarten (Dauerlichtbetrieb oder Dauer- und Notlichtbetrieb) durch Betätigung der Schaltfläche . In der Statusleiste des Hauptmenüs erscheint die Information „Gerät blockiert“. The device will be blocked (maintained light or maintained- and emergency lighting) if the button activated. The status bar in the main menu shows the message „Block“. Panel blocked Gerät blockiert Bei Blockierung des Gerätes über Fernschalter oder Fernüberwachung erfolgt eine Freigabe auch nur durch diesen/diese. Bei Aktivierung der Option „Dauerlicht- und Notlichtbetrieb blockiert“ bleibt im blockierten Gerätezustand das Notlicht während eines Netzausfalls aus! is If the device is blocked by remote switch or remote monitoring, it can only be released in the same way. If the option “maintained- and emergency lighting blocked” is activated, the emergency lighting remains blocked during a mains failure. 8.6.2.2. Release 8.6.2.2. Freigeben Durch Betätigung der Schaltfläche wird die zuvor erfolgte Blockierung deaktiviert. Das Gerät befindet sich wieder im normalen Betriebsmodus. Die Statusanzeige im Hauptmenü wechselt in die Betriebsanzeige (grüner Farmodus). Activating the button will release the previously blocked device. The device returns to normal operation mode. The status display in the main menu changes its colour to indicate the original operation mode. 75 CPS 220/48.1/SV Montage- und Betriebsanleitung CPS 220/48.1/SV Mounting and Operating Instructions 8.6.2.3. Handrückschaltung quittieren 8.6.2.3. Confirm manual reset Bei aktivierter Handrückschaltung erfolgt nach einem Netzausfall die Rückschaltung erst durch eine manuelle Bestätigung am Gerät oder per Fernüberwachung. Dies gewährleistet, dass das Notlichtgerät so lange eingeschaltet bleibt, bis die Allgemeinbeleuchtung wieder eingeschaltet ist. If the manual reset is activated, the device will stay in battery operation until a manual confirmation was done at the device or via remote monitoring. This ensures that the emergency lighting remains active until the general lighting is switched on again. Sofern diese Funktion „Handrückschaltung“ programmiert wurde und die Allgemeinbeleuchtung nach einem Netzspannungsausfall wieder vorhanden ist, kann durch Betätigen der Schaltfläche schaltet werden. das Notlicht wegge- Einrichtung, die ab einer bestimmten Batteriespannung die Versorgung der angeschlossenen Verbraucher aus einer Batterie unterbricht, um eine Tiefentladung der Batterie zu verhindern. Bei ausgelöstem Tiefentladeschutz, ist dieser durch Betätimanuell zu deaktivieren. 8.6.2.5. Ladung einschalten Sofern ein Batteriemanagementsystem dem Gerät angebunden ist, findet eine Überwachung der Spannung und Temperatur einzelner Batterieblöcke statt. Weichen die Temperatur oder Blockspannungen von definierten Schwellwerten ab, erfolgt eine Störmeldung und die Abschaltung der Ladung. Sofern eine Abschaltung der Ladung erfolgt ist, kann durch eine manuelle Betätigung der Schaltfläche die Ladung wieder zugeschaltet werden. 8.6.3. Info In dieser Menüstruktur können Informationen zu vorliegenden Störungen des Gerätes detailliert aufgerufen werden. Weiterhin ist hier das allgemeine Prüfbuch oder das des BCS Systems einzusehen. 7676 the button, if the “manual reset” function has been activated and the general lighting is available after a mains failure. 8.6.2.4. Exit deep discharge protection 8.6.2.4. Tiefentladeschutz quittieren gen der Schaltfläche The emergency lighting can be deactivated by pressing The deep discharge protection is a function which interrupts the battery supply of the connected luminaires, to avoid a deep discharge of the battery set. If the deep discharge protection has been activated, it has to be deactivated manually by pressing the button. 8.6.2.5. Start charging If a battery management system is connected to the device, the voltage and temperature of the individual battery blocks are monitored. A deviation from the given nominal values will lead to a failure message and the charging process will be cut off. The charging can be switched on again by activating the button. 8.6.3. Info This menu offers detailed information about all existing failures. In addition, the general logbook and the BCS logbook can be found here. CPS 220/48.1/SV Montage- und Betriebsanleitung CPS 220/48.1/SV Mounting and Operating Instructions 8.6.3.1. Störungsinfo 8.6.3.1. Failure info In diesem Menü werden die aktuell vorliegenden Störungen angezeigt. Zuerst werden vorhandene Gerätestörungen dargestellt, anschließend die ersten fehlerhaften Stromkreisstörungen. This menu shows all currently existing failures. Device failures are displayed at first, circuit/luminaire failures afterwards. 8.6.3.2. Geräteinfo Im Menü „Geräteinfo“ werden alle geräterelevanten Informationen der Softwarestände, der Netzwerkeinstellungen, der Hardwarekomponenten sowie deren Einstellungen angezeigt. 8.6.3.3. Prüfbuch ansehen Im Prüfbuch werden alle Ergebnisse, wie Zustandsänderungen und Testergebnisse gespeichert. Beim Aufrufen werden zunächst die aktuellsten Einträge als Klartext mit Datum, Uhrzeit und Eintragsnummer angezeigt. Ältere Einträge können durch Scrollen mittels der beiden Cursortasten (hoch und runter) aufgerufen werden. 8.6.3.2. Device info This menu shows all device information like the software versions, network settings or hardware components and their settings. 8.6.3.3. Show logbook All events, such as status changes and test results, are stored in the logbook. The newest entries are displayed at first. The event is shown in clear text, including date, time and entry number. Older entries can be seen by using the two cursor buttons to scroll up and down. 77 CPS 220/48.1/SV Montage- und Betriebsanleitung CPS 220/48.1/SV Mounting and Operating Instructions 8.6.3.4. BCS Prüfbuch ansehen 8.6.3.4. Show BCS logbook Im Prüfbuch zum BCS -System werden Zustandänderungen des Battriemanagementsystems und einmal täglich die Batterieblockwerte protokolliert. Die Darstellung zeigt Informationen zur Blockspannung und -temperatur der einzelnen Batterieblöcke an. The logbook of the BCS logs status changes of the battery management system, as well as the battery block values once a day. The screen shows information about voltage and temperature of every individual battery block. Die dargestellten Werte aller angemeldeten BCS Sensoren werden im BCS Prüfbuch mit den aktuellen Daten (zuletzt erfolgte Prüfung) von oben nach unten aufgeführt. The values for all the activated BCS sensors are displayed in the BCS logbook using the current data (last test). The order of individual sensors has to be seen as follows: Die detaillierte Anordnung einzelner Sensoren ist wie folgt zu entnehmen: Sensor 36 Sensor 1 Sensor 36 Temperature Sensor 1 Voltage Temperatur Spannung 8.6.3.5. System 8.6.3.5. System Hier sind Informationen zu den internen Systemeigenschaften zu finden. 7878 Information about the internal system characteristics are shown here. CPS 220/48.1/SV Montage- und Betriebsanleitung CPS 220/48.1/SV Mounting and Operating Instructions 8.6.4. USB 8.6.4. USB Im Bereich USB ist es möglich, Konfigurationen mittels USB Port zu laden oder zu speichern. Allgemeine oder BCS Prüfbucheinträge können auf einem USB Speichermedium gesichert werden. Weiterhin beinhaltet dieses Menü eine Software Update Funktion, die über eine entsprechende Schaltfläche erreichbar ist. It’s possible to load/save configurations from/to an USB storage medium. The general and the BCS logbook can also be downloaded to an USB storage medium. The USB menu also includes a software update function. Konfigurationsdateien laden oder speichern ist per FTP (Netzwerk) mittels INOTEC Konfigurator - Software möglich. Die maximale Größe des USB Sticks darf 32GB nicht überschreiten. Die Formatierung muss in FAT 32 ausgeführt sein. Achtung! Vor Änderung der Werks-Konfiguration muss diese aus dem Steuerteil ausgelesen und abgespeichert werden. 8.6.4.1. Verzeichnisstruktur USB Stick Um die verschiedenen Dateiformate jeweiliger Anwendungen übersichtlich und einheitlich zu gestalten, wurde eine Verzeichnisstruktur für den USB-Stick von INOTEC festgelegt. Um einen sicheren Datentransfer zwischen dem jeweiligen Steuerteil und der INOTEC Konfi-gurationssoftware zu gewährleisten, ist diese Anordnung zwingend einzuhalten. STICK LOGBOOK It’s possible to load/save configuration files by FTP (network) using the INOTEC Konfigurator software. The maximum capacity of the USB storage medium must not exceed 32GB. Formatting has to be done as FAT32. Caution! Before changing the configuration, the factory settings have to be exported and saved. 8.6.4.1. Directory structure USB Stick In order to guarantee a secure data transfer of an INOTEC controller unit and the respective configurator software the directory structure of the USB- stick is predefined and can‘t be changed. STICK LOGBOOK CONF_RD CONF_WR FAILURE UPD_VGA UPD_GUI CONF_RD CONF_WR FAILURE UPD_VGA UPD_GUI Dateiformate Die Vergabe der Dateinamen ist auf 8 Zeichen begrenzt. Diese Zeichen dürfen lediglich aus Großbuchstaben und Zahlen bestehen. Sonderzeichen sind für die Bezeichnung nicht vorgesehen. •Konfigurationsdateien XXXXXXXX.CFG •Programmdateien XXXXXXXX.HEX •Prüfbücher und Störausdrucke XXXXXXXX.TXT File formats The maximum file name length is limited to 8 digits (capital letters / numbers). Special characters, small letters and blanks are not allowed. •config files XXXXXXXX.CFG •program files XXXXXXXX.HEX •logbook and failure prints XXXXXXXX.TXT 79 CPS 220/48.1/SV Montage- und Betriebsanleitung CONF_RD Zum Lesen der Konfigurationsdateien vom Speichermedium in das Steuerteil. CONF_WR Zum Schreiben/Sichern von Konfigurationsdateien. FAILURE Störungsausdrucke werden vom Steuerteil in diesem Verzeichnis gesichert. LOGBOOK Prüfbücher sichern. Erweiterte Update Verzeichnisstruktur Ein Software Update ist jeweils separat für die Bedienoberfläche (Frontend) und der ausführenden Prozessebene (Backend) vorzunehmen. VGA Backend Update(UPD_VGA) In dem Verzeichnis „UPD_VGA“ befindet sich ein weiterer Unterordner mit der Versionsnummer als Verzeichnis namen. CPS 220/48.1/SV Mounting and Operating Instructions CONF_RD Read config files (INO- / USB- Stick to controller unit) CONF_WR Write / save configuration files FAILURE Failure printouts are saved to this directory LOGBOOK Saved logbooks Advanced directory structure for software updates Software updates for the graphic user interface (Frontend) and executive process level (Backend) have to be done separately. VGA Backend Update(UPD_VGA) The directory “UPD_VGA” contains additional sub folders with the version number as the directory name. Each sub folder includes three related files. 3.0.0 Diesem Unterordner werden drei zusammen gehörige Update Dateien zugewiesen: cps220 cgi_inoweb 3.0.0 changelog cps220 cgi_inoweb VGA Frontend Update(UPD_GUI) changelog Graphic user interface (Frontend) updates are done with *.gu files. This file has to be copied to the directory “UPD_GUI”. VGA Frontend Update(UPD_GUI) Dateien mit der Endung *.gu, beinhalten ein Software Update der TFT Bedienoberfläche. Diese Datei ist in das Verzeichnis „UPD_GUI“ zu kopieren. GUI-V1.0.0-rc2.gu Vollständige Verzeichnisstruktur eines aktiven Zentralbatteriesystems(Beispiel): STICK LOGBOOK LOGBOOK.TXT BCSLBOOK.TXT CONF_RD CONFIG.CFG CONF_WR CONFIG.CFG FAILURE UPD_VGA 3.0.0 changelog.txt cps220 cgi_inoweb UPD_GUI GUI-V1.0.0-rc4-15-g9799e27.gu 8080 GUI-V1.0.0-rc2.gu Example of a full USB directory of an active central battery system: STICK LOGBOOK LOGBOOK.TXT BCSLBOOK.TXT CONF_RD CONFIG.CFG CONF_WR CONFIG.CFG FAILURE UPD_VGA 3.0.0 changelog.txt cps220 cgi_inoweb UPD_GUI GUI-V1.0.0-rc4-15-g9799e27.gu CPS 220/48.1/SV Montage- und Betriebsanleitung CPS 220/48.1/SV Mounting and Operating Instructions 8.6.4.2. Konfiguration laden 8.6.4.2. Load configuration Eine Konfiguration, welche mit der optionalen INOTEC Konfigurator Software erstellt wurde, kann über die Schaltfläche „Konfiguration laden“ von dem USB Speichermedium in das Zentralbatteriegerät eingespielt werden. Das TFT Steuerteil ruft aus dem Ordner „CONF_RD“ des Speichermediums, die zur Verfügung stehenden Konfigurationsdateien (*.cfg) auf. A configuration, which was created by the INOTEC Konfigurator software, can be loaded into the central battery system from a USB flash memory by the button “Load configuration”. Sofern sich mehrere Konfigurationsdateien in diesem Ordner befinden, ist die entsprechende auszuwählen. Mittels betätigen der jeweiligen Schaltfläche wird die Konfiguration geladen. Wird die Konfiguration in das Steuerteil (SDKarte) geladen, so wird die „alte“ Konfiguration unwiderruflich überschrieben! Das System führt einen automatischen Neustart durch und es wird anschließend das Hauptmenü dargestellt. The TFT controller is searching for configuration files (*.cfg) in the folder “CONF_RD” of the USB flash memory. A list with all available configuration files will be shown on the screen. You can load the needed file by clicking on the corresponding button. The existing configuration will be deleted irreversible, if you load a new one into the controller (SD card). The controller is performing a restart; the main menu will be shown afterwards. 8.6.4.3. Save configuration 8.6.4.3. Konfiguration speichern Um eine Konfiguration auf dem USB-Speichermedium zu sichern, ist die Schaltfläche „Konfiguration speichern“ zu aktivieren. Activate the button “Save configuration” to save the existing system configuration to a USB flash memory. The following menu appears: Es erscheint folgendes Menü: Das Feld für die Dateibezeichnung ist zunächst leer. Um eine Konfigurationsdatei zu speichern ist die manuelle Vergabe eines Dateinamens erforderlich. Durch betätigen der Beschriftungszeile gelangen Sie in ein Untermenü, indem mittels einer Tastaturanordnung der Dateiname vergeben werden kann. The area for the file name is initially empty. It’s needed to enter a file name to save the configuration. Clicking on the area of the file name will open a sub-menu, where you can enter the file name by software keyboard. Please note: max. 8 characters, only capital letters or numbers, no special signs. Bei der Vergabe ist darauf zu achten, dass diese Bezeichnung maximal 8 Zeichen, Großbuchstaben und Zahlen, keine Sonderzeichen beinhaltet. 81 CPS 220/48.1/SV Montage- und Betriebsanleitung Durch Betätigen der Schaltfläche wird der Name gespeichert und erscheint als Dateiname im übergeordnetem Menü. Abgebrochen wird der Vorgang durch Betätigen der Schaltfläche . Sofern der Dateiname korrekt übernommen wurde, wird durch Betätigen der Schaltfläche „Auf USB-Stick schreiben“ diese Datei auf dem Speichermedium gesichert. Sie erhalten nach korrektem Speichervorgang die Information „Datei gespeichert“. Sofern sich eine Datei mit identischer Bezeichnung auf dem Speichermedium befindet, erhalten Sie vor der Speicherung die Sicherheitsabfrage „vorhandene Datei ersetzen?“. Diese ist entsprechend mit „Ja“ oder „Nein“ zu beantworten. 8282 CPS 220/48.1/SV Mounting and Operating Instructions Activating the button name. Using the button will save the entered file will cancel the entry. The configuration will be saved to the USB flash memory after activating the button [Write to USB-Stick]. The controller will show “file saved” when the file was saved correctly. A message “Overwriting existing file?” will appear if there is already a file with the same name existing on the USB flash memory. You can confirm with “yes” and “No”. CPS 220/48.1/SV Montage- und Betriebsanleitung CPS 220/48.1/SV Mounting and Operating Instructions Eine Bestätigung mit „Nein“ führt zum Abbruch des Speicherprozesses. Durch Auswahl der Schaltfläche „Ja“ erhalten Sie eine Bestätigung der erfolgreichen Speicherung. Choosing “No” will cancel the process. Choosing “Yes” will lead to a confirmation of the successfully saved configuration file. Die Konfiguration wird im Verzeichnis „CONF_WR“ auf dem USB-Speichermedium gespeichert und kann mit der optionalen INOTEC Konfigurationssoftware bearbeitet und ausgedruckt werden. The saved file can be found in the folder “CONF_WR” on the USB flash memory. You can edit / print the file by the INOTEC Konfigurator software. Jetzt kann das USB-Speichermedium entfernt werden. Weitere Informationen zum Lade- bzw. Speicherprozess einer Konfigurationsdatei finden Sie in der Bedienungsanleitung des INOTEC Anlagen Konfigurator 8.6.4.4. Prüfbuch / BCS Prüfbuch speichern Um Einträge aus dem Prüfbuch auf dem USB Speichermedium zu sichern, ist die jeweilige Schaltfläche zu aktivieren. Nach Vergabe des Dateinamens werden die Einträge durch Bestätigen der Schaltfläche „Auf USB Stick schreiben“ gesichert. 8.6.4.5. Update Die Softwareversion des Steuerteils kann mit einem USBSpeichermedium aktualisiert werden. Dazu wird zwischen einem Update der Bedienoberfläche und der auszuführenden Prozessebene unterschieden. siehe 8.6.4.1. Verzeichnisstruktur USB Stick - Seite 79 You can now remove the USB flash memory. For more detailed information about the uploadand download process of configuration files, please have a look at the operation instructions of the INOTEC system configurator. 8.6.4.4. Save Logbook / BCS Logbook Activate the respective button to save the logbook on a USB flash drive. The entries will be saved after entering a file name and clicking on the button “save to USB-stick”. 8.6.4.5. Update You can update the controller software by USB flash drive. We distinguish between an update for the user interface and the process level. see 8.6.4.1. Directory structure USB Stick on page 79 Insert the USB flash drive into the TFT controller. Navigate to the menu “USB” and click on the needed update button. The available update file will be shown on the screen. Verbinden Sie das Speichermedium mit dem TFT-Steuerteil und betätigen im Menü „USB“, die jeweilige Schaltfläche des durchzuführenden Updates. In dem Untermenü wird die zur Verfügung stehende Update Datei des Speichermediums angezeigt. 83 CPS 220/48.1/SV Montage- und Betriebsanleitung Durch Auswahl dieser Datei werden die Daten geladen und das Steuerteil bootet mit der neuen Software. Eine Aktualisierung der Steuerteilsoftware sollte nur nach Rücksprache mit unserem Kundendienst erfolgen. CPS 220/48.1/SV Mounting and Operating Instructions Selecting this file will copy the new software to the controller. An automatic reboot will load the new software. Please get in contact with us before you perform any update. Weitere Informationen zur Anwendung eines Updates finden Sie in der Bedienungsanleitung des INOTEC Anlagen Konfigurator. For more detailed information about the update, please have a look at the operating instructions of the INOTEC system configurator. 8.6.5. Einstellungen 8.6.5. Settings Im Bereich „Einstellungen“ können Programmierungen der Gerätekonfigurationen durchgeführt werden. Einstellungen der Netzwerkanbindung, automatische Testeinstellungen, Einstellungen der Lüftersteuerung sowie der Uhrzeit und des Datums sind in diesem Menü möglich. Weiterhin kann im Bereich „Learn-Mode“ die gewünschte Überwachungsart angelernt werden, die individuelle Vergabe eines Passwortes ist im Bereich „Passwort“ möglich. The “Settings” menu gives you the possibility to change the programming of the device. It’s possible to change the network settings, automatic test settings, fan-control settings and date and time settings in this menu. In addition, in the “Learn Mode” area, the desired monitoring mode can be set and an individual password can be assigned in the “Password” area. 8484 CPS 220/48.1/SV Montage- und Betriebsanleitung CPS 220/48.1/SV Mounting and Operating Instructions Gerät Device In diesem Menü können Einstellungen einzelner Bereiche (Gerätetyp, Zielort, Blockierung, Umschaltzeit, Watchdog oder Handrückschaltung) des Gerätes vorgenommen werden. Device settings can be modified in this menu. The settings include: device type, destination text, blocking, changeover time, Watchdog and manual reset. 8.6.5.1. Netzwerk In dem Menü Netzwerkeinstellungen sind Informationen der Netzwerkkommunikation dargestellt. In den Bereichen IP, Subnetzmask, Gateway, MAC , RTG Adresse sowie HTML-Verbindung können entsprechende Kommunikationsparameter eingesehen beziehungsweise festgelegt werden. Weiterhin wird das Dynamic Host Configuration Protocol (DHCP) über dieses Menü aktiv oder deaktiv gesetzt. Die jeweiligen Netzwerkeinstellungen werden mittels einer Tastatur eingegeben. Diese wird durch Berühren der jeweiligen Schaltfläche aufgerufen. 8.6.5.1. Network This menu shows information about the network communication. The communication parameters can be seen and/or changed in the corresponding areas IP, Subnet mask, Gateway, MAC, RTG address and HTML connection. Additionally, the Dynamic Host Configuration Protocol (DHCP) can be activated or deactivated in this menu. The communication parameters are entered via a keypad, which is called up by activating the relevant button. 85 CPS 220/48.1/SV Montage- und Betriebsanleitung CPS 220/48.1/SV Mounting and Operating Instructions Dazu sind folgende Informationen vom Netzwerkadministrator notwendig: The following information is required from the network administrator: ==> IP Adresse ==> IP adress ==> Subnetzmask ==> Subnet mask ==> Gateway ==> Gateway ==> MAC ==> MAC ==> RTG Adresse ==> RTG adress Mittels DHCP besteht die Möglichkeit , dass das Zentralbatteriegerät die IP Adresse automatisch von einem DHCP Server im Netzwerk erhält. Die dafür notwendige MACAdresse wird ebenfalls angegeben. The central battery system can automatically receive an IP address from a DHCP server in the network, by DHCP function. The needed MAC address is also given here. Die Checkbox DHCP kann durch Setzen des Symbols or deactivated with the aktiviert oder mit dem Symbol deaktiviert werden. Weitere Informationen zu diesem Thema erhalten Sie über Ihren Netzwerkadministrator. Änderungen an diesen Einstellungen können zu Übertragungsproblemen mit einer übergeordneten Überwachung führen! 8.6.5.2. Uhrzeit + Datum Einstellungen der Uhrzeit und des Datums sind hier möglich. The DHCP check box can be activated with the icon icon. You can obtain further information on this topic from your network administrator. Changes of these settings can lead to communication problems to a higher-level monitoring. 8.6.5.2. Date + Time The date and time can be set here. Date Datum Über die Schaltfläche wird ein Jahreskalender aufgerufen, mit dem das aktuelle Tagesdatum einzustellen ist. 8686 The button correct date. opens a calendar where you can select the CPS 220/48.1/SV Montage- und Betriebsanleitung In der oberen Zeile des Dialoges ist das gewählte Tagesdatum sichtbar. In der Mitte ist ein Kalender mit einzelnen Wochentagen und einer Monatsübersicht dargestellt. Mittels der Pfeilbutton kann der jeweilige Monat und das Jahr eingestellt werden. Sobald ein neuer Kalendermonat angewählt wurde, ist die Monatsansicht grau hinterlegt. Durch Betätigen des „Aktualisierungsbutton“ wird dieser Monat zur Einstellung aktiviert, einzelne Wochentage werden in „Schwarz“ dargestellt. Nach Auswahl des gewünschten Datums ist dieses mit der Schaltfläche „OK“ zu bestätigen. Nachdem das Kalendermenü über den Returnbotton verlassen wurde, erscheint eine Sicherheitsabfrage, bei der Sie aufgefordert werden die Änderung dauerhaft zu speichern oder zu verwerfen. Sofern kein Änderungen im Kalender durchgeführt wurden, kann dieses Menü über den Button „Menü verlassen“ beendet werden. Monats- Jahresauswahl und Menü verlassen Einstellung aktualisieren Kalendereinstellung OK Uhrzeit Die Uhrzeit ist in Stunden und Minuten separat einzustellen. Durch Betätigen der Schaltfläche Stunde oder Minute wird ein Untermenü, das eine Tastatur beinhaltet, aufgerufen. Hier ist die aktuelle Uhrzeit anzupassen. Sofern die Stundeneinstellung mit der aktuellen übereinstimmt, kann diese mit dem Button bestätigt und übernommen werden. Durch Betätigen der , kann das Menü verlassen werden, evenSchaltfläche tuell geänderte Daten werden somit nicht gespeichert. CPS 220/48.1/SV Mounting and Operating Instructions The upper line of the dialogue window displays the chosen date. The middle of the screen shows a calendar. The month and year can be set up by the arrow button. The monthly overview has a grey background when a new month is selected. Pressing the “refresh” button makes this month active. It’s possible to choose the correct date now. Once the desired date has been selected, confirm your choice with the “OK” button. When you leave the calendar menu using the return button, a confirmation dialogue appears, in which you are prompted to permanently save the change or to discard it. You can directly leave this menu using the “exit menu” button, if no changes have been made in the calendar. Month / year selection and Exit menu Update settings Confirm calendar settings Time Hours and minutes have to be set up separately. When either the “Hour” or the “Minute” button is activated, a sub-menu appears which includes a keypad. The current time can be entered here. If the hour setting is correct, you can confirm the entry by the button. You can exit this menu by pressing the changes will not be saved in this case. button; the The minutes have to be set up in the same way. Nach gleichem Schema ist die Einstellung der Minuten durchzuführen. Service Service Not yet available. Noch nicht verfügbar. 87 CPS 220/48.1/SV Montage- und Betriebsanleitung CPS 220/48.1/SV Mounting and Operating Instructions 8.6.5.3. Sprache 8.6.5.3. Language Im Sprachmenü kann zwischen verschiedener Landessprachen ausgewählt werden. The language menu offers a choice of different languages. Folgende Sprachen sind für das Steuerteil auswählbar: •Deutsch •Englisch •Dänisch •Norwegisch •Kroatisch •Niederländisch •Französisch •Tschechisch •Italienisch •Polnisch •Rumänisch •Ungarisch •Portugiesisch 8.6.5.4. Automatic test settings 8.6.5.4. Automatische Testeinstellungen In diesem Menü sind automatische Testeinstellungen möglich. Ein automatischer Funktionstest kann zu einem festgelegten Zeitpunkt in bestimmten zeitlichen Abständen ausgeführt werden. Ein automatischer Betriebsdauertest kann jedes Jahr zu einem festgelegten Zeitpunkt ausgeführt werden. Die Testzeitpunkte sind über die entsprechenden Schaltflächen einzustellen. Aktiviert werden kann der automatische Funktions- sowie Betriebsdauertest über den jeweiligen Button oder . 8.6.5.5. Learn-Mode Der Learn-Mode ist ein manuell zu startender Modus, um die Stromreferenzwerte für Endstromkeise mit Stromkreisüberwachung oder die Adressbelegung für Endstromkreise mit Einzelleuchtenüberwachung zu ermitteln. Dieser kann getrennt für Endstromkreise mit Stromkreisüberwachung (SKÜ) oder Einzelleuchtenerkennung (SV) ausgeführt werden. 8888 The following languages are available: •German •English •Danisch •Norwegian •Croatian •Dutch •French •Czech •Italian •Polish •Rumanian •Hungarian •Portuguese Use this menu to manage automatic test settings. An automatic function test can be carried out at a specific time and at a specific interval. An automatic battery duration test can be carried out at a specific time every year. You can set up the time for the tests using the corresponding buttons. The automatic function- and battery duration test are activated/deactivated by the buttons or . 8.6.5.5. Learn mode The Learn mode is a manually started mode that detects the current reference values for final circuits with circuit monitoring. It also detects the address assignment for final circuits with individual luminaire monitoring. The Learn Mode can be carried out separately for final circuits with circuit monitoring (SKÜ) or individual luminaire monitoring (SV). CPS 220/48.1/SV Montage- und Betriebsanleitung CPS 220/48.1/SV Mounting and Operating Instructions SKÜ Stromkreise SKÜ circuits Für Stromkreise mit der Überwachungsart Stromkreisüberwachung muss ein Learnmode ausgeführt werden, um die Stromaufnahme der angeschlossenen Verbraucher zu ermitteln. A Learn Mode has to be carried out for final circuits in circuit-monitoring mode. This is needed to detect the current consumption of the connected luminaires. Die angeschlossenen Verbraucher müssen zum Zeitpunkt des Learnmodes in funktionstüchtigem Zustand sein. Alter der Leuchtmittel, Temperatur, etc. können Einfluss auf die Messergebnisse haben. Ein wiederholtes Ausführen für alle Stromkreise überschreibt die alten Werte und Einstellungen. SV-Stromkreise Bei einer Einzelüberwachung der Leuchten (SV-Funktion) können die angeschlossenen Leuchten automatisch vom System erlernt werden. Bitte beachten Sie, dass nur Leuchten erkannt werden, die einwandfrei funktionieren und auch eindeutig im Stromkreis adressiert wurden. Mit einem defekten Leuchtmittel oder EVG ist die automatische Leuchtenerkennung nicht möglich. It’s mandatory that all connected luminaires are in operable condition when the Learn Mode is launched. The illuminant’s age, the temperature and so on can affect the results. If the Learn Mode is carried out again for all circuits, the old values and settings are overwritten. SV circuits Individually monitored luminaires (SV function) can be automatically detected by the system. Please note that the luminaires have to be in operable condition, as well as the addressing within the circuits has to be fine, to detect them by the system. Automatic luminaire detection will not work if an illuminant or electronic ballast is defective. If the Learn Mode is carried out again for all circuits, the old values and settings are overwritten. Ein wiederholtes Ausführen für alle Stromkreise überschreibt die alten Werte und Einstellungen. 89 CPS 220/48.1/SV Montage- und Betriebsanleitung CPS 220/48.1/SV Mounting and Operating Instructions 8.6.5.6. Lüftersteuerung 8.6.5.6. Fan control Über die Lüftersteuerung besteht die Möglichkeit, einen externen Lüfter zur Belüftung des Batterieschranks oder -raumes anzuschließen. Der entsprechende Kontakt am RIF 5 wird jede Stunde für eine bestimmte Zeitspanne geschaltet. Dazu ist neben der Startzeit, die Lüftereinschaltdauer zu programmieren. The fan control can be used to connect an external fan to ventilate the battery cabinet or -room. The corresponding contact of the RIF5 would be switched on for a fixed period every hour. The start time and the ventilation duration have to be programmed. Über die Schaltfläche „Minute Start“ wird die Startzeit in Minuten eingestellt. Mittels der Schaltfläche „Dauer“ wird die die Lüftereinschaltdauer bestimmt. Beispiel: Bei einer Lüfterstartzeit von 10 Minuten und einer Lüftereinschaltdauer von 20 Minuten, wird der Kontakt jeweils um 08:10, 09:10, 10:10, etc. für jeweils 20 Minuten eingeschaltet. Bei einer programmierten Lüftersteuerung wird der entsprechende Kontakt, unabhängig von einer programmierten Einschaltdauer, bei Starkladung geschaltet. The start time (in minutes) is set by the “Minute start” button. The duration is set by using the “Duration” button. Example: The ventilator start time is programmed to 10 minutes and the duration is 20 minutes. The contact is switched on at 08:10, 09:10, 10:10, etc. for 20 minutes. The contact will be activated if it’s programmed for fan control and boost charging is activated, independent from the programmed duty cycle. 8.7. Programmierung 8.7. Programming Ein Up - oder Download von Konfigurationsdateien sowie die Durchführung eines Software-Updates ist mittels einem handelsüblichen USB Stick möglich. Bei Einbindung des TFT Steuerteils in das jeweilige Netzwerk, können Programmierungen direkt aus dem INOTEC Anlagenkonfigurator per FTP (File Transfer Protocol) erfolgen. A standard USB flash memory can be used for up- and downloading of configuration files as well as performing software updates. It’s possible to do the programming of the TFT controller directly by the INOTEC Konfigurator software and FTP (File Transfer Protocol) network connection. Sofern dem Steuerteil keine Netzwerkverbindung zur Verfügung steht, ist eine direkte Anbindung zur Programmierung mittels LAN Verbindung (PC <==> TFT Steuerteil), über ein handelsübliches Netzwerkkabel möglich. Die auch hierfür erforderliche INOTEC Konfigurationssoftware ist der Zentralbatterieanlagen beigefügten Dokumentations CD zu entnehmen oder aktuell von unserer Homepage gegen Angabe entsprechender Kundenauftragsnummer als kostenlosen Download zu erhalten. If the controller is not connected to a LAN, you can use a standard network cable for a direct network connection between the PC and the TFT controller. The needed INOTEC Konfigurator software can be found on the attached documentation CD. It’s also possible to download the software from our homepage. You will need the system’s KA number to start the download. 8.7.1. INOTEC Anlagen Konfigurator Die INOTEC Konfigurationssoftware ist kostenfrei als Download auf der INOTEC Website verfügbar. Rufen Sie hierzu mittels ihrem Internet Browser, den Link „inotec-licht.de/konfigurator.html“ auf. Durch Eingabe ihrer Kundenauftragsnummer in vorgesehener Zeile, kann diese Software heruntergeladen werden. 9090 8.7.1. INOTEC Konfigurator You can download the INOTEC Konfigurator software for free of charge from the INOTEC website. Just open your web browser and enter the link „inotec-licht.de/konfigurator.html“. The download will be possible after entering the KA number of the delivered device. CPS 220/48.1/SV Montage- und Betriebsanleitung CPS 220/48.1/SV Mounting and Operating Instructions Detaillierte Informationen zur Anwendung der INOTEC Konfigurationssoftware finden Sie in der Bedienungsanleitung (Artikel-Nr.: 708123). Detailed information about how to use the INOTEC Konfigurator software can be found in the operating instruction (Art-Nr.: 708123). 8.7.2. Direktverbindung PC mit dem TFT Touch 8.7.2. Direct connection PC with TFT touch Steuerteil Verbinden Sie zunächst ihren PC mit dem zu konfigurierenden Steuerteil. Diese Verbindung kann mittels einem handelsüblichen Netzwerkkabel hergestellt werden. Für eine Kommunikation zwischen dem Steuerteil und dem PC muss die Netzwerkeinstellung wie folgt abgestimmt werden. 8.7.2.1. Konfiguration des TFT Touch Display Steuerteils Um die Kommunikation zwischen PC und Steuerteil sicherzustellen, ist die Konfiguration des Steuerteil wie nachfolgend beschrieben durchzuführen: controller Connect your PC with the controller. You can take a standard network cable for this connection. For communication between the controller and the PC the network settings need to be adjusted as following. 8.7.2.1. Configuration of TFT touch controller The configuration of the TFT touch controller has to be done as follows to guarantee a well working communication between PC and controller: Go to the menu “Network settings” to check the current network setting or to modify them. Rufen Sie sich in dem Steuerteil das Menü „Netzwerkeinstellungen“ auf, hier sind aktuelle Netzwerkeinstellungen einzusehen oder zu verändern. The following example shows a network setup with the IP address 10.1.20.10 and the subnet mask 255.255.255.0. DHCP (dynamic allocation of IP address) is deactivated. In nachfolgendem Beispiel wurde dem Steuerteil die IP Adresse 10.1.20.10 mit der Subnetmask 255.255.255.0 zugewiesen. Die DHCP (dynamische Zuweisung der IP Adresse) ist deaktiviert. You can change the IP address by the IP button. It’s mandatory to deactivate the DHCP function to get a well working connection. Die IP Adresse kann mittels der IP Schaltfläche angepasst werden. Um eine Kommunikation herzustellen ist die dynamische Zuweisung der IP Adresse (DHCP) zu deaktivieren! Connection of PC with activated DHCP An “OK symbol” will be shown in the DHCP checkbox if the controller got a dynamic IP address. The button of the IP address will show the status “dynamic”. This configuration allows no communication between the PC and the controller. Anbindung des PC bei aktivierter DHCP Sofern dem Steuerteil eine dynamische IP Adresse zugeteilt wird, ist in der Checkbox DHCP ein „OK-Symbol“ zu erkennen. In der Schaltfläche der IP Adresse wird der Status „dynamic“ beschrieben. In dieser Konfiguration ist keine Kommunikation zwischen dem Steuerteil und dem PC möglich. 91 CPS 220/48.1/SV Montage- und Betriebsanleitung CPS 220/48.1/SV Mounting and Operating Instructions Um eine direkte Verbindung in einem Netzwerk zwischen den Komponenten herzustellen, muss DHCP deaktiviert und die IP Adresse manuell konfiguriert werden. Beide Komponenten kommunizieren in einem Netzwerk. A direct communication with a network is only working when the DHCP function has been deactivated. The IP address has to be setup manually. PC and controller are communicating within one network. Aktivieren Sie hierzu die Schaltfläche der IP Adresse, Activate the button of the IP address, es erscheint folgendes Menü: The following menu appears: Nach manueller Eingabe der IP Adresse ist dieses Menü zu verlassen. durch Betätigen des Button You can leave the menu by the button up the correct IP address. Sofern Sie das Menü „Netzwerkeinstellungen“ verlassen, erhalten Sie folgende Sicherheitsabfrage. The following confirmation prompt appears when you leave the network settings menu. Durch Bestätigen der Sicherheitsabfrage mit „OK“ werden diese Einstellungen gespeichert. Nach Übernahme der IP Adresse wird die Checkbox DHCP automatisch deaktiviert . Pressing OK will close the confirmation prompt and save the settings. The DHCP checkbox will be automatically deactivated after saving the new IP address. after setting 8.7.2.2. Configuration of PC at Windows 7 8.7.2.2. Konfiguration des PC für Windows 7 Wählen Sie im Menü „Systemsteuerung“ das Untermenü „Netzwerk- und Freigabecenter“. Open the submenu “Network and Sharing Center” at the Windows Control Panel. Click on the button “LAN connection”. Sofern beide Komponenten mittels einem Netzwerkkabel verbunden sind, erscheint „LAN-Verbindung“ als Menüauswahl. Durch betätigen der Schaltfläche „LAN-Verbindung“ öffnet sich die Statusanzeige dieser Verbindung. Nach Betätigen des Buttons „Eigenschaften“ werden Sie in das Menü „Eigenschaften der LAN-Verbindung“ geführt. 9292 The status display of this connection is shown after clicking on “LAN connection”. Clicking on the button “Properties” will guide you to the menu “Properties of LAN connection”. CPS 220/48.1/SV Montage- und Betriebsanleitung CPS 220/48.1/SV Mounting and Operating Instructions In diesem Menü ist das Element „Internetprotokoll Version 4 (TCP/IPv4)“ mit der Maustaste zu markieren. Activate the element “Internet protocol version 4(TCP/ IPv4)” by mouse click. Die Schaltfläche „Eigenschaften“ ist dadurch aktiv und führt durch betätigen in das Untermenü des Elementes „Internetprotokoll Version 4 (TCP/IPv4)“, indem die IP Adresse und Subnetzmaske konfiguriert werden können. Die Schaltfläche „Deinstallieren“ wird in diesem Schritt „ausgegraut“. This will make the button “Properties” available. Clicking on this button will open a window where it’s possible to setup the IP address and subnet mask. In dem Auswahlfeld „Allgemein“ sind durch Setzen der Checkbox „Folgende IP-Adresse verwenden“, die Konfigurationsfelder „IP-Adresse“, „Subnetzmaske“ und „Standardgateway“ aktiv. Als IP-Adresse ist hinsichtlich des Steuerteils eine Adresse im Bereich von 10.1.20.1 – 10.1.20.254 zu wählen. Die Vergabe der IP-Adresse 10.1.20.10 ist auszuschließen, da diese bereits von dem Steuerteil benutzt wird. Activate the checkbox “Use following IP address” at the slider “General”. It’s possible to enter the IP address, subnet mask and standard gateway now. The IP address has to be within the area 10.1.20.1 – 10.1.20.254 (according to the controller IP configuration). The IP address 10.1.20.10 is invalid, because this address is blocked by the controller. The subnet mask has to be 255.255.255.0. The network configuration will be saved by clicking on “OK”. 93 CPS 220/48.1/SV Montage- und Betriebsanleitung Der Wert für die Subnetzmaske ist mit 255.255.255.0 zu definieren. Durch bestätigen mit „OK“ wird die Netzwerkkonfiguration gespeichert. CPS 220/48.1/SV Mounting and Operating Instructions PC and TFT touch controller are communicating within one network now. Deactivate all Wi-Fi connections, as they can cause troubles in the LAN communication Jetzt kommunizieren PC und das TFT Touchdisplay Steuerteil in einem Netzwerk. Alle WLAN-Verbindungen sollten deaktiviert sein, da durch aktive WLAN-Kommunikation bedingte Störungen nicht ausgeschlossen werden können. 8.8. Return Button Mit Hilfe dieser Schaltfläche gelangen Sie bei Betätigung eine Menüseite zurück. Sie haben somit die Möglichkeit jeweils eine Seite in der Menüführung zurückzublättern. 8.9. Scrollen Durch Berühren dieser beiden Schaltflächen ist es möglich den Bildschirminhalt in vertikaler Richtung zu bewegen. Die aktuelle Position ist über den seitlichen Balken zu erkennen. 8.10. Softwarestand Diese Anleitung wurde auf Basis der folgenden Softwarestände erstellt: v3.2.1/1.0.0 9494 8.8. Return Button Activating this button returns you to the previous menu. In this way you can work backwards through the menu step by step. 8.9. Scroll Use these two buttons to scroll through the menu. You can see your current position on the bar on the right side. 8.10. Software version These instructions are based on the following software version: v3.2.1/1.0.0 CPS 220/48.1/SV Montage- und Betriebsanleitung 9. INOWEB CPS 220/48.1/SV Mounting and Operating Instructions 9. INOWEB Über die INOWEB-Schnittstelle können die Statusinformationen zur Leuchte mittels eines Webbrowser dargestellt werden. Dazu wird die CPS 220 / 48.1 in ein lokales Netzwerk eingebunden. The status information of the luminaires can be displayed via the INOWEB interface using a web browser. To that end, the CPS 220/48.1 is integrated into a local network. 9.1. Bedienung 9.1. Operation Die Anwahl des entsprechenden CPS 220 / 48.1 Gerätes erfolgt über die Eingabe der IP-Adresse in der Adresszeile des Webbrowsers. The required CPS 220/48.1 device is selected by entering the IP address into an address line in the web browser. Falls der Zugriff mit einem Passwort abgesichert wurde, so wird dieses vor dem ersten Aufruf der Seite abgefragt. Der Benutzername ist immer WEBUSER. Der Benutzer bleibt bis zum Schließen des Fensters am CPS 220 / 48.1-Gerät angemeldet. Im Hauptbild wird die Anlage mit Standort und Statusanzeigen wie Batteriestrom und –spannung, sowie den Zuständen der einzelnen Stromkreise dargestellt. Über die Weboberfläche stehen dem Anwender folgende Funktionen zur Verfügung: •Funktionstest starten •Betriebsdauertest starten •Betriebsdauertest abbrechen •Gerät blockieren •Gerät freigeben •Handrückschaltung •BCS If access is password protected, this password is requested before the page is retrieved. The user name is always WEBUSER. The user remains logged on until the window of the CPS 220/48.1 device is closed. The main screen shows the system with location and status displays, such as battery current and voltage, and the states of the individual circuits. •Störungsausdruck •Reset (Konfiguration neu einlesen) •Setup •Ext. Verknüpfungen •Prüfbuch The following functions are available via the web interface: •Start function test •Start battery duration test •Cancel battery duration test •Block device •Release device •Manual reset •Failure printout •BCS •Reset (re-import configuration) •Setup •Ext. links •Logbook Mit einem Mausklick auf einen Einschub öffnet sich die Darstellung mit den Leuchten der einzelnen Stromkreise des gewählten Einschubs. Hier ist sofort erkennbar, in welchem Stromkreis welche Leuchte gestört ist. Clicking on a change-over device opens the display showing the luminaires for the individual circuits on the selected change-over device. This indicates immediately in which circuit which luminaire has failed. 95 CPS 220/48.1/SV Montage- und Betriebsanleitung CPS 220/48.1/SV Mounting and Operating Instructions Die Zielorte werden in der Stromkreisdarstellung angezeigt, die mit einem Mausklick auf die Leuchten aufgerufen wird. The destinations are shown in the current display, which can be shown by clicking the luminaires. Über „Zurück“ wird wieder in das vorhergehende Bild verzweigt. The “Back” option will return you to the previous screen. 9.2. Störungsausdruck Der Störungsausdruck zeigt alle Störungen des Gerätes auf einer Seite im Klartext an. Für ein Ausdruck wird die Druckfunktion des Webbrowsers genutzt, welche über Datei Drucken aufgerufen wird. 9696 9.2. Failure printout The failure printout shows all device failures on one page in plain text. A printout uses the print function of the web browser, which is selected by pressing File Print. CPS 220/48.1/SV Montage- und Betriebsanleitung CPS 220/48.1/SV Mounting and Operating Instructions 9.3. Externe Verknüpfungen 9.3. External links Der Menüpunkt „ext. Verknüpfung“ bietet die Möglichkeit, auf Dateien im Netzwerk zuzugreifen. Je nach gewählter Ebene (Gerät, Einschub, Stromkreis) kann ein Link hinterlegt werden, der aufgerufen wird. Dieses kann zum Beispiel eine Grundrisszeichnung mit den Leuchten des Stromkreises sein. The menu option “Ext. link” allows access to files on the network. Depending on the selected level (device, change-over device, circuit), a link can be defined and displayed. This can be, for example, a floor plan showing the luminaires of the circuit. 9.3.1. Einrichtung externer Verknüpfungen 9.3.1. Configuring external links Die externen Verknüpfungen können entweder über die Konfigurator-Software eingetragen werden oder mittels Aufruf einer Webadresse. Dazu ist die folgende Adresse in den Browser einzugeben: The external links can be entered either via the configurator software or by loading a Web address. To do this, enter the following address into a browser: http://<IP-Adresse_TFT-Steuerteil>/cgi-bin/cgi_ inoweb?text=X_1 Für die Stromkreise am IB 2 ist folgende Adresse einzugeben: http://<IP adress_TFT-controller>/cgi-bin/cgi_ inoweb?text=X_1 For circuits on IB 2, enter the following address: http://<IP adress_TFT-controller>/cgi-bin/cgi_ inoweb?text=X_2 http://<IP-Adresse_TFT-Steuerteil>/cgi-bin/cgi_ inoweb?text=X_2 Externer Link des Gerätes Ext. Link Platz 01: Stromkreis 01 Ext. Link Platz 01: Stromkreis 02 Ext. Link Platz 01: Stromkreis 03 Ext. Link Platz 01: Stromkreis 04 Ext. Link Platz 01: Stromkreis 01 Ext. Link Platz 01: Stromkreis 02 Ext. Link Platz 01: Stromkreis 03 Ext. Link Platz 01: Stromkreis 04 Ext. Link Platz 01: Stromkreis 01 Ext. Link Platz 01: Stromkreis 02 http://www.inotec-licht.de http://www.inotec-licht.de/erdgeschoss.pdf http://www.google.de Für jeden Stromkreis kann in dem Webformular eine Verknüpfung angelegt werden. Bei Verwendung eines Webservers ist der Aufbau der Verknüpfung: http://<IPAdresse_WebServer>/Dateiname . Externer Link des Gerätes Ext. Link Platz 01: circuit 01 Ext. Link Platz 01: circuit 02 Ext. Link Platz 01: circuit 03 Ext. Link Platz 01: circuit 04 http://www.inotec-licht.de http://www.inotec-licht.de/erdgeschoss.pdf http://www.google.de Ext. Link Platz 01: circuit 01 Ext. Link Platz 01: circuit 02 Ext. Link Platz 01: circuit 03 Ext. Link Platz 01: circuit 04 Ext. Link Platz 01: circuit 01 Ext. Link Platz 01: circuit 02 A link can be created for each circuit in the Web form. When using a Web server, the structure of the link is: http://<IP_Address_WebServer>/Filename . Die Länge der Verknüpfung darf nicht mehr als 100 Zeichen betragen! The length of the link may not exceed 100 characters! Bei Verwendung von statischen IP-Adressen im TFT-Steuerteil muss auch eine IP-Adresse für den Server angegeben werden, ansonsten ist bei Verwendung von DHCP und Zuweisung eines DNSServers durch den DHCP-Server die Angabe DNS-Name möglich. When using static IP addresses in the TFT controller, an IP address must also be given for the server; otherwise, it is possible to enter a DNS name if DHCP is used and a DNS server is assigned by the DHCP server. Um auf Dateien des lokalen Computers zugreifen zu können, muss ein Webserver auf dem Rechner installiert werden. Das Vorgehen sei exemplarisch am frei verfügbaren Programm USBWebserver erklärt, der auf den Apache Webserver aufsetzt. To access files on the local computer, you need a webserver installed on the computer. The procedure is explained with the free available USBWebserver program, based on the Apache webserver. Nachdem das Programmpaket entpackt wurde, kann es ohne Installation gestartet werden. Once the package has been unpacked, it can be started without installation. 97 CPS 220/48.1/SV Montage- und Betriebsanleitung CPS 220/48.1/SV Mounting and Operating Instructions Ein grüner Haken neben dem Feld Apache deutet an, dass der Webserver gestartet wurde. A green check mark next to the Apache indicates that the server was started. Unter „Settings“ können Einstellungen zum Starten des Webservers und der Zugriffsport eingestellt werden: Starting behaviour and the TCP-port can be configured via settings: Um die Dateien für den Zugriff zu hinterlegen, kann über die Schaltfläche „Root Dir“ das entsprechende Explorer Verzeichnis aufgerufen werden. By clicking „root dir“ an explorer windows open where you can store the files you want to access. Die Grundrissdateien sind in das Verzeichnis zu kopieren bzw. es können auch entsprechende Unterverzeichnisse für die Dateien angelegt werden. You can create subdirectories where the files have to be copied or storing them in the root dir. http://IP_address:port/test.PDF Netzwerk-Adresse des PC Port (Port apache eingestellt im USBWebserver) Dateiname Die Angabe eines Ports ist nur notwendig, wenn nicht der Standardport 80 verwendet wird! Soll der Zugriff nur von dem Rechner erfolgen, auf dem auch der WebServer gestartet wurde, so kann als IP-Adresse „localhost“ eingetragen werden. Ist jedoch der Zugriff auch von weiteren Computern im Netzwerk gewünscht, so muss die IP-Adresse des Rechners bzw. der Computername dort verwendet werden. Außerdem muss sichergestellt sein, dass zum Zeitpunkt des Zugriffs der Webserver im Netzwerk verfügbar. Für die Einrichtung von Zugriffsbeschränkungen verweisen wir auf die Dokumentation des Apache Webservers, welche im Internet zu finden ist. 9898 http://IP_address:port/test.PDF network address of PC used port (Port apache set at USBWebserver) file name The specification of a port is only necessary if the default port is not 80! If you want to access the files only from the local computer you can use „localhost“ as IP address. If access is also required by other computers on the network then the IP address or the computer name has to be used. As well be sure that the webserver is accessible on the network all the time. To setup access restrictions please refer to Apache webserver documentation that can be found on the internet. CPS 220/48.1/SV Montage- und Betriebsanleitung CPS 220/48.1/SV Mounting and Operating Instructions 9.3.2. INOWeb E-Mail Setup 9.3.2. INOWeb E-Mail Setup Mittels INOWeb E-Mail Client hat der Anwender die Möglichkeit über geschehene Ereignisse der Anlage per E-Mail informiert zu werden. Das TFT Touch Steuerteil sieht standardmäßig die Aktivierung der Email-Funktion vor. The INOWeb E-Mail Client enables the possibility to inform the user about all events, which happened to the system, by e-mail. This feature is activated by default at the TFT touch controller. Individuell können Events wie zum Beispiel die Information bei einer Störung oder einem Netzausfall ausgewählt werden. Entsprechende Daten werden automatisch aus dem System generiert und an den benannten E-Mail Empfänger versendet. Im Setup Menü ist es möglich bis zu zwei E-Mail Adressen zu bestimmen und entsprechend zu konfigurieren. The user can choose between several events like system has detected a failure or failure of the mains supply. All needed information are automatically generated by the system and send to the entered recipient. It’s possible to enter up to two recipients in the setup menu. Betätigen Sie um den E-Mail Server zu parametrieren im Hauptmenü der Weboberfläche die Schaltfläche „Setup“. Setup Es öffnet sich das INOWeb Setup Formular zur Konfiguration. Just click on the “Setup” button to get access to the e-mail setup menu. Setup The INOWeb setup page will be opened. 99 CPS 220/48.1/SV Montage- und Betriebsanleitung Über dieses Menü stehen dem Anwender folgende Funktionen zur Verfügung: Projekt: Hier ist die Vergabe der Projekt bezeichnung möglich. Dazu stehen Ihnen maximal 32 Zeichen zur Verfügung. Zielort Gerät Benennung des Zielortes. Die Namensvergabe darf 32 Zeichen nicht überschreiten. WEB Passwort: Für die Bestimmung des Passwortes sind 4 bis 6 Zeichen vorgesehen. CPS 220/48.1/SV Mounting and Operating Instructions This menu offers the following functions: Project: Hier ist die Vergabe der Projektebezeichnung möglich. Dazu stehen Ihnen maximal 32 Zeichen zur Verfügung. Device Destination Text It’s possible to enter the location of the device here (max. 32 signs). WEB Password: The password has to consist of 4 to 6 signs. E-Mail Events Aktuelle E-Mail Legen Sie entsprechend nachfolgender Ereignisse Auflistung die Events fest, bei denen Sie eine automatisch generierte Information erhalten möchten. 1 = status of device changed 2 = after every function test 3 = start and end of duration test 4 = during failure 5 = during mains failure 6 = while blocked 1 = Statusänderung der Anlage 2 = Nach jedem erfolgten Funktionstest 3 = Start und Ende des Betriebsdauertest 4 = Bei Störung 5 = Bei Netzausfall 6 = Bei Blockierung Bei dieser Auswahl ist es möglich zwischen einem oder mehreren Ereignissen informiert zu werden. Beispiel: Die 4 informiert bei einer Störung. Bei Auswahl 46 (4 und 6) werden Sie bei einer Störung UND einer Blockierung informiert. Aktuelle SMTP Hier ist bevorzugt die IP Adresse zu konServer: figurieren. Sofern lediglich der Servername zur Verfügung steht, kann dieser entsprechend angegeben werden. Bei Verwendung des Servernamens wird der DNS-Server benötigt! TLS (SSL): TLS Port: 100 100 Bei TLS oder Vorgängertechnik SSL, handelt es sich um ein hybrides Verschlüsselungsprotokoll zur sicheren Datenübertragung im Internet. Wählen Sie hierbei mit „1“ aus ob dieses aktiv oder mit „0“ deaktiviert werden soll. Aus sicherheitstechnischen Gründen ist die Einrichtung der TLS-Verschlüsselung zu empfehlen. Die Zeile ist für die Konfiguration des TLS Ports vorgesehen. So ist zum Beispiel bei „smtp.web.de“, „smtp.1und1.de“ oder „gmail.com“ der Port 587 anzugeben. Define the events when the recipients should receive an automated e-mail. You can select one or more events. Example: No. 4 informs during failures. You would be informed about failures AND when the device is blocked when you enter 46 (4 and 6). SMTP Server: We recommend to enter an IP address here. If you only know the server name, you can enter it here. The DNS server is required if you enter the server name here! TLS (SSL): TLS or SSL are hybrid encryption protocols for a safe data communication in the internet. “1” will activate this feature, “0” will deactivate it. We recommend to use the TLS encryption for reasons of safety. TLS port: You can configure the TLS port here. The providers “smtp.web.de”, “smtp.1und1.de” or “gmail.com” are using the port 587, as an example. CPS 220/48.1/SV Montage- und Betriebsanleitung Aktuelle Sender E-Mail Adresse: Hier ist die Senderadresse hinterlegt. Aktuelle Empfänger E-Mail Adresse: An dieser Position können bis zu zwei E-Mail Empfänger benannt werden. Beide Adressen dürfen 99 Zeichen nicht überschreiten. Es ist darauf zu achten, dass die Adressen durch ein Semikolon ohne Leerzeichen getrennt werden. Aktueller POP3 Hier ist die IP Adresse des Servers bevorServer: zugt anzugeben. Sofern diese nicht zur Verfügung steht ist der Servername (zum Beispiel smtp. web.de) einzutragen. Aktueller Login Benutzername: Hier ist ihr Benutzername anzugeben. Neues Login Passwort: Das frei wählbare Login Passwort darf maximal aus 20 Zeichen bestehen. Um Komplikationen bei Speicherungsprozessen zu vermeiden, empfehlen wir auf die Verwendung von Sonderzeichen zu verzichten. CPS 220/48.1/SV Mounting and Operating Instructions E-Mail sender adress: Enter the e-mail address of the sender here. E-Mail recipient Adress: You can enter up to two recipients here. Both addresses can consist of max. 99 signs. Please separate the addresses by a semicolon, without spaces. POP3 Server: We recommend to enter the IP address of the server here. You can also enter the server name (e.g. smtp.web.de), if the IP address is unknown. Login user name: Enter the login user name here. Login Password: Enter the login password here (max. 20 signs). We recommend to do not use local special characters. IP address (ad- The entry of the IP address is only needitional) DNS ded if DHCP is not activated. This means server: the “DNS server” is only needed if no IP address was entered at SMTP and/or POP. IP-Adr. (zusätz- Die Angabe der entsprechenden IPlicher) DNS Adresse ist nur notwendig, sofern DHCP Server: nicht aktiviert ist. D.h., der „DNS Server“ wird nur benötigt, sofern keine IP-Adressen bei SMTP und/oder POP verwendet werden. 101 CPS 220/48.1/SV Montage- und Betriebsanleitung CPS 220/48.1/SV Mounting and Operating Instructions 10. Prüfungen 10. Tests Das Notlichtgerät ist nach den national gültigen Richtlinien und Vorschriften zu prüfen. Die folgenden Angaben erheben keinen Wert auf Vollständigkeit. 10.1. Erstprüfungen Nach der Errichtung und Installation des Notlichtgeräts ist diese nach folgenden Normen zu prüfen: •Überprüfung der lichttechnischen Werte, EN 1838, DIN 5035-6 •EN 50172, VDE 0100-600, VDE 0100-560, VDE 0100-718, VDE 0108-100 The emergency light system must be tested in accordance with the applicable national guidelines and regulations. The following specifications do not lay claim to complete accuracy. 10.1. Initial tests Once the central battery system has been set up and installed, it must be tested in accordance with the following standards: •Photometric values test, EN 1838, DIN 5035-6 •EN 50172, VDE 0100-600, VDE 0100-560, VDE 0100-718, VDE 0108-100 10.2. Wiederkehrende Prüfungen der elektrischen Anlagen für Sicherheitszwecke 10.2. Recurring safety tests on electrical systems Die wiederkehrenden Prüfungen sind entsprechend der national gültigen Vorschriften durchzuführen. Die entsprechenden Kontrollen sind mit Datum der Prüfung und dem Ergebnis im Prüfbuch des Notlichtgeräts zu protokollieren. The recurring tests must be performed in accordance with the applicable national guidelines. The corresponding tests must be recorded in the emergency light system log book with the date and result of the test. Eine automatische Prüfeinrichtung muss der EN 62034 entsprechen. An automatic test facility must meet the requirements specified by the EN 62034 standard. Da nach einem Betriebsdauertest die Batterie bis zur erneuten Wiederaufladung nicht Ihre volle Leistungskapazität besitzt und die Gefahr eines Ausfall der Stromversorgung besteht, sind Prüfungen von längerer Dauer nur zu Zeiten mit geringem Riskio durchzuführen bzw. entsprechende sichernde Maßnahmen zu treffen, bis die Aufladung der Batterie abgeschlossen ist. After the battery duration test, the battery is not at full capacity until it is recharged and there is a risk of power failure, which is why longer tests must only be carried out at times of low risk and must comply with corresponding safety measures until the battery is fully charged. 10.2.1. Tägliche Prüfungen 10.2.1. Daily tests Durch eine tägliche Sichtprüfung der Geräteanzeigen muss der betriebsbereite Zustand des Systems sichergestellt werden. Eine direkte Überprüfung des Notlichtgeräts muss nicht erfolgen, wenn während der betriebserforderlichen Zeit der Zustand an eine ständig überwachte Stelle gemeldet wird (z.B. durch ein Fernmeldetableau (MTB)). Dabei sind folgende Zustände zu signalisieren: •Anlage betriebsbereit •Anlage im Notlichtbetrieb •Anlage gestört A visual inspection of the test device displays must be carried out daily to ensure that the system is ready for operation. It is not necessary to perform a direct test on the emergency light system if the status check is carried out at a constantly monitored point during the time required for operation (e.g.: remote mimic panel). In this case, the following states must be indicated: •System ready for operation •System in emergency lighting mode •System failure 10.2.2. Wöchentliche Prüfung 10.2.2. Weekly test Eine wöchentliche Umschaltung auf die Stromquelle für Sicherheitszwecke hat zu erfolgen und die Funktion der Leuchten für die Sicherheitsbeleuchtung ist zu prüfen. A changeover to the power source must be carried out every week for safety purposes and the function of the safety lighting must also be checked. Bei Einsatz einer automatischen Prüfeinrichtung muss diese der EN 62034 entsprechen. If an automatic test facility is used, this must meet the requirements specified by the EN 62034 standard. Zur Überprüfung der Umschaltung und Leuchten am Notlichtgerät CPS 220 / 48.1 führen Sie bitte einen Funktionstest per Fernüberwachung oder am Steuerteil aus In order to check the changeover and lights on the CPS 220/48.1 emergency light system, please perform a function test via remote monitoring or on the controller. siehe 8.6.1.1. Funktionstest (FT) starten - Seite 73 see 8.6.1.1. Start function test (FT) on page 73 102 102 CPS 220/48.1/SV Montage- und Betriebsanleitung CPS 220/48.1/SV Mounting and Operating Instructions 10.2.3. Monatliche Prüfungen 10.2.3. Monthly tests In einer Funktionsprüfung muss der Ausfall der Versorgung der allgemeinen Beleuchtung simuliert werden. Alle Leuchten der Sicherheitsbeleuchtung sind während der Funktionsprüfung im Batteriebetrieb zu betreiben und jede Leuchte ist auf korrekte Funktion zu überprüfen. Nach erfolgter Prüfung ist die Versorgung der allgemeinen Beleuchtung wieder herzustellen. A function check must simulate the failure of the general lighting supply. During the function check, it must be possible to operate all safety lights in battery mode and each light must be checked to ensure that it functions correctly. After the check is carried out, the general lighting supply must be re-established. Der korrekte Betrieb der Überwachungseinrichtung für Notlichtgerät ist zu prüfen. The monitoring equipment for the emergency light systems must be checked to ensure that it operates correctly. 10.2.4. Six-monthly tests 10.2.4. Halbjährliche Prüfungen Function test for insulation monitoring systems. Funktionstest der Isolationsüberwachungssysteme. For details on checking the insulation test equipment, Zur Überprüfung der Isolationstesteinrichtung see 8.6.1.2. Testing the isolation test equipment (ISO test) on page 73 . siehe 8.6.1.2. Isolationstesteinrichtung prüfen (ISO Test) Seite 73 10.2.5. Jährliche Prüfungen Die jährliche Überprüfung darf nicht automatisch ausgelöst werden! 10.2.5. Annual tests The annual test must not be triggered automatically! Neben den Prüfungen unter siehe 10.2.3. Monatliche Prüfungen - Seite 103 sind jährlich noch folgende Prüfungen durchzuführen: In addition to the tests specified in Section see 10.2.3. Monthly tests on page 103, the following checks must also performed every year: Eine Überprüfung der Bemessungsbetriebsdauer (Betriebsdauertest) hat jährlich zu erfolgen. Dabei muss jede Leuchte auf die erforderliche Betriebsdauer geprüft werden und es muss sichergestellt sein, dass diese vorhanden und sauber ist, sowie funktionstüchtig. A test to determine the battery‘s service life (battery duration test) must be carried out every year. As part of this test, every light must be tested to establish the required battery duration and to ensure the lights are present, clean and fully functional. Die Versorgung der allgemeinen Beleuchtung muss wieder hergestellt werden und die Ladeeinrichtung ist auf einwandfreie Funktion zu überprüfen. The general lighting supply must be re-established and the charging equipment checked to ensure it is working correctly. Die erforderliche Prüfung (Betriebsdauertest) kann per Fernüberwachung oder am Steuerteil erfolgen The required test (battery duration test) can be carried out via remote monitoring or on the controller siehe 8.6.1.3. Betriebsdauertest (BT Test) - Seite 74 see 8.6.1.3. Battery duration test (DT) on page 74 10.2.6. 3-jährige Prüfungen 10.2.6. Three-year checks Spätestens alle 3 Jahren muss eine Messung der Beleuchtungsstärke der Sicherheitsbeleuchtung nach der EN 1838 erfolgen. The illumination level of the safety lighting must be remeasured no later than every three years in accordance with EN 1838. 103 CPS 220/48.1/SV Montage- und Betriebsanleitung CPS 220/48.1/SV Mounting and Operating Instructions 10.3. Batterieinspektion und –überwachung 10.3. Battery inspection and monitoring. Die Batterien und Betriebsgeräte sind, gemäß EN 50272-2, regelmäßig auf einwandfreie Funktion zu überprüfen. The batteries and operating devices must be checked regularly in accordance with EN 50272-2 to ensure they function correctly. In Übereinstimmung mit den Anforderungen der Hersteller ist bei einer Inspektion Folgendes zu überprüfen: •Spannungseinstellung des Ladegerätes •Spannungen der einzelnen Batterieblöcke, sowie der gesamten Batterie •Elektrolytdichte und –stand (wenn anwendbar) •Sauberkeit und Dichtigkeit •Fester Sitz der Verbinder •Lüftung •Stopfen oder Ventile •Batterietemperatur Defekte Batterieblöcke sind unverzüglich auszutauschen! Abweichende oder spezielle Inspektions- und Überwachungspunkte, sowie deren zeitliche Abstände sind der Bedienungsanleitung des jeweiligen Batterieherstellers zu entnehmen. 10.4. Protokolle zu wiederkehrenden Prüfungen Prüfprotokolle Die wiederkehrenden Prüfungen und Ergebnisse sind in Prüfbüchern zu dokumentieren. Die Dokumentationen sind mindestens 4 Jahre aufzubewahren. Batterie- Prüfprotokolle Der schriftliche Nachweis über die jährliche Wartung muss minimal enthalten: •Raumtemperatur •Ladespannung / -strom •Entladestrom •Spannung der Batterieblöcke, sowie der gesamten Batterie … bei Belastungsbeginn und -ende Der schriftliche Nachweis über die jährliche Wartung ist die Grundlage für mögliche Garantieansprüche! 104 104 In compliance with manufacturer requirements, the following must be checked during an inspection: •Voltage setting on the charger •Voltage on the individual battery blocks, as well as the battery as a whole •Electrolyte density and status (if applicable) •Cleanliness and tightness •Connectors firmly seated •Ventilation •Plugs or valves •Battery temperature Defective battery blocks must be replaced immediately! Alternative or special inspection and monitoring points, as well as their time intervals, can be found in the operating instructions of the battery manufacturer concerned. 10.4. Protocols for repeat tests Test protocols Repeat tests and results must be recorded in logbooks. The documentation must be retained for a minimum of 4 years. Battery test protocol The documentary evidence of the annual maintenance must contain at least: •Room temperature •Charging voltage/current •Discharging current •Voltage for the battery blocks and for the battery as a whole … at the start and end of charging Documentary evidence of annual maintenance is the basis for any warranty claims! CPS 220/48.1/SV Montage- und Betriebsanleitung Anhang CPS 220/48.1/SV Mounting and Operating Instructions Appendix A. Dokumentation A. Documentation Die beiliegende Dokumentations-CD enthält von den Standard CPS 220 / 48.1-Geräten folgende Informationen: •Materiallisten •Gehäuseansichten •Stromlaufpläne •Klemmenpläne •Kopiervorlagen The enclosed documentation CD contains the following information on the standard CPS 220/48.1 devices: •Material lists •Housing views •Wiring diagrams •Terminal diagrams •Templates In folgenden Dateiformaten sind die Informationen verfügbar: •pdf •dxf •dwg The information is available in the following file formats •pdf •dxf •dwg •WSCAD •WSCAD B. Leitungslängen B. Wire lengths Die folgenden maximalen Leitungslängen dürfen nicht überschritten werden: The following maximum wire lengths must not be exceeded: 24V Stromschleife 0,5mm² max. 2000m 24 V current loop 0.5 mm² Max. 2000 m RTG BUS 0,5mm² max. 500m RTG BUS 0.5 mm² Max. 500 m Gerätebus IB1, IB2 0,5mm² max. 500m Device bus IB1, IB2 0.5 mm² Max. 500 m Die Angabe der Leitungsquerschnitte bezieht sich auf die jeweilige Mindestanforderung der zu verwendenden Leitung! The named cross-sections refer to the respective minimum requirements! Bei Angabe der Leitungslängen handelt es sich um maximale Gesamtlängen. Diese beinhalten alle Leitungsstränge inkl. Stiche The maximum wire length is the total length of one circuit incl. all stubs. 105 CPS 220/48.1/SV Montage- und Betriebsanleitung CPS 220/48.1/SV Mounting and Operating Instructions C. Kundendienst C. Customer Service Bevor Sie den Kundendienst aufgrund einer vorliegenden Störung kontaktieren, überprüfen Sie bitte Folgendes: Before contacting the customer service due to a failure, please check the following: Prüfung auf Leuchtenfehler Check for luminaire failures Betätigen Sie in der Navigationsleiste den Menübutton, es öffnet sich ein Menü verschiedener Anwendungen. Durch aktivieren der Schaltflächen „Info“ „Störungsinfo“ gelangen Sie in den entsprechenden Informationsbereich. Dort werden aktuell vorliegende Störungen wie zum Beispiel „Leuchtenstörungen“ detailliert aufgeführt. A menu with several applications will be opened, if you click on the menu button in the navigation bar. You can enter the information area by clicking on the buttons “Info” “Failure information”. All existing failures, like luminaire failures, are shown here. Funktionstest starten: 106 106 Start function test: CPS 220/48.1/SV Montage- und Betriebsanleitung CPS 220/48.1/SV Mounting and Operating Instructions ODER: OR: Liegen Leuchtenstörungen vor, so sind die Leuchtmittel gegen neue zu ersetzen und ein anschließender Funktionstest ist auszuführen. If luminaire failures are present, the illuminants must be replaced and a function test carried out. Isolationsfehler Bei einem Isolationsfehler sind die Endstromkreise zu prüfen siehe 8.6.1.2. Isolationstesteinrichtung prüfen (ISO Test) - Seite 73 Störung noch vorhanden? Im Reparaturfall oder wenn die Störungen immer noch anstehen, so wenden Sie sich bitte an Ihre zuständige Vertretung (Die Kontaktdaten Ihrer zuständigen Ver tretung finden Sie unter dem Menüpunkt „Kontakt“ auf www.inotec-licht.de). Bitte geben die folgenden Informationen an: •Projektname •Gerätetyp und Gerätennummer (KA…) vom Typenschild •Eine kurze Beschreibung der Störung •Klartextinformation im Steuerteil Wir raten zum Abschluss eines Inspektionsvertrages. Gerne erstellen wir Ihnen hierzu ein kostenloses, unverbindliches Angebot. Insulation error In event of an insulation error, the final circuits must be checked. see 8.6.1.2. Testing the isolation test equipment (ISO test) on page 73 Failure still present? In case of repair or if the failures persist, please contact your agent and provide the following information: •Project name •Device type and device number (KA…) on the type plate •A brief description of the failure •Plain text information in the controller We recommend the agreement of an inspection contract. We can provide you with a free quotation with no obligation. Software version Softwareversion D. Software version These instructions were produced based on the following software versions: CPS TFT:V3.2.1/1.0.0 D. Softwarestand Diese Anleitung wurde auf Basis der folgenden Softwarestände erstellt: CPS TFT:V3.2.1/1.0.0 107 CPS 220/48.1/SV Montage- und Betriebsanleitung CPS 220/48.1/SV Mounting and Operating Instructions Index Index A Anschluss 20 B Batterie 55,58,64,65,68,74,76 Batterieinspektion 104 Batterieschränke 21,22,23 Batterietemperatur 65 Batterieüberwachung 104 BCS 21,54,55,64,65,66,68,75,76,78,79 BCS Prüfbuch 54,65,78 Bedienungsanleitung 8,20,21,23,50,51,52,91,104 Betriebsdauertest 53,65,74,88 Blockieren 54,75 Blockierung 51 BUS 9,30,33,38,42,44,48,50, 55,59,60,68,70,71,105 BUS-Ebene 59 C Combobox CPS 220 CPS-MTB CPUS 220 CPUSB 220 68 20,25,29,48,95,102,105 48 9–11,20,29 15,20 D Datum Dokumentation DPÜ DPÜ/B Dreiphasenüberwachung Drucken 54,72,77,86,102 21,23,104,105 41,46 32,38,39,42,44,55,67,71 Siehe DPÜ oder DPÜ/B 96 E Einschalten Einzelleuchtenerkennung Einzelüberwachung Endstromkreis Entsorgung 51 88 89 55,60,61,63 7 F Favoriten 52,56 Fehler 7,106 Fernschalter 67,68,75 Fernschalter FS + / FS - 31 Filter 56 Freigeben 54,75 FTP 79 Funktionsschaltflächen 57,58 Funktionstest 7,52,53,54,56,73,88,95,102,103,106 Funktionstest starten 95,106 G Gewährleistung H Handrückschaltung Hilfetexte 7 53,54,75,76,85,95 56 A Assembly B Battery Battery cabinets Battery duration test Battery inspection Battery monitoring Battery temperature BCS BCS logbook Blocking BUS 21,104 21,22,23 33,34,53,54,74,88,95,102,103 104 104 65 21,54,55,64,65,66,68,75,76,78,79 54,65,76,78,79 51 9,30,33,38,42,44,48,50,55, 59,60,68,70,71,105 C Capacity 20,41,45,50,52,64,65,66,74,79,102 Changeover devices 55,59,60 Charger 11,12,51 Charging 9,30,33,34,54,68,75,76,90,103,104 Circuit monitoring 9,88 Combobox 68 Commissioning 50 Components 7,20,25,29 Configuration 95 Connection 20 Controller 11,12,13,54 CPS 220 20,25,29,48,95,102,105 CPS-MTB 48 CPUS 220 9–11,20,29 CPUSB 220 15,20 Current consumption 62,89 Customer service 106 D Date Deep discharge protection Destination Disposal Documentation DPÜ DPÜ/B E Energising F Failure Failure info Failure printout Fan control Favourites Filter Final circuit FTP Function buttons Function test H Help texts 108 108 20 102 53,54 62,63,68,70,85 7 21,23,104,105 41,46 32,38,39,42,44,55,67,71 51 7,106 54,77 96 54,90 52 56 55,61,62 79 57,58 7,95,102,103,106 56 CPS 220/48.1/SV Montage- und Betriebsanleitung I IB1 IB2 Inbetriebnahme Info Informationsbereich INOWEB Inspektion Isolationsmessung Isolationstesteinrichtung ISO Test K Kapazität Komponenten Konfiguration Kundendienst 59,70 59,70,71 8,50 56,72,76 57,58 10,95 21,104,107 50 73 73 64,65 7,20,29,52,55,57,67 95 106 L Ladeteil 11,12,51 Ladung 54,68,75,76 Lagerung 8,20 Learn-Mode 54,84,88 LED-Anzeige 27,41,47 Leitungslängen 105 Leuchten 52,55,56,57,58,59,61,62,63,73,89 Leuchtenschaltfläche 59,63 Leuchtenstörung 73 Lichtschalterabfragemodul Siehe LSA-3 oder LSA-8 LOMO 46 LSA 3 37,55,69,70 LSA 8.1 37,38,39,40 Lüftersteuerung 54,84,90 M Menü MTB N Navigationsleiste Netzausfall UV Netzwerk Netzwerkeinstellungen 52,56,58,59,60,61,62,63,65, 67,68,69,70,71,72,75,77,79, 84,85,87,88 47,48,102 57,58,61,72 32,41 54,79,85,86 77,85 P PAS 49 Passwort 54,84,95 Phasenauswahlschaltung 49 Produktbeschreibung 9,52 Prüfbuch 52,54,65,66,72,73,76,77,78,102 Prüfungen 102 R Reparaturen RIF RIF 5 RTG 8 55,67,68,90 29,33,34,47 48,105 CPS 220/48.1/SV Mounting and Operating Instructions I IB1 IB2 Individual luminaire monitoring Info Information display INOWEB Inspection Insulation measuring ISO Test L Layout Learn-Mode LEDs 3 Liability Logbook LOMO LSA 3 LSA 8.1 Luminaire button Luminaire failure 59,70 59,70,71 9,88 56,72,76 57,58 10,95 21,104,107 50 73 11 54,84,88 27,41,47 7 102 46 37,55,69,70 37,38,39,40 59,63 48,73 M Maintenance 8,104 Manual reset 53,95 Menu 35,42,44,52,53,56,57,58,59,60,61, 62,63,64,65,66,67,68,69,70,71,72, 75,76,77,79,81,83,84,85,87,88,91,92, 94,97,99,100,106 Module slot number 60 MTB 47,48,102 N Navigation bar Network Network settings O Operating instructions P PAS Password Phase selector switch Print Product description R Release Remote switch Repairs RIF RIF 5 RTG 58 54,85,92 77,84,92 8 49 95 49 96 9,52 54,75 31,35,55,67,75 8 55,67,68,90 29,33,34,47 48,105 109 CPS 220/48.1/SV Montage- und Betriebsanleitung S Scrollen Sicherheitshinweise SKÜ SL+/SL- SLÜ Softwarestand Software Update Softwareversion Sprache Statusanzeige Steckplatznummer Steuerteil Störung drucken Störungsinfo Stromaufnahme Stromkreiseinschübe Stromkreisüberwachung Stromschleife SV Systemaufbau T Technische Daten Temperaturfühler Testeinstellungen Tests Tiefentladeschutz U Uhrzeit Unterstation USB W Wartung 110 110 56,72,77,94 8 88,89 31 29,55,67 52,58,94 79 107 54,88 57,58,71,73,74,75 60 11,12,13 96 54,77 62,89 55,59,60 88,89 55,67,68 88,89 24 16–21,32,34,37,40,41,45,46,47,48,49 68 54,84,88 102 53,54,74,75,76 52,58,77,84,86,87 51 9,52,54,56,72,79,81,82,83 8,104 CPS 220/48.1/SV Mounting and Operating Instructions S Safety instructions Scroll Shunt SKÜ SL+/SL- SLÜ Software Update Software version Start function test Status display Storage Sub-db failure Sub station SV System layout System structure 8 56,94 64,66 88,89 31 29,55,67 79 35,52,58,94,107 95,106 57,58 8,20,79 32 14,25,28,29,51 88,89 11–20 24 T Technical data Temperatur switch Terminals Test Time 16–22,32,37,40,41,45,46,47,48,50 68 27,29,30,31,33,41,49 56,72,73,74 8,10,21,42,52,53,54,58,74,77, 84,85,86,87,88,90,98,102,104 U USB W Warranty Wire lengths 9,52,54,56,72,79,81,82,83 7 105 CPS 220/48.1/SV Montage- und Betriebsanleitung Glossar Batteriemanagmentsystem Erfassung und Protokollierung der Batterieblockspannung und -temperatur mittels BCS-Sensor. BCS Batteriemanagmentsystem BCS-Sensor Modul zur Erfassung von Blockspannung und -temperatur Batteriemanagmentsystem Bereitschaftslicht Notleuchte/Stromkreis ist im Netzbetrieb ausgeschaltet und wird bei Notbetrieb eingeschaltet. Betriebsdauertest Automatisch einstellbarer, aber mindestens jährlich manuell auszulösender Test, um zu prüfen, ob die Batterie die vorgegebene Nennbetriebsdauer (in der Regel 1h, 3h, oder 8h) erreicht. Abschaltung erfolgt automatisch bei Erkennung des Tiefentladeschutzes der Batterie. BIF Businterface-Modul zum Anschluss externer Gerätekomponenten an CPS 220 und CPS 220 / 48.1, wie z.B. CPUSB, LSA8, DPÜ/B Blockierung Dient zur bedarfsweisen Ausschaltung der Verbraucher im Normal-/Netzbetrieb. Einstellung der Funktion im Steuerteil des Notlichtgerätes: 1. Fernschalter blockiert Dauerlicht (DL): Verbraucher werden ausgeschaltet, aber im Notlichtfall automatisch eingeschaltet 2. Fernschalter blockiert Notlicht (NL) und Dauerlicht (DL): Verbraucher bleiben auch im Notlichtfall ausgeschaltet (vorschriftenkonforme Einstellung). Kein Freischalten im Sinne der 5 Sicherheitsregeln! Breadcrumb Breadcrumb Navigation ist eine Navigationsleiste, die sich um jedes zusätzlich aufgerufene Menü, in dem jeweiligen Symbol erweitert. Bei Breadcrumbs handelt es sich um Navigationselemente, die den Pfad zum aktuellen Element (Ebenen) zeigen. Eine Brotkrumennavigation gestaltet die Orientierung innerhalb tief verzweigter Elementbäume übersichtlicher, indem sie zu vorher besuchten, übergeordneten oder themenverwandten Elementen anbieten. Controller-Funktion Überwachung von Unterstationen am Steuerteil des Hauptgerätes mittels des RTG-BUS CPS Zentralbatteriegerät mit Ladeeinrichtung und Steuerteil CPUS Unterstation mit eigenem Steuerteil zum Anschluss an ein Zentralbatteriegerät CPS. CPS 220/48.1/SV Mounting and Operating Instructions Battery control system Monitoring and logging of battery block voltage(s) and -temptature(s) measured by BCS-sensor(s) BCS Battery control system BCS-Sensor Voltage- / temperature- measurement device BCS Battery duration test Test which can be scheduled to be performed automatically, but must be activated manually at least once a year, to check whether the battery has the defined rated operating time (generally 1h, 3h, or 8h). Disconnection occurs automatically when the battery deep discharge protection is detected. BIF Bus interface module to connect external device components to CPS 220 and CPS 220 / 48.1, e.g. CPUSB, LSA8, DPÜ/B Blocking Is used to switch off the consumer unit as required during normal/mains operation. Setting the function in the emergency lighting device controller: 1. Remote switch blocks maintained lighting (DL): consumer units are switched off, but are automatically switched on should emergency lighting be required 2. Remote switch blocks emergency lighting (NL) and maintained lighting (DL): consumer units remain switched off even if emergency lighting is required (setting compliant with regulations). No disconnection in accordance with the 5 safety regulations! Breadcrumb A breadcrumb navigation is a navigation bar which is dynamically growing when the user navigates deeper in the structure of the application by adding the selected element after the current. just like dropping breadcrumbs to find the way back. The breadcrumb shows the current state and the parent elements to easily navigate back to previous menus and dialogs. It helps the user to navigate through complex navigation structures by showing the full path of the element. Circuit Circuit where the emergency luminaires are connected to the emergency lighting device. Depending on the device type there can be different numbers and types of circuits. The maximum number of luminaires that can be connected is also regulated by the relevant national guidelines. Circuit monitoring Monitoring of all connected luminaires in a circuit using power comparison measurement. No clear localisation of the failure. 111 CPS 220/48.1/SV Montage- und Betriebsanleitung CPUSB BUS-Unterstation ohne eigenes Steuerteil zum Betrieb am Steuerteil einer CPS oder CPUS. Dauerlicht Eine Notleuchte/Stromkreis im Zustand Dauerlicht ist im Netz- und Notbetrieb eingeschaltet. D.E.R. Dynamisches Fluchtwegsystem. In Kombination mit einer Brandmeldeanlage werden die Fluchtwege dynamisch den Gegebenheiten angepasst. Rettungszeichen werden mit LED-Pfeilen entsprechend geschaltet. DPÜ Dreiphasenüberwachung DPÜ/B Dreiphasenüberwachung mit integriertem Busanschluss an den Gerätebus des Notlichtgerätes. Dreiphasenüberwachung Modul zur Spannungsüberwachung der drei Phasen (L1, L2, L3, N) von Unterverteilern/Beleuchtungsstromkreisen der Allgemeinbeleuchtung. Bei Ausfall einer der 3 angeschlossenen Phasen werden alle Verbraucher eingeschaltet. Einzelleuchtenüberwachung Überwachung und Statusmeldung jeder einzelnen Notleuchte im Endstromkreis. Adressierung jeder einzelnen Notleuchte notwendig. Endstromkreis Stromkreis an welchem die Notleuchten an das Notlichtgerät angeschlossen werden. Je Gerätetyp unterschiedliche Anzahl und Typen von Endstromkreisen möglich. Die Anzahl der maximal anschließbaren Leuchten wird auch durch die national gültigen Vorschriften geregelt. Fernschalter Externer Schalter (z.B. Schlüsselschalter am Meldetableau) zur Blockierung der Verbraucherstromkreise. Wird an die Klemmen FS+/FS- angeschlossen. FS+/FS Fernschalter, Schleifenüberwachung Funktionstest Überprüfung der Funktion des Notlichtgerätes und der Verbraucher für den Notlichtfall im DC-Betrieb. Geschaltetes Dauerlicht Betriebsart für Endstromkreise oder Leuchten im Endstromkreis, welche über LSA 3, LSA 8 oder DPÜ/B bei Netzbetrieb mit der Allgemeinbeleuchtung geschaltet werden. Handrückschaltung Funktion, wo nach einem Netzausfall alle angeschlossenen Verbraucher eingeschaltet bleiben, bis eine manuelle Rückschaltung am Gerät erfolgt. Dies gewährleistet, dass erst bei vorhandener und ausreichender Allgemeinbeleuchtung in betrieblich verdunkelten Räumen (z.B. Theater, Kino) zurückgeschaltet wird. 112 112 CPS 220/48.1/SV Mounting and Operating Instructions Circuit separating module (SKW) Power supply for the circuit comes from the local sub-distribution board during standard operation. Is used in tenant areas for separate consumption measurement. Controller-Function Monitoring of substations on the main device controller using the RTG-BUS CPS Central battery device with charging system and controller CPUS Substation with own controller for connecting to a central battery device CPS. CPUSB BUS substation without own controller for operation with a CPS or CPUS controller. Current loop Series connection of volt-free contacts from three-phase monitors, undervoltage monitors and/or auxiliary contacts for monitoring general lighting sub-distribution boards and their lighting circuits. ( SL+/ SL-). Deep discharge protection Device that interrupts the supply from the battery to connected consumer units when a certain battery voltage is reached to avoid deep discharge of the battery. D.E.R. Dynamic escape route system. The escape routes are dynamically altered to suit the conditions in conjunction with a fire alarm system. Emergency exit luminaires are connected with LED arrows as appropriate. Destination text Programmable device, location or luminaire designation that is displayed, for example, when a failure is triggered. DPÜ Three-phase-monitor DPÜ/B Three-phase monitor with integrated bus connection to the device bus of the emergency lighting device. Emergency lighting delay When activated, all connected emergency luminaires remain switched on for the scheduled amount of time, if the emergency lighting device switches back to standard operation following a mains failure or sub-db failure. Emergency lighting mode Failure of the main supply for the emergency lighting device, switchover to DC operation, all connected consumer units are switched on. FS+/FS Remote switch, Loop monitoring Function test Checking the function of the emergency lighting device and the consumer unit in case emergency lighting should be needed during DC operation. CPS 220/48.1/SV Montage- und Betriebsanleitung IB Interner Gerätebus zum Anschluss von INOTEC Modulen (Stromkreise, LSA, DPÜ/B, etc.) INOLAN Umsetzer von RTG auf Ethernet zur Überwachung der Notlichtgeräte mittels INOMASTER oder SVPC. INOPRINT Adapter für CENTRONICS-Schnittstellen an INOTEC-Steuerteilen zum Ausdrucken anlagenrelevanter Daten. INOSTICK Adapter für PS/2-Schnittstellen an INOTECSteuerteilen zum Ein- und Auslesen der Anlagenkonfiguration, Ausdrucken anlagenrelevanter Daten sowie Einspielen von Softwareupdates. INOWEB Ethernetmodul mit integriertem Webserver. Ermöglicht den Zugriff auf den Anlagenstatus per Webbrowser. Isolationsfehler Isolationsfehler „+“: Kurzschluss zwischen Pluspol der Batterie und Schutzleiter Isolationsfehler „-“: Kurzschluss zwischen Minuspol der Batterie und Schutzleiter Isolationsfehler können extern oder geräteintern durch alle Komponenten verursacht werden, die mit der Batterie verbunden sind. (z.B. Leuchten im Endstromkreis, LSA 8 intern/extern, DPÜ/B, etc.). ISO-Test Überprüfung der geräteinternen Messeinrichtung zur Isolationsüberwachung des Notlichtgerätes und der Endstromkreise. Ersetzt keine Isolationsmessung vor der Inbetriebnahme gem. DIN VDE 0100! Joker Patentierte Schaltung zum gleichzeitigen Betrieb von Bereitschafts- und Dauerlichtleuchten in einem Endstromkreis. KTY Temperatursensor zur temperaturgeführten Ladung der Batterien. Learn-Mode Manuell zu startender Modus, um die Stromreferenzwerte für die Endstromkreise mit Stromkreisüberwachung zu ermitteln. Lichtschalterabfragemodul Modul zum Schalten von Endstromkreisen oder Leuchten in Endstromkreisen über Schalteingänge am Modul. LOMO Loop-Monitoring-Modul. Modul zur sicheren Drahtbruch- und Kurzschlussüberwachung einzelner, stichförmig verdrahteter Stromschleifen mittels zusätzlicher Zener-Diode. LSA 3 Lichtschalterabfragemodul mit 3 Eingangskanälen LSA 8 Lichtschalterabfragemodul mit 8 Eingangskanälen Meldetableau Externes Gerät zur zentralen Anzeige der anlagenrelevanten Betriebszustände „Betrieb“, „Batteriebetrieb“, „Störung“. MTB Meldetableau NEA Netzersatzanlage CPS 220/48.1/SV Mounting and Operating Instructions IB Internal device bus for connecting INOTEC modules (circuits, LSA, DPÜ/B, etc.) Individual lamp monitoring Monitors and reports status of each individual emergency luminaire in the circuit. Each individual emergency luminaire requires an address. INOLAN Interface between RTG and Ethernet for monitoring the emergency lighting devices using INOMASTER or SVPC. INOPRINT Adapter for CENTRONICS interfaces on INOTEC controllers, used for printing out data relevant to systems. INOSTICK Adapter for PS/2 interfaces on INOTEC controllers for importing and exporting system configurations, printing out data relevant to the system and importing software updates. INOWEB Ethernet module with integrated web server. Enables access to the system status via a web browser. Insulation (ISO) failure “ISO” failure „+“: short circuit between positive battery terminal and protective earth conductor “ISO” failure „-“: short circuit between negative battery terminal and protective earth conductor Insulation failures can be caused externally or within a device by all components that are connected to the battery. (e.g. luminaires in circuit, internal/external LSA 8, DPÜ/B, etc.). ISO-Test Checking the measuring equipment inside the device for isolation monitoring of the emergency lighting device and the circuit. Not replacing insulation measuring before commissioning in accordance with DIN VDe 0100! Joker Patented circuit for concurrent operation of non-maintained luminaires and maintained luminaires in a circuit. KTY Temperature sensor for temperature-controlled charging of batteries. Learn-Mode Manually activated mode used to determine the current reference values for the circuits using circuit monitoring. Light sequence switching module Module for switching circuits or luminaires in circuits using input switches on the module. Logbook Documentation of all events and messages relating to the emergency lighting device. Can be managed electronically or manually. LOMO Loop Monitoring Module. Module for safe open circuit and short circuit monitoring of individual, track cabled current loops using additional Zener diodes. 113 CPS 220/48.1/SV Montage- und Betriebsanleitung Nennbetriebsdauer Die laut den gültigen Vorschriften notwendige Betriebsdauer des Notlichtgerätes im Notbetrieb. Ist abhängig von der Leistung der angeschlossenen Verbraucher und der Batteriekapazität. Netzersatzanlage Im Gegensatz zu batteriegestützter Notbeleuchtung erfolgt die Stromversorgung im Notbetrieb bei Netzersatzanlagen durch einen Generator oder eine zweite Einspeisung durch den Energieversorger. Netzausfall HV Ausfall der netzseitigen Stromversorgung (Hauptverteiler) des Notlichtgerätes, es erfolgt die Umschaltung in den Notlichtbetrieb. Netzausfall UV Ausfall einer per DPÜ überwachten Phase in einer Unterverteilung der Allgemeinbeleuchtung. Da es sich um eine externe Störung handelt, wird dieses nicht als Störung des Notlichtgerätes gemeldet. Notlicht Nachlauf Bei Aktivierung bleiben alle angeschlossenen Notleuchten für die eingestellte Zeit eingeschaltet, wenn das Notlichtgerät nach einem Netzausfall HV oder Netzausfall UV in den Normalbetrieb zurückschaltet. Notlichtbetrieb Ausfall der Haupteinspeisung des Notlichtgerätes, Umschalten auf DC-Betrieb, alle angeschlossenen Verbraucher werden eingeschaltet. PAS Phasenauswahlschaltung. Phasenauswahlschaltung Externes Gerät mit 3-phasigem Netzanschluss zur einphasigen Netzversorgung eines Notlichtgerätes. Beim Ausfall von bis zu 2 Phasen wird automatisch auf eine bzw. die noch aktive Phase umgeschaltet, so dass das Notlichtgerät noch nicht auf Notlicht-/Batteriebetrieb umschalten muss. Prüfbuch Dokumentation aller auftretenden Ereignisse und Meldungen des Notlichtgerätes. Kann elektronisch oder manuell geführt werden. PSU Separates Modul zur Spannungsversorgung. Relaisinterface Potentialfreie Kontakte zur Weiterleitung des Gerätestatus. Die Meldungen Betrieb, Batteriebetrieb und Störung stehen immer zur Verfügung. RIF 5 Relaisinterface Modul mit 3 festen und 2 optionalen belegbaren Kontakten (Gerätetyp abhängig). 114 114 CPS 220/48.1/SV Mounting and Operating Instructions Loop monitoring System for monitoring an SL+/SL- or FS+/FS- for open circuits or short circuits using a Zener diode. Loop monitoring must be activated in the controller. LSA 3 Light sequence switching module with 3 input channels LSA 8 Light sequence switching module with 8 input channels Maintained lighting An emergency luminaire/circuit in maintained lighting mode is switched on during mains and emergency operation. Mains failure Failure of the emergency lighting device mains-side power supply (main distribution board), it triggers switchover to emergency lighting mode. Manual reset Function, where after a power failure, all connected consumer units remain switched on until a manual reset has been carried out on the device. This guarantees that switching back only occurs when general lighting is available and sufficient in rooms that are supposed to have lowered lighting (e.g. theatre, cinema). Mimic panel External device for central display of system-relevant operating statuses „operation“, „battery operation“, „failure“. MTB Mimic panel NEA Secondary supply operator Non maintained lighting Emergency luminaire/circuit is switched off during mains operation and is switched on during emergency operation. PAS Phase selector switch. Phase selector switch External device with three-phase network connection for single-phase mains supply for an emergency lighting device. If up to 2 phases fail, automatic switching to another or the remaining active phase so that the emergency lighting device does not have to switch to emergency lighting/battery operation. PSU Separate module for power supply system. Rated operating time The operating time required in accordance with relevant guidelines for emergency lighting devices in the event of emergency operation. Is dependent on the performance of the connected consumer units and the battery capacity. RelaisinterfaceVolt-free contacts for transferring the device status. The messages Operation, Battery operation and Failure are always available. Remote switch External switch (e.g. key switch on mimic panel) for blocking consumer unit circuits. Is connected to the FS+/FS- terminals. CPS 220/48.1/SV Montage- und Betriebsanleitung RTG-BUS BUS-System von INOTEC zur Überwachung der Notlichtgeräte mittels weiterer INOTEC-Systeme oder Software. Schleifenüberwachung Einrichtung zur Überwachung einer SL+/SL- oder FS+/FS- gegen Drahtbruch und Kurzschluss mittels einer Zener-Diode. Die Schleifenüberwachung muss im Steuerteil aktiviert werden. Shunt Widerstand zur Messung des Batteriestromes. SKW Stromkreisweiche SL+/SL Stromschleife SLÜ Schleifenüberwachung Stromkreisüberwachung Überwachung aller angeschlossenen Leuchten eines Endstromkreises mittels Stromvergleichsmessung. Keine eindeutige Lokalisierung der Störung. Stromkreisweiche Spannungsversorgung des Endstromkreises erfolgt im Normalbetrieb durch den lokalen Unterverteiler. Wird in Mieterbereichen zur getrennten Verbrauchsmessung eingesetzt. Stromschleife Reihenschaltung potentialfreier Kontakte von Dreiphasenüberwachungen, Unterspannungswächtern und/oder Hilfskontakten zur Überwachung von Unterverteilern der Allgemeinbeleuchtung und deren Beleuchtungsstromkreisen. ( SL+/SL-). Temperatur switch Modul welches ab eine Maximaltemperatur die Ladung unterbricht. Tiefentladeschutz Einrichtung, die ab einer bestimmten Batteriespannung die Versorgung der angeschlossenen Verbraucher aus der Batterie unterbricht, um eine Tiefentladung der Batterie zu verhindern. Umschaltzeit Einstellbare Zeit, nach der von AC- auf DC-Betrieb umgeschaltet wird (400ms3000ms). Bei Einsatz von Fremd-EVGs ist unter Umständen eine Anpassung erforderlich. Zener Diode Diode zur Erzeugung einer Referenzspannung bei Überwachung einer Stromschleife oder eines Fernschalters gegen Drahtbruch und Kurzschluss. Zielort Programmierbare Geräte-, Standort- oder Leuchtenbezeichnung, die z.B. beim Abrufen einer Störung angezeigt wird. CPS 220/48.1/SV Mounting and Operating Instructions RTG-BUS BUS system from INOTEC for monitoring the emergency lighting device using other INOTEC systems or software. Secondary supply operater In contrast to battery-backed emergency lighting, power is supplied by a generator or a secondary supply from the energy provider during emergency operation using secondary supply operators. Shunt Resistor for measuring battery current. SKW Circuit separating module SL+/SL Current loop SLÜ Loop monitoring Sub-db failure Failure of a phase monitored by DPÜ in a general lighting sub-distribution board. As it is an external failure it is not reported as an emergency lighting device failure. Switched maintained lighting Operation mode for circuits or luminaires in circuits, which are connected via LSA 3, LSA 8 or DPÜ/B during mains operation with general lighting. Switching times Time which can be set to determine when switching from AC to DC operation occurs (400ms-3000ms). When using external electronic ballasts, an adjustment may be necessary. Temperature switch Module that interrupts the charging upon reaching a maximum temperature. Three-phase monitor Module for monitoring the voltage of the three phases (L1, L2, L3, N) of general lighting sub-distribution boards/lighting circuits. If one of the 3 connected phases fails, all consumer units are switched on. 115 CPS 220/48.1/SV Montage- und Betriebsanleitung CPS 220/48.1/SV Mounting and Operating Instructions INOTEC Sicherheitstechnik GmbH Am Buschgarten 17 D - 59 469 Ense Tel +49 29 38/97 30- 0 Fax +49 29 38/97 30-29 Technische Änderungen vorbehalten! www.inotec-licht.de Subject to technical alterations! [email protected] 116 116 INOTEC Sicherheitstechnik GmbH Am Buschgarten 17 59469 Ense Germany Tel +49 29 38/97 30-0 Fax +49 29 38/97 30-29 [email protected] www.inotec-licht.de 708 196 05/2015 Sicherheitstechnik GmbH