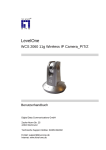
1
Guntermann & Drunck GmbH www.gdsys.de G&D CATVision DE Installation und Bedienung EN Installation and Operation A9100189-2.70 Guntermann & Drunck GmbH Installations- und Bedienungsanleitung CATVision (MC) HINWEISE Achtung UM DAS RISIKO EINES STROMSCHLAGES ZU VERM EIDEN, SOLLTEN DAS GERÄT NICHT ÖFFNEN ODER ABDECKUNGEN ENTFERNEN. IM SERVICEFALL WENDEN SIE SICH BITTE AN UNSERE TECHNIKER. SIE LESEN SIE DIE BEDIENUNGSANLEITUNG SORGFÄLTIG, BEVOR SIE DAS GERÄT IN BETRIEB NEHMEN. BEFOLGEN SIE ALLE WARNUNGEN ODER BEDIENUNGSHINWEISE, DIE SICH AM IN DER BEDIENUNGSANLEITUNG BEFINDEN. GERÄT ODER BEWAHREN SIE DIE BEDIENUNGSANLEITUNG SORGFÄLTIG AUF. SPANNUNGSVERSORGUNG : BETREIBEN SIE DIESES GERÄT NUR MIT DEM MITGELIEFERTEN ODER IN DER BEDIENUNGSANLEITUNG AUFGEFÜHRTEM AC-ADAPTER. BETREIBEN SIE DIESES GERÄT NUR AN EINER GEERDETEN SPANNUNGSQUELLE. SPANNUNGSFREIHEIT: STELLEN SIE VOR INSTALLATIONSARBEITEN SICHER, DAß DAS GERÄT SPANNUNGSFREI IST. ZIEHEN SIE DEN NETZSTECKER ODER DIE SPANNUNGSVERSORGUNG AM GERÄT AB. KABEL: VERWENDEN SIE AUSSCHLIEßLICH VON G&D GELIEFERTE KABEL. BESCHÄDIGUNGEN, DIE AUS DEM EINSATZ VON FREMDKABELN RESULTIEREN, FALLEN NICHT UNTER DIE GEWÄHRLEISTUNGSBESTIMMUNGEN. VERMEIDEN SIE BEI DER VERLEGUNG DER KABEL STOLPERFALLEN. LÜFTUNGSÖFFNUNGEN: LÜFTUNGSÖFFNUNGEN VERHINDERN EINE ÜBERHITZUNG DES GERÄTES. VERDECKEN SIE DIESE NICHT. GARANTIEAUSSCHLUß: G&D ÜBERNIMMT KEINE GARANTIE FÜR GERÄTE, DIE NICHT BESTIMMUNGSGEMÄß EINGESETZT WURDEN. NICHT AUTORISIERT REPARIERT ODER MODIFIZIERT WURDEN. SCHWERE ÄUßERE BESCHÄDIGUNGEN AUFWEISEN, WELCHE NICHT BEI LIEFERUNGSERHALT ANGEZEIGT WURDEN. DURCH FREMDZUBEHÖR BESCHÄDIGT WURDEN. G&D HAFTET NI CHT FÜR FOLGESCHÄDEN JEGLICHER ART, DIE MÖGLICHER WEISE DURCH DEN EINSATZ DER PRODUKTE ENTSTEHEN KÖNNEN. EINSATZBEREICH: DIE GERÄTE SIND AUSG ELEGT FÜR EI NE VERWENDUNG IM INNENBEREICH. VERMEIDEN SIE EXTREME KÄLTE, HITZE ODER FEUCHTIGKEIT. KONFORMITÄT: DAS GERÄT GENÜGT DEN FORDERUNGEN ÜBER DIE NIEDERSPANNUNGSRICHTLINIE 73/23 EWG BZW. 93/68/EWG IN ANLEHNUNG AN EN60950 (2003) UND ENTSPRICHT DEN WESENTLICHEN SCHUTZANFORDERUNGEN DER RECHTSVORSCHRIFTEN ÜBER DIE ELEK TROMAGNETISCHE VERTRÄGLICHKEIT (89/336/EWG) UND DEN NORMEN EN55024 (1998) +A1, A2, EN61000-6-2 (2001), EN61000-3-2 (2000) + A2, EN61000-3-3 (1995) + A1 UND EN55022 KLASSE B (1998+ A1, A2). Seite 2 Guntermann & Drunck GmbH Installations- und Bedienungsanleitung CATVision (MC) Inhaltsverzeichnis CATVision 1 2 3 Beschreibung ....................................................................................................... 6 Lieferumfang ........................................................................................................ 7 Installationsanleitung .......................................................................................... 8 3.1 Installation der Sendeeinheit........................................................................ 8 3.1.1 Videoanschluss am CATVision-MC-CPU .......................................... 9 3.1.2 Optionale Anschlussmöglichkeiten .................................................... 9 3.2 Installation der Empfangseinheit ................................................................ 10 3.2.1 Videoanschluss am CATVision-MC-Con ......................................... 11 3.2.2 Optionale Anschlussmöglichkeiten .................................................. 11 4 Stromversorgung ............................................................................................... 13 4.1 Allgemein ................................................................................................... 13 4.2 Hinweis zum USB-Betrieb.......................................................................... 13 5 Inbetriebnahme .................................................................................................. 14 5.1 Einschalten des CATVision-Systems......................................................... 14 5.2 Systemzustandsinformationen ................................................................... 14 5.2.1 Keyboard/Mouse lokal nicht vorhanden ........................................... 15 5.2.2 Remote Unit nicht vorhanden........................................................... 15 5.2.3 Fehlen der CAT-x-Verbindung ........................................................ 16 5.3 LED Anzeigen ............................................................................................ 17 5.4 IVT – Individuelles Video Tuning................................................................ 19 5.4.1 Berechtigung .................................................................................... 19 5.4.2 Aufruf des IVT-Modus ...................................................................... 20 5.4.2.1 Aufruf über das Function Menü .............................................. 21 5.4.2.2 Aufruf über Keyboard-Kombination ........................................ 21 5.4.3 Hinweise zur Einstellung des IVT..................................................... 21 5.4.4 Einstellung des Video Tuning........................................................... 22 5.4.4.1 Videokanalwechsel................................................................. 23 5.4.4.2 Automatische Einstellung ....................................................... 23 5.4.4.3 Manuelle Einstellung .............................................................. 24 5.4.4.3.1 Festlegung der Videoverstärkung ..................................... 25 5.4.4.3.2 Einstellung der Rauschunterdrückung .............................. 25 5.4.4.3.3 Beseitigung der Fahnenbildung......................................... 26 5.4.4.3.4 Einstellung der Laufzeitkompensation............................... 26 5.4.5 Kopieren der IVT-Einstellungen ....................................................... 27 5.4.6 Getestete Auflösungen..................................................................... 27 5.4.7 Kabelempfehlung ............................................................................. 28 6 Konfiguration ..................................................................................................... 29 6.1 Console Setup............................................................................................ 30 6.1.1 Einstellung des ScreenSaver ........................................................... 30 6.1.2 Einstellung des AutoLogout ............................................................. 31 6.1.3 Vergabe des Console Name ............................................................ 31 6.1.4 Aktivierung der Kanalanzeige „Display“ ........................................... 32 6.1.5 Einstellung der Display Position + Colour ........................................ 32 6.1.6 Einstellung der Menu-Position / - Size ............................................. 33 6.1.7 Einstellung der erweiterten Mouseunterstützung ............................. 33 6.1.8 OSD SyncMod ................................................................................. 34 6.1.9 Keyboard Layout .............................................................................. 34 Seite 3 Guntermann & Drunck GmbH Installations- und Bedienungsanleitung CATVision (MC) 6.2 Config......................................................................................................... 35 6.2.1 IVT.................................................................................................... 36 6.2.2 System Config .................................................................................. 37 6.2.2.1 Definition des ersten Hotkeys................................................. 38 6.2.2.2 Festlegung des Doppel-HotKey ............................................. 38 6.2.2.3 Set System Defaults (Supervisor-Funktion) ........................... 39 6.2.2.4 Remote Video (Dunkelschaltung) .......................................... 39 6.2.2.5 Local Video (Dunkelschaltung) .............................................. 40 6.2.2.6 Permanent Access ................................................................. 40 6.2.2.7 Festlegung der Time-Out-Zeit ................................................ 41 6.2.2.8 Aktivieren des Protected Mode .............................................. 41 6.2.2.9 Keyb. LED flash...................................................................... 42 6.2.2.10 Festlegung des Scancode-Satzes local ................................. 42 6.2.2.11 Festlegung des Scancode-Satzes remote ............................. 42 6.2.2.12 USB Multimedia Keyboard ..................................................... 42 6.2.2.13 USB SUN-Keyboard mode..................................................... 43 6.2.2.14 USB SUN-Keyboard layout .................................................... 43 6.2.2.15 Temperature Warning ............................................................ 43 6.2.2.16 Keyboard Type Local ............................................................. 44 6.2.2.17 Keyboard Type Remote ......................................................... 45 6.2.2.18 Signal type input..................................................................... 45 6.2.2.19 Remote sync .......................................................................... 45 6.2.3 User Account.................................................................................... 46 6.2.3.1 Account enable / disable ........................................................ 47 6.2.3.2 Vergabe des User-Namens.................................................... 47 6.2.3.3 Set Account Defaults.............................................................. 49 6.2.3.4 IVT Access ............................................................................. 49 6.2.3.5 System Config Access ........................................................... 49 6.2.3.6 User Account Access ............................................................. 50 6.2.3.7 Change Password .................................................................. 50 6.3 Mouse Utility............................................................................................... 51 7 Systembedienung .............................................................................................. 53 7.1 Zugriffsmöglichkeiten ................................................................................. 53 7.1.1 Zugriff über OpenAccess ................................................................. 53 7.1.2 Zugriff über definierte User .............................................................. 55 7.1.3 Zugriff als Supervisor ....................................................................... 55 7.2 Automatische Umschaltung ....................................................................... 56 7.3 Manuelle Haltefunktion (Permanent Access) ............................................. 57 7.4 Protected Mode.......................................................................................... 58 7.5 Dunkelschaltung des Monitors ................................................................... 59 7.5.1 Dunkelschaltung des Monitors bei automatischer Umschaltung...... 59 7.5.2 Dunkelschaltung des Monitors bei Permanent Access .................... 59 7.6 Manueller Logout ....................................................................................... 60 8 Optionale Ausstattung ...................................................................................... 61 8.1 Delay .......................................................................................................... 61 8.2 Audio .......................................................................................................... 62 8.3 RS232 ........................................................................................................ 63 8.4 Übertragung von USB 1.1 (transparent) .................................................... 63 9 System-Update ................................................................................................... 64 10 System Info......................................................................................................... 64 Seite 4 Guntermann & Drunck GmbH Installations- und Bedienungsanleitung CATVision (MC) 11 CV-Power-Erweiterung ...................................................................................... 65 11.1 Lieferumfang .............................................................................................. 65 11.2 Installationsanleitung.................................................................................. 66 11.2.1 Einbau im PC ................................................................................... 66 11.2.2 Verbinden mit CATVision-CPU ........................................................ 68 11.2.3 Verbinden des Tasters mit dem CATVision-CON ............................ 68 12 Technische Daten .............................................................................................. 70 12.1 CATVision .................................................................................................. 70 12.2 CATVision-MC ........................................................................................... 72 13 Anhang................................................................................................................ 74 13.1 HotKey-Belegungstabelle........................................................................... 74 13.2 IVT-Settings ............................................................................................... 74 13.3 Passwort .................................................................................................... 75 Seite 5 Guntermann & Drunck GmbH 1 Installations- und Bedienungsanleitung CATVision (MC) Beschreibung Das CATVision-System besteht aus einem Sender und einem Empfänger und ermöglicht es, einen Rechner aus einer Entfernung bis zu 300 Metern (max. Wert, auflösungs- und kabelabhängig) fern zu bedienen. Zusätzlich kann auch eine lokale Bedienstation am Sender angeschlossen werden. Die Bedienung kann wahlweise lokal oder remote durchgeführt werden. Setzten Sie ein CATVision-MC-System ein, kann der Rechner mit bis zu 4 Videoausgängen ausgestattet sein. Folgende Varianten stehen zur Verfügung (Unterscheidung nach den existierenden Videokanälen). Produkt CATVision CATVision-MC2 CATVision-MC3 CATVision-MC4 Videokanäle 1 Videokanal 2 Videokanäle 3 Videokanäle 4 Videokanäle Da sich alle Produkte lediglich in der Anzahl der zu übertragenden Videokanäle unterscheiden, wird in diesem Handbuch generell von den CATVisionSystemen gesprochen. Ausnahmen bilden die: Kapitel 2 (Lieferumfang), Kapitel 3 (Installationsanleitung) und Kapitel 5.4.4.1 (Videokanalwechsel). Die Übertragung der Signale Monitor, Keyboard und Mouse erfolgt über ein CAT-x-Kabel (x= 5, 6, 7). Durch die Möglichkeit der individuellen Videoanpassung werden unterschiedliche Kabelqualitäten und –längen ausgeglichen und dem Anwender steht immer ein optimales Bild zur Verfügung. Die Anpassung des Videosignals erfolgt automatisch. Jedoch ist eine individuelle Anpassung des Videosignals am entfernten Arbeitsplatz mit dem IVT möglich (vgl. Kapitel 5.4). Optional kann das System, zusätzlich zu den Monitor-, Keyboard- und Mouseinformationen, auch Audio und RS232 über das CAT-x-Kabel übertragen. Über ein zusätzliches CAT-x-Kabel können USB 1.1-Signale transparent übertragen werden. Seite 6 Guntermann & Drunck GmbH 2 Installations- und Bedienungsanleitung CATVision (MC) Lieferumfang Sendeeinheit CATVision-CPU bzw. CATVision-MC-CPU Empfangseinheit CATVision-CON bzw. CATVision-MC-CON Anschlusskabel Video/Keyboard/Mouse PS/2 CPU-2 - Zum Anschluss am CATVision-CPU (bzw. CATVision-MC-CPU): 1 x MDR-20 f. Monitor, Keyboard und Mouseanschluss - Zum Anschluss des PC: 1 x PS/2 für Mouseanschluss (inkl. 9pol-Adapter für serielle Mouse) 1 x PS/2 (incl. AT-Adapter) für Keyboard-Anschluss 1 x HD-15 Stecker für VGA-Anschluss und USB Keyboard/ Mouse USB-AM/BM-2 Kaltgerätekabel PowerCable-2 Übertragungskabel (separat bestellen) K-C7-x Optional: - 1 x RS232-M/F-2 -> SUB-D 9 (Stecker/Buchse) zum - 2 x Audio-M/M-2 -> für den rechnerseitigen - K-C7-x Anschluss eines seriellen Endgerätes - Audioanschluss -> für transparente Übertragung von USB 1.1 Zusätzlicher Lieferumfang für CATVision-MC: VGA-M/M-2 -> HD15 (Stecker/Stecker) Videoanschlusskabel; Anzahl abhängig von den zusätzlichen Videokanälen Seite 7 Guntermann & Drunck GmbH 3 Installations- und Bedienungsanleitung CATVision (MC) Installationsanleitung Die Installation der CATVision und CATVision-MC unterscheidet sich lediglich in der Anzahl der anzuschließenden Videoquellen. Daher wird in den folgenden Abschnitten nur die Installation des CATVision beschrieben. Der Anschluss zusätzlicher Videoquellen wird gesondert erläutert. Installation der Sendeeinheit Anschluß der Mouse für die lokale Konsole Mouse PS/2 Alternativ: Anschluß von Keyboard/Mouse zum Rechner über USB-AM/BM-2 RS 232 Line In Line Out Red. Power Keyb PS/2. 12V DC/0,6A Transmission USB K/M CPU Monitor USB 1.1 Trans CPU VGA Keyb. Mouse CPU Anschluß des CATVision-CON über CATx-Kabel Anschluß der Tastatur für die lokale Konsole 100-240V/60-50Hz 140-82mA 3.1 Anschluß des lokalen Rechners über CPU-x Kabel Anschluß des Monitors für die lokale Konsole Monitor-, Keyboard- und Mouse vom Rechner abziehen. Monitor: Stecken Sie den 15 pol. Sub HD Stecker des Kabels CPU-x (x=2, 4, 6 od. 9 Meter) in die VGA-Schnittstelle des Rechners. Keyboard/Mouse (PS/2): Stellen Sie nun mittels der beiden PS/2-Stecker des Kabels CPU-x die Verbindung zur Keyboard- und Mouseschnittstelle des Rechners her. Die beiden Stecker sind mit entsprechenden Symbolen versehen. Alternativ Keyboard/Mouse (USB): Stellen Sie nun mittels der beiden USB-Stecker des Kabels USBAM/BM-2 die Verbindung zur Keyboard- und Mouseschnittstelle des Rechners her. Seite 8 Guntermann & Drunck GmbH Installations- und Bedienungsanleitung CATVision (MC) Verbinden Sie danach das andere Ende der Kabel CPU-x (MDR 20 = Mini Delta Ribbon 20pol) mit der Schnittstelle VGA Keyb. Mouse CPU des CATVision. Anschluss des Verlängerungskabel Das Verlängerungskabel K-C7-x in die Schnittstelle TRANSMISSION (Buchse) der Sendeeinheit einstecken. Anschluss der lokalen Konsole Den Stecker des lokalen Keyboards und der lokalen Mouse in die Schnittstelle Keyb. beziehungsweise MOUSE PS/2 an der Sendeeinheit CATVision-CPU stecken. Den lokalen Monitor an die Buchse MONITOR anschließen. 3.1.1 Videoanschluss am CATVision-MC-CPU Verbinden Sie die Anschlusskabel VGA-M/M-2 mit den weiteren Videokanälen des Rechners. Verbinden Sie die anderen Enden des Kabels VGA-M/M-2 mit den Schnittstellen VGA CPU 2 - 4 3.1.2 Optionale Anschlussmöglichkeiten Anschluß des Übertragungskabel K-C7-x für USB 1.1 Verbindung zum Audioanschluß seriellen Port Verbindung zum USB-Port über des lokalen Rechners des Rechners Audio-M/M-2 über RS232-M/F-2 RS 232 Line In Line Out Red. Power Keyb PS/2. 12V DC/0,6A Transmission USB K/M CPU Monitor USB 1.1 Trans VGA Keyb. Mouse CPU CPU 100-240V/60-50Hz 140-82mA Mouse PS/2 Anschluss von RS232 Das Anschlusskabel RS232-M/F-x (x=2, 4, 6 od. 9 Meter) mit einer COM-Schnittstelle des Rechners und der Schnittstelle RS232 (optional) des CATVision-CPU verbinden (Belegung 1:1). Seite 9 Guntermann & Drunck GmbH Installations- und Bedienungsanleitung CATVision (MC) Anschluss von Audio Das Anschlusskabel Audio-M/M-2 mit einer Line-Out-Schnittstelle des Rechners (oder einem anderen Audiogerät) und der Schnittstelle Line IN (optional) des CATVision-CPU verbinden. Anschluss von USB1.1 Stecken Sie den Stecker USB - Typ B des mitgelieferten USB-Kabels in die Schnittstelle USB 1.1 CPU der CPU-Einheit. Stecken Sie den TYP A Stecker des USB-Kabels in den entsprechenden Rechnerport ein. Anschluss des Verlängerungskabels Das Verlängerungskabel K-C7-x innerhalb des Bereiches USB 1.1 in die Schnittstelle TRANS (Buchse) der Sendeeinheit stecken. Hinweis zur Kompatibilität des transparenten USB-Anschlusses: Der USB-Anschluss entspricht den USB 1.1 Spezifikationen, welche das Design von USB full-speed Geräten regeln. Dennoch garantieren wir nicht, dass alle USB full-speed Geräte kompatibel zum CATVision sind. 3.2 Installation der Empfangseinheit Anschluss von Keyboard/Mouse für remote Konsole Line In Micro In Speaker Keyb. USB Mouse USB Trans 12V DC/0,9A Keyb. PS/2 Anschluß der Tastatur für die remote Konsole Mouse Service Anschluß der Mouse für die lokale Konsole Monitor Transmission Red. Power Anschluß des CATVision-CPU über CATx-Kabel Anschluß des Monitors für die remote Konsole Seite 10 100-240V/60-50Hz 0,24-0,1A RS 232 Guntermann & Drunck GmbH Installations- und Bedienungsanleitung CATVision (MC) Die Empfangseinheit aufstellen. Das Verlängerungskabel K-C7-x in die Schnittstelle TRANSMISSION der Empfangseinheit CATVision-CON einstecken. Den Monitor an die Buchse MONITOR anschließen. Das PS/2-Keyboard an der Schnittstelle Keyb. am CATVision-CON anschließen. Die PS/2-Mouse an die Buchse MOUSE PS/2 anstecken. Optional haben Sie Möglichkeit, Keyboard und Mouse (auch SUNUSB-Tastaturen) über USB anzuschließen. Verbinden Sie dazu Keyboard und/oder Mouse mit den USB-Schnittstellen Keyb. USB Mouse an der Rückseite des CATVision-CON. Verwenden Sie für den Keyboard- und Mouseanschluss nicht die USB-Schnittstellen auf der Frontseite des Gerätes, da diese USBSchnittstellen eine transparente Verlängerung der USB-Signale zum Rechner ermöglichen. 3.2.1 Videoanschluss am CATVision-MC-Con Die Verlängerungskabel K-C7-x in die Schnittstelle TRANSMISSION 1 – 4 der Empfangseinheit CATVision-MC -CON einstecken. Achten Sie auf die richtige Zuordnung der Videokanäle! Die Monitore an die Buchsen MONITOR 1 - 4 anschließen. Optionale Anschlussmöglichkeiten Anschluß eines seriellen Endgerätes RS 232 Anschluß des Übertragungskabel K-C7-x für USB 1.1 Anschluß von Mikrofon, Lautsprecher und eines weiteren Audiogerätes Line In Micro In Speaker Keyb. USB Mouse USB Trans 12V DC/0,9A Keyb. PS/2 Mouse Service Monitor Transmission Red. Power Seite 11 100-240V/60-50Hz 0,24-0,1A 3.2.2 Guntermann & Drunck GmbH Installations- und Bedienungsanleitung CATVision (MC) Anschluss von RS232 Verbinden Sie das serielle Endgerät mit der Schnittstelle RS232 (optional) am CATVision-CON. Anschluss von Audio Das Mikrofon mit der Schnittstelle Micro In, die Lautsprecher mit Speaker und ein weiteres Audio-Endgerät (z. B. CD-Player) mit Line In verbinden. Anschluss von USB1.1 Zum Anschluss Ihrer USB-Geräte stecken Sie die USB-Geräte auf der Frontseite des CATVision-CON in eine der hier vier verfügbaren USBA-Buchsen. Hinweis: Es handelt sich hier um die transparente Verlängerung von USB-Signalen an den angeschlossenen Rechner. Anschluss des Verlängerungskabels Stecken Sie das Verlängerungskabel K-C7-x in die Schnittstelle USBTRANS (Buchse) der Empfangseinheit. Seite 12 Guntermann & Drunck GmbH Installations- und Bedienungsanleitung CATVision (MC) 4 Stromversorgung 4.1 Allgemein Schließen Sie das mitgelieferte Kaltgerätekabel an der Kaltgerätebuchse Main POWER der Geräte (CATVision-CPU und CATVision-CON) an. Optional kann über die Buchse Red. Power ein redundantes Netzteil angeschlossen werden. Verwenden Sie dazu das optional erhältliche Steckernetzteil Power-Set 12/Typ 2. Anschluss der Hauptstromversorgung Line In RS 232 Line Out Red. Power USB K/M USB 1.1 Trans CPU Keyb PS/2. 12V DC/0,6A Transmission Monitor 100-240V/60-50Hz 140-82mA Mouse PS/2 CPU VGA Keyb. Mouse CPU Anschluss der optionalen redundanten Stromversorgung Rückblende CATVision-CPU Anschluss der Hauptstromversorgung Line In Micro In Speaker Keyb. USB Mouse USB Trans 12V DC/0,9A Keyb. PS/2 Mouse Service Monitor Transmission Red. Power 100-240V/60-50Hz 0,24-0,1A RS 232 Anschluss der optionalen redundanten Stromversorgung Rückblende CATVision-CON 4.2 Hinweis zum USB-Betrieb Beim Anschluss von USB-Geräten werden durch das CATVision-System highPower-Geräte (bis 500 mA) unterstützt. Seite 13 Guntermann & Drunck GmbH Installations- und Bedienungsanleitung CATVision (MC) 5 Inbetriebnahme 5.1 Einschalten des CATVision-Systems Nachdem Sie das CATVision-System erstmalig eingeschaltet haben, erscheint auf beiden (lokal und remote) Monitoren ein Hinweisfenster: SYSTEM STARTUP CVM to call up AdonIS, press Ctrl + Num pc unit found remote unit found local mouse found local keyboard found Press pause to read info… Nach diesem Startfenster erscheint das Bild des Rechners auf Ihrem Monitor. WICHTIG Wenn Sie das CATVision System starten, passt das System automatisch alle Parameter (z. B. Kabellänge, Laufzeitunterschiede, Dämpfung) an Ihr Umfeld an. Als Ergebnis sollte ein Bild auf Ihrem Monitor erhalten, welches keiner weiteren Anpassung bedarf. Sollten Sie jedoch eine individuelle Anpassung durchführen wollen, steht Ihnen hierzu das IVT zur Verfügung (vgl. Kap. 5.4). 5.2 Systemzustandsinformationen Zusätzlich zu dem in Kapitel 5.1 beschriebenen Vorgang, können bei der Inbetriebnahme von des CATVisions folgende Situationen auftreten: Kein Keyboard/Mouse-Anschluss am CATVision-CPU gefunden Keine existierende Verbindung zwischen CATVision-CPU und CATVision-CON Weder Keyboard/Mouse noch Verbindung zum CATVision-CPU existiert. Diese Betriebszustände werden in den folgenden Kapiteln erläutert. Seite 14 Guntermann & Drunck GmbH 5.2.1 Installations- und Bedienungsanleitung CATVision (MC) Keyboard/Mouse lokal nicht vorhanden Sollte das lokale Keyboard und die Mouse nicht mit dem CATVision-CPU verbunden sein, erscheint auf beiden Monitoren (lokal und remote) folgender Warnhinweis: SYSTEM STARTUP CVM to call up AdonIS, press Ctrl + Num pc unit found remote unit found no local mouse found no local keyboard found Please wait… In diesem Fall wechselt der Monitor am CATVision-CON automatisch in das nächste Info-Fenster (IVT-Hinweisfenster). Um dieses Fenster zu schließen, oder den IVT-Modus zu starten, müssen Sie zumindest eine Tastatur am System anschließen. 5.2.2 Remote Unit nicht vorhanden Sollte bei der Inbetriebnahme des CATVision-System keine Verbindung zum entfernten System (CATVision-CON) existieren, erscheint an der lokalen Konsole folgender Warnhinweis: SYSTEM STARTUP CVM to call up AdonIS, press Ctrl + Num pc unit found local mouse found local keyboard found no remote unit found check connection to local keyboard and remote unit Please wait… Seite 15 Guntermann & Drunck GmbH Installations- und Bedienungsanleitung CATVision (MC) In diesem Fall bleibt das CATVision-System in diesem Zustand stehen. Um mit der Inbetriebnahme weiter fortfahren zu können, stellen Sie bitte erst die notwendigen CAT-x-Verbindungen her. Wenn diese Verbindungen hergestellt sind, wechselt das CATVision-System automatisch an beiden Konsolen (lokal und remote) in das IVT-Infofenster Info CVM To optimize video quality please start IVT. Press Enter to start IVT or ESC to exit this window or Ctrl + ESC to exit this window and don´t show again 5.2.3 Fehlen der CAT-x-Verbindung und lokal Keyboard/Mouse nicht gefunden Sollte bei der Inbetriebnahme des CATVision-System weder eine Verbindung zum entfernten System (CATVision-Con) existieren, noch lokal Keyboard/Mouse nicht dem CATVision-CPU verbunden sein, so erscheint an der lokalen Konsole folgender Warnhinweis: SYSTEM STARTUP CVM to call up AdonIS, press Ctrl + Num pc unit found no local mouse found no local keyboard found no remote unit found check connection to local keyboard and remote unit Please wait… Verfahren Sie auch in diesem Fall wie in Kap. 5.2.1 & 5.2.2 beschrieben. Seite 16 Guntermann & Drunck GmbH 5.3 Installations- und Bedienungsanleitung CATVision (MC) LED Anzeigen Nach dem Anschluss des Steckernetzteils schalten Sie die CATVisions über die Kippschalter auf den Rückseiten der Geräte ein. Die LEDs auf der Frontseite der beiden Geräte haben folgende Bedeutung: CATVision CPU CATVision CON POWER Redundant Leuchtet, wenn externes Netzteil angeschlossen ist, und 12V liefert. Main Leuchtet, wenn die Stromversorgung hergestellt ist Leuchtet, wenn externes Netzteil angeschlossen ist, und 12V liefert. Leuchtet, wenn die Stromversorgung hergestellt ist. Remote Active --- Status --- Leuchtet, solange die remote Konsole aktiv ist, oder aktiv werden kann(1). Erlischt, wenn lokal bedient wird Ist aus, wenn die remote Konsole nicht mit Spannung versorgt wird. Blinkt, wenn Spannung vorhanden ist, aber der Controller der Remotekonsole nicht arbeitet. Leuchtet dauerhaft, wenn Spannung vorhanden ist, und der Controller arbeitet. Active Leuchtet, solange die lokale Konsole aktiv ist, oder aktiv werden kann (1). Blinkt, wenn kein Keyboard vorhanden, Erlischt, wenn remote bedient wird Ist aus, wenn die lokale Konsole nicht mit Spannung versorgt wird. Blinkt, wenn Spannung vorhanden ist, aber der Controller der lokalen Konsole nicht arbeitet. (Bitte setzten Sie sich mit unserem Service in Verbindung!) Leuchtet dauerhaft, wenn Spannung vorhanden ist, und der Controller arbeitet. Local Status Seite 17 --- --- Guntermann & Drunck GmbH Installations- und Bedienungsanleitung CATVision (MC) CATVision CPU CPU Active CATVision CON Leuchtet, wenn eine der beiden Konsolen aktiv ist. (1) Leuchtet, wenn die Keyboard/Mouse-Emulation des CATVision-Systems arbeitet --- USBStatus Abschnitt --- Power --- Leuchtet, wenn eine CAT-xVerbindung zwischen CV-CPU und CV-CON besteht. Bei einer fehlerhaften Verbindung ist diese LED aus. Leuchtet, wenn das USBModul mit Spannung aus dem CATVision-CON versorgt wird. Status --- Zu (1): Eine Konsole wird aktiv, wenn mittels Mouse oder Keyboard Eingaben getätigt werden. Sie bleibt entweder für die voreingestellte Time-Out-Zeit nach der letzten Eingabe aktiv, oder solange, wie der Permanent Access oder der Protected Mode aktiviert ist, zuzüglich dem eingestellten Time-Out. Power ision -CPU Local CPU Red. Active Main Status Frontblende CATVision-CPU Status USB 1.1 Devices Power ision -CON Red. Active Main Status Power Frontblende CATVision-CON Seite 18 Remote Guntermann & Drunck GmbH 5.4 Installations- und Bedienungsanleitung CATVision (MC) IVT – Individuelles Video Tuning WICHTIG Wenn Sie das CATVision System starten, passt das System automatisch alle Parameter (z. B. Kabellänge, Laufzeitunterschiede, Dämpfung) an Ihr Umfeld an und ein Videoprofil wird angelegt. Als Ergebnis sollte ein Bild auf Ihrem Monitor erhalten, welches keiner weiteren Anpassung bedarf. Dieses Videoprofil kann im Nachhinein verändert werden. Hierfür bietet das CATVision System die Möglichkeit der manuellen Videoanpassung, falls Sie mit den automatisch eingestellten Werten nicht zufrieden sind. Durch diese Funktionalität kann der Anwender unterschiedliche Kabelqualitäten und –längen ausgleichen. Die individuelle Ausführung dieser Funktion erlaubt es, das subjektive Empfinden eines jeden Einzelnen als Maßstab für ein „gutes Bild“ zu setzen. Die Anpassung wird über das remote Keyboard oder als Supervisor der lokalen Konsole ausgeführt. Das System deckt den Bereich von 0 – 190 ab; die Anpassung kann in 1er Schritten erfolgen. Das CATVision System bietet die Möglichkeit, die eingesetzte Kabelart individuell auszuwählen. Wählen Sie den, der überwiegend eingesetzten Kabelart entsprechenden Modus für die Videoanpassung. Optional können Laufzeitunterschiede der CAT-x-Kabel (Skew) mit der DelayFunktion elektronisch kompensiert werden. 5.4.1 Berechtigung Zur Ausführung des IVT sind folgende Personen berechtigt: Im aktivierten OpenAccess: alle Personen, die mit dem System arbeiten. (Auslieferungszustand!) Ausnahme: Sollte durch den Supervisor dem „OpenAccess“ die Berechtigung zur Ausführung des IVT entzogen worden sein, so haben Sie im Modus des „OpenAccess“ keine Zugriffsmöglichkeiten auf das IVT! Im deaktivierten OpenAccess: nur Personen, die vom Supervisor dazu berechtigt worden sind. Dazu muss für jeden User ein Account angelegt werden (siehe User Accounts, Kapitel 6.2.3) und diese User müssen mit dem Recht des IVT-Zugriffes ausgestattet sein. Seite 19 Guntermann & Drunck GmbH 5.4.2 Installations- und Bedienungsanleitung CATVision (MC) Aufruf des IVT-Modus Der IVT-Modus kann über drei Wege aufgerufen werden (Default-Werte): Über das Function-Menü CTRL & NUM Über den Keyboard-Hotkey CTRL & Rollen Es öffnet sich folgendes Fenster: IVT Active channel: 1 Boost Noise filter Fine tuning delay R delay G 0 ns CVM 4 0 36 delay B 0 ns 0 ns ESC: quit IVT menu F1: save and quit F3: copy to all channels 1/2/3/4: select channel F5: auto adjust active channel F6: auto adjust all channels Das IVT -Menü lässt sich jeweils von der remote und der lokalen Konsole aufrufen. Einstellungen innerhalb des IVT -Menüs sind jedoch nur über die remote Konsole möglich. Über die lokale Konsole können nur durch den Supervisor IVT-Einstellungen durchgeführt werden. Beabsichtigt ein User von der lokale Konsole aus eine IVT-Einstellung vorzunehmen, öffnet sich folgendes Hinweisfenster: Info CVM IVT is only available on remote console. Press ESC to return. Durch Drücken der Taste ESC kehren Sie in das zuvor aktive Menü zurück. Seite 20 Guntermann & Drunck GmbH 5.4.2.1 Installations- und Bedienungsanleitung CATVision (MC) Aufruf über das Function Menü Zum Aufruf des IVT-Modus öffnen Sie das Function Menü über die Keyboardkombination CTRL + NUM (Default). Function F2: F3: F6: F8: CVM IVT Console Setup Config Logout Mouse Utility System Info Esc Enter Fahren Sie mit dem Cursor auf den Eintrag IVT oder betätigen Sie die Taste F2 und Drücken im Anschluss ENTER. Daraufhin öffnet sich das IVT-Fenster. 5.4.2.2 Aufruf über Keyboard-Kombination Zum direkten Aufruf des IVT halten Sie die CTRL-Taste gedrückt. Betätigen Sie zusätzlich die ROLLEN-Taste. Werden die beiden Tasten losgelassen öffnet sich das IVT-Fenster. (Ein Rechner muss angeschlossen sein!) 5.4.3 Hinweise zur Einstellung des IVT Die nachfolgenden Schritte verstehen sich als Richtwerte. Da die Qualität eines Videobildes sowohl vom Monitor, als auch der Grafikkarte und dem Übertragungskabel abhängt, ist es möglich, das Sie trotz einer Kabellänge von z.B. 120 Metern das subjektiv „beste Bild“ mit der Einstellung für 140 Meter erzielen. Die Bezeichnung Meter ist hierbei ein Synonym für die einzustellende Videoverstärkung! Probieren Sie die für Ihre Anwendung beste Einstellung aus. Da die PFEIL-Tasten in 1-Meter-Schritten arbeiten, müssen Sie diese evtl. häufiger drücken, um im Feintuning zum optimalen Bild zu gelangen. Sollte Ihr Monitor schwarz bleiben, prüfen Sie bitte ob die eingestellte Auflösung der Grafikkarte durch den Monitor unterstützt wird. Ist dies der Fall, aktivieren Sie das IVT (Kapitel 5.4). Möglicherweise ist der durch Ihren Monitor unterstützte Bereich über- oder unterschritten. Stellen Sie die niedrigste Verstärkung mit der Taste Pos1 ein und bewegen Sie sich dann mit der Tastaturkombination CTRL + PFEIL Rechts -Taste in Zehnerschritten nach oben. Das Bild wird dann wieder erscheinen und Sie können die optimale Einstellung vornehmen. Seite 21 Guntermann & Drunck GmbH 5.4.4 Installations- und Bedienungsanleitung CATVision (MC) Einstellung des Video Tuning Nachdem Sie das IVT aufgerufen haben, stehen Ihnen im geöffneten IVTSubmenüs folgende Einstellmöglichkeiten zur Verfügung: Festlegung der Videoverstärkung (Boost) Einstellung der Rauschunterdrückung (Noise filter) Beseitigung der Fahnenbildung (Fine Tuning) Delayeinstellung (optional) auf den Farben R, G und B des CAT-xKabels Das IVT-Submenü sieht wie folgt aus: IVT Active channel: 1 Boost Noise filter Fine tuning delay R delay G 0 ns CVM 4 0 36 delay B 0 ns 0 ns ESC: quit IVT menu F1: save and quit F3: copy to all channels 1/2/3/4: select channel F5: auto adjust active channel F6: auto adjust all channels ESC: F1: F3: 1/2/3/4 F5: F6: beendet das IVT-Submenü ohne Änderung speichert alle Änderungen und beendet das IVT-Submenü kopiert alle Einstellungen auf alle existierenden Kanäle Wechsel zwischen den Videokanälen (nur bei CATVision-MCSystemen) führt die automatische Videooptimierung für den aktiven Kanal durch führt die automatische Videooptimierung für alle Kanäle durch Zwischen den einzelnen Einträgen können Sie mit den PFEIL AUF bzw. PFEIL AB–Tasten wechseln. Das IVT-Menü kann mit der Tastaturkombination SHIFT+ PFEIL-Taste verschoben werden. Seite 22 Guntermann & Drunck GmbH Installations- und Bedienungsanleitung CATVision (MC) 5.4.4.1 Videokanalwechsel Diese Funktion ist nur bei den CATVision-MC-Systemen verfügbar. IVT Active channel: 1 CVM Der Eintrag „active channel“ bezieht sich auf den jeweils belegten Videokanal. Die Kanäle können mit den Tasten 1 bis 4 (für die Videokanäle) gewechselt werden. Ihre Auswahl bestätigen Sie mit ENTER. 5.4.4.2 Automatische Einstellung Sie können alle Video-Einstellungen automatisch durchführen lassen. Hierzu müssen Sie auf einen Target aufgeschaltet sein. Drücken Sie zum Auslösen dieser Funktion die F5-Taste. Während dieser automatischen Einstellung schaltet sich der Bildschirm für ca. 3 Sekunden dunkel und für den aktiven Kanal wird die automatische Videoanpassung durchgeführt. Mit der F6-Taste führen Sie die automatische Anpassung für alle Kanäle (nur bei CATVision-MC-Systemen) durch. In diesem Fall erscheint auf Ihrem Bildschirm folgende Meldung: Info CVM Automatic Video Tuning status Channel 1: Channel 2: Channel 3: Channel 4: ok not connected in progress wait Please wait Seite 23 Guntermann & Drunck GmbH Installations- und Bedienungsanleitung CATVision (MC) Während des automatischen Messvorgangs teilt Ihnen dieses Fenster den jeweiligen Messstatus mit. Hinweis: Die Kanäle 2 bis 4 gelten nur beim Einsatz eines CATVision-MCSystems! Die Einträge hinter den Kanalangaben haben folgende Bedeutung: ok: not connected: in progress: wait: Messvorgang erfolgreich abgeschlossen an diesem Kanal liegt kein Videosignal vor der Messvorgang für diesen Kanal läuft aktuell es ist noch kein Messvorgang erfolgt, dieser steht noch an Nach dieser automatischen Einstellung ist wieder ein Bild sichtbar. Diese hier ermittelten automatischen Werte werden im System hinterlegt. Diese Werte sind solange gültig, bis Sie diese Werte manuell (vgl. Kapitel 5.4.4.3) abändern. Sollten Sie diese Werte manuell angepasst haben, so werden fortan nur noch die manuellen Werte vom System verwendet. Hinweis: Verändern Sie nach einer manuellen Einstellung die Länge des eingesetzten Kabels, so misst das System automatisch neue Werte. Stellt das System hier bei den automatisch gemessenen Werten im Vergleich zu den manuell eingestellten Werten eine Differenz von größer als „10“ fest (als Referenz dient hier das Feld „Boost“ im IVT-Menü), verwendet das System zukünftig die neuen automatisch gemessenen Werte und verwirft die manuellen Werte. Nach der automatischen Videoeinstellung speichern Sie die Einstellung mit der F1-Taste. In diesem Fall wird das IVT-Submenü geschlossen und Sie kehren zurück zum FUNCTION-Menü. 5.4.4.3 Manuelle Einstellung Für den Fall, dass die automatische Videoeinstellung ein nicht zufrieden stellendes Ergebnis geliefert hat, können Sie dieses manuell beeinflussen. Die manuelle Einstellung des Videobildes wird in den nachfolgenden Kapiteln beschrieben. Seite 24 Guntermann & Drunck GmbH Installations- und Bedienungsanleitung CATVision (MC) 5.4.4.3.1 Festlegung der Videoverstärkung Boost: 4 Zur Veränderung der Videoverstärkung stehen Ihnen folgende Tasten zur Verfügung: Taste Taste Tasten STRG + Tasten STRG + Pos 1 Ende subtrahiert den Wert 1 zur Videoverstärkung addiert den Wert 1 zur Videoverstärkung subtrahiert den Wert 5 zur Videoverstärkung addiert den Wert 5 zur Videoverstärkung Minimale Videoverstärkung Maximale Videoverstärkung (Achtung: Übersteuerung möglich kein Monitorbild mehr sichtbar) Beabsichtigen Sie noch weitere Änderungen innerhalb des IVT-Subemenü durchzuführen, steppen Sie mit den PFEIL AUF- bzw. PFEIL AB–Tasten oder der Mouse zum nächsten Eintrag. Nach Festlegung der Videoverstärkung bestätigen und speichern Sie die Auswahl mit F1 oder verwerfen die Auswahl mit ESC. In beiden Fällen wird das IVT-Submenü geschlossen und Sie kehren zurück zum FUNCTION -Menü. 5.4.4.3.2 Einstellung der Rauschunterdrückung Noise filter: 0 Sollte die Bildqualität auf Ihrem Monitor von Störsignalen (Rauschen) beeinflusst werden, so kann dieser Effekt durch die Einstellung der Rauschunterdrückung beseitigt werden. Zur Einstellung der Rauschunterdrückung stehen Ihnen folgende Tasten zur Verfügung: subtrahiert den Wert 1 zur Rauschunterdrückung Taste addiert den Wert 1 zur Rauschunterdrückung Taste Tasten STRG + subtrahiert den Wert 5 zur Rauschunterdrückung Tasten STRG + addiert den Wert 5 zur Rauschunterdrückung Pos 1 Rauschunterdrückung hat den Wert 0 Ende Maximale Rauschunterdrückung (Wert: 255) Seite 25 Guntermann & Drunck GmbH Installations- und Bedienungsanleitung CATVision (MC) Beabsichtigen Sie noch weitere Änderungen innerhalb des IVT-Submenü durchzuführen, steppen Sie mit den PFEIL AUF bzw. PFEIL AB–Tasten oder der Mouse zum nächsten Eintrag. Nach der Einstellung der Rauschunterdrückung bestätigen und speichern Sie die Auswahl mit F1 oder verwerfen die Auswahl mit ESC. In beiden Fällen wird das IVT-Submenü geschlossen und Sie kehren zurück zum FUNCTION-Menü. 5.4.4.3.3 Beseitigung der Fahnenbildung Fine tuning: 36 Zur Beseitigung eventuell auftretender Fahnen stehen Ihnen folgende Tasten zur Verfügung: Taste Taste Tasten STRG + Tasten STRG + Pos 1 Ende subtrahiert den Wert 1 zum Fine Tuning addiert den Wert 1 zum Fine Tuning subtrahiert den Wert 5 zum Fine Tuning addiert den Wert 5 zum Fine Tuning Minimales Fine Tuning (Wert: 0) Maximales Fine Tuning (Wert: 575) Beabsichtigen Sie noch weitere Änderungen innerhalb des IVT-Submenüs durchzuführen, steppen Sie mit den PFEIL AUF bzw. PFEIL AB–Tasten oder der Mouse zum nächsten Eintrag. Nach der Beseitigung der Fahnen bestätigen und speichern Sie die Auswahl mit der F1–Taste oder verwerfen die Auswahl mit der ESC–Taste. In beiden Fällen wird das IVT-Fenster geschlossen und Sie kehren zurück zum FUNCTION-Menü. 5.4.4.3.4 Einstellung der Laufzeitkompensation delay R 0 ns delay G 0 ns delay B 0 ns Die Delaykompensation kann beim CATVision-System für alle drei Farbsignale bis zu 46 ns durchgeführt werden. Bei 0 ns ist keine Delaykompensation (Verzögerung) vorhanden. Seite 26 Guntermann & Drunck GmbH Installations- und Bedienungsanleitung CATVision (MC) Zur Durchführung des Delaykompensierung stehen Ihnen folgende Tasten zur Verfügung: Taste Taste Tasten CTRL + Tasten CTRL + Verringert die Delaykompensation um 2 ns Erhöht die Delaykompensation um 2 ns Verringert die Delaykompensation um 10 ns Erhöht die Delaykompensation um 10 ns Beispiel: Sollte das Farbsignal ROT zu früh erscheinen (roter Schatten links neben einem Buchstaben), so steppen Sie auf den Eintrag delay R und verzögern das Signal, bis alle Farben wieder übereinander liegen und ein einwandfreies Bild sichtbar wird. Sollte ein weiteres Farbsignal zu spät am Monitor erscheinen wiederholen Sie diesen Vorgang wie zuvor beschrieben. Nach Festlegung der Delaykompensation bestätigen und speichern Sie die Auswahl mit F1 oder verwerfen die Auswahl mit ESC. In beiden Fällen wird das IVT-Fenster geschlossen. Hinweis: Da sich die Laufzeitverzögerung aus dem Verhältnis der Farbsignale untereinander ergibt, macht es keinen Sinn alle drei Farben zu verzögern. Dies würde das Verhältnis nur insgesamt verschieben. Korrigieren Sie jeweils nur 2 Werte, um die Laufzeitdifferenz auszugleichen. Beabsichtigen Sie noch weitere Änderungen innerhalb des IVT-Fensters durchzuführen, steppen Sie mit den Pfeil Auf/Pfeil Ab-Tasten zum nächsten Eintrag. 5.4.5 Kopieren der IVT-Einstellungen Die für einen Videokanal getroffenen Einstellungen lassen sich über die Taste F3 auf alle weiteren vorhanden Videokanäle kopieren. Das kann sinnvoll sein, wenn für diese weiteren Videokanäle die gleichen Rahmenbedingungen vorliegen. 5.4.6 Getestete Auflösungen Die maximale Auflösung des CATVision (bei aktiviertem IVT - Individuelles Video Tuning) beträgt 1920 x 1440 Bildpunkte, welche mit einer Wiederholfrequenz von 75 Hz dargestellt werden kann. Diese Auflösung kann bei einer Kabellänge bis 300 Metern übertragen werden, falls der Rechner ein Videosignal (RGBHV) verwendet, welches für das Synchronisationssignal separate Leitungen vorsieht. Seite 27 Guntermann & Drunck GmbH Installations- und Bedienungsanleitung CATVision (MC) Wird das Synchronisationssignal hingegen von einem (oder mehreren) Farbsignalen überlagert (RGsB oder RsGsBs), so wirkt sich dies direkt auf die maximalen Übertragungslängen des Signals aus: Entfernung 100 Meter 150 Meter 180 Meter 200 Meter Auflösung 1600 x 1200 1280 x 1024 1024 x 768 800 x 600 Bildwiederholrate 80 Hz 85 Hz 85 Hz 85 Hz Diese Übersicht stellt keine Maximalwerte dar. 5.4.7 Kabelempfehlung G&D empfiehlt zum Einsatz mit dem CATVision System folgende Kabel: Patchkabel: DAETWYLER UNINET 7702 flex 4P AWG26 S-STP (bis 100 Meter) Installationskabel: Kerpen MegaLine G12-150 S/F AWG22 (bis 300 Meter) Seite 28 Guntermann & Drunck GmbH 6 Installations- und Bedienungsanleitung CATVision (MC) Konfiguration Das CATVision-System kann an Ihre Bedürfnisse angepasst werden. Die Konfiguration wird über AdonIS ausgeführt. Mit CTRL + NUM (Default-Einstellung) öffnen Sie das AdonIS: Function F2: F3: F6: F8: CVM IVT Console Setup Config Logout Mouse Utility System Info Esc Enter In dem Function Menü stehen Ihnen folgende Konfigurationsoptionen zur Verfügung: F2: IVT (vgl. Kapitel 5.4) F3: Einstellungen für die jeweilige Bedienkonsole (lokal oder remote), konsolenbezogen (vgl. Kapitel 6.1) F6: Hauptkonfigurationsmenü; hier kann zusätzlich das IVT aufgerufen werden, User Accounts werden angelegt, SystemEinstellungen vorgenommen (vgl. Kapitel 6.2) Mouse Utility: Reinitialisierung der angeschlossenen Mouse, falls die Initialisierung verloren gegangen ist (vgl. Kapitel 6.3) Seite 29 Guntermann & Drunck GmbH 6.1 Installations- und Bedienungsanleitung CATVision (MC) Console Setup Durch drücken der Taste F 3 im Function Menü gelangen Sie für die jeweils aktivierende Konsole (lokal oder remote) in das Console Setup. CONSOLE SETUP CVM Screen Saver: Auto Logout: Console Name: Display: Display Position: Menu Position: AdonIS by Mouse: OSD Sync Mode: Keyboard Layout: Esc OFF OFF CVM Temp … … NO OFF German F1:Save 6.1.1 Enter Einstellung des ScreenSaver Der hier einzustellende ScreenSaver wird vom CATVision erzeugt und steht in keiner Verbindung zum ScreenSaver des Rechners. Da in der Regel nur eine indirekte Verbindung (über das CATVision) zwischen dem Rechner und dem Monitor besteht, sollten Sie die ScreenSaver der Rechner aus Gründen Ihrer Arbeitserleichterung abschalten. Der ScreenSaver des CATVision übernimmt diese Aufgabe; er setzt den Monitor in den Power-Down Modus. Steuern Sie den Cursor auf die Zeile ScreenSaver. Der vorhandene Eintrag kann überschrieben, oder nach Drücken der ENTER -Taste editiert werden. Zulässig ist eine Zeit von 1 - 60 Minuten. Die Eingabe „0“ stellt den ScreenSaver auf „OFF“. ENTER schließt die Eingabe ab. Um die Einstellungen zu speichern, verlassen Sie dies Menü mit F 1. Seite 30 Guntermann & Drunck GmbH 6.1.2 Installations- und Bedienungsanleitung CATVision (MC) Einstellung des AutoLogout Über diese Einstellung können Sie ein automatisches LOGOUT des Systems aktivieren. Der automatische LOGOUT führt, gleich dem manuellen (Taste F8), zurück zur LOGIN Maske. Das System wird damit gegen nicht autorisierten Zugriff geschützt und erst nach einer Passwort-Eingabe im LOGIN Fenster kann wieder auf den Rechner zugegriffen werden (nur gültig, wenn der OPEN ACCESS deaktiviert ist). Die Zeit, zur Auslösung des automatischen LOGOUT, wird eingestellt, indem der Cursor auf die Zeile AutoLogout gesteuert wird. Der vorhandene Eintrag kann überschrieben, oder nach Drücken der ENTER -Taste editiert werden. Zulässig ist eine Zeit von 1 - 60 Minuten. Die Eingabe „0“ schaltet den Logout auf „OFF“. ENTER schließt die Eingabe ab. Um die Einstellungen zu speichern, verlassen Sie dies Menü mit F 1. 6.1.3 Vergabe des Console Name Für den Fall der kombinierten Verwendung mehrerer G&D-Geräte lässt sich jede G&D Einheit mit einer eindeutigen Bezeichnung, dem Console Name, versehen. Steuern Sie den Cursor auf die Zeile Console Name. Der vorhandene Eintrag kann überschrieben, oder nach Drücken der ENTER –Taste, editiert werden. Zulässig ist die Eingabe von 10 alphanumerischen Zeichen. ENTER schließt die Eingabe ab. Um die Einstellungen zu speichern, verlassen Sie dies Menü mit F 1. Seite 31 Guntermann & Drunck GmbH 6.1.4 Installations- und Bedienungsanleitung CATVision (MC) Aktivierung der Kanalanzeige „Display“ Hier besteht die Möglichkeit, die Anzeige der Systemzustandsmeldungen entweder Dauernd => Temporär => Perm oder Temp (verschwindet ca. 5 Sek. nach Umschaltung) einzustellen. Nach dem Fahren des Cursors auf das Feld DISPLAY können Sie über die SPACE Taste (toggle) oder die Tasten Y + N die gewünschte Option anwählen. Um die Einstellungen zu speichern, verlassen Sie dies Menü mit F 1. Haben Sie die temporäre Einstellung gewählt können Sie die Anzeige des Displays jederzeit durch die Tastenkombination CTRL + CAPS LOCK (DefaultEinstellung) aufrufen. 6.1.5 Einstellung der Display Position + Colour Stellen Sie hier die Lage + Größe der Displays auf dem Monitor ein. Fahren Sie den Cursor auf den entsprechenden Eintrag im Menü CONSOLE SETUP. Nach Drücken der Taste ENTER gelangen Sie in den Editiermodus und können nun über die Pfeiltasten oder mittels der Mouse die Anzeige an die gewünschte Stelle verschieben. + [Display Position####] Space: change colour Die Änderung der Farbe des eingeblendeten Textes ist optional ebenfalls möglich. Betätigen Sie die Space-Taste um zwischen den verschiedenen Farben zu wechseln. ENTER schließt die Einstellung ab und führt zurück zum CONSOLE SETUP (temporär gespeichert). Um die Einstellungen zu speichern, verlassen Sie das CONSOLE SETUP mit F 1 (permanent gespeichert). Seite 32 Guntermann & Drunck GmbH 6.1.6 Installations- und Bedienungsanleitung CATVision (MC) Einstellung der Menu-Position / - Size Verändern Sie hier die Lage und Größe aller AdonIS-Fenster. Fahren Sie den Cursor auf den entsprechenden Eintrag im Menü CONSOLE SETUP. Nach Drücken der Taste ENTER gelangen Sie in den Editiermodus und können nun über die Pfeiltasten oder mittels der Mouse die Anzeige an die gewünschte Stelle verschieben. MENU-POSITION Esc CVM Enter F1:Save Um bei allen Auflösungen eine optimale Lesbarkeit des AdonIS sicherzustellen, lässt sich die Größe der Anzeige ab einer Monitorauflösung von größer als 640 x 480 über die Tasten Bild/auf + Bild/ab verändern. ENTER schließt die Eingabe ab und führt zurück zum CONSOLE SETUP (temporär gespeichert). Um die Einstellungen zu speichern, verlassen Sie das CONSOLE SETUP mit F1 (permanent gespeichert). 6.1.7 Einstellung der erweiterten Mouseunterstützung Hier besteht die Möglichkeit, die Unterstützung der Sondertasten der IntelliExplorer Mouse für die Arbeit mit dem CATVision zu aktivieren. Setzen Sie den Eintrag hier auf „Yes“, kann das AdonIS, zusätzlich zum Aufruf über das Keyboard, auch durch Betätigen der Taste 4 oder 5 der Explorer-Mouse (linke Seitentasten) aufgerufen werden. Nach dem Fahren des Cursors auf das Feld „AdonIS by Mouse“ können Sie über die SPACE Taste (toggle) oder die Tasten Y + N die gewünschte Option anwählen. Um die Einstellungen zu speichern, verlassen Sie dies Menü mit F 1. Seite 33 Guntermann & Drunck GmbH 6.1.8 Installations- und Bedienungsanleitung CATVision (MC) OSD SyncMod Grafikkarten können unterschiedliche Sync-Signale (Sync on Green, RGBHV..) generieren. Je nach dem welches Sync-Signal anliegt, hat dies Auswirkungen auf die Darstellung des AdonIS. Das AdonIS ist auf ein RGB HV-Sync-Signal ausgelegt. Sollte nun von der Grafikkarte des angeschlossenen Rechners ein anderes Sync-Signal als RGB HV geliefert werden, hat dies eine Farbverfälschung des AdonIS zur Folge. So könnte z. B. das AdonIS zu dunkel auf Ihrem Monitor erscheinen. Um nun die Farbverfälschungen auszugleichen, können im Menüpunkt OSDSync die Farbpegel angehoben werden. Zur Auswahl stehen folgende Einträge (Auswahl durch drücken der SpaceTaste): RGB HV: kein Farbanpassung RGsB: der Pegel für das grüne Farbsignal wird angehoben RsGsBs: alle Farbpegel werden angehoben Um die Einstellungen zu speichern, verlassen Sie dies Menü mit F 1. 6.1.9 Keyboard Layout Passen Sie hier den vom CATVision verwendeten Keyboard-Satz an das tatsächliche Layout des angeschlossenen Keyboards an. Sie sollten z. B. eine Umstellung vornehmen, wenn Sie eine Y/Z-Vertauschung feststellen (amerikanisch/deutsches Layout). Folgende Alternativen stehen zur Verfügung: German English US English UK French Spanish Lat America Portuguese Nach dem Fahren des Cursors auf das Feld KEYBOARD LAYOUT können Sie über die SPACE Taste (toggle) die gewünschte Option anwählen. Seite 34 Guntermann & Drunck GmbH 6.2 Installations- und Bedienungsanleitung CATVision (MC) Config Im Menü Config haben Sie die Möglichkeit Videoanpassungen über das IVT durchzuführen, Userkonten anzulegen und systemübergreifende Einstellungen vorzunehmen. Durch drücken der Taste F6 im Function Menü gelangen Sie in das Config Menü. Der Zugriff auf dieses Menü ist nur einem bestimmten Personenkreis gestattet. Außer dem Supervisor können auch User auf dieses Menü zugreifen, die in Ihrem User Account mit einer entsprechenden Berechtigung durch den Supervisor ausgestattet worden sind. In jedem Fall hat der SUPERVISOR immer eine Zugriffsberechtigung auf das Config Menü! Da das CATVision-System entweder im Systemzustand des Open Access (der Zugriff auf das System ist ohne Login-Name und Passwort möglich) oder durch angelegte User Accounts betrieben werden kann, ergeben sich dadurch unterschiedliche Konstellationen beim Aufruf des Config-Menüs: Open Access: Zugriff ist ohne Passworteingabe möglich, wenn dem OpenAccess Konfigurationsrechte zugewiesen worden sind. Die für den OpenAccess zugänglichen Einträge des Menü Config sind weiß dargestellt. Einträge, auf die nicht zugegriffen werden kann, sind hellblau dargestellt. Hat der OpenAccess dagegen keine Konfigurationsberechtigung, öffnet sich das Login-Fenster für eine weitergehende Authentifizierung. So können Sie sich zum Beispiel als Supervisor oder User mit Konfigurationsrecht durch Eingabe des Loginnamens und des Passwortes einloggen. ACCESS CONFIG CVM Please enter your login: Name: Password: max. 14 Zeichen max. 12 Zeichen Esc Enter Nach Eingabe des Loginnamens und des Passwortes öffnet sich das Config Menü. Seite 35 Guntermann & Drunck GmbH Installations- und Bedienungsanleitung CATVision (MC) Angelegte User Accounts + Supervisor (OpenAccess ist deaktiv): Der Zugriff ist ohne Passwortabfrage möglich, da sich die Benutzer bereits angemeldet haben d.h. die Zwischenabfrage (über das Access Config Fenster) der Konfigurationsberechtigung entfällt. Jedem User können aber unterschiedliche Konfigurationsrechte zugewiesen sein (z. B. nur IVT und System Config). Die Konfigurationseinträge, die für jeden einzelnen User zur Verfügung stehen, sind weiß markiert. Hellblaue Markierung signalisieren, dass kein Zugriff möglich ist. Stehen einem Benutzer keine Konfigurationsrechte zur Verfügung, so erhält dieser einen entsprechenden Hinweis. Der Supervisor hat in jedem Fall uneingeschränkten Zugriff auf alle Einträge des Config-Menüs. Nachdem das Config-Menü erfolgreich aufgerufen wurde, erscheint auf dem Monitor folgendes Fenster: Config CVM IVT System Config User Account Esc Enter Wählen Sie mit den Pfeil Auf/Pfeil Ab-Tasten den gewünschten Eintrag aus und betätigen Sie anschließend die Enter-Taste. 6.2.1 IVT Vgl. Kap 5.4 Seite 36 Guntermann & Drunck GmbH 6.2.2 Installations- und Bedienungsanleitung CATVision (MC) System Config Steppen Sie im Config Menü auf den Eintrag System Config und drücken Sie die Taste Enter. Folgendes Fenster öffnet sich: SYSTEM CONFIG CVM Hotkey: Double Hotkey: Set System Defaults: Remote Video: Local Video: Permanent Access: Timeout: Protected Mode: Keyb. LED flash: Scan Code Set Local: Scancode Set Remote: USB Multimedia-Keyboard: USB SUN-Keyboard Mode: USB SUN-Keyboard Layout: Temperature Warning: Keyboard Type Local: Keyboard Type Remote: Signal type input: Remote Sync: Esc Enter Ctrl Off … On On Both 1s Off On 2 2 No No US OSD … … Standard as input F1: Save Sollte durch Ihre Software ein Konflikt zu den in der AdonIS Bedienung verwendeten HotKey bestehen, können Sie diese hier umstellen. Ein weiterer Grund für die Umstellung der HotKeys kann in der Kombination mehrerer G&D Umschaltertypen liegen, denn im Auslieferungszustand sind alle G&D-Geräte mit der HotKey-Kombination CTRL + NUM (als Beispiel zum Aufruf des AdonIS) eingestellt. Seite 37 Guntermann & Drunck GmbH Installations- und Bedienungsanleitung CATVision (MC) 6.2.2.1 Definition des ersten Hotkeys Fahren Sie den Cursor auf den Eintrag HotKey. Durch Betätigen der SPACE -Taste können Sie dann zwischen folgenden Alternativen wählen: Ctrl, Alt, AltGr, Win, Shift Bitte beachten Sie, dass der hier eingestellte HotKey ferner auch als erste Taste zum Aufruf des AdonIS dient ( z.B. WIN + NUM ). Um die Einstellung zu speichern, verlassen Sie dies Menü mit F 1. 6.2.2.2 Festlegung des Doppel-HotKey Hier legen Sie fest, ob Sie zum Aufruf des AdonIS oder des IVT einen DoppelHotKey verwenden wollen. Steppen Sie mit den Pfeiltasten oder bewegen Sie die Mouse auf den Eintrag Double-Hotkey. Mit der Space-Taste können Sie zwischen den Einträgen Yes No (Default) auswählen. Nachdem Sie den Eintrag auf Yes abgeändert haben, verändert sich automatisch der Eintrag in der Zeile HotKey (vgl. Kapitel 6.2.2.1). Sie können nun in dieser Zeile Ihren gewünschten Doppel-HotKey auswählen. Folgende Positionen stehen Ihnen zur Verfügung: Ctrl (Strg) + Shift Alt +Shift Alt Gr + Ctrl (Strg) Windows + Ctrl (Strg) Shift + Windows Bitte beachten Sie, dass der hier eingestellte HotKey ferner auch als erste Taste zum Aufruf des AdonIS dient (z.B. WIN (+CTRL) + NUM). Um die Einstellung zu speichern, verlassen Sie dies Menü mit F 1. Nach dieser Einstellung müssen Sie zum Aufruf des AdonIS oder der IVT-Menüs insgesamt drei Tasten drücken. Seite 38 Guntermann & Drunck GmbH Installations- und Bedienungsanleitung CATVision (MC) 6.2.2.3 Set System Defaults (Supervisor-Funktion) Die Ausführung dieser Funktion versetzt das Gerät zurück in den Lieferzustand. Auch die eingestellten Passwörter und IVT-Einstellungen werden zurückgesetzt. Die jeweiligen Default-Einstellungen entnehmen Sie bitte der Darstellung der einzelnen Menü-Fenster in diesem Handbuch. Steppen Sie mittels der Pfeiltasten auf den entsprechenden Menüpunkt. Durch Eingabe von ENTER wird die Funktion ausgeführt und folgendes Infofenster öffnet sich. Info CVM This function will delete all settings. Press Enter to continue or Esc to cancel Bestätigten Sie hier nochmals mit der Taste ENTER. Das Fenster wechselt zum Menü FUNCTION. 6.2.2.4 Remote Video (Dunkelschaltung) Mit dieser Einstellung legen Sie fest, ob der Monitor der remote Konsole bei einer Keyboard bzw. Mouseaktion der lokalen Konsole: entweder permanent eingeschaltet bleibt, dunkel geschaltet wird. oder Folgende Wählmöglichkeiten stehen zur Verfügung: ON: der Monitor bleibt permanent eingeschaltet Switch off der Monitor wird bei einer Keyboard bzw. Mouseaktion der lokalen Konsole dunkel geschaltet wird Um die Einstellung zu speichern, verlassen Sie dies Menü mit F 1. Seite 39 Guntermann & Drunck GmbH Installations- und Bedienungsanleitung CATVision (MC) Sie können diesen Menüpunkt jederzeit durch drücken der ESC - Taste verlassen. 6.2.2.5 Local Video (Dunkelschaltung) Funktion entsprechend wie in Kapitel 6.2.2.4, aber bezogen auf das Bild der lokalen Konsole (Monitor am CATVision-CPU). 6.2.2.6 Permanent Access Möchten Sie, dass z. B. Ihre Konfigurationsarbeiten nicht von Dritten unterbrochen werden sollen, so besteht sowohl für die remote Konsole (CATVision-CON) als auch die lokale Konsole am CATVision-CPU die Möglichkeit, einen permanenten Zugriff (Haltefunktion; vgl. Kapitel 7.3) zu aktivieren (Permanent Access). Wird an einer Konsole der permanente Zugriff über die Tastenkombination CTRL + Druck (Default-Einstellung) aktiviert, hat der Rechnerzugriff für diese Konsole einen exklusiven Rechnerzugriff. Wurde in den Einträgen „Local Video“ und „Remote Video“ (vgl. Kapitel 6.2.2.4 und 6.2.2.5) die Einstellung auf Switch Off vorgenommen, so schaltet der Monitor der blockierten Konsole zusätzlich dunkel. Die blockierte Konsole erhält solange keinen Zugriff, bis die Funktion durch die gleiche Tastenkombination wieder aufgehoben wird. Die Funktion Permanent Access lässt folgende Einstellungen zu: BOTH NONE LOCAL REMOTE Beide Konsole können den permanenten Zugriff aktivieren Keine Konsole kann aktivieren Nur die lokale Konsole (am CATVision-CPU) kann den permanenten Zugriff aktivieren Nur die remote Konsole (am CATVision-CON) kann aktivieren Die Änderung der Einstellung wird durchgeführt, indem der Cursor mittels Mouse oder Keyboard auf den Eintrag Permanent Access bewegt wird. Mit der SPACE -Taste werden die Wahlmöglichkeiten geschaltet (ToggleFunktion). Um die Einstellung zu speichern, verlassen Sie dies Menü mit F 1. Seite 40 Guntermann & Drunck GmbH 6.2.2.7 Installations- und Bedienungsanleitung CATVision (MC) Festlegung der Time-Out-Zeit Mit der Festlegung der Time-Out-Zeit wird definiert, wie lange die inaktive Konsole gesperrt bleibt, nachdem an der aktiven Konsole die letzte Keyboard/Mouse-Aktivität getätigt wurde. Nach Ablauf dieser Time-Out-Zeit sind beiden Konsolen für Eingaben wieder freigeschaltet. Steppen Sie dazu mit der Cursor-Taste auf den Eintrag Time-Out. Durch Eingabe einer beliebigen Zeit können Sie die Time-Out-Zeit in einem Intervall von 1 – 90 Sekunden individuell bestimmen. Um die Einstellung zu speichern, verlassen Sie dies Menü mit F 1. 6.2.2.8 Aktivieren des Protected Mode Beim Protected Mode sind im Ausgangszustand beide Monitor (lokal und remote) dunkelgeschaltet, und an keiner der beiden Konsolen sind Keyboardund Mouseaktionen möglich (vgl. Kapitel 7.4). Erst durch Eingabe eines HotKeys (CTRL + Druck), kann sich eine Konsole exklusiv das Recht zur Bedienung reservieren. Dabei bleibt der Monitor der inaktiven Konsole weiterhin dunkelgeschaltet und auch Keyboard- und Mouseaktionen sind gesperrt. Mit dieser Einstellung legen Sie fest, ob der Protected Mode aktiv geschaltet werden soll. Steppen Sie dazu mit der Cursor-Taste auf den Eintrag Protected Mode. Durch Betätigen der SPACE-Taste können Sie dann zwischen folgenden Alternativen wählen: Yes oder NO. Um die Einstellung zu speichern, verlassen Sie dies Menü mit F 1. Nach Beendigung aller Konfigurationsarbeiten ist der Protected Mode aktiv. Nach aktiviertem Protected Mode erscheint auf dem Monitor folgendes Display auf dem Monitor. CVM PROTECTED MODE ENABLED Seite 41 Guntermann & Drunck GmbH 6.2.2.9 Installations- und Bedienungsanleitung CATVision (MC) Keyb. LED flash Mit dieser Einstellung legen Sie fest, ob die Keyboard-LED „Rollen“ nach ausgelöster Haltefunktion (vgl. Kapitel 7.3) oder ausgelöstem Protected Mode (vgl. Kapitel 7.4) blinken sollen oder nicht. Steppen Sie dazu mit der Cursor-Taste auf den Eintrag Keyb. LED flash. Durch Betätigen der SPACE-Taste können Sie dann zwischen folgenden Alternativen wählen: Yes oder NO. Um die Einstellung zu speichern, verlassen Sie dies Menü mit F 1. 6.2.2.10 Festlegung des Scancode-Satzes local Der Scancode bezeichnet die „Sprache“, in welcher das Keyboard mit dem Rechner kommuniziert. Das CATVision arbeitet im Scancode 2 (Default). Stellen Sie diese Einstellung nur nach Rücksprache mit unserem Service um. Fahren Sie den Cursor auf den entsprechenden Eintrag. Durch Betätigen der SPACE-Taste können Sie dann zwischen folgenden Alternativen wählen: 3 oder 2 Um die Einstellung zu speichern, verlassen Sie dies Menü mit F 1. 6.2.2.11 Festlegung des Scancode-Satzes remote Funktion entsprechend wie in Kapitel 6.2.2.10, aber bezogen auf das Keyboard an der remote Konsole. 6.2.2.12 USB Multimedia Keyboard Mittels Anwahl dieses Menüpunktes kann die Multimedia-USB-Unterstützung im CATVision aktiviert werden. Im Auslieferungszustand ist diese deaktiviert (Wert steht auf „no“)! Um die Einstellung zu speichern, verlassen Sie dies Menü mit F 1. Seite 42 Guntermann & Drunck GmbH Installations- und Bedienungsanleitung CATVision (MC) 6.2.2.13 USB SUN-Keyboard mode Wird ein SUN-Rechner mit USB-Keyboard (und -Maus) an CATVision-CPU angeschlossen, so wird dies dem System durch Änderung des Wertes dieser Einstellung auf „yes“ mitgeteilt. Im Auslieferungszustand ist die Unterstützung für USB SUN-Keyboards deaktiviert (Wert steht auf „no“)! 6.2.2.14 USB SUN-Keyboard layout Nach Aktivierung des USB SUN-Keyboard mode (s.o.) wird über diese Einstellung das Tastaturlayout des SUN-Keyboards ausgewählt. Stellt sich während der Bedienung des Rechners heraus, dass Umlaute und andere landesspezifische Zeichen der Tastatur unzutreffend ausgegeben werden, so ist diese Einstellung zu prüfen und gegebenenfalls zu ändern. Folgende Optionen stehen zur Auswahl: DE: deutsches Tastaturlayout US: amerikanisches Tastaturlayout Wird die Einstellung des Tastaturlayouts während des laufenden Betriebs des SUN-Rechners geändert, ist ein Neustart des SUN-Rechners erforderlich, um die geänderte Einstellung anzuwenden. Im Auslieferungszustand ist das Ändern dieser Einstellung nicht möglich, da die Unterstützung für USB SUN-Keyboards deaktiviert ist. 6.2.2.15 Temperature Warning Das Arbeitsplatz- (CATVision-CON) und das Rechnermodul (CATVision-CPU) sind mit Temperatursensoren ausgestattet. Die Temperatur innerhalb der Geräte wird ständig überwacht. Um eine Überhitzung der Module zu vermeiden, werden die folgenden Aktionen bei Erreichen der angegebenen Werte durchgeführt: 60 °C: Die Module weisen durch eine Anzeige im OSD oder auf dem Bildschirm (s. u.) auf die erhöhte Temperatur hin. 80 °C: Das Bildsignal am Arbeitsplatzmodul wird deaktiviert! Seite 43 Guntermann & Drunck GmbH Installations- und Bedienungsanleitung CATVision (MC) Wichtig: Wird das Bildsignal aufgrund der hohen Temperatur innerhalb des Arbeitsplatzmoduls deaktiviert, ist die entfernte Kontrolle und Bedienung des angeschlossenen Rechners nicht möglich! Sorgen Sie bei Anzeige einer Warnmeldung unverzüglich für die Kühlung des erwärmten Moduls! Die Warnung erscheint auf beiden Modulen, sobald die Temperatur eines der Module einen kritischen Wert erreicht. In der Warnung wird angegeben, ob das Arbeitsplatz- (remote unit) oder das Rechnermodul (local unit) betroffen ist. Wichtig: Erreicht die Temperatur eines Moduls den kritischen Bereich, während bereits eine Warnung für das andere Modul aktiv ist, erfolgt hierüber keine separate Warnung! Die Temperatur-Warnung können Sie wahlweise im OSD oder als DisplayEinblendung anzeigen lassen: OSD: Die Anzeige der Warnung erscheint in der Standardeinstellung des KVM-Extenders ggf. bei Aufruf des OSDs. Durch Betätigung einer beliebigen Taste bestätigen Sie die Meldung und können das OSD wie gewohnt bedienen. Hinweis: Sinkt die Temperatur auf den Normalbereich und steigt anschließend – nach mindestens einer Minute – wieder in den kritischen Bereich, wird die Meldung erneut angezeigt. Display-Einblendung: Alternativ können Sie die Warnung als Einblendung im aktuell dargestellten Bild anzeigen lassen. Entsprechend der von Ihnen konfigurierten »Display Position« erscheint der Hinweis als dauerhafte Einblendung auf dem Bildschirm. So bestimmen Sie, ob die Warnung im OSD oder als Display-Einblendung dargestellt wird: 1. 2. 3. Wählen Sie im OSD „System Config > Temperature Warning“. Betätigen Sie die Space-Taste, um zwischen den Optionen OSD und Display zu wählen. Um die Einstellung zu speichern, verlassen Sie dies Menü mit F 1. 6.2.2.16 Keyboard Type Local Nach Anwahl dieses Menüpunktes können Sie im Untermenü die Unterstützung der Tastaturen „PixelPower Clarity (blue)“ bzw. „SKIDATA1“ im CATVision für die lokale Konsole aktivieren. Seite 44 Guntermann & Drunck GmbH Installations- und Bedienungsanleitung CATVision (MC) Im Auslieferungszustand ist diese deaktiviert. Um die Unterstützung für diese Tastatur zu aktivieren betätigen Sie bitte im Untermenü die Space-Taste um die Einstellung zu aktivieren. Um die Einstellung zu speichern, verlassen Sie dies Menü mit F 1. 6.2.2.17 Keyboard Type Remote Nach Anwahl dieses Menüpunktes können Sie im Untermenü die Unterstützung der Tastaturen „PixelPower Clarity (blue)“ bzw. „SKIDATA1“ im CATVision für die remote Konsole aktivieren. Im Auslieferungszustand ist diese deaktiviert. Um die Unterstützung für diese Tastatur zu aktivieren betätigen Sie bitte im Untermenü die Space-Taste um die Einstellung zu aktivieren. 6.2.2.18 Signal type input Um die korrekte Farbdarstellung des übertragenen Videosignals sicherzustellen, kann hier eine Auswahl getroffen werden, welcher Synchronisationstyp für das eingehende Videosignal vorliegt. Zur Auswahl stehen: Standard: umfasst RGB HV, RGsB, RsGsBs RGsB/HV: Sync auf Grün und zusätzlich getrennt HV 6.2.2.19 Remote sync Der Eintrag „Remote sync“ kann grundsätzlich zwischen zwei möglichen Einträgen wechseln. Diese sind: Separated H/V as input Wenn CATVision getrennte HV-Signale erkennt, wird Remote sync auf „Separated H/V“ gestellt und ist nicht veränderbar. Wenn keine HV-Signale erkannt werden, besteht die Möglichkeit diese über die Einstellung „Separated H/V“ trotzdem auszugeben. Bei Auswahl „as input“ wird das Signal so ausgegeben wie es vom Rechner in das CATVision-System gelangt. Seite 45 Guntermann & Drunck GmbH 6.2.3 Installations- und Bedienungsanleitung CATVision (MC) User Account Steppen Sie im Config Menü auf den Eintrag User Account und drücken Sie die Taste ENTER. Folgendes Fenster öffnet sich: User Account 1 2 3 4 ... CVM USER 01 USER 02 USER 03 USER 04 bis User 08 OpenAccess SUPERVISOR Esc Enter Hier wählen Sie den USER ACCOUNT aus, den Sie im folgenden verändern möchten. Steuern Sie den Cursor über Keyboard oder Mouse auf den entsprechenden Account. Bestätigen Sie Ihre Auswahl mit ENTER (oder linke Mousetaste) oder verlassen Sie dieses Menü ohne Auswahl über ESC (oder rechte Mousetaste). Haben Sie einen Account angewählt (z. B. User 1), gelangen Sie in ein Untermenü, das Fenster USER ACCOUNT. Hier können sie die Einstellungen für den im SELECT ACCOUNT ausgewählten User ändern. Aufgrund der Besonderheiten des Supervisor sowie des Open Access Accounts, erscheinen diese gesondert im Menü. Supervisor: User: Diese Account können keine Rechte entzogen werden Benutzer, der wahlweise mit Konfigurationsrechten ausgestattet werden kann Open Access: Ist die offene Zugangsvariante zum CATVision-System und kein "echter" User. Seite 46 Guntermann & Drunck GmbH Installations- und Bedienungsanleitung CATVision (MC) Derzeit können 8 User, der Supervisor sowie der Open Access-Zugang verwaltet werden. User Account Account No. 1 Account enabled: User Name: Set Account Defaults IVT access System Config access User Account access Change Password… Esc CVM Yes USER 01 Yes No No Enter F1:Save Hinweis: Wollen Sie mehr als ein Feld ändern, speichern Sie erst nach Durchführung aller Änderungen im USER-ACCOUNT mit F1 ab. 6.2.3.1 Account enable / disable Account enabled: Yes / No In der ersten Zeile des USER-ACCOUNT haben Sie die Möglichkeit, den gesamten Account zu sperren, bzw. freizugeben (Administrator-Account kann nicht gesperrt werden). Eine Sperrung kann z. B. bei einer längeren Abwesenheit des Account-Inhabers sinnvoll sein. Nachdem Sie den Cursor, wie zuvor beschrieben, auf das entsprechende Feld gesteuert haben, können Sie die Einstellung durch Eingabe von Y oder N verändern. Zur alternierenden Umschaltung können Sie auch die SPACE -Taste nutzen. F 1 speichert die neue Einstellung und führt zurück zum SELECT ACCOUNT. Default: Account enabled = Yes 6.2.3.2 Vergabe des User-Namens User name USER 01 Geben Sie mit max. 14 Zeichen den Namen des diesem Account zugeordneten Users ein. Vorhergehende Einträge können überschrieben werden. Steuern Sie den Cursor auf dieses Feld. Drücken Sie die ENTER -Taste, um in den Editiermodus für dieses Feld zu gelangen. Schließen Sie die Eingabe mit ENTER ab. Seite 47 Guntermann & Drunck GmbH Installations- und Bedienungsanleitung CATVision (MC) Wird der User Name geändert, erscheint automatisch ein Fenster, welches Sie auf die erfolgte Umstellung hinweist. Nachdem Sie eine beliebige Taste betätigt haben, erscheint das Eingabemenü für das User-Passwort: CHANGE PASSWORD CVM Please enter your new password twice: [max. 12 Zeichen] Esc Enter Die Eingabe kann alphanumerisch erfolgen und umfasst max. 12 Zeichen. ENTER schließt die erste Eingabe ab und springt automatisch in das zweite Feld, wo das Passwort nochmals einzugeben ist. ENTER bestätigt das neue Passwort und führt zurück zum User Account. F 1 speichert die neue Einstellung und führt zurück zum SELECT ACCOUNT. Abbruch der Passwortänderung ESC im Fenster CHANGE PASSWORD bricht die Aktion ab und führt ebenfalls zum User Account. Hinweis: Haben Sie zuvor bereits einen Usernamen angelegt, brechen jedoch diese Passwortvergabe ab, so bleibt dieser User weiter existent, kann sich aber nicht einloggen, da kein Passwort existiert! Ist bereits ein Passwort angelegt welches ersetzt werden soll, bleibt dieses weiterhin aktiv. Durch Anlegen eines Users wird der evtl. noch aktive OpenAccess deaktiviert! Seite 48 Guntermann & Drunck GmbH 6.2.3.3 Installations- und Bedienungsanleitung CATVision (MC) Set Account Defaults Set Account Defaults Diese Funktion setzt alle Änderungen des USER ACCOUNT zurück auf den Lieferzustand, der in diesem Kapitel jeweils am Ende eines Abschnitts als „default“ angegeben ist. Ausnahme: User Name + User Password Bewegen Sie den Cursor auf den Eintrag und betätigen Sie dann die ENTER Taste. Die Funktion wird im Hintergrund ausgeführt. F 1 speichert die neue Einstellung und führt zurück zum SELECT ACCOUNT. 6.2.3.4 IVT Access IVT Access: Yes/No Hier können Sie dem Inhaber dieses Accounts den Zugang zum IVT gewähren oder entziehen. Steuern Sie das Feld an und gewähren Sie den Zugang zum IVT durch Eingabe von Y oder verwehren Sie diesen durch N. Die SPACE -Taste kann zusätzlich zur alternierenden Umschaltung genutzt werden. F 1 speichert die neue Einstellung und führt zurück zum SELECT ACCOUNT. Default: IVT-Access = Yes 6.2.3.5 System Config Access System Config Access... No/Yes Hier können Sie dem Inhaber dieses Accounts den Zugang zum Menü System Config gewähren oder entziehen. Steuern Sie das Feld an und gewähren Sie den Zugang zum System Config durch Eingabe von Y oder verwehren Sie diesen durch N. Die SPACE -Taste kann zusätzlich zur alternierenden Umschaltung genutzt werden. F 1 speichert die neue Einstellung und führt zurück zum SELECT ACCOUNT. Default: System Config Access = No Seite 49 Guntermann & Drunck GmbH 6.2.3.6 Installations- und Bedienungsanleitung CATVision (MC) User Account Access User Account Access ... No/Yes Hier können Sie dem Inhaber dieses Accounts den Zugang zum Menü User Account gewähren oder entziehen. Steuern Sie das Feld an und gewähren Sie den Zugang zum User Account durch Eingabe von Y oder verwehren Sie diesen durch N. Die SPACE -Taste kann zusätzlich zur alternierenden Umschaltung genutzt werden. F 1 speichert die neue Einstellung und führt zurück zum SELECT ACCOUNT. Default: User Account Access = No 6.2.3.7 Change Password Change password... Hier können Sie das User Password festlegen. Achten Sie darauf, dass weder das Passwort noch der USER-Name zweimal vergeben wird. Die Eingabe ist alphanumerisch möglich. Fahren Sie den Cursor auf den entsprechenden Eintrag im Menü USER ACCOUNT. Nach Drücken der Taste ENTER gelangen Sie in ein Untermenü, wo Sie zur Eingabe des Passwortes aufgefordert werden. CHANGE PASSWORD CVM Please enter your new password twice: [Min. 4, max. 12 Zeichen] Esc Enter Die Eingabe kann alphanumerisch erfolgen und umfasst min. 4 Zeichen, max. 12 Zeichen. Seite 50 Guntermann & Drunck GmbH Installations- und Bedienungsanleitung CATVision (MC) ENTER schließt die erste Eingabe ab und springt automatisch in das zweite Feld, wo das Passwort nochmals einzugeben ist. ENTER bestätigt das neue Passwort und führt zurück zum USER ACCOUNT. F 1 speichert die neue Einstellung und führt zurück zum SELECT ACCOUNT. Default: Kein Passwort. Abbruch der Passwortänderung ESC im Fenster CHANGE PASSWORD bricht die Aktion ab und führt ebenfalls zum USER ACCOUNT. Hinweis: Ist bereits früher ein Passwort angelegt worden, welches erneuert werden soll, und die Passwortänderung wird abgebrochen, so bleibt das alte Passwort weiterhin aktiv. Bitte merken Sie sich die Passwörter gut, da bei Verlust kein Systemzugriff mehr möglich ist. 6.3 Mouse Utility Sollte die Mouse des angeschlossenen Rechners während des Betriebes nicht mehr funktionieren (Mouse-Pfeil bewegt sich nicht), besteht die Möglichkeit, eine Re-Initialisierung durchzuführen. Überprüfen Sie jedoch zuerst alle Anschlusskabel auf korrekten Sitz. Rufen Sie das FUNCTION Menü (CTRL + NUM) auf. Steppen Sie mittels der Pfeiltasten in den Menübereich unter F8 auf den Menüpunkt Mouse Utility. Durch Eingabe von ENTER öffnet sich ein Untermenü, welches Ihnen folgende Möglichkeiten bietet: MOUSE UTILITY CVM Enable Mouse ► for Unix ◄ Reset Mouse Enable Intelli Enable Int Explorer Esc Enter Achtung! Führen Sie nur den für den einzelnen Rechner passenden Enable/Reset durch! Seite 51 Guntermann & Drunck GmbH Installations- und Bedienungsanleitung CATVision (MC) Enable Mouse (for Unix) Wählen Sie diese Funktion bei Nicht-Windows-Systemen (z. B. Linux), wenn der Rechner mit einem Standard-Mouse Treiber arbeitet. Reset Mouse Wählen Sie diese Funktion bei Windows-Betriebssystemen; unabhängig vom eingestellten Mouse-Treiber. Dies trifft zu für: WIN 98, WIN NT, WIN ME, WIN 2000, WIN XP. Steuern Sie den Cursor mittels der Pfeiltasten auf den entsprechenden Eintrag. Betätigen Sie die Taste ENTER. Die Initialisierung der Mouse wird durchgeführt und das Menü geschlossen. Die Mouse arbeitet wieder mit voller Funktionalität. Enable Intelli (MS-Intelli-Mouse) Wählen Sie diese Funktion bei Nicht-Windows-Systemen (z. B. Linux), sollte der angeschlossene Rechner den MS-Intelli-Mousetreiber geladen haben. Enable Int Explorer (MS-Intelli-Mouse) Wählen Sie diese Funktion bei Nicht-Windows-Systemen (z. B. Linux), sollte der angeschlossene Rechner den MS-Intelli-Explorer Mousetreiber geladen haben. Seite 52 Guntermann & Drunck GmbH Installations- und Bedienungsanleitung CATVision (MC) 7 Systembedienung 7.1 Zugriffsmöglichkeiten Folgende Zugriffsmöglichkeiten bestehen auf das System: Open Access: freier Zugang zum System über definierte User: Anmeldung mit Passwort und Name erforderlich als Supervisor Im den nachfolgenden Kapiteln werden die einzelnen Zugriffsmöglichkeiten näher erläutert. 7.1.1 Zugriff über OpenAccess Beim Zugriff über OpenAccess kann jeder auf das CATVision-System und die angeschlossene CPU zugreifen. Der OpenAccess definiert sich im Lieferzustand folgendermaßen: Zugriff auf die angeschlossene CPU ohne vorherige Anmeldung mit Loginname und Passwort Zugriff auf das IVT zur individuellen Anpassung des Videobildes Zugriff auf das Menü Console Setup Berechtigung zum manuellen Logout über F8 Berechtigung zur Reinitialisierung der Mouse Im Auslieferungszustand ist dem OpenAccess der Zugriff auf das Menü Config verwehrt (Ausnahme ist das IVT; hier gelangt der OpenAccess bei der Passwortabfrage durch Drücken der Taste Enter in das Untermenü IVT). Das Recht zum Zugriff auf das Menü Config kann dem OpenAccess durch den Supervisor zugewiesen werden. Dazu muss der Supervisor im Menü User Account dem OpenAccess die gewünschten Konfigurationsrechte zuweisen (vgl. Kapitel 6.2.3.4 bis 6.2.3.6). Solange der OpenAccess aktiv ist, besteht immer die Möglichkeit des Zugriffes ohne vorherige Anmeldung, auch wenn bereits User angelegt worden sind. Um das System gegen unbefugten Zugriff zu schützen, muss durch den Supervisor oder einem User mit Konfigurationsrecht der OpenAccess deaktiviert werden. Im UserAccount wird der OpenAccess verwaltet. Um den OpenAccess zu deaktivieren, öffnen Sie das Menü UserAccount, welches ein Untermenü des Config-Menüs ist (vgl. Kapitel 6.2.3). Seite 53 Guntermann & Drunck GmbH Installations- und Bedienungsanleitung CATVision (MC) Dort befindet sich am unteren Ende des Fensters der Eintrag OpenAccess. User Account 1 2 3 4 ... CVM USER 01 USER 02 USER 03 USER 04 bis User 08 OpenAccess SUPERVISOR Esc Enter Bewegen Sie den Cursor auf diesen Eintrag und drücken Sie die Taste Enter. Folgendes Fenster öffnet sich: User Account OpenAccess Account enabled: User Name: Set Account Defaults IVT Access System Config Access User Account Access Change Password… Esc Enter CVM NO OpenAccess Yes No No F1:Save Bewegen Sie den Cursor auf den Eintrag Account enabled und wechseln mit der Space-Taste den dortigen Eintrag auf NO. Speichern Sie Ihre Einstellung mit F1. Somit ist der OpenAccess deaktiviert und der Zugriff auf das CATVisionSystem nur noch über den Login möglich. Um den OpenAccess zu aktivieren, wiederholen Sie die zuvor beschriebene Verfahrensweise, ändern jedoch den Eintrag im Feld Account enabled von NO auf YES! Seite 54 Guntermann & Drunck GmbH 7.1.2 Installations- und Bedienungsanleitung CATVision (MC) Zugriff über definierte User Beabsichtigen Sie, das System gegen unbefugten Zugriff zu schützen, ist es sinnvoll User anzulegen und diese User mit bestimmten Rechten auszustatten. Sobald durch den Supervisor im Menü UserAccount Benutzer angelegt worden sind, ist der Zugriff auf des System nur noch über einen Login-Namen und ein Passwort möglich. Diesem Benutzer können bestimmte Rechte zugewiesen sein. Das Verfahren zum Anlegen von Benutzern wird in Kapitel 6.2.3 beschrieben. 7.1.3 Zugriff als Supervisor Wollen Sie Änderungen der Voreinstellungen vornehmen, geben Sie im LOGIN-Fenster Feld „Name“ Ihre SUPERVISOR-Kennung und im Feld „Password“ Ihr SUPERVISOR-Passwort ein. Beides finden Sie in der Anlage 1 zur Bedienungsanleitung. Über den SUPERVISOR-Login haben Sie, unabhängig von den aktuellen Einstellungen, jederzeit Zugriff auf alle Konfigurationsebenen. Für Einstellungen im Menü Config ist die Anmeldung als SUPERVISOR erforderlich. Selbstverständlich kann auch an User-Logins ein Konfigurationsrecht geknüpft werden (vgl. Kapitel 6.2.3.4 bis 6.2.3.6) Bitte entfernen Sie das SUPERVISOR-Passwort zu Ihrer eigenen Sicherheit unbedingt aus der Bedienungsanleitung. Seite 55 Guntermann & Drunck GmbH 7.2 Installations- und Bedienungsanleitung CATVision (MC) Automatische Umschaltung Das CATVision-System erlaubt die wahlweise Bedienung des Rechners von beiden Konsolen aus (lokal und remote). Im Grundzustand ist die Bedienung für beide Konsolen freigechaltet. Sobald an einer der Stationen eine Eingabe über Keyboard oder Mouse durchgeführt wird, sind Keyboard/Mouse der anderen Station automatisch gesperrt. Wird für einen Time-out von ca. 1 Sek. keinerlei Bedienung vorgenommen, schaltet das System wieder frei. Der Time-out zwischen den einzelnen Umschaltvorgängen kann entsprechend Ihren Bedürfnissen angepasst werden (vgl. Kapitel 6.2.2.7). Beide angeschlossene Monitore zeigen simultan das Bild des Rechners. Ist die Dunkelschaltung aktiviert (vgl. Kapitel 7.5), so wird nur an der aktiven Konsole das Videobild angezeigt. Seite 56 Guntermann & Drunck GmbH 7.3 Installations- und Bedienungsanleitung CATVision (MC) Manuelle Haltefunktion (Permanent Access) Durch das CATVision-System ist es möglich, dass entweder die lokale oder die entfernte (remote) Konsole exklusiv den Rechner bedienen kann. Dies verhindert, dass das System die andere Konsole nach dem voreingestellten Time-Out von ca. 1 Sek. freischaltet. Durch halten der CTRL-Taste und zusätzlicher Bedienung der DRUCK-Taste wird der Permanent Access aktiviert (Default-Einstellung). Signalisiert wird der Permanent Access: an der auslösenden Konsole, durch die langsam blinkende KeyboardLed „Scroll Lock“. an der Konsole, welche durch die Haltefunktion gesperrt wurde, durch schnell blinkende Keyboard-Led „Scroll Lock“, die ACTIVE LED LOCAL (z. B. bei CATVision-CPU) erlischt und die ACTIVE LED CPU leuchtet das Display wird folgendermaßen dargestellt CVM PERMANENT ACCESS Der Permanent Access wird durch erneutes Drücken der Tastenkombination CTRL und DRUCK deaktiviert und die LED SCROLL-LOCK der Keyboard erlischt. Danach ist die automatische Umschaltung (vgl. Kapitel 7.2) wieder aktiv. Hinweis: Sollten Sie den Doppel-HotKey aktiviert haben (vgl. Kapitel 6.2.2.2), müssen Sie zur Auslösung des Permanent Access, den von Ihnen definierten Doppel-HotKey zur Auslösung des Permanent Access drücken. Im Default-Zustand ist der Permanent Access für beide Konsolen freigegeben. Beabsichtigen Sie, den Permanent Access zu sperren oder nur für eine Konsole freizugeben, so verfahren Sie bitte wie in Kapitel 6.2.2.6 beschrieben. Diese Funktion kann ebenfalls mit der Dunkelschaltungs-Funktion kombiniert werden (vgl. Kapitel 7.5). In diesem Fall wird das Videobild der gesperrten Konsole dunkel geschaltet. Seite 57 Guntermann & Drunck GmbH 7.4 Installations- und Bedienungsanleitung CATVision (MC) Protected Mode Beim Protected Mode sind im Ausgangszustand beide Monitor (lokal und remote) dunkelgeschaltet, und an keiner der beiden Konsolen sind Keyboardund Mouseaktionen möglich (vgl. Kapitel 7.4). Erst durch Eingabe eines HotKeys (CTRL + Druck), kann sich eine Konsole exklusiv das Recht zur Bedienung reservieren. Dabei bleibt der Monitor der inaktiven Konsole weiterhin dunkelgeschaltet und auch Keyboard- und Mouseaktionen sind gesperrt. Der Unterschied zum Permanent Access besteht darin, das beim Permanent Access die Bedienung grundsätzlich freigegeben ist und durch Aktivierung der Funktion sich eine Konsole das exklusive Recht zur Bedienung solange sichern kann, bis diese Funktion wieder deaktiviert wird. Durch Betätigen der Keyboard-Kombination CTRL und DRUCK erhält die auslösende Konsole vollen Keyboard- und Mousezugriff. Dagegen bleibt die inaktive Konsole weiter für Keyboard- und Mouseeingaben gesperrt. Signalisiert wird der Protected Mode: an der Konsole, welche das exklusive Recht der Bedienung hat, durch langsam blinkende Keyboard-Led „Scroll Lock“. an der Konsole, welche weiterhin gesperrt ist, durch schnell blinkende Keyboard-Led „Scroll Lock“, die ACTIVE LED LOCAL (z. B. bei CATVision-CPU) erlischt und die ACTIVE LED CPU leuchtet auf beiden Monitoren erscheint folgende Anzeige CVM PROTECTION ACTIVATED Die Protected Mode wird durch erneutes Drücken der Tastenkombination CTRL und DRUCK deaktiviert und die LED SCROLL-LOCK des Keyboards erlischt. Die Monitore werden sofort dunkel geschaltet. Danach ist die automatische Umschaltung (vgl. Kapitel 7.2) wieder aktiv. Im Default-Zustand ist die Protected Mode nicht freigegeben. Beabsichtigen Sie, den Protected Mode zu aktivieren, so verfahren Sie bitte so wie in Kapitel 6.2.2.8 beschrieben. Seite 58 Guntermann & Drunck GmbH 7.5 Installations- und Bedienungsanleitung CATVision (MC) Dunkelschaltung des Monitors Beim CATVision-System besteht die Möglichkeit, während des lokalen oder entfernten Zugriffs auf den Rechner, den Monitor der nicht zugreifenden Konsole dunkel zu schalten. Sie können somit z. B. als Supervisor Ihre Konfigurationseinstellungen gegen unbefugte Beobachter schützen. Folgende Möglichkeiten der Dunkelschaltung können sich ergeben: Dunkelschaltung bei automatischer Umschaltung Dunkelschaltung kombiniert mit Permanent Access Diese genannten Möglichkeiten werden nun in den nachfolgenden Kapiteln näher erläutert. 7.5.1 Dunkelschaltung des Monitors bei automatischer Umschaltung In der Standardeinstellung (Automatischen Umschaltung) wird die Dunkelschaltung durch eine Maus- oder Tastatureingabe ausgelöst. Nach dem voreingestellten time-out von ca. 1 Sek. wird der Bildschirm der inaktiven Konsole wieder freigeschaltet. Bedingung dafür ist jedoch, dass die Dunkelschaltung freigegeben wurde. Im Default-Zustand ist die „Dunkelschaltung“ nicht freigegeben. Beabsichtigen Sie, die „Dunkelschaltung“ zu aktivieren, so verfahren Sie bitte so wie in den Kapiteln 6.2.2.4 und 6.2.2.5 beschrieben. 7.5.2 Dunkelschaltung des Monitors bei Permanent Access Die Dunkelschaltung des nicht aktiven Monitors ist bei einer Keyboard und Mouseaktion und im Modus der „Haltefunktion“ möglich. Bedingung ist, dass die Dunkelschaltung aktiviert wurde (vgl. Kap. 6.2.2.4 und 6.2.2.5). Ausgelöst wird die Dunkelschaltung durch eine Keyboard/Mouse-Aktion oder durch die Aktivierung der Haltefunktion (CTRL + DRUCK-Taste). Die manuelle Haltefunktion wird durch erneutes Drücken der Tastenkombination CTRL und DRUCK wieder deaktiviert und der Monitor der inaktiven Arbeitstation nach dem fest definierten Time-Out (vgl. Kap. 6.2.2.7) wieder freigeschaltet. Im Default-Zustand ist die „Dunkelschaltung“ nicht freigegeben. Beabsichtigen Sie, die „Dunkelschaltung“ zu aktivieren, so verfahren Sie bitte so wie in Kap. 6.2.2.4 und 6.2.2.5 beschrieben. Seite 59 Guntermann & Drunck GmbH 7.6 Installations- und Bedienungsanleitung CATVision (MC) Manueller Logout Durch Drücken der Taste F8 im Function Menü führen Sie ein Logout durch. Diese Funktion hebt Ihre Anmeldung am CATVision auf. Nach der Ausführung wechselt der CATVision zum LOGIN Fenster: Sollten Sie sich noch im Modus OPEN ACCESS befinden, können Sie sich über die Enter-Taste sofort wieder am System anmelden. Sollten Sie User Accounts angelegt haben und OPEN ACCESS wurde deaktiviert, können Sie erst wieder nach Eingabe Ihres UserPasswortes oder des Supervisor-Passwortes Zugriff auf das System erhalten. Hinweis: Sie sollten immer dann ein Logout ausführen, wenn sie Ihren Rechner gegen nicht autorisierten Zugriff schützen möchten, z. B. wenn Sie Ihren Arbeitsplatz verlassen. Seite 60 Guntermann & Drunck GmbH 8 Installations- und Bedienungsanleitung CATVision (MC) Optionale Ausstattung Alle in diesem Kapitel erwähnten Ausstattungskomponenten sind als Zukaufoption erhältlich. Sollten Sie nachträglich einen der im folgenden genannten Komponenten benötigen, so setzen Sie sich bitte mit unserem Vertrieb (02739-8901-100 oder [email protected]) in Verbindung. 8.1 Delay Das Delay kompensiert Laufzeitunterschiede bei CAT-x-Kabeln. Diese Laufzeitunterschiede kommen durch die Verdrillung der Aderpaare zustande. Als Resultat dieser Verdrillung erhält man unterschiedliche Längen jeder einzelnen Ader. Durch diese unterschiedlichen Längen kommen die Farbsignale R, G und B zu unterschiedlichen Zeiten am Monitor an. Der Effekt dieser Laufzeitunterschiede ist, dass Sie kein harmonisches Bild erkennen, sondern Farbverschiebungen am Monitor festzustellen sind, welche mit Konvergenzfehlern am Monitor zu vergleichen sind. Um diese Laufzeitunterschiede zu kompensieren, wird das Delay eingesetzt. In Kapitel 5.4.4.3.4 wird das Verfahren beschrieben. Seite 61 Guntermann & Drunck GmbH 8.2 Installations- und Bedienungsanleitung CATVision (MC) Audio Das CATVision bietet eine bidirektionale Stereo-Audio-Übertragung in nahezu CD-Qualität an. Dazu befinden sich am CATVision-CPU die Audioschnittstellen Line In Line Out Mouse PS/2 RS 232 Line In Line Out USB K/M Red. Power 5V DC/5A Keyb PS/2. CPU In Monitor Transmission USB 1.1 Trans Main Power CPU In CPU VGA Keyb. Mouse In AC 100-240 V, 47-63 Hz Am CATVision-CON befinden sich folgende Audioschnittstellen: Line In Micro In Speaker RS 232 Line In Micro In Speaker Main Power Keyb. USB Mouse USB Trans 5V DC/5A Keyb. PS/2 Mouse Service Monitor Transmission Red. Power AC 100-240 V, 47-63 Hz Der Ausgang gibt dabei jeweils die Audiosignale aus, die am Eingang des anderen Endes der Übertragungsstrecke eingespeist werden. Die Übertragung der Audiosignale erfolgt digital über die CAT x-Kabel und ist somit von der Kabellänge unabhängig. Die Digitalisierung erfolgt mit einer Auflösung von 18 Bit und einer Abtastrate von 48kHz. Die Anschlüsse sind als 3,5 mm Klinkenbuchsen ausgeführt. Die Eingänge Micro In und Line In der jeweiligen Geräte können wahlweise, also nicht gleichzeitig, genutzt werden. Der Eingang Micro In ist mit einer Vorverstärkung von 20 dB ausgestattet. Als Beispiel die Verbindungen im wahrscheinlich häufigsten Einsatzfall: PC 1. Line-Out => 2. Line-In => CAT Vision-CPU Line-In Line-Out CAT Vision-CON Line-Out Micro-In Seite 62 Peripherie <= Aktivlautsprecher <= Mikrofon Guntermann & Drunck GmbH 8.3 Installations- und Bedienungsanleitung CATVision (MC) RS232 Mit der Schnittstelle RS232 lassen sich externe serielle Geräte am CATVision anschließen. Folgende Parameter müssen diese Geräte erfüllen: 8.4 Übertragungsrate: 200 Meter max. 38400 bit/s 100 Meter max. 57600 bit/s übertragbare Signale: TxD, RxD, RTS, CTS, DTR, DSR Übertragung von USB 1.1 (transparent) Mit dem CATVision-System überwinden Sie aufgrund der eingesetzten Technologie die übliche 5-Meter Grenze für die Entfernung zwischen CPU und USB-Peripheriegerät. Die Übertragungsrate beträgt bis zu 12 MBit/s. USB-Geräte können mit dem CATVision-System bis zu 200 Meter vom Rechner entfernt angeschlossen werden. Hinweis zur Kompatibilität des transparenten USB-Anschlusses: Der USB-Anschluss entspricht den USB 1.1 Spezifikationen, welche das Design von USB full-speed Geräten regeln. Dennoch garantieren wir nicht, dass alle USB full-speed Geräte kompatibel zum CATVision sind. Seite 63 Guntermann & Drunck GmbH 9 Installations- und Bedienungsanleitung CATVision (MC) System-Update Mit dem CATVision haben Sie die Möglichkeit einen Firmware-Update über die Servicebuchse (2,5mm Klinke) durchzuführen. Diese Buchse finden Sie beim CATVision-CPU auf der Vorderseite des Gerätes. Servicebuchse für Firmwareupdate Beim CATVision-CON befindet sich diese Buchse auf der Rückseite des Gerätes. Diese Servicebuchse ist im alltäglichen Gebrauch für Sie ohne weitere Bedeutung. Sollte einer dieser Fälle bei Ihnen vorliegen (Sonderhardware oder Einspielung von Systemupdates), so kontaktieren Sie bitte unseren Service unter der Telefonnummer 02739-8901-100 oder [email protected]. 10 System Info Im Fenster System Info, welches nur über den entsprechenden Eintrag im Menü FUNCTION aufgerufen werden kann, können Sie keinerlei Einstellungen vornehmen. Sie finden hier Informationen über den CATVision, die für den Werksservice von Bedeutung sind. ESC schließt das Fenster. Seite 64 Guntermann & Drunck GmbH 11 Installations- und Bedienungsanleitung CATVision (MC) CV-Power-Erweiterung Das CATVision-System offeriert durch die optionale CV-PowerFunktionalität (GPIO=General Purpose Input Output) die Möglichkeit, zur Schaltung elektronischer Signale über größere Distanzen. Eine konkrete Anwendung dafür ist die Fernbedienung von RESET und Schalten der ATX-Stromversorgung in einem PC. Dafür werden mit einer einfachen Slot-Blenden-Einsteckkarte in dem zu bedienenden PC die vorhandenen Taster mit den Steuersignalen des CATVision kombiniert. 11.1 Lieferumfang Zum Anschluss am CATVision-CPU 1 x CV-Power Slotkarte (ATX-Modul) zum Einbau im PC 2 x 2pol. Verbindungskabel-0,4 zur Verbindung zwischen Motherboard und CV-Power (2-adrig Buchse/Buchse) 2 x 2pol. Verbindungskabel-0,4 zur Verlängerung des Buchse-BuchseKabels (2-adrig Stecker/Buchse) 1 x Power-Cord-2 Anschlusskabel für den Anschluss der Slotkarte CV-Power mit dem CATVision-CPU (3pol-Stecker auf RJ9-Stecker) Zum Anschluss am CATVision-CON 1 x 3-pol. Kabelbuchse zum Anschluss an das Tasterverbindungskabel Seite 65 Guntermann & Drunck GmbH Installations- und Bedienungsanleitung CATVision (MC) 11.2 Installationsanleitung 11.2.1 Einbau im PC Die Verbindung des CV-Power (ATX-Modul) mit dem Motherboard des Rechners ermöglicht die Durchführung von RESET und Schalten der ATX-Stromversorgung Zum Schalten der ATX-Stromversorgung gehen Sie bitte folgendermaßen vor: Öffnen Sie die seitliche Verkleidung des PC Montieren Sie das ATX-Modul CV-Power in einen freien Erweiterungssteckplatz. Sie benötigen dabei keinen PCI-, ISA- oder AGP-Steckplatz, sondern lediglich die Montageposition an der Rückseite des Rechners. Ziehen Sie das vom ATX-Einschalter an der PC-Vorderseite kommende zweiadrige Kabel an der Hauptplatine (Motherboard) ab und stecken dieses auf den Stecker Pwr-Sw ATX-Modul CV-Power. Die 2-polige Steckerpositionen von oben nach unten betrachtet: Pwr-Sw – Power Verbindung zum ATX-Einschalter Pwr-MB – Power Verbindung zum Motherboard (Platzhalter) Res-MB – Reset Verbindung zum Motherboard Res-Sw – Reset Verbindung zum Reset-Schalter Stecken Sie nun in den Stecker Pwr-MB das 2 polige Verbindungskabel. Verbinden Sie das andere Ende mit der Steckposition auf dem Motherboard, wo zuvor das Kabel des ATXEinschalters eingesteckt war. Sollte die Länge des 2-poligen Verbindungskabels nicht ausreichen, so verwenden Sie in diesem Fall bitte das im Lieferumfang enthaltene Verlängerungskabel. Seite 66 Guntermann & Drunck GmbH Installations- und Bedienungsanleitung CATVision (MC) Zur Herstellung der Reset-Verbindung verfährt man analog zu dem oben beschriebenen Verfahren. Hier verbinden Sie die Stecker Res-Sw mit dem Resetschalter und verbinden anschließend den Stecker Res-MB des Moduls mit dem Motherboard. Hat man am PC-Gehäuse keinen Reset-Taster, möchte diesen aber dennoch aus der Ferne auslösen, so ist dieses ohne weiteres möglich. In diesem Fall wird lediglich Res-MB mit einem 2adrigen Kabel mit dem passenden Anschluß für den Reset-Taster auf der Hauptplatine verbunden. Hinweis: Zur exakten Feststellung der Kontakte auf dem Motherboard schauen Sie bitte in die Beschreibung des Motherboard. Typische Anwendung: Prinzipschaltung zur Ansteuerung von ATX-Power und –Reset: V+ 5V (Pin 2) O2 RESET# (Pin 3) 2pol-Verbindung zum ATX-Einschalter am PC-Gehäuse (Pwr-SW) 2pol-Verbindung zum Resettaster am PCGehäuse (Res-Sw) 2pol-Verbindung zu PWR-SW Anschluß auf PC-Hauptplatine (Pwr-MB) 2pol-Verbindung zu Reset-Anschluß auf PC-Hauptplatine (Res-MB) O2 ATXPWR# (Pin 1) Die Fernauslösung von Reset oder Ein-/Ausschalten des Rechners funktioniert nur bei eingeschalteten und verbundenen (über CAT-x Kabel) CATVision-CPU und CATVision-CON. Bei ordnungsgemäßer Verdrahtung funktionieren die Taster am PC ganz wie gewohnt auch weiterhin. Seite 67 Guntermann & Drunck GmbH 11.2.2 Installations- und Bedienungsanleitung CATVision (MC) Verbinden mit CATVision-CPU Um eine Verbindung vom ATX-Modul CV-Power mit dem CATVision-CPU herzustellen, verwenden Sie bitte das im Lieferumfang enthaltene Kabel PowerCord-2. Stecken Sie die 3-polige Kabelbuchse des Kabels in den 3-poligen Flanschstecker des CATVision-CPU. Dieser ist auf der Rückseite des Gerätes angebracht. (3-poliger Flanschstecker) 11.2.3 Stecken Sie anschließend den RJ9-Stecker in die RJ-9 Buchse des ATX-Modul CV-Power. Verbinden des Tasters mit dem CATVision-CON Bevor Sie Ihren Taster mit dem CATVision-CON verbinden, muss Ihr Taster mit der im Lieferumfang enthaltenen 3-poligen Kabelbuchse verbunden werden. Anhand der nachfolgenden Abbildungen ersehen Sie, welche Leitungen mit welchem PIN verbunden werden müssen. Seite 68 Guntermann & Drunck GmbH Installations- und Bedienungsanleitung CATVision (MC) Prinzipschaltung mit Tastern für Reset und ATX-Power-On/Off: I1 SW1_ATXPWR# (Pin 1) I2 SW2_RESET# (Pin 3) - 0V (Pin 2) Nachdem Sie Ihren Taster mit der 3-poligen Kabelbuchse verbunden haben, stecken Sie diese in den 3-poligen Flanschstecker des CATVision-CON. Dieser ist auf der Rückseite des Gerätes angebracht. (3-poliger Flanschstecker) Seite 69 Guntermann & Drunck GmbH Installations- und Bedienungsanleitung CATVision (MC) 12 Technische Daten 12.1 CATVision Video: Auflösung: Übertragungslänge: übertragbare Signale: max. 1920 x 1440 Bildpunkte (abhängig von Kabel und Videosignal) 10 bis max. 300 Meter (abhängig von Kabel, Auflösung und Videosignal) RGBHV, RGsB oder RsGsBs Keyboard / Mouse: (RECHNER- + USERSEITIG) Schnittstelle/Übertragung: USB, PS/2 / Intelli-Maus, SUN-USB über Adaption: Sun, MAC Mischbetrieb möglich RS232 (optional): Übertragungsrate: bis 100 Meter max. 57600 bit/s bis 200 Meter max. 38400 bit/s übertragbare Signale: TxD, RxD, RTS, CTS, DTR, DSR Audio (optional): Auflösung: 18 bit digital Abtastrate: 48 kHz Bandbreite: 22 kHz Mikrofon-Vorverstärkung: 20dB USB 1.1 (optional) Reichweite: 200 Meter Unterstützung: High Power Geräte (bis 500 mA) Übertragungsrate: bis 12 Mbits/s Übertragungskabel: CAT x - Kabel oder höher (x = 5, 6, 7) Seite 70 Guntermann & Drunck GmbH Gehäusemaße: Installations- und Bedienungsanleitung CATVision (MC) CATVision-CPU 210 x 44 x 210 ( 19“ / 1HE ) CATVision-CON 210 x 44 x 210 ( 19“ / 1 HE ) ( B x H x T in mm ) Gewichte: CATVision-CPU ohne USB mit USB CATVision-CON ohne USB mit USB 1,20 kg 1,28 kg 1,10 kg 1,18 kg Spannungsversorgung: Hauptstromversorgung: 100 – 240 V primär 50 – 60 Hz Red. Stromversorgung: DC 12V 5A Stromaufnahme (max. Werte): CATVision-CPU CATVision-CON Bei 100 V (Main) 140 mA 240 mA Bei 240 V (Main) 82 mA 100 mA Bei 12 V (red.) 600 mA 900 mA Bei 240 V (Main) 9,78 W 11,46 W Bei 12 V (red.) 7,2 W 9,96 W Bei 240 V (Main) 9,78 W 11,46 W Bei 12 V (red.) 7,2 W 9,96 W Leistungsaufnahme (max. Werte): CATVision-CPU CATVision-CON Bei 100 V (Main) 9,08 W 11,38 W Wärmeabgabe (max. Werte): CATVision-CPU CATVision-CON Bei 100 V (Main) 9,08 W 11,38 W Temperaturbereiche: Betrieb: 5 bis 40° C rel. Luftfeuchte < 80%, nicht kondensierend Lagerung: -10 bis 55°C, < 85 % Luftfeuchtigkeit Seite 71 Guntermann & Drunck GmbH 12.2 Installations- und Bedienungsanleitung CATVision (MC) CATVision-MC Video Auflösung: Übertragungslänge: übertragbare Signale: max. 1920 x 1440 Bildpunkte (abhängig von Kabel und Videosignal) 10 bis max. 300 Meter (abhängig von Kabel, Auflösung Videosignal) RGBHV, RGsB oder RsGsBs Keyboard / Mouse (RECHNER- + USERSEITIG) Schnittstelle/Übertragung: USB, PS/2 / Intelli-Maus, SUN-USB, über Adaption: Sun, MAC Mischbetrieb möglich RS232 (optional) Übertragungsrate: bis 100 Meter max. 57600 bit/s bis 200 Meter max. 38400 bit/s übertragbare Signale: TxD, RxD, RTS, CTS, DTR, DSR Audio (optional) Auflösung: 18 bit digital Abtastrate: 48 kHz Bandbreite: 22 kHz Mikrofon-Vorverstärkung: 20dB USB 1.1 (optional) Reichweite: 200 Meter Unterstützung: High Power Geräte (bis 500 mA) Übertragungsrate: bis 12 Mbits/s Übertragungskabel: CAT x - Kabel oder höher (x = 5, 6, 7) Seite 72 und Guntermann & Drunck GmbH Gehäusemaße ( B x H x T in mm ) Installations- und Bedienungsanleitung CATVision (MC) CATVision-MC 2 (3,4)-CPU; CATVision-MC 3 (4)-CON Twin CATVision-MC 2-CPU 435 x 44 x 210 (19“ / 1 HE) CATVision-MC2-CON 210 x 44 x 210 (19“ / 1 HE) Gewichte: CATVision-MC2-CPU ohne USB 1,90 kg mit USB 1,98 kg CATVision-MC3-CPU ohne USB 2,10 kg mit USB 2,18 kg CATVision-MC4-CPU ohne USB 2,15 kg mit USB 2,23 kg CATVision-MC2-CON ohne USB 1,35 kg mit USB 1,43 kg CATVision-MC3-CON ohne USB 2,00 kg mit USB 2,08 kg CATVision-MC4-CON ohne USB 2,00 kg mit USB 2,08 kg Spannungsversorgung: Hauptstromversorgung: 100 – 240 V primär 50 – 60 Hz Red. Stromversorgung: DC 12V 5A Stromaufnahme (max. Werte): Bei 100 V (Main) Bei 240 V (Main) CATVision-MC-CPU 410 mA 200 mA CATVision-MC-CON 310 mA 160 mA Bei 12 V (red.) 2A 1,5 A Leistungsaufnahme (max. Werte): Bei 100 V (Main) Bei 240 V (Main) CATVision-MC-CPU 26,0 W 26,51 W CATVision-MC-CON 19,51 W 21,96 W Bei 12 V (red.) 21,24 W 16,56 W Wärmeabgabe (max. Werte): Bei 100 V (Main) Bei 240 V (Main) CATVision-MC-CPU 26,0 W 26,51 W CATVision-MC-CON 19,51 W 21,96 W Temperaturbereiche: Betrieb: 5 bis 40° C rel. Luftfeuchte < 80%, nicht kondensierend Lagerung: -10 bis 55°C, < 85 % Luftfeuchtigkeit Seite 73 Bei 12 V (red.) 21,24 W 16,56 W Guntermann & Drunck GmbH Installations- und Bedienungsanleitung CATVision (MC) 13 Anhang 13.1 HotKey-Belegungstabelle Funktion Default-HotKey Persönlicher HotKey Seite im Handbuch Aufruf des FunctionMenüs CTRL+ NUM Seite 29 Permanent Access CTRL + DRUCK Seite 40 Freischaltung der Bedienung im Protected Mode CTRL + DRUCK Seite 58 Aufruf des IVT-Modus CTRL+ ROLLEN Seite 19 Verschieben des IVTMenüs SHIFT+ PFEILTasten Seite 22 13.2 IVT-Settings Parameter Konfigurationstaste Aufruf des IVT-Modus CTRL + ROLLEN Geringste Verstärkung POS 1 Höchste Verstärkung ENDE + 5 Verstärkung CTRL + Pfeil - 5 Verstärkung CTRL + Pfeil + 1 Verstärkung Pfeil - 1 Verstärkung Pfeil Verwerfen der neuen Einstellungen ESC Seite 74 Guntermann & Drunck GmbH 13.3 Installations- und Bedienungsanleitung CATVision (MC) Passwort Für den OpenAccess muss kein Name und Passwort eingegeben werden. Wollen Sie Konfigurationen am System vornehmen, müssen Sie sich als SUPVERVISOR anmelden! LOGIN SUPERVISOR Please enter your login: CVM 4658 Name: Password: ESC Enter Bitte beachten Sie die Groß/Kleinschreibung. Ersetzen Sie das voreingestellte Passwort bitte durch ein individuelles und sicheres Passwort. Seite 75 Guntermann & Drunck GmbH Operating Instructions CATVision (MC) INFORMATION Warning IN ORDER TO AV OID THE RISK OF AN ELECTRIC SHOCK THE DEVICE IS NOT TO BE OPENED OR THE COVERS NOT TO BE REMOVED. IN CASE OF AN ERROR PLEASE CONTACT OUR TECHNICIANS. BEFORE YOU T AKE THIS DE VICE INTO OP ERATION PLEASE R EAD THE OPERATING INSTRUCTIONS CAREFULLY. FOLLOW ALL THE WARNINGS OR OPERATING HINT S WHICH ARE ON THE DEVICE OR I N THE OPERATING INSTRUCTIONS. KEEP THE OPERATING INSTRUCTIONS IN A SAFE PLACE FOR LATER USE. POWER SUPPLY : USE THIS DEVI CE ONLY WITH THE DELIVERED OR IN THE OPER ATING INSTRUCTIONS DESCRIBED AC-ADAPTOR. CONNECT THIS DEVICE ONLY TO A N EARTHED VOLTAGE SOURCE. VOLTAGE-FREENESS: MAKE SURE THAT THIS DEVICE IS V OLTAGE-FREE INSTALLATION. PULL OFF THE POWER PLUG OR THE POWER SUPPLY. BEFORE CABLES: ONLY USE ORIGINAL G&D CABLES. DAMAGES WHICH SOURCE FROM THE USE OF FOREIGN CABLES ARE NOT INC LUDED IN T HE WARRANTY REGULATIONS. AVOID TRUMPLE TRAPS WHEN LAYING THE CABLES. VENTING SLOTS: COVER THEM. VENTING SLOTS PREVENT AN O VEHREATING OF THIS DEVICE . DO NOT EXCLUSION OF GUARANTEE: G&D DOES NO T TAKE OVER ANY GUARANTEE FOR DEVICES WHICH WERE NOT USED ACCORDINGLY. WERE REPAIRED OR MODIFIED BY NON AUTHORIZED PERSONS. SHOW BIG OUTER DAMAGES NOT VISIBLE WHEN DELIVERED. WERE DAMAGED BY FOREIGN ACCESSORIES. G&D IS NOT RESPONSIBLE FOR CONSE QUENTIAL DAMAGE OF POSSIBLY COULD OCCUR WHEN USING THE PRODUCTS. - ANY KIND WHICH RANGE: THIS DEVICE IS CONSTRUCTED FOR THE USE IN THE IN TERIOR. COLDNESS, HEAT OR MOISTURE. AVOID EXTREME CONFORMITY: THIS DEVICE FULF ILL THE N EEDS OF THE LO W VOLTAGE DIRECTIVE 73/23 EWG RESPECTIVLY 93/68 EWG IN DEPENDENCE ON EN60950 (2000) AND CORRESPONDS TO THE MAIN PR OTECTIVE DEMANDS OF THE PROVISION FOR ELECTROMA GNETIC COMPATIBILITY (89/336/EWG) AND THE STANDARDS EN55024 (1998) +A1, A2, EN610006-2 (2001), EN61000-3-2 (2000) + A2, EN61000-3-3 (1995) + A1 AND EN55022 CLASS B (1998+ A1, A2). page 2 Guntermann & Drunck GmbH Operating Instructions CATVision (MC) Table of Content CATVision 1 2 3 Description .............................................................................................................6 Scope of Delivery ...................................................................................................7 Installation ..............................................................................................................8 3.1 Installing of the transmitting unit.....................................................................8 3.1.1 Videoconnection at CATVision-MC-CPU .............................................9 3.1.2 Optional Connections ...........................................................................9 3.2 Installation of the receiving unit....................................................................10 3.2.1 Videoconnection at CATVision-MC-CON...........................................11 3.2.2 Optional Connections .........................................................................11 4 Power Supply .......................................................................................................13 4.1 In general .....................................................................................................13 4.2 Note for USB-operation................................................................................13 5 Operation ..............................................................................................................14 5.1 Switching on the CATVision-System............................................................14 5.2 System Informationen Windows...................................................................14 5.2.1 Keyboard/Mouse local not attached ...................................................15 5.2.2 Remote Unit not attached...................................................................15 5.2.3 Missing of the CAT-x-connection and local Keyboard/Mouse............16 5.3 Getting into Operation / LEDs ......................................................................17 5.4 IVT – Individual Video Tuning ......................................................................19 5.4.1 Authorization ......................................................................................19 5.4.2 Calling up the IVT Mode.....................................................................20 5.4.2.1 Call up via Function Menu........................................................21 5.4.2.2 Call up via Keyboard Combination ...........................................21 5.4.3 Advices for Setting the IVT.................................................................21 5.4.4 Video Tuning Settings ........................................................................22 5.4.4.1 Changing video channels .........................................................23 5.4.4.2 Automatic Settings ...................................................................23 5.4.4.3 Manual Settings........................................................................24 5.4.4.3.1 Establishing the Video Boost...............................................24 5.4.4.3.2 Setting Noise Suppression ..................................................25 5.4.4.3.3 Fine Tuning..........................................................................26 5.4.4.3.4 Setting the Run Time Delay Compensation ........................26 5.4.5 Copy the IVT Settings ........................................................................27 5.4.6 Tested Resolutions.............................................................................27 5.4.7 Recommended Cables.......................................................................27 6 Configuration........................................................................................................28 6.1 Console Setup..............................................................................................29 6.1.1 ScreenSaver Settings.........................................................................29 6.1.2 AutoLogout Setting.............................................................................30 6.1.3 Defining the Console Name ...............................................................30 6.1.4 Activating the Channel “Display” ........................................................31 6.1.5 Setting the Display Position + Colour.................................................31 6.1.6 Setting the Menu Position & Size.......................................................32 6.1.7 Settings of the extended Mouse Support ...........................................32 6.1.8 OSD SyncMod....................................................................................33 6.1.9 Keyboard Layout ................................................................................33 page 3 Guntermann & Drunck GmbH Operating Instructions CATVision (MC) 6.2 Config...........................................................................................................34 6.2.1 IVT......................................................................................................35 6.2.2 System Config ....................................................................................36 6.2.2.1 Defining the first Hotkey ...........................................................37 6.2.2.2 Defining the Double-HotKey.....................................................37 6.2.2.3 Set System Defaults (Supervisor Function) .............................38 6.2.2.4 Remote Video (Dark-Switching) ...............................................38 6.2.2.5 Local Video (Dark-Switching) ...................................................39 6.2.2.6 Permanent Access ...................................................................39 6.2.2.7 Defining the Time Out ..............................................................40 6.2.2.8 Enabling the Protected Mode ...................................................40 6.2.2.9 Keyb. LED flash........................................................................41 6.2.2.10 Defining the local Scan Code ...................................................41 6.2.2.11 Defining the remote Scan Code ...............................................41 6.2.2.12 USB Multimedia Keyboard .......................................................41 6.2.2.13 USB SUN Keyboard mode .......................................................41 6.2.2.14 USB SUN Keyboard layout ......................................................42 6.2.2.15 Temperature Warning ..............................................................42 6.2.2.16 Keyboard Type Local ...............................................................43 6.2.2.17 Keyboard Type Remote ...........................................................43 6.2.2.18 Signal type input.......................................................................44 6.2.2.19 Remote sync ............................................................................44 6.2.3 User Account......................................................................................44 6.2.3.1 Account Enable / Disable .........................................................45 6.2.3.2 Defining the User Name ...........................................................46 6.2.3.3 Set Account Defaults................................................................47 6.2.3.4 IVT Access ...............................................................................47 6.2.3.5 System Config Access .............................................................47 6.2.3.6 User Account Access ...............................................................48 6.2.3.7 Change Password ....................................................................48 6.3 Mouse Utility.................................................................................................49 7 System Operation ................................................................................................51 7.1 Possibilities of Access..................................................................................51 7.1.1 OpenAccess .......................................................................................51 7.1.2 Access via Defined User ....................................................................52 7.1.3 Access as Supervisor.........................................................................53 7.2 Automatic Switching.....................................................................................53 7.3 Manual Hold Function (Permanent Access).................................................54 7.4 Protected Mode............................................................................................55 7.5 Dark Switching of the Monitor ......................................................................56 7.5.1 Dark switching whilst automatic switching .........................................56 7.5.2 Dark switching whilst permanent access ...........................................56 7.6 Manual Logout .............................................................................................57 8 Optional Equipment .............................................................................................58 8.1 Delay ............................................................................................................58 8.2 Audio ............................................................................................................59 8.3 RS232 ..........................................................................................................60 8.4 USB 1.1 transmission...................................................................................60 9 System-Update .....................................................................................................61 10 System Info...........................................................................................................61 page 4 Guntermann & Drunck GmbH Operating Instructions CATVision (MC) 11 CV-Power-Expansion...........................................................................................62 11.1 Scope of Delivery .........................................................................................62 11.2 Installation ....................................................................................................63 11.2.1 Installation in the PC ..........................................................................63 11.2.2 Conncetion with CATVision-CPU .......................................................65 11.2.3 Connection of the key switch with CATVision-CON ...........................65 12 Specifications.......................................................................................................67 12.1 CATVision ....................................................................................................67 12.2 CATVision-MC .............................................................................................69 13 Appendix...............................................................................................................71 13.1 HotKey Seizure ............................................................................................71 13.2 IVT Settings..................................................................................................71 13.3 Password .....................................................................................................72 page 5 Guntermann & Drunck GmbH 1 Operating Instructions CATVision (MC) Description The CATVision system consists of a transmitter and a receiver. It allows operating a console from a distance up to 300 m (max value, dependent on the resolution and the used cable). Also a local console can be connected to the transmitter. You can choose between local and remote operation. If you use a CATVision-MC-System, your PC can be equipped with up to 4 Video-Outlets. Following products are available (differentiation by existing videochannel/s) Product CATVision CATVision-MC2 CATVision-MC3 CATVision-MC4 Videochannel/s 1 videochannel 2 videochannels 3 videochannels 4 videochannels In general in this manual is spoken of a CATVision-System, since all products differ in the number of transmittable videochannels. Exceptions in this manual are: Chapter 2 (Scope of delivery), Chapter 3 (Installation) und Chapter 5.4.4.1 (Change of Videochannel). The transmission of the monitor, keyboard and mouse signals is done via CAT-x cable (x = 5, 6, 7). By the possibility of individual video adjustment different cable qualities and lengths are balanced so that the user is always getting the optimum picture. The adjustment of the video signal happens automatically. A manual adjustment is possible from the remote console via IVT (see chapter 5.4). Via CAT-x cable the system can also transmit audio and RS232 signals besides the monitor, keyboard and mouse data. By using an additional CAT-x cable, USB-signals can be transmitted transparent. page 6 Guntermann & Drunck GmbH 2 Operating Instructions CATVision (MC) Scope of Delivery Transmitting unit CATVision-CPU or CATVision-MC-CPU Receiving unit CATVision-CON or CATVision-MC-CON Connecting cable Video/Keyboard/Mouse PS/2 CPU-2 - for connecting the CATVision-CPU: 1 x MDR-20 for monitor, keyboard and mouse port - for connecting the computer: 1 x PS/2 for mouse port (incl. 9pole adaptor for serial mouse) 1 x PS/2 (incl. AT adaptor) for keyboard port 1 x HD-15 connector for VGA port USB-AM/BM-2 and USB Keyboard/ Mouse PowerCable-2 Power cable Transmission cable (order separately) K-C7-x Optional: - - 1 x RS232-M/F-2 -> for connecting a serial terminal device 2 x Audio-M/M-2 -> for the audio port K-C7-x -> for transparent USB 1.1 transmission Additional Scope of Delivery for CATVision-MC: VGA-M/M-2 -> HD15 (jack/jack) Video connection cable; Number depends on existing videochannels page 7 Guntermann & Drunck GmbH 3 Operating Instructions CATVision (MC) Installation The installation of CATVision and CATVision-MC differs in the number of connectable video sources. As an installation example the manual focus is therefore on the CATVision. The connection of additional video sources will be explained separately. Installing of the transmitting unit Mouse port for local console Mouse PS/2 Alternative: connection for keyboard/mouse via USB-AM/BM-2 to the PC RS 232 Line In Line Out Red. Power Keyb PS/2. 12V DC/0,6A Transmission USB K/M CPU Monitor USB 1.1 Trans VGA Keyb. Mouse CPU Connection for the CAT-x cable to the CATVision-CON Port of the keyboard for the local console Port for the monitor of the local console CPU 100-240V/60-50Hz 140-82mA 3.1 Connection for the CPU-x cable to the local PC; VGA, PS/2, keyboard and PS/2 mouse Disconnect monitor, keyboard and mouse from the computer. Monitor: Connect the 15 pole Sub HD connector of the CPU-x cable (x = 2, 4, 6 or 9 m) to the VGA interface of the computer. Keyboard/Mouse (PS/2): Establish a connection to the keyboard and mouse interface of the computer by means of the two PS/2 connectors of the CPU-x cable. Both connectors have corresponding symbols. Alternativ Keyboard/Mouse (USB) Establish a connection to the keyboard and mouse interface of the computer by means of the two USB connectors of the USB- AM/BM-2-cable page 8 Guntermann & Drunck GmbH Operating Instructions CATVision (MC) Then connect the other end of the CPU-x cable (MDR 20 = Mini Delta Ribbon 20pole) with the interface VGA Keyb. Mouse CPU of CATVision. Connection of the transmission cable Connect the K-C7-x extension cable to the TRANSMISSION (jack) interface of the transmitting unit. Connection of the local console Connect the connector of the local keyboard and the local mouse to the keyboard interface or rather MOUSE PS/2 at the transmitting unit CATVision-CPU. Connect the local monitor to the MONITOR jack. 3.1.1 Videoconnection at CATVision-MC-CPU Connect the 15 pole Sub HD connector of the VGA-M/M-2-cabel to the additional VGA interface of the computer. Then connect the other end of the VGA-M/M-2-cabel with the interfaces VGA CPU 2 – 4. 3.1.2 Optional Connections Connection for the CAT-x cable K-C7-x for USB 1.1 Port for the RS232-M/F-2 to the serial Audio connection Connection to the USB-Port port of the local PC via Audio-M/M-2 of the local PC RS 232 Line In Line Out Red. Power Keyb PS/2. 12V DC/0,6A Transmission USB K/M CPU Monitor USB 1.1 Trans VGA Keyb. Mouse CPU CPU 100-240V/60-50Hz 140-82mA Mouse PS/2 Connection of RS232 Connect the RS232-M/F-x connecting cable (x=2, 4, 6 or 9 m) with a COM interface of the computer and the RS232 interface (optional) of the CATVision-CPU (seizure 1:1). page 9 Guntermann & Drunck GmbH Operating Instructions CATVision (MC) Connection of Audio Connect the Audio-M/M-2 connecting cable with the line-out interface of the computer (or another audio device) and the Line IN interface (optional) of the CATVision-CPU. Connection of USB1.1 Connect the jack USB - Typ B of the delivered USB-cabel to the interface CPU of the CPU unit. Connect the TYP A jack of the USBcabel with the appropriate USB-Port of the local PC. Connection of the transmission cable Connect the K-C7-x extension cable within the USB 1.1 section to the TRANS (jack) interface of the transmitting unit. Special note to the compatiblity of the transparent USB 1.1 connection: The USB-conncection complies with the specification of the USB 1.1 standard, which defines the design of USB full-speed devices. However, we do not gurantee, that all USB full-speed devices are compatibel to the CATVision. 3.2 Installation of the receiving unit Connection for keyboard/mouse of the remote console Line In Micro In Speaker Keyb. USB Mouse USB Trans 12V DC/0,9A Keyb. PS/2 Mouse Service Monitor Transmission Red. Power Connection for the CAT-x cable to the CATVision-CPU Port of the keyboard for the remote console Mouse port for remote console Port for the monitor of the remote console page 10 100-240V/60-50Hz 0,24-0,1A RS 232 Guntermann & Drunck GmbH Operating Instructions CATVision (MC) Set up the receiving unit. Connect the K-C7-x extension cable to the TRANSMISSION interface of the receiving unit CATVision-CON. Connect the monitor to the MONITOR jack. Connect the keyboard to the Keyb. interface at CATVision-CON. Connect the mouse to the MOUSE PS/2 jack. As an option you have the possibility to connect keyboard and mouse (also SUN-USB-keyboards) via USB. For this connect keyboard and/or mouse with the USB-interfaces Keyb. USB Mouse at the backside of CATVision-CON. Don´t use the USB-interfaces at the frontside of CATVision-CON for keyboard- mouse connection. The usage of these USB-interfaces is restricted to a usage as a transparent USB-transmission to the local PC. 3.2.1 Videoconnection at CATVision-MC-CON Connect the K-C7-x extension cable to the TRANSMISSION interface TRANSMISSION 1 – 4 of the receiving unit CATVision-MC-CON. Consider the correct assignment of the videochannels! Connect the monitors to the monitor jacks MONITOR 1 - 4. Optional Connections Connection for microphone, speakers and another Connection for another audio device serial device RS 232 Line In Micro In Speaker Connection for the CAT-x cable K-C7-x for USB 1.1 Keyb. USB Mouse USB Trans 12V DC/0,9A Keyb. PS/2 Mouse Service Monitor page 11 Transmission Red. Power 100-240V/60-50Hz 0,24-0,1A 3.2.2 Guntermann & Drunck GmbH Operating Instructions CATVision (MC) Connection of RS232 Connect the serial device with the RS232 interface (optional) at CATVision-CON. Connection of Audio Connect the microphone to Micro In, the speakers and another audio device (e.g. CD player) to Line In. Connection of USB1.1 Connect your USB devices with one of the four available USB-A-ports on the frontside of the CATVision-CON. Note: The usage of these USB-interfaces is restricted to a usage as a transparent USB-transmission to the local PC. Connection of the transmission cable Connect the K-C7-x extension cable with the the USB TRANS (jack) interface of the receiving unit. page 12 Guntermann & Drunck GmbH 4 Operating Instructions CATVision (MC) Power Supply 4.1 In general Connect the delivered power cables to the Main POWER jack of the devices (CATVision-CPU and CATVision-CON). As an option you can connect a redundant power via Optional Red. Power jack. For this use the power set Power-Set 12/Typ 2 (available as option). Connection for the main power supply Line In Line Out Red. Power USB K/M Trans CPU Keyb PS/2. 12V DC/0,6A Transmission USB 1.1 100-240V/60-50Hz 140-82mA RS 232 Mouse PS/2 CPU VGA Keyb. Mouse CPU Monitor Connection for the optional redundant power supply Rear view of CATVision-CPU Connection for the main power supply Line In Micro In Speaker Keyb. USB Mouse USB Trans 12V DC/0,9A Keyb. PS/2 Mouse Service Monitor Transmission Red. Power 100-240V/60-50Hz 0,24-0,1A RS 232 Connection for the optional redundant power supply Rear view of CATVision-CON 4.2 Note for USB-operation Only high-Power USB devices (up to 500 mA) are supported by the CATVision-System. page 13 Guntermann & Drunck GmbH 5 Operating Instructions CATVision (MC) Operation 5.1 Switching on the CATVision-System After having switched on the CATVision system the following information appears on your monitor (local and remote): SYSTEM STARTUP CVM to call up AdonIS, press Ctrl + Num pc unit found remote unit found local mouse found local keyboard found Press pause to read info… After this window the image of the PC appears on your screen. IMPORTANT When starting the CATVision system, the system executes automatically an automatic adjustment of the video parameters (e. g. cable length, run time delays to your environment. As a result, the displayed image on your screen should not need any further adjustments. If, however, the displayed image doesn´t meet your expectations, a manually adjustment can be executed via IVT (see chapter 5.4). 5.2 System Informationen Windows Additional to the described operation in Chapter 5.1 following conditions of the CATVision can exist: No local connection of Keyboard/Mouse at the CATVision-CPU was found No existing connection between CATVision-CPU and CATVisionCON Wether Keyboard/Mouse has been found local nor a communication to the CATVision-CPU exist. These conditions will be described in the following chapters. page 14 Guntermann & Drunck GmbH 5.2.1 Operating Instructions CATVision (MC) Keyboard/Mouse local not attached If local Keyboard/Mouse is not attached to the CATVision-CPU following information appears on your monitor (local and remote). SYSTEM STARTUP CVM to call up AdonIS, press Ctrl + Num pc unit found remote unit found no local mouse found no local keyboard found Please wait… In this case the monitor at the CATVision-CON changes automatically to the next Information-Window (IVT-Information). To close this window or to start IVT you have to connect at least a keyboard to the system. 5.2.2 Remote Unit not attached When the CATVision-System detects no connection to the remote unit CATVision-Con (after swichting on the system), following information appears on your local monitor. SYSTEM STARTUP CVM to call up AdonIS, press Ctrl + Num pc unit found local mouse found local keyboard found no remote unit found check connection to local keyboard and remote unit Please wait… page 15 Guntermann & Drunck GmbH Operating Instructions CATVision (MC) In this case the CATVision-System remains in this condition. To proceed with initial operation, establish first the needed CAT-x-connection. When this connection has been established, the CATVision-System automatically changes to IVT-Information window (local and remote). Info CVM To optimize video quality please start IVT. Press Enter to start IVT or ESC to exit this window or Ctrl + ESC to exit this window and don´t show again 5.2.3 Missing of the CAT-x-connection and local Keyboard/Mouse If whilst the initial operation no connection to the remot unit (CATVision-Con) exist and locally no Keyboard/Mouse connection to the CATVision-CPU can be detected, following information appears on your local monitor. SYSTEM STARTUP CVM to call up AdonIS, press Ctrl + Num pc unit found no local mouse found no local keyboard found no remote unit found check connection to local keyboard and remote unit Please wait… Proceed in this case as described in Chapter 5.2.1 & 5.2.2. page 16 Guntermann & Drunck GmbH 5.3 Operating Instructions CATVision (MC) Getting into Operation / LEDs After having connected the power set switch on the CATVisions via toggle switch on the rear. The LEDs on the front side mean the following: POWER CATVision CPU CATVision CON is lit when an external power set is connected and delivers 12V. is lit when the main power supply has been established. is lit when an external power set is connected and delivers 12V. Active --- Status --- is lit as long as the remote console is active or can be active(1). Off when locally operated Is off when the remote console is not supplied with voltage. Flashes when there is voltage but the controller of the remote console is not working. Is lit steadily when there is voltage and the controller works. Active is lit as long as the local console is active or can be active(1). Off when operated locally. Disappear whilst remote operation Off when the local console is not supplied with voltage. Flashes when there is voltage but the controller of the local console is not working. (Please contact our Service personal) Is lit steadily when there is voltage and the controller is working. Redundant Main Remote Local Status CPU Active Status is lit when the main power supply has been established. --- --- is lit when one of both --consoles is active. (1) is lit when the emulation of --keyboard and mouse is active page 17 Guntermann & Drunck GmbH USBsection Status --- Power --- Operating Instructions CATVision (MC) Is lit, when a CAT-x- connection betwenn CV-CPU and CV-CON exist. Is off, when a connection failure exist. Is lit, when the USB-modul is supplied with voltage by the CATVision-CON To (1): A console is active when there are mouse or keyboard activities. Either it stays active for the time out after the last entry or as long as the Permanent Access or Protected Mode is active plus the set time out. Power ision -CPU Local CPU Red. Active Main Status Front view of CATVision-CPU Status USB 1.1 Devices Power ision -CON Red. Active Main Status Power Front view of CATVision-CON page 18 Remote Guntermann & Drunck GmbH 5.4 Operating Instructions CATVision (MC) IVT – Individual Video Tuning IMPORTANT When starting the CATVision system, the system executes automatically an automatic adjustment of the video parameters (e. g. cable length, run time delays to your environment and a video profil will be saved. As a result, the displayed image on your screen should not need any further adjustments. This saved videoprofil can be edited if the displayed image doesn´t meet your exepectations. Therefore, the CATVision system offers the possibility of video adjustment. By this function the user can balance different cable qualities and lengths. The individual characteristic of this function allows setting the measures to the personal feeling for a “good picture”. The adjustment is done via remote keyboard or as Supervisor from the local console. The system covers a range of 0 – 190; adjustment can be done in increments of 1. The CATVision system offers the possibility of selecting the kind of cable used. Choose the corresponding mode for the kind of cable used most often. As an option the run time delays of the CAT-x cables (Skew) can be balanced with the delay electronically. 5.4.1 Authorization For using the IVT the following persons are authorized: In the activated OpenAccess: all persons who work with the system. (State of delivery) Exception: Should the authorization for using the IVT be withdrawn by the administrator you have no access in the “OpenAccess” mode to the IVT! In the disabled OpenAccess: only persons who are authorized. For this an account for each user has to be opened (see User Accounts, chapter 6.2.3) and the user must have the right of IVT access. page 19 Guntermann & Drunck GmbH 5.4.2 Operating Instructions CATVision (MC) Calling up the IVT Mode The IVT mode can be called up in two ways (Default): via function menu CTRL & NUM via hotkey CTRL & Scroll. The following window opens: IVT Active channel: 1 Boost Noise filter Fine tuning delay R delay G 0 ns CVM 4 0 36 delay B 0 ns 0 ns ESC: quit IVT menu F1: save and quit F3: copy to all channels 1/2/3/4: select channel F5: auto adjust active channel F6: auto adjust all channels The IVT menu can be called up from the remote or the local console. Settings within the IVT menu, however, are only possible via remote console. IVT settings from the local console can only be proceeded by the administrator. If a user from the local console wants to change the settings the following window opens: Info CVM IVT is only available on remote console. Press ESC to return. By pressing ESC you will get back to the last active menu. page 20 Guntermann & Drunck GmbH 5.4.2.1 Operating Instructions CATVision (MC) Call up via Function Menu For calling up the IVT mode open the function menu with CTRL + NUM (Default). Function F2: F3: F6: F8: CVM IVT Console Setup Config Logout Mouse Utility System Info Esc Enter Move the cursor to the entry IVT or confirm with F2 and press ENTER. Then the IVT window will open. 5.4.2.2 Call up via Keyboard Combination For directly calling up IVT keep CTRL pressed and additionally press Scroll. When both keys are released the IVT window opens (A PC must be connected to the system). 5.4.3 Advices for Setting the IVT The previously mentioned steps are to be understood as a default proceeding. Because the quality of the picture is dependent on the monitor as well as on the graphics card and the transmitting cable it is possible that despite a cable length of e.g.120 meter the “best picture” is reached with a setting of 140 meter. Meter stands as a synonym for the adjustable video boost. Try for the best setting. Because the cursors work in 1m steps you may have to press them more often in order to get the best picture within the fine tuning. If your monitor stays dark, check whether the set resolution of the graphics card is supported by the monitor. If so, activate the IVT (chapter 5.3.2). Possibly the supported range is exceeded or undercut. Set the lowest value with the key Pos1 and move upwards with the HotKey-combination CTRL+ Cursor Right. The picture will then appear again and you can change for the best setting. page 21 Guntermann & Drunck GmbH 5.4.4 Operating Instructions CATVision (MC) Video Tuning Settings After you access IVT, the following settings are available to you in the open IVT submenu: Establishing the video boost. Setting the noise filter. Fine tuning. Delay setting (optional) on the colors R, G, and B of the CAT-x cable. The IVT submenu appears as follows: IVT Active channel: 1 Boost Noise filter Fine tuning delay R delay G 0 ns CVM 4 0 36 delay B 0 ns 0 ns ESC: quit IVT menu F1: save and quit F3: copy to all channels 1/2/3/4: select channel F5: auto adjust active channel F6: auto adjust all channels ESC: F1: F3: 1/2/3/4 F5: F6: Exits the IVT submenu without saving changes Saves all changes and closes the IVT submenu copies all settings to all channels Selecting the video channel (only with CATVision-MCSystemen) Carries out automatic video optimization for the active channel Carries out automatic video optimization for all channels You can switch between the individual entries using the UP ARROW and/or DOWN ARROW keys. The position of IVT-menu can be placed individual on your monitor with the HotKey-combination SHIFT+ Cursor. page 22 Guntermann & Drunck GmbH Operating Instructions CATVision (MC) 5.4.4.1 Changing video channels This function is only with CATVision-MC-Systemen available. IVT Active channel: 1 CVM The entry “active channel” refers to the corresponding used video channel. The channels can be selected via pressing the keys 1 to 4. Confirm with ENTER. 5.4.4.2 Automatic Settings You can establish all video settings automatically. To do so, you must be connected to a target. To activate this function, press the F5 key. While the settings for the active channel are being established automatically, the monitor turns black for approx. 3 seconds. With the F6 key the settings will be established for all channels (only with CATVision-MC systems). In this case, following message appears on your monitor: Info CVM Automatic Video Tuning status Channel 1: Channel 2: Channel 3: Channel 4: ok not connected in progress wait Please wait Whilst the automatic measuring this windows informs you about the process of the respective measurement. page 23 Guntermann & Drunck GmbH Operating Instructions CATVision (MC) Note: Channel 2 to 4 are only available by the usage of an CATVision-MCsystem! The entrys behind the channel have the following meaning: ok: not connected: in progress: wait: automatic measuring succesfully completed no video signal available at this channel the automatic measuring for this channel is in progress no automatic measuring has been carried out yet After the automatic settings have been established, the display reappears. The values determind whilst the automatic measuring will be stored. These values can be replaced by manual settings (vgl. Kap. 5.4.4.3). By processing the manual settings, only this manual settled values will be used. Note: If you change the length of the used cabel after you have processed the manual settings, the system starts an automatic measurement. If hereby a margin of greater than „10“ is asserted between the automatic and manual settings (as reference see the entry „Boost“ within the IVT-menu), the system will use the automatic settings and discards the manual settings. After the automatic video setting process, save the settings by pressing the F2 key. In this case, the IVT submenu is closed and you return to the CONFIGURATION menu. 5.4.4.3 Manual Settings In case, that the automatic setting doesn´t meet your expectations, you can adjust the video display manually. This manually adjusting of the video display is described in the following chapters. 5.4.4.3.1 Establishing the Video Boost Boost: 4 The following keys are available to you to modify the video boost: Key Key Keys CTRL + Keys CTRL + Home End Subtracts 1 from the video boost value Adds 1 to the video boost value Subtracts 5 from the video boost value Adds 5 to the video boost value Minimum video boost Maximum video boost (Caution: Overdrive possible no picture visible on monitor) page 24 Guntermann & Drunck GmbH Operating Instructions CATVision (MC) If you want to make other changes within the IVT submenu, use the UP ARROW and/or DOWN ARROW keys to move to another entry. After establishing the video boost, confirm and save your selection by pressing F2 or discard your changes by pressing ESC. In both cases, the IVT submenu is closed and you return to the FUNCTION menu. 5.4.4.3.2 Setting Noise Suppression Noise filter: 0 If the video quality of your monitor is influenced by noise, this effect can be removed using the noise filter setting. The following keys are available to you to modify the noise filter setting: Key Key Keys CTRL + Keys CTRL + Home End Subtracts 1 from the noise suppression value Adds 1 to the noise suppression value Subtracts 5 from the noise suppression value Adds 5 to the noise suppression value Noise suppression has the value 0 Maximum noise suppression (value: 255) If you want to make other changes within the IVT submenu, use the UP ARROW and/or DOWN ARROW keys to move to another entry. After establishing the noise filter setting, confirm and save your selection by pressing F2 or discard your changes by pressing ESC. In both cases, the IVT submenu is closed and you return to the FUNCTION menu. page 25 Guntermann & Drunck GmbH Operating Instructions CATVision (MC) 5.4.4.3.3 Fine Tuning Fine tuning: 36 The following keys are available to you for fine tuning: Key Key Keys CTRL + Keys CTRL + Home End Subtracts 1 from the fine tuning value Adds 1 to the fine tuning value Subtracts 5 from the fine tuning value Adds 5 to the fine tuning value Minimum fine tuning (value: 0) Maximum fine tuning (value: 575) If you want to make other changes within the IVT submenu, use the UP ARROW and/or DOWN ARROW keys to move to another entry. After establishing the fine tuning setting, confirm and save your selection by pressing F2 or discard your changes by pressing ESC. In both cases, the IVT submenu is closed and you return to the FUNCTION menu. 5.4.4.3.4 Setting the Run Time Delay Compensation delay R 0 ns delay G 0 ns delay B 0 ns At the CATVision system the run time delay compensation can be set up to 46 ns. At 0 ns there is no delay compensation. For compensating the delay the following keys can be used: CTRL + CTRL + minimizes the delay compensation for 2 ns. increases the delay compensation for 2 ns. minimizes the delay compensation for 10 ns. increases the delay compensation for 10 ns. Example: If the colour signal red appears too early (red shadow appear left of the letter) move to the entry delay R and delay this signal until all colours are on top of page 26 Guntermann & Drunck GmbH Operating Instructions CATVision (MC) each other and the picture is faultless. If another colour signal appears to early on the monitor repeat this procedure as described before. After having defined the delay compensation confirm and safe your entry with F1 or reject your choice with ESC. In both cases the IVT window will be closed. Note: It isn´t useful to compensate all three colors, since the delay is a result of all three colors. Compensating all three colors would only shift all colors together to a new inncorrect value. Therefore adjust only two colours to compensate the run time delay. If you want to make further changes within the IVT window move to the next entry with cursor up/cursor down. 5.4.5 Copy the IVT Settings The settings for a video channel can be copied to other video channels with F3. It may be useful if the conditions for all video channels are the same. 5.4.6 Tested Resolutions In-house the following resolutions reached good pictures (the values are dependent on the used cable and the IVT settings): Cable length (m) 200 300 Resolution 1920 x 1440 1280 x 1024 Refresh Rate max. 75 Hz max. 85 Hz This overview includes no maximum values. 5.4.7 Recommended Cables G&D recommends for the use of the CATVision system the following cables: Patch cable: DAETWYLER UNINET 7702 flex 4P AWG26 S-STP (up to 100 meter) Installation cable: Kerpen MegaLine G12-150 S/F AWG22 (up to 300 meter) page 27 Guntermann & Drunck GmbH 6 Operating Instructions CATVision (MC) Configuration The CATVision system can be adapted to your needs. The configuration is done via AdonIS. With CTRL + NUM (Default) you open AdonIS: Function F2: F3: F6: F8: CVM IVT Console Setup Config Logout Mouse Utility System Info Esc Enter In the Function menu the following options can be used: F2: IVT (see chapter 5.3) F3: settings at the console (see chapter 6.1) F6: main configuration menu; here additionally IVT can be called up, User Accounts can be opened and changes in system settings can be made (see chapter 6.2) Mouse Utility: Reinitialisation of the connected mouse if the initialisation is lost (see chapter 6.3) page 28 Guntermann & Drunck GmbH 6.1 Operating Instructions CATVision (MC) Console Setup By pressing F3 in the Function Menu you will get to the Console Setup for the activating console. CONSOLE SETUP CVM Screen Saver: Auto Logout: Console Name: Display: Display Position: Menu Position: AdonIS by Mouse: OSD sync: Keyboard Layout: Esc OFF OFF CVM Temp … … NO OFF German F1:Save 6.1.1 Enter ScreenSaver Settings The ScreenSaver to be set is started by CATVision and has nothing to do with the ScreenSaver of the computer. As in general there is only one indirect connection (via CATVision) between the computer and the monitor you should switch off the ScreenSaver of the computers for making work easier. The ScreenSaver of CATVision takes over this task; it puts the monitor to the Power-Down Mode. Move the cursor to the line ScreenSaver. The current entry can be written over or edited by pressing ENTER. Valid is a time of 1 - 60 minutes. The entry “0” puts the ScreenSaver to “OFF”. ENTER completes the entry. For saving and closing this menu press F1. page 29 Guntermann & Drunck GmbH 6.1.2 Operating Instructions CATVision (MC) AutoLogout Setting With this setting you can activate the automatic LOGOUT of the system. The automatic LOGOUT, like the manual (F8), leads you back to the LOGIN mask. With this the system is protected against unauthorized access. You can only get access after entering your password in the LOGIN window. The time until the LOGOUT is carried out is set by moving the cursor to the line AutoLogout. The current entry can be written over or edited by pressing ENTER. Valid is a time of 1 - 60 minutes. The entry “0” sets the Logout to “OFF”. ENTER closes the entry. For saving and closing this menu press F1 . 6.1.3 Defining the Console Name In case of using many switches every G&D device can be given a unique name, the Console Name. Move the cursor to the line Console Name. The current entry can be written over or edited by pressing ENTER. Valid is an entry of 10 alphanumerical characters. ENTER closes this entry. For saving and closing this menu press F1. page 30 Guntermann & Drunck GmbH 6.1.4 Operating Instructions CATVision (MC) Activating the Channel “Display” With this you have the possibility to set the display of the selected computer or system informations either to permanent temporary => Perm or => Temp (disappears approx 5 seconds after switching). After having moved the cursor to the array DISPLAY you can select your wanted option with SPACE (toggle) or Y + N. For saving and closing this menu press F1. If you have selected the temporary setting, the channel display can be called up anytime by pressing CTRL + CAPSLOCK (Default). 6.1.5 Setting the Display Position + Colour Here you set the position and size of the display on the monitor. Move the cursor to the corresponding entry in the menu CONSOLE SETUP. After having pressed ENTER you get to the edit mode and can move the display with the cursor control keys or mouse to the wanted position. + [Display Position####] Space: change colour The modification of the colour of the displayed text is also possible. Press the space bar to toggle between the different available colours. ENTER closes the setting and leads you back to the CONSOLE SETUP (temporary saved). For saving the setting and closing the CONSOLE SETUP press F1 (permanently saved). page 31 Guntermann & Drunck GmbH 6.1.6 Operating Instructions CATVision (MC) Setting the Menu Position & Size With this you change the position and size of all AdonIS windows. Move the cursor to the corresponding entry in the menu CONSOLE SETUP. After having pressed ENTER you get to the edit mode and can move the display to the wanted position with the cursor control keys or mouse. MENU-POSITION Esc CVM Enter F1:Save For making sure that AdonIS can be read easily at all resolutions the size of the display can be changed with the keys picture up/picture down at a resolution higher than 640 x 480. ENTER closes the entry and leads you back to the CONSOLE SETUP (temporary saved). For saving this setting and leaving the CONSOLE SETUP press F1 (permanently saved). 6.1.7 Settings of the extended Mouse Support With this the special keys of the Intelli Explorer Mouse for working with CATVision are activated. By setting the entry to “Yes” AdonIS can also be called up by pressing button 4 or 5 of the Explorer Mouse (left side buttons). After having moved the cursor to the array „AdonIS by Mouse“ you can select the wanted option with SPACE (toggle) or the keys Y + N. For saving the settings and closing the menu press F1. page 32 Guntermann & Drunck GmbH 6.1.8 Operating Instructions CATVision (MC) OSD SyncMod Graphics cards are able to generate different sync signals (sync on Green, RGBHV etc.). Depending on the sync signal it has effect on the picture of AdonIS. AdonIS is designed for a RGB/HV-Sync signal. If the graphics card of the connected computer sends a different sync signal than RGB/HV the consequence would be a colour corruption of AdonIS. As a result of this, AdonIS could appear to dark on your monitor. In order to balance this colour corruption the colour levels can be changed in the menu OSD-Sync. The following entries can be found (be pressing the Space-Bar): RGB HV: no colour adjustment RGsB: the level for the green signal is changed RsGsBs: all colours are changed. For saving the settings and closing this menu press F1. 6.1.9 Keyboard Layout With this you select the layout of the connected keyboard. If you realize a change of Y and Z (American/German layout) you should change the setting. The following layouts can be selected: German English US English UK French Spanish Lat America Portugiese After having moved the cursor to the array KEYBOARD LAYOUT you can select the wanted option with SPACE (toggle). page 33 Guntermann & Drunck GmbH 6.2 Operating Instructions CATVision (MC) Config In the menu Config you can open user accounts and make system comprehensive settings. By pressing F6 in the function menu you will get to the Config Menu. The access to this menu is only for certain persons. Besides the supervisor also user can have access to their User Account menu having the corresponding authorization by the supervisor. Anyway, the SUPERVISOR has always access authority on that Config Menu! Because the CATVision system is used either in the Open Access Mode (access to the system without Login-Name and Password) or by opened User Accounts different constellations occur when calling up the Config Menu: Open Access: Access is possible without password entry, when the OpenAccess has configuration rights! The entries for the OpenAccess are presented in white. Entries with no access are presented in light blue. If the OpenAccess has no configuration rights a Login-Window opens for further authorization. You can now logon as an administrator or user with configuration rights by entering Login-Name and Password. ACCESS CONFIG CVM Please enter your login: Name: Password: max 14 characters max 12 characters Esc Enter After having pressed the button Enter the Config Menu opens. page 34 Guntermann & Drunck GmbH Operating Instructions CATVision (MC) Opened User Accounts & Supervisor (OpenAccess is disabled): Access without password query is possible because the users are already logged in (the password query via Access Config window doesn´t apply). Every user, however, can have different configuration rights (e.g. only IVT and System Config). The configuration entries available for the single user are marked in white. Light blue markings indicate that an access is not possible. When a user has no configuration rights an tries to access the config menu, a menu appears on his window containing information about the missing configuration rights. Anyway, the supervisor has always unlimited access to the Config-Menu! After having called up the Config-Menu successfully the following window appears on the monitor: Config CVM IVT System Config User Account Esc Enter Select the wanted entry with cursor up/cursor down and then confirm with Enter. 6.2.1 IVT See chapter 5.4 page 35 Guntermann & Drunck GmbH 6.2.2 Operating Instructions CATVision (MC) System Config Move in the menu Config Menü to the entry System Config and press Enter. The following window will open: SYSTEM CONFIG CVM Hotkey: Double Hotkey: Set System Defaults: Remote Video: Local Video: Permanent Access: Timeout: Protected Mode: Keyb. LED flash: Scan Code Set Local: Scancode Set Remote: USB Multimedia-Keyboard: USB SUN-Keyboard Mode: USB SUN-Keyboard Layout: Temperature Warning: Keyboard Type Local: Keyboard Type Remote: Signal type input: Remote Sync: Esc Enter Ctrl Off … On On Both 1s Off On 2 2 No No US OSD … … Standard as input F1: Save If there is a conflict between the hotkeys used in AdonIS and your software you can change it here. Another reason for changing the hotkeys may lay in the combination of several G&D switch types. In the delivery status of all G&D products, the default HotKey-Combination is set to CTRL + NUM (as an example for calling up the AdonIS). page 36 Guntermann & Drunck GmbH Operating Instructions CATVision (MC) 6.2.2.1 Defining the first Hotkey Move with the cursor to the entry HotKey. By pressing SPACE you can select between the following alternatives: Ctrl, Alt, AltGr, Win, Shift Please remember that the defined HotKey also is used as first key for calling up AdonIS (e.g. WIN + NUM). For saving the settings and closing the menu press F1. 6.2.2.2 Defining the Double-HotKey Here you define whether to use a double-hotkey for calling up AdonIS or the IVT Move with the cursor control keys or the mouse to the entry double-hotkey. With Space you can select between Yes No (Default). After having changed the entry to Yes the entry in the line HotKey changes automatically (see chapter 6.2.2.1). Now you can select the wanted doublehotkey. The following positions are available: Ctrl (Strg) + Shift Alt +Shift Alt Gr + Ctrl (Strg) Windows + Ctrl (Strg) Shift + Windows Please remember that the selected HotKey is also used as first key for calling up AdonIS (e.g. WIN (+CTRL) + NUM). For saving the settings and closing the menu press F1. After this setting you need to press three keys to call up AdonIS or IVT. page 37 Guntermann & Drunck GmbH Operating Instructions CATVision (MC) 6.2.2.3 Set System Defaults (Supervisor Function) This function sets back this device to the default condition. Also the passwords and IVT settings are set back. The corresponding default settings can be found in the descriptions of the different menu windows in this documentation. Move with the cursor control keys to the corresponding menu. By pressing ENTER the function will be executed and the following window will open. Info CVM This function will delete all settings. Press Enter to continue or Esc to cancel Confirm again with ENTER. The window will change to the menu FUNCTION. 6.2.2.4 Remote Video (Dark-Switching) With this setting you define whether the monitor of the remote console at keyboard or mouse action of the local console either stays permanently visible or is switched dark. The following selections are possible: ON: Monitor stays permanently visible Switch off: Monitor is switched dark at keyboard or mouse action of the local console. For saving the settings and closing the menu press F1. You can always close this menu by pressing ESC. page 38 Guntermann & Drunck GmbH 6.2.2.5 Operating Instructions CATVision (MC) Local Video (Dark-Switching) Function according to chapter 6.2.2.4 but related to the picture at the local console (monitor at CATVision-CPU). 6.2.2.6 Permanent Access Whilst your e. g. configuration you don´t want to be interrupted. Therefor the remote console (CATVision-CON) as well as for the local console (CATVisionCPU) has the possibility of activating a permanent access (hold function, see chapter 7.3). If the permanent access is activated at one console by CTRL + Print the computer access for this console is exclusive. If in the entries “Local Video” and “Remote Video” (see chapters 6.2.2.4 – 6.2.2.5) the setting is Switch Off the monitors of the blocked consele are additionally switched dark. The blocked station has access until the function is disabled by the same key combination. The function Permanent Access allows the following settings: BOTH NONE LOCAL REMOTE Both consoles can activate the permanent access No console can activate the permanent access Only the local console (CATVision-CPU) can activate the permanent access Only the remote console (CATVision-CON) can activate the permanent access The change in setting is done by moving the cursor with the mouse or keyboard to the entry Permanent Access. With SPACE the selection is activated (toggle function) For saving the settings and closing the menu press F1. page 39 Guntermann & Drunck GmbH 6.2.2.7 Operating Instructions CATVision (MC) Defining the Time Out With this setting you define the delay time you define how long the blocked console stays inactive unless at the active console no Keyboard/Mouse action can be mentioned. The other console can have access to the system again, after the in this chapter defined time-out after the last keyboard/mouse action has exceeded. Move the cursor to the entry Timeout. By entering a value in the range of 1 to 90 seconds you can define the delay time. For saving the settings and closing the menu press F1 . 6.2.2.8 Enabling the Protected Mode In default condition of the Protected Mode all connected console are locked for keyboard and mouse action and all monitors are switched dark (see chapter 7.4). Only by pressing the hotkeys (CTRL + Print), a console can exclusivly reserve the right for operation. Whilst this exclusiv operation of the active console, the monitor of the inactive console remains dark and no keyboard and mouse operation are possible. With this setting you define whether the Protected Mode (see chapter 7.4) is enabled or not. Move the cursor to the entry Protected Mode. By pressing SPACE you can chose between Yes or NO. For saving the settings and closing the menu press F1. After you have finished all settings the Protected Mode is activ. After enabling the Protected Mode the following window appears on the monitor. CVM PROTECTED MODE ENABLED page 40 Guntermann & Drunck GmbH 6.2.2.9 Operating Instructions CATVision (MC) Keyb. LED flash With this setting you define whether the keyboard LEDs will flash after activated hold function (see chapter 7.3) or Protected Mode (see chapter 7.4) or not. Move the cursor to the entry Keyb. LED flash. By pressing SPACE you can chose between Yes or NO. For saving the settings and closing the menu press F1. 6.2.2.10 Defining the local Scan Code The scan code is the language with which keyboard and computer communicate. CATVision works with Scancode 2 (Default). Only change this setting in accordance with our service department. Move the cursor to the corresponding entry. By pressing SPACE you can select between 3 or 2. For saving the settings and closing the menu press F1. 6.2.2.11 Defining the remote Scan Code Function according to chapter 6.2.2.10 but related to the keyboard at the remote console. 6.2.2.12 USB Multimedia Keyboard By selection of the entry USB Multimedia Keyboard the USB multimedia support for keyboards will be activated. In Default this setting is not activated (NO). For saving the settings and closing the menu press F1. 6.2.2.13 USB SUN Keyboard mode If you connect a SUN computer with USB keyboard (and mouse) at CATVisionCPU, adjust this setting to yes. At default the support for USB SUN Keyboards is deactivated. page 41 Guntermann & Drunck GmbH 6.2.2.14 Operating Instructions CATVision (MC) USB SUN Keyboard layout After activation of the USB SUN Keyboard mode (see above) you can use this menu item to select the keyboard layout of the SUN keyboard. If you experience that german umlauts and other language-specific characters are without correct output at screen, check this adjustment and modify if necessary. The following options are available: DE: German keyboard layout US: American keyboard layout If the adjustment of the keyboard layout is modified during the operation of the SUN computer, a restart of the SUN computer is necessary, in order to apply the modified adjustment. At default modifying of this adjustment is not possible, because the support for USB SUN keyboards is deactivated. 6.2.2.15 Temperature Warning Both the user module (CATVision-CON) and the computer module (CATVisionCPU) provide temperature sensors. The temperature within the devices is permanently monitored. To prevent the modules from overheating, the following actions are performed when the stated values are achieved: 60 °C: The modules show the increased temperature values in the OSD or as display popup (see below). 80 °C: The image signal is disabled at the user module! Important: If the computer module disables the image signal due to the increase of temperature, the connected computers cannot be controlled or operated remotely! Cool down the heated module immediately after the warning has been displayed on your screen! The warning is displayed at both modules after the temperature of one of the modules reaches a critical value. The warning states whether the overheating affects the user module (remote unit) or the computer module (local unit). Important: There is no warning if the temperature of the second module reaches a critical value while the first module also provides increased temperature values! page 42 Guntermann & Drunck GmbH Operating Instructions CATVision (MC) Decide whether you want the temperature warning to be displayed in the OSD or as display popup : OSD: In the defaults of the KVM extender, the warning is displayed in a separate OSD window. Press any key to close the window. Note: If the temperature is back at its normal value but reaches a critical value within one minute, the warning pops up again. Display popup: The warning can also pop up within the currently displayed image. Depending on the configured »Display Position«, the warning pops up on the display. Note: The warning is displayed on the monitor until the operating temperature reaches the normal value. How to define if you want the warning to be displayed in the OSD or as display popup: 1. 2. 3. Select “System Config > Temperature Warning” in the OSD. Press the Space key to select between OSD and Display. The settings are saved when leaving the menu by pressing F 1. 6.2.2.16 Keyboard Type Local By selection of the entry Keyboard Type Local, the support for the keyboard „PixelPower Clarity (blue)“ or the keyboard “SKIDATA1” can be activated for the local console in the displayed submenu. In the delivery status this setting is not activated. In order to activate the support for this keyboard, open the submenu and press the space bar. For saving the settings and closing the menu press F1. 6.2.2.17 Keyboard Type Remote By selection of the entry Keyboard Type Remote, the support for the keyboard „PixelPower Clarity (blue)“ or the keyboard “SKIDATA1” can be activated for the remote console in the displayed submenu. In the delivery status this setting is not activated. In order to activate the support for this keyboard, open the submenu and press the space bar. For saving the settings and closing the menu press F1. page 43 Guntermann & Drunck GmbH 6.2.2.18 Operating Instructions CATVision (MC) Signal type input To ensure the correct display of the transmitted video signal you find selection in this menu, which type synchronisation signal is available as input video signal. The options are: Standard: comprises RGB HV, RGsB, RsGsBs RGsB/HV: Sync on green and additionally seperated HV 6.2.2.19 Remote sync Basically, two options are available at the entry „Remote sync“. These are: Separated H/V as input When CATVision detects seperated HV signals, the value behind the entry „Remote sync“ changes to „Separated H/V“. This entry is not editable. When no seperated HV signals can be detected, you still have the possibilty to deliver seperated HV signals by choosing the value „Separated H/V“. With the value „as input“ the signal will be transmitted without any changes from the PC to the CATVision system. 6.2.3 User Account Move in the Config Menu to the entry User Account and press Enter. The following window will open: User Account 1 2 3 4 ... CVM USER 01 USER 02 USER 03 USER 04 bis User 08 OpenAccess SUPERVISOR Esc Enter Here you select the USER ACCOUNT which you want to change. Move the cursor with the keyboard or mouse to the corresponding account. page 44 Guntermann & Drunck GmbH Operating Instructions CATVision (MC) Confirm your selection with ENTER (or left mouse button) or close the menu without selection with ESC (or right mouse button). If you have selected an account (e.g. user 1) you get to a submenu with the window USER ACCOUNT. Here you can change the settings for the user selected in SELECT ACCOUNT. Due to the special condition of the Supervisor and the OpenAccess, these two accounts appear seperatly in the menu Select Account. Supervisor: User: Open Access: No rights can be detracted User, who optionally can be be provided with configuration rights by enabling this account, you can access the CATVisionSystem without Login-Name and Passwort. Up to 8 users, SUPERVISOR + OpenAccess can be managed. User Account Account No. 1 Account enabled: User Name: Set Account Defaults IVT access System Config access User Account access Change Password… Esc CVM Yes USER 01 Yes No No Enter F1:Save Notice: If you want to change more than one array save with F1 only after all changes are made in the USER-ACCOUNT. 6.2.3.1 Account Enable / Disable Account enabled: Yes / No In the first line of the USER-ACCOUNT you have the possibility to lock or release the whole account. The Administrator-Account cannot be disabled. A lock can be useful e.g. at longer absence of the account owner. After having moved the cursor to the corresponding array like described before you can change the setting with Y or N. For alternative switching you also can use SPACE. F1 saves the new settings and leads you back to SELECT ACCOUNT. Default: Account enabled = Yes page 45 Guntermann & Drunck GmbH 6.2.3.2 Operating Instructions CATVision (MC) Defining the User Name User name USER 01 Enter maximum 14 characters for the name of the user of this account. Current entries can be written over. Move the cursor to this array. Press ENTER for getting into the edit mode fort his array. Close the entry with ENTER. If the User Name is changed a window opens automatically which indicates the change. After having pressed any key the input menu for the user password appears: CHANGE PASSWORD CVM Please enter your new password twice: [max. 12 characters] Esc Enter The entry has max 12 alphanumerical characters. ENTER closes the first entry and automatically jumps to the second array where the password has to be entered again. With ENTER you confirm the new password and this will lead you back to the User Account. With F1 you save the new settings and go back to SELECT ACCOUNT. Interrupting the password change ESC in the window CHANGE PASSWORD will interrupt the action and lead you back to User Account. Note: When you have defined a User Name earlier and abort this procedure without entering a new password, this user is still existing. This user won´t have any chance to login, since no password is existing! If you abort the reentering of an existing password, the old password remains activ. By creating a User Account, the OpenAccess will be disabled. page 46 Guntermann & Drunck GmbH 6.2.3.3 Operating Instructions CATVision (MC) Set Account Defaults Set Account Defaults This function sets back all changes of the USER ACCOUNT to the default values which can be found at the end of a chapter at “default”. Exception: User Name + User Password Move the cursor to the entry and confirm with ENTER. The function will then be active in the background. With F1 you save the new settings and go back to SELECT ACCOUNT. 6.2.3.4 IVT Access IVT Access: Yes/No Here you can give the owner of this account access to IVT or not. Move to the array and give access to IVT by entering Y or deny access by entering N. SPACE can additionally be used for alternative switching. With F1 you save the new settings and go back to SELECT ACCOUNT. Default: IVT-Access = Yes 6.2.3.5 System Config Access System Config Access... No/Yes Here you can give the owner of this account access to the menu System Config or not. Move to the array and give access to System Config by entering Y or deny access by entering N. SPACE can additionally be used for alternative switching. With F1 you save the new settings and go back to SELECT ACCOUNT. Default: System Config Access = No page 47 Guntermann & Drunck GmbH 6.2.3.6 Operating Instructions CATVision (MC) User Account Access User Account Access ... No/Yes Here you can give the owner of this account access to the menu User Account or not. Move to the array and give access to the User Account by entering Y or deny access by entering N. SPACE can additionally be used for alternative switching. With F1 you save the new settings and go back to SELECT ACCOUNT. Default: User Account Access = No 6.2.3.7 Change Password Change password... Here you can define the User Password. Take care that the user password and the user name exist only once. The entry is possible for alphanumerical characters. Move the cursor to the corresponding entry in the menu USER ACCOUNT. After having pressed ENTER you get into the submenu where you are asked to enter the password. CHANGE PASSWORD CVM Please enter your new password twice: [Min. 4, max. 12 characters] Esc Enter The input can be done with min 4 and max 12 alphanumerical characters. page 48 Guntermann & Drunck GmbH Operating Instructions CATVision (MC) ENTER will close the first entry and automatically will lead you to the second array where you have to enter the password once again. With ENTER you confirm the new password and go back to the USER ACCOUNT. With F1 you save the new settings and go back to SELECT ACCOUNT. Default: no password. Interrupting the password change ESC in the window CHANGE PASSWORD will interrupt the action and lead you back to USER ACCOUNT. Note: If you abort the reentering of an existing password, the old password remains activ. Please keep the password in a safe place as at a loss a system access is not possible anymore. 6.3 Mouse Utility If the mouse of the computer does not work anymore during operation (mouse cursor does not move) you have the possibility of re-initialization. First check whether the connecting cables are fitted correctly. First call up the FUNCTION menu (CTRL + NUM). Move by means of the cursor control keys to the menu Mouse Utility. By pressing ENTER a submenu will open which offers the following possibilities: MOUSE UTILITY CVM Enable Mouse ► for Unix ◄ Reset Mouse Enable Intelli Enable Int Explorer Esc Enter Warning! Only do the Enable/Reset suitable for the single computer! page 49 Guntermann & Drunck GmbH Operating Instructions CATVision (MC) Enable Mouse (Standard Mouse) Select this function for non-Windows systems (e.g Linux) if the computer works with a standard mouse driver. Reset Mouse Select this function for Windows OS; independent from the set mouse driver. This is for: WIN 98, WIN NT, WIN ME, WIN 2000, WIN XP. Move the cursor via cursor control keys to the corresponding entry. Press ENTER. The initialisation of the mouse is done and the menu is closed. The mouse works with all its functions. Enable Intelli (MS-IntelliMouse) Select this function for non-Windows systems (e.g. Linux) if the connected computer uses the MS IntelliMouse driver. Enable Int Explorer (MS IntelliMouse) Select this function for non-Windows systems (e.g. Linux) if the connected computer uses the MS IntelliMouse Explorer driver. page 50 Guntermann & Drunck GmbH 7 Operating Instructions CATVision (MC) System Operation 7.1 Possibilities of Access The following possibilities of access on this system exist: Open Access: free access to the system User defined: Log-in with password and name as supervisor In the following chapters these possibilities of access are described in detail. 7.1.1 OpenAccess At OpenAccess everybody has access to the CATVision system and the connected CPU. OpenAccess in default condition is defined as follows: Access to the connected CPU without necessary log-in with name and password Access to the IVT for individual adjustment of the picture Access to the menu Console Setup Manual log-out via F8 Reinitialisation of the mouse In default the OpenAccess to the menu Config is denied (except IVT, the OpenAccess can access IVT just by pressing Enter at the password query). The authorization can be assigned by the supervisor. For this the supervisor has to assign the corresponding configuration rights in the menu User Account to the OpenAccess (see chapters 6.2.3.4 – 6.2.3.6). As long as the OpenAccess is active there is always the possibility of access without log-in even if the user already exists. In order to protect the system against unauthorized access OpenAccess has to be disabled by the supervisor or by a user. OpenAccess is managed in the UserAccount. For disabling OpenAccess open the menu UserAccount, a submenu of the Config Menu (see chapter 6.2.3). page 51 Guntermann & Drunck GmbH Operating Instructions CATVision (MC) At the bottom of the window the entry OpenAccess can be found. User Account 1 2 3 4 ... CVM USER 01 USER 02 USER 03 USER 04 bis User 08 OpenAccess SUPERVISOR Esc Enter Move to the entry and press Enter. The following window opens: USER ACCOUNT OpenAccess Account enabled: User Name: Set Account Defaults IVT Access System Config Access User Account Access Change Password… Esc Enter CVM NO OpenAccess Yes No No F1:Save Move to the entry Account enabled and change it with Space to NO. Save your settings with F1. With this OpenAccess is disabled and access to the CATVision system is only possible with the log-in. For activating OpenAccess again repeat the last procedure and change the entry from NO to YES! 7.1.2 Access via Defined User If you wish to protect the CATVision-system against undesired access, it is useful to define Users in the menu UserAccount and assign this users with certain rights. As soon as the supervisor has defined users, the access to the system is possible by entring a Login-Name and Password. To this user certain rights can be assigned. The procedure of defining a user is described in chapter 6.2.3. page 52 Guntermann & Drunck GmbH 7.1.3 Operating Instructions CATVision (MC) Access as Supervisor If you want to change the presets enter your SUPERVISOR identification in the arrays “name” and “password”. Both can be found in the appendix 1 of the operating instructions. Via SUPERVISOR-Login you have unrestricted access to all configuration levels independent from the current settings. For the settings in Menu Config a log-in as SUPERVISOR is necessary: Of course can a configuration right be linked to the User Login (see chapters 6.2.3.4 – 6.2.3.6) Please remove the SUPERVISOR password from the operating instructions for your own safety. 7.2 Automatic Switching The CATVision system allows the selectable operation of the computers from both consoles (local and remote). In default operation at both consoles is possible. As soon as at one of the consoles there is keyboard or mouse action keyboard and mouse of the other station are disabled. After a time out of approx 1 second where there is no action the system is enabled again. The time out between the switching can be adjusted to your needs (see chapter 6.2.2.7). Both connected monitors show simultaneously the picture of the computer. If the dark switching is enabled (see chapter 7.5) only the monitor of the active console is switched on. page 53 Guntermann & Drunck GmbH 7.3 Operating Instructions CATVision (MC) Manual Hold Function (Permanent Access) The CATVision system makes it possible that either the local or the remote console has access to the computer. This prevents that the system enables the other console after a preset time out of approx 1 second. By pressing CTRL and PRINT the hold function is enabled. The enabled permantent access is indicated by the slowly flashing keyboard LED “Scroll Lock” at the console where the hold function was enabled. by the fast flashing keyboard LED “Scroll Lock”, the disabled ACTIVE LED LOCAL (e.g. at CATVision-CPU) and the enabled ACTIVE LED CPU at the console which was locked by the hold function. The display looks like the following: CVM PERMANENT ACCESS The permantent access will be enabled by pressing CTRL and PRINT again and the LED SCROLL-LOCK of the keyboard will be switched off. After this the automatic switch (as described in chapter 7.2) will be enabled again. Notice: If you have activated the double-hotkey (see chapter 6.2.2.2) you have to press the defined double-hotkey for activating the permantent access. In default the permantent access for both consoles is released. If you intend to lock the permantent access or only release it for one console proceed as described in chapter 6.2.2.6. This function can be combined with the dark-switching-function (see chapter 7.5). In this case the monitor of the inactive console will be dark-switched. page 54 Guntermann & Drunck GmbH 7.4 Operating Instructions CATVision (MC) Protected Mode In default condition of the Protected Mode all connected console are locked for keyboard and mouse action and all monitors are switched dark (see chapter 7.4). Only by pressing the hotkeys (CTRL + Print), a console can exclusivly reserve the right for operation. Whilst this exclusiv operation of the active console, the monitor of the inactive console remains dark and no keyboard and mouse operation are possible. Whilst permanent access, operation is possible for the local and remote console. Just by activating the hold function one console obtain the exclusive right to work with the system. By pressing CTRL and PRINT the releasing console will have full keyboard and mouse access. The disabled keyboard, however, still has no keyboard and mouse access. The Protected Mode is indicated at the console which has the exclusive right of control by the slowly flashing keyboard LED “Scroll Lock”. at the console which still is locked by the fast keyboard LED “Scroll Lock”, the ACTIVE LED LOCAL (e.g. at CATVision-CPU) is switched off and the ACTIVE LED CPU is lit. The display looks like the following: CVM PROTECTION ACTIVATED The Protected Mode will be activated by pressing CTRL and PRINT again and the LED SCROLL-LOCK of the keyboard will be switched off and all monitors will be switched dark. After this the automatic switching (as described in chapter 7.2) will be active again. In default the Protected Mode is not enabled. If you intend to activate the Protected Mode proceed as described in chapter 6.2.2.8. page 55 Guntermann & Drunck GmbH 7.5 Operating Instructions CATVision (MC) Dark Switching of the Monitor The CATVision-system offers the possibility that the monitor of the local or remote console can be switched of when a keyboard/mouse action is done at one of the attached consoles. The dark-switching can be carried out: whilst automatic switching whilst permanent access All of this issues will be explaind in the following chapters. 7.5.1 Dark switching whilst automatic switching In default (automatic switching), the hold function will be released by a keyboard/mouse operation. After the set time-out of approx. 1 second, the monitor of the of the disabled console will be released after the set time out (see chapter 6.2.2.7). In default the “dark switching” is disabled. If you intend to activate the “dark switching” proceed as described in the chapters 6.2.2.4 and 6.2.2.5. 7.5.2 Dark switching whilst permanent access The dark switching of the disabled monitor is possible at keyboard and mouse action and in the mode “Hold Function” if the dark switching was enabled (see chapters 6.2.2.4 and 6.2.2.5). The dark switching is activated by keyboard or mouse action or by activating the hold function (CTRL + PRINT). The manual hold function will be disabled again by pressing CTRL and PRINT and the monitor of the disabled console will be released after the set time out (see chapter 6.2.2.7). In default the “dark switching” is disabled. If you intend to activate the “dark switching” proceed as described in the chapters 6.2.2.4 and 6.2.2.5. page 56 Guntermann & Drunck GmbH 7.6 Operating Instructions CATVision (MC) Manual Logout By pressing F8 in the Function Menu you log-out. This function deletes log-in to the CATVision. After execution CATVision opens the LOGIN window: Notice: If you are still in the mode OPEN ACCESS you can directly log-in again with Enter. If you have opened User Accounts and OPEN ACCESS was disabled you can only have access to the system after entering your user password or the supervisor password. You should use this function always then when you want to protect your computer against unauthorized access, e.g. when you leave your working place. page 57 Guntermann & Drunck GmbH 8 Operating Instructions CATVision (MC) Optional Equipment All components mentioned in this chapter are available as options. If you need one of these components please contact our sales department (phone: +49 2739 89010 or mail: [email protected]). 8.1 Delay Delay balances the run time delays in CAT-x cables. These run time delays are caused by the twisting of the core pairs. Because of these different lengths the colour signals R, G and B reach the monitor in different times. The effect of these run time delays is that you see no harmonic picture but colour shifts which can be compared with convergence errors at the monitor. For balancing the run time delays Delay is used and described in chapter 5.4.4.4. page 58 Guntermann & Drunck GmbH 8.2 Operating Instructions CATVision (MC) Audio CATVision offers a bidirectional Stereo-Audio transmission nearly in CD quality. For this CATVision-CPU has - Line In - Line Out. Mouse PS/2 RS 232 Line In Line Out Red. Power 5V DC/5A Keyb PS/2. USB K/M CPU In Monitor Transmission USB 1.1 Trans Main Power CPU In CPU VGA Keyb. Mouse In AC 100-240 V, 47-63 Hz CATVision-CON has the following connections: - Line In - Micro In - Speaker RS 232 Line In Micro In Speaker Main Power Keyb. USB Mouse USB Trans 5V DC/5A Keyb. PS/2 Mouse Service Monitor Transmission Red. Power AC 100-240 V, 47-63 Hz The output is for sending the corresponding audio signals which come in at the other end of the transmitting distance. The transmission of the audio signals is digital via CAT-x cable and so independent from the length of the cable. Digitalisation is done with a resolution of 18 Bit and a scan rate of 48 kHz. The connecting is designed as 3.5 mm jack. The inputs Micro In and Line In of the corresponding devices can not be used at the same time. The input Micro In has a preamplification of 20 dB. Here the connections used most often: PC 1. Line-Out => 2. Line-In => CAT Vision-CPU Line-In Line-Out CAT Vision-CON Line-Out Micro-In page 59 Periphery <= active speaker <= microphone Guntermann & Drunck GmbH 8.3 Operating Instructions CATVision (MC) RS232 With the port RS232 external devices can be connected to CATVision. These devices must have the following characteristics: 8.4 Transmission rate: up to 200 meter:max 38400 bits/sec up to 100 meter:max 57600 bits/sec Transmittable signals: TxD, RxD, RTS, CTS, DTR, DSR USB 1.1 transmission Due to the used technologie you overcome the transmitting limitation of the USB standard between the PC and the USB – device.(normally up to 5 meter). With the CATVision-System USB-devices can be connected up to 200 meter to the local PC. Special note to the compatiblity of the transparent USB 1.1 connection: The USB-conncection complies with the specification of the USB 1.1 standard, which defines the design of USB full-speed devices. However, the manufacturer does not gurantee, that all USB full-speed devices are compatibel to the CATVision. page 60 Guntermann & Drunck GmbH 9 Operating Instructions CATVision (MC) System-Update Over a Service-Interface you can update CATVision with an actual firmware. This interface is located at the front-side of the CATVision-CPU. Service-Interface for Firmwareupdate The Service-interface at CATVision-CON is located at the rear-side. For the daily use the Service-interface is for you without broader meaning. Since the system can be updated with special hardware or new firmware releases, a permanent use of the CATVision-System will be ensured by the Service-interface. In one of these issues, please contact out servicedepartement by dialing +49-2739-8901-100. 10 System Info In the window System Info which only can be called up via FUNCTION menu no settings can be made. Here you will find information about CATVision which is important for the service department. With ESC you close the window. page 61 Guntermann & Drunck GmbH 11 Operating Instructions CATVision (MC) CV-Power-Expansion By the CV-Power functionality (GPIO=General Purpose Input Output) the CATVision system offers the possibility of transmitting electronic signals over long distances. A correct application for this is the remote control of RESET and switching of the ATX power supply in a PC. With a simple slot-aperture insertion card the current key switches are combined with the control signals of CATVision. 11.1 Scope of Delivery For the connection at the CATVision-CPU 1 x CV power Slot card (ATX module) for the installation in a PC 2 x 2pole connection cable-0,4 for the connection between motherboard and CV power (2-core jack/jack) 2 x 2pole connection cable-0,4 for the extension of the jack-jack cable (2-core connector/jack) 1 x Power Cord-2 Connection cable for connecting the CV power card with the CATVision CPU (3pole connector on RJ9 plug) For the connection at the CATVision-CON 1 x 3-pole cable jack for the connection at the key switch connection cable page 62 Guntermann & Drunck GmbH 11.2 11.2.1 Operating Instructions CATVision (MC) Installation Installation in the PC The connection of the CV-Power (ATX module) with the motherboard of the computer allows RESET and switching of the ATX power supply. For switching the ATX power supply please proceed as follows: Open the side covers of the PC case Insert the ATX module CV-Power in a free extension slot. This doe not require a PCI, ISA or AGP slot but just the installation position at the back of the computer. Pull off the 2-core cable at the motherboard coming from the ATX switch at the PC front side(Motherboard) and connect it to the connector PwrSw ATX-Modul CV-Power. The 2-pole connector position seen from bottom to top: Pwr-Sw – Power connection to the ATX switch Pwr-MB – Power connection to the motherboard (Place holder) Res-MB – Reset connection to the motherboard Res-Sw – Reset connection to the Reset switch Now connect the 2-pole connection cable with Pwr-MB. Connect the other end with the connecting position with the motherboard where the cable of the ATX switch was connected before. If the length of the 2-pole connection cable is not sufficient use the delivered extension cable. page 63 Guntermann & Drunck GmbH Operating Instructions CATVision (MC) For establishing a Reset connection, proceed in the same way as described above. Here you connect the connector Res-Sw with the Reset switch and then the connector Res-MB of the module with the motherboard. Even if there is no Reset button at the PC case a Reset is still possible. In this case Res-MB is connected with a 2-core cable with suitable connections for the Reset key switch on the motherboard. Information: For finding the correct contacts on the motherboard please see the manual of the motherboard. Typical application: principle circuit for controlling ATX power and Reset: V+ 5V (Pin 2) O2 RESET# (Pin 3) 2-pole-connection to the ATX switch at the PC case (Pwr-SW) 2-pole connection to ATX switch at the PC case (Res-Sw) 2-pole connection to the PWR-SW connection on the PC motherboard (Pwr-MB) 2-pole connection to the Reset connection on the PC motherboar (Res-MB) O2 ATXPWR# (Pin 1) The remote activation of Reset or On/Off of the computer only works at switched on and (over CAT-x cable) connected CATVision-CPU and CATVision-CON. At a correct wiring the key switches at the PC still work as usual. page 64 Guntermann & Drunck GmbH 11.2.2 Operating Instructions CATVision (MC) Conncetion with CATVision-CPU For establishing a connection between ATX module CV-Power and CATVision-CPU please use the delivered cable PowerCord-2. Plug the 3-pole jack of the cable in the 3-pole flange connector of CATVision-CPU on the back of the device. (3-pole flange connector) 11.2.3 Then plug the RJ9 connector in the RJ-9 jack of the ATX module CVPower. Connection of the key switch with CATVision-CON Before connecting the key switch with CATVision-CON the key switch has to be connected with the delivered 3-pole cable jack. From the following illustration you can see which wire has to be connected with which PIN. page 65 Guntermann & Drunck GmbH Operating Instructions CATVision (MC) Principle circuit with key switches for Reset and ATX Power On/Off: I1 SW1_ATXPWR# (Pin 1) I2 SW2_RESET# (Pin 3) - 0V (Pin 2) After having connected the key switches with the 3-pole cable jack, plug these in the 3-pole flange connector of CATVision-CON on the back of the device. (3-pole flange connector) page 66 Guntermann & Drunck GmbH 12 Operating Instructions CATVision (MC) Specifications 12.1 CATVision Video Resolution: max 1920 x 1440 pixels (depending on cable and video signal) Transmitting distance: 10 to 300 m (max value, depending on resolution, cable and video signal) Transmittable signals: RGBHV, RGsB or RsGsBs Keyboard / Mouse (ON COMPUTER + USER SIDE) Port/Transmission: USB, PS/2 / serial Mouse / Intelli-Mouse, via adaptor: Sun, MAC Mixed operation possible RS232 (optional) Transmission rate: up to 100 meter:max 57600 bits/sec up to 200 meter:max 38400 bits/sec Transmittable signals: TxD, RxD, RTS, CTS, DTR, DSR Audio (optional) Resolution: 18 Bit digital Scan rate: 48 kHz Band width: 22 kHz Microphone preamplification: 20dB USB 1.1 (optional) Transmitting distance: 200 meter Support: High power devices (up to 500 mA) Transmission rate: up to 12 Mbits/s Transmitting cable: CAT-x cable or higher (x = 5, 6, 7) Size: (W x H x D in mm) CATVision-CPU 210 x 44 x 210 (19“ / 1 unit) CATVision-CON 210 x 44 x 210 (19“ / 1 unit) page 67 Guntermann & Drunck GmbH Operating Instructions CATVision (MC) Weight: CATVision-CPU without USB with USB CATVision-CON without USB with USB 1,20 kg 1,28 kg 1,10 kg 1,18 kg Power supply: Main: Redundant: 100 – 240 V primary 50 – 60 Hz DC 12V 5A Current consumption (max. values): CATVision-CPU CATVision-CON at 100 V (Main) 140 mA 240 mA at 240 V (Main) 82 mA 100 mA at 12 V (red.) 600 mA 900 mA at 240 V (Main) 9,78 W 11,46 W at 12 V (red.) 7,2 W 9,96 W at 240 V (Main) 9,78 W 11,46 W at 12 V (red.) 7,2 W 9,96 W Power consumption (max. values): CATVision-CPU CATVision-CON at 100 V (Main) 9,08 W 11,38 W Heat dissipation (max. values): CATVision-CPU CATVision-CON at 100 V (Main) 9,08 W 11,38 W Temperature range: Operation: 5 to 40° C rel. air moisture < 80%, non precipitate Storage: - 10 to 55°C, < 85 % Air moisture page 68 Guntermann & Drunck GmbH 12.2 Operating Instructions CATVision (MC) CATVision-MC Video Resolution: max 1920 x 1440 pixels (depending on cable and video signal) Transmitting distance: 10 to 300 m (max value, depending on resolution, cable and video signal) Transmittable signals: RGBHV, RGsB or RsGsBs Keyboard / Mouse (ON COMPUTER + USER SIDE) Port/Transmission: USB, PS/2 / serial Mouse / Intelli-Mouse, via adaptor: Sun, MAC Mixed operation possible RS232 (optional) Transmission rate: up to 100 meter:max 57600 bits/sec up to 200 meter:max 38400 bits/sec Transmittable signals: TxD, RxD, RTS, CTS, DTR, DSR Audio (optional) Resolution: 18 Bit digital Scan rate: 48 kHz Band width: 22 kHz Microphone preamplification: 20dB USB 1.1 (optional) Transmitting distance: 200 meter Support: High power devices (up to 500 mA) Transmission rate: up to 12 Mbits/s Transmitting cable: CAT-x cable or higher (x = 5, 6, 7) Size: (W x H x D in mm) CATVision-MC 2 (3,4)-CPU; CATVision-MC 3 (4)-CON Twin CATVision-MC 2-CPU 435 x 44 x 210 (19“ / 1 unit) CATVision-MC2-CON 210 x 44 x 210 (19“ / 1 unit) page 69 Guntermann & Drunck GmbH Operating Instructions CATVision (MC) Weight: CATVision-MC2-CPU without USB 1,90 kg with USB 1,98 kg CATVision-MC3-CPU without USB 2,10 kg with USB 2,18 kg CATVision-MC4-CPU without USB 2,15 kg with USB 2,23 kg CATVision-MC2-CON without USB 1,35 kg with USB 1,43 kg CATVision-MC3-CON without USB 2,00 kg with USB 2,08 kg CATVision-MC4-CON without USB 2,00 kg with USB 2,08 kg Power supply: 100 – 240 V primary 50 – 60 Hz Redundant: DC 12V 5A Current consumption (max. values): Main: at 100 V (Main) CATVision-MC-CPU 410 mA CATVision-MC-CON 310 mA at 240 V (Main) 200 mA 160 mA at 12 V (red.) 2A 1,5 A at 240 V (Main) 26,51 W 21,96 W at 12 V (red.) 21,24 W 16,56 W at 240 V (Main) 26,51 W 21,96 W at 12 V (red.) 21,24 W 16,56 W Power consumption (max. values): at 100 V (Main) CATVision-MC-CPU 26,0 W CATVision-MC-CON 19,51 W Heat dissipation (max. values): at 100 V (Main) CATVision-MC-CPU 26,0 W CATVision-MC-CON 19,51 W Temperature range: Operation: 5 to 45° C rel. air moisture < 80%, non precipitate Storage: - 10 to 55°C, < 85 % Air moisture page 70 Guntermann & Drunck GmbH 13 Operating Instructions CATVision (MC) Appendix 13.1 HotKey Seizure Function Default HotKey Personal HotKey Chapter Calling up FunctionMenu CTRL+ NUM Manual Hold function CTRL + PRINT 7.3 Activating keyboardmouse operation in protected mode CTRL + PRINT 74 Calling up the IVT Mode CTRL+ SCROLL 5.4 Shifting the IVT-Menu SHIFT+ CursorKeys 5.4.4 13.2 6 IVT Settings Parameter CALLING UP THE IVT MODE Konfiguration Key CTRL + SCROLL Chapter 5.3 Min Amplification END 5.4.4.3.1 Max Amplification POS 1 5.4.4.3.1 + 5 Amplification CTRL + 5.4.4.3.1 - 5 Amplification CTRL + 5.4.4.3.1 + 1 Amplification 5.4.4.3.1 - 1 Amplification 5.4.4.3.1 Reject new settings ESC 5.4.4.3.1 page 71 Guntermann & Drunck GmbH 13.3 Operating Instructions CATVision (MC) Password For OpenAccess name and password are not necessary. If you want to configurate the system you have to log-in as SUPVERVISOR! SUPERVISOR LOGIN CVM Please enter your login: 4658 Name: Password: ESC Enter Please watch the spelling. Replace the preset password by a individual and safe password. page 72 NOTES NOTES NOTES NOTES NOTES Das Handbuch wird fortlaufend aktualisiert und im Internet veröffentlicht. The manual is constantly updated and available on our website. http://gdsys.de/A9100189 Guntermann & Drunck GmbH Dortmunder Str. 4a 57234 Wilnsdorf Germany http://www.GDsys.de [email protected]