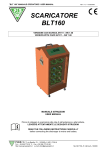
1
MANUALE DI ISTRUZIONI "Software BLTView”
Rev. n° 2 del 20/10/2009
File:BLTView_IT_GB_F_D_rev2_221009.doc
SOFTWARE
BLTView
Rev 2.2
MANUALE UTENTE
USER MANUAL
MANUEL UTILISATEUR
BENUTZERHANDBUCH
ITALIANO……………………………………………………………………………2
ENGLISH…………………………………………………………………………...34
FRANÇAIS…………………………………………………………………………67
DEUTSCH……………………………………………………………………….....99
-1-
P.B.M. S.r.l.
ALFA PROGETTI S.r.l.
Via Barella Z.I. VIGNOLA (MO) ITALIA
Tel. +39 059 77 05 311 Fax +39 059 77 05 300
http://www.gruppopbm.it e-mail: [email protected]
Via Dei Fabbri 42. SPILAMBERTO (MO) ITALIA
Tel. +39 059 78 57 26 Fax +39 059 78 57 37
http://www.alfaprogetti.com e-mail: [email protected]
MANUALE DI ISTRUZIONI "Software BLTView”
Rev. n° 2 del 20/10/2009
File:BLTView_IT_GB_F_D_rev2_221009.doc
ITALIANO
Indice
1 – Introduzione ............................................................................................................................ 3
2 – Installazione ............................................................................................................................ 3
3 – Impostazioni ............................................................................................................................ 4
3.1 – Lingua impostata............................................................................................................. 4
3.2 – Porta seriale..................................................................................................................... 5
3.3 – Configurazione................................................................................................................ 5
3.4 – Inserimento password...................................................................................................... 6
4 – BLT160 connesso .................................................................................................................... 7
4.1 – Preparazione.................................................................................................................... 7
4.2 – Consultazione dati istantanei ........................................................................................... 7
4.2.1 – TAB Programmazione.................................................................................................. 8
4.2.1.1 - Impostazione orologio....................................................................................... 9
4.2.1.2 – Scrittura parametri generali ............................................................................. 9
4.2.2 – TAB Monitor.............................................................................................................. 10
4.2.3 – TAB Info.................................................................................................................... 11
4.2.3.1 Elenco anomalie ................................................................................................ 12
4.2.5 – TAB Grafico .............................................................................................................. 13
4.2.6 – TAB Recorder ............................................................................................................ 14
4.2.7 – Download................................................................................................................... 15
5 – Consultazione dati OLD ....................................................................................................... 16
5.1 – BLT160 Explorer .......................................................................................................... 16
5.1.1 – TAB Dati OLD........................................................................................................... 16
5.1.2 – TAB Info OLD........................................................................................................... 17
5.1.3 – TAB Grafico OLD...................................................................................................... 18
5.1.4 – TAB Medie ................................................................................................................ 19
5.1.4.1 – TAB Medie – grafico............................................................................................... 20
5.1.5 – TAB Programmazione................................................................................................ 21
5.1.6 – TAB Archivia............................................................................................................. 22
5.2 – Anagrafica Clienti/Operatori ......................................................................................... 23
5.3 – Modifica associazioni.................................................................................................... 24
5.4 –Seleziona database ......................................................................................................... 25
5.5 – Recorder OLD............................................................................................................... 26
APPENDICE A ........................................................................................................................... 27
Utilizzo del programma DFU ..................................................................................................... 27
APPENDICE B ........................................................................................................................... 28
Installazione driver USB............................................................................................................. 28
B1 – Installazione del DRIVER comunicazione USB su Windows XP................................... 28
B2 – Installazione del DRIVER comunicazione USB su Windows VISTA ............................ 31
-2-
P.B.M. S.r.l.
ALFA PROGETTI S.r.l.
Via Barella Z.I. VIGNOLA (MO) ITALIA
Tel. +39 059 77 05 311 Fax +39 059 77 05 300
http://www.gruppopbm.it e-mail: [email protected]
Via Dei Fabbri 42. SPILAMBERTO (MO) ITALIA
Tel. +39 059 78 57 26 Fax +39 059 78 57 37
http://www.alfaprogetti.com e-mail: [email protected]
MANUALE DI ISTRUZIONI "Software BLTView”
Rev. n° 2 del 20/10/2009
File:BLTView_IT_GB_F_D_rev2_221009.doc
1 – Introduzione
BLTVIEW è un’applicazione per Windows98 o versioni successive, realizzata per dialogare con il
dispositivo di scarica e test di batterie denominato BLT160.
Il BLT160 comunica con il PC tramite cavo USB. È così possibile personalizzare il funzionamento
del dispositivo, fornendogli i dati relativi alla batteria collegata e alle modalità di lavoro desiderate.
È inoltre possibile monitorare tutti i parametri di funzionamento in tempo reale e scaricare i dati
memorizzati (in forma di cicli di lavoro ed in forma grafica) sul database locale presente sul PC.
Una volta scaricati i dati sul PC è possibile visualizzarli in ogni momento senza bisogno di essere
collegati tramite cavo USB.
Il programma BLTVIEW è in grado di gestire i dati di un numero illimitato di dispositivi BLT160:
tramite un semplice sistema di ricerca si individuano e visualizzano i dati dei soli dispositivi di
interesse.
I dati visualizzati tramite BLTVIEW sono stampabili mediante un tasto dedicato.
Assieme al programma BLTVIEW viene fornito un altro programma denominato DFU che permette
di eseguire l’aggiornamento del firmware presente sul BLT160.
2 – Installazione
Il pacchetto di installazione del BLTVIEW viene fornito con il dispositivo BLT160 su CD.
Prima Installazione
Per installare il pacchetto la prima volta operare come segue:
-
Accedere alla cartella dove risiede il pacchetto ed entrare nella sottocartella “Disk1”
Lanciare il programma Setup.exe e seguire le istruzioni dell’installatore
Al termine sarà presente sulla barra dei programmi la cartella BLTVIEW da cui accedere ai diversi
elementi del pacchetto. Sarà inoltre presente sul desktop un link al programma BLT160View.
Manutenzione
Per installare versioni più recenti del pacchetto è necessario rimuovere preventivamente la
versione precedentemente installata tramite gli strumenti messi a disposizione da Windows.
-3-
P.B.M. S.r.l.
ALFA PROGETTI S.r.l.
Via Barella Z.I. VIGNOLA (MO) ITALIA
Tel. +39 059 77 05 311 Fax +39 059 77 05 300
http://www.gruppopbm.it e-mail: [email protected]
Via Dei Fabbri 42. SPILAMBERTO (MO) ITALIA
Tel. +39 059 78 57 26 Fax +39 059 78 57 37
http://www.alfaprogetti.com e-mail: [email protected]
MANUALE DI ISTRUZIONI "Software BLTView”
Rev. n° 2 del 20/10/2009
File:BLTView_IT_GB_F_D_rev2_221009.doc
Una volta lanciato il programma BLTVIEW presenta una pagina principale da dove è possibile
attivare tutte le funzioni.
3 – Impostazioni
Accedendo al menù “Impostazioni” si possono modificare
- livello di accesso alle funzioni permesse in base alla password inserita
- Configurazione delle password per i vari livelli di utente
- Porta di comunicazione seriale
- Lingua del software
3.1 – Lingua impostata
Dal menù “Impostazioni” selezionare la voce “Lingua Impostata” e scegliere la lingua desiderata.
Sarà necessario riavviare il programma per rendere effettiva la selezione della lingua.
-4-
P.B.M. S.r.l.
ALFA PROGETTI S.r.l.
Via Barella Z.I. VIGNOLA (MO) ITALIA
Tel. +39 059 77 05 311 Fax +39 059 77 05 300
http://www.gruppopbm.it e-mail: [email protected]
Via Dei Fabbri 42. SPILAMBERTO (MO) ITALIA
Tel. +39 059 78 57 26 Fax +39 059 78 57 37
http://www.alfaprogetti.com e-mail: [email protected]
MANUALE DI ISTRUZIONI "Software BLTView”
Rev. n° 2 del 20/10/2009
File:BLTView_IT_GB_F_D_rev2_221009.doc
3.2 – Porta seriale
Dal menù “Impostazioni” selezionare la voce “Porta seriale” e accedere alla maschera di
configurazione: selezionare “Auto” per la ricerca automatica della porta seriale alla connessione,
oppure selezionare la porta utilizzata se già nota in partenza.
NOTE:
-
-
la ricerca automatica può richiedere alcuni istanti ad ogni connessione, in funzione della
modalità con cui il sistema operativo assegna il numero della porta seriale. Si consiglia
in questi casi di individuare il numero della porta (esplorare Pannello di controllo di
Windows -> Gestione periferiche -> Porte (COM e LPT)) e selezionare quindi la porta
individuata.
Nel caso in cui si utilizzi la stessa porta seriale, è possibile settare il numero di porta. In
questo modo si evitano perdite di tempo per la ricerca automatica.
3.3 – Configurazione
Il programma BLTVIEW ha 3 diversi livelli di accesso mediante password:
-
nessuna password:
§ accesso parziale ai dati in lettura
§ nessun accesso alla scrittura dei parametri relativi alle associazioni
possibilità di memorizzare cicli e grafici su PC
§ nessun accesso alla scrittura dei parametri di programmazione
§ nessun accesso ai parametri di taratura
-
password di livello 1 (livello utente):
§ accesso parziale ai dati in lettura
§ nessun accesso alla scrittura dei parametri relativi alle associazioni
possibilità di memorizzare cicli e grafici su PC
§ accesso parziale alla scrittura dei parametri di programmazione
§ nessun accesso ai parametri di taratura
-
password di livello 2 (livello supporto tecnico PBM o autorizzati):
§ accesso completo ai dati in lettura
§ possibilità di memorizzare cicli e grafici su PC
§ accesso completo alla scrittura dei parametri di programmazione
§ accesso completo ai parametri di taratura
-5-
P.B.M. S.r.l.
ALFA PROGETTI S.r.l.
Via Barella Z.I. VIGNOLA (MO) ITALIA
Tel. +39 059 77 05 311 Fax +39 059 77 05 300
http://www.gruppopbm.it e-mail: [email protected]
Via Dei Fabbri 42. SPILAMBERTO (MO) ITALIA
Tel. +39 059 78 57 26 Fax +39 059 78 57 37
http://www.alfaprogetti.com e-mail: [email protected]
MANUALE DI ISTRUZIONI "Software BLTView”
Rev. n° 2 del 20/10/2009
File:BLTView_IT_GB_F_D_rev2_221009.doc
3.4 – Inserimento password
Con il menù di “Impostazioni” selezionare la voce “Inserimento password” per cambiare la
password di accesso.
-
Selezionare la voce “Inserimento password” dal menù “Impostazioni” oppure premere il
pulsante “Password” ed inserire la propria password
Selezionare la voce Configurazione e accedere alla maschera di configurazione
Cambiare la password del proprio livello o di livello inferiore
NOTE:
- Le password di default alla prima installazione sono:
§ livello 1: “ALFA”
§ livello 2: “***” (collaudo e tarature)
Le password non sono “case sensitive”, ovvero i caratteri possono essere utilizzati
indifferentemente maiuscoli o minuscoli.
-6-
P.B.M. S.r.l.
ALFA PROGETTI S.r.l.
Via Barella Z.I. VIGNOLA (MO) ITALIA
Tel. +39 059 77 05 311 Fax +39 059 77 05 300
http://www.gruppopbm.it e-mail: [email protected]
Via Dei Fabbri 42. SPILAMBERTO (MO) ITALIA
Tel. +39 059 78 57 26 Fax +39 059 78 57 37
http://www.alfaprogetti.com e-mail: [email protected]
MANUALE DI ISTRUZIONI "Software BLTView”
Rev. n° 2 del 20/10/2009
File:BLTView_IT_GB_F_D_rev2_221009.doc
4 – BLT160 connesso
Di seguito si illustrano le funzioni disponibili quando ci si collega tramite USB o cavo seriale al
dispositivo BLT160.
Si suppone che il programma BLTVIEW sia già configurato come descritto in precedenza.
4.1 – Preparazione
-
Collegare il cavo USB (o il cavo seriale) al PC e al BLT160 (durante il primo collegamento,
verrà richiesto di installare i driver per la comunicazione tramite porta USB1)
Lanciare il programma BLTView
Inserire la Password se necessario per le operazioni che si desidera svolgere
Premere il pulsante di connessione “Collega BLT160”
NOTA:
La presenza di connessione seriale è segnalata dall’icona in basso a sinistra in ogni TAB.
4.2 – Consultazione dati istantanei
In questa sezione si descrivono tutti le funzioni disponibili quando si è connessi tramite cavo USB
o seriale. Se viene perso il collegamento seriale, compare un messaggio di avvertimento e le
registrazioni automatiche si bloccano.
Per ripristinare le funzioni di online occorre
- scollegare il cavo seriale o USB
- confermare con OK il messaggio di avvertimento
- ricollegare il cavo seriale o USB
- Premere il pulsante di connessione “Collega BLT160”
Vi sono 5 tab selezionabili in alto e 5 pulsanti in basso, che possono svolgere funzioni diverse a
seconda del tab selezionato.
In particolare i 2 tasti “BLT160 explorer” e “Download dati” sono sempre attivi.
1
La comunicazione tramite porta USB richiede una installazione preventiva dei driver per Windows (APPENDICE B)
-7-
P.B.M. S.r.l.
ALFA PROGETTI S.r.l.
Via Barella Z.I. VIGNOLA (MO) ITALIA
Tel. +39 059 77 05 311 Fax +39 059 77 05 300
http://www.gruppopbm.it e-mail: [email protected]
Via Dei Fabbri 42. SPILAMBERTO (MO) ITALIA
Tel. +39 059 78 57 26 Fax +39 059 78 57 37
http://www.alfaprogetti.com e-mail: [email protected]
MANUALE DI ISTRUZIONI "Software BLTView”
Rev. n° 2 del 20/10/2009
File:BLTView_IT_GB_F_D_rev2_221009.doc
4.2.1 – TAB Programmazione
I parametri accessibili da questo TAB sono quelli che caratterizzano il funzionamento del
dispositivo BLT160 e le modalità di raccogliere i dati.
In base al livello della password inserita è possibile leggere e/o scrivere questi parametri.
-8-
P.B.M. S.r.l.
ALFA PROGETTI S.r.l.
Via Barella Z.I. VIGNOLA (MO) ITALIA
Tel. +39 059 77 05 311 Fax +39 059 77 05 300
http://www.gruppopbm.it e-mail: [email protected]
Via Dei Fabbri 42. SPILAMBERTO (MO) ITALIA
Tel. +39 059 78 57 26 Fax +39 059 78 57 37
http://www.alfaprogetti.com e-mail: [email protected]
MANUALE DI ISTRUZIONI "Software BLTView”
Rev. n° 2 del 20/10/2009
File:BLTView_IT_GB_F_D_rev2_221009.doc
Nella seguente tabella si descrivono i singoli campi.
La password richiesta per la scrittura è almeno quella di livello utente.
NOME CAMPO
Parametri Nominali
Tensione Nominale (V)
Ah Batteria (Ah)
Modo di lavoro
N. Cicli
ID Batteria
Note
Scarica
Corrente di scarica (A)
Tempo di scarica (hh:mm)
Tensione di stop scarica (V/el)
Tempo di pausa dopo scarica (hh:mm)
Carica
% Magg. Ricarica (%)
Tensione di soglia (V/el)
Tempo di carica minimo (hh:mm)
Tempo di carica massimo (hh:mm)
Tempo di pausa dopo scarica (hh:mm)
Altri Parametri
Tempo campionamento grafico
Lingua
DESCRIZIONE
Valore nominale tensione di batteria
Valore nominale capacità di batteria
Modalità di test (consultare il Manuale Tecnico)
Numero cicli di carica e scarica
Matricola batteria
Note
Corrente di scarica durante il test
Durata fase di scarica
Tensione alla quale viene terminata la fase di scarica
Tempo di pausa al termine della fase di scarica
Maggiorazione di ricarica
Tensione di batteria a cui si passa dalla 1° alla 2° fase
Durata minima della fase di carica
Durata massima della fase di carica
Tempo di pausa al termine della fase di carica
Tempo di campionamento per i grafici di tensione e corrente
memorizzati
Selezione lingua
Quando viene programmato il modo di lavoro = VCOST, vi sono due parametri che cambiano
significato in tutte le situazioni in cui vengono richiamati (sia online che offline):
Tensione di stop scarica (V/el):
Tensione di regolazione (V)
Tensione di riferimento costante
Corrente di scarica (A):
Corrente massima di scarica (A)
Corrente di scarica limite durante il test
4.2.1.1 - Impostazione orologio
Per impostare il datario del dispositivo BLT160 è sufficiente premere il pulsante “Imposta
Orologio”. Poiché l’operazione trasferisce sul BLT160 la data e l’ora del PC è bene verificare che il
datario del PC sia regolato correttamente
4.2.1.2 – Scrittura parametri generali
Verificare di avere inserito la password almeno del livello utente (Livello 1)
Premere il tasto “Modifica programmazione”.
Una volta modificati i parametri, per trasferirli è necessario premere il pulsante “Invia dati al
BLT160”.
Premendo il tasto “Annulla”, i campi verranno bloccati e ne verrà riletto il valore precedente dal
BLT160.
-9-
P.B.M. S.r.l.
ALFA PROGETTI S.r.l.
Via Barella Z.I. VIGNOLA (MO) ITALIA
Tel. +39 059 77 05 311 Fax +39 059 77 05 300
http://www.gruppopbm.it e-mail: [email protected]
Via Dei Fabbri 42. SPILAMBERTO (MO) ITALIA
Tel. +39 059 78 57 26 Fax +39 059 78 57 37
http://www.alfaprogetti.com e-mail: [email protected]
MANUALE DI ISTRUZIONI "Software BLTView”
Rev. n° 2 del 20/10/2009
File:BLTView_IT_GB_F_D_rev2_221009.doc
4.2.2 – TAB Monitor
Dal TAB Monitor si accede in tempo reale ai principali parametri di stato e di funzionamento della
batteria.
Si individuano le seguenti sezioni:
- A: livello capacità in batteria
- B: Indicazioni fase di Scarica/Carica
- C: parametri nominali programmati sul dispositivo
- D: numero test e numero ciclo attuale
- E: tensione di batteria
- F: temperatura del BLT160
B
C
A
D
E
F
Ø Il tasto “BLT160 Explorer” permette di analizzare i dati off-line (vedi cap.5), quindi andare a
viusalizzare i dati salvati sul Database.
Ø Il tasto “Download dati” permette di leggere i dati presenti nella memoria del BLT160 e andarli
a salvare nel Database sul PC (vedi § 4.2.7).
Ø Il tasto “Chiudi” riporta alla pagina principale e chiude la sessione online.
- 10 -
P.B.M. S.r.l.
ALFA PROGETTI S.r.l.
Via Barella Z.I. VIGNOLA (MO) ITALIA
Tel. +39 059 77 05 311 Fax +39 059 77 05 300
http://www.gruppopbm.it e-mail: [email protected]
Via Dei Fabbri 42. SPILAMBERTO (MO) ITALIA
Tel. +39 059 78 57 26 Fax +39 059 78 57 37
http://www.alfaprogetti.com e-mail: [email protected]
MANUALE DI ISTRUZIONI "Software BLTView”
Rev. n° 2 del 20/10/2009
File:BLTView_IT_GB_F_D_rev2_221009.doc
4.2.3 – TAB Info
Dal TAB Info si accede in tempo reale ai parametri di stato e di funzionamento dettagliati del test.
Si individuano le seguenti sezioni:
- A: numero test
- B: numero ciclo del test
- C: parametri nominali
- D: dati di scarica
- E: dati di carica
- F: elenco anomalie attive
C
A
E
B
D
F
Ø Il tasto di stampa invia al dispositivo di stampa predefinito i dati presentati a monitor.
Ø Il tasto “BLT160 Explorer” permette di analizzare i dati off-line (vedi cap.5).
Ø Il tasto “Download dati” permette di leggere i dati presenti nella memoria del BLT160(vedi §
4.2.7).
Ø Il tasto “Chiudi” riporta alla pagina principale e chiude la sessione online.
- 11 -
P.B.M. S.r.l.
ALFA PROGETTI S.r.l.
Via Barella Z.I. VIGNOLA (MO) ITALIA
Tel. +39 059 77 05 311 Fax +39 059 77 05 300
http://www.gruppopbm.it e-mail: [email protected]
Via Dei Fabbri 42. SPILAMBERTO (MO) ITALIA
Tel. +39 059 78 57 26 Fax +39 059 78 57 37
http://www.alfaprogetti.com e-mail: [email protected]
MANUALE DI ISTRUZIONI "Software BLTView”
Rev. n° 2 del 20/10/2009
File:BLTView_IT_GB_F_D_rev2_221009.doc
In tabella si descrive il significato dei singoli campi.
NOME CAMPO
Numero test
Numero ciclo
Valori programmati
Note
ID BAT
Tensione Nominale (V)
Capacità Nominale (Ah)
Corrente di scarica (A)
Tempo di scarica (hh:mm)
Tensione di stop scarica (V/el)
Modo di lavoro
Versione Firmware
Dati di Scarica
Inizio Scarica
Tempo di Scarica (hh:mm)
Tempo di Pausa dopo Scarica (hh:mm)
Capacità Inizio Ciclo (Ah)
Capacità Scaricata (Ah)
Capacità a Fine Scarica (Ah)
Efficienza (%)
Tensione Minima (V/el)
Temperatura interna max (°C)
Dati di Carica
Inizio Carica
Durata fasi (1^) (hh:mm)
Durata fasi (2^) (hh:mm)
Tempo totale della Carica (hh:mm)
Tempo di Pausa dopo Carica (hh:mm)
Capacità Inizio Carica (Ah)
Capacità Caricata 1^ Fase (Ah)
Capacità Caricata 2^ Fase (Ah)
Capacità Totale Caricata (Ah)
Maggiorazione di Ricarica (%)
Capacità a Fine Carica (Ah)
Tensione Massima (V/el)
Corrente Massima (A)
Corrente di Fine Carica (A)
DESCRIZIONE
Numero test attuale
Numero ciclo attuale
Note programmate nella pagina di Programmazione
Matricola batteria programmata nella pagina di Programmazione
Valore nominale tensione batteria
Valore nominale capacità batteria
Corrente di scarica di riferimento
Durata massima della scarica
Tensione sotto la quale viene fermata la fase di scarica
Modalità con cui viene eseguito il test (consultare il Manuale Tecnico del BLT)
Versione firmware BLT160
Data e ora inizio scarica
Tempo complessivo della fase di scarica
Tempo complessivo di pausa dopo la scarica
Capacità di batteria all’inizio della scarica
Capacità scaricata
Capacità residua in batteria al termine della fase di scarica
Efficienza batteria calcolata (Capacità Scaricata/Capacità Nominale*100)
Tensione minima durante la fase di scarica
Temperatura massima dell’elettronica durante la fase di scarica
Data e ora inizio carica
Tempo complessivo della prima fase di carica
Tempo complessivo della seconda fase di carica
Tempo complessivo della fase di carica
Tempo complessivo di pausa durante la carica
Capacità in batteria all’inizio della ricarica
Capacità complessiva integrata nella prima fase di carica
Capacità complessiva integrata nella seconda fase di carica
Capacità complessiva integrata nelle fasi di carica
Maggiorazione percentuale tra capacità scaricata e capacità reintegrata
Capacità in batteria al termine della fase di ricarica
Tensione massima durante la fase di ricarica
Corrente di carica massima
Corrente di carica rilevata un secondo prima di bloccare la ricarica
4.2.3.1 Elenco anomalie
Fare riferimento al Manuale Tecnico del BLT160
- 12 -
P.B.M. S.r.l.
ALFA PROGETTI S.r.l.
Via Barella Z.I. VIGNOLA (MO) ITALIA
Tel. +39 059 77 05 311 Fax +39 059 77 05 300
http://www.gruppopbm.it e-mail: [email protected]
Via Dei Fabbri 42. SPILAMBERTO (MO) ITALIA
Tel. +39 059 78 57 26 Fax +39 059 78 57 37
http://www.alfaprogetti.com e-mail: [email protected]
MANUALE DI ISTRUZIONI "Software BLTView”
Rev. n° 2 del 20/10/2009
File:BLTView_IT_GB_F_D_rev2_221009.doc
4.2.5 – TAB Grafico
Dal TAB Grafico, è possibile visualizzare l’andamento della corrente e della tensione, del ciclo in
corso. Il grafico viene letto dal pc in modo automatico.
Viene aggiornato ad ogni tempo di campionamento impostato in programmazione con un ritardo
massimo di dieci secondi.
La capacità massima del grafico è quella permessa dal dispositivo collegato. Consultare quindi il
manuale tecnico del BLT160.
Si individuano le seguenti sezioni:
- A: grafico corrente del ciclo selezionato
- B: grafico tensione del ciclo selezionato
A
B
Ø In ognuno dei due grafici vi sono tre tasti dedicati:
- lente di ingrandimento : permette di selezionare un’area del grafico che verrà ingrandita
- foglio bianco con lente : visualizza l’anteprima di stampa di quanto visualizzato
- stampante : invia al dispositivo predefinito la stampa di quanto visualizzato
Ø Il tasto “CSV” permette di esportare i campioni rilevati sia di tensione che di corrente
sottoforma di file di testo con campi delimitati (*.csv). Viene assegnato un nome predefinito,
che può essere cambiato a piacere.
Ø Il tasto “BLT160 Explorer” permette di analizzare i dati off-line (vedi cap.5).
Ø Il tasto “Download dati” permette di leggere i dati presenti nella memoria del BLT160 (vedi §
4.2.7).
Ø Il tasto “Chiudi” riporta alla pagina principale e chiude la sessione online.
- 13 -
P.B.M. S.r.l.
ALFA PROGETTI S.r.l.
Via Barella Z.I. VIGNOLA (MO) ITALIA
Tel. +39 059 77 05 311 Fax +39 059 77 05 300
http://www.gruppopbm.it e-mail: [email protected]
Via Dei Fabbri 42. SPILAMBERTO (MO) ITALIA
Tel. +39 059 78 57 26 Fax +39 059 78 57 37
http://www.alfaprogetti.com e-mail: [email protected]
MANUALE DI ISTRUZIONI "Software BLTView”
Rev. n° 2 del 20/10/2009
File:BLTView_IT_GB_F_D_rev2_221009.doc
4.2.6 – TAB Recorder
Con questa finestra è possibile visualizzare l’andamento di correnti e di tensioni, dopo che si è
entrati nella modalità online, indipendentemente dal numero di test e di ciclo.
Le grandezze rilevate sono:
- Corrente di carica (+) o di scarica (-)
- Corrente di scarica nominale programmata (-)
- Tensione di batteria
- Tensione nominale di batteria programmata
- Tensione di soglia in carica programmata
- Tensione di stop in scarica programmata
Viene effettuata mediamente una registrazione ogni sei secondi.
La capacità del grafico è di 54000 campioni, pari a 90 ore.
Il campione N.54001 và a sovrascrivere il campione N.1)
Se si abbandona una sessione e la si riprende dopo qualche tempo, i nuovi dati verranno aggiunti
a quelli già presenti.
Per far ripartire il grafico da “zero” occorre resettarlo manualmente mediante il tasto “Reset
Recorder” posizionato in basso. Questa operazione non cancella i dati rilevati in precedenza, ma li
registra su di un file con nome predefinito, in modo da poterli consultare in tempi successivi
mediante il tasto “Recorder Old” o il menù “Archivi-Recorder Old” dalla finestra principale (vedi §
5.5).
Si individuano le seguenti sezioni:
- A: grafico delle correnti
- B: grafico delle tensioni
A
B
- 14 -
P.B.M. S.r.l.
ALFA PROGETTI S.r.l.
Via Barella Z.I. VIGNOLA (MO) ITALIA
Tel. +39 059 77 05 311 Fax +39 059 77 05 300
http://www.gruppopbm.it e-mail: [email protected]
Via Dei Fabbri 42. SPILAMBERTO (MO) ITALIA
Tel. +39 059 78 57 26 Fax +39 059 78 57 37
http://www.alfaprogetti.com e-mail: [email protected]
MANUALE DI ISTRUZIONI "Software BLTView”
Rev. n° 2 del 20/10/2009
File:BLTView_IT_GB_F_D_rev2_221009.doc
Ø In ognuno dei due grafici vi sono tre tasti dedicati:
- lente di ingrandimento : permette di selezionare un’area del grafico che verrà ingrandita
- foglio bianco con lente : visualizza l’anteprima di stampa di quanto visualizzato
- stampante : invia al dispositivo predefinito la stampa di quanto visualizzato
Ø Il tasto “CSV” permette di esportare i campioni rilevati sia di tensione che di corrente
sottoforma di file di testo con campi delimitato (*.csv). Viene assegnato un nome predefinito,
che può essere cambiato a piacere.
Ø Il tasto “Recorder Old” permette di rileggere i dati memorizzati in files dedicati (vedi § 5.5).
Ø Il tasto “Reset Recorder” inizializza la registrazione di un nuovo recorder e memorizza in un file
dedicato di quanto registrato.
Ø Il tasto “BLT160 Explorer” permette di analizzare i dati off-line (vedi § 5.1).
Ø Il tasto “Download dati” permette di leggere i dati presenti nella memoria del BLT160(vedi §
4.2.7).
Ø Il tasto “Chiudi” riporta alla pagina principale e chiude la sessione online.
4.2.7 – Download
Premendo il tasto “DOWNLOAD DATI”, viene presentata la finestra di selezione del CLIENTE
presso il quale viene eseguito il test e dell’OPERATORE che lo ha eseguito.
I campi richiesti sono obbligatori, in quanto serviranno per la ricerca dei dati storicizzati.
Dopo la selezione verificare i campi selezionati e premere il tasto “Download dati”
Se vengono letti e quindi storicizzati dati la cui associazione non è esatta, si può effettuare la
correzione mediante lo strumento disponibile offline di “modifica associazioni” (vedi §5.3).
Ø Il tasto “Nuovo” permette di inserire un nuovo cliente / operatore.
Ø Il tasto “Modifica” permette di cambiare il nome ad un cliente / operatore (se non ancora
utilizzato nei database).
Ø Il tasto “Elimina” permette di togliere un nome di cliente / operatore (se non ancora utilizzato
nei database).
Ø Il tasto “Chiudi” riporta alla pagina online.
- 15 -
P.B.M. S.r.l.
ALFA PROGETTI S.r.l.
Via Barella Z.I. VIGNOLA (MO) ITALIA
Tel. +39 059 77 05 311 Fax +39 059 77 05 300
http://www.gruppopbm.it e-mail: [email protected]
Via Dei Fabbri 42. SPILAMBERTO (MO) ITALIA
Tel. +39 059 78 57 26 Fax +39 059 78 57 37
http://www.alfaprogetti.com e-mail: [email protected]
MANUALE DI ISTRUZIONI "Software BLTView”
Rev. n° 2 del 20/10/2009
File:BLTView_IT_GB_F_D_rev2_221009.doc
5 – Consultazione dati OLD
Dopo avere memorizzato i dati di lavoro, si possono consultare off-line.
Mediante il menù “Archivi” si possono attivare le funzioni di consultazione e gestione.
-
Consultazione
Modifica anagrafica clienti ed operatori
Modifica associazioni
Lettura di dati relativi ai cicli di test salvati su altri files
Lettura di dati relativi ai diagrammi “recorder” storicizzati
5.1 – BLT160 Explorer
Dal menù “Archivi” o con il tasto dedicato nella pagina principale o nelle pagine online, selezionare
la voce “BLT 160 Explorer” per accedere alla consultazione dei dati storicizzati.
5.1.1 – TAB Dati OLD
La finestra Dati Old visualizza i principali dati del ciclo di lavoro selezionato.
A
B
C
D
E
F
- 16 -
P.B.M. S.r.l.
ALFA PROGETTI S.r.l.
Via Barella Z.I. VIGNOLA (MO) ITALIA
Tel. +39 059 77 05 311 Fax +39 059 77 05 300
http://www.gruppopbm.it e-mail: [email protected]
Via Dei Fabbri 42. SPILAMBERTO (MO) ITALIA
Tel. +39 059 78 57 26 Fax +39 059 78 57 37
http://www.alfaprogetti.com e-mail: [email protected]
MANUALE DI ISTRUZIONI "Software BLTView”
Rev. n° 2 del 20/10/2009
File:BLTView_IT_GB_F_D_rev2_221009.doc
Si individuano le seguenti sezioni:
- A: selezione dati : Cliente, Operatore, Matricola BLT 160, Idnetificarore Batteria, Numero di
Test, Data di inizio del Test
- B: Numero ciclo selezionato
- C: dati di targa
- D: dati di carica
- E: dati di scarica
- F: strumenti di selezione ciclo
La fase di scarica è visibile:
a) quando la fase di scarica del ciclo è partita (data di inizio scarica registrata correttamente)
b) quando il parametro N CICLI è uguale a 0
c) quando il parametro N CICLI è maggiore di 0 ed il ciclo selezionato è maggiore di 0.
La fase di carica è visibile:
a) quando la fase di carica del ciclo è partita (data di inizio carica registrata correttamente)
b) quando il parametro N CICLI è maggiore di 0
5.1.2 – TAB Info OLD
La finestra Info Old visualizza i dettagli dei dati del ciclo di lavoro selezionato.
A
B
C
D
E
F
G
Si individuano le seguenti sezioni:
- A: selezione dati : Cliente, Operatore, Matricola BLT 160, Idnetificarore Batteria, Numero di
Test, Data di inizio del Test
- B: Numero ciclo selezionato
- C: dati di targa
- D: dati riassuntivi di carica
- E: dati riassuntivi di scarica
- 17 -
P.B.M. S.r.l.
ALFA PROGETTI S.r.l.
Via Barella Z.I. VIGNOLA (MO) ITALIA
Tel. +39 059 77 05 311 Fax +39 059 77 05 300
http://www.gruppopbm.it e-mail: [email protected]
Via Dei Fabbri 42. SPILAMBERTO (MO) ITALIA
Tel. +39 059 78 57 26 Fax +39 059 78 57 37
http://www.alfaprogetti.com e-mail: [email protected]
MANUALE DI ISTRUZIONI "Software BLTView”
-
Rev. n° 2 del 20/10/2009
File:BLTView_IT_GB_F_D_rev2_221009.doc
F: elenco anomalie rilevate
G: strumenti di selezione ciclo
La fase di scarica è visibile:
a) quando la fase di scarica del ciclo è partita (data di inizio scarica registrata correttamente)
b) quando il parametro N CICLI è uguale a 0
c) quando il parametro N CICLI è maggiore di 0 ed il ciclo selezionato è maggiore di 0.
La fase di carica è visibile:
a) quando la fase di carica del ciclo è partita (data di inizio carica registrata correttamente)
b) quando il parametro N CICLI è maggiore di 0
Ø Il tasto di stampa invia al dispositivo predefinito i dati presentati
Ø Il tasto “Chiudi” chiude la sessione offline.
5.1.3 – TAB Grafico OLD
Dal TAB Grafico, è possibile visualizzare l’andamento della corrente e della tensione, del ciclo
selezionato.
La capacità massima del grafico è quella permessa dal dispositivo collegato. Consultare quindi il
manuale tecnico del BLT160.
Il tempo con cui sono stati campionati i dati può essere rilevato consultando il campo “Tempo
Campionamento Grafico” del tab “programmazione” (non può essere variato durante il ciclo).
Si individuano le seguenti sezioni:
- A: grafico tensione del ciclo selezionato
- B: grafico corrente del ciclo selezionato
- C: strumenti di selezione ciclo
A
B
C
- 18 -
P.B.M. S.r.l.
ALFA PROGETTI S.r.l.
Via Barella Z.I. VIGNOLA (MO) ITALIA
Tel. +39 059 77 05 311 Fax +39 059 77 05 300
http://www.gruppopbm.it e-mail: [email protected]
Via Dei Fabbri 42. SPILAMBERTO (MO) ITALIA
Tel. +39 059 78 57 26 Fax +39 059 78 57 37
http://www.alfaprogetti.com e-mail: [email protected]
MANUALE DI ISTRUZIONI "Software BLTView”
Rev. n° 2 del 20/10/2009
File:BLTView_IT_GB_F_D_rev2_221009.doc
Ø Il tasto “CSV” permette di esportare i campioni rilevati sia di tensione che di corrente
sottoforma di file di testo con campi delimitato (*.csv). Viene assegnato un nome predefinito,
che può essere cambiato a piacere.
Ø Il tasto “Chiudi” chiude la sessione offline.
5.1.4 – TAB Medie
In questa sezione è possibile analizzare l’andamento dell’efficienza, della tensione massima e
minima di una batteria in base ai cicli selezionati.
A
B
C
D
E
Si individuano le seguenti sezioni:
- A: selezione dati : Cliente, Operatore, Matricola BLT 160, Idnetificarore Batteria, Numero di
Test, Data di inizio del Test
- B: Tabella dei dati di riferimento dei cicli selezionati
- C: pulsanti per selezione cicli da analizzare
- D: dati medi relativi ai cicli selezionati
- E: strumenti di selezione ciclo
Ø
Ø
Ø
Ø
Ø
Ø
Ø
Ø
Il tasto “+++” seleziona tutti i cicli di una batteria
Il tasto “++” seleziona tutti i cicli di un test
Il tasto “+” seleziona un ciclo
Il tasto “-” deseleziona un ciclo
Il tasto “cestino” deseleziona tutto
Il tasto “grafico” presenta i dati selezionati sotto forma grafica. Vedi §5.1.4.1
Il tasto di stampa invia al dispositivo predefinito i dati presentati
Il tasto “Chiudi” chiude la sessione offline.
- 19 -
P.B.M. S.r.l.
ALFA PROGETTI S.r.l.
Via Barella Z.I. VIGNOLA (MO) ITALIA
Tel. +39 059 77 05 311 Fax +39 059 77 05 300
http://www.gruppopbm.it e-mail: [email protected]
Via Dei Fabbri 42. SPILAMBERTO (MO) ITALIA
Tel. +39 059 78 57 26 Fax +39 059 78 57 37
http://www.alfaprogetti.com e-mail: [email protected]
MANUALE DI ISTRUZIONI "Software BLTView”
Rev. n° 2 del 20/10/2009
File:BLTView_IT_GB_F_D_rev2_221009.doc
5.1.4.1 – TAB Medie – grafico
Dal TAB Medie, mediante il tasto “grafico” è possibile visualizzare l’andamento dell’efficienza, della
tensione massima e minima di una batteria in funzione dei cicli selezionati.
Ø In ognuno dei due grafici vi sono tre tasti dedicati:
- lente di ingrandimento : permette di selezionare un’area del grafico che verrà ingrandita
- foglio bianco con lente : visualizza l’anteprima di stampa di quanto visualizzato
- stampante : invia al dispositivo predefinito la stampa di quanto visualizzato
Ø Il tasto “Chiudi” riporta al TAB Medie.
- 20 -
P.B.M. S.r.l.
ALFA PROGETTI S.r.l.
Via Barella Z.I. VIGNOLA (MO) ITALIA
Tel. +39 059 77 05 311 Fax +39 059 77 05 300
http://www.gruppopbm.it e-mail: [email protected]
Via Dei Fabbri 42. SPILAMBERTO (MO) ITALIA
Tel. +39 059 78 57 26 Fax +39 059 78 57 37
http://www.alfaprogetti.com e-mail: [email protected]
MANUALE DI ISTRUZIONI "Software BLTView”
Rev. n° 2 del 20/10/2009
File:BLTView_IT_GB_F_D_rev2_221009.doc
5.1.5 – TAB Programmazione
Dal TAB Programmazione si accede ai parametri di programmazione relativi al ciclo selezionato.
Per il significato dei campi si rimanda al §4.2.1 della programmazione online.
Ø Il tasto di stampa invia al dispositivo predefinito i dati presentati
Ø Il tasto “Chiudi” chiude la sessione offline.
- 21 -
P.B.M. S.r.l.
ALFA PROGETTI S.r.l.
Via Barella Z.I. VIGNOLA (MO) ITALIA
Tel. +39 059 77 05 311 Fax +39 059 77 05 300
http://www.gruppopbm.it e-mail: [email protected]
Via Dei Fabbri 42. SPILAMBERTO (MO) ITALIA
Tel. +39 059 78 57 26 Fax +39 059 78 57 37
http://www.alfaprogetti.com e-mail: [email protected]
MANUALE DI ISTRUZIONI "Software BLTView”
Rev. n° 2 del 20/10/2009
File:BLTView_IT_GB_F_D_rev2_221009.doc
5.1.6 – TAB Archivia
In questa sezione è possibile archiviare i dati presenti nel database di riferimento in altre posizioni.
Questo può essere utile per questi motivi principali:
- riduzione delle dimensioni del database di riferimento per velocizzare le operazioni ad esso
collegate.
- backup dei soli dati che interessano per analisi di terzi.
- spostamento dei soli dati che non interessano più per eventuale cancellazione definitiva.
A
B
C
D
Si individuano le seguenti sezioni:
- A: selezione dati
- B: pulsanti per selezione cicli da archiviare
- C: tabella dei dati selezionati per l’archiviazione
- D: numero di elementi che vengono archiviati
Ø
Ø
Ø
Ø
Ø
Ø
Il tasto “+++” seleziona tutti i cicli di una batteria
Il tasto “++” seleziona tutti i cicli di un test
Il tasto “+” seleziona un ciclo
Il tasto “-” deseleziona un ciclo
Il tasto “cestino” deseleziona tutto
Il tasto “Archivia” apre una finestra per la scelta del nome
del file in cui archiviare i dati selezionati.
Per facilitare la scelta, viene predefinito una posizione ed
un nome in base alla data dell’operazione.
Ø Il tasto “Chiudi” chiude la sessione offline.
- 22 -
P.B.M. S.r.l.
ALFA PROGETTI S.r.l.
Via Barella Z.I. VIGNOLA (MO) ITALIA
Tel. +39 059 77 05 311 Fax +39 059 77 05 300
http://www.gruppopbm.it e-mail: [email protected]
Via Dei Fabbri 42. SPILAMBERTO (MO) ITALIA
Tel. +39 059 78 57 26 Fax +39 059 78 57 37
http://www.alfaprogetti.com e-mail: [email protected]
MANUALE DI ISTRUZIONI "Software BLTView”
Rev. n° 2 del 20/10/2009
File:BLTView_IT_GB_F_D_rev2_221009.doc
5.2 – Anagrafica Clienti/Operatori
Dal menù “Archivi” o con il tasto dedicato selezionare la voce “Anagrafica Clienti/Operatori” per
accedere alle anagrafiche dei Clienti e degli Operatori a cui associare i dati memorizzati dal
dispositivo BLT160.
Ø Il tasto “Nuovo” permette di inserire un nuovo cliente / operatore.
Ø Il tasto “Modifica” permette di cambiare il nome ad un cliente / operatore (se non ancora
utilizzato nei database).
Ø Il tasto “Elimina” permette di togliere un nome di cliente / operatore (se non ancora utilizzato
nei database).
Ø Il tasto “Chiudi” riporta alla pagina principale.
- 23 -
P.B.M. S.r.l.
ALFA PROGETTI S.r.l.
Via Barella Z.I. VIGNOLA (MO) ITALIA
Tel. +39 059 77 05 311 Fax +39 059 77 05 300
http://www.gruppopbm.it e-mail: [email protected]
Via Dei Fabbri 42. SPILAMBERTO (MO) ITALIA
Tel. +39 059 78 57 26 Fax +39 059 78 57 37
http://www.alfaprogetti.com e-mail: [email protected]
MANUALE DI ISTRUZIONI "Software BLTView”
Rev. n° 2 del 20/10/2009
File:BLTView_IT_GB_F_D_rev2_221009.doc
5.3 – Modifica associazioni
Con il menù di “Archivi” o con il tasto dedicato selezionare la voce “Modifica Associazioni” per
accedere alla sezione di modifica associazioni dei dati scaricati da BLT160.
A
B
C
D
Prima della modifica associazioni
Dopo la modifica associazioni
Si individuano le seguenti sezioni:
- A: menù di selezione dei test nelle associazioni attuali
- B: tasto di selezione impostazione anagrafica Clienti/Operatori (vedi §5.2)
- C: menù di selezione della nuova associazione
- D: tasto di esecuzione delle associazioni come selezionate
PROCEDURA PER LA MODIFICA:
-
Nella sezione “ASSOCIAZIONI ATTUALI”, selezionare i TEST di cui si vuole modificare le
associazioni. E’ possibile selezionare un TEST alla volta, oppure eseguire la
multiselezione, tenendo premuto il tasto SHIFT
-
Nella sezione “ASSOCIAZIONI NUOVE”, selezionare e/o inserire le nuove associazioni a
cui verranno associati i TEST
-
Premere il tasto “MODIFICA ASSOCIAZIONI”
-
Nella sezione “NUOVE ASSOCIAZIONI”, verranno visualizzati i TEST spostati
- 24 -
P.B.M. S.r.l.
ALFA PROGETTI S.r.l.
Via Barella Z.I. VIGNOLA (MO) ITALIA
Tel. +39 059 77 05 311 Fax +39 059 77 05 300
http://www.gruppopbm.it e-mail: [email protected]
Via Dei Fabbri 42. SPILAMBERTO (MO) ITALIA
Tel. +39 059 78 57 26 Fax +39 059 78 57 37
http://www.alfaprogetti.com e-mail: [email protected]
MANUALE DI ISTRUZIONI "Software BLTView”
Rev. n° 2 del 20/10/2009
File:BLTView_IT_GB_F_D_rev2_221009.doc
5.4 –Seleziona database
Con il menù di “Archivi” o con il tasto dedicato selezionare selezionare la voce “Seleziona
database” per accedere ai database storicizzati.
A
B
C
-
A: percorso database selezionato
B: tasto per selezionare il database storicizzato
C: precarica il database di default
Dopo la selezione del database storicizzato, sono abilitate le sole funzioni di esplorazione offline,
fino al ripristino del database di default.
- 25 -
P.B.M. S.r.l.
ALFA PROGETTI S.r.l.
Via Barella Z.I. VIGNOLA (MO) ITALIA
Tel. +39 059 77 05 311 Fax +39 059 77 05 300
http://www.gruppopbm.it e-mail: [email protected]
Via Dei Fabbri 42. SPILAMBERTO (MO) ITALIA
Tel. +39 059 78 57 26 Fax +39 059 78 57 37
http://www.alfaprogetti.com e-mail: [email protected]
MANUALE DI ISTRUZIONI "Software BLTView”
Rev. n° 2 del 20/10/2009
File:BLTView_IT_GB_F_D_rev2_221009.doc
5.5 – Recorder OLD
Con il menù di “Archivi” selezionare la voce “Recorder OLD” per accedere ai database dei recorder
storicizzati.
B
A
C
D
Si individuano le seguenti sezioni:
-
A: percorso database selezionato
B: tasto per riselezionare un “recorder” storicizzato
C: grafico delle correnti (carica/scarica rilevata, scarica programmata)
D: grafico delle tensioni (rilevata, nominale programmata, soglia gas programmata, soglia
di stop programmata)
- 26 -
P.B.M. S.r.l.
ALFA PROGETTI S.r.l.
Via Barella Z.I. VIGNOLA (MO) ITALIA
Tel. +39 059 77 05 311 Fax +39 059 77 05 300
http://www.gruppopbm.it e-mail: [email protected]
Via Dei Fabbri 42. SPILAMBERTO (MO) ITALIA
Tel. +39 059 78 57 26 Fax +39 059 78 57 37
http://www.alfaprogetti.com e-mail: [email protected]
MANUALE DI ISTRUZIONI "Software BLTView”
Rev. n° 2 del 20/10/2009
File:BLTView_IT_GB_F_D_rev2_221009.doc
APPENDICE A
Utilizzo del programma DFU
Il programma DFU serve per eseguire l’aggiornamento del firmware del BLT160.
Per eseguire l’aggiornamento occorre disporre di una copia del file di aggiornamento (.hex) sul PC.
- Collegare il BLT160 al PC mediante il cavo di connessione seriale
- Lanciare il programma DFU
- Selezionare la porta seriale associata al BLT160. Nel caso di connessione mediante linea
USB individuare il numero della porta assegnata da Windows: Pannello di controllo di
Windows -> Gestione periferiche -> Porte (COM e LPT)
- Premere il pulsante “Open ‘HEX’” e selezionare il file di aggiornamento
- Spegnere il BLT160 e scollegare il cavo USB
- Collegare il cavo USB al BLT160 tenendo premuto il tasto STAR/STOP del BLT160
- Dopo 2 sec. rilasciare il pulsante STAR/STOP
- Dal software DFU premere il pulsante “Upload” entro 8 sec. per eseguire l’aggiornamento.
La barra di avanzamento indica lo stato dell’aggiornamento.
Al termine dell’aggiornamento il dispositivo BLT160 riavvia automaticamente le proprie funzioni.
In figura sono evidenziate le seguenti parti:
- A: pulsante “Open ‘HEX’”
- B: Pulsante Upload/Interrompi
- C: selezione porta seriale
A
B
C
- 27 -
P.B.M. S.r.l.
ALFA PROGETTI S.r.l.
Via Barella Z.I. VIGNOLA (MO) ITALIA
Tel. +39 059 77 05 311 Fax +39 059 77 05 300
http://www.gruppopbm.it e-mail: [email protected]
Via Dei Fabbri 42. SPILAMBERTO (MO) ITALIA
Tel. +39 059 78 57 26 Fax +39 059 78 57 37
http://www.alfaprogetti.com e-mail: [email protected]
MANUALE DI ISTRUZIONI "Software BLTView”
Rev. n° 2 del 20/10/2009
File:BLTView_IT_GB_F_D_rev2_221009.doc
APPENDICE B
Installazione driver USB
B1 – Installazione del DRIVER comunicazione USB su Windows XP
1) Inserire il cavo USB nella porta USB del
computer e nel BLT160. Verrà rilevato il nuovo
hardware
2) Seguire i passi dell’ installazione guidata di
Windows, selezionando:
“Installa da un elenco o percorso
specifico (per utenti esperti)”
Premere “Avanti”
3) Selezionare:
“Ricerca il miglior driver disponibile in
questi percorsi”
Porre il segno di spunta su:
“Includi il seguente percorso nella ricerca”
Premere il tasto “Sfoglia” e selezionare il
percorso in cui si trova il driver.
“C:\Programmi\BLTView\Drivers” (percorso
creato durante l’installazione di BLTView).
Premere “Avanti”
- 28 -
P.B.M. S.r.l.
ALFA PROGETTI S.r.l.
Via Barella Z.I. VIGNOLA (MO) ITALIA
Tel. +39 059 77 05 311 Fax +39 059 77 05 300
http://www.gruppopbm.it e-mail: [email protected]
Via Dei Fabbri 42. SPILAMBERTO (MO) ITALIA
Tel. +39 059 78 57 26 Fax +39 059 78 57 37
http://www.alfaprogetti.com e-mail: [email protected]
MANUALE DI ISTRUZIONI "Software BLTView”
Rev. n° 2 del 20/10/2009
File:BLTView_IT_GB_F_D_rev2_221009.doc
4) Attendere l’avvio dell’installazione
5) Premere sul tasto “Continua”
6) Attendere la fine dell’ installazione
Premere sul tasto “Fine”
7) Premere col tasto destro sull’ icona “Risorse
Del Computer”.
Premere sulla voce di menù: “Proprietà”.
- 29 -
P.B.M. S.r.l.
ALFA PROGETTI S.r.l.
Via Barella Z.I. VIGNOLA (MO) ITALIA
Tel. +39 059 77 05 311 Fax +39 059 77 05 300
http://www.gruppopbm.it e-mail: [email protected]
Via Dei Fabbri 42. SPILAMBERTO (MO) ITALIA
Tel. +39 059 78 57 26 Fax +39 059 78 57 37
http://www.alfaprogetti.com e-mail: [email protected]
MANUALE DI ISTRUZIONI "Software BLTView”
Rev. n° 2 del 20/10/2009
File:BLTView_IT_GB_F_D_rev2_221009.doc
8) Spostarsi nella pagina “Hardware”
Premere su “Gestione periferiche”.
9) Dall’ elenco aprire la voce: “Porte (LPT e
COM)”
Verificare che la porta SmartIR USB-IRDA sia
correttamente installata.
E’ indicato il numero di porta. Nel caso in figura,
il numero di porta è la COM7.
Chiudere tutte le finestre
10) Aprire BLTView
Dal menù principale scegliere “Impostazione” e
poi “Porta Seriale”
11) Selezionare la porta seriale desiderata e
premere il tasto “Ok”.
- 30 -
P.B.M. S.r.l.
ALFA PROGETTI S.r.l.
Via Barella Z.I. VIGNOLA (MO) ITALIA
Tel. +39 059 77 05 311 Fax +39 059 77 05 300
http://www.gruppopbm.it e-mail: [email protected]
Via Dei Fabbri 42. SPILAMBERTO (MO) ITALIA
Tel. +39 059 78 57 26 Fax +39 059 78 57 37
http://www.alfaprogetti.com e-mail: [email protected]
MANUALE DI ISTRUZIONI "Software BLTView”
Rev. n° 2 del 20/10/2009
File:BLTView_IT_GB_F_D_rev2_221009.doc
B2 – Installazione del DRIVER comunicazione USB su Windows VISTA
1) Inserire il cavo USB nella porta USB del
computer. Verrà rilevato il nuovo hardware
2) Seguire i passi dell’ installazione guidata di
Windows, selezionando:
“Individuare e installare il driver (scelta
consigliata)”
3) Premere su:
“Cerca il software del driver nel
computer”
4) Premere il tasto “Sfoglia” e selezionare il
percorso in cui si trova il driver.
“C:\Programmi\BLTView\Drivers” (percorso
creato durante l’installazione di BLTView).
Porre il segno di spunta su:
“Includi sottocartelle”
Premere “Avanti”
- 31 -
P.B.M. S.r.l.
ALFA PROGETTI S.r.l.
Via Barella Z.I. VIGNOLA (MO) ITALIA
Tel. +39 059 77 05 311 Fax +39 059 77 05 300
http://www.gruppopbm.it e-mail: [email protected]
Via Dei Fabbri 42. SPILAMBERTO (MO) ITALIA
Tel. +39 059 78 57 26 Fax +39 059 78 57 37
http://www.alfaprogetti.com e-mail: [email protected]
MANUALE DI ISTRUZIONI "Software BLTView”
Rev. n° 2 del 20/10/2009
File:BLTView_IT_GB_F_D_rev2_221009.doc
5) Attendere l’avvio dell’installazione
6) Premere sul tasto “Installa il software del
driver”.
7) Attendere la fine dell’ installazione
Premere sul tasto “Chiudi”
8) Premere col tasto destro sull’ icona “Risorse
Del Computer”.
Premere sulla voce di menù: “Proprietà”.
- 32 -
P.B.M. S.r.l.
ALFA PROGETTI S.r.l.
Via Barella Z.I. VIGNOLA (MO) ITALIA
Tel. +39 059 77 05 311 Fax +39 059 77 05 300
http://www.gruppopbm.it e-mail: [email protected]
Via Dei Fabbri 42. SPILAMBERTO (MO) ITALIA
Tel. +39 059 78 57 26 Fax +39 059 78 57 37
http://www.alfaprogetti.com e-mail: [email protected]
MANUALE DI ISTRUZIONI "Software BLTView”
Rev. n° 2 del 20/10/2009
File:BLTView_IT_GB_F_D_rev2_221009.doc
9) Premere sulla voce “Gestione dispositivi”
Premere su “Gestione periferiche”.
10) Dall’ elenco aprire la voce: “Porte (LPT e
COM)”
Verificare che la porta SmartUSB sia
correttamente installata.
E’ indicato il numero di porta. Nel caso in figura,
il numero di porta è la COM11.
Chiudere tutte le finestre
11) Aprire BLTView
Dal menù principale scegliere “Impostazione” e
poi “Porta Seriale”
12) Selezionare la porta seriale desiderata e
premere il tasto “Ok”.
- 33 -
P.B.M. S.r.l.
ALFA PROGETTI S.r.l.
Via Barella Z.I. VIGNOLA (MO) ITALIA
Tel. +39 059 77 05 311 Fax +39 059 77 05 300
http://www.gruppopbm.it e-mail: [email protected]
Via Dei Fabbri 42. SPILAMBERTO (MO) ITALIA
Tel. +39 059 78 57 26 Fax +39 059 78 57 37
http://www.alfaprogetti.com e-mail: [email protected]
MANUALE DI ISTRUZIONI "Software BLTView”
Rev. n° 2 del 20/10/2009
File:BLTView_IT_GB_F_D_rev2_221009.doc
ENGLISH
Index
1 – Introduction ........................................................................................................................ 355
2 – Installation........................................................................................................................... 355
3 – Configuration ...................................................................................................................... 366
3.1 – Language .................................................................................................................... 366
3.2 – Serial port.................................................................................................................... 377
3.3 – Configuration .............................................................................................................. 377
3.4 – Password access .......................................................................................................... 388
4 – BLT160 connected............................................................................................................... 399
4.1 – Preparation.................................................................................................................. 399
4.2 – Instant data consultation .............................................................................................. 399
4.2.1 – Programming tab........................................................................................................ 40
4.2.1.1 - Time configuration........................................................................................... 41
4.2.1.2 – Programming the main parameters .............................................................. 41
4.2.2 – TAB Monitor.............................................................................................................. 42
4.2.3 – TAB Info.................................................................................................................. 443
4.2.3.1 List of faults ........................................................................................................ 45
4.2.5 – Graph TAB................................................................................................................. 45
4.2.6 – Recorder TAB ............................................................................................................ 46
4.2.7 – Download................................................................................................................... 47
5 – OLD Data consultation ......................................................................................................... 48
5.1 – BLT 160 Explorer ......................................................................................................... 48
5.1.1 – TAB Data OLD .......................................................................................................... 48
5.1.2 – TAB Info OLD........................................................................................................... 49
5.1.3 – OLD Graph TAB........................................................................................................ 50
5.1.4 – “Medie” TAB............................................................................................................. 51
5.1.4.1 – “Grafico Medie” TAB................................................................................ 52
5.1.6 – Archive TAB.............................................................................................................. 53
5.2 – Customer/Operator data................................................................................................. 55
5.3 – Modify the Associations................................................................................................ 56
5.4 –Database selection.......................................................................................................... 57
5.5 – Recorder OLD............................................................................................................... 58
APPENDIX A.............................................................................................................................. 59
DFU program use ....................................................................................................................... 59
APPENDIX B.............................................................................................................................. 60
USB driver installation ............................................................................................................... 60
B1 - Installation of the USB DRIVER on Windows XP ......................................................... 60
B2 - Installation of the USB DRIVER on Windows VISTA................................................... 64
- 34 -
P.B.M. S.r.l.
ALFA PROGETTI S.r.l.
Via Barella Z.I. VIGNOLA (MO) ITALIA
Tel. +39 059 77 05 311 Fax +39 059 77 05 300
http://www.gruppopbm.it e-mail: [email protected]
Via Dei Fabbri 42. SPILAMBERTO (MO) ITALIA
Tel. +39 059 78 57 26 Fax +39 059 78 57 37
http://www.alfaprogetti.com e-mail: [email protected]
MANUALE DI ISTRUZIONI "Software BLTView”
Rev. n° 2 del 20/10/2009
File:BLTView_IT_GB_F_D_rev2_221009.doc
1 – Introduction
BLTVIEW is an application for Windows 98 or above. It communicates with the BLT160 battery
testing and discharging device.
The BLT160 communicates with the PC via a USB or serial cable. This allows you to customize
operation of the device by configuring the battery data and required operation.
You can also view all the operating parameters in real time and download recorded data (work
cycles and graphics) to the local database on the PC.
Once downloaded onto the PC, the data can be viewed at any time without need for connection via
the USB adaptor.
The BLTVIEW program can control the data of an unlimited number of BLT160 devices: a simple
search system allows you to find and view the data of any required device.
There is a Print button that allows you to print any data displayed using the BLTVIEW program.
The BLTVIEW program also comes with a DFU program for updating the BLT160 firmware.
2 – Installation
The BLT160 device comes with a BLTVIEW installation package CD.
Initial installation
Upon initial installation:
-
Open the installation folder. Open the “Disk1” sub-folder.
Start up the Setup.exe program. Follow the on-screen instructions.
When installation is complete, the BLTVIEW folder will appear on the program bar. The folder
enables access to the content of the package. A link to the BLT160View program appears on the
desktop.
Maintenance
To install an updated version of the package you first need to remove the one that you had
previously installed, using the tools provided by Windows.
- 35 -
P.B.M. S.r.l.
ALFA PROGETTI S.r.l.
Via Barella Z.I. VIGNOLA (MO) ITALIA
Tel. +39 059 77 05 311 Fax +39 059 77 05 300
http://www.gruppopbm.it e-mail: [email protected]
Via Dei Fabbri 42. SPILAMBERTO (MO) ITALIA
Tel. +39 059 78 57 26 Fax +39 059 78 57 37
http://www.alfaprogetti.com e-mail: [email protected]
MANUALE DI ISTRUZIONI "Software BLTView”
Rev. n° 2 del 20/10/2009
File:BLTView_IT_GB_F_D_rev2_221009.doc
Once launched the program BLTVIEW has a main page where you can activate all functions.
3 – Settings
You can click on the “Settings” menu to configure:
- Password access to the functions
- Passwords for the various user levels
- The serial communication port
- The software language
3.1 – Language
On the “Settings menu”, select “Set language” and select the required language
You need to restart the program to save this change
- 36 -
P.B.M. S.r.l.
ALFA PROGETTI S.r.l.
Via Barella Z.I. VIGNOLA (MO) ITALIA
Tel. +39 059 77 05 311 Fax +39 059 77 05 300
http://www.gruppopbm.it e-mail: [email protected]
Via Dei Fabbri 42. SPILAMBERTO (MO) ITALIA
Tel. +39 059 78 57 26 Fax +39 059 78 57 37
http://www.alfaprogetti.com e-mail: [email protected]
MANUALE DI ISTRUZIONI "Software BLTView”
Rev. n° 2 del 20/10/2009
File:BLTView_IT_GB_F_D_rev2_221009.doc
3.2 – Serial port
On the “Setup menu, select “Serial port” and open the configuration window. Select “Auto” to
automatically find the serial port, or select the port yourself if already known.
NOTES:
-
-
The automatic search may take a few seconds at each connection due to the manner
the operating system assigns the serial port number. You are advised in this case to
find the port number (open the Windows Control Panel -> Device manager -> Ports
(COM and LPT)) and select it.
In the event the same serial port is used, it is possible to set the port number. This
saves time with the automatic search.
3.3 – Configuration
The BLTVIEW program features 3 password-protected access levels:
-
No password:
§
§
§
§
§
partial access to read-only data
no access to configuration of the association parameters
possibility for recording cycles and graphs on the PC
no access to configuration of the programming parameters
no access to the calibration parameters
-
Level 1 password (user level ):
§ partial access to read-only data
§ no access to configuration of the association parameters
§ possibility for recording cycles and graphs on the PC
§ partial access to configuration of the programming parameters
§ no access to the calibration parameters
-
Level 2 password (level for the PBM technician or other authorized person):
§ complete access to read-only data
§ possibility for recording cycles and graphs on the PC
§ full access to configuration of the programming parameters
§ full access to the calibration parameters
- 37 -
P.B.M. S.r.l.
ALFA PROGETTI S.r.l.
Via Barella Z.I. VIGNOLA (MO) ITALIA
Tel. +39 059 77 05 311 Fax +39 059 77 05 300
http://www.gruppopbm.it e-mail: [email protected]
Via Dei Fabbri 42. SPILAMBERTO (MO) ITALIA
Tel. +39 059 78 57 26 Fax +39 059 78 57 37
http://www.alfaprogetti.com e-mail: [email protected]
MANUALE DI ISTRUZIONI "Software BLTView”
Rev. n° 2 del 20/10/2009
File:BLTView_IT_GB_F_D_rev2_221009.doc
3.4 – Password access
Select “Add password” on the “Settings” menu to change the access password.
-
Select “Add password” on the “Settings” menu or press the “Password” button and enter
your password.
Select “Configuration” and open the configuration window.
Change the password of your level or the one below
NOTES:
- The default passwords upon initial installation are:
§ Level 1: “ALFA”
§ Level 2: “***” (test and calibration)
-
The passwords are not “case sensitive”, so it does not matter whether the characters are
upper or lower case.
- 38 -
P.B.M. S.r.l.
ALFA PROGETTI S.r.l.
Via Barella Z.I. VIGNOLA (MO) ITALIA
Tel. +39 059 77 05 311 Fax +39 059 77 05 300
http://www.gruppopbm.it e-mail: [email protected]
Via Dei Fabbri 42. SPILAMBERTO (MO) ITALIA
Tel. +39 059 78 57 26 Fax +39 059 78 57 37
http://www.alfaprogetti.com e-mail: [email protected]
MANUALE DI ISTRUZIONI "Software BLTView”
Rev. n° 2 del 20/10/2009
File:BLTView_IT_GB_F_D_rev2_221009.doc
4 – BLT160 connected
Pictured below are the functions made available upon USB o serial cable connection to the
BLT160 device. The BLTVIEW must already have been configured as instructed above.
4.1 – Preparation
-
Connect the USB ( or serial ) cable to the PC and BLT160 (when you connect for the first
time, you are requested to install the drivers required for USB communication1.
Start the BLT160View program.
Enter the password, if necessary, to proceed.
Press the connection button.
NOTE:
Serial connection is indicated by the icon in the bottom left-hand corner of each TAB.
4.2 – Instant data consultation
This chapter describes all the functions made available when you connect a USB or serial cable. If
the serial connection is lost, a warning message appears and the automatic services are blocked.
To reset the online functions:
- Disconnect the serial or USB cable
- Press OK when the message appears
- Reconnect the serial or USB cable
- Press the “Connect the BLT160” button to connect
There are 5 tabs at the top and 5 buttons at the bottom which differ according to the tab selected.
The “BLT160 explorer” and “Download Data” buttons are available on each tab.
1
The Windows drivers must already have been installed to enable communication via the USB port (APPENDIX B)
- 39 -
P.B.M. S.r.l.
ALFA PROGETTI S.r.l.
Via Barella Z.I. VIGNOLA (MO) ITALIA
Tel. +39 059 77 05 311 Fax +39 059 77 05 300
http://www.gruppopbm.it e-mail: [email protected]
Via Dei Fabbri 42. SPILAMBERTO (MO) ITALIA
Tel. +39 059 78 57 26 Fax +39 059 78 57 37
http://www.alfaprogetti.com e-mail: [email protected]
MANUALE DI ISTRUZIONI "Software BLTView”
Rev. n° 2 del 20/10/2009
File:BLTView_IT_GB_F_D_rev2_221009.doc
4.2.1 – Programming tab
This TAB enables access to the BLT160 operating parameters and to the data collection mode.
The data is read-only or configurable depending on the password level.
- 40 -
P.B.M. S.r.l.
ALFA PROGETTI S.r.l.
Via Barella Z.I. VIGNOLA (MO) ITALIA
Tel. +39 059 77 05 311 Fax +39 059 77 05 300
http://www.gruppopbm.it e-mail: [email protected]
Via Dei Fabbri 42. SPILAMBERTO (MO) ITALIA
Tel. +39 059 78 57 26 Fax +39 059 78 57 37
http://www.alfaprogetti.com e-mail: [email protected]
MANUALE DI ISTRUZIONI "Software BLTView”
Rev. n° 2 del 20/10/2009
File:BLTView_IT_GB_F_D_rev2_221009.doc
The table lists all the fields, the devices and password required for reading and configuration.
FIELD NAME
Nominal parameters
Battery voltage
Battery Ah
Operating mode
Nr of cycles (NC)
Battery ID
Notes
Discharging
Discharge current
Discharge time
End of discharge voltage
End of discharge delay time
Charging
% recharging increase
Threshold voltage
Minimum charging time
Maximum charging time
Delay after charging
Other parameters
Graph sampling time
Languages
DESCRIPTION
Nominal battery voltage
Nominal battery capacity
Test mode (cf Technical Manual)
Number of download and upload cycles
Battery serial number
Notes
Discharge current during the test
Duration of the discharge process
Voltage at which the discharge process is ended
Delay time after the discharge process
Recharging increase
Battery voltage at which the 1° process moves on to the 2°
process
Minimum duration of the charging process
Maximum duration of the charging process
Delay after the charging process
Time for sampling the recorded voltage and current graphs
Language selection
When you program the VCOST work mode, two parameters differ according to the situation in
which they are used (both online and offline):
End of charge voltage (V/el):
Voltage control (V)
Constant voltage of reference
Discharge current (A):
Max discharge current (A)
Limit discharge current during the test
4.2.1.1 - Time configuration
To configure the BLT160C device’s date clock, simply press the “Set clock” button.
Check the time and date on the PC are correct beforehand
4.2.1.2 – Programming the main parameters
Make sure you enter the password for at least the Level 1 user.
Press “Re-programming”.
To transfer the re-programmed parameters, simply press “Transfer data to BLT160”.
Pressing “Cancel” freezes the fields and resets the previous data on the BLT160.
- 41 -
P.B.M. S.r.l.
ALFA PROGETTI S.r.l.
Via Barella Z.I. VIGNOLA (MO) ITALIA
Tel. +39 059 77 05 311 Fax +39 059 77 05 300
http://www.gruppopbm.it e-mail: [email protected]
Via Dei Fabbri 42. SPILAMBERTO (MO) ITALIA
Tel. +39 059 78 57 26 Fax +39 059 78 57 37
http://www.alfaprogetti.com e-mail: [email protected]
MANUALE DI ISTRUZIONI "Software BLTView”
Rev. n° 2 del 20/10/2009
File:BLTView_IT_GB_F_D_rev2_221009.doc
4.2.2 – TAB Monitor
The TAB Monitor indicates the battery’s main status and operating parameters in real time.
These are the sections:
- A: Battery capacity level
- B: Discharging/charging information
- C: Nominal parameters programmed on the device
- D: Number of the test and cycle in progress
- E: Battery voltage
- F: Temperature of the BLT160
The meaning of the various fields is self-explanatory.
B
C
A
D
E
F
Ø The “BLT160 Explorer” button allows you to valuate data offline (see chap.5) and therefore
read the data saved in the database.
Ø The “Data download” button allows you to read the data recorded on the BLT160 and save it in
the database on the PC (see § 4.2.7).
Ø The “Close” button takes you back to the main page and closes the online session.
- 42 -
P.B.M. S.r.l.
ALFA PROGETTI S.r.l.
Via Barella Z.I. VIGNOLA (MO) ITALIA
Tel. +39 059 77 05 311 Fax +39 059 77 05 300
http://www.gruppopbm.it e-mail: [email protected]
Via Dei Fabbri 42. SPILAMBERTO (MO) ITALIA
Tel. +39 059 78 57 26 Fax +39 059 78 57 37
http://www.alfaprogetti.com e-mail: [email protected]
MANUALE DI ISTRUZIONI "Software BLTView”
Rev. n° 2 del 20/10/2009
File:BLTView_IT_GB_F_D_rev2_221009.doc
4.2.3 – TAB Info
TAB Info indicates the test’s detailed status and operating parameters in real time.
These are the sections:
- A: Test number
- B: Test cycle number
- C: Nominal parameters
- D: Discharging data
- E: Charging data
- F: List of current faults
C
A
E
B
D
F
Ø
Ø
Ø
Ø
The Print button allows you to print the data displayed on the screen.
The “BLT160 Explorer” button allows you to valuate data offline (see chap.5).
The “Data download” button allows you to read the data recorded on the BLT160 (see § 4.2.7).
The “Close” button takes you back to the main page and closes the online session.
- 43 -
P.B.M. S.r.l.
ALFA PROGETTI S.r.l.
Via Barella Z.I. VIGNOLA (MO) ITALIA
Tel. +39 059 77 05 311 Fax +39 059 77 05 300
http://www.gruppopbm.it e-mail: [email protected]
Via Dei Fabbri 42. SPILAMBERTO (MO) ITALIA
Tel. +39 059 78 57 26 Fax +39 059 78 57 37
http://www.alfaprogetti.com e-mail: [email protected]
MANUALE DI ISTRUZIONI "Software BLTView”
Rev. n° 2 del 20/10/2009
File:BLTView_IT_GB_F_D_rev2_221009.doc
The various fields are listed in the table.
FIELD NAME
Test number
Cycle number
Programmed values
Notes
BAT ID
Nominal voltage
Nominal capacity
Discharge current
Discharge time
End of discharge time
(V/el)
Operating mode
Firmware version
Discharge data
Discharge start
Discharge time
End of discharge delay
time
Start of cycle capacity
Overall discharged
capacity
End of discharge capacity
Efficiency
Minimum voltage
(discharge)
Max internal temperature
of the electronics
Charging data
Charge start
Process duration (1^)
Process duration (2^)
Overall charge time
End of charge delay time
Start of cycle capacity
Charge capacity 1st
Process
Charge capacity 2st
Process
Overall charged capacity
Recharging increase
End of charge capacity
Max voltage (charge)
Max current (charge)
End of charge current
DESCRIPTION
Number of the test in progress
Number of the cycle in progress
Notes entered on the Programming page
Battery serial number as configured on the Programming page
Nominal battery voltage
Nominal battery capacity
Discharge current
Time required for discharge
Time at the end of which the discharge process is ended
Test mode (cf Technical Manual)
Version of the BLT160 firmware
Time and date discharge is started
Overall time for all the discharge processes (discharge current > 0 )
Overall delay time after discharge
Battery capacity at start of the discharge process
Overall battery capacity discharged
Residual battery capacity in the battery after the discharge process
Battery efficiency given as a percentage
Minimum voltage during the discharge process
Temperature of the electronics
Time and date charge is started
Overall time of the charge processes (charge current > 0 ) with battery voltage
< “Threshold voltage” (cf programming)
Overall time of the charge processes (charge current > 0 ) with battery voltage
≥ “Threshold voltage” (cf programming)
Overall time of all the charge processes (charge current > 0 )
Overall delay time after charge
Battery capacity at start of the recharge process
Overall capacity charged during the charge processes (charge current > 0 )
with battery voltage < “Threshold voltage” (cf programming)
Overall capacity charged during the charge processes (charge current > 0 )
with battery voltage ≥ “Threshold voltage” (cf programming)
Overall capacity charged during the charge processes (charge current > 0 )
Increase in percentage between charged capacity and reintegrated capacity
Battery capacity at the end of the recharging process
Max voltage during the recharging process
Max charge current
Charge current a moment before ending the recharging process
- 44 -
P.B.M. S.r.l.
ALFA PROGETTI S.r.l.
Via Barella Z.I. VIGNOLA (MO) ITALIA
Tel. +39 059 77 05 311 Fax +39 059 77 05 300
http://www.gruppopbm.it e-mail: [email protected]
Via Dei Fabbri 42. SPILAMBERTO (MO) ITALIA
Tel. +39 059 78 57 26 Fax +39 059 78 57 37
http://www.alfaprogetti.com e-mail: [email protected]
MANUALE DI ISTRUZIONI "Software BLTView”
Rev. n° 2 del 20/10/2009
File:BLTView_IT_GB_F_D_rev2_221009.doc
4.2.3.1 List of faults
Refer to the BLT160 Technical Manual
4.2.5 – Graph TAB
The Graph TAB allows you to view current and voltage progress graphs for the cycle in progress.
The PC reads the graphs automatically.
The graphs are updated with new data every ten seconds at the most.
The max capacity of the graphs depends on the device connected. Consult the BLT160 technical
manual.
There are these sections:
- A: Current graph for the selected cycle.
- B: Voltage graph for the selected cycle.
A
B
Ø There are three specific buttons for each of the two graphs:
- Magnifying glass: allows you to select and enlarge an area of the graph.
- Blank sheet with magnifying glass: for a print preview of the information on the screen.
- Printer: to print out the information on the screen.
Ø The “CSV” button allows you to download current and voltage data in the form of a text file with
defined fields (*.csv). The file is given a set name which you can change.
Ø The “BLT160 Explorer” button allows you to valuate data offline (see chap.5.1).
Ø The “Data download” button allows you to read the data recorded on the BLT160 (see § 4.2.7).
Ø The “Close” button takes you back to the main page and closes the online session.
- 45 -
P.B.M. S.r.l.
ALFA PROGETTI S.r.l.
Via Barella Z.I. VIGNOLA (MO) ITALIA
Tel. +39 059 77 05 311 Fax +39 059 77 05 300
http://www.gruppopbm.it e-mail: [email protected]
Via Dei Fabbri 42. SPILAMBERTO (MO) ITALIA
Tel. +39 059 78 57 26 Fax +39 059 78 57 37
http://www.alfaprogetti.com e-mail: [email protected]
MANUALE DI ISTRUZIONI "Software BLTView”
Rev. n° 2 del 20/10/2009
File:BLTView_IT_GB_F_D_rev2_221009.doc
4.2.6 –Recorder TAB
This window allows you to view current and voltage progress graphs when online, regardless of
test and cycle number.
The measurements are:
- Charge (+) or discharge (-) current
- Programmed nominal discharge current (-)
- Battery voltage
- Programmed nominal discharge voltage
- Programmed charge threshold voltage
- Programmed discharge stop voltage
The records are updated, on average, every six seconds.
The graph can represent up to 54000 samples, the equivalent of 90 hours.
The N.54001 sample overwrites sample N.1.
If you leave a session and then return to it some time later, you will notice new data has been
added.
To re-start the graph from “zero”, reset it manually by pressing the “Reset Recorder” button at the
bottom. The previous data is not cancelled but is registered in a file with a predetermined name
which you will then be able to consult by pressing the “Recorder Old” button or the “ArchiviRecorder Old” menu in the main window (see § 5.5).
There are these sections:
- A: Current graph
- B: Voltage graph
A
B
- 46 -
P.B.M. S.r.l.
ALFA PROGETTI S.r.l.
Via Barella Z.I. VIGNOLA (MO) ITALIA
Tel. +39 059 77 05 311 Fax +39 059 77 05 300
http://www.gruppopbm.it e-mail: [email protected]
Via Dei Fabbri 42. SPILAMBERTO (MO) ITALIA
Tel. +39 059 78 57 26 Fax +39 059 78 57 37
http://www.alfaprogetti.com e-mail: [email protected]
MANUALE DI ISTRUZIONI "Software BLTView”
Ø
Ø
Ø
Ø
Ø
Ø
Rev. n° 2 del 20/10/2009
File:BLTView_IT_GB_F_D_rev2_221009.doc
- There are three specific buttons for each of the two graphs:
- Magnifying glass: allows you to select and enlarge an area of the graph.
- Blank sheet with magnifying glass: for print preview of the information on the screen.
- Printer: to print out the information on the screen.
The “CSV” button allows you to download current and voltage data in the form of a text file with
defined fields (*.csv). The file is given a set name which you can change.
The “Recorder Old” button allows you to re-read the registered data in dedicated files (see §
5.5).
The “Reset Recorder” button allows you to register a new recorder and store the data in a
dedicated file.
The “BLT160 Explorer” button allows you to valuate data offline (see chap.5.1).
The “Data download” button allows you to read the data recorded on the BLT160 (see § 4.2.7).
The “Close” button takes you back to the main page and closes the online session.
4.2.7 – Download
Pressing the “DATA DOWNLOAD” button opens the window for selecting the CLIENT for whom
the test was run and the OPERATOR who executed the same test.
These fields are mandatory for purposes of searching previous records.
After selecting check selected fields and press "Download Data
If the association for any data that has been read and registered is incorrect, it can be corrected
using the offline “modify association” tool (see §5.3).
Ø The “New” button allows you to enter a new customer/operator.
Ø The “Modify” button allows you to change the name of a customer/operator (if not already used
in the databases).
Ø The “Cancel” button allows you to wipe the name of a customer/operator (if not already used in
the database).
Ø The “Close” button takes you back to the online page.
- 47 -
P.B.M. S.r.l.
ALFA PROGETTI S.r.l.
Via Barella Z.I. VIGNOLA (MO) ITALIA
Tel. +39 059 77 05 311 Fax +39 059 77 05 300
http://www.gruppopbm.it e-mail: [email protected]
Via Dei Fabbri 42. SPILAMBERTO (MO) ITALIA
Tel. +39 059 78 57 26 Fax +39 059 78 57 37
http://www.alfaprogetti.com e-mail: [email protected]
MANUALE DI ISTRUZIONI "Software BLTView”
Rev. n° 2 del 20/10/2009
File:BLTView_IT_GB_F_D_rev2_221009.doc
5 – OLD data consultation
Registered work data can be viewed off-line.
The “Archive” menu allows you to consult and manage this data.
-
Consult
Modify customer and operator data
Modify associations
Read test cycle data saved in other files
Read archived “recorder” diagram data.
5.1 – BLT160 Explorer
To consult the archived data, select “BLT 160 Explorer” from the “Archive” menu or press the
respective button on the main page or online pages.
5.1.1 – TAB Data OLD
The “Data Old” window shows the main data of the selected work cycle.
A
B
C
D
E
F
- 48 -
P.B.M. S.r.l.
ALFA PROGETTI S.r.l.
Via Barella Z.I. VIGNOLA (MO) ITALIA
Tel. +39 059 77 05 311 Fax +39 059 77 05 300
http://www.gruppopbm.it e-mail: [email protected]
Via Dei Fabbri 42. SPILAMBERTO (MO) ITALIA
Tel. +39 059 78 57 26 Fax +39 059 78 57 37
http://www.alfaprogetti.com e-mail: [email protected]
MANUALE DI ISTRUZIONI "Software BLTView”
Rev. n° 2 del 20/10/2009
File:BLTView_IT_GB_F_D_rev2_221009.doc
There are these sections:
- A: data selection: Customer, Operator, BLT 160 serial number, Battery Identification, Test
Number, Test start date
- B: Number of the selected cycle
- C: Plate data
- D: Charge data
- E: Discharge data
- F: Cycle selection tools
La fase di scarica è visibile:
a) When the cycle’s discharge process has started (correctly registered discharge start date)
b) The Cycle Nr = 0
c) The Cycle Nr is above 0 and the selected cycle is above 0.
La fase di carica è visibile:
a) When the cycle’s discharge process has started (correctly registered discharge start date)
b) The Cycle Nr is above 0
5.1.2 – TAB Info OLD
The Info Old window presents the data for the selected work cycle.
A
B
C
D
E
F
G
There are the following sections:
- A: Data selection: Customer, Operator, BLT 160 serial number, Battery Identification, Test
Number, Test start date
- B: Number of the selected cycle
- C: Plate data
- D: Charge summary data
- E: Discharge summary data
- 49 -
P.B.M. S.r.l.
ALFA PROGETTI S.r.l.
Via Barella Z.I. VIGNOLA (MO) ITALIA
Tel. +39 059 77 05 311 Fax +39 059 77 05 300
http://www.gruppopbm.it e-mail: [email protected]
Via Dei Fabbri 42. SPILAMBERTO (MO) ITALIA
Tel. +39 059 78 57 26 Fax +39 059 78 57 37
http://www.alfaprogetti.com e-mail: [email protected]
MANUALE DI ISTRUZIONI "Software BLTView”
-
Rev. n° 2 del 20/10/2009
File:BLTView_IT_GB_F_D_rev2_221009.doc
F: Fault Log
G: Cycle selection tools
The discharge phase can be viewed:
d) when the cycle’s discharge process has started (correctly registered discharge start date)
e) when the N CICLI (No. of CYCLES) parameter is at 0
f) when the N CICLI (No. of CYCLES) parameter is more than 0 and the selected cycle is
greater than 0.
The charge phase can be viewed:
c) when the cycle’s charge process has started (correctly registered charge start date)
d) when the N CICLI (No. of CYCLES) parameter is more than 0
Ø The Print button allows you to print the data on the screen
Ø The “Close” button ends the offline session.
5.1.3 – OLD Graph TAB
The Graph TAB allows you to view current and voltage progress graphs for the selected cycle.
The max capacity of the graphs depends on the device connected. Consult the BLT160 technical
manual.
You can check the data sampling time in the “Graph Sampling Time” field on the “programming tab
(it cannot be modified during the cycle).
There are these sections:
- A: Voltage graph for the selected cycle
- B: Current graph for the selected cycle
- C: Cycle selection tools
A
B
C
- 50 -
P.B.M. S.r.l.
ALFA PROGETTI S.r.l.
Via Barella Z.I. VIGNOLA (MO) ITALIA
Tel. +39 059 77 05 311 Fax +39 059 77 05 300
http://www.gruppopbm.it e-mail: [email protected]
Via Dei Fabbri 42. SPILAMBERTO (MO) ITALIA
Tel. +39 059 78 57 26 Fax +39 059 78 57 37
http://www.alfaprogetti.com e-mail: [email protected]
MANUALE DI ISTRUZIONI "Software BLTView”
Rev. n° 2 del 20/10/2009
File:BLTView_IT_GB_F_D_rev2_221009.doc
Ø The “CSV” button allows you to download current and voltage data in the form of a text file with
defined fields (*.csv). The file is given a set name which you can change.
Ø The “Close” button ends the offline session.
5.1.4 – “Medie” TAB
This section allows you to valuate the progress of a battery’s efficiency and max and minimum
voltage according to cycle.
A
B
C
D
E
There are the following sections:
- A: Data selection: Customer, Operator, BLT 160 serial number, Battery Identification, Test
Number, Test start date
- B: Table of data for the selected cycles
- C: Buttons for selecting cycles to be valuated
- D: Mean data of the selected cycles
- E: Cycle selection tools
Ø
Ø
Ø
Ø
Ø
Ø
Ø
Ø
The “+++” button allows you to select all of a battery’s cycles
The “++” button allows you to select all of a test’s cycles
The “+” button allows you to select a cycle
The “-” button allows you to deselect a cycle
The “wastebasket” button allows you to deselect everything
The “graph” button allows you to view the data in graphical form. See §5.1.4.1
The Print button allows you to print the data on a selected device.
The “Close” button allows you to end the offline session.
- 51 -
P.B.M. S.r.l.
ALFA PROGETTI S.r.l.
Via Barella Z.I. VIGNOLA (MO) ITALIA
Tel. +39 059 77 05 311 Fax +39 059 77 05 300
http://www.gruppopbm.it e-mail: [email protected]
Via Dei Fabbri 42. SPILAMBERTO (MO) ITALIA
Tel. +39 059 78 57 26 Fax +39 059 78 57 37
http://www.alfaprogetti.com e-mail: [email protected]
MANUALE DI ISTRUZIONI "Software BLTView”
Rev. n° 2 del 20/10/2009
File:BLTView_IT_GB_F_D_rev2_221009.doc
5.1.4.1 – “Grafico Medie” TAB
The “graph” button on the “Medie” TAB allows you to valuate the progress of a battery’s efficiency
and max and minimum voltage according to cycle.
Ø There are three specific buttons for each of the two graphs:
- Magnifying glass: allows you to select and enlarge an area of the graph.
- Blank sheet with magnifying glass: for a print preview of the information on the screen.
- Printer: to print out the information on the screen.
Ø The “Close” button takes you back to the “Medie” TAB.
- 52 -
P.B.M. S.r.l.
ALFA PROGETTI S.r.l.
Via Barella Z.I. VIGNOLA (MO) ITALIA
Tel. +39 059 77 05 311 Fax +39 059 77 05 300
http://www.gruppopbm.it e-mail: [email protected]
Via Dei Fabbri 42. SPILAMBERTO (MO) ITALIA
Tel. +39 059 78 57 26 Fax +39 059 78 57 37
http://www.alfaprogetti.com e-mail: [email protected]
MANUALE DI ISTRUZIONI "Software BLTView”
Rev. n° 2 del 20/10/2009
File:BLTView_IT_GB_F_D_rev2_221009.doc
5.1.5 – Programming TAB
The Programming TAB allows you to view the programming parameters of a selected cycle.
The fields are described in section §4.2.1 on online programming.
Ø The Print button allows you to print the data on the screen
Ø The “Close” button allows you to end the offline session.
- 53 -
P.B.M. S.r.l.
ALFA PROGETTI S.r.l.
Via Barella Z.I. VIGNOLA (MO) ITALIA
Tel. +39 059 77 05 311 Fax +39 059 77 05 300
http://www.gruppopbm.it e-mail: [email protected]
Via Dei Fabbri 42. SPILAMBERTO (MO) ITALIA
Tel. +39 059 78 57 26 Fax +39 059 78 57 37
http://www.alfaprogetti.com e-mail: [email protected]
MANUALE DI ISTRUZIONI "Software BLTView”
Rev. n° 2 del 20/10/2009
File:BLTView_IT_GB_F_D_rev2_221009.doc
5.1.6 – Archive TAB
This section allows you to archive other data in the database.
There are several main uses:
- To reduce the size of the database and speed up associated operations.
- To backup only the data required for valuation.
- To move and possibly wipe any data no longer of interest.
A
B
C
D
There are the following sections:
- A: Data selection
- B: Buttons for selecting cycles to be archived
- C: Table of the data to be archived
- D: Number of components to be archived
Ø The “+++” button allows you to select all of a battery’s cycles
Ø The “++” button allows you to select all of a test’s cycles
Ø The “+” button allows you to select a cycle
Ø The “-” button allows you to deselect a cycle
Ø The “wastebasket” button allows you to deselect everything
Ø The “Archive” button opens a window where you can select the name of the file in which to
archive the selected data.
To make this process easier, a position and name are pre-selected according to the date of the
operation.
Ø The “Close” button allows you to end the offline session.
- 54 -
P.B.M. S.r.l.
ALFA PROGETTI S.r.l.
Via Barella Z.I. VIGNOLA (MO) ITALIA
Tel. +39 059 77 05 311 Fax +39 059 77 05 300
http://www.gruppopbm.it e-mail: [email protected]
Via Dei Fabbri 42. SPILAMBERTO (MO) ITALIA
Tel. +39 059 78 57 26 Fax +39 059 78 57 37
http://www.alfaprogetti.com e-mail: [email protected]
MANUALE DI ISTRUZIONI "Software BLTView”
Rev. n° 2 del 20/10/2009
File:BLTView_IT_GB_F_D_rev2_221009.doc
5.2 – Customer/Operator data
Select “Customer/Operator data” from the “Archive” menu or press the respective button to access
the data on the Customers and Operators to be associated with the data on the BLT160 device.
Ø The “New” button allows you to enter a new customer/operator.
Ø The “Modify” button allows you to change the name of a customer/operator (if not already used
in the databases).
Ø The “Cancel” button allows you to wipe the name of a customer/operator (if not already used in
the database).
Ø The “Close” button takes you back to the main page.
- 55 -
P.B.M. S.r.l.
ALFA PROGETTI S.r.l.
Via Barella Z.I. VIGNOLA (MO) ITALIA
Tel. +39 059 77 05 311 Fax +39 059 77 05 300
http://www.gruppopbm.it e-mail: [email protected]
Via Dei Fabbri 42. SPILAMBERTO (MO) ITALIA
Tel. +39 059 78 57 26 Fax +39 059 78 57 37
http://www.alfaprogetti.com e-mail: [email protected]
MANUALE DI ISTRUZIONI "Software BLTView”
Rev. n° 2 del 20/10/2009
File:BLTView_IT_GB_F_D_rev2_221009.doc
5.3 – Modify the Associations
Select “Modify the associations” from the “Archive” menu or press the respective button to access
the section for changing the associations of data downloaded from the BLT160.
A
B
C
D
Before changing the associations
After changing the associations
There are the following sections:
- A: Test menu for the current associations
- B: Customer/Operator data configuration button (see §5.2)
- C: New association menu
- D: Association execution button
INSTRUCTIONS ON HOW TO MAKE A CHANGE:
-
In the “CURRENT ASSOCIATIONS” section select the TESTS the associations of which
you wish to change. It is possible select more than one at a time by pressing and holding
the SHIFT button.
-
In the “NEW ASSOCIATIONS” section select and/or add new associations for TESTS.
-
Press the “MODIFY ASSOCIATIONS” button.
-
The moved TESTS are listed in the “NEW ASSOCIATIONS” section.
- 56 -
P.B.M. S.r.l.
ALFA PROGETTI S.r.l.
Via Barella Z.I. VIGNOLA (MO) ITALIA
Tel. +39 059 77 05 311 Fax +39 059 77 05 300
http://www.gruppopbm.it e-mail: [email protected]
Via Dei Fabbri 42. SPILAMBERTO (MO) ITALIA
Tel. +39 059 78 57 26 Fax +39 059 78 57 37
http://www.alfaprogetti.com e-mail: [email protected]
MANUALE DI ISTRUZIONI "Software BLTView”
Rev. n° 2 del 20/10/2009
File:BLTView_IT_GB_F_D_rev2_221009.doc
5.4 –Database selection
Select “Select Database” from the “Archive” menu or press the respective button to access the
archived databases.
A
B
C
-
A: directory of the selected database
B: button for selecting the archived database
C: pre-download the default database
After selecting the archived database you can only work offline until the default database is
restored.
- 57 -
P.B.M. S.r.l.
ALFA PROGETTI S.r.l.
Via Barella Z.I. VIGNOLA (MO) ITALIA
Tel. +39 059 77 05 311 Fax +39 059 77 05 300
http://www.gruppopbm.it e-mail: [email protected]
Via Dei Fabbri 42. SPILAMBERTO (MO) ITALIA
Tel. +39 059 78 57 26 Fax +39 059 78 57 37
http://www.alfaprogetti.com e-mail: [email protected]
MANUALE DI ISTRUZIONI "Software BLTView”
Rev. n° 2 del 20/10/2009
File:BLTView_IT_GB_F_D_rev2_221009.doc
5.5 – Recorder OLD
Select “Recorder OLD” from the “Archive” menu to access the databases of the archived
recorders.
B
A
C
D
There are the following sections:
-
A: directory of the selected database
B: button for re-selecting an archived “recorder”
C: Current graph (charge/discharge current, programmed discharge current)
D: Voltage graph (current voltage, programmed nominal voltage, programmed gas
threshold voltage, programmed stop threshold voltage)
- 58 -
P.B.M. S.r.l.
ALFA PROGETTI S.r.l.
Via Barella Z.I. VIGNOLA (MO) ITALIA
Tel. +39 059 77 05 311 Fax +39 059 77 05 300
http://www.gruppopbm.it e-mail: [email protected]
Via Dei Fabbri 42. SPILAMBERTO (MO) ITALIA
Tel. +39 059 78 57 26 Fax +39 059 78 57 37
http://www.alfaprogetti.com e-mail: [email protected]
MANUALE DI ISTRUZIONI "Software BLTView”
Rev. n° 2 del 20/10/2009
File:BLTView_IT_GB_F_D_rev2_221009.doc
APPENDIX A
DFU program use
The DFU program is used to update the BLT160’s firmware.
The update process requires a copy of the update file (with the .hex extension) on the PC.
- Connect the BLT160 to the PC using a serial connection cable
- Start up the DFU program
- Select the serial port associated with the BLT160. If you have a USB connection, select the
port number assigned by Windows: Windows Control Panel -> Device Manager -> Ports
(COM and LPT)
- Press the “Open ‘HEX’” button and select the update file
- Switch off the BLT160 and disconnect the USB cable
- Connect the USB cable to the BLT160 by pressing and holding the BLT160’s START/STOP
button
- Release the START/STOP button after 2 seconds
- Press the “Upload” button in the DFU software within 8 seconds to run the update. The
progress bar shows you the update status.
The BLT160 device restarts automatically at the end of the update process.
Legend for the picture:
-
A: “Open ‘HEX’” button
B: Upload/Pause button
C: Upload progress bar
D: Serial port selection
A
B
C
- 59 -
P.B.M. S.r.l.
ALFA PROGETTI S.r.l.
Via Barella Z.I. VIGNOLA (MO) ITALIA
Tel. +39 059 77 05 311 Fax +39 059 77 05 300
http://www.gruppopbm.it e-mail: [email protected]
Via Dei Fabbri 42. SPILAMBERTO (MO) ITALIA
Tel. +39 059 78 57 26 Fax +39 059 78 57 37
http://www.alfaprogetti.com e-mail: [email protected]
MANUALE DI ISTRUZIONI "Software BLTView”
Rev. n° 2 del 20/10/2009
File:BLTView_IT_GB_F_D_rev2_221009.doc
APPENDIX B
USB driver installation
B1 - Installation of the USB DRIVER on Windows XP
1) Connect the USB cable to the computer’s
USB port and the BLT160. The new hardware is
found.
2) Follow the guided installation procedure. Select:
“Installa da un elenco o percorso
specifico (per utenti esperti)”
(Install from a list of specific location
(advanced)
Click “Avanti” (Next)
3) Select:
“Ricerca il miglior driver disponibile in
questi percorsi” (Search for the best
driver in these locations)
Select:
“Includi il seguente percorso nella ricerca”
(include this location in the search)
Press “Sfoglia” (Browse) and select the driver
location.
“C:\Programmi\BLTView\Drivers” (location
created during BLTView installation).
Click “Avanti” (Next)
- 60 -
P.B.M. S.r.l.
ALFA PROGETTI S.r.l.
Via Barella Z.I. VIGNOLA (MO) ITALIA
Tel. +39 059 77 05 311 Fax +39 059 77 05 300
http://www.gruppopbm.it e-mail: [email protected]
Via Dei Fabbri 42. SPILAMBERTO (MO) ITALIA
Tel. +39 059 78 57 26 Fax +39 059 78 57 37
http://www.alfaprogetti.com e-mail: [email protected]
MANUALE DI ISTRUZIONI "Software BLTView”
Rev. n° 2 del 20/10/2009
File:BLTView_IT_GB_F_D_rev2_221009.doc
4) Wait for installation to start
5) Click “Continua” (Continue)
6) Wait for installation to end
Click “Fine” (Finish)
7) Right-click “Risorse Del Computer” (My
Computer).
Click: “Proprietà” (Properties)
- 61 -
P.B.M. S.r.l.
ALFA PROGETTI S.r.l.
Via Barella Z.I. VIGNOLA (MO) ITALIA
Tel. +39 059 77 05 311 Fax +39 059 77 05 300
http://www.gruppopbm.it e-mail: [email protected]
Via Dei Fabbri 42. SPILAMBERTO (MO) ITALIA
Tel. +39 059 78 57 26 Fax +39 059 78 57 37
http://www.alfaprogetti.com e-mail: [email protected]
MANUALE DI ISTRUZIONI "Software BLTView”
Rev. n° 2 del 20/10/2009
File:BLTView_IT_GB_F_D_rev2_221009.doc
8) Select the “Hardware” tab.
Click “Gestione periferiche” (Device manager)
9) In the list, select: “Porte (LPT e COM)” (USB
Serial Ports (LPT and COM)
Make sure the SmartIR USB-IRDA port is
correctly installed.
The port number is given. In the picture, the port
number is COM7.
Close all the windows.
10) Open BLTView
From the main menu select “Impostazione”
(Settings) and then “Porta Seriale” (Serial Port)
11) Select the required serial port and press OK.
- 62 -
P.B.M. S.r.l.
ALFA PROGETTI S.r.l.
Via Barella Z.I. VIGNOLA (MO) ITALIA
Tel. +39 059 77 05 311 Fax +39 059 77 05 300
http://www.gruppopbm.it e-mail: [email protected]
Via Dei Fabbri 42. SPILAMBERTO (MO) ITALIA
Tel. +39 059 78 57 26 Fax +39 059 78 57 37
http://www.alfaprogetti.com e-mail: [email protected]
MANUALE DI ISTRUZIONI "Software BLTView”
Rev. n° 2 del 20/10/2009
File:BLTView_IT_GB_F_D_rev2_221009.doc
B2 - Installation of the USB DRIVER on Windows VISTA
1) Connect the USB cable to the computer’s and
BLT160 USB port. The new hardware is found.
2) Follow the guided installation procedure.
Select:
“Individuare e installare il driver (scelta
consigliata)”
(Locate and install driver software recommended)
3) Select:
“Cerca il software del driver nel
computer”
(Browse my computer for driver
software)
4) Click “Sfoglia” (Browse) and browse to the
folder where the driver has been stored.
“C:\Programmi\BLTView\Drivers” (location
created during BLTView installation).
Select:
“Includi sottocartelle” (include
subfolders)
Click “Avanti” (Next)
- 63 -
P.B.M. S.r.l.
ALFA PROGETTI S.r.l.
Via Barella Z.I. VIGNOLA (MO) ITALIA
Tel. +39 059 77 05 311 Fax +39 059 77 05 300
http://www.gruppopbm.it e-mail: [email protected]
Via Dei Fabbri 42. SPILAMBERTO (MO) ITALIA
Tel. +39 059 78 57 26 Fax +39 059 78 57 37
http://www.alfaprogetti.com e-mail: [email protected]
MANUALE DI ISTRUZIONI "Software BLTView”
Rev. n° 2 del 20/10/2009
File:BLTView_IT_GB_F_D_rev2_221009.doc
5) Wait for installation to start
6) Click “Installa il software del driver” (Install
driver software)
7) Wait for installation to end
Click “Chiudi” (Close)
8) Right-click on “Risorse Del Computer”
(My Computer)
Select: “Proprietà” (Properties)
- 64 -
P.B.M. S.r.l.
ALFA PROGETTI S.r.l.
Via Barella Z.I. VIGNOLA (MO) ITALIA
Tel. +39 059 77 05 311 Fax +39 059 77 05 300
http://www.gruppopbm.it e-mail: [email protected]
Via Dei Fabbri 42. SPILAMBERTO (MO) ITALIA
Tel. +39 059 78 57 26 Fax +39 059 78 57 37
http://www.alfaprogetti.com e-mail: [email protected]
MANUALE DI ISTRUZIONI "Software BLTView”
Rev. n° 2 del 20/10/2009
File:BLTView_IT_GB_F_D_rev2_221009.doc
9) Select “Gestione dispositivi” (Hardware)
Click “Gestione periferiche” (Device Manager)
10) In the list, select: “Porte (LPT e COM) ”
(USB Serial Ports LPT and COM)
Make sure the SmartUSB port is correctly
installed.
The port number is given. In the picture, the port
number is COM11.
Close all the windows
11) Open BLTView
From the main menu select “Impostazione”
(Settings) and then “Porta Seriale” (Serial Port)
12) Select the required serial port and press OK.
- 65 -
P.B.M. S.r.l.
ALFA PROGETTI S.r.l.
Via Barella Z.I. VIGNOLA (MO) ITALIA
Tel. +39 059 77 05 311 Fax +39 059 77 05 300
http://www.gruppopbm.it e-mail: [email protected]
Via Dei Fabbri 42. SPILAMBERTO (MO) ITALIA
Tel. +39 059 78 57 26 Fax +39 059 78 57 37
http://www.alfaprogetti.com e-mail: [email protected]
MANUALE DI ISTRUZIONI "Software BLTView”
Rev. n° 2 del 20/10/2009
File:BLTView_IT_GB_F_D_rev2_221009.doc
FRANÇAIS
Table des matières
1 – Introduction .......................................................................................................................... 67
2 – Installation............................................................................................................................. 67
3 – Réglages................................................................................................................................. 68
3.1 – Langue sélectionnée ...................................................................................................... 68
3.2 – Port série ....................................................................................................................... 69
3.3 – Configuration ................................................................................................................ 69
3.4 – Introduction du mot de passe ......................................................................................... 70
4 – BLT160 connecté................................................................................................................... 71
4.1 – Préparation.................................................................................................................... 72
4.2 – Consultation des données instantanées........................................................................... 72
4.2.1 – TAB Programmation (TAB Program)......................................................................... 72
4.2.1.1 - Réglage horloge .................................................................................................. 73
4.2.1.2 – Écriture paramètres généraux............................................................................. 73
4.2.2 – TAB Monitor.............................................................................................................. 74
4.2.3 – TAB Info.................................................................................................................... 75
4.2.3.1 Liste des anomalies............................................................................................... 76
4.2.5 – TAB Graphique .......................................................................................................... 77
4.2.6 – TAB Recorder ............................................................................................................ 78
4.2.7 – Download................................................................................................................... 79
5 – Consultation données ............................................................................................................ 80
5.1 – BLT160 Explorer .......................................................................................................... 80
5.1.1 – TAB Données OLD.................................................................................................... 80
5.1.2 – TAB Info OLD........................................................................................................... 81
5.1.3 – TAB Graphique OLD ................................................................................................. 82
5.1.4 – TAB Moyennes .......................................................................................................... 83
5.1.4.1 – TAB Moyennes – graphique ............................................................................... 84
5.1.5 – TAB Programmation .................................................................................................. 85
5.1.6 – TAB Archives ............................................................................................................ 86
5.2 – Données Clients/Opérateurs .......................................................................................... 87
5.3 – Modifications des associations ...................................................................................... 88
5.4 –Sélectionner la base de donnée ....................................................................................... 89
5.5 – Recorder OLD............................................................................................................... 90
ANNEXE A ................................................................................................................................. 91
Utilisation du programme DFU.................................................................................................. 91
ANNEXE B ................................................................................................................................. 92
Installation driver USB............................................................................................................... 92
B1 - Installation DRIVER communication USB sur Windows XP ......................................... 92
B2 - Installation DRIVER communication USB sur Windows VISTA ................................... 95
- 66 -
P.B.M. S.r.l.
ALFA PROGETTI S.r.l.
Via Barella Z.I. VIGNOLA (MO) ITALIA
Tel. +39 059 77 05 311 Fax +39 059 77 05 300
http://www.gruppopbm.it e-mail: [email protected]
Via Dei Fabbri 42. SPILAMBERTO (MO) ITALIA
Tel. +39 059 78 57 26 Fax +39 059 78 57 37
http://www.alfaprogetti.com e-mail: [email protected]
MANUALE DI ISTRUZIONI "Software BLTView”
Rev. n° 2 del 20/10/2009
File:BLTView_IT_GB_F_D_rev2_221009.doc
1 – Introduction
BLTVIEW est une application pour Windows98 ou pour les versions successives, réalisée pour
communiquer avec le dispositif de décharge et test de batteries appelé BLT160.
Le BLT160 communique avec le PC via câble USB ou serial. Ceci permet de personnaliser le
fonctionnement du dispositif, en lui fournissant les données concernant la batterie utilisée et les
modes de fonctionnement souhaités.
Il est aussi possible d’afficher tous les paramètres de fonctionnement en temps réel et de
télécharger les données mémorisées (sous forme de cycles de travail et de graphiques) sur la
base de données locale se trouvant dans le PC. Après avoir téléchargé les données sur le PC, il
est possible de les visualiser en tout moment sans besoin d’être connecté via câble USB ou serial.
Le programme BLTVIEW est en mesure de gérer les données d’un nombre illimité de dispositifs
BLT160: un simple système de recherche permet d’identifier et de visualiser les données des
dispositifs souhaités uniquement.
Les données affichées via BLTVIEW peuvent être imprimées à l’aide d’une touche réservée.
La fourniture du programme BLTVIEW comprend un autre programme dénommée DFU qui permet
d’effectuer la mise à jour du firmware présent sur le BLT160.
2 – Installation
La fourniture du paquet d’installation du BLTVIEW comprend le dispositif BLT160 sur CD.
Première Installation
Pour installer le paquet pour la première fois, procéder de la façon suivante:
-
Accéder au dossier où se trouve le paquet et entrer dans le sous-dossier “Disk1”
Lancer le programme Setup.exe et suivre les instructions de l’installateur
À la fin, sur la barre des programmes apparaîtra le dossier BLTVIEW d’où il est possible d’accéder
aux différents éléments du paquet. Un lien vers le programme BLT160View sera aussi présent sur
le bureau.
Maintenance
Pour installer des versions plus récentes du paquet, il faut d’abord retirer la version précédemment
installée à l’aide des instruments mis à disposition par Windows.
- 67 -
P.B.M. S.r.l.
ALFA PROGETTI S.r.l.
Via Barella Z.I. VIGNOLA (MO) ITALIA
Tel. +39 059 77 05 311 Fax +39 059 77 05 300
http://www.gruppopbm.it e-mail: [email protected]
Via Dei Fabbri 42. SPILAMBERTO (MO) ITALIA
Tel. +39 059 78 57 26 Fax +39 059 78 57 37
http://www.alfaprogetti.com e-mail: [email protected]
MANUALE DI ISTRUZIONI "Software BLTView”
Rev. n° 2 del 20/10/2009
File:BLTView_IT_GB_F_D_rev2_221009.doc
Une fois lancé le programme BLTVIEW a une page principale, où vous pouvez activer toutes les
fonctions.
3 – Réglages
Après avoir accédé au menu “Settings” ("Configurations") on peut modifier
- le niveau d'accès aux fonctions autorisées en fonction du mot de passe introduit
- La configuration des mots de passe pour les différents niveaux d'utilisateur
- Le port utilisateur sériel
- La langue du logiciel
3.1 – Langue sélectionnée
Dans le menu “Setup” (Réglages), sélectionner l’entrée “Set language” (Langue sélectionnée) et choisir la
langue souhaitée.
Il faudra redémarrer le programme pour rendre effectives les modifications apportées à la langue
- 68 -
P.B.M. S.r.l.
ALFA PROGETTI S.r.l.
Via Barella Z.I. VIGNOLA (MO) ITALIA
Tel. +39 059 77 05 311 Fax +39 059 77 05 300
http://www.gruppopbm.it e-mail: [email protected]
Via Dei Fabbri 42. SPILAMBERTO (MO) ITALIA
Tel. +39 059 78 57 26 Fax +39 059 78 57 37
http://www.alfaprogetti.com e-mail: [email protected]
MANUALE DI ISTRUZIONI "Software BLTView”
Rev. n° 2 del 20/10/2009
File:BLTView_IT_GB_F_D_rev2_221009.doc
3.2 – Port série
Dans le menu “Setup” (Configurations), sélectionner l’entrée “Serial Port” (Port série) et accéder au
masque de configuration: sélectionner “Auto” pour la recherche automatique du port série
connecté, ou sélectionner le port utilisé si déjà connu.
REMARQUES:
- la recherche automatique peut demander quelques instants à chaque connexion, en
raison de la façon du système opératif d’assigner le numéro du port série. Dans ces
cas, nous conseillons d’identifier le numéro du port (explorer Panneau de contrôle de
Windows -> Gestion périphériques -> Ports (COM et LPT)) et le sélectionner.
- Dans le cas où on utiliserait le même port série, il est possible de paramétrer le numéro
de port. Ceci permet d’éviter des pertes de temps dues à la recherche automatique.
3.3 – Configurazione
Le programme BLTVIEW présente 3 niveaux d’accès différents à travers des mots de passe:
-
Aucun mot de passe:
§ Accès partiel aux données en mode lecture
§ Aucun accès à l'écriture des paramètres relatifs aux associations
§ Possibilité de mémoriser des cycles et des graphiques sur PC
§ Aucun accès à l'écriture des paramètres de programmation
§ Aucun accès aux paramètres d'étalonnage
-
Mot de passe de niveau 1 (niveau utilisateur):
§ Accès partiel aux données en mode lecture
§ Aucun accès à l'écriture des paramètres relatifs aux associations
§ Possibilité de mémoriser des cycles et des graphiques sur PC
§ Accès partiel au mode écriture des paramètres de programmation
§ Aucun accès aux paramètres d'étalonnage
-
Mot de passe de niveau 2 (niveau support technique PBM ou autorisés):
§ Accès total aux données en mode lecture
§ Possibilité de mémoriser des cycles et des graphiques sur PC
§ Accès complet à l'écriture des paramètres de programmation
§ Accès complet aux paramètres d'étalonnage
- 69 -
P.B.M. S.r.l.
ALFA PROGETTI S.r.l.
Via Barella Z.I. VIGNOLA (MO) ITALIA
Tel. +39 059 77 05 311 Fax +39 059 77 05 300
http://www.gruppopbm.it e-mail: [email protected]
Via Dei Fabbri 42. SPILAMBERTO (MO) ITALIA
Tel. +39 059 78 57 26 Fax +39 059 78 57 37
http://www.alfaprogetti.com e-mail: [email protected]
MANUALE DI ISTRUZIONI "Software BLTView”
Rev. n° 2 del 20/10/2009
File:BLTView_IT_GB_F_D_rev2_221009.doc
3.4 – Introduction du mot de passe
Avec le menu “Settings” ("Configurations") sélectionner l'option “Add password” ("Introduire le mot
de passe") pour changer le mot de passe d'accès.
-
-
Sélectionner l’entrée “Add password” (Introduction mot de passe) dans le menu “Setup”
(Réglages) ou appuyer sur le bouton “Password” (Mot de Passe) et introduire son mot de
passe
Sélectionner l’entrée “Settings” (Configuration) et accéder au masque de configuration
Modifier le mot de passe de son niveau ou du niveau inférieur
REMARQUES:
- Les mots de passe par défaut, à la première installation, sont:
§ niveau 1: “ALFA”
§ niveau 2: “***” (test et étalonnages)
-
Les mots de passe ne sont pas “case sensitive”, c’est-à-dire qu’il est possible d’utiliser
indifféremment des caractères majuscules ou minuscules.
- 70 -
P.B.M. S.r.l.
ALFA PROGETTI S.r.l.
Via Barella Z.I. VIGNOLA (MO) ITALIA
Tel. +39 059 77 05 311 Fax +39 059 77 05 300
http://www.gruppopbm.it e-mail: [email protected]
Via Dei Fabbri 42. SPILAMBERTO (MO) ITALIA
Tel. +39 059 78 57 26 Fax +39 059 78 57 37
http://www.alfaprogetti.com e-mail: [email protected]
MANUALE DI ISTRUZIONI "Software BLTView”
Rev. n° 2 del 20/10/2009
File:BLTView_IT_GB_F_D_rev2_221009.doc
4 – BLT160 connecté
Ci-dessous nous illustrons les fonctions disponibles au moment de se connecter via USB ou serial au dispositif
BLT160. Nous supposons que le programme BLTVIEW est déjà configuré comme nous l’avons expliqué
auparavant.
4.1 – Préparation
-
Raccorder le câble USB ou serial au PC et au BLT160 (au cours de la première
connexion, il sera demandé d’installer les drivers pour la communication via port USB1)
Lancer le programme BLT160View
Insérer, le cas échéant, le Mot de passe nécessaire aux opérations que l’on souhaite réaliser
Appuyer sur le bouton de connexion
REMARQUE:
La présence de connexion série est signalée par l’icône en bas à gauche sur chaque TAB.
4.2 – Consultation des données instantanées
Cette section décrit toutes les fonctions disponibles par connexion USB ou sérielle. Si l'on perd la
connexion sérielle, un message d'avertissement s'affiche et les enregistrements automatiques se
bloquent.
Pour rétablir les fonctions d’on-line il faut:
- débrancher le cordon sériel ou USB
- confirmer le message d'avertissement en appuyant sur OK
- rebrancher le cordon sériel ou USB
- Appuyer sur le bouton de connexion “Connect the BLT160” ("Brancher BLT160”)
5 tab sélectionnables se trouvent en haut et 5 boutons sont placés en bas, ceux-ci peuvent exercer
des fonctions différentes en fonctions du tab sélectionné.
En particulier les 2 touches “BLT160 explorer” et “Download data” (“Download données”) sont
toujours actives.
1
La communication via porta USB requiert l’installation préalable des drivers pour Windows (ANNEXE B)
- 71 -
P.B.M. S.r.l.
ALFA PROGETTI S.r.l.
Via Barella Z.I. VIGNOLA (MO) ITALIA
Tel. +39 059 77 05 311 Fax +39 059 77 05 300
http://www.gruppopbm.it e-mail: [email protected]
Via Dei Fabbri 42. SPILAMBERTO (MO) ITALIA
Tel. +39 059 78 57 26 Fax +39 059 78 57 37
http://www.alfaprogetti.com e-mail: [email protected]
MANUALE DI ISTRUZIONI "Software BLTView”
Rev. n° 2 del 20/10/2009
File:BLTView_IT_GB_F_D_rev2_221009.doc
4.2.1 – TAB Programmation (TAB Program)
Les paramètres accessibles à partir de ce TAB sont ceux qui caractérisent le fonctionnement du
dispositif BLT160 et les modes d’obtention des données.
En fonction du niveau du mot de passe introduit, il est possible de lire et/ou d’écrire ces
paramètres.
Le tableau suivant décrit les champs individuels.
Le mot de passe nécessaire pour écrire est la méme du niveau utilisateur.
NOM CHAMPS
Paramètres Nominaux
Tension Batterie
Ah Batterie
Mode de travail
N. Cycles (NC)
ID Batterie
Remarques
Décharge
Courant de décharge
Temps de décharge
Tension de stop décharge
Temps de pause après décharge
DESCRIPTION
Valeur nominale tension batterie
Valeur nominale capacité batterie
Mode de test (consulter le Manuel Technique)
Nombre de cycles de charge et décharge
Numéro de série batterie
Remarques
Courant de décharge pendant le test
Durée phase de décharge
Tension à laquelle se termine la phase de décharge
Temps de pause à la fin de la phase de décharge
- 72 -
P.B.M. S.r.l.
ALFA PROGETTI S.r.l.
Via Barella Z.I. VIGNOLA (MO) ITALIA
Tel. +39 059 77 05 311 Fax +39 059 77 05 300
http://www.gruppopbm.it e-mail: [email protected]
Via Dei Fabbri 42. SPILAMBERTO (MO) ITALIA
Tel. +39 059 78 57 26 Fax +39 059 78 57 37
http://www.alfaprogetti.com e-mail: [email protected]
MANUALE DI ISTRUZIONI "Software BLTView”
Charge
% Major. Recharge
Tension de seuil
Temps minimum de charge
Temps maximum de charge
Temps de pause après charge
Autres Paramètres
Temps échantillonnage graphique
Langue
Rev. n° 2 del 20/10/2009
File:BLTView_IT_GB_F_D_rev2_221009.doc
Majoration de recharge
Tension à laquelle on passe de la 1° à la 2° phase
Durée minimale de la phase de charge
Durée maximale de la phase de charge
Temps de pause à la fin de la phase de charge
Temps d’échantillonnage pour les graphiques de tension et de courant
mémorisés
Sélection langue
Lorsque le mode de travail VCOST est programmé, il existe deux paramètres qui changent de
signification dans toutes les situations dans lesquelles ils sont rappelés (aussi bien on-line qu’offline):
Tension de stop décharge (V/el):
Tension de réglage (V)
Tension de référence constante
Courant de décharge (A):
Courant maximum de décharge (A)
Courant de décharge limite durant le test
4.2.1.1 - Réglage horloge
Pour régler le dateur du dispositif BLT160C, il suffit d’appuyer sur le bouton “Set clock” (Réglage Horloge).
Étant donné que l’opération transfère sur le dispositif la date et l’heure du PC, nous conseillons de vérifier que
le dateur du PC soit correctement réglé.
4.2.1.2 – Écriture paramètres généraux
Vérifier d'avoir introduit au moins le mot de passe du niveau utilisateur (Niveau 1)
Appuyer sur la touche “Re-programming” ("Modifier Programmation").
Après avoir modifié les paramètres, il faut, pour pouvoir les transférer, appuyer sur le bouton
“Transfer data to BLT160” ("Envoi des données au BLT160”).
En appuyant sur la touche “Cancel” ("Annuler"), les champs seront bloqués et la valeur précédente
sera relue par le dispositif BLT160.
- 73 -
P.B.M. S.r.l.
ALFA PROGETTI S.r.l.
Via Barella Z.I. VIGNOLA (MO) ITALIA
Tel. +39 059 77 05 311 Fax +39 059 77 05 300
http://www.gruppopbm.it e-mail: [email protected]
Via Dei Fabbri 42. SPILAMBERTO (MO) ITALIA
Tel. +39 059 78 57 26 Fax +39 059 78 57 37
http://www.alfaprogetti.com e-mail: [email protected]
MANUALE DI ISTRUZIONI "Software BLTView”
Rev. n° 2 del 20/10/2009
File:BLTView_IT_GB_F_D_rev2_221009.doc
4.2.2 – TAB Monitor
Le TAB Monitor permet d’accéder en temps réel aux principaux paramètres d’état et de
fonctionnement de la batterie.
Les sections suivantes sont présentes:
- A: niveau capacité en batterie
- B: indications phase de Décharge/Charge
- C: paramètres nominaux programmés sur le dispositif
- D: numéro du test et numéro du cycle actuel
- E: tension de batterie
- F: température du BLT160
B
C
A
D
E
F
Ø La touche “BLT160 Explorer” permet d'analyser les données d’off-line (voir chap. 5), et de
visualiser les données sauvegardées sur la Base de données.
Ø La touche “Data download” (“Download données”) permet de lire les données présentes dans
la mémoire du BLT160 et de les sauvegarder dans la Base de données du PC (voir § 4.2.7).
Ø La touche “Close” ("Fermer") renvoie à la page principale et ferme la section on-line.
- 74 -
P.B.M. S.r.l.
ALFA PROGETTI S.r.l.
Via Barella Z.I. VIGNOLA (MO) ITALIA
Tel. +39 059 77 05 311 Fax +39 059 77 05 300
http://www.gruppopbm.it e-mail: [email protected]
Via Dei Fabbri 42. SPILAMBERTO (MO) ITALIA
Tel. +39 059 78 57 26 Fax +39 059 78 57 37
http://www.alfaprogetti.com e-mail: [email protected]
MANUALE DI ISTRUZIONI "Software BLTView”
Rev. n° 2 del 20/10/2009
File:BLTView_IT_GB_F_D_rev2_221009.doc
4.2.3 – TAB Info
Le TAB Info permet d’accéder en temps réel aux paramètres d’état et de fonctionnement détaillés
du test.
Les sections suivantes sont présentes:
- A: numéro test
- B: numéro cycle du test
- C: paramètres nominaux
- D: données de décharge
- E: données de charge
- F: liste des anomalies activées
C
A
E
B
D
F
Ø La touche d'impression envoie les données affichées à l'écran au dispositif d'impression
prédéfini.
Ø La touche “BLT160 Explorer” permet d'analyser les données d’off-line (voir chap. 5).
Ø La touche “Data download” (“Download données”) permet de lire les données présentes dans
la mémoire du BLT160 (voir § 4.2.7).
Ø La touche “Close” ("Fermer") renvoie à la page principale et ferme la section on-line.
Le tableau décrit les champs individuels.
NOM CHAMP
Numéro test
Numéro cycle
Valeurs programmées
Remarques
ID BAT
DESCRIPTION
Numéro test actuel
Numéro cycle actuel
Remarques programmées dans la page Programmation
Numéro de série batterie programmée dans la page Programmation
- 75 -
P.B.M. S.r.l.
ALFA PROGETTI S.r.l.
Via Barella Z.I. VIGNOLA (MO) ITALIA
Tel. +39 059 77 05 311 Fax +39 059 77 05 300
http://www.gruppopbm.it e-mail: [email protected]
Via Dei Fabbri 42. SPILAMBERTO (MO) ITALIA
Tel. +39 059 78 57 26 Fax +39 059 78 57 37
http://www.alfaprogetti.com e-mail: [email protected]
MANUALE DI ISTRUZIONI "Software BLTView”
Tension Nominale
Capacité Nominale
Courant de décharge
Temps de décharge
Temps de stop décharge (V/el)
Mode de travail
Version Firmware
Données de Décharge
Début Décharge
Temps de Décharge
Temps de pause après Décharge
Capacité en Début de Cycle
Capacité Déchargée
Capacité en Fin de Décharge
Efficacité
Tension Minimale (décharge)
Température interne max électronique
Données de Charge
Début Charge
Durée phases (1^)
Durée phases (2^)
Temps total de la Charge
Temps de Pause après Charge
Capacité Début Charge
Capacité Chargée 1^ Phase
Capacité Chargées 2^ Phase
Capacité Totale Chargée
Majoration de Recharge
Capacité en Fin de Charge
Tension Maximale (charge)
Courant Maximum (charge)
Courant de Fin de Charge
Rev. n° 2 del 20/10/2009
File:BLTView_IT_GB_F_D_rev2_221009.doc
Valeur nominale tension batterie
Valeur nominale capacité batterie
Courant de décharge
Durée de la décharge
Temps après lequel la phase de décharge se termine
Modalité de test (consulter le Manuel Technique)
Version firmware BLT160
Date et heure de début décharge
Temps total de toutes les phases de décharge (courant de décharge > 0)
Temps total de pause pendant la décharge
Capacitè en batterie au début de la décharge
Capacitè totale déchargée
Capacitè résiduelle en batterie à la fin de la phase de décharge
Efficacité batterie exprimée en pourcentage
Tension minimale pendant la phase de décharge
Température de l’électronique
Date et heure de début charge
Temps total des phases de charge (courant de charge > 0) avec tension de
batterie < “Tension de seuil” (voir programmation)
Temps total des phases de charge (courant de charge > 0) avec tension de
batterie ≥ “Tension de seuil” (voir programmation)
Temps total de toutes les phases de charge (courant de charge > 0)
Temps total de pause pendant la charge
Capacitè en batterie au début de la recharge
Capacitè totale des phases de charge (courant de charge > 0) avec tension de
batterie < “Tension de seuil” (voir programmation)
Capacitè totale chargée des phases de charge (courant de charge > 0) avec
tension de batterie ≥ “Tension de seuil” (voir programmation)
Capacitè totale des phases de charge (courant de charge > 0)
Majoration en pourcentage entre capacité chargée et capacité complétée
Capacitè en batterie à la fin de la phase de recharge
Tension maximale pendant la phase de recharge
Courant de charge maximale
Courant de charge un instant avant de bloquer la recharge
4.2.3.1 Liste des anomalies
Consulter le Manuel Technique du BLT160
- 76 -
P.B.M. S.r.l.
ALFA PROGETTI S.r.l.
Via Barella Z.I. VIGNOLA (MO) ITALIA
Tel. +39 059 77 05 311 Fax +39 059 77 05 300
http://www.gruppopbm.it e-mail: [email protected]
Via Dei Fabbri 42. SPILAMBERTO (MO) ITALIA
Tel. +39 059 78 57 26 Fax +39 059 78 57 37
http://www.alfaprogetti.com e-mail: [email protected]
MANUALE DI ISTRUZIONI "Software BLTView”
Rev. n° 2 del 20/10/2009
File:BLTView_IT_GB_F_D_rev2_221009.doc
4.2.5 – TAB Graphique
Depuis le TAB Graphique on peut visualiser la stabilité du courant et de la tension, du cycle en
cours. Le graphique est lu automatiquement par le pc.
Il est mis à jour à chaque échantillonnage configuré en programmation avec un retard maximum
de dix secondes.
La capacité maximum du graphique est celle autorisée par le dispositif branché. Consulter donc le
manuel technique du BLT160.
On localise les sections suivantes:
- A: graphique courant du cycle sélectionné
- B: graphique tension du cycle sélectionné
A
B
Ø Dans chacun des deux graphiques il y a trois touches:
- la loupe: permet de sélectionner une zone du graphique qui sera agrandie
- la feuille blanche avec loupe: permet de visualiser l'avant-première d'impression
- l’imprimante: envoie au dispositif prédéfini l'impression de la visualisation
Ø La touche "CSV" permet d'exporter les échantillons relevés, aussi bien de tension que de
courant, sous forme de fichier de texte avec des délimités (*.csv). On lui donne un nom
prédéfini, qui peut être changé au plaisir.
Ø La touche “BLT160 Explorer” permet d'analyser les données d'off-line (voir chap. 5).
Ø La touche “Data download” (“Download données”) permet de lire les données présentes dans
la mémoire du BLT160 (voir § 4.2.7).
Ø La touche “Close” ("Fermer") renvoie à la page principale et ferme la section on-line.
- 77 -
P.B.M. S.r.l.
ALFA PROGETTI S.r.l.
Via Barella Z.I. VIGNOLA (MO) ITALIA
Tel. +39 059 77 05 311 Fax +39 059 77 05 300
http://www.gruppopbm.it e-mail: [email protected]
Via Dei Fabbri 42. SPILAMBERTO (MO) ITALIA
Tel. +39 059 78 57 26 Fax +39 059 78 57 37
http://www.alfaprogetti.com e-mail: [email protected]
MANUALE DI ISTRUZIONI "Software BLTView”
Rev. n° 2 del 20/10/2009
File:BLTView_IT_GB_F_D_rev2_221009.doc
4.2.6 – TAB Recorder
Cette fenêtre permet de visualiser la stabilité des courants et des tensions après être entré en
modalité on-line, indépendamment du nombre de tests et de cycles.
Les grandeurs relevées sont:
- Courant de charge (+) ou de décharge (-)
- Courant de décharge nominale programmée (-)
- Tension de batterie
- Tension nominale de batterie programmée
- Tension de seuil en charge programmée
- Tension de stop en décharge programmée
Un enregistrement toutes les six secondes est en moyenne effectué.
La capacité du graphique est de 54000 échantillons, égal à 90 heures.
L'échantillon Nº 54001 écrase l'échantillon Nº 1)
Si l'on abandonne une section puis on la reprend après quelques temps, les nouvelles données
seront ajoutées à celles déjà présentes.
Pour faire repartir de "zéro" le graphique il faut le remettre à zéro manuellement en appuyant sur la
touche “Reset Recorder” placée en bas. Cette opération n'efface pas les données relevées
précédemment, mais elle les enregistre sur un fichier avec un nom prédéfini, de façon à pouvoir
les consulter successivement grâce à la touche “Recorder Old” ou grâce au menu “ArchiviRecorder Old” (“Archives-Recorder Old”) depuis la fenêtre principale (voir § 5.5).
On localise les sections suivantes:
- A: graphique des courants
- B: graphique des tensions
A
B
- 78 -
P.B.M. S.r.l.
ALFA PROGETTI S.r.l.
Via Barella Z.I. VIGNOLA (MO) ITALIA
Tel. +39 059 77 05 311 Fax +39 059 77 05 300
http://www.gruppopbm.it e-mail: [email protected]
Via Dei Fabbri 42. SPILAMBERTO (MO) ITALIA
Tel. +39 059 78 57 26 Fax +39 059 78 57 37
http://www.alfaprogetti.com e-mail: [email protected]
MANUALE DI ISTRUZIONI "Software BLTView”
Rev. n° 2 del 20/10/2009
File:BLTView_IT_GB_F_D_rev2_221009.doc
Ø Dans chacun des deux graphiques il y a trois touches:
- la loupe: permet de sélectionner une zone du graphique qui sera agrandie
- la feuille blanche avec loupe: permet de visualiser l'avant-première d'impression
- l’imprimante: envoie au dispositif prédéfini l'impression de la visualisation
Ø La touche "CSV" permet d'exporter les échantillons relevés, aussi bien de tension que de
courant, sous forme de fichier de texte avec des délimités (*.csv). On lui donne un nom
prédéfini, qui peut être changé au plaisir.
Ø La touche “Recorder Old” permet de relire les donnée mémorisées en fichiers spécifiques (voir
§ 5.5).
Ø La touche “Reset Recorder” initialise l'enregistrement d'un nouveau recorder et le mémorise
dans un fichier spécifique.
Ø La touche “BLT160 Explorer” permet d'analyser les données d'off-line (voir chap. 5.1).
Ø La touche “Data download” (“Download données”) permet de lire les données présentes dans
la mémoire du BLT160 (voir § 4.2.7).
Ø La touche “Close” ("Fermer") renvoie à la page principale et ferme la section on-line.
4.2.7 – Download
En appuyant sur la touche “DATA OWNLOAD” (“DOWNLOAD DONNEES”) on obtient la
présentation de la fenêtre de sélection du CLIENT auprès duquel est effectué le test et de
l'OPERATEUR qui en est chargé.
I campi richiesti sono obbligatori, in quanto serviranno per la ricerca dei dati storicizzati.
Dopo la selezione verificare i campi selezionati e premere il tasto “Data download”
Si l'on lit et par conséquent on historicise des données dont l'association est erronée, on peut en
effectuer la correction en utilisant l'instrument off-line de “modify association” (“modification des
associations” (voir §5.3).
Ø La touche “New” (“Nouveau”) permet d'introduire un nouveau client/opérateur.
Ø La touche “Modify” (“Modifier”) permet de changer le nom d'un client/opérateur (si celui-ci n'a
pas encore été utilisé dans la base de données).
Ø La touche “Cancel” (“Eliminer”) permet d'enlever le nom d'un client/opérateur (si celui-ci n'a pas
encore été utilisé dans la base de données).
Ø La toucher “Cancel” (“Fermer”) renvoie à la page on-line.
- 79 -
P.B.M. S.r.l.
ALFA PROGETTI S.r.l.
Via Barella Z.I. VIGNOLA (MO) ITALIA
Tel. +39 059 77 05 311 Fax +39 059 77 05 300
http://www.gruppopbm.it e-mail: [email protected]
Via Dei Fabbri 42. SPILAMBERTO (MO) ITALIA
Tel. +39 059 78 57 26 Fax +39 059 78 57 37
http://www.alfaprogetti.com e-mail: [email protected]
MANUALE DI ISTRUZIONI "Software BLTView”
Rev. n° 2 del 20/10/2009
File:BLTView_IT_GB_F_D_rev2_221009.doc
5 – Consultazione dati OLD
Après avoir mémorisé les données de travail, on peut consulter l'off-line.
Grâce au menu “Archive” (“Archives”) on peut activer les fonctions de consultations et de gestion.
Consultation
Modification des données des clients et des opérateurs
Modifications des associations
Lecture des données relatives aux cycles de tests sauvegardées sur les autres fichiers
Lecture des données relatives aux diagrammes “recorder” historicisés
-
5.1 – BLT160 Explorer
A partir du menu “Archive” (“Archives”) ou avec la touche de la page principale ou des pages online, sélectionner l'option “BLT 160 Explorer” pour accéder à la consultation des données
historicisées.
5.1.1 – TAB Dati OLD
La fenêtre des Data Old (Données Old) affiche les données principales du cycle de travail
sélectionné.
A
B
C
D
E
F
Les sections suivantes sont présentes:
- 80 -
P.B.M. S.r.l.
ALFA PROGETTI S.r.l.
Via Barella Z.I. VIGNOLA (MO) ITALIA
Tel. +39 059 77 05 311 Fax +39 059 77 05 300
http://www.gruppopbm.it e-mail: [email protected]
Via Dei Fabbri 42. SPILAMBERTO (MO) ITALIA
Tel. +39 059 78 57 26 Fax +39 059 78 57 37
http://www.alfaprogetti.com e-mail: [email protected]
MANUALE DI ISTRUZIONI "Software BLTView”
-
Rev. n° 2 del 20/10/2009
File:BLTView_IT_GB_F_D_rev2_221009.doc
A: sélection des données: Client, Opérateur, Numéro de matricule BLT 160, Indentificateur
de Batterie, Nombre de Tests, Donnée de démarrage du Test
B: Numéro du cycle sélectionné
C: données de la plaquette
D: données de charge
E: données de décharge
F: instruments de sélection cycle
La phase de décharge est visible:
a) quand la phase de décharge du cycle a commencé (donnée de démarrage décharge
correctement enregistrée)
b) quand le paramètre N CICLI (N CYCLES) est égale à 0
c) quand le paramètre N CICLI (N CYCLES) est supérieur à 0 et le cycle sélectionné est
supérieur à 0.
La phase de charge est visible:
a) quand la phase de charge du cycle a commencé (donnée de démarrage charge
correctement enregistrée)
b) quand le paramètre N CICLI (N CYCLES) est supérieur à 0
5.1.2 – TAB Info OLD
La fenêtre Info Old affiche les détails des données du cycle de travail sélectionné.
A
B
C
D
E
F
G
On localise les sections suivantes:
- A: sélection des données: Client, Opérateur, Numéro de matricule BLT 160, Indentificateur
de Batterie, Nombre de Tests, Donnée de démarrage du Test
- B: Numéro du cycle sélectionné
- C: données de la plaquette
- D: données récapitulatives
- 81 -
P.B.M. S.r.l.
ALFA PROGETTI S.r.l.
Via Barella Z.I. VIGNOLA (MO) ITALIA
Tel. +39 059 77 05 311 Fax +39 059 77 05 300
http://www.gruppopbm.it e-mail: [email protected]
Via Dei Fabbri 42. SPILAMBERTO (MO) ITALIA
Tel. +39 059 78 57 26 Fax +39 059 78 57 37
http://www.alfaprogetti.com e-mail: [email protected]
MANUALE DI ISTRUZIONI "Software BLTView”
-
Rev. n° 2 del 20/10/2009
File:BLTView_IT_GB_F_D_rev2_221009.doc
E: données récapitulatives de décharge
F: liste des anomalies relevées
G: instruments de sélection cycle
La phase de décharge est visible:
a) quand la phase de décharge du cycle a commencé (donnée de démarrage décharge
correctement enregistrée)
b) quand le paramètre N CICLI (N CYCLES) est égale à 0
c) quand le paramètre N CICLI (N CYCLES) est supérieur à 0 et le cycle sélectionné est
supérieur à 0.
La phase de charge est visible:
a) quand la phase de charge du cycle a commencé (donnée de démarrage charge
correctement enregistrée)
b) quand le paramètre N CICLI (N CYCLES) est supérieur à 0
Ø La touche d'impression envoie les données affichées au dispositif prédéfini
Ø La toucher “Close” (“Fermer”) ferme la section off-line.
5.1.3 – TAB Graphique OLD
Depuis le TAB Graphique on peut visualiser la stabilité du courant et de la tension, du cycle
sélectionné.
La capacité maximum du graphique est celle autorisée par le dispositif branché. Consulter donc le
manuel technique du BLT160.
Le temps avec lequel les données ont été échantillonnées peut être relevé en consultant le champ
“Graph sampling time” (“Temps Echantillonnage Graphique”) du tab “programming”
(“programmation”) (qui ne peut être modifié durant le cycle).
On localise les sections suivantes:
- A: graphique tension du cycle sélectionné
- B: graphique courant du cycle sélectionné
- C: instruments de sélection cycle
A
B
C
- 82 -
P.B.M. S.r.l.
ALFA PROGETTI S.r.l.
Via Barella Z.I. VIGNOLA (MO) ITALIA
Tel. +39 059 77 05 311 Fax +39 059 77 05 300
http://www.gruppopbm.it e-mail: [email protected]
Via Dei Fabbri 42. SPILAMBERTO (MO) ITALIA
Tel. +39 059 78 57 26 Fax +39 059 78 57 37
http://www.alfaprogetti.com e-mail: [email protected]
MANUALE DI ISTRUZIONI "Software BLTView”
Rev. n° 2 del 20/10/2009
File:BLTView_IT_GB_F_D_rev2_221009.doc
Ø La touche "CSV" permet d'exporter les échantillons relevés, aussi bien de tension que de
courant, sous forme de fichier de texte avec des délimités (*.csv). On lui donne un nom
prédéfini, qui peut être changé au plaisir.
Ø La toucher “Close” (“Fermer”) ferme la section off-line.
5.1.4 – TAB Moyennes
Cette section permet d'analyser la bonne charge de la tension maximum et minimum d'une batterie
en fonction des cycles sélectionnés.
A
B
C
D
E
On localise les sections suivantes:
- A: sélection des données: Client, Opérateur, Numéro de matricule BLT 160, Indentificateur
de Batterie, Nombre de Tests, Donnée de démarrage du Test
- B: Tableau des données de référence des cycles sélectionnés
- C: boutons de sélection des cycles à analyser
- D: données moyennes relatives aux cycles sélectionnés
- E: instruments de sélection cycle
Ø
Ø
Ø
Ø
Ø
Ø
La touche “+++” permet de sélectionner tous les cycles d'une batterie
La touche “++” permet de sélectionner tous les cycles d'un test
La touche “+” permet de sélectionner un cycle
La touche “-” permet de désélectionner un cycle
La touche “wastebasket” (“poubelle”) permet de tout désélectionner
La touche “grafico” (“graph”) présente les données sélectionnées sous forme de graphique.
Voir § 5.1.4.1
Ø La touche d'impression envoie les données affichées au dispositif prédéfini
Ø La toucher “Close” (“Fermer”) ferme la section off-line.
- 83 -
P.B.M. S.r.l.
ALFA PROGETTI S.r.l.
Via Barella Z.I. VIGNOLA (MO) ITALIA
Tel. +39 059 77 05 311 Fax +39 059 77 05 300
http://www.gruppopbm.it e-mail: [email protected]
Via Dei Fabbri 42. SPILAMBERTO (MO) ITALIA
Tel. +39 059 78 57 26 Fax +39 059 78 57 37
http://www.alfaprogetti.com e-mail: [email protected]
MANUALE DI ISTRUZIONI "Software BLTView”
Rev. n° 2 del 20/10/2009
File:BLTView_IT_GB_F_D_rev2_221009.doc
5.1.4.1 – TAB Moyennes – graphique
A partir de TAB moyennes, par l'intermédiaire de la touche “graph” (“graphique”) on peut visualiser
la bonne charge de la tension maximum et minimum d'une batterie en fonction des cycles
sélectionnés.
Ø Dans chacun des deux graphiques il y a trois touches:
- loupe: permet de sélectionner une zone du graphique qui sera agrandie
- feuille blanche avec loupe: permet de visualiser l'avant-première d'impression
- imprimante: envoie au dispositif prédéfini l'impression de la visualisation
Ø La touche “Close” (“Fermer”) renvoie à TAB Moyennes.
- 84 -
P.B.M. S.r.l.
ALFA PROGETTI S.r.l.
Via Barella Z.I. VIGNOLA (MO) ITALIA
Tel. +39 059 77 05 311 Fax +39 059 77 05 300
http://www.gruppopbm.it e-mail: [email protected]
Via Dei Fabbri 42. SPILAMBERTO (MO) ITALIA
Tel. +39 059 78 57 26 Fax +39 059 78 57 37
http://www.alfaprogetti.com e-mail: [email protected]
MANUALE DI ISTRUZIONI "Software BLTView”
Rev. n° 2 del 20/10/2009
File:BLTView_IT_GB_F_D_rev2_221009.doc
5.1.5 – TAB Programmation
A partir de TAB Programming (TAB Programmation) on accède aux paramètres de programmation
relatifs au cycle sélectionné.
En ce qui concerne la signification des champs, consulter le § 4.2.1de la programmation on-line.
Ø La touche d'impression envoie les données affichées au dispositif prédéfini
Ø La toucher “Close” (“Fermer”) ferme la section off-line.
- 85 -
P.B.M. S.r.l.
ALFA PROGETTI S.r.l.
Via Barella Z.I. VIGNOLA (MO) ITALIA
Tel. +39 059 77 05 311 Fax +39 059 77 05 300
http://www.gruppopbm.it e-mail: [email protected]
Via Dei Fabbri 42. SPILAMBERTO (MO) ITALIA
Tel. +39 059 78 57 26 Fax +39 059 78 57 37
http://www.alfaprogetti.com e-mail: [email protected]
MANUALE DI ISTRUZIONI "Software BLTView”
Rev. n° 2 del 20/10/2009
File:BLTView_IT_GB_F_D_rev2_221009.doc
5.1.6 – TAB Archives
Cette section permet d'archiver les données présentes dans la base de données de référence
dans d'autres positions.
Ceci peut être utile pour les raisons principales suivantes:
- réduction des dimensions de la base de données de référence pour accélérer les
opérations de celle-ci.
- back-up uniquement des données qui concernent les analyses de tiers.
- déplacement uniquement des données qui n'intéressent plus pour une éventuelle
élimination définitive.
A
B
C
D
On localise les sections suivantes:
- A: sélection des données
- B: boutons de sélection des cycles à archiver
- C: tableau des données sélectionnées pour la mise aux archives
- D: nombre d'éléments archivés
Ø
Ø
Ø
Ø
Ø
La touche “+++” permet de sélectionner tous les cycles d'une batterie
La touche “++” permet de sélectionner tous les cycles d'un test
La touche “+” permet de sélectionner un cycle
La touche “-” permet de désélectionner un cycle
La touche “wastebasket” (“poubelle”) permet de tout
désélectionner
Ø La touche “Archive” (“Archiver”) permet d'ouvrir une fenêtre
pour choisir le nom du fichier à l'intérieur duquel archiver les
Ø données sélectionnées.
- 86 -
P.B.M. S.r.l.
ALFA PROGETTI S.r.l.
Via Barella Z.I. VIGNOLA (MO) ITALIA
Tel. +39 059 77 05 311 Fax +39 059 77 05 300
http://www.gruppopbm.it e-mail: [email protected]
Via Dei Fabbri 42. SPILAMBERTO (MO) ITALIA
Tel. +39 059 78 57 26 Fax +39 059 78 57 37
http://www.alfaprogetti.com e-mail: [email protected]
MANUALE DI ISTRUZIONI "Software BLTView”
Rev. n° 2 del 20/10/2009
File:BLTView_IT_GB_F_D_rev2_221009.doc
Pour faciliter le choix, une position et un nom est prédéfini en fonction de la date de l'opération.
Ø La toucher “Close” (“Fermer”) ferme la section off-line.
5.2 – Données Clients/Opérateurs
A partir du menu “Archive” (“Archives”) ou en appuyant sur la touche spécifique, sélectionner
l'option “Customer/Operator data” pour accéder aux données des clients et des opérateurs
auxquels associer les données mémorisées par le dispositif BLT160.
Ø La touche “New” (“Nouveau”) permet d'introduire un nouveau client/opérateur.
Ø La touche “Modify” (“Modifier”) permet de changer le nom d'un client/opérateur (si celui-ci n'a
pas encore été utilisé dans la base de données).
Ø La touche “Cancel” (“Eliminer”) permet d'enlever le nom d'un client/opérateur (si celui-ci n'a pas
encore été utilisé dans la base de données).
Ø La touche “Close” (“Fermer”) renvoie à la page principale.
- 87 -
P.B.M. S.r.l.
ALFA PROGETTI S.r.l.
Via Barella Z.I. VIGNOLA (MO) ITALIA
Tel. +39 059 77 05 311 Fax +39 059 77 05 300
http://www.gruppopbm.it e-mail: [email protected]
Via Dei Fabbri 42. SPILAMBERTO (MO) ITALIA
Tel. +39 059 78 57 26 Fax +39 059 78 57 37
http://www.alfaprogetti.com e-mail: [email protected]
MANUALE DI ISTRUZIONI "Software BLTView”
Rev. n° 2 del 20/10/2009
File:BLTView_IT_GB_F_D_rev2_221009.doc
5.3 – Modifications des associations
A partir du menu “Archive” (“Archives”) ou avec la touche spécifique, sélectionner l'option
“Associations modify” (“Modification des Associations”) pour accéder à la section de modification
des associations des données téléchargées par le BLT160.
A
B
C
D
Avant la modification des associations
Après la modification des associations
On localise les sections suivantes:
- A: menu de sélection des tests dans le associations actuelles
- B: touche de sélection configuration donnée Clients/Opérateurs (voir § 5.2)
- C: menu de sélection de la nouvelle association
- D: touche d'exécution des associations comme sélectionnées
PROCEDURE POUR LA MODIFICATION:
-
A partir de la sélection “CURRENT ASSOCIATIONS” (“ASSOCIATIONS ACTUELLES”),
sélectionner les TESTS dont on souhaite modifier les associations. On peut sélectionner un
TEST à la fois, ou bien on peut effectuer la sélection multiple en maintenant la touche
SHIFT appuyée
-
La section “NEW ASSOCIATIONS” (“NOUVELLES ASSOCIATIONS”) permet de
sélectionner et/ou d'introduire de nouvelles associations auxquelles seront associés les
TESTS
-
Appuyer sur la touche “MODIFY ASSOCIATIONS” ("MODIFIER ASSOCIATIONS").
-
Dans la section “NEW ASSOCIATIONS” (“NOUVELLES ASSOCIATIONS”) seront
visualisées les TESTS déplacés
- 88 -
P.B.M. S.r.l.
ALFA PROGETTI S.r.l.
Via Barella Z.I. VIGNOLA (MO) ITALIA
Tel. +39 059 77 05 311 Fax +39 059 77 05 300
http://www.gruppopbm.it e-mail: [email protected]
Via Dei Fabbri 42. SPILAMBERTO (MO) ITALIA
Tel. +39 059 78 57 26 Fax +39 059 78 57 37
http://www.alfaprogetti.com e-mail: [email protected]
MANUALE DI ISTRUZIONI "Software BLTView”
Rev. n° 2 del 20/10/2009
File:BLTView_IT_GB_F_D_rev2_221009.doc
5.4 –Sélectionner la base de donnée
A partir du menu “Archive” (“Archives”) ou en appuyant sur la touche spécifique, sélectionner
l'option “Select Database“ ( Sélectionner la base de donnée) pour accéder aux bases de données
historicisées.
A
B
C
-
A: parcours base de données sélectionné
B: touche pour sélectionner la base de donnée historicisée
C: précharge la base de donnée de défaut
Après avoir sélectionné la base de donnée historicisée, seulement les fonctions d'exploration offline sont activées, jusqu'au rétablissement de la base de donnée de défaut.
- 89 -
P.B.M. S.r.l.
ALFA PROGETTI S.r.l.
Via Barella Z.I. VIGNOLA (MO) ITALIA
Tel. +39 059 77 05 311 Fax +39 059 77 05 300
http://www.gruppopbm.it e-mail: [email protected]
Via Dei Fabbri 42. SPILAMBERTO (MO) ITALIA
Tel. +39 059 78 57 26 Fax +39 059 78 57 37
http://www.alfaprogetti.com e-mail: [email protected]
MANUALE DI ISTRUZIONI "Software BLTView”
Rev. n° 2 del 20/10/2009
File:BLTView_IT_GB_F_D_rev2_221009.doc
5.5 – Recorder OLD
A partir du menu “Archive” (“Archives”), sélectionner l'option “Recorder OLD” pour accéder aux
bases de données des recorders historicisés.
B
A
C
D
On localise les sections suivantes:
-
A: parcours base de données sélectionné
B: touche pour sélectionner de nouveau un “recorder” historicisé
C: graphique des courants (charge/décharge relevée, décharge programmée)
D: graphique des tensions (relevée, nominale programmée, seuil gaz programmé, seuil de
stop programmé)
- 90 -
P.B.M. S.r.l.
ALFA PROGETTI S.r.l.
Via Barella Z.I. VIGNOLA (MO) ITALIA
Tel. +39 059 77 05 311 Fax +39 059 77 05 300
http://www.gruppopbm.it e-mail: [email protected]
Via Dei Fabbri 42. SPILAMBERTO (MO) ITALIA
Tel. +39 059 78 57 26 Fax +39 059 78 57 37
http://www.alfaprogetti.com e-mail: [email protected]
MANUALE DI ISTRUZIONI "Software BLTView”
Rev. n° 2 del 20/10/2009
File:BLTView_IT_GB_F_D_rev2_221009.doc
ANNEXE A
Utilisation du programme DFU
Le programme DFU a pour fonction d’exécuter la mise à jour du firmware du BLT160.
Pour effectuer la mise à jour, il faut disposer d’une copie du fichier de mise à jour (.hex) sur le PC.
-
-
Brancher le BLT160 au PC en utilisant le cordon de connexion sériel
Lancer le programme DFU
Sélectionner le port sériel associé au BLT160. Dans le cas d'une connexion par ligne USB,
localiser le numéro du port attribué par Windows: Panneau de configuration de Windows ->
Gestionnaire des périphériques -> Ports (COM et LPT)
Appuyer sur le bouton “Open ‘HEX’” et sélectionner le fichier de mise à jour
Eteindre le BLT160 et débrancher le câble USB
Brancher câble USB au BLT160 en le maintenant la touche STAR/STOP du BLT160
appuyée
Après 2 secondes relâcher le bouton STAR/STOP
A partir du logiciel DFU appuyer sur le bouton “Upload” dans les 8 sec. qui suivent la mise
à jour. La barre d'avancement indique l'état de la mise à jour.
À la fin de la mise à jour, le dispositif BLT160 relance automatiquement ses propres fonctions.
La figure met en évidence les parties suivantes:
-
A: Bouton “Ouvrir ‘HEX’”
B: Bouton Transférer/Interrompre
C: Sélection port série
A
B
C
- 91 -
P.B.M. S.r.l.
ALFA PROGETTI S.r.l.
Via Barella Z.I. VIGNOLA (MO) ITALIA
Tel. +39 059 77 05 311 Fax +39 059 77 05 300
http://www.gruppopbm.it e-mail: [email protected]
Via Dei Fabbri 42. SPILAMBERTO (MO) ITALIA
Tel. +39 059 78 57 26 Fax +39 059 78 57 37
http://www.alfaprogetti.com e-mail: [email protected]
MANUALE DI ISTRUZIONI "Software BLTView”
Rev. n° 2 del 20/10/2009
File:BLTView_IT_GB_F_D_rev2_221009.doc
ANNEXE B
Installation driver USB
B1 - Installation DRIVER communication USB sur Windows XP
1) Insérer le câble USB dans le port USB de
l’ordinateur et dans le BLT160. Le nouvel
hardware sera détecté
2) Suivre les pas de l’installation guidée de
Windows, en sélectionnant:
“Installa da un elenco o percorso
specifico (per utenti esperti)”
(Installer depuis une liste ou un parcours
spécifique - pour utilisateurs experts)
Appuyer sur “Avanti” (Continuer)
3) Sélectionner:
“Ricerca il miglior driver disponibile in
questi percorsi”
(Rechercher le meilleur driver disponible
dans ces parcours)
Cocher la case:
“Includi il seguente percorso nella ricerca”
(Inclure le parcours suivant dans la
recherche)
Appuyer sur la touche “Sfoglia” (Effeuiller) et
sélectionner le parcours où se trouve le driver.
“C:\Programmi\BLTView\Drivers” (parcours créé
pendant l’installation de BLTView).
Appuyer sur ““Avanti” (Continuer).
- 92 -
P.B.M. S.r.l.
ALFA PROGETTI S.r.l.
Via Barella Z.I. VIGNOLA (MO) ITALIA
Tel. +39 059 77 05 311 Fax +39 059 77 05 300
http://www.gruppopbm.it e-mail: [email protected]
Via Dei Fabbri 42. SPILAMBERTO (MO) ITALIA
Tel. +39 059 78 57 26 Fax +39 059 78 57 37
http://www.alfaprogetti.com e-mail: [email protected]
MANUALE DI ISTRUZIONI "Software BLTView”
Rev. n° 2 del 20/10/2009
File:BLTView_IT_GB_F_D_rev2_221009.doc
4) Attendre le démarrage de l’installation
5) Appuyer sur la touche “Continua” (Continuer)
6) Attendre la fin de l’installation
Appuyer sur la touche ““Fine” (Fin).
7) Appuyer avec la touche droite sur l’icône
“Risorse Del Computer” (Ressources de
l’Ordinateur”.
Appuyer sur l’entrée de menu: “Proprietà”
(Propriété).
- 93 -
P.B.M. S.r.l.
ALFA PROGETTI S.r.l.
Via Barella Z.I. VIGNOLA (MO) ITALIA
Tel. +39 059 77 05 311 Fax +39 059 77 05 300
http://www.gruppopbm.it e-mail: [email protected]
Via Dei Fabbri 42. SPILAMBERTO (MO) ITALIA
Tel. +39 059 78 57 26 Fax +39 059 78 57 37
http://www.alfaprogetti.com e-mail: [email protected]
MANUALE DI ISTRUZIONI "Software BLTView”
Rev. n° 2 del 20/10/2009
File:BLTView_IT_GB_F_D_rev2_221009.doc
8) Se déplacer dans la page “Hardware”
Appuyer sur “Gestione periferiche” (Gestion
périphériques).
9) Dans la liste, ouvrir l’entrée: “Porte (LPT e
COM)” (Ports (LPT et COM))
Vérifier que le port SmartIR USB-IRDA soit
correctement installé.
Le numéro de port est indiqué. Dans le cas en
figure, le numéro de port est COM7.
Fermer toutes les fenêtres
10) Ouvrir BLTView
Dans le menu principal, choisir “Impostazione”
(Réglage) et ensuite “Porta Seriale” (Port Série).
11) Sélectionner le port série souhaité et appuyer
sur la touche “Ok”.
- 94 -
P.B.M. S.r.l.
ALFA PROGETTI S.r.l.
Via Barella Z.I. VIGNOLA (MO) ITALIA
Tel. +39 059 77 05 311 Fax +39 059 77 05 300
http://www.gruppopbm.it e-mail: [email protected]
Via Dei Fabbri 42. SPILAMBERTO (MO) ITALIA
Tel. +39 059 78 57 26 Fax +39 059 78 57 37
http://www.alfaprogetti.com e-mail: [email protected]
MANUALE DI ISTRUZIONI "Software BLTView”
Rev. n° 2 del 20/10/2009
File:BLTView_IT_GB_F_D_rev2_221009.doc
B2 - Installation DRIVER communication USB sur Windows VISTA
1) Insérer le câble USB dans le port USB de
l’ordinateur et du BLT160. Le nouvel hardware
sera détecté.
2) Choisir les pas de l’installation guidée de
Windows, en sélectionnant:
“Individuare e installare il driver (scelta
consigliata)”
(Identifier et installer le driver - sélection
conseillée)
3) Appuyer sur:
“Cerca il software del driver nel
computer”
(Rechercher le logiciel du driver dans
l’ordinateur)
4) Appuyer sur la touche “Sfoglia” (Effeuiller) et
sélectionner le parcours où se trouve le driver.
“C:\Programmi\BLTView\Drivers” (parcours créé
pendant l’installation de BLTView).
Cocher la case:
“Includi sottocartelle”
(Inclure sous-dossiers)
Appuyer sur “Avanti“(Continuer)
- 95 -
P.B.M. S.r.l.
ALFA PROGETTI S.r.l.
Via Barella Z.I. VIGNOLA (MO) ITALIA
Tel. +39 059 77 05 311 Fax +39 059 77 05 300
http://www.gruppopbm.it e-mail: [email protected]
Via Dei Fabbri 42. SPILAMBERTO (MO) ITALIA
Tel. +39 059 78 57 26 Fax +39 059 78 57 37
http://www.alfaprogetti.com e-mail: [email protected]
MANUALE DI ISTRUZIONI "Software BLTView”
Rev. n° 2 del 20/10/2009
File:BLTView_IT_GB_F_D_rev2_221009.doc
5) Attendre le démarrage de l’installation
6) Appuyer sur la touche “Installa il software del
driver” (Installer le logiciel du driver).
7) Attendre la fin de l’installation
Appuyer sur la touche “Chiudi” (Fermer).
8) Appuyer avec la touche droite sur l’icône
“Risorse Del Computer” (Ressources de
l’Ordinateur).
Appuyer sur l’entrée de menu: “Proprietà”
(Propriété).
- 96 -
P.B.M. S.r.l.
ALFA PROGETTI S.r.l.
Via Barella Z.I. VIGNOLA (MO) ITALIA
Tel. +39 059 77 05 311 Fax +39 059 77 05 300
http://www.gruppopbm.it e-mail: [email protected]
Via Dei Fabbri 42. SPILAMBERTO (MO) ITALIA
Tel. +39 059 78 57 26 Fax +39 059 78 57 37
http://www.alfaprogetti.com e-mail: [email protected]
MANUALE DI ISTRUZIONI "Software BLTView”
Rev. n° 2 del 20/10/2009
File:BLTView_IT_GB_F_D_rev2_221009.doc
9) Appuyer sur l’entrée Gestione dispositivi”
(Gestion dispositifs).
Appuyer sur “Gestione periferiche”.
(Gestion périphériques).
10) Dans la liste, ouvrir l’entrée: “Porte (LPT e
COM)” (Ports LPT et COM).
Vérifier que le port SmartUSB soit correctement
installé.
Le numéro de port est indiqué. Dans le cas en
figure, le numéro de port est COM11.
Fermer toutes les fenêtres
11) Ouvrir BLTView
Dans le menu principal, choisir “Impostazione”
(Réglage) et ensuite “Porta Seriale” (Port Série).
12) Sélectionner le port série souhaité et
appuyer sur la touche “Ok”.
- 97 -
P.B.M. S.r.l.
ALFA PROGETTI S.r.l.
Via Barella Z.I. VIGNOLA (MO) ITALIA
Tel. +39 059 77 05 311 Fax +39 059 77 05 300
http://www.gruppopbm.it e-mail: [email protected]
Via Dei Fabbri 42. SPILAMBERTO (MO) ITALIA
Tel. +39 059 78 57 26 Fax +39 059 78 57 37
http://www.alfaprogetti.com e-mail: [email protected]
MANUALE DI ISTRUZIONI "Software BLTView”
Rev. n° 2 del 20/10/2009
File:BLTView_IT_GB_F_D_rev2_221009.doc
DEUTSCH
Inhalt
1 – Einführung .......................................................................................................................10099
2 – Installation........................................................................................................................10099
3 – Einstellungen ....................................................................................................................... 100
3.1 – Einstellung der Sprache ............................................................................................... 100
3.2 – Serieller Anschluss...................................................................................................... 101
3.3 – Konfiguration.............................................................................................................. 101
3.4 – Passwort-Eingabe ........................................................................................................ 102
4 – BLT160 in Verbindung....................................................................................................... 103
4.1 – Vorbereitung ............................................................................................................... 103
4.2 – Abfrage der Augenblicksdaten .................................................................................... 103
4.2.1 – Registerkarte Program .............................................................................................. 104
4.2.1.1 - Uhr-Einstellung .............................................................................................. 105
4.2.1.2 – Schreiben der allgemeinen Parameter....................................................... 105
4.2.2 – Registerkarte Monitor............................................................................................... 106
4.2.3 – Registerkarte Info ..................................................................................................... 107
4.2.3.1 Störungsliste..................................................................................................... 108
4.2.5 – Registerkarte Diagramm........................................................................................... 109
4.2.6 – Registerkarte Recorder ............................................................................................. 110
4.2.7 – Download................................................................................................................. 111
5 – OLD Datenabfrage.............................................................................................................. 112
5.1 – BLT 160 Explorer ....................................................................................................... 112
5.1.1 – Registerkarte Daten OLD ......................................................................................... 112
5.1.2 – Registerkarte Info OLD ............................................................................................ 113
5.1.3 – Registerkarte Diagramm OLD .................................................................................. 114
5.1.4 – Registerkarte Medien................................................................................................ 115
5.1.4.1 – Registerkarte Medien - Diagramm .................................................................... 116
5.1.5 – Registerkarte Program .............................................................................................. 117
5.1.6 – Registerkarte Averages............................................................................................. 118
5.2 – Die Meldedaten des Kunde/Benutzer........................................................................... 119
5.3 – Zuordnungen verändern............................................................................................... 120
5.4 –Wahl Datenbank........................................................................................................... 121
5.5 – Recorder OLD............................................................................................................. 122
ANHANG A .............................................................................................................................. 123
Benutzung des Programms DFU.............................................................................................. 123
ANHANG B............................................................................................................................... 124
Installation der USB-Treiber.................................................................................................... 124
B1 - Installation der USB-Kommunikationstreiber in Windows XP ..................................... 124
B2 - Installation der USB-Kommunikationstreiber in Windows VISTA ............................... 127
- 98 -
P.B.M. S.r.l.
ALFA PROGETTI S.r.l.
Via Barella Z.I. VIGNOLA (MO) ITALIA
Tel. +39 059 77 05 311 Fax +39 059 77 05 300
http://www.gruppopbm.it e-mail: [email protected]
Via Dei Fabbri 42. SPILAMBERTO (MO) ITALIA
Tel. +39 059 78 57 26 Fax +39 059 78 57 37
http://www.alfaprogetti.com e-mail: [email protected]
MANUALE DI ISTRUZIONI "Software BLTView”
Rev. n° 2 del 20/10/2009
File:BLTView_IT_GB_F_D_rev2_221009.doc
1 – Einführung
BLTVIEW ist ein Anwendungsprogramm für Windows 98 oder spätere Versionen, das für die
Kommunikation mit dem als BLT160 bezeichneten Batterietest- und Entladegerät realisiert wurde.
Das BLT160 kommuniziert mit dem PC über USB-Kabel. So kann die Funktionsweise des Geräts
individuell angepasst werden, indem die Daten der verwendeten Batterie und der gewünschten
Betriebsarten eingegeben werden.
Außerdem können alle Betriebsparameter in Echtzeit angezeigt und die in der lokalen Datenbank
gespeicherten Daten (in Form von Arbeitszyklen und in grafischer Form) auf den PC heruntergeladen werden. Danach können sie jederzeit eingesehen werden, ohne dass eine Verbindung über
den USB-Adapter erforderlich ist.
Das Programm BLTVIEW kann die Daten einer unbegrenzten Zahl von BLT160-Geräten
verwalten: Über ein einfaches Suchsystem können nur die Daten der interessierenden Geräte
gewählt und angezeigt werden.
Die mit BLTVIEW angezeigten Daten können mittels einer speziellen Taste gedruckt werden.
Mit dem Programm BLTVIEW wird ein Programm namens DFU geliefert, mit dem das Update der
Firmware auf dem BLT160 ausgeführt werden kann.
2 – Installation
Das Installationspaket von BLTVIEW wird mit dem Gerät BLT160 auf CD geliefert.
Erst-Installation
Zum erstmaligen Installieren des Pakets gehen Sie wie folgt vor:
-
Öffnen Sie den Ordner, in dem das Paket gespeichert ist, und öffnen Sie den
Unterordner „Disk1”.
Starten Sie das Programm Setup.exe und folgenden Sie den Anweisungen des
Installationsprogramms.
Am Ende finden Sie in der Programmleiste den Ordner BLTVIEW, von dem aus Sie die einzelnen
Elemente des Pakets aufrufen können. Außerdem wird auf dem Desktop ein Link zum Programm
BLT160View angelegt.
Wartung
Vor der Installation neuerer Versionen des Pakets muss die vorher installierte Version mithilfe der
von Windows zur Verfügung gestellten Mittel entfernt werden.
- 99 -
P.B.M. S.r.l.
ALFA PROGETTI S.r.l.
Via Barella Z.I. VIGNOLA (MO) ITALIA
Tel. +39 059 77 05 311 Fax +39 059 77 05 300
http://www.gruppopbm.it e-mail: [email protected]
Via Dei Fabbri 42. SPILAMBERTO (MO) ITALIA
Tel. +39 059 78 57 26 Fax +39 059 78 57 37
http://www.alfaprogetti.com e-mail: [email protected]
MANUALE DI ISTRUZIONI "Software BLTView”
Rev. n° 2 del 20/10/2009
File:BLTView_IT_GB_F_D_rev2_221009.doc
Nach dem Start des Programms BLTVIEW verfügt über ein Haupt-Seite, wo können Sie alle
Funktionen zu aktivieren.
3 – Einstellungen
Nach Aufruf des Menüs "Setup" können geändert werden
- Stufe für den Zugriff auf die Funktionen je nach eingegebenem Passwort
- Konfiguration der Passwörter für die verschiedenen Benutzerzugriffsstufen
- Serieller Kommunikationsanschluss
- Sprache der Software
3.1 – Einstellung der Sprache
Wählen Sie aus dem Menü „Setup“ den Eintrag „Set language“ und wählen Sie die gewünschte
Sprache.
Damit die Änderung der Sprache wirksam wird, muss das Programm neu gestartet werden.
- 100 -
P.B.M. S.r.l.
ALFA PROGETTI S.r.l.
Via Barella Z.I. VIGNOLA (MO) ITALIA
Tel. +39 059 77 05 311 Fax +39 059 77 05 300
http://www.gruppopbm.it e-mail: [email protected]
Via Dei Fabbri 42. SPILAMBERTO (MO) ITALIA
Tel. +39 059 78 57 26 Fax +39 059 78 57 37
http://www.alfaprogetti.com e-mail: [email protected]
MANUALE DI ISTRUZIONI "Software BLTView”
Rev. n° 2 del 20/10/2009
File:BLTView_IT_GB_F_D_rev2_221009.doc
3.2 – Serieller Anschluss
Wählen Sie aus dem Menü „Setup“ den Eintrag „Serial Port“ und rufen Sie die Konfigurationsmaske auf:
Wählen Sie „Auto“ für die automatische Suche des seriellen Anschlusses der Verbindung, oder wählen Sie
den verwendeten Anschluss, wenn dieser bereits bekannt ist.
HINWEISE:
- Je nachdem, wie das Betriebssystem die Nummern der seriellen Anschlüsse vergibt,
kann die automatische Suche bei jeder Verbindung einige Augenblicke dauern. In
diesen Fällen wird empfohlen, die Nummer des Anschlusses zu ermitteln (WindowsSystemsteuerung -> Geräte-Manager -> Anschlüsse (COM und LPT)) und zu wählen.
- Falls derselbe serielle Anschluss verwendet wird, kann die Anschluss-Nummer
festgelegt werden. So können Zeitverluste durch die automatische Suche vermieden
werden.
3.3 – Konfiguration
Das Programm BLTVIEW hat 3 verschiedene Passwort-Zugriffsstufen:
-
Kein Passwort:
§ Teilweiser Lesezugriff auf die Daten
§ Kein Schreibzugriff auf die Parameter der Zuordnungen
§ Möglichkeit zum Speichern von Zyklen und Diagrammen auf PC
§ Kein Schreibzugriff auf die Programmierparameter
§ Kein Zugriff auf die Eichparameter
-
Passwort-Ebene 1(Zugriffsstufe Benutzer):
§ Teilweiser Lesezugriff auf die Daten
§ Kein Schreibzugriff auf die Parameter der Zuordnungen
§ Möglichkeit zum Speichern von Zyklen und Diagrammen auf PC
§ Teilweiser Schreibzugriff auf die Programmierparameter
§ Kein Zugriff auf die Eichparameter
-
Passwort-Ebene 2 (Zugriffsstufe Technischer Support von PBM oder autorisierten):
§ Vollständiger Lesezugriff auf die Daten
§ Möglichkeit zum Speichern von Zyklen und Diagrammen auf PC
§ Vollständiger Schreibzugriff auf die Programmierparameter
§ Vollständiger Zugriff auf die Eichparameter
- 101 -
P.B.M. S.r.l.
ALFA PROGETTI S.r.l.
Via Barella Z.I. VIGNOLA (MO) ITALIA
Tel. +39 059 77 05 311 Fax +39 059 77 05 300
http://www.gruppopbm.it e-mail: [email protected]
Via Dei Fabbri 42. SPILAMBERTO (MO) ITALIA
Tel. +39 059 78 57 26 Fax +39 059 78 57 37
http://www.alfaprogetti.com e-mail: [email protected]
MANUALE DI ISTRUZIONI "Software BLTView”
Rev. n° 2 del 20/10/2009
File:BLTView_IT_GB_F_D_rev2_221009.doc
3.4 – Passwort-Eingabe
Wählen Sie im Menü "Setup" den Eintrag "Password input", um das Zugriffspasswort zu ändern.
-
Wählen Sie den Eintrag „Add password“ aus dem Menü „Setup“ oder drücken Sie die
Schaltfläche „Password“ und geben Sie Ihr Passwort ein.
Wählen Sie den Eintrag „Configuration“ und öffnen Sie die Konfigurationsmaske.
Ändern Sie das Password Ihrer Ebene oder einer niedrigeren Ebene.
HINWEISE:
- Die standardmäßig bei der Erst-Installation eingestellten Passwörter sind:
§ Ebene 1: “ALFA”
§ Ebene 2: “***” (Abnahmeprüfung und Kalibrierungen)
-
Die Passwörter sind nicht „case sensitive“, d. h. sie können sowohl in Klein- als auch in
Großbuchstaben eingegeben werden.
- 102 -
P.B.M. S.r.l.
ALFA PROGETTI S.r.l.
Via Barella Z.I. VIGNOLA (MO) ITALIA
Tel. +39 059 77 05 311 Fax +39 059 77 05 300
http://www.gruppopbm.it e-mail: [email protected]
Via Dei Fabbri 42. SPILAMBERTO (MO) ITALIA
Tel. +39 059 78 57 26 Fax +39 059 78 57 37
http://www.alfaprogetti.com e-mail: [email protected]
MANUALE DI ISTRUZIONI "Software BLTView”
Rev. n° 2 del 20/10/2009
File:BLTView_IT_GB_F_D_rev2_221009.doc
4 – BLT160 in Verbindung
Im Folgenden werden die Funktionen illustriert, die zur Verfügung stehen, wenn man sich über USB / Serieller mit dem
BLT160-Gerät verbindet. Es wird davon ausgegangen, dass das Programm BLTVIEW bereits wie vorher erläutert
konfiguriert ist.
4.1 – Vorbereitung
-
-
Schließen Sie das USB / Serieller-Kabel an den PC und an das BLT160 an (bei der erstmaligen
Verbindung wird zur Installation der Treiber für die Kommunikation über den USB-Anschluss1
aufgefordert).
Starten Sie das Programm BLT160View.
Geben Sie das Passwort ein, wenn dies für die gewünschten Operationen erforderlich ist.
Drücken Sie die Schaltfläche zum Verbinden.
HINWEIS:
Die bestehende serielle Verbindung wird durch das Icon unten links auf jeder Registerkarte angezeigt.
4.2 – Abfrage der Augenblicksdaten
In diesem Abschnitt werden alle Funktionen beschrieben, die zur Verfügung stehen, wenn man
über das USB- oder serielle Kabel verbunden ist. Wird die serielle Verbindung unterbrochen,
erscheint eine Warnmeldung und die automatischen Aufzeichnungen werden gesperrt.
Um die Online-Funktionen wiederherzustellen, muss man
- das serielle bzw. USB-Kabel abtrennen
- die Warnmeldung mit OK bestätigen
- das serielle bzw. USB-Kabel wieder anschließen
- die Verbindungstaste "Collega BLT160" drücken
Oben erscheinen 5 anwählbare Registerkarten und unten 5 Tasten, die je nach gewählter
Registerkarte unterschiedliche Funktionen haben können.
Die 2 Tasten "BLT160-Explorer" und "Data-Download" sind immer aktiv.
1
Für die Kommunikation über den USB-Anschluss müssen vorher die Treiber für Windows installiert werden (ANHANG B)
- 103 -
P.B.M. S.r.l.
ALFA PROGETTI S.r.l.
Via Barella Z.I. VIGNOLA (MO) ITALIA
Tel. +39 059 77 05 311 Fax +39 059 77 05 300
http://www.gruppopbm.it e-mail: [email protected]
Via Dei Fabbri 42. SPILAMBERTO (MO) ITALIA
Tel. +39 059 78 57 26 Fax +39 059 78 57 37
http://www.alfaprogetti.com e-mail: [email protected]
MANUALE DI ISTRUZIONI "Software BLTView”
Rev. n° 2 del 20/10/2009
File:BLTView_IT_GB_F_D_rev2_221009.doc
4.2.1 – Registerkarte Program
Über diese Registerkarte kann auf die Parameter zugegriffen werden, die die Funktionsweise des
Geräts BLT160 und die Art der Datenerfassung bestimmen.
Je nach eingegebenem Password können diese Parameter gelesen und/oder geschrieben werden.
In der Tabelle werden die einzelnen Felder, die Geräte, die darauf zugreifen, und das für das
Lesen/Schreiben erforderliche Passwort angegeben.
FELDNAME
Nominal Parameters
Battery Voltage
Battery Ah
Modes of Operation
N.Cicli (NC)
Batterie ID
Notes
Discharge (Entladung)
Discharge Current
Discharge Time
Discharge Stop Voltage
Pause Time After Discharge
Charge (Aufladung)
BESCHREIBUNG
Nennspannung der Batterie
Nennkapazität der Batterie
Art des Tests (siehe Technisches Handbuch)
Anzahl der Auf- und Entladezyklen
Seriennummer der Batterie
Hinweise
Entladestrom während des Tests
Dauer der Entladephase
Spannung, bei der die Entladephase beendet wird
Pausenzeit nach dem Ende der Entladephase
- 104 -
P.B.M. S.r.l.
ALFA PROGETTI S.r.l.
Via Barella Z.I. VIGNOLA (MO) ITALIA
Tel. +39 059 77 05 311 Fax +39 059 77 05 300
http://www.gruppopbm.it e-mail: [email protected]
Via Dei Fabbri 42. SPILAMBERTO (MO) ITALIA
Tel. +39 059 78 57 26 Fax +39 059 78 57 37
http://www.alfaprogetti.com e-mail: [email protected]
MANUALE DI ISTRUZIONI "Software BLTView”
Recharging Incr. %
Voltage Threshold
Min. Time of Charge
Max. Time of Charge
Pause Time After Charging
Other Parameters
Diagram Sampling Time
Language
Rev. n° 2 del 20/10/2009
File:BLTView_IT_GB_F_D_rev2_221009.doc
Zuschlag zur Aufladung
Spannung, bei der der Übergang von der 1. in die 2. Phase
erfolgt
Mindestdauer der Aufladephase
Höchstdauer der Aufladephase
Pausenzeit nach dem Ende der Aufladephase
Zeit der Abtastung für die gespeicherten Spannungs- und
Strom-Diagramme
Wahl der Sprache
Wenn als Art des Tests VCOST gewählt wird, gibt es zwei Parameter, die ihre Bedeutung in allen
Situationen ändern, in denen sie aufgerufen werden (sowohl online als auch offline):
Discharge Stop Voltage (V/el):
Regelungsspannung (V)
Konstante Referenzspannung
Discharge Current (A):
Maximum Discharge Current (A)
Grenzentladestrom während des Tests
4.2.1.1 - Uhr-Einstellung
Zum Einstellen der Uhr des Geräts BLT160C genügt es, auf die Schaltfläche „Set Clock“ zu
klicken. Da hierdurch das Datum und die Uhrzeit des PCs übertragen werden, sollte vorher geprüft
werden, ob die Uhr des PCs richtig eingestellt ist.
4.2.1.2 – Schreiben der allgemeinen Parameter
Kontrollieren, ob mindestens das Passwort der Zugriffsstufe Benutzer (Stufe 1) eingegeben wurde
Die Taste Programming Modify" betätigen.
Nachdem die Parameter verändert wurden, muss für die Datenübertragung die Taste "Send Data
to BLT160" gedrückt werden.
Drückt man die Taste "Cancel", werden die Felder blockiert und das BTL160 liest erneut den
vorherigen Wert.
- 105 -
P.B.M. S.r.l.
ALFA PROGETTI S.r.l.
Via Barella Z.I. VIGNOLA (MO) ITALIA
Tel. +39 059 77 05 311 Fax +39 059 77 05 300
http://www.gruppopbm.it e-mail: [email protected]
Via Dei Fabbri 42. SPILAMBERTO (MO) ITALIA
Tel. +39 059 78 57 26 Fax +39 059 78 57 37
http://www.alfaprogetti.com e-mail: [email protected]
MANUALE DI ISTRUZIONI "Software BLTView”
Rev. n° 2 del 20/10/2009
File:BLTView_IT_GB_F_D_rev2_221009.doc
4.2.2 – Registerkarte Monitor
Über die Registerkarte Monitor kann in Echtzeit auf die wichtigsten Zustands- und
Betriebsparameter der Batterie zugegriffen werden.
Zu finden sind die folgenden Abschnitte:
- A: Zugriffsstufe Batteriekapazität
- B: Anweisungen Entlade-/Aufladephase
- C: auf dem Gerät programmierte Nennparameter
- D: aktuelle Test- und Zyklusnummer
- E: Battery Voltage
- F: Temperatur des BLT160
B
C
A
D
E
F
Ø Über die Taste “BLT160 Explorer” können die Daten Off-Line analysiert werden (siehe Kap. 5),
dann die in der Datenbank gespeicherten Daten visualisieren.
Ø Die Taste "Data Download" ermöglicht es, die im Speicher des BLT160 vorhandenen Daten zu
lesen und sie in der Datenbank am PLC zu speichern (siehe § 4.2.7).
Ø Über die Taste "Close" kehrt man auf die Hauptseite zurück und schließt die Online-Sitzung.
- 106 -
P.B.M. S.r.l.
ALFA PROGETTI S.r.l.
Via Barella Z.I. VIGNOLA (MO) ITALIA
Tel. +39 059 77 05 311 Fax +39 059 77 05 300
http://www.gruppopbm.it e-mail: [email protected]
Via Dei Fabbri 42. SPILAMBERTO (MO) ITALIA
Tel. +39 059 78 57 26 Fax +39 059 78 57 37
http://www.alfaprogetti.com e-mail: [email protected]
MANUALE DI ISTRUZIONI "Software BLTView”
Rev. n° 2 del 20/10/2009
File:BLTView_IT_GB_F_D_rev2_221009.doc
4.2.3 – Registerkarte Info
Über die Registerkarte Info kann in Echtzeit auf die detaillierten Zustands- und Betriebsparameter
des Tests zugegriffen werden.
Zu finden sind die folgenden Abschnitte:
- A: Testnummer
- B: Zyklusnummer des Tests
- C: programmierte Nennparameter
- D: Entladungsdaten
- E: Aufladungsdaten
- F: Liste aktiver Störungen
C
A
E
B
D
F
Ø Die Taste Druck übersendet an das vorgegebene Druckgerät die auf dem Monitor dargestellten
Daten.
Ø Die Taste “BLT160 Explorer” ermöglicht es, die Daten Off-Line zu analysieren (siehe Kap.5).
Ø Die Taste "Data Download" ermöglicht es, die im Speicher des BLT160 vorhandenen Daten zu
lesen (siehe § 4.2.7).
Ø Über die Taste "Close" kehrt man auf die Hauptseite zurück und schließt die Online-Sitzung.
In der Tabelle werden die einzelnen Felder beschrieben.
FELDNAME
Test Number
Cycle Number
Programmierte Werte
Notes
ID BAT
Rated Voltage
BESCHREIBUNG
Nummer des laufenden Tests
Nummer des laufenden Zyklus’
Auf der Seite Programmierung eingegebene Hinweise
Auf der Seite Programmierung eingegebene Seriennummer der Batterie
Nennwert der Batteriespannung
- 107 -
P.B.M. S.r.l.
ALFA PROGETTI S.r.l.
Via Barella Z.I. VIGNOLA (MO) ITALIA
Tel. +39 059 77 05 311 Fax +39 059 77 05 300
http://www.gruppopbm.it e-mail: [email protected]
Via Dei Fabbri 42. SPILAMBERTO (MO) ITALIA
Tel. +39 059 78 57 26 Fax +39 059 78 57 37
http://www.alfaprogetti.com e-mail: [email protected]
MANUALE DI ISTRUZIONI "Software BLTView”
Rated Capacity
Discharge Current
Discharge Time
Tensione di stop carica
(V/el)
Modes of Operation
Firmware Version
Discharge Data
(Entladungsdaten)
Discharge Start
Discharge Time
Pause Time After
Discharge
Capacity al Cycle Start
Discharge Capacity
Capacity at Discharge End
Efficienza
Minimum Voltage
Max. Temp. on Electronic
Card
Charge Data
(Aufladungsdaten)
Start of Charging
Stages Time (1st)
Stages Time (2nd)
Total Charging Time
Pause Time After Charging
Capacity at the Start of
Charging
Capacity Charged in 1st
Phase
Capacity Charged in 2nd
Phase
Total Input Capacity
Recharging Incr. %
Capacity at End of
Charging
Maximum Voltage
Maximum Current
Current at the End of Charging
Rev. n° 2 del 20/10/2009
File:BLTView_IT_GB_F_D_rev2_221009.doc
Nennwert der Batteriekapazität
Entladestrom
Dauer der Entladung
Zeit, nach der die Entladephase beendet wird
Art des Tests (siehe Technisches Handbuch)
Firmware-Version des BLT160
Datum und Uhrzeit des Beginns der Entladung
Gesamtzeit aller Entladungsphasen (Entladestrom > 0 )
Gesamtpausenzeit während der Entladung
Ladung in der Batterie zu Beginn der Entladung
Insgesamt entladene Ladung
Restladung in der Batterie am Ende der Entladephase
Batterie-Wirkungsgrad in Prozent
Mindestspannung während der Entladephase
Temperatur der Elektronik
Datum und Uhrzeit des Beginns der Aufladung
Gesamtzeit der Aufladungsphasen (Ladestrom > 0) mit Batteriespannung <
“Schwellenspannung” (siehe Programmierung)
Gesamtzeit der Aufladungsphasen (Ladestrom > 0) mit Batteriespannung ≥
“Schwellenspannung” (siehe Programmierung)
Gesamtzeit aller Aufladungsphasen (Ladestrom > 0)
Gesamtpausenzeit während der Aufladung
Ladung in der Batterie zu Beginn der Wiederaufladung
Insgesamt in den Aufladungsphasen (Ladestrom > 0) mit Batteriespannung <
“Schwellenspannung” (siehe Programmierung) geladene Ladung
Insgesamt in den Aufladungsphasen (Ladestrom > 0) mit Batteriespannung ≥
“Schwellenspannung” (siehe Programmierung) geladene Ladung
Gesamtladung der Aufladungsphasen (Ladestrom > 0)
Prozentuale Erhöhung zwischen geladener Kapazität und wieder hergestellter Kapazität
Ladung in der Batterie am Ende der Wiederaufladungsphasen
Höchstspannung während der Wiederaufladungsphase
Maximaler Ladestrom
Ladestrom kurz vor der Sperrung der Wiederaufladung
4.2.3.1 Störungsliste
Siehe Technisches Handbuch des BLT160
- 108 -
P.B.M. S.r.l.
ALFA PROGETTI S.r.l.
Via Barella Z.I. VIGNOLA (MO) ITALIA
Tel. +39 059 77 05 311 Fax +39 059 77 05 300
http://www.gruppopbm.it e-mail: [email protected]
Via Dei Fabbri 42. SPILAMBERTO (MO) ITALIA
Tel. +39 059 78 57 26 Fax +39 059 78 57 37
http://www.alfaprogetti.com e-mail: [email protected]
MANUALE DI ISTRUZIONI "Software BLTView”
Rev. n° 2 del 20/10/2009
File:BLTView_IT_GB_F_D_rev2_221009.doc
4.2.5 – REGISTERKARTE Diagramm
Über die REGISTERKARTE Diagramm kann der Verlauf der Spannung und der Stromstärke des
laufenden Zyklus visualisiert werden. Das Diagramm wird vom PC in Modus Automatik gelesen .
Es wird bei jeder Diagramm Sampling Time, die in der Programmierung eingestellt ist, mit einer
maximalen Verzögerung von 10 Sekunden aktualisiert.
Die maximale Kapazität des Diagramms entspricht der des angeschlossenen Geräts. Siehe daher
technisches Handbuch des BLT160.
Zu finden sind die folgenden Abschnitte:
- A: Stromstärkediagramm des gewählten Programms
- B: Spannungsdiagramm des gewählten Zyklus
A
B
Ø Jedem der beiden Diagramme sind drei Tasten zugeordnet:
- Vergrößerungsglas: damit ein Bereich des Diagramms ausgewählt und vergrößert werden
- Weißes Blatt mit Vergrößerungsglas: visualisiert die Druckvorschau dessen, was
visualisiert wurde
- Drucker: übersendet an das vorgegebene Gerät den Druck dessen, was visualisiert wurde.
Ø Über die Taste “CSV” können die ermittelten Abtastungen für die Spannungs- und Stromwerte
in Form von Textdatei mit begrenzten Feldern exportiert werden (*.csv). Es wird ein
vorgegebener Name zugeordnet, der nach Belieben geändert werden kann.
Ø Die Taste “BLT160 Explorer” ermöglicht es, die Daten Off-Line zu analysieren (siehe Kap.5).
Ø Die Taste "Data Download" ermöglicht es, die im Speicher des BLT160 vorhandenen Daten zu
lesen (siehe § 4.2.7).
Ø Über die Taste "Close" kehrt man auf die Hauptseite zurück und schließt die Online-Sitzung.
- 109 -
P.B.M. S.r.l.
ALFA PROGETTI S.r.l.
Via Barella Z.I. VIGNOLA (MO) ITALIA
Tel. +39 059 77 05 311 Fax +39 059 77 05 300
http://www.gruppopbm.it e-mail: [email protected]
Via Dei Fabbri 42. SPILAMBERTO (MO) ITALIA
Tel. +39 059 78 57 26 Fax +39 059 78 57 37
http://www.alfaprogetti.com e-mail: [email protected]
MANUALE DI ISTRUZIONI "Software BLTView”
Rev. n° 2 del 20/10/2009
File:BLTView_IT_GB_F_D_rev2_221009.doc
4.2.6 – TAB Recorder
Über dieses Fenster kann der Verlauf von Spannung und Stromstärke visualisiert werden,
nachdem man in Modalität Online eingetreten ist, unabhängig von der Zyklen- und Testanzahl.
Die ermittelten Größen sind:
- Auflade- (+) oder Entladestrom (-)
- Programmierter Entladenennstrom (-)
- Battery Voltage
- Programmierte Nennspannung der Batterie
- Programmierte Schwellenspannung in der Aufladungsphase
- Spannung bei der die programmierte Entladephase beendet wird
Wird durch eine Aufzeichnung alle 6 Sekunden ausgeführt.
Die Kapazität des Diagramms umfasst 54000 Abtastungen, gleich 90 Stunden.
Die Abtastung Nr. 54001 überschreibt die Abtastung Nr.1
Verlässt man eine Sitzung und nimmt sie nach einiger Zeit wieder auf, werden die neuen Daten
den bereits vorhandenen hinzugefügt.
Um das Diagramm erneut mit "Null" zu starten, muss es manuell über die Taste “Reset Recorder”
, unten positioniert, rückgestellt werden. Diese Operation löscht die zuvor ermittelten Daten nicht,
sondern registriert sie auf eine Datei mit vorgegebenem Namen, um sie in Zukunft über die Taste
“Recorder Old” oder das Menü "Archiv - Recorder Old” über das Hauptfenster abrufen zu können
(siehe § 5.5).
Zu finden sind die folgenden Abschnitte:
- A: Diagramm der Stromwerte
- B: Diagramm der Spannungswerte
A
B
- 110 -
P.B.M. S.r.l.
ALFA PROGETTI S.r.l.
Via Barella Z.I. VIGNOLA (MO) ITALIA
Tel. +39 059 77 05 311 Fax +39 059 77 05 300
http://www.gruppopbm.it e-mail: [email protected]
Via Dei Fabbri 42. SPILAMBERTO (MO) ITALIA
Tel. +39 059 78 57 26 Fax +39 059 78 57 37
http://www.alfaprogetti.com e-mail: [email protected]
MANUALE DI ISTRUZIONI "Software BLTView”
Rev. n° 2 del 20/10/2009
File:BLTView_IT_GB_F_D_rev2_221009.doc
Ø Jedem der beiden Diagramme sind drei Tasten zugeordnet:
- Vergrößerungsglas: damit ein Bereich des Diagramms ausgewählt und vergrößert werden
- Weißes Blatt mit Vergrößerungsglas: visualisiert die Druckvorschau dessen, was visualisiert wurde
- Drucker: übersendet an das vorgegebene Gerät den Druck dessen, was visualisiert wurde.
Ø Über die Taste “CSV” können die ermittelten Abtastungen für die Spannungs- und Stromwerte in Form
von Textdatei mit begrenzten Feldern exportiert werden (*.csv). Es wird ein vorgegebener Name
zugeordnet, der nach Belieben geändert werden kann.
Ø Über die Taste “Recorder Old” kann man die in entsprechnedn Dateien gespeicherten Daten wieder
lesen (siehe § 5.5).
Ø Über die Taste “Reset Recorder” beginnt die Aufzeichnung eines neuen Recorders und die
Speicherung der Aufzeichnung in einer entsprechenden Datei.
Ø Die Taste “BLT160 Explorer” ermöglicht es, die Daten Off-Line zu analisieren (siehe § 5.1).
Ø Die Taste "Data Download" ermöglicht es, die im Speicher des BLT160 vorhandenen Daten zu lesen
(siehe § 4.2.7).
Ø Über die Taste "Close" kehrt man auf die Hauptseite zurück und schließt die Online-Sitzung.
4.2.7 – Download
Drückt man die Taste "Data Download" , erscheint das Fenster CUSTOMER bei dem der Test
ausgeführt wird und das Fenster des USER, der ihn ausgeführt hat.
Prüfen Sie nach der Auswahl die gewählten Felder und drücken Sie die Taste „Data Download“
Wenn Daten gelesen und daher Daten protokolliert werden, deren Zuordnung nicht korrekt ist,
kann man mit dem offline zur Verfügung stehendem Instrument "Zuordnungen verändern" eine
Korrektur vornehmen (siehe §5.3).
Ø Die Taste "Neu" ermöglicht die Eingabe eines neuen Costumer/User.
Ø Die Taste "Modify" ermöglicht es, den Namen eines Custumer/User zu verändern ( wenn er
noch nicht in der Datenbank benutz wurde).
Ø Die Taste "Delete" ermöglicht es, den Namen eines Custumer/User zu löschen ( wenn er noch
nicht in den Datenbanken benutzt wurde).
Ø Die Taste "Close" führt erneut auf die Seite Online.
- 111 -
P.B.M. S.r.l.
ALFA PROGETTI S.r.l.
Via Barella Z.I. VIGNOLA (MO) ITALIA
Tel. +39 059 77 05 311 Fax +39 059 77 05 300
http://www.gruppopbm.it e-mail: [email protected]
Via Dei Fabbri 42. SPILAMBERTO (MO) ITALIA
Tel. +39 059 78 57 26 Fax +39 059 78 57 37
http://www.alfaprogetti.com e-mail: [email protected]
MANUALE DI ISTRUZIONI "Software BLTView”
Rev. n° 2 del 20/10/2009
File:BLTView_IT_GB_F_D_rev2_221009.doc
5 – Consultazione dati OLD
Nachdem die Arbeitsdaten gespeichert wurden, können sie Offline konsultiert werden.
Über das Menü "Archive" können die Konsultations- und Steuerungsfunktionen aktiviert werden.
-
Konsultation
Die Meldedaten des Customer oder User verändern.
Zuordnungen verändern
Lesung der Daten von gespeicherten Testzyklen auf anderen Dateien
Lesung der Daten von protokollierten "Recorder" - Diagrammen
5.1 – BLT160 Explorer
Über das Menü "Archive" oder der entsprechenden Taste auf der Hauptseite oder auf der Online
Seite, wählt man den Menüpunkt “BLT 160 Explorer”, um die protokollierten Daten konsultieren zu
können.
5.1.1 – TAB Dati OLD
Das Fenster Daten Old visualisiert die Hauptdaten des gewählten Arbeitszyklus.
A
B
C
D
E
F
Zu finden sind die folgenden Abschnitte:
- 112 -
P.B.M. S.r.l.
ALFA PROGETTI S.r.l.
Via Barella Z.I. VIGNOLA (MO) ITALIA
Tel. +39 059 77 05 311 Fax +39 059 77 05 300
http://www.gruppopbm.it e-mail: [email protected]
Via Dei Fabbri 42. SPILAMBERTO (MO) ITALIA
Tel. +39 059 78 57 26 Fax +39 059 78 57 37
http://www.alfaprogetti.com e-mail: [email protected]
MANUALE DI ISTRUZIONI "Software BLTView”
-
Rev. n° 2 del 20/10/2009
File:BLTView_IT_GB_F_D_rev2_221009.doc
A: Datenwahl: Kunde, Benutzer, Seriennummer BLT 160, Identifizierer Batterie,
Testanzahl, Datum Testbeginn
B: Nummer des gewählten Zyklus’
C: Kenndaten
D: Aufladedaten
E: Entladedaten
F: Wahlinstrumente Zyklus
Die Entladungsphase wird angezeigt:
a) Wenn die Entladephase des Zyklus gestartet ist (Datum Entladebeginn korrekt
aufgezeichnet)
b) Wenn Parameter N CICLI gleich 0 ist
c) Wenn Parameter N CICLI und der gewählte Zyklus größer als 0 sind.
Die Aufladungsphase wird angezeigt:
a) Wenn die Aufladephase des Zyklus gestartet ist (Datum Aufladebeginn korrekt
aufgezeichnet)
b) Wenn Parameter N CICLI größer als 0 ist.
5.1.2 – Registerkarte Info OLD
Das Fenster Info Old visualisiert die Details der Daten des gewählten Arbeitszyklus.
A
B
C
D
E
F
G
Es werden die folgenden Abschnitte bestimmt:
- A: Datenwahl: Kunde, Benutzer, Seriennummer BLT 160, Identifizierer Batterie,
Testanzahl, Datum Testbeginn
- B: Nummer des gewählten Zyklus
- C: Betriebsdaten
- D: zusammenfassende Aufladedaten
- E: zusammenfassende Entladedaten
- 113 -
P.B.M. S.r.l.
ALFA PROGETTI S.r.l.
Via Barella Z.I. VIGNOLA (MO) ITALIA
Tel. +39 059 77 05 311 Fax +39 059 77 05 300
http://www.gruppopbm.it e-mail: [email protected]
Via Dei Fabbri 42. SPILAMBERTO (MO) ITALIA
Tel. +39 059 78 57 26 Fax +39 059 78 57 37
http://www.alfaprogetti.com e-mail: [email protected]
MANUALE DI ISTRUZIONI "Software BLTView”
-
Rev. n° 2 del 20/10/2009
File:BLTView_IT_GB_F_D_rev2_221009.doc
F: Verzeichnis der ermittelten Störungen
G: Instrumente für die Zykluswahl
Die Entladephase ist sichtbar:
a) Wenn die Entladephase des Zyklus gestartet ist (Datum Entladebeginn korrekt
aufgezeichnet)
b) wenn der Parameter N. ZYKLEN gleich 0 ist
c) wenn der Parameter N. ZYKLEN größer als 0 ist und der gewählte Zyklus größer als 0 ist.
Die Aufladephase ist sichtbar:
a) Wenn die Aufladephase des Zyklus gestartet ist (Datum Aufladebeginn korrekt aufgezeichnet)
b) wenn der Parameter N. ZYKLEN größer als 0 ist
Ø Die Taste Druck übersendet an das vorgegebene Druckgerät die dargestellten Daten.
Ø Die Taste "Close" schließt die Sitzung Offline.
5.1.3 – Registerkarte Diagramm OLD
Über die REGISTERKARTE Diagramm kann der Verlauf der Spannung und der Stromstärke des
gewählten Zyklus visualisiert werden.
Die maximale Kapazität des Diagramms entspricht der des angeschlossenen Geräts. Siehe daher
technisches Handbuch des BLT160.
Die Zeit, in der die Daten abgetastet wurden, kann ermittelt werden, indem man das Feld "Diagram
Sampling Time" der Registerkarte "Programmierung" konsultiert (kann während des Zyklus nicht
verändert werden).
Zu finden sind die folgenden Abschnitte:
- A: Spannungsdiagramm des gewählten Zyklus
- B: Stromstärkediagramm des gewählten Zyklus
- C: Instrumente für die Zykluswahl
A
B
C
- 114 -
P.B.M. S.r.l.
ALFA PROGETTI S.r.l.
Via Barella Z.I. VIGNOLA (MO) ITALIA
Tel. +39 059 77 05 311 Fax +39 059 77 05 300
http://www.gruppopbm.it e-mail: [email protected]
Via Dei Fabbri 42. SPILAMBERTO (MO) ITALIA
Tel. +39 059 78 57 26 Fax +39 059 78 57 37
http://www.alfaprogetti.com e-mail: [email protected]
MANUALE DI ISTRUZIONI "Software BLTView”
Rev. n° 2 del 20/10/2009
File:BLTView_IT_GB_F_D_rev2_221009.doc
Ø Über die Taste “CSV” können die ermittelten Abtastungen für die Spannungs- und Stromwerte
in Form von Textdatei mit begrenzten Feldern exportiert werden (*.csv). Es wird ein
vorgegebener Name zugeordnet, der nach Belieben geändert werden kann.
Ø Die Taste "Close" schließt die Sitzung Offline.
5.1.4 – Registerkarte Medien
In diesem Abschnitt kann der Verlauf der Wirksamkeit, der maximalen und minimalen Spannung
einer Batterie im Verhältnis zu den gewählten Zyklen analisiert werden.
A
B
C
D
E
Es werden die folgenden Abschnitte bestimmt:
- A: Datenwahl: Kunde, Benutzer, Seriennummer BLT 160, Identifizierer Batterie,
Testanzahl, Datum Testbeginn
- B: Tabelle der Bezugsdaten der gewählten Zyklen
- C: Taste für die Wahl der zu analysierenden Zyklen
- D: Durchschnittsdaten bezüglich der gewählten Zyklen
- E: Instrumente für die Zykluswahl
Ø
Ø
Ø
Ø
Ø
Ø
Ø
Ø
Die Taste “+++” wählt alle Zyklen einer Batterie
Die Taste “++” wählt alle Zyklen eines Tests
Die Taste “+” wählt einen Zyklus
Die Taste “-” wählt einen Zyklus ab
Die Taste "Papierkorb" wählt alles ab
Die Taste "Diagram" visualisiert die gewählten Daten in Form eines Diagramms. Siehe §5.1.4.1
Die Taste Druck übersendet an das vorgegebene Druckgerät die dargestellten Daten.
Die Taste "Close" schließt die Sitzung Offline.
- 115 -
P.B.M. S.r.l.
ALFA PROGETTI S.r.l.
Via Barella Z.I. VIGNOLA (MO) ITALIA
Tel. +39 059 77 05 311 Fax +39 059 77 05 300
http://www.gruppopbm.it e-mail: [email protected]
Via Dei Fabbri 42. SPILAMBERTO (MO) ITALIA
Tel. +39 059 78 57 26 Fax +39 059 78 57 37
http://www.alfaprogetti.com e-mail: [email protected]
MANUALE DI ISTRUZIONI "Software BLTView”
Rev. n° 2 del 20/10/2009
File:BLTView_IT_GB_F_D_rev2_221009.doc
5.1.4.1 – Registerkarte Medien - Diagramm
Über die registerkarte Medien kann man über die Taste "Diagram" den Verlauf der Wirksamkeit,
der maximalen und minimalen Spannung einer Batterie im Verhältnis zu den gewählten Zyklen
visualisiert werden.
Ø Jedem der beiden Diagramme sind drei Tasten zugeordnet:
- Vergrößerungsglas: damit ein Bereich des Diagramms ausgewählt und vergrößert werden
- Weißes Blatt mit Vergrößerungsglas: visualisiert die Druckvorschau dessen, was
visualisiert wurde
- Drucker: übersendet an das vorgegebene Gerät den Druck dessen, was visualisiert wurde.
Ø Die Taste "Close" führt erneut zu registerkarte Medien.
- 116 -
P.B.M. S.r.l.
ALFA PROGETTI S.r.l.
Via Barella Z.I. VIGNOLA (MO) ITALIA
Tel. +39 059 77 05 311 Fax +39 059 77 05 300
http://www.gruppopbm.it e-mail: [email protected]
Via Dei Fabbri 42. SPILAMBERTO (MO) ITALIA
Tel. +39 059 78 57 26 Fax +39 059 78 57 37
http://www.alfaprogetti.com e-mail: [email protected]
MANUALE DI ISTRUZIONI "Software BLTView”
Rev. n° 2 del 20/10/2009
File:BLTView_IT_GB_F_D_rev2_221009.doc
5.1.5 – Registerkarte Programm
Über die registerkarte Programm kann man auf die Programmierungsparameter des gewählten
Programms zugehen.
Bezüglich der Bedeutung der Felder verweisen wir auf den Paragraphen §4.2.1 Programmierung
online.
Ø Die Taste Druck übersendet an das vorgegebene Druckgerät die dargestellten Daten.
Ø Die Taste "Close" schließt die Sitzung Offline.
- 117 -
P.B.M. S.r.l.
ALFA PROGETTI S.r.l.
Via Barella Z.I. VIGNOLA (MO) ITALIA
Tel. +39 059 77 05 311 Fax +39 059 77 05 300
http://www.gruppopbm.it e-mail: [email protected]
Via Dei Fabbri 42. SPILAMBERTO (MO) ITALIA
Tel. +39 059 78 57 26 Fax +39 059 78 57 37
http://www.alfaprogetti.com e-mail: [email protected]
MANUALE DI ISTRUZIONI "Software BLTView”
Rev. n° 2 del 20/10/2009
File:BLTView_IT_GB_F_D_rev2_221009.doc
5.1.6 – Registrierkarte Averages
In diesem Abschnitt können die in der Datenbank vorhandenen Bezugsdaten in anderen
Positionen archiviert werden.
Das kann aus den folgenden Hauptgründen nützlich sein:
- Verringerung der Dimensionen der Bezugsdatenbank, um die mit ihr zusammenhängenden
Operationen zu beschleunigen.
- Nur Backup der Daten, die für die Analyse von Dritten nützlich sind.
- Nur Verstellung der Daten, die nicht mehr von Interesse sind wegen einer eventuellen
endgültigen Löschung.
A
B
C
D
Es werden die folgenden Abschnitte bestimmt:
- A: Datenwahl
- B: Tasten für die Wahl der zu archivierenden Zyklen
- C: Tabelle der gewählten Daten zur Archivierung
- D: Anzahl der Elemente, die archiviert werden
Ø
Ø
Ø
Ø
Ø
Ø
Die Taste “+++” wählt alle Zyklen einer Batterie
Die Taste “++” wählt alle Zyklen eines Tests
Die Taste “+” wählt einen Zyklus
Die Taste “-” wählt einen Zyklus ab
Die Taste "Papierkorb" wählt alles ab
Die Taste "Averages" öffnet ein Fenster für die Wahl des Namens der Datei, in der die
gewählten Daten archiviert werden sollen.
Um die Wahl zu erleichtern, wird eine Position und ein Name im Verhältnis zum Datum der
Operation
Ø Die Taste "Close" schließt die Sitzung Offline.
- 118 -
P.B.M. S.r.l.
ALFA PROGETTI S.r.l.
Via Barella Z.I. VIGNOLA (MO) ITALIA
Tel. +39 059 77 05 311 Fax +39 059 77 05 300
http://www.gruppopbm.it e-mail: [email protected]
Via Dei Fabbri 42. SPILAMBERTO (MO) ITALIA
Tel. +39 059 78 57 26 Fax +39 059 78 57 37
http://www.alfaprogetti.com e-mail: [email protected]
MANUALE DI ISTRUZIONI "Software BLTView”
Rev. n° 2 del 20/10/2009
File:BLTView_IT_GB_F_D_rev2_221009.doc
5.2 – Die Meldedaten des Customer/User
Über das Menü "Archive" oder über die entsprechende Taste wählt man den Menüpunkt
"Meldedaten Customer/User", um auf die Meldedaten des Customer oder User zuzugehen, denen
die vom Gerät BLT160 gespeicherten Daten zugeordnet werden können.
Ø Die Taste "Neu" ermöglicht die Eingabe eines neuen Costumer/User.
Ø Die Taste "Modify" ermöglicht es, den Namen eines Custumer/User zu verändern ( wenn er
noch nicht in der Datenbank benutz wurde).
Ø Die Taste "Delete" ermöglicht es, den Namen eines Custumer/User zu löschen ( wenn er noch
nicht in den Datenbanken benutzt wurde).
Ø Die Taste "Close" führt erneut auf die Hauptseite.
- 119 -
P.B.M. S.r.l.
ALFA PROGETTI S.r.l.
Via Barella Z.I. VIGNOLA (MO) ITALIA
Tel. +39 059 77 05 311 Fax +39 059 77 05 300
http://www.gruppopbm.it e-mail: [email protected]
Via Dei Fabbri 42. SPILAMBERTO (MO) ITALIA
Tel. +39 059 78 57 26 Fax +39 059 78 57 37
http://www.alfaprogetti.com e-mail: [email protected]
MANUALE DI ISTRUZIONI "Software BLTView”
Rev. n° 2 del 20/10/2009
File:BLTView_IT_GB_F_D_rev2_221009.doc
5.3 – Zuordnungen verändern
Über das Menü "Archive" oder über die entsprechenden Taste wählt man den Menüpunkt
"Zuordnungen verändern", um auf den Abschnitt für die Veränderung der Zuordnungen der vom
BLT160 abgeladenen Daten zugehen zu können.
A
B
C
D
Vor der Veränderung der Zuordnungen
Nach der Veränderung der Zuordnungen
Es werden die folgenden Abschnitte bestimmt:
- A: Menü Wahl der Tests in den aktuellen Zuordnungen
- B: Wahltaste für die Einstellung der Meldedaten User/Customer (siehe §5.2)
- C: Menü Wahl der neuen Zuordnung
- D: Taste für die Ausführung der gewählten Zuordnung
PROZEDUR FÜR DIE VERÄNDERUNG:
-
Im Abschnitt "AKTUELLE ZUORDNUNGEN" wählt man die Tests, deren Zuordnungen man
verändern will. Man kann je einen TEST auswählen oder eine Vielfachwahl ausführen,
indem man die Taste SHIFT gedrückt hält
-
Im Abschnitt "NEUE ZUORDNUNGEN" führt man die Wahl bzw. die Eingebe der neuen
Zuordnungen, denen die TESTs zugeordnet werden, aus.
-
Die Taste "VERÄNDERUNG ZUORDNUNGEN" betätigen.
-
Im Abschnitt "NEUE ZUORDNUNGEN" werden die verstellten Tests visualisiert
- 120 -
P.B.M. S.r.l.
ALFA PROGETTI S.r.l.
Via Barella Z.I. VIGNOLA (MO) ITALIA
Tel. +39 059 77 05 311 Fax +39 059 77 05 300
http://www.gruppopbm.it e-mail: [email protected]
Via Dei Fabbri 42. SPILAMBERTO (MO) ITALIA
Tel. +39 059 78 57 26 Fax +39 059 78 57 37
http://www.alfaprogetti.com e-mail: [email protected]
MANUALE DI ISTRUZIONI "Software BLTView”
Rev. n° 2 del 20/10/2009
File:BLTView_IT_GB_F_D_rev2_221009.doc
5.4 –Wahl Datenbank
Über das Menü "Archive" oder über die entsprechende Taste wählt man den Menüpunkt "Wahl
Datenbank", um auf die protokollierten Datenbanken zuzugehen.
A
B
C
-
A: Leitweg gewählte Datenbank
B: Taste zur Wahl der protokollierten Datenbank
C: die Default-Datenbank vorladen
Nach Wahl der protokollierten Datenbank sind bis zur Rückstellung der Default-Datenbank nur die
Offline-Abtastfunktionen aktiviert.
- 121 -
P.B.M. S.r.l.
ALFA PROGETTI S.r.l.
Via Barella Z.I. VIGNOLA (MO) ITALIA
Tel. +39 059 77 05 311 Fax +39 059 77 05 300
http://www.gruppopbm.it e-mail: [email protected]
Via Dei Fabbri 42. SPILAMBERTO (MO) ITALIA
Tel. +39 059 78 57 26 Fax +39 059 78 57 37
http://www.alfaprogetti.com e-mail: [email protected]
MANUALE DI ISTRUZIONI "Software BLTView”
Rev. n° 2 del 20/10/2009
File:BLTView_IT_GB_F_D_rev2_221009.doc
5.5 – Recorder OLD
Über das Menü "Archive" wählt man den Menüpunkt “Recorder OLD”, um auf die Datenbanken der
protokollierten Recorder zugehen zu können.
B
A
C
D
Es werden die folgenden Abschnitte bestimmt:
-
A: Leitweg gewählte Datenbank
B: Taste, um erneut einen protokollierten "Recorder" zu wählen
C: Diagramm der Stromwerte (ermitteltes Auf-/Entladen, programmiertes Entladen)
D: Diagramm der Spannungen (ermittelt, programmierter Nennwert, programmierte
Gasschwelle, programmierte Stopp-Schwelle)
- 122 -
P.B.M. S.r.l.
ALFA PROGETTI S.r.l.
Via Barella Z.I. VIGNOLA (MO) ITALIA
Tel. +39 059 77 05 311 Fax +39 059 77 05 300
http://www.gruppopbm.it e-mail: [email protected]
Via Dei Fabbri 42. SPILAMBERTO (MO) ITALIA
Tel. +39 059 78 57 26 Fax +39 059 78 57 37
http://www.alfaprogetti.com e-mail: [email protected]
MANUALE DI ISTRUZIONI "Software BLTView”
Rev. n° 2 del 20/10/2009
File:BLTView_IT_GB_F_D_rev2_221009.doc
ANHANG A
Benutzung des Programms DFU
Das Programm DFU dient zur Ausführung des Updates der Firmware des BLT160.
Um das Update ausführen zu können, ist eine Kopie der Update-Datei (.hex) auf dem PC erforderlich.
-
-
Das BLT160 mit dem PC über ein serielles Anschlusskabel verbinden.
Start des Programms DFU
Wahl der dem BLT160 zugeordneten seriellen Port. Im Falle eines Anschlusses mittels
einer USB-Linie, muss die Nummer der von Windows zugeordneten Port ermittelt werden:
Bedienungspult von Windows -> Steuerung der Peripheriegeräte -> Porte (COM und LPT)
Betätigen der Taste “Open ‘HEX’” und Wahl der Aktualisierungsdatei
Ausschalten des BLT160 und Anschluss des USB-Kabels
Das USB-Kabel an das BLT160 anschließen, wobei die Taste START/STOP des BLT160
gedrückt gehalten werden muss.
Nach 2 Sekunden die Taste START/STOP loslassen
Über das Software DFU die Taste “Upload” innerhalb von 8 Sekunden drücken, um die
Aktualisierung durchzuführen. Die Fortschrittliste zeigt den Zustand der Aktualisierung an.
Am Ende des Updates startet das BLT160 automatisch seine Funktionen neu.
In der Abbildung sind die folgenden Teile gekennzeichnet:
-
A: Schaltfläche “Open ‘HEX’”
B: Schaltfläche Upload/Stop (Unterbrechen)
C: Ausgewählter serieller Anschluss
A
B
C
- 123 -
P.B.M. S.r.l.
ALFA PROGETTI S.r.l.
Via Barella Z.I. VIGNOLA (MO) ITALIA
Tel. +39 059 77 05 311 Fax +39 059 77 05 300
http://www.gruppopbm.it e-mail: [email protected]
Via Dei Fabbri 42. SPILAMBERTO (MO) ITALIA
Tel. +39 059 78 57 26 Fax +39 059 78 57 37
http://www.alfaprogetti.com e-mail: [email protected]
MANUALE DI ISTRUZIONI "Software BLTView”
Rev. n° 2 del 20/10/2009
File:BLTView_IT_GB_F_D_rev2_221009.doc
ANHANG B
Installation der USB-Treiber
B1 - Installation der USB-Kommunikationstreiber in Windows XP
1) Schließen Sie das USB-Kabel an den USBAnschluss des Computers und an das BLT160 an.
Die neue Hardware wird erkannt.
2) Folgen Sie den Anweisungen des WindowsInstallationsassistenten und wählen Sie):
“Installa da un elenco o percorso
specifico (per utenti esperti)”
(Software von einer Liste oder bestimmten
Quelle installieren - für fortgeschrittene
Benutzer)
Klicken Sie auf „Avanti“ (Weiter).
3) Wählen Sie:
“Ricerca il miglior driver disponibile in
questi percorsi”
(Den besten in diesen Quellen verfügbaren
Treiber suchen)
Setzen Sie das Häkchen auf:
“Includi il seguente percorso nella ricerca”
(„Folgenden Pfad in die Suche einschließen“)
Klicken Sie auf „Sfoglia“ (Durchsuchen) und wählen
sie den Pfad, an dem sich der Treiber befindet).
“C:\Programmi\BLTView\Drivers” (während der
Installation von BLTView angelegter Pfad).
Klicken Sie auf „Avanti“ (Weiter).
- 124 -
P.B.M. S.r.l.
ALFA PROGETTI S.r.l.
Via Barella Z.I. VIGNOLA (MO) ITALIA
Tel. +39 059 77 05 311 Fax +39 059 77 05 300
http://www.gruppopbm.it e-mail: [email protected]
Via Dei Fabbri 42. SPILAMBERTO (MO) ITALIA
Tel. +39 059 78 57 26 Fax +39 059 78 57 37
http://www.alfaprogetti.com e-mail: [email protected]
MANUALE DI ISTRUZIONI "Software BLTView”
Rev. n° 2 del 20/10/2009
File:BLTView_IT_GB_F_D_rev2_221009.doc
4) Warten Sie den Start der Installation ab.
5) Klicken Sie auf die Schaltfläche „Continua“
(Fortfahren).
6) Warten Sie das Ende der Installation ab.
Klicken Sie auf „Fine“ (Beenden).
7) Klicken Sie mit der rechten Maustaste auf das
Icon „Risorse del computer“ (Windows-Explorer).
Klicken Sie auf den Menü-Eintrag „Proprietà“
(Eigenschaften).
- 125 -
P.B.M. S.r.l.
ALFA PROGETTI S.r.l.
Via Barella Z.I. VIGNOLA (MO) ITALIA
Tel. +39 059 77 05 311 Fax +39 059 77 05 300
http://www.gruppopbm.it e-mail: [email protected]
Via Dei Fabbri 42. SPILAMBERTO (MO) ITALIA
Tel. +39 059 78 57 26 Fax +39 059 78 57 37
http://www.alfaprogetti.com e-mail: [email protected]
MANUALE DI ISTRUZIONI "Software BLTView”
Rev. n° 2 del 20/10/2009
File:BLTView_IT_GB_F_D_rev2_221009.doc
8) Gehen Sie auf die Seite „Hardware“.
Klicken Sie auf „Gestione periferiche“ (Geräte-Manager).
9) Öffnen Sie den Listeneintrag „Porte COM e LPT“
(Anschlüsse COM und LPT).
Vergewissern Sie sich, dass der Anschluss SmartIR USBIRDA ordnungsgemäß installiert ist.
Es ist die Anschluss-Nummer angegeben. In der Abbildung
ist die Anschluss-Nummer COM7.
Schließen Sie alle Fenster
.
10) Öffnen Sie BLTView.
Wählen Sie im Hauptmenü „Impostazione“ (Setup) und dann
„Porta Seriale“ (Serial Port).
11) Wählen Sie den gewünschten seriellen Anschluss und
klicken Sie auf „OK“.
- 126 -
P.B.M. S.r.l.
ALFA PROGETTI S.r.l.
Via Barella Z.I. VIGNOLA (MO) ITALIA
Tel. +39 059 77 05 311 Fax +39 059 77 05 300
http://www.gruppopbm.it e-mail: [email protected]
Via Dei Fabbri 42. SPILAMBERTO (MO) ITALIA
Tel. +39 059 78 57 26 Fax +39 059 78 57 37
http://www.alfaprogetti.com e-mail: [email protected]
MANUALE DI ISTRUZIONI "Software BLTView”
Rev. n° 2 del 20/10/2009
File:BLTView_IT_GB_F_D_rev2_221009.doc
B2 - Installation der USB-Kommunikationstreiber in Windows VISTA
1) Schließen Sie das Kabel USB an den USBAnschluss des Computers / BLT160 an. Die neue
Hardware wird erkannt.
2) Folgen Sie dem Windows-Installationsassistenten
und wählen Sie):
“Individuare e installare il driver (scelta
consigliata)”
(„Treiber ermitteln und installieren Empfohlen“).
3) Klicken Sie auf:
“Cerca il software del driver nel computer”
(„Treibersoftware auf dem Computer
suchen“).
4) Klicken Sie auf „Sfoglia“ (Durchsuchen) und
wählen Sie den Pfad, an dem sich der Treiber
befindet.
“C:\Programmi\BLTView\Drivers” (während der
Installation von BLTView angelegter Pfad).
Setzen den Haken bei:
“Includi sottocartelle”
(“Unterordner einbeziehen”).
Klicken Sie auf „Avanti“ (Weiter).
- 127 -
P.B.M. S.r.l.
ALFA PROGETTI S.r.l.
Via Barella Z.I. VIGNOLA (MO) ITALIA
Tel. +39 059 77 05 311 Fax +39 059 77 05 300
http://www.gruppopbm.it e-mail: [email protected]
Via Dei Fabbri 42. SPILAMBERTO (MO) ITALIA
Tel. +39 059 78 57 26 Fax +39 059 78 57 37
http://www.alfaprogetti.com e-mail: [email protected]
MANUALE DI ISTRUZIONI "Software BLTView”
Rev. n° 2 del 20/10/2009
File:BLTView_IT_GB_F_D_rev2_221009.doc
5) Warten Sie den Start der Installation ab.
6) Klicken Sie auf „Installa il software del driver“
(Treibersoftware installieren).
7) Warten Sie das Ende der Installation ab.
Klicken Sie auf „Chiudi“ (Schließen).
8) Klicken Sie mit der rechten Maustaste auf
das Icon „Risorse del computer“ (WindowsExplorer“.
Klicken Sie auf den Menü-Eintrag „Proprietà“
(Eigenschaften).
- 128 -
P.B.M. S.r.l.
ALFA PROGETTI S.r.l.
Via Barella Z.I. VIGNOLA (MO) ITALIA
Tel. +39 059 77 05 311 Fax +39 059 77 05 300
http://www.gruppopbm.it e-mail: [email protected]
Via Dei Fabbri 42. SPILAMBERTO (MO) ITALIA
Tel. +39 059 78 57 26 Fax +39 059 78 57 37
http://www.alfaprogetti.com e-mail: [email protected]
MANUALE DI ISTRUZIONI "Software BLTView”
Rev. n° 2 del 20/10/2009
File:BLTView_IT_GB_F_D_rev2_221009.doc
9) Klicken Sie auf den Eintrag „Gestione dispositivi“
(Geräte-Verwaltung).
Klicken Sie auf „Gestione periferiche“ (GeräteManager).
10) Öffnen Sie den Listeneintrag „Porte COM e
LPT“ (Anschlüsse COM und LPT).
Vergewissern Sie sich, dass der Anschluss
SmartUSB ordnungsgemäß installiert ist.
Es ist die Anschluss-Nummer angegeben. In der
Abbildung ist die Anschluss-Nummer COM11.
Schließen Sie alle Fenster.
11) Öffnen Sie SmartView
Wählen Sie im Hauptmenü „Impostazione“ (Setup)
und dann „Porta Seriale“ (Serial Port).
12) Wählen Sie den gewünschten seriellen
Anschluss und klicken Sie auf „OK“.
- 129 -
P.B.M. S.r.l.
ALFA PROGETTI S.r.l.
Via Barella Z.I. VIGNOLA (MO) ITALIA
Tel. +39 059 77 05 311 Fax +39 059 77 05 300
http://www.gruppopbm.it e-mail: [email protected]
Via Dei Fabbri 42. SPILAMBERTO (MO) ITALIA
Tel. +39 059 78 57 26 Fax +39 059 78 57 37
http://www.alfaprogetti.com e-mail: [email protected]