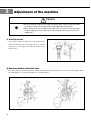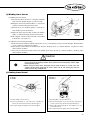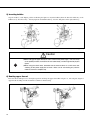
1
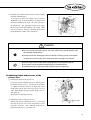
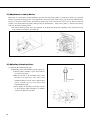
(2) Film adjustment of synchronizer
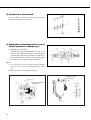
A. For new model type (see figures 14, 15)
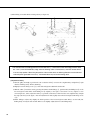
Manually turn the pulley so that the needle bar is placed where it starts rising from the lowest point. Unfasten the film
fixing screw ① in figure 15, and for “DOWN” film A, align the film adjustment base line with the sensor adjustment
base line, as can be seen in ⓚ. Then, using the fixing screw ①, fasten only as much as to prevent the film from
turning. In the same method, place the thread take up lever in the highest point. Once again unfasten the fixed screw
①, and align the “UP” film B like ⓚ. Now, be careful not to move the previously set “DOWN” film A.
B. For old model type (see figure 16 )
Adjust in the same method as new model to make the right side ⓚ of the film’s projecting part aligned to the center of
the sensor base line.
A
①
Sensor adjustment base line
B
Film adjustment
base line
[Old model synchronizer]
ⓚ
B
A
Sensor
ⓚ
①
ⓚ
Sensor
base line
Down Film Adjustment
Up Film Adjustment
Down Film Adjustment
Up Film Adjustment
[Figure 15]
Photo sensor
fixing screw
[New model synchronizer]
[Figure 16]
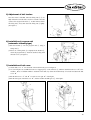
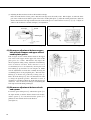
10) Reverse button function (automatic
trimming type)
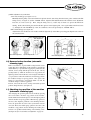
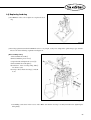
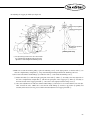
11) Checking stop position of the machine
(automatic trimming type)
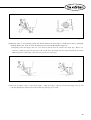
After changing the up-down position of the needle by pressing
the reverse button, check the stop position of the machine.
Check whether the thread take-up lever is in the highest position
when the needle is in up-stop position. When the stop position is
incorrect, there might be problems to the trimming function,
hence the photo film location of the synchronizer must be
corrected. That is, the needle up-stop position is the same as the
needle bar’s stop position once the trimming action takes place.
So there is no problem with the timing of the trimming action.
(See figure 18) (See ‘location detector adjustment’ on page 14)
①
[Figure 17]
Thread take up lever up-stop position
Needle bar frame
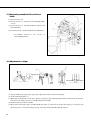
If the reverse button ① is pressed while sewing forward, reverse
sewing takes place immediately. If the machine is stopped first
and the button ① is pressed before stepping the pedal to start the
machine, reverse sewing will take place from the start. Also by
pressing button ① while the machine is in stop position, the
high-low position of the needle bar can be changed. If the button
① is pressed once when the needle bar is in down-stop position,
the needle bar changes to up-stop position. Once again, if the
button ① is pressed twice consecutively within 1 second, the
needle bar changes to down-stop position.
In short, it has both the reverse sewing and needle up-down
position change functions. (See figure 17)
[Figure 18]
15