1
USER MANUAL
- Re-position the sensor
- Replace the sensor
8.2. Pulsar™ Small-Bore MRI Sensor
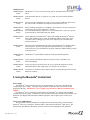
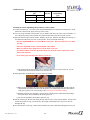
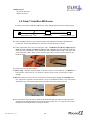
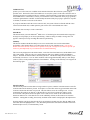
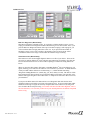
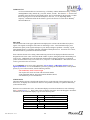
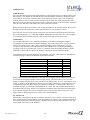
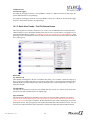
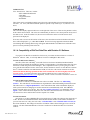
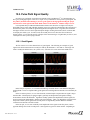
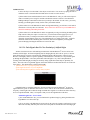
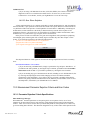
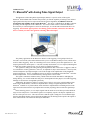
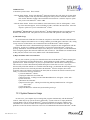
Assemble your Pulsar™ Small-Bore MRI Sensor in the configuration shown in the following figure.
Single Black Cable – 15 ft
Disposable Sensor Clip
Converter Box
1] Connect the DB9 Connector (9-pin connector) on the end of the thin black cable to the MouseOx®
Control Box. Be sure that the MouseOx® software is not running when you do this.
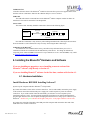
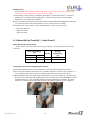
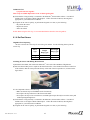
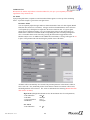
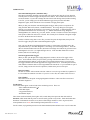
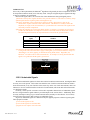
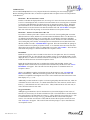
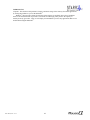
2] Connect a disposable sensor clip to the fiber-optic cable. You MUST USE a Mouse Thigh Clip (any
mouse or a rat < 101 gm) or a Rat Foot Clip (for rats > 100 gm). Place the protrusion on the end
of the fiber-optic cable labeled “LED” into the hole on the clip half marked “LED,” then do the same
for the side marked “PD.” Make sure that the fiber-optic cable is oriented so that it aligns over the
handle as shown.
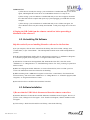
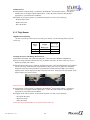
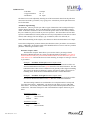
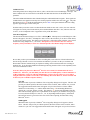
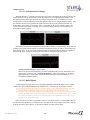
3] Connect the sensor clip to the animal:
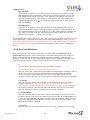
A] Mouse Thigh – Place the clip on the thigh of a mouse as shown. For non-white fur, you MUST shave
both locations of the sensor site. On white fur, shaving is not necessary, but will improve signal
strength.
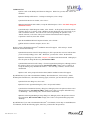
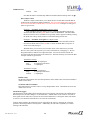
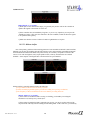
B] Rat Foot – Place the clip over the toes and locate it so that light shines through the CENTER of the
foot. Support the clip/cable so that the animal’s foot is NOT TWISTED relative to its position before
attaching the clip. The clip half marked “PD” should be on the bottom side of the foot.
Mouse Thigh
Rat Foot
4] After locating the clip on the animal, distribute the dual black fiber-optic cable such that it proceeds
straight from the animal and that it DOES NOT twist the animal’s foot. Try to lay the sensor clip so
that both the LED and PD cables are laying on the table.
P/N 100017, Rev. 5.2.4
18