Download TSL 1D Wearable Scanner User Guide
Transcript
TSL 1D Wearable Scanner
User Guide
Canada Post Corporation
Rev 0, October 22, 2009
Prepared by:
Armand Konan
Date: Oct 22, 2009
Reviewed by:
_____
Date: ___
Approved by:
______
Date: ___
Table of Contents
1. Equipement ..................................................................................................................... 1
2. Recharging the Wearable Scanner .................................................................................. 2
3. Wearing the Wearable Scanner....................................................................................... 3
4. Scanning with the Wearable Scanner ............................................................................. 4
5. Removing the Wearable Scanner Battery ...................................................................... 5
6. LED Status ..................................................................................................................... 6
Product & Process Engineering - Parcels
2
1. Equipement
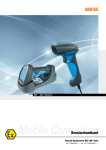
The images below describe the different parts of the Wearable Scanner and the
recharging cradle.
Image 1 – The TSL Wearable Scanner
Image 2 – The Cradle for the TSL Wearable Scanner
Product & Process Engineering - Parcels
1
2. Recharging the Wearable Scanner
The scanner is charged by docking it in the cradle. Plug the power supply
provided with the cradle in to the power in socket on the back of the cradle. The
charge time will depend on how discharged the scanner battery is. Typically a
fully discharged battery will take 3-4 hours to fully charge. The LEDs on the top of
the scanner indicate the charge status; Red for charge in progress, Green for
charge complete.
Image 3 – Wearable Scanner docked in the Cradle
Product & Process Engineering - Parcels
2
3. Wearing the Wearable Scanner
To wear the Wearable Scanner, slide your first and middle fingers through the
loops (as per image below).
To tighten the loops to hold the scanning device in place, adjust the Velcro to fit
comfortably.
Image 4 – Wearable Scanner docked in the Cradle
Product & Process Engineering - Parcels
3
4. Scanning with the Wearable Scanner
To scan, click on the yellow Trigger Button of the wearable scanner (as per
image below). A red scanning beam will show. Make sure that you position the
scanning beam all across the entire barcode width.
Start scanning packets by either:
a) Picking up a handful of items and then scanning and sorting them until you
finish the handful. Or,
b) Picking, scanning and sorting item by item.
c) But do not pick up items all together, scan them all together and sort them
all together.
d) Do not scan non-barcoded items.
Image 5 – Wearable Scanner docked in the Cradle
Product & Process Engineering - Parcels
4
5. Removing the Wearable Scanner Battery
The battery can then be lifted out and replaced. Refit the cover by sliding it back
up until the button clicks in place. See image below.
Image 6 – Removing the battery from the Wearable Scanner
Product & Process Engineering - Parcels
5
6. LED Status
The status LEDs on the top of the Wearable Scanner provide an indication of the
operating status of the unit – as per table below.
Table 1 – Status of the LED
LED colour
Off
Blue flashing
Status
The Handscanner is off.
The Handscanner is powered on and waiting
for a Bluetooth connection.
The Handscanner is powered on and
connected via Bluetooth.
The Handscanner is charging.
The Handscanner is fully charged.
The battery in the Handscanner has a fault, or
it is being charged outside the recommended
temperature range (0°C to 45°C).
Continuous Blue
Red
Green
Red and Green
Product & Process Engineering - Parcels
6


