1
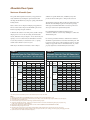
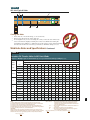
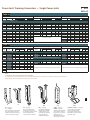
Figure 1
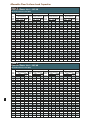
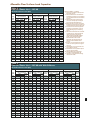
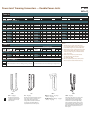
Continued
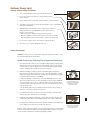
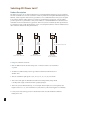
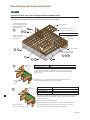
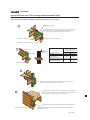
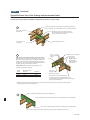
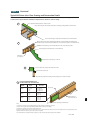
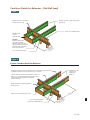
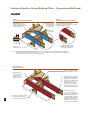
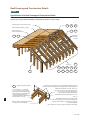
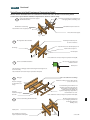
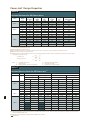
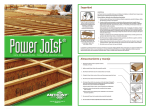
Typical ADI Power Joist® Floor Framing and Construction Details
All nails shown in the details above are assumed to be common nails unless otherwise noted. Framing lumber
assumed to be Spruce-Pine-Fir. Individual components not shown to scale for clarity.
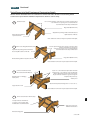
ADI rim joist per 1a
1c
Attach rim joist to floor joist with one nail at top and bottom. Nail
must provide 1 inch minimum penetration into floor joist. For
2-1/2" and 3-1/2" flange widths, toe nails may be used.
Attach Power Joist per 1b
Attach rim joist to top plate per 1a
Minimum 1-3/4" bearing required
APA Rim Board blocking
panel per 1a
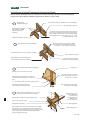
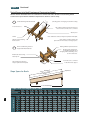
1d
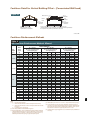
Squash block
+ 1/16"
for squash
blocks
Pair of Squash Blocks
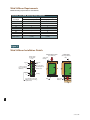
2x lumber
1-1/8" APA Rim Board,
Rim Board Plus, or
Rated Sturd-I-Floor 48 oc
1" APA Rim Board or
Rated Sturd-I-Floor 32 oc
Maximum factored
vertical load per pair
of squash blocks (lb)
3-1/2" wide 5-1/2" wide
5800
9500
4500
5800
4000
5800
Provide lateral bracing per 1a, 1b, or 1c
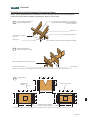
1e
Transfer load from above to bearing below. Install squash blocks per 1d.
Match bearing area of blocks below to post above.
1f
Use single Power Joist (up to 18") for factored loads up to 3300 plf, double
Power Joists (up to 18") for loads up to 6600 plf (filler block not required).
Attach Power Joist to top plate using 2-1/2" nails at 6" o.c.
9
Provide backer for siding attachment unless nailable sheathing is used
Wall sheathing, as required
APA Rim Board may be used in lieu of Power Joists. Backer is not required when
APA Rim Board is used.
Source: APA