1
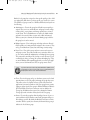
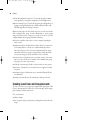
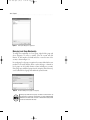
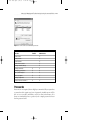
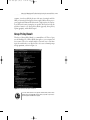
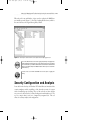
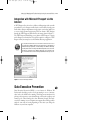
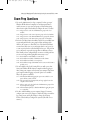
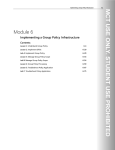
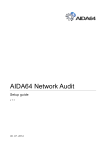
03 3609 CH03.qxd
6/21/05
11:52 AM
Page 95
3
Setting Up, Managing, and
Troubleshooting Security
Accounts and Policies
. . . . . . . . . . . . . . . . . . . . . . . . . . . . . . . . . . . . . . . . . . . . . . .
Terms you’ll need to understand:
✓
✓
✓
✓
✓
✓
✓
✓
✓
✓
✓
✓
✓
Local user account
Local group
Complex password
Domain user account
Global, Universal, and Domain Local groups
Security Identifier (SID)
Authentication
Security Center
Local Group Policy
Group Policy Object (GPO)
Resulting Set of Policies (RSoP)
Software Restriction Policy
Microsoft Passport
Techniques you’ll need to master:
✓
✓
✓
✓
✓
Adding and configuring new local user accounts
Adding users and groups from a Domain to a Local group
Properly renaming user accounts to maintain resource access
Configuring the Local Security Policy and the Local Group Policy
Understanding the order in which Group Policies apply to a user and computer
when the computer is a member of the domain
✓ Analyzing and configuring computers with the security templates
✓ Using and configuring a Microsoft Passport
03 3609 CH03.qxd
96
6/21/05
11:52 AM
Page 96
Chapter
. . . . .3. . . . . . . . . . . . . . . . . . . . . . . . . . . . . . . . . . . . . . . . . . .
The Local Users and Groups snap-in enables you to manage local users and
groups. You can get to the snap-in by choosing Start, Control Panel,
Performance and Maintenance Category, Administrative Tools, Computer
Management, and then by expanding the tree pane of the Computer
Management Console until you see the snap-in. In this snap-in, you can create, modify, duplicate, and delete users (in the Users folder) and groups (in
the Groups folder).
Built-in User and Group Accounts
The three primary built-in user accounts are Administrator, Guest, and
HelpAssistant. The Administrator account is a critical account for your computer and has some essential characteristics, including the following:
➤ Cannot be deleted.
➤ Can be disabled. Be sure to create another user account with administra-
tor privileges before disabling the default Administrator account.
➤ Through its membership in the Administrators group, has all privileges
required to perform system administration duties.
➤ Can be renamed.
The Guest account is on your system for rare and infrequent use and should
be kept securely disabled. This account also has some distinct characteristics,
including the following:
➤ Is disabled by default. Only an administrator can enable the account. If
it is enabled, it should be given a password, and User Cannot Change
Password should be set if multiple users will log on with the account.
➤ Cannot be deleted.
➤ Can be locked out.
➤ Does not save user preferences or settings.
The HelpAssistant account is on your system for use when the Remote
Desktop Assistance functions are used. This account’s characteristics include
the following:
➤ Disabled by default.
➤ Is automatically enabled when an invitation is created for Remote
Assistance.
➤ Can be deleted.
➤ Can be renamed.
03 3609 CH03.qxd
6/21/05
11:52 AM
Page 97
. . . . . . . . Setting
. . . . Up,
. . .Managing,
. . . . . and
. . .Troubleshooting
. . . . . . . . .Security
. . . . Accounts
. . . . . .and
. .Policies
. . . .
Built-in Local groups have assigned to them specific privileges (also called
user rights) that enable them to perform specific sets of tasks on a system.
The default local group accounts on a Windows XP Professional system are
the following:
➤ Administrators—Users in this group have all built-in system privileges
assigned. They can create and modify user and group accounts, manage
security policies, create printers, and manage permissions to resources
on the system. The local Administrator account is the default member
and cannot be removed. Other accounts can be added and removed.
When a system joins a domain, the Domain Admins group is added to
this group, but it can be removed.
➤ Backup Operators—Users in this group can back up and restore files and
folders regardless of security permissions assigned to those resources. They
can log on and shut down a system, but cannot change security settings.
➤ Power Users—Users in this group can share resources and create user
and group accounts. They cannot modify user accounts they did not create, nor can they modify the Administrators or Backup Operators groups.
They cannot take ownership of files, back up or restore directories, load
or unload device drivers, or manage the security and auditing logs. They
can run all Windows XP-compatible applications, as well as legacy applications, some of which members of the Users group cannot execute.
If you want certain users to have broad system administration capabilities, but do
not want them to be able to access all system resources, consider putting them in
Backup Operators and Power Users rather than Administrators.
➤ Users—Users in this group can log on, shut down a system, use local and
network printers, create local groups, and manage the groups they create.
They cannot create a local printer or share a folder. Some down-level
applications do not run for members of the Users group because security
settings are tighter for the Users group in Windows XP than in Windows
NT 4. By default, all local user accounts you create are added to the
Users group. In addition, when a system joins a domain, the Domain
Users group is made a member of that system’s local Users group.
➤ Guests—Users in this group have limited privileges but can log on to a
system and shut it down. Members cannot make permanent changes to
their desktop or profile. By default, the Built-in Local Guest account is
a member. When a system joins a domain, the Domain Guests group is
added to the Local Guests group.
97
03 3609 CH03.qxd
98
6/21/05
11:52 AM
Page 98
Chapter
. . . . .3. . . . . . . . . . . . . . . . . . . . . . . . . . . . . . . . . . . . . . . . . . .
➤ Network Configuration Operators—Users in this group have adminis-
trative privileges to manage the configuration of networking features.
➤ Remote Desktop Users—Users in this group have the added privilege of
logging on through Terminal Services, which in Windows XP is established through a Remote Desktop connection.
Built-in System groups also exist, which you do not see in the user interface
while managing other group accounts. Membership of system groups
changes based on how the computer is accessed, not on who accesses the
computer. Built-in System groups include the following:
➤ Everyone—Includes all users who access the computer, including the
Guest account.
➤ Authenticated Users—Includes all users with a valid user account in the
local security database or (in the case of domain members) in Active
Directory’s directory services. You use the Authenticated Users group
rather than the Everyone group to assign privileges and group permissions, because doing so prevents anonymous access to resources.
➤ Creator Owner—Contains the user account that created or took owner-
ship of a resource. If the user is a member of the Administrators group,
the group is the owner of the resource.
➤ Network—Contains any user with a connection from a remote system.
➤ Interactive—Contains the user account for the user logged on locally at
the system.
➤ Anonymous Logon—Includes any user account that Windows XP did
not authenticate.
➤ Dial-up—Contains all users who currently use a dial-up connection.
Creating Local User and Group Accounts
To create a local user or group account, right-click the appropriate folder
(Users or Groups) and choose New User (or New Group), enter the appropriate attributes, and then click Create.
User account names:
➤ Must be unique.
➤ Are recognized only up to 20 characters, although the name itself can be
longer.
03 3609 CH03.qxd
6/21/05
11:52 AM
Page 99
. . . . . . . . Setting
. . . . Up,
. . .Managing,
. . . . . and
. . .Troubleshooting
. . . . . . . . .Security
. . . . Accounts
. . . . . .and
. .Policies
. . . .
➤ Cannot contain the following characters: “ / \ [ ] ; : | = + * ? < >
➤ Are not case sensitive, although the user account’s name property dis-
plays the case as entered.
User account passwords:
➤ Are recommended.
➤ Are case sensitive.
➤ Can be up to 127 characters, although down-level operating systems
such as Windows NT 4 and Windows 9x support only 14-character
passwords.
➤ Should be a minimum of seven to eight characters.
➤ Should be difficult to guess and, preferably, should mix uppercase and
lowercase letters, numerals, and nonalphanumeric characters.
➤ Can be set by the administrator (who can then determine whether users
must, can, or cannot change their password) or the user (if the administrator has not specified otherwise).
Select the option User Must Change Password at Next Logon to ensure that
the user is the only one who knows the account’s password. Select User
Cannot Change Password when more than one person (such as Guest) uses
the account.
The User Cannot Change Password option is not available when User Must Change
Password at Next Logon is selected.
The Password Never Expires option is helpful when a program or a service
uses an account. To avoid having to reconfigure the service with a new password, you can set the service account to retain its password indefinitely.
Configuring Account Properties
The information you can specify when creating an account is limited in
Windows XP. Therefore, after creating an account, you often need to go to
the account’s Properties dialog box, which you can access by right-clicking
the account and choosing Properties. After the creation of a user, you can
specify the groups the user belongs to and the profile settings for the user, as
shown in Figure 3.1.
99
03 3609 CH03.qxd
6/21/05
11:52 AM
Page 100
100 Chapter 3
. . . . . . . . . . . . . . . . . . . . . . . . . . . . . . . . . . . . . . . . . . . . . . . .
Figure 3.1 The Properties dialog box of a typical user.
Managing Local Group Membership
To manage the membership of a Local group, right-click the group and
choose Properties. To remove a member, select the account and click
Remove. To add a member, click Add and select or enter the name of the
account, as shown in Figure 3.2.
In a workgroup, Local groups can contain only accounts defined in the same
machine’s local security database. When a system belongs to a domain, its
Local groups can also include domain accounts, including user accounts,
Universal groups, and Global groups from the enterprise’s Active Directory,
as well as Domain Local groups from within the system’s domain.
Figure 3.2 Interface for adding a user or group to a Local group.
Universal groups and Domain Local groups are available to add as members only
when the domain is in native mode, meaning that it can contain only Windows 2000
and Windows Server 2003 domain controllers—no Windows NT 4.0 backup domain
controllers are allowed under native mode.
03 3609 CH03.qxd
6/21/05
11:52 AM
Page 101
. . . . . . . . Setting
. . . . Up,
. . .Managing,
. . . . . and
. . .Troubleshooting
. . . . . . . . .Security
. . . . Accounts
. . . . . .and
. .Policies
. . . .
Renaming Accounts
To rename an account, right-click the account and choose Rename. Type the
new name and press Enter. Each user and group account is represented in the
local security database by a long, unique string called a Security Identifier
(SID), which is generated when the account is created. The SID is assigned
permissions and privileges. The user or group name is just a user-friendly
interface name for humans to interact with the computer. Therefore, when
you rename an account, the account’s SID remains the same and the account
retains all its group memberships, permissions, and privileges.
Two situations mandate renaming an account. The first occurs when one
user stops using a system and a new user requires the same access as the first.
Rather than creating a new local user account for the new user, rename the
old user account. The account’s SID remains the same, so its group memberships, privileges, and permissions are retained. You should also specify a
new password in the account’s Properties dialog box and select the User
Must Change Password at Next Logon option.
One thing to keep in mind is that the user’s Home Directory name will not change
along with renaming the user. The administrator will need to change the reference in
the user properties and within the directory structure where the folder resides.
The second situation that warrants renaming a user account is the security
practice of renaming the built-in Administrator and Guest accounts. You
cannot delete these accounts, nor can you remove the Administrator account
from the Local Administrators group, so renaming the accounts is a recommended practice for hindering malicious access to a system.
A Group Policy exists to modify the Administrator and Guest name and status
(enabled or disabled). You can either create this at the local computer level or at the
site, domain, or organizational unit (OU) level within Active Directory.
Disabling or Enabling User Accounts
To disable or enable a user account, open its Properties dialog box and select
or clear the Account Is Disabled check box. If an account is disabled, a user
cannot log on to the system using that account. Only Administrators can
enable the Guest account.
101
03 3609 CH03.qxd
6/21/05
11:52 AM
Page 102
102 Chapter 3
. . . . . . . . . . . . . . . . . . . . . . . . . . . . . . . . . . . . . . . . . . . . . . . .
Deleting Accounts
You can delete a local user or group account (but not built-in accounts such
as Administrator, Guest, or Backup Operators) by right-clicking the account
and choosing Delete. When you delete a group, you delete the group
account only, not the members of the group. A group is a membership list,
not a container.
When you delete an account, you are deleting its SID. Therefore, if you delete an
account by accident and re-create the account, even with the same name, it will not
have the same permissions, privileges, or group memberships. You will have to recreate all those settings. For that reason, and to facilitate auditing, it is recommended
that you disable, not delete, any user that leaves an organization.
Using the User Accounts Tool
Another tool for administering local user accounts is the User Accounts tool
in Control Panel, shown in Figure 3.3. This tool enables you to create and
remove user accounts, as well as specify specific configurations for those users.
It is wizard driven and is useful for novice administrators and home users.
The User Account tool changes functions as the computer joins a domain
from a workgroup. These changes are to control the access to the computer
from other domain users. The following is a list of configurations that can be
completed after the computer has become a member of a domain:
➤ Manage the users that can access the local computer.
➤ Modify the type of access a user has on the computer. This would include
Standard user, Limited user, or a custom type of user, such as an
Administrator.
➤ Manage passwords that are stored on the local computer.
➤ Manage .NET Passport.
➤ Access advanced user and computer settings.
➤ Change the local administrator password.
➤ Modify the secure logon preferences—basically, whether a user is
required to press Ctrl+Alt+Delete to log on.
For machines that do not participate in a domain in Windows XP, two categories of user accounts exist: Limited and Administrator. By default, the person installing the operating system is an administrator. An account that is an
administrator can perform any and all functions on the computer. By contrast, an account designated as Limited cannot create shares or install software. Table 3.1 lists several of the differences between the accounts.
03 3609 CH03.qxd
6/21/05
11:52 AM
Page 103
. . . . . . . . Setting
. . . . Up,
. . .Managing,
. . . . . and
. . .Troubleshooting
. . . . . . . . .Security
. . . . Accounts
. . . . . .and
. .Policies
. . . .
Figure 3.3 User Accounts tool for administering local users.
Table 3.1 Different Functionality Among Windows XP Accounts
Function
Limited
Create shares
Administrator
X
Create printers
X
Install software
X
Create other accounts
X
Change network settings
X
Change passwords
X
X
Change account picture
X
X
Set up .NET Passport
X
X
Access programs
X
X
Change background
X
X
Request Remote Assistance
X
X
Passwords
Passwords are not required, but are highly recommended. If your system has
accounts that don’t require any form of password, virtually anyone will be
able to access your files and folders, even if you don’t want them to. It is
always recommended to have a password; even a simple password is better
than no password at all.
103
03 3609 CH03.qxd
6/21/05
11:52 AM
Page 104
104 Chapter 3
. . . . . . . . . . . . . . . . . . . . . . . . . . . . . . . . . . . . . . . . . . . . . . . .
Forgotten Passwords
If you forget your password, you can recover your settings and user account
with the Forgotten Password Wizard. The wizard enables you to create a
Password Reset Disk to help you open your account and create a new password. The Password Reset Wizard also enables you to change your password.
To protect user accounts in the event that the user forgets the password,
every local user can make a Password Reset Disk and keep it in a safe place.
Then, if the user forgets his or her password, the password can be reset using
the Password Reset Disk, enabling the user to access the local user account
again.
If you already made a Password Reset Disk for your local user account
through the Forgotten Password Wizard, you can use it to access the computer, even if you have forgotten your password.
Fast User Switching
Fast User Switching is a special feature of Windows XP Professional. Don’t
be fooled with this option, though, because it is available only when the computer is in a workgroup. The option is removed as soon as the computer is
joined to a domain. Fast User Switching makes it possible for users to switch
quickly between other users without actually logging off from the computer.
Multiple users can share a computer and use it simultaneously, switching
back and forth without closing the programs they are running. To switch to
another user, click Start, click Log Off, click Switch User, and then click the
user account you would like to switch to. The following caveats apply when
using Fast User Switching:
➤ It will not appear if it has not been turned on in User Accounts in
Control Panel.
➤ It is not available on computers that are members of a network domain.
➤ It can be turned on or off only by users who have administrative privi-
leges on the computer.
➤ It cannot be turned off while multiple users are logged on to the com-
puter.
➤ When it is not turned on, programs shut down when a user logs off, and
the computer runs faster for the next user who logs on.
03 3609 CH03.qxd
6/21/05
11:52 AM
Page 105
. . . . . . . . Setting
. . . . Up,
. . .Managing,
. . . . . and
. . .Troubleshooting
. . . . . . . . .Security
. . . . Accounts
. . . . . .and
. .Policies
. . . .
Authentication
When a user wants to access resources on a machine, that user’s identity must
first be verified through a process called authentication. For example, when a
user logs on, the security subsystem evaluates the user’s username and password. If they match, the user is authenticated. The process of logging on to
a machine where you are physically sitting is called an interactive logon.
Authentication also happens when you access resources on a remote system.
For example, when you open a shared folder on a server, you are being
authenticated as well, only this time, the process is called a remote or network
logon, because you are not physically at the server.
The Security Dialog Box
The Security dialog box allows for interactive logon to a Windows XP system. You can access the Security dialog box shortly after a system has started, and at any time after logon, by pressing Ctrl+Alt+Delete. If you are not
currently logged on, you can enter a username and password. If the system
belongs to a domain, you need to be certain that the domain in which your
account exists is selected in the Log On To text box. You can either select the
domain from the drop-down list or enter your User Principal Name (UPN)
in the Username text box. The UPN is an attribute of an Active Directory
user object and, by default, is of the form [email protected], where
domain.name is the Windows 2000 domain for which your user account
resides (for example, braincore.net). The suffix following the @ symbol indicates the domain against which to authenticate the user.
If you are currently logged on to a system, pressing Ctrl+Alt+Delete takes
you to the Windows XP Security dialog box, at which point you can do the
following:
➤ Log off the system, which closes all programs and ends the instance of
the session.
➤ Lock the system, which allows programs to continue running but pre-
vents access to the system. When a system is locked, you can unlock it
by pressing Ctrl+Alt+Delete and entering the username and password of
the user who locked the system, or an administrator’s username and
password.
➤ Shut down the system.
➤ Change your password.
➤ Access Task Manager.
105
03 3609 CH03.qxd
6/21/05
11:52 AM
Page 106
106 Chapter 3
. . . . . . . . . . . . . . . . . . . . . . . . . . . . . . . . . . . . . . . . . . . . . . . .
Managing Domain User Accounts
Domain user accounts are managed with the Active Directory Users and
Computers snap-in. To access it, choose Start, Settings, Control Panel,
Administrative Tools, Active Directory Users and Computers. When you
open the tool, you connect to an available domain controller. To specify
which domain controller or domain you want to modify, right-click the
Active Directory Users and Computers node and choose Connect to
Domain or Connect to Domain Controller.
Unlike the local security database, which is a static list of users and groups,
Active Directory has containers and OUs, which help organize database
objects such as users, computers, printers, and other OUs. Therefore, to
manage domain user accounts in Windows 2000 or Server 2003, you need to
access the correct container or OU that houses your user object.
The Active Directory Users and Computers tool is not installed by default. You need
to install the Admin Pack (adminpk.msi) from a Windows Server 2003 domain controller before you can use Active Directory Users and Computers on a Windows XP
client computer.
Creating Domain User Accounts
You create domain user accounts by right-clicking the container or OU that
will contain the user account and then selecting New, User. A wizard
prompts you for basic account properties, including the following:
➤ First name and last name
➤ Full name (by default, the combination of the first and last names)
➤ User logon name and User Principal Name (UPN) suffix
➤ User logon name (pre-Windows 2000)
➤ Password
Creating Template User Accounts
When you expect to create multiple user objects with similar properties, you
can create a “template” account that, when copied, initiates the new accounts
with predefined attributes. One thing to keep in mind when working with
templates is to disable the template account. This will ensure that a real user
can’t access the network as the template user. Of course, when you copy the
template account to create a new user, make sure you enable the new account.
03 3609 CH03.qxd
6/21/05
11:52 AM
Page 107
. . . . . . . . Setting
. . . . Up,
. . .Managing,
. . . . . and
. . .Troubleshooting
. . . . . . . . .Security
. . . . Accounts
. . . . . .and
. .Policies
. . . .
Disabling and Deleting User Accounts
The process for disabling and deleting domain user accounts is the same as for
local user accounts, except that you use the Active Directory Users and
Computers snap-in to perform the tasks. The check box for disabling an
account is on the user’s Property sheet, or you can disable the account by
right-clicking the user object and selecting the Disable Account menu option.
Understanding and Implementing
Group Policy
One of the most powerful aspects of Windows XP Professional and
Windows 2000 Active Directory is the implementation of Group Policy.
Group Policy is the capability to control finite details of a computer or user
quickly and easily. These policies can either be configured at the local level
or within the Active Directory structure. Regardless of the location of implementation, these settings are extremely powerful and can change the way
normal control and administration is done within a company.
Local Group Policy
Actually, you can administer Local Policies from two locations: a Local
Group Policy and a Local Security Policy. The Local Group Policy can be
accessed by opening the Group Policy snap-in within a Microsoft
Management Console and then selecting the Local Computer option. You
can configure security-related settings using the Local Security Policy.
Choose Start, Administrative Tools, Local Security Policy. Each of the nodes
in the Local Security Policy Console is a security area or scope, within which
you will find dozens of security-related settings. The Local Security Policy
is nothing more than a subset of the Local Group Policy. So, when you open
the Local Group Policy, you are also accessing the Local Security Policy.
The Local Group Policy can also be accessed by typing gpedit.msc at the command
prompt.
Managing Local Group Policies
The Local Group Policy and the Local Security Policy tools are most helpful on standalone systems and laptops that roam away from the network environment. The Local Group Policy controls the configuration of the local
107
03 3609 CH03.qxd
6/21/05
11:52 AM
Page 108
108 Chapter 3
. . . . . . . . . . . . . . . . . . . . . . . . . . . . . . . . . . . . . . . . . . . . . . . .
computer and user. The policy-based settings will apply to a computer at
startup and to a user at logon. Also, these policy settings are applied at a
refresh interval, which does not require a reboot or logging off. The default
refresh interval for all Group Policy Object settings on a Windows XP client
is 90 minutes.
In a workgroup environment, you will need to access each computer and
make the desired settings on each computer individually. Methods exist to
make this more efficient by using security templates, but the process is still a
manual one that requires decentralized administration of the policy settings.
The solution to this decentralized administration is to implement Active
Directory and apply the desired settings to a grouping of computers or users
by using Group Policy Objects within Active Directory.
Group Policy Objects (GPO)
Group Policy Objects (GPOs) within Active Directory take the concept of
policy-enforced configurations and apply it to multiple computers or users.
Unlike Local Group Policy, GPOs provide a centralized enumeration of
configuration settings. You can apply, or link, GPOs to the following:
➤ A site—This is an Active Directory object that represents a portion of
your network topology with good connectivity—a local area network
(LAN), for example.
➤ A domain—This causes the configuration specified by the policy to be
applied to every user or computer in the domain.
➤ An OU—This applies policies to users or computers in the OU or any
child OUs.
To access Group Policy, you must go to the properties of a site, domain, or
OU (SDOU), and click the Group Policy tab. Therefore, to work with group
policy for a site, you use the Active Directory Sites and Services Console,
whereas to work with group policy for a domain or OU, you use Active
Directory Users and Computers.
Microsoft has released a Group Policy Management Console (GPMC), which allows
for easier and more efficient control over GPOs. This is a free download from
Microsoft and can run only on Windows XP and Windows Server 2003. After it is
installed, it is accessed from the Administrative Tools menu or the MMC as a snap-in.
An individual machine can have only one Local Group Policy, whereas an
SDOU can have multiple GPOs linked to them. In the Group Policy
Properties dialog box, you can create a new GPO by clicking New, or link an
03 3609 CH03.qxd
6/21/05
11:52 AM
Page 109
. . . . . . . . Setting
. . . . Up,
. . .Managing,
. . . . . and
. . .Troubleshooting
. . . . . . . . .Security
. . . . Accounts
. . . . . .and
. .Policies
. . . .
existing GPO to the SDOU by clicking Add. If you select a group policy and
click Edit, you expose the GPO in the Group Policy Editor. The GPMC
removes much of the complexity of creating and linking GPOs to Active
Directory objects. The GPMC displays the domain, OUs, and sites clearly,
which can all be right-clicked to expose options for creating and linking
GPOs to these nodes.
Application of Group Policy Objects
GPOs are divided into the Computer Configuration and User Configuration
nodes. The computer settings apply to every computer in the site, domain,
or OU to which the policy is linked, and, by default, to all child OUs.
Computer settings take effect at startup and at every refresh interval, which
by default is 90 minutes. User settings affect every user in the site, domain,
or OU and its children at logon, and after each refresh interval.
When configuring GPOs, ensure that the computers and/or users lie within the path
of the GPO SDOU to receive the policy settings. For example, if you want to control
a web server named IIS_Apps, you would need to move this computer object to the
proper OU to have the GPO for that OU apply to the IIS_Apps computer.
When a computer starts, its current settings are modified first by any configuration specified by the Local Group Policy. Then the configurations for
the SDOU GPOs are applied. The SDOU policies are applied in order: first,
the policies linked to the computer’s site, then the policies for its domain, and
finally the policies for each OU in the branch that leads to the object’s OU.
The policy settings from the Local Group Policy and the SDOU will append
to each other if no conflict exists. If a conflict occurs in a specific configuration setting, the last setting applied has control. Therefore, the policies that
are “closest” to the computer—the policies linked to its OU, for example—
take precedence if a conflict arises. The same application of policies applies
to a user at logon: local policy, site policy, domain policy, and OU policy.
User Rights Assignment
User rights, also called privileges, enable a user or group to perform system
functions such as changing the system time, backing up or restoring files, and
formatting a disk volume. Some rights are assigned to Built-in groups. For
example, all members of the Administrators group can format a disk volume.
You cannot deny that right to the members of the Administrators group, nor
can you assign that right to a user or group you create. Other rights are
assignable. For example, the right to back up files and folders is given by
default to all members of the Administrators and Backup Operators, but you
109
03 3609 CH03.qxd
6/21/05
11:52 AM
Page 110
110 Chapter 3
. . . . . . . . . . . . . . . . . . . . . . . . . . . . . . . . . . . . . . . . . . . . . . . .
can remove the right for those groups or assign the right to other users or
groups. You can modify the rights that are visible in the Local Security Policy
Console. You do not see the “hard wired” rights in this interface.
User rights, because they are system oriented, override object permissions
when the two are in conflict with each other. For example, a user may be
denied permission to read a folder on a disk volume. However, if the user has
been given the privilege to back up files and folders, a backup of the folder
succeeds, even though the user is denied permission to the folder.
Security Options
In the Security Options node are a number of useful security settings. This
node highlights one of the advantages of policies, because while many of these
settings are accessible elsewhere in the user interface (for example, you can
specify driver signing in the System applet), a policy enables you to configure
all those settings, from all the tools and applets, into a centralized location.
Some particularly useful options to be familiar with are the following:
➤ Clear the Virtual Memory Pagefile When the System Shuts Down—By
default, the pagefile is not cleared and could allow unauthorized access
to sensitive information that remains in the pagefile.
➤ Do Not Display Last Username in Logon Screen—This option forces
users to enter both their username and password at logon. By default,
the policy is disabled and the name of the previously logged-on user is
displayed.
➤ Number of Previous Logons to Cache—This policy limits the number
of cached profiles that are on a system. Not only will this clean up the
hard drive space on a system, but if no cached profiles exist, users will be
forced to access a domain controller when logging on to the domain,
instead of using cached credentials.
Account Policies
Account policies control the password requirements and how the system
responds to invalid logon attempts. The policies you can specify include the
following:
➤ Maximum Password Age—Specifies the period of time after which a
password must be changed.
➤ Minimum Password Length—Specifies the number of characters in a
password. Passwords can contain up to 127 characters; however, most
passwords should not exceed 14 characters.
03 3609 CH03.qxd
6/21/05
11:52 AM
Page 111
. . . . . . . . Setting
. . . . Up,
. . .Managing,
. . . . . and
. . .Troubleshooting
. . . . . . . . .Security
. . . . Accounts
. . . . . .and
. .Policies
. . . .
➤ Passwords Must Meet Complexity Requirements—This policy, if in
effect, does not allow a password change unless the new password contains at least three of four character types: uppercase (A through Z), lowercase (a through z), numeric (0 through 9), and nonalphanumeric (such
as !). All passwords must also be at least six characters long to meet complexity requirements.
➤ Enforce Password History—The system can remember a specified num-
ber of previous passwords. When a user attempts to change his or her
password, the new password is compared against the history; if the new
password is unique, the change is allowed.
➤ Minimum Password Age—Specifies the number of days that a new pass-
word must be used before it can be changed again.
➤ Account Lockout Threshold—Specifies the number of denied logon
attempts after which an account is locked out. For example, if this is set
to 3, a lockout occurs if a user enters the wrong password three times;
any further logon attempt will be denied. If this is set to 0, there is no
lockout threshold.
➤ Reset Account Lockout Counter After—Specifies the number of min-
utes after which the counter that applies to the lockout threshold is
reset. For example, if the counter is reset after 5 minutes and the
account lockout threshold is 3, a user can log on twice with the incorrect
password. After 5 minutes, the counter is reset, so the user can log on
twice more. A third invalid logon during a 5-minute period locks out the
account.
➤ Account Lockout Duration—Specifies how long logon attempts are
denied after a lockout. During this period, a logon with the locked out
username is not authenticated.
Audit Policies
Audit policies specify what types of events are entered into the Security Log.
The most important policies to understand include those in the following
list:
➤ Logon Events—Authentication of users logging on or off locally and
making connections to the computer from remote systems.
➤ Account Management—Any change to account properties, including
password changes and additions, deletions, or modifications to users or
groups.
111
03 3609 CH03.qxd
6/21/05
11:52 AM
Page 112
112 Chapter 3
. . . . . . . . . . . . . . . . . . . . . . . . . . . . . . . . . . . . . . . . . . . . . . . .
➤ Object Access—Access to objects on which auditing has been specified.
Auditing object access, for example, enables auditing of files and folders on
an NT File System (NTFS) volume, but you must also configure auditing
on those files and folders. Refer to Chapter 2, “Establishing, Configuring,
and Managing Resources,” for a detailed discussion of auditing.
➤ Privilege Use—Use of any user rights, now called privileges. For exam-
ple, this policy audits a user who changes the system time, because
changing the system time is a privilege.
For each policy, you can specify to audit successes, failures, or both. As events
are logged, they appear in the Security Log, which, by default, can be viewed
only by administrators. Other logs can be viewed by anyone.
SP2 GPO Changes
Service Pack 2 is known as the “security pack” because of all the security
changes it provides. A large amount of those security changes and features
can be controlled with GPOs. Microsoft has added more than 600 (no, this
is not a typing error) settings to a default GPO. The new settings help control Windows Firewall, Windows Update, Internet communications, and
more. The majority of these changes have taken place in the Administrative
Templates section of both the User Configuration and Computer
Configurations sections.
With so many new GPO settings, you must become familiar with all the new areas
and changes that have occurred due to SP2. These changes are available only on
Windows XP clients, until the changes are migrated over to the Windows 2000 and
Server 2003 domain controllers.
To get the full list of new Administrative Template updates that SP2 provides, go to
www.microsoft.com and type the term policysettings into the Search box. The results
of this search will take you to the site where you can download the Excel spreadsheet
that contains all the settings.
Resultant Set of Policy (RSoP)
As you become more familiar with Group Policy, both at the local and Active
Directory levels, you will quickly see that they can be very complex. The
complexity results not only from the numerous settings that are available
within a single Group Policy, but also from the fact that many policies can be
applied, and at many different areas within the enterprise. When these settings finally apply to the computer and user on a Windows XP Professional
03 3609 CH03.qxd
6/21/05
11:52 AM
Page 113
. . . . . . . . Setting
. . . . Up,
. . .Managing,
. . . . . and
. . .Troubleshooting
. . . . . . . . .Security
. . . . Accounts
. . . . . .and
. .Policies
. . . .
computer, it can be very difficult, because of the array of settings from all the
GPOs, to determine the final policies that are applied. Microsoft has gone to
great lengths with Windows XP Professional to help decipher the complexity of GPOs and security settings that are possible. Microsoft has done this
with three fantastic tools: Group Policy Result (gpresult), Group Policy
Update (gpupdate), and the RSoP snap-in.
Group Policy Result
The first tool, Group Policy Result, is a command-line tool. This tool gives
you the Resulting Set of Policy (RSoP) that applies to your computer and
user accounts. The tool is extremely simple to run and is easy to read when
it spits the results back to you. All you need to do is start a command prompt
and type gpresult, as shown in Figure 3.4.
Figure 3.4 Group Policy Result output for the RSoP.
You can also add the /v switch to the gpresult command, which provides verbose
information about the applied GPOs. Another switch, /z, provides “super verbose”
output with regard to the GPOs that are applied.
113
03 3609 CH03.qxd
6/21/05
11:52 AM
Page 114
114 Chapter 3
. . . . . . . . . . . . . . . . . . . . . . . . . . . . . . . . . . . . . . . . . . . . . . . .
Group Policy Update
It is well known that Group Policies automatically refresh by default. So, when
you configure any new setting in the Local or Active Directory Group Policies,
the settings will automatically refresh for both the computer and user. For
some situations, this is not sufficient, though. You might be testing out new
policies and want to see the results immediately, or want to force a new security policy to a department of users immediately. If you need to force a policy
immediately, you need only to run the Group Policy Update command-line
tool, gpupdate. This tool will investigate the Local and Active Directory–based
Group Policies and apply them immediately to both the computer and user
accounts. You do not need to run any switches with the tool, but if you want
better control, you can use the primary switches listed next:
➤ U: (Computer, User)—Allows explicit refreshing of either the computer
or user portions of the policies that need to be applied.
➤ /force—Reapplies all settings in the policies, whereas if no switches are
used, only the changed policies apply.
➤ /logoff—Some user-based Group Policy settings exist (such as Folder
Redirection) that do not apply until the user logs off and back on. With
this switch, the user will be logged off automatically after the other policies refresh.
➤ /boot—Like the user settings, some computer settings require a reboot
(such as software deployment). With this switch, the computer will automatically reboot after the other policies refresh.
RSoP Snap-in
The final tool for determining the RSoP is the new RSoP snap-in. This tool
enables you to investigate the policies in a GUI interface, which can then be
saved to a file or website for archiving. To open this tool, open up a new
MMC and add the RSoP snap-in. When you open the tool, you will have the
following options for your Windows XP Professional computer:
➤ Computer Scope—You have the choice of selecting either your computer
or another computer on the network (as long as you have administrative
credentials on the remote computer). You are also able to eliminate the
computer portion of the RSoP, if you want to see only user-based settings.
➤ User Scope—You can select the currently logged on user or another user
who can access the local computer. Again, you must have the correct
privileges to view another user’s RSoP. You can also eliminate the user
portion of the RSoP, if you want to see only the computer-based settings.
03 3609 CH03.qxd
6/21/05
11:52 AM
Page 115
. . . . . . . . Setting
. . . . Up,
. . .Managing,
. . . . . and
. . .Troubleshooting
. . . . . . . . .Security
. . . . Accounts
. . . . . .and
. .Policies
. . . .
When the tool is run and finishes, it gives you the results in the MMC that
you initially opened. Figure 3.5 shows the resulting RSoP format, which is
the same format as the original Group Policy Editor.
Figure 3.5 RSoP snap-in results for both the local computer and currently logged-on user.
There are two different modes of the RSoP: logging and planning. The logging mode
is native to Windows XP and produces the results mentioned previously. The planning
mode is available after you install the Administrative Pack and have the administrative
privileges to investigate and plan how GPOs will behave when objects are moved within Active Directory.
The RSoP can also be run within the GPMC. There are two options: Logging and
Planning.
Security Configuration and Analysis
It was back in the late days of Windows NT 4 that Microsoft introduced the
security templates and the capability to lock down the security of a system
with a centralized group of settings. The tool has evolved over time and has
now come to be known as the Security Configuration and Analysis tool. The
tool is a snap-in that is used on a computer-by-computer basis. The tool
allows for security analysis and configuration.
115
03 3609 CH03.qxd
6/21/05
11:52 AM
Page 116
116 Chapter 3
. . . . . . . . . . . . . . . . . . . . . . . . . . . . . . . . . . . . . . . . . . . . . . . .
The secedit command can also be used to analyze and configure security settings to
a computer.
After the tool is opened in an MMC, as shown in Figure 3.6, you need to
open one of the security templates into a database. The security templates
are text files that contain security settings that can be used to analyze a computer, be applied to computers, or be imported into a GPO. The idea is that
you bring the security template settings into the database for further analysis of the existing computer settings. With the security template settings in a
database, you can easily run an analysis against the computer settings to see
whether the existing settings are in compliance with what the database has
recorded. Figure 3.6 is a result of one analysis. Note that some settings are
equal to or better than the database, but some settings are not as secure as
what the database indicates; these are shown with a red x by them.
Figure 3.6 Security Configuration and Analysis tool.
Security Templates
Multiple security templates are available and can be used to analyze your
computers’ security settings. Some are related to the security levels of the
system, and others are related to the compatibility of a system with legacy
applications. Following is a listing of the different types of security templates:
03 3609 CH03.qxd
6/21/05
11:52 AM
Page 117
. . . . . . . . Setting
. . . . Up,
. . .Managing,
. . . . . and
. . .Troubleshooting
. . . . . . . . .Security
. . . . Accounts
. . . . . .and
. .Policies
. . . .
➤ Securews.inf—This template is designed to boost the security of a
Windows XP system with regard to Auditing, Account Policy, and some
well-known Registry subkeys.
➤ Hisecws.inf—The settings in this security template will significantly
increase the security of the system. You should use this template with
caution; the settings might cause the computer to drop communication
with the network because of the lack of security on other computers on
the network.
➤ Compatws.inf—This template is designed to reduce the security settings
on your computer, basically the Users group, so that they can run legacy
applications more easily.
Security templates can be modified, copied, and created from scratch. The
goal is to make all the necessary security settings in each template and then
apply them to the appropriate computers. Security templates can be applied
to computers in any one of three ways:
➤ Using the Security Configuration and Analysis MMC snap-in
➤ Using the Secedit command-line tool
➤ Importing security templates into a GPO
Software Restriction Policies
A Software Restriction Policy can help to control users’ running of untrusted applications and code. It is clear that most viruses are introduced into the
computing environment when users run unauthorized applications and open
email attachments. With software restrictions, these undesired applications
and code can be eliminated. The following is a listing of some of the controls
these policies provide:
➤ Untrusted code is prevented from sending email, accessing files, or per-
forming other normal computing functions until verified as safe.
➤ Protection is provided against infected email attachments. This includes
file attachments that are saved to a temporary folder as well as embedded objects and scripts.
➤ ActiveX controls downloaded from the Web are monitored, and neutral-
ized if necessary.
➤ Software restriction policies can be used on a standalone computer by
configuring the Local Security Policy.
117
03 3609 CH03.qxd
6/21/05
11:52 AM
Page 118
118 Chapter 3
. . . . . . . . . . . . . . . . . . . . . . . . . . . . . . . . . . . . . . . . . . . . . . . .
Two Types of Software Restriction Policies
Software restriction policies can be applied at two security levels:
➤ Unrestricted—Let only trusted code run. If all trusted code can be identi-
fied, the administrator can effectively lock down the system. The following are examples of where to apply a “let only trusted code run” policy:
➤ Application station
➤ Task station
➤ Kiosk
➤ Disallowed—Prevent unwanted code from running. In some cases, an
administrator cannot predict the entire list of software that users will need
to run. In these cases, the administrator can only react and identify undesirable code as it is encountered. Companies with loosely managed clients
fall into this model. The following scenarios are examples of this case:
➤ Lightly managed personal computers
➤ Moderately managed personal computers
Software Identification Rules
An administrator identifies software through one of the following rules:
➤ Hash rule—A Software Restriction Policy’s MMC snap-in allows an
administrator to browse to a file and identify that program by calculating its hash. A hash is a digital fingerprint that uniquely identifies a
program or file. A file can be renamed or moved to another folder or
computer and it will still have the same hash.
➤ Path rule—A path rule can identify software by a full pathname, such as
or by the pathname leading to the containing folder, such as C:\Windows\System32.
(This would refer to all programs in that directory and its subdirectories.) Path rules can also use environment variables, such as
%userprofile%\Local Settings\Temp.
C:\Program Files\Microsoft Office\Office\excel.exe
➤ Certificate rule—A certificate rule identifies software by the publisher
certificate used to digitally sign the software. For example, an administrator can configure a certificate rule that allows only software signed by
Microsoft or its IT organization to be installed.
➤ Zone rule—A zone rule identifies software that comes from the Internet,
local intranet, trusted sites, or restricted sites zones.
03 3609 CH03.qxd
6/21/05
11:52 AM
Page 119
. . . . . . . . Setting
. . . . Up,
. . .Managing,
. . . . . and
. . .Troubleshooting
. . . . . . . . .Security
. . . . Accounts
. . . . . .and
. .Policies
. . . .
Integration with Microsoft Passport via the
Internet
A .NET Passport (also referred to as a Microsoft Passport) provides you with
personalized access to Passport-enabled services and websites by using your
email address. Passport implements a single sign-in service that enables you
to create a single username and password. You can obtain a .NET Passport
through the .NET Passport Wizard in User Accounts, shown in Figure 3.7.
The .NET Passport Wizard helps you to obtain a .NET Passport or sign in
with a Passport you already have. You will be required to configure a .NET
Passport when you attempt to use the Windows Messenger application.
Those companies that don’t have access to the Internet or don’t allow users to use a
Microsoft Passport for Windows Messenger, but still want users to take advantage of
the Windows Messenger capabilities, can take advantage of the Windows Messenger
functionality that is built in to Exchange 2000. With Exchange 2000, users can use their
Active Directory credentials to open a Windows Messenger session and talk to other
users on the network who also have an Exchange 2000 Windows Messenger account.
Figure 3.7 Microsoft .NET Passport Wizard.
Data Execution Prevention
Data Execution Prevention (DEP) is a new feature for Windows XP
Professional that helps prevent code from running in areas of memory
where such code should not be running. This helps prevent attackers from
placing code in memory to cause default heaps, various stack overflows, and
memory pools. This technology does have limitations, though. The hardware that is running on your computer must support this technology, which
might be some time in coming depending on how often you change the
hardware on your client computers.
119
03 3609 CH03.qxd
6/21/05
11:52 AM
Page 120
120 Chapter 3
. . . . . . . . . . . . . . . . . . . . . . . . . . . . . . . . . . . . . . . . . . . . . . . .
Windows Security Center
The Security Center is command central for all things security according to
Microsoft. Within this tool you will have the capability to configure
Windows Firewall, Automatic Updates, Virus Protection, and Internet
Explorer security settings. Even though it would be nice if the Security
Center also provided immediate access to the Local Group Policy and Local
Security Policy, it does not at this time.
To access the Security Center, go to Start, Control Panel, Security Center.
When you open up the Security Center, you will see an interface that looks
like Figure 3.8.
Figure 3.8 Security Center for Windows XP SP2 computers.
The Windows Security Center may not be available if your computer has joined the
domain. The Security Center is always available for Windows XP clients that are in a
workgroup, but not in a domain. To enable the Security Center for a domain, you will
need to enable the setting in a GPO. The setting is located at Computer Configuration,
Administrative Templates, Windows Components, Security Center. Here you will find
a setting that is named Turn on Security Center (Domain PCs only). Enabling this will
allow the XP clients to see the Security Center.
One more feature that the Security Center provides is integration with a
virus-checking program. If there isn’t an antivirus application installed, the
Security Center provides an interface for you to install one, either for a trial
period or for purchase. You can also disable the Security Center from monitoring for any antivirus applications if you want to monitor that manually.
03 3609 CH03.qxd
6/21/05
11:52 AM
Page 121
. . . . . . . . Setting
. . . . Up,
. . .Managing,
. . . . . and
. . .Troubleshooting
. . . . . . . . .Security
. . . . Accounts
. . . . . .and
. .Policies
. . . .
Exam Prep Questions
1. You are the administrator for a large company. You have a group of
Windows XP Professional computers in a workgroup and want to
enable your users to create user and group accounts without giving
them excessive rights. How should you configure the users’ accounts?
❍
A. Assign your users to the Local Administrators group on the local
machine.
❍ B. Assign your users to the Server Operators group on the local machine.
❍ C. Assign your users to the Domain Administrators group in the domain.
❍ D. Assign your users to the Power Users group on the local machine.
2. Bob took over Mary’s duties when Mary retired. You created Bob’s user
account and put him in the same groups as Mary and changed the
ACLS on the resources to allow Bob access. You then deleted Mary’s
account. Later, Bob comes to you and reports that he can’t get access
to some resources that he needs that Mary had access to. You give him
access, and later he reports the same problem on different resources.
How should you have configured Bob’s account to avoid the problems
you are now facing, without giving Bob unnecessary access?
❍
A.
B.
❍ C.
❍ D.
❍
You should have renamed Mary’s account to Bob.
You should have made Bob an administrator in the domain.
You should have made Bob a Server Operator.
You should have changed the DACLS on all resources in the domain to
give Bob access.
3. You successfully set the Local Security Policy to enable you to shut
down your Windows XP Professional computer without logging on.
After joining your computer to the domain, you attempt to shut down
your computer without logging on, but the option is not available.
Why is the option not available?
❍
A. The Shutdown Without Logging On option is not available to computers that have joined a domain.
❍ B. The option in the Local Group Policy no longer applies because the
computer is in the domain.
❍ C. The user needs to be placed in the Local Administrators group for the
Local Group Policy to apply.
❍ D. The Domain Group Policy to Shutdown Without Logging On option
is set to disabled.
4. You have enabled auditing on your company’s laptops. You want to
configure your remote users’ laptops to shut down if they are unable to
log security events and log all attempts to change Local Group
Policies. How should you configure the systems? (Check all correct
answers.)
121
03 3609 CH03.qxd
6/21/05
11:52 AM
Page 122
122 Chapter 3
. . . . . . . . . . . . . . . . . . . . . . . . . . . . . . . . . . . . . . . . . . . . . . . .
❑
A. Use Security Options in the Local Security settings to set the option to
shut down the system if it’s unable to log security audits.
❑ B. Configure the Audit Policy Change setting to monitor failed changes.
❑ C. Configure the Audit Policy Change setting to monitor successful
changes.
❑ D. Configure the Audit Object Access setting to monitor successful
changes.
5. You have 250 Windows XP Professional computers in various OUs in
your domain. You want to find out which computer GPOs are being
applied to your computers, specifically policies that have been applied
in multiple places with a precedence of 1 or higher. What would be the
correct syntax to determine this?
❍
gpresult /scope user /z
❍
gpresult /scope computer /z
A.
B.
❍ C.
❍ D.
gpresult /scope user /v
gpresult /scope computer /v
6. You make changes to the local policy on a Windows XP Professional
workstation named WKSTN1. You want to refresh only the policy settings that have changed for the computer. What command will you run
to accomplish this?
❍
gpupdate /target:computer
❍
gpupdate /target:computer /force
A.
B.
❍ C.
❍ D.
gpresult /scope computer
gpresult /scope computer /z
7. You have made changes to group policy and need to import the new
template. What are some different ways to apply these new security
template settings to the computers in the enterprise? (Check all correct
answers.)
❑
A.
❑ B.
❑ C.
❑ D.
Use the secedit command.
Use an Active Directory–based Group Policy Object.
Use the Local Group Policy.
Use the gpupdate command.
8. You are the administrator of a multidivisional company’s network and
some of your users are using network applications from a server that
may not be approved for their division. All applications are in the same
folder. Which software restriction rule would you apply?
❍
A.
B.
❍ C.
❍ D.
❍
Hash rule
Certificate rule
Zone rule
Path rule
03 3609 CH03.qxd
6/21/05
11:52 AM
Page 123
. . . . . . . . Setting
. . . . Up,
. . .Managing,
. . . . . and
. . .Troubleshooting
. . . . . . . . .Security
. . . . Accounts
. . . . . .and
. .Policies
. . . .
Answers to Exam Prep Questions
1. Answer D is correct. Power Users have the right to create user and
group accounts, but they do not have total control over the computer,
as an administrator does. Answer A is incorrect because making the
users administrators would give them excessive rights. Answer B is
incorrect because the Server Operators group does not exist on a
Windows XP Professional machine, nor is this group given any privileges on the local system after joining the domain. Answer C is incorrect because, like answer A, it would give the users excessive rights;
also, because the machines are in a workgroup, putting them in the
Domain Administrators group would have no effect on their capabilities to create users and groups on the local machine.
2. Answer A is correct. Renaming the account would have ensured that
Bob had all the access to resources that Mary had. Answer B is incorrect
because you would have given Bob more access than was necessary, and
it does not ensure that Bob has access to all resources that Mary had.
Answer C is incorrect because making Bob a Server Operator does not
ensure that Bob has access to all resources that Mary had. Answer D is
incorrect because that would have given Bob unnecessary access.
3. Answer D is correct. Local Group Policies are the first to apply of all
policies and are overridden by conflicting policy settings that are located at the Active Directory levels. Answer A is incorrect because the
option is available at all GPO levels. Answer B is incorrect because
Local Group Policies still apply when computers join domains,
although they have lower priority. Answer C is incorrect because users
don’t need to be placed in the Local Administrators group to apply
policies after a computer has joined the domain.
4. Answers A, B, and C are correct. You will need to set the option in the
Local Security settings to shut down the system if the computer is
unable to log security audits, as well as set the Audit Policy Change policy for both success and failure. Answer D is incorrect because auditing
object access logs users’ access to resources, but not changes to policies.
5. Answer B is correct. The Group Policy Result tool will display the
Resultant Set of Policy (RSoP) for a target user and computer. The
/Scope switch specifies whether the user or the computer settings need
to be displayed. The /z switch specifies that the super-verbose information is to be displayed, which enables you to see whether a setting was
set in multiple places. Answer A is incorrect because the scope specified
in the syntax is user and you wanted to see computer settings. Answer
C is incorrect because the switch /v is used, which will not let you see
whether a setting was set in multiple places. This requires super-verbose
mode. Answer D is incorrect because of the switch used, as well.
6. Answer A is correct. The Group Policy Update tool refreshes Group
Policy settings and has a number of different switches. The /target:
switch has two options: Computer or User. By default, both User and
Computer policy settings are refreshed if no switch is specified.
123
03 3609 CH03.qxd
6/21/05
11:52 AM
Page 124
124 Chapter 3
. . . . . . . . . . . . . . . . . . . . . . . . . . . . . . . . . . . . . . . . . . . . . . . .
Therefore, because you want to refresh only the settings for the computer, you need to specify the option Computer. Answer B is incorrect
because the /force switch reapplies all policy settings and you want
only the settings that have changed to be refreshed. Answers C and D
are incorrect because the gpresult command gives only the Resulting
Set of Policies; it does not refresh them in any manner.
7. Answers A, B, and C are correct. The secedit command as well as the
Group Policy options at the local and Active Directory level can apply
the security templates to a computer. The secedit command is manual,
whereas the other two options are more automated because they will
automatically refresh for the computer. Answer D is incorrect because
gpupdate will update an existing Group Policy, but not apply the security templates themselves.
8. Answer D is correct. A path rule can identify software by a full pathname, such as C:\Program Files\Microsoft Office\Office\excel.exe,
or by the pathname leading to the containing folder, such as
C:\Windows\System32. Answer A is incorrect because a hash is a digital
fingerprint that uniquely identifies a program or file. You would have to
identify all the applications’ hash. Answer B is incorrect because a certificate rule identifies software by the publisher certificate used to digitally sign the software. The applications may be by different publishers,
and you don’t want to restrict users’ ability to run approved applications. Answer C is incorrect because a zone rule identifies software that
comes from the Internet, local intranet, trusted sites, or restricted sites
zones. These applications are from a local file server.
Need to Know More?
Microsoft Corporation. Microsoft Windows XP Professional Resource
Kit, 2nd ed. Redmond, WA: Microsoft Press, 2003. ISBN
0735619743 This all-in-one reference is a compilation of technical
documentation and valuable insider information that computersupport professionals and administrators can reference to install,
customize, and support Windows XP.
Mark Minasi. Mastering Windows XP Professional. Alameda, CA: Sybex,
Inc., 2001. ISBN 0-78212-981-1. This text gives you all the insider
information for the creation of users and groups—and how they interact with a domain. The book also gives a good description of how
Group Policies should be used for your XP Professional computer.
Search the TechNet CD (or its online version through
and the Windows 2000 Professional Resource
Kit CD using the keywords “local user”, “SID”, “Group Policy
Objects”, “Local Security Policy”, “SDOU”, “GPRESULT”,
“GPUPDATE”, and “Microsoft Passport”.
www.microsoft.com)