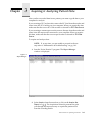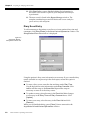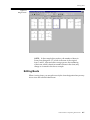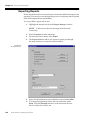
1
Operating
Instructions
Vision Premier™
Holter Analysis System
Software Version 3.3
Operating Instructions Part No. 086558
Revision: 0103
DISCLAIMER
BURDICK, INC. MAKES NO REPRESENTATIONS OR WARRANTIES WITH RESPECT TO THE CONTENTS
OR USE OF THIS MANUAL, OR WITH RESPECT TO ANY BURDICK, INC. HARDWARE OR SOFTWARE,
AND EXPRESSLY DISCLAIMS ANY EXPRESS OR IMPLIED WARRANTIES OF MERCHANTABILITY OR
FITNESS FOR A PARTICULAR PURPOSE.
Copyright © 2003 Burdick, Inc. All rights reserved.
Printed in the United States of America.
No part of this publication may be reproduced, photocopied or
transmitted without the express written consent of the publisher.
Burdick, Inc.
500 Burdick Parkway
Deerfield, Wisconsin 53531 U.S.A.
(800) 777-1777
(608) 764-1919
Authorized EC Representative
Medical Device Safety Service, GmbH
Burckhardtstr. 1
D-30163 Hannover
GERMANY
Contact: Ludger Moeller
E-mail: [email protected]
Telephone: +49 511 62628630
Fax: +49 511 62628633
Table of Contents
Intended Use . . . . . . . . . . . . . . . . . . . . . . . . . . . . . . . . . . . . . . . . . . . . . . iii
Software Version . . . . . . . . . . . . . . . . . . . . . . . . . . . . . . . . . . . . . . . . . . . iv
Electronic Manuals . . . . . . . . . . . . . . . . . . . . . . . . . . . . . . . . . . . . . . . . . iv
Warnings, Cautions & Notices . . . . . . . . . . . . . . . . . . . . . . . . . . . . . . . . v
Chapter 1
Introduction to Vision Premierª ........................... 1-1
Inspection Upon Delivery . . . . . . . . . . . . . . . . . . . . . . . . . . . . . . . . . . 1-1
System Requirements . . . . . . . . . . . . . . . . . . . . . . . . . . . . . . . . . . . . . . 1-1
Starting the Program . . . . . . . . . . . . . . . . . . . . . . . . . . . . . . . . . . . . . . . 1-2
Exiting the Program . . . . . . . . . . . . . . . . . . . . . . . . . . . . . . . . . . . . . . . 1-2
Removing the PC Card . . . . . . . . . . . . . . . . . . . . . . . . . . . . . . . . . . . . . 1-2
Search by Time . . . . . . . . . . . . . . . . . . . . . . . . . . . . . . . . . . . . . . . . . . . . 1-2
Running Vision Premier Remotely . . . . . . . . . . . . . . . . . . . . . . . . . . . 1-3
Using the Mouse . . . . . . . . . . . . . . . . . . . . . . . . . . . . . . . . . . . . . . . . . . 1-3
Getting Around . . . . . . . . . . . . . . . . . . . . . . . . . . . . . . . . . . . . . . . . . . . 1-4
Chapter 2
PC Card Recording Preparation ............................. 2-1
Initializing the PC Card . . . . . . . . . . . . . . . . . . . . . . . . . . . . . . . . . . . . 2-1
Hookup Wizard - Digital Recorder . . . . . . . . . . . . . . . . . . . . . . . . . . . 2-5
Hookup Wizard - Tape Recorder . . . . . . . . . . . . . . . . . . . . . . . . . . . 2-10
Chapter 3
Acquiring & Analyzing Patient Data .................... 3-1
Chapter 4
Managing Reports ..................................................... 4-1
Sharing Records over the Network . . . . . . . . . . . . . . . . . . . . . . . . . . . 4-1
Sorting Patient Reports . . . . . . . . . . . . . . . . . . . . . . . . . . . . . . . . . . . . . 4-2
Analyzing Patient Records . . . . . . . . . . . . . . . . . . . . . . . . . . . . . . . . . . 4-2
Changing Reports to be Displayed . . . . . . . . . . . . . . . . . . . . . . . . . . . 4-2
Tracking Open Windows . . . . . . . . . . . . . . . . . . . . . . . . . . . . . . . . . . . 4-3
Backup and Restore of Reports . . . . . . . . . . . . . . . . . . . . . . . . . . . . . . 4-3
Summarizing Reports . . . . . . . . . . . . . . . . . . . . . . . . . . . . . . . . . . . . . . 4-6
Chapter 5
Reviewing the Report ............................................... 5-1
Beat Classification . . . . . . . . . . . . . . . . . . . . . . . . . . . . . . . . . . . . . . . . . 5-1
Viewing and Editing . . . . . . . . . . . . . . . . . . . . . . . . . . . . . . . . . . . . . . . 5-2
Cover Page . . . . . . . . . . . . . . . . . . . . . . . . . . . . . . . . . . . . . . . . . . . . . . . 5-3
Narrative Summary . . . . . . . . . . . . . . . . . . . . . . . . . . . . . . . . . . . . . . . . 5-6
Tabular Summary . . . . . . . . . . . . . . . . . . . . . . . . . . . . . . . . . . . . . . . . . 5-7
Graphic Summary . . . . . . . . . . . . . . . . . . . . . . . . . . . . . . . . . . . . . . . . . 5-8
ST Summary . . . . . . . . . . . . . . . . . . . . . . . . . . . . . . . . . . . . . . . . . . . . . . 5-9
Report Strips . . . . . . . . . . . . . . . . . . . . . . . . . . . . . . . . . . . . . . . . . . . . . 5-11
Vision Premierª Operating Instructions
i
Chapter 6
Reviewing & Editing Forms.....................................6-1
Reviewing Forms . . . . . . . . . . . . . . . . . . . . . . . . . . . . . . . . . . . . . . . . . .6-2
Editing Forms . . . . . . . . . . . . . . . . . . . . . . . . . . . . . . . . . . . . . . . . . . . . .6-5
Editing Beats . . . . . . . . . . . . . . . . . . . . . . . . . . . . . . . . . . . . . . . . . . . . .6-7
Chapter 7
Reviewing & Editing Arrhythmias .........................7-1
Reviewing Arrhythmias . . . . . . . . . . . . . . . . . . . . . . . . . . . . . . . . . . . .7-1
Editing Arrhythmias . . . . . . . . . . . . . . . . . . . . . . . . . . . . . . . . . . . . . . .7-3
Editing Min/Max Heart Rate . . . . . . . . . . . . . . . . . . . . . . . . . . . . . . . .7-5
Editing Diary Events . . . . . . . . . . . . . . . . . . . . . . . . . . . . . . . . . . . . . . .7-5
Chapter 8
Viewing the ECG........................................................8-1
Full Disclosure . . . . . . . . . . . . . . . . . . . . . . . . . . . . . . . . . . . . . . . . . . . .8-1
Superimposition . . . . . . . . . . . . . . . . . . . . . . . . . . . . . . . . . . . . . . . . . . .8-7
Chapter 9
Reviewing the Tachogram........................................9-1
The Histogram Distribution and Poincare Plot . . . . . . . . . . . . . . . . .9-2
The Diagnostic Strip and Form Display . . . . . . . . . . . . . . . . . . . . . . .9-2
Including the Strip in the Final Report . . . . . . . . . . . . . . . . . . . . . . . .9-3
The Contextual View Display . . . . . . . . . . . . . . . . . . . . . . . . . . . . . . .9-3
Chapter 10
Calipers .....................................................................10-1
Chapter 11
Report Editing Enhancements ...............................11-1
Insert Beat . . . . . . . . . . . . . . . . . . . . . . . . . . . . . . . . . . . . . . . . . . . . . . .11-1
Insert Atrial Fib/Flutter . . . . . . . . . . . . . . . . . . . . . . . . . . . . . . . . . . .11-2
Chapter 12
System Setup ............................................................12-1
Chapter 13
Printing and Sending Files .....................................13-1
Printing the Report . . . . . . . . . . . . . . . . . . . . . . . . . . . . . . . . . . . . . . .13-1
Taking Pictures of the Display . . . . . . . . . . . . . . . . . . . . . . . . . . . . . .13-2
Faxing Reports . . . . . . . . . . . . . . . . . . . . . . . . . . . . . . . . . . . . . . . . . . .13-3
Sending Reports . . . . . . . . . . . . . . . . . . . . . . . . . . . . . . . . . . . . . . . . . .13-4
Exporting Reports . . . . . . . . . . . . . . . . . . . . . . . . . . . . . . . . . . . . . . . .13-6
Chapter 14
Maintenance & Troubleshooting...........................14-1
Computer-to-Recorder Interface Error Codes . . . . . . . . . . . . . . . . .14-1
Printing Problems . . . . . . . . . . . . . . . . . . . . . . . . . . . . . . . . . . . . . . . .14-2
ii
Vision Premierª Operating Instructions
Intended Use
NOTICE: This device is intended to be used as a Holter
Monitor Analysis System for the purpose of screening for ECG
rhythm disturbances. It should be used by or under the
supervision of those knowledgeable in all aspects of ECG
morphology, rhythm and arrhythmia.
This device is intended to be used under the supervision of a qualiÞed
physician. The Vision Premierª Holter analysis system may be used in
conjunction with standard 12-lead ECG analysis as an additional means for
identifying heart disease. The extended recording period for Holter data
provides a great deal more data than the standard 10-second ECG recording. A
Holter recording captures abnormalities which may be infrequent or provoked
by speciÞc activities.
Suggested indications for conducting Holter analysis include:
4
4
4
4
4
4
4
4
4
Arrhythmias
Chest pain
Unexplained syncope
Shortness of breath
Palpitations
Evaluation of a pacemaker
Regulation of antiarrhythmic drugs
Evaluation of a patient after myocardial infarction
Family history of heart disease
The Vision Premierª system uses a sophisticated algorithm to detect, measure
and classify QRS complexes. Each beat is classiÞed and grouped into
classiÞcations called forms.
After the Vision Premierª system has performed its analysis of the data, you
may then review and change the system's classiÞcation.
When editing has been completed, the Vision Premierª system automatically
recompiles the report and incorporates your changes into the Þnal results. All
aspects of the report are affected; hourly totals and beat totals.
NOTICE: Computer assisted analysis is a valuable tool when
used properly. However, no automated analysis is completely
reliable and the results should be reviewed by a qualiÞed
physician before treatment, or non-treatment, of any patient.
Vision Premierª Operating Instructions
iii
Software Version
This manual contains instructions for using Version 3.3 of the Vision Premierª
software. To check the version of the software you have installed on your
system, perform the following steps:
1. From the Windows desktop, double-click the program icon.
This will start the program.
2. Under Help on the menu bar, select About Vision Premier... The
software version is indicated in the window that appears.
Electronic Manuals
Vision Premierª software includes electronic manuals, if this optional feature
has been installed. To access electronic manuals, including the Vision Series
Setup Guide, Vision Premier Operating Instructions, and Holter recorder
Operating Instructions, perform the following steps:
1. From the Windows desktop, double-click the program icon.
This will start the program.
2. Under Help on the menu bar, select Setup Guide or one of the
other manuals that are listed.
NOTE: The Operating Instructions is listed as Main Manual.
iv
Vision Premierª Operating Instructions
Warnings, Cautions & Notices
Warnings
WARNING: Most waveform displays are not diagnostic quality. Due to
monitor video resolution, waveforms displayed on the monitor are for viewing
purposes only. To view data that is diagnostic quality, use the report strip view
or print the record.
WARNING: Remove all Holter sensors from the patient before deÞbrillation.
There is a risk of deÞbrillation failure, burns and equipment damage if
deÞbrillator paddles contact sensors or cables. In the special case where the
patient has a deÞbrillator at home, family members and in-home caregivers
who could be responsible for attempting deÞbrillation must be advised of this
hazard.
WARNING:
anesthetics.
Explosion hazard. Do NOT use in the presence of ßammable
Cautions
CAUTION: Vision Series research mode is available for use with the 6632
and 92510 digital recorders only. Attempts to use any other Burdick recorders
in research mode will result in erroneous data.
CAUTION: Edits made directly to Holter report e-mail attachments cannot
be saved. To edit Holter reports received via e-mail, Þrst save the attached
report to a secure Þle location (requires an .rps Þle extension).
CAUTION: Do NOT use acetone, ether, freon, petroleum derivatives or
other solvents to clean the recorder.
CAUTION: Holter data acquired on cassette tapes is directly affected by the
condition of the cassette tape, the tape recorder and the tape playback unit. To
ensure that a reliable analysis is made, regularly clean the recorder and
playback unit and always use Burdick Holter cassette tapes. NEVER reuse
cassette tapes.
Vision Premierª Operating Instructions
v
CAUTION: Although Burdick, Inc. recorders are designed to meet
IEC 601-1-2 EMC immunity requirements, the presence of strong EMI Þelds
generated by electronic, surgical or diathermy instruments in close proximity
to the unit may cause trace noise or input overload conditions.
CAUTION: To avoid operator injury refer to you PC owners manual for
proper ergometric use.
Notices
NOTICE: U.S Federal law restricts this device to use by or on the order of a
physician.
NOTICE: Computer assisted analysis is a valuable tool when used properly.
However, no automated analysis is completely reliable and results should be
reviewed by a qualiÞed physician before treatment, or non-treatment, of any
patient.
NOTICE: Because the Holter system offers different lead conÞgurations,
always ensure that the appropriate sensor placement is employed for the lead
conÞguration selected.
NOTICE: This device is intended to be used as a Holter Monitor Analysis
System for the purpose of screening for ECG rhythm disturbances. It should be
used by or under the supervision of those knowledgeable in all aspects of ECG
morphology, rhythm and arrhythmia.
vi
Vision Premierª Operating Instructions
Chapter
1
Introduction to Vision Premierª
Inspection Upon Delivery
Your new Vision Premierª Holter Analysis system was carefully inspected
before shipment. Please inspect all components upon delivery for any damage
which may have occurred in transit. If you notice any damage, please contact
your shipping agent. If items are missing, contact your local representative or
call Burdick Customer Service at (800) 284-4362 or (608) 764-2396.
NOTE: Your Vision Premierª system is intended for use with
approved supplies; its reliability and performance are directly
affected by the supplies you use.
All functions of the Vision Premierª system are designed to be user-friendly
and easy to understand. If questions arise or you would like additional
information, contact your local representative or Burdick Technical Support
Department at (800) 333-7770 or (608)764-1919.
Meets or exceeds Council Directive 93/42/EEC, MDD, Class IIa.
Complies with the EMC/Radiocommunications requirements set out by the
Australian Communication Authority under Radiocommunications Act, 1992.
System Requirements
In order to run the Vision Premierª program your computer system will need
to meet minimum requirements. For more information, refer to Chapter 1 of
the Vision Series Setup Guide.
Vision Premierª Operating Instructions
1-1
Chapter 1 Introduction to Vision Premierª
Starting the Program
NOTE: Reference your PC/ peripheral manual for hardware
installation.
Starting from the Icon on the Desktop
1. Turn on your computer.
2. Double click on the Spacelabs Holter System icon to start the
program.
3. The Vision Premierª program is started and the Report
Manager window is displayed.
Exiting the Program
To exit, click on Procedure then select Exit in the Vision Premierª Report
Manager window. The Windows¨ desktop is displayed.
Removing the PC Card
If you are using an internal PC Card to acquire patient records, you must
deactivate the PC Card drive before removing the PC Card from the computer.
NOTE: The following procedure applies for internal PC Card
drives only. Disregard the following if you are using an external
PC Card drive.
1. To deactivate the PC Card drive, click on the PC Card symbol in
the lower right corner of the desktop.
2. Click on the [Stop PCMCIA Card] option.
3. When the PC Card is deactivated, Windows¨ will display a
conÞrmation message. Click [OK] and remove the PC Card
from the computer.
Search by Time
You can search for speciÞc times in the Holter report using the graphic
summary view. Time is indicated near the bottom of the window. Locate the
desired time and double click to view the beats. For additional information, see
ÒGraphic SummaryÓ on pg. 5-8 and ÒDisplaying the Full DisclosureÓ on
pg. 8-1.
1-2
Vision Premierª Operating Instructions
Running Vision Premier Remotely
Running Vision Premier Remotely
Vision Series software supports the use of remote Windows operation using
third party software, such as Symantec pcAnywhereª. For information on
installing and conÞguring pcAnywhere, refer to the Vision Series Setup Guide.
Using the Mouse
Although many operations on the Vision Premierª system may be carried out
using the keyboard, the mouse is usually more convenient. Before using Vision
Premierª you may want to familiarize yourself with how the mouse works.
Moving
When moving the mouse, you might simply think of it as a holder for the small
ball which can be seen on the underside of the mouse. The best arrangement
for the mouse is ball side down on a ßat mouse pad with the cord pointing
away from you. In this position, the ball rolls along the pad whenever you
move the mouse.
When Vision Premierª is on, the screen always displays a pointer which
moves as the mouse ball rolls. If you move the mouse off the mouse pad,
simply pick up the mouse and place it back on the pad. Lifting the mouse stops
the ball from rolling and keeps it from moving the pointer.
This pointer is usually a small arrowhead (
) which is positioned over
objects when selecting them. Sometimes it is an I-beam ( ) which is used to
position the cursor for typing in edit Þelds.
Clicking
Locate the mouse under the palm of your hand with the cord pointing away
from you.
The Left and Right Mouse Buttons
Notice that the mouse has either two or three buttons. When the mouse is
positioned with the cord pointing away from you, the button to the left is the
most commonly used button. We will refer to this button as the left mouse
button and the one to the right as the right mouse button. If your mouse has
three buttons, the center one is not used by the Vision Premierª system.
Click
To Òclick,Ó press and release the left mouse button. You should feel and hear the
button click.
Right Click
Most operations require the left mouse button but some special operations can
be done with the right mouse button (see ÒContext MenusÓ on pg. 1-7).
Vision Premierª Operating Instructions
1-3
Chapter 1 Introduction to Vision Premierª
In this manual, using the right mouse button will be referred to as Òright
clicking.Ó To Òright click,Ó press and release the right mouse button. You
should feel and hear the button click.
Double Click
To Òdouble click,Ó press and release the left button twice without pausing. Do
this quickly. Double clicking takes less than one second.
Getting Around
The Vision Premierª system follows Microsoft Windows conventions for
manipulating Þles and issuing commands. When you start the program, two
windows are displayed, one for the application and one for the report manager.
The application window includes the title and menu bars, toolbar, controlmenu box, minimize and maximize/restore buttons and, when necessary,
vertical and horizontal scroll bars. The Report Manager window has only its
own title bar and window controls.
You can move around within each window by dragging or clicking the scroll
bars, and can resize each window by clicking and dragging the borders and
corners. Click and drag the title bar to move the window itself about. To reduce
the active window to an icon, select Minimize from the control-menu box or the
Minimize button. To have the window Þll the screen, click on the Maximize
button. (Report windows are always maximized when they are Þrst opened.)
The program will display multiple, independent windows, so you can have
several different reports open at once. Each report will have its own window
and can be separately moved, resized, opened and closed, and printed. To
make a window active, just click on it, or press F-T to cycle through the
open windows.
Objects are special items displayed on the screen. You can use these items to
interact with the system:
l
Menu Bars
l
Toolbars
l
Context Menus
l
Dialog Boxes
l
ConÞrmation Boxes
NOTE: When an object appears lighter than the rest, or
grayed-out, this means that the object is not available. An object
may be unavailable if:
4 Vision Premierª is not in the appropriate mode to utilize
that object.
4 Your version of Vision Premierª does not support the
objectÕs function.
1-4
Vision Premierª Operating Instructions
Getting Around
Menu Bars
Menu bars may be used to select an item such as a new window or to select a
function such as acquiring a new record from the Holter recorder.
Figure 1-1
Menu Bar
Menu bars contain two basic types of commands. ÒExecutingÓ commands
carry out tasks immediately when selected and ÒDialog boxÓ commands,
followed by an ellipsis (É), bring up dialog boxes.
You can use either the mouse or the keyboard to activate and use menu
commands.
Using the Mouse
1. Position the pointer over the menu bar item and click. More
choices become available.
2. Click on one of these items to select it or click anywhere outside
the menu bar to cancel.
Using the Keyboard
1. To activate a menu bar item, hold down the A key and press
the appropriate Òhot key.Ó
A hot key is a key on the keyboard which is temporarily
specialized to perform a function. To indicate which key will
perform this function, a letter is underlined. For example, r is
the hot key which activates the Procedure menu bar item.
2. To select an item from the pull down menu that appears, press
the appropriate hot key. (A is not needed once the pull down
menu is activated.)
Instead of hot keys, you may use the Z and Y keys on the right
side of the keyboard. With these keys, highlight the desired item
and press E to select it.
3. You may deactivate pull down menus by pressing A or
moving to other menus with the Q or R key on the right side
of the keyboard.
Vision Premierª Operating Instructions
1-5
Chapter 1 Introduction to Vision Premierª
Toolbars
Toolbars are a row (or rows) of icons located just below the menu bar. Toolbar
icons are provided to allow you to initiate a function or to advance to another
window with just a single click of the mouse. All of the icons have a
corresponding menu bar and/or drop down menu which will perform the
same function.
Figure 1-2
Toolbar
The icons presented in the Vision Premierª system toolbar change according
to what is shown in the active window. For example, if you are currently
reviewing forms, you are presented with additional icons to enable you to
quickly switch to another type of form.
You have the option of choosing which toolbars are displayed and whether or
not the text labels are on or off. To change these options, point the mouse
anywhere in the toolbar area and right click. A context menu will appear.
Options are active when they have a check mark next to the name. If you make
any changes to these options, your selections will become active after the
program has been restarted.
Figure 1-3
Toolbar Options
1-6
Vision Premierª Operating Instructions
Getting Around
Context Menus
A context menu is a list of functions available to you in context to whatever you
are pointing the mouse at when you activate the menu. You can activate a
context menu by right clicking within a window. Not all windows have context
menus.
Figure 1-4
Context Menu
Dialog Boxes
Dialog boxes are used to enter information by typing in edit Þelds, picking
from pull-down menus, or selecting check boxes or radio buttons. Dialog boxes
also include buttons for indicating you are Þnished and want the program to
accept the new settings or to escape without making any changes.
Dialog boxes may include any or all of the following objects:
lEdit Fields
lList Boxes
lCheck Boxes
lRadio Buttons
lTabs
Edit Fields
An edit Þeld is a box where you can enter text from the keyboard. To view a
window with edit Þelds, click on the System Settings icon in the toolbar of the
Report Manager window.
Vision Premierª Operating Instructions
1-7
Chapter 1 Introduction to Vision Premierª
Figure 1-5
Edit Field
The Facility IdentiÞcation Þeld is an Edit Þeld. Move the mouse pointer into
this Þeld and click to activate the Þeld. Notice that the pointer turns into an
I-beam (
) in these Þelds. Edit Þelds accept text from the keyboard when
they are active. This is indicated by a blinking cursor at the insertion point.
Start typing and the characters you type are placed into the box.
Space in edit Þelds is limited. Each edit Þeld accepts a speciÞc type of
information. For example, some accept only numbers within a preset range. If
you type invalid information, a dialog box will inform you of the problem.
List Boxes
A list box is a box with a list of available choices. An example of a list box is
shown for the Full Disclosure option in the Print tab of the System Settings
window.
Figure 1-6
List Box
1-8
Vision Premierª Operating Instructions
Getting Around
List boxes are not fully displayed until activated by clicking the expand button
(
). To select an item from a list, position the pointer over the item and click.
Click outside the list to deactivate it.
You can create or add to some of the lists that are available on the Vision
Premierª system. Most of these user-editable lists are found in the Patient
Demographic Information and the Miscellaneous Data windows. These lists
are identiÞed by a special expand button (
). Click this button to access the
window where the list can be edited.
Check Boxes
A check box is a small square object.
Check boxes are either selected or unselected. A selected check box is indicated
by a check mark. Click in the check box to select or deselect that item. Any
number of check boxes may be selected.
Figure 1-7
Check Boxes
Radio Buttons
A radio button is a small round object that is always displayed in a group of
two or more, mutually exclusive buttons.
Like check boxes, radio buttons are either selected or unselected. A selected
radio button is indicated by a Þlled-in dot. Unlike check boxes, selecting one
radio button in a group causes any other radio button in that group to become
unselected. Click on the radio button to select the desired item.
Figure 1-8
Radio Buttons
Vision Premierª Operating Instructions
1-9
Chapter 1 Introduction to Vision Premierª
Tabs
Some windows have more information in them than can be displayed at one
time. The problem of displaying all the information is handled by using tabs.
Windows with tabs have multiple ÒpagesÓ that are overlapping. A tab from
each page is visible at all times. You can click on the tab to display the
corresponding page.
Figure 1-9
Tabs
Confirmation Boxes
A conÞrmation box is a small window with just one or two buttons, usually
[OK] alone or both [OK] and [Cancel] together. These boxes provide you with
information or ask you to verify an action. They disappear after you select a
button.
An example of a conÞrmation box is displayed if you try to delete a record in
the Report Manager window.
Figure 1-10
Dialog Box
You must respond to a conÞrmation box in order to continue working. In the
above example you must click [OK] or [Cancel] to acknowledge the message.
1-10
Vision Premierª Operating Instructions
Chapter
2
PC Card Recording Preparation
To prepare for a patient recording, you must prepare the recorder and connect
the recorder to the patient. Please refer to the Operating Instructions that came
with your recorder for further information. If you are using a PC Card recorder,
the PC Card must be initialized prior to being inserted into the recorder.
The Vision Premierª system provides two methods for initializing the PC
Card. If you are experienced with patient hookup and PC Card initialization,
follow the instructions given in ÒÒInitializing the PC CardÓÓ below. The Vision
Premierª system also offers a ÒHookup WizardÓ to guide you through all of
the steps necessary to ensure accurate recording results. (For more
information, see ÒHookup Wizard - Digital RecorderÓ on pg. 2-5 or ÒHookup
Wizard - Tape RecorderÓ on pg. 2-10.)
Initializing the PC Card
To record data from a patient you must Þrst prepare the PC Card. This process
is called Initialization.
NOTE: If, at any time, you are unable to proceed to the next
step refer to ÒMaintenance & TroubleshootingÓ on pg. 14-1.
1. Remove the PC Card from the recorder and place it in the PC
Card slot in your computer.
2. Start the Vision Premierª program. The Report Manager
window is displayed.
3. Select Initialize PC Card from the Menu bar.
NOTE: If a PC Card is not inserted into PC Card drive, a
dialog will appear requesting you to insert a PC Card. This
dialog will also allow you to browse for the PC Card in case it is
located in a different drive.
Figure 2-1
Insert PC Card Dialog Box
The Initialize Holter PC Card window is displayed.
Vision Premierª Operating Instructions
2-1
Chapter 2 PC Card Recording Preparation
NOTE: If the research license is installed, then the Select PC
Card Acquisition Parameters window is displayed. For more
information, refer to ÒResearch ModeÓ on pg. 2-4.
Figure 2-2
PC Card Initialization
Options
NOTE: Your Vision Premierª system automatically
recognizes the size of the PC Card being initialized and will
grey out options not available to that speciÞc card.
4. Select the appropriate number of recorder data channels and
time duration to record by clicking the corresponding radio
button.
5. If you have the optional Pacer software installed on your
system, select the appropriate detection sensitivity. Refer to the
Pacer Operating Instructions for more information.
6. Click [Initialize PC Card] to begin initialization. The Enter
Patient Information window is presented.
NOTE: The Enter Patient Information window will not
appear if this feature has been disabled. If the window does not
appear, proceed directly to step 7.
Enter the patientÕs information into the window. When you are
Þnished, click [OK]. For more information, see ÒThe Enter
Patient Information WindowÓ on pg. 2-3.
7. When initialization is complete, a conÞrmation dialog box is
displayed.
Figure 2-3
PC Card Initialization
ConÞrmation
2-2
Vision Premierª Operating Instructions
Initializing the PC Card
8. Click [OK].
NOTE: If you are using an internal PC Card to acquire patient
records, you must deactivate the PC Card drive before
removing the PC Card from the computer. See ÒRemoving the
PC CardÓ on pg. 1-2 for more information.
The Enter Patient Information Window
Figure 2-4
Enter Patient Information
NOTE: Patient information entry is optional during
initialization. You will also have the opportunity to enter
patient information during record acquisition. If you prefer to
enter patient information at a later time, click [Cancel].
Use the keyboard to enter information.
1. Enter the Patient ID (identiÞcation number).
NOTE: If you do not enter a patient ID, Vision Premierª
automatically generates a patient ID that begins with STAT#.
Patient ID, as well as other patient information Þelds, can also
be edited when acquiring the patient record from the PC Card.
2. Click in the Last Name Þeld and enter the patient's Last Name.
3. Click in the First Name Þeld and enter the patientÕs First Name.
4. Click in the Second Last name or Middle Name Þeld and enter
the patient's second last name or middle name.
5. Click in the Data Recorder Serial Number Þeld and enter the
recorder serial number (this is located on the back or inside of
the recorder).
6. The Hookup Date and Hookup Time are automatically Þlled in
with the current date and time. Change this information if
necessary.
Vision Premierª Operating Instructions
2-3
Chapter 2 PC Card Recording Preparation
7. When you are Þnished entering information, click [OK].
Research Mode
CAUTION: Vision Series research mode is available for use
with the 6632 and 92510 digital recorders only. Attempts to use
any other Burdick recorders in research mode will result in
erroneous data.
NOTE: Research mode requires 256 MB or 512 MB PC Card.
NOTE: You always must select Initialize PC Card from the
menu bar in order to utilize research mode features. If you use
the Hookup Wizard, select Initialize PC Card after the Hookup
Wizard window closes.
Research mode on Vision Premierª allows you to initialize the digital recorder
at a higher sample rate than is regularly used. During initialization, the Select
PC Card Acquisition Parameters window appears instead of the Initialize
Holter PC Card window.
Figure 2-5
Select PC Card Acquisition
Parameters
1. Select sample rate acquisition parameters:
4 Select a sample rate from the left side of the window
or
4 Select the appropriate number of channels (at 200SPS, etc.)
from the top, right side of the window
2. If you have the optional Pacer software installed on your
system, select the appropriate detection sensitivity. Refer to the
Pacer Operating Instructions for more information.
Continue with step 6 on page 2-2.
2-4
Vision Premierª Operating Instructions
Hookup Wizard - Digital Recorder
Hookup Wizard - Digital Recorder
The Hookup Wizard includes three tiers of information:
4 an outline of all the necessary steps
4 detailed instructions in for each step (text and/or graphics)
4 on demand movies containing detailed instructions for each
step
The Hookup Wizard guides you through all of the steps necessary to ensure
accurate recording results. The wizard also initializes the PC Card for you. As
the wizard guides you through the appropriate steps, you may press [Back] at
anytime to review the previous steps and any choices you have made.
If you have installed the optional media player and video Þles, each screen will
contain a Show Me icon (
). Click on this icon anytime to view a short movie
containing detailed instructions for performing the current step.
1. Start the Vision Premierª program. The Report Manager
window is displayed.
2. Insert a PC Card into the PC Card slot in the computer.
3. Click on the Hookup Wizard icon (
Hookup Wizard is presented.
)in the toolbar. The
Figure 2-6
Hookup Wizard Ð
Electrode Placement
4. If you have a Tape Reader installed in your system, you are
given the option of selecting Tape Recorder or Digital Recorder.
Ensure Digital Recorder is selected.
5. Click on the appropriate radio button for either a 2-channel or a
3-channel hookup.
6. Attach the electrodes on the patient as indicated on the screen.
Vision Premierª Operating Instructions
2-5
Chapter 2 PC Card Recording Preparation
NOTE: Welch cups may be used at this point to eliminate
waste of sensors during signal veriÞcation. The Welch cup will
leave a red mark on the chest to aid in Þnal placement of the
sensor.
7. When you are satisÞed that the electrodes are properly placed
on the patient, click [Next]. The ECG VeriÞcation Setup screen is
presented.
Figure 2-7
Hookup Wizard Ð
ECG VeriÞcation Setup
NOTE: Audio ECG VeriÞcation is only available for the
Burdick 6722, 6732, 92512 and 92513 model recorders. If you are
using any other recorder you should evaluate the signal quality
using the procedures presented in the operating instructions for
that recorder. Click [Next] as necessary to skip the ECG Signal
VeriÞcation section of the wizard.
8. Follow the on-screen instructions for preparing the system for
audio signal veriÞcation. Click [Next] when you are ready to
verify the ECG signal. The Show ECG screen is presented.
2-6
Vision Premierª Operating Instructions
Hookup Wizard - Digital Recorder
Figure 2-8
Hookup Wizard Ð
Show ECG
NOTE: The Show ECG screen is not a calibrated display. It is
intended as a basic representation of the ECG signal to aid in the
placement of the electrodes.
9. Turn on the power to the microphone.
10. Click [Start]. Press the Event button on the recorder to advance
to the next channel.
The recorder will beep to indicate the ECG channel that is about
to be frequency modulated through the speaker (Channel 1 = 1
beep, Channel 2 = 2 beeps, Channel 3 = 3 beeps).
Verify that the amplitude of the signal for each channel is
optimal. The best recordings are produced if the amplitude of
the ECG signal is a minimum of two boxes and a maximum of
four boxes on this display.
4 To increase the amplitude in Holter channel 1, move the red
sensor down and left of the sternum.
4 To increase the amplitude in Holter channel 2, move the
black sensor right (toward the sternum).
4 To increase the amplitude in Holter channel 3, move the
orange sensor right (toward the sternum).
11. When you are satisÞed with the ECG signal quality, click [Stop],
then click [Next]. The Initialize PC Card screen is presented.
Vision Premierª Operating Instructions
2-7
Chapter 2 PC Card Recording Preparation
Figure 2-9
Hookup Wizard Ð
Initialize PC Card
NOTE: Your Vision Premierª system automatically
recognizes the size of the PC Card being initialized and will
grey out options not available to that speciÞc card.
12. Select the appropriate number of recorder data channels and
time duration to record by clicking the corresponding radio
button.
13. If you have the optional Pacer software installed on your
system, select the appropriate detection sensitivity.
14. Click [Next]. The Enter Patient Information window is
presented.
NOTE: The Enter Patient Information window will not
appear if this feature has been disabled. If the window does not
appear, proceed directly to step 15.
Enter the patientÕs information into the window. When you are
Þnished, click [OK]. For more information, see ÒThe Enter
Patient Information WindowÓ on pg. 2-3.
15. When initialization is complete, a conÞrmation dialog box is
displayed.
Figure 2-10
PC Card Initialization
ConÞrmation
2-8
Vision Premierª Operating Instructions
Hookup Wizard - Digital Recorder
NOTE: If you are using an internal PC Card to acquire patient
records, you must deactivate the PC Card drive before
removing the PC Card from the computer. See ÒRemoving the
PC CardÓ on pg. 1-2 for more information.
16. Remove the PC Card and click [OK] to continue. The Final
Recorder Setup screen is displayed.
Figure 2-11
Hookup Wizard Ð
Final Recorder Setup
17. Follow the on-screen instructions for Þnal recorder setup and
click [Finish].
NOTE: The recorder is not ready until the green LED is steady
on (i.e., on but not ßashing).
Vision Premierª Operating Instructions
2-9
Chapter 2 PC Card Recording Preparation
Hookup Wizard - Tape Recorder
The Hookup Wizard guides you through all of the steps necessary to ensure
accurate recording results. As the wizard guides you through the appropriate
steps, you may press [Back] at anytime to review the previous steps and any
choices you have made.
If you have installed the optional media player and video Þles, each screen will
contain a Show Me icon (
). Click on this icon anytime to view a short movie
containing detailed instructions for performing the current step.
1. Start the Vision Premierª program. The Report Manager
window is displayed.
2. Insert a new Holter Cassette Tape into the Tape Reader in the
computer.
3. Click on the Hookup Wizard icon (
Hookup Wizard is presented.
)in the toolbar. The
Figure 2-12
Hookup Wizard Ð
Electrode Placement
4. Ensure Tape Recorder is selected.
5. Click on the appropriate radio button for either a 2-channel or a
3-channel hookup.
6. Attach the electrodes on the patient as indicated on the screen.
7. When you are satisÞed that the electrodes are properly placed
on the patient, click [Next]. The Final Recorder Setup screen is
presented.
2-10
Vision Premierª Operating Instructions
Hookup Wizard - Tape Recorder
Figure 2-13
Hookup Wizard Ð
Final Recorder Setup
8. Follow the on-screen instructions for Þnal recorder setup and
click [Finish].
Vision Premierª Operating Instructions
2-11
Chapter 2 PC Card Recording Preparation
2-12
Vision Premierª Operating Instructions
Chapter
3
Acquiring & Analyzing Patient Data
After you have recorded data from a patient, you must copy the data to your
computer for analysis.
If you are using a PC Card recorder, remove the PC Card from the recorder and
insert it into the PC Card bay on your computer. When you acquire this data,
make sure that the correct PC Card recorder is selected for ECG Data Source.
If you are using a cassette tape recorder, remove the tape from the recorder and
insert it into the tape reader connected to your computer. When you acquire
this data, make sure that the correct tape recorder is selected for ECG Data
Source.
To acquire and analyze data:
NOTE: If, at any time, you are unable to proceed to the next
step refer to ÒMaintenance & TroubleshootingÓ on pg. 14-1.
1. Start the Vision Premierª program. The Report Manager
window is displayed.
Figure 3-1
Report Manager
2. Select Acquire from the menu bar or click on the Acquire New
Report icon ( ). The Acquisition Wizard is presented to guide
you through the steps necessary to acquire the patient record
from the recording media.
Vision Premierª Operating Instructions
3-1
Chapter 3 Acquiring & Analyzing Patient Data
NOTE: The steps presented in the acquisition wizard are
automatically determined by the recorder hardware you have
installed. Some of the steps discussed in this manual may not
appear on your system. You may skip those steps. The wizard
will guide you through the steps that are necessary for your
system.
3. The ECG Data Source screen is displayed.
Figure 3-2
Acquisition Wizard Ð
ECG Data Source
NOTE: The Select ECG Data Source dialog will not be seen by
users that have a PC Card system only. All Tape and Tape - PC
Card combination systems will see the Select ECG Data Source
dialog box.
4. Select which type of recorder you have used to record the
patientÕs data by clicking the appropriate radio button.
5. Click [Next] to continue. If you selected a tape recorder in step
4, the Select Data Channel screen is displayed. If you selected a
PC Card recorder, skip to step 10.
If you have not yet inserted the cassette or PC Card, you will be
prompted to do so at this point.
3-2
Vision Premierª Operating Instructions
Figure 3-3
Acquisition Wizard Ð
Select Data Channel
6. Select the number of data channels you wish to acquire, either
2- or 3-channel. At this point, you have the option of letting the
system determine the optimum tape gain settings or setting
them yourself. If you wish to allow the system to determine the
tape gain settings, ensure that the Enable Manual Tape Gain
check box is unchecked and click [Next]. The Tape Calibration
Data Transfer screen is displayed and the system automatically
transfers the calibration data from the tape. Proceed to step 10.
7. If you wish to set the tape gain manually, click in the Enable
Manual Tape Gain check box and click [Next]. The Tape
Calibration Data Transfer screen is displayed and the system
automatically transfers the calibration data from the tape.The
Manual Tape Gain Review window is displayed.
Figure 3-4
Acquisition Wizard Ð
Manual Tape Gain Review
Vision Premierª Operating Instructions
3-3
Chapter 3 Acquiring & Analyzing Patient Data
8. Set the Recorder Gain to the setting that was selected on the
recorder during the recording process.
9. Select the desired Scaling Factor for each channel. The data
shown in the ECG window is the uncalibrated data from the
Þrst hour of the recording. Use this to determine the
appropriate scaling factors. When the tape gain settings are as
you wish them, click [Next].
10. The Enter Patient Information screen is displayed.
NOTE: If patient information was entered during PC Card
initialization, then this information will appear automatically in
the Enter Patient Information window. Continue to step 18 on
page 3-5.
Figure 3-5
Acquisition Wizard Ð
Enter Patient Information
NOTE: Although it is possible to enter a total of 50 characters
in each name Þeld, Vision Premierª will display only the Þrst
52 characters of the combined name Þelds in the Report
Manager window. The name and patient ID may also be
truncated to Þt on the printouts.
11. Enter the Patient ID (identiÞcation number) [32 characters
maximum].
12. Click in the Last Name Þeld and enter the patient's Last Name
[64 characters maximum].
13. Click in the First Name Þeld and enter the patientÕs First Name
[64 characters maximum].
3-4
Vision Premierª Operating Instructions
NOTE: These are the only Þelds which are required in order
to acquire the record from the PC Card or tape. You may skip to
step 19, if desired.
14. Click in the Second Last name or Middle Name field and enter
the patient's second last name or middle name [64 characters
maximum].
15. To apply preset clinical limits to the patient data, select one of
the Þve options from the Clinical Limits Configuration pull down
menu. See ÒClinical LimitsÓ on pg. 12-4 for information on the
Clinical Limits settings.
16. The Hookup Date is automatically Þlled in with:
4 the date entered during initialization, or
4 the business day prior to the current date
Use the patient diary to verify this information. Change the date
if necessary.
17. The Hookup Time is automatically Þlled in with:
4 the time entered during initialization, or
4 the current time
Use the patient diary to verify this information. Change the time
if necessary.
18. To add comments to the patient event list or to insert patient
diary time and comments, see ÒDiary Event EntryÓ on pg. 3-8.
19. Click [Next]. The Enter Patient Demographic Information
screen is displayed.
Vision Premierª Operating Instructions
3-5
Chapter 3 Acquiring & Analyzing Patient Data
Figure 3-6
Acquisition Wizard Ð
Enter Patient
Demographic
Information
NOTE: All of the Þelds in this screen are optional. You may
skip to step 26 if you do not wish to include any of this
information in the patientÕs report.
20. Enter the patient's Age and select the proper age units from the
drop down menu.
21. Select the patientÕs Race from the pull down menu.
22. Select the patientÕs Gender from the pull down menu.
23. Enter the patientÕs Height and Weight and select the appropriate
units from the pull down menus.
NOTE: The lists that appear in the Medications and
Indications Þelds may be edited. Click on the expand button
(
) and you are presented with a new window where you can
add, delete or edit the available selections.
24. Select any Medications that the patient is taking from the pull
down menu or, if the medications are not listed, type them in
the text entry Þeld.
25. Select any Indications that the patient exhibits from the pull
down menu or, if the indications are not listed, type them in the
text entry Þeld.
26. Click [Next]. The Optional Test Related Information screen is
displayed.
3-6
Vision Premierª Operating Instructions
Figure 3-7
Acquisition Wizard Ð
Optional Test Related
Information
NOTE: All of the Þelds in this screen are optional. You may
skip to step 32 if you do not wish to include any of this
information on the patientÕs report.
NOTE: All of the lists that appear in this window may be
edited. Click on the expand button (
) and you are presented
with a new window where you can add, delete or edit the
available selections.
27. Select the Referring Physician from the pull down menu or, if
the physician is not listed, type the physicianÕs name in the text
entry Þeld.
28. Select the Overreading Physician from the pull down menu or,
if the physician is not listed, type the physicianÕs name in the
text entry Þeld.
29. Select the appropriate Hookup Technician from the pull down
menu or, if the technician is not listed, type the technicianÕs
name in the text entry Þeld.
30. Select the appropriate Scan Technician from the pull down
menu or, if the technician is not listed, type the technicianÕs
name in the text entry Þeld.
31. Select the Data Recorder Serial Number from the pull down
menu or, if the recorder is not listed, type the recorder number
in the text entry Þeld.
NOTE: If the recorder serial number was entered during
recorder initialization, then this information will appear
automatically in the Optional Test Related Information
window.
Vision Premierª Operating Instructions
3-7
Chapter 3 Acquiring & Analyzing Patient Data
32. Click [Next] when you are Þnished editing the information in
this screen. The record is copied to your computer and analysis
is performed.
33. The new record is listed in the Report Manager window. The
complete, unedited report and full disclosure is now ready for
you to review, edit and print.
Diary Event Entry
To add comments to the patient event list or to insert patient diary time and
comments, click [Diary Events] in the Enter Patient Information window. The
Diary/Patient Event List window is displayed.
Figure 3-8
Acquisition Wizard Ð
Diary/Patient Event List
Using the patientÕs diary, enter information as necessary. If you want the diary
entries included as a report strip in the Þnal report, ensure this option is
checked.
l
To enter a diary event, enter the date and time under Diary Time.
Use the keyboard to enter information under Diary Comment. Click
Add to add the entry to the Event List. Repeat these steps as
necessary to enter all of the diary events.
l
To update an entry, select the entry in the Event List. Make changes
as necessary in the Diary Time and Diary Comment boxes. Click
[Update].
l
To remove an entry, select the entry in the Event List and click
[Remove].
When you are Þnished editing, press [Close]. You are returned to the
Acquisition Wizard-Patient Information window.
3-8
Vision Premierª Operating Instructions
Chapter
4
Managing Reports
When you Þrst start the Vision Premierª program, the Þrst thing that is
displayed is the Report Manager window.
Figure 4-1
Report Manager
This window is your starting point for accessing and organizing all of your
patient records.
Sharing Records over the Network
NOTE: Network sharing features are available only on Vision
Premier.
NOTE: In order to share records over the network with other
users, you must install multiple licenses of Vision Premier.
Additionally, you must conÞgure the system for network use;
for more information, see the Vision Series Setup Guide.
If another user on the network opens a record, then Vision Premierª locks the
record to everyone but the user until the user closes the record. The record is
unavailable to other users and shows a status of Opened Review/Edit in the
Report Manager window.
Vision Premierª Operating Instructions
4-1
Chapter 4 Managing Reports
Sorting Patient Reports
At the top of the Report Manager window, below the toolbar, is a special kind
of menu. This menu displays titles for the columns of information which are
displayed for each report such as Patient ID. Click on a title in this menu to sort
all the displayed records according to the information in that column into
descending or ascending order.
Analyzing Patient Records
To eliminate any editing that may have been done on a patientÕs report and
generate a new report based on the original data, you may re-analyze the
report. To re-analyze a patientÕs record, highlight the record and click on
Procedure in the menu bar then select Analyze from the pull down menu. The
Select Channels to Analyze window is displayed.
Figure 4-2
Select Channels to Analyze
Select each of the channels you wish to re-analyze, and click [OK].
Changing Reports to be Displayed
You may determine which types of reports are displayed in the Report
Manager window. The options are:
4 All Reports
4 Full Disclosure Reports only
4 Summary Reports only
4 NonconÞrmed Reports only
4 ConÞrmed Reports only
These options make it easier for you to select the reports you wish to work with
during a particular session.
Click on View in the menu bar and select the type of reports you wish to see
displayed. The Refresh option updates the screen.
4-2
Vision Premierª Operating Instructions
Tracking Open Windows
Tracking Open Windows
Another item in the Report Manager menu bar is the Window option. Select
from the pull down menu under Window to manage how you want to view
open windows. The Cascade option allows windows to appear over one
another while the Tile option makes every window Þt so that no window is
obscured by any other.
Each open window is listed at the bottom of the pull down menu. The window
which is currently active is indicated by a check mark.
Backup and Restore of Reports
The Vision Premierª system allows you to backup or store your patient
records to any digital storage device that is accessible to your computer. You
can then restore those reports to your hard drive if you need to review or print
them. Click on the Archive icon (
) in the toolbar. Select Backup or Restore
from the options presented.
NOTE: The Full Disclosure, Final Report and summary
reports may be archived.
Backup Reports
This option allows you to backup a report to a local, network, optical, CDR or
CDRW drive.
1. Select the Backup option and the Backup Wizard window is
displayed.
Figure 4-3
Backup Wizard
Vision Premierª Operating Instructions
4-3
Chapter 4 Managing Reports
2. Under Where, enter the destination folder where you want the
backup Þle to go. If you want to change the destination folder,
click the [Browse] button to locate and select the new drive or
folder you wish to use.
3. Click the [Finish] button to start the backup process. If an error
occurs during the backup process, a message is displayed in the
Report Manager Ð Status column.
You may also select the [View Activity Log] button on the Backup Wizard
window to display the View Activity Log window.
Figure 4-4
View Activity Log
This window automatically sorts reports according to the time of backup (the
last report backed up is at the top of the list). The list can also be sorted into
ascending or descending order by column title, such as Patient ID.
In the View Activity Log window, two additional group boxes are shown: the
View group box and the Print List group box. Selecting a radio button in the
View group box will automatically display the corresponding backup reports
for the view selected. Selecting a radio button in the Print List group box will
select the Entire List of reports or the Selected List of highlighted reports for
printing. Click on a report to highlight it. To select more than one report, press
and hold the C key while clicking on the reports.
NOTE: The Selected List option becomes active after a report
is highlighted.
After making your selections from the View and Print List group boxes, click
the [Print] button in the Print List group box to print your selection(s) from the
View Activity Log window to your printer. To cancel any actions in the View
Activity Log window and return to the Backup Wizard window click the
[Cancel] button.
4-4
Vision Premierª Operating Instructions
Backup and Restore of Reports
Restore Reports
This option allows you to restore a report from a local, network, optical, CDR
or CDRW drive.
1. Select the Restore option and the Restore window is displayed.
Figure 4-5
Restore
2. Enter the Restore Folder where you want to get the report from.
If you want to change the Restore Folder, click the [Browse]
button to locate and select the new drive or folder you wish to
use. The records available in the location you have selected will
be listed.
3. If a folder is manually selected, click the [Refresh List] button to
update the list according to what reports are available for
restoring. Select the report to be restored by clicking once on it
and tagging it. The Print Patient group box and the Print List
group box options are now available. To select more than one
report, press and hold the C key while clicking on the reports.
The Print Patient group box allows you to print speciÞc components of an
individual report without actually opening or restoring the report. Select the
Report option to print the entire Final Report at the time the report was active
in the system. Select the Full Disclosure option to print the entire procedure or
portions of patient data as deÞned in the System Settings window (see ÒPrintÓ
on pg. 12-2.) Select the Specific Pages option to print only the Final Report
pages that you select. A window similar to the System Settings window
(seeÒPrintÓ on pg. 12-2) is displayed allowing you to make selections that affect
only the current printout.
The Print List group box allows you to print the Entire List of restorable reports
or the Selected List of tagged reports as shown in the Restore window. Printing
this list would be recommended in order to have a printed copy of a patient
reports backed up on this logical drive.
Vision Premierª Operating Instructions
4-5
Chapter 4 Managing Reports
4. Click the [Restore] button to start the restore process or click the
[Cancel] button if you do not want to restore a report at this
time.
Summarizing Reports
Once a Holter report has been reviewed by a doctor, and further actions have
been taken (if necessary), full disclosure data may not need to be saved on
Vision Premierª any longer. Full disclosure reports can be converted to
summary reports using the Summarize procedure. When a report is
summarized, full disclosure data is discarded. The summary reports consists
of a cover page, VE tabular, SVE tabular, pacer tabular, narrative, graphic
summary, ST summary and strips.
Summary reports require very little space compared to full reports, and
therefore potentially can be saved longer than full reports (for more
information, see ÒMaximum ReportsÓ on pg. 12-7).
To convert a full disclosure report to a summary report:
1. Highlight the desired record in the Report Manager window.
NOTE: To select more than one report, hold down the Control
key.
2. Select Procedure from the menu bar.
3. From the pull down menu, select Summarize.
4. The following message box appears.
Figure 4-6
Summarize warning
To backup the full report before proceeding, select [Yes]. The
Backup Wizard window is displayed. Enter the destination
folder and select [Finish].
To proceed without backing up, select [No].
NOTE: Full disclosure data will be lost if the full report is not
backed up prior to summarizing.
To exit without performing any action, select [Cancel].
Once a report has been converted a summary report, the Type as shown in the
Report Manager window changes to Summary.
4-6
Vision Premierª Operating Instructions
Chapter
5
Reviewing the Report
The Vision Premierª system provides a comprehensive and detailed report of
a patient's ambulatory cardiac procedure.
NOTICE: Computer assisted interpretation is a valuable tool
when used properly. However, no automated interpretation is
completely reliable and interpretations should be reviewed by a
qualiÞed physician before treatment, or non-treatment, of any
patient.
Beat Classification
During analysis, the Vision Premierª Holter analysis system uses a technique
known as feature extraction to group, based on their features, the individual
QRS complexes into forms. These formal and heuristic features include QRS
morphology, QRS width, QRS absolute area, QRS offset, QRS peak-to-peak
amplitude and prematurity.
After the individual QRS complexes have been consolidated into forms, the
forms are classiÞed into one of the following categories: Normal (N),
Ventricular (V), Paced (P), Other (?) or Artifact (A). Paced beats are identiÞed
only if you are using the optional pacer software.
IdentiÞcation of ventricular and supraventricular arrhythmias takes place.
These are then classiÞed as runs, couplets, isolated or SV episodes.
Rate-dependent arrhythmias, tachycardia and bradycardia, are calculated on
the basis of the RR intervals measured in an eight-beat sliding window.
Pauses are identiÞed when an RR interval exceeds preset criteria.
ST changes, both negative (depression) and positive (elevation), that satisfy the
criteria for amplitude, duration, and separation from prior episodes are
identiÞed as ST episodes.
Prior to printing the report, the classiÞcation of all arrhythmia and ischemic
episodes can be reviewed and edited.
NOTE: The Vision Premierª system locks out the Þrst Þve
minutes of ECG data which is used for calibration. These beats
are labeled U (Uneditable) in graphic displays.
Vision Premierª Operating Instructions
5-1
Chapter 5 Reviewing the Report
Viewing and Editing
There are several ways to advance through the pages of the Þnal report; use the
method that is most comfortable for you:
4 Select View in the Menu bar. From the pull down menu,
select the page you wish to view.
4 Press O/N.
4 Click on the Next/Previous page icons (
/ )to move
forward or back through the pages.
The Holter data and/or analysis information contained in some of the report
pages is editable. If the information on such a page has been edited, then the
lower left corner of the window will show * ModiÞed by user. Refer to the
graphic under ÒNarrative SummaryÓ on pg. 5-6 for an example.
NOTE: The * ModiÞed by user message appears only on the
page that has been edited, and is limited to the following pages
only: Narrative Summary, Ventricular Tabular,
Supraventricular Tabular, Pacer Tabular, and ST Tabular.
Following is a description of the pages that can be selectively included in the
report.
5-2
Vision Premierª Operating Instructions
Cover Page
Cover Page
Start from the Report Manager window. Double click the record you wish to
review or edit. The Patient Information window is displayed. This is the Þrst
page of the Final Report Cover Page.
Patient Information
Figure 5-1
Patient Information
This window includes the patient demographics, medications and clinical
indications. Enter the appropriate information using the keyboard.
NOTE: The entries for hookup time, recording duration and
channels analyzed are entered during acquisition. You should
verify that this information is correct.
Vision Premierª Operating Instructions
5-3
Chapter 5 Reviewing the Report
Holter Report Summary
Figure 5-2
Holter Report Summary
This section draws the physician's attention to highest and lowest heart rate,
total number of QRS, ventricular and supraventricular beats, severity of
pauses and the time of occurrence, duration and rate of the longest, fastest, and
slowest runs - both ventricular and supraventricular.
Any area that can be highlighted with the cursor can be edited. Before editing,
however, you should be aware of the following:
l
This is the only place that Bigeminals are reported.
l
Heart Rate (minimum and maximum) values must be between
0 and 250.
l
The only change that you can make to the rest of the values
displayed in this window is to change a value to zero. You can do
this if you disagree with the calculated value and wish to have
nothing printed on the Final Report. To edit these values to
something besides zero, you should edit forms and arrhythmias so
that the Vision Premierª system recalculates the results.
NOTE: Paced beats can be edited on the pace tabular
summary page.
NOTE: The number of isolated ventricular beats indicated in
the Summary section of the cover page is different from that
indicated in the Review Arrhythmias display. This is because on
the cover page every ventricular ectopic on the record is
counted, however, in the Review Arrhythmias display, the last
ventricular ectopic of every bigeminal cycle is not displayed.
5-4
Vision Premierª Operating Instructions
Cover Page
Interpretation
Figure 5-3
Interpretation Page
This section provides a place for the reviewing physician to type in the
interpretation. Blank lines are omitted in order to save space on the printouts.
If you enter a name (or select one from the drop down menu) in the Transcribed
By and Overreading Physician Þelds, the record report status will be changed
to ÒConfirmed.Ó
When the Cover Page is printed, there is a place for the reviewing physician to
sign and date the interpretation.
Vision Premierª Operating Instructions
5-5
Chapter 5 Reviewing the Report
Narrative Summary
Figure 5-4
Narrative Summary
This page presents a concise statement of the results in an easy-to-read
narrative style. It can be used as a preliminary guide for the physician's review
of the report or be included in the report as the physician's interpretation.
5-6
Vision Premierª Operating Instructions
Tabular Summary
Tabular Summary
Figure 5-5
Ventricular Tabular
Summary
The Tabular Summary pages provide an hourly summary of the results.
Variations in heart rate or frequency of arrhythmias during periods of activity
or sleep can be easily identiÞed.
1. Use the arrow keys to move through the columns and rows of
each table.
You may edit any areas that can be highlighted by the cursor,
however, if you change the quantity in the Total QRS column,
even inadvertently, the system requires that it be changed to 0.
You can do this if you disagree with the calculated value and
wish to have nothing printed on the Final Report. To edit these
values to something besides zero, you should edit forms and
arrhythmias so that the Vision Premierª system recalculates
the results.
2. After reviewing the Ventricular Tabular summary, advance to
the Supraventricular Tabular screen. This screen is similar to the
Ventricular Tabular screen.
Vision Premierª Operating Instructions
5-7
Chapter 5 Reviewing the Report
Graphic Summary
Figure 5-6
Graphic Summary
This display shows trends in ST level, heart rate and ventricular frequency for
a 24-hour period.
Average ST level is graphed for each channel with 1-minute resolution.
Breaks in the graph indicate that ST measurements were interrupted because
of ectopics, wide QRSs or excessive noise/artifacts.
Maximum, average, and minimum heart rates are graphed with 1-minute
resolution. Note that the time and rate of maximum and minimum heart rates
are also on the report cover page and are included automatically in the selected
ECG strips.
Frequency of ventricular beats is graphed with 1-minute resolution.
Tic marks ( | ) denoting the times at which the patient pressed the event button
on the recorder are printed below the ectopic ventricular trends.
The colors on the graphic summary ST level display allow for easy location of
information: ST elevations are in green; depressions are in magenta.
The HR graph is divided into two colors: green indicates the average; magenta
indicates the high and low rate for each 1-minute interval.
5-8
Vision Premierª Operating Instructions
ST Summary
ST Summary
This page provides a detailed summary of all ST episodes that satisfy the
clinical criteria for amplitude, duration and separation. It is divided into two
sections.
NOTE: The printout of the ST Episode Summary will include
a subset of all ST episodes displayed.
ST Channel Summary
Figure 5-7
ST Channel Summary
The ST Channel Summary provides:
l
The number of episodes of depression or elevation.
l
The duration of all episodes.
l
The time and maximum depression/elevation of the episodes for
each channel of data.
ST Episode Summary
Figure 5-8
ST Episode Summary
Vision Premierª Operating Instructions
5-9
Chapter 5 Reviewing the Report
The ST Episode Summary provides the following information for each
signiÞcant episode:
l
Onset time and date
l
Peak ST change (identiÞed as elevation or depression)
l
Slope (downsloping, upsloping or horizontal)
l
Duration
l
Channel
l
Heart rate at onset
l
Heart rate at maximum ST change
Each entry listed may be edited, inserted into the Report Strips or deleted.
1. Click the episode you wish to review or edit. The episode
becomes highlighted.
2. To edit an episode, click [Edit] at the bottom of the screen. The
ST Episode Edit window is displayed.
3. When all changes have been made, click [OK] to return to the ST
Summary window.
4. To insert an episode into the Report Strips, click [Insert] at the
bottom of the screen. The ST Episode Edit window is displayed.
5. Verify that all the information is correct and click [OK].
6. To delete an episode, click [Delete]. The episode is removed
from the list.
5-10
Vision Premierª Operating Instructions
Report Strips
Report Strips
Figure 5-9
Report Strips
The Þnal report pages show some of the strips selected by the system to
represent the arrhythmias noted in the report.
Each ECG strip shows the designation of the strip, the time and the heart rate.
For some arrhythmias (such as runs, pauses and bigeminy) additional
information is also included.
For clarity of presentation, the arrhythmia of interest is centered in the strip or,
as in the case of runs, tachycardia, bradycardia, bigeminy or pauses, the onset
of the arrhythmia is centered.
The ECG strips will vary from report to report depending upon system
conÞguration and the data being analyzed. The strips are presented either by
time or by category, depending on the report conÞguration. If they are grouped
by time, the strips are printed in chronological order starting at the beginning
of the recording. If they are grouped by category, all strips of the same type
(isolated, couplets, runs, etc.) are printed together.
To review the remaining report strips, press N or click in the scroll bar
located on the right side of the window. The strips are displayed one after
another until the last strip.
The Report Strips may be edited and deleted.
1. To edit a Report Strip, click on the strip to highlight it and press
E. A window similar to a diagnostic strip is displayed.
Vision Premierª Operating Instructions
5-11
Chapter 5 Reviewing the Report
Figure 5-10
Report Strip editing
2. You may edit any of the Þelds which can be highlighted by the
cursor. You can also select a strip label from the drop down
menu.
3. When you have Þnished editing the report strip, press X.
4. To delete a Report Strip, click on the strip, in the Report Strip
view, to highlight it and press the = key.
5-12
Vision Premierª Operating Instructions
Chapter
6
Reviewing & Editing Forms
The Vision Premierª system uses a sophisticated algorithm to detect, measure
and classify QRS complexes as types of forms.
A form is a group of beats that have similar characteristics. Forms are broken
down into Þve different categories: Normal, Ventricular, Other, Paced and
Artifact.
Normal forms (N) contain normal beats and SVE beats.
Ventricular forms (V) contain ventricular, fusion, escape and
idioventricular beats.
The Other forms (?) contain questionable normal beats that the
system could not identify with 100% conÞdence. They are
placed here for review and editing by you.
Paced forms (P) contain beats that were generated by a
pacemaker (detected only when the pacer analysis software
option is installed or when manually labelled by you).
Artifact forms (X) contain all detected events that were
determined to be noise or artifact. T-waves, P-waves and noise
are examples of Artifact forms and beats.
The Vision Premierª system offers many powerful editing capabilities that
allow you to change the system's original classiÞcation. These editing
capabilities allow you to override the form or beat classiÞcation assigned by
the system.
When form editing has been completed, the Vision Premierª system
automatically recompiles the report and incorporates your changes into the
Þnal results. All aspects of the report are affected; hourly totals and beat totals.
Even strips selected for the report may be changed.
Vision Premierª Operating Instructions
6-1
Chapter 6 Reviewing & Editing Forms
Reviewing Forms
1. Start from the Report Manager window.
Figure 6-1
Report Manager
2. Double click the record you wish to review or edit. The Patient
Information window is displayed.
Figure 6-2
Patient Information
6-2
Vision Premierª Operating Instructions
Reviewing Forms
3. Verify that the information displayed in the window is correct.
4. Click the Forms icon (
)in the toolbar. The Normal Category
forms window is displayed.
Figure 6-3
Normal Forms
NOTE: There are several ways to advance through the
various sets of forms: 1.) Click on the icon for the classiÞcation
of forms you wish to view. 2.) Select View in the Menu bar. From
the pull down menu, select the classiÞcation of forms you wish
to view. 3.) Press O/N or click on the Next/Previous page
icons ( / ) to move forward or back through the pages. Use
the method that is most comfortable for you.
NOTE: If there are more than 21 forms in the category, more
than one screen may be displayed for that category and you will
need to press N to move to the next set of forms.
Vision Premierª Operating Instructions
6-3
Chapter 6 Reviewing & Editing Forms
The Form Display
The forms are displayed in groups of up to 21 per screen. Each screen gives the
following information:
4 Category
4 Number of forms in the category
4 Each form's number and population
4 Letter used to designate the form
(for example, N for Normal)
Form Numbers
Form numbers are assigned based on the number of beats in the form (and
does not depend on the beat category). Form 1 always has the largest number
of beats.
Prime Forms
While reviewing forms you may notice that one form in a category does not
display any waveform in the viewing window. This indicates that this is the
prime form. The prime forms are also indicated by a small tic mark next to the
form designation ( ).
The beats grouped in the prime form do not Þt any other form. At least Þve
beats that share the same morphology are required to create a form. If there are
not enough beats to create a form, the beats are placed in the prime form for
that category.
Displayed Channels
A form that does not display a waveform for channel 1 or channel 2, indicates
that those beats within that group may have had a low amplitude signal in the
other channel or artifact. Typically, the unused channel contains data with too
much artifact or with a wandering baseline.
SVE Only
The SVE Only checkbox appears on the Normal Forms display. When this box
is checked, if there are any SVE beats within the currently highlighted form, a
representative SVE beat and the count of SVE beats within that form are
displayed.
Using the SVE Only option provides a more detailed view of the SVE
morphology. It provides a useful tool to edit false positives, i.e. artifact, from
the report. SVE false positives are typically recorded as single channel forms.
6-4
Vision Premierª Operating Instructions
Editing Forms
Figure 6-4
Normal Forms Ð
SVE Only
Editing Forms
While reviewing forms, the Þrst form is highlighted. The highlight cursor can
be moved with the arrow keys or by clicking once on the desired form. The
highlighted form is the one that can be edited.
To edit a form designation (and the designation of all the beats in that form):
1. Highlight the desired form.
2. Click Edit in the menu bar or click on the form with the right
mouse button and select the desired form label from the list. The
form is automatically moved to the correct category and the
label is changed. All the beats included in the form are
relabeled.
Vision Premierª Operating Instructions
6-5
Chapter 6 Reviewing & Editing Forms
Merging Forms
If there are two or more forms containing the same type of beats, they may be
merged to create one larger form. Merging does not affect data analysis.
To merge two forms:
1. Highlight the forms you wish to merge by holding down F
while clicking on each form.
Figure 6-5
Select Forms to Merge
2. Select Merge Selected from the Edit menu. A message box
appears asking you to conÞrm that you want to merge the
highlighted forms.
3. Click [Yes] to continue. The form display reßects the merge.
All the beats from the selected forms are now grouped into a
single form. This is the form that originally had the most beats.
6-6
Vision Premierª Operating Instructions
Editing Beats
Figure 6-6
Merged Forms
NOTE: In the example shown above, the number of beats in
Form 4 has changed to 175, which is the sum of the original
form 5 and 13. After and edit or merge process the numbering
of the form, which is based on number of beats in the form, may
change as occurred in the above example.
Editing Beats
When viewing forms, you may edit not only the form designation but you may
also review and edit individual beats.
Vision Premierª Operating Instructions
6-7
Chapter 6 Reviewing & Editing Forms
The Multi-Beat Display
1. Click on the desired form and select Multi Beat from the View
menu. The multi-beat view of the form is displayed.
Figure 6-7
Multi-Beat Display
Every beat that is incorporated into the form is displayed in a
series of screens with up to 60 beats per screen.
NOTE: Some frequently used functions can be accessed
quickly by right clicking within this window. This will activate
a context menu (see ÒContext MenusÓ on pg. 1-7).
Press O and N to move through each screen or click in the
scroll bar located on the right side of the window.
2. To view a beat within the context of Full Disclosure data, click
on the beat to highlight it and then select Full Disclosure from
the View menu.
3. To edit the beat label, right click on the beat and select the
desired label from the list. The beat is automatically moved to
the prime form of the correct category and the label is changed.
6-8
Vision Premierª Operating Instructions
Editing Beats
The Multi Beat with Superimposition Display
If, during the beat review, you need to see more detail of the selected beat,
select Multi Beat with Superimposition from the View menu.
Figure 6-8
Multi-Beat with
Superimposition Display
This screen displays up to 40 beats rather than 60. In the lower left of the screen
is a waveform that represents the basic appearance of the beats in the form.
Next to this is a composite picture of the displayed beats superimposed on one
another. In the lower right corner of the screen is a diagnostic strip. There are
two tic marks, one at the top and one at the bottom of this box. The beat in line
with these two marks is the currently highlighted beat.
As in the Multi Beat display, you can edit the designation of an individual beat:
Right click on the beat and select the desired label from the list. The beat is
automatically moved to the prime form of the correct category and the label is
changed.
NOTE: Tagged beat selections are not preserved from page to
page.
Vision Premierª Operating Instructions
6-9
Chapter 6 Reviewing & Editing Forms
The Diagnostic Strip Display
Double click on a speciÞc beat to view the beat in more detail. The Diagnostic
Strip is displayed.
Figure 6-9
Diagnostic Strip Display
This screen shows a 7-second diagnostic strip. There are six tic marks in this
box, three at the top and three at the bottom. The waveform in line with the two
center marks is the currently selected beat. Along the bottom of the screen is a
30-second Full Disclosure strip with the contextual viewing box centered over
the same data as that displayed in the 7-second Diagnostic Strip.
To edit the beats in this screen, right click on the beat label and select the
desired label from the list. The beat is automatically moved to the prime form
of the correct category and the label is changed.
6-10
Vision Premierª Operating Instructions
Chapter
7
Reviewing & Editing Arrhythmias
The Vision Premierª system detects arrhythmias and annotates events
indicated each time the patient presses the Event button on the recorder. These
episodes are then separated into seven classiÞcations:
4 Pause Episodes
4 Ventricular Episodes
4 Supraventricular Episodes
4 Tachycardia/Bradycardia Episodes
4 Minimum/Maximum Heart Rate
4 ST Episodes
4 Diary Patient Episodes
Reviewing Arrhythmias
1. Start from the Report Manager window.
2. Double click the record you wish to review or edit. The Patient
Information window is displayed.
3. Verify that the information displayed in the window is correct.
4. Click the Arrhythmias icon (
Strip window is displayed.
)in the toolbar. The Pattern
Figure 7-1
Pattern Strip
Vision Premierª Operating Instructions
7-1
Chapter 7 Reviewing & Editing Arrhythmias
NOTE: Some frequently used functions can be accessed
quickly by right clicking within this window. This will activate
a context menu (see ÒContext MenusÓ on pg. 1-7).
Most of the arrhythmia windows are very similar. These windows are all
divided into three sections:
4 The Histogram Distribution display
4 The Diagnostic Strip and Form displays
4 The Contextual View display
The Histogram Distribution Display
With the exception of the Min/Max Heart Rate window, the top right portion
displays the histogram distribution for the category with the following
features:
l
Each column represents a subcategory for the arrhythmia. The Þrst
column represents the number of single beats containing the
arrhythmia. The second column represents the number of instances
with 2 consecutive beats containing the arrhythmia. This pattern
continues to the far right column, which represents the number of
instances with 10 consecutive beats containing the arrhythmia.
l
The height of each column represents the number of episodes that
are included for each subcategory. This number also appears at the
top of each column.
l
The columns are proportional in height. The maximum height for
speciÞc episodes is as follows:
Isolated Ventricular and Supraventricular = 500
Ventricular and Supraventricular Couplets = 400
Ventricular and Supraventricular Runs = 400
Ventricular Bigeminy = 200
Pauses = 400
Tachycardia and Bradycardia = 200
l
The column that includes the most severe episodes is automatically
highlighted when this window is opened.
l
The top, left portion of this window displays the total number of
episodes for the current subcategory of arrhythmia and which of
these episodes is currently displayed.
For the Min/Max Heart Rate window, the top portion of the window has the
following features:
7-2
l
A 24 or 48-hour graph of the heart rate displayed in beats per minute
(BPM)
l
A blue, rectangular box that encloses 20 minutes of data on the 24 or 48hour graph.
Vision Premierª Operating Instructions
Editing Arrhythmias
l
The 20 minutes of data deÞned by the blue box is displayed at a larger
scale on the right side of the screen.
The Diagnostic Strip and Form Display
The right side of this section contains a 7-second diagnostic strip. The onset of
the current episode is centered in this box. Above the 7-second strip is
information about the episode such as a description of the subcategory and the
heart rate. Also displayed is more detailed information when applicable. For
example, a Pause episode will have the pause duration displayed here.
The left side of this section displays the form that is currently highlighted in the
7-second diagnostic strip.
The Contextual View Display
At the bottom of the Pattern Strip window is a 30-second, full disclosure strip
for viewing the selected beat in context with the surrounding beats. The onset
of the current episode is centered in this box.
Editing Arrhythmias
Selecting Arrhythmias to Edit
The Vision Premierª includes a certain number of representative arrhythmia
strips in the Final Report. The number of strips included is determined by the
System Settings. (See ÒSystem SetupÓ on pg. 12-1.) The Vision Premierª
selects what it considers to be the worst-case examples of each type of
arrhythmia. You may, however, wish to edit or include additional strips that
you feel are representative or delete those that you believe are not signiÞcant.
1. Click on the column of the subcategory you wish to review in
order to view the Diagnostic Strip and Contextual View
displays.
2. To view the next Pattern Strip for the current arrhythmia
subcategory, press N. Press O to go to the previous Pattern
Strip at any time.
3. To view another arrhythmia category, click the icon in the
toolbar that corresponds to the category you wish to review
such as SVE Episodes (
).
Editing an Episode
NOTE: Beats labeled as SVE may be reclassiÞed as Normal if
beats within the SVE run are manually edited. It takes two beats
in a row to trigger the labelling of an SVE run. Relabelling one
of these beats results in a different call by the Vision Premierª
software.
Vision Premierª Operating Instructions
7-3
Chapter 7 Reviewing & Editing Arrhythmias
Editing the Beat ClassiÞcation
Right click on the beat label above the desired beat in the 7-second strip display
and select the appropriate classiÞcation for the beat from the context menu.
Editing the Form ClassiÞcation
Right click on the form label above the form displayed at the left center of the
screen and select the appropriate classiÞcation for the form from the context
menu.
Including the Strip in the Final Report
1. Select the Strip Included in Report check box located above the
7-second strip display. The Insert/Edit Strip window is
displayed.
2. Fill in the information as needed.
Figure 7-2
Insert/Edit Strip
3. Click [OK] to save your changes and insert the strip.
Deleting a Strip
1. When the strip you wish to delete is showing in the diagnostic
strip section, press the = key or right click the mouse and
select Delete ECG Data from the context menu. All of the beats
in that strip will turn blue to indicate that they will not be used
when the report is recompiled.
NOTE: The data is not actually deleted. If you re-analyze the
report, the data will be returned to itÕs original state.
7-4
Vision Premierª Operating Instructions
Editing Min/Max Heart Rate
Editing Min/Max Heart Rate
The Minimum Heart Rate and the Maximum Heart Rate events are both
automatically included in the Final Report.
Click within the 24or 48-hour graph at the time period you would like to view.
The Diagnostic Strip and Contextual View displays change to display the data
for the corresponding time period.
To assign a different time as the Minimum Heart Rate event or the Maximum
Heart Rate event:
1. Click within the 24 or 48-hour graph to place the cursor at the
appropriate time period.
2. Select the Minimum Heart Rate or the Maximum Heart Rate
radio button.
3. Select the Used As Minimum/Maximum HR check box.
Editing Diary Events
The Vision Premierª system will automatically insert an episode for every
time that the patient pressed the EVENT button on the recorder. You can add
additional events based on what is written in the patient diary from the Pattern
Strip window.
1. While in Arrhythmia Review mode, click on the Diary Patient
Episodes icon ( ). The Pattern Strip window for the patient
events is displayed.
Figure 7-3
Patient Events window
Vision Premierª Operating Instructions
7-5
Chapter 7 Reviewing & Editing Arrhythmias
2. In the histogram section (at the top right of the display) click the
column of the episode you wish to review or edit. The column
becomes highlighted. The Diagnostic Strip, Form display and
30-second Full Disclosure strip change to display the data for
the selected episode.
3. Click [Review/Edit Events]. The Diary/Patient Event List
window is displayed.
4. To create a new episode, enter a new time in the Diary Time edit
Þeld and click [Add].
NOTE: DO NOT try to enter the day of the week, this will be
Þlled in automatically based on the date and time.
5. You can delete a patient event by highlighting it in the Event List
and clicking [Remove].
6. When all the desired changes have been made, click [Close] to
return to the Pattern Strip window.
7-6
Vision Premierª Operating Instructions
Chapter
8
Viewing the ECG
The Vision Premierª system allows you to review and verify every beat
recorded during the monitoring period. You may edit the classiÞcations made
by the system during analysis.
The Vision Premierª system provides you with two methods of viewing the
recorder ECG data:
l
Full Disclosure, a page-by-page view
l
Superimposition, a beat-by-beat view
Full Disclosure
This method of reviewing the recorded ECG data is page-by-page. Each screen
displays from 20 seconds of ECG data to up to 10 minutes depending on the
number of channels displayed and the number of seconds displayed per line.
The display format for this window may be edited in the System Settings
window (see ÒDisplayÓ on pg. 12-3). To change the display format for the
current report only, click the Report Settings icon (
) in the toolbar.
Displaying the Full Disclosure
1. Start from the Report Manager window.
2. Double click on the record you wish to review to open it.
3. Click the Full Disclosure Review icon (
Disclosure data is displayed.
)in the toolbar. Full-
Vision Premierª Operating Instructions
8-1
Chapter 8 Viewing the ECG
Figure 8-1
Full Disclosure
NOTE: Some frequently used functions can be accessed
quickly by right clicking within this window. This will activate
a context menu (see ÒContext MenusÓ on pg. 1-7).
This window shows all hours of the recording.
Abnormal beats are shown in a different color so you can
quickly pick out the abnormal beats.
4 Normal beats are black
4 Ventricular beats are red
4 SVEs are green
4 Paced beats are magenta
4 Artifact beats that are labelled asterisk or period are blue.
Artifact beats that are labeled x, X, t, or p are the same color
as the previous beat.
4. To view the data at different times, use the scroll bar to the right
of the screen.
NOTE: The Þrst Þve minutes of the ECG data is blue. This
indicates that this data was not used to generate the report. The
Vision Premierª system locks out the Þrst Þve minutes of ECG
data which is used for calibration. These beats are labeled U
(Uneditable) in other graphic displays.
8-2
Vision Premierª Operating Instructions
Full Disclosure
Selecting Data to Edit or Delete
To select Full Disclosure data, you can position the cursor box over the data
you wish to edit or delete, or you can use two I-beam shaped cursors to mark
off speciÞc regions.
To position the Cursor box, move your mouse cursor over the data you want
to select and left click your mouse.
To use the I-beam cursors:
1. Hold down the F key.
2. Click at the beginning of the section you wish to select.
3. Continue to hold the F key and click again at the end of the
data you wish to select.
You can view and edit the selected data more closely by right-clicking within
the area you have selected and choosing Diagnostic Strip from the context
menu.
Most noise is removed automatically by the system during analysis, however,
you may encounter recordings that contain excessive amounts of artifact that
you donÕt want considered when analyzing a report. To handle these
occurrences, the system allows you to manually delete data from analysis. Data
can be deleted in amounts as small as seven seconds or as large as the entire
procedure.
The deleted data is not removed from the system; it is ÒmarkedÓ and the
system ignores the data when building a report. The deleted data appears blue
to indicate that it will not be used in analysis when the report is recompiled.
To delete data, use the above procedure to select the data you wish to delete
and press the = key on the keyboard or right click the mouse and select
Delete ECG Data.
Vision Premierª Operating Instructions
8-3
Chapter 8 Viewing the ECG
Figure 8-2
Delete ECG Data
Inserting a Report Strip
Data may be manually inserted into the Final Report (see ÒReport StripsÓ on
pg. 5-11).
1. Select the desired data (see ÒSelecting Data to Edit or DeleteÓ on
pg. 8-3).
2. Right click the mouse and select Insert Strip from the context
menu. The Insert/Edit Strip window is displayed.
Figure 8-3
Insert Strip
8-4
Vision Premierª Operating Instructions
Full Disclosure
The Time Þeld is automatically Þlled in with the time of the
center of the strip.
The Strip Label Þeld is automatically set to ECG but may be
changed by selecting a different label from the pull down menu.
The Heart Rate Þeld is automatically Þlled in with the rate from
the time of the beat closest to the center of the strip.
The Strip Size Þeld is set in seven second increments up to 56
seconds. This Þeld will be Þlled in automatically if you Þrst
select the data as described in ÒSelecting Data to Edit or DeleteÓ
on pg. 8-3. You will usually want to include enough data prior
to the arrhythmia to aid in evaluating the arrhythmia.
The Comment Þeld allows you to enter a brief note to indicate
the reason you have inserted this strip into the Þnal report.
3. Fill in and edit the information in this window as needed then
click [OK].
Vision Premierª Operating Instructions
8-5
Chapter 8 Viewing the ECG
Displaying a Diagnostic Strip
For a more detailed view of a beat, right-click on the selected data in the full
disclosure view and select Diagnostic Strip from the context menu.
Figure 8-4
Diagnostic Strip
This screen shows a larger display of the contextual viewing box. The
waveform in line with the highlighted label is the selected beat. Along the
bottom of the screen is a 30-second Full Disclosure strip with the contextual
viewing box centered over the same data as that displayed in the 7-second
Diagnostic Strip.
8-6
Vision Premierª Operating Instructions
Superimposition
Superimposition
In this mode, normal beats are displayed, one on top of another
(superimposed). The display advances automatically. You may freeze the
screen at any time by clicking [Stop].
1. Start from the Report Manager window.
2. Double click on the record you wish to review to open it.
3. Click the Superimposition Review icon (
Superimposed data is displayed.
)in the toolbar.
Figure 8-5
Superimposition
A
B
C
KEY
A
superimposed ECG
B
30-second full disclosure data
C
RR plot, displays up to 400 consecutive RRs
(color coded to match standard beat classification;
see “Full Disclosure” on pg. 8-1)
Use this screen to view superimposed beats.
4 Click [Start] to begin viewing the superimposition scans.
4 Click [Stop] to stop the scan.
4 Click 30X, 60X, 120X, 180X, or 240X to select the speed of
the scan (30X is approximately 30 times the actual speed of
the recording).
Vision Premierª Operating Instructions
8-7
Chapter 8 Viewing the ECG
8-8
Vision Premierª Operating Instructions
Chapter
9
Reviewing the Tachogram
Tachogram Review allows you to view and correct all of the RRs for the entire
Holter procedure.
To review the Tachogram:
1. Start from the Report Manager window.
2. Double click the record you wish to review or edit. The Patient
Information window is displayed.
3. Verify that the information displayed in the window is correct.
4. Click the Tachogram Review icon (
Pattern Strip window is displayed.
)in the toolbar. The
Figure 9-1
Tachogram Review
NOTE: Some frequently used functions can be accessed
quickly by right clicking within this window. This will activate
a context menu (see ÒContext MenusÓ on pg. 1-7).
This screen is divided into three sections:
4 The Histogram Distribution and Poincare Plot displays
4 The Diagnostic Strip and Form displays
4 The Contextual View display
Vision Premierª Operating Instructions
9-1
Chapter 9 Reviewing the Tachogram
The Histogram Distribution and Poincare Plot
The top section contains a procedure graph which displays all of the raw RR
values. There is a box cursor within this graph which spans one hour of data.
Below the graph is a higher resolution graph showing an enlarged display of
64 minutes of raw RR values. With 2 additional minutes on either side, this box
represents the 60 minutes of data covered by the cursor in the graph above it.
There is a cursor in this box which represents the center of the 7-second strip
displayed in the Diagnostic Strip.
The 1-hour Poincare plot to the left of this section displays the plot of the last
RR value to the next RR. This data is the same data that is covered by the cursor
in the graph.
You can click anywhere within the two graphs to move the cursors. Clicking
within the Poincare plot has no effect on cursor movement.
For more precise cursor movement, make sure this section has focus (appears
highlighted) and use the Q or R key to move the 1-hour cursor box 1 minutes
to the left or right respectively. For even more precise movement, hold down
the F key while using the arrow keys to move the cursor 2 seconds to the left
or right.
The Diagnostic Strip and Form Display
The Diagnostic Strip and Form display is below the Histogram and Poincare
Plot. To the right of this section is a 7-second strip. The onset of the current
episode is centered in this box.
To the left of this section the Form is displayed for the currently highlighted
beat (see ÒReviewing & Editing FormsÓ on pg. 6-1Ó).
You can edit tachogram data in two ways:
4 Beat classiÞcation
4 Form classiÞcation
Editing is done exactly as it is done while reviewing Forms.
Editing the Beat Classification
Right click on the beat label above the desired beat in the 7-second strip display
and select the appropriate classiÞcation for the beat from the context menu.
Editing the Form Classification
Right click on the form label above the form displayed at the left center of the
screen and select the appropriate classiÞcation for the form from the context
menu.
9-2
Vision Premierª Operating Instructions
Including the Strip in the Final Report
Including the Strip in the Final Report
1. Press the [Insert] key on the keyboard. The Insert/Edit Strip
window is displayed.
2. Fill in the information as needed.
Figure 9-2
Insert/Edit Strip
3. Click [OK] to save your changes and insert the strip.
The Contextual View Display
The bottom section is a 30-second, full-disclosure strip for contextual viewing.
The onset of the current episode is centered in this box.
Vision Premierª Operating Instructions
9-3
Chapter 9 Reviewing the Tachogram
9-4
Vision Premierª Operating Instructions
Chapter
10
Calipers
This function is available from any ECG display to allow the user to make
precise measurements on screen.
Select Calipers from the View menu. The Calipers window is displayed.
Figure 10-1
Calipers Display
Select the checkbox for each channel that you wish to enable. Select the desired
vertical scale and horizontal time base. The zoom controls allow the vertical
scaling to be set to x4, x2, x1, x.5, and x.25. The vertical scaling will only effect
the channel that is active. A green, inverted ÒTÓ marker notes the active
channel. Horizontal time base can be set to 7.0, 4.0, 3.0, 2.0, 1.0 or 0.5 seconds.
The horizontal time base setting applies to all channels that are currently
displayed.
The Marker can be moved by using the keyboard or by clicking with left mouse
button. The following keyboard controls are available:
Z and Y will advance the marker up or down to other channels.
Q and R will move the marker left or right by 10% of screen size. F
combined with Q and R will advance the marker left or right at a 5-msec
interval.
Press E to lock the Þrst marker. The Þrst marker will turn red and a second
green marker will appear. Move this marker to the desired location and press
E again to lock it into place.
Vision Premierª Operating Instructions
10-1
Chapter 10 Calipers
To unlock or reset the calipers, press the c key or un-check the Set A check
box.
Figure 10-2
Set Calipers
The data for the active channel is indicated in the left side of display under
measurements. DELTA X measurements are the absolute difference between
the two markers calculated in BPM and msec. DELTA Y measurements are the
difference between the markers calculated in mm and mV. The sign is
referenced to the Þrst caliper locked. Measurements are displayed after the Þrst
caliper is locked.
NOTE: Set B values under Measurements are not functional at
this time.
After both calipers are locked, you may ÒwalkÓ the calipers. Press the Q or R
key to move the calipers to either the Next Beat or the preset Interval. With Next
Beat, the Þrst markerÕs position relative to the closest beat is used as well as the
distance to the second marker.
You may edit the beat classiÞcation by right clicking on the beat label above the
desired beat and selecting the appropriate classiÞcation for the beat from the
context menu.
The bottom part of the display shows a contextual view of the currently
selected beat.
10-2
Vision Premierª Operating Instructions
Chapter
11
Report Editing Enhancements
Insert Beat
This function is available from most ECG displays and allows you to label a
designated beat in a patient ECG.
To insert a beat Marker at a designated location, left click the mouse while
holding the F key down. The single Marker notes where Beat Insert will take
place.
The Marker can be moved by using the keyboard or by clicking on the new
location. The following keyboard controls can be used to move the Marker:
l
The Q and R keys will move the Marker left or right in 100 msec
intervals.
l
Press and hold the F key while using the Q and R keys to move
the Marker left or right in 5 msec intervals.
The display below is a Tachogram Review showing the Insert Beat I-beam
marker.
Figure 11-1
Insert Beat
NOTE: When inside the Calipers view, two color Markers
may be present inside the ECG window. To remove the inactive
Marker, left click your mouse on the ECG day and time text
above the ECG strip.
Vision Premierª Operating Instructions
11-1
Chapter 11 Report Editing Enhancements
Once you have aligned the Marker with the beat you wish to label, click on the
Insert Beat icon (
) in the tool bar or click the right mouse button and select
Insert Beat from context menu. Select the beat classiÞcation for the beat you
designated.
Insert Atrial Fib/Flutter
This function is available from most ECG displays and allows you to label a
designated period of AÞb/Flutter in a patient ECG.
To insert a Marker, left click the mouse while holding the F key down. The
single Marker notes the start of the designated AÞb/ßutter episode.
The Marker can be moved by using the keyboard or by clicking on the new
location. The following keyboard controls can be used to move the Marker:
l
The Q and R keys will move the Marker left or right in 100 msec
intervals.
l
Press and hold the F key while using the Q and R keys to move
the Marker left or right in 5 msec intervals.
To insert a second Marker, left click the mouse while holding the F key
down. This second Marker notes the end of the designated AÞb/ßutter
episode. (The second Marker can be moved in the same way as the Þrst.)
The display below shows the two AÞb/ßutter I-beam markers designating the
episode.
Figure 11-2
Insert AÞb/Flutter
11-2
Vision Premierª Operating Instructions
Insert Atrial Fib/Flutter
Once you have aligned the Markers with the segment you wish to label, click
on the Insert Afib icon (
) in the tool bar or click the right mouse button and
select Insert Afib from the context menu to open the Add/Edit Atrial Fib/Flutter
List window.
Figure 11-3
Add/Edit Atrial
Fib/Flutter List
The Analyze Start Time designates the position of the Þrst Marker. The Analyze
Stop Time designates the position of the second Marker. The duration of the
Atrial Fib/Flutter episode is the time between the two Markers. You can edit
the start and stop times to modify the duration.
To Add an Atrial Fib/Flutter episode to the list, click the [Add] button;
overlapping episodes will be merged.
To Update an existing Atrial Fib/Flutter episode, click the [Update] button;
overlapping episodes will be merged.
To Remove an existing Atrial Fib/Flutter episode, click the [Remove] button.
When all the desired modiÞcations to the list have been made, click the [Close]
button to save your modiÞcations or click the [Cancel] button to abort your
modiÞcations.
Vision Premierª Operating Instructions
11-3
Chapter 11 Report Editing Enhancements
11-4
Vision Premierª Operating Instructions
Chapter
12
System Setup
Before using your Vision Premierª system, you may wish to spend a few
minutes to conÞgure the system to suit your individual needs. Use the
Windows¨ Control Panel to set the formats for time and date. All other setup
is performed from within the Vision Premierª application, as described in this
chapter.
The Vision Premierª System Settings option allows you to set various
parameters of the system setup and report conÞgurations.
To access the System Settings:
1. Start from the Report Manager window.
2. Click on the System Settings icon (
) in the toolbar. The
System Settings window is displayed.
There are 8 pages in this window:
4 Display
4 Print
4 Clinical Limits
4 Auto Strips
4 User Strips
4 Freq. HRV
4 Time HRV
4 System
To switch to a different page, click on the appropriate tab. The
Print page is displayed when this window is Þrst opened.
NOTE: The two tabs, Frequency HRV and Time HRV, are
described in your HRV option operating instructions if you
have purchased the HRV option.
Vision Premierª Operating Instructions
12-1
Chapter 12 System Setup
Print
Figure 12-1
System Settings Ð
Print Settings
Print Settings
Physician
This is the name of the person who will be using the
customized settings.
This list is editable in the Acquire Wizard (see “Acquiring &
Analyzing Patient Data” on pg. 3-1).
When acquiring a new record, you are given the option of
selecting the name of the Overreading Physician. The
name you select there will determine which customized
System Settings are used to analyze and print that
patient’s report.
Pages to Print
Select which report pages will print when Print Report is
selected.
Selection
All Strips or User Inserted.
Format
Mini-Strip or Diagnostic.
Mini-Strip is a paper-conserving, small print format and
Diagnostic is a larger, diagnostic-quality print format.
Sort By
Time or Category.
When sorted by Time, the strips are printed in
chronological order. When sorted by Category, like strips
are printed together.
ECG Strips
Annotations
12-2
Vision Premierª Operating Instructions
Include beat annotations above each strip in the printout.
Print Settings
Full Disclosure
Select which channels to print and what resolution to use
when printing the full disclosure (10, 30 or 60 seconds per
line).
ECG Channel Gain
Adjust
Adjust the amplitude for one or more channels only if the
patient’s signal is consistently weak or strong.
ECG Channel Invert
Invert the signal from one or more channels.
Facility Identification
Type the name and address information as desired for your
facility. This information will appear on the cover page of
report printouts. The first line that you type in this field will
appear at the top of every printed page of the report.
Display
Figure 12-2
System Settings Ð
Display Settings
Display Settings
Full Disclosure/
Superimposition
Select which channels are displayed and the number
of seconds of data are displayed on each line (10, 15,
25, or 30 seconds per line).
NOTE: No data is excluded from analysis.
NOTE: The display will be larger if there are fewer
seconds displayed per line.
ECG Channel Gain Adjust
If the patient’s data is consistently weak or strong in
one or more channels, adjust the displayed
amplitude for those channels.
ECG Channel Invert
Invert the display for one or more channels.
NOTE: There is no visual indication on the screen or
printouts that this inversion has been made.
Vision Premierª Operating Instructions
12-3
Chapter 12 System Setup
Clinical Limits
Figure 12-3
System Settings Ð
Clinical Limits Settings
Clinical Limit Settings
12-4
Clinical Limits Group
Standard, Paced, Pediatrics, Custom 1, or Custom 2.
Select which set of clinical limits should be applied to
the patient data. You can configure all 5 categories to
suit your needs.
Pause Duration
The amount of time (in seconds) that must elapse
with no ECG detected before a pause is declared.
Bradycardia Rate
The rate the heart rate must fall below before a
bradycardia event is declared.
Tachycardia Rate
The rate the heart rate must exceed before a
tachycardia event is declared.
SVE Prematurity
The percentage that a normal morphology beat must
be premature before an SVE event is declared.
SVE ATach Rate
The rate a beat RR must exceed before an SVT is
declared.
Supports more accurate detection for bradycardiac
patients or patients with an underlying low heart rate.
ST Duration
The time (in seconds) an ST episode must exceed
the threshold limits before being declared an event.
Vision Premierª Operating Instructions
Clinical Limit Settings
ST Reset
The time (in seconds) an ST episode must not
exceed the threshold limits to end the declared
event.
ST Elevation
The amplitude threshold (in millimeters) the ST
segment must exceed above the baseline before
being declared.
ST Depression
The amplitude threshold (in millimeters) the ST
segment must exceed below the baseline before
being declared.
Auto Strips
Figure 12-4
System Settings Ð
Auto Strip Settings
Use this screen to tell the system how many strips of each category you want
included in the Final Report. Any combination of these strips may be selected
for a maximum of 255 total strips.
Select a Physician from the list. This is the name of the person who will be using
the customized System Settings. The Physician list is editable in the
Acquisition Wizard (see ÒAcquiring & Analyzing Patient DataÓ on pg. 3-1).
When acquiring a new record, you are given the option of selecting the name
of the Overreading Physician. The name you select there will determine which
customized System Settings are used to analyze and print that patientÕs report.
Vision Premierª Operating Instructions
12-5
Chapter 12 System Setup
User Strips
Figure 12-5
System Settings Ð
User Strips
Use this screen to create up to 16 labels for ECG strips that may be incorporated
into the Final Report.
12-6
Vision Premierª Operating Instructions
System
Figure 12-6
System Settings Ð
System
Maximum Reports
Use the Maximum Summary Reports and Maximum FD Reports Þelds to set a
limit on the number of reports that can be saved in Vision Premierª. Once the
limit is reached, old reports must be deleted before a new report can be
acquired.
When setting these values, make sure that you have enough free space on your
computerÕs hard drive to hold the indicated number of reports. As a general
rule, one FD (full disclosure) report requires between 20 and 30 Mb of space,
depending on whether the recording was 2 channel or 3 channel. One 48-hour
FD report will use up to twice these amounts. Summary Reports usually
require between 200K and 500 K bytes or more of space, depending on the total
number of report strips and the size of each strip.
PC Card Info
Use this checkbox to enable or disable patient information entry during PC
Card initialization.When the feature is enabled, the user has the option to enter
patient demographic as a part of initialization. Any patient information
entered during initialization is automatically saved to the record.
Disable this feature if you do not want the Enter Patient Information window
to appear during initialization.
Enter Custom Information
Use this area to add, delete or modify the lists for medications, indications,
overreading physician, scan technician, referring physician, hookup
technician, and data recorder serial number.
Vision Premierª Operating Instructions
12-7
Chapter 12 System Setup
Click on the arrows
next to the selection to view the list for the selection.
For example, to view the list of medications, click on the arrows next to
Medications. The Medications List window is displayed.
Figure 12-7
The Medications List
To add a new item to the list, type in the desired information and select [Add].
If you want the item to appear in a speciÞc location in the list, highlight the
item that will appear just after the new item, type the desired information for
the new item, and select [Insert Before].
To delete an item from the list, highlight the item and select [Remove].
To change an existing item, highlight the item, type in the changes and select
[Update].
NOTE: All changes are saved automatically.
To exit the window, select [Close].
HL7 Communication
HL7 parameters must be conÞgured in order for Vision Premierª to
communicate with the PYRAMIS¨ ECG Management System (see ÒSending
HL7 ReportsÓ on pg. 13-4).
4 Enter the IP address of the PYRAMIS machine which will be
receiving the exported data.
4 Enter the network location (Reference file share) for
holding summary reports that have been sent as part of HL7
communication.
All other values are automatically entered with default values.
NOTE: The Institution and Department numbers are derived
from similar values on PYRAMIS. The Port ID number is the
number for communication between Vision and PYRAMIS.
12-8
Vision Premierª Operating Instructions
Chapter
13
Printing and Sending Files
Printing the Report
From the Report Manager window there are 5 options for printing patient data:
4 Print Report
4 Print Forms
4 Print Full Disclosure
4 Print User-Inserted Strip
4 Print SpeciÞc Pages
To print patient data:
1. Highlight the desired record in the Report Manager window.
2. Click on Print in the Menu bar.
3. From the pull down menu, select the desired print option.
Figure 13-1
Print Options
Print Report
Select this option to print the entire Final Report as deÞned in the System
Settings window (see ÒPrintÓ on pg. 12-2).
Vision Premierª Operating Instructions
13-1
Chapter 13 Printing and Sending Files
Print Forms
Select this option to print all the forms as they are displayed for form review
(see ÒReviewing FormsÓ on pg. 6-2).
Print Full Disclosure
Select this option to print the entire 24 hours of patient data. The format for this
printout is determined in the System Settings window (see ÒPrintÓ on
pg. 12-2).
Print User-Inserted Strip
Select this option to print all the strips that have been inserted manually. The
format for this printout is determined in the System Settings window (see
ÒPrintÓ on pg. 12-2).
Print Specific Pages
Select this option to print only the Final Report pages that you select. A
window similar to the System Settings window (see ÒPrintÓ on pg. 12-2 for a
description of this window) is displayed where you can make selections that
affect only the current printout.
NOTE: If the highlighted record is a summary report, then
several of the options under Pages to Print will be grayed out.
Taking Pictures of the Display
With the Vision Premierª system you can obtain pictures of the image shown
on the display. This option has many uses. For example, if you are experiencing
difÞculties with your system, having a picture of the display is useful when
consulting with Technical Support personnel.
There are several options available with the Print Screen feature:
l
Obtain a picture of the entire screen display.
l
Obtain a picture of the active window only.
l
Obtain a printout from the printer.
l
Obtain a picture that can be pasted into a document such as a
WordPad document or a graphic program document.
Follow the instructions below to take pictures of the display for printing or
pasting into a document.
13-2
Vision Premierª Operating Instructions
Faxing Reports
To take a picture of the display:
4 Press the <Print Scrn> key to take a picture of the entire
screen.
or
4 Click within the window that you want to capture. The
window becomes active.
4 Hold down the A key and simultaneously press the
<Print Scrn> key.
Windows 95/98:
The Print window is displayed.
4 To print the picture, select the desired printer.
4 Click [OK].
or
4 To paste the picture into a document, click [Cancel].
4 Open the document.
4 Paste the picture into the document.
Windows 2000 Professional/XP Professional:
4 Open Wordpad
4 Paste the picture into the document.
Faxing Reports
NOTE: To use the Fax option, you must have a modem and
fax software installed. For additional information, see the
Vision Series Setup Guide.
1. Print as you would to a normal printer (see ÒPrinting the
ReportÓ on pg. 13-1 and ÒTaking Pictures of the DisplayÓ on
pg. 13-2).
2. When the Print window is displayed, select Microsoft Fax as the
name of the printer.
3. Click [OK].
Vision Premierª Operating Instructions
13-3
Chapter 13 Printing and Sending Files
Sending Reports
Sending HL7 Reports
NOTE: This feature is optional on Vision Premierª.
If the HL7 communication option has been installed on Vision Premierª, users
can send data to compatible management systems, such as PYRAMIS¨ ECG
management system. When an HL7 report is sent, the following information is
included: cover page, VE tabular, SVE tabular, pacer tabular, narrative, and ST
summary.
To send a report in HL7 format:
1. Highlight the desired record in the Report Manager window.
NOTE: To select more than one report, hold down the Control
key.
2. Select Procedure from the menu bar.
3. From the pull down menu, select Send and then HL 7 Report.
The report is sent to the IP address and port ID listed in the System Settings
window (see ÒHL7 CommunicationÓ on pg. 12-8).
Sending Summary Reports Using E-Mail
Users can e-mail summary reports to recipients using the host siteÕs e-mail
application (for more information on summary reports, see ÒSummarizing
ReportsÓ on pg. 4-6). Summary reports are included as an attachment on emails, and can be viewed on systems installed with the Visionª Series Holter
Report Viewer (for more information, see the Visionª Series Holter Report
Viewer Installation Instructions and Operating Instructions).
To e-mail a summary report:
NOTE: Vision Premierª automatically generates a summary
report if one does not already exist for a record. The summary
report is then deleted once the e-mail is sent.
1. Double click the record to open it.
2. Select Report Settings from the menu bar to view the print
settings for the report.
3. Make changes as necessary. Click [OK].
NOTE: In order for the e-mail recipient to print each page in
the summary report, each active checkbox in Pages to Print
must be selected.
4. Close the report.
13-4
Vision Premierª Operating Instructions
Sending Reports
5. With the report highlighted in the Report Manager window,
select Procedure from the menu bar.
NOTE: To select more than one report, hold down the Control
key.
6. From the pull down menu, select Send and then Mail Recipient.
7. The e-mail form is displayed.
NOTE: The information provided here includes details that
are speciÞc to Outlook¨ Express*. This is for illustration
purposes only; various e-mail applications can be used.
Figure 13-2
E-Mail form in Outlook
Express
8. Enter e-mail addresses as desired.
9. Press the send key
to e-mail the report.
CAUTION: Edits made directly to Holter report e-mail
attachments cannot be saved. To edit Holter reports received
via e-mail, Þrst save the attached report to a secure Þle location
(requires an .rps Þle extension).
*Outlook¨
Express is a registered trademark of Microsoft corporation
Vision Premierª Operating Instructions
13-5
Chapter 13 Printing and Sending Files
Exporting Reports
Holter report data can be converted into text format for additional analysis and
reporting. Conversion occurs through the process of exporting data. Exported
data can be imported into spreadsheets.
To convert Holter report data to text:
1. Highlight the desired record in the Report Manager window.
NOTE: To select more than one message, hold down the
Control key.
2. Select Procedure from the menu bar.
3. From the pull down menu, select Export.
4. The Export Wizard window will appear to guide you through
the steps necessary to setup the export function.
Figure 13-3
The Export Wizard
5. Select which information you would like to export under What.
6. To change the destination folder, select an item from under
Setup. Click the [Browse] button to locate and select the new
drive or folder you wish to use.
13-6
Vision Premierª Operating Instructions
Exporting Reports
NOTE: You must change the destination for each item
individually.
7. Once all information has been conÞgured as desired, click on
the [Finish] button.
Accessing Exported Data
One Þle is created for each item that is selected under What in the Export
Wizard window (items include, for example, cover page, VE/SVE tabular
page, etc.). Each exported item has a different Þle extensionÑfor example, the
Þle extension for a Cover Page is .txc. All Þles, however, can be opened as text.
To open exported Þles:
1. Open the location where the exported data was saved (the
location given for Destination Folder in the Export Wizard
window).
2. Click on the Þle you wish to open. Use the table below to
identify each Þle.
File Extension
Item
Data Format
.txc
Cover Page
tab delimited
.txt
VE/SVE tabular page
tab delimited
.txm
Minute HR information
comma delimited
.txs
ST episode information
comma delimited
.txh
HRV page
tab delimited
.txb
BEAT information
comma delimited
3. The following window will appear.
Vision Premierª Operating Instructions
13-7
Chapter 13 Printing and Sending Files
Select a program to open the Þle. The data can be opened using
word processing programs (such as Microsoft Word), text
viewing programs (such as Notepad or Wordpad), and
spreadsheets (such as Microsoft Excel).
13-8
Vision Premierª Operating Instructions
Chapter
14
Maintenance & Troubleshooting
No calibration is needed for your Vision Premierª system. For maintenance
and cleaning procedures, consult the documentation that came with your
computer.
Contact an authorized service agent immediately if:
4 The equipment is dropped or subjected to some other
mechanical stress.
4 Liquid is spilled on the equipment.
4 The equipment is not functioning as described in this
manual.
4 Parts of the enclosure are cracked or missing.
4 Any connector shows signs of deterioration such as
cracking.
All functions of the Vision Premierª system are designed to be user-friendly
and easy to understand. If a questions arise or you would like additional
information, contact your local representative or Burdick Technical Support
Department at (800) 333-7770 or (608)764-1919.
Computer-to-Recorder Interface Error Codes
NOTE: Please consult the operating instructions that
accompanied your recorder for additional information.
The following error codes are displayed on the computer during the PC-Card
or Tape initialization sequence.
Code
Possible Cause
Type of
Problem
1
Wrong number of parameters passed by the host
application
software
2
Data-file error.
software
3
Info-file error.
software
4
Pacer-file error.
software
5
Timeout during disk transfer
hardware
6
Disk did not respond to power-up test and/or disk erase
procedure failed.
hardware
7
No disk detected.
hardware
8
RTC/NVM write error.
hardware
Vision Premierª Operating Instructions
14-1
Chapter 14 Maintenance & Troubleshooting
Code
Possible Cause
Type of
Problem
9
Drive power-down error.
hardware
10
Excessive errors during disk read.
hardware
11
Unable to read cylinder index from drive.
hardware
12
Failure to read time from UPLD.DAT info file.
hardware or
software
13
Unable to build header file.
software
14
Unable to build event file.
software
15
Initialization failure.
hardware or
software
16
Initialization failure (pacer-data area).
hardware or
software
17
Initialization failure (time/mode verification failure).
hardware or
software
18
Mode information has been corrupted (check
hardware
connections).
Batteries were removed and reinstalled during recording.
20
Recorder does not contain data for procedure requested.
23
Requested 2-channel data - recorder contains 3-channel
data.
24
Invalid data request.
30
Recorder type is not capable of combined-mode
operation.
41
Did not detect recorder.
hardware
48
Did not find disk interface board
hardware
255
Poor or no data on recorder
1368
Copy protection violation
1369
Copy protection violation
Printing Problems
Most printing problems will result in a message displayed on the screen.
Consult the operating instructions for your printer to troubleshoot these
problems.
14-2
Vision Premierª Operating Instructions
Index
A
acquire data, 3-1
acquisition wizard, 3-1
analyze records, 4-2
annotations, 12-2
arrhythmias, 7-1
dialog boxes, 1-7
diary event entry, 3-8
diary events, edit, 7-5
display settings, 12-3
I
E
artifact data, delete, 8-3
ECG verification, 2-6
artifact forms, 6-1
edit arrhythmias, 7-3
Atrial Fib, insert, 11-2
edit fields, 1-7
audio ECG verification, 2-6
edit full disclosure, 8-3
auto strips, 12-5
electronic manuals, iv
error codes, 14-1
backup activity log, 4-4
backup records, 4-3
exit program, 1-2
export reports, 13-6
F
beat, insert, 11-1
facility identification, 12-3
beats, classify, 5-1
fax reports, 13-3
beats, color, 8-2
bigeminals, 5-4
final report
add strips, 7-4, 8-4, 9-3
delete strips, 7-4
bradycardia rate, limits, 12-4
flutter, insert, 11-2
form classification, edit, 9-2
forms, 5-1, 6-1
C
forms, classify, 5-1
calipers, 10-1
forms, edit, 6-5
cautions, v
forms, merge, 6-6
channel gain, adjust, 12-3
full disclosure display, 8-1
channel, invert, 12-3
full disclosure, edit, 8-3
check boxes, 1-9
click, 1-3
clinical limits settings, 12-4
initialize, 2-1
See also hookup wizard
insert Afib, Flutter, 11-2
insert beat, 11-1
inspection, 1-1
intended use, iii
interpretation, 5-5
L
list boxes, 1-8
beat classification, edit, 9-2
beats, edit, 6-7
hot keys, 1-5
double click, 1-4
arrhythmias, edit, 7-3
B
digital recorder, 2-5
See also initialize
tape recorder, 2-10
lists, configurable, 12-7
log, backup activity, 4-4
M
maximum reports, 12-7
menu bars, 1-5
miscellaneous settings, 12-7
mouse, 1-3, 1-5
multi-beat display, 6-8
N
narrative summary, 5-6
network operation, 4-1
normal forms, 6-1, 6-3
G
confirmation boxes, 1-10
graphic summary, 5-8
context menus, 1-7
grouping beats, 5-1
notices, vi
O
other forms, 6-1
D
H
delete artifact data, 8-3
heart rate, edit events, 7-5
diagnostic strip, 7-3, 8-6
histogram distribution, 7-2, 9-2
diagnostic strip display, 6-10
HL7 communication, 12-8
P
paced forms, 6-1
hookup wizard
Vision Premierª Operating Instructions
In-1
patient information entry, 2-3, 3-4,
3-6, 3-7
start program, 1-2
patient information entry, enable, 12-7
summarize records, 4-6
patient information, review, 5-3
superimposed data, 8-7
pattern strip, 7-1
superimposition display, 6-9
strip settings, 12-5
pause duration, limits, 12-4
SVE beats, 6-4
PC card, initialize, 2-1, 2-5, 2-10
SVE limits, 12-4
PC card, remove, 1-2
system requirements, 1-1
pcAnywhere, 1-3
system settings, 12-7
Poincare plot, 9-2
system setup, 12-1
prime forms, 6-4
print reports, 13-1
print screen, 13-2
T
print settings, 12-2
tabs, window pages, 1-10
printing problems, 14-2
tabular summary, 5-7
R
tachycardia rate, limits, 12-4
radio buttons, 1-9
text format reports, 13-7
records
analyze, 4-2
backup, 4-3
display record types, 4-2
restore, 4-5
sort, 4-2
summarize, 4-6
time search, 1-2
tachogram, 9-1
remote use, 1-3
tape gain, 3-3
toolbars, 1-6
U
uneditable beats, 5-1, 8-2
user strips, 12-6
report manager, 4-1
report strips, 5-11
report summary, 5-4
reports
export, 13-6
fax, 13-3
print, 13-1
send (e-mail), 13-4
send (HL7), 13-4
text format, 13-7
V
ventricular forms, 6-1
W
warnings, v
window tabs, 1-10
requirements, 1-1
research mode, 2-4
restore records, 4-5
S
search, 1-2
send reports, 13-4
setup, 12-1
sharing records, via network, 4-1
software version, iv
sort records, 4-2
ST limits, 12-4
ST summary, 5-9
In-2
Vision Premierª Operating Instructions
Burdick, Inc., 500 Burdick Parkway, Deerfield, WI 53531
U.S.A.
(608) 764-1919