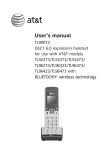
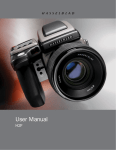
1
Phocus by Hasselblad User Manual Welcome to Phocus It is our hope that you will open Phocus, take a look around, and be inspired to get to work with an imaging workflow that develops according to the way you want things to happen. Uncompromising Image Quality The Phocus RAW processor provides the ultimate in processing q uality for Hasselblad digital images, including: • Digital lens corrections for color aberration, distortion and vignetting (DAC I, II, and III) • Hasselblad Natural Color Solution (HNCS) for perfect colors • Moiré removal directly upon raw data, preserving image detail Phocus on a Mac can also act as an extremely competent processor for 3rd party raw files taking care of workflow options such as browsing, adjusting and processing. It also supports standard file formats such as TIFF, JPEG, DNG and PNG. Perfect Viewing Quality The Viewer uses all the advanced features contained in Phocus to deliver image viewing quality that matches every detail of what you will see later in your chosen image editing program if you wish to edit further. In addition, the Phocus Viewer allows you to customize layout and composition to suit your current or desired workflow, providing a wide range of options including full view, compare, browse, horizontal, or vertical view, and so on. You can have multiple folders open simultaneously for side-by-side viewing, comparison, and selection. Camera Controls Phocus also provides special extended controls with which to operate your Hasselblad camera. These features, such as live video for easier photo shoots and workflow, or the ability to control the focus when the camera is in a remote position or when the digital capture unit is mounted on a view camera, bring an entirely new level of flexibility to the way you shoot. Flexible Workflow Phocus features easy-to-use options that allow you to customize your set-up to suit a range of different workflow situations– simple or advanced. Multiple folders can be open at the same time, while Quick Collection folders make handling your choices simple and easy. There is a choice of image export in a number of file formats, pre-setting of options In addition your customized workflow layouts can be edited, saved, exported and imported to ensure continuity of workflow across different workstations. Metadata The basic metadata architecture in Phocus follows the IPTC Core standard with XMP. Working with Hasselblad 3F raw files, the extended metadata architecture available provides for detailed and accurate image adjustment, cataloguing and indexing, providing extra benefits such as: 1. Extensive and easy overview of file information and its adjustment history. 2. All settings with regards to capture, angle, equipment, extensions etc. are stored as metadata directly in the image file for full interaction with Digital Lens Corrections (DAC). 3. The Hasselblad GPS accessory allows for a range of new functions within Phocus, as it links GPS data directly to Google Earth, making geographic reference a snap and image storage and retrieval much easier. Exported TIFFs and large JPEGs will carry most of this capture information available for further post processing and archiving. Leading Edge Moiré Removal Technology With Phocus, the moiré that can occur on even extremely high resolution Hasselblad images is effectively removed in most cases. Moiré removal is automatically performed directly on the raw data, leaving image quality intact and eliminating the need to carry out special masking selections or other manual procedures, saving hours of tedious post-production work. The moiré tool works with Hasselblad raw files only. 3 File support Phocus primarily fully supports Hasselblad 3FR and 3F files. However, additional file support on the Mac platform includes the ability to browse, handle, adjust, and process 3rd part RAW images and to support most standard nonRAW formats such as Tiff, JPEG, DNG, and the like. See File Support for further details « . Hasselblad raw files are also viewable with other selected software applications. Please check the Phocus Read-Me and our web page for updated information. Compatibility Phocus runs on Macintosh and Windows platforms that use recent operative systems. All FireWire based Hasselblad camera units are supported. Please check the Phocus Read-Me notes for details, requirements and restrictions. Computer configuration recommendations Medium-format image file editing requires a moderate amount of processing power from a computer to ensure smooth and rapid workflow. Please check the Read Me files for recommendations about hardware, graphics cards, memory requirements and configurations etc., to obtain the optimum performance from Phocus. Updates Phocus, in line with any Hasselblad product, is continually reviewed. Please occasionally check on the Hasselblad website−www.hasselblad.com–for news as well as the latest updates. ........................................................ About this manual This manual describes the workings of Phocus (Mac/Windows UK versions from version 2.5 or earlier) and how to use it on Macintosh and Windows platforms. The graphical user interfaces are very similar in appearance so the illustrations are based mainly on Macintosh screen captures with additional Windows captures where necessary. Likewise, the operative procedures are almost identical across the two platforms, with the largest difference being shortcuts. Again, these are illustrated and explained where necessary. Shortcuts are indicated by red text and symbols for Macintosh users and blue text and symbols for Windows users. Some actions require a right click with a two-button mouse. On Mac platforms this can also be achieved by holding the down the Ctrl key while clicking with a onebutton mouse. The manual is purposefully aimed at experienced photographers, rather than beginners, who are committed to exploiting the tremendous opportunities of professional level digital photography. It is assumed, therefore, that the reader already has a reasonable amount of proficiency in working on a computer and working with image editing software. Concepts such as menu structures, file systems, file storage, tools, etc, should be familiar. It is also assumed that certain digital photographic concepts such as color correction, sharpening, curves etc., are also familiar. In that way, the manual acts more as an informational source to specifically support the elements and building blocks of Phocus, rather than a step-by-step guide through image editing generalities. For non cover-to-cover readers, some information is purposefully repeated and appears on several pages. We encourage you to explore and discover the tremendous possibilities that Phocus offers. The philosophy of the program does not follow a fixed workflow or methodology. It is you who decides how to exploit the most from it, using customization and presets to create a personalized working environment. It is you who picks the tools and fine-tunes methods to get the most out of your images. You are recommended therefore to have the manual at hand in the early stages to check that you are taking advantage of what Phocus can offer. Old habits might hinder your progress towards the optimum in workflow and results, so occasionally dip into this manual to ensure you have everything that you need at your fingertips. 4 File Support Phocus primarily fully supports Hasselblad 3FR and 3F files. However, additional support on the Mac platform allows file viewing and limited editing of more than 150 third-party digital cameras, including Canon, Nikon, Leaf, Leica, Sony, Fuji, Olympus etc., as well as standard file formats such as TIFF, JPEG, DNG, PNG. Hasselblad raw files are also viewable with other selected software applications. Please check the Phocus Read-Me and our web page for updated information. 3FR: These files are a result of captures stored on CF cards generated by untethered Hasselblad equipment. They are visible as 3FR badged thumbnails and remain as such until selected and 'imported' where they then become 3F files. 3F: These files are a result of either captures generated by tethered Hasselblad equipment or as a result of 3FR files being processed to completion within Phocus. 3F files do not have to be 'imported' and can be adjusted and exported immediately. Exported 3F files include integrated metadata. nef cr2 mos dng tiff jpeg etc. N OT E When copying or transferring adjusted non-3F files to another folder, another computer or medium (that is, anywhere outside of Phocus) you must remember to include the sidecar files too. N OT E Support for files other than 3FR and 3F is only available on a Macintosh platform. Other (Mac only): This group comprises a list of various formats, both raw and non-raw, proprietary and general. These files are initially read and processed via the integral Macintosh OS X support before they are adopted by Phocus. This means the contents of a folder containing a mix of image-format files can be viewed in its entirety in Phocus. As these files can contain data that is written differently to Hasselblad files, there can therefore be a restriction on the effect that tools in Phocus could have. In practice this means you should expect the following tools to be inactive: Highlight recovery, Shadow fill, Clarity, Lens corrections, Noise reduction and Scene calibration. However, other tools can be freely used and in order to retain the adjustments, so called sidecar files are created. These are separate files that contain the necessary data that any following application needs to reconstruct the image the way you intended in Phocus. The files use the same name or designation that the original raw file had but to distinguish them from the originals, the sidecar files acquire a new suffix: .phos. These sidecar files are automatically stored in the same folder as the original files. The important point to remember here is that when transferring any non-Hasselblad files that have been adjusted in Phocus to another folder, to another computer or to an external storage medium, you must remember to include the sidecar files too. Otherwise all the changes and corrections you made in Phocus will be lost until you re-unite them. When moving or copying files inside Phocus, however, the sidecar files are automatically copied with the raw file. Be aware that initial previews of third party raw files might reflect the consequences of processing according to the manufacturer's standards. This would be particularly noticeable in regard to curve and color renditions. So, for every adjusted or exported file, Phocus creates and stores individual preview files in the Preview Cache folder that resides in the Phocus Application support folder. Though not necessarily normal workflow practice, adjustments can also be made on non-raw files if desired. 5 File Suppor t Contents Welcome About this manual File Support 3 4 25 Tabbed folder s 25 Options menu 25 Thumbnail badges 25 Viewer 27 Layout 27 Resizing 27 Viewer Toolbar 28 Compare view 28 Crop tool 28 Straighten tool 28 Neutralization tool 28 Zoom tool 28 Hand tool 29 12 Shadow warning 29 Print 13 Highlight warning 29 E xpor t 14 Grid 29 Overlay 29 Previous image 30 Nex t image 30 Switch compare images 30 Color info 30 Contents Getting Started Light Mode - over view Standard Mode - basic over view Slideshow 5 Selec tion 6 8 10 11 Layout over view 16 General description 16 File Browser 20 Layout 20 Navigation 20 Phocus Captures 21 Favorites 21 Collec tions 21 Quick collec tions 21 File System 21 Devices 21 Thumbnail Browser Tethered Capture 23 Layout 23 Resizing 23 Renaming, relocating and rating (IAA) 23 Viewing and sor ting 24 6 31 Connec tion 32 Capture 32 Live Video 33 H & V systems 33 Focus checking 34 Tool Area 36 Tabs 36 Tools 36 Tool set tings 36 Tool presets 37 Presets - general 38 Contents Tool List 40 Layouts 56 Layout - Edits 57 Adjustments 58 Adjustments Browser 40 Camera 40 Capture Info 40 Color Correc tion 40 Crop & Orientation 41 Cur ves 41 Exposure 41 Keyboard shor tcuts 67 Grayscale 41 FAQ 68 Histogram 42 Index 70 IPTC Core 42 IPTC Key words 42 Job Info 45 Lens Correc tions 45 Navigator & Zoom 46 Noise Filter 46 Output Preview 46 Queue 47 Reproduc tion 47 Scene calibration 47 Sharpness 48 White Balance 48 Menu 61 Menu shor tcuts 62 Appendix 66 Toolbar 50 Capture 50 E xpor t 50 Expor t New Images Automatically 51 Impor t & E xpor t tips 52 Impor t 52 Modifier key symbols for shortcuts Modif y 53 Macintosh Delete 53 Print 54 Preferences 55 Por trait /Landscape 56 Show 56 ^ = = = = Command Alt Control Shift Windows 7 Contents = Shift Getting Started The following is an introduction to the structure and workings of Phocus and what it can offer. 8 ??????????????????? Getting Started The Phocus DVD contains the application, user manual, video tutorial, sample images and ‘Read me’ files. After installation, you will be asked to register your copy of Phocus and you will also be able to choose whether you would like to be sent e-mails regarding software and firmware updates as well as general information about Hasselblad. A After launching, a welcome dialog presents four tabs A that offer a variety of information. What's New, for example, provides an overview of the latest improvements in Phocus while the other tabs contain more specific information and/or access to further help and information such as tutorials etc. Click on the buttons B to access the various pages under each tab heading. B The lower right corner of the welcome dialog provides initial choices regarding in which state (amount of tools and functions available etc.) you wish to start Phocus: Skip opens Phocus in the state it was when last closed. C Light Mode C is for those new to Phocus. You can go directly to the start page by clicking here « : Standard Mode provides all features and functions and is intended for regular users. D Note that you can configure a favored layout later on as layout/tool/preset combinations (default or custom) are always accessible at any time in Phocus via Layouts. −·− File Destination: When opened for the first time, Phocus automatically creates a file-destination folder called Phocus Captures, located in the Pictures D folder on the hard drive, where images shot tethered (with the camera connected) will be stored. Imported images from a CFcard will be located in the destination folder you chose during the import process. File Source: Captures can be imported from a CF card in a reader or directly from a camera in tethered mode. When connecting a Hasselblad camera it will show up under Devices in the File Browser E. When working tethered to a Hasselblad camera, all images are captured to the current destination folder and displayed in the Thumbnail Browser and Viewer. E Folders, cameras, card readers, memory sticks, hard drives, Quick Collections etc. containing captures appear in the File Browser. Clicking these will reveal their contents in the Thumbnail Browser. 9 Get ting Star ted Light Mode - basic overview Light Mode provides just the basics of Phocus. Captures can be imported, processed, viewed, saved or even printed in minutes. This mode is intended for use where no custom adjustments are required. However, Phocus can be expanded at any time providing access to all tools in conjunction with a number of predetermined layouts. Just click on the Layouts icon on the Toolbar (description follows this section). A Start up From the welcome screen, choose Standard Mode A. Import Connect a Hasselblad camera or a card reader to import captures stored on a card (if you want to import files via a card reader you can use whichever port−FireWire or USB−is supported by the card reader). Hasselblad equipment can be connected (tethered) to a computer FireWire port for direct capture import and direct selection without needing to use a card reader. File Localization Images, whether from a CF-card or from a tethered camera are imported automatically. See previous section for details. File Browsing Light Mode will display the File Browser B on the left. Tethered captures and card reader content will appear automatically in the Thumbnail Browser C. C Otherwise, click on the relevant capture storage symbol (camera/hard disk/memory card or stick) such as D, for example, to reveal the folder contents as thumbnails in the Thumbnail Browser. B Basic Options With the thumbnails visible, you can now make a selection of the desired images by clicking them. A selected image displays a white border surrounding it. D You can choose between several options that provide immediate and automated actions regarding the selected images: · Slideshow - displays selected files. · Print - prints selected files. · Export - saves selected files in the format of your choice to a folder for storage or use on another computer or image editing application. See the following pages in this chapter for further details about Slideshow « , Print « and Export « . 10 Get ting Star ted Standard Mode − basic overview Standard mode provides the complete range of tools and facilities that Phocus offers. This mode is intended for use where custom adjustment of individual files and customized batch processing is required. Refer back to the Getting Started and Light Mode pages for basics and further on for specific Standard Mode details. A Start up From the welcome screen, choose Standard Mode A, to start Phocus with all tools, choices and functions available. (Check off Show this windows at launch B if you do not wish to see the screen the next time you launch Phocus). The Welcome dialog is at all times available via the Help menu inside of Phocus. B C D Standard Mode will display the File Browser C on the left, Tools D on the right, the Viewer E in the middle with Thumbnails F below. E Import Connect a Hasselblad camera or a card reader to import captures stored on a card (if you want to import files via a card reader you can use whichever port−FireWire or USB−is supported by the card reader). Hasselblad equipment can be connected (tethered) to a computer FireWire port for direct capture import and direct selection without needing to use a card reader. F G File localization Images, whether from a CF-card or from a tethered camera are displayed automatically in Phocus. See previous section for details. File Browsing Tethered captures and card reader content will appear automatically in the thumbnail browser. Otherwise, click on the appropriate capture storage symbol (camera/ hard disk/memory stick) to reveal the folder contents as thumbnails in the Thumbnail Browser. N OT E · 3FR thumbnails represent untethered Hasselblad/CFcard stored files and require importing into 3F files to be able to view them in detail. You can, however, print and export 3FR files directly without importing them if required Adjustments Click on thumbnails to make them appear in the Viewer where they can be adjusted (3FR files must be selected first and then processed by clicking on Import G). · 3F thumbnails do not need processing. They are generated either directly from tethered captures or from imported 3FR files. Select the required tools from the four tabbed tool collections D and make the desired adjustments. · The Mac version of Phocus supports a variety of other raw formats as well as JPEG, DNG, TIFF. See File Support section « for more information. Basic Options Refer back to Light Mode description concerning Slideshow, Print and Export possibilities. 11 Get ting Star ted Slideshow (Light & Standard Modes) The Slideshow feature produces an easy-to-use, full screen display in seconds. 1. In the Thumbnail Browser, select the files you want to display in Slideshow. All supported files (see File Support section for further details « ) will work, except for non-imported Hasselblad 3FR files. Thumbnails bordered with white show they have been selected for inclusion in the slideshow. 2. Click the Slideshow icon in the toolbar or choose Slideshow via the Image menu. Mac Windows + + L Alt++L Additional functions on Mac platforms. 1. Select required action from control panel. Back, play/pause, next Index sheet. Mouse over file for information. Select any file to revert. Fit to screen or Actual size. Toggle function. 12 Adds selected file directly to iPhoto collection. Get ting Star ted Stop button (or use Escape button). Print (Light & Standard Modes) The Print feature offers high resolution direct print capabilities plus contact sheet creation. It includes features such as orientation, scaling, output size, color management, layout choice, etc.. 1. In the thumbnail browser, select the files you want to print then either: · click the Print icon in the toolbar · choose Print via the File menu · use the shortcuts: +P Ctrl +P Any of these reveals the Print dialog box. Thumbnails bordered with white show they have been selected. Full image prints 2. The dialog allows several choices. Print quality is automatically full resolution. Even 3FR files can be printed directly without processing to 3F files first. Check Full image to select optimum coverage of print medium. Check Auto rotate to set the correct orientation. You can also select next or previous image(s) here. See later section for further information about more possibilities « . Contact sheets 1. Check Contact Sheet. Select the required layout in Images per Row. Check boxes to include information. 13 2. Check Selection Only to print the original choice. Leave unchecked to print all images in folder. Get ting Star ted Export (Light & Standard Modes) Export allows you to export (convert) images into a variety of file formats such as JPEG, TIFF, DNG etc. It also offers simultaneous export of extra copies in the same or another file format. 1. In the Thumbnail Browser, select the files you want to export then either: · click the Export icon in the toolbar · choose Export via the File menu · use the shortcuts: +S Ctrl +S Any of these reveals the Export dialog box. Thumbnails bordered with white show they have been selected. 2. The Export dialog provides several choices: a) Where you want the exported file(s) to be stored. b) What types of file(s) you want. c) What type of naming you want the file(s) to have. d) Multiple output. a) Choose file destination in conventional manner. b) Click here to reveal a choice of formats. c) Click here to reveal naming choice. d) If required, click here to extend dialog box for multiple output. Type job name here. (See later sections Toolbar > Adjustment Presets for full details about choices 14 Get ting Star ted « ) Layout Overview Phocus is designed to be customized to suit your individual workflow. The following is an overview of layout possibilities. Layout Example This illustration highlights and describes the main areas as referred to in this manual. Please note this is just an example of one layout possibility. Layouts and content can be changed at any time. File Browser Menu Toolbar Lists the information concerning destination folders, storage folders, collections, hard disks and devices. Includes View, Window and Help for Phocus specific options. Accesses a variety of tools. Can be customized to suit your needs. Viewer Viewer Toolbar Thumbnail Browser Tool Area Displays the image selected in the Thumbnail Browser. A separate Viewer can be created for dualmonitor use, for example. Viewer image size can be changed in size and position. Accesses a variety of tools specifically assigned to the Viewer area only. Displays thumbnail views of selected folder content. Placing in layout can be changed. Images can be re-sized and sorted. Groups sets of tools under four main tab headings. These individual sets can also be customized to include any combination of tools. Individual tools can be floated to anywhere on the screen. 16 Layout Overview The following is a more detailed description of the main areas. Some shortcuts are mentioned but not all. See relevant sections for further information. Click here « for a complete list of keyboard shortcuts . File Browser The File Browser (not to be confused with the Browse tool tab) consists of Capture Destination, Favorites, Collections, File System and Devices. + +B Ctrl ++B } It lists all the storage locations under one heading. It can be made narrower by dragging the divider to the left. It can be hidden to increase the viewing area, for example, by using the commands mentioned here. Note that it cannot be placed anywhere else but on the left hand side of the layout. 1. Menu > Window > Hide Browser - expands area for Viewer and the Thumbnail Browser displays. Toggle function. 2. Menu > Layouts hides and shows Browser depending on choice Viewer + +V Ctrl ++V ^+ + +V Ctrl ++Alt+V + + F +Ctrl + F } } } The Viewer is the main area for image checking. A Viewer Toolbar runs along the bottom of the Viewer in all layouts. The view’s size can be changed by dragging the Viewer Toolbar up and down in the default (Landscape) layout. In Portrait mode the divider can be dragged to the left or right to change size also. 1. Menu > Window > Hide Viewer - expands area for Thumbnail displays. Toggle function. 2. Viewer in Separate Window - creates a separate window for the Viewer. 3. Full Screen Viewer - fills the screen with Viewer and Viewer Toolbar. Toggle back or press ESCAPE button to exit full screen mode. 4. Menu > Layouts hides and shows Viewer depending on choice. TIP Option click a tab head to trigger a customized preset change to the main layout. See Preferences « for details. + Tool Area +T Ctrl ++T } The Tool Area consists of four tabs: Capture, Browse, Adjust and Export. Each of these tabs can be customized for content. 1. Menu > Window > Hide Tools - expands area for Viewer and Thumbnail displays. Toggle function. 2. Menu > Window > Layout hides and shows Tools depending on choice. 17 Layout Overview If you want to customize a tab, click on it to bring it to the front. Click on the tool you want to move and use any of the following procedures: • Drag and drop any tool to another position on the list. • Drag and drop any tool to anywhere outside of the Tool Area to remove it. • Click the float icon to close the tool on the list and create a floating tool in the Viewer. • Click the right hand menu triangle on the tab header to reveal a list of tools. Clicking on a tool will add it to the selected tab. A default tool set is also a choice. • Some tools have a disclosure triangle on the tool header to reveal further options and a check box for activation. Any tab can contain any or all tools! Thumbnail Browser + +N Ctrl ++N } The Thumbnail Browser can be located beneath the Viewer, to the left of the Viewer, or replace the Viewer so that it fills the central area. 1. Menu > Window > Thumbnails expands area for Viewer displays. Toggle function. 2. Menu > Layouts hides and shows Thumbnails depending on choice. · Layouts can be configured to speed up workflow and facilitate certain actions. For example, you might prefer the very simplified Light layout for fast checking and exportation and another layout complete with specific settings for individual image adjustments. Layouts can be changed by the options on the Toolbar. Your own customized layouts can be saved/edited by Toolbar > Layouts > Edit. In the menu Phocus > Preferences, layouts can also be assigned to trigger specific actions, such as when connecting a camera, for example. Later sections in this manual take up each tool individually as well as some expanded sections for descriptions in greater detail of various aspects. 18 Layout Overview File Browser The File Browser lists all the storage locations under one heading and consists of Capture Destination, Favorites, Collections, File System and Devices. File Browser SHORTCUT Show/Hide + +B + Ctrl + B The File Browser provides easy access to your complete file system and directly links to convenient image folders such as: Capture Destination, Favorites and Collections. A right click in the File Browser opens a menu with command options for: Add to Favorites, Use as Capture Destination, Reveal in Finder, New Folder. Any folder name can be edited by clicking on the name itself, though volume names cannot be changed. Layout The view can be made narrower or wider or it can be hidden completely: 1 2 • Drag the divider to the left or right to alter the width of the view. • Choose Menu > Window > Show / Hide Browser (or use shortcut). Note, though, that the File Browser cannot be located anywhere else but on the left hand side of the layout. Navigation • Click on the arrows 1 on the header bar to navigate through recent folders. The folder name appears in the File Browser menu 2. • Click on the File Browser menu to reveal all folders. Click on a folder to display contents in the Thumbnail Browser. • Click on the disclosure triangles 3 to successively navigate to the desired folder. Click on the folder to display contents in the Thumbnail Browser. List of files Capture Destination: Contains the folders that store imported or saved captures. 3 TIP Click on a folder name to edit it. When Phocus is launched for the first time, a Phocus Captures folder is automatically created and appears on the desktop, by default. This folder becomes the automatic destination folder for all captures whether they are imported from a CF-card or directly from a tethered camera, until you choose otherwise. You can access the Phocus Captures folder in the File Browser panel under the Capture Destination heading. Clicking on the Phocus Captures icon will cause the contents to appear in the Thumbnail Browser. Other folders can be created or chosen as destination folders instead of the Phocus Captures as follows: 1. Create a new folder and name it. TIP Double click folders to expand or collapse them. 2. Choose the File Browser and navigate down through the menu to the new folder. 3. Ctrl click / Right click it to display the pop up menu where you can select Use as Capture Destination. 20 File Browser TIP Add/Remove Quick Collection +B Ctrl + B Press + B / Ctrl + B to ADD a selected file to a Quick Collection from any folder displayed in the Thumbnail Browser. Press + B / Ctrl + B to REMOVE a selected file from a Quick Collection (as well as the Quick Collection badge from the original file in the original folder) displayed in the Thumbnail Browser. Favorites: Contains aliases of frequently used folders. Drag selected folders to just beneath the Favorites heading to add them to the list. Collections: A Quick Collection is a compilation of links to images, that you want to keep together for various reasons. For example, it could be the best candidates from several folders kept in one place to present to a client. Files are added to the Quick Collection by shortcut or drag and drop to the folder. The figure in brackets displays the number of files in the collection. Click on Quick Collection to display contents in the Thumbnail Browser. Thumbnails that have been assigned to a Quick Collection acquire a Quick Collection icon, whichever folder they are stored in. Note that Quick Collection files are only alias files, not duplicate files, so if the original capture is deleted from its own folder then the alias file is automatically deleted from the Quick Collection folder too. For the same reason, an alias file deleted from the Quick Collection will not cause the original file in the capture folder to be deleted. File System: Provides an overview of the location of your local hard drives or network volumes for accessing folders. Devices: Shows the connected camera/digital back. Only visible when a device is connected. A file can also be removed from a Quick Collection folder by using the backspace / delete key. TIP Notification of any files currently being exported appears at the bottom of the file browser 21 File Browser Thumbnail Browser The Thumbnail Browser displays all the images in a selected folder. The layout can be altered while the captures can be re-sized and sorted. Thumbnail Browser The Thumbnail Browser is headed by a bar naming the selected folder. It also shows how many images are in the selected folder, as well as the available free space on the hard disk. Plus and minus symbols are also included for rapid viewing-size changes. A scroll bar can be displayed along the bottom of the Thumbnail Browser. In the top right hand corner of the Thumbnail Browser is a disclosure symbol to open an options panel. SHORTCUT Show/Hide +N + + Ctrl + N Layout At the default setting, the Thumbnail Browser is located at the bottom of the screen with images running left to right. To change the layout: + +N Ctrl ++N + +4 Ctrl ++4 } } 1 • Drag the divider (between the Thumbnail Browser and the Viewer) up or down (in landscape layout). • Drag the divider (between the Thumbnail Browser and the Viewer) to the left or right (in portrait layout). • Choose Toolbar > Show. Rapidly shows or hides the four main areas: Standard, Browse, Viewer and Thumbnails. • Choose Toolbar > Layout. Changes orientation to portrait to the left of the Viewer. • Choose Menu > Window > Show / Hide the Thumbnail Browser or shortcut. • Choose Menu > Window > Browse > Layout or shortcut. Fills area with thumbnails only (no file browser or tools). Resizing thumbnails To change the viewing-size of thumbnails: 2 + + + ++ +− +0 + Ctrl + + + Ctrl + − + Ctrl + 0 } • Click on the plus or minus symbols 1 to enlarge or reduce all the thumbnails in the Thumbnail Browser. • Move the drag handle 2 in bottom right corner of thumbnails. Alters size of all thumbnails globally. • With an image selected in the Thumbnail Browser, press ( + + +/-/0) (Ctrl + + +/-/0) zoom symbols to enlarge/reduce/fit the viewing size of all thumbnails. Renaming, relocating and rating (IAA) To rename: • TIP In Thumbnail only view, press + 0 / Ctrl + 0 to resize single thumbnails to fit view. Select name to highlight it for change. To relocate: • Drag and drop within the view. To change approval level rating (IAA) for both 3F and 3FR files before import: • Select then press – 1 for Green/ 2 for Yellow / 3 for Red. 23 Thumbnail Browser Viewing and sorting thumbnails Click on disclosure triangle to reveal thumbnail options. Thumbnails can be viewed and sorted in a number of ways. Click on the disclosure triangle on the right side of the menu bar to reveal a pop up menu. Navigate down to the required item for options. Sort by name Sort offers a variety of choices. Sort by date Custom sort Click here for more choice Ascending or descending Sort by approval Filter allows you by clicking to choose thumbnail display by rating. Show Image Types: · Filters the displayed files according to type. For example, checking 3fr would automatically select only the Hasselblad files not yet imported and disregard all other file types in that particular folder. Show Approval Level: · Filters the displayed files according to rating. For example, checking only the Red rating would automatically select only the files you have classified as doubtful and ready for possible deletion. Show Image Info: · Filters the information displayed about the files. For example, checking Crop and Badges displays the actual crop of the thumbnail as well as the crop badge. Unchecking Crop displays the whole of the thumbnail (and badge if still checked). Sort By: · Filters the information displayed about the files. For example, checking Approval will group together all green rated files first, then all yellow files followed by all red files. Bar Contents: · Hides/reveals quick access icons displayed on the Thumbnail Browser bar. Check Sort and/or Approval Filter to activate them. 24 Thumbnail Browser Selection 1 2 Click on a thumbnail to open it in the Viewer. If you make multiple selections, you can select which thumbnail to view by either clicking on it or by using the cursor keys. Tabbed Folders Cmd / Ctrl clicking a folder in the File Browser will create an extra tabbed folder 1 that appears above the Thumbnail Browser. This makes it easier and more efficient to manage files when working with several folders at the same time. Click on the X on the tab to close it (the File Browser can be closed to free up space for viewing images if required). Options menu Ctrl click / Right click thumbnails to open a list 2 of time saving options. Works individually or in multiples. Thumbnail badges 3 Thumbnails are badged with various appropriate symbols to display the file format, status and/or history. These also appear on the left of the Viewer header bar 3 as a reminder when the thumbnail browser is hidden). Badge examples 3FR file. Multishot file. Quick collection shortcut. File has been exported. Thumbnail example File has been edited (and saved) File has been exported File has been edited (and saved). File has been cropped. Quick collection TIP TIP When in Thumbnail Browser only view, double click a thumbnail to open it in a Viewer window. A slideshow function is available for selected (non 3FR) thumbnails. Choose Menu > Image > Slideshow. Features: back, next, pause, index sheet, fit to screen and add to iPhoto on the Mac platform. 25 Thumbnail Browser Viewer The Viewer displays an enlarged view of images, allowing detailed examination and adjustment of individual images. A Viewer Toolbar is available in the same view. Viewer SHORTCUT Show/Hide + +V + Ctrl + V TIP When browsing the Thumbnail Browser and the Viewer together, press + +N / Ctrl + + N to temporarily hide the thumbnails. Toggle back. TIP The top right hand corner of the Viewer displays the current magnification of the image. Layout At the default setting, the Viewer is located in the middle of the screen above the Thumbnail Browser and automatically displays any selected thumbnail. The Viewer is headed by a bar naming the selected image. It also displays the approval level, size in percent, basic exposure information and any badges assigned. It also contains a plus and a minus icon for zoom in/zoom out changes. A Viewer Toolbar runs along the bottom of the Viewer Area. Both the bar and the Viewer Toolbar follow the Viewer in any orientation and size. To change the layout: • Drag the divider (between Viewer and Thumbnail Browser) up or down (in landscape layout). • Drag the divider (between Viewer and Thumbnail Browser) to the left or right (in portrait layout). • Choose Toolbar > Layout. Changes orientation to portrait to the right of the Thumbnail Browser. • Choose Toolbar > Show. Hides or shows Viewer, amongst others. • Choose Menu > Window > Viewer in Separate Window (^ + + + V) (Ctrl + Alt + + V). Creates a separate Viewer (for dual screen use, for example) • Choose Menu > Window > Full Screen Viewer ( + + F) (Ctrl + + F). Fills screen with Viewer image and Viewer Toolbar only. • Choose Menu > Window > Standard ( Produces default layout. • Choose Menu > Window > Viewer ( + + 3) (Ctrl + + 3). Hides File Browser, Tools and the Thumbnail Browser. TIP Basic capture information can be read off the viewer bar. TIP Hand Tool • Hold down the spacebar to activate the hand tool when zoomed in to drag Viewer contents around. + + 1) (Ctrl + + 1). Resizing image in Viewer To change the size: • Activate the Zoom tool in the Viewer Toolbar. Click on image in Viewer for 100% view (toggle function to revert). • Hold down Cmd + +/– / Ctrl + +/- to enlarge/reduce the image. • Press the plus/minus zoom symbols in the top right hand corner of the Viewer. • Fit to window. Menu > View > Zoom to Fit ( • Zoom to 100%. Menu > View > Zoom to 100% ( + 0) (Ctrl + 0) + + 0) (Ctrl + Alt + 0) Resizing Viewer • Move dividers to increase or decrease Viewer area. • Hide the File Browser and/or Tools and/or the Thumbnail Browser to free up space. Image enlarges automatically to fill area. 27 Viewer VIEWER TOOLBAR Either click on the icons or use the shortcuts to access the following tools. Both methods have a toggle function. Compare View w / w Allows comparison of two images shown side-by-side in the Viewer. Images from different folders can be compared. Select a thumbnail to be first image in the Viewer. Click on the Compare view tool (or press 'w'), then select desired comparison thumbnail. Press the ‘S’ key to switch images. Option click a thumbnail to be new first image. Click on tool or press 'w' function to toggle back to standard view. Crop tool c / c Drag-activated crop tool with placement/centering grid. Can be customized in the Crop & Orientation tool in the Tool Area to conform with certain aspect ratios. Crop dimensions appear immediately beneath cropped area while mouse is pressed. Select another tool to view without crop and select Crop again to view with crop. Click outside of crop to remove it or Undo Change Crop ( + Z ) ( Ctrl + Z ) to revert. Press a number on the keyboard while activating the Crop tool to determine the number of lines in the grid (1-9). Crops can also be viewed on thumbnails (see under Thumbnail Browser/ Viewing and Sorting /Show « ). Straighten tool r / r Provides a straightening function. Place the cross cursor on any chosen point on the image, mouse down and trace a landscape or portrait line (real or imaginary) which you want to become a perpendicular landscape or portrait. Release the mouse button and the image automatically aligns to the line orientation you chose. With the Crop & Orientation tool open, you can additionally read off the number of degrees the image has been rotated. See also Crop & Orientation under Tools for refinements « . Neutralization tool n / n Allows a rapid neutral color balance to be made. Position the tool over an area judged to be neutral and click again. Look at the RGB readout (bottom right of frame) for more information. Zoom tool z / z – in ++, out +–, to fit +0, to 100% +Alt+0 in Ctrl++, out Ctrl+−, to fit Ctrl+0, to 100% Ctrl+Alt+0 Position the tool over the area you want to zoom in on. Clicking will produce a 100% view. Clicking again will revert the image to the original size. This percentage can be read off the bar just above the Viewer, in the far right corner. 28 Viewer Hand tool h / h Used to move the image in the Viewer when zoomed in. Hold down the spacebar for temporary use. Color picker tool i / i Places color-channel value-markers for specific points on image in Viewer. To move them for comparison, hover the color picker cursor over the marker (the tool active must be active). The tool cursor reverts to a regular arrow cursor for dragging. All markers can be deleted by backspace/delete with the tool active. Different read-out options (RGB / Output / Lab) are available via Color Info, found on the far right of the Viewer Toolbar (see following page). Shadow warning ^ + for options: ^+ +D / Ctrl + D + W / Ctrl + W Marks areas of the image that are rated as underexposed. These areas appear as light magenta (default) and cover the affected areas of image. Select Menu > View > Warning Options (or use shortcuts) to change threshold settings and the warning color. Alternatively, Ctrl clicking the icon and then the pop up menu that appears will directly access the Warning Options dialog. Highlight warning ^ + for options: ^+ +H / Ctrl+H + W / Ctrl + W Marks areas of the image that are rated as overexposed. These areas appear as light cyan (default) and cover the affected areas of image. Select Menu > View > Warning Options (or use shortcuts) to change threshold settings and the warning color. Alternatively, Ctrl / Ctrl clicking the icon and then the pop up menu that appears will directly access the Warning Options dialog. Grid + for options: ^+ +G/ Ctrl+G +G / Ctrl+ + G Adds a grid over the Viewer image to aid composition, etc. Select Menu > View > Grid Options to change the number of lines and their color. Ctrl / Ctrl clicking the icon and then the pop up menu that appears will directly access the Grid Options dialog. Press Alt / Alt to reposition the grid over the image with the mouse. + Overlay for options: ^+ +O +O / Ctrl+ + O to drag: + mouse/ Alt + mouse Allows another image to be superimposed. Used primarily in fixed layout composition, montage, etc. Uses JPEG, TIFF, PNG, PSD, PDF and GIF formats for the overlaid file. Choose Menu > View > Overlay Options to access opacity and scale options as well as a prompt to select the overlay file, which is automatically placed after selection. Alternatively, Ctrl / Ctrl clicking the icon and then the pop up menu that appears will directly access the Overlay Options dialog. Files can also be browsed in the Finder or placed by drag and drop. Overlaid images can be moved by Option (Alt) dragging with the mouse 29 Viewer + / Ctrl+ Previous image Displays previous image in the Thumbnail Browser, replacing the current image in the Viewer. + / Ctrl+ Next image Displays next image in the Thumbnail Browser, replacing the current image in the Viewer. Switch compare images S / S Switches the position of the two images in Compare View in the Viewer from left to right and vice versa. Color Info Provides an input RGB, Output or Lab readout of the area beneath the cursor when positioned on an image in the Viewer. TIP TIP Full screen view fills the whole Viewer area. (Menu is hidden) but retains the Viewer Toolbar for continued checking and navigation control. TIP You can change the Approval level of the selected image in the Thumbnail Folder and in the Viewer by simply pressing 1, 2 or 3 for green, yellow, or red. Clicking the green-yelllow-red icon in the Viewer will have the same effect. Menu> Window > Full Screen View Create two Viewer images side by side to compare sharpness settings, for example. Select an image in the Thumbnail Browser. Choose Compare view in the Viewer Toolbar then choose Menu > View > Compare Image. + + F + Ctrl+ F Any adjustments made then affect only the left hand image. TIP TIP Mac Ctrl/right click the Warning, Grid and Overlay tools on the Viewer Toolbar to access options. Thumbnail badges assigned to files also appear on the left of Viewer header bar as a reminder when the thumbnail browser is hidden. Win Right click the Viewer Toolbar to reveal the View list from the Menu to access options. 30 Viewer Tethered Capture Allows the control of Hasselblad digital camera products when connected by FireWire to a computer. Tethered capture SHORTCUT Capture +N Ctrl + N Connection Connect the digital camera system to a computer via a FireWire cable. An icon will appear under Devices 1 in the File Browser and a heading in the Camera tool 2 affirms that connection has been made. Regarding storage space, you can check the amount left by selecting the Capture Destination folder in the Finder and reading the figure displayed to the right in the Thumbnails Browser bar. Capture See under Tools for description of Camera tool. According to model/con figuration, the camera can be triggered either by: 1 · the Capture icon in the Toolbar 3 (H models, motorized V models and V models with winder only). · the shortcut – + N / Ctrl + N · the camera itself. 2 After exposure, the capture is stored directly in the folder that you have designated to be the Capture Destination folder (default: Phocus Captures) (see File Browser section « about how to create a new capture destination folder). The name of this selected folder appears at the top of the File Browser as a reminder. Immediately after exposure, the capture preview appears in the Viewer and in the Thumbnail Browser. An icon appears 4 on the left hand side of the bar just above the Viewer to indicate progress. It disappears when the capture has been stored. Points to note 3 • Captures are stored directly in the chosen capture destination folder. You should therefore always check beforehand that you have selected the correct folder (see Capture Destination section « for more information). • All tethered captures are stored as lossless compressed 3F files in the capture destination folder. • Using the Camera tool you can accurately control the camera setup. There are a variety of controls available under this tool, depending on the camera model. These include, apart from shutter-speed, aperture etc., even special focusing options allowing for remote focus increments using the “-“ or “+” buttons and modifier keys to control focus and depth of field. • The available set of active controls in the Camera tool will differ according to the digital camera model. H-system cameras allow more control than V-system cameras due to their greater integration and overall more advanced data-controlled capabilities. • The Mirror Up button on the Camera tool only functions with H system cameras. 4 32 Tethered Capture Live Video +L Ctrl + L Both H and V-system cameras can utilize the Live Video function, though the H-system offers a greater opportunity for automation. This function is intended for tethered operation in studio set-up environments for product and similar non-moving subjects where careful compositional placing in conjunction with layout sketches, etc is required. It provides a continual image (refreshed about once every second) that appears in the Viewer which can be zoomed in and checked for focus. An audio and a visual aid are also available to help you make very accurate focus settings. Procedure Live Video button As this function requires that the shutter remains fully open, it allows a great deal of light onto the sensor. The only exposure controls left are therefore the aperture setting and the amount of ambient light. This results in a need for quite low level lighting and small apertures (normally a combination of both). This might demand some experimentation regarding the power of your lighting set up and the aperture setting you had planned on using. When using H-system cameras, you can use the Auto aperture setting, though this might not of course correspond with your desired working aperture setting. Mirror Up button H and V-systems 1. With Phocus running, tether the camera. 2. Open the Camera tool (default: under the Capture tab) and make the desired setting adjustments H ONLY - Set the camera to Manual focus. Aperture and shutter speed settings are temporarily overridden in Live Video mode. V / CFV II ONLY - The lens must remain open for the duration of the session. Use the appropriate method according to the equipment used. Make a temporary aperture setting. 3. The function is activated either by: TIP In Preferences you can select a favored layout that is activated automatically when a camera is connected. · pressing the Live Video button in the Camera tool · Choosing Menu > View > Live Video · +L / Ctrl+L 4. The Viewer now displays a black and white image. 5. Grid lines and /or overlay can be introduced to check for compositional positioning etc. 6. A focus check can also be made (see below). 33 Tethered Capture ^+ + +A Focus checking Ctrl ++A By using the Zoom tool in the Viewer Toolbar, you can obtain a close up of the section of the image you want to check for focus. The Viewer image changes format and displays a view beneath. This is the Focus view which plots the accuracy of the focus setting displaying it in the form of a continually updated graph. 1 With tethered H-system cameras, make an initial auto focus, either directly on the camera or by pressing A 3 on the Camera tool. Press the Live Video button 1 to activate. • Click on the ‘-’ 2 or ‘+’ 4 buttons on the tool (not + or - on the keyboard) to alter the focus. • Hold down / Ctrl and click on the ‘-’ or ‘+’ buttons for finer focus adjustments. • Hold down Alt / Alt and click on the ‘-’ or ‘+’ buttons for larger focus adjustments. 2 3 4 With V system /CFV II combinations, focus must be altered manually on the lens. The goal is to obtain the highest reading on the graph for that particular area you have selected. Press ^ + + + A / Ctrl++A to activate the Audio Feedback function that signals when the focus setting is at its optimum setting. Focus checking in Live Video mode Select the Zoom tool and click on the area you want to check to produce a close-up. Changing the focus setting produces an automatically updating graph. The higher the reading, the more accurate the setting measured from the selected area. An audio signal is also available. 34 Tethered Capture Tool Area The Tool Area is on the right hand side of the screen. It consists of four individual collections of tools called tabs. Each tab can be customized for content. The area is always in the same placing in the layout but can be hidden to increase working space. Tool Area Tools are grouped under four tabs for convenience; Capture, Browse, Adjust and Export. This grouping is customizable and so the default setting should only be seen as a starting point for your own workflow preferences. Any combination of tools, including duplicates, can be grouped under any tab. After selection, tools are opened by a disclosure triangle 1 to reveal slider control 3 and numerical 4 options. A check box 6 applies setting changes. Some tools have additional options accessed by the menu triangle 5 on the header bar. Clicking the float button 2 will close the tool on the list and create a floating panel of the tool in the viewer area instead. SHORTCUT Show/Hide + +T + Ctrl + T 5 6 1 2 Tabs There are three ways to select a tab and bring it to the front: • • • 3 4 Click on the tab name itself. Choose Menu > Window > Tool Set > Capture /Browse / Adjust /Export. Use the keyboard shortcuts (see illustrations). Click on the right hand menu triangle on the Tool header to see the menu listing the tools available. Checking an item will add that tool to the selected tab or you can select Load Default Tool Set. If there are too many tools open to all be visible at one time, an arrow will appear on the bottom tool. Clicking this arrow will collapse the tool at the top of the list to free up space. TIP Select Toolbar > Layouts > Edit to save specific variations of arrangements, tool visibility, floating panels, active tool tab, etc. Tools To add a tool to a tab, click on the right hand menu triangle on the Tool header to reveal the tool list and then click on the required tool. To remove tools from individual tabs, drag and drop the tool to any area outside of the list. Each tool can be repositioned on a tab list by drag and drop and each tool can be floated to anywhere on the screen. These sets can be copied, imported and exported. Tool settings Tools are opened by clicking the main disclosure triangle on each individual Tool header. This allows setting changes, provides information etc according Capture +1 Ctrl + 1 Browse Adjust +2 Ctrl + 2 Example of tab contents 36 Tool Area +3 Ctrl + 3 Export +4 Ctrl + 4 2 1 to the tool. Some tools use slider controls together with numerical input. You can either key in a specific value or click in the view and use the ‘up’ and ‘down’ keys to raise or lower the values. Tool Presets Many of the tools in the Tool Area include the option for creating presets. These are simply shortcuts to saved settings (relevant to that particular tool) that you want to apply to other files. 4 To create a preset, proceed as follows: 1. Check the box 1 on the Tool header to preview the adjustments and settings you make. 2. Click the smaller menu triangle 2 on the right hand side of the Tool header to access the options 3. 3 3. Click on Create Preset 4 to reveal a dialog where you name the preset. Press the Create button to save it. This preset will now appear in the Tool options list. 4. Files in the Viewer can now be adjusted to precisely conform with the settings you made for the preset just made, or to predefined presets, by opening the tool again and clicking on the preset name. See the following pages for a general description of presets in Phocus! In this manual it is assumed that you have a working knowledge of how to use most of the standard image editing tools found in most graphics editing applications. The tool descriptions here are therefore basic and show how they appear in Phocus. There are many articles in books, magazines and on DVD's and the Internet that discuss and explain in great detail the specific aspects of image editing tools. TIP TIP TIP When making changes in a tool, you can use the ‘up’ and ‘down’ arrows on the numerical section of the keyboard instead of manual numerical input or using the sliders. You can simultaneously close all tools in a tab by Alt / Ctrl clicking on a collapse triangle on any tool. Press + Z / Ctrl + Z after any changes made in Tools to undo the change and revert back one step at a time. Similarly, you can expand the uppermost tools in a tab by Alt / Ctrl clicking on a triangle on any tool, to fill the tool area. Press + + Z / Ctrl + Y to reapply the same changes again, one step at a time. TIP Any tab can contain any or all tools. TIP In preferences you can select a specific layout to be triggered when holding down the option key and clicking a specific tab. 37 Tool Area Presets - general Presets are essentially shortcuts to default or user created and stored settings. They save time and effort as well as provide security regarding various automated tasks. 11 2 3 In Phocus, presets occur as an integral part of a number of different actions. Some presets can also be accessed from different locations. For example, in Output Preview in Tools, you might choose TIFF as your preferred format in the Preset menu. When exporting, the options window not only displays this choice in the Output Preset menu but also allows you to change it again. A change made here, to Layers PSD for instance, is immediately reflected back in the Output Preview tool. In other words, a preset is an independent feature that can be accessed, changed and checked at various locations. References to it are continually and automatically updated. 4 5 7 8 6 Example - Output presets When exporting an image, the Export window displays a list of options, the first being destination 1 for the file, chosen in the conventional manner. 9 The lower part of the window lists: Output Preset 2, Name Preset 3, Job Name 4 etc. Output Preset and Name Preset have Edit buttons. Clicking on the Edit button for Output Preset will display an options panel: File format 5, PPI 6, Dimensions 7 and Output profile 8. 10 11 In this example, the File Format shows TIFF as the choice, which would have been shown in the Output Preview tool. (The choices are often displayed dimmed because the presets are locked. Clicking on the unlock symbol 9 allows access to the menus). 13 12 If JPEG is now selected on the list, JPEG is displayed in the File Format menu 10. Clicking on the menu reveals further choices 11. Clicking on the menus will reveal lists of choices available, for example Dimensions 12 and Output Profile 13. 14 15 17 16 The plus and minus symbols 14 allow the addition and deletion of presets from the list. Presets can also be duplicated, exported and imported 15. You can also lock all settings to prevent inadvertent deletion 16. Additional Output 17, is also an option available in the Export window. Extra preset choices are revealed here and are selected in the same manner as above. 38 Tool Area Presets - continued Name presets 1 Name presets are dealt with in the same manner. Similarly, Name Preset is accessible from more than one location; when exporting (see section above) or from the Job Info tool (File Name > Edit). 2 3 In this example, Job Name could be removed by selecting it in Template 1 and deleting it (backspace). 4 Selecting Date Format 2 would also allow a Full Date 3 and Medium Time 4 for instance, chosen from the menu, to appear instead, etc. Again, there are a great number of choices here to cover most needs. IPTC presets IPTC Core presets use the same concepts in the options. 5 With the IPTC Core open (IPTC Core tool > Create Preset), presets can be selected 5, created 6 and deleted 7 to include or exclude the desired information checked on the list. See further in this chapter for a full description of IPTC Core and IPTC Keyword tools « . 6 7 Tool presets Tool presets are more straightforward in creation and use. Please see previous section in this chapter for details. General The extensive range of settings on offer produces a very broad choice of combinations to meet professional demand. You are encouraged to investigate this aspect of Phocus to see how it can be customized to suit your particular needs. Properly implemented, presets can make a considerable positive impact on workflow, reducing time demands and errors. 39 Tool area TOOL LIST Adjustments Browser See full explanation in the Toolbar chapter « . Camera Reflects the settings from a tethered camera, according to model. An H-system model will provide more information—focus mode, exposure mode, mirror up, for example—than a V-system model due to its greater digital capabilities and integration. See description of Live Video / Tethered Capture for full details « . Capture Info Lists the camera metadata recorded at the time of capture and is dependent on camera model and equipment used. Metadata is an integral part of each individual image file. An H-system model will provide more information than a V-system model due to its greater digital capabilities and integration. Color Correction For selective and global color correction. The colour picker can be used to isolate a tone and then modify it either by using the Hue, Saturation and Lightness sliders or by the color wheel tool. 1 Global changes can be made using the Saturation and Vibrancy sliders. To make specific tonal changes: 1. Select the color picker 1. (Keep Shift pressed down for multiple samples) 2 2. Place the picker on the desired tone in the image in Viewer. A corresponding point 2 will appear on the color wheel. 3. Hue, Saturation and Lightness can be adjusted by: 4 3 a) moving the sliders 3, or, b) using the arrow keys on the keyboard, or, c) clicking on the point on the wheel and dragging it to form an arrow 4, which can be extended, shortened and rotated to alter the settings. You can also increase or decrease the coverage of the segment by dragging the boundary markers as well as rotating the segment within the color circle. 4. Undo ( + Z / Ctrl + Z) reverts all changes one step at a time. To make global changes: 5 Saturation & Vibrancy: Non-selective (global) saturation and vibrancy changes are made by the slider controls 5. Saturation affects all of the image whereas Vibrancy is more constrained and protects areas already saturated (useful for skin tones, for example). 40 Tool Area Crop & Orientation A list of constraints is available (default: None) to set the format as well as orientation of the Crop tool. Clicking on the Mask icon will access a view where both color and opacity of the mask can be selected. TIP CURVES • To move a gravity point, either drag it with the mouse or select it and then use the arrow keys. Hold down the Ctrl / key to move the point in larger increments. • To remove gravity points from a curve, press the Delete or Backspace key. The Straighten function has quick 90° buttons as well as a slider that allows a finer adjustment of +20° to -20° shift in orientation. The Straighten function is also accessible by way of the Viewer Toolbar. Clicking on the Straighten icon will convert the arrow cursor into a cross. Place this cross on any chosen point on the image and trace a landscape or portrait line (real or imaginary) which you want to become a perpendicular landscape or portrait. The image automatically aligns to the line orientation you chose. With the Crop & Orientation tool open, you can additionally read off the number of degrees the image has been rotated. To make larger adjustments, press on one of the arrow icons (in the Crop & Orientation tool) to make a 90° adjustment, using the respective icon for clockwise or anti-clockwise orientation. The 'R' icon illustrates the current orientation and changes accordingly. Use the slider to make additional fine adjustments. When in crop mode, you can also hold down the Alt key and drag outside of the cropped area to rotate the image freehand. Curves Curve adjustments can be made as a combined RGB setting or by selected individual channels. To adjust the curve, click and drag on the graph. Each time you click on a new point, you will create a gravity point, which will pull the curve toward itself. You do not need to click on the actual curve. This system makes sure that the curve is always smooth. Ensure to check the check box on the Tool header bar so that the preview image will update to reflect the changes. Click the eyedropper icon and mouse over the areas on the Viewer image that you want to sample. The value is automatically represented on the curve. Clicking on the sampled area will fix a point on the graph. Revert by pressing Delete or Backspace. Options contain presets for consistent curve settings within a batch. Exposure EV, contrast, brightness, highlight recovery, shadow fill and clarity can be set by sliders or value fields. Adjust when viewing at 100%. Very briefly, highlight recovery reclaims data from the raw file to repair burnt out highlights, shadow fill improves the quality of shadow areas while clarity improves the contrast of mid-tones to give them 'punch'. As usual, the use of these tools, singularly or combined, might require a certain amount of experimentation for optimum results for individual files. See separate sources for in-depth explanations. Grayscale Temporarily converts image to a grayscale (while retaining RGB file components). Use RGB slider controls to adjust balance and effect. Files can be exported as color component grayscale (using RGB or CMYK channels) or as a pure grayscale. Uncheck the box in the Grayscale tool to revert back to color if required. 41 Tool Area Histogram /Alt key Graphs of combined or separate channels can be displayed (default: combined). Shadow, highlight and gamma settings can be made in the value fields or by using the slider controls. There are two checkboxes: Output Values and Endpoints. Check the Endpoints box to show top sliders and value fields for adjustment. (if the endpoints are not at default setting − 0 and 255 − then the values will appear in the top corners even if the box is not checked). F-stop marks are visible when the histogram is in input mode. The tool is resizeable (drag lower section of tool) to accommodate the extra information. By holding down the / Alt key when using the sliders you can see when clipping occurs (in the Viewer) in the shadows and highlights. This produces the same effect as the Shadow Warning and Highlight Warning. To change the color and threshold point settings of these warning demarcations, hold down the Ctrl / Ctrl keys while clicking on either the shadow or highlight slider control in the Histogram tool. A Warning Options panel opens, allowing changes. IPTC Core The IPTC Core tool allows you to apply presets of IPTC metadata to files about creators, contact information, archive/library descriptions, standard job types, etc. Click the menu triangle on the Tool header to access IPTC Views option panel for editing/creating and choosing presets. Edit allows the choosing of informational items that are included in the preset lists called Small, Medium and Large (for example, you might always want to include your name, so that would be checked in all three preset lists, but you might only want to include location in the medium and large preset lists). With any file, click on Small, Medium or Large to reveal the preset contents as a drop down list in the tool, thereby providing the information that is attached to that particular file. See larger illustrations of IPTC Core on following page. IPTC Keywords Tool can be reduced in size by dragging upwards resulting in tabbed mode illustrated below. Allows keyword inclusion to files individually or from sets. The tool can be contracted by dragging the lower bar upwards, automatically grouping the keywords (buttons) into numbered collections, as in the illustrations. Clicking on the menu bar on the tool opens the settings panel to view sets, edit sets, select saved sets and create new sets. See Editing and Managing IPTC keywords on the following page for full details. Keywords can be added to thumbnails, singly or to multiple selections. Either write in a new keyword or choose from the list. 42 Tool Area IPTC Core The IPTC Core settings can contain a good deal of information. Small Medium Large By grouping information into three presets – Small, Medium and Large – you can quickly control the information included. Editing and managing IPTC keywords A keyword selected here appears above in the list for inclusion with the file. With All Keywords chosen on the menu bar, all keywords from all sets will appear as ‘buttons’ below and any can be selected (singly or in multiples) to add to the selected file. Set In this example, a set has been chosen–Landscapes–which restricts the choice to the keywords previously added to that particular set - in this case just Lakes, Rivers and Trees. The button Rivers was selected and the keyword appears above. continued on next page 43 Tool Area Editing and managing IPTC keywords − continued 2 1 With the IPTC Keyword tool open, click on the menu bar and then Edit to open the settings panel. To add a set click on the lock symbol to open it. Click on the plus sign in the Sets column and type in the new title. 3 4 Add as many keywords as you need. To delete, select a set or keyword and click on the appropriate minus sign to delete. Click on the lock symbol to close it to retain the new set of keywords. To add a keyword click on the plus sign in the Keywords column. Type in the new word. 5 6 Keywords can be imported and exported as lists, even from Aperture and Adobe Lightroom. Click on the lock symbol to protect a set of keywords against unintentional editing. 44 Tool Area Job info Provides a selection of settings concerning new captures. Destination: Select the desired Destination folder from recent destinations or by normal browsing. Name: A new job name can be entered here. File name: Choose from the four presets to change the way that files are named or make an edit. Next Sequence Number: Enter the desired number for the new sequence. Metadata: This links an IPTC Preset (see below) to the file. The chosen IPTC Preset controls the amount and type of metadata that is included in the raw file with tethered capture, or with the Import function when importing. To create a new preset, click on Edit to reveal the options panel. Click on the plus symbol to create a new name and then use the check boxes and information section to add or remove items. When saved, the title of this preset will appear on the Metadata menu bar. See illustrations overleaf. Lens Corrections / V Lens Corrections When activated and choices checked, the Lens Corrections tool automatically adjusts the image file according to the data supplied from the particular H lens used. It can be replaced with the V Lens Correction tool for V lens use. This tool, however, requires manual data input noted at the time of capture. This situation applies whether the lens was used on a V series camera or an H series camera together with a CF lens adapter. In some cases, where the lens and/or aperture is known, the settings will be preset when importing or when making a tethered capture. Three corrections are available: Chromatic aberration, Distortion and Vignetting. Chromatic aberration: Corrects “Color fringing”. Distortion: Corrects lens distortion. Vignetting: Reduces vignetting. Check the box, then use the slider control or type in a value. 45 Tool Area Navigator & Zoom The Navigator tool can be used in several ways providing not only a navigation function but also a loupe function. 1 2 With the open tool remaining under the tab, select the Zoom tool from the Viewer toolbar and click on Viewer image over the detail you want to check. A track frame appears on the image in the tool window 1 (with the same aspect ratio as the Viewer window). Select the frame and move it to a new area if required. Frame size in tool image changes according to magnification of Viewer image. Alternatively, hover the mouse over the lower part of the tool image to reveal a control panel 2 with three buttons – a plus, a minus and a track button. Selecting the track button (shortcut toggle: L) converts the arrow cursor to a track cursor for the Viewer image while the plus and minus control enlargement for the tool image. The track cursor can be initially placed and then fixed by mousing down. Clicking elsewhere in the Viewer afterwards will automatically disable the track cursor to reveal the regular cursor again. A floating variation of the tool can also be chosen, again, providing access to the three buttons if required. This produces a much larger tool window. In addition, the lower right hand corner of the window has a drag handle to alter the size. Floating tool on top of Viewer image showing track frame and corresponding enlargement in Viewer. Both click and drag as well as mouse scroll wheels can be used in the tool window (tabbed or floating) for navigation in zoomed mode. Holding down the Alt key will allow zooming in the tool window with a scroll wheel and Alt/clicking will toggle the zoomed view to 100%. Noise Filter Reduces noise in the image. Basic noise reduction is in place for all images, but certain textures under certain lighting conditions can produce extra noise. The filtering tools are: Color: Neutralizes the coloration of colored 'noisy' pixels, typically in areas with very fine detail such as hair or on fine textured materials. Luminance: For use with long exposures and high ISO rated images. Reduces the effect of pixels showing up as 'noise' in dark areas. Moiré: Reduces moiré effects typically originating from patterned materials showing interference with the frequencies of the pixel structure on the sensor. Please note that due to its nature, moiré will seldom be cured 100%. However, Phocus allows you to export as two layered PSD files, with and without masking. (Moiré can be reduced at the capture stage by either de-focusing the lens slightly or by altering the distance of the camera from the subject). Output Preview Shows the output size of the current image exported with a given output preset (typically already selected in the export menu). 46 Tool Area Queue Displays files scheduled for export, files currently being exported in the background and files already exported as well as files being imported in the background from a card reader or connected disk. If the file has been adjusted and/or cropped, then this is also reflected in the Queue thumbnail. You can Ctrl / Right click the file to open a list of options (Reveal in Finder, Open in Editor, Show Thumbnails, Stop and Delete). Files in the queue can be selected ( + A / Ctrl + A for all) and paused by the Pause button, stopped or deleted via the Options or deleted by Backspace / Delete. The pause button will temporarily stop any further exports remaining in the queue not currently being exported. Thumbnail files can also be dragged and dropped onto the Queue tool to Export as Previous. The number of unfinished export tasks also appears on the Phocus icon in the dock as a reminder. Reproduction One file in the Export queue. Allows the possibility of specifying a custom input profile. This tool is not included in the initial default setting as it is not commonly required. It can be added by clicking on the menu triangle on the tool header. When generating the input file to be used by your profiling tool, it is important to export with an output preset where the profile is set to Source. Using the Source profile means that no ICC transformations will be applied to the data in the file. The reproduction mode provides the option to produce a colorimetric representation. This utilizes other imaging techniques that include the use of a linear film response curve. Check the Reproduction mode box to activate. Scene Calibration TIP You can resize the Queue window by dragging the bottom edge if there are a large number of files on the list. TIP Drag thumbnails to the Queue tool as a quick alternative to Export as Previous. This tool helps to remove a color cast and/or uneven illumination caused by lighting variations. It has two checkboxes: Remove cast and Equalize intensity. Remove cast: Particularly useful when tilt and shift are used, for example, where a partial unwanted color cast can sometimes be produced. Proceed as follows: 1. Create a calibration image by making a capture - tethered or untethered - of a neutral grey surface (or use an opaque filter) using the same lighting, exposure settings, focus settings, shift & tilt settings etc. as the problem image. If the capture was untethered, import it into Phocus (to make it a 3F file). 2. Select the thumbnail of the calibration image and then click the Create button in the Scene Calibration tool. A dialog prompts you to name the new correction. 3. With the problem image loaded in the Viewer, click on the menu triangle of the Scene Calibration tool header and select the newly created file from the list. 4. Ensuring the Scene Calibration tool is active, check the Remove cast box to view the improvements. Also, check the Equalize intensity box to test if a combination is even better. 47 Tool Area This correction can then be applied to multiple images using the Modify dialog. Equalize intensity: Neutralizes any overall luminance discrepancies. Useful in reproduction work and similar to even out slight variations in lighting for a more uniform distribution. Please note that this tool is not intended to compensate for inherent light fall-off and therefore should not be confused with the Vignetting feature in the Lens Corrections tool. Therefore, when using this feature, ensure that any Vignetting setting is turned off as a combination of the two will overcorrect (applies to H system lenses only). Sharpness Sharpness contains four controls: Amount, Radius, Threshold and Dark Limit. See separate sources for in-depth explanations of sharpening tools and methods. Amount: Controls the strength of the sharpening effect. Depending on image, a value between 80 and 200 is recommended as a starting point. Radius: The larger the radius, the more extensive the sharpening effect will be. The setting depends on the nature of the image and resolution. Generally, use a large radius with lower-resolution images and a smaller radius for high-resolution output. Threshold: Controls the point above or below which pixels are affected. Values are from 0 through 255. Very low settings will sharpen most pixels, and might create unwanted noise in soft texture, such as skin, for example. Higher settings will restrict the changes to detailed areas only. Dark limit: Sets the brightness level below which the filter has no effect. This will prevent the filter from intensifying noise or unwanted textures. The higher the number, the less extensive the sharpening effect will be. Depending on the image, a setting between 0 and 20 is recommended. Click on the menu triangle to access the presets: default, medium, high and portrait. White Balance The white balance tool includes: Preset: A menu containing standard presets as well as other preset possibilities. Multiple selected files can also modified at the same time to ensure consistent color within a batch. Temp: Adjusts the color temperature according to the Kelvin scale. Slider or value input. Tint: Compensates for any green (slide to the left) or magenta cast (slide to the right) or by value input. The neutralization tool on the Viewer toolbar can also be used. 48 Tool Area Toolbar The Toolbar is accessible in most, but not all, layout configurations above the File Browser, Viewer and Tool Area. It consists of a number of frequently used tools for general use. Toolbar Illustrated above is just one example of a possible Toolbar display. Ctrl / Right click the bar, to select a number of display options. Select Customize Toolbar to open the dialog illustrated below (Mac). This provides the opportunity to customize the layout by drag and drop, to change the size of the icons and text etc. You can drag and drop selected items or the default set onto the bar and delete items by drag and drop off the bar. Capture During capture, shots from a tethered camera are stored directly as 3F files in the chosen destination folder. According to model, a capture can also be controlled and initiated remotely from the keyboard. See Tethered Capture section for further details « : Export Click on the Export button to open the dialog. This allows you to choose the file format, resolution, profile etc. of the exported files. The first option is destination for the file, followed by: • Output Preset: Contains a list of image file formats. Press Edit to open an extra dialog containing File format, Quality, PPI, Dimensions and Output profile. • Name Preset: Contains a list of file-naming variables. Press Edit to open an extra dialog for a number of choices about naming variables. • Job Name: Allows a name change. • A post-export option • An Additional Output option TIP Presets can be edited to provide a very wide range of possibilities. See specific sections in this manual about Output and Name presets « to learn more about this powerful aspect of Phocus. Hide the Toolbar by clicking on the button located on the top right of the menu ( Mac ). 50 Toolbar Export New Images Automatically 1 You can speed up the export of files by using the Export New Images Automatically function. A selected folder (any folder, new or already existing) is classified as a 'hot' folder where placed files can be individually or mass processed according to a set of chosen options that apply specifically to that folder. 2 The folder can be used as a 'drag-and-drop' folder or as an import folder. Even the Capture Folder can be classified as a 'hot' folder if you wish. Proceed as follows: 1. Choose Toolbar > Export 1 to reveal an options window. 2. Go through the options 2 ensuring that all the settings are correct to produce the type of file required. 3. Choose File Browser 3 to either select a current folder or create a new folder (named "Auto Export" in this example). Whichever you choose to do, ensure that the folder remains selected. 4. Choose Menu > File > Export New Images Automatically 4. 3 New tethered captures can be automatically exported from the selected folder if you right click it and then select Use as Capture Destination from the options. 4 Alternatively you can drag and drop captures from any folder 5 into the new Auto Export folder 6 for immediate processing and dispatch to the Export folder 7. Just remember that all files placed in this 'hot' folder will be exported according to the settings originally chosen in step 2 . 5 6 7 51 Toolbar Import & Export Tips TIP TIP Files can be exported directly from the browser via an options list by Ctrl clicking / right clicking thumbnails. Be aware, however, that many advantages of Phocus will be lost by exporting 3FR files directly. See FAQ chapter for details. A tethered camera can also act as a card reader. It will appear as an icon under Devices in the File Browser. Click on the disclosure triangle to see the Capture folder. Then click on the folder to display the captures directly in the Thumbnail Browser. TIP TIP Whenever any imports or exports are active you will see a status bar at the bottom of the File Browser showing the number of remaining exports and imports. The Queue tool will also show the progress of imported/exported files. The Preferences menu allows setting the Embedded Preview Size. Choosing a Large or Extra Large preview size is recommended for optimal preview viewing quality in Phocus. However, this will affect file size and performance on older platforms. TIP TIP Double click a 3FR thumbnail to immediately import it and open it in Viewer. In Preferences you can select a specific layout that is activated automatically when a camera is connected or CF-card inserted. 52 Toolbar Import See Import tion. « in previous section and Adjustments « later in this sec- Modify Opens a dialog offering a list of choices for batch modification of selected (shift clicked) thumbnails. See illustrations below. Delete Sends selected image directly to the Trash. Alternatively press Delete or backspace on the keyboard. In these two cases a dialog opens for approval before trashing the files. Print Dialog offers not only the standard printer choice but also PDF and Preview opportunities. See following page for more details. Modify Click on Modify (+ + M / Ctrl + M) in the Toolbar to open the options. A menu offers presets such as Portrait, Product etc. Alternatively, individual tools can be checked on and off for more individual adjustments. Current and your custom presets also appear as choices via this menu. 2 In this example, a custom preset 1 has been used plus White Balance 2. 1 5 (Note also in this example, the Adjustments Browser 3 remains open from a previous save with the same preset, so the adjustment tool list 4 can be checked regarding content). 3 4 Both IPTC Core and Name options can be opened for updates by checking the boxes and clicking on the Edit buttons 5. 53 Toolbar Print The Print dialog offers a list of possibilities to cover a variety of requirements. Below are just examples of what is available. Select any presets you have stored Select paper size Select orientation of image on paper Select from a number of advanced controls Select between single image or contact sheet Click here to reveal a list of conventional as well as custom sizes. Click here to choose between Full Image or Contact Sheet. Click here to reveal a list of more advanced controls. Here, layout has been selected to provide layout choice and thin border, for example. Here, Color Matching has been selected to provide color management control, for example. 54 Toolbar Preferences Open preferences by choosing: • Toolbar > Preferences • Menu > Phocus > Preferences ( +,) The dialog contains the following: Embedded Preview Size: Small, Medium, Large and Extra Large (default setting: Medium). Note that a Large setting, for example, will increase the quality of the embedded preview as displayed in Viewer but will also increase its size and therefore requirements of computing power regarding screen redraw speed. Ixpress Initial Approval Level: Sets the approval rating of incoming files from Ixpress units. Files from other models automatically retain the default approval level already assigned. Save adjustments: Sets how adjustments are saved (default setting: Always Save). Manually - requires you to save each time you decide is necessary. Ask before saving - displays a dialog for you to check each time a save is attempted. Always Save - saves the current adjustments Flash Delay (s): delays next capture to allow time for older flash systems to regenerate correctly for next capture when using Multi-Shot. Image Editor: Click Select to choose the application you want to work with for further editing of images. Double-clicking on an image in the Queue (after it has been processed/exported) will then open it in the selected software. Layout triggers: Sets the choice of layout that can be initiated by the following actions: 1. When Phocus is launched. 2. When a camera is connected with Phocus running. 3. When a card reader is connected with Phocus running. For example, you may prefer to see Thumbnails only when a card is inserted into a reader. By making the appropriate selections, the layout will automatically change to Thumbnails Only when such a connection is made. Tool Set: Sets the layout (default or customized) that can be initiated by Option clicking (Alt/Ctrl + Alt) a Tool tab. For example, you may prefer to hide the Thumbnails and File Browser when making Adjustments. By making the appropriate selections, the layout will automatically change to Viewer only when you make an Option click on the Adjustment tab in the Tool palette. There are three options available from the Toolbar to change layouts: 55 Toolbar Layout options on the Toolbar Portrait /Landscape Switches the layout of the Viewer and the Thumbnail Browser from landscape (default) to portrait or vice versa (toggle function). Useful for exploiting viewing area on screen. See example below. Show Show (chosen via Customize Toolbar on Mac platforms; default on Windows) offers four rapid hide/show buttons for the Browser, Viewer, Thumbnails and Tools panels. See example below. Layouts Layouts (dialog) allows you to select one of four factory defined layouts (with changeable shortcuts), customized user created layouts as well as defining layout arrangements and content. See example below. Portrait / Landscape The layout on the left can be changed to the layout on the right by selecting Portrait/ Landscape on the Toolbar. Show This layout was produced by using Show on the Toolbar. The File Browser and the Thumbnails were hidden by selecting the appropriate icons (that represent the four main areas). Selecting the same buttons again would reveal the tools again (go Menu > Windows to hide and show Tools/Browser/ Thumbnails/Viewer areas or use shortcuts). 56 Toolbar Layouts This layout was produced by using selecting Thumbnails Only in Layouts on the Toolbar (can also be accessed under Menu > Window > Layout): Select Edit to create customized layout presets (see below). Working with Layouts in Phocus 3 Drag and drop presets up or down the list to change their shortcuts 1 2 Layout presets are imported and exported here to ensure rapid and secure workflow. Choose Toolbar > Layouts > Edit (or Menu > Window > Layout > Edit) to open the dialog containing many options under four headings: Views, Tool Layout, Toolbar and Adjustments. Adjustments: Sets the parameter values of all adjustments used. In addition, layout choice can be triggered by specific actions in order to automate various proceedings (see Preferences for details « ). Only current settings can be saved. Click the Update From Current buttons for each group to include those settings. A disabled Update From Current button implies that the setting already complies with the current state. When settings are complete, click on the plus sign 1 to create a new layout on the list (minus to delete a file) containing the required settings of one, several or all groups. Views: This section determines which of the four main areas are to be included. Also determines whether the viewer appears on a separate window or appears in full screen view. Check the Include sizing box if you want to retain the size of the areas. Name the file and then click on the action button 2 to copy it or export it 3. Previously saved settings can also be imported here. Change the shortcut if required by shuffling/deleting the list names. · Tool Layout: Determines which tools are to be included in regard to their position on the lists under the tabs, whether they are open, closed or floating and whether they are active or not. Preset layouts can be recalled for specific working situations on your platform and exported/imported to/from other workstations. They improve workflow considerably as less time is needed for orientation and the checking of settings. Toolbar: Sets the contents and mode of the Viewer toolbar. 57 Toolbar Adjustments A digital image is the result of light acting on silicon. Red, green, and blue filters separate the light falling on pixels which in turn create electrical signals. Various digital processes adjust the signals in a variety of ways to finally recompose them into a perceptual image. The original raw image has thus already undergone a set of transformations before it becomes the perceivable image on the computer screen. It is from this point on that a new set of transformations can be imposed to create the look and feel that the photographer or art director wants to communicate. In Phocus, these transformations are referred to as Adjustments. Color temperature setting, exposure and curve modifications, final sharpness enhancements etc. are all adjustments. The status of the image reflects the collective effect of all the applied adjustments. A saved Adjustment is therefore a prepackaged set of modifications that can be applied to any image in one move, saving time and effort. Throughout Phocus, saved adjustments are easily accessible for use or further refinement. By exploiting the possibilities of Adjustments you can not only save a great deal of time but improve the efficiency of your workflow. Controls include: • features for applying adjustments during image Import (see Importing Captures). • a Modify function for applying adjustments to a set of images. • options for how current adjustments are saved (Ask Before Saving, etc. See the Save adjustments options under Preferences. • a tool for managing adjustments. • a Save changes button that saves current adjustments when working with an image in the Viewer. 1 + +S Ctrl ++S 2 After making the customary image fine-tuning you can save the changes made by pressing the Save changes 1 button in the Adjustments section of the Toolbar or use the shortcut – + + S / Ctrl++S . This generates a new Embedded (included) set of adjustments. You can revert from any changes simply by pressing the Reload button 2 of the Adjustments section (if you haven’t made a save as this creates an Edit and automatically greys out the Reload button) to return to the image with the adjustments that were last chosen or loaded. 3 + Saving adjustments +U A recently saved adjustment can also be used on a new image by pressing the Use last saved adjustment button 3 or use the shortcut – + + U / Ctrl ++U. Ctrl ++U 58 Toolbar Adjustments - continued In this way, the Adjustment section of the Toolbar also acts as a shortcut to directly choose – or change your choice of – adjustments (as a quick alternative to going through the longer process of selecting and loading new adjustments from the Adjustments Browser Tool). Adjustment Preferences Under Preferences (in the Toolbar) you can choose how the current adjustments are to be saved when browsing to the next image. The options are Manually, Ask Before Saving and Always Save. Adjustments Browser The Adjustments Browser tool manages adjustments. It displays the history of embedded (included) adjustments 1 and comprises options for adding, renaming, and deleting adjustments under the headings of: User and Embedded. It also lets you choose which adjustments to use as default, and allows specific adjustments to be applied to the current file. 1 2 Click on an adjustment 2 to reveal the details in the view beneath 3: color correction, exposure, histogram, etc. Click on the disclosure triangles 4 to read the actual settings. Adjustments categories Phocus uses four categories of Adjustments: 3 4 4 5 Factory: The standard adjustments delivered with Phocus that are applied by default to each file. User: User defined adjustments are for applying to any image, for example, ‘Studio – Still’, ‘Studio – Fashion’, ‘Location - basic’, etc. A new user-defined adjustment is generated by using ‘+’ 4. It will copy the current settings to create a new adjustment on the user-defined adjustment list. The new adjustment can be deleted by using ‘-’ 5. Double-click the new adjustment to re-name it. Embedded: Refers to the adjustments history which has been saved while working with the individual file. New adjustments are added to the file each time the Save changes button, or shortcut, is used. The adjustments last saved with the current file are marked as default. A check mark in front of an adjustment shows that it is applied to the current file. If you want to use an embedded adjustment on another file, click on the User heading, then click on ‘+’ to copy the original embedded options and name it. It then remains on the list for use with other files. All embedded adjustments are stored directly within a 3F file. With other formats (Mac only), adjustments are stored in sidecar files. If files are moved within Phocus, then the adjustments are automatically transferred too. However, if files are copied outside of Phocus or to another computer/storage device then you should ensure that the appropriate sidecar files are copied too in the case of other formats. 3F files remain unaffected with regard to copying as they always retain their integral adjustment history. 59 Toolbar Adjustments – continued Current: This illustrates the current total set of adjustments for the selected image in the viewer. It illustrates the effect on the current image made for any loaded adjustment plus any changes made afterwards. Please note that the Current set of adjustments has not necessarily been saved as an adjustment at this point. Transferring Adjustments Initial factory adjustments are automatically added by Phocus and, together with embedded adjustments, are part of each 3F file. 1 Both Factory and Embedded adjustments can be copied to User as global adjustments. Do this by right clicking the adjustment and choosing Copy to User. 3 2 4 5 6 Adjustment example In the illustration here, a selected file appears in the Viewer. The Adjustments section 1 of the Toolbar indicates its current adjustment status; in this case ‘Nature’. Any other adjustment setting, Factory or User, can be selected from this list if desired at this point. If the file has been previously viewed and adjusted then that will also appear as an Edit followed by the date it was adjusted. These edits can also be recalled and used by selecting them. After using three tools - white balance, histogram and exposure - the adjustments are saved by clicking the Save changes button 2 in the Adjustments section of the Toolbar or by using the shortcut. Simultaneously, an edit preset name appears 3, in this case, showing the time of the save. The save button will dim automatically to indicate that a save has been made. Two more tools–color correction and noise filter–are now used on the same image and another save is made one minute later. This new save appears, indicated by the new time 4 recorded in the name and the dimming of the save button 5. 7 Also, in the Adjustments Browser, under the Embedded heading 6, the Import adjustment and the two adjustments saved will appear in the list 7. Clicking on the latest save reveals the steps taken that led up to that particular save, in this case, the five tools used. 8 Clicking on the Reload button 8 reloads the setting. Clicking on any preset and then clicking on Load 9 will revert the image back to that save. 11 9 10 Selecting an adjustment and then pressing the Make Default button 10 makes it the default which is used for the file. Pressing the ‘–‘ button 11 will open a dialog to delete the adjustment. 60 Toolbar Menu As well as the operating system requirements, the Menu contains several Phocus-specific items: Image, View, Window (all listing several keyboard shortcuts) and Help. Macintosh = Command = Alt ^ = Control = Shift Menu Shortcuts Windows =Shift MAC +, WIN (see under File) Phocus (Mac only) Preferences Hide Phocus: Hides the application. +H ++Q, (see under File) +M Alt+sp. then n Quit Phocus: Closes the application. Minimize Phocus (English operative system only) File +N Ctrl +N Capture: Triggers a tethered camera. +W Alt+F4 Ctrl +S Close: Closes the active window. Also closes application (Win only). +S ^+ +S Ctrl ++E + + +I Ctrl +I Ctrl +M +M ^+ P +P (see under Phocus) (see under Phocus) Export as Previous: Exports the current file with the same settings as the preceding file, thereby avoiding the export dialog. Import: Imports the selected file. Modify: Accesses the Modify dialog. Page Setup: Accesses page setup dialog. Ctrl +P Alt+F, then R Alt+F4 +Del Del + Export: Exports the current image. Print: Accesses print dialog. Preferences: Opens the Preferences menu (English operative system only). Exit: Closes the application Force Delete Delete Edit +Z + Ctrl +Z Undo Redo +X Ctrl +Y Ctrl +X +C Ctrl +C Copy +Z Cut 62 Menu +V +A + +A Ctrl +V Ctrl +F Ctrl +A Ctrl ++A Paste Find Select All Deselect All Image Add/Remove from Quick Collection: Affects selected images in the Thumbnail Browser. +B Ctrl +B +D Ctrl ++D Remove Crop: Reverts image back to original content. + +S Ctrl ++S Save Adjustments: Saves any adjustments made to currently selected image. Adds adjustment icon to lower right of title bar below thumbnail. + +R Ctrl ++R Reload Adjustments: Reloads previous adjustments. + +U Ctrl ++U Use Last Saved Adjustments: Reloads the Adjustment Preset present when the image was opened in the Viewer. Same function as Reload button. +M Ctrl ++M Map: Opens ‘Google Earth’ when online, to reveal selected capture’s location. Requires the use of the Hasselblad GIL accessory at time of capture. +L Alt++L + + Slideshow: Allows selected thumbnails to appear as slideshow. View + +G Ctrl +G ^+ +G Ctrl ++ G + +O Ctrl +O ^+ +O Ctrl ++ O Overlay Options: Opens a dialog to allow opacity and scale adjustments to overlay file. Also prompts selection of overlay file. Ctrl +D Shadow Warning: Marks areas of the image in the Viewer that are rated as under exposed. These areas appear as light magenta (default) and cover the affected areas of image below. Also accessible on Viewer Toolbar as Mark underexposed. ^++ +S Grid: Applies a grid pattern on top of the image in the Viewer. Grid Options: Opens a dialog to allow adjustments to the number of lines that make up the grid as well as their color. Overlay: Overlays a selected file on top of image in Viewer. ^+ +H Ctrl +H Highlight Warning: Marks areas of the image in the Viewer that are rated as overexposed. These areas appear as light cyan (default) and cover the affected areas of image below. Also accessible on Viewer Toolbar as Mark overexposed. ^+ +W Ctrl +W Warning options: Opens a dialog to allow threshold adjustments to Shadow Warning and Highlight Warning. 63 Menu Next Image: Displays the capture to the right (in Landscape mode) of the selected image in the Thumbnail Browser, replacing the current image in the Viewer. Also accessible on Viewer Toolbar. Previous Image: Displays the capture to the left (in Landscape mode) of the selected image in the Thumbnail Browser, replacing the current image in the Viewer. Also accessible on Viewer Toolbar. ^++ C Compare Image ++ Ctrl + + Zoom In: Doubles the image size in the Viewer by 100% increments (50% 100% 200% etc). (Zoom tool on Viewer Toolbar produces a 100% enlargement directly). +− Ctrl + − Zoom Out: Reduces an enlarged image in the Viewer in 100% increments (200% 100% 50% etc). +0 Ctrl + 0 Fit to Window: Chooses the appropriate size of image to fit in Viewer area (By default, the image size is adjusted to fit the Viewer area.) +0 Ctrl + Alt +0 Zoom to 100%: Enlarges image to 100% regardless of current Viewer area. + ++ + Ctrl + + Larger Thumbnails + +− + Ctrl + − Smaller Thumbnails + +0 + Ctrl + 0 Fit Thumbnails + +L Ctrl +L Live Video: Produces a continually updated image in the Viewer. Functions only with tethered operation in studio-like environments. + +/− (tool) Ctrl++/− (tool) Alt + +/− (tool) Alt++/− (tool) + +A ++ +C ^+ Ctrl ++L Fine focus-adjustment Large focus-adjustment Live Video Audio Feedback: Produces an audio tone that notifies the accuracy of the lens focus setting. Show New Captures in Viewer Window +M Alt+ space+n Minimize: Collapses current window to the dock. Minimize All: Collapses all windows. + +M Windows key+M + +T + Ctrl +T Hide/Show Tools: Shows/hides Tool Area. Toggle function. + +B + Ctrl +B Hide/Show Browser: Shows/hides File Browser. Toggle function. + +N + Ctrl +N Hide/Show Thumbnails: Shows/hides Thumbnail Browser and fills area with an expanded Viewer. Toggle function. + +V + Ctrl +V Hide/Show Viewer: Shows/hides Viewer and fills area with an expanded Thumbnail Browser. Toggle function. 64 Menu ^+ +V + + +F + Ctrl +Alt+V Viewer in Separate Window: Creates a separate Viewer window complete with Viewer Toolbar. Replaces Viewer area with the Thumbnail Browser only. Toggle function. + Ctrl +F Full Screen Viewer: Fills whole screen area with Viewer complete with Viewer Toolbar. Toggle function. Ctrl +T Toggle Portrait/Landscape Layout: Choose between: + +3 + +4 + +2 + +1 + +9 + Ctrl +1 + Ctrl +2 + Ctrl +3 + Ctrl +4 + Ctrl +5 + Ctrl +6 Standard Layout shortcuts can be reassigned to existing or newly created versions. Browse See under: Toolbar > Layouts > Edit (or Menu > Window > Layout > Edit). Viewer Thumbnails only Light Mode Standard Mode + +5 + +6 Card + +7 Tethered Camera Tool Set: Choose between: +1 +2 +3 +4 Ctrl + 1 Ctrl + 2 Ctrl + 3 Ctrl + 4 Capture Browse Adjust Export Bring All to Front: Brings Phocus and Viewer to the front if covered by other applications. Shortcuts not in Menu w/w c/c r/r n/n z/z h/h i/i l/l Alt + drag / Option + drag F5 / F5 F6 / F6 Compare View Crop tool Straighten tool Neutralization tool Zoom tool Hand tool Color picker tool Loupe (Navigator tool) Drag overlay Single-shot capture Multi-shot capture 65 Menu Appendix · Keyboard shortcuts · FAQ · Index Minimize !!!!!!! ⎇ �� �+⎇ ++ � ���+S � � � Ctrl+ ^ � ⎇ � ���⎇ �� � � � MAC KEYBOARD SHORTCUTS Photocopy the relevant list for your platform and keep it handy for quick reference. You can temporarily tape it to the side of your computer screen until you are more familiar with the shortcuts. Preferences Hide Phocus Hide Others� Quit Phocus Capture� Close � Export Export as Previous Import Modify Page Setup Print Move to Trash Undo Redo Cut Copy Paste Select All Deselect All Add/Remove from Quick Collection Remove Crop Save Adjustments� Reload Adjustments� Use Last Saved Adjustments� Map� � � Grid� � Grid Options� � Overlay� � Overlay Options � � Shadow warning� Highlight warning � Warning Options� Readout Points � Next Image Previous Image Compare Image Zoom In Zoom Out Fit to Window Zoom to 100%� Larger Thumbnails Smaller Thumbnails� Fit Thumbnails � Live Video Live Video Audio Feedback Show New Captures in Viewer Minimize Show/Hide Tools� Show/Hide Browser� � Show/Hide Thumbnails� Show/Hide Viewer� � � Viewer in Separate Window� � Full Screen Viewer� � Layout: Standard� � Layout: Browse� � Layout: Viewer� � Layout: Thumbnails only� � Tool Set: Capture� � Tool Set: Browse� � Tool Set: Adjust � Tool Set: Export Compare view Crop tool Straighten tool Neutralization tool Zoom tool Hand tool Track Single-shot capture Multi-shot capture WIN � +⎇, � � � � Phocus � +⎇ H� � � � �⎇���� ⎇� ��� � � ⎇ +���+H �⎇���� � Q� � +⎇ ⎇ �� �� �� � ��⎇� ��� � � ⎇ � � +⎇ ⎇ �� �� �� � N� � �⎇���� � +⎇ ��� ��� W�⎇ ⎇⎇ ��� � ��� � ��� � S� � +⎇ ⎇ �� �� �� � �⎇���� � +⎇ ^+⎇ � �S������ � �⎇���� �+ ⎇ +⎇ I������ � � � �⎇���� �+ ⎇ +⎇ M � � ������ � �⎇���� �+ ⎇ �� �� � +� P �� � ⎇ �⎇���� � +⎇ P �⎇������ � � �⎇���� � + ⎇ �� ⎇������ � �⎇���� � +⎇ Z �⎇������ � � �⎇���� �+ ⎇ +⎇ Z������ � � � �⎇���� � X� � +⎇ ⎇ �� �� �� � �⎇���� � +⎇ ⎇ �� �� �� � C� � �⎇���� � +⎇ V �⎇������ � � �⎇���� � A� � +⎇ ⎇ �� �� �� � �⎇���� �+ ⎇ +⎇ A������ � � � �⎇���� � ⎇ � � � + B �⎇���� � �⎇���� � D� � +⎇ ⎇ �� �� �� � �⎇���� ⎇���� +S ⎇ +� ��� ⎇ ������ �⎇���� ⎇ +��� ⎇⎇ �+R � �� � ��� ��� ⎇� ��� � � ⎇ ��+� � ⎇ +⎇ U������ � � � ��⎇� ��� � � ⎇ � ⎇ ⎇ +�� �+M ⎇� � ��� �� �� � ⎇ ��� ⎇ �� � ��� ��+G ⎇� � ��� �� �� � ⎇ +�� ⎇ ⎇ � � � � � ⎇ � � � ⎇+� � �G� � � �� ^ �+⎇ ⎇� �� ��� � ⎇ � � � ⎇ +� ��� �+O ��� � �� ⎇� ⎇ �� ��� � ⎇� ��⎇ �⎇� ���� � ⎇ � + + O ^ � ⎇ ������� ⎇ � � � � ��� � � ⎇ ++ ��� �⎇ �+S � ⎇ � � ⎇ � � � �⎇������ �⎇���� �������� ^+��+⎇H ⎇� �� �⎇ ����� �� ⎇ ⎇ � +⎇ ⎇ �� �� �� � W� ^+� � � �⎇���� �� ^+� +⎇R��⎇ �� ��� ⎇� �⎇ �� ���� � + ⎇ � ������ � �⎇ �⎇���� � + ⎇ � ������ � �⎇ �⎇���� � +⎇ ⎇ �� �� �� � C� ^+� �⎇���� � � +⎇ ⎇+ � �� �� �� � �⎇���� � � +⎇ ⎇– � �� �� �� � �⎇���� � +⎇ � ������ � 0⎇ � �⎇���� � ⎇ � � + +0 ⎇ � � � � �⎇������ �⎇���� �+ ⎇+������ � +⎇ � � ⎇���� ⎇ ��+� � ⎇–����� ��� � +⎇ � � �⎇���� + ��+⎇ 0 �������� ⎇ ⎇�� ⎇ �� � ��� � +⎇ L �⎇������ � � �⎇���� A �+ ⎇ ��� ������ � � ^ �+ ⎇ �+⎇ � �⎇���� C �+ ⎇ ��� ������ � � ^ �+ ⎇ �+⎇ � � ⎇ �⎇ � ������� � � � M� � +⎇ ⎇ �� ��� � ⎇ � +⎇ �⎇������������ � ⎇ ���+T ⎇���� �⎇ ⎇��� � ������ ⎇ �������� � ⎇ +���+B ��⎇ �⎇ ���⎇�������� � ⎇ �� ⎇ + +N ⎇ � � � �⎇��� ��� ��� ��⎇� ��� � � ⎇ ��+V ⎇� � ��� �� �� ⎇ +� �� ⎇ ⎇� ��� �⎇� ��� �� � � � ⎇ ⎇�������� � �+ ⎇�+ ���+V ^ ⎇� ��� �⎇ �� �� � � ⎇� �� ⎇ + ��+⎇ F �������� ⎇ ⎇ � �����⎇ � ��� � � � +⎇ ⎇� � ���� �� �� � ⎇ ���+1 ⎇ ⎇ ��� ⎇ �� � ��� ⎇ �������� � ⎇ +���+2 ��⎇ � ⎇ � � � � � ⎇ � � � � ⎇ +� � �+3 ��� � ⎇� ⎇ ��� ⎇ � ������ ⎇� ��� � � ⎇ +� �� �+4 � ⎇ � � � ⎇ � � � �⎇���� � ⎇ � � ��� ��� ⎇+1 ��� �⎇ � ⎇ �� � ��� ��� �⎇ ⎇ � � � � �� ⎇+2 ��� �⎇ �� �� � ⎇ � � � ���� ⎇⎇ ��� �⎇ � �� ��� � +3 ⎇��⎇ ��� ��� ⎇⎇ �� � ��� � ��� � +4 ⎇� �� �� �� � � ⎇ �⎇���� w⎇���� � �⎇���� c ⎇���� � File Edit Image View Window r ⎇���� � n z h i F5 F6 67 � ⎇ � ���⎇ �� � � � ⎇ �� �+⎇ ++ � ���+S � � � Ctrl+ ^ Tools Appendix Capture Close window or application Export Export as Previous Import Capture Modify Close window or application Print Export ExportPreferences as Previous Exit Import ForceModify Delete Delete Print Undo Exit Redo Undo Cut Redo Copy Cut Paste Copy Find Paste SelectFind All Deslect Select All Add/Remove from QuickDeslect Collection All Remove Crop Add/Remove from Quick Collection SaveRemove Adjustments Crop Reload Save Adjustments Use LastReload Saved Adjustments Map Use Last Saved Adjustments Grid Map Grid Options Grid Overlay Grid Options Overlay Options Overlay Shadow Overlaywarning Options Highlight Shadow warning Warningwarning Options Highlight NextOptions Image Warning Previous Next Image In PreviousZoom Image Zoom ZoomOut In Fit toZoom Window Out Zoom to 100% Fit to Window Larger Thumbnails Zoom to 100% Smaller Thumbnails Live Video Fit Thumbnails Live Video Audio Feedback Live Video Show/Hide Tools Live Video Audio Feedback Show/Hide Browser Show/Hide Tools Show/Hide Thumbnails Show/Hide Show/HideBrowser Viewer Show/Hide Thumbnails Viewer in Separate Window Show/Hide Full Screen Viewer Viewer Separate Window ToggleinPortrait/Landscape Viewer Layout: Full Screen Standard Standard Layout: Browse Layout: Browse Viewer Viewer Layout: Thumbnails only Layout: Thumbnails only Light Mode Layout: Standard Light Mode Layout:ToolStandard Mode Set: Capture Tool Set: Capture Browse Tool Set: Browse Adjust Adjust Tool Set: Export Tool Set: CompareExport view Compare Cropview tool Crop tool Straighten Straighten tool Neutralization Neutralization Zoom tool Zoom Hand tool Handmode tool Track mode Toggle PortraitTrack /Landscape Toggle Portrait/Landscape Minimize Phocus Minimizecapture Phocus Single-shot Multi-shot capture Ctrl+ N Alt+ F4 Ctrl+ S Ctrl++ E Ctrl+ IN Ctrl+ (Alt+ M F4) Ctrl+ P S Alt+ F, then Ctrl++ E R Alt+ Ctrl+F4 I + Ctrl+Del M Del Ctrl+ P Ctrl+ (Alt+ Z F4) Ctrl+ Y Z Ctrl+ X Y Ctrl+ C X Ctrl+ V C Ctrl+ F V Ctrl+ A F Ctrl++ Ctrl+ A A Ctrl+ B A Ctrl++ Ctrl++ Ctrl+ B D Ctrl++ S D Ctrl++ R S Ctrl++ U R Ctrl++ M U Ctrl+ G M Ctrl++ Ctrl++ Ctrl+ G G Ctrl+ O G Ctrl++ Ctrl++ Ctrl+ O O Ctrl+ D O Ctrl++ Ctrl+ H D Ctrl+ W H Ctrl+ W Ctrl+ Ctrl+ + Ctrl+ Ctrl+ –+ Ctrl+ 0– Ctrl+ Alt+ 0 0 +Ctrl ++0 Ctrl+ Alt+ +Ctrl Ctrl+ L +− +Ctrl Ctrl+++0 F Ctrl+ L T Ctrl++ Ctrl++ A B Ctrl++ T N Ctrl++ B V Ctrl++ N +V Ctrl+ Alt+ Ctrl++ Ctrl+ F V Ctrl+ Alt+ +V T Ctrl+ F 1 Ctrl++ Ctrl++ 1 2 Ctrl++ 2 3 Ctrl++ 3 4 Ctrl++ 4 5 Ctrl++ 5 6 Ctrl++ Ctrl+ 1 6 Ctrl+ 1 2 Ctrl+ 2 3 Ctrl+ 3 4 Ctrl+ w 4 w c cr rn n z zh h i lt tAlt+sp. then n Alt+sp. F5 then n F6 � ⎇ � ���⎇ �� � � � � ⎇ � ���⎇ �� � � � WIN File File Edit Image Image View View Toggle Window Window Ctrl+ T Tools Tools Frequently Asked Questions Q. I have downloaded Phocus but it won’t launch! A. Check that both your computer and operating system are compatible with Phocus. You can find this information in the Read Me file that follows each version of Phocus. Q. Where can I get the latest version of Phocus? A. You can download the latest version via our web page—www.hasselblad.com—under the Downloads > Software. section (Log-In required) Q. How do I add my adjustments to a number of images? A. Firstly, select the images you want to modify, then click the Modify icon in the Toolbar. A dialog opens allowing you to select the desired settings that you have set in Tools. Click Modify to affirm. Q. How do I get my exported images to open in my preferred image editing software? A. You can choose an image editor in the Preferences menu (Toolbar > Preferences > Image Editor). Selected images will then open automatically, when double-clicked in the Queue, in the chosen software. Q. Why are there 3FR and 3F files? Why can’t captures be saved directly as 3F files? A. 3FR files consist of native Hasselblad raw data that contains a huge amount of information, particularly when compared to 35mm digital files. This is essential to produce the level of quality expected from Hasselblad products. It follows that a good deal of computing power is required to extract the maximum in the shortest possible time. To avoid diverting the camera’s activities to image processing, the combined advantages of Phocus and a workstation are used instead. 3FR files are then processed into a complete and workable raw format that can be saved, adjusted and exported, namely, 3F. Q. What’s the difference between 3FR and 3F files? Should I keep them all? A. A 3FR file is the native raw file created by Hasselblad cameras and remains in that format when stored on a CF card. When loaded into Phocus, however, various corrections take place based on the hardware configuration of the camera used. This processes the 3FR file into a 3F format file and creates a high quality preview (size according to settings in Preferences). As this is an improved and specifically-tuned file, the original 3FR file can be discarded. You may, of course, export 3F files to TIFF, PSD, JPEG etc., and just keep those but if you have the space, retaining the 3F files could be good insurance to be able to re-process sometime in the future. Q. Why does it take a while to see the Viewer image in Phocus? It seems much faster with other programmes. A. In contrast to some other programmes, Phocus produces a full image in the Viewer, not a quick low-resolution version. What you see is what you will get (if your monitor is capable of showing it). Hasselblad files are naturally very large and demand a good deal of processing power so you will also see differences in speed on different platforms/configurations. See the Read Me files for more information about performance. 68 FAQ Q. I want to save time. What are the disadvantages of exporting Hasselblad captures directly from the browser? A. Exporting 3FR or 3F files directly generates files that exclude the complete set of advantageous adjustments such as white balance, lens corrections, moire, etc. However, this might be acceptable for a rushed set of ‘contact sheets’ for a waiting client. As long as the 3FR/3F files are retained, you can always go back and export a selection, this time with the full benefits that Phocus offers for optimum quality. Q. Is there a way to access frequently used folders in an easy way in Phocus? A. You can use the Favorites section in the File Browser. Drag selected folders to just beneath the Favorites heading to make a collection. Q. How do I get an overview of the keyboard shortcuts used in Phocus? A. There is a keyboard shortcut list in this user manual. Print it out and keep it handy for quick reference or you can tape it onto the side of your computer screen. Q. Will 3F files generated by Phocus be backwards compatible with FlexColor? A. No, you will not be able to open 3F files generated by Phocus in FlexColor. 3F camera files generated by FlexColor will however be compatible with Phocus. Q. My thumbnail image does not reflect changes made to the image in the Viewer. A. The thumbnail image will not reflect changes until you click the Save Changes button (Toolbar > Adjustments > Save Changes button). See Adjustment section in this user manual for further information « . Q. How do I get crops to show up on my thumbnail images? A. Click on the icon in the upper right corner of the thumbnail browser to open the menu. Check the Show Crop box, make the crop and choose Toolbar > Adjustments > Save Changes. Q. I exported some 3FR files directly to TIFF but I forgot to turn off the tool settings I had for a previous batch of files. Have those TIFF's now been adjusted according to the current Phocus settings? A. No. Phocus uses the Standard setting for such direct export and so no individual tool settings have been applied. 69 FAQ Index Appendix Adjustments Adjustments Browser Camera Capture Capture Info Color Correction Collections Compare view Connection Crop tool Crop & Orientation Curves Devices Export Export New Images Automatically Exposure 66 58 40 40 5, 32 30, 40 40 21 28 32 28 41 41 Grayscale Grid 41 29 Hand tool Highlight warning Histogram 29 29 42 IPTC Core IPTC Keywords Import & Export tips Import 42 42 52 52 Modify 53 Job Info 45 Keyboard shortcuts 67 Layout Layout overview Layout - Edits Lens Corrections Light Mode - overview Live Video Menu shortcuts Output Preview Overlay 46 29 Queue Quick collections 14, 50 51 41 21 20 5 21 20 46 30 28 46 Preferences Presets - general Portrait/Landscape Print 21 Favorites File Browser File Support File System Navigation Navigator & Zoom Next image Neutralization tool Noise Filter Renaming, relocating and rating (IAA) Reproduction Resizing 20, 23 16 57 45 10 33 47 21 23 47 23, 27 Scene calibration Shadow warning Sharpness Standard Mode - basic overview Switch compare images 47 29 48 11 30 Tabs Tabbed folders Tethered Capture Thumbnail badges Thumbnail Browser Tools Tool Area Toolbar Tool presets Tool settings 36 25 31 25 23 36 36 50 37 36 Selection Slideshow Straighten tool 25 12 28 Viewer Viewer Toolbar 27 28 White Balance 48 Zoom tool 28 62 70 55 38 56 13, 54 Appendix The information in this manual is furnished for informational use only, is subject to change without notice, and should not be construed as a commitment by Victor Hasselblad AB & Hasselblad A/S. The text in this manual cannot be reprinted or reused without the express permission of Victor Hasselblad AB & Hasselblad A/S. The images in this manual cannot be reprinted or reused without the express permission of the photographers who took them. Victor Hasselblad AB & Hasselblad A/S assumes no responsibility or liability for any errors or inaccuracies that may appear in this manual. Victor Hasselblad AB & Hasselblad A/S assumes no responsibility or liability for loss or damage incurred during or as a result of using Hasselblad software or products. Hasselblad, Imacon, Ixpress, FlexColor and Phocus are trademarks of Victor Hasselblad AB & Hasselblad A/S. Adobe, Adobe Photoshop, Adobe Aperture and Adobe Lightroom are trademarks of Adobe Systems, Inc. Macintosh, Mac OS, Tiger, Leopard, FireWire and the Apple symbol are registered trademarks of Apple Computer, Inc. Copyright © 2010 Victor Hasselblad AB & Hasselblad A/S All rights reserved. Hasselblad A/S Hejrevej 30, DK - 2400 Copenhagen, Denmark Victor Hasselblad AB Box 220, SE - 401 23 Göteborg, Sweden Phocus - 05.10 - UK - v9