1
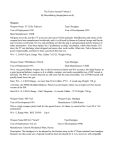
USER MANUAL
Introduction
Laser & Electronics
1
INTRODUCTION
Company name:
LPKF Laser & Elektronika d.o.o.
Abbreviated name: LPKF d.o.o.
Address:
Polica 33
4202 Naklo
Slovenia
Telephone (head office):
Fax (head office):
+386 (0) 592 08 800
+386 (0) 592 08 820
Internet:
www.lpkf.si
e-mail:
[email protected], [email protected]
Trade-mark:
Laser & Electronics
1.1
LPKF ProtoPlace
LPKF ProtoPlace is a placer designed for professional use in assembling prototype and
small run printed circuit boards with surface mounted electronic components (SMD). The
finished construction and microprocessor controlled electronics increase the precision and
functionality of the device in assembling circuits with several of the latest components,
which are currently available on the electronics market.
The device is designed and constructed in accordance with the highest technological
standards. It enables the placing of different components including fine pitch QFP
components down to 0.4 mm (16 mils) pitch with up to 300 pins and chip components
down to 0201 from various layouts (feeders, turntables, palettes), fixing of various sizes
of printed circuit boards up to 297 × 420 mm (11.8 ” × 16.5 ”), shifting and blocking the
placing/dispensing head in all directions (x, y, z), simple selection and demonstration of
methods of operation on a four-lined LCD screen. Because of its ergonomic form and
microprocessor controlled electronics, fine-adjustable settings and automatic system of
placement by positioning components, the basic model already enables reliable and
simple usage. Additional options, such as a motorized turntable, various types of feeders,
dispensing and use of a micro camera, are easily added (upgradeable) and enable an
even greater level of practicability and reliability of the device.
User manual 2.0
Firmware version 2.0
Rev.: 10.07.2008
3
Introduction
1.2
Laser & Electronics
Warning
Copying and distributing these instructions in their entirety or in parts is permitted only
on the basis of written approval by LPKF. Data can be altered without prior warning.
LPKF is not liable for consequences, which occur in connection to the use of these
instructions.
The owner of the LPKF device is obligated to:
-
Assure that the device is used only in accordance with its purpose
-
Assure that the device is used in accordance with the prescribed operating
conditions
-
Regularly check safety and control devices
-
Assure that only authorised and qualified personnel operate the device
-
Assure all operators of the device constant access to these instructions
-
Assure that the device is always equipped with safety labels
Before opening the packaging verify the »shock sensor«, located on the external side of
the packaging. In the event that the indicator is coloured bright red, DO NOT OPEN THE
PACKAGING, instead immediately inform your transport agent!
Remove the packaging (chapter 6.1) and verify the general state of the device and
equipment, as also verify the accordance of the forwarded package with the enclosed
packaging list.
In the event of any damage immediately inform the transport agent!
Before starting-up the device, remove all blockades, which served as protection for the
device during transport. Otherwise you could cause severe damage to the device!
In the event of unauthorised rework on the device and equipment, we do not assure safe
operation and we do not perform repairs in accordance with the warranty claims!
In case of any kind of troubles with the machine, please immediately contact us and
state serial number of the machine!
Phone: +386 (0)592 08 800
Fax: +386 (0)592 08 820
e-mail:
4
[email protected]
[email protected]
Rev.: 10.07.2008
LPKF ProtoPlace
Firmware version 2.0
Contents
Laser & Electronics
2
CONTENTS
1
Introduction
3
1.1
LPKF ProtoPlace
3
1.2
Warning
4
2
Contents
5
2.1
Guide through the instructions
7
3
Basic data
8
3.1
Name and address of the manufacturer
8
3.2
Indication to what type or series do the instructions refer to
8
3.3
Intended use
8
3.4
Technical data
8
3.5
Level of noise/vibration/ emission of hazardous chemicals
9
4
Safety notes
10
4.1
General
10
4.2
Hazards
10
4.3
Safety measures
11
4.4
Procedures in the event of disturbance
12
5
Device description
13
5.1
Basic parts
13
5.1.1 Micro-table
14
5.1.2 Manipulator
14
5.2
5.3
5.1.3 Dispenser
14
5.1.4 Air regulation
14
5.1.5 Display unit
15
5.1.6 Software
15
5.1.7 Foot switch
15
Equipment (optional)
16
5.2.1 Turntable
16
5.2.2 Feeder carrier
16
5.2.3 Micro-camera
17
5.2.4 Monitor
17
Accessories
18
5.3.1 Feeders
18
5.3.2 Palettes
18
5.3.3 K2 set
19
5.3.4 Picking needles / picking nozzles
19
User manual 2.0
Firmware version 2.0
Rev.: 10.07.2008
5
Contents
Laser & Electronics
6
Device instalment
20
6.1
Removing the packaging
20
6.2
Installation
22
6.2.1 Turntable instalment
22
6.2.2 Feeder carrier instalment
22
Starting-up the device
23
6.3.1 Connections
23
6.3.2 Position of the device operator
24
7
Usage instructions
25
7.1
Fixing of printed circuit boards
25
7.2
Picking and placing
25
7.2.1 Turntable rotation
26
7.2.2 Needle placement
26
7.2.3 Pneumatic settings
26
7.2.4 Manual placing
27
7.2.5 Semi-automatic placing
29
7.2.6 Precise placing with fine adjustments
32
7.2.7 Micro placing (optional)
33
Dispensing
34
7.3.1 Manual dispensing
34
7.3.2 Automatic dispensing
35
8
Maintenance
38
8.1
Cleaning
38
8.2
Maintaining
38
9
Troubleshooting
39
10
Scope of delivery
40
10.1
The primary se of the 010312 LPKF ProtoPlace
40
10.2
K2 set
41
10.3
Options
42
10.4
Accessories
43
11
Declaration of conformity
44
6.3
7.3
6
Rev.: 10.07.2008
LPKF ProtoPlace
Firmware version 2.0
Contents
Laser & Electronics
2.1
Guide through the instructions
Text, marked as bold, emphasises the importance of the information.
Symbols that you will notice in some chapters contain the following meaning:
Danger!
The symbol is used to highlight danger to life or health.
Caution!
The symbol warns us of circumstances which could threaten the safety and
health of the device operator or cause a serious device defect.
Good advice and instructions
»Rapido« warns us of possible faults and recommends simple and effective
solutions.
User manual 2.0
Firmware version 2.0
Rev.: 10.07.2008
7
Basic data
Laser & Electronics
3
BASIC DATA
3.1
Name and address of the manufacturer
Company name:
LPKF Laser & Elektronika d.o.o.
Abbreviated name: LPKF d.o.o.
Address:
Polica 33
4202 Naklo
Slovenia
Telephone (head office):
Fax (head office):
+386 (0)592 08 800
+386 (0)592 08 820
Internet:
www.lpkf.si
e-mail:
[email protected], [email protected]
Trade-mark:
Laser & Electronics
3.2
Indication to what type or series do the instructions refer to
LPKF ProtoPlace
3.3
Intended use
ProtoPlace is a placer intended for professional use in assembling printed
circuit boards with most of the surface mounted components (SMD),
currently available on the market. The device is intended for:
- placing components
- dispensing of soldering pastes, glues and washers
3.4
Technical data
Max. size of PCB
Min. size of components
297 × 420 mm (11.8” × 16.5”)
0201 chip components
220-240 V/50 Hz or 110-120 V/60 Hz
10 W
6 bar (6 × 10⁵ Pa), min. 10 l/min.,
dry, non-lubricated
Power supply
Compressed air supply
Dimensions of basic device
(W × L × H)
Device dimensions (max.)
Weight
Vacuum
Pulse / Pause duration
Number of dosing points
Dosing quantity
Turntable position
Feeders position
Operating conditions
8
760 × 760 × 250 mm
1000 × 900 × 500 mm (with feeders and turntable)
25 do 35 kg (with additional/optional equipment)
0 – 0.8 bar (0 – 0.8 × 10⁵ Pa)
0.1 - 9 s/0.1 - 2 s
up to 300/min
min. 0.2 mm3
Backward
Left
temperature: 15 - 35 oC
humidity:
30 - 80 %
general level of lighting:
500 lx
Rev.: 10.07.2008
LPKF ProtoPlace
Firmware version 2.0
Basic data
Laser & Electronics
3.5
Level of noise/vibration/emission of hazardous chemicals
The noise and vibration levels of the device are not harmful to your health during
operation.
Soldering pastes, glues and cleansers can contain hazardous chemicals.
Verify data on the type of the substance and dangerous characteristics
of the substance on the packaging or on the safety data sheet.
Soldering pastes can contain lead!
Please take into account the prescribed safety measures and prescribed
personal protective equipment, mentioned in the instructions of the
paste manufacturer!
User manual 2.0
Firmware version 2.0
Rev.: 10.07.2008
9
Safety notes
4
Laser & Electronics
SAFETY NOTES
Before starting work carefully read this chapter on safety and health in using
the device, familiarise yourself with potential risks and prescribed safety
precautions.
4.1
General
The device has to be installed in accordance with instructions for installation. Device
usage is permitted only in accordance with its purpose. A suitable working
environment has to be ensured. The device can only be handled by qualified
employees. Service work can only be performed by authorised and qualified
personnel. Constant access to Instructions for use has to be enabled to all device
operators.
4.2
Hazards
ELECTRIC HAZARD
CHEMICAL HAZARD
MANUAL HANDLING
SENSOR STRESS
ERGONOMY
10
In the event of direct contact with a damaged
electrical installation; in the event of
unauthorised intervention into a dangerous area
of the device under voltage (opening the cover)
Soldering pastes, cleansers and glues can
contain dangerous substances, which are
hazardous to your health
Weight of the device amounts to 25 - 35 kg; in
the event of incorrect manual handling spinal
injuries can occur
in the event of unsuitable general lighting of the
area the operator can experience an increase of
sensor stress
Unsuitable work environment, unsuitable work
space and unsuitable working chair can cause
hazardous effects to the health of the device
operator
Rev.: 10.07.2008
LPKF ProtoPlace
Firmware version 2.0
Safety notes
Laser & Electronics
4.3
Safety measures
-
Before starting work perform a general visual inspection of the device. Special
attention has to be put on the state of the electrical installation (el. supply cable). In
the event of any defects or malfunctions work must be stopped until all faults have
been corrected!
-
It is of vital importance to maintain the device environment clean and in order. A
disorganised work-place can cause occupational injuries (i.e. a person can fall, slip or
receive an injury, bump).
-
Please pay regard to the prescribed operational conditions! It is necessary to prevent
any contact with water, both in the form of jet or as water mist. The device also
cannot be exposed to a humid environment!
-
It is necessary to ensure regular supervision of the state of electrical equipment (el.
leads, connection). The electrical equipment must only be maintained by a qualified
and authorised person (by an electrician).
-
Cleaning and maintaining the device is only allowed when the power switch is turned
off and coincidental starting-up of the device has been prevented.
-
While performing work with the device the complete attention of the operator is
required. A person, who is feeling unwell, absent-minded should not control the
device!
-
It is permitted to use only additional equipment, which is in accordance with the
requirements of the manufacturer. The use of unsuitable equipment can cause
additional danger and perniciousness to the operator!
-
Repairs can only be performed by authorised servicemen, which will assure adequate
safety of the device even after repair work!
-
It is forbidden to store or consume food and drinks at the work-place!
-
Smoking is forbidden!
-
It is necessary to take the instructions from safety certificates of individual
substances into account when using dangerous substances!
-
After completing work it is necessary to turn off and clean the device.
-
Prescribed personal protective equipment: antistatic clothing.
User manual 2.0
Firmware version 2.0
Rev.: 10.07.2008
11
Safety notes
4.4
Laser & Electronics
Procedures in the event of disturbance
In the event of an electrical power failure the device turns itself off and automatically
starts up from the starting position.
Emergency disconnection is possible by turning off the power switch.
In the event of a work-related injury it is necessary to immediately stop the operation of
the device, and in the event of serious consequences call an ambulance (paramedics).
12
Rev.: 10.07.2008
LPKF ProtoPlace
Firmware version 2.0
Device description
Laser & Electronics
5
DEVICE DESCRIPTION
5.1
Basic parts
DISPLAY UNIT
AIR REGULATION
MANIPULATOR
MICRO-TABLE
TABLE POSITION INDICATOR
KEYBOARD
MICRO-TABLE KNOBS
5.1.1 Micro-table
The micro-table is installed in the central part of the placer
and enables fixing of printed circuit boards of various sizes,
all sizes up to 297 × 420 mm (format A3 or 11.8 ” × 16.5 ”).
Printed circuit boards are fixed between the two laths, of
which the left is fixed and the right is spring-adjustable. The
area which lies right from the spring lath is intended also for
palettes with components.
Magnetic slide supports have been added for additional support with fixing.
The rotating knobs, placed on the front cover, are intended for
accurate positioning of the micro-table when precise
placement is required. The right knob moves the table in the
direction of x axis, the left in the direction of y axis. The
positional light dot on the window for micro-table positioning
demonstrates its position according to the coordinate origin.
Toughened turning of the knobs in moving the table signifies that the table has
reached the end position, which is at the same time visible on the window –
the positional light is located in one of the end positions. Further turning of the
knobs can cause damage to the device!
User manual 2.0
Firmware version 2.0
Rev.: 10.07.2008
13
5.1.2 Manipulator
The manipulator enables picking and placing of components and soldering
with pastes, glues or washers. Simple picking of components from various
layouts (stick and tape feeders, turntable, palette) by using vacuum, with
the support of a picking needle, is assured. The rotating knob enables
rotation of the component and manual placing of components only with
the touch of a needle.
Knob for the rotation of components
Camera/dispenser carrier
Height adjustment screw for determining the height of Z axis
AIR SUPPLY
On the back side of the manipulator the air
supply for connection of dispenser and
connection for the camera cable are situated.
CONNECTION
CONNECTION FOR
THE CAMERA CABLE
Enclosed to the manipulator is the placing – dispensing kit, which besides the K2 set
(primary set for placement and dispensing) contains the foot switch for dispensing,
picking nozzle, allen key no. 2 (for replacing the needle carrier with the picking nozzle)
and a spare allen screw.
5.1.3 Dispenser
The dispenser is an external unit, which enables
dispensing of soldering pastes, glues and washers.
The unit is removable. It is fixed to the manipulator
only during usage.
5.1.4 Air regulation
2
1 … regulator of pressure during dispensing
3
2 … regulator of vacuum during placement
1
manometer
5.1.5 Display unit
3 … regulator of vacuum during dispensing
Device de
escription
Laser & Electronics
The four lined LCD display un
nit enables
s a clear selection
s
w
opera
ations and adjustmen
nts. The fo
orm and
between work
installation
n of descrip
ptions resem
mble installation and position
of keys on the keyboa
ard.
Pushing the bu
uttons on the
t
keyboard allows us
u to choos
se operatin
ng ways,
ve through
h adjustments and se
et the valu
ues of indiv
vidual para
ameters.
mov
Key
ys gently sttand out an
nd have a spring click
k, which en
nables easiier blind
handling.
S
5.1.6 Software
User frriendly softtware enab
bles the operator to work with
h two maiin menus: placing
(PLACE) and dispe
ensing (DIS
SPENSE).
ns are de
emonstrated
d on the display unit, contro
olling is
Currenttly available function
perform
med with the use of ke
eyboard butttons.
5.1.7 Foot
F
switch
h
Turrning on the foot sw
witch durin
ng the function of
placement tu
urns off the
t
vacuum and tu
urns on
erpressure for pressin
ng out sold
dering paste, glue
ove
and
d washers.
The
e connectin
ng cable of the foot switch is co
onnected
on the back side of th
he upper cover (see chapter
4).
6.4
User man
nual 2.0
Firmware
e version 2.0
Re
ev.: 10.07.200
08
15
Device description
5.2
Laser & Electronics
Equipment (optional)
5.2.1 Turntable
The turntable is primarily designed for storing individual scattered
components, which are not part of the standard packaging (tape, stick
or palette). The components are loaded into cups. The component
type, value and the sign are marked on the label. The cups are made
of conductive plastic, and they allow anti-static handling of
components. There are usually 45 cups inserted into the turntable (15
single and 30 double). With a different combination of cups we can
achieve 45, 75 or 90 storing places. The rotation of the turntable is
motorised, we control it by using the function »Turntable«.
5.2.2 Feeder carrier
The feeder carrier is intended for the application of tape or
stick feeders, which are inserted in the guides of the feeder
carrier. The feeder carrier is placed on the left side of the
placer. The area on the front side of the feeder carrier is
intended for turning components.
5.2.3 Micro camera
16
Rev.: 10.07.2008
LPKF ProtoPlace
Firmware version 2.0
Device description
Laser & Electronics
Control of precise (fine) placing is enabled by a colour finger camera
with the following characteristics:
-
1/4" CCD sensor
NTSC/PAL video system
1Vp-p/75 ohm video output
Resolution of 350 TV lines
Power voltage 6 V DC
Besides the standard objective with a focal distance of 3.8 mm another objective is
added with a focal distance of 8.0 mm, which enables observing very small components
(0201) or components with a thicker division (0.3 mm).
The camera with its holder is attached on the pin shaped
carrier on top of the manipulator. This pin has double function
– either to hold camera either to hold dispenser.
In special case, when camera would be required during
dispensing, additional pin-shape carrier is added to your
camera set. Exchange it according to your needs (fork key
No.15 is required).
5.2.4 Monitor
The monitor enables us to view the images from the camera.
Recommended monitor characteristics:
- resolution: min. 320 TV lines
- video system: PAL or NTSC
- video input (entry): compositional 1 Vp-p/75 ohm
The cable of the monitor video signal connects to the back
side of the upper cover.
Recommendation:
The monitor should have at least the same resolution as the micro camera.
User manual 2.0
Firmware version 2.0
Rev.: 10.07.2008
17
Device de
escription
5.3
Laser & Ele
ectronics
A
Accessorie
es
5.3.1 Feeders
Tape feed
ders:
We choose
e between tape
t
feederrs of 8, 12 or 16
mm in width. Disk with components is plac
ced on
t
tape is placed into
o the
the feeder axis, and the
onents
picking guide, as the image shows. Compo
d forward by rotation o
of the trans
sport
are moved
wheel, and
d the rest of
o the tape moves backwards
along the lower
l
side.
Stick fee
eders:
We choos
se between feeders for SO an
nd PLCC
componen
nts with na
arrower orr wider wid
dth. The
stick with
h compone
ents is plac
ced on the
e spring
top, and the compo
onents are moved forw
ward by
t
soft part of the trransport wheel, as
rotating the
the image
e shows.
5.3.2 Palettes
p
as clo
ose as poss
sible to the
e placing
Component palettes are placed
m the fixing
g of the printed circuit board. They
T
can
unit, right from
ght or along
gside, according to the size and fullness
be placed uprig
he palette. Empty
E
or fu
ull palettes serve for h
height adju
ustment,
of th
otherwise slidin
ng or mag
gnet suppo
orts are used for ad
dditional
port for prin
nted circuit boards.
supp
18
Re
ev.: 10.07.200
08
LPKF ProtoPlace
ersion 2.0
Firmware ve
Device description
Laser & Electronics
5.3.3 K2 basic accessories set
The K2 set includes the set of needles, nozzles and other necessary parts for immediate
start of pick&place and dispensing.
It contains:
- 1 × cartridge adapter 6 ccm
- 2 × dispensing cartridge 6 ccm
- 2 × dispensing piston
- 2 × cartridge lid
- 2 × cartridge lid - lower
- set of 11 needles for dispensing and placing
- 2 × vacuum cap
- labels together with a pencil
5.3.4 Picking needles/picking nozzles
For picking and dispensing the needles of 1/2" (12.7 mm) length and of various
thicknesses are used:
Thickness
d=1.53mm (0.038 Inch)
d=0.84 mm (0.033 Inch)
d=0.69 mm (0.027 Inch)
d=0.61 mm (0.024 Inch)
d=0.50 mm (0.020 Inch)
d=0.40 mm (0.016 Inch)
d=0.33 mm (0.013 Inch)
d=0.25 mm (0.010 Inch)
d=0.15 mm (0.006 Inch)
Colour
Olive
green
black
pink
purple
blue
orange
red
pink
Pcs.
1
2
1
2
1
1
1
1
1
Nozzle for big
components
Note:
The colours of needles for individual thicknesses refer to the manufacturer
Techcon systems and differ according to sale on the European or American
market or depend on the particular supplier.
Always use suitable picking needles: the use of needles of unsuitable
dimensions (needles that are too big) can cause plugging up of the needle with
the component!
When placing you have to take special care that fine parts, pastes or glues are
not sucked through the picking needle.
A plugged up needle can be easily cleared by blowing with the use of the manual
dispensing function »Man Dispense«.
We slip an empty cartridge on the blocked needle and empty it with the help of
manual dispensing.
User manual 2.0
Firmware version 2.0
Rev.: 10.07.2008
19
Device installation
6
DEVICE INSTALATION
6.1
Removing the packaging
-
Laser & Electronics
Check the »shock sensor«, stocked on the outside of the packaging. In the event
that the indicator is colored bright red, do not continue with opening and
immediately inform your transport agent!
1.
Cut the adhesive tape and open the cover sides of the carton packaging.
2.
Remove the plastic foil:
3.
Remove the Turntable (if enclosed) and the upper filler:
4.
Remove the Feeder carrier (if enclosed) and the middle filler.
5.
Remove the enclosed Accessories.
6.
Remove the ProtoPlace out of the package.
Attention! When shifting the placer never take hold of the front cover and
transversal guide of the manipulator. If you act contrary to this you could
damage the device! The placer can only be shifted by taking hold of the
longitudinal guides!
20
Rev.: 10.07.2008
LPKF ProtoPlace
Firmware version 2.0
Device installation
Laser & Electronics
After removing the packaging inspect the general state of the device and equipment,
and check the accordance of the forwarded package with the enclosed packaging
certificate. In the event of damage immediately inform the transport agent.
Before starting-up the device for the first time it is necessary to ensure
device acclimatization, leave the unconnected device in the working area
for such a period that the device adjusts to the temperature conditions in
the working ambient.
User manual 2.0
Firmware version 2.0
Rev.: 10.07.2008
21
Device installation
6.2
Laser & Electronics
Installation
Protoplace is to be placed on a flat surface or on a working table with free area of at least
1000 × 900 mm. The height of the working table has to meet ergonomic principles. The
working chair has to be stable, must allow adjustment to the height of the seat and
should be equipped with support for the lower part of the back. A turntable is inserted
from the back side. A feeder carrier is installed from the side. The front right side area is
intended for palettes with components. We recommend that the monitor is installed on
the left side in such a way that it is facing the operator of the device.
6.2.1 Turntable placement
The turntable is inserted from the back side and placed on the two screws on the
transversal carrier. The rotation of the turntable is motorised, the cable for motor drive is
connected to the back side of the upper cover. The turntable can also be placed on the
left side. In the event of simultaneous use of two turntables, one of the drives is
motorised, the other has to be rotated manually.
6.2.2 Feeder carrier instalment
The feeder carrier is placed on two positioning screws on the left side of the placing
table. The feeder carrier needs to be assembled before placing it. We attach the two
sides to the aluminium base plate by using inbus screws (enclosed inbus tool 2.5). We
insert tape and/or stick feeders in the guides of the feeder carriers and then push them
to the stop.
22
Rev.: 10.07.2008
LPKF ProtoPlace
Firmware version 2.0
Device installation
Laser & Electronics
6.3
Starting-up the device
Before starting-up the device for the first time it is necessary to ensure device
acclimatisation: remove the packaging and leave the not yet connected device
in the working area for such a period that the device adjusts to the
temperature conditions in the working area.
6.3.1 Connections
Compressed air (requirements):
6 bar (6×10⁵ Pa), min. 10 l/min., dry, non-lubricated
AIR
CONNECTION
max. 6bar
Air supply connection
Electrical power supply (requirements):
220-240V/50 Hz or 110-120V/60Hz, 10W
Connect the supply cable only to a grounded network socket!
4
5
1
6
2
3
User manual 2.0
Firmware version 2.0
1
Power switch (on/off)
2
Supply cable connection
3
Input fuses and voltage selector
4
Monitor video signal connection
5
Connecting the turntable cable
6
Connecting the foot switch
Rev.: 10.07.2008
23
Device installation
Laser & Electronics
Connect the device to electrical supply with the enclosed cable (100120 V/60 Hz) or (200-240 V/50 Hz). Before connecting to the network
voltage you have to check the state of the voltage selector in the
mains filter together with the power switch.
The device which is already adjusted for use on the network voltage of
110-120 V is marked with a warning sign »Ready for 110-120 V«
READY FOR 110-120V
LPKF ProtoPlace can be supplied with the set-up for network voltage 200-240
V/50 Hz with a European supply cable or for the network voltage of 110-120
V/60 Hz and equipped with the supply cable NEMA L5-15/IEC
6.3.2 The position of the device operator
The operator should handle the device in a sitting position. The
height of the working table and the height of the seat of the
working chair should be in accordance with ergonomic principles.
Our left hand controls the keyboard for selecting menus, which
are shown on the screen. Our right hand controls the manipulator
in such a way that our palm is placed on the rest of the
manipulator and with our thumb and forefinger we handle the
rotating knob on the manipulator.
24
Rev.: 10.07.2008
LPKF ProtoPlace
Firmware version 2.0
Usage instructions
Laser & Electronics
7
USAGE INSTRUCTIONS
The placer ProtoPlace is primarily designed for placing SMD electronic components but it
can also be used for soldering pastes, various glues and washers.
7.1
Fixing of printed circuit boards
Single-sided and multi-sided printed circuit boards with a
thickness of 0.8 to 5 mm can be fixed to the fixing unit. The
left fixing lath is usually fixated on the far left side, and the
right - spring lath is moved across the profile slots according
to the width of printed circuit boards. This is performed by
unwinding the knobs, which are located in all corners of the
fixing laths. We can fixate printed circuit boards of various
sizes to the fixing unit – up to format A3 size (297 × 420 mm
or 11.8” × 16.5”).
For larger circuit boards 4 magnet supports and 4 sliding supports are available in the
profile slots. Magnet supports can be optionally shifted across the entire area of the
table, meanwhile sliding supports can only be moved within the profile slots.
7.2
Picking and placing
Picking and placing components is performed by using the manipulator, with the support
of a picking needle, which we select according to the size and weight of the component.
In the basic menu we choose the function Place (left key on the keyboard) which
enables manual placing »Man« or semi-automatic »Auto« placing. We can pick
components from cups on the turntable, which are chosen manually by rotating the disc
of the turntable, or from tape slots of tape feeders, or from component carriers of stick
feeders or from the adequate palette. We move the manipulator to the place on the
printed circuit board and place it on a precisely defined place according to the selected
method.
Select mode
Dispense
Place
******
******
Pick & Place
Auto
Back
Man
******
Exit from the menu »Place« is confirmed by a left Back key.
User manual 2.0
Firmware version 2.0
Rev.: 10.07.2008
25
Usage instructions
Laser & Electronics
7.2.1 Turntable rotation
In selecting the suitable cup, which is placed in the feeder motorized turntable, we are
assisted with the selection of the function »Turntable«, which is available in both
placing methods. In both of the menus (»Man« in »Auto«) the sub-menu »Turntable«
is available for rotating the turntable, which we select by pressing the upper key on the
keyboard. With the function »Turntable« the cups rotate clockwise by pressing the left
key »CW« on the keyboard, while by pressing the right key »CCW« on the keyboard
they rotate in the opposite direction. Turntable rotation stops by releasing the keys.
Turntable
******
CW
CCW
Back
Exit from the menu »Turntable« is confirmed by pressing the lower key »Back«.
In using the feeder turntable without motorised drive, the turntable is rotated manually.
7.2.2 Needle placement
The components are picked with the picking needle, which is
placed on the vacuum axis of the manipulator. The picking
needle is chosen according to the size and weight of the
component. Usually a needle of 0.84 mm in diameter (green
colour) or a needle of 1.37 mm in diameter is used. With
bigger components a vacuum cap is used (3.2 or 9 mm in
diameter) or we replace it with a picking »nozzle«. The
picking needle is placed on a vacuum axis, pulled out with a
gentle twist while the rotating button is held with the other
hand. The picking »nozzle« is placed on the vacuum axis in such a way that we replace
the needle carrier with it. The needle carrier is removed from the axis by unscrewing the
inbus pin and gently pulling it down. In its place we place the picking »nozzle« and
attach it to the z axis with the inbus pin.
7.2.3
Pneumatic settings
For different weights or sizes of components we use, beside
different needle thicknesses, also different vacuum, which is
set in the right part of the placer with the button »vacu«. For
heavier components we require stronger vacuum (a louder
sound, coming from the silencer on the ejector can be heard).
Stronger vacuum is achieved by rotating the knob in the
counter-clockwise direction.
26
Rev.: 10.07.2008
LPKF ProtoPlace
Firmware version 2.0
Usage instructions
Laser & Electronics
7.2.4 Manual placing
The basic manual placing can be performed in at least two different ways. For
uncomplicated components, such as resistors, capacitors, integrated circuit boards with
small number of leads and large pitch, we can use the basic placing method; meanwhile
for more complicated components we recommend working with the advanced automatic
method.
Basic method:
Manual Pick & Place
Turntable
Back
******
******
With the right key on the keyboard in the basic placing menu »Place« we select manual
»Man« placing. With manual placing the vacuum is turned on by pressing the needle on
the body of the component, which we wish to pick, and is present until the component is
placed on the desired position. The component is gently pressed onto the placing area,
which consequently turns the vacuum off. Vacuum is again turned on by a further press
of the needle on the component.
With manual placing the function »Turntable« enables us to select the suitable cup from
the turntable. In the »Turntable« function manual pick and place operation is also
possible. The function »Back« returns us to the previous menu.
Identical way of manual placing is also possible in the submenu »Turntable«,
which enables picking and placing of components and rotating of turntable at the
same time.
Advanced method:
Manual Pick & Place
Manual Pick & Place
Turntable
Back
******
BrakeON
******
*****
BrakeOFF
Place
We select the component that we wish to place. With the needle
we press on the component, vacuum is being turned on and the
component is sucked to the point of the needle. The component
is lifted and taken to the placing spot. When the vacuum is
turned on the »BrakeON« option appears on the right side of
the display.
User manual 2.0
Firmware version 2.0
Rev.: 10.07.2008
27
Usage instructions
Laser & Electronics
The component is carried above the placing area and put nearer
to the placing position. First it must be correctly rotated then set
in both directions. The component is gently pressed down and
stopped 0.5 - 1 mm from the surface of the circuit board. With
the right key on the keyboard we select the function
»BrakeON«, with which we block all three axes (x, y and z
axis). Then by pressing the lower key on the keyboard we select
the function »Place« and the component is automatically placed,
the vacuum is turned off and the manipulator returns to its starting (upper) position.
After a few moments the programme returns to the basic »Manual Pick & Place«
menu.
In any time, when axes are blocked we can simply release the brakes with the function
»BrakeOFF«. Vacuum on the needle remains turned on and we can try to position the
component again.
The maximum travel of the cylinder for automatic placing along the Z
axis is 4.5 mm.
When, during the function of automatic placing, we incorrectly set the height of
the travel in such manner that it is higher than 4.5 mm, the component cannot
touch the circuit board, the vacuum consequentially does not release the
component and the operating of the manipulator is blocked. In this case by
using the function »Back« we simply return to the previous menu, unblock the
axes by selecting »BrakeOFF« function and repeat the whole procedure of
setting the height of the travel. Vacuum on the needle remains turned on
With manual placing the function »Turntable« enables us to select the suitable cup from
the turntable. In the »Turntable« function manual pick and place operation is also
possible. The function »Back« returns us to the previous menu.
28
Rev.: 10.07.2008
LPKF ProtoPlace
Firmware version 2.0
Usage instructions
Laser & Electronics
7.2.5 Semi-automatic placing
The basic semi-automatic placing can be performed in at least two different ways. For
uncomplicated components, such as resistors, capacitors, integrated circuit boards with
small number of leads and large pitch, we can use the basic automatic placing method;
meanwhile for more complicated components we recommend working with the advanced
automatic method.
Basic method:
Auto Pick & Place
Turntable
Back
BrakeON
******
To pick up the component we choose »Place« (left key on the keyboard) from the basic
menu, and there we choose the semi-automatic »Auto« (upper key) placement method.
With this option we pick components by automatically turning on the vacuum and
manually placing the component on the manually set position.
We select the component that we wish to place. In picking the
component the vacuum is present, so with the needle we only
touch the centre of the component; the component is sucked to
the point of the needle. The component is lifted and taken to the
placing spot.
The component is carried above the placing area and put nearer
to the placing position. First it must be correctly rotated then set
in both directions. The component is gently pressed onto the
placing area and the vacuum turns off.
After a few moments the vacuum automatically turns on again.
With semi-automatic »Auto« placing the function »Turntable« enables us to select the
suitable cup from the turntable, while the function »Back« returns us to the previous
menu. In the »Turntable« function »Auto« pick and place operation is also possible.
User manual 2.0
Firmware version 2.0
Rev.: 10.07.2008
29
Usage instructions
Laser & Electronics
Advanced method:
To pick up the component we choose »Place« (left key on the keyboard) from the basic
menu, and there we choose the semi-automatic »Auto« (upper key) placement method.
With this option we pick components by automatically turning on the vacuum and
automatically placing the component on the manually set position.
Auto Pick & Place
Auto Pick & Place
Turntable
Back
BrakeON
******
******
*****
BrakeOFF
Place
We select the component that we wish to place. In picking the
component the vacuum is present, so with the needle we only
touch the centre of the component; the component is sucked to
the point of the needle. The component is lifted and taken to the
placing spot.
The component is carried above the placing area and put nearer
to the placing position. First it must be correctly rotated then set
in both directions. The component is gently pressed down and
stopped 0.5 - 1 mm from the surface of the circuit board. With
the right key on the keyboard we select the function
»BrakeON«, with which we block all three axes (x, y and z
axis). Then by pressing the lower key on the keyboard we select
the function »Place« and the component is automatically placed,
the vacuum is turned off and the manipulator returns to its starting (upper) position.
After a few moments the vacuum automatically turns on again and the programme
returns to the basic »Auto Pick & Place« menu.
In any time, when axes are blocked we can simply release the brakes with the function
»BrakeOFF«. Vacuum on the needle remains turned on and we can try to position the
component again.
The maximum travel of the cylinder for automatic placing along the Z
axis is 4.5 mm.
When, during the function of automatic placing, we incorrectly set the height of
the travel in such manner that it is higher than 4.5 mm, the component cannot
touch the circuit board, the vacuum consequentially does not release the
component and the operating of the manipulator is blocked. In this case by
using the function »Back« we simply return to the previous menu, unblock the
30
Rev.: 10.07.2008
LPKF ProtoPlace
Firmware version 2.0
Usage instructions
Laser & Electronics
axes by selecting »BrakeOFF« function and repeat the whole procedure of
setting the height of the travel. Vacuum on the needle remains turned on.
With semi-automatic »Auto placing« the function »Turntable« enables us to select the
suitable cup from the turntable, while the function »Back« returns us to the previous
menu. In the »Turntable« function »Auto« pick and place operation is possible.
User manual 2.0
Firmware version 2.0
Rev.: 10.07.2008
31
Usage instructions
Laser & Electronics
7.2.6 Precise placing with fine adjustment
Precise placing with fine adjustment enables us to place more demanding »fine pitch«
components.
By pressing the left key on the keyboard in the basic menu we select the function
»Place«, within which we then select semi-automatic »Auto placing« method by
pressing the upper key. With this option we pick components with the vacuum being
automatically turned on, limit the travel alongside the z axis and automatically place
them on the manually set position.
Auto Pick & Place
Turntable
Back
BrakeON
******
With a height adjustment screw (located besides the fixing of the camera, see chapter
5.1.2) we limit the downward travel according to the appropriate height of the
component. This option is recommended for placing components with previous fine
positioning.
The height of the travel is set with a height adjustment screw
(rotation in the counter-clockwise direction decreases the length
of the travel, meanwhile rotation in the clockwise direction
increases the length of the travel) in such a manner that the
component is, when the height adjustment screw is pressed,
distanced 4.5 mm at the most from the circuit board (see
picture).
The picked component is carried above the placing area and put near to the placing
position (the height adjustment screw is pressed down so far that the screw hides in the
housing or use our finger to touch the housing of the manipulator) by pressing the height
adjustment screw. The position of the height adjustment screw is retained and at the
same time we select the function »BrakeON« on the keyboard; by doing this the
position of the component is blocked in all directions except in the direction of rotation.
The height adjustment can be released. We then correctly rotate the component and with
the fine setting of the micro-table accurately set the position of the placing area in both
directions.
32
Rev.: 10.07.2008
LPKF ProtoPlace
Firmware version 2.0
Usage instructions
Laser & Electronics
Auto Pick & Place
******
*****
BrakeOFF
Place
Fine adjustment of the table is conducted by buttons in the front cover. The left button is
for fine adjustment of the table along the Y axis, the right one serves for fine
adjustments along the X axis. When we are satisfied with the position, we select the
function »Place« by pressing the lower key on the keyboard.
Auto Placing
******
Back
******
******
The component is automatically placed, the vacuum turns off and the manipulator
returns to its starting position. After a few moments the vacuum automatically turns on
again and the programme returns to the basic »Auto Pick & Place« menu.
In any time, when axes are blocked and we are not satisfied with the position, we can
simply release the brakes with the function »BrakeOFF«. Vacuum on the needle remains
turned on and we can try to position the component again.
When, during the function of automatic placing, we incorrectly set the height of
the travel in such manner that it is higher than 4.5 mm, the component cannot
touch the circuit board, the vacuum consequentially does not release the
component and the operating of the manipulator is blocked. In this case by
using the function »Back« we simply return to the previous menu and repeat
the whole procedure of setting the height of the travel.
With semi-automatic »Auto« placing the function »Turntable« enables us to select the
appropriate cup from the turntable, meanwhile the function »Back« returns us to the
previous menu.
7.2.7 Micro placing (optional)
Recently very small components are found very difficult to position visually. For this
purpose a camera (optional) is used during micro placing for accurate positioning and
control of placement efficiency.
The finger camera can be rotated around the placing axis.
The semi-automatic »Auto Pick & Place« method of precise
placement with fine adjustments of position is also used for this
purpose.
The picture shows an example of placing chip components of
0201 size with a needle of 0.15 mm in diameter.
User manual 2.0
Firmware version 2.0
Rev.: 10.07.2008
33
Usage instructions
Laser & Electronics
7.3 Dispensing
The dispenser is a unit which enables dispensing of soldering
pastes, glues and washers. The unit is removable and is placed on
the manipulator only during usage. We place a cartridge adapter
with a connecting tube on the cartridge. The cartridge carrier is put
on from the left side of the manipulator groove towards the stop,
the cartridge is inserted in the seating and the connecting tube is
connected to the connection on the rear side of the manipulator. We
can also use the foot switch for dispensing.
Dispense
Auto
Back
Man
******
The dispensing is useful for creating a prototype by soldering pastes or glues. The
function of dispensing is selected in such a way that we choose the function »Dispense«
in the basic menu with the upper key on the keyboard. We can choose two methods of
dispensing: manual (»Man«) or automatic (»Auto«) dispensing. Both methods are
suitable for soldering pastes and also glue. Both methods use the foot switch for
activating the function; this is rarely performed by pressing down the manipulator.
For soldering pastes we often use dosing needles of 0.50, 0.61 and 0.69 mm in diameter,
although the diameter of the dosing needle greatly depends on the characteristics of the
soldering paste, its viscosity and temperature of the working place. The characteristic of
the soldering paste is prescribed by its manufacturer. With glues we use dosing needles
of 0.40, 0.50 and 0.61 mm in diameter. In this case the diameter of the dosing needle
also depends on the characteristic of the glue, which is in the same way prescribed by its
manufacturer.
7.3.1. Manual dispensing
Manual dispensing is used when we are presented with a great number of various sized
soldering pads which do not follow each other in a certain sequence. With manual
dispensing the dispensing medium leaks out of the cartridge for the duration of time,
which is equal to the time the switch is pressed. When we release the switch, the leaking
from the cartridge also stops.
The dosing needle is screwed in the cartridge. The height of the
dispensing needle is set on the level of the picking needle or in such a
way it touches the printed circuit board.
In the »Dispense« menu we choose the sub-menu »Man« with the left
key on the keyboard. The suitable pressure for dispensing is set by the
pressure regulator knob, which is located beside the manometer. If we
want to increase the pressure we rotate the knob clockwise and usually
set it between 2 and 3 bars.
34
Rev.: 10.07.2008
LPKF ProtoPlace
Firmware version 2.0
Usage instructions
Laser & Electronics
For media with high viscosity (rare media) vacuum is also used besides
pressure. Vacuum is used in case if the pressure is not supplied, so the
media doesn’t leak out of the dosing needle, or remains on the same
level. For activating dispensing the foot switch is used.
Basic Method:
Manual Dispense
******
Back
BrakeON
******
The needle is carried above the dispensing area and put nearer to the dispensing
position. When satisfied with the position the foot switch is pressed and the solder paste
is dosed on the pad.
By pressing the left key on the keyboard we choose the function »Back«, which returns
us to the basic »Dispense« menu.
Advanced Method:
Manual Dispense
Manual Dispense
******
Back
******
Back
BrakeON
******
BrakeOFF
******
The needle is carried above the dispensing area and put nearer to the dispensing
position. By pressing the right key on the keyboard we can choose the functions
»BrakeON«, all three axes are blocked and fine adjustment of the microtable is possible.
When satisfied with the position the foot switch is pressed and the solder paste is dosed
on the pad.
In any time, when axes are blocked, we can simply release the brakes with the function
»BrakeOFF«.
By pressing the left key on the keyboard we choose the function »Back«, which returns
us to the basic »Dispense« menu.
7.3.2. Automatic dispensing
The function of automatic dispensing
soldering pads in the same size which
using automatic dispensing, we set the
the quantity of pressed out medium and
is applied when we have a large number of
follow each other in a certain sequence. When
length of the impulse, with which we determine
the speed of its repetition.
The dosing needle is screwed in the cartridge. The height of the
dispensing needle is set on the level of the picking needle or in
such a way it touches the printed circuit board while the
dispensing is activated by a picking needle. The dispensing can
also be activated as with manual dosing, namely by using a foot
switch.
User manual 2.0
Firmware version 2.0
Rev.: 10.07.2008
35
Usage instructions
Laser & Electronics
Auto Dispense
Pulse
Back
BrakeON
Pause
Choose the function »Auto« in the menu »Dispense« with the upper key on the
keyboard or you can return to the previous menu by pressing the left key and selecting
the function »Back«. In the sub-menu »Auto Dispense« we can set the length of the
impulse »Pulse«, with which we determine the quantity of pressed out medium. The
function is selected by pressing the upper key on the keyboard.
Pulse 0.5 s
Inc
Back
Dec
******
The scale of the impulse is set in the range between 0.1 and 9.0 seconds, in steps per
0.1 second. By pressing the upper key on the keyboard we select the function »Inc«,
with which we extend the duration of the impulse, while with the lower key we select the
function »Dec«, with which we shorten the impulse.
Pause 1.0 s
Inc
Back
Dec
******
By pressing the right key on the keyboard we select the function »Pause«, with the help
of which we set the speed of repetition of the »Pulse« impulse. The time of the pulse is
set by using the upper and lower key, by selecting the function »Inc« or »Dec«. The
impulse »Pause« is set within the range from 0.1 to 2.0 seconds in steps per 0.1
second.
From both of the sub-menus of the function »Auto Dispense« we return to the previous
menu by pressing the left key and selecting the function »Back«
36
Rev.: 10.07.2008
LPKF ProtoPlace
Firmware version 2.0
Usage instructions
Laser & Electronics
Basic Method:
Auto Dispense
Pulse
Back
BrakeON
Pause
The needle is carried above the dispensing area and put nearer to the dispensing
position. When satisfied with the position the foot switch is pressed and the solder paste
is dosed on the pad. You can also activate the dosing with the dispensing needle but it is
rarely used. The quantity of the solder paste is previously set with the »Pulse« option.
By pressing the left key on the keyboard we choose the function »Back«, which returns
us to the basic »Dispense« menu.
Advanced Method:
Auto Dispense
Auto Dispense
Pulse
Back
Pulse
BrakeON
Pause
*****
BrakeOFF
Pause
The needle is carried above the dispensing area and put nearer to the dispensing
position. By pressing the right key on the keyboard we can choose the function
»BrakeON« and all three axes are blocked and fine adjustment of the microtable is
possible.
»Pulse« and »Pause« option can also be adjusted with brakes turned on.
In any time, when axes are blocked, we can simply release the brakes with the function
»BrakeOFF«.
The quantity of the solder paste is previously set with the »Pulse« option.
When satisfied with the position the foot switch is pressed and the solder paste is dosed
on the pad.
By pressing the left key on the keyboard we choose the function »Back«, which returns
us to the basic »Dispense« menu. When
Warning: After completion of the dispensing function it is necessary to
remove the dispensing needles from the cartridges and thoroughly
clean them. The cartridges have to be suitably closed on both sides
and the medium stored in accordance with the instructions of the
manufacturer.
User manual 2.0
Firmware version 2.0
Rev.: 10.07.2008
37
Maintenance
8
Laser & Electronics
MAINTENANCE
After the work has been accomplished it is necessary to turn off the device with the
power switch, cut off the supply of compressed air and cover the device, so that it is
protected from dust.
8.1
Cleaning
The placer is cleaned with a damp towel, soaked in a mild cleanser solution.
The added pastes, cleansers and washers have to be cleaned in accordance with
manufacturer instructions regarding each individual substance.
Most soldering pastes and glues can be cleaned using isopropyl alcohol.
Attention, follow the manufacturer instructions for each individual substance!
Before cleaning make sure the device is disconnected from the network
voltage!
When dispensing it is necessary to close the cartridge and store it in a refrigerator or in
some other dark and cold place in accordance with the manufacturer’s instructions
regarding the medium. The needles have to be emptied and cleaned with a cleanser for
soldering pastes or glues. This is performed in the simplest way by using isopropyl
alcohol. The needles can be put on an empty cartridge, emptied with the help of manual
dispensing, soaked in alcohol and cleared by blowing.
8.2
Maintenance
Occasionally coordinate rails should be greased with fine machine oil for rails on the area
of the rail wipers.
Occasionally it is also necessary to verify the dryness of the air supply; if necessary
empty the water eliminator.
38
Rev.: 10.07.2008
LPKF ProtoPlace
Firmware version 2.0
Troubleshooting
Laser & Electronics
9
TROUBLESHOOTING
Before any intervention in the device firstly disconnect the device from
network power supply.
In some cases you can correct the fault in device operation yourself with the help of
below stated guidelines. In the event that you do not succeed, do not continue with
eventual repairs but immediately turn to an authorised serviceman/ distributor of LPKF
devices.
Fault/Defect
»Blue line« does not
light up, the display is
void.
Indication on the
display: »Air pressure is
under 5 bars«.
Indication of the
position of the table is
disabled.
Cause
Procedure
No power supply.
The pressure in the device
is too low or pressure is
not supplied into the
device.
Disconnected connector
under the front cover.
Initialisation failed.
1. check the voltage of the
network (sockets)
2. check the fuses in the filter
3. check the power supply cable
1. check the pressure in the
installation (device)
2. check the air supply tube
Check the connection of the
connector.
Local lighting is
disabled.
Poor contact between the
placing manipulator and
manipulator carrier.
1. take down the placing
manipulator
2. check the contacts and install
the manipulator back
Vacuum is not present
or is not sufficient at
the end of the placing
needle.
Blocked placing needle;
Closed stifler for vacuum;
Poor contact between the
placing manipulator and
manipulator carrier.
1. replace the placing needle
2. open the vacuum stifler
3. take off the placing
manipulator
4. check if the sealing rings are
in their places
5. reinstall the manipulator
The micro-table does
not move by turning the
knobs.
The table is blocked in the
ending positions.
1. verify the position of the table
on the table position indicator
2. shift the table to the centre
The motorised turntable
does not rotate.
Disconnected cable for the
turntable.
Verify the connection of the
cable for the turntable.
The placing manipulator
does not turn off the
vacuum nor does it
return to the starting
position in spite of
touching the circuit.
The bearing shells (inlet
flange) in the manipulator
slipped »down«.
User manual 2.0
Firmware version 2.0
Note: this fault appears
only with the older models.
Rev.: 10.07.2008
1. lead the manipulator out of
the circuit area
2. with your hand take grip of
the manipulator needle and
press it down
39
Scope of delivery
Laser & Ele
ectronics
10
S
Scope
of delivery
d
10.1
T
The
prima
ary set of a 010312 LPKF ProttoPlace de
elivery:
Ord
der code
Descrription
Picture
e
LPKFP
Protoplace:
SemiaautomaticPick&Placewitth
manipulatorforprrofessionaluse
inthefieldofSMTassembling
10141
18/109920
Powerrcord
(EURO
O/NEMA1515)
10
03495
PVCairtube
10
01038
Footsw
witchFSM02
10
05543
K2setforPick&Plaaceand
dispen
nsing
10
08151
dispen
nserholder
10
06143
aircon
nnector(forccartridge
adapteer)
10
09381
nozzleforlargecomponents
10
04092
allenkkeyNo.2
05
5181
setscrrewM3x8
40
Re
ev.: 10.07.200
08
LPKF ProtoPlace
ersion 2.0
Firmware ve
Scope off delivery
Laser & Electronics
10.2
K2 set:
Orde
er code
Descriptio
on
Picture
10
06137
vacuum
mcapd=3,16
6mm(1/8")
10
06136
vacuum
mcapd=3.17
7mm(3/8")
10
09859
dispenseradapter
10
01686
cartridge6ccm
10
061411
airpow
weredpiston
n6ccm,plasttic
10
01690
endcap6ccm
10
01692
lureloccktipcap
10
01697
dispensingn
needled=1.53m
mm(0.038")
10
01698
dispensingn
needled=0.84m
mm(0.033")
10
01699
dispensingn
needled=0.69m
mm(0.027")
10
01700
dispensingn
needled=0.61m
mm(0.024")
10
05046
dispensingn
needled=0.50m
mm(0.020")
10
05047
dispensingn
needled=0.40m
mm(0.016")
10
05048
dispensingn
needled=0.33m
mm(0.013")
10
06139
dispensingn
needled=0.25m
mm(0.010")
10
01695
dispensingn
needled=0.15m
mm(0.006")
User man
nual 2.0
Firmware
e version 2.0
Re
ev.: 10.07.200
08
41
Scope of delivery
10.3
Laser & Ele
ectronics
Options
s:
Orde
er code
Description
Picture
010313
3(45bins)
010314
4(75bins)
010315
5(90bins)
Motorizedturntablessetwith
antistaticcbins:
45bins,75b
bins,90bins 01
10321
Feedercaarierforuptto13feederss
010222
2(8mm)
010223
3(12mm)
010224
4(16mm)
Tapefeed
ders:
8mm,12m
mm,16mm
010225(SO8...)
010226(PLCC28...)
010227(PLCC52...)
Stickfeed
ders:
SO8SO28(SO8LSO28L)
PLCC28PLLCC44
PLCC52PLLCC84
010317
7(NTSC)
010323
3(PAL)
42
Movablecolourmicro
ocamera
(NTSC,PA
AL)
350TVlines;0,4lux;stand
dardlensfocus
ditionallensfoccus8.0mm
3.8mm;add
Re
ev.: 10.07.200
08
LPKF ProtoPlace
ersion 2.0
Firmware ve
Scope off delivery
Laser & Electronics
10.4
Accessories:
Orde
er code
00
00287
Description
Picture
ColourLC
CDmonitor1
17"
AVinput,1280x1204,0.25
54mmpixel,
12ms,wideeviewangle140/130
01
10393
LPKFSMTTVacuumtable
Forfastclampingandsupportofrigidand
mm.
flexPCBsupto230x297m
11
10691
Thermocceramicplatee
OptionforVVacuumTable
Fortransferringflexprototyypedirectlyintto
LPKFProtoflowreflowoven;220x297x4m
mm
11
10692
Vacuumggenerator
OptionforV
VacuumTablettoincrease
vacuum.
01
10348
Magneticcsupportpin
n4x
01
10446
User man
nual 2.0
Firmware
e version 2.0
Positioningedgemagneeticsupport4
4x
Re
ev.: 10.07.200
08
43