1
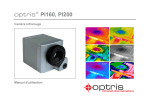
optris® PI Thermal Imager Operators manual Svensk generalagent och distributör: Sensotest AB Girovägen 13 - 17562 Järfälla, Swe Tel: 08-564 733 80 - Fax: 08-564 733 89 www.sensotest.se - [email protected] 160/ 200/ 230/ 400/ 450 ____________________________________________________________________________________________________________ CE - Conformity The product complies with the following standards: EMC: Safety regulations: EN 61326-1:2006 (Basic requirements) EN 61326-2-3:2006 EN 61010-1:2001 Optris GmbH Ferdinand-Buisson-Str. 14 13127 Berlin Germany Tel.: +49-30-500 197-0 Fax: +49-30-500 197-10 E-mail: [email protected] Internet: www.optris.com The product accomplishes the requirements of the EMC Directive 2004/108/EG and of the Low Voltage Directive 2006/95/EG. Note Read the manual carefully before the initial start-up. The producer reserves the right to change the herein described specifications in case of technical advance of the product. ____________________________________________________________________________________________________________ optris PI – E2013-04-C 1 ____________________________________________________________________________________________________________ Warranty Each single product passes through a quality process. Nevertheless, if failures occur please contact the customer service at once. The warranty period covers 24 months starting on the delivery date. After the warranty is expired the manufacturer guarantees additional 6 months warranty for all repaired or substituted product components. Warranty does not apply to damages, which result from misuse or neglect. The warranty also expires if you open the product. The manufacturer is not liable for consequential damage. If a failure occurs during the warranty period the product will be replaced, calibrated or repaired without further charges. The freight costs will be paid by the sender. The manufacturer reserves the right to exchange components of the product instead of repairing it. If the failure results from misuse or neglect the user has to pay for the repair. In that case you may ask for a cost estimate beforehand. ____________________________________________________________________________________________________________ optris PI – E2013-04-C 2 ____________________________________________________________________________________________________________ Content CE - Conformity .......................................................................................................................................................1 Warranty ..................................................................................................................................................................2 Content ....................................................................................................................................................................3 1. 2. 3. 4. 5. 6. 7. 8. 9. 10. Welcome! ........................................................................................................................................................4 Scope of Supply ..............................................................................................................................................5 Maintenance....................................................................................................................................................6 Technical Data ................................................................................................................................................7 Optical Data ..................................................................................................................................................10 Mechanical Installation ..................................................................................................................................12 Electrical Installation .....................................................................................................................................18 Initial start-up.................................................................................................................................................24 Software PIConnect ......................................................................................................................................25 Basics of Infrared Thermometry....................................................................................................................29 Appendix A – Emissivity Table Metals ...................................................................................................................36 Appendix B – Emissivity Table Non Metals ...........................................................................................................37 Appendix C - Serial Communication (a brief overview) .........................................................................................38 Appendix D – Interprocess Communication (IPC) .................................................................................................39 Appendix E – Optris PI Connect Resource Translator ..........................................................................................40 Appendix F – Process Interface ............................................................................................................................41 ____________________________________________________________________________________________________________ optris PI – E2013-04-C 3 ____________________________________________________________________________________________________________ 1. Welcome! Thank you for choosing the optris PI thermal imager! The optris PI calculates the surface temperature based on the emitted infrared energy of objects [► Basics of Infrared Thermometry]. The two-dimensional detector (FPA - focal plain array) allows a measurement of an area and will be shown as thermal image using standardized palettes. The radiometric processing of the picture data enables the user to do a comfortable detailed analysis with the software PI Connect. Please take care of the following notes: Notes The optris PI is a precise instrument and contains a sensitive infrared detector and a highquality lens. The alignment of the camera to intensive energy sources (high power laser or reflections of such equipment, e.g.) can have effect on the accuracy of the measurement or can cause an irreparable defect of the infrared detector. The mounting should be made only via the mounting threads or tripod connection the housing is providing. Avoid static electricity, arc welders, and induction heaters. Keep away from very strong EMF (electromagnetic fields). Avoid abrupt changes of the ambient temperature. In case of problems or questions which may arise when you use the infrared camera, please contact our service department. ____________________________________________________________________________________________________________ optris PI – E2013-04-C 4 ____________________________________________________________________________________________________________ 2. Scope of Supply Standard version optris PI160, PI200, PI230, PI400 or PI450 incl. 1 lens 1) USB cable (1 m ) Table tripod Process interface cable incl. terminal block (1 m) Software package PI Connect Operators manual Aluminum case optris PI200/ 230 only: focusing tool for VIS camera Thermal Analysis Kit optris PI160 or PI200 3 lenses (23°, 6° and 41°, incl. calibration certificate) 1) USB cable (1 m and 10 m) Tripod (20 - 63 cm) Process interface cable incl. terminal block (1 m) Software package PI Connect Operators manual Aluminum case optris PI200/ 230 only: focusing tool for VIS camera 1) The camera plug of USB cable (1 m) does not feature an IP67 protection class. For industrial applications there are cables with IP67 available starting at 5 m. ____________________________________________________________________________________________________________ optris PI – E2013-04-C 5 ____________________________________________________________________________________________________________ 3. Maintenance Lens cleaning Blow off loose particles using clean compressed air. The lens surface can be cleaned with a soft, humid tissue moistened with water or a water based glass cleaner. Note Never use cleaning compounds which contain solvents (neither for the lens nor for the housing). ____________________________________________________________________________________________________________ optris PI – E2013-04-C 6 ____________________________________________________________________________________________________________ 4. Technical Data Factory Default Settings The unit has the following presetting at time of delivery: Temperature range -20...100 °C Emissivity 1,000 Process interface (PIF) inactive Interprocess Communication (IPC) inactive Measurement function Rectangle measure area General Specifications Environmental rating Ambient temperature Storage temperature Relative humidity Material (housing) Dimensions Weight (incl. lens) Cable length (USB 2.0) Vibration Shock IP67 (NEMA-4) 0...50 °C -20...70 °C 10...95 %, non condensing aluminum, anodized PI160 / PI200 / PI230: 45 x 45 x 62 - 65 mm (depending on lens) PI400/ 450: 46 x 56 x 86 - 90 mm (depending on lens) PI160: 195 g, PI200/ 230: 215 g, PI400 / PI450: 320 g 1 m (Standard), 5 m, 10 m, 20 m IEC 68-2-6: 3G, 11 – 200Hz, any axis IEC 68-2-27: 50G, 11ms, any axis ____________________________________________________________________________________________________________ optris PI – E2013-04-C 7 ____________________________________________________________________________________________________________ Electrical Specifications Power Supply Current draw Output Process Interface (PIF out) Input Process Interface (PIF in) Digital Input Process Interface Digital interface Measurement Specifications Temperature ranges Detector Spectral range Lenses (FOV) 3) System accuracy 5 VDC (powered via USB 2.0 interface) max. 500 mA 0-10 V (TObj, TInt, flag status or alarm status) 0-10 V (Emissivity, Ambient temperature, Reference temperature, Flag control, triggered video or triggered snapshots) Flag control, triggered video or triggered snapshots) USB 2.0 [► Appendix F: PIF] 1) -20...100 °C; 0...250 °C; 120...900 °C; option: 200…1500°C PI160 / PI200 / PI230: UFPA, 160 x 120 pixels PI400 / PI450: UFPA, 382 x 288 pixels 7.5...13 µm 2) PI160 / PI200 / PI230 : 23° x 17°; 6° x 5°; 41° x 31°; 72° x 52° PI400 / PI450: 38° x 29°; 62° x 49°; 13° x 10° ±2 °C or ±2 % 1) The additional measurement range of 200…1500°C is not available for the model PI450 as well as for camera version PI160 / PI200 featuring 72° HFOV optics 2) For an ideal combination of IR and VIS image we recommend the 41° lens for PI200 and the 23° lens for PI230 3) At ambient temperature 235 °C; whichever is greater ____________________________________________________________________________________________________________ optris PI – E2013-04-C 8 ____________________________________________________________________________________________________________ Temperature resolution (NETD) Frame rate Warm-up time Emissivity Visual camera (PI200 only) Visual camera (PI230 only) Software 1) 2) PI160 / PI200 / PI230: 0.08 K with 23°; 0.3 K with 6°; 0.1 K with 41° and 72° 1) PI400 : 0.08 K with 38° and 62°; 0.1 K with 13° 1) PI450 : 0.04 K with 38° and 62°; 0.06 K with 13° PI160: 120 Hz 2) PI200 / PI230: 128 Hz PI400 / PI450: 80 Hz 10 min 0.100…1.000 (adjustable via software) 2) 640 x 480 pixels, 32 Hz, 54° x 40° FOV 2) 640 x 480 pixels, 32 Hz, 30° x 23° FOV PI Connect Value is valid at 40 Hz and 25°C room temperature The following options can be set: Option 1 (IR with 96 Hz at 160 x 120 px; VIS with 32 Hz at 640 x 480 px); Option 2 (IR with 128 Hz at 160 x 120 px; VIS with 32 Hz at 596 x 447 px) ____________________________________________________________________________________________________________ optris PI – E2013-04-C 9 ____________________________________________________________________________________________________________ 5. Optical Data The variety of different lenses offers the possibility to precisely measure objects in different distances. We offer lenses for close, standard distances and large distances. Different parameters are important if using infrared cameras. They display the connection between the distance of the measured object and the size of the pixel (please see tables at the end of this section). With the help of BI-SPECTRAL technology at optris PI200/ 230, a visual image (VIS) can be combined with a thermal image (IR). Both can be finally captured time synchronously: IR channel VIS channel Focusing tool for VIS camera Note Please make sure that the focus of thermal channel and visual channel (optris PI200/ 230 only) is adjusted correctly. For focusing the thermal camera please turn the lens, for focusing the visual camera please use the focusing tool supplied in the scope of delivery. ____________________________________________________________________________________________________________ optris PI – E2013-04-C 10 ____________________________________________________________________________________________________________ ____________________________________________________________________________________________________________ optris PI – E2013-04-C 11 ____________________________________________________________________________________________________________ ____________________________________________________________________________________________________________ optris PI – E2013-04-C 12 ____________________________________________________________________________________________________________ 6. Mechanical Installation The PI is equipped with two metric M4 thread holes on the bottom side (6 mm depth) and can be installed either directly via these threads or with help of the tripod mount (also on bottom side). optris PI160, dimensions in mm optris PI200/ 230, dimensions in mm ____________________________________________________________________________________________________________ optris PI – E2013-04-C 13 ____________________________________________________________________________________________________________ optris PI400 / PI450, dimensions in mm ____________________________________________________________________________________________________________ optris PI – E2013-04-C 14 ____________________________________________________________________________________________________________ Mounting accessories (optional) Mounting base, stainless steel, adjustable in 2 axes Product code: ACPIMB Protective housing, stainless steel, Incl. Mounting base Product code: ACPIPH ____________________________________________________________________________________________________________ optris PI – E2013-04-C 15 ____________________________________________________________________________________________________________ High temperature accessories (optional for PI160 only) The imager optris PI160 can be used at ambient temperature up to 50°C At higher temperatures (up to 240°C) the cooling jacket should be used. Cooling jacket for optris PI Product code: ACCJPI Mounting bracket for cooling jacket, adjustable in two axes Product code: ACCJAB ____________________________________________________________________________________________________________ optris PI – E2013-04-C 16 ____________________________________________________________________________________________________________ Cooling jacket dimensions: ____________________________________________________________________________________________________________ optris PI – E2013-04-C 17 ____________________________________________________________________________________________________________ 7. Electrical Installation At the back side of the PI you will find two connector plugs. Please connect the supplied USB cable with the right plug. The left connector plug is only used for the process interface. Backside of camera with connectors Plug for USB cable Plug for PIF cable Process Interface The PI is equipped with a process interface (cable with integrated electronics and terminal block), which can be programmed via the software as an Analog Input (AI) and Digital Input (DI) in order to control the camera or as an Analog Output (AO) in order to control the process. The signal level is always 0-10 V. Note Please make sure that the process interface (electronics within cable as well as industrial interface) is powered separately (5-24 VDC). ____________________________________________________________________________________________________________ optris PI – E2013-04-C 18 ____________________________________________________________________________________________________________ PIN Allocation PIF 1 2 3 4 5 INT SDA (I²C) SCL (I²C) DGND 3,3V (Out) USB 1 2 4 5 VCC GND DD+ Rear side of camera In case you would like to connect the process interface of the camera directly to external hardware (without using the supplied PIF cable) you should activate the field „Support proprietary PIF cable” in the menu Tools/ Configuration/ Device (PIF) in the PIConnect software. Note In case of working with a direct PIF connection the input of the PIF is not protected! ____________________________________________________________________________________________________________ optris PI – E2013-04-C 19 ____________________________________________________________________________________________________________ The process interface can be activated choosing the following options: Analog Input (AI): Analog Output (AO): Digital Input (DI): Emissivity, ambient temperature, reference temperature, flag control, triggered recording, triggered snapshots, triggered linescanner, uncommitted value Main area temperature, internal temperature, flag status, alarm flag control, triggered recording, triggered snapshots, triggered linescanner Configuration Process Interface (PIF) ____________________________________________________________________________________________________________ optris PI – E2013-04-C 20 ____________________________________________________________________________________________________________ Industrial Process Interface (optional) For use in industrial environment an industrial process interface with 500 VACRMS isolation voltage between PI and process is available (connection box with IP65, 5 m high temp cable for camera connection, terminal for process integration). [► Appendix F: PIF] Pin assignment PIF cable (industrial process interface) GREY GREEN YELLOW WHITE BROWN SHIELD Interrupt SCL (I²C) SDA (I²C) 3,3 V GND GND Connection box of industrial process interface ____________________________________________________________________________________________________________ optris PI – E2013-04-C 21 ____________________________________________________________________________________________________________ The process interface has an integrated failsafe mode. This allows to control conditions like interruption of cables, shut-down of the software etc. and to give out these conditions as an alarm. Controlled conditions on camera and software Interruption USB cable to camera Interruption data cable camera - PIF Interruption power supply PIF Shut-down of PIConnect software Crash of PIConnect software 1) Failsafe output Standard Process interface ACPIPIF √ √ √ √ - Industrial Process interface D8BACPIPIF500VCB5H √ √ √ √ √ 0V at analog output (AO) open contact (alarm relay) 1) It is possible that some malfunctions of the software under certain circumstances cannot be detected. Therefore a 100% software crash control cannot be guaranteed. ____________________________________________________________________________________________________________ optris PI – E2013-04-C 22 ____________________________________________________________________________________________________________ USB Cable Extensions The maximum USB cable length is 20m. For greater distances between PI and computer or for stand-alone solutions you should use the optional PI NetBox or the USB-Server Industry Isochron: USB-Server Industry Isochron PI NetBox ____________________________________________________________________________________________________________ optris PI – E2013-04-C 23 ____________________________________________________________________________________________________________ 8. Initial start-up Please install at first the software PI Connect from the CD. Note Further information regarding software installation as well as software features you will find in the manual supplied on the CD. Now you can connect the infrared imager into an USB port (USB 2.0) of your PC. Note If connecting the imager and the computer please plug at first the USB cable into the camera and then into the computer. If disconnecting the imager and the computer please remove at first the USB cable from the computer and then from the camera. After the software has been started, you should see the live image from the camera inside a window on your PC screen. Note At first start of software you will be asked to install the calibration data of camera (supplied on the CD). The sharpness of the image can be adjusted by turning the exterior lens ring at the camera. ____________________________________________________________________________________________________________ optris PI – E2013-04-C 24 ____________________________________________________________________________________________________________ 9. Software PIConnect 9 1 0 4 1 4 3 6 5 2 4 Note Further information regarding software installation as well as software features you will find in the manual supplied on the CD. 7 8 2 Example of software layout ____________________________________________________________________________________________________________ optris PI – E2013-04-C 25 ____________________________________________________________________________________________________________ 1 IR image from the camera 2 Temperature profile: Shows the temperatures along max. 2 lines at any size and position in the image. 3 Reference bar: Shows the scaling of temperature within the color palette. 4 5 6 Temperature of measure area: Analyses the temperature according to the selected shape, e.g. average temperature of the rectangle. The value is shown inside the IR image and the control displays. Control displays: Displays all temperature values in the defined measure areas like Cold Spots, Hot Spots, temperature at cursor, internal temperature and chip temperature. Alarm settings: Bar showing the defined temperature thresholds for low alarm value (blue arrow) and high alarm value (red arrow). The color of numbers within control displays changes to red (when temperature above the high alarm value) and to blue (when temperature below the low alarm value). 7 Histogram: Shows the statistic distribution of single temperature values. 8 Automatic / manual scaling of the palette (displayed temperature range): Man., </> (min, max), 1σ : 1 Sigma, 3σ : 3 Sigma 9 Icon for quick access to Image Subtraction function 10 Icon enabling switching between color palettes ____________________________________________________________________________________________________________ optris PI – E2013-04-C 26 ____________________________________________________________________________________________________________ Basic features of software PIConnect Extensive infrared camera software No additional costs No restrictions in licensing Modern software with intuitive user interface Remote control of camera via software Display of multiple camera images in different windows Compatible with Windows XP, Vista and 7 and LabVIEW High level of individualization for customer specific display Various language option including a translation tool Temperature display in °C or °F Different layout options for an individual setup (arrangement of windows, toolbar) Range of individual measurement parameter fitting for each application Adaption of thermal image (mirror, rotate) Individual start options (full screen, hidden, etc.) Video recording and snapshot function (IR or BI-SPECTRAL) Recording of video sequences and detailed frames for further analysis or documentation BI-SPECTRAL video analysis (IR and VIS) in order to highlight critical temperatures Adjustment of recording frequency to reduce data volume Display of snapshot history for immediate analysis ____________________________________________________________________________________________________________ optris PI – E2013-04-C 27 ____________________________________________________________________________________________________________ Extensive online and offline data analysis Analysis supported by measurement fields, hot and cold spot searching, image subtraction Real time temperature information within main window as digital or graphic display (line profile, temperature time diagram) Slow motion repeat of radiometric files and analysis without camera being connected Editing of sequences such as cutting and saving of individual images Various color palettes to highlight thermal contrasts Automatic process control Individual setup of alarm levels depending on the process BI-SPECTRAL process monitoring (IR and VIS) for easy orientation at point of measurement Definition of visual or acoustic alarms and analog data output Analog and digital signal input (process parameter) External communication of software via Comports, DLL and LabVIEW Adjustment of thermal image via reference values Temperature data analysis and documentation Triggered data collection Radiometric video sequences (*.ravi) radiometric snapshots (*.jpg,*.tiff) Text files including temp. information for analysis in Excel (*.csv, *.dat) Data with color information for standard programmes such as Photoshop or Windows Media Player (*.avi, *.jpg, *.tiff) Data transfer in real time to other software programmes via LabVIEW, DLL or Comport interfaces ____________________________________________________________________________________________________________ optris PI – E2013-04-C 28 ____________________________________________________________________________________________________________ 10. Basics of Infrared Thermometry Depending on the temperature each object emits a certain amount of infrared radiation. A change in the temperature of the object is accompanied by a change in the intensity of the radiation. Searching for new optical material William Herschel by chance found the infrared radiation in 1800. He blackened the peak of a sensitive mercury thermometer. This thermometer, a glass prism that led sun rays onto a table made his measuring arrangement. With this, he tested the heating of different colors of the William Herschel (1738 - 1822) spectrum. Slowly moving the peak of the blackened thermometer through the colors of the spectrum, he noticed the increasing temperature from violet to red. The temperature rose even more in the area behind the red end of the spectrum. Finally he found the maximum temperature far behind the red area. Nowadays this area is called “infrared wavelength area”. ____________________________________________________________________________________________________________ optris PI – E2013-04-C 29 ____________________________________________________________________________________________________________ For the measurement of “thermal radiation” infrared thermometry uses a wave-length ranging between 1 µ and 20 µm. The intensity of the emitted radiation depends on the material. This material contingent constant is described with the help of the emissivity which is a known value for most materials (see enclosed table emissivity). The electromagnetic spectrum and the area Infrared thermometers are optoelectronic sensors. They calculate the surface temperature on the basis of the emitted infrared radiation used for temperature measurement from an object. The most important feature of infrared thermometers is that they enable the user to measure objects contactless. Consequently, these products help to measure the temperature of inaccessible or moving objects without difficulties. Infrared thermometers basically consist of the following components: lens spectral filter detector electronics (amplifier/ linearization/ signal processing) The specifications of the lens decisively determine the optical path of the infrared thermometer, which is characterized by the ratio Distance to Spot size. The spectral filter selects the wavelength range, which is relevant for the temperature measurement. The detector in cooperation with the processing electronics transforms the emitted infrared radiation into electrical signals. ____________________________________________________________________________________________________________ optris PI – E2013-04-C 30 ____________________________________________________________________________________________________________ The advantages of non-contact temperature measurement are clear - it supports: temperature measurements of moving or overheated objects and of objects in hazardous surroundings very fast response and exposure times measurement without inter-reaction, no influence on the measuring object non-destructive measurement long lasting measurement, no mechanical wear Application examples: Monitoring of electronic cabinets R&D of electronics Process control extruding plastic parts R&D of electronic parts Process control at Process control manufacturing Monitoring of cables R&D of mechanical parts calendering solar modules ____________________________________________________________________________________________________________ optris PI – E2013-04-C 31 ____________________________________________________________________________________________________________ Emissivity Definition: The intensity of infrared radiation, which is emitted by each body, depends on the temperature as well as on the radiation features of the surface material of the measuring object. The emissivity (ε – Epsilon) is used as a material constant factor to describe the ability of the body to emit infrared energy. It can range between 0 and 100 %. A “blackbody” is the ideal radiation source with an emissivity of 1,0 whereas a mirror shows an emissivity of 0,1. If the emissivity chosen is too high, the infrared thermometer may display a temperature value which is much lower than the real temperature – assuming the measuring object is warmer than its surroundings. A low emissivity (reflective surfaces) carries the risk of inaccurate measuring results by interfering infrared radiation emitted by background objects (flames, heating systems, chamottes). To minimize measuring errors in such cases, the handling should be performed very carefully and the unit should be protected against reflecting radiation sources. Capability of an object to emit radiation Spectral emissivity of some materials 1 Enamel, 2 Plaster, 3 Concrete, 4 Chamotte ____________________________________________________________________________________________________________ 32 optris PI – E2013-04-C ____________________________________________________________________________________________________________ Determination of unknown emissivity ► First, determine the actual temperature of the measuring object with a thermocouple or contact sensor. Second, measure the temperature with the infrared thermometer and modify the emissivity until the displayed result corresponds to the actual temperature. ► If you monitor temperatures of up to 380°C you may place a special plastic sticker (emissivity dots – part number: ACLSED) onto the measuring object, which covers it completely. Now set the emissivity to 0,95 and take the temperature of the sticker. Afterwards, determine the temperature of the adjacent area on the measuring object and adjust the emissivity according to the value of the temperature of the sticker. Plastic sticker at metal surface ____________________________________________________________________________________________________________ optris PI – E2013-04-C 33 ____________________________________________________________________________________________________________ ► Cover a part of the surface of the measuring object with a black, flat paint with an emissivity of 0.98. Adjust the emissivity of your infrared thermometer to 0.98 and take the temperature of the colored surface. Afterwards, determine the temperature of a directly adjacent area and modify the emissivity until the measured value corresponds to the temperature of the colored surface. Shiny metal surface Blackened metal surface Note On all three methods the object temperature must be different from ambient temperature. ____________________________________________________________________________________________________________ optris PI – E2013-04-C 34 ____________________________________________________________________________________________________________ Characteristic Emissivity In case none of the methods mentioned above help to determine the emissivity you may use the emissivity tables ►Appendix A and B. These are average values, only. The actual emissivity of a material depends on the following factors: temperature measuring angle geometry of the surface thickness of the material constitution of the surface (polished, oxidized, rough, sandblast) spectral range of the measurement transmissivity (e.g. with thin films) ____________________________________________________________________________________________________________ optris PI – E2013-04-C 35 ____________________________________________________________________________________________________________ Appendix A – Emissivity Table Metals Material Aluminium Brass Copper Chrome Gold Haynes Inconel Iron Iron, casted Lead non oxidized polished roughened oxidized polished roughened oxidized polished roughened oxidized alloy electro polished sandblast oxidized non oxidized rusted oxidized forged, blunt non oxidized oxidized polished typical Emissivity 0,02-0,1 0,02-0,1 0,1-0,3 0,2-0,4 0,01-0,05 0,3 0,5 0,03 0,05-0,1 0,4-0,8 0,02-0,2 0,01-0,1 0,3-0,8 0,15 0,3-0,6 0,7-0,95 0,05-0,2 0,5-0,7 0,5-0,9 0,9 0,2 0,6-0,95 0,05-0,1 Material Lead Magnesium Mercury Molybdenum Monel (Ni-Cu) Nickel Platinum Silver Steel Tin Titanium Wolfram Zinc roughened oxidized non oxidized oxidized electrolytic oxidized black polished plate rustless heavy plate cold-rolled oxidized non oxidized polished oxidized polished polished oxidized typical Emissivity 0,4 0,2-0,6 0,02-0,1 0,05-0,15 0,1 0,2-0,6 0,1-0,14 0,05-0,15 0,2-0,5 0,9 0,02 0,1 0,1-0,8 0,4-0,6 0,7-0,9 0,7-0,9 0,05 0,05-0,2 0,5-0,6 0,03-0,1 0,02 0,1 ____________________________________________________________________________________________________________ optris PI – E2013-04-C 36 ____________________________________________________________________________________________________________ Appendix B – Emissivity Table Non Metals Material Asbestos Asphalt Basalt Carbon Carborundum Ceramic Concrete Glass Grit Gypsum Ice Limestone Paint Paper Plastic >50 µm Rubber Sand Snow Soil Textiles Water Wood non oxidized graphite non alkaline any color non transparent natural typical Emissivity 0,95 0,95 0,7 0,8-0,9 0,7-0,8 0,9 0,95 0,95 0,85 0,95 0,8-0,95 0,98 0,98 0,9-0,95 0,95 0,95 0,95 0,9 0,9 0,9-0,98 0,95 0,93 0,9-0,95 ____________________________________________________________________________________________________________ optris PI – E2013-04-C 37 ____________________________________________________________________________________________________________ Appendix C - Serial Communication (a brief overview) Introduction One of the features of the Optris PI Connect software is the ability to communicate via a serial comport interface. This can be a physical comport or a Virtual Comport (VCP). It must be available on the computer where the PI connect software is installed. Setup of the interface To enable the software for the serial communication open the Options dialog and enter the tab “Extended Communication”. Choose the mode “Comport” and select the port you want to use. Also select the baud rate that matches the baud rate of the other communication device. The other interface parameters are 8 data bits, no parity and one stop bit (8N1). This is mostly used on other communication devices too. The other station must support 8 bit data. Now you have to connect the computer with your other communication device. If this is a computer too you will have to use a null modem cable. Command list You will find the command list on the CD provided. ____________________________________________________________________________________________________________ optris PI – E2013-04-C 38 ____________________________________________________________________________________________________________ Appendix D – Interprocess Communication (IPC) The communication to the process imager device is handled by the Optris PI Connect software (Imager.exe) only. Optris supplies a dynamic link library (ImagerIPC2.dll) that serves the interprocess communication (IPC) for other attached processes. The DLL can be dynamically linked into the secondary application. Or it can be done static by a lib file too. Both Imager.exe and ImagerIPC.dll are designed for Windows XP/Vista/7 only. The application must support call-back functions. The ImagerIPC.dll will export a bunch of functions that are responsible for initiating the communication, retrieving data and setting some control parameters. Note The description of the init procedure as well as the necessary command list you will find on the CD provided. ____________________________________________________________________________________________________________ optris PI – E2013-04-C 39 ____________________________________________________________________________________________________________ Appendix E – Optris PI Connect Resource Translator Optris PI Connect is a .Net Application. Therefore it is ready for localization. Localization as a Microsoft idiom means the complete adaption of resources to a given culture. If you want to learn more about the internationalization topics please consult Microsoft’s developer documentation (e.g.: http://msdn.microsoft.com/en-us/goglobal/bb688096.aspx). If needed the localization process can be very detailed. Also the resizing of buttons or other visible resources and the support of right-to-left-languages is supported. This can be a huge effort and should be done by experts who have the appropriate tools. To limit this effort and to enable anybody to translate the resources of the PI Connect application Optris has developed the small tool “Resource Translator”. This tool helps to translate any visible text within the Optris PI Connect application. Note You will find a detailed tutorial on the CD provided. ____________________________________________________________________________________________________________ optris PI – E2013-04-C 40 ____________________________________________________________________________________________________________ Appendix F – Process Interface Analog Output: AO [yellow] GND [brown] For voltage measurements the minimum load impedance should be 10KOhm. The analog output can be used as a digital output. The voltage for “no alarm” and “alarm on” can be set within the software. The analog output (0 … 10V) has a 100 Ohm resistor in raw. With a maximum current of 10ma the voltage drop is 1V. Having an alarm LED with a forward voltage of 2V the analog output value for “alarm on” should be 3V as maximum Digital Input: DI [grey] GND [brown] ____________________________________________________________________________________________________________ optris PI – E2013-04-C 41 ____________________________________________________________________________________________________________ The digital input can be activated with a switch to the PI GND or with a low level CMOS/TTL signal: Low level 0…0.6 V; high level 2…24 V DI [grey] GND [brown] Analog Input: AI [green] GND [brown] Useful voltage range: 0 … 10 V ____________________________________________________________________________________________________________ optris PI – E2013-04-C 42 ____________________________________________________________________________________________________________ Relay output on Industrial process interface [ACPIPIF500VCB5H] The analog output has to be set to „digital“. REL1: Umax = 30VDC Imax = 400mA ____________________________________________________________________________________________________________ optris PI – E2013-04-C 43