1
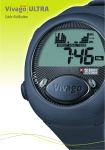
1
Vivago® Personal Wellness Manager
User’s guide
2
3
Contents
Vivago® Personal Wellness Manager User manual
Vivago Personal Wellness Manager Using the Vivago® Personal Wellness Manager
Fastening the watch The buttons function Using the Vivago® Personal Wellness Manager
Setting mode In the set up mode the buttons work as follows: 1. Setting time and date
1.1 Setting the time
1.2 24/12h display
1.3 setting the year
1.4 Setting the month
1.5 Setting the day
1.6 Type of date field
2. Setting the alarm
2.1 Alarm on/off/automatic snooze
2.2 Setting the wake-up time 3. Other settings
3.1 Setting the limit value for sleep 3.2 Resetting the memory 5. Calorie expenditure settings
5.1 Setting the weight
5.2 Setting the height
5.3 Setting the age (year of birth)
5.4 Setting the sex
5.5 Setting the user activity type What does Vivago Personal Wellness Manager tell you?
1. Watch
2. Alarm (WAKE)
3. SLEEP
3.1 Last nights sleep time
3.2 Average sleep time (ST 7d, Sleep Time 7days)
3.3 Average sleep time (ST 4w, Sleep Time 4 weeks)
3.4 The shortest sleep time, 4 days (ST 7d, Sleep Time 4 days, MIN) 3.5 The longest sleep time, 7 days (ST 7d, Sleep Time 7 days, MAX)
4. Activity (ACTIVITY)
4.1 Activity today (AC 1d, Activity today) 4.2 Daytime activity
4.3 Average activity (AC 4w, Activity 4 weeks)
4.4 Changes in activity (AC CH, Activity Change)
5. Calorie expenditure (CAL)
5.1 Today’s cumulative calorie expenditure (CAL cu)
5.2 Yesterdays calorie expenditure 5.3 Changes in the expenditure of last 7 days (CAL 7d) Using the Vivago wellness watch Using water when doing housework Shower, bath and sauna Removing and storing the watch Cleaning the watch Charging the watch Maintenance Liability Warranty Important!
4
4
5
5
5
6
6
6
7
7
7
7
7
7
7
8
8
8
9
9
9
10
10
10
10
10
10
11
11
11
11
11
12
12
12
12
12
12
12
13
13
13
13
13
13
14
14
14
14
14
14
15
15
15
15
4
Vivago® Personal Wellness Manager
User manual
Congratulations! You have chosen the well-being! Vivago Personal Wellness Manager, developed in Finland, is the first device in the
world to continuously monitor your activity and your sleep patterns.
The wellness watch measures your movement activity from which it calculates values for how
long you have slept last night, how active you have been and how many calories you have
burned. These values are shown on the watch’s display. Besides showing the time, the watch
is equipped with date and alarm functions.
According to several surveys, enough sleep and exercise are crucial for the human’s well being. By using your watch to monitor your exercise and sleep time, and changes in these, you
can maintain and increase your own health and well-being.
Vivago Personal Wellness Manager measures both metabolic energy expenditure and additional expenditure gained from exercise and other physical activity. The monitoring continues
twenty-four hours a day.
Vivago Personal Wellness Manager
•
•
•
•
•
Measures continuously activity
Shows the development of amount of activity
Analyses amount of sleep and its development
Measures the over all calorie expenditure, not only expenditure during exercise,
without an transmitter belt
A watch with automatic snooze function
Using the
Vivago® Personal Wellness Manager
The Personal Wellness Manager collects information of your activity
level. The collecting of data begins when you start using the watch.
The first information is ready to be studied after one day’s use but the
full benefit of your watch you get after one months use of the watch,
when it has collected enough data.
Fastening the watch
Fasten the watch on your wrist so that it feels comfortable and does not restrict your wrist
movements. However, please note that it should be tight enough to ensure that the bottom
face of the watch is in close contact with your skin, even when you move your arm around.
This is important, because your watch can only monitor the activity level and physiological
signals when it is in direct contact with your skin. The Watch is too loose if it can be rotated.
Do not insert pads or other materials between the watch and the wrist.
The watch knows if it is on the wrist or not. If the watch is removed from the wrist or it is too
loose on the wrist, it stops measuring activity. From this time there will not be measurement
data available.
The buttons function
The watch has three buttons: Mode (1), Vivago (2) and Light (3). With the Mode and Vivago buttons you can browse through the different menus, see figure below. By Pressing the
Light button the background light will switch on. The light will automatically switch off after
30 seconds.
1
3
2
5
6
Using the
Vivago® Personal Wellness Manager
Setting mode
By a long push on Light and Mode buttons simultaneously you enter the setting mode. The
setting mode depends on in which display mode you enter the settings. The chart below
shows how to enter different setting modes.
Not pushing any button for 30 seconds will, from all modes, return the watch to the basic
watch mode.
In the set up mode the buttons work as follows:
- LIGHT:
- MODE:
Changes settings.
Changes the numbers, for instance
from hours to minutes when setting
the time.
- VIVAGO: Confirms the setting and moves you
to next set-up mode.
Settings
MODE
LIGHT
VIVAGO
MODE
1. Watch
Settings:
LIGHT + MODE
Setting the time
24/12h display
Setting the year
Setting the month
Setting the day
Type of date field (d.m / day / empty)
MODE
2. Alarm
MODE
Next
value
Confim/
next setting
LIGHT
MODE
VIVAGO
LIGHT
LIGHT
Settings:
LIGHT + MODE
Alarm (off / automatic snooze / on)
Setting the wake-up time
MODE
Change
value
VIVAGO
MODE
VIVAGO
LIGHT
VIVAGO
LIGHT
VIVAGO
LIGHT
VIVAGO
Change
value
Next
value
LIGHT
Confim/
next setting
VIVAGO
LIGHT
MODE
VIVAGO
LIGHT + MODE
Change
value
Next
value
Confim/
next setting
Limit value for sleep 1-10 (1=sensitive, 10=ins., default=6)
Clearing the memory (no / yes)
LIGHT
VIVAGO
LIGHT
VIVAGO
3. Sleep / 4. Activity
5. Calorie consumption
Setting the weight
Setting the height
Setting the year of birth
Setting the sex
User activity type (norm / high / low)
Settings:
Settings:
LIGHT + MODE
Change
value
Next
value
Confim/
next setting
LIGHT
MODE
VIVAGO
LIGHT
MODE
VIVAGO
LIGHT
MODE
VIVAGO
LIGHT
VIVAGO
LIGHT
VIVAGO
7
1. Setting time and date
Make sure the watch shows time, in other words is in watch mode.
1.1 Setting the time
•
•
•
•
•
•
Push Light and Mode buttons simultaneously until the text: TIME appears on the
display. In this mode you can set the time.
The hour starts blinking.
Set the right time by pushing the Light button.
Proceed to setting the minutes by pushing Mode button. The minute starts to blink.
Set the minutes by pushing the Light button.
When the time is correct push the Vivago button. The watch will move to next
settings.
1.2 24/12h display
•
•
•
•
The text: CLOCK appears on the display. In this mode you can choose if you watch
sows the time in 24 or 12h.
On the display the text 24H or 12H starts blinking, depending on which time mode
the watch has been in.
By pushing Light button you can change the setting.
When you have chosen the time mode you prefer, push Vivago button and the
watch moves on to next set up.
1.3 setting the year
•
•
•
•
The text: YEAR appears on the display. In this mode you set the right year.
The last digits of the year that has been set starts blinking.
By pushing Light button you can change to the correct year.
When you have chosen the year, push Vivago button and the watch moves on to
next set up
1.4 Setting the month
•
•
•
•
The text: MO. appears on the display. In this mode you set the right month.
The month that has been set to the watch starts blinking.
By pushing Light button you can set the right month.
When you have chosen the month, push Vivago button and the watch moves on to
next set up.
1.5 Setting the day
•
•
•
•
The text: DAY appears on the display. In this mode you set the right day of the
month.
The day that earlier has been set to the watch starts blinking.
By pushing Light button you can set the right day.
When you have chosen the day, push Vivago button and the watch moves on to
next set up.
1.6 Type of date field
•
The text: VIEW appears on the display. In this mode you define what is shown in the
field above the date when the watch is in time mode.
• Depending on the mode the watch has been in one of the texts below starts blinking
in the display.
• By pushing Light button you can determine which of following options is shown:
- 14.6. (day. month) date
- MON or TUE, WED, THU, FRI, SAT, SUN, weekday
- Empty field
• When you have chosen the type of date field you prefer, push Vivago button and the
watch goes back to time mode.
8
2. Setting the alarm
Move to the Alarm menu by pushing Mode. (Menu 2, see menu structure). On the display is the text WAKE. If the Alarm is activated, the
display shows the wake-up time, if not two lines (-:-) appear on the
display.
2.1 Alarm on/off/automatic snooze
•
•
•
•
Push Light and Mode buttons simultaneously, until the time or -:-disappears from
the display. The text: WAKE is still shown on the display. In this mode you can
activate or deactivate the alarm and the automatic snooze.
Depending on the mode the watch last has been in one of the texts below starts
blinking in the display.
By pushing Light button you can determine which of following alarm options you
prefer:
- OFF, alarm off
- AUTO, snooze activated
- ON, normal alarm on
When you have activated or deactivated preferred alarm, push Vivago button. If you
have chosen OFF, the watch automatically returns to alarm menu where two lines are
shown -:-. If you chose ON or AUTO, the watch moves to alarm settings.
2.2 Setting the wake-up time
•
•
•
•
•
•
The text: WAKE appears on the display. In this mode you can set the wake-up time.
The hour on the watch starts blinking.
Set the right hour by pushing Light button.
Proceed to setting the minutes by pushing Mode button. The minute starts to blink.
Set the minutes by pushing the Light button.
When the wake-up time is set push the Vivago button. The watch moves back to
wake menu, where the text: WAKE and the time you just set appears.
9
3. Other settings
Move to sleep or activity menus by pushing Mode button. (menu 3 or
4, see menu structure).
3.1 Setting the limit value for sleep
•
•
•
•
Push Light and Mode buttons simultaneously, until the text SLEEP appears on the
display. In this mode you can set the limit values for sleep, in other words at which
activity level the watch assumes you sleep.
The limit value starts blinking on the display. The limit blinking is the same as the last
set sleep limit value.
By pushing Light button you can determine which limit value from 1-10 suits you.
The default value is 6. Choose a low limit value if the watch counts too long sleep
times for you. Choose a high limit value if you know your sleep is restless or the
watch counts too short sleep times for you.
When you have chosen the limit value for sleep, push Vivago button. The watch
returns to the next menu.
3.2 Resetting the memory
•
•
•
•
•
The text: CLEAR appears on the display. In this mode you can clear the watch’s
measurement data and memory.
The text: NO starts blinking.
You can cancel the clear operation by pushing the Vivago button.
To clear the memory choose YES by pushing the Light button and confirm by
pushing the Vivago button.
Please note that this will reset all settings.
10
5. Calorie expenditure settings
Move to the calorie settings by pushing Mode button.
5.1 Setting the weight
-
•
•
•
Push Light and Mode buttons at the same time, until the text WGT appears on the
display. You can now enter your weight.
Set the kilos by pushing the Light button and move to 10 kilos setting by pushing
Mode button.
Set the 10 kilos by pushing the Light button and move to 100 kilos setting by
pushing Mode button.
When you have set your weight, push Vivago button and the watch moves on to
next set up.
5.2 Setting the height
•
•
•
•
The text: HGT appears on the display.
Set the centimetres by pushing the Light button and move to 10 centimetres setting
by pushing Mode button.
Set the 10 centimetres by pushing the Light button and move to meter setting by
pushing Mode button.
Set the meters by pushing Light button and confirm by pushing Vivago button.
5.3 Setting the age (year of birth)
•
•
•
•
The text: Year appears on the display and the default value 1980.
Set the year by pushing the Light button and move to decade setting by pushing
Mode button.
Set the decade by pushing the Light button and move to century setting by pushing
Mode button.
Set the century by pushing Light button and confirm by pushing Vivago button.
5.4 Setting the sex
•
•
The text: SEX and default value F appears on the display.
Choose by pushing Light button either F (= Female) or M (=Male) and confirm by
pushing Vivago button.
5.5 Setting the user activity type
•
•
•
•
The energy expenditure is measured from the movement activity. Gesticulating is very
individual, and effects the calculated energy expenditure. By setting the activity type,
you can optimise the watch to calculate the correct expenditure for you.
The text: NORM appears on the display.
Confirm by pushing Vivago button.
If you know that you gesticulate a lot, choose HIGH by pressing the Light button and
confirm by pushing Vivago button.
If you know that you gesticulate very little, choose LOW by pressing the Light button
and confirm by pushing Vivago button.
What does Vivago Personal Wellness
Manager tell you?
In the following chapter the different menus and features of the Personal Wellness Manager are described.
1. Watch
In the basic display mode the watch shows the time and the date or alternatively the day of
the week. On the displays right side there is a watch symbol.
The watch can be in either 12 or 24 hours mode. When using the 12 hours mode am/pm will
be shown on the display. The date is shown in either day.month or just in weekday (mon, tue,
wed, thu, fri, sat, sun). The field can also be empty. See watch settings, if you like to set the
time and date or change the watch or date layout.
The watch will always, from all menus, return to the basic watch mode in 30 seconds if no
buttons have been pushed. By a long push of mode button you can always immediately return to watch mode.
2. Alarm (WAKE)
By once pushing the Mode button you will see the time of wake up alarm. The watch symbol
is still on the right side of the display. If the display shows two lines on the place of the time
the alarm is not activated. To set the alarm time, see watch settings.
The wake-up beep starts on the chosen time and stops by pushing any button. The beep will
also automatically end after one minute.
It is possible to set an automatic snooze (see watch setting). When the snooze is activated
the watch will wake you up only when it notices that you have moved after the set wake-up
time. The wake-up will at the latest start half an hour after set wake-up time. This way, if you
sleep peacefully and do not move, the snooze automatically gives you 30 min of extra sleeping time. If you activate the snooze and for example set your alarm on 7:00 the watch wakes
you up between 7:00 and 7:30 when you start to move but at the latest at 7:30.
3. SLEEP
By pushing the Vivago button in this menu you enter the sleep displays (3.1 – 3.5). You can
browse these submenus by pushing Mode button. By again pushing Vivago button in any
submenu you get back to the upper menu.
3.1 Last nights sleep time
This mode, graphically shows, the movement activity (activity histogram) measured by the
watch and the calculated sleep time (on the picture it is 7 hours 46 minutes) from last night.
On the right side of the display there is a symbol of sleep.
One column of the histogram describes the average of one hour of movement activity. The
picture is being drawn to the display one column at a time and shows movement activity from
the last night between 18:00-12:00 o’clock. During the drawing the display shows which hours
activity it concerns. When the entire picture has been drawn the display shows the total time
of sleep last night. At 8:00 every morning when the picture will be up-dated, you can see the
histogram and your sleep hours from last night.
In the night, before 8:00 in the morning, your sleep time and histogram are therefore from
the night before.
The watch measures your wrist movements. It will detect that you sleep when there is only
very little movements for long enough time. Because of this it is possible to count an estimate
of your sleep time. The height of the columns on the display describes your sleep. If you have
slept for an entire hour there will not be a visible column. Therefore a continuous good sleep
of 8 hours will show as blank period in the histogram. Short awakenings might not show in
the display, because the column height describes the average movement.
The arrow on the right side of the Histogram indicates if your sleep time is longer (arrow up),
shorter (arrow down) or about same (arrow linear) than your average sleep time during the
last four weeks.
Because the sleep time calculation is based on the movement measurement, the displayed
sleep length might not totally reflect your own observation of sleep. If you in the evening for
instance very peacefully watch TV, the watch might count this as sleep time even though you
are awake.
11
12
If there is not enough data collected, if you have not worn the watch continuously, two lines
(- : -) appears on the display.
3.2 Average sleep time (ST 7d, Sleep Time 7days)
In this mode the display shows the average sleep time for the last 7 days (on the picture it is
8 hours 20 minutes. The symbol for sleep is shown on the right side of the display. The data
up-dates once a day, 8:00 in the morning.
If there is not enough data from the last 7 days collected to measure the average, if you have
not worn the watch continuously, two lines (- : -) appears on the display.
3.3 Average sleep time (ST 4w, Sleep Time 4 weeks)
In this mode the display shows the average sleep time for the last 4 weeks (on the picture it
is 8 hours 5 minutes). The symbol for sleep is shown on the right side of the display. The data
up-dates once a day, 8:00 in the morning.
If there is not enough data from the last 4 weeks collected to measure the average, if you have
not worn the watch continuously, two lines (- : -) appears on the display.
3.4 The shortest sleep time, 4 days (ST 7d, Sleep Time 4 days, MIN)
In this mode the display shows the shortest sleep time for the last 7 days (on the picture it is
6 hours 5 minutes). The symbol for sleep is shown on the right side of the display. The data
up-dates once a day, 8:00 in the morning.
3.5 The longest sleep time, 7 days (ST 7d, Sleep Time 7 days, MAX)
In this mode the display shows the longest sleep time for the last 7 days (on the picture it is
8 hours 50 minutes). The symbol for sleep is shown on the right side of the display. The data
up-dates once a day, 8:00 in the morning.
4. Activity (ACTIVITY)
By pushing the Vivago button in this menu you get to the activity displays
(4.1 – 4.4). You can browse these submenus by pushing Mode button. By again pushing the
Vivago button in any submenu, you get back to the upper menu.
4.1 Activity today (AC 1d, Activity today)
This mode shows the average of today’s activity (on the picture it is 26). The data is up-dated once per hour and shows you your activity level during the day. In the night, after 20:00
o’clock, the data describes the average activity level of the whole day.
The activity is presented in a reading between 0-100. 100 represent very high activity, like
sport activities. In practice the displayed average of one day’s activity is typically between 5
and 40, because higher activity levels, for example when exercising, are only achieved for a
short period of the day.
If there is not enough data collected from the day, if you have not worn the watch continuously, two lines (- : -) appears on the display.
4.2 Daytime activity
This mode shows graphically the daytime activity histogram measured by the watch. The display shows the average activity level (on the picture it is 34) from yesterday (8:00-20:00). On
the right side of the display there is a symbol of activity.
One column of the histogram describes the average of one hour of activity. The picture is
drawn to the display one column at a time and shows activity from yesterday between 6:0024:00 o’clock no matter when you look at the histogram. During the drawing the display shows
the hour digits respectively. When the entire picture has been drawn, the display shows the
average activity for the whole day. At 20:00 every night, when the picture will be up-dated,
you can see the histogram from yesterday.
If there is not enough data collected from the last day, if you have not worn the watch continuously, two lines (- : -) appears on the display.
One column of the histogram describes the average of one hour of activity. The columns are
scaled between 0 and 50 so when the column is at its highest, your activity has been between
50 and 100 for that hour. This means very high activity.
13
The arrow on the right side of the Histogram indicates if your activity level is higher (arrow
up), lower (arrow down) or about same (arrow linear) that your average activity level during
last month.
4.3 Average activity (AC 4w, Activity 4 weeks)
In this mode the display shows the average activity level for the last 4 weeks (on the picture
it is 35). On the right side the display shows the symbol for activity. The data up-dates once a
day, every night at 20:00,
If there is not enough data from the last 4 weeks collected, if you have not worn the watch
continuously, two lines (- : -) appears on the display.
4.4 Changes in activity (AC CH, Activity Change)
This mode shows the change in your activity level. Today’s (8:00-20:00) activity is compared to
activity level of 4 weeks. In the picture the change is 1.40 which means that the current activity level is 40 % higher than before. The reading is calculated by dividing today’s activity with
the average activity for four months. If the reading is 1.00 your activity is at the same level as
normally. If the reading is under 1 your activity level is lower than normally (for instance 0.80
equals 80 % of normal activity level).
The arrow on the right side of the display indicates if today’s activity level is higher (arrow up),
lower (arrow down) or about same (arrow linear) that your average activity level last month.
5. Calorie expenditure (CAL)
By pushing the Vivago button in this menu you enter the calorie expenditure displays (5.1
– 5.3). You can browse these submenus by pushing Mode button. By again pushing Vivago
button in any submenu you get back to the upper menu.
5.1 Today’s cumulative calorie expenditure (CAL cu)
This mode shows the over all calorie expenditure of today. The values are up-dated once
per hour. The calorie expenditure is measured from the activity signal assuming that the day
starts at 0.00 o’clock and ends at 24.00 o’clock. When the reading is less than 3000 calories
it is shown as Kcal and readings higher in Mcal. In other words reading 2900 means 2900 kcal
and 3.20 equals 3200 kcal.
5.2 Yesterdays calorie expenditure
This mode shows the over all calorie expenditure of yesterday. The arrow on the right side
of the display indicates if yesterday’s activity level has been higher (arrow up), lower (arrow
down) or about same (arrow linear) that your average activity level last 7 days.
5.3 Changes in the expenditure of last 7 days (CAL 7d)
This mode, more detailed, shows the change in your calorie expenditure compared to 7 days
average. The arrow on the right side of the display indicates the direction of the change. The
reading of the display shows the changes in the expenditure in percentage.
When the arrow points up and you get the reading 1.20 it means that you have expended 20 %
more calories than in average the last seven days. When the Arrow points down and the reading 0.79 means that you have used 21 % less calories than in average the last 7 days. In other
words the calorie expenditure is 79 % of the average for last 7 days.
The measuring of calorie expenditure is based on the average expenditure of a normal person, which varies from person to person. The result is also affected by how tight you fasten
the watch on your wrist. If the watch is loosely on your wrist, it measures a lower expenditure
than you actually have. To get the most accurate reading, always wear the watch in the same
way and follow the changes compared to 7 days average.
14
Using the Vivago wellness watch
Using water when doing housework
The wellness watch is waterproof. You do not need to take the watch off while for example
cleaning, washing your hands or doing the dishes. Chemicals and detergents that contents
solvents like alcohol might damage your watch.
Shower, bath and sauna
You can wear the watch in the shower and bath. The watch cannot be used in warm conditions as in a sauna. Do not wear the watch in the sauna.
Removing and storing the watch
If you take off the watch do not leave it in direct sunlight. High temperatures might damage
the watch. Keep the watch out of reach of children and pets.
The watch automatically identifies if it is on wrist. In the field of date on the display the text:
WRIST and date will alternate when the watch is removed from wrist. When the watch is off
wrist the measurement of activity will not function. If needed it is possible to adjust the sensitivity of the watch’s on wrist identification.
Cleaning the watch
Regular cleaning of the watch is of utmost importance to ensure that the measurement function works properly. If the watch is in constant use, it is good to clean it once a
week. Clean the bottom face of the watch and then inside of the straps with a damp, soft, nonfluffy cloth. You can use mild soap or washing liquid. Dry thoroughly with a dry cloth.
Do not use washing liquids that contain solvents like alcohol. These might damage the plastic
parts of the watch. Do not scrape or scratch your watch.
Charging the watch
The watch has a rechargeable battery, which needs to be charged every six moths using the
charger included in the package. A symbol of a battery appears on the right side of the display when the battery is getting empty. The text BATT will also blink the display.
Place the charger on the watch as shown on the picture and plug the charger in the power
socket. Make sure the charger is correctly placed on the watch. Place the charger on the same
side as the mode button.
When the charger is correctly attached and it starts to charge the watch, a symbol of the
charging process appears on the display. When the battery is full the display shows a picture
of a full battery. You can detach the charger from the watch and the socket.
15
Maintenance
Regular cleaning of the watch is essential to assure that the product works correctly. The battery must be charged with about 6 months intervals.
IST Oy is responsible for the service of damaged products.
Liability
The watch is not a medical appliance, and it is not intended for diagnosing or monitoring
medical conditions.
The manufacturer is not responsible for malfunctions of the system, which are caused by the
system being used and maintained against the manner described in the operating instructions.
Warranty
The Vivago Personal Wellness Manager, manufactured by IST International Security Technology Oy, has a warranty of 12 months from purchase date. The warranty covers the cost of
repairing any defect in the system caused by faults in assembly, manufacture or raw materials.
The warranty does not cover any damage that is caused or occasioned by improper use or
user’s negligence. It does not cover any damage caused by the system not being used and
maintained in the manner described in the operating instructions, nor by an external factor
outside the manufacturer’s reasonable control or normal wear and tear.
Important!
•
•
•
•
•
•
The watch monitors your general well-being. It should not be used to monitor a
specific medical condition.
The watch is manufactured of non-irritant components.
Keep the product dry and clean. Rain, humidity and various fluids may contain
chemical compounds that can corrode the product materials.
Do not open the product, this damages the product. Opening the product should
only be done by IST Oy.
Do not drop, hit or shake the watch. Rough handling may damage the electrical
circuits inside the product.
Do not paint the product. Paint may inhibit its proper function.
16
IST International Security Technology Oy
Melkonkatu 16 A • FIN-00210 Helsinki • Finland • www.ist.fi


![SS HNBL-018 Owners manual HN1004-5 [EN] A3.indd - Jouef](http://vs1.manualzilla.com/store/data/006909007_1-61f91df4c9e84909195a3d6de9b86041-150x150.png)