1
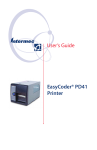
User’s Guide
EasyCoder PX4i
Bar Code Label
Printer
(Fingerprint Version)
User’s Guide
EasyCoder PX4i
Bar Code Label
Printer
(Fingerprint Version)
Intermec Technologies Corporation
Worldwide Headquarters
6001 36th Ave.W.
Everett, WA 98203
U.S.A.
www.intermec.com
The information contained herein is proprietary and is provided solely for the purpose of
allowing customers to operate and service Intermec-manufactured equipment and is not to be
released, reproduced, or used for any other purpose without written permission of Intermec
Technologies Corporation.
Information and specifications contained in this document are subject to change without prior
noticed and do not represent a commitment on the part of Intermec Technologies Corporation.
© 2003-2008 by Intermec Technologies Corporation. All rights reserved.
The word Intermec, the Intermec logo, Norand, ArciTech, CrossBar, Data Collection Browser,
dcBrowser, Duratherm, EasyCoder, EasyLAN, Enterprise Wireless LAN, EZBuilder,
Fingerprint, i-gistics, INCA (under license), InterDriver, Intermec Printer Network Manager,
IRL, JANUS, LabelShop, Mobile Framework, MobileLAN, Nor*Ware, Pen*Key, Precision Print,
PrintSet, RoutePower, TE 2000, Trakker Antares, UAP, Universal Access Point, and Virtual
Wedge are either trademarks or registered trademarks of Intermec Technologies Corporation.
There are U.S. and foreign patents as well as U.S. and foreign patents pending.
Throughout this manual, trademarked names may be used. Rather than put a trademark (™ or ®)
symbol in every occurrence of a trademarked name, we state that we are using the names only in
an editorial fashion, and to the benefit of the trademark owner, with no intention of
infringement.
There are U.S. and foreign patents pending.
The name Centronics is wholly owned by GENICOM Corporation.
Microsoft is a registered trademark of Microsoft Corporation.
TrueDoc is a registered trademark of Bitstream, Inc.
TrueType is a trademark of Apple Computer Inc.
Unicode is a trademark of Unicode Inc.
Windows is a trademark of Microsoft Corporation.
ii
EasyCoder PX4i Bar Code Label Printer User’s Guide (Fingerprint Version)
Document Change Record
This page records changes to this document. The document was
originally released as Version -00.
Version
Number Date
Description of Change
-00
05/2004 For preproduction DAT printers.
-01
09/2004 For preproduction MAT printers.
-001
06/2008 Revised to incorporate new changes and
brought into FrameMaker 8.
EasyCoder PX4i Bar Code Label Printer User’s Guide (Fingerprint Version)
iii
iv
EasyCoder PX4i Bar Code Label Printer User’s Guide (Fingerprint Version)
Contents
Before You Begin. . . . . . . . . . . . . . . . . . . . . . . . . . . . . . . . . . . . . . . . . . . . . . . . . . . . . x
Safety Summary . . . . . . . . . . . . . . . . . . . . . . . . . . . . . . . . . . . . . . . . . . . . . . x
Do not repair or adjust alone . . . . . . . . . . . . . . . . . . . . . . . . . . . . . x
First aid . . . . . . . . . . . . . . . . . . . . . . . . . . . . . . . . . . . . . . . . . . . . . x
Resuscitation . . . . . . . . . . . . . . . . . . . . . . . . . . . . . . . . . . . . . . . . . x
Energized equipment . . . . . . . . . . . . . . . . . . . . . . . . . . . . . . . . . . . x
Safety Icons . . . . . . . . . . . . . . . . . . . . . . . . . . . . . . . . . . . . . . . . . . . . . . . . xi
Global Services and Support . . . . . . . . . . . . . . . . . . . . . . . . . . . . . . . . . . . . xi
Warranty Information . . . . . . . . . . . . . . . . . . . . . . . . . . . . . . . . . xi
Web Support . . . . . . . . . . . . . . . . . . . . . . . . . . . . . . . . . . . . . . . . xii
Telephone Support . . . . . . . . . . . . . . . . . . . . . . . . . . . . . . . . . . . xii
Service Location Support . . . . . . . . . . . . . . . . . . . . . . . . . . . . . . xiii
Who Should Read This Manual . . . . . . . . . . . . . . . . . . . . . . . . . . . . . . . . xiii
Related Documents . . . . . . . . . . . . . . . . . . . . . . . . . . . . . . . . . . . . . . . . . xiii
1 Introduction
. . . . . . . . . . . . . . . . . . . . . . . . . . . . . . . . . . . . . . . . . . . . . . . . . . . . .1
Description of EasyCoder PX4i Printer. . . . . . . . . . . . . . . . . . . . . . . . . . . . . . . . . . . . 2
Safety Summary . . . . . . . . . . . . . . . . . . . . . . . . . . . . . . . . . . . . . . . . . . . . . . . . . . . . . 3
Product Identification . . . . . . . . . . . . . . . . . . . . . . . . . . . . . . . . . . . . . . . . . . . . . . . . . 3
2 Installation
. . . . . . . . . . . . . . . . . . . . . . . . . . . . . . . . . . . . . . . . . . . . . . . . . . . . . . .5
Unpacking the Printer. . . . . . . . . . . . . . . . . . . . . . . . . . . . . . . . . . . . . . . . . . . . . . . . . 6
Front View . . . . . . . . . . . . . . . . . . . . . . . . . . . . . . . . . . . . . . . . . . . . . . . . . . 7
Rear View. . . . . . . . . . . . . . . . . . . . . . . . . . . . . . . . . . . . . . . . . . . . . . . . . . . 8
Media Compartment . . . . . . . . . . . . . . . . . . . . . . . . . . . . . . . . . . . . . . . . . . 9
Print Mechanism . . . . . . . . . . . . . . . . . . . . . . . . . . . . . . . . . . . . . . . . . . . . 10
Connecting the Printer . . . . . . . . . . . . . . . . . . . . . . . . . . . . . . . . . . . . . . . . . . . . . . . 11
Computer. . . . . . . . . . . . . . . . . . . . . . . . . . . . . . . . . . . . . . . . . . . . . . . . . . 11
RS-232 Serial Interface (“uart1:”) . . . . . . . . . . . . . . . . . . . . . . . . . . . . . . . . 11
USB Interface (“usb1:”) . . . . . . . . . . . . . . . . . . . . . . . . . . . . . . . . . . . . . . . 11
Optional Interface and Network Boards
(“uart2:”, “uart3:”, “uart4:”, “uart5:”, “centronics:”, and “net1:”) . . . . . . 11
Controls and Indicators . . . . . . . . . . . . . . . . . . . . . . . . . . . . . . . . . . . . . . . . . . . . . . 12
Indicator Lamps . . . . . . . . . . . . . . . . . . . . . . . . . . . . . . . . . . . . . . . . . . . . . 12
Display . . . . . . . . . . . . . . . . . . . . . . . . . . . . . . . . . . . . . . . . . . . . . . . . . . . . 13
Keyboard . . . . . . . . . . . . . . . . . . . . . . . . . . . . . . . . . . . . . . . . . . . . . . . . . . 13
EasyCoder PX4i Bar Code Label Printer User’s Guide (Fingerprint Version)
v
Beeper . . . . . . . . . . . . . . . . . . . . . . . . . . . . . . . . . . . . . . . . . . . . . . . . . . . . 15
3 Starting Up
. . . . . . . . . . . . . . . . . . . . . . . . . . . . . . . . . . . . . . . . . . . . . . . . . . . . . 17
Startup Files. . . . . . . . . . . . . . . . . . . . . . . . . . . . . . . . . . . . . . . . . . . . . . . . . . . . . . . 18
Memory Card . . . . . . . . . . . . . . . . . . . . . . . . . . . . . . . . . . . . . . . . . . . . . . . . . . . . . 18
Switching On the Printer . . . . . . . . . . . . . . . . . . . . . . . . . . . . . . . . . . . . . . . . . . . . . 20
4 Loading Media
. . . . . . . . . . . . . . . . . . . . . . . . . . . . . . . . . . . . . . . . . . . . . . . . . 23
Tear-Off (Straight-Through) . . . . . . . . . . . . . . . . . . . . . . . . . . . . . . . . . . . . . . . . . . 24
Cut-Off . . . . . . . . . . . . . . . . . . . . . . . . . . . . . . . . . . . . . . . . . . . . . . . . . . . . . . . . . . 29
Peel-Off (Self-Strip) . . . . . . . . . . . . . . . . . . . . . . . . . . . . . . . . . . . . . . . . . . . . . . . . . 34
Internal Batch Takeup (Roll-to-Roll) . . . . . . . . . . . . . . . . . . . . . . . . . . . . . . . . . . . . 40
External Supply (Fanfold) . . . . . . . . . . . . . . . . . . . . . . . . . . . . . . . . . . . . . . . . . . . . 47
5 Loading Ribbon for Thermal Transfer Printing
. . . . . . . . . . 51
Loading Ribbon. . . . . . . . . . . . . . . . . . . . . . . . . . . . . . . . . . . . . . . . . . . . . . . . . . . . 52
6 Setting Up the Printer
. . . . . . . . . . . . . . . . . . . . . . . . . . . . . . . . . . . . . . . . 59
Description . . . . . . . . . . . . . . . . . . . . . . . . . . . . . . . . . . . . . . . . . . . . . . . . . . . . . . . 60
Default Setup. . . . . . . . . . . . . . . . . . . . . . . . . . . . . . . . . . . . . . . . . . . . . . . . . . . . . . 61
Reading the Current Setup . . . . . . . . . . . . . . . . . . . . . . . . . . . . . . . . . . . . . . . . . . . 62
Setup Parameters . . . . . . . . . . . . . . . . . . . . . . . . . . . . . . . . . . . . . . . . . . . . . . . . . . .
Serial Communication. . . . . . . . . . . . . . . . . . . . . . . . . . . . . . . . . . . . . . . .
Baud Rate . . . . . . . . . . . . . . . . . . . . . . . . . . . . . . . . . . . . . . . . . .
Character Length . . . . . . . . . . . . . . . . . . . . . . . . . . . . . . . . . . . .
Parity . . . . . . . . . . . . . . . . . . . . . . . . . . . . . . . . . . . . . . . . . . . . .
Stop Bits . . . . . . . . . . . . . . . . . . . . . . . . . . . . . . . . . . . . . . . . . . .
Flow Control . . . . . . . . . . . . . . . . . . . . . . . . . . . . . . . . . . . . . . .
New Line . . . . . . . . . . . . . . . . . . . . . . . . . . . . . . . . . . . . . . . . . .
vi
62
62
63
63
63
63
64
64
EasyCoder PX4i Bar Code Label Printer User’s Guide (Fingerprint Version)
Receive Buffer . . . . . . . . . . . . . . . . . . . . . . . . . . . . . . . . . . . . . . . 65
Transmit Buffer . . . . . . . . . . . . . . . . . . . . . . . . . . . . . . . . . . . . . . 65
Feed Adjust. . . . . . . . . . . . . . . . . . . . . . . . . . . . . . . . . . . . . . . . . . . . . . . . . 65
Start Adjust . . . . . . . . . . . . . . . . . . . . . . . . . . . . . . . . . . . . . . . . . 65
Stop Adjust . . . . . . . . . . . . . . . . . . . . . . . . . . . . . . . . . . . . . . . . . 65
Recommended Feed Adjustments . . . . . . . . . . . . . . . . . . . . . . . . 66
Media . . . . . . . . . . . . . . . . . . . . . . . . . . . . . . . . . . . . . . . . . . . . . . . . . . . . . 66
Media Size . . . . . . . . . . . . . . . . . . . . . . . . . . . . . . . . . . . . . . . . . . 66
Media Type . . . . . . . . . . . . . . . . . . . . . . . . . . . . . . . . . . . . . . . . . 69
Paper Type. . . . . . . . . . . . . . . . . . . . . . . . . . . . . . . . . . . . . . . . . . 70
Contrast . . . . . . . . . . . . . . . . . . . . . . . . . . . . . . . . . . . . . . . . . . . . 72
Testfeed . . . . . . . . . . . . . . . . . . . . . . . . . . . . . . . . . . . . . . . . . . . . 73
Print Defines . . . . . . . . . . . . . . . . . . . . . . . . . . . . . . . . . . . . . . . . . . . . . . . 73
Head Resistance . . . . . . . . . . . . . . . . . . . . . . . . . . . . . . . . . . . . . . 73
Testprint . . . . . . . . . . . . . . . . . . . . . . . . . . . . . . . . . . . . . . . . . . . 73
Print Speed . . . . . . . . . . . . . . . . . . . . . . . . . . . . . . . . . . . . . . . . . 75
LSS Test. . . . . . . . . . . . . . . . . . . . . . . . . . . . . . . . . . . . . . . . . . . . 75
LTS (Label Taken Sensor) . . . . . . . . . . . . . . . . . . . . . . . . . . . . . . 75
Returning to Factory Default Setup . . . . . . . . . . . . . . . . . . . . . . . . . . . . . . . . . . . . . 75
7 Setup Mode
. . . . . . . . . . . . . . . . . . . . . . . . . . . . . . . . . . . . . . . . . . . . . . . . . . . . . 77
Entering Setup Mode at Installation . . . . . . . . . . . . . . . . . . . . . . . . . . . . . . . . . . . . . 78
Navigating in Setup Mode . . . . . . . . . . . . . . . . . . . . . . . . . . . . . . . . . . . . . . . . . . . . 79
Setup Modes . . . . . . . . . . . . . . . . . . . . . . . . . . . . . . . . . . . . . . . . . . . . . . . . . . . . . . . 81
8 Intermec Shell Startup Program
. . . . . . . . . . . . . . . . . . . . . . . . . . . . 91
Introduction . . . . . . . . . . . . . . . . . . . . . . . . . . . . . . . . . . . . . . . . . . . . . . . . . . . . . . . 92
Starting with Intermec Shell . . . . . . . . . . . . . . . . . . . . . . . . . . . . . . . . . . . . . . . . . . . 93
Intermec Shell v8.1 Overview . . . . . . . . . . . . . . . . . . . . . . . . . . . . . . . . . . . . . . . . . . 97
Line Analyzer . . . . . . . . . . . . . . . . . . . . . . . . . . . . . . . . . . . . . . . . . . . . . . . . . . . . . . 98
9 Options
. . . . . . . . . . . . . . . . . . . . . . . . . . . . . . . . . . . . . . . . . . . . . . . . . . . . . . . . . 101
Introduction . . . . . . . . . . . . . . . . . . . . . . . . . . . . . . . . . . . . . . . . . . . . . . . . . . . . . . 102
EasyCoder PX4i Bar Code Label Printer User’s Guide (Fingerprint Version)
vii
Liner/Batch Takeup Kit . . . . . . . . . . . . . . . . . . . . . . . . . . . . . . . . . . . . . . . . . . . . . 103
Paper Cutter . . . . . . . . . . . . . . . . . . . . . . . . . . . . . . . . . . . . . . . . . . . . . . . . . . . . . 103
Fanfold Guides . . . . . . . . . . . . . . . . . . . . . . . . . . . . . . . . . . . . . . . . . . . . . . . . . . . 104
Media Roll Retainer. . . . . . . . . . . . . . . . . . . . . . . . . . . . . . . . . . . . . . . . . . . . . . . . 104
3-inch Adapter. . . . . . . . . . . . . . . . . . . . . . . . . . . . . . . . . . . . . . . . . . . . . . . . . . . . 105
Label Taken Sensor . . . . . . . . . . . . . . . . . . . . . . . . . . . . . . . . . . . . . . . . . . . . . . . . 105
Real Time Clock . . . . . . . . . . . . . . . . . . . . . . . . . . . . . . . . . . . . . . . . . . . . . . . . . . 105
CompactFlash Protection Plate . . . . . . . . . . . . . . . . . . . . . . . . . . . . . . . . . . . . . . . 105
Alphanumeric Keyboards. . . . . . . . . . . . . . . . . . . . . . . . . . . . . . . . . . . . . . . . . . . . 106
Interface Boards . . . . . . . . . . . . . . . . . . . . . . . . . . . . . . . . . . . . . . . . . . . . . . . . . . . 106
10 Troubleshooting
. . . . . . . . . . . . . . . . . . . . . . . . . . . . . . . . . . . . . . . . . . 107
Intermec Ready-to-Work Indicator . . . . . . . . . . . . . . . . . . . . . . . . . . . . . . . . . . . . 108
Troubleshooting. . . . . . . . . . . . . . . . . . . . . . . . . . . . . . . . . . . . . . . . . . . . . . . . . . . 111
11 Maintaining the Printer
. . . . . . . . . . . . . . . . . . . . . . . . . . . . . . . . . . 115
Printhead Cleaning . . . . . . . . . . . . . . . . . . . . . . . . . . . . . . . . . . . . . . . . . . . . . . . . 116
External Cleaning . . . . . . . . . . . . . . . . . . . . . . . . . . . . . . . . . . . . . . . . . . . . . . . . . 120
Cleaning the Label Stop Sensor . . . . . . . . . . . . . . . . . . . . . . . . . . . . . . . . . . . . . . . 121
Replacing the Printhead. . . . . . . . . . . . . . . . . . . . . . . . . . . . . . . . . . . . . . . . . . . . . 123
Media Jams . . . . . . . . . . . . . . . . . . . . . . . . . . . . . . . . . . . . . . . . . . . . . . . . . . . . . . 128
12 Adjustments
. . . . . . . . . . . . . . . . . . . . . . . . . . . . . . . . . . . . . . . . . . . . . . . 129
Narrow Media . . . . . . . . . . . . . . . . . . . . . . . . . . . . . . . . . . . . . . . . . . . . . . . . . . . . 130
Printhead Pressure . . . . . . . . . . . . . . . . . . . . . . . . . . . . . . . . . . . . . . . . . . . . . . . . . 131
viii
EasyCoder PX4i Bar Code Label Printer User’s Guide (Fingerprint Version)
Label Stop Sensor . . . . . . . . . . . . . . . . . . . . . . . . . . . . . . . . . . . . . . . . . . . . . . . . . . 132
A Technical Data
B Media Specifications
. . . . . . . . . . . . . . . . . . . . . . . . . . . . . . . . . . . . . . . . . . . . . . . . 137
. . . . . . . . . . . . . . . . . . . . . . . . . . . . . . . . . . . . . . . . . 143
Media Roll Size . . . . . . . . . . . . . . . . . . . . . . . . . . . . . . . . . . . . . . . . . . . . . . . . . . . . 144
Media . . . . . . . . . . . . . . . . . . . . . . . . . . . . . . . . . . . . . . . . . . . . . . . . . . . . . . . . . . . 145
Non-Adhesive Strip . . . . . . . . . . . . . . . . . . . . . . . . . . . . . . . . . . . . . . . . . 145
Self-Adhesive Strip . . . . . . . . . . . . . . . . . . . . . . . . . . . . . . . . . . . . . . . . . . 146
Self-Adhesive Labels . . . . . . . . . . . . . . . . . . . . . . . . . . . . . . . . . . . . . . . . . 147
Tickets With Gaps . . . . . . . . . . . . . . . . . . . . . . . . . . . . . . . . . . . . . . . . . . 148
Tickets With Black Mark . . . . . . . . . . . . . . . . . . . . . . . . . . . . . . . . . . . . . 150
C Interfaces
. . . . . . . . . . . . . . . . . . . . . . . . . . . . . . . . . . . . . . . . . . . . . . . . . . . . . . 153
RS-232 Interface . . . . . . . . . . . . . . . . . . . . . . . . . . . . . . . . . . . . . . . . . . . . . . . . . . . 154
Protocol For The Default Setup . . . . . . . . . . . . . . . . . . . . . . . . . . . . . . . . 154
Interface Cable . . . . . . . . . . . . . . . . . . . . . . . . . . . . . . . . . . . . . . . . . . . . . 155
USB Interface . . . . . . . . . . . . . . . . . . . . . . . . . . . . . . . . . . . . . . . . . . . . . . . . . . . . . 155
Bar Code Wand Interface . . . . . . . . . . . . . . . . . . . . . . . . . . . . . . . . . . . . . . . . . . . . 156
Optional Interfaces . . . . . . . . . . . . . . . . . . . . . . . . . . . . . . . . . . . . . . . . . . . . . . . . . 157
D Intermec Supplies
. . . . . . . . . . . . . . . . . . . . . . . . . . . . . . . . . . . . . . . . . . . 161
Direct Thermal Media . . . . . . . . . . . . . . . . . . . . . . . . . . . . . . . . . . . . . . . . . . . . . . 162
Thermal Transfer Media . . . . . . . . . . . . . . . . . . . . . . . . . . . . . . . . . . . . . . . . . . . . . 162
Transfer Ribbons. . . . . . . . . . . . . . . . . . . . . . . . . . . . . . . . . . . . . . . . . . . . . . . . . . . 163
Bar Code Directions . . . . . . . . . . . . . . . . . . . . . . . . . . . . . . . . . . . . . . . . . . . . . . . . 164
Recommended Paper Type Settings (Europe) . . . . . . . . . . . . . . . . . . . . . . . . . . . . . 165
Recommended Paper Type Settings (North America) . . . . . . . . . . . . . . . . . . . . . . . 168
EasyCoder PX4i Bar Code Label Printer User’s Guide (Fingerprint Version)
ix
Before You Begin
Before You Begin
This section provides you with safety information, technical
support information, and sources for additional product
information.
Safety Summary
Your safety is extremely important. Read and follow all
warnings and cautions in this document before handling
and operating Intermec equipment. You can be seriously
injured, and equipment and data can be damaged if you do
not follow the safety warnings and cautions.
Do not repair or adjust alone
Do not repair or adjust energized equipment alone under
any circumstances. Someone capable of providing first aid
must always be present for your safety.
First aid
Always obtain first aid or medical attention immediately
after an injury. Never neglect an injury, no matter how
slight it seems.
Resuscitation
Begin resuscitation immediately if someone is injured and
stops breathing. Any delay could result in death. To work
on or near high voltage, you should be familiar with
approved industrial first aid methods.
Energized equipment
Never work on energized equipment unless authorized by a
responsible authority. Energized electrical equipment is
dangerous. Electrical shock from energized equipment can
cause death. If you must perform authorized emergency
work on energized equipment, be sure that you comply
strictly with approved safety regulations.
x
EasyCoder PX4i Bar Code Label Printer User’s Guide (Fingerprint Version)
Before You Begin
Safety Icons
This section explains how to identify and understand the
warnings, cautions, and notes that are in this document.
You may also see icons that tell you when to follow ESD
procedures.
A warning alerts you of an operating procedure, practice,
condition, or statement that must be strictly observed to avoid
death or serious injury to the persons working on the
equipment.
A caution alerts you to an operating procedure, practice,
condition, or statement that must be strictly observed to
prevent equipment damage or destruction, or corruption or
loss of data.
This icon appears at the beginning of any procedure in this
manual that could cause you to touch components (such as
printed circuit boards) that are susceptible to damage from
electrostatic discharge (ESD). When you see this icon, you must
follow standard ESD guidelines to avoid damaging the
equipment you are servicing.
Note: Notes either provide extra information about a topic or
contain special instructions for handling a particular condition or
set of circumstances.
Global Services and Support
Warranty Information
To understand the warranty for your Intermec product, visit the
Intermec web site at www.intermec.com and click Support >
Returns and Repairs > Warranty.
Disclaimer of warranties: The sample code included in this
document is presented for reference only. The code does not
necessarily represent complete, tested programs. The code is
provided “as is with all faults.” All warranties are expressly
disclaimed, including the implied warranties of merchantability
and fitness for a particular purpose.
EasyCoder PX4i Bar Code Label Printer User’s Guide (Fingerprint Version)
xi
Before You Begin
Web Support
Visit the Intermec web site at www.intermec.com to download
our current manuals (in PDF). To order printed versions of the
Intermec manuals, contact your local Intermec representative or
distributor.
Visit the Intermec technical knowledge base (Knowledge
Central) at www.intermec.com and click Support > Knowledge
Central to review technical information or to request technical
support for your Intermec product.
Telephone Support
These services are available from Intermec.
Services
Description
Order Intermec • Place an order.
products
• Ask about an existing
order.
1 and then choose 2
Order Intermec Order printer labels and
media
ribbons.
1 and then choose 1
Order spare
parts
Order spare parts.
1 or 2 and then
choose 4
Technical
Support
Talk to technical support
about your Intermec
product.
2 and then choose 2
Service
• Get a return authorization 2 and then choose 1
number for authorized
service center repair.
• Request an on-site repair
technician.
Service contracts • Ask about an existing
contract.
• Renew a contract.
• Inquire about repair
billing or other service
invoicing questions.
xii
In the USA and
Canada call 1-800755-5505 and
choose this option
1 or 2 and then
choose 3
EasyCoder PX4i Bar Code Label Printer User’s Guide (Fingerprint Version)
Before You Begin
Outside the U.S.A. and Canada, contact your local Intermec
representative. To search for your local representative, from the
Intermec web site, click About Us > Contact Us.
Service Location Support
For the most current listing of service locations, click Support >
Returns and Repairs > Repair Locations.
For technical support in South Korea, use the after service
locations listed below:
AWOO Systems
102-1304 SK Ventium
522 Dangjung-dong
Gunpo-si, Gyeonggi-do Korea, South 435-776
Contact: Mr. Sinbum Kang
Telephone: +82-31-436-1191
E-mail: [email protected]
IN Information System PTD LTD
6th Floor
Daegu Venture Center Bldg 95
Shinchun 3 Dong
Donggu, Daegu City, Korea
E-mail: [email protected] or [email protected]
Who Should Read This Manual
This User’s Guide provides you with information about the
features of the EasyCoder PX4i printer and how to install,
configure, operate, maintain, and troubleshoot it.
Related Documents
The Intermec web site at www.intermec.com contains our
documents (as PDF files) that you can download for free.
To download documents
1 Visit the Intermec web site at www.intermec.com.
2 Click Support > Manuals.
3 In the Select a Product field, choose the product that you
want to download documentation for.
To order printed versions of the Intermec manuals, contact
your local Intermec representative or distributor.
EasyCoder PX4i Bar Code Label Printer User’s Guide (Fingerprint Version)
xiii
Before You Begin
xiv
EasyCoder PX4i Bar Code Label Printer User’s Guide (Fingerprint Version)
1
Introduction
This chapter introduces the EasyCoder PX4i printer and covers
the following topics:
• Description of EasyCoder PX4i Printer
• Safety Summary
• Product Identification
EasyCoder PX4i Bar Code Label Printer User’s Guide (Fingerprint Version)
1
Chapter 1 — Introduction
Description of EasyCoder PX4i Printer
The EasyCoder PX4i printer is an industrial, rugged, and highvolume thermal transfer printer with a printhead resolution of
8 dots/mm (203.2 dots/inch) or 11.81 dots/mm (300 dots/inch).
The maximum print width is 112 mm (4.5 in).
The EasyCoder PX4i printer offers a large number of useful
features:
• High speed printing up to 300 mm/sec (12 in/sec)
• Flash memory SIMMs for firmware, fonts, bar codes, and
application programs
• Built-in CompactFlash memory card adapter
• Built-in RS-232 and USB interfaces
• Provision for one or two extra interface boards including
wired or wireless EasyLAN connections, parallel interface,
double serial interfaces, and serial/industrial interfaces
• Keyboard and display with backlight
• Support for network monitoring through optional software
tools
A large number of factory-installed or field-installable options are
available, so the printer can be configured for a wide range of
applications. See “Options” on page 101, for more information.
The EasyCoder PX4i supports the unique and flexible Intermec
Fingerprint v8.30 programming language, which allows the user
or third-party developer to create custom-made application
programs and label formats in a BASIC-like environment.
The printer is also designed to work with the Intermec Direct
Protocol programming language, Intermec InterDriver, and
Intermec LabelShop. The InterDriver allows you to print labels
from standard MS Windows applications, for example Microsoft
Office. Intermec LabelShop is a series of label design programs
that work under various versions of MS Windows.
2
EasyCoder PX4i Bar Code Label Printer User’s Guide (Fingerprint Version)
Chapter 1 — Introduction
The EasyCoder PX4i supports 15 scalable Unicode TrueType and
TrueDoc fonts as standard. Additional fonts can be downloaded
into the printer’s Flash memory, or be plugged in using a
CompactFlash card. The Unicode standard allows the use of
special characters for various languages including non-Latin
fonts, such as Arabic, Cyrillic, Chinese, Japanese, Korean,
Hebrew, and similar.
A version of EasyCoder PX4i, that supports the Intermec
Programming Language (IPL) v2.30, is described in a special
User’s Guide.
Safety Summary
Intermec assumes no responsibility regarding the CE Directive if
the printer is handled, modified, or installed in any way other
than that described in Intermec’s manuals.
• Read this manual carefully before connecting the printer.
• Moving parts are exposed when the side doors are open, so
ensure that the doors are closed before you operate the printer.
• Do not remove the left-hand cover. Dangerous voltage!
• Do not remove the bottom plate. Dangerous voltage!
• Do not put your fingers inside the print mechanism when the
power is on.
• Place the printer on an even surface which can support its
weight of approximately 13 kg (28.5 lb) plus supplies.
• Do not spray the printer with water. If you are using a hose to
clean the premises in an industrial environment, remove the
printer or protect it carefully from spray and moisture.
• Carefully read the warning text on the envelope before using a
cleaning card.
Product Identification
The machine label is attached to the printer’s rear plate and
contains information on type, model, and serial number as well
as AC voltage. It also contains regulatory agency markings
indicating compliance with specific agency regulations, if any.
EasyCoder PX4i Bar Code Label Printer User’s Guide (Fingerprint Version)
3
Chapter 1 — Introduction
4
EasyCoder PX4i Bar Code Label Printer User’s Guide (Fingerprint Version)
2
Installation
This chapter explains how to unpack and install the EasyCoder
PX4i printer and also describes the printer’s various parts in
detail. It covers the following topics:
• Unpacking the Printer
• Connecting the Printer
• Controls and Indicators
EasyCoder PX4i Bar Code Label Printer User’s Guide (Fingerprint Version)
5
Chapter 2 — Installation
Unpacking the Printer
Before you install the printer, unpack and examine it for possible
damage or missing parts.
To unpack the printer
1 Open the box and lift the printer out.
2 Check that the printer has not been visibly damaged during
transportation. Keep the packing materials in case you need to
move or reship the printer.
3 Check the label on the printer’s rear plate, which gives the
voltage, the part number, and the serial number.
4 Check that any options you ordered are included.
5 Check that all the accessories are included:
• Intermec EasyCoder PX4i printer
• Adapter for 3 in media roll core
• Power cord
• Quality check card
• Cleaning card
• Compact disk (CD) with supporting software, additional
manuals, and product information.
6 Check that the type of power cord is appropriate for the local
standard. The printer works within 90 to 265 VAC,
50 to 60 Hz.
7 If the printer has been damaged in any way during
transportation, report the damage to the carrier immediately.
8 If the delivery is incorrect or any parts are missing, report it
immediately to the distributor.
6
EasyCoder PX4i Bar Code Label Printer User’s Guide (Fingerprint Version)
Chapter 2 — Installation
Front View
At the front of the printer are the display window, the indicator
lamps, and the keyboard. These features allow the operator to
control and set up the printer manually.
The front door is held by a snap-lock. Open the front door to
view the various parts on the printer’s front.
Refer to “Options” on page 101, for information on possible
optional devices fitted on the printer’s front.
Indicator lamps
Display window
Keyboard
Connector
for optional
cutter
Print mechanism
Front door
Side door
Front View
EasyCoder PX4i Bar Code Label Printer User’s Guide (Fingerprint Version)
7
Chapter 2 — Installation
Rear View
The rear plate contains the On/Off switch, the AC power cord
socket, and various interface connectors and slots.
Provision for EasyLAN
Wireless antenna
(option)
Provision for EasyLAN
Ethernet connection
(option)
Intake slot for external
media supply
Memory card slot
Provision for two optional
interface boards
On/Off Switch
Bar code wand socket
("wand:")
AC Power cord socket
RS-232 serial interface
("uart1:")
USB Interface ("usb1:")
Machine label
Intake slot for external
media supply
Rear View
8
EasyCoder PX4i Bar Code Label Printer User’s Guide (Fingerprint Version)
Chapter 2 — Installation
Media Compartment
The media compartment is covered by the side door which can
be opened 180° downwards to provide complete access to the
media and ribbon loading area. The door is held closed by a
magnetic lock. It can be completely removed by opening it and
then pulling it forward.
The media can be supplied from a rotating hub or from an
external supply of fanfolded media behind the printer. For more
information, see “Options” on page 101.
Side door
Ribbon supply hub
Media supply
roll hub
Ribbon rewind hub
Slack absorber
Media Compartment
EasyCoder PX4i Bar Code Label Printer User’s Guide (Fingerprint Version)
9
Chapter 2 — Installation
Print Mechanism
The print mechanism features a high-performance thermal
printhead with quick-mount fittings to facilitate replacement.
Pressure arm
locking knob
Printhead
pressure
adjustment
knob
Edge
guide
Pressure
arm
Thermal printhead
Tear bar
Upper label stop sensor
guide (removable)
Printhead lift
lever
Lower label stop sensor guide
(removable)
Label stop sensor
position adjustment
screw
Print Mechanism
10
EasyCoder PX4i Bar Code Label Printer User’s Guide (Fingerprint Version)
Chapter 2 — Installation
Connecting the Printer
To connect the printer to power
1 Place the printer on a level surface near an AC outlet. You
should be able to access the back, front, and sides of the
printer as necessary to load supplies and remove the printout.
2 Check that the printer is switched off.
3 Connect the power cord from the socket on the rear plate to
an electrical outlet (90 to 265 VAC).
Computer
The EasyCoder PX4i printer is fitted with one 9-pin D-style
subminiature (DB9) socket for the RS-232 serial interface port
and one class B connector for the USB interface port. For more
information about ports, see “Interfaces” on page 153.
RS-232 Serial Interface (“uart1:”)
Use the serial interface with Intermec LabelShop or the Intermec
Inter-Driver. Also use it with the Intermec Direct Protocol or the
Intermec Fingerprint programming language because you can
receive error messages from your printer. Before you can use the
serial interface, you may need to set up the communication
parameters, such as baud rate, parity, etc. as described in “Setting
Up the Printer” on page 59.
USB Interface (“usb1:”)
Use the USB interface with an USB-compatible version of the
Intermec InterDriver for printing. The USB interface is not
suitable for programming because the host cannot receive error
messages from your printer.
Optional Interface and Network Boards
(“uart2:”, “uart3:”, “uart4:”, “uart5:”, “centronics:”, and “net1:”)
For details, see “Interface Boards” on page 106. Refer to
“Setting Up the Printer” on page 59, “Navigating in Setup
Mode” on page 79, and “Optional Interfaces” on page 157 for
connection and setup instructions.
EasyCoder PX4i Bar Code Label Printer User’s Guide (Fingerprint Version)
11
Chapter 2 — Installation
The printer can be set to scan all communication ports. When it
detects incoming data on a port, the printer automatically
switches to use that port for both input and output. This facility
(“auto”) can be selected in Intermec Shell (see “Intermec Shell
Startup Program” on page 91) or using the Intermec Fingerprint
instruction SETSTDIO, see Intermec Fingerprint v8.3x,
Programmer’s Reference Manual. Press F5/i to get information on
the active communication channels.
Switch off both PC and printer before connecting them together.
Controls and Indicators
The EasyCoder PX4i printer has several ways of communicating
directly with its operator: three colored LEDs, a display window,
a membrane-switch keyboard with 23 programmable keys and
buttons on the front, and a beeper.
Display and controls
Indicator Lamps
The indicators are colored LEDs (Light Emitting Diodes) and are
used for the following purposes:
Power (solid green) indicates that the power is on.
Status (solid green) indicates that the printer is ready for use.
12
EasyCoder PX4i Bar Code Label Printer User’s Guide (Fingerprint Version)
Chapter 2 — Installation
Status (flashing green) indicates that the printer is
communicating.
Status (solid red) indicates an error condition (see
“Troubleshooting” on page 107).
Intermec Ready-to-Work indicator (blue; on, blink, or off ). The
indicator has three different states: On, Blinking, and Off. When
the indicator is On, the printer is ready for use. When the
indicator is blinking, the printer may be initializing, waiting for
external resources, or in need of user attention. When the
indicator is off, the printer is not ready to operate.
Display
The display window contains an LCD (Liquid Crystal Display)
with background illumination and two lines of text, each with 16
characters. It provides information on installed firmware or
running application, prompts the operator in Intermec Shell and
in the Setup Mode, and can show information on possible errors
and active communication channels. The Intermec Fingerprint
programming language and the Intermec Direct Protocol allow
custom-made messages to be composed and displayed according
to the requirements of the application.
Keyboard
The keyboard is of the membrane-switch type and has 22 keys.
The keyboard is supplemented by a large Print button. Some
keys have hard-coded functions in the startup and setup modes.
Keyboard Buttons
Button
Function
Print button
Feeds a page or pauses a print job. Repeats last
printed label.
Toggle between pause and printing when
executing a print job.
EasyCoder PX4i Bar Code Label Printer User’s Guide (Fingerprint Version)
13
Chapter 2 — Installation
Keyboard Buttons (continued)
Button
Function
Interrupt a running Fingerprint program.
+
Enter Setup Mode. For more information, see
“Setup Mode” on page 77.
Feed out a blank label or the equivalent.
+
Perform a Testfeed (feed a blank label and
adjust the media feed).
Display error messages, Intermec
Ready-To-Work status, and communication
channel information.
Scroll between types of information after
pressing F5/i. Possible error messages and
information on active communications
channels are shown in a loop.
In application programs created using the Intermec Fingerprint
programming language, the keys can be assigned to various
functions or be disabled individually. Since one key is assigned as
shift key, up to 44 different key combinations are possible. An
audible signal, which can be turned off if so desired,
acknowledges that a key has been pressed.
Keyboard Color Code
Yellow
14
Operation of the printer (operator level)
Green
Setup or service (site or service technician level)
White
Data input to printer (operator or technician level)
EasyCoder PX4i Bar Code Label Printer User’s Guide (Fingerprint Version)
Chapter 2 — Installation
Beeper
The beeper acknowledges that an error has occurred or a key has
been pressed. The Intermec Fingerprint programming language
allows the key acknowledge signal to be turned off. The
frequency and duration of signals can be specified. Thus, it is
possible to create different signals for different conditions or even
to make the printer play simple melodies!
EasyCoder PX4i Bar Code Label Printer User’s Guide (Fingerprint Version)
15
Chapter 2 — Installation
16
EasyCoder PX4i Bar Code Label Printer User’s Guide (Fingerprint Version)
3
Starting Up
This chapter explains how to start up the printer after installation
or after having been switched off. It covers the following topics:
• Startup Files
• Memory Cards
• Switching on the Printer
EasyCoder PX4i Bar Code Label Printer User’s Guide (Fingerprint Version)
17
Chapter 3 — Starting Up
Startup Files
When the printer is switched on, its behavior depends on the
existence of a startup file (autoexec.bat) in its memory. There are
two cases:
• The printer is only fitted with the Intermec Shell
file-managing program, which allows the operator to choose
between a variety of applications and functions.
• In addition to Intermec Shell, the printer is also fitted with a
custom made application program that is design to perform a
specific task, for example to print tickets, baggage tags, or
product labels for a certain company. Such a program may be
initiated by a startup file (autoexec.bat) stored in the printer’s
permanent memory or in a memory card.
There can be one startup file stored in each of three different
parts of the printer’s memory. If there are startup files stored in
more than one part, only one will be used with the following
priority:
1 An autoexec.bat file stored in a memory card, provided the
card was inserted in the printer before the power was switched
on.
2 An autoexec.bat file stored in the read/write part of the
printer’s permanent memory (device “/c”).
3 The pup.bat file (Intermec Shell) in the read-only part of the
printer’s permanent memory (device “/rom”).
Note: If you insert a CompactFlash memory card that contains a
startup file before you switch on the printer, this startup file will
be used instead of Intermec Shell.
Memory Card
If you want to use a memory card, you must insert it into the slot
in the printer’s rear plate before you switch on the power. The
memory card must be a CompactFlash card (8MB-1GB).
CompactFlash cards marked “CF+” will not work. You can use
the CompactFlash card to expand the printer’s storage memory
(“card1:”). There are also three types of pre-programmed
CompactFlash cards:
18
EasyCoder PX4i Bar Code Label Printer User’s Guide (Fingerprint Version)
Chapter 3 — Starting Up
• Font Cards provide additional fonts that can be used as long
as the card remains inserted in the printer.
• Font Install Cards permanently install additional fonts in the
printer, which can be used even after the card has been
removed.
• Firmware Cards automatically replace the printer’s firmware,
usually with an updated version.
CompactFlash cards are widely used for consumer’s computer
products like digital cameras. You can get a certain protection
from theft by installing an optional plate that covers an inserted
CompactFlash card.
CompactFlash
memory card
Protection plate
with screw
(option)
CompactFlash memory card
Note: Always switch off the power before inserting or removing a
memory card! The card will only fit in one way. A memory card is
only detected if it is inserted before the printer is started.
EasyCoder PX4i Bar Code Label Printer User’s Guide (Fingerprint Version)
19
Chapter 3 — Starting Up
Switching On the Printer
Before switching on the printer, make the necessary connections,
and check that the printhead is engaged.
Switch on the power using the On/Off switch on the rear plate.
The “Power” LED on the front panel lights up when the power is
on. Wait for a few moments while the printer loads the program
and runs some self-diagnostic tests. The Display Window will
show the following progress indicator.
Starting
After a short time, the printer is initialized. The progress of the
initialization is indicated by an increasing number of colons on
the lower line in the display.
Initializing
:::
The type of startup file running in the printer is indicated by the
message shown in the display window immediately after
initialization.
A. Intermec Shell Startup Program
ENTER=SHELL
5 sec.
v.8.1
4 sec.
v.8.1
3 sec.
v.8.1
2 sec.
v.8.1
1 sec.
v.8.1
Refer to “Intermec Shell Startup Program” on page 91 for more
information on Intermec Shell. The digits in the lower right
corner of the display indicate the version of Intermec Shell.
20
EasyCoder PX4i Bar Code Label Printer User’s Guide (Fingerprint Version)
Chapter 3 — Starting Up
B. Custom-Made Application Program
Any other display messages than those illustrated above indicates
that the printer is running some custom-made, non-standard
application program, or that some error has occurred.
EasyCoder PX4i Bar Code Label Printer User’s Guide (Fingerprint Version)
21
Chapter 3 — Starting Up
22
EasyCoder PX4i Bar Code Label Printer User’s Guide (Fingerprint Version)
4
Loading Media
This chapter explains how to load the printer with various kinds
of continuous, gap, or mark media for the following modes of
operation:
• Tear-Off (Straight-Through)
• Cut-Off (Cutter)
• Peel-Off (Self-adhesive Strip)
• Internal Batch Takeup (Roll-to-Roll)
• External Supply (Fanfold or Continuous Stock)
EasyCoder PX4i Bar Code Label Printer User’s Guide (Fingerprint Version)
23
Chapter 4 — Loading Media
Tear-Off (Straight-Through)
The EasyCoder PX4i printer can print on labels, tickets, tags, and
continuous stock in various forms. This section describes the case
when the media is torn off manually against the printer’s tear bar.
This method is also known as “straight-through printing.”
Press Feed when loading the same type of media as before. When
switching to a new type of media, or if the printer does not feed
out the media properly, simultaneously press Shift and Feed to
perform a “testfeed.”
Tear-off can be used for:
• Non-adhesive continuous stock
• Self-adhesive continuous stock with liner
• Self-adhesive labels with liner (gap or continuous stock)
• Tickets with gaps (gap stock), with or without perforations
• Tickets with black marks (mark stock), with or without
perforations
An optional label taken sensor can hold the printing of the next
copy in the batch until the present copy has been removed. For
more information, see “Label Taken Sensor” on page 105.
24
EasyCoder PX4i Bar Code Label Printer User’s Guide (Fingerprint Version)
Chapter 4 — Loading Media
To load media for tear-off operation
1 Open the front and side doors.
2 Turn the printhead lift lever counter-clockwise to raise the
printhead.
3 Remove any empty core from the media supply hub.
EasyCoder PX4i Bar Code Label Printer User’s Guide (Fingerprint Version)
25
Chapter 4 — Loading Media
4 In the case of a media roll with a 76 mm (3 in) core, fit an
adapter on the media supply hub.
5 Fit a new roll of media onto the media supply hub and push
the roll inwards as far as it will go.
6 Route the media underneath the slack absorber and forward
towards the print mechanism. The slack absorber can be
rotated for better access and then snap-locked in open
position.
26
EasyCoder PX4i Bar Code Label Printer User’s Guide (Fingerprint Version)
Chapter 4 — Loading Media
7 Route the media through the print unit and push it inwards
as far as it will go.
8 This diagram shows the path the media will take through the
printer.
9 Turn the printhead lift lever to the “closed” position.
EasyCoder PX4i Bar Code Label Printer User’s Guide (Fingerprint Version)
27
Chapter 4 — Loading Media
10 Adjust the position of the green edge guides so that the media
is guided with a minimum of play.
11 Close the front and side doors.
12 Press Feed to advance the media and adjust the media feed.
Tear off the media by grabbing the outer edge and pulling
downwards.
Feed
28
EasyCoder PX4i Bar Code Label Printer User’s Guide (Fingerprint Version)
Chapter 4 — Loading Media
Cut-Off
The EasyCoder PX4i printer can print on labels, tickets, tags, and
continuous stock in various forms. This section describes the case
when the media is to be cut off by an automatic paper cutter
(option).
Press Feed when loading the same type of media as before. When
switching to a new type of media, or if the printer does not feed
out the media properly, simultaneously press Shift and Feed to
perform a “testfeed.”
Cut-off can be used for:
• Non-adhesive continuous stock
• Self-adhesive labels with liner (cut only liner between labels)
The cutter is designed to cut through paper-based media with a
thickness between 60 and 175 μm, which roughly corresponds to
a paper weight of 60 to 175 grams/m2 (basis weight 40 to 120
lb.). The cutter should not be used to cut through labels because
the adhesive will stick to the shears, which can damage the cutter.
The optional label taken sensor cannot be used with the cutter.
The rotating cutting blade can be accidently activated while the
cutter is open. To avoid any risk of injury to fingers, always switch
off the power before loading media and/or ribbon in a
cutter-equipped printer.
EasyCoder PX4i Bar Code Label Printer User’s Guide (Fingerprint Version)
29
Chapter 4 — Loading Media
To load media for cut-off operation
1 Switch off the power. Open the cutter and the side door.
Easy
Cod
er
PX4
i
2 Turn the printhead lift lever counterclockwise to raise the
printhead.
3 Remove any empty core from the media supply hub.
30
EasyCoder PX4i Bar Code Label Printer User’s Guide (Fingerprint Version)
Chapter 4 — Loading Media
4 In the case of a media roll with a 76 mm (3 in) core, fit an
adapter on the media supply hub.
5 Fit a new roll of media onto the media supply hub and push
the roll inwards as far as it will go.
6 Route the media underneath the slack absorber and forward
towards the print mechanism. The slack absorber can be
rotated for better access and then snap-locked in open
position.
EasyCoder PX4i Bar Code Label Printer User’s Guide (Fingerprint Version)
31
Chapter 4 — Loading Media
7 Route the media through the print unit and push it inwards
as far as it will go.
8 This diagram shows the path the media will take through the
printer.
9 Turn the printhead lift lever to the “closed” position.
32
EasyCoder PX4i Bar Code Label Printer User’s Guide (Fingerprint Version)
Chapter 4 — Loading Media
10 Adjust the position of the green edge guides so that the media
is guided with a minimum of play.
11 Route the media through the cutter between the two guide
plates.
Eas
yCo
der
PX4
i
12 Close the cutter unit while pulling on the end of the media.
Close the side door and then switch the power on.
Eas
yCo
der
PX4
i
EasyCoder PX4i Bar Code Label Printer User’s Guide (Fingerprint Version)
33
Chapter 4 — Loading Media
13 Press Feed to advance the media and adjust the media feed.
Feed
Peel-Off (Self-Strip)
The EasyCoder PX4i printer can print on labels, tickets, tags, and
continuous stock in various forms.
This section describes the case when self-adhesive labels are
separated from the liner immediately after printing, which
requires an optional internal liner/batch takeup unit. For more
information, see “Liner/Batch Takeup Kit” on page 103. This is
also known as “Self-strip” operation.
Press Feed when loading the same type of media as before. When
switching to a new type of media, or if the printer does not feed
out the media properly, simultaneously press Shift and Feed to
perform a “testfeed.”
Peel-off can only be used for self-adhesive labels with liner.
An optional label-taken sensor can hold the printing of the next
label in a batch until the present label has been removed. See
“Label Taken Sensor” on page 105.
Note: Peel-off operation sets high demands on the media for
proper label stiffness, release characteristics of the adhesive and
liner, resistance against electrostatic charge, and so on. If these
specific requirements are not met, the labels will not dispense
properly. Consult your media supplier or test the media to make
sure it is suitable for your application.
34
EasyCoder PX4i Bar Code Label Printer User’s Guide (Fingerprint Version)
Chapter 4 — Loading Media
To load media for peel-off operation
1 Open the front and side doors.
2 Turn the printhead lift lever counter-clockwise to raise the
printhead.
3 Pull out the green clip (1) on the liner takeup hub and dispose
of any wound-up liner (2).
2.
1.
EasyCoder PX4i Bar Code Label Printer User’s Guide (Fingerprint Version)
35
Chapter 4 — Loading Media
4 Remove any empty core from the media supply hub.
5 In the case of a media roll with a 76 mm (3 in) core, fit an
adapter on the media supply hub.
6 Fit a new roll of media onto the media supply hub and push
the roll inwards as far as it will go.
36
EasyCoder PX4i Bar Code Label Printer User’s Guide (Fingerprint Version)
Chapter 4 — Loading Media
7 Route the media underneath the slack absorber and forward
towards the print mechanism. The slack absorber can be
rotated for better access and then snap-locked in open
position.
8 Route the media through the print unit and push it inwards
as far as it will go.
9 Pull out approximately 40 cm (15 in) of labels and remove the
labels from the liner.
Eas
yCo
der
PX4
i
5 in
m/1
40 c
EasyCoder PX4i Bar Code Label Printer User’s Guide (Fingerprint Version)
37
Chapter 4 — Loading Media
10 Route the liner around the tear bar and back under the print
unit.
Eas
yCod
er
PX4i
11 Secure the liner to the takeup hub with the green clip (1) and
rotate the hub (2) until the media is pulled tight.
1.
2.
12 This diagram shows the path the media and liner will take
through the printer.
38
EasyCoder PX4i Bar Code Label Printer User’s Guide (Fingerprint Version)
Chapter 4 — Loading Media
13 Turn the printhead lift lever to the “closed” position.
14 Adjust the position of the green edge guides so that the media
is guided with a minimum of play.
15 Close the front and side doors.
EasyCoder PX4i Bar Code Label Printer User’s Guide (Fingerprint Version)
39
Chapter 4 — Loading Media
16 Press Feed to advance the media and adjust the media feed.
Feed
Internal Batch Takeup (Roll-to-Roll)
The EasyCoder PX4i printer can print on labels, tickets, tags, and
continuous stock in various forms. This section describes the case
when printed labels fitted on liner (backing paper) or
pre-perforated tickets and tags are wound up inside the printer.
The roll of printed labels, tickets, or tags can then be removed
and be handled manually. This requires an optional internal
liner/batch takeup unit.
Press Feed when loading the same type of media as before. When
switching to a new type of media, or if the printer does not feed
out the media properly, simultaneously press Shift and Feed to
perform a “testfeed.”
The takeup hub can accommodate 30 to 40% of a full-size media
roll.
Internal batch takeup can be used for:
• Self-adhesive labels fitted on liner
• Pre-perforated tickets with gaps
• Pre-perforated tickets with marks
40
EasyCoder PX4i Bar Code Label Printer User’s Guide (Fingerprint Version)
Chapter 4 — Loading Media
To load media for internal batch takeup operation
1 Open the front and side doors.
2 Turn the printhead lift lever counter-clockwise to raise the
printhead.
3 Remove any empty core from the media supply hub.
EasyCoder PX4i Bar Code Label Printer User’s Guide (Fingerprint Version)
41
Chapter 4 — Loading Media
4 Loosen the single screw that holds the guide plate at the rear
of the media compartment.
5 Remove the tear bar from the print unit and replace it with
the guide plate.
42
EasyCoder PX4i Bar Code Label Printer User’s Guide (Fingerprint Version)
Chapter 4 — Loading Media
6 In the case of a media roll with a 76 mm (3 in) core, fit an
adapter on the media supply hub.
7 Fit a new roll of media onto the media supply hub and push
the roll inwards as far as it will go.
EasyCoder PX4i Bar Code Label Printer User’s Guide (Fingerprint Version)
43
Chapter 4 — Loading Media
8 Route the media underneath the slack absorber and forward
towards the print mechanism. The slack absorber can be
rotated for better access and then snap-locked in open
position.
9 Route the media through the print unit and push it inwards
as far as it will go.
10 Pull out approximately 40 cm (15 in) of labels.
Eas
yCo
der
PX4
i
5 in
m/1
40 c
44
EasyCoder PX4i Bar Code Label Printer User’s Guide (Fingerprint Version)
Chapter 4 — Loading Media
11 Route the labels around the guide plate and back under the
print unit to the takeup hub
Eas
yCod
er
PX4i
12 Wind up some of the media on the takeup hub (1) and secure
it with the green clip (2).
2.
1.
13 This diagram shows the path the media will take through the
printer.
EasyCoder PX4i Bar Code Label Printer User’s Guide (Fingerprint Version)
45
Chapter 4 — Loading Media
14 Turn the printhead lift lever to the “closed” position.
15 Adjust the position of the green edge guides so that the media
is guided with a minimum of play.
16 Close the side door, but keep the front door open.
Eas
46
yCod
er
PX4i
EasyCoder PX4i Bar Code Label Printer User’s Guide (Fingerprint Version)
Chapter 4 — Loading Media
17 Press Feed to advance the media and adjust the media feed.
Eas
yCod
er
PX4i
Feed
External Supply (Fanfold)
This section describes the case when an external media supply is
used such as a stack of fanfold tickets or an external media roll.
It is possible to simply let the media enter the printer through
either of the two slots in the rear plate. However, we recommend
the optional Intermec Fanfold Kit, which provides adjustable
guides to more accurately guide the media into the printer. The
Fanfold Kit can be fitted to either the upper or the lower slot in
the rear plate.
When using an external media supply, take care to protect the
media from dust, dirt, and other foreign particles that can impair
the printout quality or cause unnecessary wear to the printhead.
Depending on brand and quality, all direct thermal media are
more or less sensitive to heat, direct sunlight, moisture, oil,
plasticizers, fat, and other substances. Protect the media
accordingly.
External supply can be used for:
• Tear-off operation
• Cut-off operation
• Peel-off operation (upper slot only)
• Internal batch takeup operation
EasyCoder PX4i Bar Code Label Printer User’s Guide (Fingerprint Version)
47
Chapter 4 — Loading Media
To load media for external supply operation
1 Use the upper slot in the rear plate when the supply is at the
same level as the printer or when using peel-off operation.
2 Use the lower slot in the rear plate when the supply is placed
lower than the printer.
3 The printer can be fitted with an optional set of fanfold
guides in either slot.
48
EasyCoder PX4i Bar Code Label Printer User’s Guide (Fingerprint Version)
Chapter 4 — Loading Media
4 The outer guide is adjustable for various media widths. The
minimum is 40 mm (1.58 in).
5 Fit the fanfold guide into the upper slot in the rear plate when
the supply is at the same level as the printer or when using
peel-off operation.
6 Fit the fanfold guide into the lower slot in the rear plate when
the supply is placed lower than the printer.
EasyCoder PX4i Bar Code Label Printer User’s Guide (Fingerprint Version)
49
Chapter 4 — Loading Media
50
EasyCoder PX4i Bar Code Label Printer User’s Guide (Fingerprint Version)
5
Loading Ribbon for Thermal
Transfer Printing
This chapter explains how to load the printer with ribbon for
thermal transfer printing.
EasyCoder PX4i Bar Code Label Printer User’s Guide (Fingerprint Version)
51
Chapter 5 — Loading Ribbon for Thermal Transfer Printing
Loading Ribbon
The EasyCoder PX4i printer can print on labels, tickets, tags, and
continuous stock using either direct thermal printing on special
heat-sensitive media or thermal transfer printing using a special
ink-coated ribbon.
Thermal transfer printing makes it possible to use a wide range of
receiving face materials and gives a durable printout less
vulnerable to fat, chemicals, heat, sunlight etc. than direct
thermal printing. Make sure to select a type of ribbon that
matches the type of receiving face material and to set up the
printer accordingly.
The EasyCoder PX4i printer can use transfer ribbon rolls wound
with the ink-coated side facing either outward or inward.
Illustrations in this manual show the ink-coated side facing
inward.
Ribbon is usually loaded in connection with media
replenishment, but loaded media is not shown in the illustrations
in this chapter in order to give a clearer view of the ribbon path.
For media load instructions, see “Loading Media” on page 23.
Most transfer ribbons do not smear at room temperature.
52
EasyCoder PX4i Bar Code Label Printer User’s Guide (Fingerprint Version)
Chapter 5 — Loading Ribbon for Thermal Transfer Printing
To load ribbon for thermal transfer operation
1 Open the front and side doors.
2 Turn the printhead lift lever counterclockwise to raise the
printhead.
3 Remove any used ribbon and the empty ribbon core.
Eas
yCod
er
PX4i
EasyCoder PX4i Bar Code Label Printer User’s Guide (Fingerprint Version)
53
Chapter 5 — Loading Ribbon for Thermal Transfer Printing
4 Unpack a roll of original Intermec thermal transfer ribbon.
5 Adjust the ribbon supply bobbin for your ribbon:
a If your ribbon is 55 to 60 mm (2.16 to 2.3 in) wide, compress
the ribbon supply bobbin and move it so it snaps into the first
(innermost) groove.
b If your ribbon is 88 to 90 mm (3.5 in) wide, compress the
ribbon supply bobbin and move it so it snaps into the second
groove.
54
EasyCoder PX4i Bar Code Label Printer User’s Guide (Fingerprint Version)
Chapter 5 — Loading Ribbon for Thermal Transfer Printing
c If your ribbon is 110 mm (4.3 in) wide, compress the ribbon
supply bobbin and move it so it snaps into the third
(outermost) groove.
4 Press the ribbon roll onto the ribbon supply bobbin (1) and
route the ribbon through the print unit. Pull out 20 cm (8 in)
of ribbon.
1.
Eas
yCo
der
PX4
i
2.
EasyCoder PX4i Bar Code Label Printer User’s Guide (Fingerprint Version)
55
Chapter 5 — Loading Ribbon for Thermal Transfer Printing
5 Without releasing the ribbon, turn the printhead lift lever to
“closed” position to lock the ribbon.
6 Press the cardboard core at the front end of the ribbon onto
the rewind hub. During printing, the rewind hub will rotate
counterclockwise.
56
EasyCoder PX4i Bar Code Label Printer User’s Guide (Fingerprint Version)
Chapter 5 — Loading Ribbon for Thermal Transfer Printing
7 Turn the printhead lift lever to the “open” position.
8 Wind up the ribbon until all of the transparent leader has
passed the printhead and the ribbon becomes tight.
EasyCoder PX4i Bar Code Label Printer User’s Guide (Fingerprint Version)
57
Chapter 5 — Loading Ribbon for Thermal Transfer Printing
9 Turn the printhead lift lever to “closed” position.
10 Close the front and side door.
58
EasyCoder PX4i Bar Code Label Printer User’s Guide (Fingerprint Version)
6
Setting Up the Printer
This chapter describes the various parameters that are used
during Setup mode or in the various application programs to
configure the printer for the user’s specific requirements. It covers
the following topics:
• Description
• Default Setup
• Setup parameters for communication, test/service, media, and
configuration.
When measurements are specified as “dots”, the actual length in
millimeters or inches depends on the printhead density. Convert
as follows:
8 dots/mm (203 dots/inch) printhead:
1 dot = 0.125 mm = 0.0049 in (4.9 mils)
11.81 dots/mm (300 dots/inch) printhead:
1 dot = 0.085 mm = 0.0033 in (3.3 mils)
EasyCoder PX4i Bar Code Label Printer User’s Guide (Fingerprint Version)
59
Chapter 6 — Setting Up the Printer
Description
The setup controls the printer in regard of serial communication,
test and service operations, and specifies which types of media
and ribbon are loaded in the printer.
Check the list below to see if the printer’s default setup matches
your requirements. If not, you will have to change the setup. To
enter the Setup Mode, press Setup on the printer’s
built-in keyboard and follow the instructions in “Setup Mode”
on page 77.
Setup Mode
• Press Setup on the printer’s built-in keyboard to enter the
Setup Mode.
• Select the Setup option in Intermec Shell to enter the Setup
Mode.
• Execute the Intermec Fingerprint SETUP instruction to enter
the Setup Mode.
• Access the Setup Mode via the printer’s home (requires an
optional EasyLAN interface board).
See “Setup Mode” on page 77 and the EasyLAN documentation.
Intermec Fingerprint
• Use setup strings to change individual setup parameters
remotely from the host.
• Use setup files to create sets of setup parameters remotely
from the host.
See the Intermec Fingerprint v8.3x manuals.
Intermec Direct Protocol
• Use setup strings to change individual setup parameters
remotely from the host.
See the Intermec Direct Protocol v8.3x manuals.
60
EasyCoder PX4i Bar Code Label Printer User’s Guide (Fingerprint Version)
Chapter 6 — Setting Up the Printer
Default Setup
The printer’s default setup is listed below, with no options
included.
Ser-Com “uart1:”
Baud rate
9600 bps
Character length
8 bits
Parity
None
Stop bits
1 bit
RTS/CTS
Disable
ENQ/ACK
Disable
XON/XOFF, data to host
Disable
XON/XOFF, data from host
Disable
New line
CR/LF
Receive buffer
1024 bytes
Transmit buffer
1024 bytes
Feed Adjust
Start adjust
0 dots
Stop adjust
0 dots
Media
X-Start
24 dots
Width
424 dots
Label length
1200 dots
Media type
Label (with Gaps)
Paper type
Thermal transfer
Ribbon Constant
90
Ribbon factor
25
Label offset
0
Ribbon sensor (low diameter)
0 mm
Contrast
0%
EasyCoder PX4i Bar Code Label Printer User’s Guide (Fingerprint Version)
61
Chapter 6 — Setting Up the Printer
Media
Paper sensor (low diameter)
0 mm
Configuration
Print speed
200 mm/sec.
Reading the Current Setup
The printer’s current setup values can be read from the printer’s
display window by browsing through the Setup Mode.
You can list the printer’s current setup values by printing test label
“Setup Info” in the Setup Mode or by using Intermec Shell.
The current setup values can be sent to the host via the standard
serial communication channel using a SETUP WRITE
"uart1:"statement. For more information. see Intermec
Fingerprint v8.3x, Programmer’s Reference Manual (P/N 933-054xxx).
Setup Parameters
Serial Communication
The serial communication parameters control the
communication between the printer and the connected computer
or other devices on the serial port "uart1:" and the optional serial
ports "uart2:", "uart3:", "uart4:", and "uart5:". The optional
ports require one or two optional interface boards. The printer’s
firmware detects if an interface board is installed in the printer
and presents additional sets of commu-nication setup menus
depending on type of communication (refer to the overviews in
“Setup Mode” on page 77).
Note: The serial communication parameters have no effect on
parallel or EasyLAN communications., or on the IN and OUT
ports on the optional Serial/Industrial Interface Board.
For the serial communication channel "uart1:", the following
parameters can be set. Make sure the printer’s communication
parameters match the setup of the connected device or vice versa.
If the setup of the printer and the setup of the host do not match,
the response from the printer to host will be garbled.
62
EasyCoder PX4i Bar Code Label Printer User’s Guide (Fingerprint Version)
Chapter 6 — Setting Up the Printer
Baud Rate
The baud rate is the transmission speed in bits per second. There
are 10 options:
• 300
• 600
• 1200
• 2400
• 4800
• 9600 (default)
• 19200
• 38400
• 57600
• 115200
Character Length
The character length specifies the number of bits that will define
a character. Eight bits are recommended, because that option
allows more special characters and characters specific for foreign
languages to be used. Refer to the Intermec Fingerprint v8.3x,
Programmer’s Reference Manual for more information.
• 7 Characters ASCII 000 to 127 decimal
• 8 Characters ASCII 000 to 255 decimal (default)
Parity
The parity decides how the firmware will check for transmission
errors. There are five options:
• None (default)
• Even
• Odd
• Mark
• Space
Stop Bits
The number of stop bits specifies how many bits will define the
end of a character. There are two options:
EasyCoder PX4i Bar Code Label Printer User’s Guide (Fingerprint Version)
63
Chapter 6 — Setting Up the Printer
• 1 (default)
• 2
Flow Control
RTS/CTS is a protocol where the communication is controlled
by currents through separate lines in the cable being set either to
high or low. By default, this option is disabled.
RTS high indicates that the transmitting unit is able to receive
characters. RTS low indicates that the receive buffer is filled to
75% (see XON/ XOFF).
CTS high indicates that the unit transmitting the CTS signal is
ready to receive data. CTS low indicates that the receive buffer is
full (see XON/ XOFF). In some computer programs, for example
MS Windows Terminal, RTS/CTS is designated “Hardware.”
ENQ/ACK is a protocol where the communication is controlled
by the control characters ENQ (ASCII 05 dec.) and ACK (ASCII
06 dec.) being transmitted on the same line as the data. The
sending unit transmits ENQ at regular intervals. If the response
ACK is not received, the transmission is held up awaiting an
ACK character from the receiving unit. By default, ENQ/ACK is
disabled.
XON/XOFF is a protocol where the communication is
controlled by the control characters XON (ASCII 17 dec.) and
XOFF (ASCII 19 dec.) being transmitted on the same line as the
data. XON/XOFF can be enabled/disabled separately for data
received from the host by the printer (printer sends XON/XOFF)
and for data transmitted to the host from the printer (host sends
XON/XOFF).
XOFF is sent from the printer when its receive buffer is filled to
75%, and the transmission from the host is held, waiting for an
XON character. When enough data has been processed so the
receive buffer is filled only to 50%, the printer sends an XON
character and the host resumes transmitting data. The same
principles apply to XON/XOFF sent by the host, even if the
percentage figure may differ. By default, XON/XOFF is disabled
for data in both directions.
New Line
Selects the character(s) transmitted from the printer to specify the
switch-ing to a new line. There are three options:
64
EasyCoder PX4i Bar Code Label Printer User’s Guide (Fingerprint Version)
Chapter 6 — Setting Up the Printer
• CR/LF ASCII 13 + 10 decimals (default)
• LF ASCII 10 decimals
• CR ASCII 13 decimals
Receive Buffer
The receive buffer stores the input data before processing.
Default size is 1024 bytes.
Transmit Buffer
The transmit buffer stores the output data to be transmitted
before transmission. Default size is 1024 btyes.
Feed Adjust
The Feed Adjust part of the Setup Mode controls how much of
the media is fed out or pulled back before and/or after the actual
printing. These settings are global and will be effected regardless
of which program is run.
Note: The firmware uses the front edges of labels with gaps, the
ends of detection slots, and the forward edges of black marks for
detection, all seen in relation to the feed direction.
Start Adjust
The Start Adjust value is given as a positive or negative number of
dots (1 dot = 0.125 mm = 4.9 mils). Default value is 0, which
places the origin a certain distance back from the forward edge of
the copy.
• A positive start adjustment means that the specified length of
media will be fed out before the printing starts. Thus, the
origin is moved further back from the forward edge of the
copy.
• A negative start adjustment means that the specified length of
media will be pulled back before the printing starts. Thus, the
origin is moved towards the forward edge of the copy.
Stop Adjust
The Stop Adjust value is given as a positive or negative number of
dots (1 dot = 0.125 mm = 4.9 mils). Default value is 0, which
stops the media feed in a position suitable for tear off operation.
EasyCoder PX4i Bar Code Label Printer User’s Guide (Fingerprint Version)
65
Chapter 6 — Setting Up the Printer
• A positive stop adjustment means that the normal media feed
after the printing is completed will be increased by the
specified value.
• A negative stop adjustment means that the normal media
feed after the printing is completed will be decreased by the
specified value.
Recommended Feed Adjustments
The following settings allow printing from the top of the label.
Minor deviations from the recommended values may be required
due to various combinations of media types, roll size, type of
media supply device, and individual differences between printers.
Adjustment
type
8 dots/mm
203.2 dpi
11.81 dots/mm
300 dpi
Distance
Tear-Off (Straight-through)
Start adjust
-108 dots
-160 dots
13.5 mm/ 0.54 in
Stop adjust
0 dots
0 dots
0
Peel-Off (Self-strip)
Start adjust
-80 dots
-118 dots
10 mm/0.39 in
Stop adjust
-40 dots
-60 dots
5 mm/0.20 in
Cut between labels with gaps
Start adjust
-287 dots
-424 dots
35.9 mm/1.41 in
Stop adjust
+176 dots
+260 dots
22 mm/0.87 in
Cut fix and variable length strip
Start adjust
-294 dots
-434 dots
36.8 mm/1.45 in
Stop adjust
+298 dots
+440 dots
37.3 mm/1.47 in
Media
The media parameters tell the firmware the characteristics of the
media that will be used, so the printout will be positioned
correctly and get the best quality possible.
Media Size
The size of the printable area is defined by three parameters;
X-Start, Width, and Length.
66
EasyCoder PX4i Bar Code Label Printer User’s Guide (Fingerprint Version)
Chapter 6 — Setting Up the Printer
X-Start
Specifies the position of the origin along the dots on the
printhead.
By default, X-Start is 24 dots, which places the inner margin of
the print area 3 mm (0.118 in) from the inner edge of the media
and gives a maximum print width of 424 dots (53 mm/2.087 in).
This prevents printing outside labels when the liner is slightly
wider than the labels.
If you want to use the entire media width, reset the X-Start value
to 0 which gives a maximum print width of 448 dots
(56 mm/2.205 in).
By increasing the value for the X-Start parameter, the origin will
be moved outwards, away from the inner edge of the media path.
In other words, the larger X-Start value, the wider inner margin
and the less available print width.
Width
Specifies the width of the printable area in number of dots from
the origin. Thus, the sum of the X-Start and width values gives
the outer margin of the printable area. The width should be set to
prevent printing outside the media, which may harm the
printhead.
Length
Specifies the length of the printable area in number of dots from
the origin along the Y-coordinate and allocates memory space for
two identical image buffers in the printer’s temporary memory.
The size of each buffer can be calculated using this formula:
Buffer size (bits) = [Print length in dots] x
[Printhead width in dots]
Note: The temporary memory has other functions that also
require some memory space. To obtain a longer print area, the
memory can be increased by fitting a larger SDRAM SIMM on
the printer’s CPU board as described in the Service Manual.
• The length setup also decides the amount of media feed when
using “fix length strip.”
• The length setup creates an emergency stop, which works
when the printer is set up for “Label (with gaps)”, “Ticket
(with mark)”, or “Ticket (with gaps).” If the label stop sensor
EasyCoder PX4i Bar Code Label Printer User’s Guide (Fingerprint Version)
67
Chapter 6 — Setting Up the Printer
(LSS) has not detected a gap or mark within 150% of the set
length, the media feed is automatically stopped to avoid
feeding out a whole roll of media, because of an LSS
malfunction.
By setting up the X-Start, the Width, and the Length, you will
create a print window inside which the printing can be
performed. Any object or field extending outside the print
window in any direction will either be clipped or cause an error
condition (Error 1003 “Field out of label”), see Intermec
Fingerprint v8.xx, Command Reference Manual.
8 mm (0.32 in)
max. 112 mm (4.4 in)
Length
Dot-line
on printhead
Origin
X-start
Dot #0
PRINT
WINDOW
Width (1-896)
FEED
DIRECTION
Dot #895
25-120 mm (1-4.7 in)
Print Window 8 dots/mm (203.2 dpi) printhead
68
EasyCoder PX4i Bar Code Label Printer User’s Guide (Fingerprint Version)
Chapter 6 — Setting Up the Printer
8 mm (0.32 in)
max. 112 mm (4.4 in)
Length
Dot-line
on printhead
PRINT
WINDOW
Origin
X-start
Dot #0
Width (1-1322)
FEED
DIRECTION
Dot #1321
25-120 mm (1-4.7 in)
Print Window 11.81 dots/mm (300 dpi) printhead
Media Type
The Media Type parameters control how the label stop sensor
(LSS) and the media feed work. There are five media type
options:
• Gap is used for adhesive labels mounted on liner (backing
paper) or continuous paper stock with detection slots.
Default.
• Mark is used for labels, tickets, or strip provided with black
marks at the back.
• Continuous is used for continuous stock without any
detection slots or black marks.
• Label (with gaps) is used for adhesive labels mounted on liner.
• Ticket (with mark) is used for labels, tickets, or continuous
stock provided with black marks at the back.
EasyCoder PX4i Bar Code Label Printer User’s Guide (Fingerprint Version)
69
Chapter 6 — Setting Up the Printer
• Ticket (with gaps) is used for tickets and tags with detection
slits.
• Fix length strip is used for continuous stock where the length
of the print window decides the length of media to be fed out.
• Var length strip is used for continuous stock. The size of the
print image decides the length of each copy.
It is important to select the correct media type, so the printer can
indicate the following errors.
• Error 1005 “Out of paper” indicates that the last ordered copy
could not be printed because of an empty media stock.
• Error 1031 “Next label not found” indicates that the last
ordered label or ticket was successfully printed, but no more
labels/tickets can be printed because of an empty media stock.
Paper Type
The Paper Type parameters control the heat emitted from the
printhead to the direct thermal media or optionally the transfer
ribbon in order to produce the dots that make up the printout
image. Labels, tickets, tags, strip, and ribbons for various types of
application are available from Intermec. For the best printout
quality and maximum life of the printhead, use Intermec
supplies. Setup recommendations for Intermec supplies offered
in Europe and North America are listed in Appendix D.
As a general rule, high energy and/or high print speed will
shorten the life of the printhead. Never use higher paper type and
print speed settings than necessary for obtaining an acceptable
printout quality and throughput speed.
If the ambient temperature is lower than +15°C (+59°F), decrease
the speed by 50 mm/sec.
Start by choosing between two alternatives:
• Direct Thermal printing (default)
• Thermal Transfer printing (option)
Your choice will decide which parameters to enter next:
Direct Thermal Printing
• Label Constant (range 50 to 115)
• Label Factor (range 10 to 50)
70
EasyCoder PX4i Bar Code Label Printer User’s Guide (Fingerprint Version)
Chapter 6 — Setting Up the Printer
When adjusting the image darkness for non-Intermec direct
thermal media, set the Label Factor to the recommended value
for the type of direct thermal media. Set the Label Constant to
the value listed below and decrease or increase it for lighter or
darker images respectively until you are satisfied with the
printout quality.
Paper Type Settings Guide (Direct Thermal)
Sensitivity1
Label Constant Label Factor
Max. Print
Speed
Low
100
150
50
Standard
90
50
150
High
80
50
200
Ultra High
70
50
200
1. Note that the preprint and varnish decrease the sensitivity of direct
thermal media.
Thermal Transfer Printing
• Ribbon Constant (range 50 to 115)
• Ribbon Factor (range 10 to 50)
• Label Offset (range -50 to 50)
• Ribbon Sensor (auto-adjustment)
• Low Diameter (range 25 to 80 mm)
When adjusting the image darkness for non-Intermec media and
transfer ribbons, set the Ribbon Factor to the recommended
value for the type of thermal transfer ribbon. Set the Ribbon
Constant to the value listed below and decrease or increase it for
lighter or darker images respectively until you are satisfied with
the printout quality. The Label Offset parameter is presently not
used, so keep it at the default value 0.
Paper Type Settings Guide (Thermal Transfer)
Type
Ribbon
Constant
Ribbon
Factor
Max. Print
Speed
Wax (Europe)
70
25
150
Wax (U.S.A.)
70
25
150
EasyCoder PX4i Bar Code Label Printer User’s Guide (Fingerprint Version)
71
Chapter 6 — Setting Up the Printer
Paper Type Settings Guide (Thermal Transfer) (continued)
Ribbon
Constant
Ribbon
Factor
Max. Print
Speed
Wax/Resin
(Europe)
80
25
150-200
Wax/Resin
(U.S.A.)
90
25
150-200
Resin (Europe)
90
30
200
Resin (U.S.A.)
95
30
200
Type
The Ribbon Sensor parameter is read-only. When performing a
Testfeed or pressing Enter when the Ribbon Sensor menu is
displayed, the printer will feed out some media and autoadjust
the sensor. The resulting setting is displayed in the menu.
The Low Diameter parameter specifies the diameter of the
ribbon supply roll, where SYSVAR(26) switches from 0 to 1.
SYSVAR(26) = 0 means that there is still a sufficient supply of
ribbon, whereas SYSVAR(26) = 1 means that it is time to
consider replacing the ribbon supply. The diameter is expressed
in millimeters (1 mm = 0.04 in.) and an accuracy of ±3 mm can
be expected. Note that this setting has little effect unless
SYSVAR(26) is read by a Fingerprint program. However, Error
1083 “Ribbon Low” is reported at every tenth printing
operation. By default, the low diameter is 0, that is, the ribbon
low function is disabled.
Contrast
Use the contrast parameter to make minor adjustments of the
blackness in the printout, for example to adapt the printer to
variations in quality between different batches of the same media.
11 options are displayed in an endless loop from -10% to +10%.
Default value is 0%. The contrast is reset to the default (±0)
whenever a new paper type is specified, regardless which method
has been used.
72
EasyCoder PX4i Bar Code Label Printer User’s Guide (Fingerprint Version)
Chapter 6 — Setting Up the Printer
Testfeed
The sensitivity of the label stop sensor (LSS) may need to be
adjusted when switching from one type of media to another. This
is especially the case when using adhesive labels since the
transparency of the liner (backing paper) may vary. When the
Testfeed menu is displayed, press Enter. A number of blank
copies will be fed out until the firmware has decided the proper
setting for the LSS. At the same time, the front edges of the
labels, tickets, etc. are detected so the feed control can position
the media according to the Feed Adjust parameter (same as the
Intermec Fingerprint statement TESTFEED). Four values used
for troubleshooting the LSS are displayed (read-only
information).
Print Defines
Head Resistance
The printhead resistance is measured automatically at startup
(read-only information).
Testprint
The test labels “Diamonds”, “Chess”, “Bar Codes #1”, and “Bar
Codes” are used to check the printout quality and facilitate
adjustment of the printhead pressure, see “Printhead Pressure”
on page 131. The test labels “Setup Info” and “Hardware info”
list the printer’s current setup and the installed electronic devices.
Test label “Network Info” is only printed if the printer has an
optional EasyLAN interface board. If the information does not
fit on one label, two or more labels will be printed. If the printer
refuses to print a test label, press F5/i to find out what is wrong,
for example “printhead lifted” or “out-of paper”.
EasyCoder PX4i Bar Code Label Printer User’s Guide (Fingerprint Version)
73
Setup Info
74
CR/LF
0
0
36
1286
5000
LABEL (w GAPS)
TRANSFER
100
40
100
25
0
8
0
+0%
8
0
77 162 3 6
974
100
DISABLE
DISABLE
CR/LF
1024
1024
9600-8-N-1
DISABLE
DISABLE
PX4i
4.0 (CLIC version 1)
8192 (k)
0+4096 (k)
0 (k)
4077568 bytes free
1769700 bytes free
0 (m)
Model
Hardware version
Ram
Flash
CompactFlash
c:
tmp:
Odometer
Hardware
1-971652-50 / PSU / 1.1 / 0052-000000
1-971653-25 / Console / 1.0 / 0053-000000
1-959035-00 / TPH / 0.0 / 00037-00001
1-971630-50 / CPU / 1.1 / 0030-001033
FIRMWARE
Fingerprint
8.30
MCS1743 DD-MMM-YY hh:mm:ss
Boot
DD-MMM-YY hh:mm:ss
UART1
RTS/CTS
ENQ/ACK
XON/XOFF
DATA TO HOST
DATA FROM HOST
NEW LINE
REC BUF
TRANS BUF
PRINT CONFIG
NEW LINE
STARTADJ
STOPADJ
XSTART
WIDTH
LENGTH
MEDIA TYPE
PAPER TYPE
LABEL CONSTANT
LABEL FACTOR
RIBBON CONSTANT
RIBBON FACTOR
LABEL OFFSET
RIBBON SENSOR
RIBBON LOW DIAMETER
CONTRAST
PAPER SENSOR
PAPER LOW DIAMETER
TESTFEED
HEAD RESIST
PRINT SPEED
Chapter 6 — Setting Up the Printer
Test Labels
974 ohms/11.81 dots/mm
Diamonds
Chess
Bar Codes #1
Bar Codes #2
Hardware Info
EasyCoder PX4i Bar Code Label Printer User’s Guide (Fingerprint Version)
Chapter 6 — Setting Up the Printer
Print Speed
The print speed is variable between 100 and 300 mm/sec.
Generally, the lower the speed, the better the printout quality.
This is especially true when printing bar codes with the bars
running across the media path (“ladder style”), when printing on
demanding face materials, and when printing at low ambient
temperatures. The default setting is 200 mm/sec (approximately
8 in/sec).
Refer to “Intermec Supplies” on page 161 for recommended
maximum print speed for various combinations of Intermec
media and transfer ribbon.
LSS Test
The function on the label stop sensor (LSS) can be tested
automatically or manually as described in “Adjustments” on
page 129.
LTS (Label Taken Sensor)
The sensitivity of the LTS can be tested and adjusted as described
in “Adjustments” on page 129.
Returning to Factory Default Setup
There are two ways to return to the factory default setup of the
printer:
• Insert a special CompactFlash memory card and restart the
printer.
• Use the printer’s built-in keyboard.
To return to factory default setup using the keyboard
1 Lift the printhead.
2 Switch on the power to the printer and press F5/i and wait
until the printer beeps.
Quickly press the following keys:
d/F4, c/F2, c/F2, e/F1
3 The following message will be displayed:
Factory Default?
Enter=Yes ESC=No
EasyCoder PX4i Bar Code Label Printer User’s Guide (Fingerprint Version)
75
Chapter 6 — Setting Up the Printer
4 Within 10 seconds, press Enter to reset the printer to factory
default. The parameters will be reset and the printer will
continue the normal startup.
If you press c/F2 or wait until the 10 seconds time-out has
passed, the normal startup process will continue without any
reset being performed.
Note: If any of the files "card:NOSHELL.CFG",
rom:NOSHELL.CFG", or "c:NOSHELL.CFG"exists in the
printer’s memory, no reset to factory default will be performed.
The factory default will remove all files used to store settings. It
will not reset settings that already has been read when the files are
removed. This means that EasyLAN Wireless settings (SSID,
keys, etc.) will retain their values from the previous start.
However, the next reboot will reset them to factory default.
76
EasyCoder PX4i Bar Code Label Printer User’s Guide (Fingerprint Version)
7
Setup Mode
This chapter describes how to enter the setup mode at
installation, explains how to navigate in the setup mode, and
provides overviews over which parameters and messages are
available for the standard printer and with various interface
boards.
EasyCoder PX4i Bar Code Label Printer User’s Guide (Fingerprint Version)
77
Chapter 7 — Setup Mode
Entering Setup Mode at Installation
The method of entering the Setup Mode depends on which
startup files are stored in the printer’s memory, a subject that was
more thoroughly discussed in “Startup Files” on page 18.
EasyCoder PX4i with Intermec Shell
1 Switch on the power.
2 When the display shows the message “Enter=Shell; x sec...”,
press Enter.
3 Press Setup (this facility can be used anywhere within
Intermec Shell).
4 Set up the printer as described in this chapter.
5 Return to Intermec Shell by pressing Setup.
EasyCoder PX4i with a custom-made application program
Normally, there is no need to enter the Setup Mode when using
application programs that start up automatically. Necessary
provisions for changing the setup, manually or automatically,
should be provided by the program.
78
EasyCoder PX4i Bar Code Label Printer User’s Guide (Fingerprint Version)
Chapter 7 — Setup Mode
Navigating in Setup Mode
Enter the Setup Mode by pressing Setup on the printer’s front
panel. Text in the display guide you through the setup procedure.
Use the printer’s keyboard to navigate menus, acknowledge
displayed values, or select or enter new values.
Note: An external keyboard cannot be used inside the Setup
Mode.
Keyboard Buttons for Setup Mode
Button
Function
Move one menu to the left on the same level or
scroll back in a stack of options.
Move up one level.
Move one menu to the right on the same level or
scroll forward in a stack of options.
Move down one level.
Display error messages at test label printing
failure.
-
Enter numeric values.
Specify negative values (leading position).
Clear displayed values.
Acknowledge and move to next menu or perform
test feeds in the Testfeed menu, or print test
labels in the Test label menu.
Exit the Setup Mode. Can be used anywhere in
Setup Mode.
EasyCoder PX4i Bar Code Label Printer User’s Guide (Fingerprint Version)
79
Chapter 7 — Setup Mode
The Setup Mode is organized as an endless loop, from which you
can select a number of sub-categories. with a number of subcategories. At startup, the firmware determines if options such as
label taken sensor or an interface board are installed in the
printer. Only installed options are shown in the Setup Mode.
The diagram below shows the options in the main loop. Detailed
overviews are shown on the following pages.
Starting point
SETUP:
SER-COM, UART2
SETUP:
SER-COM, UART1
Option
SETUP:
SER-COM, UART3
Option
SETUP:
PRINT DEFS
SETUP:
SER-COM, UART4
Option
SETUP:
SER-COM, UART5
SETUP:
MEDIA
Option
SETUP:
FEEDADJ
SETUP:
NET-COM, NET1
SETUP:
NETWORK
Option
Option
80
EasyCoder PX4i Bar Code Label Printer User’s Guide (Fingerprint Version)
Chapter 7 — Setup Mode
Setup Modes
Serial Communication “uart1:”
(Intermec Fingerprint v8.30)
Legend:
Dotted boxes and lines indicate options.
Thick boxes indicates default options.
Values inside brackets indicate default settings.
EasyCoder PX4i Bar Code Label Printer User’s Guide (Fingerprint Version)
81
Chapter 7 — Setup Mode
Feed Adjust
(Intermec Fingerprint v8.30)
82
EasyCoder PX4i Bar Code Label Printer User’s Guide (Fingerprint Version)
Chapter 7 — Setup Mode
Media
(Intermec Fingerprint v8.30)
EasyCoder PX4i Bar Code Label Printer User’s Guide (Fingerprint Version)
83
Chapter 7 — Setup Mode
Print Defs
(Intermec Fingerprint v8.30)
84
EasyCoder PX4i Bar Code Label Printer User’s Guide (Fingerprint Version)
Chapter 7 — Setup Mode
Serial Communication “uart2:” (option)
(Intermec Fingerprint v8.30)
SETUP:SETUP:
SER-COM, UART2
SER-COM, UART2:
BAUDRATE
BAUDRATE;
9600
BAUDRATE;
19200
BAUDRATE;
38400
BAUDRATE;
57500
BAUDRATE;
115200
BAUDRATE;
300
BAUDRATE;
600
BAUDRATE;
1200
BAUDRATE;
2400
BAUDRATE;
4800
EasyCoder PX4i Bar Code Label Printer User’s Guide (Fingerprint Version)
85
Chapter 7 — Setup Mode
Serial Communication “uart3:” (option)
(Intermec Fingerprint v8.30)
86
EasyCoder PX4i Bar Code Label Printer User’s Guide (Fingerprint Version)
Chapter 7 — Setup Mode
Serial Communication “uart4:” (option)
(Intermec Fingerprint v8.30)
EasyCoder PX4i Bar Code Label Printer User’s Guide (Fingerprint Version)
87
Chapter 7 — Setup Mode
Serial Communication “uart5:” (option)
(Intermec Fingerprint v8.30)
88
EasyCoder PX4i Bar Code Label Printer User’s Guide (Fingerprint Version)
Chapter 7 — Setup Mode
Network Communication “net1:” (option)
(Intermec Fingerprint v8.30)
EasyCoder PX4i Bar Code Label Printer User’s Guide (Fingerprint Version)
89
Chapter 7 — Setup Mode
90
EasyCoder PX4i Bar Code Label Printer User’s Guide (Fingerprint Version)
8
Intermec Shell Startup
Program
This chapter describes the Intermec Shell Startup program and
covers the following topics:
• Introduction
• Starting with Intermec Shell
• Intermec Shell Overview
• Line Analyzer
EasyCoder PX4i Bar Code Label Printer User’s Guide (Fingerprint Version))
91
Chapter 8 — Intermec Shell Startup Program
Introduction
Intermec Shell is a startup program, which is a program that
automatically starts running when the printer is switched on.
Intermec Shell helps the operator to choose between a number of
standard or custom-made application programs and to start
certain useful facilities, as listed below.
Application Programs
• Intermec Fingerprint (for creating your own programs or to
run the Intermec InterDriver)
• Intermec Direct Protocol (easy-to-use slave protocol)
• LINE_AXP.PRG (line analyzer program)
• Other application programs in the printer’s memory.
A prerequisite for a program to appear as an option in
Intermec Shell is that the program is provided with the
extension “.PRG” and is stored in the root of the directory
“/c” or “card1:”. However, some original Intermec utility
programs are excluded as long as they remain stored in
“/rom”:
• ERRHAND.PRG
• FILELIST.PRG
• LBLSHTXT.PRG
• KAUTO.PRG
• SHELLXP.PRG
• WINXP.PRG
Other Facilities
• Setup Mode (manual setup from printer’s keyboard)
• Print Setup (printing setup on label)
• Testfeed (form feeds and auto-adjust of the LSS)
• Test Label (printing of test labels)
• Default setup (resetting all setup parameters to default)
92
EasyCoder PX4i Bar Code Label Printer User’s Guide (Fingerprint Version)
Chapter 8 — Intermec Shell Startup Program
• Software Update (downloading data from a host to a
CompactFlash card in the printer, upgrading the printer’s
firmware from a Compact- Flash card, or upgrading the
printer’s firmware from a file in a PC)
• Reboot (restarting the printer)
Note: Intermec Shell is factory-installed in the printer’s
permanent memory (device “/rom”). If you insert a memory card
with another startup file before you switch on the printer, or if
there is a startup file stored in the printer’s permanent memory
(device “/c”), this startup file will be used instead of Intermec
Shell (see “Startup Files” on page 18).
Starting with Intermec Shell
A few seconds after you have switched on the power to the
printer and the initialization is completed, the countdown menu
of the Intermec Shell program will be displayed:
ENTER=SHELL
5 sec. v.8.1
Now you have 5 seconds to enter Intermec Shell by pressing
Enter. The lower line tells you how much time you have left.
Should the time run out before you have taken any action, the
last selected application in Intermec Shell will be opened. If you
use the same application all the time, you will only need to switch
on the power, once the application has been selected.
If no other application has yet been selected, the current version
of Intermec Fingerprint will be opened with “auto” selected as std
I/O channel (see Intermec Fingerprint manuals). When the
countdown is completed, you will see these lines in the display:
FINGERPRINT
8.20
If you want to select another application, just cycle the power and
enter Intermec Shell before the countdown is completed.
EasyCoder PX4i Bar Code Label Printer User’s Guide (Fingerprint Version)
93
Chapter 8 — Intermec Shell Startup Program
When you enter the Intermec Shell from the countdown menus,
the Select Application menu displays:
SHELL
SEL. APPLICATION
In this menu, you can choose between two options:
• Press Enter to go to menus where you can select an
application program.
• Press X to go to the Facilities part of Intermec Shell.
Selecting an Application
In Intermec Shell, the menus present the options in infinite
loops, To see all menus and options, refer to the overview in this
chapter. The Select application lets you choose an application
program that resides in the printer’s memory:
• Current appl. starts the last selected application (by default
Intermec Fingerprint with “auto” selected as standard I/O
channel).
• Fingerprint is used to create, modify, or run programs written
in the Intermec Fingerprint programming language and to
run the Intermec InterDriver. This option requires that you
also select a standard IN/OUT channel, which is the channel
you want to use for communication between the printer and
the computer. Normally, you select “uart1:”. Refer to the
Intermec Fingerprint manuals.
• Direct Protocol is an easy-to-use printer protocol for
downloading label formats and variable input data to a printer
from a host computer. This option requires that you also
select a standard IN/OUT channel, that is the serial channel
you want to use for communication between the printer and
the host. Normally, you select “uart1:”. Refer to the Intermec
Fingerprint v8.xx, Command Reference Manual.
• LINE-AXP.PRG (Line Analyzer) is a Fingerprint program
that captures characters received by the printer on a
communication channel and prints them on labels.
• Other Application Programs will presented as additional
options.
94
EasyCoder PX4i Bar Code Label Printer User’s Guide (Fingerprint Version)
Chapter 8 — Intermec Shell Startup Program
Note: When an application program is started, it may
automatically change the communication setup. If another
application is selected later, this communication setup will remain
valid, unless the new application includes instructions that
automatically change the setup. The setup could also be changed
manually in the Setup Mode.
Selecting Other Facilities
As an alternative to selecting an application, you can step through
a number of other useful facilities:
Setup
Set up the printer using its built-in keyboard, see “Setup Mode”
on page 77.
Print Setup
Produce a printout of the printer’s current setup values (test label
“Setup Info”).
Testfeed
Feed out a number of label, ticket, tag, or portions of continuous
stock while the printer auto-adjusts its media feed and
label stop/black mark sensor. It is recommended to perform a
Testfeed each time you load a roll of labels from a new batch or a
different brand.
Test Label
Print a series of four test labels (test labels “Diamonds”, “Chess”,
“Bar Codes #1”, and “Bar Codes #2”) in order to test the
printout quality and printhead alignment. The labels are
presented in an infinite loop, so you can print the series over and
over again. Press Enter for each new label.
Default Setup
Reset all setup parameters to their default values, as listed in
“Default Setup” on page 61.
Software Update
Using the Zmodem communication tool, files can be
downloaded from a PC, either to be stored on a standard
CompactFlash memory card or to upgrade the printer’s firmware.
The following options are available:
• Update CompactFlash card allows the printer to be used as a
CompactFlash card programming device. Any files can be
EasyCoder PX4i Bar Code Label Printer User’s Guide (Fingerprint Version)
95
Chapter 8 — Intermec Shell Startup Program
downloaded from a PC to a standard CompactFlash card
inserted in the memory card slot in the printer’s rear plate.
A typical application is to create a firmware upgrade card from
an upgrade file stored in a PC. You can use the card to
upgrade the firmware in several printers simply by moving the
card from printer to printer. Just insert the card, switch on the
power, and wait from the prompts to appear in the printer’s
display window.
Update firmware is used to directly upgrade the firmware of a
specific printer from a new firmware version stored as a file in a
PC. If the printer is equipped with an EasyLAN Ethernet or
Wireless board, the user must have access rights to upgrade the
firmware, see the EasyLAN User’s Guide for the Ethernet or
Wireless board.
If the CompactFlash card or upgrade file contains an earlier
firmware version than the one in the printer, the printer’s
firmware will be downgraded without warning.
Firmware upgrade files can be found on www.intermec.com or be
obtained from your local Intermec distributor.
Reboot
Corresponds to cycling the power to the printer. To exit Intermec
Shell without having selected any application, select Reboot.
Then wait for the 5 seconds countdown to finish, and the last
selected application will be opened.
96
EasyCoder PX4i Bar Code Label Printer User’s Guide (Fingerprint Version)
Chapter 8 — Intermec Shell Startup Program
Intermec Shell v8.1 Overview
3 sec.
v.8.2
ENTER=SHELL
2 sec.
v.8.2
SEL. APPLICATION
STD I/O CHANNEL
Direct Protocol
auto
Optional application
STD I/O CHANNEL
programs
uart1:
ENTER=SHELL
STD I/O CHANNEL
1 sec.
uart2:
v.8.2
Last selected
application is started
Default:
Fingerprint 8.30 w. std I/O = "auto"
STD I/O CHANNEL
uart3:
STD I/O CHANNEL
centronics:
Legend:
The selected application is started
is fitted.
ENTER=SHELL
STD I/O CHANNEL
net1:
Return to previous menu.
STD I/O CHANNEL
Proceed to next menu.
usb1:
STD I/O CHANNEL
Accept displayed option
and proceed, or
execute displayed option.
uart4:
STD I/O CHANNEL
uart5:
Perform a Testfeed
anywhere in Intermec Shell.
SEL.APPL rom:
LINE_AXP.PRG
Enter the Setup Mode
from anywhere
in Intermec Shell.
SHELL
SETUP:
SETUP
SER-COM,UART1
SHELL
See the chapter “Setup Mode”
Prints a list of current setup values (test label “Setup Info”).
PRINT SETUP
SHELL
TESTFEED
Performs a Testfeed (feeds out a number of blank copies
while autoadjusting the label stop sensor).
SHELL
Prints test labels “Diamonds”, “Chess”, “Bar Codes #1”, and “Bar Codes #2” in a loop.
Press Enter for each new label.
TEST LABEL
SHELL
ARE YOU SURE?
DEFAULT SETUP
DEFAULT SETUP
YES=ENTER/NO=ESC
PERFORMED
SHELL
UPDATE:
COMPACT FLASH?
TRANSFER FILE
SOFTWARE UPDATE
USING ZMODEM
TRANSFER
COMPLETED
SHELL
REBOOT
UPDATE:
TRANSFER FILE
FIRMWARE?
USING ZMODEM
Restarts the printer (same as power off/on)
EasyCoder PX4i Bar Code Label Printer User’s Guide (Fingerprint Version)
Printer rebooted
automatically.
97
Chapter 8 — Intermec Shell Startup Program
Line Analyzer
The Line Analyzer (LINE_AXP.PRG) is a program written in the
Intermec Fingerprint programming language and is intended to
help solving possible communication problems. As the name
implies, the Line Analyzer captures all incoming characters on a
specified communication channel and prints them on one or
more labels.
Printable characters are printed in black-on-white, whereas
control characters and space characters (ASCII 000–032 dec) are
printed in white-on-black.
While the printer is receiving data, the “Ready” LED blinks.
There is a 0.5 second time-out. That is, if no more characters
have been received after 0.5 second, the program considers the
transmission terminated and prints out a label.
As long as a continuous string of characters is being received, the
program wraps the lines until the label is full and then starts to
print another label. At the bottom of each label, the following
information is printed:
• Page number
• Number of characters printed on the label
• Total number of characters received so far
The Line Analyzer is displayed as the option “LINE_AXP.PRG”
under the “SEL. APPLICATION” menu. After the Line Analyzer
has been selected and the printer has started up again, the printer
feeds out two labels and the following menu is displayed:
Line Analyzer
Sel.port(1-6) 1
Enter the desired communication port using the numeric keys on
the printer’s keyboard:
1 = “uart1:”
2 = “uart2:”
3 = “uart3:”
4 = “centronics:”
98
EasyCoder PX4i Bar Code Label Printer User’s Guide (Fingerprint Version)
Chapter 8 — Intermec Shell Startup Program
5 = “net1:”
6 = “usb1:”
If the printer is not fitted with the specified port, an error
message appears in the display and you can select another port:
Line Analyzer
Error: 56
EasyCoder PX4i Bar Code Label Printer User’s Guide (Fingerprint Version)
99
Chapter 8 — Intermec Shell Startup Program
100
EasyCoder PX4i Bar Code Label Printer User’s Guide (Fingerprint Version)
9
Options
This chapter describes the options available for the EasyCoder
PX4i printer. The options can be factory installed, field-installed
by an authorized service technician, or in some cases installed by
the operator.
EasyCoder PX4i Bar Code Label Printer User’s Guide (Fingerprint Version)
101
Chapter 9 — Options
Introduction
The EasyCoder PX4i printer provides a high degree of flexibility
because it has a modular design. By adding options to the basic
printer, the EasyCoder PX4i printer can be adapted for a variety
of applications. Some options should be installed by an
authorized service technician or are only available as
factory-installed options.
3-inch
adapter
(included)
EasyLAN Wireless
antenna
Fanfold
guides
Media roll
retainer
Alphanumeric
keyboard
Label taken
sensor
Paper
cutter
Liner/batch
takeup
PX4i options
102
EasyCoder PX4i Bar Code Label Printer User’s Guide (Fingerprint Version)
Chapter 9 — Options
Liner/Batch Takeup Kit
This is a factory-installed option only and is used to separate
labels from the liner and wind up the spent liner inside the
printer’s media compartment. Labels, tickets, tags, etc. can be
wound up inside the media compartment after printing by fitting
a special guide to the front of the print unit.
The kit consists of a stepper motor that drives the liner drive
roller in the print unit (fitted as standard) and a takeup hub in
the media compartment. A guide shaft is fitted to the center
section immediately behind the slack absorber. A guide plate is
fitted at the rear of the media compartment and can be used to
replace the standard tear bar on the print unit for batch takeup
operation.
Operation and media load are described in “Peel-Off (SelfStrip)” on page 34 and “Internal Batch Takeup (Roll-to-Roll)”
on page 40.
Paper Cutter
The EasyCoder PX4i printer can easily be fitted with an optional
paper cutter. The cutter unit replaces the front door or the label
taken sensor (LTS), if one is equipped. It is connected by a single
cable to the DIN-connector on the printer’s front. The paper
cutter is available both as a factory-installed option and as a
operator-installable kit.
The paper cutter increases the printer’s total weight by
approximately 1.0 kg (2.2 lb) and its length by 28 mm (1.1 in).
The paper cutter is intended to cut through continuous nonadhesive paper-based media or through the liner between labels.
It must not cut through any adhesive, which would stick to the
cutting parts and rapidly render the cutter inoperable–possibly
also causing damage to the electric motor. Maximum thickness
for normal paper-based materials is 175 μm (≈175 grams/m2).
The paper cutter can be tilted forward in order to facilitate
cleaning and media load. For media load instructions, see
“Cut-Off ” on page 29.”
The cutter is activated by CUT or CUT ON instructions, see the
Intermec Fingerprint v8.3x manuals.
EasyCoder PX4i Bar Code Label Printer User’s Guide (Fingerprint Version)
103
Chapter 9 — Options
The rotating edge will cut through the media approximately
37 mm (1.5 in) in front of the printer’s dot line. The media feed
should be adjusted accordingly, see “Setup Mode” on page 77.
Should you inadvertently cut through self-adhesive labels, you
will have to clean the cutting parts. Tilt the cutter unit down and
wipe it using a piece of tissue moistened with isopropyl alcohol.
The cutting edge will rotate when the power is switched on
and when the printer is re-booted. Always keep the cutter in
closed position during operation. Switch off the power or
disconnect the cutter before cleaning. Keep your fingers away
from cutting edges!
Fanfold Guides
The fanfold guides provide more exact routing of the media
when the supply is placed outside the media compartment, such
as a stack of fanfolded tickets. The guides come as an operatorinstallable kit with installation instructions. The guides can be
fitted in the upper or lower slot in the rear plate.
Instructions for loading the media are included in the section
“External Supply (Fanfold)” on page 47.
Media Roll Retainer
The media roll retainer is intended for applications where the
media may become misaligned on the media supply hub. The
plastic wing-shaped retainer is simply slipped onto the media
supply hub outside the media roll by the operator. No tools are
required.
104
EasyCoder PX4i Bar Code Label Printer User’s Guide (Fingerprint Version)
Chapter 9 — Options
3-inch Adapter
The 3 in/76 mm adapter is included in the package and makes it
possible to use media rolls with 3 in/76 mm inner diameter
cardboard cores.
The adapter is pressed onto the media supply hub and held in
place by a screw. When fitting the adapters, make sure that the
screw hits a rounded plastic surface, not a metal leaf spring.
Illustrations of how to load the media using the adapter can be
found in “Loading Media” on page 23.
Label Taken Sensor
The Label Taken Sensor (LTS) is a photoelectric sensor fitted to
the center section inside the front door. It allows the printer’s
firmware to detect if the latest printed label, ticket, tag etc. has
been removed before printing another copy.
The label taken sensor is usually factory-fitted, but is also
available as a kit for installation by an authorized service
technician. It cannot be fitted in combination with a paper
cutter.
The LTS can be enabled or disabled by means of the instructions
LTS& ON and LTS& OFF respectively in Intermec Fingerprint
and the Intermec Direct Protocol.
Real Time Clock
This factory or field-installed circuit (RTC) relieves the operator
or the host from having to set the clock/calendar using the
Intermec Fingerprint instructions DATE$ and TIME$ after each
power up. The RTC has its own backup battery backup that will
last 10 years or more.
CompactFlash Protection Plate
The protection plate encloses an inserted CompactFlash card and
makes it more difficult to steal, see illustration in “Memory
Card” on page 18. Operator-installed.
EasyCoder PX4i Bar Code Label Printer User’s Guide (Fingerprint Version)
105
Chapter 9 — Options
Alphanumeric Keyboards
The overlay of the printer’s built-in keyboard can be replaced
with an alphanumeric overlay. However, such a keyboard requires
an application program created using the Intermec Fingerprint
programming language.
External alphanumeric keyboards can be connected to the serial
port.
Interface Boards
A number of interface boards are available for use with the
EasyCoder PX4i printer. The interface boards are either factoryfitted or can easily be fitted by an authorized service technician.
The EasyCoder PX4i printer can accommodate one EasyLAN
interface board plus one or two other interface board.
EasyLAN boards:
• EasyLAN Ethernet interface
• EasyLAN Wireless interface
Other communication boards:
• Parallel Interface Board (IEEE 1284)
• Double Serial Interface Board
• Serial/Industrial Interface Board
106
EasyCoder PX4i Bar Code Label Printer User’s Guide (Fingerprint Version)
10
Troubleshooting
This chapter describes how the Intermec Ready-to-Work
indicator and other indicators work. It also lists various possible
cases of inferior printout quality, describes possible causes, and
suggests remedies.
EasyCoder PX4i Bar Code Label Printer User’s Guide (Fingerprint Version)
107
Chapter 10 — Troubleshooting
Intermec Ready-to-Work Indicator
The readiness of the printer, individually or as a part of a
solution, is indicated by the blue Intermec Ready-to-Work
indicator.
If the indicator blinks or is switched off, the printer is not ready.
Further information can be obtained in the display window by
pressing F5/i. In case of several errors or similar conditions
occurring simultaneously, only the most significant error is
displayed. Once this error has been cleared, next remaining error
is displayed.
The printer will also return error messages to the host, provided
there is a working two-way communication. Refer to the Intermec
Fingerprint v8.3x, Programmer’s Reference Manual.
Provided the printer is connected to a network, all conditions
that prevents printing are reported to the EasyADC Console.
The EasyADC Console is a PC-based software which allows a
supervisor to monitor all connected devices that have an
Intermec Ready-to-Work indicator, including handheld
computers, access points, and printers.
.
Display Messages and LED Indications
Error/Event
Ready-to-Work Error Number
Comment
Operational
On
0
No error
Out of paper
Blink
1005
Next label not found
Blink
1031
Label not taken
Blink
Out of transfer ribbon
Blink
1027
Head lifted
Blink
1022
Cutter does not respond Blink
1059
Cutter error1
Blink
1701
Cutter error2
Blink
1702
Cutter error3
Blink
1703
Cutter open
Blink
1704
LSS too high
Blink
1007
108
EasyCoder PX4i Bar Code Label Printer User’s Guide (Fingerprint Version)
Chapter 10 — Troubleshooting
Display Messages and LED Indications (continued)
Error/Event
Ready-to-Work Error Number
LSS too low
Blink
1008
Testfeed not done
Blink
1606
Pause Mode entered
Blink
Setup Mode entered
Blink
Including interactive setup
from Fingerprint/Direct
Protocol
IP link error
Blink
See note 1, 2, and 3
IP configuration error
Blink
See note 1, 3, and 4
Generic DP error
Blink
See note 5
Press any key to continue Blink
See note 6
Application load error
See note 7
Blink
Comment
IRI blink by application Blink
Set by Fingerprint instruction
SYSHEALTH
IRI off by application
Off
Set by Fingerprint instruction
SYSHEALTH
See note 8
Application break
Off
Printhead not found
Off
Rebooted
Off
Initializing
Off
Set at startup until operational
See note 3 and 9
Printer crash
Off
Printer turned off
Off
Maintenance
Off
Power supply Over
temperature
Off
1718
Printhead too hot
Off
1088
Set when upgrading
See note 10
Note 1: This is only applicable for printers equipped with an EasyLAN interface.
Note 2: A printer that is equipped with an EasyLAN interface, but is not connected to a
network, will have a blinking IRI. To avoid this, the user can set “IP SELECTION” to
“MANUAL” and “IP ADDRESS” to “0.0.0.0”. This will indicate that the user does not regard
the lack of network connection as an error.
Note 3: No trap can be sent when this error/event occurs.
Note 4: This error indicates that the printer has not received an IP address. It is only applicable
for printers with IP SELECTION set to DHCP and/or BOOTP.
EasyCoder PX4i Bar Code Label Printer User’s Guide (Fingerprint Version)
109
Chapter 10 — Troubleshooting
Note 5: In the Direct Protocol, the user can enable error handling for specific errors using the
ERROR statement. When errors added to the built-in error handling occur, this event will be
set. The text included in the snmp trap is the standard text corresponding to the error.
Note 6: If an error occurs in the Fingerprint immediate mode, for example “out of paper” when
the print key is pressed, this event will be set.
Note 7: If an application is started but does not execute, the IRI will blink. This will occur for
example if there is a syntax error in the loaded program file. This is useful when a printer has an
AUTOEXEC.BAT file (startup file) that is supposed to run automatically.
Note 8: When execution is stopped with user break (SHIFT + PAUSE) or due to a run-time
error, the IRI shall be off. It will be set to on if the user changes mode to Direct Protocol or runs
an application. If, however, the application program handles the user break (ON BREAK) or
the runtime error (ON ERROR GOTO), the IRI will not be affected. In this case, it is up to the
application to set the status.
Note 9: At most, but not all, printer crashes, the console is reset. This will make the IRI go off.
Note 10: If the printhead temperature raises above 100°C, error 1088 occurs.
In Fingerprint, printing will be aborted. Resuming printing after the printhead has cooled off to
85°C must be handled by the application program.
In the Direct Protocol, the printing is paused but will be automatically resumed when the
printhead has cooled off to 85°C. Meanwhile, the printer is able to receive instructions and data
until the buffer is filled.
110
EasyCoder PX4i Bar Code Label Printer User’s Guide (Fingerprint Version)
Chapter 10 — Troubleshooting
Troubleshooting
Overall Weak Printout
Possible Cause
Remedy
Reference
Wrong media grade
Change parameter
“Setup Parameters” on
page 62,
Contrast value too
low
Change parameter
“Setup Parameters” on
page 62
Printhead pressure
too low
Adjust pressure
“Printhead Pressure” on
page 131
Worn printhead
Replace printhead
“Replacing the
Printhead” on page 123
Wrong printhead
voltage
Replace CPU board
Call Service
Printout Weaker On One Side
Possible Cause
Remedy
Reference
Uneven printhead
pressure
Adjust arm alignment
“Printhead Pressure”
on page 131
Weak Spots
Possible Cause
Remedy
Reference
Foreign particles on Clean or replace
media
“Loading Media” on
page 23, “Loading
Ribbon” on page 52
Media/ribbon don’t Change to matching
match
media
“Media” on page 66
Poor media or
ribbon quality
Select a better brand
of media/ribbon
“Intermec Supplies” on
page 161
Worn printhead
Replace printhead
“Replacing the
Printhead” on page 123
Worn platen roller
Replace rollers
Call Service
EasyCoder PX4i Bar Code Label Printer User’s Guide (Fingerprint Version)
111
Chapter 10 — Troubleshooting
Overall Dark Printout
Possible Cause
Remedy
Reference
Wrong media grade
Change parameter
“Setup Parameters” on
page 62
Contrast value too
high
Change parameter
“Setup Parameters” on
page 62
Printhead pressure
too high
Adjust
“Printhead Pressure” on
page 131
Wrong printhead
voltage
Replace CPU board
Call Service
Excessive Bleeding
Possible Cause
Remedy
Reference
Wrong media grade
Change parameter
“Setup Parameters” on
page 62
Contrast value too
high
Change parameter
“Setup Parameters” on
page 62
Printhead pressure too Adjust pressure
high
Faulty energy control Replace CPU board
“Printhead Pressure” on
page 131
Call Service
Dark Lines Along Media Path
Possible Cause
Remedy
Reference
Foreign objects on
printhead
Clean printhead
“Printhead
Cleaning” on
page 116
White Vertical Lines
112
Possible Cause
Remedy
Reference
Printhead dirty
Clean printhead
“Printhead Cleaning”
on page 116
Missing printhead
Replace printhead
“Replacing the
Printhead” on page 123
EasyCoder PX4i Bar Code Label Printer User’s Guide (Fingerprint Version)
Chapter 10 — Troubleshooting
Large Part Of Dot Line Missing
Possible Cause
Remedy
Reference
Failing printhead
Replace printhead
“Replacing the
Printhead” on
page 123
Failing strobe signal
Check CPU-board
Call Service
Printout Missing Along Inner Edge
Possible Cause
Remedy
Reference
Bad media alignment
Adjust
“Loading Media” on
page 23
Using small core with
supply post in upper
position.
Move post to lower
position
“Installation” on
page 5
X-start parameter value
too low
Increase value
“Setup Parameters”
on page 62
Transfer Ribbon Breaks
Possible Cause
Remedy
Reference
Ribbon not fitted
correctly
Reload ribbon correctly
“Loading Ribbon” on
page 52
Wrong media grade Change parameter, then
clean printhead
Bad energy control
Adjust
“Setup Parameters”
on page 62
Call Service
Transfer Ribbon Wrinkles
Possible Cause
Remedy
Reference
Faulty ribbon break shaft Adjust
adjustment
“Narrow Media” on
page 130
Incorrect edge guide
adjustment
Adjust
“Loading Media” on
page 23
Printhead pressure too
strong
Adjust pressure
“Printhead Pressure” on
page 131
EasyCoder PX4i Bar Code Label Printer User’s Guide (Fingerprint Version)
113
Chapter 10 — Troubleshooting
No Thermal Transfer Printout
Possible Cause
Remedy
Ink-coated side of ribbon Reload ribbon
is not facing media
Reference
“Loading Ribbon”
on page 52
Media Feed Not Working Properly
Possible Cause
Remedy
Reference
Changed media
characteristics
Press Print
“Loading Media”
on page 23
Wrong label rest
parameter
Check/change
“Setup
Parameters” on
page 62
Wrong Media Type
parameter
Check/change
“Setup
Parameters” on
page 62
Wrong LSS position
Check/change
“Label Stop
Sensor” on
page 132
Dirty sensors
Clean sensors
“Cleaning the
Label Stop Sensor”
on page 121
Loose or missing adapter Replace and tighten set “Tear-Off
screw
(StraightThrough)” on
page 24
Faulty sensors
Replace sensors
Call Service
Compressed Text Or Bar Code
Possible Cause
Remedy
Too high print speed for Reduce print speed
large media roll
114
Reference
“Setup
Parameters” on
page 62
EasyCoder PX4i Bar Code Label Printer User’s Guide (Fingerprint Version)
11
Maintaining the Printer
This chapter describes how the operator can maintain the printer.
Regular maintenance is important for the printout quality and
for the life of the printhead. The chapter covers the following
topics:
• Printhead Cleaning
• External Cleaning
• Cleaning the Label Stop Sensor
• Replacing the Printhead
• Media Jams
When cleaning or replacing the printhead, take precautions to
avoid electrostatic discharges.
EasyCoder PX4i Bar Code Label Printer User’s Guide (Fingerprint Version)
115
Chapter 11 — Maintaining the Printer
Printhead Cleaning
Cleaning the printhead on a regular basis is important for the life
of the printhead and for the printout quality. You should clean
the printhead each time you replace the media. This section
describes how to clean the printhead using cleaning cards. If
additional cleaning is required, for example removing adhesive
residue from the platen roller or tear bar, use a cotton swab
moistened with isopropyl alcohol.
Isopropyl alcohol [(CH-3)2CHOH; CAS 67-63-0] is a highly
flammable, moderately toxic, and mildly irritating substance.
To clean the printhead
1 Open the front and side doors.
2 Turn the printhead lift lever counterclockwise to raise the
printhead.
116
EasyCoder PX4i Bar Code Label Printer User’s Guide (Fingerprint Version)
Chapter 11 — Maintaining the Printer
3 Remove any media and transfer ribbon.
Eas
yCod
er
PX4i
4 Open the cleaning card envelope and pull out the cleaning
card. Read the warning text.
5 Insert most of the cleaning card under the printhead (1).
Engage the printhead (2).
Eas
yCod
er
PX4i
2
1
EasyCoder PX4i Bar Code Label Printer User’s Guide (Fingerprint Version)
117
Chapter 11 — Maintaining the Printer
6 Pull out the cleaning card (1) and raise the printhead (2).
EasyC
oder
PX4i
1
7 Wait for approximately 30 seconds to allow the cleaning fluid
to dissolve the residue.
8 Insert most of the cleaning card under the printhead again
(1). Engage the printhead (2).
EasyC
oder
1
PX4i
2
2.5 cmin)
(1
118
EasyCoder PX4i Bar Code Label Printer User’s Guide (Fingerprint Version)
Chapter 11 — Maintaining the Printer
9 Pull out the cleaning card. If necessary, repeat the process with
a fresh cleaning card.
Eas
yCo
der
PX4i
2
1
10 Allow the cleaned parts to dry completely before loading any
media and ribbon.
Eas
yCod
er
PX4i
EasyCoder PX4i Bar Code Label Printer User’s Guide (Fingerprint Version)
119
Chapter 11 — Maintaining the Printer
External Cleaning
To clean the exterior of the printer
1 Always remove the power cord before cleaning!
2 Wipe external surfaces with a soft cloth slightly moistened
with water or a mild detergent.
Never spray the printer. Protect it from water when cleaning the
premises.
120
EasyCoder PX4i Bar Code Label Printer User’s Guide (Fingerprint Version)
Chapter 11 — Maintaining the Printer
Never use any sharp tools for removing stuck labels. The
printhead and rollers are delicate.
EasyC
oder
PX4i
Cleaning the Label Stop Sensor
The label stop sensor, which controls the media feed, is partially
enclosed by two plastic guides. Light passes through slots
between the upper and lower part of the sensor. If the guides are
not clean, stuck labels or other objects may block the light beam.
If the printer starts to feed out labels in an unexpected way,
remove the guides as described below and check for anything
blocking the beam of light. If necessary, clean the guides using a
cleaning card or a soft cloth soaked with isopropyl alcohol. Do
not use any other type of chemicals.
Isopropyl alcohol [(CH-3)2CHOH; CAS 67-63-0] is a highly
flammable, moderately toxic, and mildly irritating substance.
EasyCoder PX4i Bar Code Label Printer User’s Guide (Fingerprint Version)
121
Chapter 11 — Maintaining the Printer
To clean the Label Stop Sensor
1 Pull the upper guide straight out. (Upper part of print unit
omitted for better view.)
2 Press the snap-lock, lift the outer end of the lower guide and
pull it out. After cleaning, reassemble in reverse order.
122
EasyCoder PX4i Bar Code Label Printer User’s Guide (Fingerprint Version)
Chapter 11 — Maintaining the Printer
Replacing the Printhead
The printhead is subject to wear both from the direct thermal
media or transfer ribbon and from the rapid heating and cooling
process during printing. Thus, the printhead will require periodic
replacement.
Time between printhead replacements depends on the print
images, the type of direct thermal media or ribbon in use, the
amount of energy to the printhead, the print speed, the ambient
temperature, and several other factors.
While replacing the printhead, the power must be off. The
firmware will not detect the new printhead resistance and
density until the printer has been restarted.
Note: Check that the density of the new printhead matches the
printhead you are replacing. While you can switch between
densities at will, the printout will be affected accordingly.
To replace the printhead
1 Open the front and side doors.
EasyCoder PX4i Bar Code Label Printer User’s Guide (Fingerprint Version)
123
Chapter 11 — Maintaining the Printer
2 Turn the printhead lift lever counterclockwise to raise the
printhead.
3 Remove any media and transfer ribbon.
Eas
yCod
er
124
PX4i
EasyCoder PX4i Bar Code Label Printer User’s Guide (Fingerprint Version)
Chapter 11 — Maintaining the Printer
4 Pull the printhead bracket away from the magnet in the
pressure arm.
5 Disconnect the hooked printhead bracket fingers from the
shaft and pull out the printhead as far as the cables allow.
EasyCoder PX4i Bar Code Label Printer User’s Guide (Fingerprint Version)
125
Chapter 11 — Maintaining the Printer
6 Disconnect the cables from the printhead. Note the snap-lock
on the inner connector. Pull at the connectors—not at the
cables!
7 Connect the two cables to the replacement printhead.
8 Fit the hooks of the printhead bracket fingers onto the
headlift shaft. Make sure that the cables do not prevent the
bracket fingers from being properly seated on the headlift
shaft.
126
EasyCoder PX4i Bar Code Label Printer User’s Guide (Fingerprint Version)
Chapter 11 — Maintaining the Printer
9 Close the printhead so the magnet engages the printhead
bracket.
10 Load a new supply of media and ribbon, as described in
“Loading Media” on page 23.
Eas
yCod
er
PX4i
EasyCoder PX4i Bar Code Label Printer User’s Guide (Fingerprint Version)
127
Chapter 11 — Maintaining the Printer
Media Jams
Should a media jam occur in the print mechanism, proceed this
way to clear it.
To clear a media jam
1 Always switch off the power before starting to clear the
jammed media.
2 Raise the printhead and pull out the media.
3 If the media has been wound up on or has stuck to the platen
roller, carefully remove it by hand without using any sharp
tools that can damage the delicate platen roller or printhead.
Avoid rotating the platen roller.
If you must pull away the media by force causing the platen
roller to rotate, it is very important that the power has been
off for a minute or more. If not, the electronics can be
damaged beyond repair.
4 Cut off any damaged or wrinkled part.
5 If there is any adhesive somewhere in the print mechanism,
remove it using a cleaning card or a cotton swab soaked in
isopropyl alcohol.
Isopropyl alcohol [(CH-3)2CHOH; CAS 67-63-0] is a
highly flammable, moderately toxic, and mildly irritating
substance.
6 Reload the media as described in “Loading Media” on
page 23.
7 Switch on the power.
8 Readjust the media feed by raising and closing the printhead
and then pressing Feed.
128
EasyCoder PX4i Bar Code Label Printer User’s Guide (Fingerprint Version)
12
Adjustments
This chapter describes how the operator can adjust the printer.
The chapter covers the following topics:
• Narrow Media Adjustment
• Printhead Pressure Adjustment
• Label Stop Sensor Adjustment
EasyCoder PX4i Bar Code Label Printer User’s Guide (Fingerprint Version)
129
Chapter 12 — Adjustments
Narrow Media
The printer is factory-adjusted for full size media width. When
using narrower media, adjust the pressure arm so it remains
centered on the media and applies pressure evenly.
A poorly adjusted pressure arm may be detected by a weaker
printout on either side of the media path.
To adjust the pressure arm
1 Remove the ribbon, if any.
2 Loosen the knob that holds the pressure arm. Move the arm
inwards or outwards until the arrow on the tip of the arm
becomes centered on the media stock.
While moving the arm, push at the part where the knob is
situated, not at the tip. If the arm is hard to move, lift the
printhead and pull the printhead bracket free from the
magnet in the arm.
3 Lock the arm in the new position by tightening the knob.
4 Re-adjust the edge guides.
5 Reload the ribbon, if any.
Knob
Center of
media
Pressure arm
Edge guides
Pressure Arm adjustment
130
EasyCoder PX4i Bar Code Label Printer User’s Guide (Fingerprint Version)
Chapter 12 — Adjustments
Printhead Pressure
The pressure of the thermal printhead against the ribbon or
direct thermal media is factory adjusted. However, the use of
thicker or thinner media than normal could require the printhead
pressure to be readjusted.
Turn the adjustment knob clockwise for increased pressure, or
counterclockwise for less pressure. Print a few labels, preferably
test labels, and check the printout. For help printing test labels,
see “Setting Up the Printer” on page 59. Increased pressure
generally gives a darker printout and vice versa. Repeat until the
desired result is obtained.
To find the basic setting, turn the knob counterclockwise until
there is no pressure left. Test with a piece of media under the
printhead. You should be able to pull it out without more than
just a little resistance. Then turn the knob four full turns
clockwise. Fine-adjust using the trial-and-error method.
Do not use a higher printhead pressure than necessary.
Unnecessary pressure may increase the wear of the printhead
and shorten its life.
Knob
Printhead pressure adjustment
EasyCoder PX4i Bar Code Label Printer User’s Guide (Fingerprint Version)
131
Chapter 12 — Adjustments
Label Stop Sensor
The label stop sensor (LSS) is a photoelectric sensor that controls
the printer’s media feed by detecting gaps between labels or slots
or black marks in continuous stock, depending on the printer’s
setup in regard of media type. The LSS should be aligned with
the gaps, slots, or black marks. If using irregularly shaped labels,
align the LSS with the front tips of the labels.
The label stop/black mark sensor (LSS) can be moved laterally
within a range of 0 to 50 mm (0 to 1.96 in) from the inner edge
of the media path. There is a screw running through the outer
lower gable. Turning the screw clockwise will move the LSS
inwards and vice versa. The position of the LSS in relation to the
media is best checked by looking head on into the print unit
when the printhead is raised. Align the center point of the Vshaped upper sensor with the center of the slots or marks to be
detected.
The linear markings on the lower guide plate can also be used for
positioning of the LSS because they are spaced with an interval of
exactly 1 cm (0.39 in). This method is especially useful for black
marks (measure the lateral position of the black marks with a
ruler before loading the media).
Detection slots
Upper part of LSS
Adjustment screw
Label Stop Sensor adjustment
132
EasyCoder PX4i Bar Code Label Printer User’s Guide (Fingerprint Version)
Chapter 12 — Adjustments
In the Print Defines part of the Setup Mode, you have two ways
to test the label stop sensor if you have a detection problem; LSS
Auto and LSS Manual.
The menu provides only indications from the label stop sensor
unit. The testing menu can determine if the sensor unit is not
physically in position, is blocked by dust or stuck labels, or is
defective in some way. Furthermore, this is an aid if media has
detection complications.
Note: There is no way to adjust the LSS-function. The menus
only indicate values from the LSS obtained by performing a
TESTFEED operation.
LSS Auto is the quick and normal way to determine if the label
stop sensor works properly and is able to detect gaps, slots, or
black marks.
LSS Manual shows the actual setting provided by the latest
TESTFEED operation. It is also possible to try other settings.
LSS Manual is primarily intended for service and is not described
in this manual.
LSS Auto
• Check that the printer is set up for the type of media loaded
in your printer (Setup Mode/Media/Media type/LABELS
(with GAPS);TICKET (with MARK), TICKET (with
GAPS), FIX LENGTH STRIP; or VAR LENGTH STRIP.
• Perform a TESTFEED by simultaneously pressing Shift and
Feed on the printer’s keyboard.
• Make sure that there is a label—not a gap or mark—at the
LSS.
• Check that the media is routed as close to the center section as
the guides allow.
• Enter the Setup Mode (see “Setup Mode” on page 77) and go
to Setup Mode/Print Defines/LSS Test/LSS Auto.
• The menu should look like this with the cursor placed in the
center:
EasyCoder PX4i Bar Code Label Printer User’s Guide (Fingerprint Version)
133
Chapter 12 — Adjustments
•
Gap or slot detection:
Lift the printhead and pull out the media slowly. When the
LSS detects a gap or a detection slot, the cursor moves to the
right.
• Black mark detection:
Lift the printhead and pull out the media slowly. When the
LSS detects a black, the cursor moves to the left.
• It is possible to refresh the centered cursor position by
pressing d/F4.
If the cursor behaves as described above, the LSS is working and
is properly aligned with the gaps, slots, or black marks.
If the cursor does not react to a gap, slot, or black mark, check
the following:
• Is the LSS laterally aligned with the slots or black marks?
• Are both the upper and lower part of the LSS aligned with
each other?
• Is the transfer ribbon properly loaded so it does not
interfere with the LSS (See “Loading Ribbon” on
page 52)?
• Are the label stop sensors free from dust and are the guides
free from stuck labels or other objects that may interfere
with the light that goes from one part of the LSS to the
other? If necessary, clean the sensors.
• Does the media have some kind of preprint that can
disturb the detection?
• Is there too little difference between the black marks and
the surrounding areas?
134
EasyCoder PX4i Bar Code Label Printer User’s Guide (Fingerprint Version)
Chapter 12 — Adjustments
• Does the liner have too little transparency?
• Does the LSS work with another type of media?
(Remember to change the Media Type setup and perform
a new TESTFEED.)
EasyCoder PX4i Bar Code Label Printer User’s Guide (Fingerprint Version)
135
Chapter 12 — Adjustments
136
EasyCoder PX4i Bar Code Label Printer User’s Guide (Fingerprint Version)
A
Technical Data
This appendix lists the technical data for the printer. Please note
that Intermec reserves the right to change this information
without prior notice and that this information does not represent
a commitment on the part of Intermec.
EasyCoder PX4i Bar Code Label Printer User’s Guide (Fingerprint Version)
137
Appendix A — Technical Data
Printing
Print Technique
Direct Thermal and Thermal Transfer
Printhead Resolution
8 dots/mm (203.2 dpi)
11.81 dots/mm (300 dpi)
Print Speed (variable)
100 to 300 mm/sec (± 4 to 12 in/sec)
Print Width (max)
112 mm (4.41 in) - Direct Transfer
110 mm (4.33 in) - Thermal Transfer
Print Length (max)
32767 dots
= 409.5 cm (161.25 in) at 203.2 dpi
=277.5 cm (109.23 in) at 300 dpi
See Note 1
Media Width
(min/max)
25 to 120 mm (1 to 4.72 in.)
Media Roll Diameter
(max)
213 mm (8.38 in) Tear-Off
205 mm (8.07 in Peel-Off
Media Roll Core
Diameter
38 to 40 mm (1.5 in)
76 mm (3 in) with adapter fitted
Ribbon Width
(min/max)
55 to 110 mm (2.17 to 4.33 in)
Ribbon Roll Diameter
(outer), max.
80 mm (3.15 in)
± 450 m (1476 ft) of ribbon
Print Technique
Direct Thermal and Thermal Transfer
Ribbon Roll Core
Diameter (inner)
25 mm (1 in)
Print Directions
4
Note 1: The maximum print length is also restricted by the amount of
free SDRAM memory.
Modes of Operation
138
Tear-Off (Straight-through)
Yes
Cut-Off
Option
With cutter
Peel-Off (Self-strip)
Option
With rewinder
Internal Batch Takeup
Option
With rewinder
EasyCoder PX4i Bar Code Label Printer User’s Guide (Fingerprint Version)
Appendix A — Technical Data
Firmware
Operating System
Intermec
Fingerprint v8.30
Smooth Fonts
True Doc and
TrueType fonts
Resident scalable fonts
15
Resident bar codes
59
Startup Program (std)
Intermec Shell v8.2
Incl. Direct Protocol
Unicode fonts
See Note 1
Note 1: Latin, Greek, and Cyrillic fonts according to Unicode standard
are included.
Physical Measurements
Dimensions (W × L × H)
275 × 482 × 238 mm
(10.8 × 19.0 × 9.4 in)
Weight (excluding media)
12.85 kg (28.4 lb)
Ambient Operating
Temperature
+5°C to +40°C (+41°F to +104°F)
Storage Temperature
-20°C to +70°C
(-4°F to +152°F)
Humidity
10 to 90% non-condensing
Electronics
Microprocessor
32 bit RISC
On-board Flash SIMMs
2 sockets for 4 MB or 8 MB each
Standard 1 x 4 MB
On-board SDRAM SIMM
1 socket for 16 MB Standard
16 MB
Power Supply
AC Voltage
90 to 265 VAC, 45 to 65 Hz
PFC Regulation
IEC 61000-3-2
Power Consumption
Minimum 20 W; Continuous printing,
average 125 W; Peak 400 W
EasyCoder PX4i Bar Code Label Printer User’s Guide (Fingerprint Version)
139
Appendix A — Technical Data
Sensors
Label Gap/Black Mark/Out of Media
Yes
Printhead Lifted
Yes
Ribbon End/Ribbon Low
Yes
Paper Sensor
Yes
Variable position
Controls
LEDs
3
Display
2 × 16 character LCD
Keyboard
22 keys membrane-switch type
Print button
1
Beeper
Yes
Background light
Data Interfaces
140
Serial
1 × RS-232 + 1 × USB
Bar Code Wand
Yes
Connection for Optional
Interface Boards
1+1
Cutter Interface
1
Memory Card Adapter
1
1 for EasyLAN, 2 for
other boards
CompactFlash cards
EasyCoder PX4i Bar Code Label Printer User’s Guide (Fingerprint Version)
Appendix A — Technical Data
Accessories and Options
Integral Self-strip Unit with
Liner Takeup
Option 1, 2
Media Roll Retainer
Option 3
Fanfold Guide
Option 3
For peel-off and
batch takeup
Cutter
Option 3
Label Taken Sensor
Option 1, 2
Real Time Clock
Option 1, 2
10+ years life
Parallel Interface Board
Option 1, 2
IEEE 1284
Double Serial Interface Board
Option 1, 2
2 serial ports
Serial/Industrial Interface Board Option 1, 2
EasyLAN Ethernet Interface
Option 1, 2
EasyLAN Wireless Interface
Option 1, 2
Built-in Alphanumeric Keyboard Option 1, 2
External Alphanumeric
Keyboard
Option 3
CompactFlash Protection Plate
Option 3
CompactFlash Cards for various Option 3
purposes
8 MB-1 GB
Option 1: Factory installed option.
Option 2: Field-installable kit. Installation should be performed by a
service technician.
Option 3: Operator-installable option.
EasyCoder PX4i Bar Code Label Printer User’s Guide (Fingerprint Version)
141
Appendix A — Technical Data
142
EasyCoder PX4i Bar Code Label Printer User’s Guide (Fingerprint Version)
B
Media Specifications
This appendix specifies the physical measurements for various
types of media.
EasyCoder PX4i Bar Code Label Printer User’s Guide (Fingerprint Version)
143
Appendix B — Media Specifications
Media Roll Size
Core diameter (A), standard: 38 to 40 mm (1.5 in), with adapter:
76.2 mm (3 in)
Core Width: Must not protrude outside the media.
The media must be wound up on the core in such a way that the
printer can pull the end free.
Max. diameter (B), tear-off and cut-off
213 mm (8.38 in)
Max.diameter (B), peel-off and batch takeup
205 mm (8.07 in)
Max. width (C)
120 mm (4.72 in)
Min. width (C)
25 mm (1.00 in)
The recommended media thickness is 60 to 170 μm (2.4 to 6.7
mils). If thicker media is used, print quality may be reduced.
Media stiffness must be balanced against thickness to maintain
print quality. Media rolls to be loaded inside the printer should
be wound with the printable side facing outwards.
The media supply must not be exposed to dust, sand, or grit. Any
hard particles, however small, can damage the printhead.
144
EasyCoder PX4i Bar Code Label Printer User’s Guide (Fingerprint Version)
Appendix B — Media Specifications
Media
Non-Adhesive Strip
(a) Media Width
Minimum: 25 mm (1.00 in)
Maximum: 120 mm (4.72 in)
Media Type Setup:
• Fix length strip
• Var length strip
EasyCoder PX4i Bar Code Label Printer User’s Guide (Fingerprint Version)
145
Appendix B — Media Specifications
Self-Adhesive Strip
(a) External Media Width (including liner)
Minimum: 25 mm (1.00 in)
Maximum: 120 mm (4.72 in)
(b) Liner Width
The liner must not extend more than a total of 1.6 mm (0.06 in)
past the edge of the face material and should protrude equally on
both sides.
(c) Media Width (excluding liner)
Minimum: 23.8 mm (0.94 in)
Maximum: 118.4 mm (4.66 in)
Media Type Setup:
• Fix length strip
• Var length strip
146
EasyCoder PX4i Bar Code Label Printer User’s Guide (Fingerprint Version)
Appendix B — Media Specifications
Self-Adhesive Labels
(a) External Media Width (including liner)
Minimum: 25 mm (1.00 in)
Maximum: 120 mm (4.72 in)
(b) Liner Width
The liner must not extend more than a total of 1.6 mm (0.06 in)
past the edge of the face material and should protrude equally on
both sides. Recommended minimum transparency: 40% (DIN
53147).
(c) Media Width (excluding liner)
Minimum: 23.8 mm (0.94 in
Maximum: 118.4 mm (4.66 in)
(d) Label Length
Minimum (without LTS): 8 mm (0.32 in)
Minimum (with LTS): 12 mm (0.47 in) For more information,
see “Label Taken Sensor” on page 105.
Maximum: 8 dots/mm (203.2 dpi): 6,143 mm (241 in)
11.81 dots/mm (300 dpi): 4,162 mm (163 in), provided that
there is a sufficient amount of free SDRAM memory
(e) Label Gap
Recommended: 3.0 mm (0.12 in)
Minimum: 1.27 mm (0.05 in)
Maximum: 25.0 mm (0.98 in)
The Label Stop Sensor must be able to detect the extreme front
edges of the labels. For more information, see “Label Stop
Sensor” on page 132.
Opacity
The difference between in opacity between label plus liner and
liner only should be ≥ 19% units. Maximum liner opacity is
72%.
Media Type Setup: Label (with gaps)
EasyCoder PX4i Bar Code Label Printer User’s Guide (Fingerprint Version)
147
Appendix B — Media Specifications
a
c
d
e
b
b
Tickets With Gaps
(a) Media Width
Minimum: 25 mm (1.00 in)
Maximum: 120 mm (4.72 in)
(b) Liner Width
Minimum (without LTS): 8 mm (0.32 in)
Minimum (with LTS): 12 mm (0.47 in) For more information,
see “Label Taken Sensor” on page 105.
Maximum: 8 dots/mm (203.2): 6,143 mm (241 in)
11.81 dots/mm (300 dpi): 4,162 mm (163 in), provided there is
a sufficient amount of free SDRAM memory
(c) LSS Detection Position: Variable, see “Label Stop Sensor” on
page 132.
148
EasyCoder PX4i Bar Code Label Printer User’s Guide (Fingerprint Version)
Appendix B — Media Specifications
(d) Detection Slit Length
The length of the detection slit (excluding corner radii) must be a
minimum of 2.5 mm (0.10 in) to either side (right or left) of the
label stop sensor detection position.
(e) Detection Slit Height
Recommended: 1.6 mm (0.06 in)
Minimum: 1.27 mm (0.05 in)
Maximum: 25.0 mm (0.98 in)
Opacity
Max opacity difference: 48%
Media Type Setup: Gap Stock
Note: Handle perforated media carefully to avoid rips or breaks
along the perforations. Broken or ripped perforations, particularly
at the edges, may cause the media to break or misfeed during
printing.
a
c
b
e
d
EasyCoder PX4i Bar Code Label Printer User’s Guide (Fingerprint Version)
149
Appendix B — Media Specifications
Tickets With Black Mark
(a) Media Width
Minimum: 25 mm (1.00 in)
Maximum: 120 mm (4.72 in)
(b) Copy Length
Minimum: 20.0 mm (0.8 in)
Maximum: 8 dots/mm (203.2 dpi): 6,143 mm (241 in)
11.81 dots/mm (300 dpi): 4,162 mm (163 in), provided there is
a sufficient amount of free SDRAM memory
(c) LSS Detection Position: Variable, see“Label Stop Sensor” on
page 132.
(d) Black Mark Width
Recommended: 10.0 mm (0.39 in)
Minimum: 5.0 mm (0.20 in)
Maximum: Full media width
(e) Black Mark Length
Recommended: 3.2 mm (0.13 in)
Minimum: 1.27 mm (0.05in)
Maximum: 25.0 mm (0.98 in)
(f ) Black Mark Y-Position
It is recommended that you place the black mark as close to the
front edge of the ticket as possible and use a negative Stop Adjust
value to control the media feed, so the tickets can be properly
torn off. The black mark can be placed either on the top or at the
back of the media.
Black Mark Characteristics
Maximum reflectance: 15%, 940 nm
Difference between mark and media: 55%
Media Type Setup: Mark Stock
Note: Handle perforated media carefully to avoid rips or breaks
along the perforations. Broken or ripped perforations, particularly
at the edges, may cause the media to break or misfeed during
printing.
150
EasyCoder PX4i Bar Code Label Printer User’s Guide (Fingerprint Version)
Appendix B — Media Specifications
Note: Preprint that may interfere with the detection of the black
mark should be avoided. However, the Intermec Fingerprint
statement LBLCOND allows the sensor to be temporarily
disabled during a specified amount of media feed in order to
avoid unintentional detection, see Intermec Fingerprint manuals.
a
b
c
e
d
f
EasyCoder PX4i Bar Code Label Printer User’s Guide (Fingerprint Version)
151
Appendix B — Media Specifications
152
EasyCoder PX4i Bar Code Label Printer User’s Guide (Fingerprint Version)
C
Interfaces
This appendix describes the interface connectors found on the
printer’s rear plate. It covers the following topics:
• RS-232 Interface
• USB Interface
• Bar Code Wand Interface
• Optional Interfaces
EasyCoder PX4i Bar Code Label Printer User’s Guide (Fingerprint Version)
153
Appendix C — Interfaces
RS-232 Interface
Protocol For The Default Setup
Baud rate: 9600
Character length: 8 bits
Parity: None
Stop bits: 1
RTS/CTS: Disabled
ENQ/ACK: Disabled
XON/XOFF: Disabled (both ways)
New Line: CR/LF
To change the interface settings, see “Setting Up the Printer” on
page 59.
SIgnals On Printer’s Serial Port “uart1:”
DB-9
Signal
1
2
Meaning
External +5V DC*
TXD
Transmit data
3
RXD
Receive data
4
DSR
Data set ready
5
GND
Ground
6
DTR
Data terminal ready
7
CTS
Clear to send
8
RTS
Request to send
9
---
Not Used
* The external +5 V is limited to 500 mA and is automatically switched
off at overload.
154
EasyCoder PX4i Bar Code Label Printer User’s Guide (Fingerprint Version)
Appendix C — Interfaces
RS-232
("uart1:")
RS-232 Interface
Interface Cable
Computer end: Depends on computer model
Printer end: DB-9 plug
USB Interface
This printer supports USB v1.1 (also called USB 2.0 full speed).
To use the USB interface for printing from a PC, you need a
special Intermec USB printer driver installed in your PC.
The printer is a so-called “self-powered device.” We recommend
that you only connect one printer to each USB port on the host,
either directly or via a hub. Other devices, like a keyboard and a
mouse, can be connected to the same hub. If you need to connect
more than one Intermec USB printer to a host, you should use
different USB ports.
Using a USB Class A/B cable, connect the Class A plug to your
PC or hub and the Class B plug to your printer.
The USB interface is essentially a one-way communication
interface. There is no communication setup for the USB port.
USB Class A connector
EasyCoder PX4i Bar Code Label Printer User’s Guide (Fingerprint Version)
155
Appendix C — Interfaces
USB Class B connector
USB ("usb1:")
USB Interface
Bar Code Wand Interface
The printer has a socket on the CPU board for connecting a bar
code wand or scanner. The socket is accessible through a slot in
the printer’s rear plate.
If a Code 128 bar code that contains the character FNC3 is read
via this port, the data will be treated as a setup string and will
change the printer’s setup accordingly. A setup bar code may
contain a single parameter or a combination of up to 3 or 4 setup
parameters. Refer to the EasySet Bar Code Wand Setup manual
(P/N 1-960560-00) for more information on how to produce
setup bar codes.
The printer will acknowledge that a bar code has been
successfully read by emitting a short beep signal.
If no FNC3 character is found in the bar code, the data will be
stored in a buffer which could be read by specifying the “wand:”
device. The buffer is small, so it is recommended to use short bar
code data (max. 16 characters) and read the buffer regularly to
avoid overflow.
156
EasyCoder PX4i Bar Code Label Printer User’s Guide (Fingerprint Version)
Appendix C — Interfaces
For more demanding applications or for reading bar codes other
than Code 128, choose a regular bar code scanner from
Intermec’s wide product range and connect it to a serial port.
Bar code wand
interface ("wand:")
Bar Code Wand Interface
Optional Interfaces
The printer can optionally be fitted with one or two of the
following interface boards at the right-hand side of the printer’s
rear plate:
• Double Serial Interface Board
• Serial/Industrial Interface Board
• IEEE 1284 Parallel Interface Board (only one at a time)
Regardless of any of the interface boards mentioned above are
installed, the printer can also be fitted with one of the following
EasyLAN interface boards for connection to a Local Area
Network (LAN).
• EasyLAN Ethernet Interface
• EasyLAN Wireless Interface
EasyCoder PX4i Bar Code Label Printer User’s Guide (Fingerprint Version)
157
Appendix C — Interfaces
Double Serial Interface Board
"uart3:"
RS-232,
RS-422 non isolated,
or 20 mA current loop
"uart2:"
RS-232,
RS-422 non isolated,
RS-422 Isolated,
or RS-485
+
Serial/Industrial Interface Board
Industrial interface
8 digital In ports
8 digital Out ports
4 relay ports
"uart2:"
RS-232,
RS-422 non isolated,
RS-422 Isolated,
or RS-485
IEEE 1284 Parallel Interface Board
"centronics:"
158
EasyCoder PX4i Bar Code Label Printer User’s Guide (Fingerprint Version)
Appendix C — Interfaces
Allowed Interface Combinations
Left-hand slot Ports
Right-hand slot Ports
Double Serial
uart2: + uart3:
–
–
Double Serial
uart2: + uart3:
Double Serial
uart4: + uart5:
Double Serial
uart2: + uart3:
Serial/Industrial
uart4:
Double Serial
uart2: + uart3:
IEEE 1284
centronics:
Serial/Industrial
uart2:
–
–
Serial/Industrial
uart2:
Serial/Industrial
uart3:
Serial/Industrial
uart2:
Double Serial
uart3: + uart4:
Serial/Industrial
uart2:
IEEE 1284
centronics:
IEEE 1284
centronics:
–
–
IEEE 1284
centronics:
Double Serial
uart2: + uart3:
IEEE 1284
centronics:
Serial/Industrial
uart2:
Remarks:
• The left-hand slot is the slot closest to the center section.
• Always start by fitting an interface board in the left-hand slot.
• RS-485 is only supported by “uart2:”.
EasyLAN Ethernet Interface
"net1:"
EasyCoder PX4i Bar Code Label Printer User’s Guide (Fingerprint Version)
159
Appendix C — Interfaces
EasyLAN Wireless Interface
"net1:"
For information on how to set up, operate, configure, and
troubleshoot an EasyLAN interface, please refer to the following
manuals included on the PrinterCompanion CD.
• EasyLAN Interface Kit Installation Instructions
• EasyLAN Wireless Interface Kit Installation Instructions
• EasyLAN User’s Guide
• EasyLAN Network Setup User’s Guide
160
EasyCoder PX4i Bar Code Label Printer User’s Guide (Fingerprint Version)
D
Intermec Supplies
This appendix describes the supplies offered by Intermec for use
with this printer, that is, direct thermal media, thermal transfer
ribbons, and receiving face materials for thermal transfer
printing.
EasyCoder PX4i Bar Code Label Printer User’s Guide (Fingerprint Version)
161
Appendix D — Intermec Supplies
Direct Thermal Media
Intermec offers two quality grades of direct thermal media for the
Easy-Coder printers:
Premium Quality
Top-coated media with high demands on printout quality and
resistance against moisture, plasticizers, and vegetable oils.
Examples:
Europe
North America
Thermal Top Board
Duratherm II
Thermal Top
Duratherm II Tag
Thermal Top High Speed
Duratherm Ltg.
Duratherm IR
Economy Quality
Non top-coated media with less resistance to moisture,
plasticizers, and vegetable oils. In all other respects, it is equal to
Premium Quality. Examples:
Europe
North America
Thermal Eco
–
Thermal Eco Board
Thermal Transfer Media
Intermec offers stock labels for thermal transfer printing in a wide
range of quality grades.
Uncoated Papers
Economical high-volume printing. To be used with GP/TMX
1500 ribbons. Examples:
162
Europe
North America
TTR Uncoated
–
EasyCoder PX4i Bar Code Label Printer User’s Guide (Fingerprint Version)
Appendix D — Intermec Supplies
Coated Papers
Various coat-weight, smoothness, and gloss. To be used with HP/
TMX 2500 and GP/TMX 1100/TMX 1500 ribbons. Examples:
Europe
North America
TTR Coated
Duratran II
TTR Premium
Duratran II Tag
TTR Premium Board
Valeron Tag
TTR High Gloss White
Polyethylene Plastics
These media have better resistance to water and many common
chemicals than uncoated and coated papers. They can be use
outdoors and offer good tear resistance. Most often used with
HP/TMX 2500 ribbons. Examples:
Europe
North America
TTR Polyethylene
Kimdura
TTR Gloss Polyethylene
Syntran
Polyesters
These media give high resistance to chemicals, heat, and
mechanical abrasion with HR/TMX 3200 ribbons. Examples:
Europe
North America
TTR High Gloss Polyester
PET Gloss
Transfer Ribbons
Intermec offer three ranges of thermal transfer ribbons optimized
for different purposes:
• General Purpose (GP/TMX 1500) transfer ribbons allow
high speed printing and give a good printout, but are
somewhat sensitive to smearing. They may be the best choice
for uncoated and coated papers.
• High Performance (HP/TMX 2200, TMX 2500) transfer
ribbons allow high speed printing and give a highly readable
and de. ned printout on most face materials with smooth
EasyCoder PX4i Bar Code Label Printer User’s Guide (Fingerprint Version)
163
Appendix D — Intermec Supplies
surfaces. They have good “smear resistance” and are most
suitable for intricate logotypes and images on matte-coated
papers and synthetic face materials.
• High Resistance (HR/TMX 3200) transfer ribbons give an
extremely durable printout, which is resistant to most
chemical agents and high temperatures. However, such
transfer ribbons set high demands on the receiving face
material, which must be very smooth, such as polyesters.
The use of HR/TMX 3200 ribbons requires the print speed
and the energy supplied by the printhead to be controlled
with great accuracy according to the receiving face material.
Custom-made setup options adapted for special applications
can also be created. Consult your Intermec distributor.
Bar Code Directions
Note: Intermec thermal transfer ribbons are engineered
specifically for the EasyCoder printheads.
In the tables on the pages that follow, different maximum print
speeds may be recommended depending on the direction of
possible bar codes in the printout. Generally, ladder style bar
codes are more demanding and may require a lower print speed,
especially in connection with a large media roll and/or negative
start adjust values (see “Print Speed” on page 75). The
illustration below shows how the two type of bar code directions
relate to the media feed direction.
Dir 1 & 3
Picket Fence
Ladder
Dir 2 & 4
Feed
Direction
164
EasyCoder PX4i Bar Code Label Printer User’s Guide (Fingerprint Version)
Appendix D — Intermec Supplies
Recommended Paper Type Settings (Europe)
Direct Thermal Printing; 8 dots/mm (203.2 dpi)
Max Rec. Print Speed1
Dir 1&32 Dir 2&43
Type/Speed
Name
Label
Label
Constant Factor
Top Coated
Thermal Top Board4
113
40
150
300
Standard
Thermal Top
79
40
250
300
Thermal IR
98
40
150
300
Non Top Coated
Thermal Eco
69
40
300
300
Standard
Thermal Eco Board4
65
40
200
300
Top Coated/High
Thermal Top Coated
85
40
300
300
Thermal Transfer Printing; 8 dots/mm (203.2 dpi)
Type/Speed Name
Ribbon
Ribbon Label
Constant Factor Offset
Max Rec. Print Speed1
Dir 1&32 Dir 2&43
GP02
TTR Uncoated
66
25
0
300
300
TTR Coated
67
25
0
300
300
TTR Premium
60
25
0
300
300
TTR Coated
86
25
0
300
300
TTR Premium
77
25
0
300
300
TTR Premium
Board4
97
25
0
300
300
TTR High Gloss 96
White
25
0
300
300
TTR
Polyethylene
74
25
0
300
300
TTR Gloss
Polyethylene
93
25
0
300
300
TTR Coated
79
25
0
250
250
TTR Premium
72
25
0
250
250
TTR Premium
Board4
86
25
0
250
250
TTR High Gloss 85
White
25
0
250
250
TTR Polethylene 68
25
0
250
250
HP66
HP05
EasyCoder PX4i Bar Code Label Printer User’s Guide (Fingerprint Version)
165
Appendix D — Intermec Supplies
Thermal Transfer Printing; 8 dots/mm (203.2 dpi) (continued)
Ribbon
Ribbon Label
Constant Factor Offset
Max Rec. Print Speed1
Dir 1&32 Dir 2&43
83
25
0
250
250
TTR High Gloss 88
Polyester
25
0
150
225
Type/Speed Name
TTR Gloss
Polyethylene
HR03
1. Exceeding the recommended print speed may cause the printhead to wear out prematurely. If
the ambient temperature is lower than =15°C (+59°F), decrease print speed by 50 mm/sec.
2. Applies to printing of text, lines, boxes, images, and picket fence bar codes.
3. Applies to ladder bar codes.
4. Requires high printhead pressure (See “Printhead Pressure” on page 131).
Direct Thermal Printing; 11.81 dots/mm (300 dpi)
Max Rec. Print Speed1
Dir 1&32 Dir 2&43
Type/Speed
Name
Label
Label
Constant Factor
Top Coated
Thermal Top Board4
96
40
300
200
Standard
Thermal Top
92
40
300
200
Thermal IR
96
40
250
200
Non Top Coated
Thermal Eco
74
40
300
300
Standard
Thermal Eco Board4
61
40
300
250
Top Coated/High
Thermal Top Coated
85
40
300
300
Thermal Transfer Printing; 11.81 dots/mm (300 dpi)
Type/Speed Name
Ribbon
Ribbon Label
Constant Factor Offset
Max Rec. Print Speed1
Dir 1&32 Dir 2&43
GP02
TTR Uncoated
64
25
0
300
300
TTR Coated
63
25
0
300
300
TTR Premium
56
25
0
300
300
TTR Coated
71
25
0
300
300
TTR Premium
71
25
0
300
300
TTR Premium
Board4
99
25
0
300
300
HP66
166
EasyCoder PX4i Bar Code Label Printer User’s Guide (Fingerprint Version)
Appendix D — Intermec Supplies
Thermal Transfer Printing; 11.81 dots/mm (300 dpi) (continued)
Type/Speed Name
HP05
HR03
Ribbon
Ribbon Label
Constant Factor Offset
Max Rec. Print Speed1
Dir 1&32 Dir 2&43
TTR High Gloss 84
White
25
0
300
300
TTR
Polyethylene
69
25
0
300
300
TTR Gloss
Polyethylene
80
25
0
300
300
TTR Coated
84
25
0
250
250
TTR Premium
74
25
0
250
250
TTR Premium
Board4
92
25
0
250
250
TTR High Gloss 85
White
25
0
250
250
TTR Polethylene 69
25
0
250
250
TTR Gloss
Polyethylene
80
25
0
250
250
TTR High Gloss 83
Polyester
25
0
150
225
1. Exceeding the recommended print speed may cause the printhead to wear out prematurely. If
the ambient temperature is lower than =15°C (+59°F), decrease print speed by 50 mm/sec.
2. Applies to printing of text, lines, boxes, images, and picket fence bar codes.
3. Applies to ladder bar codes.
4. Requires high printhead pressure (See “Printhead Pressure” on page 131).
EasyCoder PX4i Bar Code Label Printer User’s Guide (Fingerprint Version)
167
Appendix D — Intermec Supplies
Recommended Paper Type Settings (North America)
Direct Thermal Printing; 8 dots/mm (203.3 dpi)
Type/Speed Name
Label
Label Max Rec.
Constant Factor Dir 1&32
Print Speed1
Dir 2&43
Top Coated
85
40
300
300
86
40
250
300
Duratherm II
Duratherm II-2
4
Standard
Duratherm II Tag
68
40
300
300
Top Coated
Duratherm Lightning
62
40
300
300
High
Duratherm Lightning Plus 75
40
300
300
Duratherm Lightning IR
40
250
300
65
Thermal Transfer Printing; 8 dots/mm (203.3 dpi)
Type/Speed Name
Ribbon
Constant
Ribbon Label
Factor Offset
Max Rec. Print Speed1
Dir 1&32 Dir 2&43
TMX 1500
Duratran II
Label
53
25
0
200
200
Duratran II
Syntran
64
25
0
200
200
Duratran
Kimdura
64
25
0
200
200
Duratran S
63
25
0
200
200
Duratran II Tag
57
25
0
200
200
Duratran II
Labels
63
25
0
200
200
Duratran II
Syntran
66
25
0
200
200
Duratran
Kimdura
78
25
0
200
200
Duratran Valeron 79
25
0
200
200
Duratran S
25
0
200
200
TMX 2200
168
71
EasyCoder PX4i Bar Code Label Printer User’s Guide (Fingerprint Version)
Appendix D — Intermec Supplies
Thermal Transfer Printing; 8 dots/mm (203.3 dpi) (continued)
Ribbon
Constant
Ribbon Label
Factor Offset
Max Rec. Print Speed1
Dir 1&32 Dir 2&43
Duratran II Tag
64
25
0
200
200
Duratran II
Gloss Polyester
93
30
0
150
150
Type/Speed Name
TMX 3200
1. Exceeding the recommended pring speed may cause the printhead to wear out prematurely. If
the ambient temperature is lower than =15°C (+59°F), decrease print speed by 50 mm/sec.
2. Applies to printing of text, lines, boxes, images, and picket fence bar codes.
3. Applies to ladder bar codes.
4. Requires high printhead pressure (See “Printhead Pressure” on page 131).
Direct Thermal Printing; 11.81 dots/mm (300 dpi)
Type/Speed
Name
Label
Label Max Rec. Print Speed1
Constant Factor Dir 1&32 Dir 2&43
Top Coated
Duratherm II
86
40
300
300
88
40
300
250
68
40
300
300
Duratherm II-2
Standard
Duratherm II Tag
4
Top Coated
Duratherm Lightning
69
40
300
300
High
Duratherm Lightning Plus
80
40
300
250
Duratherm Lightning IR
75
40
300
250
40
300
150
Duratherm Lightning IR Tag 110
Thermal Transfer Printing; 11.81 dots/mm (300 dpi)
Type/Speed Name
Ribbon
Ribbon Label
Constant Factor Offset
Max Rec.
Dir 1&32
Print Speed1
Dir 2&43
TMX 1500
Duratran II
Label
53
25
0
200
200
Duratran II
Syntran
64
25
0
200
200
Duratran
Kimdura
64
25
0
200
200
Duratran S
63
25
0
200
200
EasyCoder PX4i Bar Code Label Printer User’s Guide (Fingerprint Version)
169
Appendix D — Intermec Supplies
Thermal Transfer Printing; 11.81 dots/mm (300 dpi) (continued)
Ribbon
Ribbon Label
Constant Factor Offset
Max Rec.
Dir 1&32
Print Speed1
Dir 2&43
Duratran II Tag
57
25
0
200
200
Duratran II
Labels
63
25
0
200
200
Duratran II
Syntran
66
25
0
200
200
Duratran
Kimdura
78
25
0
200
200
Duratran Valeron 79
25
0
200
200
Duratran S
71
25
0
200
200
Duratran II Tag
64
25
0
200
200
Duratran II
Gloss Polyester
93
30
0
150
150
Type/Speed Name
TMX 2200
TMX 3200
1. Exceeding the recommended pring speed may cause the printhead to wear out prematurely. If
the ambient temperature is lower than =15°C (+59°F), decrease print speed by 50 mm/sec.
2. Applies to printing of text, lines, boxes, images, and picket fence bar codes.
3. Applies to ladder bar codes.
4. Requires high printhead pressure (See “Printhead Pressure” on page 131).
170
EasyCoder PX4i Bar Code Label Printer User’s Guide (Fingerprint Version)
Worldwide Headquarters
6001 36th Avenue West
Everett, Washington 98203
U.S.A.
tel 425.348.2600
fax 425.355.9551
www.intermec.com
EasyCoder PX4i Bar Code Label Printer User’s Guide (Fingerprint Version)
*934-040-001*
P/N 934-040-001