1
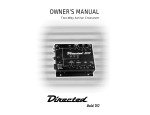
USER GUIDE
PRO-EQ PLATINUM
Welcome
Thank you for making Fishman a part of your acoustic experience. We are proud
to offer the finest acoustic amplification products available: high-quality professional-grade tools which empower you to sound your very best.
2
Quick Start
1. Place XLR Pre / Post switch to “post” position.
2. Adjust the Input Gain so that the Clip / Low Battery light barely flickers
with strong playing.
3. Strum hard and raise the Smooth knob
up until you hear the Compressor take
the percussive edge off your highs.
4
2
4. Set Phase switch to position that
sounds best and suppresses feedback.
5. Set the Notch dial between 1:00 and
2:30 to suppress low end feedback.
3
1
3
5
Power Options
1. 9 Volt battery
Squeeze the tabs on top of the preamp together and the battery drawer will pop
out. Snap in a fresh 9 Volt alkaline. To conserve the battery, unplug the input of
the Pro-EQ Platinum when you are not using the preamp.
2. 48 Volt phantom power
Use an XLR cable to connect the Pro-EQ Platinum to a mixing board with 48V
phantom power. When you turn on the 48V phantom at the mixer, the green 48V
phantom LED lights up, the 9V battery shuts off and the Pro-EQ Platinum draws
power through the XLR cable.
The green 48V phantom LED may not light up once you switch on phantom
power. This means the phantom power from the mixer is not delivering enough
voltage. For insurance, keep a fresh 9V battery in the preamp. The battery will
take up the slack if the phantom power is too low.
3. AC adapter input
Use only a well filtered and regulated AC adapter with a 9 Volt DC output. We
recommend the Fishman 910-R. Use of a non-recommended
(center = negative)
adapter may void the warranty and damage the unit.
4
Input—Plug Your Instrument In Here
When you plug into the input jack, the 9 Volt battery switches on. Remember
to unplug the input jack when you are not using the preamp to save the battery.
Turn down your amp or mute your mixer input before you plug into the Pro-EQ
Platinum input to protect your speakers (and your ears) from loud pops.
Input Gain
For the cleanest possible signal, adjust the Input Gain so that the Clip / Low
Battery LED barely flickers with strong playing. If the Clip LED lights up brightly
as you play, your instrument signal is overdriving the circuit and you will hear
distortion. Not every instrument will have enough signal to engage the Clip light
on your Platinum. This is perfectly acceptable.
5
Clip / Low Battery Indicator
This light has three distinct functions:
1. Power up indicator
The LED flashes briefly when you plug into the input—it is telling you that the
unit is powering up.
2. Clip indicator
Flashes brightly when your instrument signal overloads the preamp. Adjust the
Input Gain so that the Clip LED barely flashes with strong playing.
3. Low battery warning
When the red LED lights with no signal present it is time to change the battery.
If the Low Battery light comes on while you’re playing, don’t worry, you’ll have
enough power to get through a gig (at least 4 hours).
6
Volume
For the cleanest sound, set the Volume as high as you can without distorting your
amp or mixer.
Smooth Acoustic Compression
Takes the percussive edge off of your high end when you play hard.
To set the Smooth control:
1. Turn the Smooth knob fully counter-clockwise.
2. Adjust the Input Gain so that the Clip / Low Battery light faintly flashes when
you play your hardest.
3. Raise the Smooth knob (clockwise) just enough to take the percussive edge off
your string sound as you strum hard (set the dial at about 12:00). Be aware that
turning the Smooth knob up too high may kill the highs for lighter picking styles.
7
Notch and Phase
These controls work to suppress two
adjacent ranges of acoustic feedback. We
use guitar as an example, but the Notch
filter and Phase switch are compatible with
all acoustic instruments.
The Notch control is a variable
frequency notch filter designed to subdue
a resonant peak on the instrument which
is prone to feedback. Turning the knob
adjusts the center frequency of the filter,
ranging from subsonic (off) to 330Hz at full
clockwise.
8
Lower Feedback Range
(E to G#)
Upper Feedback Range
(A and above)
When not being used for feedback, the Notch control can also be used as a tone
control to subdue an unpleasant frequency in a microphone or room. Play a note
which accentuates the offending frequency and turn the control until the intensity
is diminished.
The Phase switch flips the polarity of your instrument signal from positive
to negative, changing its relationship to the sound coming from the amplifier.
One phase setting usually provides better resistance to feedback than the other
and will vary depending on the instrument and playing environment. Another
approach to determining optimal phase is the selection which sounds or feels
most natural when playing.
In certain playing environments the Phase switch may not have an audible
impact.
9
Tone Controls
Bass: A boost here will add depth and weight to the sound of an instrument
with light bass response. Cut the bass a few dB to tighten up the big boomy tone
of a dreadnought or jumbo guitar.
Mid EQ: Two sliders (Level and Frequency) make up the Mid control. The
Frequency slider lets you tune in on a specific mid-frequency range which you
can boost or cut with the Level slider.
Treble: A boost here will help to “cut through the mix.” Conversely, cutting the
Treble will mellow and subdue your amplified tone.
Brilliance: This slider can add shimmer and sparkle to your sound or reduce
excessive finger noise and fret buzz.
10
Output (¼" Unbalanced)
Signal Path: Instrument signal Ö Input Gain Ö Depth Ö EQ Ö Compression Ö
Volume Ö Phase Switch Ö Output
Plug a standard instrument cable from the Platinum output to your amplifier or
unbalanced mixer input.
XLR (Balanced) Out
Plug a standard mic cable from the XLR out into a PA or recording console.
Note that the Platinum can be powered by a 48V phantom supply through this
output. (See Power Options on page 4)
11
XLR Pre / Post Switch
Choose between a true D.I. (pre EQ) or an affected XLR output (post EQ).
1. XLR Post
Signal Path: Instrument Signal Ö Input Gain Ö Depth Ö EQ Ö Compression Ö
Volume Ö Phase Switch Ö XLR Out
Post is useful in live venues (especially if you are mixing from onstage) where you
want your personal “dialed-in” sound to come through the PA.
2. XLR Pre
Signal Path: Instrument Signal Ö Input Buffer Ö Phase Switch Ö XLR Out
You’ll find that this true direct or “DI” output produces a warm and uncluttered
signal that is exceptional for recording. Set the Pre / Post switch to the Pre position when you want a “flat” DI signal going to the board and you wish to leave it
to the sound-person or recording engineer to dial up the instrument tone from
the console.
12
XLR Ground Lift
Use this switch to eliminate AC ground loop hum. When you use the XLR and
one of the other outputs together and you hear hum from the speakers, put
the switch in the “lift” position and the hum should go away. If you use all three
outputs (XLR, ¼” output and tuner / send) to three separate AC powered devices,
the “lift” position may not completely eliminate ground loop hum.
Note: When you use only the XLR out, leave the Gnd/Lift switch in the “gnd”
position. In these cases, if you move the switch to the “lift” position, you will
hear a “pop” through your speakers and phantom power to the unit may be
compromised.
Tuner / Send
Signal Path: Instrument Signal Ö Input Buffer Ö Tuner/Send
Use the tuner / send output when you need an unbalanced direct signal that is
not affected by any of the front panel controls. Use it for an external tuner or as
an aux send to a stage amp or a second mixer for broadcast / live recording.
13
Sample EQ Settings
Fingerstyle
Mid cut
This setting will add fullness to the bass To scoop out harsh midrange.
and definition to the treble.
Fingerstyle
Mid Cut
14
Strummer
This is a good overall setting if you
mainly strum the instrument.
Cut through the mix
This setting is helpful when you need to
be heard through a loud band.
Strummer
Cut Through
15
Stage Setup
Acoustic
Guitar Amp
PA / Recording
Console
¼” Input
Jack
16
Block Diagram
Note: This diagram is meant only
to describe the signal routing for
the Pro-EQ Platinum and does
not represent the actual electronic
layout of the preamp.
Input Stage
17
Specifications
Nominal Input Level:
Input Overload Level:
Input Impedance:
-20dBV
+6dBV
10MW
Nominal output levels and impedances
¼” Out:
-23dBV + 3dBV (1kW )
Tuner/Send Out:
-.23dBV + 3dBV(1kW )
XLR Out:
-32dBV -6dBV (600W )
Bass Control Range:
Treble Control Range:
Mid Control Range:
Brilliance Control Range:
±12dB at 60Hz
±3dB at 350Hz
±12dB at 10kHz
±3dB at 2.4kHz
±12dB (adjustable from
250Hz to 5kHz) Q=0.5
±9dB at 10kHz
±3dB bandwidth 7kHz
18
THD:
Signal to Noise Ratio:
Power Supply:
Current Draw:
Less than .02%, -10dBV input
90dB (A weighted, -10dBV input,
2dBV ¼”output)
9V alkaline battery
(estimated 120 hours continuous use)
Regulated FISHMAN 9V AC adapter
4.7mA
All specifications subject to change without notice.
19
www.fishman.com
009-091-001 Rev D 3-10