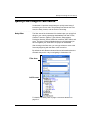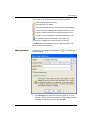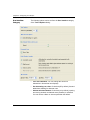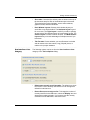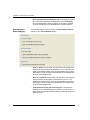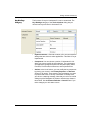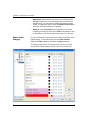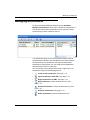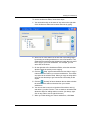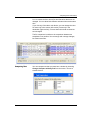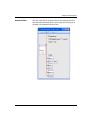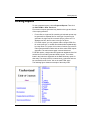
1
User Guide and
Reference Manual
Version 2.0
March 2008
Scientific Toolworks, Inc.
230 N 1680 E, Ste. OP1
St George, UT 84790
Copyright © 2008 Scientific Toolworks, Inc. All rights reserved.
The information in this document is subject to change without notice.
Scientific Toolworks, Inc., makes no warranty of any kind regarding this
material and assumes no responsibility for any errors that may appear
in this document.
RESTRICTED RIGHTS: Use, duplication, or disclosure by the Government is subject to restrictions as set forth in subparagraph (c)(1)(ii) of
the Rights in Technical Data and Computer Software clause at DFAR
252.227-7013 (48 CFR). Contractor/Manufacturer is Scientific Toolworks, Inc., 230 N 1680 E, Ste. OP1, St. George, UT 84790.
NOTICE: Notwithstanding any other lease or license agreement that
may pertain to or accompany the delivery of this restricted computer
software, the rights of the Government regarding use, reproduction, and
disclosure are as set forth in subparagraph (c)(1) and (2) of Commercial
Computer Software-Restricted Rights clause at FAR 52.227-19.
Part Number: USTAND2-GEN-UG-433 (3/08)
Contents
Chapter 1
Introduction
What is Understand 2.0? . . . . . . . . . . . . . . . . . . . . . . . . . . . .
Programming Language Versions Supported . . . . . . . .
Use Server Mode to Integrate with Your IDE . . . . . . . . .
For Those Who Don’t Like to Read Manuals . . . . . . . . . . . . .
Chapter 2
Parts and Terminology
Using Understand 2.0 Windows . . . . . . . . . . . . . . . . . . . . . . .
Understand 2.0 Terminology. . . . . . . . . . . . . . . . . . . . . . . . . .
Parts . . . . . . . . . . . . . . . . . . . . . . . . . . . . . . . . . . . . . . . .
Starting Understand 2.0 . . . . . . . . . . . . . . . . . . . . . . . . . . . . .
Other Ways to Run Understand 2.0 . . . . . . . . . . . . . . . .
Right-Click Menus Are Everywhere . . . . . . . . . . . . . . . . . . . .
Quickly Find Things in Your Source . . . . . . . . . . . . . . . . . . . .
Entity Filter . . . . . . . . . . . . . . . . . . . . . . . . . . . . . . . . . . .
Entity Locator . . . . . . . . . . . . . . . . . . . . . . . . . . . . . . . .
Find in Files . . . . . . . . . . . . . . . . . . . . . . . . . . . . . . . . .
Favorites. . . . . . . . . . . . . . . . . . . . . . . . . . . . . . . . . . . .
Info Browser . . . . . . . . . . . . . . . . . . . . . . . . . . . . . . . . . . . . .
Source Editor . . . . . . . . . . . . . . . . . . . . . . . . . . . . . . . . . . . .
Architecture Browser. . . . . . . . . . . . . . . . . . . . . . . . . . . . . . .
Snapshots Windows . . . . . . . . . . . . . . . . . . . . . . . . . . . . . . .
Graphical Views . . . . . . . . . . . . . . . . . . . . . . . . . . . . . . . . . .
ASCII and HTML Reports . . . . . . . . . . . . . . . . . . . . . . . . . . .
PERL and C APIs for Custom Reporting . . . . . . . . . . . . . . .
Chapter 3
1–2
1–3
1–4
1–4
2–2
2–3
2–4
2–5
2–6
2–7
2–9
2–9
2–10
2–11
2–11
2–12
2–13
2–14
2–15
2–16
2–17
2–18
Configuring Your Project
About Understand 2.0 Projects . . . . . . . . . . . . . . . . . . . . . . . .
The Understand 2.0 Project Database . . . . . . . . . . . . . .
Creating a New Project . . . . . . . . . . . . . . . . . . . . . . . . . . . . . .
Project Configuration Dialog . . . . . . . . . . . . . . . . . . . . . . . . . .
Languages Category. . . . . . . . . . . . . . . . . . . . . . . . . . . . . . . .
Files Category . . . . . . . . . . . . . . . . . . . . . . . . . . . . . . . . . . . .
Adding Directories . . . . . . . . . . . . . . . . . . . . . . . . . . . .
Adding Files . . . . . . . . . . . . . . . . . . . . . . . . . . . . . . . . .
Deleting Directories and Files . . . . . . . . . . . . . . . . . . .
Setting Overrides . . . . . . . . . . . . . . . . . . . . . . . . . . . . .
Scanning Watched Directories . . . . . . . . . . . . . . . . . . .
Understand 2.0 User Guide and Reference Manual
3–2
3–2
3–3
3–7
3–9
3–10
3–11
3–13
3–13
3–13
3–14
iii
Contents
Setting File Portability . . . . . . . . . . . . . . . . . . . . . . . . . .
File Types . . . . . . . . . . . . . . . . . . . . . . . . . . . . . . . . . . . . . . .
Metrics. . . . . . . . . . . . . . . . . . . . . . . . . . . . . . . . . . . . . . . . . .
Metrics->Selected Category . . . . . . . . . . . . . . . . . . . . .
Reports . . . . . . . . . . . . . . . . . . . . . . . . . . . . . . . . . . . . . . . . .
Reports->Output Category . . . . . . . . . . . . . . . . . . . . . .
Reports->Options Category . . . . . . . . . . . . . . . . . . . . .
Reports->Selected Category . . . . . . . . . . . . . . . . . . . .
Visual Studio . . . . . . . . . . . . . . . . . . . . . . . . . . . . . . . . . . . . .
Ada Options. . . . . . . . . . . . . . . . . . . . . . . . . . . . . . . . . . . . . .
Ada->Macros Category. . . . . . . . . . . . . . . . . . . . . . . . .
Assembly Options . . . . . . . . . . . . . . . . . . . . . . . . . . . . . . . . .
Assembly->Includes Category . . . . . . . . . . . . . . . . . . .
Assembly-> Includes ->Replacement Text Category . .
C++ Options . . . . . . . . . . . . . . . . . . . . . . . . . . . . . . . . . . . . .
C++->Includes Category. . . . . . . . . . . . . . . . . . . . . . . .
C++->Includes->Auto Category . . . . . . . . . . . . . . . . . .
C++->Includes-> Ignore Category . . . . . . . . . . . . . . . .
C++->Includes-> Replacement Text. . . . . . . . . . . . . . .
C++->Macros Category . . . . . . . . . . . . . . . . . . . . . . . .
C++->Macros-> Undefines Category . . . . . . . . . . . . . .
C# Options . . . . . . . . . . . . . . . . . . . . . . . . . . . . . . . . . . . . . .
C#->References Category . . . . . . . . . . . . . . . . . . . . . .
FORTRAN Options . . . . . . . . . . . . . . . . . . . . . . . . . . . . . . . .
Fortran>Includes Category . . . . . . . . . . . . . . . . . . . . . .
Other Fortran Categories . . . . . . . . . . . . . . . . . . . . . . .
Java Options . . . . . . . . . . . . . . . . . . . . . . . . . . . . . . . . . . . . .
Java->Class Paths Category . . . . . . . . . . . . . . . . . . . .
JOVIAL Options. . . . . . . . . . . . . . . . . . . . . . . . . . . . . . . . . . .
Jovial->Copy Category . . . . . . . . . . . . . . . . . . . . . . . . .
Pascal Options . . . . . . . . . . . . . . . . . . . . . . . . . . . . . . . . . . .
Pascal->Macros Category . . . . . . . . . . . . . . . . . . . . . .
Pascal->Namespaces Category . . . . . . . . . . . . . . . . . .
Pascal->Standard Library Paths Category . . . . . . . . . .
Pascal->Search Paths Category . . . . . . . . . . . . . . . . .
PL/M Options. . . . . . . . . . . . . . . . . . . . . . . . . . . . . . . . . . . . .
Setting General Preferences . . . . . . . . . . . . . . . . . . . . . . . . .
General Category . . . . . . . . . . . . . . . . . . . . . . . . . . . . .
User Interface Category . . . . . . . . . . . . . . . . . . . . . . . .
User Interface->Lists Category . . . . . . . . . . . . . . . . . . .
User Interface-> Alerts Category . . . . . . . . . . . . . . . . .
Key Bindings Category . . . . . . . . . . . . . . . . . . . . . . . . .
TrackBack Category . . . . . . . . . . . . . . . . . . . . . . . . . . .
iv
3–15
3–16
3–17
3–18
3–19
3–19
3–20
3–20
3–21
3–23
3–25
3–27
3–27
3–27
3–28
3–30
3–32
3–32
3–32
3–33
3–34
3–35
3–35
3–36
3–38
3–38
3–39
3–40
3–41
3–42
3–43
3–43
3–44
3–44
3–44
3–45
3–46
3–46
3–48
3–49
3–50
3–51
3–52
Understand 2.0 User Guide and Reference Manual
Contents
Analyze Category . . . . . . . . . . . . . . . . . . . . . . . . . . . . .
Configure Category . . . . . . . . . . . . . . . . . . . . . . . . . . .
Named Roots Category . . . . . . . . . . . . . . . . . . . . . . . .
Editor Category . . . . . . . . . . . . . . . . . . . . . . . . . . . . . .
Editor->Styles Category . . . . . . . . . . . . . . . . . . . . . . . .
Editor->Browse Category . . . . . . . . . . . . . . . . . . . . . . .
Analyzing the Code. . . . . . . . . . . . . . . . . . . . . . . . . . . . . . . .
Chapter 4
Exploring Your Codebase
PLEASE RIGHT CLICK . . . . . . . . . . . . . . . . . . . . . . . . . . . . .
Various Windows Explained... . . . . . . . . . . . . . . . . . . . . . . . .
Project Assistant . . . . . . . . . . . . . . . . . . . . . . . . . . . . . . . . . . .
Entity Filter . . . . . . . . . . . . . . . . . . . . . . . . . . . . . . . . . . . . . . .
Using the Filter Field . . . . . . . . . . . . . . . . . . . . . . . . . . .
Customizing the Display . . . . . . . . . . . . . . . . . . . . . . . . .
Root Filters . . . . . . . . . . . . . . . . . . . . . . . . . . . . . . . . . . .
Info Browser . . . . . . . . . . . . . . . . . . . . . . . . . . . . . . . . . . . . . .
Drilling Down A Relationship . . . . . . . . . . . . . . . . . . . . .
Displaying More or Less Information . . . . . . . . . . . . . .
Syncing the Info Browser . . . . . . . . . . . . . . . . . . . . . . .
Visiting Source Code . . . . . . . . . . . . . . . . . . . . . . . . . .
Visiting References . . . . . . . . . . . . . . . . . . . . . . . . . . .
Viewing Metrics . . . . . . . . . . . . . . . . . . . . . . . . . . . . . .
Saving and Printing Info Browser Text . . . . . . . . . . . . .
Entity History . . . . . . . . . . . . . . . . . . . . . . . . . . . . . . . .
Project Browser. . . . . . . . . . . . . . . . . . . . . . . . . . . . . . . . . . .
Project Metrics Browser . . . . . . . . . . . . . . . . . . . . . . . . . . . .
Exploring a Hierarchy . . . . . . . . . . . . . . . . . . . . . . . . . . . . . .
Favorites . . . . . . . . . . . . . . . . . . . . . . . . . . . . . . . . . . . . . . . .
Creating a Favorite. . . . . . . . . . . . . . . . . . . . . . . . . . . .
Using the Favorites . . . . . . . . . . . . . . . . . . . . . . . . . . .
Chapter 5
3–52
3–53
3–53
3–54
3–56
3–57
3–59
4–2
4–3
4–4
4–5
4–6
4–6
4–6
4–8
4–9
4–10
4–10
4–10
4–11
4–11
4–11
4–12
4–13
4–15
4–16
4–17
4–17
4–18
Searching Your Source
Searching: An Overview . . . . . . . . . . . . . . . . . . . . . . . . . . . . .
5–2
Entity Locator . . . . . . . . . . . . . . . . . . . . . . . . . . . . . . . . . . . . .
5–3
Resizing Columns . . . . . . . . . . . . . . . . . . . . . . . . . . . . .
5–3
Long versus Short Names . . . . . . . . . . . . . . . . . . . . . . .
5–3
Column Headers . . . . . . . . . . . . . . . . . . . . . . . . . . . . . .
5–4
Choosing Columns . . . . . . . . . . . . . . . . . . . . . . . . . . . . .
5–4
Filtering the List . . . . . . . . . . . . . . . . . . . . . . . . . . . . . . .
5–5
Find in Files. . . . . . . . . . . . . . . . . . . . . . . . . . . . . . . . . . . . . . .
5–8
Find Results . . . . . . . . . . . . . . . . . . . . . . . . . . . . . . . . .
5–10
Finding Windows. . . . . . . . . . . . . . . . . . . . . . . . . . . . . . . . . .
5–11
Understand 2.0 User Guide and Reference Manual
v
Contents
Chapter 6
Editing Your Source
Source Editor. . . . . . . . . . . . . . . . . . . . . . . . . . . . . . . . . . . . . .
Scope List . . . . . . . . . . . . . . . . . . . . . . . . . . . . . . . . . . . .
Status Icons . . . . . . . . . . . . . . . . . . . . . . . . . . . . . . . . . .
Status Line . . . . . . . . . . . . . . . . . . . . . . . . . . . . . . . . . . .
Selecting and Copying Text . . . . . . . . . . . . . . . . . . . . . .
Browse Mode . . . . . . . . . . . . . . . . . . . . . . . . . . . . . . . . .
Right-Click Menu . . . . . . . . . . . . . . . . . . . . . . . . . . . . . .
Saving Source Code . . . . . . . . . . . . . . . . . . . . . . . . . . . . . . . .
Searching Source Code . . . . . . . . . . . . . . . . . . . . . . . . . . . . .
Incremental Find . . . . . . . . . . . . . . . . . . . . . . . . . . . . . . .
Find. . . . . . . . . . . . . . . . . . . . . . . . . . . . . . . . . . . . . . . . .
Source Visiting History . . . . . . . . . . . . . . . . . . . . . . . . . .
Other Features . . . . . . . . . . . . . . . . . . . . . . . . . . . . . . . . . . . .
Bracket Matching . . . . . . . . . . . . . . . . . . . . . . . . . . . . . .
Folding and Hiding . . . . . . . . . . . . . . . . . . . . . . . . . . . . .
Changing Case . . . . . . . . . . . . . . . . . . . . . . . . . . . . . . . .
Commenting and Uncommenting . . . . . . . . . . . . . . . . . .
Keyboard Commands . . . . . . . . . . . . . . . . . . . . . . . . . . .
Printing Source Views . . . . . . . . . . . . . . . . . . . . . . . . . . . . . . .
Chapter 7
Architecting Your Codebase
About Architectures . . . . . . . . . . . . . . . . . . . . . . . . . . . . . . . . .
Using an Architecture as a Browser . . . . . . . . . . . . . . . . . . . .
Exploring Architectures. . . . . . . . . . . . . . . . . . . . . . . . . .
Generating Graphs . . . . . . . . . . . . . . . . . . . . . . . . . . . . .
Generating Metrics . . . . . . . . . . . . . . . . . . . . . . . . . . . . .
Managing Architectures. . . . . . . . . . . . . . . . . . . . . . . . . . . . . .
Creating an Architecture . . . . . . . . . . . . . . . . . . . . . . . . . . . .
Using the Architecture Wizard . . . . . . . . . . . . . . . . . . .
Editing an Architecture . . . . . . . . . . . . . . . . . . . . . . . . . . . . .
Using XML to Manage Architectures. . . . . . . . . . . . . . . . . . .
Exporting Architectures to XML . . . . . . . . . . . . . . . . . .
Importing XML Architectures . . . . . . . . . . . . . . . . . . . .
Using Architecture Filters . . . . . . . . . . . . . . . . . . . . . . . . . . .
Chapter 8
7–2
7–3
7–3
7–6
7–7
7–9
7–10
7–11
7–12
7–14
7–14
7–14
7–15
Managing Source Changes
About Snapshots . . . . . . . . . . . . . . . . . . . . . . . . . . . . . . . . . . .
Managing Snapshots. . . . . . . . . . . . . . . . . . . . . . . . . . . . . . . .
Creating a Snapshot . . . . . . . . . . . . . . . . . . . . . . . . . . . .
Edit Snapshot . . . . . . . . . . . . . . . . . . . . . . . . . . . . . . . . .
Remove Snapshot . . . . . . . . . . . . . . . . . . . . . . . . . . . . .
vi
6–2
6–3
6–3
6–3
6–4
6–4
6–4
6–5
6–6
6–6
6–7
6–7
6–8
6–8
6–8
6–8
6–9
6–9
6–9
8–2
8–2
8–3
8–4
8–5
Understand 2.0 User Guide and Reference Manual
Contents
Comparing Snapshots . . . . . . . . . . . . . . . . . . . . . . . . . . . . . .
Exploring Changes . . . . . . . . . . . . . . . . . . . . . . . . . . . . . . . . .
Architecture View . . . . . . . . . . . . . . . . . . . . . . . . . . . . .
Change List . . . . . . . . . . . . . . . . . . . . . . . . . . . . . . . . .
Entity Comparison . . . . . . . . . . . . . . . . . . . . . . . . . . . .
Difference Listing . . . . . . . . . . . . . . . . . . . . . . . . . . . . .
Using Change Reports . . . . . . . . . . . . . . . . . . . . . . . . . . . . .
Comparing Entities . . . . . . . . . . . . . . . . . . . . . . . . . . . . . . . .
Comparing Entities Between Snapshots . . . . . . . . . . .
Comparing Two Entities . . . . . . . . . . . . . . . . . . . . . . . .
Comparing Files and Folders . . . . . . . . . . . . . . . . . . . . . . . .
Comparing Text . . . . . . . . . . . . . . . . . . . . . . . . . . . . . .
Using TrackBack . . . . . . . . . . . . . . . . . . . . . . . . . . . . . . . . . .
Chapter 9
8–6
8–9
8–10
8–11
8–11
8–14
8–15
8–17
8–17
8–19
8–20
8–21
8–23
Using Graphical Views
Graphical View Browsers . . . . . . . . . . . . . . . . . . . . . . . . . . . .
Hierarchy Views . . . . . . . . . . . . . . . . . . . . . . . . . . . . . . .
Structure Views . . . . . . . . . . . . . . . . . . . . . . . . . . . . . . .
General Rules for Using Graphical Browsers. . . . . . . . .
Filtering Out Entities . . . . . . . . . . . . . . . . . . . . . . . . . . . .
Reuse Checkbox . . . . . . . . . . . . . . . . . . . . . . . . . . . . . .
Sync Checkbox . . . . . . . . . . . . . . . . . . . . . . . . . . . . . . .
Types of Views . . . . . . . . . . . . . . . . . . . . . . . . . . . . . . . . . . . .
Hierarchy View Types . . . . . . . . . . . . . . . . . . . . . . . . . .
Hierarchy View Examples . . . . . . . . . . . . . . . . . . . . . . .
Structure View Types . . . . . . . . . . . . . . . . . . . . . . . . . .
Structure View Examples . . . . . . . . . . . . . . . . . . . . . . .
Graphical Notation . . . . . . . . . . . . . . . . . . . . . . . . . . . . . . . .
Controlling Graphics Layout . . . . . . . . . . . . . . . . . . . . . . . . .
Called by Menu . . . . . . . . . . . . . . . . . . . . . . . . . . . . . .
Constants Menu . . . . . . . . . . . . . . . . . . . . . . . . . . . . . .
Default Members Menu . . . . . . . . . . . . . . . . . . . . . . . .
Dependent Of Menu . . . . . . . . . . . . . . . . . . . . . . . . . . .
Dependent Menu . . . . . . . . . . . . . . . . . . . . . . . . . . . . .
Duplicate Subtrees Menu . . . . . . . . . . . . . . . . . . . . . . .
Extended By Menu . . . . . . . . . . . . . . . . . . . . . . . . . . . .
Extends Menu . . . . . . . . . . . . . . . . . . . . . . . . . . . . . . .
External Functions Menu . . . . . . . . . . . . . . . . . . . . . . .
Filename Menu. . . . . . . . . . . . . . . . . . . . . . . . . . . . . . .
Function Pointer Menu . . . . . . . . . . . . . . . . . . . . . . . . .
Globals Menu . . . . . . . . . . . . . . . . . . . . . . . . . . . . . . . .
Implements Menu. . . . . . . . . . . . . . . . . . . . . . . . . . . . .
Implemented By Menu . . . . . . . . . . . . . . . . . . . . . . . . .
Imports Menu . . . . . . . . . . . . . . . . . . . . . . . . . . . . . . . .
Understand 2.0 User Guide and Reference Manual
9–2
9–2
9–3
9–4
9–6
9–7
9–7
9–8
9–8
9–9
9–12
9–12
9–16
9–17
9–18
9–18
9–18
9–18
9–18
9–18
9–18
9–19
9–19
9–19
9–19
9–19
9–19
9–19
9–20
vii
Contents
Included By Menu . . . . . . . . . . . . . . . . . . . . . . . . . . . . .
Includes Menu . . . . . . . . . . . . . . . . . . . . . . . . . . . . . . .
Inherits Menu . . . . . . . . . . . . . . . . . . . . . . . . . . . . . . . .
Inherited By Menu. . . . . . . . . . . . . . . . . . . . . . . . . . . . .
Intrinsic Menu . . . . . . . . . . . . . . . . . . . . . . . . . . . . . . . .
Invocations Menu . . . . . . . . . . . . . . . . . . . . . . . . . . . . .
Layout Menu . . . . . . . . . . . . . . . . . . . . . . . . . . . . . . . . .
Level Menu . . . . . . . . . . . . . . . . . . . . . . . . . . . . . . . . . .
Locals Menu . . . . . . . . . . . . . . . . . . . . . . . . . . . . . . . . .
Members Menu. . . . . . . . . . . . . . . . . . . . . . . . . . . . . . .
Name Menu . . . . . . . . . . . . . . . . . . . . . . . . . . . . . . . . .
Objects Menu . . . . . . . . . . . . . . . . . . . . . . . . . . . . . . . .
Operators Menu . . . . . . . . . . . . . . . . . . . . . . . . . . . . . .
Parameters Menu . . . . . . . . . . . . . . . . . . . . . . . . . . . . .
Private Members Menu. . . . . . . . . . . . . . . . . . . . . . . . .
Protected Members Menu . . . . . . . . . . . . . . . . . . . . . .
Public Members Menu . . . . . . . . . . . . . . . . . . . . . . . . .
Renames Menu . . . . . . . . . . . . . . . . . . . . . . . . . . . . . .
Routines Menu . . . . . . . . . . . . . . . . . . . . . . . . . . . . . . .
Scale Menu. . . . . . . . . . . . . . . . . . . . . . . . . . . . . . . . . .
Sort Menu . . . . . . . . . . . . . . . . . . . . . . . . . . . . . . . . . . .
Spacing Menu. . . . . . . . . . . . . . . . . . . . . . . . . . . . . . . .
Sql Menu. . . . . . . . . . . . . . . . . . . . . . . . . . . . . . . . . . . .
Static Menu. . . . . . . . . . . . . . . . . . . . . . . . . . . . . . . . . .
Text Menu. . . . . . . . . . . . . . . . . . . . . . . . . . . . . . . . . . .
Types Menu . . . . . . . . . . . . . . . . . . . . . . . . . . . . . . . . .
Typetext Menu . . . . . . . . . . . . . . . . . . . . . . . . . . . . . . .
Unknown Menu. . . . . . . . . . . . . . . . . . . . . . . . . . . . . . .
Unresolved Menu . . . . . . . . . . . . . . . . . . . . . . . . . . . . .
Usedby Menu . . . . . . . . . . . . . . . . . . . . . . . . . . . . . . . .
Uses Menu . . . . . . . . . . . . . . . . . . . . . . . . . . . . . . . . . .
Variables Menu. . . . . . . . . . . . . . . . . . . . . . . . . . . . . . .
Withs Menu. . . . . . . . . . . . . . . . . . . . . . . . . . . . . . . . . .
With Bys Menu . . . . . . . . . . . . . . . . . . . . . . . . . . . . . . .
Saving Graphical Views . . . . . . . . . . . . . . . . . . . . . . . . . . . .
Saving Views to Files . . . . . . . . . . . . . . . . . . . . . . . . . .
Saving Views as Visio Files . . . . . . . . . . . . . . . . . . . . .
Printing Graphical and Source Views . . . . . . . . . . . . . . . . . .
Graphical View Printing . . . . . . . . . . . . . . . . . . . . . . . .
Printing on UNIX Machines. . . . . . . . . . . . . . . . . . . . . .
Chapter 10
Generating Reports and Metrics
Configuring Reports . . . . . . . . . . . . . . . . . . . . . . . . . . . . . . .
Generating Reports . . . . . . . . . . . . . . . . . . . . . . . . . . . . . . . .
Viewing Reports . . . . . . . . . . . . . . . . . . . . . . . . . . . . . . . . . .
viii
9–20
9–20
9–20
9–20
9–20
9–21
9–21
9–22
9–22
9–23
9–23
9–23
9–23
9–24
9–24
9–24
9–24
9–24
9–24
9–25
9–25
9–25
9–25
9–25
9–26
9–26
9–26
9–26
9–27
9–27
9–27
9–27
9–27
9–27
9–28
9–28
9–29
9–29
9–29
9–30
10–2
10–4
10–5
Understand 2.0 User Guide and Reference Manual
Contents
An Overview of Report Categories . . . . . . . . . . . . . . . . . . . .
Augment with the PERL or C API. . . . . . . . . . . . . . . . .
Cross-Reference Reports . . . . . . . . . . . . . . . . . . . . . . . . . . .
Data Dictionary Report . . . . . . . . . . . . . . . . . . . . . . . . .
Program Unit Cross-Reference Report . . . . . . . . . . . .
File Contents Report . . . . . . . . . . . . . . . . . . . . . . . . .
Object Cross-Reference Report . . . . . . . . . . . . . . . . .
Type Cross-Reference Report . . . . . . . . . . . . . . . . . .
Class and Interface Cross-Reference . . . . . . . . . . . .
Macro Cross-Reference . . . . . . . . . . . . . . . . . . . . . . .
Include File Cross-Reference. . . . . . . . . . . . . . . . . . .
Exception Cross-Reference Report . . . . . . . . . . . . . .
Structure Reports . . . . . . . . . . . . . . . . . . . . . . . . . . . . . . . .
Declaration Tree. . . . . . . . . . . . . . . . . . . . . . . . . . . . .
Class Extend Tree . . . . . . . . . . . . . . . . . . . . . . . . . . .
Invocation Tree Report. . . . . . . . . . . . . . . . . . . . . . . .
Simple Invocation Tree Report. . . . . . . . . . . . . . . . . .
With Tree Report . . . . . . . . . . . . . . . . . . . . . . . . . . . .
Simple With Tree Report . . . . . . . . . . . . . . . . . . . . . .
Generic Instantiation Report. . . . . . . . . . . . . . . . . . . .
Renames Report . . . . . . . . . . . . . . . . . . . . . . . . . . . .
Import Report . . . . . . . . . . . . . . . . . . . . . . . . . . . . . . .
Quality Reports . . . . . . . . . . . . . . . . . . . . . . . . . . . . . . . . . .
Program Unit Complexity Report . . . . . . . . . . . . . . . .
FORTRAN Extension Usage Report . . . . . . . . . . . . .
Implicitly Declared Objects Report . . . . . . . . . . . . . . .
Unused Objects Report . . . . . . . . . . . . . . . . . . . . . . .
Unused Types Report . . . . . . . . . . . . . . . . . . . . . . . .
Unused Program Units Report . . . . . . . . . . . . . . . . . .
Withs Not Needed Report . . . . . . . . . . . . . . . . . . . . .
Metrics Reports . . . . . . . . . . . . . . . . . . . . . . . . . . . . . . . . . .
Ways to Get Metrics Information . . . . . . . . . . . . . . . .
What Metrics are Available?. . . . . . . . . . . . . . . . . . . .
Project Metrics Report . . . . . . . . . . . . . . . . . . . . . . . .
Class Metrics Report . . . . . . . . . . . . . . . . . . . . . . . . .
Class OO Metrics Report . . . . . . . . . . . . . . . . . . . . . .
Program Unit Metrics Report . . . . . . . . . . . . . . . . . . .
File Metrics Report . . . . . . . . . . . . . . . . . . . . . . . . . . .
File Average Metrics Report. . . . . . . . . . . . . . . . . . . .
Exporting Metrics . . . . . . . . . . . . . . . . . . . . . . . . . . . . . . . .
Chapter 11
10–6
10–7
10–8
10–8
10–9
10–10
10–10
10–11
10–11
10–12
10–12
10–13
10–14
10–14
10–15
10–16
10–16
10–16
10–17
10–17
10–17
10–17
10–18
10–18
10–19
10–20
10–20
10–21
10–21
10–21
10–22
10–22
10–23
10–23
10–23
10–24
10–24
10–25
10–26
10–27
Running External Commands
Running External Commands . . . . . . . . . . . . . . . . . . . . . . . .
Variables . . . . . . . . . . . . . . . . . . . . . . . . . . . . . . . . . . .
Understand 2.0 User Guide and Reference Manual
11–2
11–3
ix
Contents
Chapter 12
Command Line Processing
Using the und Command Line. . . . . . . . . . . . . . . . . . . . . . . .
Getting Help on Command Line Options . . . . . . . . . . .
Creating a New Project. . . . . . . . . . . . . . . . . . . . . . . . .
Creating a Project and Adding Sources in One Step . .
Adding Files to a Project. . . . . . . . . . . . . . . . . . . . . . . .
Creating a List of Files . . . . . . . . . . . . . . . . . . . . . . . . .
Analyzing a Project . . . . . . . . . . . . . . . . . . . . . . . . . . . .
Command Line Options . . . . . . . . . . . . . . . . . . . . . . . .
x
12–2
12–2
12–3
12–3
12–3
12–4
12–4
12–5
Understand 2.0 User Guide and Reference Manual
Chapter 1
Introduction
This chapter is intended to introduce the Understand 2.0 software.
This manual assumes a moderate understanding of the
programming language in which your project is written.
This chapter contains the following sections:
Section
Page
What is Understand 2.0?
1–2
For Those Who Don’t Like to Read Manuals
1–4
Understand 2.0 User Guide and Reference Manual
1-1
Chapter 1: Introduction
What is Understand 2.0?
Understand 2.0 is a cross-platform, multi-language, maintenanceoriented IDE (interactive development environment). It is designed
to help maintain and understand large amounts of legacy or newlycreated source code. The source code analyzed may include Ada,
C++, C#, FORTRAN, Java, JOVIAL, and/or Delphi/Pascal.
It offers code navigation using a detailed cross-reference, a syntaxcolorizing “smart” editor, and a variety of graphical reverse
engineering views.
Understand 2.0 creates a repository of the relations and structures
contained within the software project. The repository is then used to
learn about the source code.
1-2
Understand 2.0 User Guide and Reference Manual
What is Understand 2.0?
Understand 2.0 has analysis features that help you quickly answer
questions such as:
•
What is this entity?
•
Where is it changed?
•
Where is it referenced?
•
Who depends on it?
•
What does it depend on?
Understand 2.0 has architecture features that help you create
hierarchical aggregations of source code units. You can name these
units and manipulate them in various ways to create interesting
hierarchies for analysis.
....................................................................................................
Programming
Language Versions
Supported
Understand 2.0 supports Ada, C/C++/C#, FORTRAN, Java, Jovial,
and Pascal.
Understand 2.0 supports Ada83 and Ada95 code, separately, or in
combination.
Understand 2.0 analyzes K&R or ANSI C source code and most
constructs of the C++ language. Understand 2.0 works with any C
compiler, and has been tested with most of the popular ones.
Note:
C++ templates are not yet supported.
Understand 2.0 supports C#.
Understand 2.0 supports FORTRAN 77, FORTRAN 90, and
FORTRAN 95, in both free and fixed format. Extensions supported
include Harris FORTRAN and DEC FORTRAN. We often expand
Understand 2.0 to support common compiler extensions. If you find
that the compiler extensions you are using are not currently
supported, contact us at [email protected].
Understand 2.0 supports JDK 1.3, 1.4, and most of 1.5. Specifically,
the generics introduced in 1.5 are not currently supported. Source
code containing generics may be analyzed but generics information
will be ignored.
Understand 2.0 supports all versions of Borland's Delphi language
and Borland's Turbo Pascal language. It also supports ISO 7185:
1990 (also known as Unextended Pascal) with DEC Pascal
extensions. You can also enable support for Ingres embedded SQL
statements.
This manual does not provide detailed descriptions of how specific
language features are handled.
Understand 2.0 User Guide and Reference Manual
1-3
Chapter 1: Introduction
....................................................................................................
Use Server Mode to
Integrate with Your
IDE
Understand 2.0 is designed to be used both for standalone
browsing/discovery as well as browsing that is controlled from
another application.
You can control Understand 2.0 from any editor or program from
which you can launch “understand.exe”. The client accepts action
commands for an entity name, and optional file, line, column
specifiers, and more.
For Those Who Don’t Like to Read Manuals
If you are like many engineers at Scientific Toolworks, you like to just
dig in and get going with software. We encourage that, or at least we
are pragmatic enough to know you will do it anyway! So feel free to
use this manual as a safety net, or to find the less obvious features.
However, before you depart the manual, skim the next chapter for
tips on effectively utilizing what Understand 2.0 has to offer.
Help is available by choosing Help->Help and Help->FAQ.
1-4
Understand 2.0 User Guide and Reference Manual
Chapter 2
Parts and Terminology
This chapter is intended to help you put Understand 2.0 to good use
quickly and easily. The chapter describes the basic windows in
Understand 2.0.
This chapter contains the following sections:
Section
Page
Using Understand 2.0 Windows
2–2
Understand 2.0 Terminology
2–3
Starting Understand 2.0
2–5
Right-Click Menus Are Everywhere
2–7
Quickly Find Things in Your Source
2–9
Info Browser
2–12
Source Editor
2–13
Architecture Browser
2–14
Snapshots Windows
2–15
Graphical Views
2–16
ASCII and HTML Reports
2–17
PERL and C APIs for Custom Reporting
2–18
Understand 2.0 User Guide and Reference Manual
2-1
Chapter 2: Parts and Terminology
Using Understand 2.0 Windows
Understand 2.0 has a main window and many smaller areas that
open within the Understand 2.0 application window. You can
arrange these areas in your workspace to meet your needs.
Title Bar
Pushpin
Dock/Undock
Previous
Next
Close
Window
Drop-down
Sliding
Frame
•
Title Bar: You can drag the title bar of an area around the main
window. If you move to the edge of the main window, a docking
area expands. If you drop the area there, it “docks” to the edge of
the main window.
•
Pushpins and Drawers: Click the
icon to move an area to
a tab along the same edge of the main window to which this area
was docked. This is a “drawer” that opens automatically if you
point your mouse at the tab title. The drawer closes if you move
your mouse away from the area without clicking on it or if you
click the title tab of the currently open drawer.
Click the
icon to “pin” a drawer open. Pinned drawers have
a title bar and title bar icons like the ones shown above.
2-2
•
Dock/Undock: Click the
icon to change the area to an
undocked window. Click the icon again in an undocked window
to return to a docked area.
•
Close: Click the “X” icon to close the area or undocked window.
•
Window Drop-down: Click this small icon to see the right-click
menu for this area in general. Right-clicking an item within an
area usually displays a right-click menu specific to that item.
•
Sliding Frame: You can drag the frames between window areas
to change their sizes.
•
Previous and Next: Each area type has different icons below
the title bar. For the Info Browser area shown, you can browse
through the history of entities viewed. For other areas, you will
see other icons.
Understand 2.0 User Guide and Reference Manual
Understand 2.0 Terminology
Understand 2.0 Terminology
Before continuing with the rest of this manual, please take a
moment to familiarize yourself with Understand 2.0’s terminology.
Doing so will make reading the manual more helpful and also put
you on the same sheet of music as the technical support team
should you need to email or call.
Architect: Architect is a tool and infrastructure that lets humans
easily name regions of software. This tool can then generate reports
and graphs, and other tools can use architectures when selecting
source code sets.
Architecture: An architecture is a hierarchical aggregation of
source code units (entities). An architecture can be user created or
automatically generated. Architectures need not be complete (i.e an
architecture's flattened expansion need not reference every source
entity in the database), nor unique (i.e. an architecture's flattened
expansion need not maintain the set property).
Architecture Files: Architecture files are external (serialized)
architecture files that can be imported into the database each time
the database is reparsed. An optional process and list of arguments
can be provided to regenerate the file before importing.
Architecture Template: An architecture template is an architecture
that may not contain entities. It is a hierarchy from which new
architectures can be derived.
Database: The database is where the results of the source code
parsing, as well as project settings, are stored. By default this is a
project’s “.udb” file.
Entity: An Understand 2.0 “entity” is anything it has information
about. In practice this means anything declared or used in your
source code and the files that contain the project. Subroutines,
variables, and source files are all examples of entities.
Project: The set of source code you have analyzed and the
settings and parameters chosen. A “project file” contains the list of
source files and the project settings.
Relationship: A particular way that entities relate to one another.
The names of relationships come from the syntax and semantics of
a programming language. For instance, subroutine entities can have
“Call” relationships and “CalledBy” relationships.
Understand 2.0 User Guide and Reference Manual
2-3
Chapter 2: Parts and Terminology
Script: Generally a PERL script. These can be run from within
Understand 2.0’s GUI, or externally via the “uperl” command. The
Understand PERL API provides easy and direct access to all
information stored in an Understand database.
Snapshot: A snapshot is used to capture the state of the database
at a given point in time. Snapshots are used to compare changes
between different states of the database.
....................................................................................................
Parts
Filter
Menu bar Area
Info
Browser
2-4
The following figure shows the main parts of the Understand 2.0
graphical user interface (GUI):
Source
Editor
Toolbar
Status Line
Document
Area
Graphical View
Find in Files Search Dialog
Understand 2.0 User Guide and Reference Manual
Starting Understand 2.0
Starting Understand 2.0
When you install Understand 2.0 on Windows, commands to launch
the software are added to your Windows Start menu in the SciTools
folder.
When you start Understand 2.0, you see the Create/Open Project
dialog. To begin creating a new project, click Create New Project.
See Creating a New Project on page 3–3 for details.
If you’ve used a project recently, it is listed in this dialog, and you
can select it and click Open Selected Project. If the existing project
you want to open isn’t listed, click Browse for Project and browse.
If you want to learn about Understand 2.0, click Open Example
Project and choose an example project that uses a source code
language used in your own projects.
Understand 2.0 User Guide and Reference Manual
2-5
Chapter 2: Parts and Terminology
....................................................................................................
Other Ways to Run
Understand 2.0
For information on running Understand 2.0 from the command line,
see Chapter 12, Command Line Processing.
If multiple users will run Understand 2.0 from the same Windows
machine, each user may have a separate initialization file. These
files store user preferences. Understand 2.0 looks for the
initialization file location in the following sequence:
1 %APPDATA% (local settings and applications)
2 %WINDIR% (typically c:\Windows)
3 %STI_INIDIR%
2-6
Understand 2.0 User Guide and Reference Manual
Right-Click Menus Are Everywhere
Right-Click Menus Are Everywhere
Right-clicking gets you a long way in Understand 2.0; almost
everywhere you point you can learn more and do more by bringing
up menus with your right mouse button.
Tip:
Hold down the Ctrl key while right-clicking to create new windows
rather than re-using existing ones.
Remember to right-click, anytime, anywhere, on any entity to get
more information about that entity.
Example: Right-click on an entity in the Source Editor:
Understand 2.0 User Guide and Reference Manual
2-7
Chapter 2: Parts and Terminology
Example: Right-click on an entity in the filter area:
Example: Right-click on an entity in the Info Browser:
2-8
Understand 2.0 User Guide and Reference Manual
Quickly Find Things in Your Source
Quickly Find Things in Your Source
Understand 2.0 provides several ways to quickly locate items of
interest in your source code. The windows used include the Filter
Area, the Entity Locator, and the Find in Files dialog.
....................................................................................................
Entity Filter
The filter area of the Understand 2.0 window helps you quickly find
things in your code by separating that database into lists of Files,
Classes, Functions, Objects, Types, Macros, Subprograms,
Packages, Modules, Blocks, Methods, Interfaces, SQL Tables, and
more. The types of filters available depend on the languages you
have configured your Understand 2.0 project to understand.
After clicking in the filter area, you can type a letter to move to the
first entity beginning with that letter in the current list.
By default the Info Browser shows all known information about the
selected entity and is a key to navigating in Understand 2.0.
Filter Area
Info Browser
For details, see Entity Filter on page 4–5 and Info Browser on
page 4–8.
Understand 2.0 User Guide and Reference Manual
2-9
Chapter 2: Parts and Terminology
....................................................................................................
Entity Locator
The filter provides a quick way to find major items that were
declared and used in your project. However, some items such as
local parameters, variables, and unresolved variables (used but not
declared in the processed source) are not listed in the filters. To
search or browse the entire database for your project, use the Entity
Locator.
To open the Entity Locator, choose Search->Entity Locator.
By default, this area lists all the entities in the project. You can
search for entities matching a particular text or regex string using
the fields above each column.
For details, see Entity Locator on page 5–3.
As in any other window, the right-click menu is also active:
2-10
Understand 2.0 User Guide and Reference Manual
Quickly Find Things in Your Source
....................................................................................................
Find in Files
Similar to the UNIX
command grep, you
may search files for
the occurrence of a
string. Select Find in
Files either from the
Search menu or from
a right-click menu.
When you click the
Search icon, a list of
all occurrences
matching the
specified string or
regular expression is
displayed in the Find
Results window.
Double click on any
result to display the
Source View where
the string occurs.
The Find Options let
you set options such
as case-sensitivity
and wildcard pattern
matching.
See Find in Files on page 5–8 for more information.
....................................................................................................
Favorites
You can place entities and code locations that you often use on your
Favorites list. To add a favorite, right-click on it and select Add
Favorite. To see the Favorites list, choose Search->Favorites.
Then, double-click a favorite from the list to go to its location.
See Favorites on page 4–17 for more information.
Understand 2.0 User Guide and Reference Manual
2-11
Chapter 2: Parts and Terminology
Info Browser
Just about everything Understand 2.0 knows about code is shown in
the Info Browser (IB). The IB is used for all types of entities.
The Info Browser shows different things depending on the type of
entity selected.
It shows different kinds of information about entities such as source
files, classes, members, functions, types, methods, packages,
interfaces, and more. Information that is hierarchical in nature (such
as a call relationship) can be expanded multiple levels.
Below are Info Browser windows for a file and a C function:
For details, see Info Browser on page 4–8.
2-12
Understand 2.0 User Guide and Reference Manual
Source Editor
Source Editor
Understand 2.0 has a source editor that not only lets you edit your
source code, it colorizes the source code and also tells you about
the code you are editing.
Source can be visited by double-clicking almost anywhere else in
the tool. You can move forward or backward through such “visits” by
using the Next and Previous icons in the toolbar.
As with any other place in Understand 2.0, a right-click menu is
available throughout the editor. To learn about something just rightclick on it to see what information is available.
For details, see Source Editor on page 6–2.
Understand 2.0 User Guide and Reference Manual
2-13
Chapter 2: Parts and Terminology
Architecture Browser
The Architecture Browser allows you to manage architectures. It
shows a list of all the defined architectures in the database and
provides a way to navigate individual architectures.
For example, this windows shows the auto-architectures provided
with Understand 2.0: Filesystem and Calendar (disabled by default).
The Filesystem architecture is expanded somewhat to show the toplevel filesystem for an example application.
You can use the auto-architectures, create your own architectures,
import and export architectures (as XML files), generate graphs and
metrics for any level in an architecture hierarchy, and combine
architectures through filtering.
For details, see About Architectures on page 7–2.
2-14
Understand 2.0 User Guide and Reference Manual
Snapshots Windows
Snapshots Windows
The Snapshots windows allow you to compare versions of files. You
can take a snapshot to capture the state of the database at a given
point in time. Later, you can compare a snapshot to the current files
to find what changes have occurred.
For details, see About Snapshots on page 8–2.
Understand 2.0 User Guide and Reference Manual
2-15
Chapter 2: Parts and Terminology
Graphical Views
Understand 2.0 analyzes your software code and creates a
database containing information about the entities and the relations
between entities. The database can then be browsed using various
“graphical view” windows. The graphical views are divided into
these kinds:
•
Hierarchy views show relations between entities. Each view
follows a relation (for instance “Calls”) from the starting entity
(that you inquired about) through its children and successors.
•
Structure views quickly show the structure of any entity that
adds to the structure of your software (for instance a package,
function, procedure, or task).
Examples of each type are shown in the following figure:
Structure
View
Hierarchy
View
For details, See Using Graphical Views on page 9–1.
2-16
Understand 2.0 User Guide and Reference Manual
ASCII and HTML Reports
ASCII and HTML Reports
Views in Understand 2.0 provide information about individual
entities. The reports bundle information about all entities in ASCII or
HTML format.
The HTML and ASCII reports also show information not available
interactively, such as project metrics and quality reports. These
reports are suitable for printing or browsing with a web browser.
See Generating Reports and Metrics on page 10–1 for more
information.
Understand 2.0 User Guide and Reference Manual
2-17
Chapter 2: Parts and Terminology
PERL and C APIs for Custom Reporting
Understand 2.0 data is also available directly from scripts and
programs that you (or we) write. A C API (usable from C, C++ or
other languages that can call C libraries) and a PERL interface are
available.
Using the API you have exactly the same access that we have when
we write the existing GUI and report generators.
This manual doesn’t cover the APIs. Choose Help->PERL API
Documentation and Help->FAQ for more information.
2-18
Understand 2.0 User Guide and Reference Manual
Chapter 3
Configuring Your Project
This chapter shows how to create new Understand 2.0 project files
that you will use to analyze your source code.
This chapter contains the following sections:
Section
Page
About Understand 2.0 Projects
3–2
Creating a New Project
3–3
Project Configuration Dialog
3–7
Languages Category
3–9
Files Category
3–10
File Types
3–16
Metrics
3–17
Reports
3–19
Visual Studio
3–21
Ada Options
3–23
Assembly Options
3–27
C++ Options
3–28
C# Options
3–35
FORTRAN Options
3–36
Java Options
3–39
JOVIAL Options
3–41
Pascal Options
3–43
PL/M Options
3–45
Setting General Preferences
3–46
Analyzing the Code
3–59
Understand 2.0 User Guide and Reference Manual
3-1
Chapter 3: Configuring Your Project
About Understand 2.0 Projects
Understand 2.0 is like a compiler, except it creates information, not
executable code.
In order for Understand 2.0 to analyze your source code, it needs
much of the information your compiler needs. It needs to know:
•
What source files to analyze
•
The type of source code
•
The standard library paths and include directories
•
Where to find Java .jar files that provide classes for which you do
not have source code
•
Compiler/environment specific macros that need to be defined
for the pre-processor
•
Application-specific macro definitions
•
What implementation parameters (such as integer precision) and
column truncation settings to use
•
Any namespaces
If you developed the program or have been working with it for some
time, this information is probably obvious to you. However, if you
inherited this source code from another programmer, team, or
company, you will probably have to examine the project building files
(e.g. makefile) in order to come up with the information needed for
accurate parsing of the code.
The easiest way to analyze your code is to use Understand 2.0’s
GUI to build and parse a project.
....................................................................................................
The Understand 2.0
Project Database
The Understand 2.0 project database is stored in a proprietary
binary format. The file format uses a network/object format that is
optimized for storing Understand 2.0 information.
Understand 2.0 databases have a file extension of .udb.
The project file permits multiple simultaneous read accesses, but it
does not (yet) support multi-user write access.
Occasionally, a new feature to Understand 2.0 requires a change to
the database format. Such changes are noted in the Change Log.
When you install a build that modifies the database format, existing
projects are automatically reparsed when you open them.
3-2
Understand 2.0 User Guide and Reference Manual
Creating a New Project
Creating a New Project
To begin analyzing code, you create a project and specify what
source files to parse. Understand 2.0 parses your code and creates
a database you can browse. This database can be refreshed
incrementally in the GUI or updated using command-line tools.
This section shows how to create a new project using the New
Project Wizard. The project will be stored in a Project Database,
which has a file extension of .udb.
You can open the New Project Wizard by clicking the Create New
Project button in the Create/Open dialog that you see when you
start Understand 2.0. Or, you can choose File->New Project from
within Understand 2.0.
To use the New Project Wizard, follow these steps:
1 In the Create a project file page, click Create as and browse to
the folder where you wish to create the project database.
2 Type the name of the project in the File name field. The .udb
extension will be added automatically. Then click Save.
3 Click Next to see the Languages page of the wizard.
4 Put checkmarks next to languages used in the source code for
this project. You can check multiple languages. See Languages
Category on page 3–9 for more information. Then click Next.
Understand 2.0 User Guide and Reference Manual
3-3
Chapter 3: Configuring Your Project
5 If you use Visual Studio on Microsoft Windows, you can
synchronize your Understand project with Visual Studio projects
by clicking New.
In the Add a new Visual Studio file dialog, click ... and browse for
your Visual Studio project file. In the Add a new Visual Studio file
dialog, select the project configuration you want used when
Understand 2.0 analyzes your project. Then click OK.
You can add multiple Visual Studio projects or use the Edit
button to change the Configuration setting. Then click Next.
See Visual Studio on page 3–21 for more information.
3-4
Understand 2.0 User Guide and Reference Manual
Creating a New Project
6 To add source files to a project, you can click Add a Directory or
Add a File.
To add a file, just browse for the file and add it.
When you add a directory, you can browse for a directory, modify
the list of languages used in the source files, add additional filters
for file extensions not expected by Understand 2.0, filter out any
files you want to exclude (for example, temp*.*), and choose
whether all the subdirectories of this directory should be added.
See Adding Directories on page 3–11 for details.
If you chose a Visual Studio project, those files are automatically
listed in the Source Files page of the New Project Wizard.
Understand 2.0 User Guide and Reference Manual
3-5
Chapter 3: Configuring Your Project
7 Choose whether to Analyze project now or further configure the
project. Choosing Configure more settings takes you to the
Project Configuration dialog, which is described starting on
page 3–7. In either case, you can go to the Project Configuration
dialog anytime you like.
3-6
Understand 2.0 User Guide and Reference Manual
Project Configuration Dialog
Project Configuration Dialog
The Understand 2.0 Project Configuration dialog opens when you
finish using the New Project Wizard or when you choose the
Project->Configure Project menu item.
The categories on the left in the Project Configuration dialog allow
you to specify various project settings to be used during analysis.
The Project Configuration dialog contains the following categories:
•
Languages - Specify the types of languages to be parsed. For
details, see page 3–9.
•
Files - Specify the locations of source files to be analyzed. For
details, see page 3–10.
•
File Types - Specify how to handle source file types and what file
extensions are used. For details, see page 3–16.
Understand 2.0 User Guide and Reference Manual
3-7
Chapter 3: Configuring Your Project
•
Metrics - Specify the metrics you want computed for this project.
For details, see page 3–17.
•
Reports - Specify the reports you want generated for this
project. For details, see page 3–19.
•
Visual Studio - Specify a Visual Studio project to synchronize
this Understand 2.0 project with. For details, see page 3–21.
•
Language-Specific Options - Specify options for the languages
you selected in the Languages category. For details, see:
- Ada Options, page 3–23
- Assembly Options, page 3–27
- C++ Options, page 3–28
- C# Options, page 3–35
- Fortran Options, page 3–36
- Java Options, page 3–39
- Jovial Options, page 3–41
- Pascal Options, page 3–43
- PL/M Options, page 3–45
After you have changed the project configuration, click the OK
button and the configuration will be saved. Cancel closes the dialog
without saving your changes.
Whenever the files in the project configuration are modified,
including at the time of project creation, a dialog alerting you to the
change in configuration appears.
Choose “Yes” and Understand 2.0 then begins parsing (that is,
analyzing) the code.
3-8
Understand 2.0 User Guide and Reference Manual
Languages Category
Languages Category
In the Languages category of the Project Configuration dialog, you
can check boxes for the languages used in your project. A project
can contain source code in one or more languages.
When you select a language, categories for that language are
added to the list on the left in the Project Configuration dialog.
The languages you choose here not only affect how the source files
are parsed. They also affect the filter types available, the metrics
available, and the report types available.
If you select multiple languages, references between those
languages are analyzed. For example, if C code calls an assembly
function, that reference is shown.
Understand 2.0 User Guide and Reference Manual
3-9
Chapter 3: Configuring Your Project
Files Category
In the Files category of the Project Configuration dialog, you can
add source code directory trees and/or individual files to the project.
You can also delete specific files from the analysis and modify the
language-specific options for individual directories and files.
You can add sources here, or you can tie the project to those
specified in an MS Visual Studio project file (MS Windows versions
of Understand 2.0 only). See Visual Studio on page 3–21.
The top area shows the directories and files you have added in a
tree that you can expand. It also shows how many files are currently
in the project.
The bottom area shows any option overrides you have set for the
selected directory or file.
3-10
Understand 2.0 User Guide and Reference Manual
Files Category
Icons at the top of the dialog perform the following actions:
Open the Add a Directory dialog.
Open the Add a File dialog.
Delete the selected directory or file from the project analysis.
Copy the override settings for the selected directory or file.
Copy the override settings to the selected directory or file.
Configure override settings for the selected directory or file.
Set portability options for file paths. See page 3–15.
Note that your changes are not saved until you click OK.
Click Rescan if you have added files to a directory that are not
shown in the tree in this dialog.
....................................................................................................
Adding Directories
To add source directories to the project, click
Directory dialog:
. You see the Add a
1 In the Directory field, type the full directory path. Or, you can
click the ... button and use the Browse for Folder dialog to locate
a directory containing source files and click OK.
Understand 2.0 User Guide and Reference Manual
3-11
Chapter 3: Configuring Your Project
2 In the Configured Filters field, click the ... button if you want to
add or delete languages from the list shown. In the Select Filters
from Configured File Types dialog, put a checkmark next to any
languages you want to be recognized as part of the project.
Notice that additional languages are listed beyond those shown
in the Languages category. These include JavaScript, MSDos
Batch, Perl, Tcl, Text, and XML.
If this directory contains source files with extensions that are not
listed, click Configure. Also, see File Types on page 3–16. For
example, you might add .a64 as an assembly file type.
3 In the Additional Filters field, type a pattern-matching string that
matches only the files you want to keep in the analysis. For
example, std*.* includes only files that begin with “std”.
4 In the Exclude field, type a pattern-matching string that matches
files you want to exclude from the analysis. For example, temp*.*
excludes all files that begin with “temp”.
5 To select and add multiple subdirectories to a project
configuration, check the Include subdirectories box (on by
default). This causes all source files matching the filter in all
subdirectories of the specified path to be added to the project.
6 If you want this directory to be watched for any new files or
deleted files, check the Watch this directory box. Whenever a
source file is added to or deleted from this directory, the change
is reflected in this project. Watched directories are indicated by a
icon in the files list. Directories excluded from being watched
are indicated by a
icon. By default, the subdirectories of a
watched directory are also watched. See page 3–13 for watch
setting overrides.
7 On UNIX, you can choose whether symbolic links should be
followed when adding files.
8 After you have specified the fields, click the OK button to add the
source files in that directory to the project. You can click Cancel
if the add file process is taking too long.
Tip:
You may add files from multiple directory trees.
If you are using Microsoft Windows, you may drag and drop a
directory, a file, or a selection of files, from another window into the
Project Configuration dialog to add it to the project. If you drag a
folder, the Add a Project Directory dialog opens automatically. If you
drag an individual file, that file will be added to the project whether it
matches the file filter or not.
All directory paths are absolute.
3-12
Understand 2.0 User Guide and Reference Manual
Files Category
....................................................................................................
Adding Files
To add individual source files to the project, click
. You see the
Add a File dialog, which is a normal file-selection dialog.
Browse for and select a file or files. Then click Open. The file(s) are
added to the project.
....................................................................................................
Deleting Directories
and Files
To delete a directory or file from the project, select the items you
want to delete and click
.
....................................................................................................
Setting Overrides
Normally, each file in the project is processed according to the rules
you specify in the Project Configuration window for the language of
the file. For example, for C++ you can set include directories and
macro definitions. However, you can override the default settings on
a directory-by-directory or file-by-file basis if you like.
Directory: To override settings for a directory, follow these steps:
1 Select a directory.
2 Click
or right-click and select Configure override settings.
3 In the Watched Properties category, you can choose how files
in this directory should be watched for new files to add to the
project or deleted files to remove from the project. For Watch
Settings, you can choose to watch a directory, not watch a
directory, or inherit watch settings from the parent directory. In
addition to specifying whether to watch a directory, you can set
filters and exclude filters for an individual directory that control
what types of new and deleted files will be found.
Understand 2.0 User Guide and Reference Manual
3-13
Chapter 3: Configuring Your Project
4 In the various Override categories, you can make directoryspecific language-related settings.
File: To override settings for a file, follow these steps:
1 Select a file.
2 Click
or right-click and select Configure override settings.
3 In the Watched Properties category, you can choose to have
the file watched by its parent directory (if that directory is
watched) or excluded from being watched.
4 In the various Override categories, select a category and make
changes. The categories available are different depending on the
language of the source file. See page 3–23 through page 3–45
for details.
The File Type category lets you override the language of this file
indicated by the file extension.
5 Click OK to save your overrides.
....................................................................................................
Scanning Watched
Directories
3-14
If you set directories to be watched, you can scan those directories
for new files to be added to the project or deleted files to be removed
from the project by choosing Project->Rescan Watched Project
Directories.
Understand 2.0 User Guide and Reference Manual
Files Category
....................................................................................................
Setting File
Portability
You can control the portability of Understand 2.0 projects by clicking
the
icon at the top of the Files category of the Project
Configuration dialog. You will see the following dialog.
A more portable project can allow you to share the project with other
users and to use the project unchanged after moving the source
code files.
The choices are as follows:
•
Absolute. This option is the default. It stores full file paths for all
directories. If the source files change location, the paths will be
incorrect.
•
Relative. This option stores the relative path to directories from
the location of the Understand 2.0 project database. If you store
the project database in the source file tree and move it along with
the source files, the project can still be used.
•
Named Root. This option allows you to specify “Named Roots”
that are similar to environment variables to point to a root
directory. Different users may then use different definitions for a
named root. Click the Edit Named Roots button and see
page 3–53 for details.
Check the Use File Portability Mode to convert paths box if you
want the file paths currently stored in the project to be updated when
you click OK.
Understand 2.0 User Guide and Reference Manual
3-15
Chapter 3: Configuring Your Project
File Types
In the File Types category of the Project Configuration dialog, you
can control how file extensions are interpreted by Understand 2.0.
The list shows all the file extensions already understood. Files with
the types understood for the languages you checked in the
Languages category are analyzed as part of the project. Other files
are not analyzed.
To add file extensions to this list, click New.
Type a file extension and select the language indicated by the file
extension. Then click OK.
3-16
Understand 2.0 User Guide and Reference Manual
Metrics
Metrics
In the Metrics category of the Project Configuration dialog, you can
control how metrics are generated. The Metrics category has two
sub-categories: Options and Selected.
You see this window when you choose the Project->Configure
Project menu item and then the Metrics category. If you attempt to
generate metrics before configuring metrics, this window opens
automatically.
The Options subcategory has the following fields:
•
Output file. Specify the location and name of the file you want to
use for metrics output. Understand 2.0 sends its metrics output
to a .csv (comma-separated values) file. This file can be opened
with Microsoft Excel and other spreadsheets.
•
Show File Entities Name as. Specify whether files should be
displayed with Short names (just the filename), Full names
(including the absolute path), or Relative names (relative
directory path).
Understand 2.0 User Guide and Reference Manual
3-17
Chapter 3: Configuring Your Project
•
Show Declared in File. Check this box if you want the file in
which each entity is declared to be included in the output. You
can specify whether you want these files displayed with Short
names, Full names, or Relative names.
•
Show Function Parameter Types. Check this box if you want
the type of each function parameter listed.
•
Write Column Titles. Check this box if you want column
headings in the CSV file.
....................................................................................................
Metrics->Selected
Category
The Selected subcategory has lists like the following:
1 In the Available Metrics list (left), select metrics you want to
include in the output you generate. You can hold down Shift to
select a continuous group or Ctrl to select discontinuous items.
2 Click Add to copy the selected metrics to the right column.
3 You can reorder the metrics in the right column using the Move
Up and Move Down buttons.
See the FAQs at www.scitools.com for descriptions of the metrics.
3-18
Understand 2.0 User Guide and Reference Manual
Reports
Reports
In the Reports category of the Project Configuration dialog, you can
control how reports are generated. The Reports category has the
following sub-categories: Output, Options and Selected.
You see this window when you choose the Project->Configure
Project menu item and then the Reports category. You can also
reach this window by clicking Configure in the Project Reports
window.
....................................................................................................
Reports->Output
Category
The Output subcategory has two main areas:
•
Generate HTML. This option generates a large group of HTML
files that are interlinked.
- You may generate Single or multiple HTML files for each
report type. It is recommended that you split up the files for
large projects. Choose Alphabetic to generate multiple HTML
files per report which are split up alphabetically by the first
Understand 2.0 User Guide and Reference Manual
3-19
Chapter 3: Configuring Your Project
letter of the entity name. Choose Every n Entities to generate
multiple HTML files per report which are split up every “n”
number of entities. By default, a single HTML file is generated
for each letter of the alphabet.
- The “home” file for the reports is index.html, but you can select
an alternate Title Page.
- The default Save in directory is the <proj_file>_html folder
below the folder where your .udb file is stored, but you can
select an alternate location.
•
Text reports. This option generates simple text files containing
the report data.
- You may generate one text file of the specified location and
name (by choosing Single Text File). Alternately, you may
generate multiple text files (by choosing Separate Files) and
specify a directory to contain all the files. The file extensions of
each text file will denote the separate reports. Depending on
which option you select, you can also select either a file or
directory location for the output.
....................................................................................................
Reports->Options
Category
The Options subcategory has the following fields:
•
Display full filenames. If this box is checked, the invocation tree
and metrics reports show full entity names. The default is to use
short names.
•
Write generation time on report. If this box is checked, the
generation date and time are included at the top of text report
files. This is on by default.
....................................................................................................
Reports->Selected
Category
3-20
The Selected subcategory lets you check the boxes for the reports
you want to generate. The list of reports differs depending on which
languages are used in your project. See Chapter 10 for descriptions
of these report formats.
Understand 2.0 User Guide and Reference Manual
Visual Studio
Visual Studio
In the Visual Studio category of the Project Configuration dialog,
you can tell Understand 2.0 to use the source, macro, and include
path settings from a Microsoft Studio project file.
You see this window when you choose the Project->Configure
Project menu item and select the Visual Studio category.
Follow these steps:
1 Click New.
2 In the Add a new Visual Studio file dialog, click the “...” button
next to Visual Studio File. Then browse to select a Visual
Studio project file and click Open. MS Visual Studio project files
with extensions of .dsp, .dsw (workspace file), .sln, .vcp
(Windows CE project), and .vcproj are supported.
3 Select the Configuration you want Understand 2.0 to use when
analyzing your project.
Understand 2.0 User Guide and Reference Manual
3-21
Chapter 3: Configuring Your Project
4 You can expand the Contains list to see the includes, defines,
and files for the configuration currently selected.
Note: If you sync with a Visual Studio workspace file, the default
target is used because there is no mechanism for specifying
targets for each .dsp project within a .dsw file.
5 Click OK to add this to your project.
Once set, the source files, macros and include paths from the Visual
Studio project are used by Understand 2.0. This is in addition to any
project settings you configure in the other categories.
Note:
3-22
Settings in other categories for include path and macros take priority
over the Visual Studio project settings. This permits you to use the
bulk of the Visual Studio settings while selectively overriding as your
needs require.
Understand 2.0 User Guide and Reference Manual
Ada Options
Ada Options
In the Ada->Options category of the Project Configuration dialog,
you can tell Understand 2.0 how to analyze Ada source code. You
see this window when you choose the Project->Configure Project
menu item and select the Ada category.
The fields in this category are as follows:
•
Version. Choose the version of Ada used in your project.
Understand 2.0 supports Ada 83, Ada 95, and Ada 05.
•
Preprocessor. Choose which type of preprocessor statements
are used in your Ada code. The choices are None, C, and Verdix.
Understand 2.0 User Guide and Reference Manual
3-23
Chapter 3: Configuring Your Project
•
Standard. Choose the directory that contains the standard
library used by this project. Default standards are provided within
<install_directory>/conf/understand/ada.
Sometimes it is helpful to parse code in context of its compilation
environment rather than the environment defined as “Standard”
in the Ada Language Reference Manual. This is most often
needed when your compiler vendor offers bindings to other
languages or low level attributes of a chip or system. To do so,
place all the source files containing the Ada specifications for the
new standard in one directory. Then point to this directory in the
Standard field.
3-24
•
Case of externally linkable entities. Choose which case should
be used for “exporting” entities in this language that can be
linked to (for example, called as functions) by other languages.
For example, if an entity is declared in this language as
“MYITEM” and you choose “all lowercase” here, other languages
would be expected to call that entity as “myitem”.
•
Count and/or operators in strict complexity. Place a check in
this box if you also want “and” and “or” operators considered
when calculating the strict complexity metric shown in the
Program Unit Complexity report. Strict complexity is like
cyclomatic complexity, except that each short-circuit operator
(“and then” and “or else”) adds 1 to the complexity.
•
Count exception handlers in complexity. If this box is checked
(it is on by default), exception handlers are considered when
calculating the complexity metrics shown in the Info Browser and
the Program Unit Complexity report.
•
Count for-loops in complexity. Remove the check from this
box if you do not want FOR-loops considered when calculating
the complexity metrics shown in the Info Browser and the
Program Unit Complexity report. Complexity measures the
number of independent paths through a program unit.
•
Create and cross-reference record object components. If this
box is checked (off by default), separate entities are created for
each object that references a record type. By default, all such
references are combined into one entity.
•
Create relations between formal and actual parameters.
Place a check in this box if you want the analysis to create
relations between formal and actual parameters. The actual
parameters linked to formal parameters include items used in
expressions passed as actual parameters. This option is off by
default to speed up analysis.
Understand 2.0 User Guide and Reference Manual
Ada Options
•
Less memory usage versus speed. Place a check in this box if
you want to use Understand 2.0 in a very low memory
consumption mode. In order to conserve memory, Understand
2.0 frees memory used to process a program unit if that program
unit is not needed. Using this option may slow down operation
significantly. It is off by default.
•
Save comments associated with entities. You can choose
whether source code comments that occur before and after an
entity should be associated with that entity.
•
Prompts on parse errors. By default, you are prompted for how
to handle errors that occur when analyzing files. When
prompted, you may choose to ignore that error or all future
errors. Turn this option off to disable this prompting feature. If
you turned it off during analysis, but later want to turn error
prompting back on, check it here.
•
Display entity names as. Choose whether entity names should
be displayed in Understand 2.0 with the same case as the
source code (original), all uppercase, all lowercase, only the first
letter capitalized, or mixed case.
•
Main subprograms. Provide a comma-separated list of the
names of the main subprograms in the project.
....................................................................................................
Ada->Macros
Category
Ada code may contain conditional compiler instructions in pragma
statements. For example:
PRAGMA IF DEVICE == D129
The supported pragmas are IF, IFDEF, ELSIF, ELSE, and ENDIF.
These pragmas are similar to preprocessor directives such as #ifdef
in C code.
For Understand 2.0 to successfully analyze your software it needs to
know what macro definitions should be set.
In the Ada->Macros category of the Project Configuration dialog,
you can specify what macros to define for use with pragmas. You
see this window when you choose the Project->Configure Project
Understand 2.0 User Guide and Reference Manual
3-25
Chapter 3: Configuring Your Project
menu item and select the Ada category and the Macros
subcategory.
The Macros category lists macros and their optional definitions.
Each macro may be edited or deleted.
To define a macro, click New.
Type the name of the macro in the first field and the definition (if
any) in the second field. Then click OK.
Note that a macro must have a name, but that the definition is
optional. Macros that are defined but have no definition value are
commonly used in conjunction with PRAGMA IFDEF statements to
see if macros are defined.
To change the definition of an existing macro without changing the
name, select the macro and click Edit.
You can set a macro on the und command line with the -define
name[=value] option.
3-26
Understand 2.0 User Guide and Reference Manual
Assembly Options
Assembly Options
In the Assembly->Options category of the Project Configuration
dialog, you specify how to analyze assembly code. To see this,
choose Project-> Configure Project and select Assembly.
The fields in the Assembly->Options category are as follows:
•
Assembler. Choose the assembler to use for analyzing code.
Currently, the Intel IA64 assembler is supported for Windows.
•
Assembler include paths. Type the absolute path to files
included by the assembly code.
•
Save macro expansion text. Check this box if you want the
expansions of macros to be stored to optimize future analysis.
....................................................................................................
Assembly->Includes
Category
In the Assembly->Includes category you can click New and add a
directory containing included files. The Move Up and Move Down
buttons let you change the search order for directories you specify.
The following fields are in the Assembly->Includes category:
•
Search for include files among project files. Check this box if
you want the directories you have added to the project to be
searched for include files. This box is checked by default.
•
Treat system includes as user includes. Check this box if you
want system includes (#include <file>) to be searched for in the
directories you list here. This box is checked by default.
•
Use case-insensitive lookup for includes. Check this box if
you want include files to be searched for case-insensitively.
....................................................................................................
Assembly-> Includes
->Replacement Text
Category
In the Assembly->Includes->Replacement Text category you can
specify text that should be replaced in include file text. For example,
you might use this feature to replace include paths like
%somewhere% with specific paths without modifying the source
code. See C++->Includes-> Replacement Text on page 3–32.
In the Assembly->Macros category you can add macro definitions.
See C++->Macros Category on page 3–33.
Understand 2.0 User Guide and Reference Manual
3-27
Chapter 3: Configuring Your Project
C++ Options
In the C++->Options category of the Project Configuration dialog,
you can tell Understand 2.0 how to analyze C and C++ source code.
You see this window when you choose the Project->Configure
Project menu item and select the C++ category.
The fields in the C++->Options category are as follows:
3-28
•
Compiler. Select the compiler/platform that you use. This will set
up compiler-specific macros for use by the Understand 2.0
parser. Note that not all features of a particular compiler will
necessarily be handled.
•
Compiler Include Paths. Type the path the compiler uses to
find include files. For example, %include%.
•
Allow nested comments. By default, this is off. If turned on it
permits C style (/* */) comments to be nested. This isn’t permitted
by the ANSI standard, but some compilers do permit it.
Understand 2.0 User Guide and Reference Manual
C++ Options
•
Prepend the names of externally linkable entities with. You
may optionally type a string that you want used as a prefix to
reference all linkable entities in other source code languages.
•
Append the names of externally linkable entities with. You
may optionally type a string that you want used as a suffix to
reference all linkable entities in other source code languages.
•
Create implicit special member functions. Check this box if
you want a default constructor and destructor to be created in the
database and given implicit declaration references, if they are
not declared in the source code for class and struct entities. This
option provides entities for the parser to reference when they are
called. The default is off.
•
Create references in inactive code. If you wish to exclude
cross-reference information for code that is IFDEFed out by the
current macro settings, turn this option off. By default, this option
is on and cross-reference information for inactive code is
included.
•
Create references to local objects. By default, all local object
declarations are included in the database. If you wish to exclude
variables declared within functions from the database, turn this
option off. Local objects included for analysis can then be either
included or excluded from the HTML output generated. Specify
whether to include local objects in the HTML output on the main
window of Understand 2.0.
•
Create references to macros during macro expansion.
Checking this box causes references to be stored during macro
expansion. In some cases this is useful. Be aware that enabling
this option can add a lot of references and makes the database
large and slower. The default is off.
•
Create references to parameters. If you wish to exclude crossreference information for parameters, turn this option off. By
default, this option is on and all cross-reference information for
parameters is included.
•
Save comments associated with entities. You can choose
whether source code comments that occur before and after an
entity should be associated with that entity.
•
Save duplicate references. By default, duplicate crossreferences are condensed to a single cross-reference. To keep
duplicates, check this box.
Understand 2.0 User Guide and Reference Manual
3-29
Chapter 3: Configuring Your Project
•
Save macro expansion text. If you put a check in this box, you
can right-click on a macro and choose Expanded Macro Text
from the pop-up menu to see how the macro expands.
•
Use include cache. By default, include files are cached during
the analysis phase as they are often referenced in multiple
source files. This speeds up analysis, but also uses more
memory. If you have problems with excessive memory use
during analysis, turn this option off. Note that there are also
situations where turning the include cache on or off can affect
analysis results, particularly where include actions are
dependent on where they are included.
....................................................................................................
C++->Includes
Category
The C++->Include category in the Project Configuration dialog
(which you open with Project->Configure) allows you to specify
include directories. You can specify multiple directories to search for
include files used in the project.
Include paths are not recursively searched; that is, any
subdirectories will not be searched for include files unless that
subdirectory is explicitly specified in the list of include directories.
To add a directory, click the New button and then the ... button,
browse to the directory, and click OK.
During analysis, the include directories will be searched in the order
that they appear in the dialog. You can click Move Up or Move
Down to change the order in which directories will be searched.
Typically only include files that are not directly related to your project
(such as system-level includes) and that you do not want to analyze
fully are defined here. For project-level includes that you want to be
analyzed, add those include files as source files in the Sources
category.
You may use environment variables in include file paths. Use the
$var format on UNIX and the %var% format on Windows.
3-30
Understand 2.0 User Guide and Reference Manual
C++ Options
Tip:
If you have a lot of include files or they are generated by another
process, you can add include files in bulk by specifying a file
prefixed by an @ sign. For example, “@mydefs.txt”. This file should
contain a list of directories in the desired search order:
/usr/include/X11
/home/nelson/GUI
Any relative paths are relative to the project file.
The C++->Include category provides the following options to control
how includes are handled:
•
Add found include files to source list. Enabling this option
causes include files found during project analysis to be added to
the project automatically. This allows you to see more detailed
information about such include files. The default is off.
•
Add found system include files to source list. If you choose
to add include files that are found to the source list, you can also
choose whether system include files should be added. The
default is off.
•
Prompt for missing includes. By default, for any include files
that cannot be found during analysis, you will be prompted for
how to handle that missing file. When prompted during analysis,
you may choose to ignore the missing file, or you may specify the
path where the file can be found. Turn this option off to disable
this prompting feature. Any missing include files found during
analysis when the prompt feature is turned off will be ignored.
•
Search for include files among project files. This option
directs the parser to look among project files as a last resort for
missing include files. The default is on.
•
Treat system includes as user includes. This option tells the
parser to look for system includes (surrounded by < >) using the
same strategies as normal includes (surrounded by quotes). If
this item is off, the parser looks for system includes only in
directories defined by the compiler configuration. The default is
on.
•
Use case-insensitive lookup for includes. This option tells the
parser whether to ignore the case of filenames in #include
statements. The default is off.
Understand 2.0 User Guide and Reference Manual
3-31
Chapter 3: Configuring Your Project
....................................................................................................
C++->Includes->Auto
Category
In the C++->Includes->Auto category you can specify include files
that should be included before each file in a project.
To add a file, click the New button and browse for the file. Then click
Open.
....................................................................................................
C++->Includes->
Ignore Category
In the C++->Includes->Ignore category you can specify individual
include files that you wish to ignore during analysis.
To add a file to be ignored, click the New button and type the
filename of the include file. Then click OK. The filename can use
wildcards, such as moduleZ_*.h, to match multiple files.
Any missing files you choose to ignore when prompted during
analysis will be added to this list.
....................................................................................................
C++->Includes->
Replacement Text
In the C++->Includes->Replacement Text category you can
specify text that should be replaced in include file text.
For example, you might use this feature to replace VAX/VMS
include paths like [sys$somewhere] with valid UNIX or Windows
paths without modifying the source code.
To add an item, type the string found in the actual include files in the
Include String field. Type the text you want to replace it with in the
Replace With field. Then click OK.
3-32
Understand 2.0 User Guide and Reference Manual
C++ Options
....................................................................................................
C++->Macros
Category
C source code is often sprinkled with pre-processor directives
providing instructions and options to the C compiler. Directives such
as the following affect what the software does and how it should be
parsed:
#define INSTRUMENT_CODE
#ifdef INSTRUMENT_CODE
... statements ...
#endif
Macros are often defined with directives (#define) in include files (.h
files) or are passed in via the compiler (typically with the -D option).
For Understand 2.0 to successfully analyze your software it needs to
know what macro definitions should be set.
The C++->Macros category in the Project Configuration dialog
(which you open with Project->Configure) allows you to define
preprocessor macros that are used when compiling the code.
To add a macro definition, click the New button and type the name
of the macro and optionally a definition. Then click OK.
Note that a macro must have a name, but that the definition is
optional. Macros that are defined but have no definition value are
commonly used in conjunction with #ifdef pre-processor statements
to see if macros are defined.
Note:
A number of preprocessor macros are automatically supported. In
additions to the common macros, Understand 2.0 supports the
following macro formats for embedded assembly code:
#asm(<embedded assembly code>);
#asm “<embedded assembly code>”;
#asm
<embedded assembly code>
#endasm
Understand 2.0 User Guide and Reference Manual
3-33
Chapter 3: Configuring Your Project
Tip:
If you have a lot of macros or they are generated by another
process, you can add macros in bulk by specifying a file prefixed by
an @ sign. For example, type “@mydefs.txt” in the Macro field and
click OK. This file should contain macro definitions in any of the
following formats:
#define foo bar
foo=bar
foo bar
All of these formats define a macro “foo” to be “bar”.
The priority for macro definitions is as follows, from lowest to highest
priority:
1 Built-in language macros (__FILE__, etc.)
2 Compiler configuration file
3 Macro definitions in a synchronized Visual Studio project
4 Undefines of compiler defines (via the Configure Undefines
button)
5 Project defines (Macros category)
6 Define on undc command line using -define
7 Define in source file (#define / #undefine in source)
....................................................................................................
C++->Macros->
Undefines Category
3-34
You can list undefined macros in the C++->Macros->Undefines
category in the Project Configuration dialog. Click New and type the
name of a macro that is not defined. Then click OK.
Understand 2.0 User Guide and Reference Manual
C# Options
C# Options
If your source code uses C#, you can set the following C# specific
option in the C#->Options category of the Project Configuration
window:
In the Standard field, click ... and browse for the standard directory
used by the compiler. A copy of the standard library is included in
the Understand 2.0 installation.
The C/C++ options do not apply to C# code.
....................................................................................................
C#->References
Category
In the C#->References category, click New. Click ... and browse for
a .dll file. Then type the alias for that file used in the code and click
OK.
Understand 2.0 User Guide and Reference Manual
3-35
Chapter 3: Configuring Your Project
FORTRAN Options
In the Fortran->Options category of the Project Configuration
dialog, you can specify how to analyze FORTRAN source code. You
see this window when you choose the Project->Configure Project
menu item and select the Fortran category.
The fields in the Fortran->Options category are as follows:
•
3-36
Version. Select the variant of FORTRAN used by the source
code in this project. If you change the version after creating a
project, the project will be reanalyzed when you click OK. The
choices are FORTRAN 77, FORTRAN 90, or FORTRAN 95. If
you have a mix of code, choose the newest language variant.
That is, if you have F77 and F95 code, choose F95.
Understand 2.0 User Guide and Reference Manual
FORTRAN Options
•
Format. Some older FORTRAN variants and all new variants
permit free form statements, which may cross lines). Fixed form
statements are terminated by a line end or column number. The
default is “auto format,” which automatically detects the parsing
format (fixed or free) on a file-by-file basis. This allows you to mix
free and fixed format. Auto format also determines the correct
truncation point for fixed format files. Choose “fixed” or “free” only
if all your source files have the same format.
•
Truncate column. If you choose fixed form, you may also
choose what column terminates statements. Common columns
72 and 132 are available or you may specify a column or no
truncation.
•
Allow C-style comments. Check this option if your FORTRAN
code contains comments of the form /* ... */.
•
Allow colons in names. Check this box to allow colons (:) used
in identifiers in F77 code. Enabling this option could cause
problems in F77 code that does not use this extension, so the
default is off.
•
Allow function declaration without parentheses. Check this
box if you want to allow functions to be declared without the use
of parentheses. By default, parentheses are required.
•
Allow quote in octal constants. Check this box if a double
quote mark ( " ) should be treated as the start of a DEC-style
octal constant. For example, "100000. If this box is not checked
(the default), a double quote mark begins a string literal.
•
Case sensitive identifiers. Check this box if you want identifier
names to be treated case-sensitively. By default, the case is
ignored.
•
Use preprocessor. Use this option to disable or enable
preprocessor support.
•
Intrinsics file. Type or browse for a file that contains intrinsic
functions you want to be parsed. Default intrinsics files are
provided in the <install_directory>/conf/understand/fortran
directory: intrinsics77.txt, intrinsics90.txt, and intrinsics95.txt.
•
Case of externally linkable entities. Choose which case should
be used for “exporting” entities in this language that can be
linked to (for example, called as functions) by other languages.
For example, if an entity is declared in this language as
“MYITEM” and you choose “all lowercase” here, other languages
would be expected to call that entity as “myitem”.
Understand 2.0 User Guide and Reference Manual
3-37
Chapter 3: Configuring Your Project
•
Prepend the names of externally linkable entities with. You
may optionally type a string that you want used as a prefix to
reference all linkable entities in other source code languages.
•
Append the names of externally linkable entities with. You
may optionally type a string that you want used as a suffix to
reference all linkable entities in other source code languages.
•
Prompt on parse errors. By default, parsing errors cause a
prompt asking how to handle that error. When prompted during
analysis, you may choose to ignore that error or all future errors.
Turn this option off to disable this prompting feature. If you
turned it off during analysis, but later want to turn error prompting
back on, check it here.
•
Display entity names as. Choose whether entity names should
be displayed in Understand 2.0 with the same case as the
source code (original), all uppercase, all lowercase, only the first
letter capitalized, or mixed case.
....................................................................................................
Fortran>Includes
Category
The Fortran->Include category in the Project Configuration dialog
(which you open with Project->Configure) allows you to specify
include directories. You can specify multiple directories to search for
include files used in the project.
Include paths are not recursively searched; that is, any
subdirectories will not be searched for include files unless that
subdirectory is explicitly specified in the list of include directories.
To add a directory, click the New button and then the ... button,
browse to the directory, and click OK.
During analysis, the include directories will be searched in the order
that they appear in the dialog. You can click Move Up or Move
Down to change the order in which directories will be searched.
Typically only include files that are not directly related to your project
(such as system-level includes) and that you do not want to analyze
fully are defined here. For project-level includes that you want to be
analyzed, add those include files as source files in the Sources
category.
For more information, see C++->Includes Category on page 3–30.
....................................................................................................
Other Fortran
Categories
For information about the Fortran->Includes->Replacement Text
category, see C++->Includes-> Replacement Text on page 3–32.
For information about the Fortran->Macros category, see C++>Macros Category on page 3–33.
3-38
Understand 2.0 User Guide and Reference Manual
Java Options
Java Options
In the Java->Options category of the Project Configuration dialog,
you can specify how to analyze Java source code. You see this
window when you choose the Project->Configure Project menu
item and select the Java category.
The Java->Options category contains the following fields:
•
Version. Select the version of Java used by the source code in
this project. If you change the version after creating a project, the
project will be reanalyzed when you click OK. The choices are
Java 1.3, 1.4, and 1.5. For details about the language constructs
supported in Java 1.5, see the Understand 2.0 build log on the
Scientific Toolworks website.
•
Prepend the names of JNI/KNI external entities with. You can
specify a prefix used by Java to call functions in other languages.
A Java call to a function “func” would match the C function
prepend_pkg_class_func, where prepend is the string you
specify here, pkg is the Java package name, and class is the
Java class. This follows the Java Native Interface (JNI) and the
Kaffe Native Interface (KNI).
•
Save comments associated with entities. You can choose
whether source code comments that occur before and after an
entity should be associated with that entity.
Understand 2.0 User Guide and Reference Manual
3-39
Chapter 3: Configuring Your Project
....................................................................................................
Java->Class Paths
Category
The Java->Class Paths category allows you to identify Java .jar
and .class files that provide classes for which you do not have
source code.
Both .jar files and .class files are supported. Jar files contain
compressed .java (source) files. Class files contain compiled
sources. By default, the src.jar (or src.zip) file provided by the Java
Developers Kit is located. You can add other .jar files as needed.
To add a directory with .class and .java files, follow these steps:
1 Click Add Path.
2 Locate and select the directory containing .class files.
3 Click OK.
To add a .jar file to the list, follow these steps:
1 Click New Jar.
2 Locate and select the .jar or .zip file. You can select multiple .jar
files while holding down the Ctrl key.
3 Click Open.
If a class is found in both a .java and .class file in the class path, the
class in the .java file is used.
3-40
Understand 2.0 User Guide and Reference Manual
JOVIAL Options
JOVIAL Options
In the JOVIAL->Options category of the Project Configuration
dialog, you can specify how to analyze JOVIAL source code. You
see this window when you choose the Project->Configure Project
menu item and select the Jovial category.
The Jovial->Options category contains the following fields:
•
Version. Select the JOVIAL version you use. JOVIAL73 and
JOVIAL3 are supported.
•
Truncate column. By default, statements are not truncated by
column location. You may choose to truncate statements at
column 72 or at some other user-defined column.
•
Automatic compool file. Click ... and browse to the compool file
you want to use. The file extension should be .txt.
•
Implementation fields. The fields in this section allow you to
specify the sizes and precision of various datatypes. These sizes
vary with different implementations of JOVIAL. You can specify
Understand 2.0 User Guide and Reference Manual
3-41
Chapter 3: Configuring Your Project
the number of bits in a byte, number of bits in a pointer, number
of bits in a word, precision for fixed datatypes, number of bits in a
floating exponent, precision for floating datatypes, and the
precision for an integer.
•
Display entity names as. Choose whether entity names should
be displayed in Understand 2.0 with the same case as the
source code (original), all uppercase, all lowercase, only the first
letter capitalized, or mixed case.
....................................................................................................
Jovial->Copy
Category
The Jovial->!Copy category in the Project Configuration dialog
(which you open with Project->Configure) lets you select
directories to be searched for files named in !COPY directives.
To add a directory to the list, follow these steps:
1 Click the New.
2 Click the ... button and browse to the directory you want to add.
3 Click OK.
When a !COPY directive is analyzed, the directories are searched in
the order listed. To change the search order, select a directory and
click Move Up or Move Down.
3-42
Understand 2.0 User Guide and Reference Manual
Pascal Options
Pascal Options
In the Pascal->Options category of the Project Configuration
dialog, you can specify how to analyze Pascal source code. You see
this window when you choose the Project->Configure Project
menu item and select the Pascal category.
The Pascal->Options category contains the following fields:
•
Version. Select the version of Pascal used by the source code in
this project. The choices are Compaq, Delphi, and Turbo. Select
Compaq for legacy DEC Pascal projects.
•
Allow embedded SQL. Check this box to enable parsing of
embedded SQL statements in your source code.
•
Predeclared entities file. Click ... to select a text file (*.txt) that
contains predeclared routines, types, constants, and parameters
used in your source code. Two versions of this file are provided
in the <install_directory>/conf/understand/pascal directory:
predeclared.txt and predeclareddelphi.txt.
....................................................................................................
Pascal->Macros
Category
The Pascal->Macros category allows you to add support for
preprocessor macros in source code. For example, the $IF, $IFDEF,
and $ELSE directives are supported.
The CPU386 and MSWINDOWS macros are predefined for some
types of Pascal/Delphi sources to avoid generating syntax errors
with the standard library.
For more information about the Pascal->Macros category, see
C++->Macros Category on page 3–33.
Understand 2.0 User Guide and Reference Manual
3-43
Chapter 3: Configuring Your Project
....................................................................................................
Pascal->Namespaces
Category
The Pascal->Namespaces category allows you to add a directory
of namespaces to use when locating a unit specified in a USES
statement. A USES statement may refer to a unit without specifying
a namespace. So, directories you add in this category are searched
in the order provided to find units with unspecified namespaces.
For example, in the following statement, Unit1 has a namespace
specified, so only the namespace CompanyName.ProjectName is
searched for Unit1. Since Unit2 has no namespace specified, the
namespaces in the Namespaces category will be searched for
Unit2.
uses CompanyName.ProjectName.Unit1, Unit2;
To add a namespace directory, follow these steps:
1 Click the New button.
2 Click the ... button and browse to a directory. Then click OK.
3 You can click Move Up or Move Down to change the
precedence order in which the standard libraries are checked.
....................................................................................................
Pascal->Standard
Library Paths
Category
The Pascal->Standard Library Paths category allows you to
specify directories that should be searched for standard libraries.
Standard library paths are used to find units that are not found in the
project files. Only files that contain the required units are processed.
For example the following statement causes the standard libraries to
be searched for a unit names System:
Uses System;
The standard libraries are not used when computing project metrics.
To add a directory, follow these steps:
1 Click the New button.
2 Click the ... button and browse to a directory. Then click OK.
3 You can click Move Up or Move Down to change the
precedence order in which the standard libraries are checked.
....................................................................................................
Pascal->Search Paths
Category
The Pascal->Search Paths category allows you to specify
directories to search. To add a directory, follow these steps:
1 Click the New button.
2 Click the ... button and browse to a directory. Then click OK.
3 You can click Move Up or Move Down to change the
precedence order in which the standard libraries are checked.
3-44
Understand 2.0 User Guide and Reference Manual
PL/M Options
PL/M Options
In the PL/M->Options category of the Project Configuration dialog, you
can specify how to analyze PL/M source code. You see this window
when you choose the Project->Configure Project menu item and select the PL/M category.
The PL/M->Options category contains the following fields:
•
Display entity names as. Choose whether entity names should
be displayed in Understand 2.0 with the same case as the
source code (original), all uppercase, all lowercase, only the first
letter capitalized, or mixed case.
Understand 2.0 User Guide and Reference Manual
3-45
Chapter 3: Configuring Your Project
Setting General Preferences
Understand 2.0 allows you to control a number
of aspects of its operation using the Software
Options dialog. To open this dialog, choose
Tools-> Options. This dialog provides options
to set in the categories shown to the left:
The subsections that follow describe each of
the categories.
....................................................................................................
General Category
The following options can be controlled from the General category
of the Tools->Options dialog:
•
3-46
Application Font. To change the font used in dialogs and lists in
Understand 2.0, click Change Font and select the font, font
style, and font size you want to use and click OK.
Understand 2.0 User Guide and Reference Manual
Setting General Preferences
•
Open last project on startup. If checked (off by default), the
most recently opened project is automatically opened when you
start Understand 2.0 with no other project specified. This is a
useful option if you typically work with only one project.
•
Use default working directory. If checked (off by default), you
can select an alternate default directory. This will be the starting
place when you are browsing for other directories. The default is
the directory where your project is saved.
•
Allow interactivity during intensive processing. If checked
(on by default), you can interact with Understand 2.0 while it is
performing background processing. Your interactive events are
processed at the interval you specify in milliseconds.
•
Open project dialog, Show on startup. If checked (on by
default), the Create/Open Project dialog (see page 2–5) is shown
when you start Understand 2.0.
Understand 2.0 User Guide and Reference Manual
3-47
Chapter 3: Configuring Your Project
....................................................................................................
User Interface
Category
3-48
The following options can be set from the User Interface category
of the Tools->Options dialog:
•
Tree row indentation. You can change the amount of
indentation in hierarchical tree displays.
•
Use alternating row colors. If checked (off by default), lists and
tables have shading for alternate rows.
•
Animate windows/drawers. If checked (on by default), opening
and closing windows and tabbed areas (drawers) is animated.
You can choose a faster or slower speed than the default.
Understand 2.0 User Guide and Reference Manual
Setting General Preferences
•
Show tabs. If checked (the default), tabs are shown at the top of
the document area for each of the windows open in that area.
This included the Project Assistant, source editor windows,
graphical views, and other windows.
•
Dock Window Layouts. Choose which window layout you
would like to use as the default. The Assistant Layout is good
for new users. The Tight Layout is useful if you will be opening
several source files and want plenty of screen space for that. The
Classic Layout is similar to earlier versions. The Multi-monitor
Layout allows you to take advantage of multiple screens if you
have them.
•
Title Formats. Choose whether you want filenames in window
and tab names to be short names, long (full path) name, or
relative to the project database.
....................................................................................................
User Interface->Lists
Category
The following options can be set from the User Interface->Lists
category of the Tools->Options dialog:
•
Default most recently used list setting. The default is to show
five items in a list of recently used items. You can change that
default for both lists here.
•
Recent files most recently use list. To change the number of
recently used files in the File menu, select the Display item and
change the number to display. If you want to omit the recently
used files from the File menu, uncheck this box.
Understand 2.0 User Guide and Reference Manual
3-49
Chapter 3: Configuring Your Project
•
Recent projects most recently use list. To change the number
of recently used projects in the File menu, select the Display
item and change the number to display. If you want to omit the
recently used projects from the File menu, uncheck this box.
....................................................................................................
User Interface->
Alerts Category
3-50
The following options can be set from the User Interface->Alerts
category of the Tools->Options dialog:
•
Save on parse. Choose what you want done with changed but
unsaved source files when the database is to be analyzed. The
default is to always prompt you to choose whether to save files.
Alternately, you can choose to automatically save changed files
or to not save changed files.
•
Save on command. Choose what you want done with changed
but unsaved source files when a command is to be run. The
default is to always prompt you to choose whether to save files.
Alternately, you can choose to automatically save changed files
or to not save changed files.
•
Prompt before closing the current project. If checked (the
default), you are asked whether you want to close the current
project and all associated windows when you attempt to open a
different project.
Understand 2.0 User Guide and Reference Manual
Setting General Preferences
....................................................................................................
Key Bindings
Category
The functions of keys in Understand 2.0 can be customized. The
Key Bindings category of the Tools->Options dialog lets you
choose how keys will work in Understand 2.0:
•
Keyboard Scheme. This field will allow you to choose keyboard
settings that are similar to other applications. This field is not yet
implemented.
•
Component. You can choose a portion of Understand 2.0 for
which you want to modify the key behaviors. The components
are Application (dialogs and items not otherwise listed), Editor,
Favorites, Find Results, Info Browser, and Project Browser.
•
Actions. In the list of actions, you can modify the key sequences
by placing your cursor in the Primary Sequence or Alternate
column for an action. Then press the key combination you want
to perform that action. If the key combination is already used,
you will see a warning message. Note that you can’t use normal
editing keys like Backspace or Delete to edit the keys shown in
these fields. Use the Restore Defaults or Cancel button if you
make changes you don’t want to save.
Understand 2.0 User Guide and Reference Manual
3-51
Chapter 3: Configuring Your Project
....................................................................................................
TrackBack Category
The TrackBack category of the Tools->Options dialog allows you
to send files to the separate TrackBack software to be watched for
changes.
By default, TrackBack is installed with Understand 2.0 and
integration is enabled. To have all of the files in this Understand 2.0
project watched for changes, click the Submit button.
For more about TrackBack integration, see page 8–23.
....................................................................................................
Analyze Category
3-52
The Analyze category of the Tools->Options dialog allows you to
specify options for how the project is analyzed.
•
Sound beep on parse completion. By default, a beep notifies
you when the analysis is complete.
•
Show standard library files. For languages whose standard
libraries are parsed by Understand 2.0 (such as Ada), if you
check this box the standard library files are shown in the parse
log. By default this box is not checked, and the parse log is
shorter.
Understand 2.0 User Guide and Reference Manual
Setting General Preferences
....................................................................................................
Configure Category
The following options can be set from the Configure category of the
Tools->Options dialog:
•
Use the New Project Wizard when creating new projects. The
check in this box causes the New Project Wizard (page 3–3) to
be used when you choose File->New Project. If you uncheck
this box, you can specify a project database location and
filename and then use the full Project Configuration dialog.
....................................................................................................
Named Roots
Category
The Named Roots category of the Tools->Options dialog lets you
specify names used as substitutes for file paths.
After you have defined a named root, you can use that name in
other Understand 2.0 dialogs, such as the Project Configuration.
This is useful, for example, if you want to share projects with people
who reference project files over a network using different paths.
To add a named root, click the Add Named Root button. This adds
a new row where you can type a name and a path (or click the folder
icon to browse for the location).
You can uncheck named roots if you want to temporarily deactivate
certain names.
Understand 2.0 User Guide and Reference Manual
3-53
Chapter 3: Configuring Your Project
....................................................................................................
Editor Category
3-54
The following options can be set from the Editor category of the
Tools->Options dialog:
•
Default style. Use the Font pull-down list to select a font for
Source Editor windows. The fonts shown are the fixed-width
fonts available on your system. Select a Size for the Source
Editor text. If you check the Antialias box, the font is smoothed.
•
File Mode. Select the type of Encoding to use when saving
source files and the Line Endings character you want used.
Many encoding formats are supported. You should change this
only if your other applications have problems opening or
displaying files created by Understand 2.0. By default, these
settings apply only to new files you create, including text and
Understand 2.0 User Guide and Reference Manual
Setting General Preferences
CSV files. The previous format is preserved for existing files.
However, if you check the Convert existing line endings box,
files you save are converted to the format chosen here.
- Windows line-endings are terminated with a combination of a
carriage return (\r) and a newline (\n), also called CR/LF.
- UNIX line-endings are terminated with a newline (\n), also
referred to as a linefeed (LF).
- Classic Macintosh line-endings are terminated with a single
carriage return (CR).
If you check the Convert tabs to spaces box, tabs are changed
to the number of spaces specified in the Width field when you
save the file. Also, if you check the Add newline at end of file if
absent box, a new line character is added to a file that doesn’t
have one when you save the file (checked by default).
•
Caret Line. Check the Highlight Caret Line box if you want the
full line on which your cursor is located to be highlighted. The
default Color is light gray, but you can change that by clicking
the color box and using the Select Color dialog.
•
Externally Modified Files. If an open file is changed in some
other program, Understand 2.0 detects this. Choose Always
Prompt if you want to be notified and asked to load that changed
version. Automatically Reload does this without prompting.
Automatically Ignore is dangerous and not recommended.
•
Indent. Check the Show Indent Guide box if you want a dotted
line to show where lines should be indented to. By default, the
Insert Spaces Instead of Tabs box is off; turning it on adds
spaces to a source file when you press Tab. Checking the Auto
Indent box causes automatic indentation when you are typing in
the Source Editor. For Width, specify the number of blank
spaces to use when showing tabs.
Indent Guide
•
Show Page Guide. Check the Page Guide box to display a line
similar to the Indent Guide at a defined line width. Set the
Column to the character width you want to see indicated.
Understand 2.0 User Guide and Reference Manual
3-55
Chapter 3: Configuring Your Project
•
Whitespace. Select whether you want to see indicators about
whitespace characters. A dot indicates a space, and an arrow
indicates a tab. You can choose Invisible (the default), Always
Visible, or Visible after Indent. Check the Show End-of-Line box
to see the characters that force a line break.
•
Margins. Check Line Number (on by default) to turn on line
numbering in the source view. Check Fold (on by default) to turn
on the ability to “fold” source code entity blocks out of the way.
....................................................................................................
Editor->Styles
Category
You can customize the colors used in the Source Code Editor in the
Options dialog. To open this dialog, choose Tools->Options.
Expand the Editor category, and select the Styles category.
To change a color, click a color square next to an item in the list.
Use the Select Color dialog to choose a new color for that item.
3-56
Understand 2.0 User Guide and Reference Manual
Setting General Preferences
You can change the text foreground (FG) and background (BG)
colors for any item. You can also make the text bold (B), italic (I), or
underlined (U) for any item. To highlight the whole line for an item,
check the EOL box.
By default, the following color codes are used for the source code:
•
Dark blue text: used for language keywords
•
Red text: used for characters and character strings
•
Italic blue text: used for comments
•
Green text: used for preprocessor statements
•
Black text: used for all other source text and for line numbers
•
White background: used for most source text
•
Pink background: used for inactive lines of code
•
Gray background: used for line numbers
•
Yellow background: used to highlight text in Find Results for
Find in Files.
Additional items are available for customization depending on your
source code language. For Delphi, you can customize the colors of
module, routine, and type names. For FORTRAN, you can
customize the colors of block, module, subprogram, and type
names. For Ada, you can customize the colors of package names,
subprogram names, and type names.
....................................................................................................
Editor->Browse
Category
You can control the behavior of Browse Mode (see page 6–4) in the
Source Editor. To see this dialog, choose Tools->Options. Expand
the Editor category, and select the Browse category.
•
Activate when Control key is pressed. If this box is checked
(on by default), Source Editor windows use Browse Mode if you
are holding down the Ctrl key when pointing at an entity.
Understand 2.0 User Guide and Reference Manual
3-57
Chapter 3: Configuring Your Project
3-58
•
Visit Source. If this box is checked (on by default), clicking an
entity while in Browse Mode causes focus to jump to the
declaration of that entity.
•
Update Information Browser. If this box is checked (on by
default), clicking an entity while in Browse Mode causes the Info
Browser to show information about an entity when you click on it.
Understand 2.0 User Guide and Reference Manual
Analyzing the Code
Analyzing the Code
Once you have configured a project, Understand 2.0 can parse (that
is, analyze) the project. During analysis, the source files are
examined and data is stored in the Understand 2.0 database. After
parsing, the Understand 2.0 database contains lots of data to
browse.
When you save or modify the project configuration, a prompt to
analyze the project appears automatically. You can also analyze the
project in the following ways:
Project->Analyze Changed Files. This analyzes all files
that have been changed and all files that depend on those
changed since the last analysis. This is also referred to as
“incremental analysis.” To analyze changed files, you can also leftclick the toolbar icon shown here.
Project->Analyze All Files. This
forces a full analysis of all project
files, whether they have changed
since the last analysis or not. As a
shortcut for this command, you can
right-click on the icon and choose Analyze All Files.
For either command, the status is reported on the Status Line and
the Command Results window appears with a log of the results.
...
Understand 2.0 User Guide and Reference Manual
3-59
Chapter 3: Configuring Your Project
Analyzing a large project can take some time. If you click Cancel
while the project is being analyzed you will see a message that says
this action will leave the project in an incomplete state. You will need
to analyze the project in order to explore it.
When the analysis is complete, the source code for any errors or
warnings may be examined by double-clicking on the message in
the Parse Log window.
To save the Parse Log to a text file, right-click on the white
background of the Parse Log and choose Save As. Specify the
location and name of the file you want to save.
Tip:
A configured project may be analyzed in batch mode using the
command line program “und”. Refer to Using the und Command
Line on page 12–2 for details on using “und”.
See Analyze Category on page 3–52 for options that affect the
project analysis.
3-60
Understand 2.0 User Guide and Reference Manual
Chapter 4
Exploring Your Codebase
This chapter covers the basic windows in Understand 2.0 and their
options in detail. It also covers operations within the Filter Area and
the Info Browser.
Details on the use and operation of the Entity Locator and Find in
Files for searching for and locating entities are provided in the
chapter Searching Your Source on page 5–1.
Details on the use and operation of the Source Editor is contained
in the chapter Editing Your Source on page 6–1.
This chapter contains the following sections:
Section
Page
PLEASE RIGHT CLICK
4–2
Various Windows Explained...
4–3
Project Assistant
4–4
Entity Filter
4–5
Info Browser
4–8
Project Browser
4–13
Project Metrics Browser
4–15
Exploring a Hierarchy
4–16
Favorites
4–17
Understand 2.0 User Guide and Reference Manual
4-1
Chapter 4: Exploring Your Codebase
PLEASE RIGHT CLICK
Sorry for shouting (by using all caps above). In order to make the
Understand 2.0 interface as quick, tight and elegant as possible, we
have hidden a lot of power beneath your mouse buttons.
The general rule is that Anywhere you look you can right-click to do
or learn something. A second general rule is that right-click reuses
windows where it can and Ctrl + right-click brings up new
windows.
So please right-click. There will be no more reminders.
Check out all the stuff
you can learn or do
right-clicking!
Right-click almost
anywhere to bring up
a menu.
Ctrl + right-click
brings up the same men
but actions happen
in a new window.
4-2
Understand 2.0 User Guide and Reference Manual
Various Windows Explained...
Various Windows Explained...
Understand 2.0’s GUI has a number of tools for locating and
examining entities. This chapter provides a brief list of all these tools
and describes the Entity Filter, Info Browser, and Favorites in more
detail.
The tools available for finding and exploring entities are:
•
Project Assistant. Provides links to actions you can perform.
See page 4–4.
•
Entity Filter. Provides an alphabetic list of entities of the
selected type. See page 4–5.
•
Info Browser. Provides an explorer for entity characteristics and
connections. See page 4–8.
•
Project Browser. Lets you browse a hierarchical file list. See
page 4–13.
•
Exploring View. Lets you browse a relationship hierarchy. See
page 4–16.
•
Favorites. Lets you provide quick links to frequently-used
entities. See page 4–17.
•
Entity Locator. Lets you filter all entities in a project in complex
ways. See page 5–3.
•
Find in Files. Searches multiple files. See page 5–8.
•
Source Editor. Shows source code. See page 6–1.
•
Scope list. Lists the functions or similar constructs in a file. See
page 6–3.
•
Architectures. Defines named regions and views of the project.
See Chapter 7.
•
Snapshots. Explore the history of an entity. See Chapter 8.
•
Graphical Views. Shows connections and structures of entities.
See Chapter 9.
•
Reports. Generate reports about entities. See Chapter 10.
•
Metrics. Generate statistics about entities. See page 10–22.
Understand 2.0 User Guide and Reference Manual
4-3
Chapter 4: Exploring Your Codebase
Project Assistant
The Project Assistant provides links to useful tools. If you close the
Project Assistant, you can reopen it by choosing Project->Project
Assistant.
The Project Information portion of the Project Assistant tells you
the full path to the project database, the languages supported in this
project, the number of files in the project, and the total lines of code
in the project.
The remaining sections of the Project Assistant provide links to
various tools. For information about these tools, see the following
locations:
Explore
•
View Project Files. See page 4–5.
•
View Project Functions. See page 4–5.
•
Search Project Files. See page 5–8.
•
Search Project Entities. See page 5–3.
Architect
•
What is an Architecture? See page 7–2.
•
Create a Custom Architecture. See page 7–10.
•
Browse Architectures. See page 7–3.
•
Manage Architectures. See page 7–9.
•
Predefined Architectures. See page 7–10.
Snapshots
•
What is a Snapshot? See page 8–2.
•
Manage Snapshots. See page 8–2.
•
Compare Snapshots. See page 8–6.
Project Metrics
4-4
•
Project Metrics Browser. See page 4–15.
•
Generate Project Metrics. See page 10–22.
•
Generate Project Reports. See page 10–2.
Understand 2.0 User Guide and Reference Manual
Entity Filter
Entity Filter
The Entity Filter provides a quick list of the selected entity type. You
can filter this list to match a text string.
The options in the Show list depend upon the languages you have
enabled for your project and the types of entities and relationships
found in your project. If your project uses multiple languages, the
language is listed along with the type.
For each of these types, you can quickly find any entity that has
been declared (or used) in the source code.
By default, the entities are sorted in ascending (A to Z) order. You
can reverse the order by clicking the drop-down icon
and
choosing Sort Descending.
You can only have one Entity Filter open. If you close the Entity
Filters window, reopen it by choosing Search->Entity Filter.
Understand 2.0 User Guide and Reference Manual
4-5
Chapter 4: Exploring Your Codebase
....................................................................................................
Using the Filter Field
In the Filter field, you can type a string to match a set of entities. By
default, the string matches entity names starting from the first
character. So, for example, you can type “y” to list only entities that
contain a Y or y anywhere in the name.
If you want to quickly jump to the point in the list where entities begin
with a particular letter, just click in the list of entities and type a letter.
You can select other ways for the Filter field to work. Click the dropdown icon
and choose Filter Pattern Syntax. The options are:
•
Fixed String. This is the default behavior.
•
WildCard. With this option selected, you can use * (any
characters) and ? (any single character) wildcards for pattern
matching. See page 5–5 for examples.
•
Regular Expression. With this option selected, you can use
UNIX-style regular expressions. See page 5–5 for an overview.
By default, filtering is case-insensitive. You can make it case
sensitive by clicking the drop-down icon
and choosing Filter
Case Sensitivity->Case Sensitive.
When you are finished using a filter and want to see all the entities
for the selected type, click the drop-down icon and choose Clear
Filter.
....................................................................................................
Customizing the
Display
You can modify how the Entity Filter lists entities as follows:
By default, the full entity name is shown in the Entity Filters list and
entities are alphabetized by their full name. This name may include
a class prefix or other language-specific prefix type. To list entities
by their “short”, unprefixed names, click the drop-down icon and
choose Entity Name as->Short Name.
By default, only the name of the file is shown in a Files list in the
Entity Filter. This name does not include the file location. To list files
including their locations, click the drop-down icon and choose File
Name as->Relative Name or File Name as->Long Name.
....................................................................................................
Root Filters
4-6
Notice that there are the filter type names that contain “Root”, as in
Root Calls, Root Callbys, and Root IncludeBys. These “Root”
types show only the top of a given tree. The tops (or bottoms) of
relationship trees are often helpful points to begin exploring code
that is new to you.
Understand 2.0 User Guide and Reference Manual
Entity Filter
•
Root Calls - lists only entities that call others, but are not called
themselves. These are either high-level code (mains), code
called by hardware (interrupt handlers), or dead (unused) code.
•
Root CallBys - lists only entities that are called by others, but
that do not call anybody else. These are low-level routines.
•
Root IncludeBys - lists only files included by others, but not
included themselves. These are “lower” level include files.
•
Root Classes - lists only classes not derived from other classes.
These are candidates for lower level classes, or library classes.
•
Root Decls - lists only the highest level declaring routines. (Ada)
•
Root Withs - lists only program units (packages, tasks,
subprograms) that With other program units, but are not withed
by anybody else. (Ada)
Understand 2.0 User Guide and Reference Manual
4-7
Chapter 4: Exploring Your Codebase
Info Browser
When you click on an
item in the Entity Filter or
in a number of other
windows, the Info
Browser updates to show
everything that
Understand 2.0 knows
about that entity. The Info
Browser shows this data
as a tree whose branches
can be expanded
individually or all at once.
If the Info Browser isn’t
open, you can open it by
either clicking on an item
in the Entity Filter or
Project Browser. Or, you
can right-click on an item
anywhere and choose
View Information.
Everything Understand
2.0 knows about an entity
can be learned using the
Info Browser. The
information is shown in a
tree. The tree can be
expanded selectively or
in bulk. Each terminating
item (leaf) of a tree
provides some
information about that
entity.
All information in an Info Browser window can be saved to a text file,
or copied and pasted via standard Windows or X11 copying
functions.
4-8
Understand 2.0 User Guide and Reference Manual
Info Browser
As you drill down you can change which entity you are learning
about. Each time you change the entity, it is remembered in the Info
Browser history for quick backtracking.
Kind and name of entity
Location or path
Relationship tree
Where used
Statistics for this entity
....................................................................................................
Drilling Down A
Relationship
Drilling down the tree works as expected (mostly). To expand a tree,
click on the + sign. To close the tree click on the - sign.
Right-clicking brings up
a menu that includes
expand/collapse options.
Expand All provides a
shortcut to expand all
levels of the selected
branch.
To open or close the
entire tree, right-click on
the top item and choose
Expand All or Collapse All.
See Saving and Printing Info Browser Text on page 4–11 for details
on the other options in this right-click menu.
Understand 2.0 User Guide and Reference Manual
4-9
Chapter 4: Exploring Your Codebase
....................................................................................................
Displaying More or
Less Information
If you right-click on a bold heading such as Calls, Called By or
References in the Info Browser, you’ll see options in the right-click
menu that let you modify how that entity is listed. These options
include:
•
Fullname. If checked, the fully-qualified name of the entity is
shown.
•
Parameter. Lists the parameters.
•
Reference. Choose “Full” to include the file and line location of
the reference.
•
Return Type. Lists the return type.
•
Sort. Controls the sort order of the list.
•
Type. If checked, the datatype is shown.
•
Filename. Controls whether the reference format is short, long,
or relative to the project database.
....................................................................................................
Syncing the Info
Browser
You can have multiple Info Browser windows open if you uncheck
the Sync box. Selecting an entity or choosing View Information
updates the Info Browser that has its Sync box checked.
The File Sync box synchronizes the Info Browser with the file in the
active Source Editor.
....................................................................................................
Visiting Source Code
4-10
In general, if you double-click on an entity in an informational
window (Info Browser or Entity Filter) the declaration of that entity
will be loaded into the Document Area.
Understand 2.0 User Guide and Reference Manual
Info Browser
Another way to visit source from any entity you see in Understand
2.0, is the right-click menu. Where appropriate, an entity’s right-click
menu contains an Edit Source menu item. In some cases there are
separate menus items for Edit Definition and Edit Declaration or
separate menus for other language-specific locations.
....................................................................................................
Visiting References
The portion of the Info Browser labeled “References” lists
everywhere the entity is referred to in the analyzed source code:
List of each place
the entity is referred
to in the source code
Line number of reference
Kind of use
File containing reference
(right click for its context menu)
Left-click on any reference to visit that location in the source code.
....................................................................................................
Viewing Metrics
The last node on the Info Browser tree is Metrics. This branch
shows the metrics available for the current entity.
If you are changing the entity frequently in a large project, closing
this node until you want to view the metrics may improve the speed
of Info Browser updates.
See Metrics Reports on page 10–22 for details on metrics.
....................................................................................................
Saving and Printing
Info Browser Text
All text shown in the Info Browser can be copied to the clipboard for
pasting into another application as unformatted text. Only the
currently expanded branches are pasted. When saving or pasting in
text format, the branches of the tree are represented by indents in
the text.
The right-click menu offers choices to Copy (only the selected line)
and Copy All.
Understand 2.0 User Guide and Reference Manual
4-11
Chapter 4: Exploring Your Codebase
....................................................................................................
Entity History
As you explore your code, you can go a lot of places quickly. Often
you want to backtrack to explore a new path. To help you do this, the
Info Browser contains a full history of what is has displayed. The Info
Browser history can be found in the bottom left corner:
Click small arrows to see a full history list
Choose from menu to jump to that point in your exploration.
History arrows.
Click to move
back and forth
in history.
Use the right and left arrows to move back and forward in the history
list. The down-arrows show the whole list.
4-12
Understand 2.0 User Guide and Reference Manual
Project Browser
Project Browser
To open the Project Browser, choose Project->Project Browser
from the menus.
By default, the Project Browser is in the same area as the Entity
Filter (and the Architecture Browser). Use the tabs on the left to
switch between browser tools in this area.
The Project Browser shows the project files in their directory
hierarchy. You can expand and collapse the tree as needed.
Understand 2.0 User Guide and Reference Manual
4-13
Chapter 4: Exploring Your Codebase
The right-click menus for this view offer a number of options. The
options with icons are also available in the toolbar for this browser.
Show in Info Browser
Use with Find in Files
Open tree all the way
Close tree all the way
Copy full text to clipboard
Copy selected item text to clipboard
Add new item to project
Add a file to the project
Remove selected item from project
Open item in Source Editor
Open item with operating system tool
The Open Externally command opens an operating system
dependent tool for the directory or file. For example, on Windows it
opens a directory using the Windows Explorer. For a file it opens the
default tool for the file extension.
For a file, the right-click menu includes additional commands,
including commands to open graphical views, to parse (analyze) this
file only, to compare snapshots of this file, to find uses of the
filename in project files, and to add the file to the Favorites list.
4-14
Understand 2.0 User Guide and Reference Manual
Project Metrics Browser
Project Metrics Browser
To open the Project Browser, choose Project->Browse Project
Metrics from the menus or click Project Metrics Browser in the
Project Assistant.
In this tool, you can browse the enabled architectures in your project
and select any architecture node or file in the project. The list on the
right shows basic code size metrics for the selected directory or file.
If you double-click a file or entity, the Source Editor for that item
opens.
You can select rows on the right and click Copy Selected or press
Ctrl+C to copy those lines to the clipboard. Click Copy All to copy
the full list of metrics for the selected directory or file.
Click Generate Detailed Metrics to open the Project Metrics
dialog, which is described on page page 10–27. For more about
metrics, see Metrics Reports on page 10–22.
Understand 2.0 User Guide and Reference Manual
4-15
Chapter 4: Exploring Your Codebase
Exploring a Hierarchy
The Exploring view lets you browse up and down a relationship
hierarchy within your project.
The right-click menu in the Info Browser, Entity Filter, and Project
Browser offers a command to Explore certain types of entities. The
command may be Explore Calls/Callbys or Explore
Includes/Includebys.
If you click on an item in one column, you can see its relationships in
the columns on either side. As you choose items further to the left or
right, the columns become scrollable so you can see more of the
hierarchy.
If you double-click an item, a Source Editor window shows the
entity’s definition.
The References area provides more detail on the current
relationship.
If you check the Sync to Information Browser box, then choosing
another entity causes the current item in the Info Browser to reflect
your choice.
If you check the Sync to Editor box, then choosing another entity
causes the current item to be opened in the Source Editor.
4-16
Understand 2.0 User Guide and Reference Manual
Favorites
Favorites
You can mark entities as “Favorites” so that you can quickly access
them as you would web pages in a browser’s Favorites list.
....................................................................................................
Creating a Favorite
To mark an entity as a favorite, follow these steps:
1 Right-click on an entity in the Entity Filters area, the Info
Browser, a source view, a graphical view, or anywhere else
entities occur.
2 From the right-click menu, choose Add Favorite. In the Source
Editor, you can choose to add the entity itself (even if it moves)
or the line number. You will see the New Favorites dialog.
Understand 2.0 User Guide and Reference Manual
4-17
Chapter 4: Exploring Your Codebase
3 You can change the Name to be shown in the Favorites list.
4 In the Create in box you can select an existing favorites folder or
create a new folder. If you don’t select a folder, the favorite will
be at the top level.
5 Check the All project favorite box if you want this favorite to be
available in all projects you create and use.
6 Click OK to create the favorite.
....................................................................................................
Using the Favorites
To open your Favorites list, choose Search->Show Favorites from
the menus.
You can do the following in the Favorites area:
4-18
•
Single-click an item to view it in the Info Browser (unless it was
saved as an editor location only).
•
Double-click an item to see its location in the source.
•
Use the Remove, Edit, and New Folder icons in the Favorites
toolbar to manage the selected item.
•
Drag folders and items around to rearrange them.
Understand 2.0 User Guide and Reference Manual
Chapter 5
Searching Your Source
This chapter covers how to use Understand 2.0’s Find in Files and
Entity Locator features to locate thing in your source code.
This chapter contains the following sections:
Section
Page
Searching: An Overview
5–2
Entity Locator
5–3
Find in Files
5–8
Finding Windows
5–11
Understand 2.0 User Guide and Reference Manual
5-1
Chapter 5: Searching Your Source
Searching: An Overview
Finding things in large bodies of source code can be difficult,
tedious, and error prone.
Understand 2.0 offers these solutions for finding things:
•
Project wide, entity only, searching using the Entity Locator. This
kind of search finds only entities (not strings, or comments, or
non-syntactically declared or used items). See Entity Locator on
page 5–3.
•
Project wide, text-based searching using Find in Files. See Find
in Files on page 5–8.
•
Single file searching in the Editor. See Searching Source Code
on page 6–6.
Each of these searching methods has advantages and
disadvantages. Together they provide powerful ways to easily find
what you need to find to better understand and modify your code.
5-2
Understand 2.0 User Guide and Reference Manual
Entity Locator
Entity Locator
Not all entities fall into one of the tab categories shown in the Entity
Filter. You can find and learn more about any entity by using the
Entity Locator, which provides a filterable list of entities in the
database. You can filter by name, by entity type, by where the entity
is declared, or within what type of container the entity is declared.
You can also use architecture hierarchies to sort entities.
To open the Entity Locator, choose the Search->Entity Locator
from the main menu bar.
As in other windows in Understand 2.0, when you right-click on an
entity anywhere in the Entity Locator, a menu of commands
available for the item appears.
....................................................................................................
Resizing Columns
Column widths can be sized to adjust how much of each column is
visible. You can drag the column header divider between two
columns to resize the column to the left. Or, double-click on the
column header divider while the double-headed arrow is displayed
and the field to the left of the divider will be expanded or shrunk to
the maximum size needed to view all items in that column.
....................................................................................................
Long versus Short
Names
In the Entity, Declared In and File columns, you can right-click the
column header to specify the display format for entity names and
filenames. For entities, you can choose the short name or a full
name that includes the name of the compilation unit. For filenames,
you can choose the short, full, or relative path.
Understand 2.0 User Guide and Reference Manual
5-3
Chapter 5: Searching Your Source
....................................................................................................
Column Headers
Column headers are tools in the Entity Locator. Left-click them to
sort according to that column. Right-click a column or click the dropdown icon to see a menu that lets you control how entities are listed,
sorted, and filtered.
The entity list may be sorted by any column. Left-click on the column
header to toggle between sorting in ascending order and
descending order. The default sorting order is in ascending order of
entity names.
....................................................................................................
Choosing Columns
Click the large + icon in the upper-right of the Entity Locator to see
the Locator Column Chooser.
The Entity column must always be displayed. You can enable or
disable the other columns.
5-4
Understand 2.0 User Guide and Reference Manual
Entity Locator
....................................................................................................
Filtering the List
The field below each column heading lets you filter the entities
shown by the Entity Locator. The filter can be entered manually or
automatically based on what was right-clicked on.
For example, you may filter by the Kind column by right-clicking on
any item listed in the Kind column and selecting Filter By Selection
from the menu. This filters the list of entities to contain only entities
of the kind you selected.
Or, you can simply type a filter in one of the fields. To clear a filter,
just delete the text from the field in the column heading.
The following example shows Filter By Selection for an entity Kind:
Right-click a column or click the drop-down icon to see the context
menu for that column. You can choose for the filter case sensitivity
to be Case Sensitive or Case Insensitive (the default). You can
also choose for the filter pattern matching syntax to use fixed strings
(the default), wildcards, or regular expressions.
•
Fixed string. The string you type matches if that exact string is
found anywhere in the column value.
Understand 2.0 User Guide and Reference Manual
5-5
Chapter 5: Searching Your Source
•
Wildcard. These are * or ?, where * matches any string of any
length and ? matches a single character. For example, ??ext_io
matches any name having 8 letters and ending in ext_io.
•
Regular expression. A powerful and precise way to filter and
manipulate text. You cannot use the Case Sensitive option if
you are using regular expressions.
The following table lists some special characters used in regular
expressions.
Symbol
Description
^
Match at the beginning of a line only. ^word
Finds lines with w in the first column.
$
Match at end of a line only.
word$
Finds lines that end with “word” (no white
space follows word).
\<
Match at beginning of word only.
\<word
Finds wordless and wordly but not fullword
or awordinthemiddle.
\>
Match at end of word only.
\<word
Finds keyword and sword but not wordless
or awordinthemiddle.
.
A period matches any single
character.
w.rd
Finds lines containing word, ward, w3rd,
forward, and so on, anywhere on the line.
*
Asterisk matches zero or more
occurrences of the previous
character or expression.
word*
Finds word, wor, work, and so on.
+
Match one or more occurrences of
wor+d
the previous character or expression. Finds word, worrd, worrrd, and so on.
?
Match zero or one occurrences of the wor?d
previous character or expression.
Finds word and wod.
[]
Match any one of the characters in
brackets but no others.
[AZ ]
Finds any line that contains A or Z.
[Kk][eE][Nn]
Finds any variation of case when spelling
"Ken" or "KEn" or "keN".
[^ ]
Match any character except those
inside the brackets.
[^AZ ]
Finds any line that does not contain the
letters A or Z.
5-6
Example
Understand 2.0 User Guide and Reference Manual
Entity Locator
Symbol
Description
Example
[-]
Match a range of characters.
[A..Z]
Finds any line containing letters A through
Z on them but not lower case letters
|
A vertical bar acts as an OR to
word | let+er
combine two alternatives into a single Finds word, leter, letter, lettter, and so on.
expression.
\
Make a regular-expression symbol a
literal character.
\*/$
Allows searching for *. This example finds
all lines ending in */
A full explanation of regular expressions is beyond the scope of this
manual. UNIX users may refer to the manual page for regex using
the command “man -k regex”. For a comprehensive explanation of
regex expressions we refer you to the book “Mastering Regular
Expressions”, published by O’Reilly and Associates
(www.ora.com/catalog/regex or 1-800-889-8969).
Understand 2.0 User Guide and Reference Manual
5-7
Chapter 5: Searching Your Source
Find in Files
You may search the project files or another selection of files for the
occurrence of a text string or regular expression. Matches are
shown in the Find Results window and can be visited in the source
code by double-clicking on any line in the results.
To open this dialog, choose Search->Find in Files from the menu
bar, choose Find in Files from any right-click menu, or press F5.
The Find in Files dialog allows you to search multiple files for the
occurrence of a string. In previous versions, this feature was called
Hyper Grep for its similarity to the UNIX command grep.
The Find in Files function is available when you right-click on an
item in other windows.
5-8
Understand 2.0 User Guide and Reference Manual
Find in Files
In the Find in Files dialog, specify a search as follows:
•
Find. Type the string you want to search for. The other fields
control how this search is performed.
•
File Types. You can select file extensions for various source
code languages to narrow the search. Or, type your own file
extension pattern.
•
Find In. Choose whether to search based on project files (either
all or just the open files), architecture nodes you select,
directories you select, or files you select.
The boxes in the Semantic Options area let you control which
matches are reported. Put a check in the Filter Search Results if
you want to limit results to certain types of lines. Then you can
check any combination of the Include Comments, Include Strings,
Include Statements, and Include Inactive Code boxes to include
those types of lines in the results. You must check at least one of the
Include boxes if you check the Filter Search Results box.
The fields in the Find Options area (which can be hidden with the
icon) let you set the following options:
•
Case Sensitive. Choose case-sensitive or case-insensitive (the
default) searching.
•
Match Whole Words. Choose whether to match whole words
only (“test” matches “test” but not “testing”) or to ignore word
boundaries.
•
Pattern Syntax. Choose whether to use fixed string, wildcard, or
regular expression matching. See page 5–5 for details.
Press the Search button after specifying the search criteria. A list of
all occurrences of the string will be displayed in the Find Results
window.
Understand 2.0 User Guide and Reference Manual
5-9
Chapter 5: Searching Your Source
....................................................................................................
Find Results
In the Find Results window, you can view the occurrence found by
double-clicking on a results entry. This opens the Source Editor and
highlights the match.
The Details in the Find Results window contains information about
the search that was performed.
Multiple searches are shown in the results tree. You can right-click
on the background of the window and choose Expand All to expand
all nodes in the window. Or, choose Collapse All to compress the
list to just the top-level search listing.
From the right-click menu, you can choose Copy or Copy All to
copy the current contents of the window as text for pasting
elsewhere.
The toolbar for the Find Results area lets you search within the
results, delete the current set of results, open the selected
occurrence in the Source Editor, or move to the previous or next
occurrence. You can also use the toolbar to choose how the results
are sorted.
5-10
Understand 2.0 User Guide and Reference Manual
Finding Windows
Finding Windows
If you have a
number of windows
open, you can use
the options in the
Window menu to
organize or find
particular windows.
The Window menu
lets you Tile or
Cascade the open
windows.
After the Cascade
command, the
Window menu lists
the windows you
currently have open.
You can select one
of these windows to
move focus to that window.
The Window->Selector command opens an area that lists currently
open source file windows. By default it lists all windows, but you can
choose to show only Editor windows or various other window types.
The most recently used windows are at the top of the list. Doubleclick an item in this list to give that item focus.
Understand 2.0 User Guide and Reference Manual
5-11
Chapter 5: Searching Your Source
The Window->Navigator command (Ctrl+Tab) opens a list of
currently open source file windows. When you double-click on an
item in this list, the list goes away and focus is given to the item you
chose.
If you check the Type-Ahead Filter box, the list of windows is
filtered to match the string you type after checking the box.
If you have a lot of windows open in the document area, you can
right-click on the title bar of the window you are using and choose
Close All But This.
5-12
Understand 2.0 User Guide and Reference Manual
Chapter 6
Editing Your Source
This chapter covers Understand 2.0’s source and text file editor.
This chapter contains the following sections:
Section
Page
Source Editor
6–2
Saving Source Code
6–5
Searching Source Code
6–6
Other Features
6–8
Printing Source Views
6–9
Understand 2.0 User Guide and Reference Manual
6-1
Chapter 6: Editing Your Source
Source Editor
The Source Editor offers a full featured source code editor, with
syntax coloring and right-click access to information most entities in
your code.
The line numbers and “fold” markings to expand/collapse blocks of
code can be turned on and off in the Editor category of the Software
Options dialog you can open with the Tools->Options command
(see page 3–54). The display font and a number of other items can
also be changed in the Editor category. You can also enable an
indent guide marking and a right margin marker in that category of
the dialog.
The Editor->Styles category of the Software Options dialog (see
page 3–56) lets you change the colors used for different types of
source code. The Key Bindings category (see page 3–51) shows a
list (and lets you modify the list) of keystrokes you can use in the
Source Editor.
6-2
Understand 2.0 User Guide and Reference Manual
Source Editor
....................................................................................................
Scope List
You can jump to a particular
function, procedure, or other
language-specific construct in the
current source file by selecting from
the scope drop-down list in the
toolbar. The drop-down list shows
all such constructs found in the file
the last time the project was
analyzed.
You can click the + icon to move the
list to a Scope tab in the area where
the Entity Filter is shown. This tab
lists the constructs in the currently selected source file. This tab is
useful for jumping around in large files.
....................................................................................................
Status Icons
Each file in a Source Editor window has a status icon in its upper-left
title bar. The letter inside the icon indicates the type of file. The color
of the icon indicates whether the file has been modified but not yet
analyzed. An asterisk next to the filename marks files with unsaved
changes.
Yellow icon = parsed project file (has not been modified)
Red icon = modified project file (needs to be parsed)
White icon = file not in the project
....................................................................................................
Status Line
When a Source Editor is the active window, the status bar at the
bottom of the Understand 2.0 window shows the line number,
column number, and source language at a quick glance:
If you click on the line number in the status bar, a Go To Line dialog
appears.
Understand 2.0 User Guide and Reference Manual
6-3
Chapter 6: Editing Your Source
....................................................................................................
Selecting and
Copying Text
Text can be selected (marked) then cut or copied into the Windows
(or X11) clipboard. Selecting text works as standard for the
operating system in use. For Windows dragging while holding down
the left mouse selects text. Alternately you can hold down the Shift
key and move the cursor (via arrows or the mouse).
Once you select text, you can use the Cut and Copy commands in
the Edit menu or on the right-click menu. You may then paste the
text into other applications as needed.
....................................................................................................
Browse Mode
You can switch the Source Editors to “Browse” mode by clicking the
Browse button in the main toolbar. When you are in Browse mode,
the icon is highlighted.
You can temporarily enter Browse Mode by holding down the Ctrl
key while using a Source Editor window.
In Browse Mode, entities in the code act as links. An underline is
shown when your mouse cursor moves to a link. Clicking a link
moves you to the declaration of that entity and updates the Info
Browser to show details about that entity.
If the declaration of an entity you click on is not found, a message is
shown in the status bar and your computer beeps.
When you are in Browse Mode, you can still edit the file and the
keyboard and right-click function the same as in regular mode. Only
left-clicking the mouse is different.
See page 3–57 for settings to control the behavior of Browse Mode.
....................................................................................................
Right-Click Menu
The right-click menu in the Source Editor provides access to a
number of exploration and editing features.
The following exploration features are typically included in the rightclick menu (depending on where you click):
6-4
•
View Information (see page 4–8)
•
Graphical Views (see Chapter 9)
•
Compare (see Chapter 8)
•
Explore Relationships (see page 4–16)
•
Find in Files (see page 5–8)
Understand 2.0 User Guide and Reference Manual
Saving Source Code
•
Add Favorite (see page 4–17)
The following editing features are typically included in the right-click
menu:
•
Undo
•
Cut / Copy / Paste (see page 6–4)
•
Select All
•
Revert (see page 6–5)
•
Hide/Show Inactive Lines (see page 6–8)
•
Fold All (see page 6–8)
•
Comment Selection / Uncomment Selection (see page 6–9)
•
Change Case (see page 6–8)
Saving Source Code
If you have edited a source file, you can click
choose File->Save to save your changes.
, press Ctrl+S, or
You can choose File->Save As to save to a different filename. If
you save a project file to another filename, you will be asked
whether you want to add the new file to the project.
If you have edited multiple source files, you can click
File->Save All to save changes to all modified files.
or choose
If you want to ignore changes you have made choose since the last
save, right-click in a file and choose Revert.
Understand 2.0 User Guide and Reference Manual
6-5
Chapter 6: Editing Your Source
Searching Source Code
There are a number of ways to search for strings in your source
code or to locate particular lines. The commands for these options
are located in the Search menu. These commands are described in
the locations listed in the following table:
Search Menu
Command
See
Entity Locator
page 5–3
Find in Files
page 5–8
Incremental Find
page 6–6
Find
page 6–7
History
page 6–7
Bracket Matching
page 6–8
Favorites
page 4–17
See page 4–3 for a more complete list of the code exploration tools
in Understand 2.0.
....................................................................................................
Incremental Find
To search quickly within the current file, press Ctrl+F (or choose
Search->Incremental Find). The status bar of the Source Editor
changes to a search bar.
You can type a string in the field. As you type, matches for that
string are highlighted in the Source Editor. Click Previous or Next to
move from match to match. You can also check the Match Case
and Match Whole Words boxes to modify how the search is
performed.
As soon as you click on the code, the incremental search bar is
hidden. When you press Ctrl+F again, your last search is shown.
Use Ctrl+Shift+F to find the previous occurrence.
6-6
Understand 2.0 User Guide and Reference Manual
Searching Source Code
....................................................................................................
Find
If you want to use Search-and-Replace or regular expressions for
searching, you can use the Find dialog. To open this dialog, choose
the Search->Find menu item or press Ctrl+Alt+F.
In the Find field, type the string you want to find.
You can check the Regular expression, Match case, and Match
whole words boxes to modify how the search is performed. If you
check the Regular expression box, you can use UNIX-style pattern
matching. For a list of some of the capabilities of regular
expressions, see page 5–5.
If you want to replace the string you are finding, type that in the
Replace field.
Click Previous or Next to search in either direction. Click Replace
All, Replace, or Replace & Find if you want to replace the string
that was found.
The Find dialog searches only individual files. To search multiple
files, see Find in Files on page 5–8.
....................................................................................................
Source Visiting
History
You can move forward or backward through the
history of your source code visiting locations using
Previous and Next icons in the toolbar. This history
is stored even between Understand 2.0 sessions.
You can click the down-arrows to see the full list of source locations
in the history.
The source locations are stored as line numbers, not by entity
name. If you want to save locations by entity rather than line
number, see Favorites on page 4–17.
Understand 2.0 User Guide and Reference Manual
6-7
Chapter 6: Editing Your Source
Other Features
The Source Editor also provides several other options for displaying
and editing files.
....................................................................................................
Bracket Matching
A handy feature of the Understand editor is syntax bracket
matching. Use this feature to find the matching ending bracket of
syntactically used braces, parenthesis and brackets. Symbols
matched are ( ), { }, and [ ]. Matching isn’t done inside comments.
Pressing Ctrl+j jumps the editor to the matching end or beginning
brace. Ctrl+j isn’t active unless over a symbol that it can match.
Another Ctrl+j takes you back where you started.
Pressing Ctrl+Shift+J selects all the text from the bracket to its
matching bracket.
Brackets without a match are highlighted in red when you move your
cursor to them. Brackets with a match are highlighted in green.
....................................................................................................
Folding and Hiding
The - and + markings next to the line numbers allow you to “fold” the
code to hide blocks such as functions, if statements, and other
statements that have a beginning and end.
If you right-click on the code, you can choose Fold All to close all
the open blocks.
You can also choose Hide Inactive Lines to hide preprocessor
lines that are not active because a preprocessor macro is not
defined. Choose Show Inactive Lines to view all lines again.
....................................................................................................
Changing Case
You can change the case of selected text in the Source Editor.
Follow these steps:
1 Select a word or words in the source code.
2 Right-click and choose Change Case from the pop-up menu.
3 Choose the type of case you want to apply to the selection. The
choices are as follows:
6-8
Choice
Default Keystroke
Original
Result
Upper Case
Ctrl+Shift+U
Test_me
TEST_ME
Lower Case
Ctrl+U
Test_me
test_me
Invert Case
Ctrl+Shift+I
Test_me
tEST_ME
Capitalize
Ctrl+Alt+U
Test_me
Test_Me
Understand 2.0 User Guide and Reference Manual
Printing Source Views
....................................................................................................
Commenting and
Uncommenting
You can comment code that you have selected by right-clicking and
choosing Comment Selection. To remove the comment
characters, right-click and choose Uncomment Selection.
Not that nested comments within the selection are not parsed.
....................................................................................................
Keyboard Commands
To see a list of keystrokes that work in the Source Editor, choose
Tools->Options and go to the Key Bindings category. For
example, Ctrl+Alt+K cuts the text from the cursor position to the end
of the line. And, Ctrl+T transposes the line at the cursor position with
the line above it.
Printing Source Views
The menu option File->Print sends the currently viewed source file
to the printer. The printout will use 66 lines per page. As with other
printing, the Windows driver setup is used on Windows.
By default, files are printed in the font and color shown on the
screen when you choose the File->Print menu option.
On UNIX machines Understand 2.0 uses Postscript as its primary
output format. The output files created are Level 2, Encapsulated
Postscript without a preview image. All output is to a file, the file can
optionally be sent to a queuing command (such as lp or lpr).
Understand 2.0 User Guide and Reference Manual
6-9
Chapter 6: Editing Your Source
6-10
Understand 2.0 User Guide and Reference Manual
Chapter 7
Architecting Your Codebase
This chapter is explains the architecture features provided by
Understand 2.0 and explains how you can use them to analyze your
code.
This chapter contains the following sections:
Section
Page
About Architectures
7–2
Using an Architecture as a Browser
7–3
Managing Architectures
7–9
Creating an Architecture
7–10
Editing an Architecture
7–12
Using XML to Manage Architectures
7–14
Using Architecture Filters
7–15
Understand 2.0 User Guide and Reference Manual
7-1
Chapter 7: Architecting Your Codebase
About Architectures
An architecture is an abstract hierarchy layered onto a body of
source code. For example, a staff architecture could have nodes for
each engineer working on a particular project. The nodes would
contain a list of source code files belonging to or to be modified by
that engineer. Dependencies and interactions could then be derived
from that architecture.
Architectures allow you to name regions of a software project or
ways of looking at software hierarchically. An architecture creates a
hierarchy of source code units (entities). You can use the provided
architectures or create your own.
Architectures need not reference every source entity in the
database; that is, they can define a subset of the entities. Also,
architectures can contain a particular entity more than once.
(Technically, that is, the architecture's flattened expansion need not
maintain the set property.)
You can combine architectures successively to create novel filters
for your entities.
From a more technical perspective, simple set algebra is used to
combine and transform architecture hierarchies. The result of the
filter is a list of entities. This result list can be viewed as a flat list or
in terms of another architecture. The filter definition can be saved as
a dynamic architecture. A dynamic filter architecture is updated as
the contents of the database change and it can be used to
reconstitute the filter at a later date.
7-2
Understand 2.0 User Guide and Reference Manual
Using an Architecture as a Browser
Using an Architecture as a Browser
To open the Architecture Browser, choose Architect->Browse
Architectures from the main menubar.
You see an expandable list of the architectures currently defined for
your project. Understand 2.0 provides some “auto-architectures”
that are built in. These are Filesystem (for viewing the project in its
normal file hierarchy) and Calendar (for viewing the project files by
their latest update). The Calendar architecture is disabled by default
for performance reasons; see page 7–9 for how to enable it.
This Architectures area is similar to the Filters area. When you click
on an item, information about it is automatically shown in the Info
Browser (as long as the “sync” box is checked in the Info Browser).
....................................................................................................
Exploring
Architectures
To explore the existing architectures, click the “+” signs to expand
the hierarchy. Entities, such as files, functions, and variables are
shown in the hierarchies. The following auto-architectures are
provided:
•
Filesystem. Lists directories in the project and their
subdirectories. Your source code files are listed where they occur
in the directory hierarchy and their functions and variables (or
similar entities) are listed below them in the hierarchy.
•
Calendar: Lists files in the project by when they were last
changed. A hierarchy of dates is shown that progresses from
This Year, This Quarter, This Month, and This Week to Yesterday
and Today. Beneath the filename, the functions and variables (or
similar entities) are listed as in the Alphabetic architecture. The
Calendar architecture is disabled by default for performance
reasons; see page 7–9 for how to enable it.
Understand 2.0 User Guide and Reference Manual
7-3
Chapter 7: Architecting Your Codebase
The auto-architectures are updated only when the project is
analyzed. So, if your source code is actively being modified and you
have not analyzed it recently, architectures—especially the
Calendar architecture—could be out-of-date.
You can right-click on any item in the Architecture Browser to get a
list of information you can view about that item.
Right-click on file in Architecture
Right-click on Architecture node
Notice that the right-click menu for an architecture node (such as a
filesystem directory or “This Quarter” contains some extra items not
available in other right-click menus:
7-4
•
Graph. Creates a graph of the architecture hierarchy from this
point down. You are asked whether you want to include entities
in the graph or just the architecture nodes. See page 7–6.
•
Dependency Graph. Shows the dependencies between
architecture nodes. See page 7–6.
•
Metrics Summary. Provides metrics for the entities within the
selected node. The metrics are based on entities in the current
node, but not those in sub-nodes lower in the hierarchy. See
page 7–7.
•
Metrics Export. Creates a CSV output of the metrics from the
Metrics Summary. See page 7–7.
Understand 2.0 User Guide and Reference Manual
Using an Architecture as a Browser
•
XML Export. Creates an XML export listing the architecture
nodes and entities from the selected point down in the hierarchy.
See page 7–14.
•
Edit Architecture. Opens the Architecture Editor for the
selected architecture if it is one you created. You cannot edit the
auto-architectures provided with Understand 2.0. See
page 7–12.
•
Rename Architecture. Opens a Rename Architecture window
that lets you rename the selected architecture if it is one you
created. You cannot rename the auto-architectures provided with
Understand 2.0. See page 7–10.
•
Duplicate Architecture. Opens a Duplicate Architecture window
that lets you type a name for a duplicate copy of the selected
architecture. See page 7–10.
•
Manage Architectures. Opens the Architect Manager window.
See page 7–9.
Understand 2.0 User Guide and Reference Manual
7-5
Chapter 7: Architecting Your Codebase
....................................................................................................
Generating Graphs
You can generate graphs that show the hierarchy of an architecture.
You can save these graphs as PNG, JPEG, SVG, and Visio files.
To create a graph, follow these steps:
1 Select the highest-level node of the architecture you want to
graph. You can graph the entire architecture hierarchy or just a
sub-hierarchy.
2 Right-click on the node and choose Graph or Dependency
Graph from the right-click menu.
3 You are asked whether you want to include entities in the graph.
Click Yes or No.
4 You see the graph and can scroll the window as needed. For
example, the following architecture graph shows a directory
structure starting from a subdirectory called “multicore”.
5 To save the graph, right-click and select Export to Image File or
Export to Visio File. Export to Image File lets you save to a
JPG, PNG, or SVG file. See page 9–28 for more about these
formats. See page 9–29 for more about Visio files.
7-6
Understand 2.0 User Guide and Reference Manual
Using an Architecture as a Browser
....................................................................................................
Generating Metrics
You can generate metrics information about an architecture or a
subset of an architecture. The metrics information can be either a
text summary or a comma-separated list for use in spreadsheets.
To create a metrics summary, follow these steps:
1 Select the highest-level node of the architecture for which you
want metrics.
2 Right-click on the node and choose Metrics Summary from the
right-click menu.
3 You see an Architecture Metrics Summary window. For example,
the following two summaries use the Complexity architecture to
compare metrics for “Low Complexity” and “High Complexity”
functions.
4 When you close the window, you are asked whether you want to
save the file. If you click Save, you can save the summary as
text.
Understand 2.0 User Guide and Reference Manual
7-7
Chapter 7: Architecting Your Codebase
To create a metrics export file, follow these steps:
1 Select the highest-level node of the architecture for which you
want metrics.
2 Right-click on the node and choose Metrics Export from the
right-click menu.
3 You see a comma-separated values file. The heading label for
each column is in the first row. Each node in the architecture
hierarchy has a separate row with metrics for that node’s
contents.
4 When you close the window, you are asked whether you want to
save the file. If you click Save, you can save the data as a .CSV
file.
7-8
Understand 2.0 User Guide and Reference Manual
Managing Architectures
Managing Architectures
To open the Architect Manager window, choose Architect->
Manage Architectures from the main menubar in Understand 2.0.
The window lists the auto-architectures on the right and custom
architectures you have created on the left.
The checkboxes allow you to control whether custom and auto
architectures are shown in the Architectures area. Removing the
checkmark next to an architecture can improve performance,
especially for large projects. So, you might want to disable/hide
architectures you never or rarely use.
You can use the icons at the top of this area or right-click on an
architecture to perform the following actions:
•
Create a new architecture. See page 7–10.
•
Import architecture from XML. See page 7–14.
•
Export architecture to XML. See page 7–14.
•
Edit architecture. Custom architectures only. See
page 7–12.
•
Rename architecture. Custom architectures only. See
page 7–10.
•
Duplicate architecture. See page 7–10.
•
Delete architecture. Custom architectures only.
Understand 2.0 User Guide and Reference Manual
7-9
Chapter 7: Architecting Your Codebase
Creating an Architecture
There are several ways to create a new architecture:
•
To create an architecture from scratch, choose Architect->New
Architecture from the menus or click the
icon in the
Architect Manager window. Use the Architecture Wizard to
create the architecture as described in Using the Architecture
Wizard on page 7–11.
•
To duplicate an existing architecture (which you can then
modify), select an architecture and click the
icon in the
Architect Manager window. Or, right-click an existing architecture
and choose Duplicate Architecture from the right-click menu.
You can rename an architecture you have created by selecting an
architecture and clicking the
icon in the Architect Manager
window. Or, right-click on an existing custom architecture and
choose Rename Architecture from the right-click menu.
The Project Assistant suggests some custom architectures you
might want to create: Staff (nodes for the code handled by each
engineer on the project), Functional Decomposition (nodes for the
code making up the major components of the project), and
Requirements (nodes for the code affected by various sub-projects).
7-10
Understand 2.0 User Guide and Reference Manual
Creating an Architecture
....................................................................................................
Using the
Architecture Wizard
When you open the Architecture Wizard by choosing Architect->
New Architecture from the menus or clicking the
icon in the
Architect Manager window, you see a page that asks for the name of
your architecture.
Type a name for the architecture. This name should be fairly short
so it can be shown in architecture trees.
Then click Next to see the page that lets you add and edit
architecture nodes. This is the hierarchy to which entities will be
assigned in a later page of the wizard
Understand 2.0 User Guide and Reference Manual
7-11
Chapter 7: Architecting Your Codebase
Click Add a Node and type the Name of the node you want to add.
The default location is within the node you had selected in the
Architecture Wizard, but you can select another location in the
Create In field. Then click OK.
You can modify nodes you have created by selecting a node and
clicking Edit Node. You can delete the selected node by clicking
Remove Node.
The next window presents an animation that shows how to use the
Architecture Editor to add entities to the nodes you have created.
When you have finished watching the animation, click Finish. This
opens the Architecture Editor shown in the animation. Your
architecture nodes are shown on the right. See Editing an
Architecture on page 7–12 for details on adding entities to each
node.
Editing an Architecture
To edit an existing architecture, select that architecture and click the
icon in the Architect Manager window. Or, right-click on an
existing architecture and choose Edit Architecture from the rightclick menu. Both actions open the Architecture Editor.
This dialog allows you to manually create architectures. You create
an architecture structure on the right-hand side and map entities into
the architecture from the left-hand side.
You can transfer items between the two sides only if there is a
selection on both the left and right sides.
7-12
Understand 2.0 User Guide and Reference Manual
Editing an Architecture
To use the Architecture Editor, follow these steps:
1 You can double-click on the name of any node on the right side
of the Architecture Editor and rename that node by typing.
2 Select one or more entities on the left side of this dialog. Begin
by selecting an existing architecture to use to find entities. Then,
expand the tree and select the highest-level entity that you would
like to copy to your new architecture. For example, you can
select files or functions.
3 On the right side of the Architecture Editor, select the node that
should contain the nodes you are copying.
4 Click the
“Map” right arrow between the two sides to copy a
node and its sub-nodes to your custom architecture. The entities
are copied to the selected node. When you copy an entity within
a file, the tree hierarchy to get from the file to that entity is also
copied.
5 Click the
“Unmap” left arrow between the two sides to delete
the selected node and its sub-nodes from your custom
architecture.
6 You can use the icons on the right side of the editor to add (+)
and delete (-) nodes. Click the ? icon to watch an animation that
shows the steps for adding entities to nodes. (As always, rightclick on any node to use its right-click menu.)
7 When you finish editing your custom architecture, click Save.
Understand 2.0 User Guide and Reference Manual
7-13
Chapter 7: Architecting Your Codebase
Using XML to Manage Architectures
You can use XML as a way to share architectures between one
Understand 2.0 database and another.
In addition to using XML to share architectures, you can use XML
export/import to quickly create architectures that are a simple subset
of another architecture by selecting a lower node in the hierarchy.
....................................................................................................
Exporting
Architectures to XML
To create an XML file for an architecture, follow these steps:
1 Select the highest-level node of the architecture that you want to
export. All of the hierarchy below the node you select will be
represented in the XML file.
2 Click the
icon in the Architect Manager window. Or, rightclick on the node you selected and choose XML Export from the
right-click menu.
3 You see an XML file that contains <arch> and <set> tags for
architecture nodes.
4 When you close the XML window, you are asked if you want to
save the file. If you click Save, the default filename is the name
of the node you selected.
....................................................................................................
Importing XML
Architectures
To import an XML file for an architecture, follow these steps:
1 Click the
icon in the Architect Manager window.
2 In the Choose XML File to Import Architecture dialog, select an
XML file that matches the tag format used by Understand 2.0 to
describe architectures. For example, you can choose XML files
created by Understand 2.0. Click Open.
3 The architecture described by the XML file is added to your list of
architectures.
7-14
Understand 2.0 User Guide and Reference Manual
Using Architecture Filters
Using Architecture Filters
Architecture filtering allows you to find a subset of code in which you
are interested.
A powerful way to use architectures is to combine them through
successive filtering. For example, you can use successive filters to
find code that depends upon code that was changed this month. Or,
you can combine custom functional decomposition and staff
architectures to find out who modified entities in the “3Ddisplay”
portion of a project.
Successive filters are saved as dynamic architectures. That is, they
store the parameters used for the filter so that, as the database
changes, the filter continuously updates.
To use successive filtering, choose Architect->Filter Architectures
from the menubar in the main Understand 2.0 window. Then, use
the Successive Architecture Filter window by following these steps:
Understand 2.0 User Guide and Reference Manual
7-15
Chapter 7: Architecting Your Codebase
1 Type a Filter Description for the filter you intend to create. This
is a text description—it can be longer than the name you will
save the filter with.
2 Click the “...” button in the row below the Filter Description. You
see a window similar to the following:
3 In the top field, select a defined architecture. For example, in the
figure above, the “Calendar” architecture was selected.
4 In the list of architecture nodes, select the node you want to filter
based on. Then click Save. This places the name of the node
you selected in the first row of the Successive Architecture Filter
window.
5 In the field to the left of the node you
selected, choose how you want the filter
to compare entities. The default is “Is”,
but you can select “Is Not”, “Depends On”
or “Is Depended On By”.
“Depends On” means all the code that the
selected architecture depends upon. For example, if you select
“This Month” and “Is Depended On By”, the result of the filter is
any code that depends upon code that was changed this month.
6 After you have set up one filter line, you can add another line by
clicking the “+” button. Then, fill in the new line by repeating
steps 2 through 5. For lines other than line 1, you can also
choose whether the filters should be ANDed or ORed with the
previous filter. To remove a filter line, click the line’s “-” button.
7 To see the results of your current filter combination, click the
binocular icon.
7-16
Understand 2.0 User Guide and Reference Manual
Using Architecture Filters
8 You can change the hierarchy used to display the results of your
filter using the View as Architecture field and clicking the
arrow button.
9 To save your filter combination as a new dynamic architecture,
click the disk icon at the top of the window and enter a name for
the filter.
In contrast to the top save icon button, the lower save icon saves
the results of the filter as a static architecture. The results of a
static architecture are not updated when the database is
updated.
For example, if your filter finds files changed within a certain time
period, those results will be updated with newly changed files
and the new date when you use a dynamic architecture again. In
contrast, a static architecture would save the results as of the
time you created that architecture.
Saves dynamic
architecture
Saves static
results of
architecture
just processed
Understand 2.0 User Guide and Reference Manual
7-17
Chapter 7: Architecting Your Codebase
7-18
Understand 2.0 User Guide and Reference Manual
Chapter 8
Managing Source Changes
This chapter is explains the change-management features provided
by Understand 2.0 and explains how you can use snapshots to
analyze changes to your code.
This chapter contains the following sections:
Section
Page
About Snapshots
8–2
Managing Snapshots
8–2
Comparing Snapshots
8–6
Exploring Changes
8–9
Using Change Reports
8–15
Comparing Entities
8–17
Comparing Files and Folders
8–20
Using TrackBack
8–23
Understand 2.0 User Guide and Reference Manual
8-1
Chapter 8: Managing Source Changes
About Snapshots
A snapshot captures the state of the files and entities in your project
at a given point in time. Snapshots allow you to compare changes
between entities as they were at different times.
An Understand 2.0 snapshot stores all the information needed to
regenerate metrics, reports, change markups, and more based on
the state of your source code when you created the snapshot.
(Creating frequent snapshots or snapshots of large code projects
can result in very large .udb project files.)
One of the advantages of using Understand 2.0 to find differences
between snapshots is that the snapshots you save are always
accessible in the database. You don’t need to do large checkouts of
old source code in order to make comparisons.
If you want to create snapshots of older generations of your source
code (from before you used Understand 2.0), you can check those
versions out in order to make snapshots of old code.
Managing Snapshots
You use the Snapshots window to manage snapshots. You can
create, edit, and delete snapshots.
To open this window, choose Change->Manage Snapshots from
the main menubar in Understand 2.0.
In this window, each snapshot has its own column listing project
metrics for each language used in the project.
Columns are sorted left-to-right from newest to oldest snapshot.
There is also a column for the “Current Database”; this is not
technically a snapshot, since it isn’t saved for future reference.
Unlike the TrackBack tool you might have used, Understand 2.0
compares whole-project snapshots you have saved—not changes
to individual files that are backed up as they happen or on a regular
schedule.
8-2
Understand 2.0 User Guide and Reference Manual
Managing Snapshots
....................................................................................................
Creating a Snapshot
When you create a snapshot, you can give it a name, comment, and
a creation date. To create a snapshot, follow these steps:
1 Choose Change->Manage Snapshots from the main menubar
in Understand 2.0.
2 Type a Name for the snapshot. This should be short enough to fit
in drop-down fields and as a column heading.
3 Optionally, type a Comment for the snapshot you will create.
This can be longer than the snapshot name.
Understand 2.0 User Guide and Reference Manual
8-3
Chapter 8: Managing Source Changes
4 Optionally, check the Alternate Snapshot Time box and type a
date and time for the snapshot. The default is the current time,
and you can keep this default if you are creating a snapshot of
the current state of the codebase. If you are creating a snapshot
of an older version of the codebase—for example, files that have
been retrieved from a code management system—you may want
to modify the date to match when the files you are snapshotting
were created.
5 Click Create.
6 You may be told that you must parse your code in order to create
a snapshot. Click OK if you want to analyze your project and
create a snapshot.
7 When the snapshot has been created, the new snapshot has its
own column in the Snapshot Manager window.
....................................................................................................
Edit Snapshot
In the Snapshots window, click the
Snapshot window.
Edit icon to open the Edit
You can modify the name or comment for a snapshot. If you want to
modify anything else about a snapshot (such as the date), you can
delete and recreate the snapshot.
8-4
Understand 2.0 User Guide and Reference Manual
Managing Snapshots
....................................................................................................
Remove Snapshot
If you want to delete a snapshot, select the column for the snapshot
you want to delete in the Snapshots window, then click the
Remove icon.
Removing a snapshot removes the information in the Understand
2.0 database. It does not remove the actual files on which the
snapshot is based.
(If removing a snapshot creates enough empty space in the
Understand 2.0 database, the database will be compacted
automatically.)
Understand 2.0 User Guide and Reference Manual
8-5
Chapter 8: Managing Source Changes
Comparing Snapshots
To compare snapshots you have taken of your project with the
current state of your project, you can compare snapshots and
explore the differences.
To compare snapshots, follow these steps:
1 Choose Change->Compare Snapshots from the main menubar
in Understand 2.0. This opens the Change Result Setup dialog:
2 In the Left Snapshot field, select the snapshot version you want
to compare to a later version.
3 In the Right Snapshot field, select the snapshot version you
want to compare to an earlier version. This field lists only
snapshots with dates later than the current Left Snapshot.
4 You can use architectures (see Chapter 7) to organized the
results. To do this, select a Root Architecture from the list.
8-6
Understand 2.0 User Guide and Reference Manual
Comparing Snapshots
5 If you want to further control how the architecture is used, move
to the Advanced tab and follow the steps below.
- In the Advanced tab, put a check in the Limit search to
entities that are field.
- Choose whether you want to see changed entities that are in,
depend upon, and/or are depended on by an architecture
node. Note that you can select more than one option here.
Understand 2.0 User Guide and Reference Manual
8-7
Chapter 8: Managing Source Changes
- Click the Architecture(s) button. You will see the Choose an
Architecture window:
- Expand a snapshot to see its architectures and the
architectures nodes. Select an architecture or node and click
OK.
- If you want to create a custom architecture, click New
Architecture (and see page 7–12) or New Filter (and see
page 7–15).
6 In the Comparison Options area of the Advanced tab, you can
choose to Skip whitespace or do a Case insensitive search.
These options are possible in Understand 2.0 because it
compares entities and syntax rather than comparing files
character-by-character as many differencing tools do.
7 Click Find Changes to compare the snapshots.
8-8
Understand 2.0 User Guide and Reference Manual
Exploring Changes
Exploring Changes
When you compare snapshots to generate change results, you see
a Change Results window:
Entity Comparison
Architecture view
Toolbar
Change list
Difference list
This window provides several ways to examine the difference
results you created. The window has these main areas:
•
Architecture view. This area lists entities that were changed
using the selected architecture hierarchy. See page 8–10.
•
Change list. This area shows how many changes there are
within the selected hierarchy node or entity. The number of
changes is also provided individually for each source language in
the project. See page 8–11.
Understand 2.0 User Guide and Reference Manual
8-9
Chapter 8: Managing Source Changes
•
Entity Comparison. This area allows you to examine the
differences in entity versions. See page 8–11.
•
Difference Listing. This area allows you to select individual
differences between two versions. See page 8–14.
•
Toolbar. This allows you to modify how the Architecture view
area is displayed (see page 8–10). You also use it to generate
reports based on changes (see page 8–15).
The small
fold icon between the areas allows you to
close and reopen areas to make more space for the other areas.
....................................................................................................
Architecture View
The architecture view portion of the Change Results window lists
entities that were changed using the selected architecture hierarchy.
You can use the toolbar to adjust how these entities are listed.
Expand the architecture to find the changed entities. When you
select an entity, the number of changes made to it is shown in the
Change List (page 8–11).
By default, the results are organized according to the Root
Architecture field in the Change Result Setup window. You can
change the organization by using the Architecture drop-down in the
toolbar to select a different architecture.
Entities that were added or deleted are shown in different colors.
You can change these colors using the Colors drop-down in the
toolbar.
If you chose to limit the search using an architecture node, you can
select the All, Dep. On, and Dep. On By tabs in the toolbar.
As always, right-click on any hierarchy node or entity to see lots of
item-specific options in the right-click menu.
You can double-click an entity to open the most recent source file
containing its definition in a source editing window.
8-10
Understand 2.0 User Guide and Reference Manual
Exploring Changes
....................................................................................................
Change List
This area shows how many changes there are within the selected
hierarchy node or entity. Select a different hierarchy node or entity
to see how many changes there are at each level.
The Change Summary above the list shows the name of the item
selected.
Line additions, deletions, and changes are shown in different colors.
You can change these colors using the Colors drop-down in the
toolbar.
The number of changes is also provided individually for each source
language in the project.
....................................................................................................
Entity Comparison
The Entity Comparison area shows individual differences between
versions of an entity. The display is similar to that of common
differencing tools.
Version selected on left (older)
Version selected on right (newer)
The left side shows the older snapshot of the entity; the right side
shows the newer snapshot. The snapshot version names are shown
just above the listings.
The two listings automatically jump to the first difference. Scrolling of
the two listing is synchronized horizontally and vertically.
Understand 2.0 User Guide and Reference Manual
8-11
Chapter 8: Managing Source Changes
For certain languages that Understand 2.0 understands—such as C
code—you can click the + and - signs in the listings to expand and
compress code constructs such as if and else statements, functions,
extended comments, and so on.
Line-by-line differences are shown in the colors in the toolbar’s
Colors drop-down.
The currently selected difference is highlighted in blue (or bluish
purple on some screens) by default. Other differences are
highlighted in pink by default.
You can edit the source code if you like in the current database
version of the files. However, you cannot save changes in the
Change Results window.
You can select text and copy it to the clipboard. To select text, use
the mouse or your keyboard. To select all, press Ctrl+A or right-click
and choose Select All. To copy text to the clipboard, press Ctrl+C
or right-click and choose Copy.
To search for text in the source code displayed, follow these steps:
1 Press Ctrl+F to display the Search area in place of the status
bar.
2 Click on the left or right listing to select which one to search. The
default is the right listing unless you clicked the left one more
recently.
3 Type the text you want to search for in the search field. The
listing automatically moves to the next occurrence of that text as
you type. The two listings scroll together.
4 You can put checkmarks in the Match case or Match whole
words boxes to specify how the search is performed.
8-12
Understand 2.0 User Guide and Reference Manual
Exploring Changes
5 Click Next or Previous to search down or up. If you want to
search the other listing, click there.
You can use the Options drop-down to display the following options:
•
Options->Case Insensitive. By default, changing the case of a
letter is not treated as a difference. For example, if you change
“a” to “A”, the Difference Listing shows “No Differences” if that
was the only change.
•
Options->Skip Whitespace. By default, changing the number of
spaces or tabs is not treated as a difference. The Difference
Listing shows “No Differences” if only whitespace was changed.
You can change this behavior by toggling this option off.
•
Options->Files are Unicode. By default, differences are
reported only for ASCII files. If Understand 2.0 says “File is
Binary”, use this command to turn on Unicode file handling.
•
Color choices. These options let you change the highlighting in
the entity comparisons.
•
Double Click Merging. A shortcut for merging is to double-click
on a difference in the listing. This works only if you enable it
here.
The Case Insensitive, Skip Whitespace, and Files are Unicode
options are not available if you have made a change to a listing.
The status bar shows your line location in the source code where
you last clicked. It also shows the language of the code.
Understand 2.0 User Guide and Reference Manual
8-13
Chapter 8: Managing Source Changes
....................................................................................................
Difference Listing
The Difference listing area shows a list of the changes in the entity
currently shown in the Entity Comparison area.
You can click the Prev and Next buttons above
the Entity Comparison area to jump to another
difference between the entities.
You can merge changes made in older versions into the most recent
version of an entity. (You cannot merge changes into an older
version.) However, you cannot save merged changes within the
Change Results window—you can copy and paste merged changed
into another application. To merge changes, follow these steps:
1 Use the Architecture view to select which entity to display.
2 Select a difference in the listings or by selecting a line in the
Difference listing area.
3 Click the Merge Selected button. This copies the older (left)
version of this difference to the current (right) version of the
code. (If you change your mind, click Unmerge Selected.)
4 Click the Prev or Next button to move to another difference and
repeat the previous step.
5 When you have finished making changes, you can right-click and
choose Select All and press Ctrl+C. Then, paste the merged
file into a Source Editor window or another application.
In the difference list, merged differences are shown in italics. In the
listings, differences you have merged are highlighted in green. (The
currently selected difference is still highlighted in blue/purple, even if
it has been merged.)
A shortcut for merging is to double-click on a difference in the listing
if you have enabled Double Click Merging in the Options dropdown.
If you know you want to merge all of
the differences, click Merge All. If you
want to undo all merges you have made, click Unmerge All.
8-14
Understand 2.0 User Guide and Reference Manual
Using Change Reports
Using Change Reports
You can generate HTML reports that are equivalent to the change
results available in the Change Results window. Many pages are
created, so you can browse the results in various ways.
To generate a report, follow these steps:
1 From the Change Results window toolbar, choose Reports->
Generate Reports.
2 You are asked to name your report. Type a name and click OK.
The Save As dialog lists any other reports you have already
created.
3 In the Browse For Folder dialog, browse to the location where
you want to store your report.
Understand 2.0 User Guide and Reference Manual
8-15
Chapter 8: Managing Source Changes
4 Unless you already have an empty folder to contain your report,
click Make New Folder. Rename the new folder to the name you
want. Then click OK.
5 Dialogs show the progress of the report generation.
6 When the report generation is complete, choose Reports->
View Report from the Change Results window toolbar.
- The Main Report pages shows metrics for all the saved
snapshots and the current project.
- The next page shows the Architecture view hierarchy.
- Depending on the languages used in your project, pages for
various types of entities are included. For each entity type,
there is a page listing items added, removed, and changed.
- When you click on a filename, a page showing the entity
comparison for that file is shown.
- Finally, an alphabetic index of changed files and entities is
provided.
8-16
Understand 2.0 User Guide and Reference Manual
Comparing Entities
Comparing Entities
There are two ways to compare entities in Understand 2.0. You can
compare an entity across different snapshots, or you can compare
one entity with another.
....................................................................................................
Comparing Entities
Between Snapshots
When you right-click on an entity in Understand 2.0, the right-click
menu often contains the Compare command. When you choose
this command, you see the following question:
•
If you choose Quick, whatever is at the entity’s current definition
location in previous snapshots is compared with the entity’s
current definition. For example, if an entity definition is on lines
25 to 35 of the main.c file, then those lines are compared across
snapshots.
•
If you choose Slow, then the definitions for the entity in each
snapshot are compared.
Understand 2.0 User Guide and Reference Manual
8-17
Chapter 8: Managing Source Changes
The comparison window looks similar to this:
As you can see, this window is similar to the Change Results
window, except that the Architecture view hierarchy is omitted. (This
is because the comparison is for one file or entity only.)
This window allows you to move through various snapshots to
view the sequence of changes to a particular entity. To change
the version viewed, click the drop-down icon for the left or right
code to see a list of the versions available:
You can move backward and forward through the history of a file’s
snapshots by clicking the left and right arrows.
The version you select on the left must have an earlier date than the
version on the right.
8-18
Understand 2.0 User Guide and Reference Manual
Comparing Entities
....................................................................................................
Comparing Two
Entities
You can compare two entities by choosing Change->Compare
Entities from the menus. You see the Comparison window.
This window behaves similarly to other comparison windows. At the
top of the window is an entity filter (page 4–5). Select a type of
entity. Then use the lists to select two entities you want to compare.
You cannot save merged changes in this window.
Understand 2.0 User Guide and Reference Manual
8-19
Chapter 8: Managing Source Changes
Comparing Files and Folders
Understand 2.0 provides a tool for comparing files and folders. To
open this tool, choose Change->Compare files/folders from the
menus.
In this dialog, select a file or folder for the left and right comparison.
Both sides should be similar files or similar folders. Click the file icon
to browse for a file; click the folder icon to browse for a directory.
Subdirectories of the directories you choose are also compared.
In the directory comparison, you can use the icons at the top to view
the directory tree with only different files, unchanged files, or both
changed and unchanged files.
Toggling the Source Only icon on causes the list to show files that
were in the source (left) version but not in the destination (right)
version. Toggling the Destination Only icon causes the list to show
files that exist in the destination version but not in the source
version. You can have both choices toggled on at the same time.
Toggling the Different icon on causes the list to show files and
directories that are different in the two versions. Toggling the Same
8-20
Understand 2.0 User Guide and Reference Manual
Comparing Files and Folders
icon on causes the list to show files and directories that have not
changed. You can show both different and same items at the same
time.
If you click any of the three color blocks, you can change the color
for items only in the source (left version), items only in the
destination (right version), or items that exist in both versions but
were changed.
The file comparison is similar to the comparison between two
snapshots or two entities. You can merge and unmerge changes,
but cannot save files.
....................................................................................................
Comparing Text
You can compare text that you paste into a window by choosing
Change->Compare arbitrary text from the menus. You see a
window like this:
Understand 2.0 User Guide and Reference Manual
8-21
Chapter 8: Managing Source Changes
Paste the before and after text you want to compare into the left and
right sides. Then, click OK to see the comparison.
The text comparison is similar to the comparison between two
snapshots or two entities. You can merge and unmerge changes,
but cannot save files.
Click the Refresh button if needed to see the comparison
highlighting.
Click the
8-22
fold icon to see a list of differences.
Understand 2.0 User Guide and Reference Manual
Using TrackBack
Using TrackBack
The TrackBack tool automatically tracks changes to files. These
changes are backed up as they happen or on a regular schedule.
By default, TrackBack is installed with Understand 2.0 and
integration is enabled. To change the TrackBack integration setting,
see page 3–52.
TrackBack is a “personal change management” tool that
automatically creates backup versions of important files and
directories. It fills the gap between application-specific “autosave”
functions and expensive enterprise-wide change management
software, providing new power and productivity to individuals.
You can launch TrackBack from within Understand 2.0 by choosing
Tools->TrackBack History Explorer from the menus. For details
about using TrackBack, see the TrackBack User’s Guide.
When a Source Editor window is active, you can use the following
icons in the toolbar for TrackBack integration:
Add the current file to the set of files tracked by TrackBack.
This icon is inactive if the current file is already being tracked.
Open TrackBack to view the history of the current file. This icon
is inactive if the current file is not being tracked by TrackBack. You
can also right-click on a file that is being tracked and choose
TrackBack file history.
When you are in the Source Editor window for a file that is being
tracked by TrackBack, the right end of the status bar shows the
number of revisions of this file stored by TrackBack.
Understand 2.0 User Guide and Reference Manual
8-23
Chapter 8: Managing Source Changes
8-24
Understand 2.0 User Guide and Reference Manual
Chapter 9
Using Graphical Views
This chapter covers the graphical views in Understand 2.0 and their
options.
This chapter contains the following sections:
Section
Page
Graphical View Browsers
9–2
Controlling Graphics Layout
9–17
Saving Graphical Views
9–28
Printing Graphical and Source Views
9–29
Understand 2.0 User Guide and Reference Manual
9-1
Chapter 9: Using Graphical Views
Graphical View Browsers
The right-click menu of an entity that has a structure or hierarchy
offers a choice called Graphical Views:
The Graphical Views menu adapts based on what kind of entity has
been right-clicked. A greyed-out item refers to information that is
normally available for this kind of entity but that is not applicable to
this particular entity (for instance a package that could be WITHed
but isn’t).
There are two main types of graphical views: hierarchy views and
structure views.
....................................................................................................
Hierarchy Views
9-2
A hierarchy view shows multiple level relationships between entities.
All relationships are multi-level and are shown to the top or bottom
of their respective tree unless a level option is set in the
preferences. The following is a Call By graph for a function.
Understand 2.0 User Guide and Reference Manual
Graphical View Browsers
....................................................................................................
Structure Views
Structure views offer a one glance way to see important structure
and relational information about a given entity. The following is an
example of a Declaration structure view:
Understand 2.0 User Guide and Reference Manual
9-3
Chapter 9: Using Graphical Views
....................................................................................................
General Rules for
Using Graphical
Browsers
There are some general rules that can be used for browsing any
type of graphical view.
•
Entity info. Anywhere you see an entity, you can right-click on it
to see a menu that offers many ways to learn more about that
entity. Single-clicking shows information about the entity in the
Info Browser.
•
Opening source. Double-clicking on an entity in a graphical
view opens the source location where the entity is declared.
•
Listing open views. You can use the Window menu or the tabs
across the top of the document area to see a list of all the
separate graphical views you have open.
•
Scrolling. You can scroll around a graphical view dragging your
cursor within the view.
•
Expanding hierarchy. You can expand and contract tree views
by clicking the red circle to the right of a node. Right-click on the
background of a view and choose Open All Nodes or Close All
Nodes to expand or contract all nodes at once.
•
Path highlighting. To highlight the path for a particular entity in a
tree view (such as a Callby view), select the entity and right-click.
In the pop-up menu, choose Highlight Path.
Nodes to expand
or contract tree
9-4
Understand 2.0 User Guide and Reference Manual
Graphical View Browsers
•
Zooming. You can zoom in or out using the toolbar.
•
Printing and saving. Everything you see can be printed or
saved. Printing may be done to one page (squeezing the picture)
or across multiple pages (poster style). See Printing Graphical
and Source Views on page 9–29 for details on printing. Graphical
views can be saved as BMP, JPEG, PNG, and Visio files. See
Saving Graphical Views on page 9–28 for details on saving to a
file.
•
Layout control. Layout is done automatically, there is no need
to move lines or boxes around for a better view. Options are
available for changing the layout decisions. For example, you
can control whether entities are sorted according to their order in
the code or alphabetically. See Controlling Graphics Layout on
page 9–17.
Understand 2.0 User Guide and Reference Manual
9-5
Chapter 9: Using Graphical Views
....................................................................................................
Filtering Out Entities
You can apply filters to hide certain entities in graphical views. To
create such a filter, follow these steps:
1 Right-click on the background of a graphical view and choose
Edit Graphic Filters from the pop-up menu.
2 In the Graphic Filter dialog, put a checkmark in the Enable
Project Filters box.
3 Click New. This opens the Graphic Filter Editor dialog.
4 Type a filter in the Filter Text field. For example, use gr* to
match entity names beginning with gr. Filters are case-sensitive.
5 In the Filter Criteria field, select whether to compare the filter to
long names, definition files, or the type text of entities. For
example, if you choose long names, a filter of print* does not
match SomeProc::printWide. Instead, you can type *print*.
9-6
Understand 2.0 User Guide and Reference Manual
Graphical View Browsers
6 In the Action field, select one of the following options:
- Hide Node: Items that match the filter are not included in the
output.
- Hide Sub Nodes: The item that matches the filter is shown,
but any subnodes of these items are removed from the output.
- Collapse Sub Nodes: Any subnodes of items that match the
filter are collapsed in the output. An icon is shown after the
node to indicate that there are subnodes. Items that match the
filter are shown.
7 Click OK to add the filter to the project.
You can also create filters by right-clicking on an entity in a graphical
view and choosing one of the filtering options. The options allow you
to quickly filter out entities with that name or in that file.
You can remove filters you have created by clicking Remove or
Remove All.
The filters you create apply to all graphical views. The status bar
tells how many entities are filtered out of the current view. You can
temporarily disable filtering in the Graphical Settings dialog or by
right-clicking on any graphical view and choosing Disable Graphic
Filters from the pop-up menu.
....................................................................................................
Reuse Checkbox
The Reuse checkbox controls whether a view is reused or a new
window is opened when another graphical view is requested. If you
request a graphical view from within a graphical view, that view is
reused unless you press Ctrl, no matter whether the Reuse box is
checked.
The Reuse box is unchecked by default. At most one graphical view
can have the Reuse box checked at once.
....................................................................................................
Sync Checkbox
The Sync checkbox controls whether this graphical view changes
when a different entity is selected in the Project Browser, Entity
Filter, and other windows that let you select an entity. For example,
if you check the Sync box in a Declaration graph window and then
select a different entity in the Entity Filter, the graph shows
declaration information for the newly selected entity.
Understand 2.0 User Guide and Reference Manual
9-7
Chapter 9: Using Graphical Views
Types of Views
There are two main types of graphical views: hierarchy views and
structure views.
....................................................................................................
Hierarchy View Types
9-8
Hierarchical views show multi-level relationships between entities.
Understand 2.0 offers hierarchy graphs of the following types of
relationships. Some types apply to specific source languages.
•
Calls - Shows who this entity calls.
•
Called By - Shows who calls a given entity.
•
Include - shows who this file includes.
•
IncludeBy - shows who includes this file.
•
Derived Classes - Shows classes derived from a given class.
•
Base Classes - Show what classes are the base for a class.
•
Extends - Shows which classes extend this class.
•
Extended By - Shows which classes are extended by this class.
•
Class Inheritance - Shows who inherits from a given class.
•
Child Lib Units - Shows the Child Library Units of a given
compilation unit. (Ada 95 only)
•
Declared In - Shows the declaration tree from where this
program unit is declared.
•
Declaration Tree - Shows the declaration nesting of program
units in a compilation unit.
•
Instantiated From - Shows the instantiation tree of a generic
type or compilation unit.
•
Instantiations - Shows who instantiates a given generic unit.
•
Invocation - Shows what compilation units a unit invokes.
•
Parent Lib Unit - Shows the parent lib units of a given entity.
•
Type Derived From - Shows tree of types a type is derived from.
•
Type Tree - Shows types that derive new types from an entity.
•
With - Shows what compilation unit an entity “Withs” into scope.
•
WithBy - Shows what compilation units “Withs” a given entity.
•
Uses - Shows which modules use this item.
•
Used By - Shows which modules are used by this item.
Understand 2.0 User Guide and Reference Manual
Types of Views
....................................................................................................
Hierarchy View
Examples
Hierarchy views show multi-level relationships between entities.
Here are examples of the types of hierarchy views that Understand
2.0 offers.
•
Calls - Shows the entire chain of calls emanating from this
function. Each line between entities is read as “x calls y”.
•
Called By - Shows what calls an entity. Each line connecting an
entity is read as “x is called by y”. In this example, error is called
by code (and others), which is called by rules (and others). Note
that this view is read from the bottom up or right to left.
Understand 2.0 User Guide and Reference Manual
9-9
Chapter 9: Using Graphical Views
9-10
•
Include - Shows the include hierarchy of an entity, such as a file.
A connecting line is read as “x includes y.” In this example,
align.h includes global.h.
•
Include By - Shows the include tree in the other direction. In the
previous example, align.h is included by several files such as
algebra.h.
•
Base Classes- For classes, shows the base classes from which
this class is derived from. In this example, class CLInearCurve is
derived from class CCurve which is derived from class CSurface
and so on.
•
Derived Classes - Shows the classes that are derived from this
class. In this example, class CTexture3d is a base class for
classes CIrradianceCache and others.
Understand 2.0 User Guide and Reference Manual
Types of Views
•
Extends - Shows which classes extend other classes. In this
example, the regexp.UncheckedRE class extends the regexp.RE
class, which extends the regexp.REToken class.
•
Extended By - Shows which classes are extended by other
classes. A line is read as “class is extended by class.” In this
example, the regexp.REToken class is extended by a number of
classes, including the regexp.RE class, which in turn is extended
by the regexp.UncheckedRE class.
Understand 2.0 User Guide and Reference Manual
9-11
Chapter 9: Using Graphical Views
....................................................................................................
Structure View Types
Structure views offer a one glance way to see important structure
and relational information about a given entity. Understand 2.0
structure views include the following:
•
Declaration - Shows what a structure is composed of. For
example, shows the parameters, return type, and callbys of a
function. For classes, shows what members are provided, who
inherits this class, and who it is based on.
•
Parent Declaration - Shows what a structure is composed of.
Shows Calls instead of the Called Bys shown by a Declaration
graph.
•
Declaration File - Shows what entities (such as functions, types,
macros, and variables) are defined within a given file.
•
Declaration Type - Shows what a type is composed of.
•
Data Members - Shows what components a class, struct, or type
contains.
•
Control Flow - Shows a flow chart of the function or similar
entity type.
•
Package - Shows what entities are declared in a given package
(body or spec).
•
Task - Shows the parameters, invocations, and what
entities/entry points are declared in a task. Also shows what the
task Withs.
•
Rename Declaration - shows what entities are renamed in the
entity.
....................................................................................................
Structure View
Examples
9-12
Structure views quickly show structure and relations.
Understand 2.0 structure views are designed to present essential
information about an entity in a small and concise manner. The
structure diagram is derived from the graphs presented by Booch
and Buhr in their respective books “Software Engineering with Ada”
and “System Design in Ada.” Where needed, symbols and
annotations have been extended or altered to represent new kinds
of information available from Understand 2.0.
Understand 2.0 User Guide and Reference Manual
Types of Views
•
Declaration - Shows the structure of the entity. For example,
shows the parameters, return type, and callbys of a function.
•
Parent Declaration - Similar to a Declaration graph but shows
what the entity calls.
Understand 2.0 User Guide and Reference Manual
9-13
Chapter 9: Using Graphical Views
9-14
•
Declaration File - Shows the entities declared in the file. Also
shows files included by the file and classes imported by the file.
•
Declaration Type - Shows information about a type declaration.
Understand 2.0 User Guide and Reference Manual
Types of Views
•
Class Declaration - Shows the members defining the class and
the parent class from which it is derived.
•
Control Flow - Shows a flow chart of the function or similar
entity type.
Understand 2.0 User Guide and Reference Manual
9-15
Chapter 9: Using Graphical Views
Graphical Notation
The following symbols are used by Understand 2.0 to represent
various language constructs.
9-16
•
Most entities (such as functions and other program units) are
shown in rectangles.
•
Files and system-level entities are shown as double-bordered
rounded rectangles.
•
Classes and types are shown in flattened hexagons.
•
Unknown or unresolved entities are drawn with dashed outlines.
•
Oval denotes a variable.
•
A slash through a variable means it is a constant.
•
Other shapes are language-specific.
Understand 2.0 User Guide and Reference Manual
Controlling Graphics Layout
Controlling Graphics Layout
The two main types of graphical view windows, Hierarchy and
Structure, have a variety of configuration options. You can set them
by right-clicking on the background of a graphical view and choosing
the option you want to modify from the pop-up menu.
These options control the layout and drawing of the graphic views
and vary based on the current type of view.
Understand 2.0 User Guide and Reference Manual
9-17
Chapter 9: Using Graphical Views
....................................................................................................
Called by Menu
The Called by menu controls whether program units that call the
current entity are shown in declaration views.
View with Called By set to On
View with Called By set to Off
....................................................................................................
Constants Menu
The Constants menu controls whether to show constants in
Declaration views. The default is On.
....................................................................................................
Default Members
Menu
The Default Members menu controls whether declaration views
show default members of the class.
....................................................................................................
Dependent Of Menu
The Dependent Of menu controls whether files a C file is
dependent on are drawn in the C File Declaration view. The Default
is On.
....................................................................................................
Dependent Menu
If Dependents is on (the default) then files dependent on the current
C file are shown in a File Declaration view.
....................................................................................................
Duplicate Subtrees
Menu
The Duplicate Subtrees menu controls whether multiple
occurrences of the same sub-tree are shown in hierarchy views. The
options are to Hide or Show such subtrees. The default is to show
duplicate subtrees. In some applications, hiding duplicate subtrees
can dramatically simplify hierarchy views. Duplicate subtrees are not
shown if a view has over 1000 nodes.
....................................................................................................
Extended By Menu
9-18
The Extended By menu controls whether declaration views show
classes by which the selected class is extended.
Understand 2.0 User Guide and Reference Manual
Controlling Graphics Layout
....................................................................................................
Extends Menu
The Extends menu controls whether declaration views show
classes that the selected class extends.
....................................................................................................
External Functions
Menu
If External Functions is on then functions defined in a header file or
in a file included by a header file are shown in the Declaration View
for a header file. Default is On.
....................................................................................................
Filename Menu
The Filename menu controls how filenames are displayed in views.
It is available for both declaration and hierarchy views. The options
are Off and On.:
•
None - Filenames are not shown in the view.
•
Shortname - Where filenames are relevant, only the name of the
file is shown in square brackets.
•
Fullname - Where filenames are relevant, the full file path and
filename are shown in square brackets.
....................................................................................................
Function Pointer
Menu
The Function Pointer menu controls whether function pointers are
displayed as invocations in the Call and CallBy trees.
....................................................................................................
Globals Menu
The Globals menu controls whether to show globals in Declaration
views. The default is On.
....................................................................................................
Implements Menu
The Implements menu controls whether declaration views show
entities that the selected entity implements.
....................................................................................................
Implemented By
Menu
The Implemented By menu controls whether declaration views
show entities by which the selected entity is implemented.
Understand 2.0 User Guide and Reference Manual
9-19
Chapter 9: Using Graphical Views
....................................................................................................
Imports Menu
The Imports menu controls whether declaration views show entities
imported by the current entity.
View with Imports set to On
View with Imports set to Off
....................................................................................................
Included By Menu
If IncludeBy is on (default) then files that include the Header File
being drawn in a Header File Declaration view are shown.
....................................................................................................
Includes Menu
The Includes menu controls if include files are drawn on file
declaration diagrams (C file, Header file). Default is On.
....................................................................................................
Inherits Menu
The Inherits menu controls whether declaration views show entities
that the selected entity inherits.
....................................................................................................
Inherited By Menu
The Inherited By menu controls whether declaration views show
entities inherited by the selected entity.
....................................................................................................
Intrinsic Menu
9-20
The Intrinsic menu controls whether intrinsic functions (e.g. cos,
sin) are displayed or hidden.
Understand 2.0 User Guide and Reference Manual
Controlling Graphics Layout
....................................................................................................
Invocations Menu
The Invocations menu controls whether procedures and functions
called by the current procedure or function are shown in Declaration
views.
View shows Invocations
View without Invocations shown
....................................................................................................
Layout Menu
The Layout menu controls the layout algorithm for a hierarchical
chart. It is available only in hierarchy views (calls, callby, etc.). The
options are:
•
Crossing - a left-to-right view, minimizing space used but
sacrificing some readability by permitting lines between entities
to cross.
Understand 2.0 User Guide and Reference Manual
9-21
Chapter 9: Using Graphical Views
•
Horizontal Non-Crossing - a left-to-right layout, using more
space in some situations but enhancing readability by having no
crossing lines.
•
Vertical Non-Crossing - an top-to-bottom layout similar to
Horizontal Non-Crossing.
....................................................................................................
Level Menu
The Level menu controls the number of levels to be traversed when
laying out a hierarchical view. The default value is “All Levels”.
Values of 1 to 5 may be set. It is available only in hierarchy views.
All Levels
One Level
....................................................................................................
Locals Menu
9-22
The Locals menu controls whether local items are shown in
Declaration views. The default is On.
Understand 2.0 User Guide and Reference Manual
Controlling Graphics Layout
....................................................................................................
Members Menu
The Members menu controls whether members and operators are
shown in the Type Tree and Type Derived From views. The choices
are to show None, Components, Operators, or Operators and
Components.
....................................................................................................
Name Menu
The Name menu controls whether or not fullnames are used in
views. It is available for both declaration and hierarchy views.
A fullname includes its parent compilation units. For example:
•
Text_Io.Put is the fully specified name.
•
Put is the Short Name
Longer versus shorter names can alter the layout of pictures
substantially.
....................................................................................................
Objects Menu
The Objects menu controls whether to show objects in Declaration
views. The default is On.
....................................................................................................
Operators Menu
The Operators menu controls whether entities that are operators
are shown in the Callby, Declaration, Declaration Tree, and
Invocation views.
Understand 2.0 User Guide and Reference Manual
9-23
Chapter 9: Using Graphical Views
....................................................................................................
Parameters Menu
The Parameters menu controls whether parameters are shown in
hierarchical views. Available on any hierarchical graphical view
(invocation and callby). The default is Off, turning this On can make
hierarchical pictures much bigger.
Parameters Off (the default)
Parameters On
....................................................................................................
Private Members
Menu
The Private Members menu controls whether declaration views
show private members of the entity.
....................................................................................................
Protected Members
Menu
The Protected Members menu controls whether declaration views
show protected members of the entity.
....................................................................................................
Public Members
Menu
The Public Members menu controls whether declaration views
show public members of the entity.
....................................................................................................
Renames Menu
The Renames menu controls whether declarations that are
renames are shown in Declaration views. The default is to show
rename declarations.
....................................................................................................
Routines Menu
9-24
The Routines menu controls whether to show routines (procedures,
functions, ...) in Declaration views. The default is On.
Understand 2.0 User Guide and Reference Manual
Controlling Graphics Layout
....................................................................................................
Scale Menu
The Scale menu allows you to choose the size of the text used. It is
available for both declaration and hierarchy views. All picture sizes
and layouts vary with text point size. The currently selected size is
indicated by a check mark.
Other point sizes can be added by customizing configuration files
found in the Understand 2.0 installation directory. Contact
[email protected] for information on how to do this.
....................................................................................................
Sort Menu
The Sort menu lets you specify whether entity names in tree views
should be sorted alphabetically. If this option is off (the default),
entities are sorted in the order they are encountered in the project.
....................................................................................................
Spacing Menu
The Spacing menu lets you choose to change the space between
boxes. You can choose compact, small, normal, wide, or extra wide.
....................................................................................................
Sql Menu
The Sql menu lets you specify whether SQL entities should be
shown in graphical views. This option is on by default.
....................................................................................................
Static Menu
The Static menu controls if static functions are drawn in function, C
File and Header File declaration views. Static functions are those
declared using the “static” keyword. They are visible only within the
file they are declared in. If enabled static functions are drawn with
the edge of their box inside the edge of the outer declaration box for
their enclosing unit (C file). Default is On.
Understand 2.0 User Guide and Reference Manual
9-25
Chapter 9: Using Graphical Views
....................................................................................................
Text Menu
The Text menu sets the way entity names are trimmed or altered to
accommodate the layout of graphics. It is available for both
declaration and hierarchy views. Names may be truncated to a
certain length or wrapped at a certain length.
•
No Truncation - Uses the name as defined in the source code.
The default.
•
Truncate Short - Cuts off names at 10 characters.
•
Truncate Medium - Cuts off names at 20 characters.
•
Truncate Long - Cuts off names at 30 characters.
•
No Wrap - Never wraps text to the next line.
•
Wrap Short - Wraps the name between 8 and 10 characters.
Location in that range depends on if a natural wrapping character
is found. Natural wrapping characters are . _ - and :
•
Wrap Medium - Similar to Wrap Short except wrapping range is
15-20 characters.
•
Wrap Long - Similar to Wrap Short except wrapping range is 2030 characters.
....................................................................................................
Types Menu
The Types menu controls whether to show types in Program
Declaration views. The default is On.
....................................................................................................
Typetext Menu
The Typetext menu tells declaration views (Function Declaration, C
File Declaration, Header File Declaration) to include types on the
view. Default is On.
....................................................................................................
Unknown Menu
9-26
The Unknown menu controls whether entities that are used, but for
which no declaration was found should be drawn. Unknown
methods and entities are those used in the analyzed source without
a definition in the same source.
Understand 2.0 User Guide and Reference Manual
Controlling Graphics Layout
....................................................................................................
Unresolved Menu
The Unresolved menu controls whether entities that have been
used but no declaration was found should be drawn. This option is
available on hierarchy and structure views. Unresolved functions
and entities are those used in the analyzed source without a
definition in the same source. Unresolved include files are those
included but not found along a declared include path (either a
compiler or project include path).
Unresolved entities are drawn as normal but with a dashed border:
....................................................................................................
Usedby Menu
The Usedby menu tells Declaration views whether to show items
that use this item.
....................................................................................................
Uses Menu
The Uses menu tells Uses views whether to show only items that
are used directly, or to also show items that are used by nested
subprograms. The default is to show both.
....................................................................................................
Variables Menu
The Variables menu controls whether to show globals in
Declaration views. The default is On.
....................................................................................................
Withs Menu
The Withs menu controls on Declaration views of compilation units
(packages, tasks, separate procedures, etc...) if Withs are drawn.
The default is On.
....................................................................................................
With Bys Menu
Controls if With Bys (who Withs a given compilation unit) are shown
on Declaration views. The default is On.
Understand 2.0 User Guide and Reference Manual
9-27
Chapter 9: Using Graphical Views
Saving Graphical Views
Understand 2.0 offers a number of ways to export your graphical
views and use them in other ways. To see these options, right-click
on the background of a graphical view. The lower part of the pop-up
menu shows the export options. The icons for these options are also
available in the toolbar for the graphical view.
In addition to printing, you can save graphical views as BMP, JPEG,
PNG, SVG, and Visio files. The first four formats are common
graphics formats. The last format requires the Visio software.
....................................................................................................
Saving Views to Files
To save a graphical view in one of the following formats, right-click
on the background of the view and choose Export to Image File
from the pop-up menu. In the Export dialog, choose a location,
filename, and file type for the view.
•
BMP files are uncompressed bitmaps commonly used by
Microsoft Windows applications.
•
JPEG files are compressed bitmaps. They can be viewed with
most web browsers, document editors, and graphics programs.
This format is “lossy”; some data is lost in the compression.
•
PNG files store compressed bitmaps similar to GIF files. They
can be viewed with most web browsers, document editors, and
graphics programs. They use a non-patented compression
method.
•
SVG files are Scalable Vector Graphics files. This file type uses
XML to describe a 2-dimensional vector-based image.
You can also copy a graphical view to the clipboard and paste it as a
bitmap into the image program or word processor of your choice. To
do this, right-click on the background of the view and choose Copy
Image to Clipboard from the pop-up menu. Then, paste the image
into another program.
9-28
Understand 2.0 User Guide and Reference Manual
Printing Graphical and Source Views
....................................................................................................
Saving Views as Visio
Files
Microsoft Visio is a vector-based graphics program used for drawing
flowcharts and similar graphics. That is, it deals with shapes and
objects rather than pixels.
In order to save a graphical view as a Visio file, you must have Visio
5 or a later version installed on your computer. (Visio 2000 is
equivalent to Visio 6.)
To save a Visio file, right-click on the background of the view and
choose Export to Visio from the pop-up menu.
If Visio is not open, Understand 2.0 opens it and begins creating
objects to match the ones in the graphical view. The process of
creating all the objects may take some time for a large graphical
view. A progress bar is shown in Understand 2.0 while the file is
being created. Avoid exiting Visio or attempting to stop the process
of creating the Visio diagram while it is in progress.
Once the view has been drawn in Visio, use Visio to save the file.
Printing Graphical and Source Views
Understand 2.0 has these printing modes:
•
Source File printing simply queues the file to the printer using 66
lines of source per page.
•
Graphical view printing fits a picture, no matter what its size,
onto the current printer page size.
....................................................................................................
Graphical View
Printing
Graphical views can be printed with the File->Print menu option.
(The right-click menu for a graphical view also has a Print Graph
command.)
The File->Print File Setup menu option applies only to printing
source code and other text files.
Choosing File->Print prints the graphic, making it fit on the given
page size. On Windows, the standard Windows printer setup dialog
can be used to configure printing options available for your printer.
See Printing on UNIX Machines on page 9–30 for more information
about configuring printouts on UNIX machines.
Understand 2.0 User Guide and Reference Manual
9-29
Chapter 9: Using Graphical Views
....................................................................................................
Printing on UNIX
Machines
On UNIX machines Understand 2.0 uses Postscript as its primary
output format. The output files created are Level 2, Encapsulated
Postscript without a preview image.
All output is to a file, the file can optionally be sent to a queuing
command (such as lp or lpr).
Initially the Print Dialog appears:
9-30
•
Print Range specify optional range of pages (if more than one
page)
•
Copies - specify number of copies of each printed page
•
Print to File, if checked then a dialog is displayed so you can
specify what file to print to.
Understand 2.0 User Guide and Reference Manual
Printing Graphical and Source Views
•
Setup - use to further configure printing, as shown in this panel:
- Printer Command - Sets the system command used to print.
The default is lpr. This command name may be set to any
command. No checking is made to ensure it is a valid
command or that it is on your executable search path. The
name of the Postscript file is passed as its first argument. The
text (if any) contained in the Printer Options field is passed as
arguments following the Postscript file name.
- Paper Types Toggle - - Lets you choose what paper size to
use. The default is 8 1/2 by 11 (letter).
Understand 2.0 User Guide and Reference Manual
9-31
Chapter 9: Using Graphical Views
9-32
Understand 2.0 User Guide and Reference Manual
Chapter 10
Generating Reports and
Metrics
This chapter describes how to create and view reports and the types
of reports available.
This chapter contains the following sections:
Section
Page
Configuring Reports
10–2
Generating Reports
10–4
Viewing Reports
10–5
An Overview of Report Categories
10–6
Cross-Reference Reports
10–8
Structure Reports
10–14
Quality Reports
10–18
Metrics Reports
10–22
Exporting Metrics
10–27
Understand 2.0 User Guide and Reference Manual
10-1
Chapter 10: Generating Reports and Metrics
Configuring Reports
Understand 2.0 provides a large number of reports you can
generate about your code. These can be generated in HTML or text
format. You can choose which reports and how to format them.
To begin generating reports, choose Project->Project Reports.
The Configure button opens the Project Configuration dialog with
the Reports->Output category selected. See page 3–19 for details.
•
HTML reports. The “home” file for the reports is index.html, but
you can select an alternate title page. You may generate single
or multiple HTML files for each report type. It is recommended
that you split up the files for large projects. Choose Alphabetic to
generate multiple HTML files per report which are split up
alphabetically by the first letter of the entity name. Choose Every
n Entities to generate multiple HTML files per report which are
split up every “n” number of entities. By default, a single HTML
file is generated for each letter of the alphabet.
•
Text reports. You may generate one text file of the specified
name (by choosing File). Alternately, you may generate multiple
text files (by choosing Separate) and specify a common filename
prefix. The file extensions of each text file will denote the
separate reports.
For details on the Reports->Options category, see page 3–20.
10-2
Understand 2.0 User Guide and Reference Manual
Configuring Reports
The Reports->Selected category lets you select from the available
reports for the languages used by your project. This list shows all
the reports for all languages:
See An Overview of Report Categories on page 10–6 for
descriptions of the types of reports you can generate.
Understand 2.0 User Guide and Reference Manual
10-3
Chapter 10: Generating Reports and Metrics
Generating Reports
Once you have specified formatting options and the types of reports
to be generated, click Generate in the Project Reports dialog to
begin generating the selected reports.
On Windows, the ASCII text follows the DOS text file format
(carriage return and line feed at the end of each line). On UNIX, text
files are created according to the UNIX convention (lines end with a
carriage return).
HTML reports are generated as HTML 3.0 format files. The
generated HTML is not complex, the only HTML 3.0 (versus HTML
2.0) feature used is frames. Netscape 2.0 and higher, and Internet
Explorer 3.0 and higher can display the files.
You can view the reports as described in Viewing Reports on
page 10–5.
For large projects, reports can take a long time to generate. You can
click Cancel to halt report generation. Clicking Cancel leaves the
reports in a partially generated state.
10-4
Note:
You may want to temporarily toggle off anti-virus protection
programs while reports are being generated. This may speed the
process of creating reports. If you do this, be sure to turn on virus
checking after report generation is finished.
Note:
HTML, text, and project metrics reports may also be generated with
the “und” command line program. Refer to Chapter 12 for details.
Understand 2.0 User Guide and Reference Manual
Viewing Reports
Viewing Reports
To view generated reports, choose Project->Reports. Then click
the View HTML or View Text button.
File names of reports generated vary based on the type and format
of the report generated.
•
For text files, a single text file containing all selected reports may
be generated or separate files for each type of report may be
generated. A single text file is named <project_name>.txt. For
separate text files, the file name is the type of report.
•
For HTML reports, you can generate either a single HTML files
for each report type, or smaller files divided either alphabetically
by entity name or in groups of N number of entities. An index file
is also generated that contains links to all the other HTML reports
generated. The main window page is named index.html.
For HTML reports, a single index file contains an alphabetic list of all
entities found in all other generated HTML reports. The entities
listed in the index have hyperlinks to the Data Dictionary report for
that entity. The entity index file is named entity_index.html and can
be accessed from the “index” link on the main HTML page.
The following figure shows an example of the entity index.
Understand 2.0 User Guide and Reference Manual
10-5
Chapter 10: Generating Reports and Metrics
An Overview of Report Categories
Understand 2.0 generates a wide variety of reports. The reports fall
into these categories:
•
Cross-Reference reports show information similar to that in the
Info Browser, except that all entities are shown together in
alphabetic order. See Cross-Reference Reports on page 10–8.
•
Structure reports show the structure of the analyzed program.
See Structure Reports on page 10–14.
•
Quality reports show areas where code might need to be
examined. See Quality Reports on page 10–18.
•
Metrics reports show basic metrics such as the number of lines
of code and comments. See Metrics Reports on page 10–22.
The following table shows the type and page number for each
report.
Report Type
Report Name and Page
Cross-Reference
Data Dictionary Report on page 10–8
Cross-Reference
File Contents Report on page 10–10
Cross-Reference
Program Unit Cross-Reference Report on page 10–9
Cross-Reference
Object Cross-Reference Report on page 10–10
Cross-Reference
Type Cross-Reference Report on page 10–11
Cross-Reference
Macro Cross-Reference on page 10–12
Cross-Reference
Include File Cross-Reference on page 10–12
Cross-Reference
Exception Cross-Reference Report on page 10–13
Structure
Declaration Tree on page 10–14
Structure
Class Extend Tree on page 10–15
Structure
Invocation Tree Report on page 10–16
Structure
Simple Invocation Tree Report on page 10–16
Structure
Import Report on page 10–17
Structure
With Tree Report on page 10–16
Structure
Simple With Tree Report on page 10–17
Structure
Generic Instantiation Report on page 10–17
Structure
Renames Report on page 10–17
Quality
Program Unit Complexity Report on page 10–18
Quality
Unused Objects Report on page 10–20
Quality
Unused Types Report on page 10–21
Quality
Unused Program Units Report on page 10–21
10-6
Understand 2.0 User Guide and Reference Manual
An Overview of Report Categories
Report Type
Report Name and Page
Quality
Withs Not Needed Report on page 10–21
Quality
Implicitly Declared Objects Report on page 10–20
Quality
FORTRAN Extension Usage Report on page 10–19
Metrics
Project Metrics Report on page 10–23
Metrics
Program Unit Metrics Report on page 10–24
Metrics
File Metrics Report on page 10–25
Metrics
File Average Metrics Report on page 10–26
Metrics
Class Metrics Report on page 10–23
Metrics
Class OO Metrics Report on page 10–24
....................................................................................................
Augment with the
PERL or C API
The reports included with Understand 2.0 have evolved over many
years to accommodate common customer requests. However, we
recognize that not all needs can be covered.
To help you develop custom reports we include both PERL and C
interfaces to Understand 2.0 databases.
For details on the PERL interface choose Help->PERL API
Documentation and Help->FAQ.
Understand 2.0 User Guide and Reference Manual
10-7
Chapter 10: Generating Reports and Metrics
Cross-Reference Reports
Cross-Reference reports show information similar to that in the
References section of the Info Browser, except that all entities are
shown together in alphabetic order. The following table shows the
page that describes each type of cross-reference report.
Report Name
Data Dictionary Report on page 10–8
Program Unit Cross-Reference Report on page 10–9
File Contents Report on page 10–10
Object Cross-Reference Report on page 10–10
Type Cross-Reference Report on page 10–11
Class and Interface Cross-Reference on page 10–11
Macro Cross-Reference on page 10–12
Include File Cross-Reference on page 10–12
Exception Cross-Reference Report on page 10–13
....................................................................................................
Data Dictionary
Report
10-8
The Data Dictionary Report lists all entities alphabetically. Each
listing shows the entity name, what kind of entity it is (for example,
Understand 2.0 User Guide and Reference Manual
Cross-Reference Reports
macro, type, variable, function, include, file, or procedure), along
with links to the location where each is declared in the source code.
Optionally break up report alphabetically
Quick link to cross-reference of this entity
What kind of entity it is
What file/line it was declared in.
Name
....................................................................................................
Program Unit CrossReference Report
The Program Unit Cross-Reference Report lists all program units
(such as procedures and functions) analyzed in alphabetic order
along with information about what they return (if anything), what
parameters are used, and where they are used by other program
units.
The HTML version offers hyperlinks to the Data Dictionary report
entry and to the source code where each reference occurs.
Name and
entity type
Type of reference
What file/line it occurs in
Understand 2.0 User Guide and Reference Manual
Link to containing unit
in data dictionary
10-9
Chapter 10: Generating Reports and Metrics
You can create an additional Program Unit Index report to list all the
program units in the project and show the file and line where each is
declared. For text reports, this is stored in a *.pcn file.
....................................................................................................
File Contents Report
Lists functions declared within a source file and the line numbers
where they are declared. HTML versions of this report permit
hyperlinked jumping to the function in the source as well as viewing
of the entire source file.
....................................................................................................
Object CrossReference Report
The Object Cross-Reference Report lists all objects (FORTRAN
variables, parameters, macros) in alphabetic order along with
declaration and usage references.
The HTML version of this report includes hyperlinks to the Data
Dictionary Report and the source code where the reference occurs.
10-10
Understand 2.0 User Guide and Reference Manual
Cross-Reference Reports
....................................................................................................
Type CrossReference Report
The Type Cross-Reference Report lists all declared types in
alphabetic order, along with their declaration and usage information.
The HTML version of the report offers hyperlinks to the Types data
dictionary report entry, as well as the source code where the
reference occurs.
....................................................................................................
Class and Interface
Cross-Reference
The Class and Interface Cross-Reference Report lists all declared
classes and interfaces in alphabetic order, along with their
declaration and usage information. The HTML version of the report
includes hyperlinks to the data dictionary report entries, as well as
the source code where the reference occurs.
Understand 2.0 User Guide and Reference Manual
10-11
Chapter 10: Generating Reports and Metrics
....................................................................................................
Macro CrossReference
The Macro Cross-Reference Report lists all macros analyzed in the
source code in alphabetic order along with information about where
they are declared and where they are used. The HTML version
offers hyperlinks to the macro’s Data Dictionary report entry and to
the source code where each reference occurs.
....................................................................................................
Include File CrossReference
10-12
The File Cross-Reference Report lists all include files analyzed in
the source code in alphabetic order with information about which
files include them. The HTML version offers hyperlinks to the source
code where each reference occurs.
Understand 2.0 User Guide and Reference Manual
Cross-Reference Reports
....................................................................................................
Exception CrossReference Report
The Exception Cross-Reference Report documents the declaration
and usage of all exceptions. Each declaration and any raises or
handles are documented. In the HTML version each raise or handle
may be visited in the source, as well as the declaration point of the
Exception (if visible).
Understand 2.0 User Guide and Reference Manual
10-13
Chapter 10: Generating Reports and Metrics
Structure Reports
Structure reports are designed to help you understand the
relationships between various entities. The following table shows
the page in this chapter that describes each type of structure report.
Report Name and Page
Declaration Tree on page 10–14
Class Extend Tree on page 10–15
Invocation Tree Report on page 10–16
Simple Invocation Tree Report on page 10–16
With Tree Report on page 10–16
Simple With Tree Report on page 10–17
Generic Instantiation Report on page 10–17
Renames Report on page 10–17
Import Report on page 10–17
....................................................................................................
Declaration Tree
The Declaration Tree shows the declaration nesting of each
program unit analyzed. Each nesting level is indicated by an indent
with a vertical bar used to help align your eyes when viewing. Each
nesting level is read as “declares”. In the HTML version of the report
each program unit name is a hyperlink to its entry in the Program
Unit Cross-Reference Report.
Package Body Occupants
| Procedure Put_View
| Procedure Look
| Procedure Get
| Function May_I_Get
| Procedure Drop
| Function May_I_Drop
| Procedure Inventory
| Procedure Go
| | Block
In the above example, Package Body Occupants is the top level
program unit. It has declared within it, Put_View, Look, Get,
May_I_Get, Drop, May_I_Drop, Inventory, and Go. Nested within Go
is an unnamed declare block.
10-14
Understand 2.0 User Guide and Reference Manual
Structure Reports
The Declaration Tree report shows a textual representation of an
declaration tree for each FORTRAN file.
Subroutines/blocks
declared in file allocate.f
....................................................................................................
Class Extend Tree
The Class Extend Tree report shows the nesting of class
declarations in the files analyzed. Each nesting level is indicated by
an indent with a vertical bar to help align your eyes when viewing.
Each nesting level is read as “extends”. In the HTML version of the
report each class name is a hyperlink to its entry in the Data
Dictionary and Interface Cross-Reference Report.
Understand 2.0 User Guide and Reference Manual
10-15
Chapter 10: Generating Reports and Metrics
....................................................................................................
Invocation Tree
Report
The Invocation Tree Report shows a textual representation of the
invocation tree for each program unit analyzed. The report shows
who each program unit calls. Levels are indicated by tabs and are
lined up with vertical bars. Each nesting level is read as “calls”.
The HTML version offers hyperlinks to the corresponding Data
Dictionary report entries.
....................................................................................................
Simple Invocation
Tree Report
The Simple Invocation Tree Report shows the invocation tree to only
one level for each program unit that has been analyzed.
The invocation level is indicated by an indent and a vertical bar and
is read as “calls”.
....................................................................................................
With Tree Report
Structured identically to the other hierarchy reports, the With Tree
report shows a textual representation of the With Tree for each
program unit that is not Withed by another.
As with the other textual hierarchy reports, indents show level with a
vertical bar helping align your eye. For this report, each line is read
as “Withs”.
Package Body Occupants
| Package Rename Text_IO
| | Package Text_IO
| | | Package IO_Exceptions
| | | Package System
| | | Package Parameters
10-16
Understand 2.0 User Guide and Reference Manual
Structure Reports
In the above example, the package body Occupants Withs package
Text_IO, which in turn Withs IO_Exceptions, System,
and Parameters.
....................................................................................................
Simple With Tree
Report
The Simple With Tree report is similar to the With Tree report. It
shows a textual representation of the With Tree for each program
unit that is not Withed by another. However, it shows only one level
of withs. For example:
Package Body Occupants
| Package Rename Text_IO
....................................................................................................
Generic Instantiation
Report
This report lists each package that was created through
instantiation.
In the HTML version, the source where it was instantiated and its
Data Dictionary Report entry may be visited from hyperlinks.
My_Int_IO
Package Instantiation
FILE: board.adb LINE:12
Instantiated From =>
INTEGER_IO
Package
Generic
....................................................................................................
Renames Report
The Renames Report cross-references the use of the Ada
command “renames”, as in:
function Rouge return Color renames Red;
This report lists program units that have been renamed in alphabetic
order. Each rename shows the program unit it renames, and in the
HTML report a hyperlink to the rename instance in the source is
provided.
The Info Browser also identifies packages and program units that
rename others or are renamed.
....................................................................................................
Import Report
The Import report shows lists all source files that import other files
and the files they import. The HTML version offers hyperlinks to the
data dictionary entry for each imported file.
Understand 2.0 User Guide and Reference Manual
10-17
Chapter 10: Generating Reports and Metrics
Quality Reports
Understand 2.0’s quality reports are designed to provide information
about areas of the analyzed source that might not meet standards or
that hold the potential for trouble. They also identify areas where
extra programming has been done but not needed. This sometimes
identifies areas that aren’t yet complete, or that haven’t been
maintained completely.
The following table shows the page in this chapter that describes
each type of quality report.
Report Name and Page
Program Unit Complexity Report on page 10–18
FORTRAN Extension Usage Report on page 10–19
Implicitly Declared Objects Report on page 10–20
Unused Objects Report on page 10–20
Unused Types Report on page 10–21
Unused Program Units Report on page 10–21
Withs Not Needed Report on page 10–21
The complete list of quality metrics available in Understand 2.0
changes frequently - more frequently than this manual is reprinted.
A complete and accurate list is always available on our web site:
http://www.scitools.com/metrics.txt. More detail is provided at
http://www.scitools.com/metricsexplained.html.
....................................................................................................
Program Unit
Complexity Report
The Program Unit Complexity Report lists every procedure and
function or similar program unit in alphabetic order along with the
McCabe (Cyclomatic) complexity value for the code implementing
that program unit.
The Cyclomatic complexity is the number of independent paths
through a module. The higher this metric the more likely a program
unit is to be difficult to test and maintain without error.
The Modified column shows the cyclomatic complexity except that
each case statement is not counted; the entire switch counts as 1.
The Strict column shows the cyclomatic complexity except && and ||
also count as 1.
10-18
Understand 2.0 User Guide and Reference Manual
Quality Reports
The Nesting column shows the maximum nesting level of control
constructs in this program unit.
Click column
header for
explanation
of each metric
....................................................................................................
FORTRAN Extension
Usage Report
This report lists anywhere your source code has non-standard
FORTRAN extensions. The report factors in what variant (F77, F90,
F95) you chose on your project configuration.
For information about what FORTRAN language extensions are
included in this report, see the Change Log on the Scientific
Toolworks website (http://www.scitools.com).
Understand 2.0 User Guide and Reference Manual
10-19
Chapter 10: Generating Reports and Metrics
Following is a snippet from a sample FORTRAN Extension Usage
report:
....................................................................................................
Implicitly Declared
Objects Report
The Implicitly Declared Objects Report lists any variables or
parameters that were implicitly declared using FORTRAN’s implicit
declaration mode. Using implicitly declared variables is considered a
risky practice, and this report helps you weed out where the practice
is occurring in your code.
The HTML version offers hyperlinks to the function’s Data Dictionary
report entry.
....................................................................................................
Unused Objects
Report
10-20
The Unused Objects Report lists objects (for example, variables,
parameters, constants) that are declared but never used. The HTML
Understand 2.0 User Guide and Reference Manual
Quality Reports
version has links to the function’s Data Dictionary report entry and to
the source line where the object is declared.
....................................................................................................
Unused Types Report
The Unused Types Report lists types that are declared but never
used. The HTML version has links to the function’s Data Dictionary
report entry and the source where the type is declared.
....................................................................................................
Unused Program
Units Report
The Unused Program Units Report identifies program units that are
declared but never used.
Note that this listing in this report doesn’t mean the system doesn’t
need this program unit. For instance, interrupt handlers that are
called by system interrupts are often never “used” within the other
source of the program.
....................................................................................................
Withs Not Needed
Report
This report lists, any With statements a program unit has but does
not need (by not using items made public by the With statement).
Understand 2.0 User Guide and Reference Manual
10-21
Chapter 10: Generating Reports and Metrics
Note that this covers only direct usage in the program unit and
doesn’t account for side effects that may be needed by the program
to operate correctly. For instance, sometimes a package can be
Withed just to start a task or to execute code in its begin/end block.
Metrics Reports
Metrics reports show basic metric information such as number of
lines of code and comments. The following table shows the page in
this chapter that describes each type of cross-reference report.
Report Name and Page
Project Metrics Report on page 10–23
Class Metrics Report on page 10–23
Class OO Metrics Report on page 10–24
Program Unit Metrics Report on page 10–24
File Metrics Report on page 10–25
File Average Metrics Report on page 10–26
....................................................................................................
Ways to Get Metrics
Information
10-22
Understand 2.0 provides these ways to get metrics information:
•
Info Browser - The last node on the Info Browser tree is Metrics.
This branch can be expanded to show all the metrics available
for the currently selected entity.
•
Reports - These are described below. It is important to note that
not all metrics collected are reported. Some are not shown in the
reports to save space or because they do not fall into a particular
report category.
•
Export - All metrics may be exported from the Project-> Metrics
Export menu. Metrics may be chosen. This output is commadelimited, which allows you to import it into most spreadsheets
and databases. See Exporting Metrics on page 10–27.
•
PERL/C API - a more advanced way to get existing metrics, and
also to calculate new metrics, is with the PERL and C API. These
provide full access to the Understand 2.0 database. Choose
Help->PERL API Documentation and Help->FAQ for more
information. Examples and more documentation can be found at
http://www.scitools.com/perl.shtml.
Understand 2.0 User Guide and Reference Manual
Metrics Reports
....................................................................................................
What Metrics are
Available?
The complete list of metrics available in Understand 2.0 changes
frequently—more frequently than this manual is reprinted.
A complete and accurate list is always available on our web site:
http://www.scitools.com/metrics.txt. The metrics are explained in
more detail in http://www.scitools.com/metricsexplained.html.
....................................................................................................
Project Metrics
Report
The Project Metrics Report provides metric information about the
entire project. The metrics reported include: the total number of files,
the total number of program units, and the total number of lines of
source code.
These metrics are also reported on the title page of the HTML
report.
....................................................................................................
Class Metrics Report
The Class Metrics Report provides the following metrics for each
class that has been analyzed:
•
Total number of lines
•
Total number of blank lines
•
Total number of lines of code
•
Total number of lines that contain comments
•
Average number of lines per class
•
Average number of comment lines per class
•
Average complexity per class
•
Maximum complexity within class
Understand 2.0 User Guide and Reference Manual
10-23
Chapter 10: Generating Reports and Metrics
•
Ratio of comment lines to code lines
....................................................................................................
Class OO Metrics
Report
The Class OO Metrics Report provides the following object-oriented
metrics for each class that has been analyzed:
•
LCOM (Percent Lack of Cohesion). 100% minus the average
cohesion for class data members. A method is cohesive when it
performs a single task.
•
DIT (Max Inheritance Tree). Maximum depth of the class in the
inheritance tree.
•
IFANIN (Count of Base Classes). Number of immediate base
classes.
•
CBO (Count of Coupled Classes). Number of other classes
coupled to this class.
•
NOC (Count of Derived Classes). Number of immediate
subclasses this class has.
•
RFC (Count of All Methods). Number of methods this class
has, including inherited methods.
•
NIM (Count of Instance Methods). Number of instance
methods this class has.
•
NIV (Count of Instance Variables). Number of instance
variables this class has.
•
WMC (Count of Methods). Number of local methods this class
has.
....................................................................................................
Program Unit Metrics
Report
10-24
The Program Unit Metrics Report provides information on various
metrics for each program unit that has been analyzed.
Understand 2.0 User Guide and Reference Manual
Metrics Reports
The following metrics are provided for each program unit:
Note:
•
Lines. Total number of lines in the function.
•
Comment. Number of comment lines in the function.
•
Blank. Number of blank lines in the function.
•
Code. Number of lines in the function that contain any code.
•
Lines-exe. Lines of code in the function that contain no
declaration.
•
Lines-decl. Lines of code in the function that contain a
declaration or part of a declaration.
•
Stmt-exe. Number of executable statements in the function.
•
Stmt-decl. Number of declarative statements in the function.
This includes statements that declare classes, structs, unions,
typedefs, and enums.
•
Ratio Comment/Code. Ratio of comment lines to code lines.
(comment_lines/code_lines)
code+comment+blank != lines
Some lines may contain both code and comments.
....................................................................................................
File Metrics Report
The File Metrics Report provides information similar to that in the
Program Unit Metrics Report. However, it is organized by file rather
than by program unit.
Click on each metric column to get a detailed description of it.
Understand 2.0 User Guide and Reference Manual
10-25
Chapter 10: Generating Reports and Metrics
Note:
code+comment+blank != lines
Some lines may contain both code and comments.
....................................................................................................
File Average Metrics
Report
10-26
The File Average Metrics Report provides averages for the functions
within a file. All lines outside any function are ignored when
calculating the averages. The following metrics are provided for
each function:
•
Cyclomatic. The average number of independent paths through
the functions in this file. The higher this metric the more likely a
program unit is to be difficult to test and maintain without error.
•
Modified. Same as Cyclomatic complexity except that each case
statement is not counted; the entire switch statement counts as
1.
•
Strict. Same as Cyclomatic complexity except that && and || also
count as 1.
•
Essential. Measures the amount of unstructured code in a
function.
•
Lines. Average number of lines in the functions in this file.
•
Code. Average number of lines that contain any code in the
functions in this file.
•
Comment. Average number of comment lines in the functions in
this file.
•
Blank. Average number of blank lines in the functions in this file.
Understand 2.0 User Guide and Reference Manual
Exporting Metrics
Exporting Metrics
The Project Metrics Report provides metric information about the
entire project. Project metrics can be saved to a comma-delimited
text file which can be used in Excel and other spreadsheet
programs.
Choose Project->Project Metrics to see the Project Metrics dialog.
The Configure button opens the Project Configuration dialog with
the Metrics->Options category selected. See page 3–17 for details.
The Metrics->Selected category lets you select from the available
metrics. See page 3–18 for details.
After setting options, click Generate to export the .CSV file.
A complete and accurate list of the available metrics is available at:
http://www.scitools.com/metrics.txt. The metrics are explained in
more detail in http://www.scitools.com/metricsexplained.html.
The following is an excerpt of a sample comma-delimited metrics
file. When you click View Metrics, your default application for .CSV
files will run. This is likely to be a spreadsheet application.
Understand 2.0 User Guide and Reference Manual
10-27
Chapter 10: Generating Reports and Metrics
10-28
Understand 2.0 User Guide and Reference Manual
Chapter 11
Running External
Commands
This chapter will show you how to configure and use source code
editors and other external tools from within Understand 2.0.
This chapter contains the following sections:
Section
Page
Running External Commands
11–2
Understand 2.0 User Guide and Reference Manual
11-1
Chapter 11: Running External Commands
Running External Commands
The Tools->Run a Command menu item permits any external
command to be run directly from Understand 2.0. Common
commands to invoke are compilers, configuration management
tools, and Perl programs written using Understand’s API.
The Run a Command dialog looks like this:
To run a command, follow these steps:
1 Type a Command or click ... and browse for a file to run. A
number of Perl programs are provided in the Understand 2.0
installation.
2 Type any command-line Parameters required by the command.
Click the right arrow if you want to select one of the special
variables. These are listed on page 11–3.
3 Click ... and browse for the directory that should act as the
Working Directory.
4 If you want the output sent to a window in Understand 2.0, leave
the Capture Output box checked.
11-2
Understand 2.0 User Guide and Reference Manual
Running External Commands
5 If you are running a Perl script, check the STI Perl script box if
this is a script provided by Scientific Toolworks.
6 Click Run. The output is shown in a Command Window in
Understand 2.0 if you checked the Capture Output box.
Otherwise, the command runs in the background and is listed in
the Running Commands box. You can select a command from
this list and click Stop to halt the command.
On UNIX systems, output to both stdout and stderr are captured.
....................................................................................................
Variables
You can use the following variables in the Command or the
Parameter field.
Variable
Description
$CurProject
Current fullname location of opened project
$CurProjectDir
Directory the opened project is located
$CurProjectName
Current short filename of opened project (not including extension)
$CurReportHtml
Current fullname location of opened project's HTML Report
$CurReportText
Current fullname location of opened project's single file Text Report
$CurCol
Current file's column position
$CurEntityScope
Scope of current entity
$CurFile
Current file's full path name
$CurFileDir
Current file's directory
$CurFileShortName
Current file's name without full path
$CurFileName
Current file's name not including extension or full path
$CurFileExt
Current file's extension
Understand 2.0 User Guide and Reference Manual
11-3
Chapter 11: Running External Commands
Variable
Description
$CurLine
Current file's line position
$CurSelection
Selected text in the Current window (currently file windows only)
$CurWord
The word/text at the current cursor position in the current file
window
$DeclCol
Column in which the selected entity was declared, defaults to 1
$DeclFile
Full path name of the file in which the selected entity was declared
$DeclLine
Line in which the selected entity was declared, defaults to 1
$PromptForText
"text descriptor" before executing command, prompts user for this
needed string parameter
11-4
Understand 2.0 User Guide and Reference Manual
Chapter 12
Command Line Processing
This chapter shows how to create an Understand 2.0 database by
analyzing your source code, and how to generate reports from the
command line. Command-line processing can be used in a batch file
for automatic re-building and report generation of projects.
This chapter describes the “und” command-line programs, which
allows you to analyzes sources and create Understand 2.0
databases from the command line. In addition, it allows you to
generate reports.
(The “und” program replaces the previous und* and rep* languagespecific programs. Existing batch files and shell scripts that ran the
old programs will need some modification.)
Most examples in this chapter refer to C/C++ files. However, you
can use und with any supported language.
This chapter contains the following sections:
Section
Page
Using the und Command Line
12–2
Understand 2.0 User Guide and Reference Manual
12-1
Chapter 12: Command Line Processing
Using the und Command Line
A command line tool for creating and building Understand 2.0
databases is und. This command line program parses your source
code to populate the database with information that can be browsed
or reported on.
If you will use the “und” tool frequently, you should put it in your
operating system’s PATH definition.
The “und” command line takes the following form, where filename is
the project database file and is a required argument.
und -db filename [options]
Create a new database using the -create option and then load the
files into the database with the -addDir and -addFiles options.
To parse all files, specify -analyze.
The effects of all commands are permanent. There is no option to
make temporary changes as there was in previous versions.
All options that set the configuration are performed before any report
or analyze options, no matter what the sequence of the options on
the command line.
Refer to the sections that follow for details on all the available
command line options and how to create and analyze a project.
....................................................................................................
Getting Help on
Command Line
Options
Since we do frequent builds of Understand 2.0, it is likely that this
manual may not describe all the options of the “und” command line.
The und tool lists its command line options when passed the -help
option:
und -help
Individual options provide a brief explanation when passed with the
-help option. The following example explains the -create option.
und -help create
Some options are only listed in the command-line help if you get
help on their master option. For example:
und -help addDir
You can use the -list option to get a list of language-specific settings
for an option. For example, the following commands list the
available settings for a C++ project for the -compiler_name option.
und -db myproject -C++ -list compiler_name
12-2
Understand 2.0 User Guide and Reference Manual
Using the und Command Line
....................................................................................................
Creating a New
Project
There are several ways to create a new project file using “und”. Of
course you can use the graphical interface of Understand 2.0 to first
create your project, but here we will examine a few ways to do it
from the command line.
To create a new, empty, project called sample.udb:
und -create -db myproject
This example creates a database called myproject.udb.
....................................................................................................
Creating a Project
and Adding Sources
in One Step
You can create and add files to the database all in one command.
For example:
und -db myproject.udb -create -addDir \usr\myfiles
....................................................................................................
Adding Files to a
Project
If you have a small number of source files then it may be easiest to
just supply their names to the analyzer using the wildcarding abilities
of your operating system shell. In this example we will process all
source files in the folder:
und -db myproject.udb -addDir \usr\myproject
In some cases there may be too many file locations to use the -add
technique. A common command line limitation is 255 characters. A
directory with hundreds or thousands of files may easily exceed this
limit. In this case, or when you want more fine-grained/repeatable
control over what files are processed, you should create a “listfile”.
This file must have a format of one filename per line:
c:\myfiles\myproject\myproject.c
c:\myfiles\myproject\myproject.h
c:\myfiles\myproject\support.c
c:\myfiles\myproject\io.c
c:\myfiles\myproject\io.h
h:\shared\allprojects\file2.c
h:\options\file3.c
h:\options\file4.c
h:\options\file5.c
. . .
is processed via the -addFiles command line option:
und -db myproject -C++ -addFiles @myfiles.lis
Note that there is no limit on the number of files listed in the list file.
Understand 2.0 User Guide and Reference Manual
12-3
Chapter 12: Command Line Processing
....................................................................................................
Creating a List of
Files
On UNIX here are a couple ways to create such a file:
•
Use the ‘ls’ command, as in:
ls *.c *.h > my_project.lst
•
Use the ‘find’ command to recurse subdirectories, as in:
find . -name “*.c *.h” -print > my_project.lst
In a Windows command shell:
•
Use the dir command with the /b option:
dir /b *.c *.h > my_project.lst
•
Use the /s option to recurse subdirectories, as in:
dir /b /s *c *.h > my_project.lst
....................................................................................................
Analyzing a Project
The “und” command line program allows you to analyze (or reanalyze) a previously created project database.
When analyzing a project, you have several options to choose from.
You may re-analyze all files with the -analyzeAll option, only those
files that have changed with the -analyze option, or a list of files with
the -analyzeFiles option.
If you are doing your first analysis after creating a new project, it
doesn’t matter which option you choose as it will parse all files
regardless. However, if you are performing this function on a regular
basis, you may prefer to do an incremental analysis where only the
modified files and any other files dependent on those files are reanalyzed.
For example, you can parse all files in the project with the following
command:
und -db myproject.udb -analyzeAll
Or, to perform an incremental analysis, re-parsing only those files
that have changed or other dependent files, use the command:
und -db myproject.udb -analyze
This command checks each file previously parsed into the
repository to see if it has changed. If it has changed then it will reparse it, and any files that depend on it (and so on) until the
database is fully refreshed.
Use this feature to keep your database up to date while keeping
your parsing to a minimum.
12-4
Understand 2.0 User Guide and Reference Manual
Using the und Command Line
....................................................................................................
Command Line
Options
The only required option for all commands using “und” is the -db
option to specify the project database file.
Command-lines for multi-language projects must also use an option
to specify which language you are configuring if you use a project
configuration options. For example: -C++, -Java, or -Pascal.
Where a command accepts a @lisfile.txt for an option, the file must
contain one item per line. Full or relative paths may be used.
Relative paths are relative to the -cwd directory. A # sign in the first
column of a line in the file indicates a comment.
The following table lists the command line options for “und”:
Option
Description
-db filename
Specify the name of the database to create or open. An
extension of .udb is provided if no extension is given.
You can use a filename in the current directory or a full
path to the file. This option is required for most actions.
-Ada
-Assembly
-C++
-C#
-Fortran
-Java
-Jovial
-Pascal
-Plm
Sets the language that this configuration applies to.
Required for configuration actions on multi-language
projects when you set items that apply to multiple
languages, such as -include.
-addDir directory
Add the specified directory as a source file directory to
the project. When adding directories, you can also use
the following -addDir* options.
-addDirExcludes wildcard1
wildcard2...
Add the specified paths or wildcard patterns to the list
of files to be excluded from the project.
-addDirFilters wildcard1 wildcard2...
Use the specified filetype filters to match source files in
the directories specified by -addDir.
-addDirLangTypes lang1 lang2...
Add only files that match the filetypes for the specified
languages.
-addDirSubdirs [On/Off]
Specify On if you want subdirectories of the directory
specified with -addDir to also be added.
-addDirWatch [On/Off]
Specify On if you want the added directory to be a
watched directory.
Understand 2.0 User Guide and Reference Manual
12-5
Chapter 12: Command Line Processing
Option
Description
-addFiles file1 file2 ...
or -addFiles @lisfile.txt
Add the listed files to the project. Filenames can be
relative to -cwd or can use a full path.
-analyze
Analyze (parse) any changed files in the project.
-analyzeAll
Analyze all files in the project.
-analyzeFiles file1 file2...
or -analyzeFiles @lisfile.txt
Analyze the specified list of files.
-arch <name>
Specify the name of an existing architecture for use
with other options.
-archDelete
Delete the architecture specified with the -arch option.
-archRename newname
Rename the architecture specified with the -arch
option.
-archExport export.xml
Export XML for the architecture specified with the -arch
option.
-archImport import.xml
Import XML for an architecture from the specified file.
-assembler name
Set the configured name of the assembly language
assembler.
-compiler_name name
Set the configured compiler for the specified language.
-compiler_version version
Set the configured version of the compiler.
-create
Create a new project with the given -db filename. If the
.udb file exists, it will be replaced with new empty
project. Use -languages to set the source code
language(s) for the new project.
-cwd directory
Set the current working directory for other relative
filenames, such as those provided with -db and
-report_htmldir.
-define macro1=def1 macro2=def2...
or -define @lisfile.txt
Defines macros that may be used with #ifdef and
similar preprocessor directives.
-fileType ext1=lang ext2=lang...
Add a file extension and specify the language it should
be treated as.
-fileTypeDel ext1 ext2...
Delete the specified file extensions associations.
-help option
Provide information about an option.
-include includedir1 includedir2...
or @lisfile.txt
Add the specified directories to the list of include
directories.
12-6
Understand 2.0 User Guide and Reference Manual
Using the und Command Line
Option
Description
-include_addfound [On/Off]
Set to On if you want include files found when
analyzing a project to be automatically added to the
source file list.
-include_addfoundsys [On/Off]
Set to On if you want system include files found when
analyzing a project to be automatically added to the
source file list.
-include_case [On/Off]
Set to On if you want to use case-insensitive searching
for include files.
-include_search [On/Off]
Set to On if you want to search for include files among
project files.
-include_treatsys [On/Off]
Set to On if you want to treat system include files as
user include files.
-languages lang1 lang2...
Specify the source code languages used by the
project.
-list option
List the available settings for the specified commandline option.
-listarch
List all the architecture names in the project.
-listfiles
List all the files in the project database.
-listfilestree
List all the files in the project database in tree format
showing watched states.
-metrics [outputfile]
Generate list of currently selected metrics. If an
outputfile is optionally specified, send the output to that
file.
-metrics_sel metric1 metric2...
or -metrics [all/none]
Add the specified metrics to the list to generate. To
clear the list, use none. Use -list metrics_sel to get a
list of metric names.
-metrics_DeclFilename
[none/short/relative/full]
Specify whether “declared in” filenames should be
shown as short, relative, full, or not at all (none).
-metrics_Filename [short/relative/full] Specify whether filenames should be shown as short,
relative, full, or not at all (none).
-metrics_Parameters [On/Off]
Set to On if you want function parameter types shown
in metrics output.
-metrics_Titles [On/Off]
Set to On if you want column headings in metrics
output.
Understand 2.0 User Guide and Reference Manual
12-7
Chapter 12: Command Line Processing
Option
Description
-process commandfile.txt
Pass a file containing command-line options to und.
The most recent -db setting is use for commands in the
file.
-quiet [On/Off]
Set to On if you want only errors that would cause a
failure to be reported to the display.
-removeDir directory
Remove the specified directory and its subdirectories
from the project. If a directory is watched, it is set to
exclude.
-removeFiles file1 file2 ...
or -removeFiles @lisfile.txt
Remove the listed files to the project. Filenames can
be relative to -cwd or can use a full path. If the files are
watched files, they are set to excluded files.
-report html text
Generate currently selected reports. If html or text is
optionally specified, generate only that type of output.
-report_sel report1 report2...
or -report [all/none]
Add the specified reports to the list to generate. To
clear the list, use none. Use -list report_sel to get a list
of report names.
-report_htmldir directory
Specify a directory to contain HTML report output.
-report_htmlstyle
[single/alpha/split=N]
Specify how HTML reports are to be split.
-report_htmltitle titlepage
Specify the filename of an HTML page you want used
as the title page.
-report_Filename [short/full]
Specify whether you want the reports to use short or
full filenames.
-report_time [On/Off]
Set to On if you want the time the report was generated
to be placed on the report.
-report_textdir directory
Specify a directory to contain text report output.
-report_textfile filename.txt
Specify a filename for the text report if you are using
the single file option.
-report_textstyle [single/separate]
Choose whether you want text reports sent to a single
file or separate files.
-rescan
Rescan all the watched directories for newly added or
removed source files.
12-8
Understand 2.0 User Guide and Reference Manual
Using the und Command Line
Option
Description
-rootAdd name1=directory1 [...]
Create or reset one or more named root directories. If
the root does not exist in the current project, it is
added. Otherwise, its mapping is reset to the new
directory. A valid name must begin with an uppercase
letter (A-Z) and be followed by at least one more
uppercase letter, numbers, “_”, or “$”. This is a
temporary setting that applies to the current command
only. If you use this option in a commandfile.txt for the
-process option, it applies to multiple commands.
-rootList
List the defined named root directories.
-rootMode mode
Set the current default mode for adding named roots.
-rootRemove name
Remove the specified named root definition.
-rootReset name=directory
Sets the directory for the specified named root to the
specified directory. If the root does not exist in the
current project, an error occurs. This is a temporary
setting that applies to the current command only.
-snapshot name
Create a new snapshot with the specified name.
-snapshotComment "Comment"
Associate the specified comment with the snapshot
specified by the -snapshot option.
-vsFile filename
Add the specified Visual Studio file to the project
configuration.
-vsFileConf configuration
Specify the Visual Studio configuration to use for the
specified -vsFile.
-vsFileDel filename
Remove the specified Visual Studio file from this
project.
Understand 2.0 User Guide and Reference Manual
12-9
Chapter 12: Command Line Processing
12-10
Understand 2.0 User Guide and Reference Manual
Index
Index
Symbols
" prefixing octal constants, 3–37
" prefixing string literals, 3–37
"" surrounding normal includes, 3–31
$ in regular expressions, 5–6
* in regular expressions, 5–6
* wild card, 5–6
+ expanding tree in Info Browser, 4–9
+ in regular expressions, 5–6
. in regular expressions, 5–6
/* ... */, 3–28, 3–37
: in F77 identifiers, 3–37
<> surrounding system includes, 3–31
? in regular expressions, 5–6
? wild card, 5–6
@ prefixing file of include paths, 3–31
@ prefixing file of macro definitions, 3–34
[ - ] in regular expressions, 5–7
[ ] in regular expressions, 5–6
[^ ] in regular expressions, 5–6
\ in regular expressions, 5–7
\< in regular expressions, 5–6
\> in regular expressions, 5–6
^ in regular expressions, 5–6
| in regular expressions, 5–7
A
Activate when Control key is pressed
field, 3–57
actual parameters, relationship to formal
parameters, 3–24
Ada
version of, specifying, 3–23
versions supported, 1–3
Ada Project Type window, 3–24
Add found include files to source list, 3–31
Add found system include files to source
list, 3–31
Understand 2.0 User Guide and Reference Manual
-add option
und command line, 12–3
All project favorite box, 4–18
Allow Colons in Names field, 3–37
Allow C-style comments field, 3–37
Allow Nested Comments field, 3–28
Analyze All Files option, 3–59
Analyze All Files option, Project menu, 3–59
Analyze Changed Files option, 3–59
Analyze Changed Files option, Project
menu, 3–59
-analyze option
und command line, 12–4
-analyzeAll option
und command line, 12–4
and operators, including in strict
complexity, 3–24
angle brackets (<>) surrounding system
includes, 3–31
anti-virus software, turning off while
generating reports, 10–4
%APPDATA% environment variable, 2–6
arrows
for Info Browser history, 4–12
ASCII text. See text
Assembly tab, Project Configuration
dialog, 3–27
Assistant area, 4–4
Associate Comments field, 3–25, 3–29, 3–39
asterisk (*) in regular expressions, 5–6
asterisk (*) wild card, 5–6
at sign (@) prefixing file of include
paths, 3–31
at sign (@) prefixing file of macro
definitions, 3–34
Auto Includes window, 3–32
B
backslash (\) in regular expressions, 5–7
base classes
count of, 10–24
displaying, 9–8, 9–10, 9–15
Index–1
Base Classes View, 9–8, 9–10
Before running commands, if modified files
field, 3–50
bitmaps, saving graphical views as, 9–28
black text, 3–57
blocks
declaration view, 9–12
listing in Project Window, 2–9
blue text, 3–57
BMP format, saving graphical views as, 9–28
braces, matching. See brackets, matching
brackets
in regular expressions, 5–6
matching, 6–8
Browse category, Options dialog, 3–57
Browse Mode, 3–57, 6–4
C
C++ tab, Project Configuration dialog, 3–28
C/C++
API for custom reports, 2–18, 10–7, 10–22
preprocessor directives, 3–33
templates support for, 1–3
versions supported, 1–3
caching include files, 3–30
Callby View, 9–8, 9–9
Called by menu, under Options menu, 9–18
capitalization
of entity names, 3–42
of selected text, 6–8
caret (^) in regular expressions, 5–6
case
changing for selected text, 6–8
of entity names, 3–42
Case Insensitive command, 8–13
case sensitivity, 8–12, 8–13
case-sensitivity
filter lists, 4–5
CBO (Count of Coupled Classes)
metric, 10–24
Change Case menu option, 6–8
Change Log, 3–2
Index–2
character strings, pink text for, 3–57
Child Lib Units View, 9–8
children of entity, 9–8
Class and Interface Cross-Reference
report, 10–11
Class Declaration View, 9–15
Class Extend Tree report, 10–15
.class files, providing classes without
source, 3–40
Class Inheritance View, 9–8
Class Metrics report, 10–23
Class OO Metrics report, 10–24
Class Paths tab, Project Configuration
dialog, 3–40
classes
base classes for, 9–8, 9–10, 9–15, 10–24
cohesion of, 10–24
coupled, 10–24
declaration for, 9–15
derived, 9–8, 9–10, 10–24
extended by other classes, 9–8, 9–11, 9–18
extending other classes, 9–8, 9–10, 9–19
implemented, 9–19
implemented by, 9–19
inherited from other classes, 9–8
listing in Project Window, 2–9
metrics about, 10–23, 10–24
providing without source code, 3–40
reports about, 10–11, 10–15, 10–23, 10–24
root, listing, 4–7
shape for, in graphical views, 9–16
client/server interface, 1–4
clipboard, 8–12
copying text from Info Browser to, 4–11
copying text from Source Editor to, 6–4
graphical view, 9–28
Code Type field, 3–43
cohesion for class data members, 10–24
colon (:) in F77 identifiers, 3–37
colors
in Source Editor, 3–56, 3–57
of line numbers, 6–2
Understand 2.0 User Guide and Reference Manual
Index
colors, highlighting, 8–12, 8–14
column headers in Entity Locator, 5–4
column number, 6–3
column truncation, 3–37, 3–41
command line
project analysis. See und command
command renames, reports about, 10–17
Command Results window, 3–59
external commands executed in, 11–3
saving to text file, 3–60
commands
external, running, 11–2
project analysis, 3–59
comments
associating with entities, 3–25, 3–29, 3–39
C-style, 3–28, 3–37
nested, allowing, 3–28
red text for, 3–57
Compaq Pascal, 3–43
compilation unit
Child Library Units of, 9–8
declaration nesting of program units
in, 9–8
declaration structure for, 9–13
entities called by, 9–8
entities that call a compilation unit, 9–13
instantiation tree for, 9–8
With By relationships of, 9–8, 9–27
With relationships of, 9–8, 9–13
compiler
compared to Understand, 3–2
setting, 3–28
Compiler field, 3–28
Compiler Include Paths field, 3–28
complexity
exception handlers included in, 3–24
FOR-loops included in, 3–24
strict, and/or operators included in, 3–24
compressing code, 8–12
Configure Auto Includes button, 3–32
Configure Ignored Includes button, 3–32
Configure option, Project menu, 3–7
Understand 2.0 User Guide and Reference Manual
Configure Replacement Text button, 3–32
Configure Undefines button, 3–34
constants
displayed in graphical views, 9–18
shape for, in graphical views, 9–16
Constants menu, under Options menu, 9–18
contact information, 1–3
Convert existing tabs to spaces during save
field, 3–55
Convert new tabs to spaces field, 3–55
Copies field, 9–30
Copy as HTML option, Edit menu, 6–4
Copy option, Edit menu, 6–4
copy text, 8–12
Count and/or operators in strict complexity
field, 3–24
Count exception handlers in complexity
field, 3–24
Count for-loops in complexity field, 3–24
Count of All Methods metric, 10–24
Count of Base Classes metric, 10–24
Count of Coupled Classes metric, 10–24
Count of Derived Classes metric, 10–24
Count of Instance Methods metric, 10–24
Count of Instance Variables metric, 10–24
Count of Methods metric, 10–24
coupled classes, 10–24
Create implicit special member functions
field, 3–29
-create option
und command line, 12–3
Create references in inactive code field, 3–29
Create relations between formal and actual
parameters field, 3–24
Crossing layout option, 9–21
cross-reference reports
list of, 10–8
C-style comments, 3–28, 3–37
Ctrl+e keystroke, replace text, 6–7
Ctrl+f keystroke, find text, 6–7
Ctrl+m keystroke, jump to matching
bracket, 6–8
Index–3
Ctrl+right-click keystroke
creating new windows, 2–7, 4–2
Ctrl+Shift+m keystroke, select text in
brackets, 6–8
Cut option, Edit menu, 6–4
Cyclomatic complexity, 10–18, 10–26
D
dashed outline shapes, in graphical
views, 9–16
Data Dictionary report, 10–8
data members view, 9–12
database
changes to format of, 3–2
creating on command line, 12–2, 12–3
definition, 2–3, 3–2
file extension for, 2–3, 3–2
multi-user read/write access for, 3–2
See also project
-db option
und command line, 12–5
DEC Pascal, 3–43
Declaration File View, 9–14
Declaration Tree report, 10–14
Declaration Tree View, 9–8
Declaration Type View, 9–14
Declaration View, 9–12, 9–13
declaration views
constants displayed in, 9–18
default members displayed in, 9–18
extended by classes displayed in, 9–18
extended classes displayed in, 9–19
external functions displayed in, 9–19
file dependencies displayed in, 9–18
globals displayed in, 9–19
header file include by’s displayed in, 9–20
implemented by classes displayed
in, 9–19
implemented classes displayed in, 9–19
imported entities displayed in, 9–20
include files displayed in, 9–20
invocations displayed in, 9–21
Index–4
local items displayed in, 9–22
objects displayed in, 9–23
private members displayed in, 9–24
protected members displayed in, 9–24
public members displayed in, 9–24
rename declarations in, 9–24
routines displayed in, 9–24
static functions displayed in, 9–25
types displayed in, 9–26
variables displayed in, 9–27
With By relationships displayed in, 9–27
With relationships displayed in, 9–27
See also graphical views
declarations
implicit, 10–20
local, including in database, 3–29
root, listing, 4–7
Declared In View, 9–8
Default Members menu, under Options
menu, 9–18
defines. See macros
Delphi
choosing code type, 3–43
dependencies, file, 9–18
Dependent menu, under Options menu, 9–18
Dependent Of menu, under Options
menu, 9–18
derived classes, 9–8, 9–10, 10–24
Derived Classes View, 9–8, 9–10
Difference Listing area, 8–10
differences, 8–12
colors, 8–14
directives in include files, 3–33
Display tab, Project Configuration
dialog, 3–42
DIT (Max Inheritance Tree) metric, 10–24
Dock Window Layouts, 3–49
Document Area, 2–4
documentation, 1–4
dollar sign ($) in regular expressions, 5–6
DOS line termination style
for reports, 10–4
Understand 2.0 User Guide and Reference Manual
Index
for saving source files, 3–55
double quotes. See quotes
double-clicking
entities in graphical view, 9–4
items in Find Results window, 5–10
on entity to display source, 4–10
.dsp file extension, 3–21
.dsw file extension, 3–21
duplicate references, 3–29
Duplicate Subtrees menu, under Options
menu, 9–18
E
Edit category, Software Preferences
dialog, 3–54
Edit menu
Copy as HTML option, 6–4
Copy option, 6–4
Cut option, 6–4
editor
See also Source Editor
Editor category, Options dialog, 3–54
Embedded SQL, 3–43
Enable embedded SQL parsing field, 3–43
entities
comments associated with, 3–25, 3–29,
3–39
definition, 2–3
displaying source for. See Source Editor
information about. See Info Browser
listed in Entity Locator, 2–10, 5–3
listed in Filter Area, 4–5
listed in Project Window, 2–9
metrics for. See metrics
names of, formatting for reports, 3–20
names of, formatting for user
interface, 3–42
references for, 4–11
relationships between, 2–3, 9–2, 9–8, 9–9
reports about. See reports
unknown, 9–26
unresolved, 9–27
Understand 2.0 User Guide and Reference Manual
views of, 9–9
views of. See views
See also specific entities
Entity Comparison area, 8–10
entity file, 3–43
Entity Locator, 2–10, 5–3
column headers in, customizing, 5–4
column headers in, sorting, 5–4
columns in, hiding and reordering, 5–4
columns in, resizing, 5–3
filtering by selection, 5–5
filtering manually, 5–5
filtering, regular expressions for, 5–6
filtering, wildcards for, 5–6
length of names in, 5–3
opening, 5–3
right-clicking in, 2–10, 5–3
right-clicking on column header, 5–5
Entity Locator option, Search menu, 2–10,
5–3
entity_index.html file, 10–5
environment variables
initialization file location, 2–6
using in include paths, 3–30
errors
file parsing errors, prompting for, 3–25
file parsing, prompting for, 3–38
missing include files, prompting for, 3–31
missing include files, searching project
files for, 3–31
order parsing errors, prompting for, 3–25,
3–38
event, keyboard, 3–51
Exception Cross-Reference report, 10–13
exceptions
handlers for, including in complexity, 3–24
reports about, 10–13
expanding code, 8–12
Export Metrics dialog, 10–27
Extended By menu, under Options
menu, 9–18
Extended By View, 9–8, 9–11
Index–5
Extends menu, under Options menu, 9–19
Extends View, 9–8, 9–10
external commands, running, 11–2
External Functions menu, under Options
menu, 9–19
external tools
commands, 11–2
F
F5 key, Find in Files option, 5–8
favorites, 4–17
marking, 4–17
Favorites option, Search menu, 2–11
File Average Metrics report, 10–26
File Contents report, 10–10
File Declaration View, 9–12
file extensions
for database, 2–3, 3–2
for source files, 3–12
for MSVC project files, 3–21
File menu
New Project option, 3–3
Print Drawing option, 9–29
Print File Setup option, 6–9
Print option, 6–9
Save All option, 6–5
Save option, 6–5
File Metrics report, 10–25
file names
display options in graphical views, 9–19
for reports, 10–5
File Print Preferences dialog, 6–9
File Sync box, 4–10
File Types tab, Project Configuration
dialog, 3–7, 3–16
Filename menu, under Options menu, 9–19
Files are Unicode command, 8–13
files. See database; header files; include
files; MSVC project; project; source files
files. See database; include files; project;
source files
files. See database; project; source files
Index–6
Filter Area, 2–9, 4–5
displaying information about entities
in, 4–8
displaying source of selected entity, 4–10
entities not listed in, 5–3
location of, 2–4
right-clicking in, 2–8
Root filters in, 4–6
Filter By dialog, 5–5
Filter By menu option, 5–5
Filter By Selection menu option, 5–5
filters
for graphical views, 9–6
in Entity Locator, setting, 5–5
Find in Files dialog, 2–11, 5–8
diagram of, 2–4
Find in Files Find Results window, 2–4, 5–10
Find in Files menu option, 2–11, 5–8
Find option, Search menu, 6–7
Find Results window, 2–11, 5–8, 5–10
fixed file format, 3–37
FOR-loops, including in complexity
metrics, 3–24
formal parameters, relationship to actual
parameters, 3–24
format of FORTRAN statements, 3–37
FORTRAN
choosing variant of, 3–36, 3–39
extensions supported, 1–3
fixed or free format of statements, 3–37
reports showing non-standard extension
usage, 10–19
versions supported, 1–3
FORTRAN Extension Usage report, 10–19
free file format, 3–37
fullname
entity lists, 4–6
Function Pointer menu, under Options
menu, 9–19
functions
entities invoked by, 9–9
external, 9–19
Understand 2.0 User Guide and Reference Manual
Index
listing in Project Window, 2–9
metrics about, 10–26
reports about, 10–10, 10–26
static, 9–25
functions. See program units
G
General category, Software Preferences
dialog, 3–46
Generic Instantiation report, 10–17
generic unit
instantiation hierarchy for, 9–8
instantiation tree for, 9–8
generics, 1–3
globals
displayed in graphical views, 9–19
Globals menu, under Options menu, 9–19
Go To Line dialog, 6–3
Graphical Settings dialog, 9–6
Graphical Settings option, Options
menu, 9–6
graphical user interface (GUI), parts of, 2–4
graphical views
browsing, 9–4
calling methods displayed in, 9–18
constants displayed in, 9–18
default members displayed in, 9–18
diagram of, 2–4
displaying, 9–2
entity name truncation for, 9–26
extended by classes displayed in, 9–18
extended classes displayed in, 9–19
external functions displayed in, 9–19
file dependencies displayed in, 9–18
filename display options, 9–19
filtering, 9–6
fullnames displayed in, 9–23
function pointers displayed in, 9–19
globals displayed in, 9–19
header files include by’s displayed, 9–20
hierarchical, 9–8
hierarchy levels, number of, 9–22
Understand 2.0 User Guide and Reference Manual
implemented by classes displayed
in, 9–19
implemented classes displayed in, 9–19
imported entities displayed in, 9–20
include files displayed in, 9–20
intrinsic functions displayed in, 9–20
invocations displayed in, 9–21
layout configuration for, 9–17
layout options for, 9–21
local items displayed in, 9–22
members displayed in, 9–23
multiple subtrees displayed in, 9–18
objects displayed in, 9–23
operators displayed in, 9–23
parameters, displaying in, 9–24
printing, 6–9, 9–29, 9–30
private members displayed in, 9–24
protected members displayed in, 9–24
public members displayed in, 9–24
rename declarations in, 9–24
Reuse box, 9–7
routines displayed in, 9–24
saving, 9–28
scrolling in, 9–4
showing SQL, 9–25
sorting entities, 9–25
spacing entities, 9–25
static functions displayed in, 9–25
Sync box, 9–7
text size of, 9–25
types displayed in, 9–26
unknown entities, displaying, 9–26
unresolved entities, displaying, 9–27
variables displayed in, 9–27
With By relationships displayed in, 9–27
With relationships displayed in, 9–27
See also structure views; hierarchical
views
Graphical Views menu option, 9–2
green text, 3–57
GUI (graphical user interface), parts of, 2–4
Index–7
H
header files
displaying files that include in graphical
views, 9–20
help, 1–4
hexagons, in graphical views, 9–16
hierarchical views, 2–16
calling methods displayed in, 9–18
layout of, 9–21
levels in, 9–22
list of, 9–2, 9–8, 9–9
multiple subtrees displayed in, 9–18
parameters, displaying in, 9–24
See also graphical views
Hierarchy View, 9–2
highlight colors, 8–12, 8–14
history
in Info Browser, 4–9, 4–12
Horizontal Non-Crossing layout option, 9–22
HTML
copying text in Source Editor as, 6–4
generating reports as, 2–17, 10–2, 10–4
reports, entity index for, 10–5
viewing reports as, 10–5
Hyper Grep. See Find in Files dialog
hyphen (-) collapsing tree in Info
Browser, 4–9
I
IB. See Info Browser
IFANIN (Count of Base Classes)
metric, 10–24
Ignore Includes window, 3–32
Implemented By menu, under Options
menu, 9–19
Implements menu, under Options
menu, 9–19
implicit special member functions, 3–29
Implicitly Declared Objects report, 10–20
Import report, 10–17
imported entities, displaying in graphical
Index–8
views, 9–20
Imports menu, under Options menu, 9–20
inactive code
cross-reference information for, 3–29
Include Cache field, 3–30
Include File Cross-Reference report, 10–12
include files
adding as source files, 3–30, 3–38
adding before each project file, 3–32
adding in bulk, 3–31
adding to project, 3–30, 3–38
adding when found during project
analysis, 3–31
compiler path for, 3–28
displayed in graphical views, 9–20
environment variables in paths for, 3–30
hierarchy of, for source files, 9–8
ignoring during analysis, 3–32
overriding MSVC project settings for, 3–22
replacement text for, 3–32
reports about, 10–12
root, listing, 4–7
searching project files for, 3–31
system, 3–31
system include files, 3–31
Include Replace window, 3–32
Include Subdirectories field, 3–12
Include tab, Project Configuration
dialog, 3–30, 3–38
Include View, 9–8, 9–10
IncludeBy View, 9–8
Included By menu, under Options
menu, 9–20
Includes menu, under Options menu, 9–20
Info Browser (IB), 2–9, 2–12, 4–8
choosing entity information displayed
by, 4–10
copying text to clipboard, 4–11
displaying from entity in Filter Area, 4–8
displaying source of selected entity, 4–10,
4–11
expanding and collapsing the tree, 4–9
Understand 2.0 User Guide and Reference Manual
Index
history for, 4–9, 4–12
location of, 2–4
metrics in, 4–11, 10–22
printing text in, 4–11
References in, 4–11
right-clicking in, 2–8
saving text to file, 4–11
Inherited By menu, under Options
menu, 9–20
Inherits menu, under Options menu, 9–20
initialization files, 2–6
instance methods, 10–24
instance variables, 10–24
Instantiated From View, 9–8
instantiation
of generic types or compilation units, 9–8
of generic units, 9–8
reports about, 10–17
Instantiations View, 9–8
interfaces
listing in Project Window, 2–9
reports about, 10–11
interrupt handlers
listed as unused program units, 10–21
intrinsic functions
parsing, 3–37
Intrinsic menu, under Options menu, 9–20
Intrinsics file field, 3–37
Invocation Tree report, 10–16
Invocation View, 9–8, 9–9
invocations
reports about, 10–16
views of, 9–8, 9–9
Invocations menu, under Options
menu, 9–21
J
.jar files, providing classes without
source, 3–40
Java
versions supported, 1–3
JDK, versions supported, 1–3
Understand 2.0 User Guide and Reference Manual
JPEG format, saving graphical views
as, 9–28
K
keyboard mappings, 3–51
default, 3–51
keywords, blue text for, 3–57
L
Language field, 3–39
Layout menu, under Options menu, 9–21
layout, for graphical views, 9–21
LCOM (Percent Lack of Cohesion)
metric, 10–24
Level menu, under Options menu, 9–22
library
alternate, 3–24
standard, specifying location of, 3–24
line number, 6–3
line numbers
color of, in Source Editor, 6–2
displaying in Source Editor, 3–56, 6–2
line termination style
for reports, 10–4
for saving source files, 3–54
Local menu, under Options menu, 9–22
local object declarations, including in
database, 3–29
local parameters, listed in Entity
Locator, 2–10
log files
from Command Results, 3–60
M
Macintosh line termination style, 3–55
Macro Cross-Reference report, 10–12
macros
adding in bulk, 3–34
automatically supported macros, 3–33
changing definition of, 3–26
compiler-specific, 3–28
Index–9
defining, 3–25, 3–33
defining on command line, 3–26
expansion text, 3–30
listing in Project Window, 2–9
overriding MSVC project settings for, 3–22
recording references when
expanding, 3–29
reports about, 10–10, 10–12
undefined, 3–34
See also objects
Macros tab, Project Configuration
dialog, 3–25, 3–33
"Mastering Regular Expressions"
(O’Reilly), 5–7
Match case box, 8–12
Match Case field, 5–5
Match whole words box, 8–12
Max Inheritance Tree metric, 10–24
McCabe (Cyclomatic) complexity, 10–18,
10–26
members
default, 9–18
displayed in graphical views, 9–23
private, 9–24
protected, 9–24
public, 9–24
Members menu, under Options menu, 9–23
memory
caching include files, 3–30
optimizing analysis to use less, 3–25
Menu bar, 2–4
menus. See specific menus
merge changes, 8–14
Merge Selected button, 8–14
methods
cohesion of, 10–24
instance, 10–24
listing in Project Window, 2–9
metrics about, 10–24
metrics
displayed in Info Browser, 4–11, 10–22
exporting, 10–22
Index–10
list of, online, 10–23
reports about, 10–22, 10–23, 10–24, 10–25,
10–26
Metrics Export option, Project menu, 10–22,
10–27
Microsoft Visio files, saving graphical views
as, 9–29
Microsoft Visual C++ project. See MSVC
project
minus sign (-) collapsing tree in Info
Browser, 4–9
Modify view options menu option, 9–17
modules
listing in Project Window, 2–9
MSVC project
versions supported, 3–21
multiple users, initialization files for, 2–6
N
Name menu, under Options menu, 9–23
Namespaces tab, Project Configuration
dialog, 3–44
Navigator window, 5–12
nested comments, 3–28
New Files as field, 3–54
New Project option, File menu, 3–3
New Project Window, 3–3
Next button, 8–14
Next option, Window menu, 2–13
NIM (Count of Instance Methods)
metric, 10–24
NIV (Count of Instance Variables)
metric, 10–24
No Truncation text option, 9–26
NOC (Count of Derived Classes)
metric, 10–24
node
in Info Browser, 4–9
nodes
graphical view, 9–4
Understand 2.0 User Guide and Reference Manual
Index
O
Object Cross-Reference report, 10–10
object-oriented metrics, 10–24
objects
displayed in graphical views, 9–23
listing in Project Window, 2–9
reports about, 10–10, 10–20
Objects menu, under Options menu, 9–23
online help, 1–4
Open last project at startup field, 3–47
Operators menu, under Options menu, 9–23
operators, displayed in graphical views, 9–23
Optimize for less memory usages versus
speed field, 3–25
Options dialog
Browse category, 3–57
Editor category, 3–54
Styles category, 3–56
Options menu, 9–17
Graphical Settings option, 9–6
Preferences option, 3–46
Options tab, Project Configuration
dialog, 3–23, 3–28
or operators, including in strict
complexity, 3–24
ovals, in graphical views, 9–16
P
Package View, 9–12
packages
declaration structure for, 9–12
listing in Project Window, 2–9
reports about, 10–17
With By relationships for, 9–12
With relationships for, 9–12
Paper Types Toggle field, 9–31
parallelograms, in graphical views, 9–16
parameters
cross-reference information for, 3–29
declaration structure of parent, 9–13
relationships between formal and actual
Understand 2.0 User Guide and Reference Manual
parameters, 3–24
reports about, 10–10, 10–20
See also objects
Parameters menu, under Options
menu, 9–24
parent
of class. See base classes
of entity, 9–8
of parameter, 9–13
Parent Declaration View, 9–12, 9–13
Parent Lib Unit View, 9–8
parentheses, matching. See brackets,
matching
Parse Double Quote Octal Constants
field, 3–37
Parse Using preprocessing field, 3–37
Pascal
choosing code type of, 3–43
pattern matching. See regular expressions
PC line termination style. See DOS line
termination style
.pcn file, 10–10
Percent Lack of Cohesion metric, 10–24
period (.) in regular expressions, 5–6
PERL interface, 10–7
PERL, interface for custom reports, 2–18,
10–7, 10–22
pink background, 3–57
pink text, 3–57
plus sign (+) expanding tree in Info
Browser, 4–9
plus sign (+) in regular expressions, 5–6
PNG format, saving graphical views as, 9–28
Postscript format, printing graphical views
in, 6–9, 9–30
pragma statements, defining macros
referenced in, 3–25
Predeclared entity file field, 3–43
Preferences option, Options menu, 3–46
preprocessor directives, 3–33, 3–57
preprocessor macros. See macros
preprocessor statements, green text
Index–11
for, 3–57
preprocessor support, enabling, 3–37
Prev button, 8–14
Previous option, Window menu, 2–13
Print dialog, 9–30
Print Drawing option, File menu, 9–29
Print File Setup option, File menu, 6–9
Print option, File menu, 6–9
Print Range field, 9–30
Print Setup dialog, 9–31
Print to File field, 9–30
Printer Command field, 9–31
printing
graphical views, 9–29
Info Browser text, 4–11
source files, 6–9, 9–29
Private Members menu, under Options
menu, 9–24
procedures. See program units
Program Unit Complexity report, 10–18
Program Unit Cross-Reference report, 10–9
Program Unit Metrics report, 10–24
program units
metrics about, 10–24
reports about, 10–9, 10–14, 10–16, 10–18,
10–21, 10–24
With relationships for, 4–7, 10–16, 10–17,
10–21
programming language
features supported, 1–3
versions supported, 1–3
project
adding source files on command line, 12–3
adding source files to, 3–10
adding source files using symbolic
links, 3–12
adding source files with drag-anddrop, 3–12
adding subdirectories to, 3–12
analyzing (parsing), 3–59
analyzing (parsing) after changing
configuration of, 3–8
Index–12
analyzing (parsing) on command
line, 12–4
analyzing (parsing) using compilation
environment, 3–24
closing automatically when opening new
project, 3–50
configuration settings for, 3–7
creating, 3–3
creating on command line, 12–3
definition, 2–3
excluding files from, 3–12
files for. See database; source files
including files from, 3–12
metrics report for, 10–23, 10–27
opening most-recent project at
startup, 3–47
saving configuration of, 3–8
Project Assistant, 4–4
Project Code Type field, 3–43
Project Configuration dialog, 3–7
Assembly tab, 3–27
C++ tab, 3–28
Class Paths tab, 3–40
Display tab, 3–42
Include tab, 3–30, 3–38
Macros tab, 3–25, 3–33
Options tab, 3–23
saving configuration, 3–8
Sources tab, 3–10
Project menu
Analyze All Files option, 3–59
Analyze Changed Files option, 3–59
Configure option, 3–7
Metrics Export option, 10–22, 10–27
Reports Generate option, 10–2
Reports View option, 10–5
Rescan Watched Project Directories
option, 3–14
Project Metrics report, 10–23, 10–27
Project Window, 2–9
entities not included in, 2–10
jumping to entities in, 2–9
Understand 2.0 User Guide and Reference Manual
Index
See also Filter Area; Info Browser
Prompt for missing includes field, 3–31
Prompt if errors occurred in Order Parsing
Phase field, 3–38
Prompt if errors occurred in order parsing
phase field, 3–25
Prompt OK on project close field, 3–50
Prompt on a File Parse error field, 3–38
Prompt on a file parse error field, 3–25
$PromptForText variable, 11–4
Protected Members menu, under Options
menu, 9–24
Public Members menu, under Options
menu, 9–24
Q
quality reports, list of, 10–18
question mark (?) in regular expressions, 5–6
question mark (?) wild card, 5–6
quote (") prefixing octal constants, 3–37
quote (") prefixing string literals, 3–37
quotes ("") surrounding normal
includes, 3–31
R
Record local object declarations field, 3–29
Record macro expansion text field, 3–30
Record parameter references field, 3–29
Record references during intermediate
macro expansion field, 3–29
rectangles, in graphical views, 9–16
red text, 3–57
References, in Info Browser, 4–11
Regular Expression field, 5–5
regular expressions, 6–7
book about, 5–7
in filters for Entity Locator, 5–6
relationship, definition of, 2–3
Rename Declaration View, 9–12
rename declarations
displayed in graphical views, 9–24
reports about, 10–17
Understand 2.0 User Guide and Reference Manual
Renames menu, under Options menu, 9–24
Renames report, 10–17
Replace option, Search menu, 6–7
Report Configuration/Generation
dialog, 10–2
Report Generation Options dialog, 10–3
reports, 2–17, 10–6
choosing which reports to generate, 10–3
configuring, 10–2
customizing with PERL or C, 2–18, 10–7,
10–22
entity index for, 10–5
file names for, 10–5
generating, 10–2, 10–4
HTML output, 10–4, 10–5
text output, 10–4
viewing, 10–5
See also specific reports
Reports Generate option, Project
menu, 10–2
Reports View option, Project menu, 10–5
Rescan Watched Project Directories
option, 3–14
Reuse box, 9–7
RFC (Count of All Methods) metric, 10–24
Right-click Menu
diagram of, 2–4
Find in Files option, 2–11, 5–8
right-clicking
+ or - sign in Info Browser tree, 4–9
on Analyze icon, 3–59
anywhere in Understand, 2–7, 4–2
in background of graphical views, 9–17
bold heading in Info Browser, 4–10
on entities in Entity Locator, 2–10, 5–3
on entities in graphical views, 9–2, 9–4
on entities in Info Browser, 2–8
on entities in Source Editor, 2–7, 2–13
on entities to display source, 4–11
in Entity Locator cells, 5–5
in Entity Locator column headers, 5–4, 5–5
in Filter Area, 2–8
Index–13
reusing windows by, 2–7, 4–2
on selected text, 6–4, 6–8
in white space of Info Browser, 4–11
Root CallBys filter, 4–7
Root Calls filter, 4–7
Root Classes filter, 4–7
Root Decls filter, 4–7
Root IncludeBys filter, 4–7
Root Withs filter, 4–7
routines
displayed in graphical views, 9–24
Routines menu, under Options menu, 9–24
Run a Command option, Tools menu, 11–2
S
Save All icon, Source Editor, 6–5
Save All option, File menu, 6–5
Save duplicate references field, 3–29
Save Files as field, 3–55
Save icon, Source Editor, 6–5
Save option, File menu, 6–5
Scale menu, under Options menu, 9–25
script, PERL, 2–4
scrolling, 8–11
Search for include files among project files
field, 3–31
Search menu
Entity Locator option, 2–10, 5–3
Favorites option, 2–11
Find in Files option, 2–11, 5–8
Find option, 6–7
Replace option, 6–7
searching source files, 6–6
select text, 8–12
Selector window, 5–11
server mode, 1–4
Set Undefines dialog, 3–34
shortcut commands, 3–51
Show fullname field, 4–6
Show Line Numbers field, 3–56
Shrink to fit printing mode, 9–29
Simple Invocation Tree report, 10–16
Index–14
Simple With Tree report, 10–17
Skip Whitespace command, 8–13
slashed shapes, in graphical views, 9–16
"Software Engineering with Ada"
(Booch), 9–12
Software Preferences dialog, 3–46
Edit category, 3–54
General category, 3–46
Sort case sensitive field, 4–5
Sort menu, under Options menu, 9–25
Source Editor, 2–13, 6–2
bracket matching in, 6–8
case, changing in, 6–8
colors in, customizing, 3–56, 3–57
colors in, default, 3–57
copying to clipboard from, 6–4
displaying by right-clicking on
entities, 4–11
displaying from Find Results
window, 2–11, 5–10
displaying from Info Browser, 4–10
file display options, 3–54
file editing options, 3–54
keyboard mappings for, 3–51
line number color in, 6–2
line numbers displayed in, 6–2
location of, 2–4
moving between windows of, 2–13
printing files from, 6–9
replacing text in source files, 6–7
right-clicking in, 2–7, 2–13
save options, 3–54
saving files, 6–5
searching source files, 6–6
status icons, 6–3
status line, 6–3
Source File printing mode, 9–29
source files
adding to project, 3–10
adding to project from subdirectories, 3–12
adding to project on command line, 12–3
adding to project using symbolic
Understand 2.0 User Guide and Reference Manual
Index
links, 3–12
adding to project with drag-and-drop, 3–12
analyzing using projects. See project
declaration structure for, 9–12
declarations in, 9–14
display options for, 3–54
displaying by right-clicking on
entities, 4–11
displaying from Filter Area, 4–10
displaying from Find Results
window, 2–11, 5–10
displaying from Info Browser, 4–10
editing. See Source Editor
excluding from source list, 3–12
imported, 10–17
imported classes in, 9–14
include files specified as, 3–30, 3–38
include hierarchy for, 9–8
including in source list, 3–12
line termination style, 3–54
list of, generating from command
line, 12–4
listing in Project Window, 2–9
metrics about, 10–25
moving between windows of, 2–13
printing, 6–9, 9–29
replacing text in, 6–7
save options, 3–54
saving, 6–5
searching, 6–6
shape for, in graphical views, 9–16
status icons for, 6–3
Sources tab, Project Configuration
dialog, 3–7, 3–10
spaces
converting tabs to, 3–55
Spacing menu, under Options menu, 9–25
special member functions, 3–29
Sql menu, under Options menu, 9–25
SQL parsing, 3–43
square brackets. See brackets
src.jar file, 3–40
Understand 2.0 User Guide and Reference Manual
src.zip file, 3–40
standard library
alternate for, 3–24
specifying location of, 3–24
Standard tab, Project Configuration
dialog, 3–44
Start menu, Understand commands in, 2–5
static functions, displayed in graphical
views, 9–25
Static menu, under Options menu, 9–25
status icons, Source Editor, 6–3
status line
location of, 2–4
Source Editor, 6–3
%STI_INIDIR% environment variable, 2–6
strict complexity, and/or operators included
in, 3–24
structure reports, list of, 10–14
Structure view, 9–3
structure views, 2–16
list of, 9–3, 9–12
See also graphical views
Styles category, Options dialog, 3–56
subdirectories, adding to project, 3–12
subprograms
declaration structure for, 9–12
listing in Project Window, 2–9
subtraction sign (-) collapsing tree in Info
Browser, 4–9
support contact information, 1–3
SVG format, saving graphical views as, 9–28
symbolic links, adding files with, 3–12
Sync box, 4–10, 9–7
"System Design in Ada" (Buhr), 9–12
system include files, 3–31
T
Tab size field, 3–55
tabs
converting to spaces, 3–55
Task View, 9–12
tasks
Index–15
declaration structure for, 9–12
With relationships for, 9–12
technical support contact information, 1–3
text
copying to clipboard, 6–4
generating reports as, 2–17, 10–2
report output format, 10–4
saving Command Results log as, 3–60
selecting, 6–4
size of, in graphical views, 9–25
viewing reports as, 10–5
Text menu, under Options menu, 9–26
title page, 3–20, 10–2
Toolbar
location of, 2–4
Tools menu
Run a Command option, 11–2
TrackBack tool, 8–23
Treat system includes as user includes
field, 3–31
Truncate Long text option, 9–26
Truncate Medium text option, 9–26
Truncate Short text option, 9–26
truncation at column, 3–37, 3–41
Turbo Pascal, 3–43
Type Cross-Reference report, 10–11
Type Declaration View, 9–12
Type Derived From View, 9–8
Type Tree View, 9–8
types
displayed in graphical views, 9–26
information about, 9–14
listing in Project Window, 2–9
reports about, 10–11, 10–21
shape for, in graphical views, 9–16
types derived from, 9–8
Types menu, under Options menu, 9–26
Typetext menu, under Options menu, 9–26
U
.udb file extension, 2–3
und command, 12–2
Index–16
-add option, 12–3
adding files to project, 12–3
-analyze option, 12–4
analyzing a project, 12–4
creating new project, 12–3
-db option, 12–3
-help option, 12–2
options in latest version, 12–2
undefined macros, 3–34
Understand
Ada versions supported, 1–3
C/C++ versions supported, 1–3
compared to compiler, 3–2
contact information, 1–3
features of, 1–2
FORTRAN versions supported, 1–3
Java versions supported, 1–3
multiple users for, 2–6
server mode, 1–4
starting, 2–5
user interface, parts of, 2–4
UNIX
line termination style, for reports, 10–4
line termination style, for saving source
files, 3–55
printing graphical views, 6–9, 9–30
symbolic links used when adding
files, 3–12
unknown entities, displaying in graphical
views, 9–26
Unknown menu, under Options menu, 9–26
Unmerge Selected button, 8–14
unresolved entities
displaying in graphical views, 9–27
Unresolved menu, under Options
menu, 9–27
unresolved variables, listed in Entity
Locator, 2–10
Unused Object report, 10–20
Unused Program Unit report, 10–21
Unused Type report, 10–21
Update Information Browser field, 3–58
Understand 2.0 User Guide and Reference Manual
Index
uperl command, 2–4
Use Entity Fullnames field, 3–20
Used By View, 9–8
Usedby menu, 9–27
user interface, parts of, 2–4
users, multiple, initialization files for, 2–6
Uses menu, 9–27
Uses View, 9–8
V
variables
displayed in graphical views, 9–27
instance, 10–24
listed in Entity Locator, 2–10
metrics about, 10–24
reports about, 10–10, 10–20
shape for, in graphical views, 9–16
unresolved, 2–10
See also objects
Variables menu, under Options menu, 9–27
.vcp file extension, 3–21
.vcw file extension, 3–21
Version field, 3–36
versions of Ada supported, 1–3
versions of C/C++ supported, 1–3
versions of FORTRAN supported, 1–3
versions of Java supported, 1–3
vertical bar (|) in regular expressions, 5–7
Vertical Non-Crossing layout option, 9–22
views
types of, 9–9
See also declaration views; graphical
views; hierarchical views
Visio files, saving graphical views as, 9–29
Visit Source field, 3–58
W
PERL interface, 10–22
When files are modified externally field, 3–55
white background, 3–57
white file icon, 6–3
whitespace, 8–13
whole words, 8–12
wild cards
in filters for Entity Locator, 5–6
%WINDIR% environment variable, 2–6
Window menu, 5–11
Next option, 2–13
Previous option, 2–13
windows
creating with Ctrl+right-click, 2–7, 4–2
drag-and-drop used to add files to
project, 3–12
reusing for graphical views, 9–7
reusing with right-click, 2–7, 4–2
Windows CE project, 3–21
Windows CE workspace, 3–21
Windows folder, 2–6
With Bys menu, under Options menu, 9–27
With Tree report, 10–16
With View, 9–8
WithBy View, 9–8
Withs menu, under Options menu, 9–27
Withs Not Needed report, 10–21
WMC (Count of Methods) metric, 10–24
workspace file, 3–21
Wrap Long text option, 9–26
Wrap Medium text option, 9–26
Wrap Short text option, 9–26
Write generation time on report field, 3–20
Y
yellow "M" project file icon, 6–3
yellow project file icon, 6–3
Watch this directory box, 3–12
watched directories, 3–14
websites
metrics, list of, 10–18, 10–23
O’Reilly and Associates, 5–7
Understand 2.0 User Guide and Reference Manual
Index–17
Index–18
Understand 2.0 User Guide and Reference Manual