1
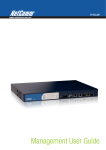
MSC1000G
Management Switch Card
User’s Guide
Version 3.71
2/2007
Edition 1
www.zyxel.com
About This User's Guide
About This User's Guide
Intended Audience
This manual is intended for administrators who want to configure the IES-5000 using the web
configurator or command line interface. You should have at least a basic knowledge of TCP/IP
networking concepts and topology.
Related Documentation
• IES-5000 Series User’s Guide
Refer to the IES-5000 Series User’s Guide for directions on installation, connections,
maintenance, hardware trouble shooting and safety warnings.
• ALC1248G, ALC1272G, SLC1248G and VLC1224G Line Card User’s Guides
These user’s guides introduce the DSL line cards and give detailed information about the
line card features and hardware.
• ZyXEL Web Site
Please refer to www.zyxel.com for additional support documentation and product
certifications.
User Guide Feedback
Help us help you. Send all User Guide-related comments, questions or suggestions for
improvement to the following address, or use e-mail instead. Thank you!
The Technical Writing Team,
ZyXEL Communications Corp.,
6 Innovation Road II,
Science-Based Industrial Park,
Hsinchu, 300, Taiwan.
E-mail: [email protected]
MSC1000G User’s Guide
3
Document Conventions
Document Conventions
Warnings and Notes
These are how warnings and notes are shown in this User’s Guide.
1
"
Warnings tell you about things that could harm you or your device.
Notes tell you other important information (for example, other things you may
need to configure or helpful tips) or recommendations.
Syntax Conventions
• The MSC1000G Management Switch Card may be referred to as the “MSC1000G”, the
“MSC”, the “management switch card”, the “device”, the “switch” or the “system” in this
User’s Guide.
• "IES-5000" refers to the IES-5000 series system including the main and splitter chassis
and their cards. The IES-5000 may be referred to as the “IES”.
• The ALC1248G-51 for ADSL over POTS (Annex A) Line Card may be referred to as the
“ALC1248G”, the “ALC” or the “line card” in this User’s Guide.
• The ALC1248G-53 for ADSL over ISDN (Annex B) Line Card may be referred to as the
“ALC1248G”, the “ALC” or the “line card” in this User’s Guide.
• The ALC1272G ADSL2/2+ Line Card may be referred to as the “ALC1272G”, the
“ALC” or the “line card” in this User’s Guide.
• The SLC1248G SHDSL Line Card may be referred to as the “SLC1248G”, the “SLC” or
the “line card” in this User’s Guide.
• The VLC1224G VDSL Line Card may be referred to as the “VLC1224G”, the “VLC” or
the “line card” in this User’s Guide.
• Product labels, screen names, field labels and field choices are all in bold font.
• A key stroke is denoted by square brackets and uppercase text, for example, [ENTER]
means the “enter” or “return” key on your keyboard.
• “Enter” means for you to type one or more characters and then press the [ENTER] key.
“Select” or “choose” means for you to use one of the predefined choices.
• A right angle bracket ( > ) within a screen name denotes a mouse click. For example,
Maintenance > Log > Log Setting means you first click Maintenance in the navigation
panel, then the Log sub menu and finally the Log Setting tab to get to that screen.
• Units of measurement may denote the “metric” value or the “scientific” value. For
example, “k” for kilo may denote “1000” or “1024”, “M” for mega may denote “1000000”
or “1048576” and so on.
4
MSC1000G User’s Guide
Document Conventions
Icons Used in Figures
Figures in this User’s Guide may use the following generic icons. The IES-5000 icon is not an
exact representation of your device.
IES-5000
Computer
Notebook computer
Server
Telephone
Switch
Router
MSC1000G User’s Guide
5
Safety Warnings
Safety Warnings
1
For your safety, be sure to read and follow all warning notices and instructions.
• Do NOT use this product near water, for example, in a wet basement or near a swimming
pool.
• Do NOT expose your device to dampness, dust or corrosive liquids.
• Do NOT store things on the device.
• Do NOT install, use, or service this device during a thunderstorm. There is a remote risk
of electric shock from lightning.
• Connect ONLY suitable accessories to the device.
• ONLY qualified service personnel should service or disassemble this device.
• Make sure to connect the cables to the correct ports.
• Place connecting cables carefully so that no one will step on them or stumble over them.
• Always disconnect all cables from this device before servicing or disassembling.
• Do not use the device outside, and make sure all the connections are indoors. There is a
remote risk of electric shock from lightning.
• CAUTION: RISK OF EXPLOSION IF BATTERY (on the motherboard) IS REPLACED
BY AN INCORRECT TYPE. DISPOSE OF USED BATTERIES ACCORDING TO THE
INSTRUCTIONS. Dispose them at the applicable collection point for the recycling of
electrical and electronic equipment. For detailed information about recycling of this
product, please contact your local city office, your household waste disposal service or the
store where you purchased the product.
• Do NOT obstruct the device ventilation slots, as insufficient airflow may harm your
device.
• Use only No. 26 AWG (American Wire Gauge) or larger telecommunication line cord.
• Warning! To avoid risk of electric shock, remove only one card at a time and do not place
fingers or objects inside the chassis. Cover empty slots with slot covers.
• Refer also to the IES-5000 Series User’s Guide and follow all safety warnings for
installation, connections, maintenance and hardware trouble shooting.
This product is recyclable. Dispose of it properly.
6
MSC1000G User’s Guide
Safety Warnings
MSC1000G User’s Guide
7
Safety Warnings
8
MSC1000G User’s Guide
Contents Overview
Contents Overview
Introduction ............................................................................................................................ 45
Getting to Know Your MSC1000G ............................................................................................. 47
Hardware Connections .............................................................................................................. 57
Web Configurator ................................................................................................................... 63
The Web Configurator ............................................................................................................... 65
Initial Setup Example ................................................................................................................. 75
Access Control List Screens ...................................................................................................... 81
Alarm Screens ..........................................................................................................................111
Cluster Screens ....................................................................................................................... 125
Diagnostic Screens .................................................................................................................. 131
Maintenance Screens .............................................................................................................. 137
Multicast Screens .................................................................................................................... 141
DSL Port Setup Screens ......................................................................................................... 151
Profile Screens ........................................................................................................................ 205
Statistics Screens .................................................................................................................... 227
Switch Screens ........................................................................................................................ 263
Sys Screens ............................................................................................................................ 287
VLAN Screens ......................................................................................................................... 299
Commands ........................................................................................................................... 307
Commands .............................................................................................................................. 309
acl Commands ......................................................................................................................... 347
alarm Commands .................................................................................................................... 371
clear Commands ..................................................................................................................... 379
cluster Commands ................................................................................................................... 381
config Commands .................................................................................................................... 389
diagnostic Commands ............................................................................................................. 391
ip Commands .......................................................................................................................... 395
lcman Commands .................................................................................................................... 401
multicast Commands ............................................................................................................... 407
port Commands ....................................................................................................................... 419
profile Commands ................................................................................................................... 467
show Commands ..................................................................................................................... 499
switch Commands ................................................................................................................... 527
sys Commands ........................................................................................................................ 557
vlan Commands ....................................................................................................................... 581
MSC1000G User’s Guide
9
Contents Overview
Firmware and Configuration File Maintenance ........................................................................ 585
Troubleshooting ................................................................................................................... 591
Troubleshooting ....................................................................................................................... 593
Appendices and Index ......................................................................................................... 601
10
MSC1000G User’s Guide
Table of Contents
Table of Contents
About This User's Guide .......................................................................................................... 3
Document Conventions............................................................................................................ 4
Safety Warnings........................................................................................................................ 6
Contents Overview ................................................................................................................... 9
Table of Contents.................................................................................................................... 11
List of Figures ......................................................................................................................... 33
List of Tables........................................................................................................................... 39
Part I: Introduction................................................................................. 45
Chapter 1
Getting to Know Your MSC1000G ......................................................................................... 47
1.1 Introduction .......................................................................................................................... 47
1.1.1 Applications ................................................................................................................ 47
1.2 Ways to Manage the MSC1000G ........................................................................................ 49
1.3 Good Habits for Managing the MSC1000G ......................................................................... 49
1.4 Features .............................................................................................................................. 50
Chapter 2
Hardware Connections........................................................................................................... 57
2.1 Front Panel .......................................................................................................................... 57
2.2 LEDs .................................................................................................................................... 57
2.3 Ports and Connections ........................................................................................................ 58
2.3.1 Alarm Connections ..................................................................................................... 59
2.3.2 Gigabit Ethernet Interfaces ........................................................................................ 60
2.3.3 SFP Slots .................................................................................................................. 60
Part II: Web Configurator ...................................................................... 63
Chapter 3
The Web Configurator ............................................................................................................ 65
MSC1000G User’s Guide
11
Table of Contents
3.1 Web Configurator Introduction ............................................................................................. 65
3.2 System Login ....................................................................................................................... 65
3.3 Navigation Panel ................................................................................................................. 66
3.4 Saving Your Configuration .................................................................................................. 71
3.5 Logging Out of the Web Configurator .................................................................................. 72
3.6 System Info ......................................................................................................................... 72
3.6.1 Card Status Details .................................................................................................... 73
Chapter 4
Initial Setup Example.............................................................................................................. 75
4.1 Initial Configuration .............................................................................................................. 75
Chapter 5
Access Control List Screens ................................................................................................. 81
5.1 DHCP Relay Overview ........................................................................................................ 81
5.1.1 DHCP Relay Agent Information ................................................................................. 81
5.1.2 DHCP Relay Agent Circuit ID and Remote ID Sub-option Formats ........................... 81
5.2 DHCP Relay Screen ............................................................................................................ 82
5.2.1 Example: DHCP Relay for Two VLANs ...................................................................... 84
5.3 DHCP Snooping .................................................................................................................. 85
5.3.1 Anti-IP Address Spoofing ........................................................................................... 86
5.4 DHCP Snooping Configuration ............................................................................................ 86
5.4.1 DHCP Snooping Slot Screen ..................................................................................... 88
5.4.2 Example: DHCP Snooping ......................................................................................... 89
5.5 Downstream Broadcast Screen ........................................................................................... 90
5.5.1 Downstream Broadcast Slot Screen .......................................................................... 92
5.6 MAC Count Screen .............................................................................................................. 93
5.6.1 MAC Count Slot Screen ............................................................................................. 95
5.7 MAC Filter Screen .............................................................................................................. 96
5.7.1 MAC Filter Slot Screen ............................................................................................... 98
5.8 OUI Filter ............................................................................................................................. 99
5.8.1 OUI Filter Slot Screen .............................................................................................. 100
5.9 Packet Filter Screen ......................................................................................................... 101
5.10 Packet Filter Slot Screen ................................................................................................. 104
5.11 IEEE 802.1x ..................................................................................................................... 105
5.11.1 RADIUS .................................................................................................................. 105
5.12 802.1X PNAC Port Setup Screen ................................................................................... 105
5.12.1 802.1X PNAC Slot Screen ..................................................................................... 107
5.13 RADIUS Screen ............................................................................................................... 109
Chapter 6
Alarm Screens....................................................................................................................... 111
6.1 Current Alarm Screen .........................................................................................................111
12
MSC1000G User’s Guide
Table of Contents
6.2 History Alarm Screen .........................................................................................................112
6.3 Alarm Port Setup Screen ...................................................................................................114
6.3.1 Alarm Port Setup Slot Screen ...................................................................................116
6.4 Alarm Severity Assignment Screen ...................................................................................117
6.5 Alarm Descriptions .............................................................................................................119
6.6 Alarm Clear Screen .......................................................................................................... 122
Chapter 7
Cluster Screens..................................................................................................................... 125
7.1 Cluster Management Status Overview ............................................................................. 125
7.2 Cluster Management Status ............................................................................................. 126
7.3 Cluster Management Configuration ................................................................................. 127
7.3.1 Cluster Member Management ................................................................................. 129
Chapter 8
Diagnostic Screens............................................................................................................... 131
8.1 LDM Test Screen (DELT) ................................................................................................... 131
8.1.1 Loop Diagnostics Test Parameters .......................................................................... 132
8.2 F5 Loopback Screen ......................................................................................................... 133
8.3 IP Ping Screen ................................................................................................................... 133
8.4 Trace Route Screen .......................................................................................................... 134
Chapter 9
Maintenance Screens ........................................................................................................... 137
9.1 Configuration Backup Screen .......................................................................................... 137
9.2 Configuration Restore Screen .......................................................................................... 137
9.3 Configuration Reset Screen .............................................................................................. 138
9.4 Firmware Upgrade Screen ................................................................................................ 139
9.5 Reboot Screen ................................................................................................................... 140
Chapter 10
Multicast Screens ................................................................................................................. 141
10.1 IGMP Introduction ............................................................................................................ 141
10.1.1 IP Multicast Addresses ........................................................................................... 141
10.1.2 IGMP Snooping ...................................................................................................... 141
10.1.3 IGMP Proxy ............................................................................................................ 141
10.1.4 IGMP Snooping and Proxy Note ............................................................................ 142
10.2 IGMP Setup Screen ........................................................................................................ 143
10.3 IGMP Filtering .................................................................................................................. 144
10.4 IGMP Filter Setup Screen ................................................................................................ 144
10.4.1 IGMP Filter Setup Slot Screen ............................................................................... 146
10.5 Static Multicast ................................................................................................................. 147
10.6 Static Multicast Screen .................................................................................................... 147
MSC1000G User’s Guide
13
Table of Contents
10.6.1 Static Multicast Slot Screen .................................................................................... 148
Chapter 11
DSL Port Setup Screens....................................................................................................... 151
11.1 ADSL Standards Overview .............................................................................................. 151
11.2 VDSL Parameters ............................................................................................................ 151
11.2.1 Frequency Band Plan ............................................................................................. 151
11.2.2 Upstream Power Back Off ...................................................................................... 152
11.2.3 RFI (Radio Frequency Interference) ....................................................................... 152
11.3 Downstream and Upstream ............................................................................................. 152
11.4 DSL Profiles ..................................................................................................................... 152
11.5 Alarm Profiles ................................................................................................................... 152
11.6 Default Settings ................................................................................................................ 153
11.7 ADSL Port Setup .............................................................................................................. 153
11.7.1 ADSL Port Setup Line Card Screen ....................................................................... 155
11.7.2 ADSL Port Setup Advanced ................................................................................... 157
11.7.3 Option Mask Screen ............................................................................................... 160
11.8 VDSL Port Setup .............................................................................................................. 161
11.8.1 VDSL Port Setup Line Card Screen ....................................................................... 163
11.8.2 VDSL Port Setup Advanced ................................................................................... 164
11.8.3 Transparent LAN Service (TLS) ............................................................................ 166
11.8.4 TLS Network Example ............................................................................................ 167
11.8.5 VDSL VLAN Setup ................................................................................................. 168
11.9 SHDSL Port Setup ........................................................................................................... 170
11.9.1 SHDSL Port Setup Line Card Screen .................................................................... 173
11.9.2 SHDSL Port Setup Advanced ................................................................................ 174
11.10 Permanent Virtual Circuits ............................................................................................. 176
11.10.1 LLC ....................................................................................................................... 176
11.10.2 VC Mux ................................................................................................................. 176
11.10.3 ATM Profiles ......................................................................................................... 177
11.11 PVC Setup Screen ......................................................................................................... 177
11.11.1 PVC Setup Slot Screen ........................................................................................ 179
11.11.2 PVC Setup VLAN Screen ..................................................................................... 180
11.12 Priority-based PVCs ....................................................................................................... 181
11.13 PPVC Setup Screen ...................................................................................................... 181
11.13.1 PPVC Setup Slot Screen ...................................................................................... 184
11.13.2 PPVC Setup VLAN Screen .................................................................................. 185
11.14 IP Bridge Overview ........................................................................................................ 186
11.14.1 Upstream and Downstream Traffic ....................................................................... 188
11.14.2 IP Bridge Settings ................................................................................................. 189
11.14.3 IP Bridge Configuration ........................................................................................ 190
11.15 IPB ARP Proxy Screen .................................................................................................. 190
11.16 IPB Domain Screen ....................................................................................................... 191
14
MSC1000G User’s Guide
Table of Contents
11.17 IPB Edgerouter Screen .................................................................................................. 193
11.18 IPB Interface Screen ...................................................................................................... 195
11.19 IPBPVC Screen ............................................................................................................. 196
11.19.1 IPBPVC VLAN Setup Screen ............................................................................... 199
11.19.2 IPBPVC by Slot Screen ........................................................................................ 200
11.20 IPB Route Screen .......................................................................................................... 201
11.21 Port Copy Screen ........................................................................................................... 203
Chapter 12
Profile Screens...................................................................................................................... 205
12.1 Profiles Overview ............................................................................................................. 205
12.2 Interleave Delay ............................................................................................................... 205
12.2.1 Fast Mode .............................................................................................................. 205
12.3 Configured Versus Actual ADSL Rates ........................................................................... 206
12.4 ADSL Profile Screen ........................................................................................................ 206
12.5 VDSL Profile Setup .......................................................................................................... 209
12.6 Configured Versus Actual SHDSL Rates ..........................................................................211
12.7 N-wire Mode .................................................................................................................... 212
12.8 SHDSL Profile Screen ..................................................................................................... 212
12.9 ATM QoS ......................................................................................................................... 214
12.10 Traffic Shaping ............................................................................................................... 214
12.10.1 ATM Traffic Classes ............................................................................................. 214
12.10.2 Traffic Parameters ................................................................................................ 215
12.11 ATM Profile Screen ........................................................................................................ 216
12.12 Alarm ADSL Profile Screen ........................................................................................... 218
12.13 Alarm VDSL Profile Screen ........................................................................................... 220
12.14 Alarm SHDSL Profile Screen ......................................................................................... 222
12.15 IGMP Filter Profile Screen ............................................................................................. 223
Chapter 13
Statistics Screens ................................................................................................................. 227
13.1 ARP Table ........................................................................................................................ 227
13.1.1 How ARP Works .................................................................................................... 227
13.2 ARP Table Screen .......................................................................................................... 227
13.3 DHCP .............................................................................................................................. 228
13.4 MAC Table ....................................................................................................................... 229
13.5 MAC Table Screen .......................................................................................................... 230
13.6 IGMP Status Screen ........................................................................................................ 231
13.6.1 IGMP Port Statistics
............................................................................................. 232
13.7 IP Bridge ARP Proxy Screen ........................................................................................... 233
13.8 IP Bridge Interfaces Screen ............................................................................................. 234
13.9 IP Bridge Routes Screen ................................................................................................. 235
13.10 Online Users Screen .................................................................................................... 236
MSC1000G User’s Guide
15
Table of Contents
13.11 Port Statistics ................................................................................................................. 236
13.11.1 Ethernet Port Statistics ......................................................................................... 237
13.11.2 Detailed Ethernet Port Statistics .......................................................................... 238
13.11.3 RMON Statistics .................................................................................................. 240
13.11.4 Line Card Statistics ............................................................................................... 243
13.12 Dot3ad ........................................................................................................................... 254
13.13 VLAN Statistics .............................................................................................................. 255
13.13.1 VLAN Port Statistics ............................................................................................. 256
13.14 MSTP Statistics ............................................................................................................. 256
13.14.1 MSTP CIST Statistics ........................................................................................... 256
13.14.2 MSTP CIST Statistics: Port Details ...................................................................... 258
13.14.3 MSTP MSTI Statistics .......................................................................................... 260
13.15 IP Statistics .................................................................................................................... 261
Chapter 14
Switch Screens ..................................................................................................................... 263
14.1 Ethernet Port Trunking ..................................................................................................... 263
14.2 Dynamic Link Aggregation ............................................................................................... 263
14.3 Link Aggregation ID ........................................................................................................ 264
14.4 Queuing Overview ........................................................................................................... 264
14.4.1 Strict Priority Queuing (SPQ) ................................................................................. 265
14.4.2 Weighted Round Robin Scheduling (WRR) ........................................................... 265
14.5 Switch Setup General Screen ......................................................................................... 265
14.6 Switch Setup Dot3ad Screen ........................................................................................... 266
14.7 Switch Setup QSchedule Screen .................................................................................... 268
14.8 Switch Setup Isolation Screen ......................................................................................... 268
14.9 Spanning Tree Protocols ................................................................................................. 270
14.9.1 STP and RSTP ....................................................................................................... 270
14.9.2 Multiple STP ........................................................................................................... 272
14.10 MSTP Setup .................................................................................................................. 274
14.10.1 MSTP Bridge Settings .......................................................................................... 274
14.10.2 MSTP Port Settings .............................................................................................. 277
14.10.3 MSTP Configuration Example .............................................................................. 278
14.11 Switch Port ..................................................................................................................... 280
14.11.1 Uplink and Subtending Modes ............................................................................. 280
14.11.2 Flow Control ......................................................................................................... 281
14.11.3 Port VLAN Trunking .............................................................................................. 281
14.11.4 Bandwidth Control ................................................................................................ 281
14.11.5 Broadcast Storm Control ...................................................................................... 282
14.12 Switch Port Setup Port Screen ...................................................................................... 282
14.13 Switch Port Setup 802.1P/1Q Screen ........................................................................... 283
14.14 Switch Port Setup Bandwidth Screen ............................................................................ 284
14.15 Switch Port Setup Broadcast Screen ............................................................................ 285
16
MSC1000G User’s Guide
Table of Contents
Chapter 15
Sys Screens........................................................................................................................... 287
15.1 SNMP .............................................................................................................................. 287
15.1.1 Supported MIBs ..................................................................................................... 288
15.2 SNMP Screen .................................................................................................................. 288
15.3 Service Access Control Screen ....................................................................................... 290
15.3.1 Secured Client Screen ........................................................................................... 291
15.4 General Setup ................................................................................................................. 292
15.5 IP Setup ........................................................................................................................... 293
15.6 Syslog Screen ................................................................................................................. 294
15.7 User Account Screen ....................................................................................................... 295
15.8 RADIUS Service Types ................................................................................................... 297
15.9 TACAS+ ........................................................................................................................... 297
15.10 User Account Authentication Screen ............................................................................. 297
Chapter 16
VLAN Screens ....................................................................................................................... 299
16.1 VLAN Introduction ........................................................................................................... 299
16.2 IEEE 802.1Q Tagged VLAN
......................................................................................... 299
16.2.1 Forwarding Tagged and Untagged Frames ........................................................... 300
16.3 Automatic VLAN Registration .......................................................................................... 300
16.3.1 GARP .................................................................................................................... 300
16.3.2 GVRP ..................................................................................................................... 301
16.4 Tagged Frames Forwarding Example .............................................................................. 301
16.5 Untagged Frames Forwarding Example .......................................................................... 301
16.6 VLAN Setup Screen ........................................................................................................ 302
16.7 VLAN Port Setting Screen ............................................................................................... 303
16.8 VLAN Port Setting Slot Screen ........................................................................................ 304
16.9 VLAN Port Setting Slot Detail Screen .............................................................................. 305
Part III: Commands .............................................................................. 307
Chapter 17
Commands ............................................................................................................................ 309
17.1 Commands Introduction .................................................................................................. 309
17.2 Command Conventions .................................................................................................. 309
17.3 Getting Help ..................................................................................................................... 310
17.3.1 List of Available Commands ................................................................................... 310
17.3.2 Detailed Command Information ............................................................................. 310
17.4 Common Command Notation ...........................................................................................311
17.5 Command Privilege Levels ...............................................................................................311
MSC1000G User’s Guide
17
Table of Contents
17.6 Saving Your Configuration ............................................................................................... 312
17.7 Commands Summary ...................................................................................................... 312
17.7.1 acl Commands ....................................................................................................... 312
17.7.2 alarm Commands ................................................................................................... 317
17.7.3 clear Commands .................................................................................................... 318
17.7.4 cluster Commands ................................................................................................. 319
17.7.5 config Commands .................................................................................................. 319
17.7.6 diagnostic Commands ............................................................................................ 320
17.7.7 ip Commands ......................................................................................................... 320
17.7.8 lcman Commands .................................................................................................. 321
17.7.9 multicast Commands .............................................................................................. 321
17.7.10 port Commands .................................................................................................... 323
17.7.11 profile Commands ................................................................................................ 330
17.7.12 show Commands ................................................................................................. 336
17.7.13 switch Commands ................................................................................................ 338
17.7.14 sys Commands .................................................................................................... 342
17.7.15 vlan Commands ................................................................................................... 344
Chapter 18
acl Commands ...................................................................................................................... 347
18.1 acl Commands Summary ................................................................................................ 347
18.2 acl dhcp relay82 Commands .......................................................................................... 351
18.2.1 acl dhcprelay82 clearinfo Command ..................................................................... 351
18.2.2 acl dhcprelay82 enable Command ......................................................................... 351
18.2.3 acl dhcprelay82 info Command ............................................................................. 352
18.2.4 acl dhcprelay82 relaymode Command .................................................................. 352
18.2.5 acl dhcprelay82 server active Command .............................................................. 353
18.2.6 acl dhcprelay82 server delete Command .............................................................. 353
18.2.7 acl dhcprelay82 server set Command ................................................................... 354
18.2.8 acl dhcprelay82 set Command .............................................................................. 354
18.2.9 acl dhcprelay82 show Command .......................................................................... 354
18.3 DHCP Relay Option 82 (Agent Information) Sub-option 2 (Remote ID) .......................... 355
18.3.1 Option 82 Sub-option 2 Enable Command ............................................................ 355
18.3.2 Option 82 Sub-option 2 Disable Command ............................................................ 355
18.3.3 Option 82 Sub-option 2 Set Command .................................................................. 355
18.4 acl dhcpsnoop Commands ............................................................................................. 356
18.4.1 acl dhcpsnoop disable Command ......................................................................... 356
18.4.2 acl dhcpsnoop enable Command .......................................................................... 356
18.4.3 acl dhcpsnoop flush Command ............................................................................. 356
18.4.4 acl dhcpsnoop pool set Command ........................................................................ 357
18.4.5 acl dhcpsnoop pool delete Command ................................................................... 357
18.4.6 acl dhcpsnoop show Command ............................................................................ 357
18.5 acl dot1x Commands ....................................................................................................... 357
18
MSC1000G User’s Guide
Table of Contents
18.5.1 acl dot1x disable Command ................................................................................... 358
18.5.2 acl dot1x enable Command ................................................................................... 358
18.5.3 acl dot1x port control Command ............................................................................ 358
18.5.4 acl dot1x port disable Command ............................................................................ 358
18.5.5 acl dot1x port enable Command ............................................................................ 358
18.5.6 acl dot1x port period Command ............................................................................. 358
18.5.7 acl dot1x port reauth Command ............................................................................. 359
18.5.8 acl dot1x port show Command ............................................................................... 359
18.5.9 acl dot1x radius ip Command ................................................................................. 359
18.5.10 acl dot1x radius port Command ........................................................................... 360
18.5.11 acl dot1x radius secret Command ........................................................................ 360
18.5.12 acl dot1x show Command .................................................................................... 360
18.6 acl maccount Commands ................................................................................................ 360
18.6.1 acl maccount disable Command ........................................................................... 361
18.6.2 acl maccount enable Command ............................................................................. 361
18.6.3 acl maccount set Command ................................................................................... 361
18.6.4 acl maccount show Command ............................................................................... 362
18.7 acl macfilter Commands .................................................................................................. 362
18.7.1 acl macfilter delete Command ................................................................................ 362
18.7.2 acl macfilter disable Command .............................................................................. 363
18.7.3 acl macfilter enable Command ............................................................................... 363
18.7.4 acl macfilter mode Command ................................................................................ 363
18.7.5 acl macfilter set Command ..................................................................................... 363
18.7.6 acl macfilter show Command ................................................................................. 364
18.8 acl ouifilter Commands .................................................................................................... 364
18.8.1 acl ouifilter disable Command ............................................................................... 364
18.8.2 acl ouifilter enable Command ................................................................................ 365
18.8.3 acl ouifilter mode Command ................................................................................. 365
18.8.4 acl ouifilter set Command ...................................................................................... 365
18.8.5 acl ouifilter show Command .................................................................................. 365
18.9 acl pktfilter Commands .................................................................................................... 366
18.9.1 acl pktfilter set Command ....................................................................................... 366
18.9.2 acl pktfilter show Command ................................................................................... 367
18.10 PPPoE Agent Information .............................................................................................. 367
18.10.1 acl pppoeagent clearinfo Command .................................................................... 367
18.10.2 acl pppoeagent enable Command ....................................................................... 368
18.10.3 acl pppoeagent delete Command ........................................................................ 368
18.10.4 acl pppoeagent disable Command ....................................................................... 368
18.10.5 acl pppoeagent info Command ............................................................................ 368
18.10.6 acl pppoeagent set Command ............................................................................. 369
18.10.7 acl pppoeagent show Command .......................................................................... 369
18.11 acl rule Commands ....................................................................................................... 369
18.11.1 acl rule delete Command .................................................................................... 369
MSC1000G User’s Guide
19
Table of Contents
18.11.2 acl rule set Command ......................................................................................... 370
18.11.3 acl rule show Command ...................................................................................... 370
Chapter 19
alarm Commands.................................................................................................................. 371
19.1 alarm Commands Summary ............................................................................................ 371
19.2 General alarm Command Parameters ............................................................................. 372
19.3 alarm Commands ............................................................................................................ 373
19.3.1 alarm clear Command ............................................................................................ 373
19.3.2 alarm cutoff Command ........................................................................................... 373
19.3.3 alarm edit Command .............................................................................................. 373
19.3.4 alarm history clear Command ................................................................................ 373
19.3.5 alarm history show Command ................................................................................ 374
19.3.6 alarm port set Command ........................................................................................ 374
19.3.7 alarm port show Command .................................................................................... 375
19.3.8 alarm show Command ........................................................................................... 375
19.3.9 alarm tablelist Command ....................................................................................... 376
19.3.10 alarm xedit Command .......................................................................................... 377
Chapter 20
clear Commands ................................................................................................................... 379
20.1 clear Commands Summary ............................................................................................. 379
20.2 clear Command Example ................................................................................................ 380
Chapter 21
cluster Commands................................................................................................................ 381
21.1 cluster commands Summary ........................................................................................... 381
21.1.1 cluster disable Command ....................................................................................... 381
21.1.2 cluster enable manager Command ........................................................................ 382
21.1.3 cluster enable member Command ......................................................................... 382
21.1.4 cluster login Command .......................................................................................... 382
21.1.5 cluster member candidate show Command ........................................................... 383
21.1.6 cluster member candidate flush Command ............................................................ 383
21.1.7 cluster member delete Command .......................................................................... 383
21.1.8 cluster member set Command ............................................................................... 383
21.1.9 cluster member show Command ........................................................................... 384
21.1.10 cluster show Command ........................................................................................ 384
21.1.11 cluster vlan Command .......................................................................................... 385
21.2 Cluster Member Firmware and Configuration File Management ..................................... 386
Chapter 22
config Commands................................................................................................................. 389
22.1 config Commands Summary ........................................................................................... 389
20
MSC1000G User’s Guide
Table of Contents
22.1.1 config default Command ........................................................................................ 389
22.1.2 config save Command ........................................................................................... 389
22.1.3 config show Command ........................................................................................... 390
Chapter 23
diagnostic Commands ......................................................................................................... 391
23.1 diagnostic Commands Summary ..................................................................................... 391
23.2 diagnostic Commands ..................................................................................................... 392
23.2.1 diagnostic ldm show Command ............................................................................ 392
23.2.2 diagnostic ldm test Command ................................................................................ 393
23.2.3 diagnostic loopback f5 Command .......................................................................... 393
23.2.4 diagnostic selt show Command ............................................................................ 394
23.2.5 diagnostic selt test Command ................................................................................ 394
Chapter 24
ip Commands ........................................................................................................................ 395
24.1 ip Commands Summary .................................................................................................. 395
24.2 ip Commands .................................................................................................................. 396
24.2.1 ip arp flush Command ............................................................................................ 396
24.2.2 ip arp show Command ........................................................................................... 396
24.2.3 ip gateway Command ............................................................................................ 396
24.2.4 ip ping Command ................................................................................................... 397
24.2.5 ip route delete Command ....................................................................................... 397
24.2.6 ip route set Command ............................................................................................ 398
24.2.7 ip route show Command ........................................................................................ 398
24.2.8 ip show Command ................................................................................................. 398
24.2.9 ip set Command ..................................................................................................... 399
24.2.10 ip tracert Command .............................................................................................. 400
Chapter 25
lcman Commands .................................................................................................................401
25.1 lcman Commands Summary ........................................................................................... 401
25.2 lcman Commands ............................................................................................................ 401
25.2.1 lcman enable Command ........................................................................................ 401
25.2.2 lcman disable Command ........................................................................................ 402
25.2.3 lcman reset Command ........................................................................................... 402
25.2.4 lcman show Command ........................................................................................... 402
Chapter 26
multicast Commands............................................................................................................ 407
26.1 multicast Commands Summary ....................................................................................... 407
26.2 multicast bandwidth Commands ..................................................................................... 408
26.2.1 multicast bandwidth default Command ................................................................. 409
MSC1000G User’s Guide
21
Table of Contents
26.2.2 multicast bandwidth delete Command .................................................................. 409
26.2.3 multicast bandwidth set Command ....................................................................... 409
26.3 multicast bandwidth port Commands .............................................................................. 410
26.3.1 multicast bandwidth port disable Command ......................................................... 410
26.3.2 multicast bandwidth port enable Command .......................................................... 410
26.3.3 multicast bandwidth port set Command ................................................................ 410
26.3.4 multicast bandwidth port show Command ............................................................ 410
26.4 multicast igmp Commands .............................................................................................. 410
26.4.1 multicast igmp disable Command ..........................................................................411
26.4.2 multicast igmp enable Command ...........................................................................411
26.4.3 multicast igmp qryvid delete Command .................................................................411
26.4.4 multicast igmp qryvid set Command ......................................................................411
26.4.5 multicast igmp qryvid show Command ................................................................... 412
26.4.6 multicast igmp show Command ............................................................................. 412
26.5 IGMP Count Limit ............................................................................................................ 412
26.6 multicast igmpcount Commands ..................................................................................... 412
26.6.1 multicast igmpcount disable Command ................................................................. 412
26.6.2 multicast igmpcount enable Command .................................................................. 413
26.6.3 multicast igmpcount set Command ........................................................................ 413
26.6.4 multicast igmpcount show Command .................................................................... 413
26.7 multicast igmpfilter Commands ........................................................................................ 414
26.7.1 multicast igmpfilter set Command .......................................................................... 414
26.7.2 multicast igmpfilter show Command ...................................................................... 414
26.8 multicast mvlan Commands ........................................................................................... 415
26.8.1 multicast mvlan delete Command ......................................................................... 415
26.8.2 multicast mvlan disable Command
...................................................................... 415
26.8.3 multicast mvlan enable Command ........................................................................ 415
26.8.4 multicast mvlan group delete Command ............................................................... 416
26.8.5 multicast mvlan group set Command .................................................................... 416
26.8.6 multicast mvlan group delete Command ............................................................... 416
26.8.7 multicast mvlan name Command .......................................................................... 416
26.8.8 multicast mvlan set Command .............................................................................. 416
26.8.9 multicast mvlan show Command .......................................................................... 417
26.9 multicast smcast Commands .......................................................................................... 417
26.9.1 multicast smcast delete Command ....................................................................... 417
26.9.2 multicast smcast set Command ............................................................................ 418
26.9.3 multicast smcast show Command ......................................................................... 418
Chapter 27
port Commands .................................................................................................................... 419
27.1 port Commands Summary ............................................................................................... 419
27.2 port Commands ............................................................................................................... 426
27.3 port adsl Commands ....................................................................................................... 426
22
MSC1000G User’s Guide
Table of Contents
27.3.1 port adsl alarmprof Command ................................................................................ 426
27.3.2 port adsl annexl disable Command ........................................................................ 426
27.3.3 port adsl annexl enable Command ........................................................................ 426
27.3.4 port adsl annexm disable Command ...................................................................... 427
27.3.5 port adsl annexm enable Command ...................................................................... 427
27.3.6 port adsl annexi disable Command ........................................................................ 427
27.3.7 port adsl annexi enable Command ........................................................................ 428
27.3.8 port adsl dscarrier0 Command ............................................................................... 428
27.3.9 port adsl dscarrier1 Command ............................................................................... 429
27.3.10 port adsl inpmin Command .................................................................................. 429
27.3.11 port adsl optionmask Command ........................................................................... 430
27.3.12 port adsl pmm disable Command ........................................................................ 431
27.3.13 port adsl pmm enable Command ......................................................................... 432
27.3.14 port adsl power Command ................................................................................... 432
27.3.15 port adsl psd maximum Command ..................................................................... 433
27.3.16 port adsl set Command ........................................................................................ 433
27.3.17 port adsl uscarrier Command ............................................................................... 434
27.4 port copy Command ........................................................................................................ 435
27.5 port disable Command .................................................................................................... 435
27.6 port enable Command ..................................................................................................... 436
27.7 IP Bridge Commands ...................................................................................................... 436
27.8 IP Bridge ARP Proxy Commands .................................................................................... 436
27.8.1 port ipbpvc arpproxy age Command ...................................................................... 436
27.8.2 port ipbpvc arpproxy flush Command .................................................................... 437
27.8.3 port ipbpvc arpproxy show Command .................................................................... 437
27.9 IP Bridge PVC Commands .............................................................................................. 437
27.10 port ipbpvc delete Command ......................................................................................... 438
27.11 IP Bridge Domain Commands ....................................................................................... 438
27.11.1 port ipbpvc domain delete Command ................................................................... 438
27.11.2 port ipbpvc domain dhcpvlan enable Command .................................................. 439
27.11.3 port ipbpvc domain dhcpvlan disable Command .................................................. 439
27.11.4 port ipbpvc domain set Command ........................................................................ 439
27.11.5 port ipbpvc domain show Command .................................................................... 440
27.11.6 port ipbpvc domain vlan Command ...................................................................... 440
27.12 IP Bridge Edge Router Commands ............................................................................... 441
27.12.1 port ipbpvc edgerouter delete Command ............................................................. 441
27.12.2 port ipbpvc edgerouter set Command .................................................................. 441
27.12.3 port ipbpvc edgerouter show Command .............................................................. 442
27.13 IP Bridge Interface Commands ..................................................................................... 442
27.13.1 port ipbpvc interface delete Command ................................................................ 442
27.13.2 port ipbpvc interface set Command ..................................................................... 443
27.13.3 port ipbpvc interface show Command .................................................................. 443
27.14 IP Bridge Routing Table Commands ............................................................................. 444
MSC1000G User’s Guide
23
Table of Contents
27.14.1 port ipbpvc route delete Command ...................................................................... 444
27.14.2 port ipbpvc route set Command ........................................................................... 445
27.14.3 adsl ipbpvc route show Command ....................................................................... 446
27.14.4 port ipbpvc set Command .................................................................................... 446
27.14.5 port ipbpvc show Command ................................................................................. 447
27.14.6 port ipbpvc vlan Command .................................................................................. 448
27.15 port name Command ..................................................................................................... 448
27.16 PPPoA to PPPoE (PAE) Translation ............................................................................. 449
27.16.1 port paepvc delete Command ............................................................................. 449
27.16.2 port paepvc set Command .................................................................................. 449
27.16.3 port paepvc show Command .............................................................................. 450
27.17 port ppvc Commands .................................................................................................... 450
27.17.1 port ppvc delete Command .................................................................................. 450
27.17.2 port ppvc member delete Command .................................................................... 451
27.17.3 port ppvc member set Command ......................................................................... 451
27.17.4 port ppvc set Command ....................................................................................... 452
27.17.5 port ppvc show Command ................................................................................... 452
27.17.6 port ppvc vlan Command ..................................................................................... 453
27.18 port pvc Commands ...................................................................................................... 454
27.18.1 port pvc delete Command .................................................................................... 454
27.18.2 port pvc mvlan disable Command ....................................................................... 454
27.18.3 port pvc mvlan enable Command ....................................................................... 454
27.18.4 port pvc set Command ......................................................................................... 455
27.18.5 port pvc show Command ..................................................................................... 455
27.18.6 port pvc usratelimit enable Command .................................................................. 456
27.18.7 port pvc usratelimit disable Command ................................................................. 456
27.18.8 port pvc usratelimit set Command ........................................................................ 456
27.18.9 port pvc usratelimit show Command .................................................................... 456
27.18.10 port pvc vlan Command ..................................................................................... 457
27.19 port shdsl Commands .................................................................................................... 457
27.19.1 port shdsl alarmprof Command ............................................................................ 458
27.19.2 port shdsl pbo Command ..................................................................................... 458
27.19.3 port shdsl pmms Command ................................................................................. 459
27.19.4 port shdsl set Command ...................................................................................... 460
27.20 port show Command ..................................................................................................... 460
27.21 port tel Command .......................................................................................................... 461
27.22 Transparent LAN Service (TLS) ................................................................................... 461
27.22.1 port tlspvc delete Command ............................................................................... 462
27.22.2 port tlspvc set Command .................................................................................... 462
27.22.3 port tlspvc show Command ................................................................................. 462
27.23 port vdsl Commands ...................................................................................................... 462
27.23.1 port vdsl alarmprof Command .............................................................................. 463
27.23.2 port vdsl frametype Command ............................................................................. 463
24
MSC1000G User’s Guide
Table of Contents
27.23.3 port vdsl frequencyplan Command ...................................................................... 463
27.23.4 port vdsl priority Command .................................................................................. 463
27.23.5 port vdsl pvid Command ...................................................................................... 463
27.23.6 port vdsl rfiband Command .................................................................................. 463
27.23.7 port vdsl rficustom Commands ............................................................................. 464
27.23.8 port vdsl set Command ........................................................................................ 465
27.23.9 port vdsl tls Commands ........................................................................................ 465
27.23.10 port vdsl upbo Commands ................................................................................. 465
27.23.11 port vdsl vlan Commands ................................................................................... 466
Chapter 28
profile Commands ................................................................................................................ 467
28.1 Profiles Overview ............................................................................................................. 467
28.2 profile Commands Summary ........................................................................................... 467
28.3 profile acl Commands ...................................................................................................... 474
28.3.1 profile acl delete Command .................................................................................. 474
28.3.2 profile acl map Command ..................................................................................... 474
28.3.3 profile acl set Command ....................................................................................... 475
28.3.4 profile acl show Command .................................................................................... 477
28.4 profile adsl Commands .................................................................................................... 477
28.4.1 profile adsl set Command ...................................................................................... 477
28.4.2 profile adsl map Command .................................................................................... 479
28.4.3 profile adsl delete Command ................................................................................. 479
28.4.4 profile adsl show Command ................................................................................... 480
28.5 profile alarmadsl Commands ........................................................................................... 480
28.5.1 profile alarmadsl show Command .......................................................................... 480
28.5.2 profile alarmadsl set Command ............................................................................. 481
28.5.3 profile alarmadsl delete Command ........................................................................ 482
28.5.4 profile alarmadsl map Command ........................................................................... 483
28.6 profile alarmshdsl Commands ......................................................................................... 483
28.6.1 profile alarmshdsl show Command ........................................................................ 483
28.6.2 profile alarmshdsl set Command ............................................................................ 484
28.6.3 profile alarmshdsl delete Command ....................................................................... 484
28.6.4 profile alarmshdsl map Command ......................................................................... 485
28.7 profile alarmvdsl Commands ........................................................................................... 485
28.7.1 profile alarmvdsl show Command .......................................................................... 485
28.7.2 profile alarmvdsl set Command .............................................................................. 486
28.7.3 profile alarmvdsl delete Command ......................................................................... 487
28.7.4 profile alarmvdsl map Command ........................................................................... 487
28.8 profile atm Commands .................................................................................................... 487
28.8.1 profile atm show Command ................................................................................... 487
28.8.2 profile atm set Command ...................................................................................... 488
28.8.3 profile atm delete Command .................................................................................. 489
MSC1000G User’s Guide
25
Table of Contents
28.8.4 profile atm map Command ..................................................................................... 490
28.9 Profile Server ................................................................................................................... 490
28.10 profile profsvr Commands ............................................................................................. 490
28.10.1 profile profsvr show Command ............................................................................ 490
28.10.2 profile profsvr mode Command ............................................................................ 490
28.10.3 profile profsvr clientlist set Command .................................................................. 491
28.10.4 profile profsvr clientlist delete Command ............................................................. 491
28.10.5 profile profsvr clientlist show Command ............................................................... 491
28.10.6 profile profsvr serverset Command ...................................................................... 492
28.10.7 profile profsvr sync Command ............................................................................. 492
28.11 profile shdsl Commands ................................................................................................ 492
28.11.1 profile shdsl set Command ................................................................................... 492
28.11.2 profile shdsl map Command ................................................................................. 494
28.11.3 profile shdsl delete Command .............................................................................. 494
28.11.4 profile shdsl show Command ............................................................................... 494
28.12 profile vdsl commands ................................................................................................... 495
28.12.1 profile vdsl delete command ................................................................................ 495
28.12.2 profile vdsl map command ................................................................................... 495
28.12.3 profile vdsl set command ..................................................................................... 496
28.12.4 profile vdsl show Command ................................................................................. 497
Chapter 29
show Commands .................................................................................................................. 499
29.1 show Commands Overview ............................................................................................. 499
29.2 show Commands Summary ............................................................................................ 499
29.3 show Commands ............................................................................................................. 501
29.3.1 show adsl Commands ........................................................................................... 501
29.3.2 show arp Command ............................................................................................... 504
29.3.3 show atm Command .............................................................................................. 504
29.3.4 show dot3ad Command ......................................................................................... 505
29.3.5 show dhcp counter Command .............................................................................. 506
29.3.6 show dhcp snoop Command ................................................................................. 506
29.3.7 show enet Command ............................................................................................. 506
29.3.8 show igmp Commands ........................................................................................... 509
29.3.9 show ip Command ................................................................................................. 510
29.3.10 show ipbpvc arpproxy Command ..........................................................................511
29.3.11 show ipbpvc interface Command ..........................................................................511
29.3.12 show ipbpvc route Command ............................................................................... 512
29.3.13 show lineinfo Command ....................................................................................... 513
29.3.14 show lineperf Command ...................................................................................... 514
29.3.15 show linerate Command ...................................................................................... 515
29.3.16 show linestat Command ....................................................................................... 515
29.3.17 show mac Command ........................................................................................... 516
26
MSC1000G User’s Guide
Table of Contents
29.3.18 show monitor Command ...................................................................................... 516
29.3.19 show mstp Command ......................................................................................... 517
29.3.20 show packet Command ........................................................................................ 518
29.3.21 show paepvc counter Command ......................................................................... 519
29.3.22 show paepvc session Command ........................................................................ 520
29.3.23 show performance Command .............................................................................. 520
29.3.24 show rmon Command .......................................................................................... 522
29.3.25 show sys Command ............................................................................................ 524
29.3.26 show user Command ........................................................................................... 524
29.3.27 show vlan Command ............................................................................................ 525
Chapter 30
switch Commands ................................................................................................................ 527
30.1 switch Commands Overview ........................................................................................... 527
30.2 switch Commands Summary ........................................................................................... 527
30.3 switch bandwidth Commands .......................................................................................... 530
30.3.1 switch bandwidth disable Command ...................................................................... 530
30.3.2 switch bandwidth enable Command ...................................................................... 531
30.3.3 switch bandwidth set Command ............................................................................ 531
30.3.4 switch bandwidth show Command ......................................................................... 532
30.4 switch bcasctrl Commands .............................................................................................. 532
30.4.1 switch bcastctrl threshold Command .................................................................... 532
30.4.2 switch bcastctrl show Command ........................................................................... 533
30.5 switch dot3ad Commands ............................................................................................... 533
30.5.1 switch dot3ad lacp priority Command ................................................................... 533
30.5.2 switch dot3ad lacp timeout Command .................................................................. 534
30.5.3 switch dot3ad lacp show Command ...................................................................... 534
30.5.4 switch dot3ad enable Command ........................................................................... 534
30.5.5 switch dot3ad disable Command .......................................................................... 535
30.5.6 switch dot3ad show Command ............................................................................. 535
30.6 switch garptimer Commands .......................................................................................... 535
30.6.1 switch garptimer show Command .......................................................................... 536
30.6.2 switch garptimer join Command ............................................................................. 536
30.6.3 switch garptimer leave Command .......................................................................... 536
30.6.4 switch garptimer leaveall Command ...................................................................... 537
30.6.5 switch garptimer set Command .............................................................................. 537
30.7 switch isolation Commands ............................................................................................ 538
30.7.1 switch isolation show Command ............................................................................ 538
30.7.2 switch isolation enable Command .......................................................................... 538
30.7.3 switch isolation disable Command ......................................................................... 538
30.7.4 switch isolation vlan delete Command ................................................................... 539
30.7.5 switch isolation vlan set Command ........................................................................ 539
30.8 switch mstp Commands .................................................................................................. 540
MSC1000G User’s Guide
27
Table of Contents
30.8.1 switch mstp cfgname Command ........................................................................... 540
30.8.2 switch mstp disable Command ............................................................................. 540
30.8.3 switch mstp enable Command .............................................................................. 540
30.8.4 switch mstp fwdelay Command ............................................................................. 540
30.8.5 switch mstp hellotime Command .......................................................................... 541
30.8.6 switch mstp maxage Command ............................................................................ 541
30.8.7 switch mstp maxhops Command .......................................................................... 541
30.8.8 switch mstp priority Command .............................................................................. 541
30.8.9 switch mstp revision Command ............................................................................ 542
30.8.10 switch mstp show Command .............................................................................. 542
30.8.11 switch mstp version Command ........................................................................... 543
30.8.12 switch mstp vlanmap Command ......................................................................... 543
30.9 switch port Commands .................................................................................................... 544
30.9.1 switch port disable Command ................................................................................ 544
30.9.2 DSCP Overview ..................................................................................................... 544
30.9.3 switch port dscp Commands ................................................................................. 545
30.9.4 switch port enable Command ................................................................................. 546
30.9.5 switch port flowctrl disable Command .................................................................... 546
30.9.6 switch port flowctrl enable Command .................................................................... 547
30.9.7 switch port frametype Command ........................................................................... 547
30.9.8 switch port gvrp Commands .................................................................................. 547
30.9.9 switch port mode Command .................................................................................. 548
30.9.10 switch port mstp Commands ............................................................................... 548
30.9.11 switch port name Command ................................................................................. 550
30.9.12 switch port priority Command ............................................................................... 551
30.9.13 switch port pvid Command ................................................................................... 551
30.9.14 switch port show Command ................................................................................. 551
30.9.15 switch port speed Command ................................................................................ 552
30.10 switch port vlantrunk Commands .................................................................................. 552
30.10.1 switch port vlantrunk enable Command ............................................................... 552
30.10.2 switch port vlantrunk disable Command .............................................................. 553
30.11 switch qschedule Commands ........................................................................................ 553
30.11.1 switch qschedule set Command ........................................................................... 553
30.11.2 switch qschedule show Command ....................................................................... 554
30.12 switch queuemap Commands ....................................................................................... 554
30.12.1 switch queuemap set Command .......................................................................... 554
30.12.2 switch queuemap show Command ...................................................................... 555
Chapter 31
sys Commands ..................................................................................................................... 557
31.1 sys Commands Overview ................................................................................................ 557
31.2 sys Commands Summary ............................................................................................... 557
31.3 sys Commands ................................................................................................................ 560
28
MSC1000G User’s Guide
Table of Contents
31.3.1 sys version Command ............................................................................................ 560
31.3.2 sys baud set Command ......................................................................................... 560
31.3.3 sys baud show Command ...................................................................................... 561
31.3.4 sys client set Command ......................................................................................... 561
31.3.5 sys client enable Command ................................................................................... 561
31.3.6 sys client disable Command .................................................................................. 561
31.3.7 sys client show Command ..................................................................................... 562
31.3.8 sys time show Command ....................................................................................... 562
31.3.9 sys time set Command ........................................................................................... 562
31.3.10 sys date show Command ..................................................................................... 562
31.3.11 sys date set Command ......................................................................................... 563
31.3.12 sys timeserver show Command ........................................................................... 563
31.3.13 sys timeserver set Command ............................................................................... 563
31.3.14 sys timeserver sync Command ............................................................................ 564
31.3.15 sys info chassis Command .................................................................................. 564
31.3.16 sys info contact Command ................................................................................... 565
31.3.17 sys info frame Command ..................................................................................... 565
31.3.18 sys info hostname Command ............................................................................... 565
31.3.19 sys info location Command .................................................................................. 566
31.3.20 sys info show Command ...................................................................................... 566
31.3.21 sys monitor set Command ................................................................................... 566
31.3.22 sys monitor show command ................................................................................. 568
31.3.23 sys multilogin enable Command .......................................................................... 569
31.3.24 sys multilogin disable Command .......................................................................... 569
31.3.25 sys multilogin show Command ............................................................................. 570
31.3.26 sys reboot Command ........................................................................................... 570
31.3.27 sys server port Command .................................................................................... 571
31.3.28 sys server disable Command ............................................................................... 571
31.3.29 sys server enable Command ............................................................................... 571
31.3.30 sys server show Command .................................................................................. 571
31.4 sys snmp Commands ...................................................................................................... 572
31.4.1 sys snmp getcommunity Command ....................................................................... 572
31.4.2 sys snmp setcommunity Command ....................................................................... 572
31.4.3 sys snmp trapcommunity Command ...................................................................... 572
31.4.4 sys snmp trapdst Command .................................................................................. 573
31.4.5 sys snmp show Command ..................................................................................... 573
31.4.6 sys snmp user Command ..................................................................................... 574
31.4.7 sys snmp version Command ................................................................................. 575
31.5 sys syslog Commands ..................................................................................................... 575
31.5.1 sys syslog server Command .................................................................................. 575
31.5.2 sys syslog enable Command ................................................................................. 575
31.5.3 sys syslog disable Command ................................................................................. 576
31.5.4 sys syslog show Command .................................................................................... 576
MSC1000G User’s Guide
29
Table of Contents
31.6 sys user Commands ........................................................................................................ 576
31.6.1 sys user auth Command ........................................................................................ 576
31.6.2 sys user server Command ..................................................................................... 577
31.6.3 sys user set Command .......................................................................................... 578
31.6.4 sys user delete Command ..................................................................................... 578
31.6.5 sys user enable Command .................................................................................... 579
31.6.6 sys user disable Command .................................................................................... 579
31.6.7 sys user show Command ....................................................................................... 579
31.6.8 sys user online Command ...................................................................................... 580
Chapter 32
vlan Commands .................................................................................................................... 581
32.1 vlan Commands Overview ............................................................................................... 581
32.2 vlan Commands Summary .............................................................................................. 581
32.3 vlan Commands ............................................................................................................... 581
32.3.1 vlan delete Command ............................................................................................ 581
32.3.2 vlan disable Command ........................................................................................... 582
32.3.3 vlan enable Command ........................................................................................... 582
32.3.4 vlan name Command ............................................................................................. 582
32.3.5 vlan set Command ................................................................................................. 582
32.3.6 vlan show Command .............................................................................................. 583
Chapter 33
Firmware and Configuration File Maintenance .................................................................. 585
33.1 Firmware and Configuration File Maintenance Overview ................................................ 585
33.2 Filename Conventions ..................................................................................................... 585
33.3 Editable Configuration File .............................................................................................. 586
33.3.1 Editable Configuration File Backup ....................................................................... 586
33.3.2 Edit Configuration File ............................................................................................ 587
33.3.3 Editable Configuration File Upload ......................................................................... 587
33.4 Firmware File Upgrade ................................................................................................... 588
33.5 Configuration File Upgrade .............................................................................................. 589
Part IV: Troubleshooting ..................................................................... 591
Chapter 34
Troubleshooting.................................................................................................................... 593
34.1 Power, Hardware Connections, and LEDs ...................................................................... 593
34.2 MSC1000G Access and Login ........................................................................................ 594
34.3 Data Transmission ........................................................................................................... 597
34.4 Redundant Management Switch Cards ........................................................................... 597
30
MSC1000G User’s Guide
Table of Contents
34.5 Management Lockout ...................................................................................................... 597
34.6 A Line Card Does Not Become Active ............................................................................. 598
34.7 Resetting the Defaults ..................................................................................................... 598
34.7.1 Resetting the Defaults Via CLI Command ............................................................. 598
34.7.2 Recovering the Firmware ....................................................................................... 599
Part V: Appendices and Index ............................................................ 601
Appendix A Product Specifications....................................................................................... 603
Appendix B Virtual Circuit Topology ..................................................................................... 613
Appendix C Legal Information .............................................................................................. 615
Appendix D Customer Support............................................................................................. 619
Index....................................................................................................................................... 623
MSC1000G User’s Guide
31
Table of Contents
32
MSC1000G User’s Guide
List of Figures
List of Figures
Figure 1 MTU Application ...................................................................................................................... 48
Figure 2 Central Office Application ....................................................................................................... 49
Figure 3 MSC1000G Front Panel .......................................................................................................... 57
Figure 4 ALARM Connector Pin Layout ................................................................................................ 59
Figure 5 Transceiver Installation ............................................................................................................ 61
Figure 6 Installed Transceiver ............................................................................................................... 61
Figure 7 Opening the Transceiver Latch ............................................................................................... 61
Figure 8 Removing the Transceiver ...................................................................................................... 62
Figure 9 Web Configurator: Login ......................................................................................................... 65
Figure 10 Web Configurator: First Screen .............................................................................................. 66
Figure 11 Web Configurator: Save Configuration on Logout ................................................................. 72
Figure 12 Web Configurator: Logout Screen ......................................................................................... 72
Figure 13 Web Configurator: Home Screen (System Info) .................................................................... 72
Figure 14 System Info: Slot ................................................................................................................... 74
Figure 15 Sys: IP Setup Menu ................................................................................................................ 75
Figure 16 IP Setup .................................................................................................................................. 76
Figure 17 DHCP Relay ........................................................................................................................... 77
Figure 18 VLAN Setup Example ............................................................................................................. 77
Figure 19 Port Setup Menu .................................................................................................................... 78
Figure 20 PVC Setup .............................................................................................................................. 78
Figure 21 Deleting PVCs ........................................................................................................................ 79
Figure 22 Adding a New Channel ........................................................................................................... 79
Figure 23 Copying the PVC .................................................................................................................... 80
Figure 24 Select Ports ............................................................................................................................ 80
Figure 25 DHCP Relay Agent Circuit ID Sub-option Format .................................................................. 82
Figure 26 DHCP Relay Agent Remote ID Sub-option Format ................................................................ 82
Figure 27 DHCP Relay ........................................................................................................................... 83
Figure 28 DHCP Relay Network Example ............................................................................................. 85
Figure 29 DHCP Relay: Configuration Example .................................................................................... 85
Figure 30 DHCP Snooping Network Example ....................................................................................... 86
Figure 31 DHCP Snooping .................................................................................................................... 87
Figure 32 DHCP Snooping: Slot ............................................................................................................ 89
Figure 33 DHCP Snooping: Computer A Example ................................................................................ 90
Figure 34 DHCP Snooping: Computer B Example ................................................................................ 90
Figure 35 Downstream Broadcast ......................................................................................................... 91
Figure 36 Downstream Broadcast: Slot ................................................................................................. 93
Figure 37 MAC Count ............................................................................................................................. 94
Figure 38 MAC Count: Slot .................................................................................................................... 96
MSC1000G User’s Guide
33
List of Figures
Figure 39 MAC Filter .............................................................................................................................. 97
Figure 40 MAC Filter: Slot ..................................................................................................................... 98
Figure 41 OUI Filter ............................................................................................................................... 99
Figure 42 OUI Filter: Slot ..................................................................................................................... 101
Figure 43 Packet Filter ......................................................................................................................... 102
Figure 44 Packet Filter: Slot ................................................................................................................ 104
Figure 45 RADIUS Server .................................................................................................................... 105
Figure 46 802.1X PNAC: Port Setup ................................................................................................... 106
Figure 47 802.1X PNAC: Port Setup: Slot ........................................................................................... 108
Figure 48 802.1X PNAC: RADIUS ...................................................................................................... 109
Figure 49 Current Alarm: All .................................................................................................................111
Figure 50 History Alarm: All ..................................................................................................................113
Figure 51 Alarm Port Setup ..................................................................................................................114
Figure 52 Alarm Port Setup: Slot ..........................................................................................................116
Figure 53 Alarm Severity Assignment: DSL .........................................................................................118
Figure 54 Alarm Clear ......................................................................................................................... 123
Figure 55 Clustering Application Example ........................................................................................... 125
Figure 56 Cluster: Status ..................................................................................................................... 126
Figure 57 Cluster: Configuration ......................................................................................................... 127
Figure 58 Cluster Member Web Configurator Screen ......................................................................... 129
Figure 59 LDM Test ............................................................................................................................. 131
Figure 60 F5 Loopback ........................................................................................................................ 133
Figure 61 IP Ping ................................................................................................................................. 134
Figure 62 Trace Route ......................................................................................................................... 134
Figure 63 Configuration Backup .......................................................................................................... 137
Figure 64 Configuration Restore ......................................................................................................... 138
Figure 65 Configuration Reset ............................................................................................................. 138
Figure 66 Confirm Restore Factory Default Settings ........................................................................... 138
Figure 67 Restart After Load Factory Defaults .................................................................................... 139
Figure 68 FW Upgrade ........................................................................................................................ 139
Figure 69 Reboot ................................................................................................................................. 140
Figure 70 Confirm Restart ................................................................................................................... 140
Figure 71 Rebooting ............................................................................................................................. 140
Figure 72 IGMP Proxy Network Example ............................................................................................. 142
Figure 73 IGMP Setup ......................................................................................................................... 143
Figure 74 IGMP Filter Setup ................................................................................................................. 144
Figure 75 Copy ..................................................................................................................................... 145
Figure 76 IGMP Filter Setup: Slot ........................................................................................................ 146
Figure 77 IGMP Filter Copy .................................................................................................................. 146
Figure 78 Static Multicast .................................................................................................................... 147
Figure 79 Static Multicast Slot ............................................................................................................. 149
Figure 80 ADSL Port Setup .................................................................................................................. 153
Figure 81 Copy ..................................................................................................................................... 154
34
MSC1000G User’s Guide
List of Figures
Figure 82 ADSL Port Setup: Line Card ................................................................................................ 155
Figure 83 Copy .................................................................................................................................... 156
Figure 84 ADSL Port Setup: Advanced ............................................................................................... 157
Figure 85 ADSL Port Setup: Advanced: Option Mask ......................................................................... 160
Figure 86 VDSL Port Setup ................................................................................................................. 161
Figure 87 Copy ..................................................................................................................................... 162
Figure 88 VDSL Port Setup: Line Card ............................................................................................... 163
Figure 89 Copy ..................................................................................................................................... 164
Figure 90 VDSL Port Setup: Advanced ............................................................................................... 165
Figure 91 VLAN Stacking Example ..................................................................................................... 167
Figure 92 VDSL VLAN Setup .............................................................................................................. 169
Figure 93 SHDSL Port Setup ............................................................................................................... 171
Figure 94 Copy ..................................................................................................................................... 172
Figure 95 SHDSL Port Setup: Line Card .............................................................................................. 173
Figure 96 Copy .................................................................................................................................... 173
Figure 97 SHDSL Port Setup: Advanced ............................................................................................ 174
Figure 98 PVC Setup ............................................................................................................................ 177
Figure 99 Copy .................................................................................................................................... 178
Figure 100 PVC Setup: Slot ................................................................................................................. 179
Figure 101 PVC Setup: VLAN .............................................................................................................. 180
Figure 102 PPVC Setup ....................................................................................................................... 182
Figure 103 Copy ................................................................................................................................... 183
Figure 104 PPVC Setup: Slot ............................................................................................................... 184
Figure 105 PPVC Setup: VLAN ............................................................................................................ 185
Figure 106 IP Bridge: Traditional vs. IP-aware DSLAM ........................................................................ 187
Figure 107 IP Bridge: Upstream Traffic Example ................................................................................. 188
Figure 108 IPB ARP Proxy ................................................................................................................... 191
Figure 109 IPB Domain ........................................................................................................................ 192
Figure 110 IPB Edgerouter ................................................................................................................... 194
Figure 111 IPB Interface ....................................................................................................................... 195
Figure 112 IPBPVC .............................................................................................................................. 197
Figure 113 IPBPVC: VLAN Setup ......................................................................................................... 199
Figure 114 IPBPVC: Slot ...................................................................................................................... 200
Figure 115 IPB Route ........................................................................................................................... 201
Figure 116 Port Copy ............................................................................................................................ 203
Figure 117 Copy ................................................................................................................................... 204
Figure 118 ADSL Profile ...................................................................................................................... 207
Figure 119 VDSL Profile ...................................................................................................................... 210
Figure 120 SHDSL Profile .................................................................................................................... 212
Figure 121 PCR, SCR and MBS in Traffic Shaping .............................................................................. 215
Figure 122 TAT, CDVT and BT in Traffic Shaping ................................................................................ 216
Figure 123 ATM Profile ......................................................................................................................... 217
Figure 124 Alarm ADSL Profile ............................................................................................................ 219
MSC1000G User’s Guide
35
List of Figures
Figure 125 Alarm VDSL Profile ........................................................................................................... 221
Figure 126 Alarm SHDSL Profile .......................................................................................................... 222
Figure 127 IGMP Filter Profile .............................................................................................................. 224
Figure 128 ARP Table ......................................................................................................................... 228
Figure 129 DHCP Statistics ................................................................................................................ 228
Figure 130 MAC Table Filtering Flowchart .......................................................................................... 230
Figure 131 MAC Table ......................................................................................................................... 230
Figure 132 IGMP Status ...................................................................................................................... 231
Figure 133 IGMP Status: Port .............................................................................................................. 232
Figure 134 IP Bridge ARP Proxy .......................................................................................................... 233
Figure 135 IP Bridge Interfaces ............................................................................................................ 234
Figure 136 IP Bridge Routes ................................................................................................................ 235
Figure 137 Online Users ...................................................................................................................... 236
Figure 138 Port Statistics ..................................................................................................................... 237
Figure 139 Port Statistics: ENET ......................................................................................................... 238
Figure 140 Port Statistics: ENET Details ............................................................................................. 239
Figure 141 Port Statistics: ENET: RMON ............................................................................................ 241
Figure 142 Port Statistics: ENET: RMON History ................................................................................ 242
Figure 143 Port Statistics: ENET: RMON History: Detail ..................................................................... 243
Figure 144 Port Statistics: Line Card ................................................................................................... 244
Figure 145 Port Statistics: Line Card: Packet Counter ........................................................................ 245
Figure 146 Port Statistics: Line Card: Cell Counter ............................................................................. 246
Figure 147 Port Statistics: Line Card: Line Detail ................................................................................ 247
Figure 148 Port Statistics: Line Card: Line Performance: Current ....................................................... 250
Figure 149 Port Statistics: Line Card: Line Performance: 15Min ......................................................... 252
Figure 150 Port Statistics: Line Card: Line Performance: 1day ........................................................... 254
Figure 151 Dot3ad ............................................................................................................................... 254
Figure 152 VLAN Statistics .................................................................................................................. 255
Figure 153 VLAN: Port Status ............................................................................................................. 256
Figure 154 MSTP Statistics: CIST ....................................................................................................... 257
Figure 155 MSTP Statistics: CIST: Port Details ................................................................................... 259
Figure 156 MSTP Statistics: MSTI ....................................................................................................... 260
Figure 157 IP Statistics ........................................................................................................................ 261
Figure 158 Switch Setup General ......................................................................................................... 265
Figure 159 Switch Setup Dot3ad .......................................................................................................... 267
Figure 160 Switch Setup QSchedule .................................................................................................... 268
Figure 161 Switch Setup Isolation ........................................................................................................ 269
Figure 162 STP Root Ports and Designated Ports ............................................................................... 271
Figure 163 STP/RSTP Network Example ............................................................................................ 272
Figure 164 MSTP Network Example ................................................................................................... 273
Figure 165 MSTIs in Different Regions ............................................................................................... 274
Figure 166 MSTP and Legacy RSTP Network Example ..................................................................... 274
Figure 167 MSTP: Bridge ................................................................................................................... 275
36
MSC1000G User’s Guide
List of Figures
Figure 168 MSTP: Port ........................................................................................................................ 277
Figure 169 MSTP Network Example 2 ................................................................................................ 278
Figure 170 MSTP Configuration Example: Bridge ............................................................................... 279
Figure 171 MSTP Configuration Example: Port .................................................................................. 280
Figure 172 Port VLAN Trunking ........................................................................................................... 281
Figure 173 Switch Port Setup .............................................................................................................. 282
Figure 174 Switch Port Setup: 802.1P/1Q ........................................................................................... 283
Figure 175 Switch Port Setup: Bandwidth ........................................................................................... 284
Figure 176 Switch Port Setup: Broadcast ............................................................................................ 285
Figure 177 SNMP Management Model ................................................................................................ 287
Figure 178 Access Control: SNMP ....................................................................................................... 289
Figure 179 Access Control: Service Access Control ............................................................................ 290
Figure 180 Access Control: Secured Client ......................................................................................... 291
Figure 181 General Setup .................................................................................................................... 292
Figure 182 IP Setup .............................................................................................................................. 294
Figure 183 Unix Syslog ........................................................................................................................ 295
Figure 184 User Account ...................................................................................................................... 296
Figure 185 User Account Authentication .............................................................................................. 297
Figure 186 VLAN Setup ....................................................................................................................... 302
Figure 187 VLAN Port Setting ............................................................................................................. 304
Figure 188 VLAN Port Setting Slot ...................................................................................................... 305
Figure 189 VLAN Port Setting Slot Detail ............................................................................................ 305
Figure 190 FTP Upload to a Cluster Member Example ....................................................................... 386
Figure 191 Mixed PPPoA-to-PPPoE Broadband Network Example ................................................... 449
Figure 192 switch port flowctrl enable Command Example .................................................................. 547
Figure 193 Example Xmodem Upload .................................................................................................. 599
Figure 194 Console Port Pin Layout ......................................................................................................611
Figure 195 ALARM Connector Pin Layout ...........................................................................................611
Figure 196 Virtual Circuit Topology ....................................................................................................... 613
MSC1000G User’s Guide
37
List of Figures
38
MSC1000G User’s Guide
List of Tables
List of Tables
Table 1 Management Switch Card LED Descriptions ............................................................................ 57
Table 2 Front Panel Descriptions ........................................................................................................... 58
Table 3 Navigation Panel Links ............................................................................................................. 66
Table 4 Web Configurator Screen Sub-links Details .............................................................................. 69
Table 5 System Info (Home) .................................................................................................................. 73
Table 6 System Info: Slot ....................................................................................................................... 74
Table 7 DHCP Relay .............................................................................................................................. 83
Table 8 DHCP Snooping ........................................................................................................................ 87
Table 9 DHCP Snooping: Slot ............................................................................................................... 89
Table 10 Downstream Broadcast ........................................................................................................... 91
Table 11 Downstream Broadcast: Slot ................................................................................................... 93
Table 12 MAC Count ............................................................................................................................. 94
Table 13 MAC Count: Slot ..................................................................................................................... 96
Table 14 MAC Filter ............................................................................................................................... 97
Table 15 MAC Filter: Slot ....................................................................................................................... 98
Table 16 OUI Filter ................................................................................................................................. 99
Table 17 DHCP Snooping: Slot ........................................................................................................... 101
Table 18 Packet Filter .......................................................................................................................... 102
Table 19 Packet Filter: Slot .................................................................................................................. 104
Table 20 802.1X PNAC: Port Setup ..................................................................................................... 106
Table 21 802.1X PNAC: Port Setup: Slot ............................................................................................ 108
Table 22 802.1X PNAC: RADIUS ........................................................................................................ 109
Table 23 Current Alarm: All ...................................................................................................................111
Table 24 History Alarm: All ...................................................................................................................113
Table 25 Alarm Port Setup ....................................................................................................................115
Table 26 Alarm Port Setup: Slot ...........................................................................................................117
Table 27 Alarm Severity Assignment: DSL ...........................................................................................118
Table 28 Alarm Descriptions .................................................................................................................119
Table 29 Alarm Clear ........................................................................................................................... 123
Table 30 ZyXEL Cluster Management Specifications .......................................................................... 125
Table 31 Cluster: Status ....................................................................................................................... 126
Table 32 Cluster: Configuration ........................................................................................................... 128
Table 33 Cluster Member Web Configurator Screen ........................................................................... 130
Table 34 LDM Test ............................................................................................................................... 132
Table 35 Loop Diagnostics Test Parameters ....................................................................................... 132
Table 36 F5 Loopback ......................................................................................................................... 133
Table 37 IP Ping .................................................................................................................................. 134
Table 38 Trace Route .......................................................................................................................... 135
MSC1000G User’s Guide
39
List of Tables
Table 39 IGMP Setup .......................................................................................................................... 143
Table 40 IGMP Filter Setup ................................................................................................................. 145
Table 41 IGMP Filter Setup: Slot ......................................................................................................... 146
Table 42 Static Multicast ...................................................................................................................... 147
Table 43 Static Multicast Slot ............................................................................................................... 149
Table 44 ADSL Standards Maximum Transfer Rates .......................................................................... 151
Table 45 ADSL Port Setup ................................................................................................................... 153
Table 46 ADSL Port Setup: Line Card ................................................................................................. 156
Table 47 ADSL Port Setup: Advanced ................................................................................................. 157
Table 48 ADSL Port Setup: Advanced: Option Mask .......................................................................... 160
Table 49 VDSL Port Setup ................................................................................................................... 161
Table 50 VDSL Port Setup: Line Card ................................................................................................. 164
Table 51 VDSL Port Setup: Advanced ................................................................................................. 165
Table 52 Supported VDSL Profiles ...................................................................................................... 166
Table 53 VLAN Tag Format ................................................................................................................. 167
Table 54 Single and Double Tagged 802.1Q Frame Format ............................................................... 168
Table 55 802.1Q Frame ....................................................................................................................... 168
Table 56 VDSL Port Setup: VLAN Setup ............................................................................................. 169
Table 57 SHDSL Port Setup ................................................................................................................ 171
Table 58 SHDSL Port Setup: Line Card .............................................................................................. 173
Table 59 SHDSL Port Setup: Advanced .............................................................................................. 175
Table 60 PVC Setup ............................................................................................................................ 177
Table 61 PVC Setup: Slot .................................................................................................................... 179
Table 62 PVC Setup: VLAN ................................................................................................................. 180
Table 63 PPVC Setup .......................................................................................................................... 182
Table 64 PPVC Setup: Slot .................................................................................................................. 184
Table 65 PPVC Setup: VLAN .............................................................................................................. 185
Table 66 IP Bridge: Layer-2 Header for Upstream Traffic .................................................................... 188
Table 67 IPB ARP Proxy ...................................................................................................................... 191
Table 68 IPB Domain ........................................................................................................................... 192
Table 69 IPB Edgerouter ..................................................................................................................... 194
Table 70 IPB Interface ......................................................................................................................... 195
Table 71 IPBPVC ................................................................................................................................. 197
Table 72 IPBPVC: VLAN Setup ........................................................................................................... 199
Table 73 IPBPVC: Slot ......................................................................................................................... 200
Table 74 IPB Route .............................................................................................................................. 202
Table 75 Port Copy .............................................................................................................................. 203
Table 76 ADSL Profile ......................................................................................................................... 207
Table 77 VDSL Profile ......................................................................................................................... 210
Table 78 SHDSL Profile ....................................................................................................................... 213
Table 79 ATM Profile ........................................................................................................................... 217
Table 80 Alarm ADSL Profile ............................................................................................................... 219
Table 81 Alarm VDSL Profile ............................................................................................................... 221
40
MSC1000G User’s Guide
List of Tables
Table 82 Alarm SHDSL Profile ............................................................................................................ 223
Table 83 IGMP Filter Profile ................................................................................................................. 224
Table 84 ARP Table ............................................................................................................................. 228
Table 85 DHCP Statistics ..................................................................................................................... 229
Table 86 MAC Table ............................................................................................................................ 231
Table 87 IGMP Status .......................................................................................................................... 232
Table 88 IGMP Status: Port ................................................................................................................. 233
Table 89 IP Bridge ARP Proxy ............................................................................................................. 233
Table 90 IP Bridge Interfaces .............................................................................................................. 234
Table 91 IP Bridge Routes ................................................................................................................... 235
Table 92 Online Users ......................................................................................................................... 236
Table 93 Port Statistics ........................................................................................................................ 237
Table 94 Port Statistics: ENET ............................................................................................................. 238
Table 95 Port Statistics: ENET Details ................................................................................................. 239
Table 96 Port Statistics: ENET: RMON ................................................................................................ 241
Table 97 Port Statistics: ENET: RMON History .................................................................................... 243
Table 98 Port Statistics: Line Card ....................................................................................................... 244
Table 99 Port Statistics: Line Card: Packet Counter ............................................................................ 245
Table 100 Port Statistics: Line Card: Cell Counter ............................................................................... 246
Table 101 Port Statistics: Line Card: Line Detail .................................................................................. 247
Table 102 Port Statistics: Line Card: Line Performance: Current ........................................................ 250
Table 103 Port Statistics: Line Card: Line Performance: 15Min .......................................................... 252
Table 104 Dot3ad ................................................................................................................................ 255
Table 105 VLAN Statistics ................................................................................................................... 255
Table 106 VLAN: Port Status ............................................................................................................... 256
Table 107 MSTP Statistics: CIST ......................................................................................................... 257
Table 108 MSTP Statistics: CIST: Port Details .................................................................................... 259
Table 109 MSTP Statistics: MSTI ........................................................................................................ 260
Table 110 IP Statistics .......................................................................................................................... 261
Table 111 Link Aggregation ID: Local Switch ....................................................................................... 264
Table 112 Link Aggregation ID: Peer Switch ....................................................................................... 264
Table 113 Physical Queue Priority ....................................................................................................... 264
Table 114 Switch Setup General ......................................................................................................... 266
Table 115 Switch Setup Dot3ad ........................................................................................................... 267
Table 116 Switch Setup QSchedule .................................................................................................... 268
Table 117 Switch Setup Isolation ......................................................................................................... 269
Table 118 STP Path Costs ................................................................................................................... 270
Table 119 MSTP/RSTP Path Costs ..................................................................................................... 270
Table 120 RSTP and STP Port States ................................................................................................. 271
Table 121 MSTP: Bridge ...................................................................................................................... 275
Table 122 MSTP: Port ......................................................................................................................... 277
Table 123 Switch Port Setup ............................................................................................................... 282
Table 124 Switch Port Setup: 802.1P/1Q ............................................................................................ 283
MSC1000G User’s Guide
41
List of Tables
Table 125 Switch Port Setup: Bandwidth ............................................................................................. 284
Table 126 Switch Port Setup: Broadcast ............................................................................................. 285
Table 127 SNMP Commands .............................................................................................................. 288
Table 128 Access Control: SNMP ....................................................................................................... 289
Table 129 Access Control: Service Access Control ............................................................................. 291
Table 130 Access Control: Secured Client .......................................................................................... 291
Table 131 General Setup ..................................................................................................................... 292
Table 132 IP Setup .............................................................................................................................. 294
Table 133 Unix Syslog ......................................................................................................................... 295
Table 134 User Account ...................................................................................................................... 296
Table 135 Service Type to Privilege Level Mapping ............................................................................ 297
Table 136 User Account Authentication ............................................................................................... 298
Table 137 IEEE 802.1Q VLAN Terminology ........................................................................................ 301
Table 138 VLAN Setup ........................................................................................................................ 302
Table 139 VLAN Port Setting ............................................................................................................... 304
Table 140 VLAN Port Setting Slot ........................................................................................................ 305
Table 141 VLAN Port Setting Slot Detail ............................................................................................. 305
Table 142 Common Command Notation ..............................................................................................311
Table 143 acl Commands .................................................................................................................... 312
Table 144 alarm Commands ................................................................................................................ 317
Table 145 clear Commands ................................................................................................................. 318
Table 146 cluster Commands .............................................................................................................. 319
Table 147 config Commands ............................................................................................................... 319
Table 148 diagnostic Commands ........................................................................................................ 320
Table 149 ip Commands ...................................................................................................................... 320
Table 150 lcman Commands ............................................................................................................... 321
Table 151 multicast Commands .......................................................................................................... 321
Table 152 port Commands .................................................................................................................. 323
Table 153 profile Commands ............................................................................................................... 330
Table 154 show Commands ................................................................................................................ 336
Table 155 switch Commands ............................................................................................................... 338
Table 156 sys Commands ................................................................................................................... 342
Table 157 vlan Commands .................................................................................................................. 345
Table 158 acl Commands .................................................................................................................... 347
Table 159 alarm Commands ................................................................................................................ 371
Table 160 General alarm Command Parameters ................................................................................ 372
Table 161 clear Commands ................................................................................................................. 379
Table 162 cluster Commands .............................................................................................................. 381
Table 163 FTP Upload to a Cluster Member Example ........................................................................ 386
Table 164 config Commands ............................................................................................................... 389
Table 165 diagnostic Commands ........................................................................................................ 391
Table 166 ip Commands ...................................................................................................................... 395
Table 167 lcman Commands ............................................................................................................... 401
42
MSC1000G User’s Guide
List of Tables
Table 168 lcman show Command ....................................................................................................... 403
Table 169 lcman show Command: Detailed Information ..................................................................... 404
Table 170 multicast Commands .......................................................................................................... 407
Table 171 port Commands .................................................................................................................. 419
Table 172 profile Commands ............................................................................................................... 467
Table 173 show Commands ................................................................................................................ 499
Table 174 show atm Command Display .............................................................................................. 505
Table 175 show enet Command Display ............................................................................................. 507
Table 176 IPB ARP Proxy Show Command Output .............................................................................511
Table 177 show lineinfo Command Display ......................................................................................... 513
Table 178 Line Performance Counters ................................................................................................ 514
Table 179 Line Rate Information .......................................................................................................... 515
Table 180 show monitor Command Information .................................................................................. 517
Table 181 show paepvc counter Command Fields .............................................................................. 519
Table 182 show performance curr ....................................................................................................... 521
Table 183 show performance 1day ...................................................................................................... 522
Table 184 switch Commands ............................................................................................................... 527
Table 185 sys Commands ................................................................................................................... 557
Table 186 Multiple Login Overview ...................................................................................................... 569
Table 187 vlan Commands .................................................................................................................. 581
Table 188 File Name Conventions ....................................................................................................... 586
Table 189 Default Settings ................................................................................................................... 603
Table 190 MSC1000G Specifications .................................................................................................. 605
Table 191 IES-5000 Features .............................................................................................................. 606
Table 192 Supported Standards .......................................................................................................... 609
Table 193 Console Port Pin Assignments ............................................................................................611
Table 194 ALARM Connector Pin Assignments ...................................................................................611
MSC1000G User’s Guide
43
List of Tables
44
MSC1000G User’s Guide
P ART I
Introduction
Getting to Know Your MSC1000G (47)
Hardware Connections (57)
45
46
CHAPTER
1
Getting to Know Your
MSC1000G
This chapter introduces the main applications of the MSC1000G. It also introduces the ways
you can manage the MSC1000G.
1.1 Introduction
The IES-5000 series is perfect for ISPs or large building applications seeking to provide high
bandwidth broadband services to subscribers while minimizing costs.
The MSC1000G (Management Switch Card Gigabit) centralizes the management of all of the
Integrated Ethernet Switch’s DSL line cards. You can configure and maintain the DSL line
cards through the management switch card; thus eliminating the need to connect to each line
card individually. It also provides Gigabit ports and slots for connecting to other Ethernet
switches. See Appendix A on page 603 for a complete list of features.
1.1.1 Applications
• The IES-5000 can provide Internet access and multimedia services for Multiple Tenant
Units (MTU).The following diagram depicts a typical application of the IES-5000 with
DSL modems, in a large residential building, that leverages existing phone line wiring to
provide Internet access to all tenants. ADSL service can coexist with voice service on the
same line.
MSC1000G User’s Guide
47
Chapter 1 Getting to Know Your MSC1000G
Figure 1 MTU Application
• The IES-5000 provides DSL service over telephone wires to subscribers in a Central
Office (CO) application. The following figure shows the IES-5000 set up in a telephone
company’s central office.
48
MSC1000G User’s Guide
Chapter 1 Getting to Know Your MSC1000G
Figure 2 Central Office Application
• Other applications include telemedicine, surveillance systems, remote servers systems,
cellular base stations and high-quality videoconferencing.
1.2 Ways to Manage the MSC1000G
Use any of the following methods to manage the MSC1000G.
• Web Configurator. This is GUI-based management using a (supported) web browser. See
Chapter 3 on page 65.
• Command Line Interface. Use line commands through Telnet or the console port to
manage the MSC1000G. See Chapter 17 on page 309.
• Editable plain text based configuration file
• FTP for firmware upgrades and configuration backup/restore (Chapter 33 on page 585).
• SNMP. The device can be monitored by an SNMP manager. See Chapter 15 on page 287
and Section 31.4 on page 572.
• EMS (Element Management System) support. The device can be remotely managed using
a Network Management System (NMS) such as Castlerock.
1.3 Good Habits for Managing the MSC1000G
Do the following things regularly to make the MSC1000G more secure and to manage the
MSC1000G more effectively.
MSC1000G User’s Guide
49
Chapter 1 Getting to Know Your MSC1000G
• Change the password. Use a password that’s not easy to guess and that consists of
different types of characters, such as numbers and letters.
• Write down the password and put it in a safe place.
• Back up the configuration (and make sure you know how to restore it). Restoring an
earlier working configuration may be useful if the device becomes unstable or even
crashes. If you forget your password, you will have to reset the MSC1000G to its factory
default settings. If you backed up an earlier configuration file, you would not have to
totally re-configure the MSC1000G. You could simply restore your last configuration.
1.4 Features
This section introduces key IES-5000 series features.
Management Switch Card Redundancy
You can install two management switch cards in the IES-5000 to increase system reliability.
The two management switch cards must have the same types of uplink and subtending
connections. One management switch card is active and the other acts as a standby.
The first management switch card installed is active. If both management switch cards are
installed at the same time, the management switch card in the lower numbered slot is active.
Whenever the active management switch card cannot operate (whether it is removed, restarts
or crashes), the standby management switch card becomes active.
Gigabit Ethernet Ports
The Gigabit Ethernet ports allow the switch to connect to another WAN switch or daisy-chain
to other switches.
SFP Slots
Install SFP (Small Form-factor Pluggable) transceivers in these slots to connect to other
Ethernet switches at longer distances than the Ethernet port.
Console Port
Use the console port for local management.
DHCP Relay
DHCP (Dynamic Host Configuration Protocol RFC 2131 and RFC 2132) allows individual
computers to obtain TCP/IP configuration at start-up from a server. You can configure the
system as a DHCP relay agent to have another DHCP server provide TCP/IP configuration for
the clients. In addition, you can set the system to forward client DHCP requests to specific
DHCP servers based on the VLAN ID. You can also specify up to two DHCP servers for each
VLAN to provide fail-over protection.
DHCP Relay Option82
The system supports DHCP relay agent82 (RFC 3046) that adds additional information to
client DHCP requests that the MSC1000G relays to a DHCP server. It also supports adding the
sub-option 2 (Remote ID) with additional information.
50
MSC1000G User’s Guide
Chapter 1 Getting to Know Your MSC1000G
DHCP Snooping
DHCP snooping allows the system to identify packets with DHCP server assigned IP
address(es) and block access of devices using unknown IP addresses on a subscriber port. You
can also manually add static IP addresses to the DHCP snooping table.
Anti-IP Address Spoofing
With DHCP snooping, a line card records which IP address is assigned to each DHCP client
MAC address and the VLAN to which each IP and MAC address pair belongs. The line card
drops packets from a device using an IP address that is assigned to a different MAC address.
Downstream Broadcast Blocking
The system can block downstream broadcast packets from being sent to specified VLANs on
specified ports.
Cluster Management
Cluster management allows you to access the web configurators and CLIs of multiple
DSLAMs through one DSLAM, called the cluster manager. The IESs must be directly
connected and be in the same VLAN group so as to be able to communicate with one another.
Queuing
Queuing is used to help solve performance degradation when there is network congestion.
Two scheduling services are supported: Strict Priority Queuing (SPQ) and Weighted Round
Robin (WRR) Queuing. This allows the MSC1000G to maintain separate queues for packets
from each individual source or flow and prevent a source from monopolizing the bandwidth.
Trunking
The management switch card can trunk (aggregate port links into one logical link) Gigabit
Ethernet interfaces.
Isolation (per-VLAN)
Use isolation to block the DSL subscribers in a specific VLAN from sending traffic directly to
each other. The DSL subscribers can only send and receive traffic to and from the ports that
are set to uplink mode. The Integrated Ethernet Switch blocks access between the DSL ports.
Link Aggregation Control Protocol (LACP)
The MSC1000G supports the link aggregation IEEE 802.3ad protocol. Link aggregation
(trunking) is the grouping of physical ports into one logical higher-capacity link. You may
want to trunk ports if for example, it is cheaper to use multiple lower-speed links than to
under-utilize a high-speed, but more costly, single-port link.
IEEE 802.1Q Tagged VLAN
Your management switch card uses the IEEE 802.1Q Tagged VLAN (Virtual Local Area
Network), which allows your device to deliver tagged/untagged frames to and from its ports.
MSC1000G User’s Guide
51
Chapter 1 Getting to Know Your MSC1000G
Multicast VLAN
Multicast VLAN is designed for applications (such as Media-on-Demand (MoD)) using
multicast traffic across an Ethernet ring-based service provider network. Multicast VLAN
allows one single multicast VLAN to be shared among different subscriber VLANs on the
network. This improves bandwidth utilization by reducing multicast traffic in the subscriber
VLANs and simplifies multicast group management.
Transparent LAN Service (TLS)
Use TLS (also known as VLAN stacking) to add an outer VLAN tag to the inner IEEE 802.1Q
tagged frames that enter the network. By tagging the tagged frames (“double-tagged” frames),
the service provider can manage up to 4,094 VLAN groups with each group containing up to
4,094 customer VLANs. This allows a service provider to provide different services based on
specific VLANs, for many different customers.
PPPoA-to-PPPoE (PAE) PVC
This feature allows the system to translate PPPoA packets to PPPoE packets (and vice versa)
to allow communication between CPE clients and an access concentrator (such as a BRAS)
through the switch.
PPPoE Intermediate Agent Information
Similar to DHCP relay option82, you can set the system to insert line information into client
PPPoE Active Discovery Initialization (PADI) packets. This allows a PPPoE termination
server to identify and authenticate a PPPoE client.
IEEE 802.1p Priority
The system uses IEEE 802.1p priority to assign priority levels to individual PVCs. The system
can also handle multiple IEEE 802.1p priority queues on a single PVC.
Classifier and Policy
You can create a policy to define actions to be performed on a traffic flow grouped by a
classifier according to specific criteria such as the IP address, port number or protocol type,
and so on.
IEEE 802.1x Port-based Authentication
Your MSC1000G supports the IEEE 802.1x standard for centralized user authentication
through an optional network authentication (RADIUS) server.
Spanning Tree Protocol (STP)/ Rapid STP (RSTP)/ Multiple STP (MSTP)
(R)STP detects and breaks network loops and provides backup links between switches,
bridges or routers. It allows a switch to interact with other (R)STP -compliant switches in your
network to ensure that only one path exists between any two stations on the network.
MSTP is backward compatible with (R)STP and allows you to configure multiple spanning
trees for one or more VLANs and still have a loop-free network topology.
52
MSC1000G User’s Guide
Chapter 1 Getting to Know Your MSC1000G
MAC (Media Access Control) Filters
Use the MAC filter to filter incoming frames based on MAC (Media Access Control)
address(es) or the OUI (Organizational Unit Identifier) that you specify. You may enable/
disable the MAC filter on specific ports. You may specify up to ten MAC addresses per port.
MAC (Media Access Control) Count Limit
You can limit the number of MAC addresses that may be dynamically learned on a port. You
may enable/disable the MAC count limit on individual ports.
IGMP Count Limit
You can limit the number of IGMP groups a subscriber on a port can join. You may enable/
disable the IGMP count limit on individual ports.
Static Multicast
Use static multicast to allow incoming frames based on multicast MAC address(es) that you
specify. This feature can be used in conjunction with IGMP snooping to allow multicast MAC
address(es) that are not learned by IGMP snooping. You can use static multicast to pass
routing protocols, such as RIP and OSPF.
IGMP Snooping
With IGMP snooping, group multicast traffic is only forwarded to ports that are members of
that group. IGMP snooping generates no additional network traffic, allowing you to
significantly reduce multicast traffic passing through your IES-5000.
IGMP Proxy
The IES-5000 can act as an IGMP proxy device to reduce multicast traffic. It issues IGMP
host messages to a multicast router or server on behalf of the connected multicast hosts.
Broadcast Storm Control
Broadcast storm control limits the number of broadcast packets the management switch card
receives per second on its ports.
Secured Client
Configure up to four rules to allow up to four ranges of remote host IP addresses to access
your management switch card.
Profile Server
The profile server feature allows you to manage profiles on multiple IES-5000s.
System Error Logging
The system error log will record error logs locally to the management switch card memory.
Configurable Alarms
The system allows you to customize the priority levels of individual alarms and the alarm
severity threshold for recording alarms on an individual port(s).
MSC1000G User’s Guide
53
Chapter 1 Getting to Know Your MSC1000G
Multiple Management Logins
The management switch card can support multiple concurrent management sessions.
Remote Firmware Upgrade
You can use FTP or SFTP to perform configuration backup/restore and firmware upgrade from
a remote location.
Security
•
•
•
•
Password protection for system management
VLAN
RADIUS client
TACACS+ client
Alarm LED
An ALM (alarm) LED lights when the second power source is not connected, the IES-5000 is
overheated, the voltage readings are outside the tolerance levels a fan fails or another alarm
with a severity level of MAJOR or CRITICAL occurs.
Flow Control
The management switch card uses IEEE 802.3 flow control to manage the sending of traffic so
the sending device does not transmit more than the receiving device can process. This helps
prevent traffic from being dropped and having to be resent.
Quality of Service
The MSC1000G has eight priority queues so you can ensure mission-critical data gets
delivered on time.
Multiple PVC and ATM QoS
The IES-5000 allows you to use different channels (also called Permanent Virtual Circuits or
PVCs) for different services or subscribers. Define channels on each DSL port for different
services or levels of service and assign each channel a priority. ATM Quality of Service (QoS)
allows you to regulate the average rate and fluctuations of data transmission. This helps
eliminate congestion to allow the transmission of real time data (such as audio and video).
Priority-based PVCs
The system provides Priority-based PVCs (PPVCs) to give different priorities to PVCs that are
members of the same VLAN. Use up to eight priority queues for the member PVCs. The
system maps frames with certain IEEE 802.1p priorities to a PVC with a particular priority
queue.
DSCP-to-IEEE 802.1p Priority Mapping
DiffServ is a class of service (CoS) model that marks packets with DiffServ Code Points
(DSCP) so that they receive specific per-hop treatment at DiffServ-compliant network devices
along the route. You can configure DSCP-to-IEEE 802.1p mappings to allow the MSC1000G
to prioritize all incoming traffic based on the DSCP value according to the mapping table.
54
MSC1000G User’s Guide
Chapter 1 Getting to Know Your MSC1000G
System Monitoring
• System status (link status, rates, statistics counters)
• Temperatures, voltage reports and alarms.
Bandwidth Control
The MSC1000G supports rate limiting in 1 Mbps increments on the individual Gigabit
Ethernet interfaces allowing you to limit backbone bandwidth usage. You can also apply
bandwidth control on multicast traffic.
IP-aware Bridging
The line cards can forward frames based on the destination IP address, instead of the
destination MAC address, and replace the source MAC address with its own MAC address.
This provides better scalability and security for large-scale access networks, especially with
Ethernet.
Single End Loop Test (SELT)
This feature checks the distance to an ADSL subscriber’s location.
Dual End Loop Test (DELT)
This feature (also called a Loop Diagnostic Mode test or LDM test) provides details about the
condition of an ADSL subscriber’s line.
MSC1000G User’s Guide
55
Chapter 1 Getting to Know Your MSC1000G
56
MSC1000G User’s Guide
CHAPTER
2
Hardware Connections
This chapter introduces the MSC1000G’s hardware and how to connect it.
"
Refer to the Integrated Ethernet Switch’s User’s Guide for directions and
safety warnings on installing the management switch card.
Use this chapter’s port and slot descriptions to connect the management switch
card.
2.1 Front Panel
Figure 3 MSC1000G Front Panel
2.2 LEDs
Table 1 Management Switch Card LED Descriptions
LED
COLO
R
STATUS
DESCRIPTION
PWR
Green
On
The management switch card is installed and receiving power from the
main chassis.
Off
The management switch card is not receiving power from the main
chassis.
On
An alarm has been detected on the MSC1000G, the Integrated Ethernet
Switch fan or the INPUT ALARM terminals. Examples of an alarm on
the MSC1000G are when the MSC1000G’s voltage or temperature is
outside of the normal range.
Off
The MSC1000G has not detected an alarm on itself, the Integrated
Ethernet Switch fan or the INPUT ALARM terminals.
ALM
Red
MSC1000G User’s Guide
57
Chapter 2 Hardware Connections
Table 1 Management Switch Card LED Descriptions
LED
COLO
R
STATUS
DESCRIPTION
SYS
Green
Blinking
The system is initializing.
On
The management switch card is on and functioning properly.
Off
The management switch card is not receiving power, is not ready or has
malfunctioned.
Blinking
The port is transmitting/receiving to/from a 100 Mbps Ethernet network.
On
A 100 Mbps Ethernet link is up.
Off
The Ethernet link is down.
Blinking
The port is transmitting/receiving to/from a 1000 (1 Gbps) Mbps
Ethernet device.
On
A 1000 Mbps (1 Gbps) Ethernet link is up.
Off
The Ethernet link is down.
Blinking
The port is transmitting/receiving to/from a 100 Mbps Ethernet network.
On
A 100 Mbps Ethernet link is up.
Off
The Ethernet link is down.
Blinking
The port is transmitting/receiving to/from a 10 Mbps Ethernet device.
On
A 10 Mbps Ethernet link is up.
Off
The Ethernet link is down.
1000/
100
Yellow
Green
MGMT Yellow
Green
The following LEDs apply to the SFP slots.
LNK
1~4
Green
ACT
1~4
Green
On
A 1000 Mbps (1 Gbps) Ethernet link is up.
Off
The Ethernet link is down.
Blinking
The system is transmitting/receiving Ethernet traffic.
Off
The system is not transmitting/receiving Ethernet traffic.
2.3 Ports and Connections
"
Install the MSC1000G before you make the hardware connections. Refer to
the IES-5000 User’s Guide for installation instructions.
Table 2 Front Panel Descriptions
58
LABEL
DESCRIPTION
ALARM
This DB15F connector is for connecting to alarm input and alarm output terminals on
other pieces of equipment.
ACO
Press this Alarm Cut Off Button to cancel an alarm. This stops the sending of the alarm
signal current. This is useful in stopping an alarm if you have the alarm output
connector pins connected to a visible or audible alarm. The alarm entry remains in the
system.
MSC1000G User’s Guide
Chapter 2 Hardware Connections
Table 2 Front Panel Descriptions (continued)
LABEL
DESCRIPTION
1000/100
The management switch card uses one or two uplink ports for connecting to an
Ethernet switch(es) that is part of a high-bandwidth backbone network.
This is an electrical Ethernet interface for use with the following copper Ethernet
cables:
a). 100Base-Tx 2 pair UTP Cat. 5, up to 100m
b). 1000Base-T 4-pair UTP Cat. 5, up to 100m
Connector: RJ-45
For better performance and lower radiation noise, use shielded Ethernet cables.
SFP
These are slots for SFP transceivers.
MGMT
This is an RJ-45 Ethernet port for connecting to an Ethernet network for out-of-band
management (a separate channel for management that is not part of the channels that
are usually used for data transfer).
CONSOLE
This DB-9 RS-232 port is for connecting to a computer for local management.
2.3.1 Alarm Connections
Figure 4 ALARM Connector Pin Layout
A closed circuit on the ALARM input pins indicates an alarm.
• Pins 1 and 9 are alarm input one.
• Pins 2 and 10 are alarm input two.
• Pins 3 and 11 are alarm input three.
The MSC1000G signals an alarm when it detects an alarm on the ALARM input pins, the
IES-5000 is overheated, the voltage readings are outside the tolerance levels a fan fails or
another alarm occurs.
To signal a minor alarm, the MSC1000G opens the circuit for pins 4 and 12 and closes the
circuit for pins 5 and 12.
To signal a major alarm, the MSC1000G opens the circuit for pins 13 and 6 and closes the
circuit for pins 14 and 6.
To signal a critical alarm, the MSC1000G opens the circuit for pins 7 and 15 and closes the
circuit for pins 8 and 15.
Examples of an alarm on the MSC1000G are when the MSC1000G’s voltage or temperature is
outside of the normal range.
MSC1000G User’s Guide
59
Chapter 2 Hardware Connections
2.3.2 Gigabit Ethernet Interfaces
There are two Gigabit Ethernet SFP slots and two Gigabit Ethernet port/SFP slot pairs. The
SFP slots have priority over the Gigabit ports. This means that if a SFP transceiver and the
corresponding Gigabit port are connected at the same time, the Gigabit port will be disabled.
The Ethernet ports are auto-negotiating and can detect and adjust to the optimum Ethernet
speed (100/1000 Mpbs) and duplex mode (full duplex or half duplex) of the connected device.
The Ethernet ports are also auto-crossover (auto-MDI/MDI-X), they automatically work with
a straight-through or crossover Ethernet cable.
2.3.2.1 Uplink and Subtending
SFP slots 1 and 2 are subtending ports. The Gigabit Ethernet port/SFP slot pairs labeled 3 and
4 are uplink ports.
The Gigabit Ethernet SFP slots and ports can function in either subtending or uplink mode.
Connect a port in uplink mode to an backbone Ethernet switch or router. The management
switch card allows traffic between the ports in uplink mode and the DSL ports on the line
cards.
Use the subtending mode to daisy-chain other Ethernet switches. With subtending mode, the
management switch card allows traffic between the ports in subtending mode and the ports in
uplink mode. The management switch card does not allow traffic between the ports in
subtending mode and the DSL ports on the line cards.
See Section 30.9.9 on page 548 to change the mode of a Gigabit Ethernet port.
2.3.3 SFP Slots
These are slots for SFP transceivers. A transceiver is a single unit that houses a transmitter and
a receiver. The switch does not come with transceivers. You must use transceivers that comply
with the SFP Transceiver MultiSource Agreement (MSA). See the SFF committee’s INF8074i specification Rev 1.0 for details.
SFP slots 1 and 2 are separate interfaces.
SFP slots 3 and 4 are combined with Gigabit Ethernet ports 3 and 4 respectively. The SFP
ports have priority over the Gigabit ports. This means that if a SFP transceiver and the
corresponding Gigabit port are connected at the same time, the Gigabit port will be disabled.
You can change transceivers while the MSC1000G is operating. You can use different
transceivers to connect to Ethernet switches with different types of fiber-optic connectors.
• Type: SFP connection interface
• Connection speed: 1 Gigabit per second (Gbps)
1
60
To avoid possible eye injury, do not look into an operating fiber-optic module’s
connectors.
MSC1000G User’s Guide
Chapter 2 Hardware Connections
2.3.3.1 Transceiver Installation
Use the following steps to install a mini GBIC transceiver (SFP module) in a slot.
"
The slot is at an angle. Do not attempt to straighten it.
1 Remove the dust cover from the transceiver.
2 For transceivers with a flip-up or flip-down latch, close the latch.
3 Insert the fiber-optic cables into the transceiver (you may need to remove cable dust
covers).
4 Insert the transceiver into the slot with the exposed section of PCB board facing down.
5 Press the transceiver firmly until it clicks into place.
Figure 5 Transceiver Installation
Figure 6 Installed Transceiver
2.3.3.2 Transceiver Removal
Use the following steps to remove a mini GBIC transceiver (SFP module) from the slot.
1
2
3
4
Remove the fiber-optic cables from the transceiver.
Unlock the transceiver’s latch (latch styles vary).
Pull the transceiver out of the slot.
Put the transceiver’s dust cover on the transceiver.
Figure 7 Opening the Transceiver Latch
MSC1000G User’s Guide
61
Chapter 2 Hardware Connections
Figure 8 Removing the Transceiver
Console Port
Use the console port for local management of the MSC1000G.
62
MSC1000G User’s Guide
P ART II
Web Configurator
The Web Configurator (65)
Initial Setup Example (75)
Access Control List Screens (81)
Alarm Screens (111)
Cluster Screens (125)
Diagnostic Screens (131)
Maintenance Screens (137)
Multicast Screens (141)
DSL Port Setup Screens (151)
Profile Screens (205)
Statistics Screens (227)
Switch Screens (263)
Sys Screens (287)
VLAN Screens (299)
63
64
CHAPTER
3
The Web Configurator
This section introduces the configuration and functions of the web configurator.
3.1 Web Configurator Introduction
The web configurator is an HTML-based management interface that allows easy switch setup
and management via Internet browser. Use Internet Explorer 6.0 and later or Netscape
Navigator 7.0 and later versions. The recommended screen resolution is 1024 by 768 pixels.
In order to use the web configurator you need to allow:
• Web browser pop-up windows from your device. Web pop-up blocking is enabled by
default in Windows XP SP (Service Pack) 2.
• JavaScript (enabled by default).
• Java permissions (enabled by default).
3.2 System Login
1 Start your web browser.
2 Type “http://” and the IP address of the switch in the Location or Address field. Press
[ENTER]. 192.168.1.1 is the default in-band management IP address and 192.168.0.1 is the
default out-of-band (management port) IP address.
3 The login screen appears. The default username is admin and associated default
password is 1234. The date and time display as shown if you have not configured a time
server nor manually entered a time and date in the General Setup screen.
Figure 9 Web Configurator: Login
MSC1000G User’s Guide
65
Chapter 3 The Web Configurator
4 Click OK to view the first web configurator screen.
Figure 10 Web Configurator: First Screen
3.3 Navigation Panel
In the navigation panel (the column on the left), click a main link to reveal a list of submenu
links. The following table describes the links in the navigation panel.
Table 3 Navigation Panel Links
LINK
DESCRIPTION
ACL
DHCP Relay
This link takes you to a screen where you can configure DHCP relay information
and specify the DHCP server(s).
DHCP Snoop
This link takes you to screens where you can activate DHCP snooping and
configure static client IP addresses on a port.
Downstream
Broadcast
This link takes you to a screen where you can block downstream broadcast packets
from being sent to specified VLANs on specified ports.
MAC Count
This link takes you to a screen where you can limit the number of MAC addresses
that can connect to a subscriber port.
MAC Filter
This link takes you to a screen where you can allow only traffic from specified
source MAC addresses on the specified subscriber ports.
OUI Filter
This link takes you to a screen where you can allow only traffic from MAC
addresses with the specified OUI on the specified subscriber ports.
Packet Filter
This link takes you to a screen where you can allow or drop specified packet types
on the specified subscriber ports.
802.1X PNAC
This link takes you to a screen where you can configure RADIUS (Remote
Authentication Dial-In User Service) and IEEE 802.1x authentication settings.
Alarm
Current Alarm
66
This link takes you to a screen where you can display current detailed alarms by
severity or time period.
MSC1000G User’s Guide
Chapter 3 The Web Configurator
Table 3 Navigation Panel Links (continued)
LINK
DESCRIPTION
History Alarm
This link takes you to a screen where you can display historical alarms by severity
or time period.
Alarm Port Setup This link takes you to a screen where you can set the severity level of alarms to
record on specified ports.
Alarm Severity
Assignment
This link takes you to a screen where you where you can configure the log facility,
message type and severity of the alarm categories.
Alarm Clear
This link takes you to a screen where you can erase alarm entries.
Cluster
Cluster Status
This link takes you to a screen where you can view clustering status
Cluster
Configuration
This link takes you to a screen where you can configure clustering management.
Diagnostic
LDM
This link takes you to a screen where you can perform LDM (Loop Diagnostic
Mode) tests on a subscriber port.
Loopback
This link takes you to a screen where you can perform an OAMF5 loopback test on
a subscriber port or PVC.
IP Ping
This link takes you to a screen where you can ping a host.
IP Trace Route
This link takes you to a screen where you can send a traceroute packet to an IP
address and use the response to determine the path a packet takes to that IP
address.
Maintenance
Config Backup
This link takes you to a screen where you can back up your current system
configuration.
Config Restore
This link takes you to a screen where you can restore a previously saved
configuration.
Config Reset
This link takes you to a screen where you can reset the system back to the factory
defaults.
Firmware
Upgrade
This link takes you to a screen where you can upload a new firmware.
Reboot
This link takes you to a screen where you can restart the system.
Multicast
IGMP
This link takes you to screens where you can enable or disable IGMP proxy or
IGMP snooping and assign IGMP filter profiles to subscriber ports.
Static Multicast
This link takes you to a screen where you can configure static multicast group
entries.
Port
ADSL
This link takes you to screens where you can configure the ADSL ports.
VDSL
This link takes you to screens where you can configure the VDSL ports.
SHDSL
This link takes you to screens where you can configure the SHDSL ports.
PVC
This link takes you to screens where you can configure PVCs (Permanent Virtual
Circuits) on subscriber ports.
PPVC
This link takes you to screens where you can configure Priority PVCs on subscriber
ports.
MSC1000G User’s Guide
67
Chapter 3 The Web Configurator
Table 3 Navigation Panel Links (continued)
LINK
DESCRIPTION
IP Bridge
This link takes you to a screen where you can configure IP-aware bridging, where
the MSC1000G forwards packets based on destination IP address instead of
destination MAC address.
Copy
This link takes you to a screen where you can copy port settings from a source port
to destination ports on the same type of line card.
Profile
ADSL
This link takes you to a screen where you can configure ADSL profiles.
VDSL
This link takes you to a screen where you can configure VDSL profiles.
SHDSL
This link takes you to a screen where you can configure SHDSL profiles.
ATM
This link takes you to a screen where you can configure ATM traffic profiles.
Alarm ADSL
This link takes you to a screen where you can configure ADSL alarm profiles.
Alarm VDSL
This link takes you to a screen where you can configure VDSL alarm profiles.
Alarm SHDSL
This link takes you to a screen where you can configure SHDSL alarm profiles.
IGMP Filter
This link takes you to a screen where you can configure IGMP filter profiles
Statistics
ARP Table
This link takes you to a screen where you can view the MAC address to IP address
resolution table.
DHCP
This link takes you to a screen where you can view DHCP counters and DHCP
snooping information.
MAC Table
This link takes you to a screen where you can see the MAC addresses that the
system has dynamically learned.
IGMP Status
This link takes you to a screen where you can view information collected by IGMP
snooping and/or IGMP proxy.
IP Bridge
This link takes you to a screen where you can view IP bridge information.
Online Users
This link takes you to a screen where you can view information about administrators
that are logged into the system.
Port Statistics
This link takes you to screens where you can view port statistics and status. You
can also view RMON history information on the switch ports.
Dot3ad
This link takes you to a screen where you can view the link aggregation status.
VLAN
This link takes you to screens where you can view the VLAN settings and status.
MSTP
This link takes you to screens where you can view the MSTP status and statistics.
IP
This link takes you to a screen where you can view the port IP statistics.
Switch
Switch Setup
This link takes you to a screen where you can set up global switch parameters such
as GARP, link aggregation, priority queues and a port’s queuing method.
MSTP
This link takes you to a screen where you can configure spanning tree settings to
prevent network loops.
Switch Port
Setup
This link takes you to a screen where you can configure settings for individual
Gigabit Ethernet interfaces.
Sys
68
Access Control
This link takes you to screens where you can configure SNMP and remote
management.
General Setup
This link takes you to a screen where you can configure general identification
information about the switch and the time and date settings.
MSC1000G User’s Guide
Chapter 3 The Web Configurator
Table 3 Navigation Panel Links (continued)
LINK
DESCRIPTION
IP Setup
This link takes you to a screen where you can configure the in-band and out-ofband management IP addresses and subnet masks.
Unix SysLog
This link takes you to a screen where you can configure the syslog settings.
User Account
This link takes you to screens where you can configure a user account and its level
of access privileges and authentication settings.
VLAN
VLAN
This link takes you to screens where you can configure static VLANs.
Port Setting
This link takes you to screens where you can configure port VLAN settings.
Config Save
Config Save
This link takes you to a screen where you can save the device’s configuration into
the nonvolatile memory (the system’s storage that remains even if the power is
turned off).
The following table lists the various web configurator screens within the sub-links.
Table 4 Web Configurator Screen Sub-links Details
ACL
DHCP Relay
DHCP Snoop
DHCP Snoop Slot
Downstream Broadcast
Downstream Broadcast
Slot
MAC Count
MAC Count Slot
MAC Filter
MAC Filter Slot
OUI Filter
OUI Filter Slot
Packet Filter
Packet Filter Slot
802.1X PNAC
Port Setup
802.1X PNAC Slot
RADIUS
MSC1000G User’s Guide
Alarm
Current Alarm
Critical
Major
Minor
All
History Alarm
Critical
Major
Minor
All
Alarm Port Setup
Alarm Port Setup Slot
Alarm Severity Assignment
DSL
Equipment
System
Ethernet
Alarm Clear
Cluster
Cluster Status
Cluster Status Member
Cluster Configuration
Diagnostic
LDM
Loopback
IP Ping
IP Trace Route
69
Chapter 3 The Web Configurator
Table 4 Web Configurator Screen Sub-links Details (continued)
Maintenance
Config Backup
Config Restore
Config Reset
Firmware Upgrade
Reboot
Multicast
IGMP
IGMP Setup
Filter Setup
IGMP Slot
Static Multicast
Port
ADSL
ADSL Port Setup
ADSL Port Setup Slot
ADSL Port Setup
Advanced
VDSL
VDSL Port Setup
VDSL Port Setup Slot
VDSL Port Setup
Advanced
SHDSL
SHDSL Port Setup
SHDSL Port Setup Slot
SHDSL Port Setup
Advanced
PVC
PVC Setup Slot
PVC Setup VLAN
PPVC
PPVC Setup Slot
PPVC Setup VLAN
IP Bridge
ARP Proxy
Domain
Edgerouter
Interface
IPBPVC
IPBPVC Slot
Route
Copy
Profile
ADSL
VDSL
SHDSL
ATM
Alarm ADSL
Alarm VDSL
Alarm SHDSL
IGMP Filter
Statistics
ARP Table
DHCP
MAC Table
IGMP Status
Status
Port
IP Bridge
ARP Proxy
Interface
Route
Online Users
Port Statistics
Counter Slot
Packet Counter
Dot3ad
VLAN
VLAN Detail
MSTP
CIST
CIST Detail
MSTI
IP
Switch
Switch Setup
General
Dot3ad
QSchedule
Isolation
MSTP
Bridge
Port
Switch Port Setup
Port
802.1P/1Q
Bandwidth
Broadcast
Sys
Access Control
SNMP
Access Ctrl
Secured Client
General Setup
IP Setup
Unix SysLog
User Account
User Account
Authentication
VLAN
VLAN
Port Setting
VLAN Slot
VLAN Detail
Config Save
Config Save
70
MSC1000G User’s Guide
Chapter 3 The Web Configurator
3.4 Saving Your Configuration
Click Apply in a configuration screen when you are done modifying the settings in that screen
to save your changes back to the run time memory and to make your changes take effect.
Click Config Save in the navigation panel and then the Save button to save your configuration
to nonvolatile memory. Nonvolatile memory refers to the switch's storage that remains even if
the switch's power is turned off.
"
Use Config Save when you are done with a configuration session.
If you log out of the web configurator without saving configuration changes, a screen displays
as shown. Click Yes to save the changes or click No if you do not want to save the changes.
Unsaved changes are lost when the switch's power is turned off.
Figure 11 Web Configurator: Save Configuration on Logout
3.5 Logging Out of the Web Configurator
Click Logout in a screen to exit the web configurator. You have to log in with your password
again after you log out. This is recommended after you finish a management session both for
security reasons and so as you don’t lock out other switch administrators.
Figure 12 Web Configurator: Logout Screen
3.6 System Info
The System Info screen is the first screen that displays when you access the web configurator.
MSC1000G User’s Guide
71
Chapter 3 The Web Configurator
Figure 13 Web Configurator: Home Screen (System Info)
The following table describes the labels in this screen.
Table 5 System Info (Home)
72
LABEL
DESCRIPTION
Current Alarm
Click the links to view detailed alarm information (see Section 6.1 on page 111).
Critical Alarms
This field displays the number of critical alarms occurred. Click the link to display
the Current Alarm: Critical Alarm screen.
Major Alarms
This field displays the number of major alarms occurred. Click the link to display
the Current Alarm: Major Alarm screen.
Minor Alarms
This field displays the number of minor alarms occurred. Click the link to display
the Current Alarm: Minor Alarm screen.
ID
This is the slot number of a line card. Click the index number of an active line card
to display the System Info - Slot screen to view detailed status.
State
This field displays the line card’s current operational status.
active means the line card is operating normally.
init means the MSC1000G is initializing the line card.
disable means a manager has disabled the line card.
inactive means the line card is starting up or is not operating normally. This could
be due to the card starting, a firmware upgrade in progress or a malfunction. See
Section 34.6 on page 598 for what to do if the line card stays stuck in the inactive
state.
Card Type
This field displays the type of a line card.
Up Time
This field displays how long the line card has been running since the last time it
was started.
Firmware
This field displays the current firmware version installed on the line card.
Over Heat
This field indicates whether the temperate of the line card is too high.
Voltage Failure
This field indicates whether the voltage on the line card is out of the tolerance
range.
Monitor Error
This field indicates if no line card status information can be obtained.
Linecard Down
This field indicates whether the line card has failed.
Linecard Out
This field indicates whether the line card is removed from its slot.
MSC1000G User’s Guide
Chapter 3 The Web Configurator
3.6.1 Card Status Details
To view detailed card status information, click an index number of an active card in the
System Info screen.
Figure 14 System Info: Slot
The following table describes the labels in this screen.
Table 6 System Info: Slot
LABEL
DESCRIPTION
Hardware Version This is the version of the physical device hardware.
Hardware Serial
Number
This is the individual identification number assigned to the device at the factory.
Firmware Version
This field displays the version number of the device’s current firmware including
the date created.
DSL Driver
Version
This field displays the version number of the DSL line card’s driver.
DSL Modem
Version
This field displays the version number of the DSL line card’s modem code.
Current Voltage
Level
This field displays the current voltage readings.
Current
Temperature
This field displays the current temperature at the sensors
Current Fan
Speed
This field is not applicable for DSL line cards.
This field displays the current fan speeds.
MSC1000G User’s Guide
73
Chapter 3 The Web Configurator
74
MSC1000G User’s Guide
CHAPTER
4
Initial Setup Example
This chapter describes initial configuration for the switch.
4.1 Initial Configuration
This chapter shows what you first need to do to provide service to DSL subscribers connected
to a line card.
1 Click Sys > IP Setup.
Figure 15 Sys: IP Setup Menu
2 Use this screen to change the in-band and out-of-band management IP address and
subnet mask settings. You also need to configure a default gateway IP address for the
system. Apply the settings. If you change the IP address, you must use the new IP
address if you want to access the web configurator again.
3 You can also change the in-band management VLAN (CPU). You can only manage the
MSC1000G through ports that are members of the management VLAN.
MSC1000G User’s Guide
75
Chapter 4 Initial Setup Example
"
By default, you can access the management VLAN from all of the IES-5000’s
in-band ports since they are all in the management VLAN. If you need more
security, please see Section 24.2.9.1 on page 399 for an example of changing
the management VLAN.
Figure 16 IP Setup
4 If you will use DHCP with the subscribers, click ACL > DHCP Relay to display the
screen shown next.
5 Create a new DHCP relay entry for the VLAN (3 in this example). Enable DHCP relay
and specify any option 82 information that you want to include when relaying the DHCP
requests.
6 Configure the primary/secondary DHCP server’s IP address and select which DHCP
server to which the device sends DHCP request first.
7 Click Apply.
76
MSC1000G User’s Guide
Chapter 4 Initial Setup Example
Figure 17 DHCP Relay
8 Click VLAN > VLAN in the navigation panel to display the screen shown next.
Configure VLAN 3 and make ports Up1 and Up2 (the uplink ports) fixed members.
Click Apply.
Figure 18 VLAN Setup Example
9 Use the following steps to set the VPI and VCI and PVID (default VLAN ID) settings
for all of an ALC or SLC line card’s DSL ports.
First you will delete the default PVC from all of the line card’s DSL ports. Then you will
configure a new PVC for a port and copy it to the line card’s other DSL ports.
10 Under Port, click PVC.
MSC1000G User’s Guide
77
Chapter 4 Initial Setup Example
Figure 19 Port Setup Menu
11 Click an active line card’s slot number to display PVC settings for all DSL ports on the
selected line card.
Figure 20 PVC Setup
12 Select the Select All check box and click Delete. Click UP to go back to the previous
screen.
78
MSC1000G User’s Guide
Chapter 4 Initial Setup Example
Figure 21 Deleting PVCs
13 Select the line card and a DSL port. Enter the VPI and VCI that you need (or leave the
defaults if your subscribers will use VPI 0 and VCI 33). Set the PVID to 3. Leave the
other default settings and click Apply.
Figure 22 Adding a New Channel
14 Select the new channel's Select radio button and click Copy.
MSC1000G User’s Guide
79
Chapter 4 Initial Setup Example
Figure 23 Copying the PVC
15 Select the line card.
16 Click Select All to select every port on the selected line card.
17 Click Apply to paste the settings.
Figure 24 Select Ports
You can now (with the other settings set to the defaults) provide service to DSL subscribers
connected to the line card. See the appendices for information on other default settings.
80
MSC1000G User’s Guide
CHAPTER
5
Access Control List Screens
This chapter describes the ACL (Access Control List) screens.
5.1 DHCP Relay Overview
DHCP (Dynamic Host Configuration Protocol, RFC 2131 and RFC 2132) allows individual
clients to obtain TCP/IP configuration at start-up from a DHCP server. You can configure the
system to relay client TCP/IP configuration requests to a DHCP server and the server's
responses back to the clients.
You can configure the system to forward client DHCP requests from different VLANs to
specific DHCP servers.
5.1.1 DHCP Relay Agent Information
The system can add information to DHCP requests that it relays to a DHCP server. This helps
provide authentication about the source of the requests. You can also specify additional
information for the system to add to the DHCP requests that it relays to the DHCP server.
Please refer to RFC 3046 for more details.
The DHCP relay agent information feature adds an Agent Information field to the option 82
field of the headers in the DHCP request frames that the switch relays to a DHCP server. The
following lists the DHCP relay agent option 82 information that the switch sends to the DHCP
server:
•
•
•
•
Slot ID (1 byte)
Port ID (1 byte)
VLAN ID (2 bytes)
Information that you specify (up to 23 English keyboard characters)
5.1.2 DHCP Relay Agent Circuit ID and Remote ID Sub-option Formats
The DHCP relay agent information feature adds an Agent Information field to the option 82
field of the DHCP headers of DHCP request frames that the MSC1000G relays to a DHCP
server. The Agent Information field that the MSC1000G adds contains an “Agent Circuit-ID
sub-option” that includes the port number, VLAN ID and optional information about the port
where the DHCP request was received.
MSC1000G User’s Guide
81
Chapter 5 Access Control List Screens
The following figure shows the format of the Agent Circuit ID sub-option. The 1 in the first
field identifies this as an Agent Circuit ID sub-option. The length N gives the total number of
octets in the Agent Information Field. If the configuration request was received on a DSL port,
a 2-byte Port No field specifies the ingress port number (the first byte is always 0, the second
byte is in hexadecimal format). The next field is 2 bytes and displays the DHCP request
packet’s VLAN ID. The last field (A) can range from 0 to 24 bytes and is optional information
(that you specify) about this relay agent.
Figure 25 DHCP Relay Agent Circuit ID Sub-option Format
The Agent Information field that the MSC1000G adds also contains an “Agent Remote-ID
sub-option” of information that you specify.
The following figure shows the format of the Agent Remote ID sub-option. The 2 in the first
field identifies this as an Agent Remote ID sub-option. The length N gives the total number of
octets in the Agent Information Field. Then there is the number of the port (in plain text
format) upon which the DHCP client request was received. The next field (B in the figure) is 0
to 23 bytes of optional information that you specify. This is followed by the name and
telephone number configured for the ADSL port. The port number, optional information (B in
the figure), ADSL name and ADSL telephone number fields are separated by forward slashes.
Figure 26 DHCP Relay Agent Remote ID Sub-option Format
5.2 DHCP Relay Screen
Click ACL > DHCP Relay to display the screen shown next.
82
MSC1000G User’s Guide
Chapter 5 Access Control List Screens
Figure 27 DHCP Relay
The following table describes the labels in this screen.
Table 7 DHCP Relay
LABEL
DESCRIPTION
VID
Enter a VLAN ID (between 1 and 4094) to be served with DHCP relay.
Enable DHCP
Relay
Select disable to deactivate the DHCP relay service in this VLAN.
Select mode 1 to activate DHCP relay service and have the MSC1000G add the
originating port numbers, VLAN ID and additional information (if configured) to the
client DHCP requests for this VLAN.
Select mode 2 to disable DHCP relay service but have the MSC1000G add the
originating port numbers, VLAN ID and additional information (if configured) to the
client DHCP requests. Before broadcasting, the MSC1000G adds the originating
port numbers, VLAN ID and additional information (if configured) to DHCP
requests.
Sub-option1
(Circuit ID) Info
Use this field to specify up to 23 English keyboard characters of additional
information for the MSC1000G to add to the DHCP requests that it relays to a
DHCP server.
Examples of information you could add would be the name of the MSC1000G or
the ISP.
Sub-option2
Enable
Select this option to have the MSC1000G add the sub-option 2 (Remote ID) to the
client DHCP requests for this VLAN.
Sub-option2
(Remote ID) Info
Use this field to specify up to 23 English keyboard characters of additional
information for the MSC1000G to add to the DHCP requests that it relays to a
DHCP server.
This field is configurable only when you select Sub-option2 Enable.
Primary/
Secondary Server
IP
Enter the IP addresses of the remote DHCP servers to which the switch should
relay DHCP requests.
MSC1000G User’s Guide
83
Chapter 5 Access Control List Screens
Table 7 DHCP Relay (continued)
LABEL
DESCRIPTION
Relay Mode
Select Auto to have the system send DHCP requests to the active DHCP server
first. If the active DHCP server does not respond, the system sends the DHCP
request to the other DHCP server which then becomes the active DHCP server.
Select Both to have the switch send DHCP requests to both the primary and
secondary DHCP servers.
Active Server
Specify to which DHCP server (Primary or Secondary) the system is to forward
this VLAN’s DHCP request first.
Apply
Click Apply to save the changes in this screen to the system’s volatile memory.
The system loses these changes if it is turned off or loses power, so use the
Config Save on the navigation panel and then the Save button to save your
changes to the non-volatile memory when you are done configuring.
New
Click New to create a new DHCP relay entry.
Cancel
Click Cancel to begin configuring this screen afresh.
Index
This is the index number of an entry.
VID
This is the ID number of the VLAN group.
Mode
This field displays whether the DHCP relay setting is activated or not.
Circuit ID Info
This field displays the sub-option 1 information to add to the DHCP request
packets.
Sub-option2
This field displays whether information (configured in the Sub-option 2 Info field)
will be included in the client DHCP requests for this VLAN or not (V for enabled, for disabled).
Server IP
This is the IP address of the primary/secondary DHCP server.
An asterisk in parentheses (*) indicates which DHCP server is active for each
VLAN.
Relay
This field displays the DHCP relay mode.
Select
Select an entry’s Select check box and click Delete to remove the entry or click
Modify to edit the entry.
Modify
Click Modify to change the settings of the selected entry.
Delete
Click Delete to remove the selected entries.
5.2.1 Example: DHCP Relay for Two VLANs
The following example displays two VLANs (VIDs10 and 12) for the campus network. Two
DHCP servers are installed to serve each VLAN. The system is set up to forward DHCP
requests from the dormitory rooms (VLAN 10) to the DHCP server with an IP address of
192.168.1.100. Requests from the academic buildings (VLAN 12) are sent to the other DHCP
server with an IP address of 172.168.10.100.
84
MSC1000G User’s Guide
Chapter 5 Access Control List Screens
Figure 28 DHCP Relay Network Example
DHCP: 192.168.1.100
Dorm (VID 10)
Internet
Academic (VID 12)
DHCP: 192.168.10.100
For the example network, configure the DHCP Relay screen as shown.
Figure 29 DHCP Relay: Configuration Example
5.3 DHCP Snooping
With DHCP snooping, the system obtains a client’s MAC-IP address information (in the reply
messages from a DHCP server) and stores it in the DHCP snooping table. Frames with known
source IP addresses are allowed to go through the subscriber ports. Frames from unknown IP
addresses are dropped. This feature prevents subscribers from assigning their own static IP
addresses that may conflict with a DHCP-assigned IP address.
MSC1000G User’s Guide
85
Chapter 5 Access Control List Screens
You can also specify static IP addresses (for a subscriber given a static IP address) on a
subscriber port. This is useful when service providers assign static WAN IP addresses to some
subscribers. This static binding allows the switch to forward frames with the specified IP
addresses.
In the following network example, the DHCP snooping table on the switch contains two
source IP addresses: 192.168.1.100 (DHCP-assigned) and 192.168.1.200 (static). Traffic from
computers A and B is allowed to go through the DSL ports. While traffic from computer C is
blocked since its IP address is unknown to the switch (not in the DHCP snooping table).
Figure 30 DHCP Snooping Network Example
A: 192.168.1.100
DHCP Snooping
192.168.1.100
192.168.1.200
B: 192.168.1.200
Internet
C: 192.168.1.10
DHCP
5.3.1 Anti-IP Address Spoofing
While performing DHCP snooping, a line card records which IP address is assigned to each
DHCP client MAC address. and which VLAN the client uses. The line card drops packets
from a device using an IP address that is assigned to a different MAC address.
5.4 DHCP Snooping Configuration
Click ACL > DHCP Snoop to display the screen shown next.
86
MSC1000G User’s Guide
Chapter 5 Access Control List Screens
Figure 31 DHCP Snooping
The following table describes the labels in this screen.
Table 8 DHCP Snooping
LABEL
DESCRIPTION
Slot
Port
Use the drop-down list boxes to select a DSL port on a line card for which you
want to configure DHCP snooping.
Load
Click Load to display the port’s current settings.
Enable
Select the check box to activate DHCP snooping on the specified DSL port.
Static IP1 .. 3
Specify the static IP addresses of frames you want the switch to allow passage on
the port.
Enter the IP address in dotted decimal notation. For example, 192.168.1.100.
Note: Make sure the specified static IP addresses are not in the
DHCP client pool on the DHCP server.
Apply
Click Apply to save the changes in this screen to the system’s volatile memory.
The system loses these changes if it is turned off or loses power, so use the
Config Save on the navigation panel and then the Save button to save your
changes to the non-volatile memory when you are done configuring.
Cancel
Click Cancel to begin configuring the screen again.
MSC1000G User’s Guide
87
Chapter 5 Access Control List Screens
Table 8 DHCP Snooping (continued)
LABEL
DESCRIPTION
Copy
Do the following to copy the settings you configure above to another port or ports.
1. Click Copy.
2. Select to which line card you want to copy the settings.
3. Select to which ports on the line card you want to copy the settings. Use Select
All to select every port. Use Select None to clear all of the check boxes.
4. Click Apply to paste the settings.
ID
This is the slot number of a line card. Click the index number of an active line card
to display the DHCP Snoop Slot screen where you can view and copy settings
from one port to another port or ports on the selected line card.
State
This field displays the line card’s current operational status.
active means the line card is operating normally.
init means the MSC1000G is initializing the line card.
disable means a manager has disabled the line card.
inactive means the line card is starting up or is not operating normally. This could
be due to the card starting, a firmware upgrade in progress or a malfunction. See
Section 34.6 on page 598 for what to do if the line card stays stuck in the inactive
state.
Card Type
This field displays the type of a line card.
Up Time
This field displays how long the line card has been running since the last time it
was started.
Firmware
This field displays the current firmware version installed on the line card.
5.4.1 DHCP Snooping Slot Screen
Click the slot number of an active line card in the DHCP Snoop screen to display the screen
shown next.
88
MSC1000G User’s Guide
Chapter 5 Access Control List Screens
Figure 32 DHCP Snooping: Slot
The following table describes the labels in this screen.
Table 9 DHCP Snooping: Slot
LABEL
DESCRIPTION
UP
Click UP to go back to the previous screen.
Copy
Do the following to copy settings from one port to another port or ports.
1. Select the Select radio button of the port from which you want to copy settings
2. Click Copy.
3. Select to which line card you want to copy the settings.
4. Select to which ports on the line card you want to copy the settings. Use Select
All to select every port. Use Select None to clear all of the check boxes.
5. Click Apply to paste the settings.
Port
This field displays the number of the DSL port.
Enable
This field displays whether DHCP snooping is activated on the specified DSL port
or not (V for enabled, - for disabled).
Static IP
This field displays the static IP addresses in the DHCP snooping table for a port.
Select
Select the radio button of the port from which you want to copy settings.
5.4.2 Example: DHCP Snooping
The following figures show the DHCP snooping configuration for computers A and B in the
example network shown in Figure 30 on page 86. In this example, the line card in slot 3 has
computer A connected to DSL port 1 and computer B connected to DSL port 10.
MSC1000G User’s Guide
89
Chapter 5 Access Control List Screens
Figure 33 DHCP Snooping: Computer A Example
Figure 34 DHCP Snooping: Computer B Example
5.5 Downstream Broadcast Screen
Downstream broadcast allows you to block downstream broadcast packets from being sent to
specified VLANs on specified ports.
Click ACL > Downstream Broadcast to display the screen shown next.
90
MSC1000G User’s Guide
Chapter 5 Access Control List Screens
Figure 35 Downstream Broadcast
The following table describes the labels in this screen.
Table 10 Downstream Broadcast
LABEL
DESCRIPTION
Slot
Port
Use the drop-down list boxes to select an DSL port on an active line card for which
you want to configure downstream broadcast blocking.
Load
Click Load to display the port’s current settings.
Add disabled
VLAN
Specify the number of a VLAN (on this port) to which you do not want to send
broadcast traffic. The VLAN must already be configured in the system.
Apply
Click Apply to save the changes in this screen to the system’s volatile memory.
The system loses these changes if it is turned off or loses power, so use the
Config Save on the navigation panel and then the Save button to save your
changes to the non-volatile memory when you are done configuring.
Index
This is the number of the downstream broadcast blocking entry.
VLAN ID
This field displays the number of a VLAN to which you do not want to send
broadcast traffic (through the specified port).
Delete
Select one or more entries’ check boxes and then use the Apply button to remove
it (or them). Use the Select All check box to select all of the entries for the
specified line card’s port.
Apply
Click Apply to save the changes in this screen to the system’s volatile memory.
The system loses these changes if it is turned off or loses power, so use the
Config Save on the navigation panel and then the Save button to save your
changes to the non-volatile memory when you are done configuring.
Cancel
Click Cancel to begin configuring the screen again.
MSC1000G User’s Guide
91
Chapter 5 Access Control List Screens
Table 10 Downstream Broadcast (continued)
LABEL
DESCRIPTION
Copy
Do the following to copy the settings you configure above to another port or ports.
1. Click Copy.
2. Select to which line card you want to copy the settings.
3. Select to which ports on the line card you want to copy the settings. Use Select
All to select every port. Use Select None to clear all of the check boxes.
4. Click Apply to paste the settings.
ID
This is the slot number of a line card. Click the index number of an active line card
to display the Bandwidth Broadcast Slot screen where you can view and copy
settings from one port to another port or ports on the selected line card.
State
This field displays the line card’s current operational status.
active means the line card is operating normally.
init means the MSC1000G is initializing the line card.
disable means a manager has disabled the line card.
inactive means the line card is starting up or is not operating normally. This could
be due to the card starting, a firmware upgrade in progress or a malfunction. See
Section 34.6 on page 598 for what to do if the line card stays stuck in the inactive
state.
Card Type
This field displays the type of a line card.
Up Time
This field displays how long the line card has been running since the last time it
was started.
Firmware
This field displays the current firmware version installed on the line card.
5.5.1 Downstream Broadcast Slot Screen
Click the slot number of an active line card in the Downstream Broadcast screen to display
the screen shown next.
92
MSC1000G User’s Guide
Chapter 5 Access Control List Screens
Figure 36 Downstream Broadcast: Slot
The following table describes the labels in this screen.
Table 11 Downstream Broadcast: Slot
LABEL
DESCRIPTION
UP
Click UP to go back to the previous screen.
Copy
Do the following to copy settings from one port to another port or ports.
1. Select the Select radio button of the port from which you want to copy settings
2. Click Copy.
3. Select to which line card you want to copy the settings.
4. Select to which ports on the line card you want to copy the settings. Use Select
All to select every port. Use Select None to clear all of the check boxes.
5. Click Apply to paste the settings.
Port
This field displays the number of the DSL port.
VLAN ID
This field displays the number of a VLAN to which you do not want to send
broadcast traffic (through the specified port).
Select
Select the radio button of the port from which you want to copy settings.
5.6 MAC Count Screen
This screen allows you to limit how many MAC addresses may be dynamically learned on a
DSL port.
MSC1000G User’s Guide
93
Chapter 5 Access Control List Screens
"
You cannot enable both MAC count and MAC filtering on the same port at the
same time.
Click ACL > MAC Count to display the screen shown next.
Figure 37 MAC Count
The following table describes the labels in this screen.
Table 12 MAC Count
LABEL
DESCRIPTION
Slot
Port
Use the drop-down list boxes to select an DSL port on a line card for which you
want to configure the MAC count limit.
Load
94
Click Load to display the port’s current settings.
Enable
Select the check box to activate the MAC count limit on the specified DSL port.
You can only enable the MAC count filter on DSL ports that do not have the MAC
filter enabled.
Limited Number
of Learned MAC
Address
Specify how many MAC addresses the system can dynamically learn on this port.
The range is 1~128.
For example, if you are configuring port 2 and you set this field to "5", then only five
devices with dynamically learned MAC addresses may access port 2 at any one
time. A sixth device would have to wait until one of the five learned MAC
addresses ages out.
Apply
Click Apply to save the changes in this screen to the system’s volatile memory.
The system loses these changes if it is turned off or loses power, so use the
Config Save on the navigation panel and then the Save button to save your
changes to the non-volatile memory when you are done configuring.
Cancel
Click Cancel to begin configuring the screen again.
MSC1000G User’s Guide
Chapter 5 Access Control List Screens
Table 12 MAC Count (continued)
LABEL
DESCRIPTION
Copy
Do the following to copy the settings you configure above to another port or ports.
6. Click Copy.
7. Select to which line card you want to copy the settings.
8. Select to which ports on the line card you want to copy the settings. Use Select
All to select every port. Use Select None to clear all of the check boxes.
9. Click Apply to paste the settings.
ID
This is the slot number of a line card. Click the index number of an active line card
to display the MAC Count Slot screen where you can view and copy settings from
one port to another port or ports on the selected line card.
State
This field displays the line card’s current operational status.
active means the line card is operating normally.
init means the MSC1000G is initializing the line card.
disable means a manager has disabled the line card.
inactive means the line card is starting up or is not operating normally. This could
be due to the card starting, a firmware upgrade in progress or a malfunction. See
Section 34.6 on page 598 for what to do if the line card stays stuck in the inactive
state.
Card Type
This field displays the type of a line card.
Up Time
This field displays how long the line card has been running since the last time it
was started.
Firmware
This field displays the current firmware version installed on the line card.
5.6.1 MAC Count Slot Screen
Click the slot number of an active line card in the MAC Count screen to display the screen
shown next.
MSC1000G User’s Guide
95
Chapter 5 Access Control List Screens
Figure 38 MAC Count: Slot
The following table describes the labels in this screen.
Table 13 MAC Count: Slot
LABEL
DESCRIPTION
UP
Click UP to go back to the previous screen.
Copy
Do the following to copy settings from one port to another port or ports.
1. Select the Select radio button of the port from which you want to copy settings
2. Click Copy.
3. Select to which line card you want to copy the settings.
4. Select to which ports on the line card you want to copy the settings. Use Select
All to select every port. Use Select None to clear all of the check boxes.
5. Click Apply to paste the settings.
Port
This field displays the number of the DSL port.
Enable
This field displays whether the MAC count limit is activated on the specified DSL
port or not (V for enabled, - for disabled).
Limited Number
of Learned MAC
Address
This fields displays how many MAC addresses a port may dynamically learn.
Select
Select the radio button of the port from which you want to copy settings.
5.7 MAC Filter Screen
Use MAC filter to allow or block frames from MAC (Media Access Control) address(es) that
you specify to come in through a port. You may specify up to ten MAC addresses per port.
96
MSC1000G User’s Guide
Chapter 5 Access Control List Screens
"
You cannot enable both MAC filtering and MAC count on the same port at the
same time.
Click ACL > MAC Filter to display the screen shown next.
Figure 39 MAC Filter
The following table describes the labels in this screen.
Table 14 MAC Filter
LABEL
DESCRIPTION
Slot
Port
Use the drop-down list boxes to select an DSL port on a line card for which you
wish to configure MAC filtering.
Load
Click Load to display the port’s current settings.
Enable
Select the check box to turn on the MAC filtering feature on a line card’s specified
DSL port.
Mode
Select accept to only allow frames from MAC addresses that you specify and
block frames from other MAC addresses.
Select deny to block frames from MAC addresses that you specify and allow
frames from other MAC addresses.
MAC1~10
Type a device’s MAC address in hexadecimal notation (xx:xx:xx:xx:xx:xx, where x
is a number from 0 to 9 or a letter from a to f) in this field. The MAC address must
be a valid MAC address.
MSC1000G User’s Guide
97
Chapter 5 Access Control List Screens
Table 14 MAC Filter (continued)
LABEL
DESCRIPTION
Apply
Click Apply to save the changes in this screen to the system’s volatile memory.
The system loses these changes if it is turned off or loses power, so use the
Config Save on the navigation panel and then the Save button to save your
changes to the non-volatile memory when you are done configuring.
Cancel
Click Cancel to begin configuring the screen again.
ID
This is the slot number of a line card. Click the index number of an active line card
to display the MAC Filter Slot screen where you can view MAC filtering settings
on the specified line card.
State
This field displays the line card’s current operational status.
active means the line card is operating normally.
init means the MSC1000G is initializing the line card.
disable means a manager has disabled the line card.
inactive means the line card is starting up or is not operating normally. This could
be due to the card starting, a firmware upgrade in progress or a malfunction. See
Section 34.6 on page 598 for what to do if the line card stays stuck in the inactive
state.
Card Type
This field displays the type of a line card.
Up Time
This field displays how long the line card has been running since the last time it
was started.
Firmware
This field displays the current firmware version installed on the line card.
5.7.1 MAC Filter Slot Screen
Click the slot number of an active line card in the MAC Filter screen to display the screen
shown next.
Figure 40 MAC Filter: Slot
The following table describes the labels in this screen.
Table 15 MAC Filter: Slot
98
LABEL
DESCRIPTION
UP
Click UP to go back to the previous screen.
Port
This field displays the number of the DSL port.
Mode
This field displays the filter action.
Enable
This field displays whether MAC filtering is activated on the specified DSL port or
not (V for enabled, - for disabled).
MAC
This fields displays the MAC address(es) you set for the port.
MSC1000G User’s Guide
Chapter 5 Access Control List Screens
5.8 OUI Filter
Configure an OUI (Organizationally Unique Identifier) filter to block or forward packets from
devices with the specified OUI in the MAC address.
The OUI field is the first three octets in a MAC address. An OUI uniquely identifies the
manufacturer of a network device and allows you to identify from which device brands the
switch will accept traffic or send traffic to. The OUI value is assigned by the IANA.
Click ACL > OUI Filter to display the configuration screen.
Figure 41 OUI Filter
The following table describes the labels in this screen.
Table 16 OUI Filter
LABEL
DESCRIPTION
Slot
Port
Use the drop-down list boxes to select an DSL port on a line card for which you wish
to configure packet type filtering.
Load
Click Load to display the port’s current settings.
Enable
Select Enable to activate this filter.
Clear this check box to disable the filter without deleting it.
Mode
Specify the action on matched frames.
Select accept to allow frames with a matched OUI field in the MAC addresses. The
switch blocks frames with other OUIs not specified.
Select deny to block frames with a matched OUI field in the MAC addresses. The
switch allows frames with other OUIs not specified.
MSC1000G User’s Guide
99
Chapter 5 Access Control List Screens
Table 16 OUI Filter (continued)
LABEL
DESCRIPTION
OUI1.. 10
Enter the first three octets of a MAC address in the format xx:xx:xx. For example,
00:0F:FE.
Apply
Click Apply to save the changes in this screen to the system’s volatile memory. The
system loses these changes if it is turned off or loses power, so use the Config Save
on the navigation panel and then the Save button to save your changes to the nonvolatile memory when you are done configuring.
Cancel
Click Cancel to begin configuring the screen again.
Copy
Do the following to copy the settings you configure above to another port or ports.
1. Click Copy.
2. Select to which line card you want to copy the settings.
3. Select to which ports on the line card you want to copy the settings. Use Select
All to select every port. Use Select None to clear all of the check boxes.
4. Click Apply to paste the settings.
ID
This is the slot number of a line card. Click the index number of an active line card to
display the OUI Filter Slot screen where you can view and copy settings from one
port to another port or ports on the selected line card.
State
This field displays the line card’s current operational status.
active means the line card is operating normally.
init means the MSC1000G is initializing the line card.
disable means a manager has disabled the line card.
inactive means the line card is starting up or is not operating normally. This could be
due to the card starting, a firmware upgrade in progress or a malfunction. See
Section 34.6 on page 598 for what to do if the line card stays stuck in the inactive
state.
Card Type
This field displays the type of a line card.
Up Time
This field displays how long the line card has been running since the last time it was
started.
Firmware
This field displays the current firmware version installed on the line card.
5.8.1 OUI Filter Slot Screen
Click the slot number of an active line card in the OUI Filter screen to display the screen
shown next.
100
MSC1000G User’s Guide
Chapter 5 Access Control List Screens
Figure 42 OUI Filter: Slot
The following table describes the labels in this screen.
Table 17 DHCP Snooping: Slot
LABEL
DESCRIPTION
UP
Click UP to go back to the previous screen.
Copy
Do the following to copy settings from one port to another port or ports.
1. Select the Select radio button of the port from which you want to copy settings
2. Click Copy.
3. Select to which line card you want to copy the settings.
4. Select to which ports on the line card you want to copy the settings. Use Select
All to select every port. Use Select None to clear all of the check boxes.
5. Click Apply to paste the settings.
Port
This field displays the number of the DSL port.
Mode
This field displays the filter mode (deny or accept).
Enable
This field displays whether OUI filtering is activated on the specified DSL port or
not (V for enabled, - for disabled).
OUI
This field displays the OUI address to filter on a port.
Select
Select the radio button of the port from which you want to copy settings.
5.9 Packet Filter Screen
Use this screen to set which types of packets the switch accepts on individual DSL ports. Click
ACL > Packet Filter to display the screen shown next.
MSC1000G User’s Guide
101
Chapter 5 Access Control List Screens
Figure 43 Packet Filter
The following table describes the labels in this screen.
Table 18 Packet Filter
LABEL
DESCRIPTION
Slot
Port
Use the drop-down list boxes to select an DSL port on a line card for which you wish
to configure packet type filtering.
Load
Click Load to display the port’s current settings.
Select the radio buttons of the types of packets to accept on the ADSL port.
102
Accept All
Select Accept All to allow any traffic.
PPPoE Only
Select PPPoE Only to allow only PPPoE traffic. This will gray out the check boxes for
other packet types and the switch will drop any non-PPPoE packets.
Custom
Select Custom and specify which types of packets listed below will be blocked.
PPPoE Filter
Out
Point-to-Point Protocol over Ethernet relies on PPP and Ethernet. It is a specification
for connecting the users on an Ethernet to the Internet through a common broadband
medium, such as a single DSL line, wireless device or cable modem.
IP Filter Out
Internet Protocol. The underlying protocol for routing packets on the Internet and
other TCP/IP-based networks.
ARP Filter Out
Address Resolution Protocol is a protocol for mapping an Internet Protocol address
(IP address) to a physical computer address that is recognized in the local network.
NetBIOS Filter
Out
NetBIOS (Network Basic Input/Output System) are TCP or UDP packets that enable
a computer to find other computers.
MSC1000G User’s Guide
Chapter 5 Access Control List Screens
Table 18 Packet Filter (continued)
LABEL
DESCRIPTION
DHCP Filter
Out
Dynamic Host Configuration Protocol (DHCP) automatically assigns IP addresses to
clients when they log on. DHCP centralizes IP address management on central
computers that run the DHCP server program. DHCP leases addresses, for a period
of time, which means that past addresses are “recycled” and made available for
future reassignment to other systems.
EAPOL Filter
Out
EAP (Extensible Authentication Protocol, RFC 2486) over LAN. EAP is used with
IEEE 802.1x to allow additional authentication methods (besides RADIUS) to be
deployed with no changes to the access point or the wireless clients.
IGMP Filter
Out
Internet Group Multicast Protocol is used when sending packets to a specific group of
hosts.
Apply
Click Apply to save the changes in this screen to the system’s volatile memory. The
system loses these changes if it is turned off or loses power, so use the Config Save
on the navigation panel and then the Save button to save your changes to the nonvolatile memory when you are done configuring.
Cancel
Click Cancel to begin configuring the screen again.
Copy
Do the following to copy the settings you configure above to another port or ports.
1. Click Copy.
2. Select to which line card you want to copy the settings.
3. Select to which ports on the line card you want to copy the settings. Use Select
All to select every port. Use Select None to clear all of the check boxes.
4. Click Apply to paste the settings.
ID
This is the slot number of a line card. Click the index number of an active line card to
display the Packet Filter Slot screen where you can view and copy settings from
one port to another port or ports on the selected line card.
State
This field displays the line card’s current operational status.
active means the line card is operating normally.
init means the MSC1000G is initializing the line card.
disable means a manager has disabled the line card.
inactive means the line card is starting up or is not operating normally. This could be
due to the card starting, a firmware upgrade in progress or a malfunction. See
Section 34.6 on page 598 for what to do if the line card stays stuck in the inactive
state.
Card Type
This field displays the type of a line card.
Up Time
This field displays how long the line card has been running since the last time it was
started.
Firmware
This field displays the current firmware version installed on the line card.
MSC1000G User’s Guide
103
Chapter 5 Access Control List Screens
5.10 Packet Filter Slot Screen
Click the slot number of an active line card in the Packet Filter screen to display the screen
shown next.
Figure 44 Packet Filter: Slot
The following table describes the labels in this screen.
Table 19 Packet Filter: Slot
104
LABEL
DESCRIPTION
UP
Click UP to go back to the previous screen.
Copy
Do the following to copy settings from one port to another port or ports.
1. Select the Select radio button of the port from which you want to copy settings
2. Click Copy.
3. Select to which line card you want to copy the settings.
4. Select to which ports on the line card you want to copy the settings. Use Select
All to select every port. Use Select None to clear all of the check boxes.
5. Click Apply to paste the settings.
Slot
This field displays the number of the DSL port.
Accept All,
PPPoE Only,
PPPoE, IP, ARP,
NetBIOS, DHCP,
EAPOL, IGMP
These are the packet filter settings for each port.
Accept All and PPPoE Only: “V” displays for the packet types that the system is
to accept on the port. “-” displays for packet types that the system is to reject on
the port.
PPPoE, IP, ARP, NetBIOS, DHCP, EAPOL and IGMP: “V” displays for the packet
types that the system is to reject on the port. “-” displays for packet types that the
system is to accept on the port.
Select
Select the radio button of the port from which you want to copy settings.
MSC1000G User’s Guide
Chapter 5 Access Control List Screens
5.11 IEEE 802.1x
This section describes the IEEE 802.1x authentication method and RADIUS server connection
setup.
IEEE 802.1x is an extended authentication protocol1 that allows support of RADIUS (Remote
Authentication Dial In User Service, RFC 2138, 2139) for centralized user profile
management on a network RADIUS server.
5.11.1 RADIUS
RADIUS authentication is a popular protocol used to authenticate users by means of an
external server instead of (or in addition to) an internal device user database that is limited to
the memory capacity of the device. In essence, RADIUS authentication allows you to validate
an unlimited number of users from a central location. In the following graphic, the RADIUS
server (A) authenticates users 1, 2 and 3.
Figure 45 RADIUS Server
A
2
1
3
5.12 802.1X PNAC Port Setup Screen
Click ACL > 802.1X PNAC to display the screen shown next. PNAC stands for Port-based
Network Access Control. Use this screen to configure IEEE 802.1x settings.
1.
Not all Windows operating systems support IEEE 802.1x (see the Microsoft web site for details). For other
operating systems, see its documentation. If your operating system does not support IEEE 802.1x, then you
may need to install IEEE 802.1x client software.
MSC1000G User’s Guide
105
Chapter 5 Access Control List Screens
Figure 46 802.1X PNAC: Port Setup
The following table describes the labels in this screen.
Table 20 802.1X PNAC: Port Setup
LABEL
DESCRIPTION
Slot
Port
Use the drop-down list boxes to select an DSL port on a line card for which you
wish to configure IEEE 802.1x authentication.
Load
Click Load to display the port’s current settings.
Enable
Select this check box to turn on IEEE 802.1x authentication on the system.
Control
Select AUTO to authenticate all subscribers before they can access the network
through this port.
Select FORCE AUTHORIZED to allow all connected users to access the network
through this port without authentication.
Select FORCE UNAUTHORIZED to deny all subscribers access to the network
through this port.
Reauthentication Specify if a subscriber has to periodically re-enter his or her username and
password to stay connected to the port.
Reauthentication Specify how often a client has to re-enter his or her username and password to stay
Period(s)
connected to the port.
106
Apply
Click Apply to save the changes in this screen to the system’s volatile memory. The
system loses these changes if it is turned off or loses power, so use the Config
Save on the navigation panel and then the Save button to save your changes to the
non-volatile memory when you are done configuring.
Cancel
Click Cancel to begin configuring the screen again.
MSC1000G User’s Guide
Chapter 5 Access Control List Screens
Table 20 802.1X PNAC: Port Setup (continued)
LABEL
DESCRIPTION
Copy
Do the following to copy the settings you configure above to another port or ports.
1. Click Copy.
2. Select to which line card you want to copy the settings.
3. Select to which ports on the line card you want to copy the settings. Use Select
All to select every port. Use Select None to clear all of the check boxes.
4. Click Apply to paste the settings.
ID
This is the slot number of a line card. Click the index number of an active line card
to display the 802.1X PNAC Slot screen where you can view and copy settings
from one port to another port or ports on the selected line card.
State
This field displays the line card’s current operational status.
active means the line card is operating normally.
init means the MSC1000G is initializing the line card.
disable means a manager has disabled the line card.
inactive means the line card is starting up or is not operating normally. This could
be due to the card starting, a firmware upgrade in progress or a malfunction. See
Section 34.6 on page 598 for what to do if the line card stays stuck in the inactive
state.
Card Type
This field displays the type of a line card.
Up Time
This field displays how long the line card has been running since the last time it was
started.
Firmware
This field displays the current firmware version installed on the line card.
5.12.1 802.1X PNAC Slot Screen
Click the slot number of an active line card in the Port Setup screen to display the screen
shown next.
MSC1000G User’s Guide
107
Chapter 5 Access Control List Screens
Figure 47 802.1X PNAC: Port Setup: Slot
The following table describes the labels in this screen.
Table 21 802.1X PNAC: Port Setup: Slot
108
label
description
UP
Click UP to go back to the previous screen.
Copy
Do the following to copy settings from one port to another port or ports.
1. Select the Select radio button of the port from which you want to copy settings
2. Click Copy.
3. Select to which line card you want to copy the settings.
4. Select to which ports on the line card you want to copy the settings. Use Select
All to select every port. Use Select None to clear all of the check boxes.
5. Click Apply to paste the settings.
Port
This field displays the number of the DSL port.
Enable
This field displays whether IEEE 802.1x is turned on or not (V for enabled, - for
disabled).
Control
This field displays the IEEE 802.1x port authentication option for a subscriber port.
Reauthentication
This field displays whether the IEEE 802.1x re-authentication option is turned on
or not (V for enabled, - for disabled).
Reauthentication
Period (Sec)
This field displays the IEEE 802.1x re-authentication period.
Select
Select the radio button of the port from which you want to copy settings.
MSC1000G User’s Guide
Chapter 5 Access Control List Screens
5.13 RADIUS Screen
Click ACL > 802.1X PNAC > RADIUS to display the screen shown next.
Figure 48 802.1X PNAC: RADIUS
The following table describes the labels in this screen.
Table 22 802.1X PNAC: RADIUS
LABEL
DESCRIPTION
Enable
Select this check box to have the switch use an external RADIUS server to
authenticate users.
Radius Server
1/2
IP address
Enter the IP address of the external RADIUS server in dotted decimal notation.
UDP Port
The default port of the RADIUS server for authentication is 1812. You need not
change this value unless your network administrator instructs you to do so.
Shared Secret
Specify a password (up to 31 alphanumeric characters) as the key to be shared
between the external RADIUS server and the system. This key is not sent over the
network. This key must be the same on the external RADIUS server and the switch.
Apply
Click Apply to save the changes in this screen to the system’s volatile memory. The
system loses these changes if it is turned off or loses power, so use the Config
Save on the navigation panel and then the Save button to save your changes to the
non-volatile memory when you are done configuring.
Cancel
Click Cancel to begin configuring the screen again.
MSC1000G User’s Guide
109
Chapter 5 Access Control List Screens
110
MSC1000G User’s Guide
CHAPTER
6
Alarm Screens
This chapter describes alarm management.
6.1 Current Alarm Screen
Click Alarm > Current Alarm to display the screen where you can view all current alarms.
You can also click a tab to view the alarms only specific to one severity level.
Figure 49 Current Alarm: All
The following table describes the labels in this screen.
Table 23 Current Alarm: All
LABEL
DESCRIPTION
UP
Click UP to go to the System Info screen.
Show All
Select the radio button to display all alarms.
Show Alarm
Select the radio button and specify a range of time in the year/month/day format to
From To (YYYY/ display the alarms occur during this period only.
MM/DD)
Apply
Click Apply to display the alarms (either all or from the time range you selected).
No
This is the index number of the alarm.
Alarm
This is the alarm category.
Condition
This is the alarm condition.
Severity
This is the severity level of alarms.
Timestamp
This is the time when the alarm occurred.
Source
This is the location where the alarm occurred.
Previous 10
Click Previous 10 to show the preceding 10 pages of information.
MSC1000G User’s Guide
111
Chapter 6 Alarm Screens
Table 23 Current Alarm: All (continued)
LABEL
DESCRIPTION
Previous
Next
Click Previous or Next to show the preceding/following screen if the information
cannot be displayed in one screen.
Next 10
Click Next 10 to show the following 10 pages of alarms.
6.2 History Alarm Screen
Click Alarm > History Alarm to display the screen where you can view all historic alarms.
You can also click a tab to view the alarms only specific to one severity level.
112
MSC1000G User’s Guide
Chapter 6 Alarm Screens
Figure 50 History Alarm: All
The following table describes the labels in this screen.
Table 24 History Alarm: All
LABEL
DESCRIPTION
UP
Click UP to go to the System Info screen.
Show All
Select the radio button to display all alarms.
Show Alarm
Select the radio button and specify a range of time in the year/month/day format to
From To (YYYY/ display the alarms occur during this period only.
MM/DD)
Apply
Click Apply to display the alarms (either all or from the time range you selected).
No
This is the index number of the alarm.
MSC1000G User’s Guide
113
Chapter 6 Alarm Screens
Table 24 History Alarm: All (continued)
LABEL
DESCRIPTION
Alarm
This is the alarm category.
Condition
This is the alarm condition.
Severity
This is the severity level of alarms.
TimeStamp
This is the time when the alarm occurred.
Source
This is the location where the alarm occurred.
Previous 10
Click Previous 10 to show the preceding 10 alarms.
Previous
Next
Click Previous or Next to show the preceding/following screen if the information
cannot be displayed in one screen.
Next 10
Click Next 10 to show the following 10 alarms.
6.3 Alarm Port Setup Screen
Use this screen to set the severity level of alarms to record on specified ports. Click Alarm >
Alarm Port Setup to display the screen shown next.
Figure 51 Alarm Port Setup
114
MSC1000G User’s Guide
Chapter 6 Alarm Screens
The following table describes the labels in this screen.
Table 25 Alarm Port Setup
LABEL
DESCRIPTION
sub1
sub2
up1
up2
Management
Select the severity level from info, minor, major and critical for the alarms to
record on the specified port of the MSC.
Apply
Click Apply to save the changes in this screen to the system’s volatile memory. The
system loses these changes if it is turned off or loses power, so use the Config
Save on the navigation panel and then the Save button to save your changes to the
non-volatile memory when you are done configuring.
Slot
Port
Use the drop-down list boxes to select an DSL port on a line card for which you wish
to configure the severity level.
Load
Click Load to refresh the whole screen.
Severity
Select the minimum severity level of alarms (info, minor, major or critical) that the
system records on the port.
Apply
Click Apply to save the changes in this screen to the system’s volatile memory. The
system loses these changes if it is turned off or loses power, so use the Config
Save on the navigation panel and then the Save button to save your changes to the
non-volatile memory when you are done configuring.
Cancel
Click Cancel to begin configuring the screen again.
Copy
Do the following to copy settings from one port to another port or ports.
1. Select the Select radio button of the port from which you want to copy settings
2. Click Copy.
3. Select to which line card you want to copy the settings.
4. Select to which ports on the line card you want to copy the settings. Use Select
All to select every port. Use Select None to clear all of the check boxes.
5. Click Apply to paste the settings.
ID
This is the slot number of a line card. Click the index number of an active line card to
display the Alarm Port Setup Slot screen where you can view and copy settings
from one port to another port or ports on the selected line card.
MSC1000G User’s Guide
115
Chapter 6 Alarm Screens
Table 25 Alarm Port Setup (continued)
LABEL
DESCRIPTION
State
This field displays the line card’s current operational status.
active means the line card is operating normally.
init means the MSC1000G is initializing the line card.
disable means a manager has disabled the line card.
inactive means the line card is starting up or is not operating normally. This could
be due to the card starting, a firmware upgrade in progress or a malfunction. See
Section 34.6 on page 598 for what to do if the line card stays stuck in the inactive
state.
Card Type
This field displays the type of a line card.
Up Time
This field displays how long the line card has been running since the last time it was
started.
Firmware
This field displays the current firmware version installed on the line card.
6.3.1 Alarm Port Setup Slot Screen
Click the slot number of a line card in the Alarm Port Setup screen to display the screen
shown next.
Figure 52 Alarm Port Setup: Slot
116
MSC1000G User’s Guide
Chapter 6 Alarm Screens
The following table describes the labels in this screen.
Table 26 Alarm Port Setup: Slot
LABEL
DESCRIPTION
UP
Click UP to go back to the previous screen.
Copy
Do the following to copy settings from one port to another port or ports.
1. Select the Select radio button of the port from which you want to copy settings
2. Click Copy.
3. Select to which line card you want to copy the settings.
4. Select to which ports on the line card you want to copy the settings. Use Select
All to select every port. Use Select None to clear all of the check boxes.
5. Click Apply to paste the settings.
Port
This field displays the number of the DSL port.
Severity
This field displays the minimum severity level of alarms that the system records on
the port.
Select
Select the radio button of the port from which you want to copy settings.
6.4 Alarm Severity Assignment Screen
Click Alarm > Alarm Severity Assignment to configure the severity levels of individual
alarms and where the system is to send them. Click a tab to view the alarms specific to an
alarm category.
MSC1000G User’s Guide
117
Chapter 6 Alarm Screens
Figure 53 Alarm Severity Assignment: DSL
The following table describes the labels in this screen.
Table 27 Alarm Severity Assignment: DSL
118
LABEL
DESCRIPTION
Condition
This identifies an individual alarm. See Section 6.5 on page 119 for more
information.
Facility
Select the log facility (local1~local7) to have the device log the syslog messages to
a specific file in the syslog server. See your syslog program’s documentation for
details.
SNMP
Select the check box to have the switch send SNMP traps of the specified alarm
condition.
Syslog
Select the check box to have the switch send syslog messages of the specified
alarm condition.
Severity
Select the severity level from minor, major and critical for the specified alarm
condition. You cannot change the severity level of the info severity level alarms.
Clearable
Select the check box to allow an administrator to manually remove records of the
specified alarm.
Select All
Select an option from the Select All drop-down list box to automatically select that
option for all entries. Alternatively, you may configure individual entries.
Select a Select All check box to automatically select that option for all entries. Clear
it to clear that option for all entries. Alternatively, you may select or clear the check
boxes for individual entries.
Apply
Click Apply to save the changes in this screen to the system’s volatile memory. The
system loses these changes if it is turned off or loses power, so use the Config
Save on the navigation panel and then the Save button to save your changes to the
non-volatile memory when you are done configuring.
Cancel
Click Cancel to begin configuring the screen again.
MSC1000G User’s Guide
Chapter 6 Alarm Screens
6.5 Alarm Descriptions
This table describes the alarms on the MSC1000G.
•
•
•
•
“ALC” is the ADSL Line Card.
“SLC” is the SHDSL Line Card.
“VLC” is the VDSL Line Card.
“TCA” Stands for Threshold Crossed Alarm and indicates that an alarm profile threshold
was exceeded.
• An “X” means that the alarm applies to the specific card.
• Atu-c refers to the IES-5000 or the downstream channel (for traffic going from the IES5000 to the subscriber).
• Atu-r refers to subscriber or the upstream channel (for traffic coming from the subscriber
to the IES-5000).
Table 28 Alarm Descriptions
ALARM
SEVERITY
MSC ALC SLC
VLC
DESCRIPTION
DSL
LINE_UP
INFO
X
X
The line is up.
LINE_DOWN
MINOR
X
X
The line is down.
LINE_LDM_START
INFO
X
The line entered loop diagnosis mode.
LINE_LDM_END
INFO
X
The loop diagnostics were OK and the line
left loop diagnosis mode.
LINE_PM_L2
INFO
X
The line went into power down L2 mode.
LINE_PM_L0
INFO
X
The line went into power down L0 mode.
LINE_FAIL
MAJOR
X
ADSL_TCA_LOL
INFO
X
The Loss Of Link seconds (<value>) within
15 minutes for the atu(c or r) has reached
the threshold (<value>).
ADSL_TCA_LOF
INFO
X
The Loss Of Frame seconds (<value>)
within 15 minutes for the atu(c or r) has
reached the threshold (<value>).
ADSL_TCA_LOS
INFO
X
The Loss Of Signal seconds (<value>)
within 15 minutes for the atu(c or r) has
reached the threshold (<value>).
ADSL_TCA_LPR
INFO
X
The Loss of Power (<value>) of 15-minute
interval of the atu(c or r) reaches threshold
(<value>)
ADSL_TCA_ES
INFO
X
The Error Seconds (<value>) within 15
minutes for the atu(c or r) has reached the
threshold (<value>).
ADSL_RATE_CHANGE
INFO
X
The transmission rate of the atu(c or r)
changed from <value> to <value>.
ADSL_TCA_SES
INFO
X
The Severely Errored Seconds (<value>)
within 15 minutes for the atu(c or r) has
reached the threshold (<value>).
ADSL_TCA_UAS
INFO
X
The UnAvailable Seconds (<value>) within
15 minutes for the atu(c or r) has reached
the threshold (<value>).
MSC1000G User’s Guide
X
The line failed.
119
Chapter 6 Alarm Screens
Table 28 Alarm Descriptions (continued)
ALARM
SEVERITY
MSC ALC SLC
VLC
DESCRIPTION
SHDSL_TCA_ATTEN
INFO
X
The loop attenuation (<value>) of the
endpoint (unit address <value>-<side>-wire
pair <value>) reached or exceeded the
threshold (<value>).
SHDSL_TCA_SNRM
INFO
X
The SNR margin (<value>) of the endpoint
(unit address <value>-<side>-wire pair
<value>) reached or dropped below the
threshold (<value>).
SHDSL_TCA_ES
INFO
X
The error seconds (<value>) of the
endpoint (unit address <value>-<side>-wire
pair <value>) reached or exceeded the
threshold (<value>).
SHDSL_TCA_SES
INFO
X
The severely errored seconds (<value>) of
the endpoint (unit address <value>-<side>wire pair <value>) reached or exceeded the
threshold (<value>).
SHDSL_TCA_CRC
INFO
X
The CRC anomalies (<value>) of the
endpoint (unit address <value>-<side>-wire
pair <value>) reached or exceeded the
threshold (<value>).
SHDSL_TCA_LOSW
INFO
X
The Loss Of Sync Word seconds (<value>)
of the endpoint (unit address <value><side>-wire pair <value>) reached or
exceeded the threshold (<value>).
SHDSL_TCA_UAS
INFO
X
The UnAvailable Seconds (<value>) of the
endpoint (unit address <value>-<side>-wire
pair <value>) reached or exceeded the
threshold (<value>)
VDSL_TCA_LOL
INFO
X
The Loss Of Link seconds (<value>) within
15 minutes for the atu(c or r) has reached
the threshold (<value>).
VDSL_TCA_LOF
INFO
X
The Loss Of Frame seconds (<value>)
within 15 minutes for the atu(c or r) has
reached the threshold (<value>).
VDSL_TCA_LOS
INFO
X
The Loss Of Signal seconds (<value>)
within 15 minutes for the atu(c or r) has
reached the threshold (<value>).
VDSL_TCA_LPR
INFO
X
The Loss of Power (<value>) within 15
minutes for the atu(c or r) has reached the
threshold (<value>).
VDSL_TCA_ES
INFO
X
The Error Seconds (<value>) within 15
minutes for the atu(c or r) has reached the
threshold (<value>).
VDSL_TCA_SES
INFO
X
The Severely Errored Seconds (<value>)
within 15 minutes for the atu(c or r) has
reached the threshold (<value>).
VDSL_TCA_UAS
INFO
X
The UnAvailable Seconds (<value>) within
15 minutes for the atu(c or r) has reached
the threshold (<value>).
Equipment
DC_POWER_FAIL
120
CRITICAL
X
The -48VDC power -<index> failed.
MSC1000G User’s Guide
Chapter 6 Alarm Screens
Table 28 Alarm Descriptions (continued)
ALARM
SEVERITY
MSC ALC SLC
VOLTAGE_ERROR
CRITICAL
X
X
X
The voltage <index> at input <value> is too
low <value>, or high <value>.
TEMPERATURE_ERROR
CRITICAL
X
X
X
The temperature <index> at input <value>
is too low <value> or high <value>.
FAN_ERROR
CRITICAL
X
The fan <index> speed <value> is too low
<value> or high <value>
FAN_STOP_LOW_TEMP
MINOR
X
The fan stopped due to low temperature.
HW_MONITOR_FAIL
CRITICAL
COLD_START
INFO
X
System cold-start.
WARM_START
INFO
X
System warm-start.
MGMT_ETHER_UP
INFO
X
The management Ethernet interface is up.
MGMT_ETHER_DOWN
MINOR
X
The management Ethernet interface is
down.
ALARM_IN
CRITICAL
X
External alarm on input <index>.
SPT_TOPOLOGY_CHANG
MINOR
X
A spanning tree topology change was
detected.
NT_FW_UPLOAD_OK
INFO
X
Firmware upload was successful.
NT_FW_UPLOAD_FAIL
MAJOR
X
Firmware upload failed.
LT_PLUG_IN
INFO
X
A line card was inserted into a slot.
LT_PULL_OUT
MAJOR
X
A line card was removed from a slot.
LT_DSL_DEVICE_FAIL
CRITICAL
X
A DSL chipset on an ALC failed.
LT_DSL_DEVICE_RELOA
D
INFO
X
A DSL chipset on an ALC re-downloaded
firmware <index>.
LT_ACTIVE
INFO
X
A line card became active.
LT_INACTIVE
MAJOR
X
A line card became inactive.
LT_FW_UPLOAD_OK
INFO
X
X
X
Firmware was successfully uploaded to a
card.
LT_FW_UPLOAD_FAIL
MAJOR
X
X
X
Firmware upload to a card failed.
LT_ENABLE
INFO
X
Line card enabled.
LT_DISABLE
INFO
X
Line card disabled.
LT_RESET
INFO
X
Line card reset.
NT_SWITCH_OVER
MAJOR
X
The MSC1000G in standby mode becomes
active.
CPU_UTIL_HIGH
MAJOR
X
The MSC1000G is overloading.
REBOOT
INFO
X
The system restarted.
CONFIG_CHANGE
INFO
X
The system configuration has changed.
CONFIG_UPLOAD_OK
INFO
X
Uploading of the system configuration was
successful.
CONFIG_UPLOAD_FAIL
MAJOR
X
Uploading of the system configuration
failed.
X
X
VLC
DESCRIPTION
A hardware monitor diagnosis test failed.
System
MSC1000G User’s Guide
121
Chapter 6 Alarm Screens
Table 28 Alarm Descriptions (continued)
ALARM
SEVERITY
MSC ALC SLC
VLC
DESCRIPTION
TIME_SYNC_FAIL
MINOR
X
Synchronizing the time with a timeserver
failed.
ALARM_CUT_OFF
INFO
X
An administrator cutoff (canceled) an
alarm.
ALARM_CLEAR
INFO
X
An administrator cleared the alarms.
LOGIN_FAIL
MINOR
X
A user failed to login.
LOGIN_OK
INFO
X
A user logged in successfully.
ACCOUNT_ADD
INFO
X
A user account was added.
ACCOUNT_DELETE
INFO
X
A user account was deleted.
ACCOUNT_MODIFY
INFO
X
A user’s account was modified.
SVR_SYNC_PROF_OK
INFO
X
Server-initiated profile synchronization is
successful.
SVR_SYNC_PROF_FAIL
INFO
X
Server-initiated profile synchronization
failed.
CLI_SYNC_PROF_OK
INFO
X
Client-initiated profile synchronization is
successful.
CLI_SYNC_PROF_FAIL
INFO
X
Client-initiated profile synchronization
failed.
ANTI_SPOOFING
Minor
X
A system connected to the MSC1000G
detected a MAC address connected to
more than one port.
CLUSTER_MBR_ACTIVE
INFO
X
The cluster manager has established a
connection with a particular cluster
member.
CLUSTER_MBR_INACTIV
E
INFO
X
The cluster manager has established a
connection with a particular cluster
member.
CLUSTER_MBR_ADD
INFO
X
The cluster manager added a member to a
cluster.
CLUSTER_MBR_DELETE
INFO
X
The cluster manager removed a member
from cluster.
ENET_UP
INFO
X
One of the MSC1000G’s Gigabit Ethernet
interfaces is up.
ENET_DOWN
MINOR
X
One of the MSC1000G’s Gigabit Ethernet
interfaces is down.
Ethernet
6.6 Alarm Clear Screen
Click Alarm > Alarm Clear to open this screen where you can erase alarm entries.
122
MSC1000G User’s Guide
Chapter 6 Alarm Screens
Figure 54 Alarm Clear
The following table describes the labels in this screen.
Table 29 Alarm Clear
LABEL
DESCRIPTION
Current Alarm
Click Clear to manually remove the records of all the current alarms that are
clearable.
History Alarm
Click Clear to manually remove the records of all the historical (past) alarms that are
clearable. Use the drop-down list box to select the severity level of alarms that you
want to remove.
Alarm output
Cutoff
Click Cutoff to cancel an alarm. This stops the sending of the alarm signal current.
This is useful in stopping an alarm if you have the alarm output connector pins
connected to a visible or audible alarm. The alarm entry remains in the system.
MSC1000G User’s Guide
123
Chapter 6 Alarm Screens
124
MSC1000G User’s Guide
CHAPTER
7
Cluster Screens
This chapter covers how to configure cluster management.
7.1 Cluster Management Status Overview
Cluster management allows you to manage multiple DSLAMs through one DSLAM, called
the cluster manager. The DSLAMs must be directly connected and be in the same VLAN
group so as to be able to communicate with one another.
Table 30 ZyXEL Cluster Management Specifications
Maximum number of
cluster members
8
Cluster Member
Models
Must be DSLAMs compatible with ZyXEL cluster management implementation.
Cluster Manager
The DSLAM through which you can access the web configurators of the cluster
member DSLAMs.
Cluster Members
The DSLAMs (up to seven) being accessed through the cluster manager
DSLAM.
In the following example, DSLAM A in the central office is the cluster manager and the other
DSLAMs are cluster members.
Figure 55 Clustering Application Example
MSC1000G User’s Guide
125
Chapter 7 Cluster Screens
7.2 Cluster Management Status
Click Cluster in the navigation panel to display the following screen.
"
A cluster can only have one manager.
Figure 56 Cluster: Status
The following table describes the labels in this screen.
Table 31 Cluster: Status
126
LABEL
DESCRIPTION
Number of
Members in
Cluster
This is how many DSLAMs are in the management cluster (including the cluster
manager).
ID
You can manage cluster member DSLAMs via the cluster manager DSLAM. The
number for each cluster member is a hyperlink leading to the DSLAM’s web
configurator (see Figure 58 on page 129). ID 1 is the cluster manager.
State
This field displays the status of this DSLAM within the cluster.
active: the manager can communicate with the member.
inactive: the manager can not communicate with the member.
waiting: the manager has sent a command to add the member and is waiting for a
response.
error: the member reported that the password was wrong.
If a member DSLAM’s management password changes, then it cannot be managed
from the cluster manager and its State displays as error. You need to delete the
member from the Cluster > Configuration screen’s Membership Configuration list
and re-add it from the Cluster Candidate list.
Hostname
This is the cluster DSLAM’s System Name.
Uptime
This field displays how long the DSLAM has been turned on and in the cluster.
Model
This field displays the model name of the DSLAM.
MacAddr
This is the DSLAM’s hardware MAC address.
MSC1000G User’s Guide
Chapter 7 Cluster Screens
7.3 Cluster Management Configuration
Use this screen to configure cluster management settings. Click Cluster > Configuration to
display the next screen.
Figure 57 Cluster: Configuration
MSC1000G User’s Guide
127
Chapter 7 Cluster Screens
The following table describes the labels in this screen.
Table 32 Cluster: Configuration
LABEL
DESCRIPTION
Cluster Manager
Activity
Select Disabled to have this DSLAM not function as part of the cluster.
Select Manager to have this DSLAM become the cluster manager DSLAM. A
cluster can only have one manager. Other cluster managers do not display in
the Cluster Candidate list.
Select Member to have this DSLAM become a cluster member so it can be
managed through the cluster manager.
If a DSLAM that was previously a cluster member is later set to become a
cluster manager, then its Status is displayed as Error in the old cluster
manager’s Cluster > Status screen and a warning icon (
) appears in the
Cluster > Configuration screen’s Membership Configuration list. You need to
change the cluster configuration of the old cluster member.
Cluster Name
Type a name to identify the cluster. You may use up to 32 printable characters.
Spaces are not allowed.
Password
Each cluster member’s password is its management password. When you set a
DSLAM to be a cluster member, enter its management password.
Vid
This is the cluster management VLAN ID. The cluster’s DSLAMs must be
directly connected and in the same VLAN group. The cluster management VID
must be different from the management VID.
Apply
Click Apply to save the changes in this section of the screen to the system’s
volatile memory. The system loses these changes if it is turned off or loses
power, so use the Config Save on the navigation panel and then the Save
button to save your changes to the non-volatile memory when you are done
configuring.
Cancel
Click Cancel to begin configuring the screen again.
Membership
Configuration
ID
This is the index number of a cluster member.
Hostname
This is the cluster DSLAM’s System Name.
Model
This field displays the device’s model name.
MAC Address
This is the DSLAM’s hardware MAC address.
Select
Select this check box (or use Select All to select every check box) and then
click the Delete button to remove a cluster member from the cluster.
Cancel
Click Cancel to reset the fields.
Cluster Candidate
128
The following table lists the DSLAMs that the cluster manager has added to the
cluster.
The MSC1000G finds potential cluster member DSLAMs by auto-discovery and
lists them here. The DSLAMs must be directly connected and in the same VLAN
group. You must have also logged into that device and configured it as a cluster
member.
A device can only be part of one cluster at a time. If a device is already in
another cluster, it does not display here. Devices that are set to be cluster
managers will not be visible.
ID
This is the index number of a cluster member candidate.
Hostname
This is the cluster DSLAM’s System Name.
Model
This field displays the device’s model name.
MAC Address
This is the DSLAM’s hardware MAC address.
MSC1000G User’s Guide
Chapter 7 Cluster Screens
Table 32 Cluster: Configuration (continued)
LABEL
DESCRIPTION
Select
Select this check box and then configure the Password and the Member ID
fields and click the Apply button to add a cluster member candidate to the
cluster.
Password
Each cluster member’s password is its management password. When you
select a DSLAM to be a cluster member, enter its management password.
If a member DSLAM’s management password changes, then it cannot be
managed from the cluster manager. Its State displays as Error in the Cluster >
Status screen and a warning icon ( ) appears in the Cluster > Configuration
screen’s Membership Configuration list. You need to delete the member from
the Membership Configuration list and re-add it from the Cluster Candidate
list.
Member ID
This is the index number of a cluster member.
Apply
Click Apply to add a cluster member candidate to the cluster. The MSC1000G
checks the password with the device. The changes in this section of the screen
are saved to the system’s volatile memory. The system loses these changes if it
is turned off or loses power, so use the Config Save on the navigation panel
and then the Save button to save your changes to the non-volatile memory
when you are done configuring.
Cancel
Click Cancel to reset the fields.
Refresh
Click Refresh to update the list of suitable candidates found by auto-discovery.
7.3.1 Cluster Member Management
Click Cluster > Status screen of the cluster manager and then click an Index hyperlink from
the list of members to go to that cluster member's web configurator. The top of the cluster
member's web configurator screen displays cluster information.
Figure 58 Cluster Member Web Configurator Screen
MSC1000G User’s Guide
129
Chapter 7 Cluster Screens
The following table describes the labels at the top of the screen.
Table 33 Cluster Member Web Configurator Screen
130
LABEL
DESCRIPTION
Cluster Name
This is the name of the cluster.
Cluster ID
This is the VLAN ID that the cluster uses and is only applicable if the manager
DSLAM is set to use IEEE 802.1Q VLAN. All DSLAMs must be directly
connected and in the same VLAN group to belong to the same cluster. This field
is ignored if the clustering manager is using port-based VLAN.
Hostname
This is the cluster member DSLAM’s System Name.
Manager DSLAM
This is the cluster manager DSLAM’s System Name.
MSC1000G User’s Guide
CHAPTER
8
Diagnostic Screens
This chapter explains the Diagnostic screens.
8.1 LDM Test Screen (DELT)
Click Diagnostic > LDM in the navigation panel to display this screen. Use this screen to
perform loop diagnostics (LDM stands for Loop Diagnostic Mode) on an ADSL port. This is a
Dual End Loop Test (DELT). A DELT provides details about the line condition. The
subscriber device must also support DELT in order to perform this. This feature is applicable
for ALC line cards only.
Figure 59 LDM Test
MSC1000G User’s Guide
131
Chapter 8 Diagnostic Screens
The following table describes the labels in this screen.
Table 34 LDM Test
LABEL
DESCRIPTION
LDM Test
Select slot and port numbers from the Slot and Port drop-down list boxes and
click Set LDM Port to perform loop diagnostics on the specified port. Only slots
with an active ADSL line card display in the Slot drop-down list box. The ADSL
port must be set to ADSL2 or ADSL2+ ADSL operational mode and have a
connection. It takes about one minute for the loop diagnostics to finish. The
screen displays a message confirming upon which ADSL port loop diagnostics
will be performed.
Click Get LDM Data to display the loop diagnostics results after using the Set
LDM Port button on an ADSL port. Use the loop diagnostics results to analyze
problems with the physical ADSL line.
Note: Wait at least one minute after using Set LDM Port before
using Get LDM Data.
8.1.1 Loop Diagnostics Test Parameters
The following table lists the loop diagnostics test parameters that display, see the ITU-T’s
G.992.3 for more information.
Table 35 Loop Diagnostics Test Parameters
132
LABEL
DESCRIPTION
near end
This column of diagnostics results is for the upstream traffic (coming from the
subscriber to the IES-5000).
far end
This column of diagnostics results is for the downstream traffic (going from the
IES-5000 to the subscriber).
attainable bit rate
(kbps)
This is the upstream and downstream attainable net data rate in Kilobits/s.
loop attenuation
(dB)
This is the upstream and downstream line attenuation, measured in decibels
(dB).
Loop attenuation is the difference between the power transmitted at the near-end
and the power received at the far-end. Loop attenuation is affected by the
channel characteristics (wire gauge, quality, condition and length of the physical
line).
signal attenuation
(dB)
This is the upstream and downstream signal attenuation (reductions in amplitude
of the DSL signal). It is measured in decibels (dB).
Signal attenuation is affected by factors such as noise, heat, crosstalk and loop
attenuation.
snr margin (dB)
This is the upstream and downstream Signal-to-Noise Ratio margin (in dB). A
DMT sub-carrier’s SNR is the ratio between the received signal power and the
received noise power. The signal-to-noise ratio margin is the maximum that the
received noise power could increase with the system still being able to meet its
transmission targets.
actual tx power fe
(dBm)
This is the upstream and downstream far end actual aggregate transmit power (in
dBm)
MSC1000G User’s Guide
Chapter 8 Diagnostic Screens
8.2 F5 Loopback Screen
Click Diagnostic > F5 Loopback in the navigation panel to display this screen. Use this
screen to perform loopback tests.
Figure 60 F5 Loopback
The following table describes the labels in this screen.
Table 36 F5 Loopback
LABEL
DESCRIPTION
F5 Loopback
Select slot and port numbers from the Slot and Port drop-down list boxes and enter a
VPI/VCI to specify a PVC. Click test to perform an OAMF5 loopback test on the
specified DSL port. An Operational, Administration and Maintenance Function 5 test is
used to test the connection between two DSL devices. First, the DSL devices establish
a virtual circuit. Then the local device sends an ATM F5 cell to be returned by the
remote DSL device (both DSL devices must support ATM F5 in order to use this test).
The results (“Passed” or “Failed”) display in the multi-line text box.
8.3 IP Ping Screen
Click Diagnostic > IP Ping in the navigation panel to display this screen. Use this screen to
ping IP addresses.
MSC1000G User’s Guide
133
Chapter 8 Diagnostic Screens
Figure 61 IP Ping
The following table describes the labels in this screen.
Table 37 IP Ping
LABEL
DESCRIPTION
IP Ping
Type the IP address of a device that you want to ping in order to test a connection.
In the field to the right specify the number of times that you want to ping the IP address.
Click Ping to ping the IP address that you specified.
8.4 Trace Route Screen
Click Diagnostic > Trace Route in the navigation panel to display this screen. Use this screen
to show the path that packets take from the system to a specific IP address.
Figure 62 Trace Route
134
MSC1000G User’s Guide
Chapter 8 Diagnostic Screens
The following table describes the labels in this screen.
Table 38 Trace Route
LABEL
DESCRIPTION
Trace Route
Type the IP address of a device.
Click Start to perform a trace route in order to check the path that packets take to get to
the IP address that you specified.
MSC1000G User’s Guide
135
Chapter 8 Diagnostic Screens
136
MSC1000G User’s Guide
CHAPTER
9
Maintenance Screens
This chapter explains how to use the maintenance screens.
9.1 Configuration Backup Screen
Click Maintenance > Config Backup in the navigation panel to open the following screen.
Use this screen to back up your system configuration. This allows you to create various “snap
shots” of your device from which you may restore at a later date.
Figure 63 Configuration Backup
1 Click Backup to save your device’s configuration to your computer.
2 In the Save As screen, choose a location to save the file on your computer from the Save
in drop-down list box and type a descriptive name for it in the File name list box. Click
Save to save the configuration file to your computer.
"
You can change the “.dat” file to a “.txt” file and still upload it to the system.
See the chapters on commands to edit the configuration text file.
9.2 Configuration Restore Screen
Click Maintenance > Config Restore in the navigation panel to open the following screen.
Use this screen to load a configuration file from your computer to the system.
MSC1000G User’s Guide
137
Chapter 9 Maintenance Screens
Figure 64 Configuration Restore
Type the path and file name of the configuration file you wish to restore in the File Path text
box or click Browse to display a Choose File screen from which you can locate it. After you
have specified the file, click Restore. "conf-0" is the name of the configuration file on the
system, so your backup configuration file is automatically renamed when you restore using
this screen.
9.3 Configuration Reset Screen
Click Maintenance > Config Reset in the navigation panel to open the following screen. Use
this screen to clear all system configuration information that you have configured and return to
the factory defaults.
Figure 65 Configuration Reset
Click Reset to return the system to the factory default settings.
Figure 66 Confirm Restore Factory Default Settings
Click OK to begin resetting all system configurations to the factory defaults and then wait for
the system to restart. This takes up to two minutes. If you want to access the web configurator
again, you may need to change the IP address of your computer to be in the same subnet as
that of the default system IP address (192.168.1.1 for in-band, 192.168.0.1 for out-of-band).
138
MSC1000G User’s Guide
Chapter 9 Maintenance Screens
Figure 67 Restart After Load Factory Defaults
9.4 Firmware Upgrade Screen
Click Maintenance > Firmware Upgrade in the navigation panel to open the following
screen. Use this screen to view your current firmware version number and upload firmware to
cards in the system. Make sure you have downloaded (and unzipped) the correct model
firmware and version to your computer before uploading to the card.
1
Be sure to upload the correct model firmware as uploading the wrong model
firmware may damage a card.
Figure 68 FW Upgrade
Select the check boxes beside the card or cards to which you want to upload firmware. You
can simultaneously upload firmware to cards of the same type. You can only upload firmware
to cards that are active.
Type the path and file name of the firmware file you wish to upload in the File Path text box
or click Browse to locate it. After you have specified the file, click Upgrade.
After the firmware upgrade process is complete, use this screen to verify your current
firmware version number.
MSC1000G User’s Guide
139
Chapter 9 Maintenance Screens
9.5 Reboot Screen
Click Maintenance > Reboot in the navigation panel to open the following screen. Use this
screen to restart the system without physically turning the power off.
Figure 69 Reboot
Use the Config Save screen first if you want to save the system’s current configuration.
Otherwise, using the Reboot button will return the system to the configuration that was last
saved to nonvolatile memory.
Click the Reboot button to display the following screen.
Figure 70 Confirm Restart
Click OK.
Figure 71 Rebooting
Click OK again and wait for the system to restart. This takes up to two minutes.
140
MSC1000G User’s Guide
CHAPTER
10
Multicast Screens
This chapter describes the Multicast screens.
10.1 IGMP Introduction
Traditionally, IP packets are transmitted in one of either two ways - Unicast (1 sender to 1
recipient) or Broadcast (1 sender to everybody on the network). Multicast delivers IP packets
to just a group of hosts on the network.
IGMP (Internet Group Multicast Protocol) is a network-layer protocol used to establish
membership in a multicast group - it is not used to carry user data. Refer to RFCs 1112, 2236
and 3376 for information on IGMP versions 1, 2 and 3 respectively.
10.1.1 IP Multicast Addresses
In IPv4, a multicast address allows a device to send packets to a specific group of hosts
(multicast group) in a different sub-network. A multicast IP address represents a traffic
receiving group, not individual receiving devices. IP addresses in the Class D range (224.0.0.0
to 239.255.255.255) are used for IP multicasting. Certain IP multicast numbers are reserved by
IANA for special purposes (see the IANA web site for more information).
10.1.2 IGMP Snooping
A layer-2 switch can passively snoop on IGMP Query, Report and Leave (IGMP versions 2
and 3) packets transferred between IP multicast routers/switches and IP multicast hosts to
learn the IP multicast group membership. It checks IGMP packets passing through it, picks out
the group registration information, and configures multicasting accordingly. IGMP snooping
allows the system to learn multicast groups without you having to manually configure them.
The system forwards multicast traffic destined for multicast groups (that it has learned from
IGMP snooping or that you have manually configured) to ports that are members of that
group. The system discards multicast traffic destined for multicast groups that it does not
know. IGMP snooping generates no additional network traffic, allowing you to significantly
reduce multicast traffic passing through your device.
10.1.3 IGMP Proxy
To allow better network performance, you can use IGMP proxy instead of a multicast routing
protocol in a simple tree network topology.
MSC1000G User’s Guide
141
Chapter 10 Multicast Screens
In IGMP proxy, an upstream interface is the port that is closer to the source (or the root of the
multicast tree) and is able to receive multicast traffic. There should only be one upstream
interface (also known as the query port) on the system to limit bandwidth use. A downstream
interface is a port that connects to a host (such as a computer). A query VLAN determines
which ports are downstream interfaces.
The following figure shows a network example where A is the multicast source while
computers 1, 2 and 3 are the receivers. In the figure A is connected to the upstream interface
and 1, 2 and 3 are connected to the downstream interface.
Figure 72 IGMP Proxy Network Example
A
1
2
3
The system will not respond to IGMP join and leave messages on the upstream interface. The
system only responds to IGMP query messages on the upstream interface. The system sends
IGMP query messages to the hosts that are members of the query VLAN.
The system only sends an IGMP leave messages via the upstream interface when the last host
leaves a multicast group.
One of the Ethernet ports acts as the upstream interface. By default, the DSL ports are set as
the downstream interfaces.
"
The switch does not allow a subscriber port to send multicast traffic (except
static multicast traffic) to an uplink port. Only the uplink port can forward
multicast traffic to the subscriber port(s).
10.1.4 IGMP Snooping and Proxy Note
The IES-5000 acts as an IGMPv3 client host for an edge IGMPv3 multicast router and as a
IGMPv2/v3 router for IGMPv2/v3 client hosts (subscribers). The IES-5000 can recognize
IGMPv3 protocol messages and forward them towards the IGMP multicast router. It does not
support full-featured IGMPv3 functions like source IP address control specified in RFC 3376.
142
MSC1000G User’s Guide
Chapter 10 Multicast Screens
10.2 IGMP Setup Screen
Click Multicast > IGMP in the navigation panel to display the screen shown next. Use this
screen to configure your IGMP settings.
Figure 73 IGMP Setup
The following table describes the labels in this screen.
Table 39 IGMP Setup
LABEL
DESCRIPTION
IGMP Mode
Select Enable_IGMP_Snooping to have the system passively learn multicast
groups.
Select Enable_IGMP_Proxy to have the system proxy multicast traffic.
Select Disable to have the system not use either IGMP proxy or snooping.
IGMP Version
Select which version of IGMP you want the system to support. Select IGMPv2 (V2) or
IGMPv3 (V3). If you select IGMPv2, the system discards IGMPv3 packets. This
provides better security if none of the devices in the network use IGMPv3. If you
select IGMPv3, the system recognizes both IGMPv2 and IGMPv3.
Add Static
Query VID
Type the number for an IGMP proxy VLAN and click Apply to add a static VLAN on
which the system sends IGMP query messages. This should be the number of a
subscriber VLAN. The VLAN will appear in the Static Query VID Table. You must
configure the system’s VLAN settings before you can set static query VIDs.
Static Query
VID Table
This table lists the manually added VLANs on which the system sends IGMP query
messages. These are multicast service subscriber VLANs.
Click Delete to remove the selected entry.
Dynamic
Query VID
Table
This table lists the IGMP query VLANs that the system has dynamically learned via
IGMP snooping or IGMP proxy. These are VLANs on which the system sends IGMP
query messages. They are multicast service subscriber VLANs.
MSC1000G User’s Guide
143
Chapter 10 Multicast Screens
10.3 IGMP Filtering
With the IGMP filtering feature, you can set which IGMP groups a subscriber on a port can
join. This allows you to control the distribution of multicast services (such as content
information distribution) based on service plans and types of subscription.
You can set the device to filter the multicast group join reports on a per-port basis by
configuring an IGMP filtering profile and associating the profile to a port.
10.4 IGMP Filter Setup Screen
You can use the IGMP filter profiles to control access to a service that uses a specific multicast
group (like a SIP server for example). Configure an IGMP filter profile that allows access to
that multicast group. Then assign the IGMP filter profile to ADSL ports that are allowed to use
the service.
Click Multicast > IGMP > Filter Setup to open the following screen.
The DEFVAL IGMP filter profile is assigned to all of the DSL ports by default. It allows a port
to join all multicast IP addresses (224.0.0.0~239.255.255.255). If you want to allow an DSL
subscriber access to only specific IGMP multicast groups, use the IGMP Filter Profile screen
to configure a different profile and then use the IGMP Filter Setup screen to assign it to the
subscriber’s DSL port.
Use the top of the screen to set the IGMP filter profile that an individual DSL port (or entire
slot) uses. Click an ID number in the bottom part of the screen to go to a screen where you can
copy a DSL port’s IGMP filter profile setting to another DSL port.
Figure 74 IGMP Filter Setup
144
MSC1000G User’s Guide
Chapter 10 Multicast Screens
The following table describes the labels in this screen.
Table 40 IGMP Filter Setup
LABEL
DESCRIPTION
Slot
Select the number of a line card’s slot.
Port
Select the number of a DSL port on the line card.
Load
Click Load to retrieve the port’s IGMP filter profile setting and display it in the Profile
drop-down list box.
Profile
Select an IGMP filtering profile.
Apply
Click Apply to have the specified DSL port use the selected IGMP filter profile.
Cancel
Click Cancel to set the fields back to the settings that you last retrieved.
Copy
Do the following to copy settings from one DSL port to another DSL port or ports.
1. Use the Slot and Port drop-down list boxes and the Load button to select the
number of the DSL port from which you want to copy IGMP filter profile settings.
2. Click Copy to open the following screen.
Figure 75 Copy
3. Select a line card to which you want to copy settings.
4. Select the check boxes of the DSL ports on the line card to which you want to
copy the IGMP filter profile setting. Click Select All to mark all of the port check
boxes or click Select None to clear all of the port check boxes.
5. Click Apply to copy the IGMP filter settings to all of the ports that you have
selected in this screen. Click Cancel to close the screen without saving changes.
ID
This column lists the slot numbers of the line cards. Click the ID number of an active
line card to go to a screen where you can copy a DSL port’s IGMP filter profile setting
to another DSL port.
State
This field displays the line card’s current operational status.
active means the line card is operating normally.
init means the MSC1000G is initializing the line card.
disable means a manager has disabled the line card.
inactive means the line card is starting up or is not operating normally. This could be
due to the card starting, a firmware upgrade in progress or a malfunction. See Section
34.6 on page 598 for what to do if the line card stays stuck in the inactive state.
Card Type
This field displays the type of a line card.
Up Time
This field displays how long the line card has been running since the last time it was
started.
Firmware
This field displays the current firmware version installed on the line card.
MSC1000G User’s Guide
145
Chapter 10 Multicast Screens
10.4.1 IGMP Filter Setup Slot Screen
Click Multicast > IGMP > Filter Setup and then the slot number of an active line card to
open the following screen.
Figure 76 IGMP Filter Setup: Slot
The following table describes the labels in this screen.
Table 41 IGMP Filter Setup: Slot
LABEL
DESCRIPTION
UP
Click this to return to the IGMP Filter Setup screen.
Port
These are the numbers of the DSL ports on the line card.
Profile
This is the IGMP filtering profile that a DSL port is currently set to use.
Copy
Do the following to copy IGMP filter settings from one DSL port to another DSL port or
ports.
1. Select the radio button of the DSL port from which you want to copy IGMP filter
profile settings.
2. Click Copy to open the following screen.
Figure 77 IGMP Filter Copy
3. Select a line card to which you want to copy settings.
4. Select the check boxes of the DSL ports on the line card to which you want to
copy the IGMP filter profile setting. Click Select All to mark all of the port check
boxes or click Select None to clear all of the port check boxes.
5. Click Apply to copy the IGMP filter settings to all of the ports that you have
selected in this screen. Click Cancel to close the screen without saving changes.
146
MSC1000G User’s Guide
Chapter 10 Multicast Screens
10.5 Static Multicast
Use static multicast to allow incoming frames based on multicast MAC address(es) that you
specify. This feature can be used in conjunction with IGMP snooping to allow multicast MAC
address(es) that are not learned by IGMP snooping or IGMP proxy. Use static multicast to pass
routing protocols, such as RIP and OSPF.
10.6 Static Multicast Screen
Click Multicast > Static Multicast in the navigation panel to display the screen shown next.
Figure 78 Static Multicast
The following table describes the related labels in this screen.
Table 42 Static Multicast
LABEL
DESCRIPTION
VID
Type the number of the VLAN that this static multicast group is to use.
Group IP
This is the static multicast IP address.
Type a VID and a group IP and click Apply to display entries in the first table.
Index
This column lists the slot numbers of the line cards. Click the number of an active line
card to go to a screen where you can set the membership of each of the card’s ports
for this static multicast group.
Cardname
This field displays the type of card installed in a slot.
MSC1000G User’s Guide
147
Chapter 10 Multicast Screens
Table 42 Static Multicast (continued)
LABEL
DESCRIPTION
Port
This section lists the VLAN membership setting of each port on each line card. An “F”
indicates that the port is a permanent member of the static multicast group. An “X”
indicates that the port is forbidden (blocked) from joining the static multicast group.
An “-” indicates that the port is a normal member and can join the group dynamically.
Apply
Click Apply to save the changes in this screen to the system’s volatile memory. The
system loses these changes if it is turned off or loses power, so use the Config Save
on the navigation panel and then the Save button to save your changes to the nonvolatile memory when you are done configuring.
New
After you click Apply, entries display in the first table so you can edit them. Click New
if you want to configure a different static multicast group.
Cancel
Click Cancel to begin configuring the screen again.
Modify
Select a static multicast group’s radio button and click Modify to display the static
multicast group in the table above so you can edit it.
Delete
Select a static multicast group’s radio button and click Delete to remove the static
multicast group.
VID
This is the number of the VLAN that this static multicast group uses.
Group IP
This is the static multicast IP address.
Port
This section lists the VLAN membership setting of the ports on the management
switch card. An “F” indicates that the port is a permanent member of the static
multicast group. An “X” indicates that the port is forbidden (blocked) from joining the
static multicast group. An “-” indicates that the port is a normal member and can join
the VLAN dynamically.
Slot
This section displays the numbers of any slots that are fixed members of the static
multicast group. All other slots are represented by a “-”.
Select
Select a static multicast group’s radio button and then click Modify to be able to edit
it or click Delete to remove it.
10.6.1 Static Multicast Slot Screen
Click Multicast > Static Multicast in the navigation panel to display the Static Multicast
screen. Type a VID and a group IP and click Apply to display entries in the first table. Click
the slot number of an active line card to open the following screen.
148
MSC1000G User’s Guide
Chapter 10 Multicast Screens
Figure 79 Static Multicast Slot
The following table describes the related labels in this screen.
Table 43 Static Multicast Slot
LABEL
DESCRIPTION
1~X
The numbers represent the individual ports on the card.
Use the F, -, and X radio buttons to set each port’s membership in the static multicast
group.
Select F to make the port a permanent member of the static multicast group.
Select - to make the port a normal member and allow it to join the VLAN dynamically.
Select X to set the port to “forbidden” meaning it is always blocked from joining the
static multicast group.
Use the All Fix, All Normal or All Forbidden button if you want to set all of the
card’s ports to the same membership status for this static multicast group.
Apply
Click Apply to save the changes in this screen to the system’s volatile memory. The
system loses these changes if it is turned off or loses power, so use the Config Save
on the navigation panel and then the Save button to save your changes to the nonvolatile memory when you are done configuring.
Cancel
Click Cancel to close the screen without saving your changes.
MSC1000G User’s Guide
149
Chapter 10 Multicast Screens
150
MSC1000G User’s Guide
CHAPTER
11
DSL Port Setup Screens
This chapter explains how to configure settings for individual DSL ports. It also covers how to
configure permanent virtual circuits.
11.1 ADSL Standards Overview
These are the ADSL standards and rates that the ADSL line card supports at the time of
writing. The actual transfer rates will vary depending on what the subscriber’s device supports,
the line conditions and the connection distance.
Table 44 ADSL Standards Maximum Transfer Rates
STANDARD
MAXIMUM DOWNSTREAM
MAXIMUM UPSTREAM
G.dmt
8160 Kbps
1024 Kbps
ANSI T1.413 issue 2
8160 Kbps
1024 Kbps
G.lite
1536 Kbps
512 Kbps
ADSL2
12000 Kbps
1200 Kbps
ADSL2 Annex M
12000 Kbps
2400 Kbps
ADSL2+
25000 Kbps
1200 Kbps
ADSL2+ Annex M
25000 Kbps
2400 Kbps
11.2 VDSL Parameters
The following sections introduce some VDSL parameters.
11.2.1 Frequency Band Plan
Each VDSL mode operates in a different frequency band allocation, resulting in different
upstream and downstream speeds.
Band plan 997 is optimized for symmetric connections and is used mostly in Europe.2 Band
plan 998 is suitable for asymmetric connections and is widely used in North America.
2.
Band plan 997 is not supported at the time of writing.
MSC1000G User’s Guide
151
Chapter 11 DSL Port Setup Screens
11.2.2 Upstream Power Back Off
PSD (Power Spectral Density) defines the distribution of a VDSL line’s power in the
frequency domain.
In a network with varying telephone wiring lengths, the PSD on each line is different. This
causes crosstalk between the lines. Enable Upstream Power Back Off (UPBO) to allow the
system to adjust the transmit PSD of all lines based on a reference line length so that the PSD
at the receiving end is the same.
11.2.3 RFI (Radio Frequency Interference)
RFI is induced noise on the lines by surrounding radio frequency electromagnetic radiation
from sources such as AM and HAM radio stations. Since VDSL uses a much larger frequency
range that overlaps with other radio frequency systems, signals from VDSL lines and other
radio systems interfere with each other. To avoid performance degradation due to RFI, set the
switch to not transmit VDSL signals in the RFI band defined by the regulatory bodies (ETSI
and ANSI). You can also configure your own RFI bands on the system.
11.3 Downstream and Upstream
Downstream refers to traffic going out from the line card to the subscriber's DSL modem or
router. Upstream refers to traffic coming into the line card from the subscriber's DSL modem
or router.
11.4 DSL Profiles
A DSL profile is a table that contains a list of pre-configured DSL settings. Each DSL port has
one (and only one) profile assigned to it at any given time. You can configure multiple
profiles, including profiles for troubleshooting. Profiles allow you to configure DSL ports
efficiently. You can configure many DSL ports with the same profile, thus removing the need
to configure the settings of each DSL port one-by-one. You can also change an individual DSL
port’s settings by assigning it a different profile.
For example, you could set up different profiles for different kinds of accounts (for example,
economy, standard and premium). Assign the appropriate profile to an DSL port and it takes
care of a large part of the port’s configuration. You still get to individually enable or disable
each port and configure port specific settings. See the chapter on profiles for how to configure
DSL profiles.
11.5 Alarm Profiles
Alarm profiles define DSL port alarm thresholds. The system sends an alarm trap and
generates a syslog entry when the thresholds of the alarm profile are exceeded. See the chapter
on profiles for how to configure alarm profiles.
152
MSC1000G User’s Guide
Chapter 11 DSL Port Setup Screens
11.6 Default Settings
The default profiles always exists and all of the DSL ports use the default profile settings when
the line card is shipped. The default profiles are named DEFVAL. Refer to the chapter on
initial configuration for the settings of the default profile and DSL port default settings.
11.7 ADSL Port Setup
Click Port > ADSL in the navigation panel to open the following screen. Use this screen to
configure settings for individual ADSL ports.
Figure 80 ADSL Port Setup
The following table describes the fields in this screen.
Table 45 ADSL Port Setup
LABEL
DESCRIPTION
Slot
Select the number of a line card’s slot.
Port
Select the number of a DSL port on the line card.
Load
Click Load to display the port’s settings in the fields below.
Enable
Select this check box to turn on this port.
Mode
Select the port’s ADSL operational mode. Select the mode that the subscriber’s
device uses or auto to have the system automatically determine the mode to use.
See Table 44 on page 151 for information on the individual ADSL modes.
MSC1000G User’s Guide
153
Chapter 11 DSL Port Setup Screens
Table 45 ADSL Port Setup (continued)
LABEL
DESCRIPTION
ADSL Profile
Select a profile of ADSL settings (such as the transfer rate, interleave delay and
signal to noise ratio settings) to assign to this port. Use the ADSL Profile screen
to configure ADSL port profiles.
Alarm Profile
Select an alarm profile to define the thresholds that trigger an alarm on the port
when exceeded.
Customer
Information
Enter information to identify the subscriber connected to this ADSL port. You can
use up to 31 printable English keyboard characters (including spaces and
hyphens).
Telephone No.
Enter information to identify the telephone number of the subscriber connected to
this ADSL port. You can use up to 15 English keyboard characters (including
spaces and hyphens).
Advanced
Feature
Click the Setup button to open a screen where you can configure the ADSL port’s
detailed settings.
Apply
Click Apply to save the changes in this screen to the system’s volatile memory.
The system loses these changes if it is turned off or loses power, so use the
Config Save on the navigation panel and then the Save button to save your
changes to the non-volatile memory when you are done configuring.
Cancel
Click Cancel to begin configuring the screen again.
Copy
Do the following to copy DSL settings from one DSL port to another DSL port or
ports.
1. Use the Slot and Port drop-down list boxes and the Load button to select the
number of the DSL port from which you want to copy settings.
2. Click Copy to open the following screen.
Figure 81 Copy
3. Select a line card to which you want to copy settings.
4. Select the check boxes of the DSL ports on the line card to which you want to
copy the settings. Click Select All to mark all of the port check boxes or click
Select None to clear all of the port check boxes.
5. Click Apply to copy the settings to all of the ports that you have selected in this
screen. Click Cancel to close the screen without saving changes.
ID
154
This column lists the slot numbers of the line cards. Click the ID number of an
active ADSL line card to go to a screen where you can copy an ADSL port’s
settings to another ADSL port.
MSC1000G User’s Guide
Chapter 11 DSL Port Setup Screens
Table 45 ADSL Port Setup (continued)
LABEL
DESCRIPTION
State
This field displays the line card’s current operational status.
active means the line card is operating normally.
init means the MSC1000G is initializing the line card.
disable means a manager has disabled the line card.
inactive means the line card is starting up or is not operating normally. This could
be due to the card starting, a firmware upgrade in progress or a malfunction. See
Section 34.6 on page 598 for what to do if the line card stays stuck in the inactive
state.
Card Type
This field displays the type of a line card.
Up Time
This field displays how long the line card has been running since the last time it
was started.
Firmware
This field displays the current firmware version installed on the line card.
11.7.1 ADSL Port Setup Line Card Screen
Click Port > ADSL in the navigation panel to open the ADSL Port Setup screen. Click the
slot number of an active ADSL line card to open the following screen. Use this screen to
configure settings for individual ADSL ports and copy settings between ports.
Figure 82 ADSL Port Setup: Line Card
MSC1000G User’s Guide
155
Chapter 11 DSL Port Setup Screens
The following table describes the fields in this screen.
Table 46 ADSL Port Setup: Line Card
LABEL
DESCRIPTION
UP
Click this to return to the previous screen.
Copy
Do the following to copy settings from one DSL port to another DSL port or ports.
1. Use the Select column to choose a DSL port from which you want to copy
settings.
2. Click Copy to open the following screen.
Figure 83 Copy
3. Select a line card to which you want to copy settings.
4. Select the check boxes of the DSL ports on the line card to which you want to
copy the settings. Click Select All to mark all of the port check boxes or click
Select None to clear all of the port check boxes.
5. Click Apply to copy the settings to all of the ports that you have selected in this
screen. Click Cancel to close the screen without saving changes.
156
Apply
Click Apply to save the changes in this screen to the system’s volatile memory.
The system loses these changes if it is turned off or loses power, so use the
Config Save on the navigation panel and then the Save button to save your
changes to the non-volatile memory when you are done configuring.
Cancel
Click Cancel to begin configuring the screen again.
Port
These are the numbers of the DSL ports on the line card.
To configure advanced port settings, click a port number to display the ADSL Port
Setup screen.
Enable
Select a check box in this column to turn on a port. Select the check box at the top
of the column to turn on all of the line card’s ports.
Customer
Information
Enter information to identify the subscriber connected to this ADSL port. You can
use up to 31 printable English keyboard characters (including spaces and
hyphens).
ADSL Profile
Select a profile of ADSL settings (such as the transfer rate, interleave delay and
signal to noise ratio settings) to assign to this port. Use the ADSL Profile screen
to configure ADSL port profiles.
Mode
Select the port’s ADSL operational mode. Select the mode that the subscriber’s
device uses or auto to have the system automatically determine the mode to use.
See Table 44 on page 151 for information on the individual ADSL modes.
Select
Use the Select column to choose a DSL port from which you want to copy
settings.
MSC1000G User’s Guide
Chapter 11 DSL Port Setup Screens
11.7.2 ADSL Port Setup Advanced
Click Port > ADSL in the navigation panel to open the ADSL Port Setup screen. Click the
slot number of an active ADSL line card and click a port number to display the configuration
screen. Use this screen to configure an ADSL port’s detailed settings.
Figure 84 ADSL Port Setup: Advanced
The following table describes the fields in this screen.
Table 47 ADSL Port Setup: Advanced
LABEL
DESCRIPTION
UP
Click this to return to the previous screen.
Apply
Click Apply to save the changes in this screen to the system’s volatile memory.
The system loses these changes if it is turned off or loses power, so use the
Config Save on the navigation panel and then the Save button to save your
changes to the non-volatile memory when you are done configuring.
Cancel
Click Cancel to begin configuring the screen again.
Enable
Select this check box to turn on this port.
Customer Info
Enter information to identify the subscriber connected to this ADSL port. You can
use up to 31 printable English keyboard characters (including spaces and
hyphens).
Telephone No.
Enter information to identify the telephone number of the subscriber connected to
this ADSL port. You can use up to 15 English keyboard characters (including
spaces and hyphens).
MSC1000G User’s Guide
157
Chapter 11 DSL Port Setup Screens
Table 47 ADSL Port Setup: Advanced (continued)
LABEL
DESCRIPTION
ADSL Profile
Select a profile of ADSL settings (such as the transfer rate, interleave delay and
signal to noise ratio settings) to assign to this port. Use the ADSL Profile screen
to configure ADSL port profiles.
Mode
Select an ADSL mode from the drop-down list box the card is to use.
Alarm Profile
Select an alarm profile to define the thresholds that trigger an alarm on the port
when exceeded.
ADSL2/2+
Feature
These are features available with ADSL2/2+. The subscriber’s ADSL device must
also support the individual features in order to use them.
Annex I/J
Enable Annex I /J to use all digital mode. With Annex I/J, the ADSL connection
uses the full spectrum of the physical line and the user can not use POTS or ISDN
service. This increases the upstream data rate.
Note: The subscriber cannot use POTS or ISDN services when you
enable Annex I/J.
158
Annex L
Enable Annex L to use reach extended ADSL2. This allows increased connection
distances.
Select enable (narrow) to enable extended ADSL2 in narrow Power Spectral
Density (PSD) mode. Narrow mode supports longer loop lengths but has lower
transmission speeds.
Select enable (wide) to enable extended ADSL2 in wide PSD mode. Narrow
mode supports higher transmission speeds but requires shorter loop lengths.
Select disable to disable extended ADSL2.
Annex M
Enable Annex M to use double upstream mode. This has the upstream connection
use tones 6 to 63.
Option Mask
This field displays the bit mask that represents the features that have been
disabled for this connection. Click the bit mask number to open the Option Mask
screen where you can disable attributes for the port. This is for advanced
troubleshooting.
Power
Management
Mode
Enable power management to reduce the amount of power used overall and
reduce the instances of the connection going down. This increases or decreases
the transmission power based on line conditions. It also decreases the number of
service interruptions.
Select L2 to have the ADSL connection use power saving mode and reduce the
rate when there is no traffic. The rate comes back up when there is traffic.
Select L3 to use both power management modes L2 and L3. L3 puts the ADSL
connection to sleep mode when there is no traffic.
Power Mode
The power mode controls the connection’s power adaptivity.
Select fix to set the maximum downstream transmit power to the number you
specify in the Max DS TxPower field.
Select priority to power to give the saving of transmission power priority over the
transmission rate. The line card attempts to reduce its transmit power as much as
possible while still maintaining the configured minimum rate. This only applies to
the downstream connection and the ADSL operational mode must be G.dmt, ANSI
T1.413 or G.lite.
Select priority to rate to give the transmission rate priority over the saving of
transmission power. The line card attempts to achieve the maximum configured
transmission rate before reducing the transmit power.
Max US TxPower
Set the maximum upstream transmit power, -130~200 in 0.1 dBm.
Max DS TxPower
Set the maximum downstream transmit power, -50~200 in 0.1 dBm.
Max RxPower
Set the maximum aggregate receive power at the line card’s port, -255~255 in 0.1
dBm. This only applies to the ADSL2/2+ ADSL operational modes.
MSC1000G User’s Guide
Chapter 11 DSL Port Setup Screens
Table 47 ADSL Port Setup: Advanced (continued)
LABEL
DESCRIPTION
Minimum Impulse
Noise Protection
Sudden spikes in the line’s noise level (impulse noise) can cause errors and result
in lost packets. Set the impulse noise protection minimum to have a buffer to
protect the ADSL physical layer connection against impulse noise. This buffering
causes a delay that reduces transfer speeds. It is recommended that you use a
non-zero setting for real time traffic that has no error correction (like videoconferencing).
Select a number of DMT symbols to use for the minimum upstream impulse noise
protection (Us_Inp) setting.
Select a number of DMT symbols to use for the minimum downstream impulse
noise protection (Ds_Inp) setting.
Carrier Setup
Use this part of the screen to mask carrier tones. Masking a carrier tone disables
the use of that tone on the ADSL port. Do this to have the system not use an
ADSL line’s tones that are known to have a high noise level.
The “0x” at the beginning of the mask fields indicates hexadecimal digits (0~ffffffff)
are to be used. Each mask can use up to 8 hexadecimal digits. Each hexadecimal
digit represents 4 tones. The hexadecimal digit is converted to binary and a '1'
masks (disables) the corresponding tone.
US Carrier
Use these fields to disable upstream carrier tones (from 0~63).
Mask0 = tones 0~31
Mask1 = tones 32~63
For example,”0x00000080” in the Mask0 field and “0x00000000” in the Mask1
field disables upstream carrier tone 8.
DS Carrier
(32~255)
Use these fields to disable downstream carrier tones (from 32~255).
Mask1 = tones 32~63
Mask2 = tones 64~95
Mask3 = tones 96~127
Mask4 = tones 128~159
Mask5 = tones 160~191
Mask6 = tones 192~223
Mask7 = tones 224~255
For example, “0x01000000” in the Mask2 field and all of the other mask fields set
to the default disables downstream carrier tone 89.
“0x03000000” in the Mask2 field and all of the other mask fields set to the default
disables downstream carrier tones 89 and 90.
DS Carrier
(256~511)
Use these fields to disable downstream carrier tones (from 256~511).
Mask0 = tones 256~287
Mask1 = tones 288~319
Mask2 = tones 320~351
Mask3 = tones 352~383
Mask4 = tones 384~415
Mask5 = tones 416~447
Mask6 = tones 448~479
Mask7 = tones 480~511
For example, “0x00001000” in the Mask1 field and all of the other mask fields set
to the default disables downstream carrier tone 301.
For another example, “0x0000f000”in the Mask1 field and all of the other mask
fields set to the default disables downstream carrier tones 301 to 304.
Apply
Click Apply to save the changes in this screen to the system’s volatile memory.
The system loses these changes if it is turned off or loses power, so use the
Config Save on the navigation panel and then the Save button to save your
changes to the non-volatile memory when you are done configuring.
Cancel
Click Cancel to begin configuring the fields again.
MSC1000G User’s Guide
159
Chapter 11 DSL Port Setup Screens
11.7.3 Option Mask Screen
Click the Option Mask link in the advanced ADSL Port Setup screen to display a pop-up
screen as shown. Use this screen to disable features on a port for advanced troubleshooting.
Figure 85 ADSL Port Setup: Advanced: Option Mask
The following table describes the fields in this screen.
Table 48 ADSL Port Setup: Advanced: Option Mask
160
LABEL
DESCRIPTION
All
Use the check boxes to disable individual features. Use the All check box to select
every feature check box.
Disable Trellis
Trellis encoding helps to reduce the noise in ADSL transmissions. Trellis may
reduce throughput but it makes the connection more stable.
Disable Reed
Solomon
Reed-Solomon performs transmission error correction.
Disable
Upstream/
Downstream
Bitswap
Bit swapping allows the system to respond to noise on a tone by sending it’s data
on another tone. The subscriber (ATU-R) equipment must also support this in
order for it to work.
Disable 1-bit
Constellation
1-bit constellation allows the system to send individual bits over DMT tones that
can only support one bit. This allows the connection to use as many of the tones
as possible.
Disable Transmit
Windowing
Transmit windowing is only available with ADSL2+.
Disable S=0.5
Support(ADSL1
Only)
0.5 support maps two Reed-Solomon code words into one data frame (instead of
one) to increase the maximum G.dmt transmission rate.
Disable G.lite
Rate Limit
(ADSL1 Only)
Disabling the G.lite rate limit allows the G.lite upstream transmission rate to be
greater than 512 Kbps.
Current Option
mask is:
Selecting or clearing feature check boxes adjusts the current option mask
displayed at the bottom of the screen.
Apply
Click Apply to save the changes in this screen to the system’s volatile memory.
The system loses these changes if it is turned off or loses power, so use the
Config Save on the navigation panel and then the Save button to save your
changes to the non-volatile memory when you are done configuring.
Cancel
Click Cancel to close the screen without saving your changes.
MSC1000G User’s Guide
Chapter 11 DSL Port Setup Screens
11.8 VDSL Port Setup
Click Port > VDSL in the navigation panel to open the following screen. Use this screen to
configure settings for individual VDSL ports.
Figure 86 VDSL Port Setup
The following table describes the fields in this screen.
Table 49 VDSL Port Setup
LABEL
DESCRIPTION
Slot
Select the number of a line card’s slot.
Port
Select the number of a DSL port on the line card.
Load
Click Load to display the port’s settings in the fields below.
Enable
Select this check box to turn on this port.
VDSL Profile
Select a VDSL line profile to assign to this port. Use the VDSL Profile screen to
configure VDSL port profiles.
Select a profile defined by the VDSL standard from the drop-down list box. Refer
to Table 52 on page 166 for profile information.
Frequency
Bandplan
Specify a band plan in this field.
Select 997 for symmetric connections.A
Select 998 for asymmetric connections.
Alarm Profile
Select an alarm profile to define the thresholds that trigger an alarm on the port
when exceeded.
MSC1000G User’s Guide
161
Chapter 11 DSL Port Setup Screens
Table 49 VDSL Port Setup (continued)
LABEL
DESCRIPTION
Customer
Information
Enter information to identify the subscriber connected to this DSL port. You can
use up to 31 printable English keyboard characters (including spaces and
hyphens).
Telephone No.
Enter information to identify the telephone number of the subscriber connected to
this DSL port. You can use up to 15 English keyboard characters (including
spaces and hyphens).
Advanced
Features
Click the Setup button to open a screen where you can configure the VDSL port’s
detailed settings.
VLAN
Click the Setup button to open a screen where you can configure the VLAN
settings for the VDSL port.
Apply
Click Apply to save the changes in this screen to the system’s volatile memory.
The system loses these changes if it is turned off or loses power, so use the
Config Save on the navigation panel and then the Save button to save your
changes to the non-volatile memory when you are done configuring.
Cancel
Click Cancel to begin configuring the screen again.
Copy
Do the following to copy DSL settings from one DSL port to another DSL port or
ports.
1. Use the Slot and Port drop-down list boxes and the Load button to select the
number of the DSL port from which you want to copy settings.
2. Click Copy to open the following screen.
Figure 87 Copy
3. Select a line card to which you want to copy settings.
4. Select the check boxes of the DSL ports on the line card to which you want to
copy the settings. Click Select All to mark all of the port check boxes or click
Select None to clear all of the port check boxes.
5. Click Apply to copy the settings to all of the ports that you have selected in this
screen. Click Cancel to close the screen without saving changes.
162
ID
This column lists the slot numbers of the line cards. Click the ID number of an
active DSL line card to go to a screen where you can copy an DSL port’s settings
to another DSL port.
State
This field displays the line card’s current operational status.
active means the line card is operating normally.
init means the MSC1000G is initializing the line card.
disable means a manager has disabled the line card.
inactive means the line card is starting up or is not operating normally. This could
be due to the card starting, a firmware upgrade in progress or a malfunction. See
Section 34.6 on page 598 for what to do if the line card stays stuck in the inactive
state.
MSC1000G User’s Guide
Chapter 11 DSL Port Setup Screens
Table 49 VDSL Port Setup (continued)
LABEL
DESCRIPTION
Card Type
This field displays the type of a line card.
Up Time
This field displays how long the line card has been running since the last time it
was started.
Firmware
This field displays the current firmware version installed on the line card.
A.
Band plan 997 is not supported at the time of writing.
11.8.1 VDSL Port Setup Line Card Screen
Click Port > VDSL in the navigation panel to open the VDSL Port Setup screen. Click the
slot number of an active VDSL line card to open the following screen. Use this screen to
configure settings for individual VDSL ports and copy settings between ports.
Figure 88 VDSL Port Setup: Line Card
MSC1000G User’s Guide
163
Chapter 11 DSL Port Setup Screens
The following table describes the fields in this screen.
Table 50 VDSL Port Setup: Line Card
LABEL
DESCRIPTION
UP
Click this to return to the previous screen.
Copy
Do the following to copy settings from one DSL port to another DSL port or ports.
1. Use the Select column to choose a DSL port from which you want to copy
settings.
2. Click Copy to display the following screen.
Figure 89 Copy
3. Select a line card to which you want to copy settings.
4. Select the check boxes of the DSL ports on the line card to which you want to
copy the settings. Click Select All to mark all of the port check boxes or click
Select None to clear all of the port check boxes.
5. Click Apply to copy the settings to all of the ports that you have selected in this
screen. Click Cancel to close the screen without saving changes.
Apply
Click Apply to save the changes in this screen to the system’s volatile memory.
The system loses these changes if it is turned off or loses power, so use the
Config Save on the navigation panel and then the Save button to save your
changes to the non-volatile memory when you are done configuring.
Cancel
Click Cancel to begin configuring the screen again.
Port
These are the numbers of the DSL ports on the line card.
To configure advanced port settings, click a port number to display the VDSL Port
Setup screen.
Enable
Select a check box in this column to turn on a port. Select the check box at the top
of the column to turn on all of the line card’s ports.
Customer
Information
Enter information to identify the subscriber connected to this VDSL port. You can
use up to 31 printable English keyboard characters (including spaces and
hyphens).
VDSL Profile
Select a profile of VDSL settings (such as the transfer rate, interleave delay and
signal to noise ratio settings) to assign to this port. Use the VDSL Profile screen
to configure VDSL port profiles.
Select
Use the Select column to choose a DSL port from which you want to copy
settings.
11.8.2 VDSL Port Setup Advanced
Click Port > VDSL in the navigation panel to open the VDSL Port Setup screen. Click the
slot number of an active VDSL line card and click a port number to display the configuration
screen. Use this screen to configure an VDSL port’s detailed settings.
164
MSC1000G User’s Guide
Chapter 11 DSL Port Setup Screens
Figure 90 VDSL Port Setup: Advanced
The following table describes the fields in this screen.
Table 51 VDSL Port Setup: Advanced
LABEL
DESCRIPTION
UP
Click this to return to the previous screen.
Customer Info
Enter information to identify the subscriber connected to this VDSL port. You can
use up to 31 printable English keyboard characters (including spaces and
hyphens).
Telephone No.
Enter information to identify the telephone number of the subscriber connected to
this VDSL port. You can use up to 15 English keyboard characters (including
spaces and hyphens).
VDSL Profile
Select a VDSL line profile to assign to this port. Use the VDSL Profile screen to
configure VDSL port profiles.
Select a profile defined by the VDSL standard from the drop-down list box. Refer
to Table 52 on page 166 for profile information.
Frequency
Bandplan
Specify a band plan in this field.
Select 997 for symmetric connections.A
Select 998 for asymmetric connections.
Alarm Profile
Select an alarm profile to define the thresholds that trigger an alarm on the port
when exceeded.
MSC1000G User’s Guide
165
Chapter 11 DSL Port Setup Screens
Table 51 VDSL Port Setup: Advanced (continued)
LABEL
DESCRIPTION
PVID/Priority
Enter the port VID and the VLAN priority.
VDSL Feature
Upstream
UPBO (Upstream Power Back Off) allows the switch to provide better service in a
Power Backoff network environment with telephone wiring of varying lengths.
Select On to activate this feature.
Select Off to deactivate this feature.
RFI Band
RFI Custom
RFI is induced noise on the lines by surrounding radio sources such as AM and
HAM radio stations. To avoid performance degradation due to RFI, set the switch
to not transmit VDSL signals in the RFI band plans defined by the regulatory
bodies. You can also configure your own RFI band plans on the system.
Select ansi to use the RFI band plan settings defined by ANSI.
Select etsi to use the RFI band plan settings defined by ETSI.
Select Disable to deactivate this function.
Select Custom to configure RFI settings in the fields below.
Settings in these fields apply to all VDSL ports. This means if you change the
custom RFI settings on one VDSL port, the same changes apply to all other VDSL
ports.
Index
This field displays the index number.
Enable
Select Enable to activate the RFI band.
Start
Enter the start of the frequency range in kilo Herz (kHz).
End
Enter the end of the frequency range in kHz.
Apply
Click Apply to save the changes in this screen to the system’s volatile memory.
The system loses these changes if it is turned off or loses power, so use the
Config Save on the navigation panel and then the Save button to save your
changes to the non-volatile memory when you are done configuring.
Cancel
Click Cancel to begin configuring the fields again.
A.
Band plan 997 is not supported at the time of writing.
The following table lists the supported VDSL profiles defined by the VDSL standard.
Table 52 Supported VDSL Profiles
PROFILE
8A
8B
8C
8D
12A
Bandwidth (MHz)
8.832
8.832
8.5
8.832
12
Tone
2048
2048
1972
2048
2783
Tone Spacing (kHz)
4.3125
4.3125
4.3125
4.3125
4.3125
Line Power (dBm)
+17.5
+20.5
+11.4
+14.5
+14.5
11.8.3 Transparent LAN Service (TLS)
Transparent LAN Service (also known as VLAN stacking or Q-in-Q) allows a service provider
to distinguish multiple customers VLANs, even those with the same (customer-assigned)
VLAN ID, within its network.
166
MSC1000G User’s Guide
Chapter 11 DSL Port Setup Screens
Use TLS to add an outer VLAN tag to the inner IEEE 802.1Q tagged frames that enter the
network. By tagging the tagged frames (“double-tagged” frames), the service provider can
manage up to 4,094 VLAN groups with each group containing up to 4,094 customer VLANs.
This allows a service provider to provide different services, based on specific VLANs, for
many different customers.
A service provider’s customers may require a range of VLANs to handle multiple
applications. A service provider’s customers can assign their own inner VLAN tags to traffic.
The service provider can assign an outer VLAN tag for each customer. Therefore, there is no
VLAN tag overlap among customers, so traffic from different customers is kept separate.
Before the switch sends the frames from the customers, the VLAN ID is added to the frames.
When packets intended for specific customers are received on the MSC1000G, the outer
VLAN tag is removed before the traffic is sent.
11.8.4 TLS Network Example
In the following example figure, both A and B are Service Provider’s Network (SPN)
customers with VPN tunnels between their head offices and branch offices respectively. Both
have an identical VLAN tag for their VLAN group. The service provider can separate these
two VLANs within its network by adding tag 37 to distinguish customer A and tag 48 to
distinguish customer B at edge device 1 and then stripping those tags at edge device 2 as the
data frames leave the network.
Figure 91 VLAN Stacking Example
11.8.4.1 VLAN Tag Format
A VLAN tag (service provider VLAN stacking or customer IEEE 802.1Q) consists of the
following three fields.
Table 53 VLAN Tag Format
Type
Priority
VID
Type is a standard Ethernet type code identifying the frame and indicates that whether the
frame carries IEEE 802.1Q tag information. SP TPID (Service Provider Tag Protocol
Identifier) is the service provider VLAN stacking tag type. The system use 0x8100.
MSC1000G User’s Guide
167
Chapter 11 DSL Port Setup Screens
TPID (Tag Protocol Identifier) is the customer IEEE 802.1Q tag.
Priority refers to the IEEE 802.1p standard that allows the service provider to prioritize traffic
based on the class of service (CoS) the customer has paid for.
• On the switch, configure the priority level of the inner IEEE 802.1Q tag in the Port Setup
screen.
• "0" is the lowest priority level and "7" is the highest.
VID is the VLAN ID. SP VID is the VID for the second (service provider’s) VLAN tag.
11.8.4.2 Frame Format
The frame format for an untagged Ethernet frame, a single-tagged 802.1Q frame (customer)
and a “double-tagged” 802.1Q frame (service provider) is shown next.
Configure the fields as circled in the switch VLAN Stacking screen.
Table 54 Single and Double Tagged 802.1Q Frame Format
DA
DA SA
SPTPI
D
SA
Priority VID
DA
SA
Len/
Etype
Data
FCS Untagged
Ethernet
frame
TPID
Priorit
y
VID
Len/
Etype
Data
FCS IEEE 802.1Q
customer
tagged frame
TPID
Priorit
y
VID
Len/
Etype
Data
FCS Doubletagged frame
Table 55 802.1Q Frame
DA
Destination Address
Priority
802.1p Priority
SA
Source Address
Len/
Etype
Length and type of Ethernet frame
(SP)TPID (Service Provider) Tag Protocol IDentifier
Data
Frame data
VID
FCS
Frame Check Sequence
VLAN ID
11.8.5 VDSL VLAN Setup
Click Port > VDSL in the navigation panel to open the VDSL Port Setup screen. Select a
VDSL line card ID, a port index number and click Setup next to VLAN to open the following
screen. Use this screen to add the VDSL port to VLANs (or remove it from VLANs) and
configure the TLS (Transparent LAN Service) settings.
168
MSC1000G User’s Guide
Chapter 11 DSL Port Setup Screens
Figure 92 VDSL VLAN Setup
The following table describes the fields in this screen.
Table 56 VDSL Port Setup: VLAN Setup
LABEL
DESCRIPTION
UP
Click this to return to the previous screen.
PVID/Priority
PVID refers to the customer’s VLAN ID. In the first field, enter the customer VLAN
ID (from 1 to 4094) for frames received on this port.
In the second field, enter the priority level for the customer VLAN ID. "0" is the
lowest priority level and "7" is the highest.
TLS Enable
Transparent LAN Service (also known as VLAN stacking or Q-in-Q) allows a
service provider to distinguish multiple customers VLANs, even those with the
same (customer-assigned) VLAN ID, within its network.
Select this option to enable TLS (Transparent LAN Service). Clear this check box
to disable this feature. Refer to Section 27.22 on page 461 for more information.
SPVID/Priority
SPVID refers to the service provider’s VLAN ID (the outer VLAN tag). In the first
field, enter the service provider ID (from 1 to 4094) for frames received on this
port.
In the second field, enter the priority level for the service provider’s VLAN ID. "0" is
the lowest priority level and "7" is the highest.
Apply
Click Apply to save the changes in this screen to the system’s volatile memory.
The system loses these changes if it is turned off or loses power, so use the
Config Save on the navigation panel and then the Save button to save your
changes to the non-volatile memory when you are done configuring.
Cancel
Click Cancel to begin configuring the screen again.
VID
Type a VID (VLAN ID) to add this port as a member.
This must be the VLAN ID of a VLAN that is already configured. The port that you
are configuring must also be set to the fixed status in the VLAN.
Registration
Select join to have the port be a member of the specified VLAN.
Select leave to remove the port from the specified VLAN.
Tag
Select the check box to tag all frames transmitted on this port with the port’s VID.
MSC1000G User’s Guide
169
Chapter 11 DSL Port Setup Screens
Table 56 VDSL Port Setup: VLAN Setup (continued)
LABEL
DESCRIPTION
Apply
Click Apply to save the changes in this screen to the system’s volatile memory.
The system loses these changes if it is turned off or loses power, so use the
Config Save on the navigation panel and then the Save button to save your
changes to the non-volatile memory when you are done configuring.
Cancel
Click Cancel to begin configuring the screen again.
The table in the bottom half of the screen lists the VLANs that the port is a member of.
Modify
Click Modify to display the selected VLAN membership entry’s settings in the
fields above so you can edit them.
Delete
Click Delete to remove the selected VLAN membership entry.
Index
This is the number of the VLAN membership entry.
VID
This field displays the number of a VLAN (VLAN ID) of which this port is a
member.
Registration
This field displays “fixed” to indicate that the port is a member of the specified
VLAN.
Tag
This field displays “V” if the line card is to tag all frames that are transmitted out on
this port with this VLAN group ID. It displays “-” if the line card does not tag all
frames that are transmitted out on this port with this VLAN group ID.
Select
Select the radio button of a VLAN membership entry and then use the Modify
button or the Delete button.
11.9 SHDSL Port Setup
Click Port > SHDSL in the navigation panel to open the following screen. Use this screen to
configure settings for individual SHDSL ports.
170
MSC1000G User’s Guide
Chapter 11 DSL Port Setup Screens
Figure 93 SHDSL Port Setup
The following table describes the fields in this screen.
Table 57 SHDSL Port Setup
LABEL
DESCRIPTION
Slot
Select the number of a line card’s slot.
Port
Select the number of a DSL port on the line card.
Load
Click Load to display the port’s settings in the fields below.
Enable
Select this check box to turn on this port.
SHDSL Profile
Select a profile of SHDSL settings (such as the transfer rate, wire pair and signal
to noise ratio settings) to assign to this port. Use the SHDSL Profile screen to
configure SHDSL port profiles.
Span Alarm
Profile
Select an alarm profile to define the thresholds that trigger an alarm on the port
when exceeded. This alarm profile is for the whole span. This is the entire
connection including any SHDSL regenerators that might be located between the
STU-C (SHDSL Termination Unit - Central) and STU-R (SHDSL Termination Unit Remote) end points. An SHDSL regenerator amplifies the SHDSL signal in order
to increase the connection distance.
Stuc Alarm Profile
Select an alarm profile to define the thresholds that trigger an alarm on the port
when exceeded. This alarm profile is for the STU-C (SHDSL Termination Unit Central) end point.
Stur Alarm Profile
Select an alarm profile to define the thresholds that trigger an alarm on the port
when exceeded. This alarm profile is for the STU-R (SHDSL Termination Unit Remote) end point.
MSC1000G User’s Guide
171
Chapter 11 DSL Port Setup Screens
Table 57 SHDSL Port Setup (continued)
LABEL
DESCRIPTION
Customer
Information
Enter information to identify the subscriber connected to this DSL port. You can
use up to 31 printable English keyboard characters (including spaces and
hyphens).
Telephone No.
Enter information to identify the telephone number of the subscriber connected to
this DSL port. You can use up to 15 English keyboard characters (including
spaces and hyphens).
Advanced
Features
Click the Setup button to open a screen where you can configure the SHDSL
port’s detailed settings.
Apply
Click Apply to have the specified DSL port use the selected IGMP filter profile.
Cancel
Click Cancel to set the fields back to the settings that you last retrieved.
Copy
Do the following to copy DSL settings from one DSL port to another DSL port or
ports.
1. Use the Slot and Port drop-down list boxes and the Load button to select the
number of the DSL port from which you want to copy settings.
2. Click Copy to open the following screen.
Figure 94 Copy
3. Select a line card to which you want to copy settings.
4. Select the check boxes of the DSL ports on the line card to which you want to
copy the settings. Click Select All to mark all of the port check boxes or click
Select None to clear all of the port check boxes.
5. Click Apply to copy the settings to all of the ports that you have selected in this
screen. Click Cancel to close the screen without saving changes.
172
ID
This column lists the slot numbers of the line cards. Click the ID number of an
active SHDSL line card to go to a screen where you can copy an SHDSL port’s
settings to another SHDSL port.
State
This field displays the line card’s current operational status.
active means the line card is operating normally.
init means the MSC1000G is initializing the line card.
disable means a manager has disabled the line card.
inactive means the line card is starting up or is not operating normally. This could
be due to the card starting, a firmware upgrade in progress or a malfunction. See
Section 34.6 on page 598 for what to do if the line card stays stuck in the inactive
state.
Card Type
This field displays the type of a line card.
MSC1000G User’s Guide
Chapter 11 DSL Port Setup Screens
Table 57 SHDSL Port Setup (continued)
LABEL
DESCRIPTION
Up Time
This field displays how long the line card has been running since the last time it
was started.
Firmware
This field displays the current firmware version installed on the line card.
11.9.1 SHDSL Port Setup Line Card Screen
Click Port > SHDSL in the navigation panel to open the SHDSL Port Setup screen. Click the
slot number of an active SHDSL line card to open the following screen. Use this screen to
configure settings for individual SHDSL ports and copy settings between ports.
Figure 95 SHDSL Port Setup: Line Card
The following table describes the fields in this screen.
Table 58 SHDSL Port Setup: Line Card
LABEL
DESCRIPTION
UP
Click this to return to the previous screen.
Copy
Do the following to copy settings from one DSL port to another DSL port or ports.
1. Use the Select column to choose a DSL port from which you want to copy
settings.
2. Click Copy to open the following screen.
Figure 96 Copy
3. Select a line card to which you want to copy settings.
4. Select the check boxes of the DSL ports on the line card to which you want to
copy the settings. Click Select All to mark all of the port check boxes or click
Select None to clear all of the port check boxes.
5. Click Apply to copy the settings to all of the ports that you have selected in this
screen. Click Cancel to close the screen without saving changes.
MSC1000G User’s Guide
173
Chapter 11 DSL Port Setup Screens
Table 58 SHDSL Port Setup: Line Card (continued)
LABEL
DESCRIPTION
Apply
Click Apply to save the changes in this screen to the system’s volatile memory.
The system loses these changes if it is turned off or loses power, so use the
Config Save on the navigation panel and then the Save button to save your
changes to the non-volatile memory when you are done configuring.
Cancel
Click Cancel to begin configuring the screen again.
Port
These are the numbers of the DSL ports on the line card.
Enable
Select a check box in this column to turn on a port. Select the check box at the top
of the column to turn on all of the line card’s ports.
Customer
Information
Enter information to identify the subscriber connected to this DSL port. You can
use up to 31 printable English keyboard characters (including spaces and
hyphens).
SHDSL Profile
Select a profile of SHDSL settings (such as the transfer rate, wire pair and signal
to noise ratio settings) to assign to this port. Use the SHDSL Profile screen to
configure SHDSL port profiles.
Note: You must apply the same profile on the two SHDSL ports
connecting to the same subscriber device.
Select
Use the Select column to choose a DSL port from which you want to copy
settings.
11.9.2 SHDSL Port Setup Advanced
Click Port > SHDSL in the navigation panel to open the SHDSL Port Setup screen. Click the
Setup button to open the following screen. Use this screen to configure an SHDSL port’s
detailed settings.
Figure 97 SHDSL Port Setup: Advanced
174
MSC1000G User’s Guide
Chapter 11 DSL Port Setup Screens
The following table describes the fields in this screen.
Table 59 SHDSL Port Setup: Advanced
LABEL
DESCRIPTION
UP
Click this to return to the previous screen.
Apply
Click Apply to save the changes in this screen to the system’s volatile memory.
The system loses these changes if it is turned off or loses power, so use the
Config Save on the navigation panel and then the Save button to save your
changes to the non-volatile memory when you are done configuring.
Cancel
Click Cancel to begin configuring the screen again.
Enable
Select this check box to turn on this port.
SHDSL Profile
Select a profile of SHDSL settings (such as the transfer rate, wire pair and signal
to noise ratio settings) to assign to this port. Use the SHDSL Profile screen to
configure SHDSL port profiles.
Span Alarm
Profile
Select an alarm profile to define the thresholds that trigger an alarm on the port
when exceeded. This alarm profile is for the whole span. This is the entire
connection including any SHDSL regenerators that might be located between the
STU-C (SHDSL Termination Unit - Central) and STU-R (SHDSL Termination Unit Remote) end points. An SHDSL regenerator amplifies the SHDSL signal in order
to increase the connection distance.
Stuc Alarm Profile
Select an alarm profile to define the thresholds that trigger an alarm on the port
when exceeded. This alarm profile is for the STU-C (SHDSL Termination Unit Central) end point.
Stur Alarm Profile
Select an alarm profile to define the thresholds that trigger an alarm on the port
when exceeded. This alarm profile is for the STU-R (SHDSL Termination Unit Remote) end point.
Customer Info
Enter information to identify the subscriber connected to this ADSL port. You can
use up to 31 printable English keyboard characters (including spaces and
hyphens).
Telephone No.
Enter information to identify the telephone number of the subscriber connected to
this ADSL port. You can use up to 15 English keyboard characters (including
spaces and hyphens).
SHDSL Feature
Power Backoff
MSC1000G User’s Guide
This command sets the power backoff feature setting on the SHDSL port. Power
backoff calculates how much power is needed for the connection. This allows the
STU-C and STU-R to use only enough power for the port’s maximum transmission
rate (configured in the SHDSL profile). You can normally just leave the default
setting (NORMAL_EPL), you only need to use this command if the STU-R does
not support EPL or you need to configure the port to use a specific power backoff
setting.
Select NORMAL_EPL to use power backoff with EPL (Estimated Power Loss).
Each end calculates an EPL and uses it in determining a power backoff value for
the other end to use.
Select FORCED_EPL to use forced power backoff with EPL. The STU-C
calculates an EPL and uses it in determining the power backoff values for both
ends. This can be used when the STU-R device does not support EPL.
Select FORCED_NO_EPL to use forced power backoff without EPL. The STU-C
uses the value you specify in determining the power backoff values for both ends.
This can be used when you have prior knowledge about the physical line (loop).
Set the power backoff value (0~31 in dBm).
When using NORMAL_EPL or FORCED_EPL, this sets the maximum power
backoff value.
When using FORCED_NO_EPL, this sets the power backoff value.
175
Chapter 11 DSL Port Setup Screens
Table 59 SHDSL Port Setup: Advanced (continued)
LABEL
DESCRIPTION
The Negotiated
Noise Margin
Mode
Specify how the target noise margin value is acquired.
Select normal to have each end of the connection determine the target noise
margin to be used by the other end.
Select forced to set the upstream and downstream parameters according to the
target noise margin value set in the SHDSL profile.
Apply
Click Apply to save the changes in this screen to the system’s volatile memory.
The system loses these changes if it is turned off or loses power, so use the
Config Save on the navigation panel and then the Save button to save your
changes to the non-volatile memory when you are done configuring.
Cancel
Click Cancel to begin configuring the fields again.
11.10 Permanent Virtual Circuits
A Permanent Virtual Circuit (PVC) is a logical point-to-point circuit between sites. PVCs are
low-delay circuits because routing decisions do not need to be made along the way. Permanent
means that the circuit is pre-programmed by the carrier as a path through the network. It does
not need to be set up or torn down for each session. PVCs are also called virtual channels.
The system can handle multiple IEEE 802.1p priority queues on a single PVC. You can also
define up to eight PVCs on a DSL port and use them for different services or levels of service.
You set the PVID that is assigned to untagged frames received on each channel. You also set
an IEEE 802.1p priority for each of the PVIDs. In this way you can assign different priorities
to different channels (and consequently the services that get carried on them or the subscribers
that use them).
For example, you want to give high priority to voice service on one of the ADSL ports. First
configure a static VLAN on the system for voice on the port. Then do the following:
• Configure a channel on the port for voice service.
• Set the channel to use the PVID of the static VLAN you configured.
• Assign the channel a high priority.
11.10.1 LLC
LLC is a type of encapsulation where one VC (Virtual Circuit) carries multiple protocols with
each packet header containing protocol identifying information. Despite the extra bandwidth
and processing overhead, this method may be advantageous if it is not practical to have a
separate VC for each carried protocol, for example, if charging heavily depends on the number
of simultaneous VCs.
11.10.2 VC Mux
VC Mux is a type of encapsulation where, by prior mutual agreement, each protocol is
assigned to a specific virtual circuit, for example, VC1 carries IP, VC2 carries IPX, and so on.
VC-based multiplexing may be dominant in environments where dynamic creation of large
numbers of ATM VCs is fast and economical.
176
MSC1000G User’s Guide
Chapter 11 DSL Port Setup Screens
11.10.3 ATM Profiles
Asynchronous Transfer Mode (ATM) is a networking technology that provides high-speed
data transfer. ATM uses fixed-size packets of information called cells. With ATM, a high QoS
(Quality of Service) can be guaranteed. ATM profiles allow you to configure the virtual
channels efficiently. You can configure all of the virtual channels with the same profile, thus
removing the need to configure the virtual channels one-by-one. You can also change an
individual virtual channel by assigning it a different profile. See the chapter on profiles for
information on how to configure ATM profiles.
11.11 PVC Setup Screen
Click Port > PVC in the navigation panel to open the following screen. Use this screen to
view and configure permanent virtual circuit settings for individual ports.
Figure 98 PVC Setup
The following table describes the fields in this screen.
Table 60 PVC Setup
LABEL
DESCRIPTION
PVC Table
This table displays the PVCs that are configured for the selected port.
Slot
Select the number of a line card’s slot.
Port
Select the number of a DSL port on the line card.
MSC1000G User’s Guide
177
Chapter 11 DSL Port Setup Screens
Table 60 PVC Setup (continued)
LABEL
Load
DESCRIPTION
Click Load to display the port’s PVC settings in the PVC Table.
Index
This is the number of the PVC on this port. Click a number to open a screen where you
can add the PVC to more VLANs (or remove it from VLANs).
VPI / VC
This field displays the Virtual Path Identifier (VPI) and Virtual Circuit Identifier (VCI). The
VPI and VCI identify a channel on this port.
Profile
This field displays the ATM profile that this channel uses.
MUX
This field displays the encapsulation type (llc or vc) for this channel.
Type
This field displays whether the channel is a PVC or a PPVC.
PVID
This field displays the PVID (Port VLAN ID) to assign to untagged frames received on
this channel.
Priority
This field displays the priority value (0 to 7) that the line card adds to frames that come
in on this PVC without a (IEEE 802.1p) priority tag.
Select
Select a PVC’s radio button and then use the Modify, Copy or Delete button.
Modify
Click Modify to display the selected PVC’s settings in the fields above so you can edit
them.
Copy
Do the following to copy VLAN and PVC settings from one DSL port to another DSL port
or ports.
1. Use the Select column to choose a PVC which you want to copy to another port.
2. Click Copy to open the following screen.
Figure 99 Copy
3. Select a line card to which you want to copy settings.
4. Select the check boxes of the DSL ports on the line card to which you want to copy
the settings. Click Select All to mark all of the port check boxes or click Select
None to clear all of the port check boxes.
5. Click Apply to copy the settings to all of the ports that you have selected in this
screen. Click Cancel to close the screen without saving changes.
178
Delete
Click Delete to remove the selected PVC.
VPI / VCI
Type the Virtual Path Identifier and Virtual Circuit Identifier for a channel on this port.
PVID
Type a PVID (Port VLAN ID) to assign to untagged frames received on this channel.
This must be the VLAN ID of a VLAN that is already configured. The port that you are
configuring must also be set to the fixed status in the VLAN.
Profile
Use the drop-down list box to select an ATM profile to assign to this channel.
MUX
Select the encapsulation type (llc or vc) for this channel.
MSC1000G User’s Guide
Chapter 11 DSL Port Setup Screens
Table 60 PVC Setup (continued)
LABEL
DESCRIPTION
Priority
Type the priority value (0 to 7) to add to incoming frames without a (IEEE 802.1p)
priority tag.
Apply
Click Apply to save the changes in this screen to the system’s volatile memory. The
system loses these changes if it is turned off or loses power, so use the Config Save on
the navigation panel and then the Save button to save your changes to the non-volatile
memory when you are done configuring.
Cancel
Click Cancel to begin configuring the screen again.
ID
This column lists the slot numbers of the line cards. Click the ID number of an active
DSL line card to go to a screen where you can view and delete PVCs from the line
card’s DSL ports.
State
This field displays the line card’s current operational status.
active means the line card is operating normally.
init means the MSC1000G is initializing the line card.
disable means a manager has disabled the line card.
inactive means the line card is starting up or is not operating normally. This could be
due to the card starting, a firmware upgrade in progress or a malfunction. See Section
34.6 on page 598 for what to do if the line card stays stuck in the inactive state.
Card Type
This field displays the type of a line card.
Up Time
This field displays how long the line card has been running since the last time it was
started.
Firmware
This field displays the current firmware version installed on the line card.
11.11.1 PVC Setup Slot Screen
Click Port > PVC in the navigation panel to open the PVC Setup screen. Click an active
ADSL or SHDSL line card’s ID number to open the following screen. Use this screen to view
and delete PVCs from the line card’s DSL ports.
Figure 100 PVC Setup: Slot
The following table describes the fields in this screen.
Table 61 PVC Setup: Slot
LABEL
DESCRIPTION
UP
Click this to return to the previous screen.
Delete
Click Delete to remove the selected PVC(s).
Index
This is the number of the PVC. Click a number to open a screen where you can
add the PVC to more VLANs (or remove it from VLANs).
Port
This is the number of a DSL port on the line card.
MSC1000G User’s Guide
179
Chapter 11 DSL Port Setup Screens
Table 61 PVC Setup: Slot (continued)
LABEL
DESCRIPTION
VPI / VC
This field displays the Virtual Path Identifier (VPI) and Virtual Circuit Identifier
(VCI). The VPI and VCI identify a channel on this port.
Profile
This field displays the ATM profile that this channel uses.
MUX
This field displays the encapsulation type (llc or vc) for this channel.
Type
This field displays whether the channel is a PVC or a PPVC.
PVID
This field displays the PVID (Port VLAN ID) to assign to untagged frames received
on this channel.
Priority
This field displays the priority value (0 to 7) that the line card adds to frames that
come in on this PVC without a (IEEE 802.1p) priority tag.
Select
Select one or more PVCs’ check boxes and then use the Delete button to remove
it (or them). Use the Select All check box to select all of the PVCs for all of the line
card’s ports.
11.11.2 PVC Setup VLAN Screen
Click Port > PVC in the navigation panel to open the PVC Setup screen. Click an active
ADSL or SHDSL card ID and a PVC’s index number to open the following screen. Use this
screen to add the PVC to more VLANs (or remove it from VLANs). You can also get to this
screen by clicking a PVC’s index number in the PVC Setup Slot screen.
Figure 101 PVC Setup: VLAN
The following table describes the fields in this screen.
Table 62 PVC Setup: VLAN
180
LABEL
DESCRIPTION
UP
Click this to return to the previous screen.
VPI / VCI
This field displays the Virtual Path Identifier (VPI) and Virtual Circuit Identifier
(VCI). The VPI and VCI identify the channel.
VID
Type a VID (VLAN ID) to add this channel as a member.
This must be the VLAN ID of a VLAN that is already configured. The port that you
are configuring must also be set to the fixed status in the VLAN.
MSC1000G User’s Guide
Chapter 11 DSL Port Setup Screens
Table 62 PVC Setup: VLAN (continued)
LABEL
DESCRIPTION
Registration
Select join to have the port be a member of the specified VLAN.
Select leave to remove the port from the specified VLAN.
Tag
Select the check box to tag all frames that are transmitted out on this PVC with
this VLAN group ID.
Apply
Click Apply to save the changes in this screen to the system’s volatile memory.
The system loses these changes if it is turned off or loses power, so use the
Config Save on the navigation panel and then the Save button to save your
changes to the non-volatile memory when you are done configuring.
Cancel
Click Cancel to begin configuring the screen again.
The table in the bottom half of the screen lists the VLANs that the PVC is a member of.
Modify
Click Modify to display the selected VLAN membership entry’s settings in the
fields above so you can edit them.
Delete
Click Delete to remove the selected VLAN membership entry.
Index
This is the number of the VLAN membership entry.
VPI / VCI
This field displays the Virtual Path Identifier (VPI) and Virtual Circuit Identifier
(VCI). The VPI and VCI identify the channel.
VID
This field displays the number of a VLAN (VLAN ID) of which this channel is a
member.
Registration
This field displays “fixed” to indicate that the port is a member of the specified
VLAN.
Tag
This field displays “V” if the line card is to tag all frames that are transmitted out on
this PVC with this VLAN group ID. It displays “-” if the line card does not tag all
frames that are transmitted out on this PVC with this VLAN group ID.
Select
Select the radio button of a VLAN membership entry and then use the Modify
button or the Delete button.
11.12 Priority-based PVCs
A PPVC (Priority-based PVC) allows you to give different priorities to PVCs that are
members of the same VLAN. The system maps frames with IEEE 802.1p priorities to PVCs
with the matching priority.
11.13 PPVC Setup Screen
Click Port > PPVC in the navigation panel to open the following screen. Use this screen to
view and configure PPVCs.
MSC1000G User’s Guide
181
Chapter 11 DSL Port Setup Screens
Figure 102 PPVC Setup
The following table describes the fields in this screen.
Table 63 PPVC Setup
LABEL
DESCRIPTION
PVC Table
This table displays the PVC’s that are configured for the selected port.
Slot
Select the number of an ADSL or SHDSL line card’s slot.
Port
Select the number of a DSL port on the line card.
Load
182
Click Load to display the port’s PVC settings in the PVC Table.
Index
This is the number of the PVC on this port. Click a number to open a screen where
you can add the channel to more VLANs (or remove it from VLANs).
VPI / VC
This field displays the Virtual Path Identifier (VPI) and Virtual Circuit Identifier
(VCI). The VPI and VCI identify a channel on this port.
MUX
This field displays the encapsulation type (llc or vc) for this channel.
Type
This field displays whether the channel is a PVC or a PPVC.
PVID
This field displays the PVID (Port VLAN ID) to assign to untagged frames received
on this channel.
Priority
This field displays the priority value (0 to 7) that the line card adds to frames that
come in on this PVC without a (IEEE 802.1p) priority tag.
Select
Select a PVC’s radio button and then use the Modify, Copy or Delete button.
Modify
Click Modify to display the selected PVC’s settings in the fields above so you can
edit them.
MSC1000G User’s Guide
Chapter 11 DSL Port Setup Screens
Table 63 PPVC Setup (continued)
LABEL
DESCRIPTION
Copy
Do the following to copy VLAN and PVC settings from one DSL port to another
DSL port or ports.
1. Use the Select column to choose a PVC which you want to copy to another
port.
2. Click Copy to open the following screen.
Figure 103 Copy
3. Select a line card to which you want to copy settings.
4. Select the check boxes of the DSL ports on the line card to which you want to
copy the settings. Click Select All to mark all of the port check boxes or click
Select None to clear all of the port check boxes.
5. Click Apply to copy the settings to all of the ports that you have selected in this
screen. Click Cancel to close the screen without saving changes.
Delete
Click Delete to remove the selected PVC.
VPI / VCI
Type the Virtual Path Identifier and Virtual Circuit Identifier for a PPVC on this port.
PVID
Type a PVID (Port VLAN ID) to assign to untagged frames received on this PPVC.
This must be the VLAN ID of a VLAN that is already configured. The port that you
are configuring must also be set to the fixed status in the VLAN.
MUX
Select the encapsulation type (llc or vc) for this PPVC.
Priority
Type the priority value (0 to 7) to add to incoming frames without a (IEEE 802.1p)
priority tag.
Modify
Click Modify to display the selected PVC’s settings in the fields above so you can
edit them.
Apply
Click Apply to save the changes in this screen to the system’s volatile memory.
The system loses these changes if it is turned off or loses power, so use the
Config Save on the navigation panel and then the Save button to save your
changes to the non-volatile memory when you are done configuring.
Cancel
Click Cancel to begin configuring the screen again.
ID
This column lists the slot numbers of the line cards. Click the ID number of an
active DSL line card to go to a screen where you can view and delete PVCs from
the line card’s DSL ports.
MSC1000G User’s Guide
183
Chapter 11 DSL Port Setup Screens
Table 63 PPVC Setup (continued)
LABEL
DESCRIPTION
State
This field displays the line card’s current operational status.
active means the line card is operating normally.
init means the MSC1000G is initializing the line card.
disable means a manager has disabled the line card.
inactive means the line card is starting up or is not operating normally. This could
be due to the card starting, a firmware upgrade in progress or a malfunction. See
Section 34.6 on page 598 for what to do if the line card stays stuck in the inactive
state.
Card Type
This field displays the type of a line card.
Up Time
This field displays how long the line card has been running since the last time it
was started.
Firmware
This field displays the current firmware version installed on the line card.
11.13.1 PPVC Setup Slot Screen
Click Port > PPVC in the navigation panel to open the PPVC Setup screen. Click an active
ADSL or SHDSL line card’s ID number to open the following screen. Use this screen to view
and delete PPVCs from the line card’s DSL ports.
Figure 104 PPVC Setup: Slot
The following table describes the fields in this screen.
Table 64 PPVC Setup: Slot
184
LABEL
DESCRIPTION
UP
Click this to return to the previous screen.
Delete
Click Delete to remove the selected PVC(s).
Index
This is the number of the PVC. Click a number to open a screen where you can
add the PVC to more VLANs (or remove it from VLANs).
Port
This is the number of a DSL port on the line card.
VPI / VC
This field displays the Virtual Path Identifier (VPI) and Virtual Circuit Identifier
(VCI). The VPI and VCI identify a channel on this port.
Profile
This field displays the ATM profile that this channel uses.
MUX
This field displays the encapsulation type (llc or vc) for this channel.
Type
This field displays whether the channel is a PVC or a PPVC.
PVID
This field display the PVID (Port VLAN ID) to assign to untagged frames received
on this channel.
MSC1000G User’s Guide
Chapter 11 DSL Port Setup Screens
Table 64 PPVC Setup: Slot
LABEL
DESCRIPTION
Priority
This field displays the priority value (0 to 7) that the line card adds to frames that
come in on this PVC without a (IEEE 802.1p) priority tag.
Select
Select one or more PVCs’ check boxes and then use the Delete button to remove
it (or them). Use the Select All check box to select all of the PVCs for all of the line
card’s ports.
11.13.2 PPVC Setup VLAN Screen
Click Port > PPVC in the navigation panel to open the PPVC Setup screen. Click an index
number of a card and a PPVC’s index number to open the following screen. Use this screen to
add the PPVC to more VLANs (or remove it from VLANs). You can also get to this screen by
clicking a PPVC’s index number in the PPVC Setup Slot screen.
Figure 105 PPVC Setup: VLAN
The following table describes the fields in this screen.
Table 65 PPVC Setup: VLAN
LABEL
DESCRIPTION
UP
Click this to return to the previous screen.
VPI / VC
This field displays the Virtual Path Identifier (VPI) and Virtual Circuit Identifier
(VCI). The VPI and VCI identify the channel.
VID
Type a VID (VLAN ID) to add this channel as a member.
This must be the VLAN ID of a VLAN that is already configured. The port that you
are configuring must also be set to the fixed status in the VLAN.
Registration
Select join to have the port be a member of the specified VLAN.
Select leave to remove the port from the specified VLAN.
Tag
Select the check box to tag all frames that are transmitted out on this PPVC with
this VLAN group ID.
Apply
Click Apply to save the changes in this screen to the system’s volatile memory.
The system loses these changes if it is turned off or loses power, so use the
Config Save on the navigation panel and then the Save button to save your
changes to the non-volatile memory when you are done configuring.
Cancel
Click Cancel to begin configuring the screen again.
The table in the bottom half of the screen lists the VLANs that the PVC is a member of.
MSC1000G User’s Guide
185
Chapter 11 DSL Port Setup Screens
Table 65 PPVC Setup: VLAN (continued)
LABEL
DESCRIPTION
Modify
Click Modify to display the selected VLAN membership entry’s settings in the
fields above so you can edit them.
Delete
Click Delete to remove the selected VLAN membership entry.
Index
This is the number of the VLAN membership entry.
VPI / VC
This field displays the Virtual Path Identifier (VPI) and Virtual Circuit Identifier
(VCI). The VPI and VCI identify the channel.
VID
This field displays the number of a VLAN (VLAN ID) of which this channel is a
member.
Registration
This field displays “fixed” to indicate that the port is a member of the specified
VLAN.
Tag
This field displays “V” if the line card is to tag all frames that are transmitted out on
this PPVC with this VLAN group ID. It displays “-” if the line card does not tag all
frames that are transmitted out on this PPVC with this VLAN group ID.
Select
Select the radio button of a VLAN membership entry and then use the Modify
button or the Delete button.
11.14 IP Bridge Overview
The IP bridge function is designed for large-scale, flat, access networks, and it is ideal when
the network is based on Ethernet. When the IP bridge is enabled, the MSC1000G forwards
frames based on the destination IP address, instead of the destination MAC address, and it
replaces the source MAC address with its own MAC address.
186
MSC1000G User’s Guide
Chapter 11 DSL Port Setup Screens
Figure 106 IP Bridge: Traditional vs. IP-aware DSLAM
Traditional
Forward by
destination MAC
IP Aware
Forward by
destination IP
The IP-aware MSC1000G does not modify the IP packet header, but it uses the destination IP
address to modify the layer-2 header, in particular the source MAC address, destination MAC
address, and VLAN tag. As a result, the MSC1000G prevents the MAC addresses and VLAN
ID downstream of the MSC1000G (in other words, the subscribers’ MAC addresses and
VLAN ID) from propagating into the network upstream of the MSC1000G, and vice versa.
In the end, the IP-aware MSC1000G makes the network more secure and more scalable, as
explained below.
• User-to-user security. The MSC1000G does not forward subscribers’ MAC addresses
upstream of the MSC1000G, so there is no way for subscribers to know each other’s MAC
addresses. This prevents the spoofing of MAC addresses and IP addresses upstream of the
MSC1000G.
• Scalability. The scale of access networks is typically limited by the number of MAC
addresses in the network. Since the MSC1000G does not forward subscribers’ MAC
addresses or VLAN ID upstream, the upstream network is more scalable, and it is simpler
to use the same VLAN ID upstream of several MSC1000G. In addition, the MSC1000G
drastically reduces the scale of ARP traffic storms.
The MSC1000G itself is transparent in the network.
MSC1000G User’s Guide
187
Chapter 11 DSL Port Setup Screens
11.14.1 Upstream and Downstream Traffic
When the MSC1000G forwards upstream traffic, it makes the following changes in the layer-2
header.
Table 66 IP Bridge: Layer-2 Header for Upstream Traffic
ORIGINAL
UPDATED
Source MAC address
Subscriber’s MAC address
MSC1000G’s MAC address
Destination MAC address
MSC1000G’s MAC address
Destination IP’s MAC address
VLAN ID
Subscriber’s VLAN ID
Destination IP’s VLAN ID
The original frame has the MSC1000G’s MAC address as the destination MAC address
because the MSC1000G, not the device that really has the destination IP, responded to the
ARP request for the destination IP. (This is part of the ARP proxy feature for IP bridges.) Once
the MSC1000G receives the frame, it updates the MAC addresses and VLAN ID and forwards
it to the device that really has the destination IP.
This is illustrated in the following example.
Figure 107 IP Bridge: Upstream Traffic Example
MAC x
MAC g
IP 192.168.10.5
VLAN: 200
MAC a
IP: 192.168.1.1
VLAN: 100
Source IP: 192.168.1.1
Source MAC: a
Destination IP: 192.168.10.5
Destination MAC: x
VLAN: 100
Source IP: 192.168.1.1
Source MAC: x
Destination IP: 192.168.10.5
Destination MAC: g
VLAN: 200
Notice that the MSC1000G does not change the IP packet header.
The process is reversed but otherwise similar for downstream traffic. The MSC1000G learns
how to forward frames to the appropriate subscriber from one of the following sources.
• DHCP snooping. The IP-aware MSC1000G snoops DHCP packets, so it knows what IP
addresses have been assigned to subscribers.
• ARP. The MSC1000G uses ARP to find out which subscriber has a particular IP address.
• Static information. You should provide forwarding information manually for subscribers
that have static IP addresses and do not respond to ARP queries.
188
MSC1000G User’s Guide
Chapter 11 DSL Port Setup Screens
11.14.2 IP Bridge Settings
The IP bridge function consists of the following settings.
•
•
•
•
•
•
Domains and VLANs
Edge routers
Downlink interfaces
Routing tables
PVCs
ARP proxy settings
Each set of settings is discussed in more detail in the following sections.
11.14.2.1 Domains and VLAN
A domain represents an ISP. Each domain is defined by (and dominates) the VLAN that are in
it and has its own routing table and ARP table. As a result, two or more VLANs in different
domains can use the same IP subnet, and one network can support multiple ISPs.
VLANs in IP bridges are exclusive. They can be in at most one domain. In addition, VLANs in
IP bridges share the same VLAN space as regular VLANs, so VLANs in IP bridges must have
different VLAN IDs than regular VLANs.
11.14.2.1.1 Configuring VLANs for Domains
To add a VLAN to a domain,
1 Add (Join) a new (undefined) VLAN ID to the domain.
2 Create the VLAN in the system using the regular screens or commands for VLANs.
To remove a VLAN from a domain,
1 Delete the VLAN from the system using the regular screens or commands for VLANs.
2 Remove (Leave) the VLAN ID from the domain.
11.14.2.2 Edge Routers
Edge routers are usually the gateways that are provided to the subscribers. They can also be
gateways that are specified in static routing table entries. Each edge router, in addition to its IP
address, has an associated VLAN ID. When the MSC1000G forwards a frame to an edge
router, it uses this VLAN ID to replace whatever VLAN ID the subscriber specified. The
MSC1000G also uses the VLAN ID to identify the domain the edge router is in.
If two edge routers are in different domains, it is possible for them to have the same IP
address.
11.14.2.3 Downlink Interfaces
Downlink interfaces provide forwarding information for downstream traffic. The MSC1000G
learns some of this information by snooping DHCP packets. For static IP addresses, you
should provide this information manually. In this case, specify the VLAN ID and, optionally,
the PVC for a range of IP addresses. The MSC1000G uses the VLAN ID to identify the
domain the downlink interface is in. Downlink interfaces in the same domain cannot have
overlapping IP addresses.
MSC1000G User’s Guide
189
Chapter 11 DSL Port Setup Screens
11.14.2.4 Routing Tables
Each domain has its own routing table. Each routing table contains entries that, based on the
destination IP address, control where the MSC1000G forwards packets (for upstream and
downstream traffic). The MSC1000G automatically creates routing table entries for each
downlink interface and for each edge router in the domain. You can create additional entries by
specifying the edge router to which the MSC1000G should forward traffic for a particular
destination IP address or IP subnet.
11.14.2.5 PVCs
IP bridge PVCs are similar to regular PVCs and are endpoints of the IP bridge. In addition, IP
bridge PVCs are one of two types, IP over Ethernet or IP over ATM, depending on the
underlying network.
The PVID is used to identify the domain the PVC is in, so the PVID must be in a domain.
11.14.2.6 ARP Proxy Settings
The MSC1000G is an ARP proxy for edge routers and subscribers in an IP bridge. You can
configure basic settings for this, and you can look at (and flush, in some cases) the (PVC,
MAC, IP, VID) information the MSC1000G has learned using DHCP snooping and ARP.
11.14.3 IP Bridge Configuration
Follow these steps to set up a simple IP bridge.
1 Create a domain. (Each domain is an ISP.)
2 Create one or more VLANs in the domain. (For example, one VLAN is for high-speed
Internet, and another VLAN is for VoIP.)
3 Create the VLAN in the system using the regular screens or commands for VLANs.
4 Specify one or more edge routers for the domain.
5 Create routing table entries, so the MSC1000G forwards frames to the appropriate edge
router.
6 Create downlink interfaces, so the MSC1000G forwards frames to the appropriate
subscribers.
7 Create PVCs for the subscribers.
11.15 IPB ARP Proxy Screen
Use this screen to configure how long the MSC1000G keeps entries in the ARP table. You can
also flush the Address Resolution Protocol (ARP) table for each domain.
To open this screen, click Port > IP Bridge.
See Section 13.7 on page 233 for how to display the ARP table for each domain.
190
MSC1000G User’s Guide
Chapter 11 DSL Port Setup Screens
Figure 108 IPB ARP Proxy
The following table describes the labels in this screen.
Table 67 IPB ARP Proxy
LABEL
DESCRIPTION
Aging Time
Enter a number of seconds (10~10000) to set how long the MSC1000G keeps
ARP table entries for IP bridge domains.
Apply
Click Apply to save your changes to the MSC1000G’s volatile memory.
The system loses these changes if it is turned off or loses power, so use the
Config Save on the navigation panel and then the Save button to save your
changes to the non-volatile memory when you are done configuring.
Cancel
Click Cancel to begin configuring the screen again.
Type
Select whether you want to clear edge router, interface (or all) ARP table
entries.
Domain
Select the domain whose ARP table you want to clear.
IP/Mask
Select the IP address and subnet mask bit number whose ARP table you want
to clear.
Flush
Click Flush to remove entries from the ARP table.
11.16 IPB Domain Screen
Use this screen to set up and maintain domains in an IP bridge. A domain represents an ISP.
Each domain is defined by (and dominates) the VLAN that are in it and has its own routing
table and ARP table.
To open this screen, click Port > IP Bridge > Domain.
MSC1000G User’s Guide
191
Chapter 11 DSL Port Setup Screens
Figure 109 IPB Domain
The following table describes the labels in this screen.
Table 68 IPB Domain
192
LABEL
DESCRIPTION
Name
Enter the name of the domain you want to create. You can use 1-31 printable
English keyboard characters, except for right angle brackets (>). Spaces are not
allowed.
DHCP VLAN
Select the VLAN where the domain’s DHCP server is located. If you select a
specific VLAN, the MSC1000G forwards subscribers’ DHCP packets to the
selected VLAN and changes the source MAC address to the MSC1000G’s MAC
address. Select Disabled if there is no DHCP server for the domain, in which
case the MSC1000G does not change the source MAC address in DHCP
packets.
This setting has no effect on DHCP packets that come from VLANs where the
MSC1000G’s DHCP relay settings are active. See Chapter 16 on page 299. The
DHCP relay settings take precedence over the IP bridge DHCP VLAN setting.
The MSC1000G also still adds whatever Option 82 information is specified for
the VLAN in the DHCP relay settings.
Apply
Click Apply to create the domain. It is then displayed in the summary table at
the bottom of the screen.
Clicking Apply saves your changes to the MSC1000G’s volatile memory. The
MSC1000G loses these changes if it is turned off or loses power, so use the
Config Save link on the navigation panel to save your changes to the nonvolatile memory when you are done configuring.
New
Click New to set the screen to configure a new entry.
Cancel
Click Cancel to start configuring this section of the screen again.
Add VLAN
Enter the ID of the VLAN you want to add to the domain.
MSC1000G User’s Guide
Chapter 11 DSL Port Setup Screens
Table 68 IPB Domain (continued)
LABEL
DESCRIPTION
Apply
Click Apply to add the VLAN to the domain. It then appears in the table below.
Clicking Add saves your changes to the MSC1000G’s volatile memory. The
MSC1000G loses these changes if it is turned off or loses power, so use the
Config Save link on the navigation panel to save your changes to the nonvolatile memory when you are done configuring.
Index
This field displays the index number of the VLAN in the domain.
VLAN
This field displays the ID of each VLAN in the domain.
Select
Select the check box in the Select column for an entry and click Delete to
remove the entry.
Note: You have to delete every IP bridge setting (including DHCP
VLAN) that uses the selected VLAN before you can
remove it from the domain.
Select All
Click this to select all entries in the table.
Cancel
Click Cancel to start configuring this section of the screen again.
Index
This field displays the number of the domain.
Name
This field displays the name of each domain.
DHCP VLAN
This field displays the VLAN where the domain’s DHCP server is located (or
disabled if there is no DHCP server for the domain).
Select
Modify
Delete
Select the radio button in the Select column for an entry. Click Modify to edit
the entry or Delete to remove it.
11.17 IPB Edgerouter Screen
Use this screen to set up and maintain edge routers in an IP bridge. Edge routers are usually the
gateways that are provided to the subscribers. They can also be the gateways that are specified
in static routing table entries. If two edge routers are in different domains, it is possible for
them to have the same IP address.
To open this screen, click Port > IP Bridge > Edgerouter.
MSC1000G User’s Guide
193
Chapter 11 DSL Port Setup Screens
Figure 110 IPB Edgerouter
The following table describes the labels in this screen.
Table 69 IPB Edgerouter
194
LABEL
DESCRIPTION
Edgerouter IP
Enter the IP address of the edge router.
NetMask
Enter the number of bits in the subnet mask of the edge router.
VID
Enter the ID of the VLAN of which the edge router is a member. The MSC1000G
uses this VLAN ID when it forwards frames to the edge router. It also uses the
VLAN ID to identify the domain the edge router is in. You have to add the VLAN
ID to an IP bridge domain before you can enter it here.
Apply
Click Apply to create the edge router setting. It is then displayed in the
summary table at the bottom of the screen.
Clicking Apply saves your changes to the MSC1000G’s volatile memory. The
MSC1000G loses these changes if it is turned off or loses power, so use the
Config Save link on the navigation panel to save your changes to the nonvolatile memory when you are done configuring.
New
Click New to set the screen to configure a new entry.
Cancel
Click Cancel to start configuring this section of the screen again.
Index
This field displays the number of the edge router.
Domain
This field displays the name of the domain to which the edge router belongs.
Edgerouter IP
This field displays the IP address of the edge router.
NetMask
This field displays the number of bits in the subnet mask of the edge router.
VID
This field displays the VLAN ID of the edge router.
Select
Modify
Delete
Select the radio button in the Select column for an entry and click Modify to be
able to edit the entry or Delete to remove it.
Page X of X
This identifies which page of information is displayed and the total number of
pages of information.
Previous/Next
Click one of these buttons to show the preceding/following screen if the
information cannot be displayed in one screen.
MSC1000G User’s Guide
Chapter 11 DSL Port Setup Screens
11.18 IPB Interface Screen
Use this screen to set up and maintain forwarding information for downstream traffic. The
MSC1000G learns some of this information by snooping DHCP packets. For static IP
addresses, you should provide this information manually. Downlink interfaces in the same
domain cannot have overlapping IP addresses.
To open this screen, click Port > IP Bridge > Interface.
See Section 13.8 on page 234 for how to display all the forwarding information for
downstream traffic, whether learned by snooping DHCP packets or provided manually.
Figure 111 IPB Interface
The following table describes the labels in this screen.
Table 70 IPB Interface
LABEL
DESCRIPTION
Use the top section to create downlink interfaces manually.
Interface IP
NetMask
Enter the IP address and the number of bits in the subnet mask that define the
range of IP addresses to which this downlink interface applies. If the destination
IP address of a packet is in this range, the MSC1000G tries to forward the frame
to a subscriber in the specified VLAN or PVC. Downlink interfaces in the same
domain cannot have overlapping IP addresses.
VID
Enter the VLAN ID the subscriber is in. The MSC1000G uses this VLAN ID
when it forwards frames to the subscriber. It also uses the VLAN ID to identify
the domain the downlink interface is in. You have to add the VLAN ID to an IP
bridge domain before you can enter it here.
PVC, Slot, Port
Select the PVC check box if you want the MSC1000G to forward frames to a
specific channel in the specified VLAN. Use the Slot and Port drop-down list
boxes to select the line card and port for the channel.
Note: Make sure you specify a valid IP bridge PVC. Do not
specify PVCs that are not defined in the IPBPVC screen in
Section 11.19 on page 196.
VPI/VCI
MSC1000G User’s Guide
These fields apply if you select the PVC check box. Type the Virtual Path
Identifier and Virtual Circuit Identifier for a channel on this port.
195
Chapter 11 DSL Port Setup Screens
Table 70 IPB Interface (continued)
LABEL
DESCRIPTION
Apply
Click Apply to create the downlink interface. It is then displayed in the summary
table at the bottom of the screen.
Clicking Apply saves your changes to the MSC1000G’s volatile memory. The
MSC1000G loses these changes if it is turned off or loses power, so use the
Config Save link on the navigation panel to save your changes to the nonvolatile memory when you are done configuring.
New
Click New to set the screen to configure a new entry.
Cancel
Click Cancel to start configuring this section of the screen again.
The bottom section displays downlink interfaces created manually. It does not
show forwarding information learned by snooping DHCP packets.
Index
This field displays the index number of the downlink interface.
Domain
This field displays the name of the domain to which the edge router belongs.
Interface IP
NetMask
This field displays the IP address and the number of bits in the subnet mask that
define the range of IP addresses to which this downlink interface applies. If the
destination IP address of a packet is in this range, the MSC1000G tries to
forward the frame to a subscriber in the specified VLAN and PVC, if any.
VID
This field displays the VLAN ID the subscriber is in.
Slot
This field displays the number of the slot where the line card is located. It
displays “-” if the MSC1000G looks for the subscriber in the whole VLAN and
not a specific PVC.
Port
This field displays the number of the ADSL port on the line card to which the
MSC1000G forwards frames. It displays “-” if the MSC1000G looks for the
subscriber in the whole VLAN and not a specific PVC.
VPI/VCI
This field displays the Virtual Path Identifier (VPI) and Virtual Circuit Identifier
(VCI), if any. The VPI and VCI identify a channel on this port.
Select
Modify
Delete
Select the radio button in the Select column for an entry and click Modify to be
able to edit the entry or Delete to remove it.
Page X of X
This identifies which page of information is displayed and the total number of
pages of information.
Previous/Next
Click one of these buttons to show the preceding/following screen if the
information cannot be displayed in one screen.
11.19 IPBPVC Screen
Use this screen to set up and maintain PVCs for subscribers in an IP bridge.
To open this screen, click Port > IP Bridge > IPBPVC.
196
MSC1000G User’s Guide
Chapter 11 DSL Port Setup Screens
Figure 112 IPBPVC
The following table describes the labels in this screen.
Table 71 IPBPVC
LABEL
DESCRIPTION
Slot
Use this drop-down list box to select the slot that contains a line card with a port
for which you wish to set up an IP bridge PVC.
Port
Use this drop-down list box to select a port for which you wish to set up an IP
bridge PVC.
Load
Click Load to display the port’s IPB PVC settings in the fields below.
Index
This field displays the index number of a channel on this port. Click the index
number to go to a screen where you can configure the IPB PVC’s VLAN settings
(see Section 11.19.1 on page 199).
VPI/VCI
This field displays the Virtual Path Identifier (VPI) and Virtual Circuit Identifier
(VCI). The VPI and VCI identify a channel on this port.
Profile
This shows which ATM profile this channel uses.
Type
This field displays IPB to indicate that this is an IPB PVC.
IPBPVC
llc and vc are for a PVC running on Ethernet (IPoE), llc_r and vc_r are for a
PVC running on ATM (IPoA).
PVID
This is the VLAN ID assigned to frames received on this channel.
Priority
This is the priority value (0 to 7) added to incoming frames without a (IEEE
802.1p) priority tag.
MSC1000G User’s Guide
197
Chapter 11 DSL Port Setup Screens
Table 71 IPBPVC (continued)
198
LABEL
DESCRIPTION
Select
Select the radio button in the Select column for an entry and click Modify to be
able to edit the entry, Copy to duplicate the entry’s settings on another port, or
Delete to remove the entry.
Modify
Select the radio button in the Select column for an entry and click Modify to be
able to edit the entry.
Copy
Do the following to copy the settings you configure above to another port or
ports.
1. Click Copy.
2. Select to which line card you want to copy the settings.
3. Select to which ports on the line card you want to copy the settings. Use
Select All to select every port. Use Select None to clear all of the check
boxes.
4. Click Apply to paste the settings.
Delete
Select the radio button in the Select column for an entry and click Delete to
remove the entry.
VPI/VCI
Type the Virtual Path Identifier and Virtual Circuit Identifier for a channel on this
port.
PVID
Type the VLAN ID to assign to frames received on this channel. This VLAN ID
must be in an IP bridge domain.
Profile
Use the drop-down list box to select an ATM profile to use for this channel’s
traffic shaping.
IPBPVC Type
Use the drop-down list box to specify the encapsulation type for the PVC.
llc and vc are for a PVC running on Ethernet (IPoE), llc_r and vc_r are for a
PVC running on ATM (IPoA).
Priority
Use the drop-down list box to select the priority value (0 to 7) to add to incoming
frames without a (IEEE 802.1p) priority tag.
Apply
Click Apply to add or save channel settings on the selected port.
Clicking Apply saves your changes to the MSC1000G’s volatile memory. The
MSC1000G loses these changes if it is turned off or loses power, so use the
Config Save link on the navigation panel to save your changes to the nonvolatile memory when you are done configuring.
Cancel
Click Cancel to start configuring the screen again.
ID
This is the slot number of a line card. Click the index number of an active line
card that supports PVC to display a list of the IPB PVCs on the selected line
card (see Section 11.19.2 on page 200).
MSC1000G User’s Guide
Chapter 11 DSL Port Setup Screens
Table 71 IPBPVC (continued)
LABEL
DESCRIPTION
State
This field displays the line card’s current operational status.
active means the line card is operating normally.
init means the MSC1000G is initializing the line card.
disable means a manager has disabled the line card.
inactive means the line card is starting up or is not operating normally. This
could be due to the card starting, a firmware upgrade in progress or a
malfunction. See Section 34.6 on page 598 for what to do if the line card stays
stuck in the inactive state.
Card Type
This field displays the type of a line card.
Up Time
This field displays how long the line card has been running since the last time it
was started.
Firmware
This field displays the current firmware version installed on the line card.
11.19.1 IPBPVC VLAN Setup Screen
Use this screen to configure a IPB PVC’s VLAN settings.
To open this screen, click Port > IP Bridge > IPBPVC and then the index number of an IPB
PVC .
Figure 113 IPBPVC: VLAN Setup
The following table describes the labels in this screen.
Table 72 IPBPVC: VLAN Setup
LABEL
DESCRIPTION
UP
Click UP to go back to the previous screen.
VPI/VCI
This field displays the Virtual Path Identifier (VPI) and Virtual Circuit Identifier
(VCI). The VPI and VCI identify a IPB PVC (a channel).
VID
Type the VLAN ID to which this channel belongs. This VLAN ID must be in an IP
bridge domain.
Registration
Select join to have the port be a member of the specified VLAN.
Select leave to remove the port from the specified VLAN.
Tag
Select the check box to tag all frames transmitted on this PVC with the port’s
VID.
MSC1000G User’s Guide
199
Chapter 11 DSL Port Setup Screens
Table 72 IPBPVC: VLAN Setup (continued)
LABEL
DESCRIPTION
Apply
Click Apply to save changes on the selected IPB PVC.
Clicking Apply saves your changes to the MSC1000G’s volatile memory. The
MSC1000G loses these changes if it is turned off or loses power, so use the
Config Save link on the navigation panel to save your changes to the nonvolatile memory when you are done configuring.
Cancel
Click Cancel to start configuring the screen again.
Index
This field displays the index number of a IPB PVC on this port.
VPI/VCI
This field displays the Virtual Path Identifier (VPI) and Virtual Circuit Identifier
(VCI). The VPI and VCI identify a IPB PVC (a channel).
VID
This is the VLAN ID to which this channel belongs.
Registration
This field displays fixed to indicate that the port is a member of the specified
VLAN.
Tag
This field displays V if the line card is to tag all frames that are transmitted out
on this PVC with this VLAN group ID. It displays - if the line card does not tag all
frames that are transmitted out on this PVC with this VLAN group ID.
Select
Select the radio button in the Select column for an entry and click Modify to be
able to edit the entry, or Delete to remove the entry.
Modify
Select the radio button in the Select column for an entry and click Modify to be
able to edit the entry.
Delete
Select the radio button in the Select column for an entry and click Delete to
remove the entry.
11.19.2 IPBPVC by Slot Screen
This screen displays all of the IPB PVCs on a particular line card.
To open this screen, click Port > IP Bridge > IPBPVC and then the index number of an
active line card that supports PVC .
Figure 114 IPBPVC: Slot
The following table describes the labels in this screen.
Table 73 IPBPVC: Slot
200
LABEL
DESCRIPTION
UP
Click UP to go back to the previous screen.
Delete, Select
Select an entry’s Select check box and click Delete to remove the entry.
Index
This field displays the index number of a IPB PVC on this slot. Click the index
number to go to a screen where you can configure the IPB PVC’s VLAN settings
(see Section 11.19.1 on page 199).
MSC1000G User’s Guide
Chapter 11 DSL Port Setup Screens
Table 73 IPBPVC: Slot (continued)
LABEL
DESCRIPTION
Port
This field displays the port number of a port on this line card that has an IPB
PVC.
VPI/VCI
This field displays the Virtual Path Identifier (VPI) and Virtual Circuit Identifier
(VCI). The VPI and VCI identify a IPB PVC (a channel).
Profile
This shows which ATM profile this channel uses.
Type
This field displays IPB to indicate that this is an IPB PVC.
IPBPVC
llc and vc are for a PVC running on Ethernet (IPoE), llc_r and vc_r are for a
PVC running on ATM (IPoA).
PVID
This is the VLAN ID assigned to frames received on this channel.
Priority
This is the priority value (0 to 7) added to incoming frames without a (IEEE
802.1p) priority tag.
Select
Select the radio button in the Select column for an entry and click Delete to
remove the entry.
11.20 IPB Route Screen
Use this screen to set up and maintain the routing table for each domain. Each routing table
contains entries that, based on the destination IP address, control where the MSC1000G
forwards packets. The MSC1000G automatically creates routing table entries for each
downlink interface and for each edge router in the domain that the associated VLAN is in. You
can create additional entries by specifying the edge router to which the MSC1000G should
forward traffic for a particular destination IP address or IP subnet.
To open this screen, click Port > IP Bridge > Route.
Figure 115 IPB Route
MSC1000G User’s Guide
201
Chapter 11 DSL Port Setup Screens
The following table describes the labels in this screen.
Table 74 IPB Route
LABEL
DESCRIPTION
Use the top section to create routing table entries manually.
Domain
Select the domain to whose routing table you want to add this entry.
Route IP
NetMask
Enter the IP address and the number of bits in the subnet mask that define the
range of IP addresses to which this entry applies. If the destination IP address
of a packet is in this range, the MSC1000G forwards the frame to the specified
edge router.
Nexthop
Enter the IP address to which the MSC1000G forwards frames if the destination
IP address of a packet is in the specified range.
If this IP address corresponds to an edge router in the edge router screen (see
Section 11.17 on page 193), the MSC1000G uses the associated VLAN ID. In
addition,
• If the edge router is in the same domain as the entry, the entry is used for
upstream traffic.
• If the edge router is in a different domain than the entry, the entry is used for
downstream traffic.
If the specified edge router is not set up in the edge router screen, the
MSC1000G uses the entry for downstream traffic and does not change the
VLAN ID.
Metric
The metric represents the “cost” of transmission for routing purposes. IP routing
uses hop count as the measurement of cost, with a minimum of 1 for directlyconnected networks. Select the number that approximates the cost for this link
The number need not be precise, but it must be between 1 and 15. In practice, 2
or 3 is usually a good number.
If two entries have the same metric, the MSC1000G uses the one with the lower
IP address.
Change Pbit
If you want to set the IEEE 802.1p priority value of incoming frames, select the
check box and use the drop-down list box to select the priority value (0 to 7) to
use.
Apply
Click Apply to create the routing table entry. It is then displayed in the summary
table at the bottom of the screen.
Clicking Apply saves your changes to the MSC1000G’s volatile memory. The
MSC1000G loses these changes if it is turned off or loses power, so use the
Config Save link on the navigation panel to save your changes to the nonvolatile memory when you are done configuring.
New
Click New to set the screen to configure a new entry.
Cancel
Click Cancel to start configuring this section of the screen again.
The bottom section displays routing table entries created manually. It does not
show entries added automatically by the MSC1000G. See Section 13.9 on page
235 to look at the full routing table(s) for selected domain(s).
202
Domain
Select a domain for which you wish to view information and click Load to
display it.
Index
This field displays the number of the entry.
Route IP
NetMask
These fields display the IP address and the number of bits in the subnet mask
that define the range of IP addresses to which this entry applies. If the
destination IP address of a packet is in this range, the MSC1000G forwards the
frame to the specified edge router.
Nexthop
This field displays the IP address to which the MSC1000G forwards frames if
the destination IP address of a packet is in the specified range.
Metric
This field displays the “cost” of transmission for routing purposes.
MSC1000G User’s Guide
Chapter 11 DSL Port Setup Screens
Table 74 IPB Route (continued)
LABEL
DESCRIPTION
Change Pbit
If you set the MSC1000G to change the IEEE 802.1p priority value of incoming
frames, this field displays the priority value (0 to 7) to which the MSC1000G sets
them. “-” displays if you do not set the MSC1000G to change the IEEE 802.1p
priority value of incoming frames.
Select
Modify
Delete
Select the radio button in the Select column for an entry and click Modify to be
able to edit the entry or Delete to remove it.
11.21 Port Copy Screen
Click Port > Copy in the navigation panel to open the following screen. Use this screen to
copy DSL, VLAN and PVC settings from one DSL port to another DSL port or ports.
Figure 116 Port Copy
The following table describes the fields in this screen.
Table 75 Port Copy
LABEL
DESCRIPTION
Slot
Select the number of a line card’s slot.
MSC1000G User’s Guide
203
Chapter 11 DSL Port Setup Screens
Table 75 Port Copy (continued)
LABEL
DESCRIPTION
Port
Select the number of a DSL port on the line card.
Copy
Do the following to copy settings from one DSL port to another DSL port or ports.
1. Use the Slot and Port drop-down list boxes to select the number of the DSL
port from which you want to copy settings.
2. Click Copy to open the following screen.
Figure 117 Copy
3. Select a line card to which you want to copy settings.
4. Select the check boxes of the DSL ports on the line card to which you want to
copy the settings. Click Select All to mark all of the port check boxes or click
Select None to clear all of the port check boxes.
5. Click Apply to copy the settings to all of the ports that you have selected in this
screen. Click Cancel to close the screen without saving changes.
204
MSC1000G User’s Guide
CHAPTER
12
Profile Screens
This chapter describes how to configure profiles to use in assigning settings to the DSL ports.
12.1 Profiles Overview
A profile is a list of settings that you define. Then you can use them to configure one or more
individual ports or PVCs. You cannot delete or modify the DEFVAL profiles.
•
•
•
•
Use ADSL profiles to configure ADSL port settings.
Use SHDSL profiles to configure SHDSL port settings.
Use VDSL profiles to configure VDSL port settings.
Use ATM profiles to configure ATM traffic shaping settings to be used in configuring
PVCs.
• Use alarm ADSL profiles to configure alarm settings for ADSL ports.
• Use alarm SHDSL profiles to configure alarm settings for SHDSL ports.
• Use IGMP filter profiles to configure IGMP filter settings for DSL ports.
12.2 Interleave Delay
Interleave delay is the wait (in milliseconds) that determines the size of a single block of data
to be interleaved (assembled) and then transmitted. Interleave delay is used when transmission
error correction (Reed- Solomon) is necessary due to a less than ideal telephone line. The
bigger the delay, the bigger the data block size, allowing better error correction to be
performed.
Reed-Solomon codes are block-based error correcting codes with a wide range of applications.
The Reed-Solomon encoder takes a block of digital data and adds extra "redundant" bits. The
Reed-Solomon decoder processes each block and attempts to correct errors and recover the
original data.
12.2.1 Fast Mode
Fast mode means no interleaving takes place and transmission is faster (a "fast channel"). This
would be suitable if you have a good line where little error correction is necessary.
MSC1000G User’s Guide
205
Chapter 12 Profile Screens
12.3 Configured Versus Actual ADSL Rates
You configure the maximum rate of an individual ADSL port by modifying its profile (see the
set profile command) or assigning the port to a different profile (see the set port command).
However, due to noise and other factors on the line, the actual rate may not reach the
maximum that you specify.
Even though you can specify arbitrary numbers in the set profile command, the actual rate is
always a multiple of 32 Kbps for the G.dmt, ANSI T1.413 and G.lite ADSL standards or a
multiple of 4 Kbps for the ADSL2 and ADSL2+ standards.
With the G.dmt, ANSI T1.413 and G.lite ADSL standards, if you enter a rate that is not a
multiple of 32 Kbps, the actual rate will be the next lower multiple of 32 Kbps. For instance, if
you specify 60 Kbps for a port, the actual rate for that port will not exceed 32 Kbps, and if you
specify 66 Kbps, the actual rate will not be over 64 Kbps.
With the ADSL2 and ADSL2+ standards, if you enter a rate that is not a multiple of 4 Kbps,
the actual rate will be the next lower multiple of 4 Kbps. For instance, if you specify 67 Kbps
for a port, the actual rate for that port will not exceed 64 Kbps, and if you specify 69 Kbps, the
actual rate will not be over 68 Kbps.
Note that when you configure an ADSL port, the upstream rate must be less than or equal to
the downstream rate. Note also that the list port command displays the configured parameters
of the ADSL port, while the show port command displays the actual rates.
12.4 ADSL Profile Screen
Click Profile > ADSL in the navigation panel to open the following screen. Use this screen to
configure ADSL profiles. Later you can use the ADSL profiles to configure ADSL ports in the
ADSL Port Setup screens.
206
MSC1000G User’s Guide
Chapter 12 Profile Screens
Figure 118 ADSL Profile
The following table describes the fields in this screen.
Table 76 ADSL Profile
LABEL
DESCRIPTION
The top part of the screen is for profile configuration.
Name
When editing a profile, this is the name of this profile. When adding a profile, type
a name (up to 31 characters) for the profile.
Latency Mode
This field sets the ADSL latency mode for the ports that belong to this profile.
Select fast mode to use no interleaving and have faster transmission (a “fast
channel”). This would be suitable if you have a good line where little error
correction is necessary.
Select interleave mode to use interleave delay when transmission error correction
(Reed- Solomon) is necessary due to a less than ideal telephone line.
See Section 12.2 on page 205 for more on interleave delay.
Upstream
The following parameters relate to upstream transmissions.
Max Rate
(kbps)
Type a maximum upstream transfer rate for this profile. Configure the maximum
upstream transfer rate to be less than the maximum downstream transfer rate.
Min Rate
(kbps)
Type the minimum upstream transfer rate for this port. Configure the minimum
upstream transfer rate to be less than the maximum upstream transfer rate.
Interleave
Delay (ms)
Configure this field when you set the Latency Mode field to Interleave. Type the
number of milliseconds of interleave delay to use for upstream transfers. It is
recommended that you configure the same latency delay for both upstream and
downstream.
Max SNR (0.1
dB)
Type the maximum upstream signal to noise margin (measured in tenths of a
decibel).
Min SNR (0.1
dB)
Type the minimum upstream signal to noise margin (measured in tenths of a
decibel). Configure the minimum upstream signal to noise margin to be less than
or equal to the maximum upstream signal to noise margin.
MSC1000G User’s Guide
207
Chapter 12 Profile Screens
Table 76 ADSL Profile (continued)
LABEL
Target SNR
(0.1 dB)
Type the target upstream signal to noise margin (measured in tenths of a decibel).
Configure the target upstream signal to noise margin to be greater than or equal to
the minimum upstream signal to noise margin and less than or equal to the
maximum upstream signal to noise margin.
SRA Mode
Select the upstream rate adaptation setting.
Select fix to not use any rate adaptation.
Select startup to use rate adaptation at initialization.
Select runtime to use rate adaptation at any time while the connection is up.
Up-shift Noise
Margin (0.1
dB)
The upstream up shift signal to noise margin (measured in tenths of a decibel).
When the channel’s signal to noise margin goes above this number, the device
can attempt to use a higher transfer rate. Configure the upstream up shift signal to
noise margin to be greater than or equal to the target upstream signal to noise
margin and less than or equal to the maximum upstream signal to noise margin.
Down-shift
Noise Margin
(0.1 dB)
The upstream down shift signal to noise margin (measured in tenths of a decibel).
When the channel’s signal to noise margin goes below this number, the device
shifts to a lower transfer rate. Configure the upstream down shift signal to noise
margin to be less than or equal to the target upstream signal to noise margin and
greater than or equal to the minimum upstream signal to noise margin.
Downstream
208
DESCRIPTION
The following parameters relate to downstream transmissions.
Max Rate
(kbps)
Type a maximum downstream transfer rate for this port. Configure the maximum
downstream transfer rate to be greater than the maximum upstream transfer rate.
Min Rate
(Kbps)
Type the minimum downstream transfer rate for this port. Configure the minimum
downstream transfer rate to be less than the maximum downstream transfer rate.
Interleave
Delay (ms)
Configure this field when you set the Latency Mode field to interleave. Type the
number of milliseconds of interleave delay to use for upstream transfers. It is
recommended that you configure the same latency delay for both upstream and
downstream.
Max SNR (0.1
dB)
Type the maximum downstream signal to noise margin (measured in tenths of a
decibel).
Min SNR (0.1
dB)
Type the minimum downstream signal to noise margin (measured in tenths of a
decibel). Configure the minimum downstream signal to noise margin to be less
than or equal to the maximum downstream signal to noise margin.
Target SNR
(0.1 dB)
Type the target downstream signal to noise margin (measured in tenths of a
decibel). Configure the target downstream signal to noise margin to be greater
than or equal to the minimum downstream signal to noise margin and less than or
equal to the maximum downstream signal to noise margin.
SRA Mode
Select the downstream rate adaptation setting.
Select fix to not use any rate adaptation.
Select startup to use rate adaptation at initialization.
Select runtime to use rate adaptation at any time while the connection is up.
Up-shift Noise
Margin (0.1
dB)
The downstream up shift signal to noise margin (measured in tenths of a decibel).
When the channel’s signal to noise margin goes above this number, the device
can attempt to use a higher transfer rate. Configure the downstream up shift signal
to noise margin to be greater than or equal to the target downstream signal to
noise margin and less than or equal to the maximum downstream signal to noise
margin.
Down-shift
Noise Margin
(0.1 dB)
The downstream down shift signal to noise margin (measured in tenths of a
decibel). When the channel’s signal to noise margin goes below this number, the
device shifts to a lower transfer rate. Configure the downstream down shift signal
to noise margin to be less than or equal to the target downstream signal to noise
margin and greater than or equal to the minimum downstream signal to noise
margin.
MSC1000G User’s Guide
Chapter 12 Profile Screens
Table 76 ADSL Profile (continued)
LABEL
DESCRIPTION
Apply
Click Apply to save the changes in this screen to the system’s volatile memory.
The system loses these changes if it is turned off or loses power, so use the
Config Save on the navigation panel and then the Save button to save your
changes to the non-volatile memory when you are done configuring.
New
While you are modifying a profile, you can click New to start configuring a fresh
profile without saving your changes.
Cancel
Click Cancel to start configuring the screen again.
The bottom part of the screen lists the configured profiles.
Index
This is the port profile index number.
Name
These are the names of individual profiles. The DEFVAL profile always exists and
all of the DSL ports have it assigned to them by default.
Latency Mode
This is the ADSL latency mode (fast or interleave) for the ports that belong to this
profile.
Down/Up SRA
Mode
These are the downstream and upstream rate adaptation settings for the ports that
belong to this profile.
Down/Up Max
Rate (kbps)
These are the maximum downstream and upstream transfer rates for the ports
that belong to this profile.
Modify
Select a profile’s Select radio button and click Modify to edit the profile.
Delete
Select a profile’s Select radio button and click Delete to remove the profile.
12.5 VDSL Profile Setup
Click Profile > VDSL in the navigation panel to open the following screen. Use this screen to
configure VDSL profiles. Later you can use the VDSL profiles to configure VDSL ports in the
VDSL Port Setup screens.
MSC1000G User’s Guide
209
Chapter 12 Profile Screens
Figure 119 VDSL Profile
The following table describes the fields in this screen.
Table 77 VDSL Profile
LABEL
DESCRIPTION
The top part of the screen is for profile configuration.
210
Name
When editing a profile, this is the name of this profile. When adding a profile, type
a name (up to 31 characters) for the profile.
Latency Mode
This field sets the VDSL latency mode for the ports that belong to this profile.
Select fast mode to use no interleaving and have faster transmission (a “fast
channel”). This would be suitable if you have a good line where little error
correction is necessary.
Select interleave mode to use interleave delay when transmission error correction
(Reed- Solomon) is necessary due to a less than ideal telephone line.
See Section 12.2 on page 205 for more on interleave delay.
Upstream
The following parameters relate to upstream transmissions.
Max Rate
(kbps)
Type a maximum upstream transfer rate for this profile. Configure the maximum
upstream transfer rate to be less than the maximum downstream transfer rate.
Min Rate
(kbps)
Type the minimum upstream transfer rate for this port. Configure the minimum
upstream transfer rate to be less than the maximum upstream transfer rate.
Interleave
Delay (ms)
Configure this field when you set the Latency Mode field to Interleave. Type the
number of milliseconds of interleave delay to use for upstream transfers. It is
recommended that you configure the same latency delay for both upstream and
downstream.
Max SNR (0.1
dB)
Type the maximum upstream signal to noise margin (measured in tenths of a
decibel).
Min SNR (0.1
dB)
Type the minimum upstream signal to noise margin (measured in tenths of a
decibel). Configure the minimum upstream signal to noise margin to be less than
or equal to the maximum upstream signal to noise margin.
MSC1000G User’s Guide
Chapter 12 Profile Screens
Table 77 VDSL Profile (continued)
LABEL
Target SNR
(0.1 dB)
Downstream
DESCRIPTION
Type the target upstream signal to noise margin (measured in tenths of a decibel).
Configure the target upstream signal to noise margin to be greater than or equal to
the minimum upstream signal to noise margin and less than or equal to the
maximum upstream signal to noise margin.
The following parameters relate to downstream transmissions.
Max Rate
(kbps)
Type a maximum downstream transfer rate for this port. Configure the maximum
downstream transfer rate to be greater than the maximum upstream transfer rate.
Min Rate
(Kbps)
Type the minimum downstream transfer rate for this port. Configure the minimum
downstream transfer rate to be less than the maximum downstream transfer rate.
Interleave
Delay (ms)
Configure this field when you set the Latency Mode field to interleave. Type the
number of milliseconds of interleave delay to use for upstream transfers. It is
recommended that you configure the same latency delay for both upstream and
downstream.
Max SNR (0.1
dB)
Type the maximum downstream signal to noise margin (measured in tenths of a
decibel).
Min SNR (0.1
dB)
Type the minimum downstream signal to noise margin (measured in tenths of a
decibel). Configure the minimum downstream signal to noise margin to be less
than or equal to the maximum downstream signal to noise margin.
Target SNR
(0.1 dB)
Type the target downstream signal to noise margin (measured in tenths of a
decibel). Configure the target downstream signal to noise margin to be greater
than or equal to the minimum downstream signal to noise margin and less than or
equal to the maximum downstream signal to noise margin.
Apply
Click Apply to save the changes in this screen to the system’s volatile memory.
The system loses these changes if it is turned off or loses power, so use the
Config Save on the navigation panel and then the Save button to save your
changes to the non-volatile memory when you are done configuring.
New
While you are modifying a profile, you can click New to start configuring a fresh
profile without saving your changes.
Cancel
Click Cancel to start configuring the screen again.
The bottom part of the screen lists the configured profiles.
Index
This is the port profile index number.
Name
These are the names of individual profiles. The DEFVAL profile always exists and
all of the DSL ports have it assigned to them by default.
Latency Mode
This is the VDSL latency mode (fast or interleave) for the ports that belong to this
profile.
Down/Up Max
Rate (kbps)
These are the maximum downstream and upstream transfer rates for the ports
that belong to this profile.
Modify
Select a profile’s Select radio button and click Modify to edit the profile.
Delete
Select a profile’s Select radio button and click Delete to remove the profile.
12.6 Configured Versus Actual SHDSL Rates
You configure the maximum and minimum rates of individual SHDSL ports using the set
profile command. However, due to noise and other factors on the line, the actual rate may not
reach the maximum that you specify.
MSC1000G User’s Guide
211
Chapter 12 Profile Screens
Even though you can specify arbitrary numbers in the set profile command, the actual rate is
always a multiple of 64 Kbps. If you enter a rate that is not a multiple of 64 Kbps, the actual
value will be the next lower multiple of 64Kbps. For instance, if you specify 2100 Kbps for a
port, the actual value will be 2048 Kbps, and if you specify 2120 Kbps, the actual value will be
2112 Kbps.
Note that when you configure a SHDSL profile, the upstream and downstream speeds are the
same. The minimum rate must be less than or equal to the maximum rate.
12.7 N-wire Mode
The n-wire mode allows you to physically bundle two SHDSL ports into a single 4-wire
connection. The 4-wire mode is described in ITU-T G.991.2. You can use it to connect to
SHDSL modems or routers that also support 4-wire mode. N-wire mode also allows you to
physically bundle four SHDSL ports into a single 8-wire connection. The 8-wire group is
called mpair4.
N-wire mode can increase the reach of a particular data rate without having to regenerate the
signal. It can also give increased bandwidth for LAN-to-LAN applications.
You can n-wire bundle multiple groups of ports on a single SHDSL line card.
12.8 SHDSL Profile Screen
Click Profile > SHDSL in the navigation panel to open the following screen. Use this screen
to configure SHDSL profiles. Later you can apply the SHDSL profiles to configure SHDSL
ports in the SHDSL Port Setup screens.
Figure 120 SHDSL Profile
212
MSC1000G User’s Guide
Chapter 12 Profile Screens
The following table describes the fields in this screen.
Table 78 SHDSL Profile
LABEL
DESCRIPTION
The top part of the screen is for profile configuration.
Name
When editing a profile, this is the name of this profile. When adding a profile, type
a name (up to 31 characters) for the profile.
Max Rate
[192~4096] kbps
Type a maximum transfer rate for this profile.
Min Rate
[192~4096] kbps
Type the minimum upstream transfer rate for this profile.
Annex Mode
Select the region setting.
Select ANNEX_A to use DSL over POTS.
Select ANNEX_B to use DSL over ISDN.
Wire Pair
Select a wire pair number.
Select 2wire for a normal connection using a single SHDSL port’s two wires, this
is the default.
Select 4wire for a 4-wire n-wire group (two SHDSL ports grouped together).
Select mpair4 for an 8-wire n-wire group (four SHDSL ports grouped together).
Line Probing
Enable Mode
The SHDSL line card and subscriber modem use line probes to determine the
best possible transmission rate. This is used in rate adaptation.
Disable the line probe to have the system skip the rate adaptation phase to
shorten connection set up time.
Select enable (current_condition_ target_SNR) to enable line probing using the
current target Signal to Noise Ratio margin.
Select enable (worst_case_target_SNR) to enable line probing using the worst
case target Signal to Noise Ratio margin.
Current Condition
SNR Margin [10~21]
Type the current condition target Signal to Noise Ratio margin, -10 ~ 21 in dB. You
only configure this if you enable line probing using the current target Signal to
Noise Ratio margin.
Worst Case SNR
Margin [-10~21]
Type the worst case Signal to Noise Ratio margin, -10 ~ 21 in dB. You only
configure this if you enable line probing using the worst case target Signal to
Noise Ratio margin.
Apply
Click Apply to save the changes in this screen to the system’s volatile memory.
The system loses these changes if it is turned off or loses power, so use the
Config Save on the navigation panel and then the Save button to save your
changes to the non-volatile memory when you are done configuring.
New
While you are modifying a profile, you can click New to start configuring a fresh
profile without saving your changes.
Cancel
Click Cancel to start configuring the screen again.
The bottom part of the screen lists the configured profiles.
Index
This is the port profile index number.
Name
These are the names of individual profiles. The DEFVAL profile always exists and
all of the DSL ports have it assigned to them by default.
Max Rate (kbps)
This is the maximum transfer rate (in Kbps) for this profile.
Min Rate (kbps)
This is the minimum upstream transfer rate (in Kbps) for this profile.
Modify
Select a profile’s Select radio button and click Modify to edit the profile.
Delete
Select a profile’s Select radio button and click Delete to remove the profile.
MSC1000G User’s Guide
213
Chapter 12 Profile Screens
12.9 ATM QoS
ATM Quality of Service (QoS) mechanisms provide the best service on a per-flow guarantee.
ATM network infrastructure was designed to provide QoS. It uses fixed cell sizes and built-in
traffic management (see the following section on traffic shaping). This allows you to fine-tune
the levels of services on the priority of the traffic flow.
12.10 Traffic Shaping
Traffic shaping is an agreement between the carrier and the subscriber to regulate the average
rate and fluctuations of data transmission over an ATM network. This agreement helps
eliminate congestion, which is important for transmission of real time data such as audio and
video connections.
"
Traffic shaping controls outgoing (downstream) traffic, not incoming
(upstream).
12.10.1 ATM Traffic Classes
These are the basic ATM traffic classes defined by the ATM Forum Traffic Management 4.0
Specification.
12.10.1.1 Constant Bit Rate (CBR)
Constant Bit Rate (CBR) is an ATM traffic class that provides fixed bandwidth. CBR traffic is
generally time-sensitive (doesn't tolerate delay). CBR is used for connections that
continuously require a specific amount of bandwidth. Examples of connections that need CBR
would be high-resolution video and voice.
12.10.1.2 Variable Bit Rate (VBR)
The Variable Bit Rate (VBR) ATM traffic class is used with bursty connections. Connections
that use the Variable Bit Rate (VBR) traffic class can be grouped into real time (rt-VBR) or
non-real time (nrt-VBR) connections.
The rt-VBR (real-time Variable Bit Rate) type is used with bursty connections that require
closely controlled delay and delay variation. An example of an rt-VBR connection would be
video conferencing. Video conferencing requires real-time data transfers and the bandwidth
requirement varies in proportion to the video image's changing dynamics.
The nrt-VBR (non real-time Variable Bit Rate) type is used with bursty connections that do not
require closely controlled delay and delay variation. An example of an nrt-VBR connection
would be non-time sensitive data file transfers.
214
MSC1000G User’s Guide
Chapter 12 Profile Screens
12.10.1.3 Unspecified Bit Rate (UBR)
The Unspecified Bit Rate (UBR) ATM traffic class is similar to the ABR traffic class for
bursty data transfers. However, while ABR gives subscribers a set amount of bandwidth, UBR
doesn't guarantee any bandwidth and only delivers traffic when the network has spare
bandwidth.
12.10.2 Traffic Parameters
These are the parameters that control the flow of ATM traffic.
12.10.2.1 Peak Cell Rate (PCR)
Peak Cell Rate (PCR) is the maximum rate at which the sender can send cells. This parameter
may be lower (but not higher) than the maximum line speed. 1 ATM cell is 53 bytes (424 bits),
so a maximum speed of 832Kbps gives a maximum PCR of 1962 cells/sec. This rate is not
guaranteed because it is dependent on the line speed.
12.10.2.2 Sustained Cell Rate (SCR)
Sustained Cell Rate (SCR) is the mean cell rate of each bursty traffic source. It specifies the
maximum average rate at which cells can be sent over the virtual connection. SCR may not be
greater than the PCR.
12.10.2.3 Maximum Burst Size (MBS)
Maximum Burst Size (MBS) is the maximum number of cells that can be sent at the PCR.
After MBS is reached, cell rates fall below SCR until cell rate averages to the SCR again. At
this time, more cells (up to the MBS) can be sent at the PCR again.
"
If the PCR, SCR or MBS is set to the default of "0", the system will assign a
maximum value that correlates to your upstream line rate.
The following figure illustrates the relationship between PCR, SCR and MBS.
Figure 121 PCR, SCR and MBS in Traffic Shaping
MSC1000G User’s Guide
215
Chapter 12 Profile Screens
12.10.2.4 Cell Delay Variation Tolerance (CDVT)
Cell Delay Variation Tolerance (CDVT) is the accepted tolerance of the difference between a
cell's transfer delay and the expected transfer delay. CDVT controls the time scale over which
the PCR is enforced. CDVT is used to determine if a cell arrived too early in relation to PCR.
12.10.2.5 Burst Tolerance (BT)
Burst Tolerance (BT) is the maximum number of cells that the port is guaranteed to handle
without any discards. BT controls the time scale over which the SCR is enforced. BT is used to
determine if a cell arrived too early in relation to SCR. Use this formula to calculate BT: (MBS
- 1) x (1 / SCR - 1 / PCR) = BT.
12.10.2.6 Theoretical Arrival Time (TAT)
The Theoretical Arrival Time (TAT) is when the next cell (in an ATM connection's stream of
cells) is expected to arrive. TAT is calculated based on the PCR or SCR.
The following figure illustrates the relationship between TAT, CDVT and BT. If a cell arrives
at time A, then according to PCR or SCR, the next cell is expected to arrive at time B. If the
next cell arrives earlier than time C, it is discarded or tagged for not complying with the TAT.
Time C is calculated based on the CDVT or BT.
Figure 122 TAT, CDVT and BT in Traffic Shaping
12.11 ATM Profile Screen
Click Profile > ATM in the navigation panel to open the following screen. Use this screen to
configure ATM profiles. Later you can use the ATM profiles to configure PVCs in the PVC
Setup screens.
216
MSC1000G User’s Guide
Chapter 12 Profile Screens
Figure 123 ATM Profile
The following table describes the fields in this screen.
Table 79 ATM Profile
LABEL
DESCRIPTION
The top part of the screen is for profile configuration.
Name
When editing a profile, this is the name of this profile. When adding a profile, type a
name for the profile. You can use up to 31 English keyboard characters; spaces are
not allowed.
Traffic Class
Select CBR (constant bit rate) to specify fixed (always-on) bandwidth for voice or
data traffic.
Select UBR (unspecified bit rate) for applications that are non-time sensitive, such
as e-mail.
Select VBR (real time variable bit rate) or NRT (non real time variable bit rate) for
bursty traffic and bandwidth sharing with other applications.
Peak Cell Rate
[150~300000]
The Peak Cell Rate is the maximum rate at which the sender can send cells. Peak
Cell Rate applies with all of the ATM traffic classes. You can type a number of (ATM)
cells per second in the first field or type a number of kilobytes per second in the
second field to have the system automatically compute the number of ATM cells per
second.
Cell Delay
Variation
Tolerance
[0~255]
Cell Delay Variation Tolerance is the accepted tolerance of the difference between a
cell’s transfer delay and the expected transfer delay. Cell Delay Variation Tolerance
applies with all of the ATM traffic classes. Type the Cell Delay Variation Tolerance
here.
Sustained Cell
Rate
[150~300000]
The Sustained Cell Rate sets the average cell rate (long-term) that can be
transmitted. Type the Sustained Cell Rate, which must be less than the Peak Cell
Rate. Sustained Cell Rate applies with the variable bit rate traffic classes. You can
type a number of (ATM) cells per second in the first field or type a number of
kilobytes per second in the second field to have the system automatically compute
the number of ATM cells per second.
Burst Tolerance
[0~255]
Burst Tolerance sets a maximum number of cells that the port is guaranteed to
handle without any discards. Type the Burst Tolerance here. Burst Tolerance applies
with the variable bit rate traffic classes.
Apply
Click Apply to save the changes in this screen to the system’s volatile memory. The
system loses these changes if it is turned off or loses power, so use the Config Save
on the navigation panel and then the Save button to save your changes to the nonvolatile memory when you are done configuring.
MSC1000G User’s Guide
217
Chapter 12 Profile Screens
Table 79 ATM Profile (continued)
LABEL
DESCRIPTION
New
While you are modifying a profile, you can click New to start configuring a fresh
profile without saving your changes.
Cancel
Click Cancel to start configuring the screen again.
The bottom part of the screen lists the configured profiles.
Index
This is the number of the ATM profile.
Name
This name identifies the ATM profile.
Traffic Class
This field displays the type of ATM traffic class: cbr (constant bit rate), vbr (real-time
variable bit rate), nrt (non-real time variable bit rate) or ubr (unspecified bit rate).
Modify
Select a profile’s Select radio button and click Modify to edit the profile.
Delete
Select a profile’s Select radio button and click Delete to remove the profile.
12.12 Alarm ADSL Profile Screen
Click Profile> Alarm ADSL in the navigation panel to open the following screen. Use this
screen to configure alarm profiles for the ADSL ports. Later you can apply the alarm ADSL
profiles to ADSL ports in the ADSL Port Setup screens.
Alarm ADSL profiles define ADSL port alarm thresholds. The system sends an alarm trap and
generates a syslog entry when the thresholds of the alarm profile are exceeded.
218
MSC1000G User’s Guide
Chapter 12 Profile Screens
Figure 124 Alarm ADSL Profile
The following table describes the fields in this screen.
Table 80 Alarm ADSL Profile
LABEL
DESCRIPTION
The top part of the screen is for profile configuration.
Name
Type a name to identify the alarm profile (you cannot change the name of the
DEFVAL profile). You can use up to 31 English keyboard characters; spaces are
not allowed.
Threshold
Specify limits for the individual performance counters. The system sends an alarm
trap and generates a syslog entry when one of these thresholds is exceeded. A
value of 0 disables the alarm threshold.
ATU-C
These fields are for traffic coming from the subscriber’s device to the system.
ATU-R
These fields are for traffic going from the system to the subscriber’s device.
15 Min LOF
[0~900]
This field sets the limit for the number of Loss Of Frame seconds that are
permitted to occur within 15 minutes.
15 Min LOS
[0~900]
This field sets the limit for the number of Loss Of Signal seconds that are
permitted to occur within 15 minutes.
15 Min LOL
[0~900]
This field sets limit for the number of Loss Of Link seconds that are permitted to
occur within 15 minutes.
15 Min LPR
[0~900]
This field sets the limit for the number of Loss of Power (on the ATUR) seconds
that are permitted to occur within 15 minutes.
15 Min ES
[0~900]
This field sets the limit for the number of Errored Seconds that are permitted to
occur within 15 minutes.
MSC1000G User’s Guide
219
Chapter 12 Profile Screens
Table 80 Alarm ADSL Profile (continued)
LABEL
DESCRIPTION
15 Min SESL
[0~900]
This field sets the limit for the number of Severely Errored Seconds that are
permitted to occur within 15 minutes.
15 Min UASL
[0~900]
This field sets the limit for the number of UnAvailable Seconds that are permitted
to occur within 15 minutes.
15 Min Failed
Fast [0~900]
This field sets the limit for the number of failed fast retrain seconds that are
permitted to occur within 15 minutes.
Init Failure Trap
Select Enable to trigger an alarm for an initialization failure trap.
Fast Rate Up
[0~2147483]
(kbps)
Specify a rate in kilobits per second (kbps). If a fast mode connection’s upstream
transmission rate increases by more than this number, then a trap is sent.
Fast Rate Down
[0~2147483]
(kbps)
Specify a rate in kilobits per second (kbps). If a fast mode connection’s
downstream transmission rate decreases by more than this number, then a trap is
sent.
Interleave Rate
Up [0~2147483]
(kbps)
Specify a rate in kilobits per second (kbps). If an interleave mode connection’s
upstream transmission rate increases by more than this number, then a trap is
sent.
Interleave Rate
Down
[0~2147483]
(kbps)
Specify a rate in kilobits per second (kbps). If an interleave mode connection’s
upstream transmission rate decreases by more than this number, then a trap is
sent.
Apply
Click Apply to save the changes in this screen to the system’s volatile memory.
The system loses these changes if it is turned off or loses power, so use the
Config Save on the navigation panel and then the Save button to save your
changes to the non-volatile memory when you are done configuring.
New
While you are modifying a profile, you can click New to start configuring a fresh
profile without saving your changes.
Cancel
Click Cancel to start configuring the screen again.
The bottom part of the screen lists the configured profiles.
Index
This is the index number of the alarm profile.
Name
This is the name of the alarm profile.
Modify
Select a profile’s Select radio button and click Modify to edit the profile.
Delete
Select a profile’s Select radio button and click Delete to remove the profile.
12.13 Alarm VDSL Profile Screen
Click Profile> Alarm VDSL in the navigation panel to open the following screen. Use this
screen to configure alarm profiles for the VDSL ports. Later you can apply the alarm VDSL
profiles to VDSL ports in the VDSL Port Setup screens.
Alarm VDSL profiles define VDSL port alarm thresholds. The system sends an alarm trap and
generates a syslog entry when the thresholds of the alarm profile are exceeded.
220
MSC1000G User’s Guide
Chapter 12 Profile Screens
Figure 125 Alarm VDSL Profile
The following table describes the fields in this screen.
Table 81 Alarm VDSL Profile
LABEL
DESCRIPTION
The top part of the screen is for profile configuration.
Name
Type a name to identify the alarm profile (you cannot change the name of the
DEFVAL profile). You can use up to 31 English keyboard characters; spaces are
not allowed.
Threshold
Specify limits for the individual performance counters. The system sends an alarm
trap and generates a syslog entry when one of these thresholds is exceeded. A
value of 0 disables the alarm threshold.
15 Min LOF
[0~900]
This field sets the limit for the number of Loss Of Frame seconds that are
permitted to occur within 15 minutes.
15 Min LOS
[0~900]
This field sets the limit for the number of Loss Of Signal seconds that are
permitted to occur within 15 minutes.
15 Min LOL
[0~900]
This field sets limit for the number of Loss Of Link seconds that are permitted to
occur within 15 minutes.
15 Min LPR
[0~900]
This field sets the limit for the number of Loss of Power (on the ATUR) seconds
that are permitted to occur within 15 minutes.
15 Min ES
[0~900]
This field sets the limit for the number of Errored Seconds that are permitted to
occur within 15 minutes.
15 Min SESL
[0~900]
This field sets the limit for the number of Severely Errored Seconds that are
permitted to occur within 15 minutes.
15 Min UASL
[0~900]
This field sets the limit for the number of UnAvailable Seconds that are permitted
to occur within 15 minutes.
15 Min Failed
Fast [0~900]
This field sets the limit for the number of failed fast retrain seconds that are
permitted to occur within 15 minutes.
Init Failure Trap
Select Enable to trigger an alarm for an initialization failure trap.
MSC1000G User’s Guide
221
Chapter 12 Profile Screens
Table 81 Alarm VDSL Profile (continued)
LABEL
DESCRIPTION
Apply
Click Apply to save the changes in this screen to the system’s volatile memory.
The system loses these changes if it is turned off or loses power, so use the
Config Save on the navigation panel and then the Save button to save your
changes to the non-volatile memory when you are done configuring.
New
While you are modifying a profile, you can click New to start configuring a fresh
profile without saving your changes.
Cancel
Click Cancel to start configuring the screen again.
The bottom part of the screen lists the configured profiles.
Index
This is the index number of the alarm profile.
Name
This is the name of the alarm profile.
Modify
Select a profile’s Select radio button and click Modify to edit the profile.
Delete
Select a profile’s Select radio button and click Delete to remove the profile.
12.14 Alarm SHDSL Profile Screen
Click Profile> Alarm SHDSL in the navigation panel to open the following screen. Use this
screen to configure alarm profiles for the SHDSL ports. Later you can apply the alarm SHDSL
profiles to SHDSL ports in the SHDSL Port Setup screens.
Alarm SHDSL profiles define SHDSL port alarm thresholds. The system sends an alarm trap
and generates a syslog entry when the thresholds of the alarm profile are exceeded.
Figure 126 Alarm SHDSL Profile
The following table describes the fields in this screen.
222
MSC1000G User’s Guide
Chapter 12 Profile Screens
Table 82 Alarm SHDSL Profile
LABEL
DESCRIPTION
The top part of the screen is for profile configuration.
Name
Type a name to identify the alarm profile (you cannot change the name of the
DEFVAL profile). You can use up to 31 English keyboard characters; spaces are
not allowed.
Threshold
Specify limits for the individual performance counters. The system sends an alarm
trap and generates a syslog entry when one of these thresholds is exceeded. A
value of 0 disables the alarm threshold.
LoopAttenuation
[0~127] (dB)
The permitted attenuation (reduction of signal amplitude) of a port’s connection.
SNRMargin
[0~15] (dB)
The permitted signal to noise ratio margin.
ES [0~900] (sec)
The number of Errored Seconds (0~900) that are permitted to occur within 15
minutes.
SES [0~900] (sec) The number of Severely Errored Seconds (0~900) that are permitted to occur
within 15 minutes.
CRCanomalies
[0~2147483647]
The number of Cyclic Redundancy Checking anomalies that are permitted to
occur within 15 minutes.
LOWS [0~900]
(sec)
The number of Loss Of Sync Word Seconds (0~900) that are permitted to occur
within 15 minutes.
UAS [0~900]
The number of UnAvailable Seconds (0~900) that are permitted to occur within 15
minutes.
Apply
Click Apply to save the changes in this screen to the system’s volatile memory.
The system loses these changes if it is turned off or loses power, so use the
Config Save on the navigation panel and then the Save button to save your
changes to the non-volatile memory when you are done configuring.
New
While you are modifying a profile, you can click New to start configuring a fresh
profile without saving your changes.
Cancel
Click Cancel to start configuring the screen again.
The bottom part of the screen lists the configured profiles.
Index
This is the index number of the alarm profile.
Name
This is the name of the alarm profile.
Modify
Select a profile’s Select radio button and click Modify to edit the profile.
Delete
Select a profile’s Select radio button and click Delete to remove the profile.
12.15 IGMP Filter Profile Screen
You can use the IGMP filter profiles to control access to a service that uses a specific multicast
group (like a SIP server for example). Configure an IGMP filter profile that allows access to
that multicast group. Then assign the IGMP filter profile to ADSL ports that are allowed to use
the service.
Click Profile > IGMP Filter in the navigation panel to open the following screen. Use this
screen to configure IGMP filter profiles. Later you can apply the IGMP filter profiles to ADSL
ports in the ADSL Port Setup screens.
MSC1000G User’s Guide
223
Chapter 12 Profile Screens
The DEFVAL IGMP filter profile is assigned to all ADSL ports by default. It allows a port to
join all multicast IP addresses (224.0.0.0~239.255.255.255). If you want to allow an ADSL
subscriber access to only specific IGMP multicast groups, use the IGMP Filter Profile screen
to configure a different profile and then assign it to the subscriber's ADSL port in the ADSL
Port Setting screens.
Use the top part of the screen to add or edit IGMP filter profiles. The bottom of the screen lists
the configured IGMP filter profiles.
Figure 127 IGMP Filter Profile
The following table describes the fields in this screen.
Table 83 IGMP Filter Profile
224
LABEL
DESCRIPTION
Name
Type a name to identify the IGMP filter profile (you cannot change the name of the
DEFVAL profile). You can use up to 31 English keyboard characters; spaces are
not allowed.
Start IP
Enter the starting multicast IP address for a range of multicast IP addresses to
which you want this IGMP filter profile to allow access.
End IP
Enter the ending multicast IP address for a range of IP addresses to which you
want this IGMP filter profile to allow access.If you want to add a single multicast IP
address, enter it in both the Start IP and End IP fields.
Apply
Click Apply to save the changes in this screen to the system’s volatile memory.
The system loses these changes if it is turned off or loses power, so use the
Config Save on the navigation panel and then the Save button to save your
changes to the non-volatile memory when you are done configuring.
New
While you are modifying a profile, you can click New to start configuring a fresh
profile without saving your changes.
Cancel
Click Cancel to start configuring the screen again.
Index
This is the index number of the IGMP profile.
Name
This is the name of the IGMP profile.
MSC1000G User’s Guide
Chapter 12 Profile Screens
Table 83 IGMP Filter Profile (continued)
LABEL
DESCRIPTION
Modify
Select a profile’s Select radio button and click Modify to edit the profile.
Delete
Select a profile’s Select radio button and click Delete to remove the profile.
MSC1000G User’s Guide
225
Chapter 12 Profile Screens
226
MSC1000G User’s Guide
CHAPTER
13
Statistics Screens
This chapter describes the run-time statistics.
13.1 ARP Table
Address Resolution Protocol (ARP) is a protocol for mapping an Internet Protocol address (IP
address) to a physical machine address, also known as a Media Access Control or MAC
address, on the local area network.
An IP (version 4) address is 32 bits long. In an Ethernet LAN, MAC addresses are 48 bits
long. The ARP table maintains an association between each MAC address and its
corresponding IP address.
13.1.1 How ARP Works
When an incoming packet destined for a host device on a local area network arrives at the
switch, the switch's ARP program looks in the ARP Table and, if it finds the address, sends it
to the device.
If no entry is found for the IP address, ARP broadcasts the request to all the devices on the
LAN. The switch fills in its own MAC and IP address in the sender address fields, and puts the
known IP address of the target in the target IP address field. In addition, the switch puts all
ones in the target MAC field (FF.FF.FF.FF.FF.FF is the Ethernet broadcast address). The
replying device (which is either the IP address of the device being sought or the router that
knows the way) replaces the broadcast address with the target's MAC address, swaps the
sender and target pairs, and unicasts the answer directly back to the requesting machine. ARP
updates the ARP Table for future reference and then sends the packet to the MAC address that
replied.
13.2 ARP Table Screen
Click Statistics > ARP Table in the navigation panel to open the following screen. This screen
lists the IP addresses that the system has mapped to MAC addresses.
MSC1000G User’s Guide
227
Chapter 13 Statistics Screens
Figure 128 ARP Table
The following table describes the labels in this screen.
Table 84 ARP Table
LABEL
DESCRIPTION
Total X ARP
Entries
This displays the number of entries in the ARP table.
Flush
Click Flush to remove all of the entries from the ARP table.
Index
This is the ARP table entry number.
IP Address
This is the learned IP address of a device connected to one of the system’s ports.
Time
This is the remaining number of seconds that the entry will remain in the table before it
is deleted (unless it is resolved again before the time period expires). An entry can
remain in the ARP table for up to 300 seconds after it is created. This is the number of
seconds that the entry has been in the table.
MAC Address
This is the MAC address of the device with the listed IP address.
Interface
This identifies to which interface (inband or outband) the device is connected.
Page X of X
This identifies which page of information is displayed and the total number of pages of
information.
Previous/Next
Click one of these buttons to show the preceding/following screen if the information
cannot be displayed in one screen.
13.3 DHCP
To view DHCP packet counters on a port, click Statistics > DHCP.
Figure 129 DHCP Statistics
228
MSC1000G User’s Guide
Chapter 13 Statistics Screens
The following table describes the labels in this screen.
Table 85 DHCP Statistics
LABEL
DESCRIPTION
Slot
Select the number of a line card’s slot.
Port
Select the number of a DSL port on the line card.
Load
Click Load to retrieve the port’s IGMP filter profile setting and display it in the Profile
drop-down list box.
Flush
Click Flush to remove all of the entries from the table below.
Discover
This field displays the number of DHCP Discover packets on this port.
Offer
This field displays the number of DHCP Offer packets on this port.
Request
This field displays the number of DHCP Request packets on this port.
Ack
This field displays the number of DHCP Acknowledge packets on this port.
Overflow
This field displays the number of IP addressees not added to the DHCP snooping
table when it is full.
Flush
Click Flush to remove all of the entries from the table below.
Snooping
Table
Overflow
This field displays whether the DHCP snooping table is full or not.
Index
This field displays the index number.
IP
This field displays the IP address assigned to a client n this port.
VID
This field displays the VLAN ID of the VLAN to which the client computer belongs.
MAC Address
This field displays the MAC address of the client computer.
13.4 MAC Table
The MAC table lists device MAC addresses that are dynamically learned by the system. The
table shows the following for each MAC address: the port upon which Ethernet frames were
received from the device, to which VLAN groups the device belongs (if any) and to which
channel it is connected (for devices connected to DSL ports).
The switch uses the MAC table to determine how to forward frames. See the following figure.
1 The switch examines a received frame and learns the port on which this source MAC
address came.
2 The switch checks to see if the frame's destination MAC address matches a source MAC
address already learned in the MAC table.
• If the switch has already learned the port for this MAC address, then it forwards the
frame to that port.
• If the switch has not already learned the port for this MAC address, then the frame is
flooded to all ports. Too much port flooding leads to network congestion.
• If the switch has already learned the port for this MAC address, but the destination
port is the same as the port it came in on, then it filters the frame.
MSC1000G User’s Guide
229
Chapter 13 Statistics Screens
Figure 130 MAC Table Filtering Flowchart
13.5 MAC Table Screen
Click Statistics > MAC Table in the navigation panel to display the following screen. This
screen lists device MAC addresses that the system dynamically learned.
Figure 131 MAC Table
230
MSC1000G User’s Guide
Chapter 13 Statistics Screens
The following table describes the labels in this screen.
Table 86 MAC Table
LABEL
DESCRIPTION
Date
This displays the date that the displayed MAC address information was last updated.
The date is in year, month and day format.
Time
This displays the time that the displayed MAC address information was last updated.
The time is in (24-hour) hour, minute and second format.
Flush
Click Flush to remove all of the dynamically learned MAC address entries from the
MAC table.
All
Select All to display the MAC address table of the port/slot belonging to all VLANs.
Vid
Select this open and enter a VLAN ID to display the MAC address table of the port/
slot belonging to this VLAN.
Slot/Port
Select an individual management switch card port or line card for which to show
information.
Refresh
Click Refresh to update the list of dynamically learned MAC addresses.
Index
This is the number of the MAC table entry.
Vid
This is the VLAN group to which the device belongs.
MAC Address
This is the MAC address of the device that the system has learned is connected to
the port.
Slot
This is the number of the slot to which the MAC address is associated.
Port
This is the port to which the MAC address is associated.
Page X of X
This identifies which page of information is displayed and the total number of pages
of information.
Previous/Next
Click one of these buttons to show the previous/next screen if all of the information
cannot be seen in one screen.
13.6 IGMP Status Screen
Click Statistics > IGMP Status in the navigation panel to display the following screen. Use
this screen to view information collected by IGMP snooping and/or IGMP proxy.
Figure 132 IGMP Status
MSC1000G User’s Guide
231
Chapter 13 Statistics Screens
The following table describes the labels in this screen.
Table 87 IGMP Status
LABEL
DESCRIPTION
Flush
Click Flush to reset the counters.
Query
This is the total number of Query packets received.
Report
This is the total number of Report packets received.
Leave
This is the total number of Leave packets received.
Number Of
IGMP Groups
This is the number of IGMP groups that the system has identified on the local
network.
The first table displays the names of the fields. The subsequent tables show the settings of the IGMP
groups.
Index
This is the IGMP group index number.
VID
The VID is the number that identifies the VLAN that the IP multicast group is on.
Multicast
Group
This is the static multicast IP address of an IP multicast group.
Port
This column displays which ports are members of the IGMP group.
Slot
This column displays which slots are members of the IGMP group.
Timestamp
This is the time when the IGMP information was recorded.
Page X of X
This identifies which page of information is displayed and the total number of pages of
information.
Previous/Next
Click one of these buttons to show the previous/next screen if all of the information
cannot be seen in one screen.
13.6.1 IGMP Port Statistics
Click Statistics > IGMP Status > Port to display the following screen. Use this screen to
view information collected by IGMP snooping and/or IGMP proxy on a selected port.
Figure 133 IGMP Status: Port
232
MSC1000G User’s Guide
Chapter 13 Statistics Screens
The following table describes the labels in this screen.
Table 88 IGMP Status: Port
LABEL
DESCRIPTION
Slot/Port
Select a line card and line card port and click Load to show information.
Group Count
This is the number of IGMP groups that the port is a member of.
Query Count
This is the total number of Query packets received.
Join Count
This is the total number of Join packets received.
Leave Count
This is the total number of Leave packets received.
The first table displays the names of the fields. The subsequent tables show the settings of the IGMP
groups.
Port
This field displays the selected port number.
Slot
This field displays the selected slot number.
VID
The VID is the number that identifies the VLAN that the IP multicast group is on.
Multicast IP
This is the static multicast IP address of an IP multicast group.
Client IP
This column displays which ports are members of the IGMP group.
13.7 IP Bridge ARP Proxy Screen
Use this screen to look at the Address Resolution Protocol (ARP) table for each IP bridge
domain.
To open this screen, click Statistics > IP Bridge > ARP Proxy.
Figure 134 IP Bridge ARP Proxy
The following table describes the labels in this screen.
Table 89 IP Bridge ARP Proxy
LABEL
DESCRIPTION
Domain, Load
Select the domain at whose ARP table you want to look. You can also look at
the ARP table entries for a specific type of interface or a specific interface in the
domain. Click Load to display the requested entries below.
Index
This field displays the number of the IP address entry.
VID
This field displays the ID of the VLAN to which the device belongs.
IP
This field displays the IP address assigned to the specific device.
MAC
This field displays the MAC (Media Access Control) address of the device.
MSC1000G User’s Guide
233
Chapter 13 Statistics Screens
Table 89 IP Bridge ARP Proxy (continued)
LABEL
DESCRIPTION
Slot
This field displays the number of the slot that contains the line card with the port
number to which the device is connected.
Port
This field displays the line card’s port number to which the device is connected.
VPI
This field displays the Virtual Path Identifier (VPI) the device is using. The VPI
and VCI identify a channel on a port.
VCI
This field displays the Virtual Circuit Identifier (VCI) the device is using. The VPI
and VCI identify a channel on a port.
Interface
This field displays the name of the interface the device is using.
Previous 10
Click Previous 10 to show the preceding 10 pages of information.
Previous
Click Previous to show the preceding screen if the information cannot be
displayed in one screen.
Page X of X
This identifies which page of information is displayed and the total number of
pages of information.
Next
Click Next to show the following screen if the information cannot be displayed in
one screen.
Next 10
Click Next 10 to show the following 10 pages of alarms.
13.8 IP Bridge Interfaces Screen
Use this screen to look at all the forwarding information for downstream traffic, whether
learned by snooping DHCP packets or provided manually.
To open this screen, click Statistics > IP Bridge > Interface.
Figure 135 IP Bridge Interfaces
The following table describes the labels in this screen.
Table 90 IP Bridge Interfaces
234
LABEL
DESCRIPTION
Index
This field displays the index number of the downlink interface.
Domain
This field displays the name of the domain to which this entry applies.
Interface IP,
NetMask
These fields display the IP address and the number of bits in the subnet mask
that define the range of IP addresses to which this downlink interface applies. If
the destination IP address of a packet is in this range, the MSC1000G tries to
forward the frame to a subscriber in the specified VLAN and PVC, if any.
VID
This field displays the VLAN ID the subscriber is in.
Slot
This field displays the number of the slot that contains the line card with the port
number to which the MSC1000G forwards frames.
MSC1000G User’s Guide
Chapter 13 Statistics Screens
Table 90 IP Bridge Interfaces (continued)
LABEL
DESCRIPTION
Port
This field displays the line card’s port number to which the device is connected.
It displays “-” if the MSC1000G looks for the subscriber in the whole VLAN and
not a specific PVC.
VPI/VCI
This field displays the Virtual Path Identifier (VPI) and Virtual Circuit Identifier
(VCI), if any. The VPI and VCI identify a channel on this port.
Type
This field specifies whether the downlink interface is running on Ethernet (ipoe)
or on ATM (ipoa).
13.9 IP Bridge Routes Screen
Use this screen to look at the routing table for a domain. This table includes all the entries,
whether added automatically by the MSC1000G or provided manually.
To open this screen, click Statistics > IP Bridge > Route.
Figure 136 IP Bridge Routes
The following table describes the labels in this screen.
Table 91 IP Bridge Routes
LABEL
DESCRIPTION
Domain
Select a domain for which you wish to view information and click Load to
display it.
Index
This field displays the number of the entry.
Domain Name
This field displays the name of the domain to which this entry applies.
Interface IP
NetMask
These fields display the IP address and the number of bits in the subnet mask
that define the range of IP addresses to which this entry applies. If the
destination IP address of a packet is in this range, the MSC1000G forwards the
frame to the specified edge router.
Nexthop
This field displays the IP address to which the MSC1000G forwards frames if
the destination IP address of a packet is in the specified range. It displays “-” if
the field does not apply to the entry (for example, in entries created
automatically by the MSC1000G).
Metric
This field displays the “cost” of transmission for routing purposes. It displays “-”
if the field does not apply to the entry (for example, in entries created
automatically by the MSC1000G).
MSC1000G User’s Guide
235
Chapter 13 Statistics Screens
Table 91 IP Bridge Routes (continued)
LABEL
DESCRIPTION
Priority
This field displays the priority value (0 to 7) to add to incoming frames without a
(IEEE 802.1p) priority tag. It displays “-” if the field does not apply to the entry
(for example, in entries created automatically by the MSC1000G).
Type
This field indicates whether this entry is used for upstream traffic (U) or
downstream traffic (D). By default, all entries are for downstream traffic, unless
the edge router is configured in the edge router screen (see Section 11.17 on
page 193).
13.10 Online Users Screen
Click Statistics > Online Users in the navigation panel to display the following screen. Use
this screen to view information about administrators that are logged into the system.
Figure 137 Online Users
The following table describes the labels in this screen.
Table 92 Online Users
LABEL
DESCRIPTION
Session
This is the type of connection that the administrator is using (web, console, or telnet).
User
This is the user name that the administrator is using.
Remote IP
This is the IP address of the administrator’s computer.
Login Time
This displays the time and date that the administrator logged into the system. The
time is in (24-hour) hour, minute and second format. The date is in year, month and
day format.
13.11 Port Statistics
Click Statistics > Port Statistics in the navigation panel to display the following screen. Use
this screen to view port information (such as packet counts, uptime etc.).
"
236
You can only view port information on an active card.
MSC1000G User’s Guide
Chapter 13 Statistics Screens
Figure 138 Port Statistics
The following table describes the labels in this screen.
Table 93 Port Statistics
LABEL
DESCRIPTION
ID
This column lists the slot numbers of the cards. Click the ID number of an active
card to go to a screen where you can view port status and statistics.
State
This field displays the line card’s current operational status.
active means the line card is operating normally.
init means the MSC1000G is initializing the line card.
disable means a manager has disabled the line card.
inactive means the line card is starting up or is not operating normally. This could
be due to the card starting, a firmware upgrade in progress or a malfunction. See
Section 34.6 on page 598 for what to do if the line card stays stuck in the inactive
state.
Card Type
This field displays the type of a card.
Uptime
This field displays how long the card has been running since the last time it was
started.
Firmware
This field displays the current firmware version installed on the card.
13.11.1 Ethernet Port Statistics
Click the ID for an MSC1000G card in the Port Statistics screen to view Ethernet port status
and statistics.
MSC1000G User’s Guide
237
Chapter 13 Statistics Screens
Figure 139 Port Statistics: ENET
The following table describes the labels in this screen.
Table 94 Port Statistics: ENET
LABEL
DESCRIPTION
Flush
Select a port or slot and click Flush to reset its counters.
Slot/Port
This field displays the port name or slot number. “sub” and “up” refer to the
subtending and uplink Ethernet ports on the front panel of the MSC1000G card.
“Slot” refers to a back panel Ethernet connection to one of the other cards. Click
one of these links to see detailed Ethernet port statistics.
Status
This field displays whether the port is connected (up) or not (down).
Uptime
This field displays how long the port has been running (or connected) since the
last time it was started.
RxPkts/ TxPkts
This field displays the number of packets received/transmitted on this port
(including multicast, unicast, broadcast and bad packets).
Rx Kbps/ Tx Kbps
This field displays the number of octets of Ethernet frames received/transmitted
per second counting the ones in bad packets, not counting framing bits but
counting FCS (Frame Check Sequence) octets. An octet is an 8-bit binary digit
(byte).
Errors
This field displays the number of error packets occurred on this port.
Rate
This field displays the transmission speed of the port.
Poll Interval(s)
The text box displays how often (in seconds) this screen refreshes. You may
change the refresh interval by typing a new number in the text box and then
clicking Set Interval.
Stop
Click Stop to stop port statistic polling.
13.11.2 Detailed Ethernet Port Statistics
To view detailed port statistics on a selected Ethernet port, click the port index number in the
ENET screen.
238
MSC1000G User’s Guide
Chapter 13 Statistics Screens
Figure 140 Port Statistics: ENET Details
The following table describes labels in this example.
Table 95 Port Statistics: ENET Details
LABEL
DESCRIPTION
Status
This shows whether or not the port has an active connection.
Rate
This shows the connection speed for an active connection.
Uptime
This shows how long the connection has been active.
Flush
Click Flush to clear the counters.
Refresh
Click Refresh to update this screen.
Bytes
This is the number of octets of Ethernet frames received/transmitted that are from
0 to 1518 octets in size, counting the ones in bad packets, not counting framing
bits but counting FCS (Frame Check Sequence) octets. An octet is an 8-bit binary
digit (byte).
Pkts
This is the number of packets received/transmitted on this port (including
multicast, unicast, broadcast and bad packets).
kbytes/s
This is the number of octets of Ethernet frames received/transmitted per second.
UcastPkts
This is the number of good unicast frames received/transmitted.
NUcastPkts
This is the number of good non-unicast frames received/transmitted.
MCastPkts
This is the number of good multicast frames received/transmitted of 64 to 1518
octets in length (for non VLAN) or 1522 octets (for VLAN), not including Broadcast
frames. Frames with range or length errors are also not taken into account.
MSC1000G User’s Guide
239
Chapter 13 Statistics Screens
Table 95 Port Statistics: ENET Details (continued)
LABEL
DESCRIPTION
BCastPkts
This is the number of good broadcast frames received/transmitted of 64 to 1518
octets in length (for non VLAN) or 1522 octets (for VLAN), not including multicast
frames. Frames with range or length errors are also not taken into account.
Pause
This is the number of valid IEEE 802.3x Pause frames received/transmitted on this
port.
Pkt64
This is the number of frames received/transmitted (including bad frames) that
were 64 octets or less in length (this includes FCS octets but excludes framing
bits).
Pkt65~127
This is the number of frames received/transmitted (including bad frames) that
were 65 to 127 octets in length (this includes FCS octets but excludes framing
bits).
Pkt128~255
This is the number of frames received and transmitted (including bad frames) that
were 128 to 255 octets in length (this includes FCS octets but excludes framing
bits).
Pkt256~511
This is the number of frames received/transmitted (including bad frames) that
were 256 to 511 octets in length (this includes FCS octets but excludes framing
bits).
Pkt512~1023
This is the number of frames received/transmitted (including bad frames) that
were 512 to 1023 octets in length (this includes FCS octets but excludes framing
bits).
Pkt1024~1518
This is the number of frames received/transmitted (including bad frames) that
were 1024 to 1518 octets in length (this includes FCS octets but excludes framing
bits).
Oversize
This is the number of frames received/transmitted that were bigger than 1518 (non
VLAN) or 1522 (VLAN) octets and contained a valid FCS.
Undersize
This is the number of frames received/transmitted that were less than 64 octets
long and contained a valid FCS.
FCSError
This is the number of frames received/transmitted with an integral length of 64 to
1518 octets and containing a Frame Check Sequence error.
AlignError
This is the number of frames received/transmitted that were 64 to 1518 (non
VLAN) or 1522 (VLAN) octets long but contained an invalid FCS and a nonintegral number of octets.
Jabber
This is the number of frames received/transmitted that were longer than 1518
octets (non VLAN) or 1522 octets (VLAN) and contained an invalid FCS, including
alignment errors.
Fragment
This is the number of frames received/transmitted that were less than 64 octets
long, and contained an invalid FCS, including non-integral and integral lengths.
Dropped
This is the number of received/transmitted frames that were received by the
MSC1000G, but later dropped because of a lack of system resources.
Underrun
This is the number of outgoing frames that were less than 64 octets long.
Collision
This is the number of frames for which transmission failed due to excessive
collisions. Excessive collision is defined as the number of maximum collisions
before the retransmission count is reset.
13.11.3 RMON Statistics
To view RMON statistics on a switch port, click on the ID for the MSC1000G card in the Port
Statistics screen and click the RMON tab.
240
MSC1000G User’s Guide
Chapter 13 Statistics Screens
Figure 141 Port Statistics: ENET: RMON
The following table describes the labels in this screen.
Table 96 Port Statistics: ENET: RMON
LABEL
DESCRIPTION
sub1~up2
These are the Ethernet ports on the front panel of the MSC1000G card. Click one
to view RMON history information for that port.
DropEvent
This field displays the total number of packets that were dropped on this port.
Octets
This field displays the total number of octets received/transmitted on this port.
Pkts
This field displays the total number of good packets received/transmitted on this
port.
BcastPkts
This field displays the total number of broadcast packets received/transmitted on
this port.
McastPkts
This field displays the total number of multicast packets received/transmitted on
this port.
CRCAlignErrors
This field displays the total number of CRC (Cyclical Redundancy Check)
alignment errors on this port.
UndersizePkts
This field displays the total number of packets that were too small received/
transmitted on this port.
OversizePkts
This field displays the total number of packets that were too big received/
transmitted on this port.
Fragments
This is the number of frames received/transmitted that were less than 64 octets
long, and contained an invalid FCS, including non-integral and integral lengths.
Jabbers
This is the number of frames received/transmitted that were longer than 1518
octets (non VLAN) or 1522 octets (VLAN) and contained an invalid FCS, including
alignment errors.
Collisions
This is the number of frames for which transmission failed due to excessive
collisions. Excessive collision is defined as the number of maximum collisions
before the retransmission count is reset.
64Octets
This is the number of frames received/transmitted (including bad frames) that
were 64 octets or less in length (this includes FCS octets but excludes framing
bits).
MSC1000G User’s Guide
241
Chapter 13 Statistics Screens
Table 96 Port Statistics: ENET: RMON (continued)
LABEL
DESCRIPTION
65to127Octets
This is the number of frames received/transmitted (including bad frames) that
were 65 to 127 octets in length (this includes FCS octets but excludes framing
bits).
128to255Octets
This is the number of frames received and transmitted (including bad frames) that
were 128 to 255 octets in length (this includes FCS octets but excludes framing
bits).
256to511Octets
This is the number of frames received/transmitted (including bad frames) that
were 256 to 511 octets in length (this includes FCS octets but excludes framing
bits).
512to1023Octets
This is the number of frames received/transmitted (including bad frames) that
were 512 to 1023 octets in length (this includes FCS octets but excludes framing
bits).
1024to1518Octets
This is the number of frames received/transmitted (including bad frames) that
were 1024 to 1518 octets in length (this includes FCS octets but excludes framing
bits).
Poll Interval(s)
The text box displays how often (in seconds) this screen refreshes. You may
change the refresh interval by typing a new number in the text box and then
clicking Set Interval.
Stop
Click Stop to stop port statistic polling.
13.11.3.1 RMON History Statistics
To view RMON history information, click a switch port link in the RMON screen. This
RMON History screen displays general information (such as sample time) on history samples.
Figure 142 Port Statistics: ENET: RMON History
242
MSC1000G User’s Guide
Chapter 13 Statistics Screens
The following table describes the labels in this screen.
Table 97 Port Statistics: ENET: RMON History
LABEL
DESCRIPTION
Interval
Click Apply to use the selected data sampling time.
Refresh
Click Refresh to update this screen.
SampleIndex
This field display the index number. Click this link to view detailed RMON history
information.
Interval Start
This field displays the data sampling time.
Pkts
This field displays the number of packets received/transmitted since the last
sample time.
BroadcastPkts
This field displays the number of broadcast packets received/transmitted since
the last sample time.
MulticastPkts
This field displays the number of multicast packets received/transmitted since the
last sample time.
Utilization
This field displays the port utilization status.
13.11.3.2 RMON History Details
To view detail RMON history information, click on a sample index in the RMON History
screen. An RMON History Detail screen displays. Refer to Table 96 on page 241 or Table 97
on page 243 for more field descriptions.
Figure 143 Port Statistics: ENET: RMON History: Detail
13.11.4 Line Card Statistics
Click the ID for a line card in the Port Statistics screen to view port status and statistics on the
line card. Statistics screens for the line cards are similar. Example screens for the ALC-1248G53 are shown.
MSC1000G User’s Guide
243
Chapter 13 Statistics Screens
Figure 144 Port Statistics: Line Card
The following table describes the labels in this screen.
Table 98 Port Statistics: Line Card
LABEL
DESCRIPTION
Port
This field displays the port number.
Link
This field displays the port link status.
On an SHDSL port, this field displays the wire pair setting when the port is up.
Config Rate
This field displays the configured upstream and downstream rates.
Payload Rate
This field displays the actual upstream and downstream rates.
Error
This field displays the number of errors occurred on the port.
Rx kbps
This field displays the receiving rate in kilo bits per second (kbps).
Tx kbps
This field displays the transmission rate in kilo bits per second (kbps).
Uptime
This field displays how long the connection is up.
Poll Interval(s)
The text box displays how often (in seconds) this screen refreshes. You may
change the refresh interval by typing a new number in the text box and then
clicking Set Interval.
Stop
Click Stop to stop port statistic polling.
13.11.4.1 Packet Counter
To display the packet counters of a port on a line card, click the port number in the line card’s
statistics screen (see Figure 144 on page 244).
244
MSC1000G User’s Guide
Chapter 13 Statistics Screens
Figure 145 Port Statistics: Line Card: Packet Counter
The following table describes the labels in this screen.
Table 99 Port Statistics: Line Card: Packet Counter
LABEL
DESCRIPTION
Flush
Click Flush to clear the counters.
Link
This field displays the port link status.
Payload Rate
This field displays the configured and actual upstream and downstream rates.
Error
This field displays the number of errors occurred on the port.
Rx kbps
This field displays the receiving rate in kilo bits per second (kbps).
Tx kbps
This field displays the transmission rate in kilo bits per second (kbps).
Uptime
This field displays how long the port has been running since the last time it was
started.
Packet Counter
IfOctets
This field displays the number of octets received/transmitted on this port.
IfUCastPkts
This field displays the number of unicast packets received/transmitted on this
port.
IfBCastPkts
This field displays the number of broadcast packets received/transmitted on this
port.
IfMCastPkts
This field displays the number of multicast packets received/transmitted on this
port.
IfDiscard
This field displays the number of received/transmitted packets that were
discarded on this port.
IfErrors
This field displays the number of packets received/transmitted with errors on this
port.
IfUnknownProtos
This field displays the number of packets received/transmitted with unknown
protocol number on this port.
MSC1000G User’s Guide
245
Chapter 13 Statistics Screens
Table 99 Port Statistics: Line Card: Packet Counter (continued)
LABEL
DESCRIPTION
Poll Interval(s)
The text box displays how often (in seconds) this screen refreshes. You may
change the refresh interval by typing a new number in the text box and then
clicking Set Interval.
Stop
Click Stop to stop port statistic polling.
13.11.4.2 Cell Counters
To display detailed ATM cell count information, click the port number in the line card’s
statistics screen (see Figure 144 on page 244) and click the Cell Counter tab.
"
The Cell Counter screen is NOT available for the VLC.
Figure 146 Port Statistics: Line Card: Cell Counter
The following table describes the labels in this screen.
Table 100 Port Statistics: Line Card: Cell Counter
LABEL
DESCRIPTION
Flush
Click Flush to clear the counters.
ATM
246
Rx cells
This field displays the number of cells received.
Tx Cells
This field displays the number of cells transmitted.
Rx rate (byte/sec)
This field displays the number of cells bytes received per second.
Tx rate (byte/sec)
This field displays the number of cells bytes transmitted per second.
CRC errors
This field displays the number of CRC errors.
Poll Interval(s)
The text box displays how often (in seconds) this screen refreshes. You may
change the refresh interval by typing a new number in the text box and then
clicking Set Interval.
Stop
Click Stop to stop port statistic polling.
MSC1000G User’s Guide
Chapter 13 Statistics Screens
13.11.4.3 Line Detail
To display detailed line information, click the port number in the line card’s statistics screen
(see Figure 144 on page 244) and click the Line Detail tab.
Figure 147 Port Statistics: Line Card: Line Detail
The following table describes the labels in this screen.
Table 101 Port Statistics: Line Card: Line Detail
LABEL
DESCRIPTION
Flush
Click Flush to clear the counters.
Line Information
Link
This displays the connection status of the DSL link.
Service Type
This is the DSL standard that the port is using.
MSC1000G User’s Guide
247
Chapter 13 Statistics Screens
Table 101 Port Statistics: Line Card: Line Detail (continued)
LABEL
DESCRIPTION
Coding Mode
Trellis coding helps to reduce the noise in ADSL transmissions. Trellis may
reduce throughput but it makes the connection more stable.
“RS” coding stands for Reed-Solomon error correction.
Us Interleave
Delay
This is the number of milliseconds of interleave delay for upstream transmissions.
Ds Interleave
Delay
This is the number of milliseconds of interleave delay for downstream
transmissions.
Us inp DMT
symbol(s)
This is the number of impulse noise protection DMT symbols for upstream
transmissions.
Ds inp DMT
symbol(s)
This is the number of impulse noise protection DMT symbols for downstream
transmissions.
Us Output Power
(dBm)
This is the power output of the subscriber’s DSL modem or router. The total
output power of the transceiver varies with the line length and quality.
Ds Output Power
(dBm)
This is the DSP port’s output power. The total output power of the transceiver
varies with the length and line quality. The farther away the subscriber’s ADSL
modem or router is or the more interference there is on the line, the higher the
power will be.
Country Code
This is the country code acquired from the subscriber’s ADSL device during
negotiation/provisioning message interchanges. The country code is from the
Vendor ID (see ITU-T G.994.1).
Provider Code
This is the provider code acquired from the subscriber’s ADSL device during
negotiation/provisioning message interchanges. The provider code includes the
Vendor ID and Version Number obtained from the Vendor ID.
Min Rate (kbps)
This is the minimum upstream and downstream rates on the SHDSL port.
Config Rate (kbps)
This field displays the configured upstream and downstream rates on the SHDSL
port.
Actual Rate (kbps)
This field displays the actual upstream and downstream rates on the SHDSL port.
Noise Margin (dB)
These are the SHDSL line’s noise margins. Measured in decibels (dB).
Attenuation (dB)
These are the reductions in amplitude of the SHDSL signals. Measured in
decibels (dB).
Linkup Count
This is the number of Linkup attempts on the VDSL port.
VTUC Vendor
This field displays the name of the CO VDSL device vendor.
VTUC Version
This field displays the name of the CO VDSL device hardware version.
VTUC Serial
This field displays the name of the CO VDSL device serial number.
VTUR Vendor
This field displays the name of the CPE VDSL device vendor.
VTUR Version
This field displays the name of the CPE VDSL device hardware version.
VTUR Serial
This field displays the name of the CPE VDSL device serial number.
Line Performance
248
FeCrc
This is the number of far end cyclic redundancy checks.
NeCrc
This is the number of near end cyclic redundancy checks.
FeFec
This is the number of far end corrected blocks.
NeFec
The is the number of near end corrected blocks.
Es (seconds)
This is the number of Errored Seconds. This is how many seconds contained at
least one errored block or at least one defect.
MSC1000G User’s Guide
Chapter 13 Statistics Screens
Table 101 Port Statistics: Line Card: Line Detail (continued)
LABEL
DESCRIPTION
Ses (seconds)
This is the number of Severely Errored Seconds. This is how many seconds
contained 30% or more errored blocks or at least one defect. This is a subset of
Es.
Uas (seconds)
This is the number of Unavailable seconds (Uas).
Lofs (seconds)
This is the number of Loss Of Frame (Lof) seconds.
Loss (seconds)
This is the number of Loss Of Signal (Los) seconds.
Lprs (seconds)
This is the number of times a Loss of PoweR (on the ATUR) has occurred.
CRC
This is the number of Cyclic Redundancy Check (CRC) error seconds.
Losws
This is the number of Lost Sync Word (LOSW) seconds.
Segment Anomaly
This is the number of segment anomaly seconds.
Segment Defect
This is the number of segment defect seconds.
Payload Rate
(Kbps)
These are the data (the payload data without transport layer protocol headers and
traffic) transfer rates (in Kbps) at which the port is receiving and sending data.
Actual Rate (Kbps) These are the data transfer rates (in Kbps) at which the port is receiving and
sending data.
Attainable Rate
(Kbps)
These are the highest theoretically possible transfer rates (in Kbps) at which the
port could receive and send data.
Noise Margin (dB)
These are the DSL line’s noise margins. Measured in decibels (dB).
Attenuation (dB)
These are the reductions in amplitude of the DSL signals. Measured in decibels
(dB).
Poll Interval(s)
The text box displays how often (in seconds) this screen refreshes. You may
change the refresh interval by typing a new number in the text box and then
clicking Set Interval.
Stop
Click Stop to stop port statistic polling.
13.11.4.4 Current Line Performance
To display current line performance counters, click the port number in the line card’s statistics
screen (see Figure 144 on page 244) and click the Current tab.
MSC1000G User’s Guide
249
Chapter 13 Statistics Screens
Figure 148 Port Statistics: Line Card: Line Performance: Current
The following table describes the labels in this screen.
Table 102 Port Statistics: Line Card: Line Performance: Current
LABEL
DESCRIPTION
Flush
Click Flush to clear the counters.
PhysEntry
250
CurrSnrMgn (dB)
These are the DSL line’s current downstream and upstream signal to noise
margins in decibels.
CurrAtn (dB)
These are the DSL line’s current downstream and upstream line attenuation in
decibels.
CurrOutputPwr (dBm)
These are the DSL line’s current downstream and upstream output powers in
decibels.
CurrAttainableRate
These are the DSL line’s current downstream and upstream attainable rates in
decibels.
MSC1000G User’s Guide
Chapter 13 Statistics Screens
Table 102 Port Statistics: Line Card: Line Performance: Current (continued)
LABEL
DESCRIPTION
ChanEntry
ChanInterleaveDelay
(ms)
These are the numbers of milliseconds of interleave delay for downstream and
upstream transmissions.
SlowBurstProtect
(kbps)
This field displays the level of impulse noise (burst) protection for a slow
interleaved channel.
ChanCurrTxRate
(kbps)
These are the DSL line’s current downstream and upstream transmission
rates in decibels.
ChanPrevTxRate
(kbps)
These are the DSL line’s previous downstream and upstream transmission
rates in decibels.
PerfDataEntry
Lofs (seconds)
These are the DSL line’s downstream and upstream numbers of Loss of frame
Seconds that have occurred within the current 15 minute period.
Loss (seconds)
These are the DSL line’s downstream and upstream numbers of Loss of signal
Seconds that have occurred within the current 15 minute period.
Lols (seconds)
These are the DSL line’s downstream and upstream numbers of Loss of link
Seconds that have occurred within the current 15 minute period.
Lprs (seconds)
These are the DSL line’s downstream and upstream numbers of Loss of
power Seconds that have occurred within the current 15 minute period.
ESs (seconds)
These are the DSL line’s downstream and upstream numbers of Errored
Seconds that have occurred within the current 15 minute period.
SESs (seconds)
This is the number of Severely Errored Seconds. This is how many seconds
contained 30% or more errored blocks or at least one defect. This is a subset
of Es.
UASs (seconds)
This is the number of Unavailable seconds (Uas).
Inits (seconds)
These are the DSL line’s downstream and upstream numbers of initialization
failure traps that have occurred within the current 15 minute period.
StatSesL (seconds)
These are the DSL line’s downstream and upstream numbers of Severely
errored seconds that have occurred within the current 15 minute period.
StatUasL (seconds)
These are the DSL line’s downstream and upstream numbers of UnAvailable
Seconds that have occurred within the current 15 minute period.
ChanPerfDataEntry
ChanCorrectedBlks
These are the numbers of corrected blocks for downstream and upstream
transmissions.
ChanUnCorrectedBlk
s
These are the numbers of uncorrected blocks for downstream and upstream
transmissions.
EndpointCurrEntry
CurrSnrMgn (dB)
These are the DSL line’s current downstream and upstream signal to noise
margins in decibels.
CurrAtn (dB)
These are the DSL line’s current downstream and upstream line attenuation in
decibels.
CRC (seconds)
This field displays the number of CRC anomalies since the system was last
restarted
ESs (seconds)
This is the number of Errored Seconds. This is how many seconds contained
at least one errored block or at least one defect.
SESs (seconds)
This is the number of Severely Errored Seconds. This is how many seconds
contained 30% or more errored blocks or at least one defect. This is a subset
of Es.
MSC1000G User’s Guide
251
Chapter 13 Statistics Screens
Table 102 Port Statistics: Line Card: Line Performance: Current (continued)
LABEL
DESCRIPTION
LOSWs (seconds)
This is the number of Lost Sync Word (LOSW) seconds.
UASs (seconds)
This is the number of Unavailable seconds (Uas).
Poll Interval(s)
The text box displays how often (in seconds) this screen refreshes. You may
change the refresh interval by typing a new number in the text box and then
clicking Set Interval.
Stop
Click Stop to stop port statistic polling.
13.11.4.5 15Min Line Performance
To display line performance counters for the past 15 minutes, click the port number in the line
card’s statistics screen (see Figure 144 on page 244) and click the 15Min tab.
Figure 149 Port Statistics: Line Card: Line Performance: 15Min
The following table describes the labels in this screen.
Table 103 Port Statistics: Line Card: Line Performance: 15Min
252
LABEL
DESCRIPTION
Flush Current
Click Flush Current to clear the counters.
Refresh
Click Refresh to update this screen.
TimeElapsed
This field displays the time since the last 15-minute data collection.
Lofs (seconds)
These are the DSL line’s downstream and upstream numbers of Loss of frame
Seconds that have occurred for the past 15 minute period.
Loss (seconds)
These are the DSL line’s downstream and upstream numbers of Loss of signal
Seconds that have occurred for the past 15 minute period.
Lols (seconds)
This is the DSL line’s downstream number of Loss of link Seconds that have
occurred for the past 15 minute period.
Lol
This is the number of times the DSL line’s downstream connection has
experienced a Loss of link during the past 15 minute period.
MSC1000G User’s Guide
Chapter 13 Statistics Screens
Table 103 Port Statistics: Line Card: Line Performance: 15Min (continued)
LABEL
DESCRIPTION
Lprs (seconds)
This is the DSL line’s upstream number of Loss of power Seconds that have
occurred for the past 15 minute period.
Lpr
This is the number of times the DSL line’s upstream connection has
experienced a Loss of power during the past 15 minute period.
ESs (seconds)
These are the DSL line’s downstream and upstream numbers of Errored
Seconds that have occurred for the past 15 minute period.
SESs (seconds)
These are the DSL line’s downstream and upstream numbers of Severely
Errored Seconds that have occurred for the past 15 minute period. This is how
many seconds contained 30% or more errored blocks or at least one defect.
This is a subset of Es.
UASs
These are the DSL line’s downstream and upstream numbers of UnAvailable
Seconds that have occurred for the past 15 minute period.
Inits
These are the DSL line’s downstream and upstream numbers of initialization
failure traps that have occurred for the past 15 minute period.
CorrectedBlks
These are the numbers of corrected blocks for downstream and upstream
transmissions.
UnCorrectedBlks
These are the numbers of uncorrected blocks for downstream and upstream
transmissions.
Poll Interval(s)
The text box displays how often (in seconds) this screen refreshes. You may
change the refresh interval by typing a new number in the text box and then
clicking Set Interval.
Stop
Click Stop to stop port statistic polling.
13.11.4.6 1day Line Performance
To display line performance counters for the past one day, click the port number in the line
card’s statistics screen (see Figure 144 on page 244) and click the 1day tab.
TimeElapsed shows how long the port’s downstream and upstream connections have been up
during the current day.
MoniSecs (seconds) shows how long the port’s downstream and upstream connections have
been up during a previous day.
Refer to Table 103 on page 252 for descriptions of the rest of the fields in this screen.
MSC1000G User’s Guide
253
Chapter 13 Statistics Screens
Figure 150 Port Statistics: Line Card: Line Performance: 1day
13.12 Dot3ad
Click Statistics > Dot3ad in the navigation panel to display the following screen. Use this
screen to view IEEE 802.3ad link aggregation settings.
Figure 151 Dot3ad
254
MSC1000G User’s Guide
Chapter 13 Statistics Screens
The following table describes the labels in this screen.
Table 104 Dot3ad
LABEL
DESCRIPTION
Trunk
Sub refers to the subtending ports while up refers to the uplink ports.
State
This field displays whether link aggregation is activated on the ports.
Members
This field displays the name of the link aggregation group.
Links
These are the ports you have configured to be in the trunk group.
Syncs
These are the ports that are currently transmitting data as one logical link in this
trunk group.
13.13 VLAN Statistics
Click Statistics > VLAN in the navigation panel to display the following screen. Use this
screen to view current VLAN settings.
Figure 152 VLAN Statistics
The following table describes the labels in this screen.
Table 105 VLAN Statistics
LABEL
DESCRIPTION
VID
This field displays the VLAN ID.
ENET ports 1~8
This column displays the VLAN’s settings for the MSC1000G’s Ethernet ports.
ENET port 1 and 2 are subtending ports 1 and 2.
ENET port 3 and 4 are uplink ports 1 and 2.
ENET ports 5~8 do not apply.
A tagged port is marked as T, an untagged port is marked as U and ports not
participating in a VLAN are marked as X.
Slot
This column displays the VLAN’s settings for the line cards (identified by slot). A
number displays for each line card that is a member of the VLAN. An “X” displays
for each line card that is not a member of the VLAN.
Page X of X
This identifies which page of information is displayed and the total number of
pages of information.
Previous/Next
Click one of these buttons to show the previous/next screen if all of the
information cannot be seen in one screen.
MSC1000G User’s Guide
255
Chapter 13 Statistics Screens
13.13.1 VLAN Port Statistics
To view VLAN port status, click a VID in the VLAN screen.
Figure 153 VLAN: Port Status
The following table describes the labels in this screen.
Table 106 VLAN: Port Status
LABEL
DESCRIPTION
VID X
This field displays the VLAN ID.
Index
This field displays the index number.
Card Name
This field displays the name of the line card in this VLAN.
Port Status
This field displays the port status in this VLAN. A tagged port is marked as T, an
untagged port is marked as U and ports not participating in a VLAN are marked as
X.
13.14 MSTP Statistics
Use the MSTP statistics screen to displays the status and statistics for the device’s MSTP CIST
(Common and Internal Spanning Tree) and MSTI ((Multiple Spanning Tree Instance) settings.
Refer to Section 14.9 on page 270 for more background information.
13.14.1 MSTP CIST Statistics
Click Statistics > MSTP in the navigation panel to display the MSTP CIST statistics screen.
256
MSC1000G User’s Guide
Chapter 13 Statistics Screens
Figure 154 MSTP Statistics: CIST
The following table describes the labels in this screen.
Table 107 MSTP Statistics: CIST
LABEL
DESCRIPTION
Enable
This field displays whether MSTP is activated on the device.
BridgeID
This is the unique identifier for this bridge, consisting of bridge priority plus
MAC address. This ID is the same in ExtRootID if this device is the root
switch.
TimeSinceTopoChang
e
This is the time since the spanning tree was last reconfigured.
TopoChangeCount
This is the number of times the spanning tree has been reconfigured.
TopoIsChanging
The spanning tree is currently reconfiguring if “True” displays.
ExtRootPortID
This is the unique identifier for the port that connects to the external root
bridge.
ExtRootID
This is the unique identifier for the external root bridge, consisting of bridge
priority plus MAC address.
ExtRootPathCost
This is the path cost of the link to the root bridge.
ExtRootMaxAge
This is the maximum time (in seconds) the spanning tree can wait without
receiving a configuration message before attempting to reconfigure on the
root port.
MSC1000G User’s Guide
257
Chapter 13 Statistics Screens
Table 107 MSTP Statistics: CIST (continued)
LABEL
DESCRIPTION
ExtRootHelloTime
This is the time interval (in seconds) at which the root transmits a
configuration message through the root port. The root bridge determines the
Hello Time, Max Age and Forward Delay.
ExtRootForwardDelay
This is the time (in seconds) the root bridge will wait before changing states
(that is, listening to learning or learning to forwarding) on the root port. Each
change in states requires the forward delay time before the change.
BridegMaxAge
This is the maximum time (in seconds) the root bridge can wait without
receiving a configuration message before attempting to reconfigure.
BridegHelloTime
This is the time interval (in seconds) at which the root switch transmits a
configuration message. The root bridge determines the Hello Time, Max Age
and Forward Delay.
BridegForwardDelay
This is the time (in seconds) the root switch will wait before changing states
(that is, listening to learning to forwarding).
ForceVersion
This is the version of spanning tree protocol the device is using (MSTP or
RSTP). The system will send BPDUs of the specified spanning tree version.
TransmitHoldCount
This is the number of BPDUs that are allowed to be sent before pausing for 1
second.
IntRootID
This field displays the ID of the root switch in a region.
IntRootPathCost
This field displays path cost to the internal root bridge.
Port Info.
sub1~up2
These are the MSC1000G’s subtending and uplink Ethernet ports. Click a link
to see detailed MSTP CIST statistics for that port.
Enable
This field displays whether a port is active or not.
Uptime
This field displays the time the port is running.
State
This field displays the STP status on this port.
PortID
This field displays port ID.
MACOperational
This field displays true when the link is up or false if the link is not up.
RecvInternal
This field displays whether the BPDU received was transmitted by a bridge in
the same region.
13.14.2 MSTP CIST Statistics: Port Details
Click a port’s link in the Statistics > MSTP screen to see detailed MSTP CIST statistics for
that port.
258
MSC1000G User’s Guide
Chapter 13 Statistics Screens
Figure 155 MSTP Statistics: CIST: Port Details
The following table describes the labels in this screen.
Table 108 MSTP Statistics: CIST: Port Details
LABEL
DESCRIPTION
Enable
This field displays whether MSTP is activated on the device.
Uptime
This field displays the time the port is running.
State
This field displays the STP status on this port.
PortID
This field displays port ID.
DsgBridgeID
This is the unique identifier for the bridge in the LAN segment to which this
bridge belongs that has the lowest path cost to reach the root bridge,
consisting of bridge priority plus MAC address.
DsgPortID
This is the port on the designated bridge that has the lowest path cost to
reach the root bridge, consisting of bridge priority.
ExtPortPathCost
This field displays the path cost of this port to an external bridge (a bridge in a
different MST region).
ExtRootID
This is the unique identifier for the external root bridge, consisting of bridge
priority plus MAC address.
ExtRootPathCost
This is the path cost of the link to the root bridge.
AdminEdgePort
An edge port connects to a non-STP device (such as a computer or a hub).
This field displays whether or not an administrator has set this port as an
edge port.
OperEdgePort
This field displays whether or not the spanning tree network has determined
this port to be an edge port.
MACOperational
This field displays true when the link is up or false if the link is not up.
AdminP2PLink
This field displays whether or not an administrator has set this port as a pointto-point link to the neighbor switch.
OperP2PLink
This field displays whether or not the spanning tree network has determined
this port to be a point-to-point link to the neighbor switch.
PortHelloTime
This is the time interval (in seconds) at which the port transmits a
configuration message.
RecvInternal
This field displays whether the BPDU received was transmitted by a bridge in
the same region.
RxStpCfgBPDU
This is the number of legacy STP configuration BPDUs that have been
received on this port.
RxStpTcnBPDU
This is the total number of legacy STP topology change notification BPDUs
that have been received on this port.
MSC1000G User’s Guide
259
Chapter 13 Statistics Screens
Table 108 MSTP Statistics: CIST: Port Details (continued)
LABEL
DESCRIPTION
RxRstpBPDU
This is the number of RSTP BPDUs that have been received on this port.
RxMstpBPDU
This is the number of MSTP BPDUs that have been received on this port.
IntPortPathCost
This is the path cost to the internal root bridge.
IntRootID
This is the ID of the internal root bridge.
13.14.3 MSTP MSTI Statistics
Click Statistics > MSTP > MSTI to display the MSTP MSTI statistics screen. Use this
screen to view the port status of a selected spanning tree instance.
Figure 156 MSTP Statistics: MSTI
The following table describes the labels in this screen.
Table 109 MSTP Statistics: MSTI
LABEL
DESCRIPTION
MSTID
Select an MSTI number and click Apply to display the port status for that
spanning tree instance.
BridgeID
This is the unique identifier for this bridge, consisting of bridge priority plus MAC
address.
TimeSinceTopoCh
ange
This is the time since the spanning tree was last reconfigured.
TopoChangeCount This is the number of times the spanning tree has been reconfigured.
TopoIsChanging
The spanning tree is currently reconfiguring if “True” displays.
IntRootPathCost
This field displays path cost to the internal root bridge.
IntRootID
This field displays the ID of the root switch in a region.
IntPortPathCost
This is the path cost to the internal root bridge.
Port Info.
260
sub1~up2
These are the MSC1000G’s subtending and uplink Ethernet ports.
Enable
This field displays whether a port is active or not.
MSC1000G User’s Guide
Chapter 13 Statistics Screens
Table 109 MSTP Statistics: MSTI (continued)
LABEL
DESCRIPTION
Uptime
This field displays the time the port is running.
State
This field displays the STP status on this port.
PortID
This field displays port ID.
DsgBridgeID
This is the unique identifier for the bridge in the LAN segment to which this bridge
belongs that has the lowest path cost to reach the root bridge, consisting of bridge
priority plus MAC address.
DsgPortID
This is the port on the designated bridge that has the lowest path cost to reach the
root bridge, consisting of bridge priority.
IntRootPathCost
This field displays path cost to the internal root bridge.
IntRootID
This field displays the ID of the root switch in a region.
13.15 IP Statistics
To view management IP settings and statistics, click Statistics > IP in the navigation panel.
Figure 157 IP Statistics
The following table describes the labels in this screen.
Table 110 IP Statistics
LABEL
DESCRIPTION
Flush
Click Flush to reset the counters for the selected port.
Refresh
Click Refresh to update this screen.
Inet
This field displays the management IP address.
Netmask
This field displays the subnet mask for the IP address above.
Broadcast
This field displays the broadcast address.
MSC1000G User’s Guide
261
Chapter 13 Statistics Screens
Table 110 IP Statistics (continued)
262
LABEL
DESCRIPTION
Mtu
This field displays the size of the Maximum Transmission Unit (MTU).
In Octet
This field displays the number of octets received on this port.
In Unicast
This field displays the number of unicast packets received on this port.
In Multicast
This field displays the number of multicast packets received on this port.
In Discard
This field displays the number of discarded packets received on this port.
In Error
This field displays the number of errored packets received on this port.
In Unknown
This field displays the number of packets with an unknown source received on
this port.
Out Octet
This field displays the number of octets transmitted on this port.
Out Unicast
This field displays the number of unicast packets transmitted on this port.
Out Multicast
This field displays the number of multicast packets transmitted on this port.
Out Discard
This field displays the number of discarded packets transmitted on this port.
Out Error
This field displays the number of errored packets transmitted on this port.
Out Unknown
This field displays the number of packets with an unknown source transmitted on
this port.
MSC1000G User’s Guide
CHAPTER
14
Switch Screens
This chapter describes the screens you use to configure Ethernet ports, multicast VLAN and
global switch parameters such as GARP, link aggregation, priority queues and queuing
method.
14.1 Ethernet Port Trunking
Ethernet port trunking lets you aggregate the Ethernet ports into one logical link. The switch
uses MAC-based load balancing which analyzes a packet’s source and destination MAC
addresses to distribute the load between the two Ethernet ports when uplinking to the remote
switch.
"
"
The remote switch must also support Ethernet port trunking. The loadbalancing method, however, does not have to be the same as on this switch.
The two uplink ports or two subtending ports must be connected to a single
remote switch when port trunking is enabled.
14.2 Dynamic Link Aggregation
The MSC1000G adheres to the IEEE 802.3ad standard for static and dynamic (LACP) port
trunking.
The MSC1000G supports the link aggregation IEEE 802.3ad standard. This standard describes
the Link Aggregate Control Protocol (LACP), which is a protocol that dynamically creates and
manages trunk groups.
When you enable LACP link aggregation on a port, the port can automatically negotiate with
the ports at the remote end of a link to establish trunk groups. LACP also allows port
redundancy, that is, if an operational port fails, then one of the “standby” ports become
operational without user intervention. Please note that:
MSC1000G User’s Guide
263
Chapter 14 Switch Screens
• You must connect all ports point-to-point to the same Ethernet switch and configure the
ports for LACP trunking.
• LACP only works on full-duplex links.
• All ports in the same trunk group must have the same media type, speed, duplex mode and
flow control settings.
Configure trunk groups or LACP before you connect the Ethernet switch to avoid causing
network topology loops.
14.3 Link Aggregation ID
LACP aggregation ID consists of the following information3:
Table 111 Link Aggregation ID: Local Switch
SYSTEM PRIORITY MAC ADDRESS
KEY
PORT PRIORITY
PORT NUMBER
0000
0000
00
0000
00-00-00-00-00
Table 112 Link Aggregation ID: Peer Switch
SYSTEM PRIORITY MAC ADDRESS
KEY
PORT PRIORITY
PORT NUMBER
0000
0000
00
0000
00-00-00-00-00
14.4 Queuing Overview
Queuing is used to help solve performance degradation when there is network congestion.
Queuing algorithms allow switches to maintain separate queues for packets from each
individual source or flow and prevent a source from monopolizing the bandwidth.
The switch has eight physical queues, Q0 to Q7. Q7 has the highest priority and Q0 has the
lowest.
Table 113 Physical Queue Priority
QUEUE
PRIORITY
Q7
8 (Highest)
Q6
7
Q5
6
Q4
5
Q3
4
Q2
3
Q1
2
Q0
1 (Lowest)
3.
264
Port Priority and Port Number are 0 as it is the aggregator ID for the trunk group, not the individual port.
MSC1000G User’s Guide
Chapter 14 Switch Screens
14.4.1 Strict Priority Queuing (SPQ)
Strict Priority Queuing (SPQ) services queues based on priority only. As traffic comes into the
switch, traffic on the highest priority queue, Q7 is transmitted first. When that queue empties,
traffic on the next highest-priority queue, Q6 is transmitted until Q6 empties, and then traffic is
transmitted on Q5 and so on. If higher priority queues never empty, then traffic on lower
priority queues never gets sent. SPQ does not automatically adapt to changing network
requirements.
14.4.2 Weighted Round Robin Scheduling (WRR)
Round Robin Scheduling services queues on a rotating basis and is activated only when a port
has more traffic than it can handle. A queue is a given an amount of bandwidth irrespective of
the incoming traffic on that port. This queue then moves to the back of the list. The next queue
is given an equal amount of bandwidth, and then moves to the end of the list; and so on,
depending on the number of queues being used. This works in a looping fashion until a queue
is empty.
Weighted Round Robin Scheduling (WRR) uses the same algorithm as round robin
scheduling, but services queues based on their priority and queue weight (the number you
configure in the queue weight fields) rather than a fixed amount of bandwidth. WRR is
activated only when a port has more traffic than it can handle. Queues with larger weights get
more service than queues with smaller weights. This queuing mechanism is highly efficient in
that it divides any available bandwidth across the different traffic queues and returns to queues
that have not yet emptied.
14.5 Switch Setup General Screen
Click Switch > Switch Setup in the navigation panel to display the screen as shown.
Figure 158 Switch Setup General
MSC1000G User’s Guide
265
Chapter 14 Switch Screens
The following table describes the labels in this screen.
Table 114 Switch Setup General
LABEL
DESCRIPTION
GARP Timer:
Switches join VLANs by making a declaration. A declaration is made by issuing a Join message using
GARP. Declarations are withdrawn by issuing a Leave message. A Leave All message terminates all
registrations. GARP timers set declaration timeout values.
Refer to Chapter 16 on page 299 for more background information.
Join Timer
Join Timer sets the duration of the Join Period timer for GVRP in milliseconds.
Each port has a Join Period timer. The allowed Join Time range is between 100
and 65535 milliseconds; the default is 200 milliseconds. See the chapter on VLAN
setup for more background information.
Leave Timer
Leave Timer sets the duration of the Leave Period timer for GVRP in milliseconds.
Each port has a single Leave Period timer. Leave Time must be two times larger
than Join Timer; the default is 600 milliseconds.
Leave All Timer
Leave All Timer sets the duration of the Leave All Period timer for GVRP in
milliseconds. Each port has a single Leave All Period timer. Leave All Timer must
be larger than Leave Timer; the default is 1000 milliseconds.
Priority Queue Assignment
IEEE 802.1p defines up to 8 separate traffic types by inserting a tag into a MAC-layer frame that
contains bits to define class of service. Frames without an explicit priority tag are given the default
priority of the ingress port. Use the drop-down list boxes to configure the priority level-to-physical
queue mapping.
The system has 8 physical queues that you can map to the 8 priority levels. On the switch, traffic
assigned to higher index queues gets through faster while traffic in lower index queues is dropped if the
network is congested.
Priority Levels (The following descriptions are based on the traffic types defined in the IEEE 802.1d
standard (which incorporates IEEE 802.1p).
Priority 7
Typically used for network control traffic such as router configuration messages.
Priority 6
Typically used for voice traffic that is especially sensitive to jitter (jitter is the
variations in delay).
Priority 5
Typically used for video that consumes high bandwidth and is sensitive to jitter.
Priority 4
Typically used for controlled load, latency-sensitive traffic such as SNA (Systems
Network Architecture) transactions.
Priority 3
Typically used for “excellent effort” or better than best effort and would include
important business traffic that can tolerate some delay.
Priority 2
This is for “spare bandwidth”.
Priority 1
This is typically used for non-critical “background” traffic such as bulk transfers
that are allowed but that should not affect other applications and users.
Priority 0
Typically used for best-effort traffic.
Apply
Click Apply to save the changes in this screen to the system’s volatile memory.
The system loses these changes if it is turned off or loses power, so use the
Config Save on the navigation panel and then the Save button to save your
changes to the non-volatile memory when you are done configuring.
Cancel
Click Cancel to begin configuring this screen afresh.
14.6 Switch Setup Dot3ad Screen
Click Switch > Switch Setup > Dot3ad to display the screen as shown.
266
MSC1000G User’s Guide
Chapter 14 Switch Screens
Figure 159 Switch Setup Dot3ad
The following table describes the labels in this screen.
Table 115 Switch Setup Dot3ad
LABEL
DESCRIPTION
LACP Priority
Type a number between 1 and 65,535 for the LACP system priority. The switch
with the lowest system priority (and lowest port number if system priority is the
same) becomes the LACP “server”. The LACP “server” controls the operation of
LACP setup. Enter a number to set the priority of an active port using Link
Aggregate Control Protocol (LACP). The smaller the number, the higher the
priority level.
LACP Timeout
LACP timeout is the time interval between the individual port exchanges of LACP
packets in order to check that the peer port in the trunk group is still up. If a port
does not respond after three tries, then it is deemed to be “down” and is removed
from the trunk. Set a short timeout (one second) for busy trunked links to ensure
that disabled ports are removed from the trunk group as soon as possible. Select
either short (1 second) or long (30 seconds).
Group ID
This column displays the names of the trunk groups for the management switch
card’s Ethernet ports. tsub is for the management switch card’s subtending ports
and tup is for the management switch card’s uplink ports.
Active
Select this check box to turn on a trunk group.
Dynamic(LCAP)
Select this check box to use Link Aggregate Control Protocol (LACP), to
dynamically create and manage the trunk group.
Port
This column lists the management switch card’s Gigabit Ethernet interfaces.
Group
This column displays to which trunk group an MSC1000G Gigabit Ethernet
interface belongs.
Apply
Click Apply to save the changes in this screen to the system’s volatile memory.
The system loses these changes if it is turned off or loses power, so use the
Config Save on the navigation panel and then the Save button to save your
changes to the non-volatile memory when you are done configuring.
Cancel
Click Cancel to begin configuring this screen afresh.
MSC1000G User’s Guide
267
Chapter 14 Switch Screens
14.7 Switch Setup QSchedule Screen
Click Switch > Switch Setup > QSchedule to display the screen as shown.
Figure 160 Switch Setup QSchedule
The following table describes the labels in this screen.
Table 116 Switch Setup QSchedule
LABEL
DESCRIPTION
Port
This column lists the management switch card’s Gigabit Ethernet interfaces.
Algo_Type
Use this field to set a Gigabit Ethernet interface’s queuing algorithm. If trunking is
enabled, you set this for one interface and it applies to the whole trunk group.
Select spq to use Strict Priority Queuing (SPQ). SPQ services queues based on
priority only. When the highest priority queue empties, traffic on the next highestpriority queue begins.
Select wrr to use Weighted Round Robin (WRR) Scheduling. WRR services
queues on a rotating basis based on their queue weight (the number you configure
in the queue weight fields). Queues with larger weights get more service than
queues with smaller weights.
Queue 0~7
These fields apply when you select the wrr queuing algorithm in the Algo_Type
field.
Use these fields to set the priority weight (0~15) of each queue on a Gigabit
Ethernet interface (or trunk group if trunking is enabled). The higher a queue’s
weight, the more service it gets.
Apply
Click Apply to save the changes in this screen to the system’s volatile memory.
The system loses these changes if it is turned off or loses power, so use the
Config Save on the navigation panel and then the Save button to save your
changes to the non-volatile memory when you are done configuring.
Cancel
Click Cancel to begin configuring this screen afresh.
14.8 Switch Setup Isolation Screen
Click Switch > Switch Setup > Isolation to display the screen as shown.
268
MSC1000G User’s Guide
Chapter 14 Switch Screens
Figure 161 Switch Setup Isolation
The following table describes the labels in this screen.
Table 117 Switch Setup Isolation
LABEL
DESCRIPTION
Port Isolation
Turn on port isolation to block communications between subscriber ports. When
you enable port isolation you do not need to configure the VLAN to isolate
subscribers.
Apply
Click Apply to save the changes in this screen to the system’s volatile memory.
The system loses these changes if it is turned off or loses power, so use the
Config Save on the navigation panel and then the Save button to save your
changes to the non-volatile memory when you are done configuring.
Cancel
Click Cancel to begin configuring this screen afresh.
Add Isolation
VLAN
The isolation VLAN fields display if you disable Port Isolation.
Use isolation VLANs to block communications between subscribers in different
VLANs if you do not block communications between subscriber ports.
For example, you might want to isolate some VLAN (for example, high-speed
Internet) and not isolate other VLAN (for example, VoIP).
VID
Specify the number of a VLAN for which you want to block communications with
other VLANs.
Add
Click Apply to save your changes to the MSC1000G’s volatile memory.
The MSC1000G loses these changes if it is turned off or loses power, so use the
Config Save link on the navigation panel to save your changes to the non-volatile
memory when you are done configuring.
Index
This field displays the index number of the isolated VLAN.
VLAN ID
This field displays the number of a VLAN for which communications with other
VLAN are blocked.
Select
Select an entry’s Select check box and click Delete to remove the entry.
Clicking Delete saves your changes to the MSC1000G’s volatile memory.
The MSC1000G loses these changes if it is turned off or loses power, so use the
Config Save link on the navigation panel to save your changes to the non-volatile
memory when you are done configuring.
Select All
Select this check box to select all of the column’s check boxes. Clear this check
box to clear all of the column’s check boxes.
MSC1000G User’s Guide
269
Chapter 14 Switch Screens
14.9 Spanning Tree Protocols
The switch supports Spanning Tree Protocol (STP), Rapid Spanning Tree Protocol (RSTP)
and Multiple Spanning Tree Protocol (MSTP) as defined in the following standards.
• IEEE 802.1D Spanning Tree Protocol
• IEEE 802.1w Rapid Spanning Tree Protocol
• IEEE 802.1s Multiple Spanning Tree Protocol
14.9.1 STP and RSTP
RSTP adds rapid reconfiguration capability to STP. The switch supports RSTP and the earlier
STP. RSTP and STP detect and break network loops and provide backup links between
switches, bridges or routers. They allow a device to interact with other RSTP or STP-aware
devices in your network to ensure that only one path exists between any two stations on the
network. The switch uses RSTP by default but can still interoperate with STP switches
(although without RSTP's benefits).
The root bridge is the base of the spanning tree; it is the bridge with the lowest identifier value
(MAC address). Path cost is the cost of transmitting a frame onto a LAN through that port. It is
assigned according to the speed of the link to which a port is attached. The slower the media,
the higher the cost - see the following tables.
Table 118 STP Path Costs
LINK
SPEED
RECOMMENDED VALUE
RECOMMENDED RANGE
ALLOWED
RANGE
4Mbps
250
100 to 1000
1 to 65535
10Mbps
100
50 to 600
1 to 65535
16Mbps
62
40 to 400
1 to 65535
100Mbps
19
10 to 60
1 to 65535
1Gbps
4
3 to 10
1 to 65535
10Gbps
2
1 to 5
1 to 65535
Link Speed Recommended value
Recommended range
Allowed Range
<= 100 Kbps 200 000 000
200 000 000 to 200 000 000
1 to 200 000 000
1 Mbps
20 000 000
2 000 000 to 200 000 000
1 to 200 000 000
10 Mbps
2 000 000
200 000 to 20 000 000
1 to 200 000 000
100 Mbps
200 000
20 000 to 2 000 000
1 to 200 000 000
1 Gbps
20 000
2000 to 200 000
1 to 200 000 000
10 Gbps
2000
200 to 20 000
1 to 200 000 000
100 Gbps
200
20 to 2000
1 to 200 000 000
1000 Gbps
20
2 to 200
1 to 200 000 000
1 to 20
1 to 200 000 000
Table 119 MSTP/RSTP Path Costs
10 000 Gbps 2
270
MSC1000G User’s Guide
Chapter 14 Switch Screens
On each bridge, the root port is the port through which this bridge communicates with the root.
It is the port on this switch with the lowest path cost to the root (the root path cost). If there is
no root port, then this switch has been accepted as the root bridge of the spanning tree
network.
For each LAN segment, a designated bridge is selected. This bridge has the lowest cost to the
root among the bridges connected to the LAN.
After a bridge determines the lowest cost-spanning tree with RSTP, it enables the root port and
the ports that are the designated ports for the connected LANs, and disables all other ports that
participate in RSTP. Network packets are therefore only forwarded between enabled ports,
eliminating any possible network loops.
Figure 162 STP Root Ports and Designated Ports
RSTP-aware devices exchange Bridge Protocol Data Units (BPDUs) periodically. When the
bridged LAN topology changes, a new spanning tree is constructed.
In RSTP, the devices send BPDUs every Hello Time. If an RSTP-aware device does not get a
Hello BPDU after three Hello Times pass (or the Max Age), the device assumes that the link to
the neighboring bridge is down. This device then initiates negotiations with other devices to
reconfigure the network to re-establish a valid network topology.
In STP, once a stable network topology has been established, all devices listen for Hello
BPDUs transmitted from the root bridge. If an STP-aware device does not get a Hello BPDU
after a predefined interval (Max Age), the device assumes that the link to the root bridge is
down. This device then initiates negotiations with other devices to reconfigure the network to
re-establish a valid network topology.
RSTP assigns three port states to eliminate packet looping while STP assigns five (see
following table). A device port is not allowed to go directly from blocking state to forwarding
state so as to eliminate transient loops.
Table 120 RSTP and STP Port States
RSTP PORT
STATE
STP PORT
STATE
DESCRIPTION
Discarding
Disabled
STP is disabled (default).
Discarding
Blocking
Only configuration and management BPDUs are received and
processed.
Discarding
Listening
All BPDUs are received and processed.
MSC1000G User’s Guide
271
Chapter 14 Switch Screens
Table 120 RSTP and STP Port States
RSTP PORT
STATE
STP PORT
STATE
DESCRIPTION
Learning
Learning
All BPDUs are received and processed. Information frames are
submitted to the learning process but not forwarded.
Forwarding
Forwarding
All BPDUs are received and processed. All information frames are
received and forwarded.
14.9.2 Multiple STP
Multiple Spanning Tree Protocol (IEEE 802.1s) is backward compatible with STP/RSTP and
addresses the limitations of existing spanning tree protocols (STP and RSTP) in networks to
include the following features:
• One Common and Internal Spanning Tree (CIST) that represents the entire network’s
connectivity.
• Grouping of multiple bridges (or switching devices) into regions that appear as one single
bridge on the network.
• Multiple Spanning Tree Instances (Mists) that allow multiple VLANs to use the same
spanning tree.
• Load-balancing is possible as traffic from different VLANs can use distinct paths in a
region.
14.9.2.1 MSTP Network Example
The following figure shows a network example where two VLANs are configured on the two
switches. If the switches are using STP or RSTP, the link for VLAN 2 will be blocked as STP
and RSTP allow only one link in the network and block the redundant link.
Figure 163 STP/RSTP Network Example
With MSTP, VLANs 1 and 2 are mapped to different spanning trees in the network. Thus
traffic from the two VLANs travel on different paths. The following figure shows the network
example using MSTP.
272
MSC1000G User’s Guide
Chapter 14 Switch Screens
Figure 164 MSTP Network Example
14.9.2.2 MST Region
An MST region is a logical grouping of multiple network devices that appears as a single
device to the rest of the network. Each MSTP-enabled device can only belong to one MST
region. When BPDUs enter an MST region, external path cost (of paths outside this region) is
increased by one. Internal path cost (of paths within this region) is increased by one when
BPDUs traverse the region.
Devices that belong to the same MST region are configured to have the same MSTP
configuration identification settings. These include the following parameters:
• Name of the MST region
• Revision level as the unique number for the MST region
• VLAN-to-MST mapping
14.9.2.3 MST Instance
An MST Instance (MSTI) is a set of VLANs that use the same spanning tree. Each created
MSTI is identified by a unique number (known as an MST ID) known internally to a region.
Thus an MSTI does not span across MST regions.
The following figure shows an example where there are two MST regions. Regions 1 and 2
have 2 spanning tree instances.
MSC1000G User’s Guide
273
Chapter 14 Switch Screens
Figure 165 MSTIs in Different Regions
14.9.2.4 Common and Internal Spanning Tree (CIST)
A CIST represents the connectivity of the entire network and it is equivalent to a spanning tree
in an STP/RSTP. The CIST is the default MST instance (MSTID 0). Any VLANs that are not
members of an MST instance are members of the CIST. In an MSTP-enabled network, there is
only one CIST that runs between MST regions and single spanning tree devices. A network
may contain multiple MST regions and other network segments running RSTP.
Figure 166 MSTP and Legacy RSTP Network Example
14.10 MSTP Setup
Use the MSTP screens to enable MSTP on the switch and configure MSTP bridge and port
settings.
14.10.1 MSTP Bridge Settings
Click Switch > MSTP in the navigation panel to display the screen shown next. Use this
screen to configure MSTP and RSTP settings.
274
MSC1000G User’s Guide
Chapter 14 Switch Screens
Figure 167 MSTP: Bridge
The following table describes the labels in this screen.
Table 121 MSTP: Bridge
LABEL
DESCRIPTION
Config Name
Enter a descriptive name (up to 31 characters) of an MST region.
Revision Level
Enter a number to identify a region’s configuration. Devices must have the same
revision level to belong to the same region.
Enable
Select this option to activate MSTP on the system.
Priority
Priority is used in determining the root switch. The switch with the highest priority
(lowest numeric value) becomes the STP root switch. If all switches have the
same priority, the switch with the lowest MAC address will then become the root
switch. Enter a number between 0 and 65535. The system will automatically
round the number to the nearest multiple of 4096.
The lower the numeric value you assign, the higher the priority for this switch.
Bridge Priority determines the root bridge, which in turn determines Hello Time,
Max Age and Forwarding Delay.
MSC1000G User’s Guide
275
Chapter 14 Switch Screens
Table 121 MSTP: Bridge (continued)
276
LABEL
DESCRIPTION
Hello Time
This is the time interval in seconds between BPDU (Bridge Protocol Data Units)
configuration message generations by the root switch. The allowed range is 1 to
10 seconds.
MaxAge
This is the maximum time (in seconds) a switch can wait without receiving a
BPDU before attempting to reconfigure. All switch ports (except for designated
ports) should receive BPDUs at regular intervals. Any port that ages out STP
information (provided in the last BPDU) becomes the designated port for the
attached LAN. If it is a root port, a new root port is selected from among the switch
ports attached to the network. The allowed range is 6 to 40 seconds.
Forwarding Delay
This is the maximum time (in seconds) a switch will wait before changing states.
This delay is required because every switch must receive information about
topology changes before it starts to forward frames. In addition, each port needs
time to listen for conflicting information that would make it return to a blocking
state; otherwise, temporary data loops might result. The allowed range is 4 to 30
seconds. As a general rule:
2 * (Forward Delay - 1) >= Max Age >= 2 * (Hello Time + 1)
Force Version
Specify a spanning tree protocol (MSTP or RSTP) the switch is to use.
Select MSTP to configure multiple spanning trees that allows a loop-free network
for one or more VLANs. Only MSTP BPDUs will be sent.
Select RSTP to send RSTP BPDUs and ignore any MSTP-specific information.
MaxHops
Enter the number of hops (between 1 and 255) in an MSTP region before the
BPDU is discarded and the port information is aged.
MSTI
This field displays the MST instance number. The switch can identifies up to 16
spanning trees in a region.
Priority
Set the priority of the switch for the specific spanning tree instance. The lower the
number, the more likely the switch will be chosen as the root bridge within the
spanning tree instance.
Enter priority values between 0 and 61440 in increments of 4096 (thus valid
values are 4096, 8192, 12288, 16384, 20480, 24576, 28672, 32768, 36864,
40960, 45056, 49152, 53248, 57344 and 61440).
Apply
Click Apply to save the changes in this screen to the system’s volatile memory.
The system loses these changes if it is turned off or loses power, so use the
Config Save on the navigation panel and then the Save button to save your
changes to the non-volatile memory when you are done configuring.
Cancel
Click Cancel to start configuring this screen again.
MSTID
Enter the ID number (0 ~ 16) of a spanning tress to which you want to map the
VLAN ID settings below.
Start VID
Enter the start of the VLAN ID range to map to the MST instance.
End VID
Enter the end of the VLAN ID range to map to the MST instance. To map only one
VLAN, enter the same VID as the start VID.
Apply
Click Apply to add the VLAN-to-MST instance mapping. The new settings
automatically displays in the tables below.
MSTID
This field displays the ID of an MST instance.
VID
This field displays the VID (or VID ranges) to which the MST instance is mapped.
Config Digest
A configuration digest is generated from the VLAN-MSTI mapping information.
This field displays the 16-octet signature that is included in an MSTP BPDU. This
field displays the digest when MSTP is activated on the system.
MSC1000G User’s Guide
Chapter 14 Switch Screens
14.10.2 MSTP Port Settings
Click Switch > MSTP > Port to display the configuration screen as shown. Use this screen to
set the MST settings on the switch ports.
Figure 168 MSTP: Port
The following table describes the labels in this screen.
Table 122 MSTP: Port
LABEL
DESCRIPTION
MSTID
Select an MST region ID from the drop-down list box and click Apply to set the
port settings.
Port
This column lists the management switch card’s Gigabit Ethernet interfaces.
Enable
Select this option to set the port to be a member of the selected MST region.
Priority
When a loop occurs and two ports have the same path cost, the port with a higher
priority (lower numerical value) becomes the root port and the other port becomes
an alternate port.
Specify the port priority in the spanning tree. Enter a number (between 1 and 255).
Enter a smaller number to have the switch select this port first. If two ports have
the same priority, the switch will select the one with the smallest port ID (which
consists of the port priority and port number).
Path Cost
When a loop occurs, MSTP selects the port with the lowest path cost to the root
bridge.
Specify the path cost (between 0 and 200000000) for the port. Enter a smaller
number to have the switch select this port first. Enter 0 to have to system
automatically determines the path cost based on the link speed. If two ports have
the same path cost, the switch will select the one with the highest priority.
Edge
An edge port connects to a non-STP device.
Select this option to set the port as an edge port. The switch immediately sets this
port to the forwarding state when a link failure is detected. This allows for fast
recovery.
P2P
Set a point-to-point link between ports to increase the speed of convergence by
allowing the network to determine the designated port faster. The port must be
connected directly to another switch port.
Select Enable to activate this feature on a full-duplex port that is connected
directly to another switch port.
Select Disable to deactivate this feature on the port that is in half-duplex mode.
Select Auto to have the system automatically determine if the port is full-duplex or
half-duplex.
MSC1000G User’s Guide
277
Chapter 14 Switch Screens
Table 122 MSTP: Port (continued)
LABEL
DESCRIPTION
Apply
Click Apply to save the changes in this screen to the system’s volatile memory.
The system loses these changes if it is turned off or loses power, so use the
Config Save on the navigation panel and then the Save button to save your
changes to the non-volatile memory when you are done configuring.
Cancel
Click Cancel to start configuring this screen again.
14.10.3 MSTP Configuration Example
This section shows you how to configure MSTP settings for the network example shown. In
this network example, there are two VLANs on two spanning tree instances.
Figure 169 MSTP Network Example 2
1
2
3
4
278
Log into the web configurator and access the MSTP-Bridge screen.
Specify a descriptive name in the Config Name field for the MSTP region.
Enter a number in the Revision Level field.
To create VLAN-to-MSTI mapping, set the MSTID, Start VID and End VID fields and
click Apply. For this example, map VLAN 1 to MSTID 1 and VLAN 2 to MSTID 2.
MSC1000G User’s Guide
Chapter 14 Switch Screens
Figure 170 MSTP Configuration Example: Bridge
5 To configure port MSTP settings, click the Port tab.
6 Select the instance ID number in the MSTID field and click Apply.
7 Select Enable to set the port to belong to this spanning tree and click Apply.
For this network example, enable uplink ports 1 and 2 in the two spanning tree instances
(MSTID 1 and 2).
MSC1000G User’s Guide
279
Chapter 14 Switch Screens
Figure 171 MSTP Configuration Example: Port
8 For switch B, configure the same general MSTP settings and VLAN-to-MST mappings
as switch A for the subtending ports.
9 Set the subtending port priorities on switch B to allow MSTP to forward traffic to the
corresponding link.
In MSTID1, set the subtending port 1 priority to 0 and subtending port 2 priority to 240.
In MSTID2, set the subtending port 1 priority to 240 and subtending port 2 priority to 0.
"
Devices belonging to the same MST region must have the same settings in the
Config Name and Revision Level fields and VLAN-MST instance
mapping(s).
14.11 Switch Port
This section describes the switch port features and parameters.
14.11.1 Uplink and Subtending Modes
The Gigabit Ethernet SFP slots and ports can function in either subtending or uplink mode.
Connect a port in uplink mode to an backbone Ethernet switch or router. The management
switch card allows traffic between the ports in uplink mode and the DSL ports on the line
cards.
Use the subtending mode to daisy-chain other Ethernet switches. With subtending mode, the
management switch card allows traffic between the ports in subtending mode and the ports in
uplink mode. The management switch card does not allow traffic between the ports in
subtending mode and the DSL ports on the line cards.
280
MSC1000G User’s Guide
Chapter 14 Switch Screens
14.11.2 Flow Control
A concentration of traffic on a port decreases port bandwidth and overflows buffer memory
causing packet discards and frame losses. Flow control is used to regulate transmission of
signals to match the bandwidth of the receiving port.
The MSC1000G uses IEEE 802.3x flow control in full duplex mode and back pressure flow
control in half duplex mode.
IEEE 802.3x flow control is used in full duplex mode to send a pause signal to the sending
port, causing it to temporarily stop sending signals when the receiving port memory buffers
fill.
Back pressure flow control is typically used in half duplex mode to send a "collision" signal to
the sending port (mimicking a state of packet collision) causing the sending port to
temporarily stop sending signals and resend later.
14.11.3 Port VLAN Trunking
VLAN Trunking allows frames belonging to unknown VLAN groups to pass through a port.
This is useful if you want to set up VLAN groups on end devices without having to configure
the same VLAN groups on intermediary devices.
Refer to the following figure. Suppose you want to create VLAN groups 1 and 2 (V1 and V2)
on devices A and B. Without VLAN Trunking, you must configure VLAN groups 1 and 2 on
all intermediary switches C, D and E; otherwise they will drop frames with unknown VLAN
group tags. However, with VLAN Trunking enabled on a port(s) in each intermediary switch
you only need to create VLAN groups in the end devices (A and B). C, D and E automatically
allow frames with VLAN group tags 1 and 2 (VLAN groups that are unknown to those
switches) to pass through their VLAN trunking port(s).
Figure 172 Port VLAN Trunking
14.11.4 Bandwidth Control
Use bandwidth control to define a maximum allowable bandwidth for incoming and/or outgoing traffic flows on individual Gigabit Ethernet interfaces. This may be useful for limiting
backbone bandwidth usage and preventing viruses from using up all of the system’s resources.
MSC1000G User’s Guide
281
Chapter 14 Switch Screens
14.11.5 Broadcast Storm Control
Broadcast storm control limits the number of broadcast, multicast and destination lookup
failure (DLF) packets the switch receives per second on the ports. When the maximum number
of allowable broadcast, multicast and/or DLF packets is reached per second, the subsequent
packets are discarded. Enable this feature to reduce broadcast, multicast and/or DLF packets in
your network. You can specify limits for each packet type on each port. DLF packets are also
known as unknown unicast packets.
14.12 Switch Port Setup Port Screen
Click Switch > Switch Port Setup in the navigation panel to display the screen shown next.
Use this screen to configure basic settings for the Gigabit Ethernet interfaces.
Figure 173 Switch Port Setup
The following table describes the labels in this screen.
Table 123 Switch Port Setup
282
LABEL
DESCRIPTION
Port
This is the label of a Gigabit Ethernet interface.
Enable
Select this check box to turn on an interface. The factory default for all ports is
enabled. A port must be enabled for data transmission to occur.
Name
Enter a descriptive name that identifies this port. You can use up to 31 English
keyboard characters; spaces are not allowed.
Mode
Set a port as subtending to daisy-chain other Ethernet switches. Use uplink mode
to connect to a backbone Ethernet switch or router.
Speed/Duplex
Select the type of Ethernet connection for this port. When you don’t use autonegotiation, you must make sure that the settings of the peer Ethernet port are the
same in order to connect.
Select Auto (auto-negotiation) to have the system automatically determine the
type of connection that the Ethernet port has. When the peer Ethernet device has
auto-negotiation turned on, the system negotiates with the peer to determine the
connection speed. If the peer Ethernet port does not have auto-negotiation turned
on, the system determines the connection speed by detecting the signal on the
cable and using full duplex.
Select 1000/Full if the Ethernet port has a 1000 MB connection.
Select 100/Full if the Ethernet port has a 100 MB full-duplex electrical connection.
Select 100/Half if the Ethernet port has a 100 MB half-duplex electrical
connection.
Flow Control
Select this check box to turn on flow control on a port.
MSC1000G User’s Guide
Chapter 14 Switch Screens
Table 123 Switch Port Setup (continued)
LABEL
DESCRIPTION
Apply
Click Apply to save the changes in this screen to the system’s volatile memory.
The system loses these changes if it is turned off or loses power, so use the
Config Save on the navigation panel and then the Save button to save your
changes to the non-volatile memory when you are done configuring.
Cancel
Click Cancel to begin configuring this screen afresh.
14.13 Switch Port Setup 802.1P/1Q Screen
Click Switch > Switch Port Setup > 802.1P/1Q in the navigation panel to display the screen
shown next. Use this screen to configure IEEE 802.1p priority and IEEE 802.1Q VLAN
settings for the Gigabit Ethernet interfaces.
Figure 174 Switch Port Setup: 802.1P/1Q
The following table describes the labels in this screen.
Table 124 Switch Port Setup: 802.1P/1Q
LABEL
DESCRIPTION
Port
This is the label of a Gigabit Ethernet interface.
Default Priority
Select a default priority to use for frames that come into the interface without a
IEEE 802.1p priority tag.
Default VLAN ID
[1-4094]
Select a default VLAN ID to use for frames that come into the interface without a
IEEE 802.1Q VLAN ID.
GVRP
Select this check box to turn on GARP VLAN Registration Protocol to have the
interface propagate VLAN information to other devices.
Clear the check box to not have the interface propagate VLAN information to other
devices.
Frame Type
Select all to have the interface accept all Ethernet frames. Select tag to have the
interface only accept frames with an IEEE 802.1Q VLAN tag.
VLAN Trunk
Select this check box to have the interface use VLAN trunking in order to accept
frames with any VID.
Clear the check box to have the interface only accept frames with registered VIDs.
MSC1000G User’s Guide
283
Chapter 14 Switch Screens
Table 124 Switch Port Setup: 802.1P/1Q (continued)
LABEL
DESCRIPTION
Apply
Click Apply to save the changes in this screen to the system’s volatile memory.
The system loses these changes if it is turned off or loses power, so use the
Config Save on the navigation panel and then the Save button to save your
changes to the non-volatile memory when you are done configuring.
Cancel
Click Cancel to begin configuring this screen afresh.
14.14 Switch Port Setup Bandwidth Screen
Click Switch > Switch Port Setup > Bandwidth in the navigation panel to display the screen
shown next. Use this screen to configure bandwidth control settings for the Gigabit Ethernet
interfaces.
Figure 175 Switch Port Setup: Bandwidth
The following table describes the labels in this screen.
Table 125 Switch Port Setup: Bandwidth
284
LABEL
DESCRIPTION
Port
This is the label of a Gigabit Ethernet interface.
Enable
Select this check box to turn on bandwidth control for an interface.
Ingress Rate
Type a maximum bandwidth allowed for the incoming traffic flow on a port
(measured in megabits per second). Use a number from 0 to 1000.
Egress Rate
Type a maximum bandwidth allowed for the out-going traffic flow on a port
(measured in megabits per second). Use a number from 0 to 1000.
Apply
Click Apply to save the changes in this screen to the system’s volatile memory.
The system loses these changes if it is turned off or loses power, so use the
Config Save on the navigation panel and then the Save button to save your
changes to the non-volatile memory when you are done configuring.
Cancel
Click Cancel to begin configuring this screen afresh.
MSC1000G User’s Guide
Chapter 14 Switch Screens
14.15 Switch Port Setup Broadcast Screen
Click Switch > Switch Port Setup > Broadcast in the navigation panel to display the screen
shown next. Use this screen to configure broadcast storm control settings for the Gigabit
Ethernet interfaces.
Figure 176 Switch Port Setup: Broadcast
The following table describes the labels in this screen.
Table 126 Switch Port Setup: Broadcast
LABEL
DESCRIPTION
Port
This is the label of a Gigabit Ethernet interface.
Broadcast
Select Enable to limit the number of broadcast packets the interface will accept
per second.
Type how many broadcast packets the interface should accept per second
(0~262143).
Multicast
Select Enable to limit the number of multicast packets the interface will accept per
second.
Type how many multicast packets the interface should accept per second
(0~262143).
Unknown Unicast
Select Enable to limit the number of unknown unicast packets the interface will
accept per second. Unknown unicast packets are also known as destination
lookup failure (DLF) packets.
Type how many unknown unicast packets the interface should accept per second
(0~262143).
Apply
Click Apply to save the changes in this screen to the system’s volatile memory.
The system loses these changes if it is turned off or loses power, so use the
Config Save on the navigation panel and then the Save button to save your
changes to the non-volatile memory when you are done configuring.
Cancel
Click Cancel to begin configuring this screen afresh.
MSC1000G User’s Guide
285
Chapter 14 Switch Screens
286
MSC1000G User’s Guide
CHAPTER
15
Sys Screens
This chapter describes the Sys screens you use to configure general system, access control,
syslog, administrator login accounts and management IP settings.
15.1 SNMP
Simple Network Management Protocol is a protocol used for exchanging management
information between network switches. SNMP is a member of TCP/IP protocol suite. A
manager station can manage and monitor the MSC1000G through the network via SNMP
version one (SNMPv1) and/or SNMP version 2c. The next figure illustrates an SNMP
management operation. SNMP is only available if TCP/IP is configured.
Figure 177 SNMP Management Model
An SNMP managed network consists of two main components: agents and a manager.
An agent is a management software module that resides in a managed switch (the
MSC1000G). An agent translates the local management information from the managed switch
into a form compatible with SNMP. The manager is the console through which network
administrators perform network management functions. It executes applications that control
and monitor managed devices.
MSC1000G User’s Guide
287
Chapter 15 Sys Screens
The managed devices contain object variables/managed objects that define each piece of
information to be collected about a switch. Examples of variables include such as number of
packets received, node port status etc. A Management Information Base (MIB) is a collection
of managed objects. SNMP allows a manager and agents to communicate for the purpose of
accessing these objects.
SNMP itself is a simple request/response protocol based on the manager/agent model. The
manager issues a request and the agent returns responses using the following protocol
operations:
Table 127 SNMP Commands
COMMAND
DESCRIPTION
Get
Allows the manager to retrieve an object variable from the agent.
GetNext
Allows the manager to retrieve the next object variable from a table or list within an
agent. In SNMPv1, when a manager wants to retrieve all elements of a table from
an agent, it initiates a Get operation, followed by a series of GetNext operations.
Set
Allows the manager to set values for object variables within an agent.
Trap
Used by the agent to inform the manager of some events.
15.1.1 Supported MIBs
MIBs let administrators collect statistics and monitor status and performance. The MSC1000G
supports the following MIBs:
•
•
•
•
•
•
•
•
•
•
SNMP MIB II (RFC 1213)
BRIDGE MIB (RFC 1573) dot1dStp (RSTP), dot1dGarp (GARP)
BRIDGE Extension MIB (RFC 2674)
Dot3 MIB (RFC 2665)
ADSL Line MIB (RFC 2662)
ADSL Extension Line MIB (RFC 3440)
RMON MIB (RFC 1757)
ifXTable MIB (RFC 2863)
RFC 3635
RFC 3636
The MSC1000G can also respond with specific data from the ZyXEL private ies5000 MIB.
15.2 SNMP Screen
Click Sys > Access Control from the navigation panel to open the following screen.
288
MSC1000G User’s Guide
Chapter 15 Sys Screens
Figure 178 Access Control: SNMP
The following table describes the labels in this screen.
Table 128 Access Control: SNMP
LABEL
DESCRIPTION
Get Community
Enter the get community, which is the password for the incoming Get- and
GetNext- requests from the management station. You can use up to 31 English
keyboard characters; spaces are not allowed.
Set Community
Enter the set community, which is the password for incoming Set- requests from
the management station. You can use up to 31 English keyboard characters;
spaces are not allowed.
Trap Community
Enter the trap community, which is the password sent with each trap to the SNMP
manager. You can use up to 31 English keyboard characters; spaces are not
allowed.
Version
Specify the SNMP version and access mode.
Select v2c to allow SNMPv2 read/write access.
Select v3 to allow SNMPv3 read/write access with additional user authentication
and data encryption options.
Select v3v2c to allow SNMPv3 read/write and SNMPv2 read-only access.
Trap Destination
Enter the IP address of a station to send your SNMP traps to.
Version
Specify the format of the SNMP trap PDU (Protocol Data Unit) to be sent. The
default is v2c.
IP
Enter the IP address (in dotted decimal notation) of the trap server.
Port
Enter the port number upon which the station listens for SNMP traps.
Username
This field is applicable when you select v3 in the Version field.
Enter the username to be included in the trap PDUs.
MSC1000G User’s Guide
289
Chapter 15 Sys Screens
Table 128 Access Control: SNMP (continued)
LABEL
DESCRIPTION
User Information
Configure the administrative login accounts for SNMP management.
Use the User Account screen to create administrative login accounts. See
Section 15.7 on page 295.
Index
This field displays the index number.
Enable
This field displays whether the administrative login account is activated or note.
Name
This field displays the administrative login account user name.
Level
Select noauth to disable SNMPv3 user authentication and encryption for SNMP
communication.
Select auth to enable SNMPv3 user authentication.
Select privacy to enable SNMPv3 user authentication and encryption for SNMP
communication using a private key generated from the password.
Hash
Specify an authentication method.
Select md5 (Message Digest 5) to produce a 128-bit digest for minimal
authentication security.
Select sha (Secure Hash Algorithm) to produces a 160-bit digest for maximum
authentication security.
Encrypt
Specify an encryption method. Select des or aes.
Data Encryption Standard (DES) is a widely used method of data encryption using
a secret key. DES applies a 56-bit key to each 64-bit block of data.
Advanced Encryption Standard (AES) is a newer method of data encryption that
also uses a secret key. AES is more secure than DES.
Apply
Click Apply to save the changes in this screen to the system’s volatile memory.
The system loses these changes if it is turned off or loses power, so use the
Config Save on the navigation panel and then the Save button to save your
changes to the non-volatile memory when you are done configuring.
Cancel
Click Cancel to begin configuring this screen afresh.
15.3 Service Access Control Screen
Click Sys > Access Control > Access Ctrl to open the following screen. Use this screen to set
which services may be used to access the system.
Figure 179 Access Control: Service Access Control
290
MSC1000G User’s Guide
Chapter 15 Sys Screens
The following table describes the labels in this screen.
Table 129 Access Control: Service Access Control
LABEL
DESCRIPTION
Services
These are services you may use to access the system are listed here.
Enable
Select the Enable check boxes for the corresponding services that you want to
allow to access the system.
Service Port
For Telnet, SSH, SNMP, FTP or web services, you can use this field to change the
service port number. If you change the port number then you will have to let people
(who wish to use the service) know the new port number for that service.
Apply
Click Apply to save the changes in this screen to the system’s volatile memory.
The system loses these changes if it is turned off or loses power, so use the
Config Save on the navigation panel and then the Save button to save your
changes to the non-volatile memory when you are done configuring.
Cancel
Click Cancel to begin configuring this screen afresh.
15.3.1 Secured Client Screen
Click Sys > Access Control from the navigation panel and then the Secured Client tab to
open the following screen. Use this screen to configure IP address ranges of trusted computers
that may manage the system.
Figure 180 Access Control: Secured Client
The following table describes the labels in this screen.
Table 130 Access Control: Secured Client
LABEL
DESCRIPTION
Index
This is the client set index number. A “client set” is a group of one or more “trusted
computers” from which an administrator may use a service to manage the system.
Enable
Select this check box to activate this secured client set. Clear the check box if you
wish to temporarily disable the set without deleting it.
Start Address
End Address
Configure the IP address range of trusted computers from which you can manage
the system.
The system checks if the client IP address of a computer requesting a service or
protocol matches the range set here. The system immediately disconnects the
session if it does not match.
Telnet/SSH/
SNMP/FTP/Web/
ICMP
Select services that may be used for managing the system from the specified
trusted computers.
MSC1000G User’s Guide
291
Chapter 15 Sys Screens
Table 130 Access Control: Secured Client (continued)
LABEL
DESCRIPTION
Apply
Click Apply to save the changes in this screen to the system’s volatile memory.
The system loses these changes if it is turned off or loses power, so use the
Config Save on the navigation panel and then the Save button to save your
changes to the non-volatile memory when you are done configuring.
Cancel
Click Cancel to begin configuring this screen afresh.
15.4 General Setup
Click Sys > General Setup from the navigation panel to open the following screen.
Figure 181 General Setup
The following table describes the labels in this screen.
Table 131 General Setup
292
LABEL
DESCRIPTION
Host Name
Choose a descriptive name for identification purposes. This name consists of up
to 31 English keyboard characters; spaces are not allowed.
Location
Enter the geographic location of your system. You can use up to 31 English
keyboard characters; spaces are not allowed.
Contact Person's
Name
Enter the name of the person in charge of this system. You can use up to 31
English keyboard characters; spaces are not allowed.
Frame Number
Enter the number (an integer from 1 to 65535) of the frame (rack) where the
system is installed.
MSC1000G User’s Guide
Chapter 15 Sys Screens
Table 131 General Setup (continued)
LABEL
DESCRIPTION
Chassis Number
Enter a chassis number (an integer from 1 to 64). The chassis number helps to
keep track of this individual unit in a multiple unit application.
Product Model
This field displays your device type.
System Up Time
This field shows how long the system has been running since the last time it was
started.
Database Version
This field displays the time and date that the system’s configuration was last saved
to the non-volatile memory. The time is in (24-hour) hour, minute and second
format. The date is in year, month and day format.
Use Time Server
When Bootup
Enter the time service protocol that a timeserver uses. Not all timeservers support
all protocols, so you may have to use trial and error to find a protocol that works.
The main differences between them are the time format.
When you select the Daytime (RFC 867) format, the system displays the day,
month, year and time with no time zone adjustment. When you use this format it is
recommended that you use a Daytime timeserver within your geographical time
zone.
Time (RFC-868) format displays a 4-byte integer giving the total number of
seconds since 1970/1/1 at 0:0:0.
NTP (RFC-1305) is similar to Time (RFC 868).
None is the default value. Enter the time manually. Each time you turn on the
system, the time and date will be reset to 2000-1-1 0:0.
Time Server IP
Address
Enter the IP address (or URL if you configure a domain name server in the IP
Setup screen) of your timeserver. The system searches for the timeserver for up
to 60 seconds. If you select a timeserver that is unreachable, then this screen will
appear locked for 60 seconds. Please wait.
Current Time
This field displays the time you open this menu (or refresh the menu).
New Time
(hh:min:ss)
Enter the new time in hour, minute and second format. The new time then appears
in the Current Time field after you click Apply.
Current Date
This field displays the date you open this menu.
New Date (yyyymm-dd)
Enter the new date in year, month and day format. The new date then appears in
the Current Date field after you click Apply.
Time Zone
Select the time difference between UTC (Universal Time Coordinated, formerly
known as GMT, Greenwich Mean Time) and your time zone from the drop-down
list box.
Apply
Click Apply to save the changes in this screen to the system’s volatile memory.
The system loses these changes if it is turned off or loses power, so use the
Config Save on the navigation panel and then the Save button to save your
changes to the non-volatile memory when you are done configuring.
Cancel
Click Cancel to begin configuring this screen afresh.
15.5 IP Setup
Click Sys > IP Setup from the navigation panel to open the following screen. Use this screen
to configure the system and management IP addresses and subnet masks.
MSC1000G User’s Guide
293
Chapter 15 Sys Screens
Figure 182 IP Setup
The following table describes the labels in this screen.
Table 132 IP Setup
LABEL
DESCRIPTION
Inband
These fields configure in-band management settings. In-band management refers
to accessing the management interface through a network port (not the
management port).
IP Address
Enter the in-band management IP address for the system in dotted decimal
notation (for example 1.2.3.4).
IP Mask
Enter the in-band management IP subnet mask for the system in dotted decimal
notation for example 255.255.255.0.
VID
Enter the VLAN ID (Identifier) of the management (CPU) VLAN. You must connect
to the system through a port that is a member of the management (CPU) VLAN in
order to perform in-band management.
Outband
These fields configure out-of-band management settings. Out-of-band
management refers to accessing the management interface through a
management port.
IP Address
Enter the out-of-band management IP address for the management port in dotted
decimal notation (for example 1.2.3.4).
IP Mask
Enter the out-of-band management IP subnet mask for the management port in
dotted decimal notation for example 255.255.255.0.
Default Gateway
Enter the IP address of the default outgoing gateway in dotted decimal notation.
Apply
Click Apply to save the changes in this screen to the system’s volatile memory.
The system loses these changes if it is turned off or loses power, so use the
Config Save on the navigation panel and then the Save button to save your
changes to the non-volatile memory when you are done configuring.
Cancel
Click Cancel to begin configuring this screen afresh.
15.6 Syslog Screen
Click Sys > Unix SysLog from the navigation panel to open the following screen. The syslog
feature sends logs to an external syslog server.
294
MSC1000G User’s Guide
Chapter 15 Sys Screens
Figure 183 Unix Syslog
The following table describes the labels in this screen.
Table 133 Unix Syslog
LABEL
DESCRIPTION
Enable Unix
Syslog
Select this check box to activate syslog (system logging) and then configure the
syslog parameters described in the following fields.
Facility1~7
The log facility allows you to send logs to different files in the syslog server. Please
refer to the documentation of your syslog program for more details.
SysLog Server IP
Enter the IP address of the syslog server for the corresponding log facility.
Apply
Click Apply to save the changes in this screen to the system’s volatile memory.
The system loses these changes if it is turned off or loses power, so use the
Config Save on the navigation panel and then the Save button to save your
changes to the non-volatile memory when you are done configuring.
Cancel
Click Cancel to begin configuring this screen afresh.
15.7 User Account Screen
Click Sys > User Account from the navigation panel to open the following screen. Use this
screen to manage administrator accounts.
MSC1000G User’s Guide
295
Chapter 15 Sys Screens
Figure 184 User Account
The following table describes the labels in this screen.
Table 134 User Account
296
LABEL
DESCRIPTION
Enable
Select this check box to activate the administrator account.
Name
Type a user name for the account
Password
Type a password for the account.
Retype Password
to confirm
Type the password again to make sure you have entered it properly.
Privilege
Select the administrator account’s level of access privileges.
Select high to allow the administrator to perform all types of system configuration,
including the management of administrator accounts.
Select middle to allow the administrator to configure the system through the web
configurator but not manage administrator accounts.
Select low to allow the administrator read-only access to the web configurator
screens.
Apply
Click Apply to save the changes in this screen to the system’s volatile memory.
The system loses these changes if it is turned off or loses power, so use the
Config Save on the navigation panel and then the Save button to save your
changes to the non-volatile memory when you are done configuring.
Cancel
Click Cancel to begin configuring this screen afresh.
Index
This column numbers the administrator account entries.
Enable
This column displays a “V” if the administrator account is turned on or a “-” if the
account is turned off.
Name
This column displays the user names of the accounts.
Privilege
This column displays the level of access privileges of the accounts.
Delete
Select one or more account entries’ check boxes and then use the Delete button
to remove it (or them).
MSC1000G User’s Guide
Chapter 15 Sys Screens
15.8 RADIUS Service Types
When you set the system to authenticate users using an external RADIUS server, the system
assigns a privilege level to the login account based on the service type information received
from the RADIUS server after the authentication is successful.
The following table shows the service type and privilege level mappings.
Table 135 Service Type to Privilege Level Mapping
SERVICE TYPE
PRIVILEGE LEVEL
login
low
nas-prompt
medium
admin
high
15.9 TACACS+
TACACS (Terminal Access Controller Access-Control System) is a security protocol similar
to RADIUS. Like RADIUS, TACACS uses a centralized TACACS server that responds to
client requests.
TACACS+ is the latest version of TACACS and supports authentication, authorization, and
accounting (AAA). Earlier versions only supported authentication or authentication and
accounting. TACACS+ connections are more reliable than those earlier TACACS versions due
to the use of TCP as the transport protocol for packets. TACACS+ also encrypts the body of
traffic traveling between the TACACS+ server and client (although the header is
unencrypted).
15.10 User Account Authentication Screen
Click Sys > User Account from the navigation panel and then the Authentication tab to open
the following screen. Use this screen to set up how the system authenticate administrators
when they log in.
Figure 185 User Account Authentication
MSC1000G User’s Guide
297
Chapter 15 Sys Screens
The following table describes the labels in this screen.
Table 136 User Account Authentication
LABEL
DESCRIPTION
Authentication
Mode
Use this field to set which database the system uses to authenticate a user.
Select local to have the system use the internal user account database.
Select radius to have the system use an external RADIUS server.
Select local first and then radius to have the system check the internal user
account database first, and then the external RADIUS server if there is no match.
Select tacas+ to have the system use an external TACACS+ server.
Select local first and then tacas+ to have the system check the internal user
account database first, and then the external TACACS+ server if there is no
match.
IP
Type the IP address of the RADIUS server.
Port
Type the RADIUS server’s listening port number. The MSC1000G uses the default
of 1812 if you do not specify a port.
Secret
Type the password for the RADIUS server.
Default Privilege
Level
Specify the default login account privilege level if no service type information is
received from the RADIUS server.
Select a default privilege level (low, medium or high). Refer to Section 17.5 on
page 311 for more information.
Select deny to block management access to the system.
Note: You will be blocked access to the system for remote
management if you enter deny and the system uses only
RADIUS authentication without receiving system type
information. In this case, you can only access and manage
the device through the console port.
298
Apply
Click Apply to save the changes in this screen to the system’s volatile memory.
The system loses these changes if it is turned off or loses power, so use the
Config Save on the navigation panel and then the Save button to save your
changes to the non-volatile memory when you are done configuring.
Cancel
Click Cancel to begin configuring this screen afresh.
MSC1000G User’s Guide
CHAPTER
16
VLAN Screens
16.1 VLAN Introduction
A VLAN (Virtual Local Area Network) allows a physical network to be partitioned into
multiple logical networks. Devices on a logical network belong to one group. A device can
belong to more than one group. With VLAN, a device cannot directly talk to or hear from
devices that are not in the same group(s); the traffic must first go through a router.
In MTU (Multi-Tenant Unit) applications, VLAN is vital in providing isolation and security
among the subscribers. When properly configured, VLAN prevents one subscriber from
accessing the network resources of another on the same LAN, thus a user will not see the
printers and hard disks of another user in the same building. If you have enabled port isolation
in the Switch Setup screen, you do not need to configure the VLAN to isolate subscribers.
VLAN also increases network performance by limiting broadcasts to a smaller and more
manageable logical broadcast domain. In traditional switched environments, all broadcast
packets go to each and every individual port. With VLAN, all broadcasts are confined to a
specific broadcast domain.
16.2 IEEE 802.1Q Tagged VLAN
The IEEE 802.1Q Tagged VLAN uses both explicit and implicit tagging.
1 Explicit Tagging
A VLAN identifier is added to the frame header that identifies the source VLAN.
2 Implicit Tagging
The MAC (Media Access Control) number, the port or other information is used to
identify the source of a VLAN frame.
Tagged VLAN uses an explicit tag (VLAN ID) in the MAC header to identify the VLAN
membership of a frame across bridges - they are not confined to the switch on which they were
created. The VLANs can be created statically by hand or dynamically through GVRP. The
VLAN ID associates a frame with a specific VLAN and provides the information that switches
need to process the frame across the network. A tagged frame is four bytes longer than an
untagged frame and contains two bytes of TPID (Tag Protocol Identifier, residing within the
type/length field of the Ethernet frame) and two bytes of TCI (Tag Control Information, starts
after the source address field of the Ethernet frame).
The CFI (Canonical Format Indicator) is a single-bit flag, always set to zero for Ethernet
switches. If a frame received at an Ethernet port has a CFI set to 1, then that frame should not
be forwarded as it is to an untagged port. The remaining twelve bits define the VLAN ID,
giving a possible maximum number of 4,096 VLANs. Note that user priority and VLAN ID
MSC1000G User’s Guide
299
Chapter 16 VLAN Screens
are independent of each other. A frame with VID (VLAN Identifier) of null (0) is called a
priority frame, meaning that only the priority level is significant and the default VID of the
ingress port is given as the VID of the frame. Of the 4096 possible VIDs, a VID of 0 is used to
identify priority frames and value 4095 (FFF) is reserved, so the maximum possible VLAN
configurations are 4,094.
TPID
2 Bytes
User Priority
3 Bits
CFI
1 Bit
VLAN ID
12 bits
The MSC1000G handles up to 4094 VLANs (VIDs 1-4094). The switch accepts incoming
frames with VIDs 1-4094.
16.2.1 Forwarding Tagged and Untagged Frames
Each port on the switch is capable of passing tagged or untagged frames. To forward a frame
from an 802.1Q VLAN-aware switch to an 802.1Q VLAN-unaware switch, the switch first
decides where to forward the frame and then strips off the VLAN tag. To forward a frame from
an 802.1Q VLAN-unaware switch to an 802.1Q VLAN-aware switch, the switch first decides
where to forward the frame, and then inserts a VLAN tag reflecting the ingress port's default
VID. The default PVID is VLAN 1 for all ports, but this can be changed.
The egress (outgoing) port(s) of a frame is determined on the combination of the destination
MAC address and the VID of the frame. For a unicast frame, the egress port based by the
destination address must be a member of the VID, also; otherwise, the frame is blocked. A
broadcast frame (or a multicast frame for a multicast group that is known by the system) is
duplicated only on ports that are members of the VID (except the ingress port itself), thus
confining the broadcast to a specific domain.
Whether to tag an outgoing frame depends on the setting of the egress port on an individual
VLAN and port basis (remember that a port can belong to multiple VLANs). If the tagging on
the egress port is enabled for the VID of a frame, then the frame is transmitted as a tagged
frame; otherwise, it is transmitted as an untagged frame.
16.3 Automatic VLAN Registration
GARP and GVRP are the protocols used to automatically register VLAN membership across
switches.
16.3.1 GARP
GARP (Generic Attribute Registration Protocol) allows network switches to register and deregister attribute values with other GARP participants within a bridged LAN. GARP is a
protocol that provides a generic mechanism for protocols that serve a more specific
application, for example, GVRP.
16.3.1.1 GARP Timers
Switches join VLANs by making a declaration. A declaration is made by issuing a Join
message using GARP. Declarations are withdrawn by issuing a Leave message. A Leave All
message terminates all registrations. GARP timers set declaration timeout values.
300
MSC1000G User’s Guide
Chapter 16 VLAN Screens
16.3.2 GVRP
GVRP (GARP VLAN Registration Protocol) is a registration protocol that defines a way for
switches to register necessary VLAN members on ports across the network. Enable this
function to permit VLANs groups beyond the local switch.
Please refer to the following table for common IEEE 802.1Q VLAN terminology.
Table 137 IEEE 802.1Q VLAN Terminology
VLAN PARAMETER
Term
Description
VLAN Type
Permanent VLAN
This is a static VLAN created manually.
Dynamic VLAN
This is a VLAN configured by a GVRP registration/
deregistration process.
Registration Fixed
Fixed registration ports are permanent VLAN members.
Registration
Forbidden
Ports with registration forbidden are forbidden to join the
specified VLAN.
Normal Registration
Ports dynamically join a VLAN using GVRP.
Tagged
Ports belonging to the specified VLAN tag all outgoing
frames transmitted.
Untagged
Ports belonging to the specified don't tag all outgoing
frames transmitted.
Port VID
This is the VLAN ID assigned to untagged frames that
this port received.
Acceptable Frame
Type
You may choose to accept both tagged and untagged
incoming frames or just tagged incoming frames on a
port.
Ingress Filtering
If set, the switch discards incoming frames for VLANs
that do not have this port as a member
VLAN Administrative
Control
VLAN Tag Control
VLAN Port
16.4 Tagged Frames Forwarding Example
1 First the MSC1000G checks the VLAN ID (VID) of tagged frames or assigns temporary
VIDs to untagged frames.
2 The MSC1000G then checks the VID in a frame’s tag against the SVLAN table.
3 The MSC1000G notes what the SVLAN table says (that is, the SVLAN tells the
MSC1000G whether or not to forward a frame and if the forwarded frames should have
a tag).
4 Then the MSC1000G applies the port filter to finish the forwarding decision. This means
that frames may be dropped even if the SVLAN says to forward them. Frames might
also be dropped if they are sent to a CPE (customer premises equipment) DSL device
that does not accept tagged frames.
16.5 Untagged Frames Forwarding Example
1 An untagged frame comes in from the LAN.
2 The MSC1000G checks the PVID table and assigns a temporary VID.
MSC1000G User’s Guide
301
Chapter 16 VLAN Screens
3 The MSC1000G ignores the port from which the frame came, because the MSC1000G
does not send a frame to the port from which it came. The MSC1000G also does not
forward frames to “forbidden” ports.
4 If after looking at the SVLAN, the MSC1000G does not have any ports to which it will
send the frame, it won’t check the port filter.
16.6 VLAN Setup Screen
Click VLAN > VLAN in the navigation panel to display the screen shown next. You can
assign the management switch card’s Gigabit Ethernet interfaces to be members of a VLAN
group or prohibit an interface from joining a VLAN group in this screen. This is an IEEE
802.1Q VLAN.
Figure 186 VLAN Setup
The following table describes the labels in this screen.
Table 138 VLAN Setup
302
LABEL
DESCRIPTION
Enable
Select this check box to turn on the VLAN group. You cannot disable a VLAN if any
PVIDs are set to use the VLAN or the VLAN is the CPU (management) VLAN.
Name
Enter a descriptive name for this VLAN group for identification purposes.
VID
Enter the VLAN ID (VLAN Identifier) for this static VLAN entry; the valid range is
between 1 and 4094.
Port
This is the label of a Gigabit Ethernet interface.
MSC1000G User’s Guide
Chapter 16 VLAN Screens
Table 138 VLAN Setup (continued)
LABEL
DESCRIPTION
Registration
Select Normal for the port to dynamically join this VLAN group using GVRP.
Select Fix for the port to be a permanent member of this VLAN group.
Select Forbidden if you want to prohibit the port from joining this VLAN group.
You cannot change a port from the fixed state to another state if the port’s PVID is set
to this VLAN. The VLAN must have at least one port set to the fixed status if the
VLAN is the CPU (management) VLAN.
Tag
Select this check box if you want to tag all frames transmitted though a port with this
VLAN group ID.
Apply
Click Apply to save the changes in this screen to the system’s volatile memory. The
system loses these changes if it is turned off or loses power, so use the Config Save
on the navigation panel and then the Save button to save your changes to the nonvolatile memory when you are done configuring.
New
Click New to start configuring the screen again.
Cancel
Click Cancel to start configuring the screen again.
Show VID From Type a range of VLAN IDs that you want to view and click Apply to display them in
the table below.
Index
This field displays the number of the VLAN entry in this list.
Name
This field displays the descriptive name for this VLAN group.
VID
This field displays the ID number of the VLAN group. Click the number to edit the
VLAN settings.
Enable
This field indicates whether the VLAN settings are enabled (V) or disabled (-).
ENET Ports
This column displays the VLAN tagging settings of the MSC1000G’ Gigabit Ethernet
interfaces.
ENET port 1 and 2 are subtending ports 1 and 2.
ENET port 3 and 4 are uplink ports 1 and 2.
ENET ports 5~8 do not apply (and nothing displays).
T displays if the system is to tag all frames transmitted though the port with this
VLAN group ID.
U displays if the system is not to tag all frames transmitted though the port with this
VLAN group ID.
An X indicates that the port is forbidden (blocked) from joining the static multicast
group.
An - indicates that the port is a normal member and can join the VLAN dynamically.
Page X of X
This identifies which page of information is displayed and the total number of pages
of information.
Previous/Next
Page
Click one of these buttons to show the preceding/following screen if the information
cannot be displayed in one screen.
Modify
Select a VLAN’s Select radio button and click Modify to edit the VLAN.
Delete
Select a VLAN’s Select radio button and click Delete to remove the VLAN.You
cannot delete the CPU (management) VLAN.
16.7 VLAN Port Setting Screen
Click VLAN > Port Setting in the navigation panel to display the screen shown next. You can
select a DSL line card to view the VLAN settings on its ports.
MSC1000G User’s Guide
303
Chapter 16 VLAN Screens
Figure 187 VLAN Port Setting
The following table describes the labels in this screen.
Table 139 VLAN Port Setting
LABEL
DESCRIPTION
ID
This is the slot number of a line card. Click the index number of an active line card to
display which of the line card’s ports belong to which VLANs.
State
This field displays the line card’s current operational status.
active means the line card is operating normally.
init means the MSC1000G is initializing the line card.
disable means a manager has disabled the line card.
inactive means the line card is starting up or is not operating normally. This could be
due to the card starting, a firmware upgrade in progress or a malfunction. See
Section 34.6 on page 598 for what to do if the line card stays stuck in the inactive
state.
Card Type
This field displays the type of a line card.
Up Time
This field displays how long the line card has been running since the last time it was
started.
Firmware
This field displays the current firmware version installed on the line card.
16.8 VLAN Port Setting Slot Screen
Click VLAN > Port Setting and then click the ID of an active DSL line card. Use this screen
to view the VLAN settings on the DSL line card’s ports.
304
MSC1000G User’s Guide
Chapter 16 VLAN Screens
Figure 188 VLAN Port Setting Slot
The following table describes the labels in this screen.
Table 140 VLAN Port Setting Slot
LABEL
DESCRIPTION
Port
This is the label of a DSL port. Click a port’s index number to open a details screen
about that port.
Joined VLAN
These are the VLAN IDs of all the VLANs to which the DSL port belongs.
16.9 VLAN Port Setting Slot Detail Screen
Click VLAN > Port Setting and then click the ID of an active DSL line card. Click the Use
this screen to view the VLAN settings on the DSL line card’s ports.
Figure 189 VLAN Port Setting Slot Detail
The following table describes the labels in this screen.
Table 141 VLAN Port Setting Slot Detail
LABEL
DESCRIPTION
VID
This column lists the VLAN IDs of all the VLANs to which the DSL port belongs.
PVC
This column list the VPI and VCI that the DSL port uses with each VLAN.
MSC1000G User’s Guide
305
Chapter 16 VLAN Screens
306
MSC1000G User’s Guide
P ART III
Commands
Commands (309)
acl Commands (347)
alarm Commands (371)
clear Commands (379)
cluster Commands (381)
config Commands (389)
diagnostic Commands (391)
ip Commands (395)
lcman Commands (401)
multicast Commands (407)
port Commands (419)
profile Commands (467)
show Commands (499)
switch Commands (527)
sys Commands (557)
vlan Commands (581)
Firmware and Configuration File Maintenance (585)
307
308
CHAPTER
17
Commands
This chapter introduces the Command Line Interface (CLI) and lists the available commands.
"
See the web configurator chapters of this User’s Guide for background
information on features configurable by web configurator.
17.1 Commands Introduction
You can use commands to configure the IES-5000.
Telnet to the IES-5000 or connect a computer to the console port on the MSC1000G and use
terminal emulation software configured to VT100 terminal emulation, 9600 bps, No parity, 8
data bits, 1 stop bit, and no flow control.
The default user name is “admin” and the default password is “1234”.
User name: admin
Password: ****
Copyright (c) 1994 - 2006 ZyXEL Communications Corp.
ras>
17.2 Command Conventions
The rules of the commands are listed next.
1 The command keywords are in courier new font.
2 A command can be abbreviated to the smallest unique string that differentiates it from
other commands. For example the sys date show command could be abbreviated to
sy d sh.
3 The optional fields in a command are enclosed in square brackets [], for instance, config
[save] means that the save field is optional.
4 “Command” refers to a command used in the command line interface.
5 The | symbol means “or”.
MSC1000G User’s Guide
309
Chapter 17 Commands
1
Using commands not documented in the user’s guide can damage the unit
and possibly render it unusable.
17.3 Getting Help
The system includes a help facility to provide you with the following information about the
commands:
• List of available commands under a command group.
• Detailed descriptions of the commands.
17.3.1 List of Available Commands
Enter “help” or “?” to display a list of commands you can use.
ras> help
acl
config
lcman
show
alarm
diagnostic
multicast
switch
clear
exit
port
sys
cluster
ip
profile
vlan
ras> switch ?
bandwidth
isolation
qschedule
bcastctrl
mac
queuemap
dot3ad
mstp
garptimer
port
17.3.2 Detailed Command Information
Enter a command followed by “help” or “?” to display detailed sub commands and
parameters.
ras> switch port speed ?
usage: speed <giga-port> <speed>
<giga-port> : sub1|sub2|up1|up2|all if trunking is disabled
tsub|tup|all if trunking is enabled
<speed>
: auto|1000F|100F|100H
310
MSC1000G User’s Guide
Chapter 17 Commands
17.4 Common Command Notation
The following table describes commonly used command parameter notation.
Table 142 Common Command Notation
NOTATION
DESCRIPTION
[…]
The optional fields in a command are enclosed in square brackets [], for instance,
ip ping <ip> [<count>] means that the count field is optional.
|
The | symbol means “or”.
sub1
This represents subtending port 1. On the MSC’s front panel this is SFP slot 1.
sub2
This represents subtending port 2. On the MSC’s front panel this is SFP slot 2.
up1
This represents uplink port 1. On the MSC’s front panel this is Gigabit interface 3 (a
Gigabit Ethernet port/SFP slot pair).
up2
This represents uplink port 2. On the MSC’s front panel this is Gigabit interface 4 (a
Gigabit Ethernet port/SFP slot pair).
<giga-port>
This represents the Gigabit Ethernet uplink port(s) or subtending port(s) or both.
<index>
This is an integer that sets the index number of a table entry. The range starts at 1.
The end of the range varies by command.
<ip>
This represents a valid IP version four address in dotted decimal notation.
192.168.1.1 is an example.
<mac>
This represents a MAC address in "a0:c5:12:34:56:78" format.
</netmask>
This represents the bit number of the subnet mask of an IP address. The range is 0
to 32.
To find the bit number, convert the subnet mask to binary and add all of the 1’s
together. Take “255.255.255.0” for example. 255 converts to eight 1’s in binary.
There are three 255’s, so add three eights together and you get the bit number (24).
<port>
This represents the UDP or TCP port number of a service.
<slot>
This represents the number of an individual chassis slot where a DSL line card is
located.
<slot-port>
This represents the number of an individual chassis slot where a DSL line card is
located and the number of a DSL port(s). You can specify a single port <1>, all ports
<*> or a list of ports <1,3,4>. You can also include a range of ports
<1,5,6~10,11,12>.
<vid>
This represents a VLAN identifier (VLAN ID). The range is [1.. 4094].
<vpi/vci>
The VPI (Virtual Path Indicator) and VCI (Virtual Channel Indicator) of an individual
PVC (Permanent Virtual Circuit). The VPI setting can be 0 to 255. The VCI setting
can be 32 to 65535 if the VPI is 0 or 1 to 65535 if the VPI is not 0.
17.5 Command Privilege Levels
There is a high, medium or low privilege level for each command.
High privilege commands are only available to administrators with high privilege access. High
privilege commands include things like creating administrator accounts, restarting the system
and resetting the factory defaults. Administrators with high privilege access can use all
commands including the lower privilege commands.
Administrators with middle privilege access can use middle or low privilege commands.
Middle privilege commands include things like general feature configuration.
MSC1000G User’s Guide
311
Chapter 17 Commands
Administrators with the low privilege level are restricted to using only low privilege
commands. Low privilege commands are read only and consist of displaying feature settings
or configuration.
17.6 Saving Your Configuration
Use the following command to save your configuration when you are done with a
configuration session.
ras> config save
1
Do not turn off your MSC1000G while saving your configuration.
This command saves all system configurations to nonvolatile memory. You must use this
command to save any configuration changes that you make, otherwise the MSC1000G returns
to its last saved settings when it is restarted. Save your changes after each configuration
session.
Nonvolatile memory refers to the MSC1000G’s storage that remains even if the MSC1000G’s
power is turned off. Configuration changes saved in the volatile (run time) memory are lost
when the MSC1000G is turned off.
17.7 Commands Summary
The following tables list the commands that you can use with the MSC1000G. The P column
on the right indicates the administrator privilege level needed to use the command (H for high,
M for middle or L for low).
17.7.1 acl Commands
These are the Access Control List management commands.
Table 143 acl Commands
COMMAND
DESCRIPTION
P
acl
dhcprelay82
312
clearinfo
<vid>
Removes option 82 information
for the specified VLAN.
M
delete
<vid>
Deletes the option 82 information
entry for the specified VLAN.
M
disable
<vid>
Deactivates option 82 for the
specified VLAN.
M
MSC1000G User’s Guide
Chapter 17 Commands
Table 143 acl Commands (continued)
COMMAND
<vid> <mode>
Enables option 82 information for
the specified VLAN.
<mode> = 1 or 2
1: Enable DHCP relay and
option82.
2: Disable DHCP relay but enable
option82.
M
info
<vid> <string>
Sets information for the option 82
Circuit ID field.
M
relaymode
<vid>
[auto|both]
Sets which DHCP relay mode the
system uses for the specified
VLAN.
auto = send the requests to the
active DHCP server first. If the
active DHCP server does not
respond, the switch sends the
DHCP request to the backup
DHCP server.
both = send the requests to both
the active and backup DHCP
servers.
M
server
active <vid>
<1|2>
Sets the active DHCP server to
which the DHCP requests are
sent first.
<vid> = a VLAN ID to be
served with DHCP relay.
1 = Sets the first DHCP server
as the active server.
2 = Sets the second DHCP server
as the active server.
The default is 1.
M
set <vid>
<serverip1>
[serverip2]
Sets an entry for forwarding
DHCP requests to the DHCP
servers at the specified IP
addresses. <vid> = a VLAN ID
to be served with DHCP relay.
M
delete <vid>
[serverip]
Removes an entry for forwarding
DHCP requests to the DHCP
server at the specified IP address.
M
<vid>
Creates an option 82 entry for the
VLAN.
M
Displays DHCP relay and option
82 settings.
L
enable <vid>
Turns on option 82 sub-option 2.
M
disable <vid>
Turns off option 82 sub-option 2.
M
set <vid> <info>
Adds the specified information for
sub-option 2.
M
show
suboption2
MSC1000G User’s Guide
P
enable
set
dhcpsnoop
DESCRIPTION
DHCP snooping allows the
system to identify and block
packets from devices using
unknown/static IP addresses.
313
Chapter 17 Commands
Table 143 acl Commands (continued)
COMMAND
P
disable
<slot-port>
Deactivates DHCP snooping on
the specified subscriber port(s).
M
enable
<slot-port>
Activates DHCP snooping on the
specified subscriber port(s).
M
flush
<slot-port>
Clears the DHCP snooping table
on the specified port(s).
M
pool
delete <slotport> <ip>
Removes the static IP address
from the DHCP snooping table.
M
set <slot-port>
<ip>
Adds a static IP address to the
DHCP snooping table. You can
add up to 3 static IP addresses
per port.
M
<slot>|<slotport>
Displays the DHCP snooping
table on the specified port.
L
show
IEEE 802.1x authentication.
dot1x
disable
Turns off IEEE 802.1x.
M
enable
Turns on IEEE 802.1x.
M
control <slotport>
auto|auth|unauth
Sets the IEEE 802.1x port
authentication option for specific
subscriber ports.
auto = authentication required
auth = forced authentication
unauth = forced no
authentication
M
disable <slotport>
Turns off IEEE 802.1x for specific
subscriber ports.
M
enable <slotport>
Turns on IEEE 802.1x for specific
subscriber ports.
M
period <slotport> <secs>
Sets the IEEE 802.1x reauthentication period (60~65535)
for specific subscriber ports.
M
reauth <slotport> on|off
Sets the IEEE 802.1x reauthentication option for specific
subscriber ports.
M
port
radius
show
314
DESCRIPTION
show <slot>
Displays IEEE 802.1x settings.
L
ip <index> <ip>
Sets the IP address of the
specified external RADIUS server
(1 or 2).
M
port <index>
<port>
Sets the external RADIUS server
port number of the specified
RADIUS server.
M
secret <index>
<secret_key>
Sets the authentication and
encryption key of the specified
RADIUS server.
M
Displays the external RADIUS
server settings.
L
MSC1000G User’s Guide
Chapter 17 Commands
Table 143 acl Commands (continued)
COMMAND
dsbcast
P
enable
<slot-port>
<vid>
Turns on the blocking of
downstream broadcast packets
from going to the specified VLAN
on the specified port.
M
disable
<slot-port>
<vid>
Turns off the blocking of
downstream broadcast packets to
go to the specified VLAN on the
specified port.
M
show
<slot>|<slotport>
Displays the settings for blocking
downstream broadcast packets
for the specified slot or port.
M
MAC count limits the number of
MAC addresses that can connect
to a subscriber port.
maccount
disable
<slot-port>
Turns off MAC count limiting on
the specified subscriber ports.
M
enable
<slot-port>
Turns on MAC count limiting on
the specified subscriber ports.
M
set
<slot-port>
<count>
Sets the MAC count limit number
(1-128) on the specified
subscriber ports.
M
show
<slot>
Displays MAC count limiting
settings.
L
MAC filter allows only traffic from
specified source MAC addresses
on the specified subscriber ports.
M
macfilter
delete
<slot-port>
<mac>
Removes a MAC filter MAC
address entry.
M
disable
<slot-port>
Turns off the MAC filter on the
specified subscriber ports.
M
enable
<slot-port>
Turns on the MAC filter on the
specified subscriber ports.
M
mode
<slot-port>
<accept|deny>
Sets the MAC filter actions.
M
set
<slot-port>
<mac>
Adds a MAC filter MAC address
entry.
M
show
<slot>|<slotport>
Displays MAC filter settings.
L
MAC OUI (Organization Unit
Identifier) filter allows or drops
packets with MAC addresses
from specific vendors.
ouifilter
MSC1000G User’s Guide
DESCRIPTION
delete
<slot-port>
<mac>
Removes the static MAC OUI
filter.
<mac> = first three octets of the
MAC address.
M
disable
<slot-port>
Deactivates MAC OUI filtering on
this port.
M
enable
<slot-port>
Activates MAC OUI filtering on
this port.
M
315
Chapter 17 Commands
Table 143 acl Commands (continued)
COMMAND
mode
<slot-port>
<accept|deny>
set
<slot-port>
<mac>
DESCRIPTION
P
Sets the filter action.
M
Creates a MAC OUI filter.
M
<mac> = first three octets of the
MAC address.
show
<slot>|<slotport>
set
<slot-port>
<type>
Sets the packet type filter for the
specified subscriber ports.
<type> = accept-all, pppoe-only,
or any combination of ip, arp,
dhcp, eapol, pppoe, netbios, igmp
separated by a space.
M
show
<slot>
Displays packet type filter
settings.
L
clearinfo
<vid>
Resets PPPoE line description for
the VLAN.
M
enable
<vid>
Enables PPPoE line information
for the VLAN. The switch adds
the line information to PPPoE
packets for identification and
security.
M
delete
<vid>
Deletes PPPoE line information
settings.
M
disable
<vid>
Deactivate PPPoE line
information insertion.
M
info
<vid>
<description>
Sets PPPoE line information.
Enter a description (up to 24
characters).
M
set
<vid>
Creates a PPPoE agent entry for
the VLAN.
M
Displays PPPoE line information
settings.
L
show
Upstream access control rules
allows you to apply profiles on the
subscriber line PVC.
rule
316
L
Packet type filter allows or drops
specified packet types on the
specified subscriber ports.
pktfilter
pppoeagent
Displays MAC OUI filter settings
for the specified port or slot.
delete
<slot-port-vpi/
vci> <profile>
Removes the ACL profile.
M
set
<slot-port-vpi/
vci> <profile>
Applies the ACL profile. You can
apply up to 8 profiles to a PVC.
M
show
<slot-port-vpi/
vci>
Displays ACL profile settings for a
PVC.
L
MSC1000G User’s Guide
Chapter 17 Commands
17.7.2 alarm Commands
These are the alarm management commands.
Table 144 alarm Commands
COMMAND
DESCRIPTION
alarm
Alarm command general parameters:
<alarm> = alarm category (eqpt, dsl,
enet, sys or all)
<severity> = alarm severity level
(critical, major, minor, info or all)
<condition> = Specify an alarm
condition.
P
clear
Erases historic alarm entries.
M
cutoff
Cancels an alarm. This stops the
sending of the alarm signal current.
M
Edits an alarm report entry.
<fac> = local1~local7
M
edit
<alarm>|all
<fac>
<target>[,<targ
et>]
<target> = snmp|syslog
|all|none ‘none’ disables alarm
reports on this alarm category.
xedit
history
port
Sets the severity level of an alarm(s)
and where the system is to send the
alarm(s).
<cond> = <condition>|<code>|all
<alarm> <cond>
<severity>
<fac>
<target>[,<targ
et>]
<clearable>
M
<target> = snmp|syslog
|all|none ‘none’ disables alarm
reports on this alarm category.
<clearable> = clearable|unclearable
Removes historic alarm entries by
alarm category and alarm condition or
by severity.
M
[<severity>|all]
[<alarm>|all]
[<condition>|all
] [<sdate>|all]
[<edate>|all]
[for|rev]
[detail]
Displays historic alarms by severity,
alarm category and alarm condition.
You can also display detailed alarms.
L
show
<slot>
Displays port alarm severity level
thresholds.
L
set
<all|sub1|sub2|u
p1|up2|mgmt
|slot-port>
<severity>
Sets the severity of alarms to record for
individual ports.
M
clear
<alarm>|all
<condition>|all
clear
<severity>
show
MSC1000G User’s Guide
317
Chapter 17 Commands
Table 144 alarm Commands (continued)
COMMAND
DESCRIPTION
P
show
[<severity>|all
] [<alarm>|all]
[<condition>|al
l]
[<sdate>|all]
[<edate>|all]
[for|rev]
[detail]
Displays current alarms by severity,
alarm category or alarm condition. You
can also display detailed alarms.
L
tablelist
[<alarm>|all]
[<severity>|all
] [<fac>|all]
[<target>[,<tar
get>]]
[<condition>|al
l]
Displays the supported alarm list and
report settings.
<fac> = local1~local7
<target> = snmp|syslog|all
L
17.7.3 clear Commands
These are the commands to reset the counters.
Table 145 clear Commands
COMMAND
DESCRIPTION
P
clear
atm
<slotport>|<slotport-vpi/vci>
Resets ATM counters on the specified
port or PVC.
M
dhcp
counter
port>
Resets DHCP counters.
M
enet
<gigaport>|<slot>
Resets counters on the Ethernet port.
M
igmp
info
Resets IGMP counters and the number
of learned IGMP groups.
M
Resets the counter of IGMP packets
received and the number of learned
groups on a port.
M
<slot-
port info
318
<slotport>
ip
inband|outband|b
oth
Resets management counters.
M
lineperf
<slot-port>
Resets subscriber line performance
counters.
M
packet
<slotport>|<slotport-vpi/vci>
Resets the packet transmission counters
on a subscriber port or PVC.
M
paepvc
counter
Resets the PAE PVC counters.
M
performance
<slot-port>
curr|15min|1day
Resets subscriber line performance
counters.
M
<slotport>|<s
lotportvpi/vci>
MSC1000G User’s Guide
Chapter 17 Commands
17.7.4 cluster Commands
These are the commands to configure cluster management.
Table 146 cluster Commands
COMMAND
DESCRIPTION
P
Disable clustering, default is disabled
M
manager <name>
Enable device as cluster manager
M
member
<password>
Enable device as cluster member
M
login
<id>
Login into a client
M
member
candidate
show
List all available candidates
M
flush
Flush current candidates
M
delete
<id>
Removes a member from a cluster.
M
set
<id>
<mac>
<passwor
d>
Adds a member to the cluster.
M
Displays cluster member settings.
L
Displays the cluster member status.
L
Sets the cluster VLAN ID.
M
cluster
disable
enable
show
show
vlan
<vid>
17.7.5 config Commands
These are the configuration file management commands.
Table 147 config Commands
COMMAND
DESCRIPTION
P
default
Resets factory default configuration.
H
save
Saves current configuration to nonvolatile memory.
M
Displays the current configuration.
L
config
show
MSC1000G User’s Guide
sys|ip|switch|po
rt|profile|acl|v
lan|multicast|al
l [nopause]
319
Chapter 17 Commands
17.7.6 diagnostic Commands
These commands allow you to execute a specified diagnostic or test function to an interface
port or a subscriber port.
Table 148 diagnostic Commands
COMMAND
DESCRIPTION
P
diagnostic
A Loop Diagnostic Mode test provides
details about the condition of an ADSL
line. This feature is applicable for ALC
line cards only.
ldm
M
show
<slot-port>
Displays the most recent loop diagnostic
result|hlin|hlog|q mode test results for the specified
subscriber port.
ln|snr
test
<slot-port>
Sets the specified subscriber port to loop M
diagnostic mode and displays the results.
loopback
f5
<slot-port-vpi/
vci>
Performs an OAMF5 loopback test on the
specified subscriber port or PVC.
M
selt
test
<slot-port>
This feature is applicable for ALC line
cards only.
Single End Loop Test (SELT) checks the
distance to the subscriber’s location.
M
Note: The port must have an open
loop. There cannot be a
DSL device, phone, fax
machine or other device
connected to the
subscriber’s end of the
telephone line.
Starts SELT on the port.
show
<slot-port>
Displays the SELT result (such as line
type and loop length).
M
17.7.7 ip Commands
The ip commands configure management interface IP settings.
Table 149 ip Commands
COMMAND
DESCRIPTION
P
flush
Clears the device’s IP Address
Resolution Protocol table.
M
show
Displays the device’s IP Address
Resolution Protocol table.
L
gateway
<ip>
Sets the default gateway IP address.
M
ping
<ip>
[<count>]
Pings a host (default 3 times)
<count> = number of pings.
L
ip
arp
320
MSC1000G User’s Guide
Chapter 17 Commands
Table 149 ip Commands (continued)
COMMAND
route
DESCRIPTION
P
delete
<dst-ip>[/
<netmask>]
<gateway>
Removes a routing table entry.
M
set
<dst-ip>[/
<netmask>]
<gateway-ip>
[<metric>]
[<name>]
Adds or modifies a route entry.
<gateway-ip> = a gateway IP
address of ‘0.0.0.0/0’ means a default
gateway.
M
Displays the routing table.
L
Displays the IP addresses of the inband and out-of-band management
interfaces and the default gateway, as
well as the in-band management VLAN
ID.
L
show
show
set
inband|outb
and <ip>[/
<netmask>]
[<inbandvid>]
Sets the management IP address,
subnet mask and in-band management
VLAN ID.
<ip> = ‘0.0.0.0’ disables a
management interface.
M
tracert
<ip>
Sends a traceroute packet to the IP
address (in the field to the left) and uses
the response to determine the path a
packet takes to that IP address.
L
17.7.8 lcman Commands
These are the line card management commands.
Table 150 lcman Commands
COMMAND
DESCRIPTION
P
lcman
disable
<slot>
Turns off the specified line card.
H
enable
<slot>
Turns on the specified line card.
H
reset
<slot>
Performs a hardware reset on the specified line card. H
show
[<slot>]
Displays information about the installed cards.
L
17.7.9 multicast Commands
The multicast commands allow you to perform static and dynamic multicast group
management.
Table 151 multicast Commands
COMMAND
DESCRIPTION
P
Sets the default bandwidth (between
1 and 100 000 kbps) allowed for
multicast channel(s) for which you
have not set the bandwidth settings.
M
multicast
bandwidth
MSC1000G User’s Guide
default
<bandwidth>
321
Chapter 17 Commands
Table 151 multicast Commands (continued)
COMMAND
<index>
Removes the specified multicast
bandwidth configuration.
M
port
disable <slotport>
Deactivates multicast bandwidth
setting on a port.
M
enable <slotport>
Activates multicast bandwidth setting
on a port.
M
set <slot-port>
<bandwidth>
Sets the maximum multicast
bandwidth allowed on a port.
M
show
<slot>|<slotport>
Displays multicast bandwidth settings
on the specified line card or port.
L
<index> <startmcast-ip> <endmcast-ip>
<bandwidth>
Sets bandwidth allowed for the
specified multicast channel(s).
M
show
Displays multicast bandwidth settings
on the device.
L
disable
Turns off IGMP proxy or snooping.
M
enable
proxy|snooping
[v2|v3]
Turns on IGMP proxy or snooping
using the specified version.
M
qryvid
delete
Removes an IGMP query VLAN ID.
M
set <vid>
Adds an IGMP query VLAN ID.
M
show
Displays the IGMP query VLAN IDs.
L
Displays the IGMP mode (proxy,
snooping or disabled) and version (v2
or v3).
M
show
igmpcount
igmpfilter
mvlan
322
P
delete
set
igmp
DESCRIPTION
disable
<slot-port>
Turns off the IGMP count limit for a
DSL port(s).
M
enable
<slot-port>
Turns on the IGMP count limit for a
DSL port(s).
M
set
<slot-port>
<count>
Sets the IGMP count limit for a DSL
port(s).
M
show
<slot>
Displays the IGMP count limit setting
status for the specified slot.
L
set
<slot-port>
<igmpfilter>
Sets a DSL port(s) to use an IGMP
filter profile.
M
show
<slot>
Displays multicast group
configuration and dynamic group
member status.
L
delete
<vid>
Removes a multicast VLAN.
M
disable
<vid>
Deactivates a multicast VLAN.
M
enable
<vid>
Activates a multicast VLAN.
M
group
delete <vid>
<index>
Removes a multicast VLAN group.
M
MSC1000G User’s Guide
Chapter 17 Commands
Table 151 multicast Commands (continued)
COMMAND
smcast
DESCRIPTION
P
set <vid>
<index> <startmcast-ip> <endmcast-ip>
Sets a multicast VLAN group.
M
name
<name>
Sets the name of the multicast VLAN
setting.
M
set
<vid> <slotport>
fix|forbid
Sets the port multicast group
membership settings.
M
show
<vid>
Displays multicast VLAN settings.
L
delete
<vid> <groupip>
Removes a static multicast group
entry.
M
set
<vid> <groupip>
all|sub<#>|up<#
>|tsub|tup|<slo
t-port>
fix|forbid|norm
al
Configures a static multicast group
entry.
M
Displays the static multicast group
configuration.
L
show
17.7.10 port Commands
The port commands allow you to configure the subscriber DSL ports.
Table 152 port Commands
COMMAND
DESCRIPTION
P
port
ADSL port specific commands
adsl
alarmprof
<slot-port>
<alarmprofile>
Applies an ADSL alarm profile to the
subscriber port.
M
annexl
disable <slotport>
Turns off the Annex L reach extended
feature.
M
enable <slot-port>
[narrow]
Turns on the Annex L reach extended
feature. If the ‘narrow’ is not entered then
Annex L mode will be enabled as ‘wide’
PSD mode.
M
disable <slotport>
Turns off the Annex M double upstream
feature.
M
enable <slot-port>
Turns on the Annex M double upstream
feature (upstream tones from 6 to 63).
M
disable <slotport>
Turns off the Annex I all digital mode
feature.
M
enable <slot-port>
Turns on the Annex I all digital mode
feature.
M
annexm
annexi
MSC1000G User’s Guide
323
Chapter 17 Commands
Table 152 port Commands (continued)
COMMAND
324
DESCRIPTION
P
dscarrier0
<slot-port> <m1>
<m2> <m3> <m4> <m5>
<m6> <m7>
Disables downstream carrier tones from 33
to 255.
<m1>~<m7> = carrier tones, 0~ffffffff,
'1' disables the corresponding tone.
M
dscarrier1
<slot-port> <m1>
<m2> <m3> <m4> <m5>
<m6> <m7>
Disables downstream carrier tones from
256 to 511.
<m1>~<m7> = carrier tones, 0~ffffffff,
'1' disables the corresponding tone.
M
inpmin
<slot-port>
<us_inp> <ds_inp>
Sets the upstream (us) and downstream
(ds) Impulse Noise Protection minimum
setting (0~6).
M
optionmask
<slot-port>
<option_mask>
Sets the following attributes.
0x0001= disable Trellis
0x0002 = disable Reed-Solomon
0x0004 = disable upstream bitswap
0x0008 = disable downstream bitswap
0x0010 = disable 1-bit constellation
0x0020 = disable transmit windowing
(ADSL2+ only)
0x0040 = disable s=0.5 support (G.dmt
only)
0x0080 = disable G.lite rate limit (G.lite
only)
M
pmm
disable <slotport>
Turns off power management mode.
M
enable <slot-port>
[L2|L3]
Turns on power management mode.
L2 = power management mode L2
L3 = power management mode L2 and L3
M
param <slot-port>
[l0time <l0time>]
[l2time <l2time>]
[l2pcb <l2atpr>
<l2atprt>] [l2rate
<l2minrate>
<l2maxrate>
<l2threshold>]
Sets the L0 (full power) and L2 (low power)
power mode transition settings.
<l0time> = Time (10 ~ 65535 seconds)
to stay in L0 mode.
<l2time> = Time (10 ~ 65535 seconds)
to wait before performing another power
trims in L2 mode.
<l2atpr> = Maximum aggregated power
reduction (APTR) per trim in dB (0 ~
l2atprt).
<l2atprt> = Maximum total aggregate
power reduction in dB (0-15).
<l2minrate> = Minimum rate in L2 (32
~ 4096).
<l2maxrate> = Maximum rate in L2
(minimum L2 rate ~ maximum upstream
rate in kbps).
<l2threshold> = Line rate threshold to
stay in L2 mode. When the rate is not
within the threshold, the port switches to L0
mode immediately.
M
MSC1000G User’s Guide
Chapter 17 Commands
Table 152 port Commands (continued)
COMMAND
DESCRIPTION
P
power
<slot-port>
fix|power|rate
<max_us_tx>
<max_ds_tx>
<max_rx>
Specifies the maximum allowed transmit
power and maximum aggregate received
power.
fix|power|rate = PSD and power
adaptivity
fix = fixed mode
power = priority to power
rate = priority to rate
<max_us_tx> = maximum upstream
transmit power, -130~200 in 0.1 dBm.
<max_ds_tx> = maximum downstream
transmit power, -50~200 in 0.1 dBm.
<max_rx> = maximum aggregate receive
power at atu-c, -255~255 in 0.1 dBm.
M
psd
maximum [<slotSets/displays maximum upstream/
port> <us-psd> <ds- downstream nominal PSD values. This is
for testing purposes.
psd>]
<us-psd> = Upstream PSD (-400 ~ 40 in
0.1dBm/Hz).
<ds-psd> = Downstream PSD (-400 ~ 40 in
0.1dBm/Hz).
M
set
<slot-port>
<profile> <mode>
Sets ADSL port(s) to use a profile created
by the profile adsl set command.
<mode> = for Annex A, gdmt, t1413, glite,
auto, adsl2, adsl2+; for Annex B, gdmt,
etsi, auto, adsl2, adsl2+
M
uscarrier
<slot-port> <m0>
<m1>
Disables upstream carrier tones from 0 to
63.
<m0>, <m1> = carrier tones, 0~ffffffff,
'1' disables the corresponding tone.
M
copy
<source>
<destination>
Copies port settings from a source port to
destination ports on the same type of line
card.
M
disabl
e
<slot-port>
Turns off a subscriber port.
M
enable
<slot-port>
Turns on a subscriber port.
M
ipbpvc
arpproxy
flush all
|edgerouter [<ip>
<vid>] |interface
[<ip/mask> <vid>]
Manually flush the learned MAC addresses
from the ARP table.
M
age set <sec>
Sets the valid time interval for learned MAC
addresses in the ARP table. 10..10000
seconds
M
show
Displays the number of seconds a learned
MAC address remains valid in the ARP
table.
M
delete
<slot-port-vpi/
vci>
Remove the specified IP aware Bridge
PVC.
M
domain
delete <domainname>
Removes the specified domain. First delete
all VLANs belonging to this domain.
M
MSC1000G User’s Guide
325
Chapter 17 Commands
Table 152 port Commands (continued)
COMMAND
DESCRIPTION
P
Disable DHCP VLAN in a domain
M
dhcpvlan enable
Enable DHCP VLAN in a domain
<domain name> <vid>
M
dhcpvlan disable
<domain name>
set <domain name>
Create domain, maximum 8 domains in the
system.
M
show[<domain
name>]
Display domain setting
L
vlan <domain name>
<vid>
<registration>
Set vlan to join or leave specified domain,
maximum 8 VLANs in one domain.
M
delete <ip> <vid>
Delete specified edge router setting
M
set <ip>/<mask>
<vid>
Sets the edge router
M
show [<vid>]
Displays the edge router setting.
L
delete <ip>/<mask>
<vid>
Delete an IP interface.
M
set <ip>/<mask>
<vid> [<slot-portvpi/vci>]
Sets the interface.
M
show all|<ip/
mask>|<vid>|<ip/
mask> <vid>
Displays the interface setting by optional
<ip>/<mask> and vlan id parameter
L
delete <domainname> <ip/mask>
<nexthop>
Deletes route entry from specified domain
M
set <domain-name>
<ip/mask>
<nexthop> <metric>
[<priority>]
Sets a new route to specified edge router
for a given domain. Maximum 16 routes in
a domain.
M
show [<domain name>
| <ip/mask> |
<domain> <ip/
mask>]
Displays current routing table for specific
domain.
L
set
<slot-port-vpi/
vci> <profile>
<vid> <priority>
<type>
Sets IP aware Bridge PVC.
M
show
<slot>|<slotport>|<slot-portvpi/vci>
Displays IP aware Bridge PVC settings.
L
vlan
<slot-port-vpi/
vci> <vid>
<registration>
<tag>
Sets VLAN attributes of a PVC.
M
Sets a name for a subscriber port.
M
edgerouter
interface
route
name
326
<slot-port>
<name>
MSC1000G User’s Guide
Chapter 17 Commands
Table 152 port Commands (continued)
COMMAND
DESCRIPTION
P
Commands for configuring and displaying
PPPoA-to-PPPoE (PAE) PVC settings.
paepvc
delete
<slot-port-vpi/
vci>
Removes a PAE PVC.
M
set
<slot-port-vpi/
vci> <profile>
<mux> <pvid>
<priority> [acname
<acname>]
[srvcname
<srvcname>]
[hellotime
<hellotime>]
Configures a PVC for PAE translation.
<mux> = Encapsulation type (llc or
vcmux).
<acname> = Host name of the access
concentrator.
<srvcname> = Descriptive name for the
service that uses this PVC.
<hellotime> = Timeout (0-600 seconds)
for PPPoE session.
M
Note: Make sure the VID is not
already used for MVLAN or
TLS PVC.
show
<slot>|<slotport>|<slot-portvpi/vci>
Displays the PAE PVC settings for the
specified port and/or slot.
L
Priority PVC channel commands.
ppvc
delete
<slot-port-vpi/
vci>
Removes a priority-based PVC.
M
member
delete <slot-portvpi/vci> <vpi/vci>
Removes a PVC channel from a PVC
group.
M
set <slot-portvpi/vci> <vpi/vci>
<atmprofile>
<level>
Adds a priority-PVC into the group.
M
set
<slot-port-vpi/
vci> <mux> <pvid>
<priority>
Creates a priority-based PVC.
<mux> = encapsulation: llc, vcmux
<pvid> = default VLAN ID, 1~4094
<priority> = default priority, 0~7
M
show
<slot>|<slotport>|<slot-portvpi/vci> [detail]
Displays runtime configured virtual
channels.
L
vlan
<slot-port-vpi/
vci> <vid>
<registration>
<tag>
Adds a PVC channel to a VLAN.
M
<registration> = join or leave
<tag> = TX tagging, tag or untag
Permanent Virtual Circuit channel specific
commands.
pvc
delete
<slot-port-vpi/
vci>
Removes a PVC setting.
M
mvlan
disable <slotport-vpi/vci>
Deactivates multicast VLAN on the PVC.
M
enable <slot-portvpi/vci>
Activates the multicast VLAN in the PVC.
M
MSC1000G User’s Guide
327
Chapter 17 Commands
Table 152 port Commands (continued)
COMMAND
DESCRIPTION
P
set
<slot-port-vpi/
vci> <profile>
<mux> <pvid>
<priority>
Creates or modifies a PVC setting.
<profile> = ATM profile
<mux> = encapsulation: llc, vcmux
<pvid> = default VLAN ID, 1~4094
<priority> = default priority, 0~7
M
show
<slot>|<slotport>|<slot-portvpi/vci> [detail]
Displays runtime configured virtual
channels.
L
usratelimit
enable <pvc>
Activates upstream rate limiting on the
PVC.
M
disable <pvc>
Deactivates upstream rate limiting on the
PVC.
M
set <pvc> <rate>
Sets the maximum upstream rate (in Kbps)
the PVC is allowed to use.
M
show <pvc>
Displays upstream rate limiting settings.
L
<slot-port-vpi/
vci> <vid>
<registration>
<tag>
Adds a PVC channel to a VLAN.
M
<registration> = join or leave
<tag> = TX tagging, tag or untag
vlan
SHDSL specific commands.
shdsl
alarmprof
<slot-port>
span|stuc|stur|*
<alarmprofile>
Sets SHDSL ports or end point(s) to use an
alarm profile.
span = set alarm profile for the whole
span
stuc = set alarm profile at stuc end point
stur = set alarm profile at stur end point
* = set alarm profile at both stuc and stur
M
pbo
<slot-port>
normal_epl|forced_
epl|forced_no_epl
<value>
Sets power backoff for SHDSL port(s).
normal_epl = Power backoff with EPL
(Estimated Power Loss).
forced_epl = Forced power backoff
with EPL.
forced_no_epl = Forced power
backoff without EPL.
<value> = 0~31 in dB
M
pmms
<slot-port> <mode>
Sets the negotiated noise margin mode of
the SHDSL port(s).
<mode> = negotiated noise margin mode,
M
Sets SHDSL port(s) to use a profile created
by the profile shdsl set
command.
M
normal|forced
set
show
<slot>|<slotport>
Displays port settings.
L
tel
<slot-port>
<telephoneno>
Records a DSL port(s) subscriber’s
telephone number.
M
tlspvc
328
<slot-port>
<profile_name>
Commands to configure Transparent LAN
Service (TLS) or VLAN stacking on the
PVCs.
MSC1000G User’s Guide
Chapter 17 Commands
Table 152 port Commands (continued)
COMMAND
vdsl
DESCRIPTION
P
delete
<slot-port-vpi/
vci>
Removes a TLS PVC.
M
set
<slot-port-vpi/
vci> <profile>
llc|vcmux <vid>
<priority>
Sets/changes TLS PVC settings.
M
show
<slot>|<slotport>|<slot-portvpi/vci>
Displays the settings for a TLS PVC.
L
alarmprof
<slot-port>
<profile>
Sets the VDSL port(s) to use the specified
alarm profile.
M
frametype
<slot-port>
<all|tag>
Sets the acceptable frame type on the
VDSL port(s).
M
frequencyplan
<slot-port>
<997|998>
Sets the band plan the VDSL port(s) uses.
M
priority
<slot-port>
<priority>
Sets the VDSL port(s) VLAN priority (0 - 7).
M
pvid
<slot-port> <vid>
Sets the port VID on the VDSL port(s).
M
rfiband
<slot-port>
<disable|ansi|etsi
|custom>
Selects an RFI band or disables this
feature.
M
Uses these commands to set custom RFI
settings. The settings are applied to all
VDSL ports.
rficustom
set
disable <index>
Displays the settings of a custom RFI entry.
M
enable <index>
Activates the specified custom RFI entry.
M
set <index>
<start_freq>
<stop_freq>
Sets a custom RFI entry.
index = 1 - 8
start_freq = start of the frequency
range in kHz. start_freq cannot be
bigger than stop_freq.
stop_freq= end of the frequency range
in kHz.
M
show
Displays custom RFI settings.
L
<slot-port>
<profile>
<vdsl_profile>
Specifies the profiles on the VDSL port(s).
profile = custom line profile.
vdsl_profile =
M
disable <slotport>
Disables Transparent LAN Service (TLS).
The system does not insert additional
VLAN tags to packets.
M
enable <slot-port>
Disables Transparent LAN Service (TLS) to
insert additional VLAN tags to packets.
M
set <slot-port>
<svid> <spriority>
Sets/changes TLS settings on the VDSL
port(s).
M
8a|8b|8c|8d|12a|
tls
MSC1000G User’s Guide
329
Chapter 17 Commands
Table 152 port Commands (continued)
COMMAND
DESCRIPTION
P
upbo
<slot-port>
<on|off>
Enables/disable Upstream Power Back Off
(UPBO).
M
vlan
<slot-port> <vid>
<registration>
<tag>
Sets the VLAN setting on the VDSL port(s).
M
17.7.11 profile Commands
Use the profile commands to configure DSL, alarm and traffic profiles.
Table 153 profile Commands
COMMAND
DESCRIPTION
P
ADSL profiles allow efficient
configuration of ADSL port settings.
M
profile
adsl
delete
<profile>
Removes an unreferenced ADSL port
settings profile.
M
map
<profile>
Displays which ADSL ports reference
this profile.
L
set
<profile> <usmax-rate> <dsmax-rate>
[fast|delay <usdelay> <dsdelay>][minrate
<us-min-rate>
<ds-min-rate>]
[usmgn <us-maxmgn> <us-min-mgn>
<us-tgtmgn>][dsmgn <dsmax-mgn> <ds-minmgn> <ds-tgtmgn>] [usra
fixed|startup|ru
ntime <us-us-mgn>
<us-dsmgn>][dsra
fixed|startup|ru
ntime <ds-us-mgn>
<ds-ds-mgn>]
Creates a profile of ADSL port settings. M
“us” is UpStream, “ds” is DownStream
us maximum rate = 64~4096 in Kbps
ds maximum rate = 64~32000 in Kbps
us/ds delay = 1~255 in ms
us minimum rate = 32~4096 in Kbps
ds minimum rat e= 32~32000 in Kbps
max noise margin = 0~310 in 0.1 dB
min. noise margin = 0~310 in 0.1 dB
target noise margin = 0~310 in 0.1 dB
fixed = no rate adaptation
startup = rate adaptation at
initialization
runtime = rate adaptation any time
up shift noise margin = 0~310 in 0.1 dB
us/ds down shift noise margin = 0~310
in 0.1 dB
show
[<profile>]
Lists the ADSL configuration profiles or
a specific profile’s detailed settings.
ADSL alarm profiles allow efficient
configuration of ADSL alarm settings.
alarmadsl
330
L
delete
<profile>
Removes an unreferenced ADSL
alarm profile.
M
map
<profile>
Displays which ADSL ports reference
this alarm profile.
L
MSC1000G User’s Guide
Chapter 17 Commands
Table 153 profile Commands (continued)
COMMAND
P
set
<profile> atuc
[lofs <lofs>]
[loss <loss>]
[lols <lols>]
[lprs <lprs>]
[ess <ess>] [ffr
<ffr>] [sesl
<sesl>] [uasl
<uasl>]
[fru <fru>] [iru
<iru>] [frd
<frd>] [ird
<ird>] [ift
<ift>]
or
<profile> atur
[lofs <lofs>]
[loss <loss>]
[lprs <lprs>]
[ess <ess>] [sesl
<sesl>] [uasl
<uasl>] [fru
<fru>][iru
<iru>][frd <frd>]
[ird <ird>]
Creates a profile of ADSL alarm
settings.
<profile> = profile name, up to 31
characters
atuc = near end
atur = far end
<lofs> = number of loss of framing
seconds, 0~900
<loss> = number of loss of signal
seconds, 0~900
<lols> = number of loss of link
seconds, 0~900
<lprs> = number of loss of power
seconds, 0~900
<ess> = number of error seconds,
0~900
<ffr> = number of failed fast retrains
seconds, 0~900
<sesl> = number of severely errored
seconds-line, 0~900
<uasl> = number of unavailable
seconds-line, 0~900
<fru> = fast rate up in Kbps,
0~2147483
<iru> = interleave rate up in Kbps,
0~2147483
<frd> = fast rate down in Kbps,
0~2147483
<ird> = interleave rate down in
Kbps, 0~2147483
<ift> = init failure trap enable, 1enable, 0-disable
M
show
[<profile>]
Lists the ADSL alarm profiles or a
specific profile’s settings.
L
SHDSL alarm profiles allow efficient
configuration of SHDSL alarm settings.
alarmshdsl
MSC1000G User’s Guide
DESCRIPTION
delete
<profile>
Removes an unreferenced SHDSL
alarm profile.
M
map
<profile>
Displays which SHDSL ports reference
this alarm profile.
L
331
Chapter 17 Commands
Table 153 profile Commands (continued)
COMMAND
P
set
<profile> [atten
<atten>] [snrmgn
<snrmgn>] [es
<es>] [ses
<ses>][crc <crc>]
[losws <losws>]
[uas <uas>]
Creates a profile of SHDSL alarm
settings.
<profile> = profile name, up to 31
characters
<atten> = loop attenuation
threshold, 0~127
<snrmgn> = snr margin threshold,
0~15
<es> = number of errored seconds,
0~900
<ses> = severely errored seconds,
0~900
<crc> = the number of CRC
anomalies, >=0
<losws> = number of loss of sync
word seconds, 0~900
<uas> = number of unavailable
seconds, 0~900
M
show
[<profile>]
Lists the SHDSL alarm profiles or a
specific profile’s settings.
L
ADSL alarm profiles allow efficient
configuration of ADSL alarm settings.
alarmadsl
332
DESCRIPTION
delete
<profile>
Removes an unreferenced ADSL
alarm profile.
M
map
<profile>
Displays which ADSL ports reference
this alarm profile.
L
MSC1000G User’s Guide
Chapter 17 Commands
Table 153 profile Commands (continued)
COMMAND
P
set
<profile> atuc
[lofs <lofs>]
[loss <loss>]
[lols <lols>]
[lprs <lprs>]
[ess <ess>] [ffr
<ffr>] [sesl
<sesl>] [uasl
<uasl>]
[fru <fru>] [iru
<iru>] [frd
<frd>] [ird
<ird>] [ift
<ift>]
or
<profile> atur
[lofs <lofs>]
[loss <loss>]
[lprs <lprs>]
[ess <ess>] [sesl
<sesl>] [uasl
<uasl>] [fru
<fru>][iru
<iru>][frd <frd>]
[ird <ird>]
Creates a profile of ADSL alarm
settings.
<profile> = profile name, up to 31
characters
atuc = near end
atur = far end
<lofs> = number of loss of framing
seconds, 0~900
<loss> = number of loss of signal
seconds, 0~900
<lols> = number of loss of link
seconds, 0~900
<lprs> = number of loss of power
seconds, 0~900
<ess> = number of error seconds,
0~900
<ffr> = number of failed fast retrains
seconds, 0~900
<sesl> = number of severely errored
seconds-line, 0~900
<uasl> = number of unavailable
seconds-line, 0~900
<fru> = fast rate up in Kbps,
0~2147483
<iru> = interleave rate up in Kbps,
0~2147483
<frd> = fast rate down in Kbps,
0~2147483
<ird> = interleave rate down in
Kbps, 0~2147483
<ift> = init failure trap enable, 1enable, 0-disable
M
show
[<profile>]
Lists the ADSL alarm profiles or a
specific profile’s settings.
L
VDSL alarm profiles allow efficient
configuration of VDSL alarm settings.
alarmvdsl
MSC1000G User’s Guide
DESCRIPTION
delete
<profile>
Removes an unreferenced VDSL
alarm profile.
M
map
<profile>
Displays which VDSL ports reference
this alarm profile.
L
333
Chapter 17 Commands
Table 153 profile Commands (continued)
COMMAND
P
set
<profile> [lofs
<lofs>] [loss
<loss>] [lols
<lols>] [lprs
<lprs>]
[ess <ess>]
[sesl <sesl>]
[uasl <uasl>]
[ift <ift>]
Creates a profile of VDSL alarm
settings.
<profile> = profile name, up to 31
characters
<lofs> = number of loss of framing
seconds, 0~900
<loss> = number of loss of signal
seconds, 0~900
<lols> = number of loss of link
seconds, 0~900
<lprs> = number of loss of power
seconds, 0~900
<ess> = number of error seconds,
0~900
<sesl> = number of severely errored
seconds-line, 0~900
<uasl> = number of unavailable
seconds-line, 0~900
<ift> = init failure trap enable, 1enable, 0-disable
M
show
[<profile>]
Lists the VDSL alarm profiles or a
specific profile’s settings.
L
ATM traffic profiles allow efficient
configuration of ATM traffic settings.
atm
delete
<profile>
Removes an unreferenced ATM traffic
profile.
M
map
<profile>
Displays which ports reference this
ATM profile.
L
set
<atmprofile>
cbr|ubr <pcr>
<cdvt>
or
<atmprofile> rtvbr|nrt-vbr <pcr>
<cdvt> <scr> <bt>
Creates a profile of ATM traffic
settings.
cbr = constant cell rate
ubr = unspecified cell rate
rt-vbr = realtime variable bit rate
nrt-vbr = non-realtime variable bit
rate
<pcr> = peak cell rate, 150~300000
<scr> = sustainable cell rate,
150~300000
<cdvt> = cell delay variation
tolerance, 0~255
<bt> = burst tolerance, 0~255
Note: <pcr>, <cdvt>, <scr> and <bt>
can be inputted '*' as default value
Note: use “*” to set <pcr>, <cdvt>,
<scr> or <bt> to the default value.
M
show
[<profile>]
Lists the ATM traffic profiles or a
specific profile’s settings.
L
IGMP filter profiles allow you to control
access to IGMP multicast groups.
igmpfilter
delete
334
DESCRIPTION
<igmpfilter>
Removes an unreferenced IGMP filter
profile.
M
MSC1000G User’s Guide
Chapter 17 Commands
Table 153 profile Commands (continued)
COMMAND
profsvr
P
L
map
<igmpfilter>
Displays which ports reference this
IGMP filter profile.
set
<igmpfilter>
<index> <startip>
<endip>
M
Creates an IGMP filter profile of ATM
traffic settings.
<igmpfilter> = profile name
<index> = index of address, 1~16
<startip> = start of address range
<endip> = end of address range
show
[igmpprofile]
Lists the IGMP filter profiles or a
specific profile’s settings.
L
Displays the current profile server
setting.
L
show
mode
client|server
Sets the profile server operation mode. M
clientlist
set <ip> <type>
Adds an entry to the profile server
client list.
M
delete <ip>
Removes an entry from the profile
server client list.
M
show
Displays the profile server client list.
L
<ip>
Sets the target profile server IP
address for synchronization.
M
Synchronize with the profile server.
M
serverset
sync
SHDSL profiles allow efficient
configuration of SHDSL port settings.
shdsl
MSC1000G User’s Guide
DESCRIPTION
delete
<profile>
Removes an unreferenced SHDSL
port settings profile.
M
map
<profile>
Displays which SHDSL ports reference
this profile.
L
set
<profile> <minrate> <max-rate>
[annexa|annexb
2wire|4wire|mpai
r4
[lp_off |
lp_on_cur
[curr_margin] |
lp_on_wc
[worst_margin]]]
Creates a profile of SHDSL port
settings.
<min-rate> = minimum rate,
192~4096 in Kbps
<max-rate> = maximum rate,
192~4096 in Kbps
annexa|annexb = regional setting,
'annexb' by default
<wire-pair> = the number of wire
pairs to be used, '2wire' by default
lp_off = disable line probe, default line
probe mode
lp_on_cur = enable line probe with
current target snr margin
lp_on_wc = enable line probe with
worst case target snr margin
<curr-margin> = current condition
target snr margin, -10~21 in dB
<worst-margin> = worse case
noise margin, -10~21 in dB
M
show
[<profile>]
Lists the SHDSL port setting profiles or
a specific profile’s settings.
L
335
Chapter 17 Commands
Table 153 profile Commands (continued)
COMMAND
DESCRIPTION
P
VDSL profiles allow efficient
configuration of VDSL port settings.
vdsl
delete
<profile>
Removes a VDSL port settings profile.
M
map
<profile>
Displays which VDSL ports reference
this profile.
L
set
<profile> <usmax-rate> <dsmax-rate>
[fast|delay <usdelay> <dsdelay>]
[minrate <us-minrate> <ds-minrate>]
[usmgn <us-maxmgn> <us-min-mgn>
<us-tgt-mgn>]
[dsmgn <ds-maxmgn> <ds-min-mgn>
<ds-tgt-mgn>]
Creates a VDSL line profile. “us” is
UpStream, “ds” is DownStream
us maximum rate = 64~45440 in Kbps
ds maximum rate = 64~100032 in
Kbps
us/ds delay = 1~255 in ms
us minimum rate = 64~4096 in Kbps
ds minimum rat e= 64~32000 in Kbps
max noise margin = 0~310 in 0.1 dB
min. noise margin = 0~310 in 0.1 dB
target noise margin = 0~310 in 0.1 dB
M
show
[<profile>]
Lists the VDSL port setting profiles or a
specific profile’s settings.
L
17.7.12 show Commands
The show commands display runtime status information.
Table 154 show Commands
COMMAND
DESCRIPTION
P
Displays an ADSL port’s line bit
allocation.
L
show
adsl
linedata
<slot-port>
linegain
<slot-port>
L
linehlog
Displays ADSL line channel
characteristics. The format provides
magnitude values in a logarithmic
scale.
L
lineqln
Displays the Quiet Line Noise for a
DMT tone is the rms (root mean
square) level of the noise present on
the line, when no ADSL signals are
present. It is measured in dBm/Hz.
The QLN can be used in analyzing
crosstalk.
L
L
linetssi
arp
336
Displays the ARP table.
L
MSC1000G User’s Guide
Chapter 17 Commands
Table 154 show Commands (continued)
COMMAND
DESCRIPTION
P
Displays ATM traffic counters.
L
atm
<slotport>|<slotport-vpi/vci>
[reset]
dhcp
counter
<slot>|<slo
t-port>
Displays port DHCP statistics.
L
snoop
<slot-port>
Displays port DHCP snooping
information.
L
Displays the (IEEE 802.3ad) link
aggregation settings.
L
dot3ad
enet
<gigaport>|<slot>
Displays Ethernet packet counters.
L
igmp
info
Displays IGMP related statistics.
L
group
[<vid>
<group_ip>]
Displays the learned IGMP group
settings and status.
L
port
info <slotport>
Displays IGMP related information on
the port.
L
group
<slot-port>
Displays joint IGMP group information
on the port.
L
Displays management IP settings.
L
ip
ipbpvc
arpproxy
all|domain
[<domain>]|
edgerouter
[<ip>
<vid>]|inte
rface [<ip/
mask>
<vid>]
Display whole ARP table.
Display learnt ARP table for a domain.
Display learnt ARP table for all/an
edge router.
Display learnt ARP table for all/an
interface.
Age time information is included.
L
interface
[<ip/
mask>|<vid|
<ip/mask>
<vid>]
Display runtime interfaces.
L
route
[<domain>]|
[<ip/
mask>]|[<do
main> <ip/
mask>]]
Display runtime routing table.
L
lineinfo
<slot-port>
Displays DSL line information.
L
lineperf
<slot-port>
Displays DSL line performance
statistics.
L
linerate
<slot-port>
Displays DSL line rate values.
L
linestat
<slot-port>
Displays DSL link status.
L
mac
[<gigaport>|<mac>|<slo
t>|<slotport>|vid
<vid1>[-<vid2>]]
Displays a port’s IEEE 802.1d MAC
address forwarding table.
L
MSC1000G User’s Guide
337
Chapter 17 Commands
Table 154 show Commands (continued)
COMMAND
DESCRIPTION
P
monitor
<slot>
Displays a card’s hardware monitor
statistics.
L
mstp
<mstid>
[<end_mstid>]
Displays MSTP information for the
Ethernet ports.
L
packet
<slot-port>
Displays a port’s packet counter.
L
paepvc
counter
<slotport>|<slot
-port-vpi/
vci>
Displays PAE PVC counter statistics.
L
session
<slotport>|<slot
-port-vpi/
vci>
Displays PAE PVC session
information.
L
Displays a DSL port’s performance
counters.
L
Displays the CPU utilization and
memory usage status.
L
Displays Gigabit Ethernet interface link
RMON information.
L
Displays information on logged in
users. * denotes your session.
L
Displays current VLANs.
L
performance
<slot-port>
curr|15min|1day
sys
rmon
stats|history
<giga-port>
user
vlan
[<vid>]|[
<start-vid>
<end-vid>]
17.7.13 switch Commands
The switch commands configure switching functions and manage the Ethernet interfaces.
Table 155 switch Commands
COMMAND
DESCRIPTION
P
switch
bandwidth
bcastctrl
338
disable
<giga-port>
Turns off bandwidth control on the
specified port(s).
M
enable
<giga-port>
Turns on bandwidth control on the
specified port(s).
M
set
<giga-port>
<ingress-rate>
<egress-rate>
Sets the incoming or outgoing bandwidth
control for the specified port(s). 0~1000
(Mbps).
M
show
Displays the bandwidth control settings.
L
show
Displays broadcast and multicast storm
control settings.
L
MSC1000G User’s Guide
Chapter 17 Commands
Table 155 switch Commands (continued)
COMMAND
dot3ad
DESCRIPTION
P
threshold <giga-port> <bclimit> <mc-limit>
<uu-limit>
Sets the limitations of broadcast, multicast
and unknown unicast packets, in packets
per second for each trunk port (0~262143,
-1 means no limit).
<bc-limit> = broadcast packet limit
<mc-limit> = multicast packet limit
<uu-limit> = unknown unicast packet
limit
M
aggport
<portlist>
t1|t2|t3|t4|none
Creates a link aggregation trunk groups.
M
disable
[t1|t2|t3|t4]
Turns off link aggregation on the specified
trunk group.
M
enable
[t1|t2|t3|t4]
[lacp]
Turns on link aggregation on the specified
trunk group. lacp turns on LACP
protocol.
M
lacp
priority
<priority>
Sets the LACP system priority (0~65535).
M
show
Displays LACP settings.
L
timeout short|long
Sets the time interval between exchanging
LACP packets.
M
Displays the link aggregation state.
L
show
garptimer
isolation
join
<join-msec>
Sets the GARP timer’s Join Timer in
milliseconds, 100~32766.
M
leave
<leave-msec>
Sets the GARP timer’s Leave Timer in
milliseconds, 201~65534.
M
leaveall
<leaveall-msec>
Sets the GARP timer’s Leave All Timer in
milliseconds, 202~65535.
M
set
<join-msec>
<leave-msec>
<leaveall-msec>
Sets GARP timers.
M
show
Displays the GARP timer settings.
L
disable
Turns off the subscriber isolation feature.
M
enable
Turns on the subscriber isolation feature.
M
delete <vid>
Deletes the specified isolation VLAN.
M
set <vid>
Creates the specified isolation VLAN.
M
Displays the subscriber isolation feature’s
current setting.
L
vlan
show
mac
flush
enet|all
Clears the MAC table on the Ethernet ports
or all ports (Ethernet and subscriber ports).
M
mstp
cfgname
<config name>
Sets a descriptive name for the MSTP
configuration.
M
disable
Deactivates MSTP on the system.
M
enable
Activates MSTP on the system.
M
Sets the maximum time (between 4 and 30
seconds) a switch will wait before changing
states
M
fwdelay
MSC1000G User’s Guide
<fwdelay-sec>
339
Chapter 17 Commands
Table 155 switch Commands (continued)
COMMAND
DESCRIPTION
P
hellotime <hellotime-sec>
Sets the time interval (between 1 and 10
seconds) between BPDU (Bridge Protocol
Data Units) configuration message
generations by the root switch.
M
maxage
<maxage-sec>
Sets the maximum time (between 6 and 40
seconds) a switch can wait without
receiving a BPDU before attempting to
reconfigure.
M
maxhops
<max-hops>
Sets the number of hops (between 1 and
255) in an MSTP region before the BPDU
is discarded and the port information is
aged.
M
priority
<mstid> <priority>
Sets the priority of the switch for the
instance ranges. The lower the number,
the more likely the switch will be chosen as
the root bridge.
Enter 0, 4096, 8192, 12288, 16384, 20480,
24576, 28672, 32768, 36864, 40960,
45056, 49152, 53248, 57344 or 61440 in
this field.
M
revision
<revision level>
Sets the configuration version number (0 65535).
M
Displays MSTP settings.
L
show
port
340
version
rstp|mstp
Sets the spanning tree protocol version the
switch uses.
M
vlanmap
<mstid> <vid>
[<end_vid>]
Sets the VLAN-MSTID mapping.
M
disable
<giga-port>
Turns off data transmission on a port.
M
dscp
disable <gigaport>
Deactivates DSCP-IEEE 802.1p mappings
on this port.
M
enable <giga-port>
Activates DSCP-IEEE 802.1p mappings on
this port.
M
set <giga-port>
<srccp> <mapcp>
<mappri>
Sets DSCP-IEEE 802.1p mappings on this
port.
<srccp>: source code point, 0~63,
example: 1,3~5,10~15
<mapcp>: code point, 0~63
<mappri>: priority, 0~7
M
show [<giga-port>]
Displays DSCP-IEEE 802.1p mappings on
this port.
L
enable
<giga-port>
Turns on data transmission on a port.
M
flowctrl
disable <gigaport>
Turns off flow control on a port.
M
enable <giga-port>
Turns on flow control on a port.
M
frametype <giga-port>
all|tag
Sets the port(s) to accept VLAN tagged
and untagged Ethernet frames or only
tagged.
M
gvrp
Turns on GVRP for a port(s).
M
disable <gigaport>
MSC1000G User’s Guide
Chapter 17 Commands
Table 155 switch Commands (continued)
COMMAND
DESCRIPTION
P
enable <giga-port>
Turns off GVRP for a port(s).
M
mode
<giga-port>
uplink|subtend
Sets a port to operate as uplink or
subtending.
M
mstp
disable <gigaport> <mstid>
Deactivates MSTP on the port in the
spanning tree instance.
M
enable <giga-port>
<mstid>
Activates MSTP on the port in the
spanning tree instance.
M
pathcost <gigaport> <mstid>
<pathcost>
Sets the path cost (between 0 and
200000000). Enter 0 to have the system
automatically set the path cost based on
the link speed.
M
p2plink <gigaport>
auto|enable|disabl
e
Enables point-to-point connection.
M
priority <gigaport> <mstid>
<priority>
Specify the priority (0 - 255) of the Ethernet
port in the MST region. The system
automatically rounds the number to the
nearest multiple of 16.
M
show <mstid>
[<end_mstid>]
Displays MSTP settings.
L
name
<giga-port> <name>
Sets the name of a port.
M
priority
<giga-port>
<priority>
Sets a port’s default ingress user priority
(0~7).
M
pvid
<giga-port> <vid>
Sets the PVID (Port VLAN ID) (1~4094)
assigned to untagged frames or priority
frames (0 VID) received on this port(s).
M
Displays port settings.
L
Sets a port’s speed and duplex mode.
M
Turns off VLAN trunking on a port to have it
only accept frames with registered VIDs.
M
enable <giga-port>
Turns on VLAN trunking on a port to have it
accept frames with any VID.
M
<giga-port>
or
<giga-port>
<wt0> <wt1>
<wt3> <wt4>
<wt6> <wt7>
Sets a port’s queuing method and/or
priority weight.
spq = strict priority queuing algorithm
wrr = weighted round robin queue
algorithm
<wt0>~<wt7> = priority weight, 0~15
M
Displays the queuing settings.
L
Sets a queue’s priority.
M
Displays the queues’ priorities.
L
show
speed
<giga-port>
<speed>
vlantrunk disable <gigaport>
qschedule
set
spq
wrr
<wt2>
<wt5>
show
queuemap
set
show
MSC1000G User’s Guide
<priority> <queue>
341
Chapter 17 Commands
17.7.14 sys Commands
The sys commands are for system management and maintenance.
Table 156 sys Commands
COMMAND
DESCRIPTION
P
set
9600|19200|3
8400|57600|1
15200
Sets the console port speed.
M
show
Displays the console port speed.
L
chsh
[engsh|stdsh
]
Changes to normal or privileged
command shell.
H
client
disable
<index>
Turns off a secured client set.
M
enable
<index>
Turns on a secured client set.
M
set
<index> <start-ip>
<end-ip> [telnet]
[ftp] [web] [icmp]
[ssh] [snmp]
Sets a group of trusted computers from
which you can manage the switch.
M
Displays the secured client sets.
L
Sets the system date.
M
Displays the current system date.
L
sys
baud
show
date
set
<yyyy> <mm> <dd>
show
info
chassis
<chassis>
Sets the system chassis number (1~64).
M
contact
<contact>
Sets contact person information.
M
frame
<frame>
Sets the system frame number.
M
hostname
<hostname>
Sets the system name.
M
location
<location>
Sets the geographic location of the
system.
M
Displays general system and MSC1000G
information.
L
show
monitor
multilogin
set
<slot>
<volt|temp|fan|cup
> <index> <highlimit> <low-limit>
Sets the hardware monitor threshold
settings.
M
show
<slot>
Displays the hardware monitor threshold
settings of a slot.
L
disable
Turns off multiple concurrent logins.
M
enable
Turns on multiple concurrent logins.
M
show
Displays the multiple login setting.
L
Restarts the system.
H
[show]
Displays the reboot schedule.
H
<sec>
Sets the number of seconds
(1~2147483647) before the system
reboots. If there is no time specified, the
system reboots immediately.
H
[cancel]
Aborts the scheduled system rebooting.
H
reboot
342
MSC1000G User’s Guide
Chapter 17 Commands
Table 156 sys Commands (continued)
COMMAND
server
telnet|ssh|ftp|web
|icmp|snmp
Turns on service access to the switch.
M
disable
telnet|ssh|ftp|web
|icmp|snmp
Turns off service access to the switch.
M
port
telnet|ftp|web|snm
p|ssh <port>
Sets a port for a service.
M
Displays service access control settings.
L
getcommunity
<community>
Sets the SNMP GetRequest community.
M
setcommunity
<community>
Sets the SNMP SetRequest community.
M
Displays SNMP settings.
L
show
syslog
trapcommunit
y
<community>
Sets the SNMP Trap community.
M
trapdst
<index>
<destination>
[<port>]
[v1|v2c|v3]
[<name>]
Sets the IP addresses and listening ports
for up to four SNMP trap server IP
addresses and listening ports. Set 0.0.0.0
to not send any SNMP traps.
<name> = username to be included in
trap packets. Only applicable for V3.
M
user
<name>
noauth|auth|priv
md5|sha des|aes
Sets SNMPv3 user name and security
settings.
noauth = disables user authentication
and data encryption.
auth = enables user authentication.
pri = enables user authentication and
data encryption.
md5|sha = authentication method.
des|aes = encryption method.
M
version
v2c|v3|v3v2c
Sets the system to use the specified
SNMP version and access.
v2c = SNMPv2 read/write
v3 = SNMPv3 read/write
v3v2c = SNMPv3 read/write and
SNMPv2 read-only.
M
Turns off syslog logging.
M
disable
Turns on syslog logging.
M
<fac> <ip>
Sets the log facility (local1~local7) to log
the syslog messages to a specific file in
the syslog server. See your syslog
program’s documentation for details. Sets
the syslog server IP address.
M
Displays the syslog settings.
L
<hh> [<mm> [<ss>]]
Sets the system time.
M
Displays the current system time.
L
Clears the time server settings.
M
enable
server
show
time
set
show
timeserver
P
enable
show
snmp
DESCRIPTION
set
MSC1000G User’s Guide
none
343
Chapter 17 Commands
Table 156 sys Commands (continued)
COMMAND
DESCRIPTION
P
Sets the time service protocol and IP
address of a time server.
[sync] = Gets the time and date.
M
show
Displays the time server settings.
L
sync
Gets the time and date from a predefined
time server.
M
<mode>
Select which database the switch uses to
authenticate a user. 1 = local, 2 = radius,
3 = local then radius 4 = TACACS+, 5 =
local then TACACS+.
H
delete
<name>
Removes a user account.
H
disable
<name>
Stops a user from logging in.
H
enable
<name>
Allows a user to log in.
H
Displays information about online users
that are logged into the switch. * denotes
your session.
L
daytime <ip>
[sync]
or
time|ntp <ip>
<utc[<+|>0100~1200]>
[sync]
user
auth
online
server
<ip> <port>
<secret>
[high|middle|low|d
eny]
Sets a RADIUS server’s IP address and
port number and the password to access
the server.
low = assigns the login accounts a low
privilege level if the received service type
is “login”.
medium = assigns the login accounts a
medium privilege level if the received
service type is “nas-prompt”.
high = assign the login accounts a high
privilege level if the received service type
is “admin”.
deny = block access from this login
account if no service type is received.
H
set
<username>
<password>
high|middle|low
Sets a user account and its level of
access privileges.
H
Displays authentication settings and user
accounts.
L
Displays the MSC1000G’s general
information such as the model name and
firmware version.
L
show
version
17.7.15 vlan Commands
Use the VLAN commands for static VLAN management.
344
MSC1000G User’s Guide
Chapter 17 Commands
Table 157 vlan Commands
COMMAND
DESCRIPTION
P
vlan
delete
<vid>
Removes a static VLAN.
M
disable
<vid>
Turns off a VLAN.
M
enable
<vid>
Turns on a VLAN.
M
name
<vid> <name>
Sets the name of a VLAN.
M
set
<vid> <giga-port>
fix|forbid|normal
tag|untag
Adds a static VLAN.
<giga-port> = sub1|sub2
|up1|up2|all if trunking is not
enabled;
sub|up|all if trunking is enabled.
M
show
[<vid>]|[<startvid> <end-vid>]
Displays all VLANs’ settings, a specified
VLAN’s settings or a range of static
VLANs’ settings.
L
MSC1000G User’s Guide
345
Chapter 17 Commands
346
MSC1000G User’s Guide
CHAPTER
18
acl Commands
This chapter describes the Access Control List management commands.
18.1 acl Commands Summary
The following table lists the acl commands. The P column on the right indicates the
administrator privilege level needed to use the command (H for high, M for middle or L for
low).
Table 158 acl Commands
COMMAND
DESCRIPTION
P
acl
dhcprelay82
MSC1000G User’s Guide
clearinfo
<vid>
Removes option 82 information
for the specified VLAN.
M
delete
<vid>
Deletes the option 82 information
entry for the specified VLAN.
M
disable
<vid>
Deactivates option 82 for the
specified VLAN.
M
enable
<vid> <mode>
Enables option 82 information for
the specified VLAN.
<mode> = 1 or 2
1: Enable DHCP relay and
option82.
2: Disable DHCP relay but enable
option82.
M
info
<vid> <string>
Sets information for the option 82
Circuit ID field.
M
relaymode
<vid>
[auto|both]
Sets which DHCP relay mode the
system uses for the specified
VLAN.
auto = send the requests to the
active DHCP server first. If the
active DHCP server does not
respond, the switch sends the
DHCP request to the backup
DHCP server.
both = send the requests to both
the active and backup DHCP
servers.
M
347
Chapter 18 acl Commands
Table 158 acl Commands (continued)
COMMAND
server
set
DESCRIPTION
P
active <vid>
<1|2>
Sets the active DHCP server to
which the DHCP requests are
sent first.
<vid> = a VLAN ID to be
served with DHCP relay.
1 = Sets the first DHCP server
as the active server.
2 = Sets the second DHCP server
as the active server.
The default is 1.
M
set <vid>
<serverip1>
[serverip2]
Sets an entry for forwarding
DHCP requests to the DHCP
servers at the specified IP
addresses. <vid> = a VLAN ID
to be served with DHCP relay.
M
delete <vid>
[serverip]
Removes an entry for forwarding
DHCP requests to the DHCP
server at the specified IP address.
M
<vid>
Creates an option 82 entry for the
VLAN.
M
Displays DHCP relay and option
82 settings.
L
enable <vid>
Turns on option 82 sub-option 2.
M
disable <vid>
Turns off option 82 sub-option 2.
M
set <vid> <info>
Adds the specified information for
sub-option 2.
M
show
suboption2
DHCP snooping allows the
system to identify and block
packets from devices using
unknown/static IP addresses.
dhcpsnoop
disable
<slot-port>
Deactivates DHCP snooping on
the specified subscriber port(s).
M
enable
<slot-port>
Activates DHCP snooping on the
specified subscriber port(s).
M
flush
<slot-port>
Clears the DHCP snooping table
on the specified port(s).
M
pool
delete <slotport> <ip>
Removes the static IP address
from the DHCP snooping table.
M
set <slot-port>
<ip>
Adds a static IP address to the
DHCP snooping table. You can
add up to 3 static IP addresses
per port.
M
<slot>|<slotport>
Displays the DHCP snooping
table on the specified port.
L
show
IEEE 802.1x authentication.
dot1x
348
disable
Turns off IEEE 802.1x.
M
enable
Turns on IEEE 802.1x.
M
MSC1000G User’s Guide
Chapter 18 acl Commands
Table 158 acl Commands (continued)
COMMAND
port
radius
DESCRIPTION
P
control <slotport>
auto|auth|unauth
Sets the IEEE 802.1x port
authentication option for specific
subscriber ports.
auto = authentication required
auth = forced authentication
unauth = forced no
authentication
M
disable <slotport>
Turns off IEEE 802.1x for specific
subscriber ports.
M
enable <slotport>
Turns on IEEE 802.1x for specific
subscriber ports.
M
period <slotport> <secs>
Sets the IEEE 802.1x reauthentication period (60~65535)
for specific subscriber ports.
M
reauth <slotport> on|off
Sets the IEEE 802.1x reauthentication option for specific
subscriber ports.
M
show <slot>
Displays IEEE 802.1x settings.
L
ip <index> <ip>
Sets the IP address of the
specified external RADIUS server
(1 or 2).
M
port <index>
<port>
Sets the external RADIUS server
port number of the specified
RADIUS server.
M
secret <index>
<secret_key>
Sets the authentication and
encryption key of the specified
RADIUS server.
M
Displays the external RADIUS
server settings.
L
show
dsbcast
enable
<slot-port>
<vid>
Turns on the blocking of
downstream broadcast packets
from going to the specified VLAN
on the specified port.
M
disable
<slot-port>
<vid>
Turns off the blocking of
downstream broadcast packets to
go to the specified VLAN on the
specified port.
M
show
<slot>|<slotport>
Displays the settings for blocking
downstream broadcast packets
for the specified slot or port.
M
MAC count limits the number of
MAC addresses that can connect
to a subscriber port.
maccount
MSC1000G User’s Guide
disable
<slot-port>
Turns off MAC count limiting on
the specified subscriber ports.
M
enable
<slot-port>
Turns on MAC count limiting on
the specified subscriber ports.
M
set
<slot-port>
<count>
Sets the MAC count limit number
(1-128) on the specified
subscriber ports.
M
349
Chapter 18 acl Commands
Table 158 acl Commands (continued)
COMMAND
show
<slot>
macfilter
Displays MAC count limiting
settings.
L
MAC filter allows only traffic from
specified source MAC addresses
on the specified subscriber ports.
M
<slot-port>
<mac>
Removes a MAC filter MAC
address entry.
M
disable
<slot-port>
Turns off the MAC filter on the
specified subscriber ports.
M
enable
<slot-port>
Turns on the MAC filter on the
specified subscriber ports.
M
mode
<slot-port>
<accept|deny>
Sets the MAC filter actions.
M
set
<slot-port>
<mac>
Adds a MAC filter MAC address
entry.
M
show
<slot>|<slotport>
Displays MAC filter settings.
L
MAC OUI (Organization Unit
Identifier) filter allows or drops
packets with MAC addresses
from specific vendors.
delete
<slot-port>
<mac>
Removes the static MAC OUI
filter.
<mac> = first three octets of the
MAC address.
M
disable
<slot-port>
Deactivates MAC OUI filtering on
this port.
M
enable
<slot-port>
Activates MAC OUI filtering on
this port.
M
mode
<slot-port>
<accept|deny>
Sets the filter action.
M
set
<slot-port>
<mac>
Creates a MAC OUI filter.
<mac> = first three octets of the
MAC address.
M
show
<slot>|<slotport>
Displays MAC OUI filter settings
for the specified port or slot.
L
Packet type filter allows or drops
specified packet types on the
specified subscriber ports.
pktfilter
350
P
delete
ouifilter
pppoeagent
DESCRIPTION
set
<slot-port>
<type>
Sets the packet type filter for the
specified subscriber ports.
<type> = accept-all, pppoe-only,
or any combination of ip, arp,
dhcp, eapol, pppoe, netbios, igmp
separated by a space.
M
show
<slot>
Displays packet type filter
settings.
L
clearinfo
<vid>
Resets PPPoE line description for
the VLAN.
M
MSC1000G User’s Guide
Chapter 18 acl Commands
Table 158 acl Commands (continued)
COMMAND
DESCRIPTION
P
enable
<vid>
Enables PPPoE line information
for the VLAN. The switch adds
the line information to PPPoE
packets for identification and
security.
M
delete
<vid>
Deletes PPPoE line information
settings.
M
disable
<vid>
Deactivate PPPoE line
information insertion.
M
info
<vid>
<description>
Sets PPPoE line information.
Enter a description (up to 24
characters).
M
set
<vid>
Creates a PPPoE agent entry for
the VLAN.
M
Displays PPPoE line information
settings.
L
show
Upstream access control rules
allows you to apply profiles on the
subscriber line PVC.
rule
delete
<slot-port-vpi/
vci> <profile>
Removes the ACL profile.
M
set
<slot-port-vpi/
vci> <profile>
Applies the ACL profile. You can
apply up to 8 profiles to a PVC.
M
show
<slot-port-vpi/
vci>
Displays ACL profile settings for a
PVC.
L
18.2 acl dhcp relay82 Commands
Use these commands to configure the DHCP relay feature.
18.2.1 acl dhcprelay82 clearinfo Command
Syntax:
acl dhcprelay82 clearinfo <vid>
This command deletes the relay agent information settings.
18.2.2 acl dhcprelay82 enable Command
Syntax:
acl
dhcprelay82 enable <vid> <mode>
MSC1000G User’s Guide
351
Chapter 18 acl Commands
where
<vid>
=
ID of the VLAN to which this setting applies.
<mode>
=
Sets the relay mode.
1 activates DHCP relay service and include option 82 information in
the client DHCP requests for this VLAN.
2 disables DHCP relay service but include option 82 information in
the client DHCP requests. Before broadcasting, the switch adds
option82 information to DHCP requests.
This command enables DHCP relay on a VLAN and sets the relay mode.
The following example creates a configuration entry and enables DHCP relay mode 1 on
VLAN 10.
ras> acl dhcprelay82 set 10
ras> acl dhcprelay82 enable 10 2
18.2.3 acl dhcprelay82 info Command
Syntax:
acl dhcprelay82 info <vid> <string>
where
<vid>
=
ID of the VLAN to which this setting applies.
<string>
=
Up to 23 English keyboard characters of additional information to add
to the DHCP client TCP/IP configuration requests that are relayed to a
DHCP server.
Examples of information you could add would be the name of the
system or the ISP.
This command sets the relay agent information to be included in client DHCP requests before
forwarding. A DHCP server implements network information (such as IP address) policies
based on the relay agent information.
The following example sets the system to add a string (test) to client DHCP request packets
before forwarding them to the DHCP server.
ras> acl dhcprelay82 info test
18.2.4 acl dhcprelay82 relaymode Command
Syntax:
acl dhcprelay82 relaymode <mode>
352
MSC1000G User’s Guide
Chapter 18 acl Commands
where
<mode>
=
auto The system sends the requests to the active DHCP server first. If
the active DHCP server does not respond, the switch sends the DHCP
request to the backup DHCP server.
both The system sends the requests to both the active and backup
DHCP servers.
This command sets the DHCP relay mode on the system.
18.2.5 acl dhcprelay82 server active Command
Syntax:
acl dhcprelay82 server active <vid> <active-server>
where
<active-server>
=
1 Sets the first DHCP server as the active DHCP server. The
system sends DHCP requests in the specified VLAN to the first
DHCP server first.
2 Sets the second DHCP server as the active DHCP server. The
system sends DHCP requests in the specified VLAN to the
second DHCP server first.
This command specifies the DHCP server to which client DHCP requests are sent first. If you
have also configured a second DHCP server, the non-active DHCP server will be the backup
DHCP server. This function is applicable when you have configured two DHCP server settings
for the VLAN.
The following example sets the system to forward client DHCP requests in VLAN 3 to the
second DHCP server first.
ras> acl dhcprelay82 server active 3 2
18.2.6 acl dhcprelay82 server delete Command
Syntax:
acl dhcprelay82 server delete <vid> [serverip]
where
<vid>
=
A VLAN ID to be served with DHCP relay.
<serverip>
=
The IP address of a DHCP server.
This command removes a DHCP server setting to which DHCP client requests are forwarded
in the specific VLAN.
MSC1000G User’s Guide
353
Chapter 18 acl Commands
18.2.7 acl dhcprelay82 server set Command
Syntax:
acl dhcprelay82 server set <vid> <primary-server> [secondary-server]
where
<vid>
=
A VLAN ID to be served with DHCP relay.
Note: The DHCP server(s) must be in the same VLAN.
<primary-server>
=
The IP address of the primary DHCP server.
<secondary-server>
=
The IP address of the secondary DHCP server.
This command sets an entry for forwarding client DHCP requests received on a specific
VLAN to the DHCP server(s) at the specified IP address(es).
The following example sets 192.168.1.10 and 192.168.1.11 as the primary and secondary
DHCP servers respectively in VLAN 3.
ras> acl dhcprelay82 server set 3 192.168.1.10 192.168.1.11
18.2.8 acl dhcprelay82 set Command
Syntax:
acl dhcprelay82 set <vid>
This command creates a DHCP relay entry for the specified VLAN. After you have created an
entry, you can configure DHCP relay and relay option82 settings.
The following figure creates an entry for VLAN 10.
ras> acl dhcprelay82 set 10
18.2.9 acl dhcprelay82 show Command
Syntax:
acl dhcprelay82 show
This command displays whether or not the DHCP relay feature is activated, the DHCP
server’s IP address, the status of the DHCP relay agent info option 82 feature and the
information configured for it. It also lists the DHCP relay server entries.
354
MSC1000G User’s Guide
Chapter 18 acl Commands
The following figure shows an example. The asterisk (*) in front of a DHCP server address
indicates that it is the active DHCP server in the VLAN.
ras> acl dhcprelay82 show
dhcp relay status:
disable
dhcp relay mode:
both
dhcp relay option82 info:
[NULL]
server list:
server set: 1
index vid primary-server
secondary-server
----- ----- ------------------ -----------------1
3 192.168.1.10
(*)192.168.1.11
ras>
18.3 DHCP Relay Option 82 (Agent Information) Sub-option 2
(Remote ID)
Use the following commands to configure the DHCP relay Option 82 (agent information)
feature, sub-option 2. This feature applies regardless of whether or not the DHCP relay is on.
18.3.1 Option 82 Sub-option 2 Enable Command
Syntax:
ras> acl dhcprelay82 suboption2 enable <vid>
where
<vid>
=
The ID of the VLAN to which to apply the setting.
This command turns on the DHCP relay agent information (Option 82, Sub-option 2) for the
specified VLAN.
18.3.2 Option 82 Sub-option 2 Disable Command
Syntax:
ras> acl dhcprelay82 suboption2 disable <vid>
where
<vid>
=
The ID of the VLAN to which to apply the setting.
This command turns off the DHCP relay agent information (Option 82, Sub-option 2) for the
specified VLAN.
18.3.3 Option 82 Sub-option 2 Set Command
Syntax:
ras> acl dhcprelay82 suboption2 set <vid> <info>
MSC1000G User’s Guide
355
Chapter 18 acl Commands
where
<vid>
=
The ID of the VLAN to which to apply the setting.
<info>
=
Up to 23 English keyboard characters of additional information
for the MSC1000G to add to the DHCP requests that it relays to
a DHCP server.
Examples of information you could add would be the name of
the MSC1000G or the ISP. To clear this field, type a pair of
double quotation marks with no space between them (““).
This command adds the specified information for the relay agent (Option 82, Sub-option 2) for
the specified VLAN.
18.4 acl dhcpsnoop Commands
Use these commands to configure or show DHCP snooping settings on the subscriber ports.
The switch gets the client MAC-IP address information (in the reply from a DHCP server) and
stores it in the DHCP snooping table. The system only forwards packets from the clients
whose MAC-IP address is in the DHCP snooping table. Packets from unknown IP address(es)
are not forwarded (dropped). This feature prevents subscribers from assigning their own static
IP addresses.
18.4.1 acl dhcpsnoop disable Command
Syntax:
acl dhcpsnoop disable <slot-port>
This command disables the DHCP snooping feature on the specified port(s) on the line card.
18.4.2 acl dhcpsnoop enable Command
Syntax:
acl dhcpsnoop disable <slot-port>
This command activates the DHCP snooping feature on the specified port(s) on the line card.
The following example enables DHCP snooping on port 1 of the line card in slot 3.
ras> acl dhcpsnoop enable 3-1
18.4.3 acl dhcpsnoop flush Command
Syntax:
acl dhcpsnoop flush <slot-port>
This command clears the DHCP snooping binding table. The system automatically clears the
binding table when you disable DHCP snooping on a port.
356
MSC1000G User’s Guide
Chapter 18 acl Commands
18.4.4 acl dhcpsnoop pool set Command
Syntax:
acl dhcpsnoop pool set <slot-port> <ip>
This command adds a static IP address to the DHCP snooping table on a port.
The following example adds two static IP addresses (192.168.1.10 and 192.168.1.11) to
the DHCP snooping table on port 10 of the line card in slot 2.
ras> acl dhcpsnoop pool set 2-10 192.168.1.10
ras> acl dhcpsnoop pool set 2-10 192.168.1.11
ras> acl dhcpsnoop show 2-10
port enable static ip pool
----- ------ ----------------------------------------------2-10
192.168.1.10
192.168.1.11
ras>
18.4.5 acl dhcpsnoop pool delete Command
Syntax:
acl dhcpsnoop pool delete <slot-port> <ip>
This command removes a static IP address from the DHCP snooping table of a port on the
specified line card. The following example removes the static IP address of 192.168.1.11 from
the port 10 on the line card in slot 2.
ras> acl dhcpsnoop pool delete 2-10 192.168.1.11
ras> acl dhcpsnoop show 2-10
port enable static ip pool
----- ------ ----------------------------------------------2-10
192.168.1.10
ras>
18.4.6 acl dhcpsnoop show Command
Syntax:
acl dhcpsnoop show <slot>|<slot-port>
Use this command to display the current static DHCP snooping settings of the port(s) on the
line card. The following example displays the settings of port 10 on the line card in slot 2.
ras> acl dhcpsnoop show 2-10
port enable static ip pool
----- ------ ----------------------------------------------2-10
192.168.1.10
192.168.1.11
ras>
18.5 acl dot1x Commands
Use these commands to configure the IEEE 802.1x authentication feature.
MSC1000G User’s Guide
357
Chapter 18 acl Commands
18.5.1 acl dot1x disable Command
Syntax:
acl dot1x disable
This command turns off the IEEE 802.1x authentication feature.
18.5.2 acl dot1x enable Command
Syntax:
acl dot1x enable
This command turns on the IEEE 802.1x authentication feature.
18.5.3 acl dot1x port control Command
Syntax:
acl dot1x port control <slot-port> auto|auth|unauth
where
auto
=
Authenticate all subscribers before they can access the network
through this port.
auth
=
Allow all connected users to access the network through this port
without authentication.
unauth
=
Deny all subscribers access to the network through this port.
This command sets the IEEE 802.1x port authentication option for specific subscriber ports.
18.5.4 acl dot1x port disable Command
Syntax:
acl dot1x port disable <slot-port>
This command turns off IEEE 802.1x for the specified subscriber ports.
18.5.5 acl dot1x port enable Command
Syntax:
acl dot1x port enable <slot-port>
This command turns on IEEE 802.1x for the specified subscriber ports.
18.5.6 acl dot1x port period Command
Syntax:
acl dot1x port period <slot-port> <secs>
358
MSC1000G User’s Guide
Chapter 18 acl Commands
where
=
<secs>
Sets the IEEE 802.1x re-authentication period in seconds
(60~65535).
This command sets the IEEE 802.1x re-authentication period for the specified subscriber
ports.
18.5.7 acl dot1x port reauth Command
Syntax:
acl dot1x port reauth <slot-port> on|off
This command enables or disables the IEEE 802.1x re-authentication option for the specified
subscriber ports.
18.5.8 acl dot1x port show Command
Syntax:
acl dot1x port show <slot>
This command displays the IEEE 802.1x settings of the subscriber ports on the line card in the
specified slot.
ras> acl dot1x port show 5
port enable control reauth period
---- ------ ------- ------ -----5- 1
auto
V
3600
5- 2
auto
V
3600
5- 3
auto
V
3600
5- 4
auto
V
3600
5- 5
auto
V
3600
-------------------------- [ snip ] -------------------------5-45
auto
V
3600
5-46
auto
V
3600
5-47
auto
V
3600
5-48
auto
V
3600
18.5.9 acl dot1x radius ip Command
Syntax:
acl dot1x radius ip <index> <ip>
where
<index>
=
The index number of an external RADIUS server entry (1 or 2).
<ip>
=
This IP address of the external RADIUS server.
This command sets the IP address of the specified external RADIUS server.
MSC1000G User’s Guide
359
Chapter 18 acl Commands
18.5.10 acl dot1x radius port Command
Syntax:
acl dot1x radius port <index> <port>
where
<index>
=
The index number of an external RADIUS server entry (1 or 2).
<port>
=
The RADIUS server port number.
This command sets the external RADIUS server port number of the specified RADIUS server.
18.5.11 acl dot1x radius secret Command
Syntax:
acl dot1x radius secret <index> <secret_key>
where
<index>
=
The index number of an external RADIUS server entry (1 or 2).
<secret_key>
=
The authentication and encryption keys of the specified RADIUS
server.
This command sets the authentication and encryption keys of the specified RADIUS server.
18.5.12 acl dot1x show Command
Syntax:
acl dot1x show
This command displays the status of the IEEE 802.1x feature and the external RADIUS server
settings.
ras> acl dot1 show
dot1x feature is disable
radius servers:
no ip
port
-- --------------- ----1 0.0.0.0
1812
2 0.0.0.0
1812
secret
------------------------------1234
1234
18.6 acl maccount Commands
Use maccount commands to limit how many MAC addresses may be dynamically learned or
statically configured on a DSL port. MAC count commands are listed next.
360
MSC1000G User’s Guide
Chapter 18 acl Commands
"
You cannot enable both MAC count and MAC filtering on the same port at the
same time.
18.6.1 acl maccount disable Command
Syntax:
acl maccount disable <slot-port>
This command disables the MAC count limit on the specified DSL port(s).
The following example turns off the MAC count limit on DSL port 4 on a line card in slot 5.
ras> acl maccount disable 5-4
18.6.2 acl maccount enable Command
Syntax:
acl maccount enable <slot-port>
This command enables the MAC count limit on the specified DSL port(s). You can only
enable the MAC count filter on DSL ports that do not have the MAC filter enabled.
The following example turns on the MAC count limit on DSL port 4 on a line card in slot 5.
ras> acl maccount enable 5-4
18.6.3 acl maccount set Command
Syntax:
acl maccount set <slot-port> <count>
where
<count>
=
Set the limit for how many MAC addresses that a port may dynamically
learn. For example, if you are configuring port 2 and you set this field to
"5", then only five devices with dynamically learned MAC addresses
may access port 2 at any one time. A sixth device would have to wait
until one of the five learned MAC addresses ages out.
The valid range is from “1” to “128”.
This command sets the limit for how many MAC addresses may be dynamically learned on
the specified DSL port(s).
The following example sets the MAC count filter to allow up to 50 MAC addresses to be
dynamically learned on DSL port 4 on the line card in slot 5.
ras> acl maccount set 5-4 50
MSC1000G User’s Guide
361
Chapter 18 acl Commands
18.6.4 acl maccount show Command
Syntax:
acl maccount show <slot>
This command displays the MAC count settings for the DSL port(s). The following example
displays the MAC count settings for slot 5.
ras> acl maccount show 5
[slot5] maccount
port enable count
----- ------ ----5- 1
5
5- 2
5
5- 3
5
5- 4
5
-------------------------- [ snip ] -------------------------5-44
5
5-45
5
5-46
5
5-47
5
5-48
5
18.7 acl macfilter Commands
Use the MAC filter commands to allow only incoming frames from MAC (Media Access
Control) address(es) that you specify. MAC filter commands are listed next. You may specify
up to ten MAC addresses per port.
"
You cannot enable both MAC filtering and MAC count on the same port at the
same time.
18.7.1 acl macfilter delete Command
Syntax:
acl macfilter delete <slot-port> <mac>
where
<mac>
=
The source MAC address in "a0:c5:12:34:56:78" format.
This command removes a configured source MAC address from a line card’s specified DSL
port.
362
MSC1000G User’s Guide
Chapter 18 acl Commands
The following example removes the source MAC address of a0:c5:12:34:56:78 from the MAC
filter for ADSL port 5.
ras> acl macfilter delete 5-4 a0:c5:12:34:56:78
18.7.2 acl macfilter disable Command
Syntax:
acl macfilter disable <slot-port>
This command turns off the MAC filtering feature on a line card’s specified DSL port(s).
The following example turns off the MAC filtering feature on DSL port 4 of the line card in
slot 5.
ras> acl macfilter disable 5-4
18.7.3 acl macfilter enable Command
Syntax:
acl macfilter enable <slot-port>
This command turns on the MAC filtering feature on a line card’s specified DSL port(s).
The following example turns on the MAC filtering feature on DSL port 4 of the line card in
slot 5.
ras> acl macfilter enable 5-4
18.7.4 acl macfilter mode Command
Syntax:
acl macfilter mode <slot-port> accept|deny
where
accept|deny
=
accept Allows frames from MAC addresses that you specify and
block frames from other MAC addresses.
deny Blocks frames from MAC addresses that you specify and
allow frames from other MAC addresses.
18.7.5 acl macfilter set Command
Syntax:
acl macfilter set <slot-port> <mac>
where
<mac>
MSC1000G User’s Guide
=
The source MAC address in "a0:c5:12:34:56:78" format.
363
Chapter 18 acl Commands
This command adds an allowed source MAC address on a line card’s specified DSL port or on
the DSL port in all of the line cards DSL ports if no slot is specified.
The following example adds source MAC address a0:c5:12:34:56:78 for DSL port 4 of the
line card in slot 5.
ras> acl macfilter set 5-4 a0:c5:12:34:56:78
18.7.6 acl macfilter show Command
Syntax:
acl macfilter show <slot>|<slot-port>
This command displays the MAC filtering status (V for enabled, - for disabled) and the fixed
source MAC addresses on a line card’s specified DSL port(s) or on all of the line card’s DSL
ports if no port is specified.
The following example displays the MAC filtering status on all ports of the line card in slot 2.
ras> acl macfilter show 2
port mode enable mac address
----- ------ ------ ----------------2- 1 accept
2- 2 accept
2- 3 accept
2- 4 accept
---------------------- Snip --------------------2-45 accept
2-46 accept
2-47 accept
2-48 accept
ras>
18.8 acl ouifilter Commands
Use the following OUI (Organizationally Unique Identifier) filter commands to filter out
packets from devices with the specified OUI in the MAC address field.
The OUI field is the first three octets in a MAC address. An OUI uniquely identifies the
manufacturer of a network device and allows you to identify from which device brands the
switch will accept traffic or send traffic to. The OUI value is assigned by the IANA.
18.8.1 acl ouifilter disable Command
Syntax:
acl ouifilter disable <slot-port>
This command deactivates MAC OUI filtering on the port(s) of the specified line card.
364
MSC1000G User’s Guide
Chapter 18 acl Commands
18.8.2 acl ouifilter enable Command
Syntax:
acl ouifilter enable <slot-port>
This command activates MAC OUI filtering on the port(s) of the specified line card.
18.8.3 acl ouifilter mode Command
Syntax:
acl ouifilter mode <slot-port> accept|deny
where
accept|deny
=
accept Allows frames from MAC addresses with the OUI(s) that
you specify and blocks frames with MAC addresses of other OUIs.
deny Blocks frames from MAC addresses with the OUI(s) that you
specify and allows frames from other MAC addresses.
This command activates MAC OUI filtering on the port(s) of the specified line card. Use the
acl ouifilter set command to set the OUI value(s).
The following example sets the system to drop packets with the specified OUI value on port 1
of the line card in slot 3.
ras> acl ouifilter mode 3-1 deny
18.8.4 acl ouifilter set Command
Syntax:
acl ouifilter set <slot-port> <mac>
where
<mac>
=
The first three octets of a MAC address in the format xx:xx:xx. For
example, 00:0F:FE.
This command specifies a MAC OUI whose packets you want to filter. Use the acl
ouifilter mode command to set the action on the matched packets.
The following example sets the system to filter packets with an OUI value of 00-0F-FE on port
1 of the line card in slot 3.
ras> acl ouifilter set 3-1 00:0f:fe
18.8.5 acl ouifilter show Command
Syntax:
acl ouifilter show
MSC1000G User’s Guide
<slot>|<slot-port>
365
Chapter 18 acl Commands
This command displays the OUI filtering status (V for enabled, - for disabled) and the OUI
value(s) of the MAC address on a line card’s specified DSL port(s) or on all of the line card’s
DSL ports if no port is specified. The following example displays the OUI filter setting of port
1 on the line card in slot 3.
ras> acl ouifilter show 1-1
port mode enable mac address
----- ------ ------ ----------------1- 1 accept
-
18.9 acl pktfilter Commands
Use the following packet filter commands to filter out specific types of packets on specific
ports.
18.9.1 acl pktfilter set Command
Syntax:
acl pktfilter set <slot-port> <type>
where
<type>
=
accept-all Accept all packet types.
pppoe-only Accept only PPPoE packets and reject all other packet
types. (Point-to-Point Protocol over Ethernet) relies on PPP and
Ethernet. PPPoE is a specification for connecting the users on an
Ethernet to the Internet through a common broadband medium, such as a
single DSL line, wireless device or cable modem.
Alternatively, you can have the system reject any combination of the
following packet types (separated by a space).
ip Reject IP packets. Internet Protocol. The underlying protocol for
routing packets on the Internet and other TCP/IP-based networks.
arp Reject ARP packets. Address Resolution Protocol is a protocol for
mapping an Internet Protocol address (IP address) to a physical computer
address that is recognized in the local network.
dhcp Reject DHCP packets. Dynamic Host Configuration Protocol
automatically assigns IP addresses to clients when they log on. DHCP
centralizes IP address management on central computers that run the
DHCP server program. DHCP leases addresses, for a period of time,
which means that past addresses are “recycled” and made available for
future reassignment to other systems.
eapol Reject EAPol packets. EAP (Extensible Authentication Protocol,
RFC 2486) over LAN. EAP is used with IEEE 802.1x to allow additional
authentication methods (besides RADIUS) to be deployed with no
changes to the access point or the wireless clients.
pppoe Reject PPPoE packets.
366
MSC1000G User’s Guide
Chapter 18 acl Commands
netbios Reject NetBIOS packets. (Network Basic Input/Output
System) are TCP or UDP broadcast packets that enable a computer to
connect to and communicate with a LAN.
igmp Reject IGMP packets. Internet Group Multicast Protocol is used
when sending packets to a specific group of hosts.
This command sets the packet type filter for the specified ADSL port(s).
The following example sets DSL port 4 of the line card in slot 5 to reject ARP, PPPoE and
IGMP packets.
ras> acl pktfilter set 5-4 arp pppoe igmp
18.9.2 acl pktfilter show Command
Syntax:
acl pktfilter show <slot>
This command displays the packet type filter settings on the specified line card’s DSL port(s).
The following example displays the packet type filter settings for the DSL ports of the line
card in slot 5.
ras> acl pktfilter show 5
port filter
----- ------------------------------------5- 1 accept-all
5- 2 accept-all
5- 3 accept-all
-------------------------- [ snip ] -------------------------5-45 accept-all
5-46 accept-all
5-47 accept-all
5-48 accept-all
18.10 PPPoE Agent Information
Similar to DHCP relay option82, you can set the switch to insert line information into client
PPPoE Active Discovery Initialization (PADI) packets. This allows a PPPoE termination
server to identify and authenticate a PPPoE client based on the specified information (such as
the ISP name or line card number).
18.10.1 acl pppoeagent clearinfo Command
Syntax:
acl pppoeagent clearinfo <vid>
This command resets the PPPoE line description for subscribers in the specified VLAN.
MSC1000G User’s Guide
367
Chapter 18 acl Commands
18.10.2 acl pppoeagent enable Command
Syntax:
acl pppoeagent enable <vid>
This command turns on PPPoE line information for subscribers in the specified VLAN. The
switch adds line information to PPPoE discover packets for user authentication and
identification.
The following example activates the PPPoE agent setting for VLAN 10.
ras> acl pppoeagent enable 10
18.10.3 acl pppoeagent delete Command
Syntax:
acl pppoeagent delete <vid>
This command removes PPPoE line information setting for the specified VLAN.
18.10.4 acl pppoeagent disable Command
Syntax:
acl pppoeagent disable <vid>
This command sets the switch to not add line information in PPPoE discover packets.
18.10.5 acl pppoeagent info Command
Syntax:
acl pppoeagent info <vid> <description>
This command specifies the PPPoE line information the switch is to add to PPPoE discover
packets from the specified VLAN. Enter a description (up to 24 alphanumerical characters).
"
368
Before you can configure PPPoE agent information, you must first create a
entry using the acl pppoeagent set command.
MSC1000G User’s Guide
Chapter 18 acl Commands
The following example sets the switch to add “testing” as the line information to PPPoE
discover packets on VLAN 10.
ras>
ras>
ras>
ras>
vid
---10
vlan
ras>
acl pppoeagent set 10
acl pppoeagent enable 10
acl pppoeagent info 10 testing
acl pppoeagent show
en
info
----- -----------------------V
testing
set: 1
18.10.6 acl pppoeagent set Command
Syntax:
acl pppoeagent set <vid>
This command creates a PPPoE agent information entry for the VLAN. After you have created
an entry for a VLAN, you can configure the line information settings. The following example
creates an entry for VLAN 10.
ras> acl pppoeagent set 10
18.10.7 acl pppoeagent show Command
Syntax:
acl pppoeagent show
This command displays PPPoE line information settings. The following figure shows the
PPPoE agent setting for VLAN 10.
ras>
vid
---10
vlan
ras>
acl pppoeagent show
en
info
----- -----------------------V
testing
set: 1
18.11 acl rule Commands
Use the acl rule commands to apply ACL profiles (you created using the profile acl
commands) on the PVCs.
18.11.1 acl rule delete Command
Syntax:
acl rule delete <slot-port-vpi/vci> <profile>
MSC1000G User’s Guide
369
Chapter 18 acl Commands
where
<profile>
=
Name of an access control profile.
This command allows you to remove an access control settings from the specified PVC.
18.11.2 acl rule set Command
Syntax:
acl rule set <slot-port-vpi/vci> <profile>
where
<profile>
=
Name of an access control profile.
This command allows you to apply an access control profile to the specified DSL link(s). You
can apply up to eight profiles to a subscriber port.
The following example applies the “example” rule to PVC.
ras> acl rule set 3-1-0/33 example
18.11.3 acl rule show Command
Syntax:
acl rule show <slot-port-vpi/vci>
This command displays the current access control rule assignment settings. The following
figure shows an example.
ras> acl rule show 3-1-0/33
pvc
profile
-------------- -------------------------------3-1-0/33
example
ras>
370
MSC1000G User’s Guide
CHAPTER
19
alarm Commands
This chapter describes the alarm management commands.
19.1 alarm Commands Summary
The following table lists the alarm commands. The P column on the right indicates the
administrator privilege level needed to use the command (H for high, M for middle or L for
low).
Table 159 alarm Commands
COMMAND
DESCRIPTION
alarm
Alarm command general parameters:
<alarm> = alarm category (eqpt, dsl,
enet, sys or all)
<severity> = alarm severity level
(critical, major, minor, info or all)
<condition> = Specify an alarm
condition.
P
clear
Erases historic alarm entries.
M
cutoff
Cancels an alarm. This stops the
sending of the alarm signal current.
M
Edits an alarm report entry.
<fac> = local1~local7
M
edit
<alarm>|all
<fac>
<target>[,<targ
et>]
<target> = snmp|syslog
|all|none ‘none’ disables alarm
reports on this alarm category.
xedit
history
Sets the severity level of an alarm(s)
and where the system is to send the
alarm(s).
<cond> = <condition>|<code>|all
<alarm> <cond>
<severity>
<fac>
<target>[,<targ
et>]
<clearable>
<target> = snmp|syslog
|all|none ‘none’ disables alarm
reports on this alarm category.
<clearable> = clearable|unclearable
clear
<alarm>|all
<condition>|all
clear
<severity>
MSC1000G User’s Guide
M
Removes historic alarm entries by
alarm category and alarm condition or
by severity.
M
371
Chapter 19 alarm Commands
Table 159 alarm Commands (continued)
COMMAND
port
DESCRIPTION
P
show
[<severity>|all]
[<alarm>|all]
[<condition>|all
] [<sdate>|all]
[<edate>|all]
[for|rev]
[detail]
Displays historic alarms by severity,
alarm category and alarm condition.
You can also display detailed alarms.
L
show
<slot>
Displays port alarm severity level
thresholds.
L
set
all|mgmt|<gigaport>|<slotport> <severity>
Sets the severity of alarms to record for
individual ports.
M
show
[<severity>|all
] [<alarm>|all]
[<condition>|al
l]
[<sdate>|all]
[<edate>|all]
[for|rev]
[detail]
Displays current alarms by severity,
alarm category or alarm condition. You
can also display detailed alarms.
L
tablelist
[<alarm>|all]
[<severity>|all
] [<fac>|all]
[<target>[,<tar
get>]]
[<condition>|al
l]
Displays the supported alarm list and
report settings.
<fac> = local1~local7
<target> = snmp|syslog|all
L
19.2 General alarm Command Parameters
The following table describes commonly used alarm command parameter notation.
Table 160 General alarm Command Parameters
372
NOTATION
DESCRIPTION
<alarm>
Specify a category of alarms.
eqpt represents equipment alarms.
dsl represents Digital Subscriber Line (DSL) alarms.
enet represents Ethernet alarms.
sys represents system alarms.
all specifies every alarm category.
<severity>
Specify an alarm severity level (critical, major, minor, info or all).
<condition>
Specify an alarm condition.
<sdate>
Specify a start date in yyyy/mm/dd format.
<edate>
Specify an end date in yyyy/mm/dd format.
for|rev
Specify the displaying order. for = forward, rev = reverse
[detail]
Display more comprehensive alarm condition descriptions.
MSC1000G User’s Guide
Chapter 19 alarm Commands
19.3 alarm Commands
Use these commands to view and clear alarms. You can also set the device to report alarms to
an SNMP or syslog server that you specify.
19.3.1 alarm clear Command
Syntax:
alarm clear
This command erases (clearable) historic alarm entries.
19.3.2 alarm cutoff Command
Syntax:
alarm cutoff
This command cancels an alarm. This stops the sending of the alarm signal current. This is
useful in stopping an alarm if you have the alarm output connector pins connected to a visible
or audible alarm. The alarm entry remains in the system.
19.3.3 alarm edit Command
Syntax:
alarm edit <alarm> <fac> <target>[,<target>]
where
<fac>
=
The log facility (local1~local7) that has the device log the syslog
messages to different files in the syslog server. See your syslog
program’s documentation for details.
<target>
=
snmp|syslog|all|none The type of alarm messages that the
device is to send (SNMP, syslog or all). none disables alarm reports
on this alarm category.
This command creates or edits an alarm report entry.
The following example creates an alarm report entry that sends system alarms to an SNMP
server at the local 3 log facility.
ras> alarm edit sys local3 snmp
19.3.4 alarm history clear Command
Syntax:
alarm history clear [<alarm>|all <condition>|all] <severity>
This command removes historic alarm entries by alarm category, alarm condition or severity.
MSC1000G User’s Guide
373
Chapter 19 alarm Commands
The following example removes the historic minor level alarms for all alarm categories, and
all conditions.
ras> alarm history clear minor
19.3.5 alarm history show Command
Syntax:
alarm history show [<severity>|all] [<alarm>|all] [<condition>|all]
[<sdate>|all] [<edate>|all] [for|rev] [detail]
This command displays historic alarms by severity, alarm category or alarm condition.
The following example displays the historic major level alarms for all alarm categories, and all
conditions.
ras> alarm history show major
no alarm
condition
------ ------ -----------------------1 eqpt
+LT_INACTIVE
2 eqpt
+LT_INACTIVE
3 eqpt
-LT_INACTIVE
4 eqpt
-LT_INACTIVE
severity
-------major
major
major
major
timestamp
-------------09/09 09:38:54
09/09 09:38:54
09/09 09:39:25
09/09 09:39:28
source
------slot 4
slot 9
slot 4
slot 9
19.3.6 alarm port set Command
Syntax:
alarm port set
all|mgmt|<giga-port>|<slot-port> <severity>
where
<fac>
=
The log facility (local1~local7) that has the device log the syslog
messages to different files in the syslog server. See your syslog
program’s documentation for details.
<target>
=
snmp|syslog|all|none The type of alarm messages that the
device is to send (SNMP, syslog or all). none disables alarm reports on
this alarm category.
This command sets the alarm severity threshold for recording alarms on an individual port(s).
The system reports an alarm on a port if the alarm has a severity equal to or higher than the
port’s threshold.
The following example has the systems only record critical alarms on DSL port 7 on the line
card in slot 4.
ras> alarm port set 4-7 critical
374
MSC1000G User’s Guide
Chapter 19 alarm Commands
19.3.7 alarm port show Command
Syntax:
alarm port show <slot>
where
<fac>
=
The log facility (local1~local7) that has the device log the syslog
messages to different files in the syslog server. See your syslog
program’s documentation for details.
<target>
=
snmp|syslog|all|none The type of alarm messages that the
device is to send (SNMP, syslog or all). none disables alarm reports on
this alarm category.
This command displays port alarm severity level thresholds. The system reports an alarm on a
port if the alarm has a severity equal to or higher than the port’s threshold.
The following example displays the port alarm thresholds for the ports on the line card in slot
4. “ifindex” identifies the interface.
ras> alarm port show 4
ifindex
severity
-------------------4- 1
minor
4- 2
minor
4- 3
minor
-------------------------- [ snip ] -------------------------4-44
minor
4-45
minor
4-46
minor
4-47
minor
4-48
minor
19.3.8 alarm show Command
Syntax:
alarm show [<severity>|all] [<alarm>|all] [<condition>|all] [<sdate>|all]
[<edate>|all] [for|rev] [detail]
where
[detail]
=
Display in depth alarm information.
This command displays the current alarms by severity, alarm category or alarm condition.
MSC1000G User’s Guide
375
Chapter 19 alarm Commands
The following example displays the critical level alarms for all alarm categories and
conditions.
ras> alarm show critical all
[current card alarm]
id state
card type
heat vol mon down out
--- --------- --------------- --------------------1 standby
MSC1000G
2 active
MSC1000G
3 4 ALC1248G-53
V
V
5 active
ALC1248G-53
6 7 ALC1248G-51
V
V
8 9 ALC1248G-53
V
V
10 ALC1248G-53
V
V
[current alarm list]
no alarm
condition
------ ------ -------------------------1 eqpt
+FAN_ERROR
2 eqpt
+FAN_ERROR
3 eqpt
+FAN_ERROR
4 eqpt
+FAN_ERROR
5 eqpt
+FAN_ERROR
6 eqpt
+FAN_ERROR
7 eqpt
+DC_POWER_FAIL
severity timestamp
source
-------- -------------- ----------critical
critical
critical
critical
critical
critical
critical
12/14
12/14
12/14
12/14
12/14
12/14
12/14
13:46:41
13:46:41
13:46:41
13:46:41
13:46:41
13:46:41
13:46:21
slot
slot
slot
slot
slot
slot
slot
2
2
2
2
2
2
2
19.3.9 alarm tablelist Command
Syntax:
alarm tablelist [<alarm>|all] [<severity>|all]
[<fac>|all][<target>[,<target>]] [<condition>|all]
where
<fac>
=
The log facility (local1~local7) that has the device log the syslog
messages to different files in the syslog server. See your syslog
program’s documentation for details.
<target>
=
snmp|syslog|all The type of alarm messages that the device is to
send (SNMP, syslog or all).
This command displays the supported alarm list and report settings.
376
MSC1000G User’s Guide
Chapter 19 alarm Commands
The following example displays the supported alarms for all alarm levels, all alarm categories,
all facilities, all types of alarm messages and all conditions.
ras> alarm
no alarm
clearable
--- -----1
dsl
2
dsl
3
dsl
4
dsl
5
dsl
6
dsl
7
dsl
8
dsl
9
dsl
10
dsl
11
dsl
12
dsl
13
dsl
14
dsl
15
dsl
16
dsl
17
dsl
18
dsl
19
dsl
tablelist
(code)condition
------------------------( 5002)LINE_UP
( 5003)LINE_DOWN
( 5006)LINE_LDM_START
( 5007)LINE_LDM_END
( 5008)LINE_PM_L2
( 5009)LINE_PM_L0
( 5010)LINE_FAIL
( 5013)ADSL_TCA_LOL
( 5016)ADSL_TCA_LOF
( 5017)ADSL_TCA_LOS
( 5018)ADSL_TCA_LPR
( 5019)ADSL_TCA_ES
( 5020)ADSL_RATE_CHANG
( 5021)ADSL_TCA_SES
( 5022)ADSL_TCA_UAS
( 5023)SHDSL_TCA_ATTEN
( 5024)SHDSL_TCA_SNRM
( 5025)SHDSL_TCA_ES
( 5026)SHDSL_TCA_SES
facility snmp syslog severity
--------- ---- ------ -------- ------local1
V
V
info
local1
V
V
minor
V
local1
V
V
info
local1
V
V
info
local1
V
V
info
local1
V
V
info
local1
V
V
major
local1
V
V
info
V
local1
V
V
info
V
local1
V
V
info
V
local1
V
V
info
V
local1
V
V
info
V
local1
V
V
info
V
local1
V
V
info
V
local1
V
V
info
V
local1
V
V
info
V
local1
V
V
info
V
local1
V
V
info
V
local1
V
V
info
V
Press any key to continue, 'e' to exit, 'n' for nopause
19.3.10 alarm xedit Command
Syntax:
alarm xedit <alarm> <cond> <severity> <fac> <target>[,<target>] <clearable>
where
<cond>
=
<condition>|<code>|all
The condition is the text description for the condition under which
the alarm applies. Use the alarm tablelist command to find
alarm conditions.
The condition code is the number of a specific alarm message. Use
the alarm tablelist command to find alarm condition codes.
<fac>
=
The log facility (local1~local7) that has the device log the
syslog messages to different files in the syslog server. See your
syslog program’s documentation for details.
<target>
=
snmp|syslog|all|none The type of alarm messages that the
device is to send (SNMP, syslog or all). none disables alarm reports
on this alarm category.
<clearable>
=
clearable|unclearable This sets whether or not the alarm can
be manually cleared from the system.
MSC1000G User’s Guide
377
Chapter 19 alarm Commands
This command sets the severity level of an alarm(s) and where the system is to send the
alarm(s). You can also set whether or not the alarm can be manually cleared from the system.
Use the alarm tablelist command to display alarm setting details.
The following example creates an alarm report entry that sets all system alarms to the major
severity level and sends them to a syslog server at the local 3 log facility. It also sets the system
alarms to be manually clearable.
ras> alarm xedit sys all major local3 syslog clearable
378
MSC1000G User’s Guide
CHAPTER
20
clear Commands
This chapter describes the clear commands that you use to reset the various system counters.
20.1 clear Commands Summary
The following table lists the clear commands you can use to reset the counters. Once you reset
a counter, you can only display new counter information using the show command.
Table 161 clear Commands
COMMAND
DESCRIPTION
P
clear
atm
<slotport>|<slotport-vpi/vci>
Resets ATM counters on the specified
port or PVC.
M
dhcp
counter
port>
Resets DHCP counters.
M
enet
<gigaport>|<slot>
Resets counters on the Ethernet port.
M
igmp
info
Resets IGMP counters and the number
of learned IGMP groups.
M
Resets the counter of IGMP packets
received and the number of learned
groups on a port.
M
<slot-
port info
<slotport>
ip
inband|outband|b
oth
Resets management counters.
M
lineperf
<slot-port>
Resets subscriber line performance
counters.
M
packet
<slotport>|<slotport-vpi/vci>
Resets the packet transmission counters
on a subscriber port or PVC.
M
paepvc
counter
Resets the PAE PVC counters.
M
performance
<slot-port>
curr|15min|1day
Resets subscriber line performance
counters.
M
MSC1000G User’s Guide
<slotport>|<s
lotportvpi/vci>
379
Chapter 20 clear Commands
20.2 clear Command Example
The following example resets the IGMP counters on the system. This clears the IGMP
counters and the number of IGMP groups learned.
ras> clear igmp info
380
MSC1000G User’s Guide
CHAPTER
21
cluster Commands
This chapter describes the cluster management commands.
21.1 cluster commands Summary
The following table lists the cluster commands. The P column on the right indicates the
administrator privilege level needed to use the command (H for high, M for middle or L for
low).
Table 162 cluster Commands
COMMAND
DESCRIPTION
P
Disable clustering, default is disabled
M
manager <name>
Enable device as cluster manager
M
member
<password>
Enable device as cluster member
M
login
<id>
Login into a client
M
member
candidate
show
List all available candidates
M
flush
Flush current candidates
M
delete
<id>
Removes a member from a cluster.
M
set
<id>
<mac>
<passwor
d>
Adds a member to the cluster.
M
Displays cluster member settings.
L
Displays the cluster member status.
L
Sets the cluster VLAN ID.
M
cluster
disable
enable
show
show
vlan
<vid>
21.1.1 cluster disable Command
Syntax:
cluster disable
This command sets this DSLAM to not function as part of the cluster.
MSC1000G User’s Guide
381
Chapter 21 cluster Commands
21.1.2 cluster enable manager Command
Syntax:
cluster enable manager <name>
where
<name>
=
A name to identify the cluster. You may use up to 32 printable
characters. Spaces are not allowed.
This command sets this DSLAM as the cluster manager DSLAM. A cluster can only have one
manager. Other cluster managers do not display in the cluster candidate list.
The following example sets the DSLAM to be the cluster manager and use “Manager-A” as
the cluster name.
ras> cluster enable manager Manager-A
21.1.3 cluster enable member Command
Syntax:
cluster enable member <password>
where
<password>
=
Type the cluster member’s management password. If the
administrator changes the device’s management password
afterwards, then it cannot be managed from the cluster manager.
This command sets this DSLAM to be a cluster member. The device will display in the cluster
candidate list.
The following example sets the DSLAM to be a cluster member. The DSLAM’s management
password is “1234”.
ras> cluster enable member 1234
21.1.4 cluster login Command
Syntax:
cluster login <id>
where
<id>
=
The member’s ID number (2~8).
This command lets you open the DSLAM’s CLI via the cluster manager DSLAM.
382
MSC1000G User’s Guide
Chapter 21 cluster Commands
The following is an example. After you log into a cluster member, the cluster name and the
member’s ID number display in the command prompt.
ras> cluster login 2
Copyright (c) 1994 - 2006 ZyXEL Communications Corp.
IES6000:2>
21.1.5 cluster member candidate show Command
Syntax:
cluster member candidate show
This command displays potential cluster member DSLAMs that were found by autodiscovery. The DSLAMs must be directly connected and in the same VLAN group. You must
have also logged into that device and configured it as a cluster member.
A device can only be part of one cluster at a time. If a device is already in another cluster, it
does not display here. Devices that are set to be cluster managers will not be visible.
21.1.6 cluster member candidate flush Command
Syntax:
cluster member candidate flush
This command updates the list of suitable candidates found by auto-discovery.
21.1.7 cluster member delete Command
Syntax:
cluster member delete <id>
where
<id>
=
The member’s ID number (2~8).
This command removes the specified cluster member from the cluster.
The following example removes the cluster member DSLAM with ID 3 from the cluster.
ras> cluster member delete 3
21.1.8 cluster member set Command
Syntax:
cluster member set <id> <mac> <password>
where
<id>
MSC1000G User’s Guide
=
An ID number (2~8) for the cluster member.
383
Chapter 21 cluster Commands
<mac>
=
The hardware MAC address of the device
<password>
=
The cluster member’s management password. If the administrator
changes the device’s management password afterwards, then it
cannot be managed from the cluster manager.
This command adds the specified cluster member to the cluster.
The following example adds a DSLAM as cluster member 4. The DSLAM’s MAC address is
“00:13:49:d1:d0:cd” and its password is “1234”.
ras> cluster member set 4 00:13:49:d1:d0:cd 1234
21.1.9 cluster member show Command
Syntax:
cluster member show
This command displays a list of the cluster members. ID 1 is the cluster manager.
The following is an example.
ras> cluster member show
member list:
id mac
-- ----------------1 00:13:49:d1:d0:bc
2 3 4 5 6 7 8 -
21.1.10 cluster show Command
Syntax:
cluster show
This command displays status information about the cluster.
384
MSC1000G User’s Guide
Chapter 21 cluster Commands
The following is an example.
ras> cluster show
mode
:manager
vlan
:4094
name
:Manager-A
member list:
id state
hostname
uptime
model
mac
-- -------- --------------- ------------- ---------------- ----------------1 active
02:20:38 IES-5000
00:13:49:d1:d0:bc
2 3 4 5 6 7 8 -
where
mode
=
Whether this device is the manager of the cluster or a member.
vlan
=
This is the VLAN ID that the cluster uses and is only applicable if
the manager DSLAM is set to use IEEE 802.1Q VLAN. All
DSLAMs must be directly connected and in the same VLAN
group to belong to the same cluster. This field is ignored if the
clustering manager is using port-based VLAN.
name
=
This is the name of the cluster.
member list
=
This table lists the DSLAMs that belong to the cluster.
id
=
The DSLAM’s ID number in the cluster. 1 is the cluster manager.
state
=
This column displays the status of this DSLAM within the cluster.
active: the member is fine.
inactive: the manager can not communicate the member.
waiting: the manager has sent a command to add the member and
is waiting for a response.
error: the member reported that the password was wrong.
hostname
=
This is the cluster DSLAM’s system name.
uptime
=
This is how long the DSLAM has been turned on and in the
cluster.
model
=
This field displays the model name of the DSLAM.
mac
=
This is the DSLAM’s hardware MAC address.
21.1.11 cluster vlan Command
Syntax:
cluster vlan <vid>
MSC1000G User’s Guide
385
Chapter 21 cluster Commands
where
<vid>
=
This is the cluster management VLAN ID. The cluster’s DSLAMs
must be directly connected and in the same VLAN group. The
cluster management VID must be different from the management
VID.
This command sets the VLAN ID for the cluster.
The following example sets the cluster VID to 79.
ras> cluster vlan 79
21.2 Cluster Member Firmware and Configuration File
Management
You can use FTP to upload firmware to a cluster member through the cluster manager. You can
also upload or download configuration files. The following example shows uploading
MSC1000G firmware to cluster member 2. See Chapter 33 on page 585 for more on uploading
firmware and uploading or downloading configuration files.
Figure 190 FTP Upload to a Cluster Member Example
C:\>ftp 172.23.19.228
Connected to 172.23.19.228.
220 FTP version 1.0 ready at Fri Nov 10 10:53:52 2006
User (172.23.19.228:(none)): admin
331 Enter PASS command
Password:
230 Logged in
226 File sent OK
ftp> bin
200 Type I OK
ftp> cd member-2
257 "/node-2" is current directory
ftp> put 370AIN0b5.bin
200 Port command okay
150 Opening data connection for STOR ras
226 File received OK
ftp: 3558910 bytes sent in 3.89Seconds 914.65Kbytes/sec.
ftp>
The following table explains some of the FTP parameters.
Table 163 FTP Upload to a Cluster Member Example
386
FTP PARAMETER
DESCRIPTION
User
Enter “admin”.
Password
The web configurator password default is 1234.
bin
Changes the transfer mode to binary.
MSC1000G User’s Guide
Chapter 21 cluster Commands
Table 163 FTP Upload to a Cluster Member Example (continued)
FTP PARAMETER
DESCRIPTION
V3.70(ABF.0)b5
This is the name of the firmware file you want to upload to the
cluster member.
cd member-2
Use “cd member-” and the index number of the cluster member to
which you want to upload firmware. This index number matches the
member’s number in the
MSC1000G User’s Guide
387
Chapter 21 cluster Commands
388
MSC1000G User’s Guide
CHAPTER
22
config Commands
This chapter describes the configuration file management commands.
22.1 config Commands Summary
The following table lists the config commands. The P column on the right indicates the
administrator privilege level needed to use the command (H for high, M for middle or L for
low).
Table 164 config Commands
COMMAND
DESCRIPTION
P
default
Resets factory default configuration.
H
save
Saves current configuration to nonvolatile memory.
M
Displays the current configuration.
L
config
show
sys|ip|switch|po
rt|profile|acl|v
lan|multicast|al
l [nopause]
22.1.1 config default Command
Syntax:
ras> config default
This command resets the system to the factory default configuration. The system restarts with
the factory default settings.
1
Do not turn off your device while returning to the default configuration.
22.1.2 config save Command
Syntax:
ras> config save
MSC1000G User’s Guide
389
Chapter 22 config Commands
This command saves your configuration when you are done with a configuration session. This
command saves all system configuration to nonvolatile memory. You must use this command
to save any configuration changes that you make, otherwise the system returns to its
previously saved settings when it is restarted. Save your changes after each configuration
session.
Nonvolatile memory refers to the MSC1000G’s storage that remains even if the power is
turned off. Configuration saved in the run time (volatile) memory is lost when the power is
turned off.
1
Do NOT turn off your device while saving your configuration.
22.1.3 config show Command
Syntax:
ras> config show sys|ip|switch|port|profile|acl|vlan|multicast|all [nopause]
This command shows the configuration of the specified category. nopause allows you to
show all settings at one time so you do not need to press a key to continue.
An example is shown next.
ras> config show ip nopause
================= ip ======================================
================= ip/show ====================
interface
interface ip
netmask
vid
--------- --------------- --------------- ---inband
172.23.15.86
255.255.255.0
1
outband
192.168.0.1
255.255.255.0
gateway: 172.23.15.254
================= ip/arp =====================
ip address
time ether address
interface
--------------- ----- ----------------- ---------172.23.14.10
240 00:0d:60:cb:cc:ae inband
172.23.14.12
270 00:0e:7f:a8:90:13 inband
172.23.14.16
260 00:0d:60:cb:22:4c inband
172.23.14.19
290 00:0e:7f:a9:80:70 inband
172.23.14.35
260 00:a0:c5:b2:6a:43 inband
172.23.14.91
240 00:0a:e4:0a:76:21 inband
172.23.14.99
270 00:0b:cd:fc:30:45 inband
172.23.14.250
270 00:a0:c5:8e:9d:16 inband
172.23.15.172
300 02:0e:a6:89:41:60 inband
172.23.15.254
300 00:04:80:9b:78:00 inband
arp entry: 18
================= ip/route ===================
dest
interface gateway
metric
------------------ ---------- --------------- -----192.168.0.0/24
outband
192.168.0.1
1
172.23.15.0/24
inband
172.23.15.86
1
default
inband
172.23.15.254
1
390
name
----------------
MSC1000G User’s Guide
CHAPTER
23
diagnostic Commands
This chapter describes the diagnostic commands.
23.1 diagnostic Commands Summary
The following table lists the diagnostic commands. The P column on the right indicates the
administrator privilege level needed to use the command (H for high, M for middle or L for
low).
Table 165 diagnostic Commands
COMMAND
DESCRIPTION
P
diagnostic
A Loop Diagnostic Mode test provides
details about the condition of an ADSL
line. This feature is applicable for ALC
line cards only.
ldm
show
<slot-port>
Displays the most recent loop diagnostic
result|hlin|hlog|q mode test results for the specified
subscriber port.
ln|snr
M
test
<slot-port>
Sets the specified subscriber port to loop M
diagnostic mode and displays the results.
loopback
f5
<slot-port-vpi/
vci>
Performs an OAMF5 loopback test on the
specified subscriber port or PVC.
M
selt
test
<slot-port>
This feature is applicable for ALC line
cards only.
Single End Loop Test (SELT) checks the
distance to the subscriber’s location.
M
Note: The port must have an open
loop. There cannot be a
DSL device, phone, fax
machine or other device
connected to the
subscriber’s end of the
telephone line.
Starts SELT on the port.
show
MSC1000G User’s Guide
<slot-port>
Displays the SELT result (such as line
type and loop length).
M
391
Chapter 23 diagnostic Commands
23.2 diagnostic Commands
Use these commands to execute a specified diagnostic or test function to an interface port or a
subscriber port.
23.2.1 diagnostic ldm show Command
Syntax:
diagnostic ldm show <slot-port> result|hlin|hlog|qln|snr
where
result
=
Displays the basic loop diagnostic mode test results.
hlin
=
Displays the channel characteristics function represented in linear format
by a scale factor and a complex number. These are the maximum
upstream and downstream scale factors used in producing the channel
characteristics function.
hlog
=
Displays channel characteristics. The format provides magnitude values
in a logarithmic scale. This can be used in analyzing the physical
condition of the ADSL line.
qln
=
Displays the Quiet Line Noise for a DMT tone is the rms (root mean
square) level of the noise present on the line, when no ADSL signals are
present. It is measured in dBm/Hz. The QLN can be used in analyzing
crosstalk.
snr
=
Displays the upstream and downstream Signal to Noise Ratio (in dB). A
DMT tone’s SNR is the ratio between the received signal power and the
received noise power. The SNR can be used in analyzing time dependent
changes in crosstalk levels and line attenuation (such as those caused by
temperature variations and moisture).
Use this command to display the most recent loop diagnostic mode test results for an ADSL
port. Use the loop diagnostics results to analyze problems with the physical ADSL line.
"
Wait at least one minute after using the diagnostic ldm test command before
using the diagnostic ldm show command.
The following example performs loop diagnostics on DSL port 4 of the line card in slot 5.
392
MSC1000G User’s Guide
Chapter 23 diagnostic Commands
The command then displays the results of the ADSL port loop diagnostics.
ras> diagnostic ldm show 5-4 result
port 5-4:
near end
-----------attainable bit rate(kpbs):
1420
loop attenuation(dB)
:
1.6
signal attenuation(dB)
:
0.5
snr margin(dB)
: out of range
actual tx power fe(dBm) :
11.7
far end
-----------26060
0.0
0.0
out of range
10.1
23.2.2 diagnostic ldm test Command
Syntax:
diagnostic ldm test <slot-port>
This command has the system perform a Loop Diagnostic Mode test. This is a Dual End Loop
Test (DELT). It provides details about the condition of the specified ADSL port’s line. The
ADSL port must be set to ADSL2 or ADSL2+ ADSL operational mode and have a
connection. Use the loop diagnostics results to analyze problems with the physical ADSL line.
The subscriber device must also support DELT in order to perform this. This feature is
applicable for ALC line cards only.
It takes about one minute for the loop diagnostics to finish.
The following example performs loop diagnostics on DSL port 4 of the line card in slot 5. The
command then displays the results of the ADSL port loop diagnostics.
ras>
diagnostic ldm test 7-5
23.2.3 diagnostic loopback f5 Command
Syntax:
diagnostic loopback f5 <slot-port-vpi/vci>
This command has the system perform an OAMF5 loopback test on the specified virtual
circuit. An Operational, Administration and Maintenance Function 5 (OAMF5) test is used to
test the connection between two DSL devices. First, the DSL devices establish a virtual circuit.
Then the local device sends an ATM F5 cell to be returned by the remote DSL device (both
DSL devices must support ATM F5 in order to use this test).
The following example has the system perform a local loopback test on a virtual circuit on
DSL port 5 of the line card in slot 7. The virtual circuit is identified by VPI 0 and VCI 33.
ras> diagnostic loopback f5 7-5-0/33
line 1 oam loopback success!
MSC1000G User’s Guide
393
Chapter 23 diagnostic Commands
23.2.4 diagnostic selt show Command
Syntax:
diagnostic selt show <slot>|<slot-port>
This command displays the Single End Loop Test (SELT) result after you have performed a
SELT test on the specified port on the line card. The report tells you what gauge of telephone
wire is connected to the port and the approximate length of the line measured both in meters
(m) and thousands of feet (Kft).
23.2.5 diagnostic selt test Command
Syntax:
diagnostic selt test <slot-port>
This command starts the Single End Loop Test (SELT) on the specified port on the line card.
This test checks the distance to the subscriber’s location.
"
394
The port must have an open loop. There cannot be a DSL device, phone, fax
machine or other device connected to the subscriber’s end of the telephone
line.
MSC1000G User’s Guide
CHAPTER
24
ip Commands
This chapter shows you how to use the ip commands to configure the IP (Internet Protocol)
parameters.
24.1 ip Commands Summary
The following table lists the ip commands. The P column on the right indicates the
administrator privilege level needed to use the command (H for high, M for middle or L for
low).
Table 166 ip Commands
COMMAND
DESCRIPTION
P
flush
Clears the device’s IP Address
Resolution Protocol table.
M
show
Displays the device’s IP Address
Resolution Protocol table.
L
gateway
<ip>
Sets the default gateway IP address.
M
ping
<ip>
[<count>]
Pings a host (default 3 times)
<count> = number of pings.
L
route
delete
<dst-ip>[/
<netmask>]
<gateway>
Removes a routing table entry.
M
set
<dst-ip>[/
<netmask>]
<gateway-ip>
[<metric>]
[<name>]
Adds or modifies a route entry.
<gateway-ip> = a gateway IP
address of ‘0.0.0.0/0’ means a default
gateway.
M
Displays the routing table.
L
Displays the IP addresses of the inband and out-of-band management
interfaces and the default gateway, as
well as the in-band management VLAN
ID.
L
ip
arp
show
show
MSC1000G User’s Guide
395
Chapter 24 ip Commands
Table 166 ip Commands (continued)
COMMAND
DESCRIPTION
P
set
inband|outb
and <ip>[/
<netmask>]
[<inbandvid>]
Sets the management IP address,
subnet mask and in-band management
VLAN ID.
<ip> = ‘0.0.0.0’ disables a
management interface.
M
tracert
<ip>
Sends a traceroute packet to the IP
address (in the field to the left) and uses
the response to determine the path a
packet takes to that IP address.
L
24.2 ip Commands
The following shows general IP commands that help with the management of the IP
parameters.
24.2.1 ip arp flush Command
Syntax:
ras> ip arp flush
This command clears the MSC1000G’s IP Address Resolution Protocol (ARP) table.
24.2.2 ip arp show Command
Syntax:
ras> ip arp show
This command displays the MSC1000G’s IP Address Resolution Protocol (ARP) table. This is
the list of IP addresses and matching MAC addresses that the device has resolved.
An example is shown next.
ras> ip arp show
ip address
time
--------------- ----172.23.14.65
300
172.23.15.172
300
172.23.15.254
300
arp entry: 3
ether address
----------------00:00:86:47:11:91
02:0e:a6:89:41:60
00:04:80:9b:78:00
interface
---------outband
outband
outband
24.2.3 ip gateway Command
Syntax:
ras> ip gateway <ip>
This command sets the system’s default gateway IP address.
396
MSC1000G User’s Guide
Chapter 24 ip Commands
The following example sets the system to use 172.23.15.254 as the default gateway.
ras> ip gateway
172.23.15.254
24.2.4 ip ping Command
Syntax:
ras> ip ping <ip> [<count>]
where
<ip>
=
The IP address of the target.
[<count>]
=
The number of pings you want the MSC1000G to send.
This is an IP facility to check for network functionality by sending an echo request to another
IP host and waiting for the reply.
The following example has the MSC1000G send 4 pings to IP address 172.23.19.254.
ras> ip ping 172.23.19.254 4
pinging 172.23.19.254 with 32 bytes of data:
reply
reply
reply
reply
from
from
from
from
172.23.19.254:
172.23.19.254:
172.23.19.254:
172.23.19.254:
bytes=32
bytes=32
bytes=32
bytes=32
time<1ms
time<1ms
time<1ms
time<1ms
24.2.5 ip route delete Command
Syntax:
ras> ip route delete
<dst-ip>[/<netmask>] <gateway>
where
<dst ip>
=
The destination IP address of packets to which this static route applies.
[/netmask]
=
The destination subnet mask of packets to which this static route
applies.
<gateway>
=
The IP address of the gateway that you want to send the packets
through.
This command removes a static, IP forwarding route.
The following example removes a static route for destination IP address 172.23.19.233
through a gateway at IP address 172.23.15.253.
ras> ip route delete 172.23.19.233 172.23.15.253
MSC1000G User’s Guide
397
Chapter 24 ip Commands
24.2.6 ip route set Command
Syntax:
ras> ip route set
<dst-ip>[/<netmask>] <gateway-ip> [<metric>] [<name>]
where
<dst ip>
=
The destination IP address of packets that this static route is to
route.
[/
<netmask>]
=
The destination subnet mask of packets that this static route is to
route.
<gatewayip>
=
The IP address of the gateway that you want to send the packets
through.
[<metric>]
=
The metric (hop count) of this static route.
[<name>]
=
A name to identify this static route. Up to 31 English keyboard
characters. Spaces and tabs are not allowed.
This command defines a new, static IP forwarding route or edits an existing one.
The following example creates a static route named “Bob” to send traffic for destination IP
address 172.23.19.233 through a gateway at IP address 172.23.15.253.
ras> ip route set 172.23.19.233 172.23.15.253 5 Bob
24.2.7 ip route show Command
Syntax:
ras> ip route show
This command displays the MSC1000G’s routing table. An example is shown next.
ras> ip route show
dest
-----------------172.23.15.0/24
172.23.19.233
192.168.1.0/24
default
interface
---------outband
outband
inband
outband
gateway
metric name
--------------- ------ ---------------172.23.15.86
1 172.23.15.253
5 Bob
192.168.1.2
1 172.23.15.254
1 -
24.2.8 ip show Command
Syntax:
ras> ip show
398
MSC1000G User’s Guide
Chapter 24 ip Commands
Use the command to display the current management IP settings. An example is shown next.
ras> ip show
interface
interface ip
netmask
vid
--------- --------------- --------------- ---inband
192.168.1.2
255.255.255.0
1
outband
172.23.15.86
255.255.255.0
gateway: 172.23.15.254
24.2.9 ip set Command
Syntax:
ras> ip set inband|outband <ip>[/<netmask>] [<inband-vid>]
where
inband
=
Sets the in-band management IP address.
outband
=
Sets the out-of-band management IP address (for the MGMT port).
[<inbandvid>]
=
Sets the VLAN ID (Identifier) of the management (CPU) VLAN. You
must connect to the MSC1000G through a port that is a member of the
management (CPU) VLAN in order to perform in-band management.
This command sets the system’s IP addresses and in-band management VLAN (CPU). You
can only manage the MSC1000G through ports that are members of the management VLAN.
"
By default, you can access the management VLAN from all of the IES-5000’s
in-band ports since they are all in the management VLAN. If you need more
security, please see the following example.
24.2.9.1 Configuring Management VLAN Example
"
After the following example configuration, you must connect through the third
Ethernet port (uplink port 1) in order to perform inband management. You must
connect through a VLAN aware device that is using the proper VLAN ID in
order to perform management.
Another option would be to set the PVID of the third Ethernet port to 3, but this is not
recommended since all Ethernet frames received on the port without a VLAN tag would be
considered part of VLAN 3.
By default, the DSL ports are members of the management VLAN (VID 1). The following
procedure shows you how to configure a tagged VLAN that limits management access to just
one Ethernet port.
MSC1000G User’s Guide
399
Chapter 24 ip Commands
"
Use the out-of-band management port or console port to configure the
MSC1000G if you misconfigure the management VLAN and lock yourself out
from performing in-band management.
1 Use the vlan set command to configure a VLAN ID (VID 3 in this example) for
managing the MSC1000G (the “management” or “CPU” VLAN).
ras> vlan set 3 up1 fix tag
ras> vlan enable 3
2 Use the ip set command to set VID 3 as the management VLAN.
ras> ip set inband 192.168.1.2 3
24.2.10 ip tracert Command
Syntax:
ras> ip tracert <ip>
This command sends a traceroute packet to the IP address (in the field to the left) and uses the
response to determine the path a packet takes to that IP address.
The following example displays route information to an Ethernet device with an IP address of
172.23.19.11.
ras> ip tracert 172.23.19.11
Resolving 172.23.19.11... traceroute to 172.23.19.11 (172.23.19.11), 30 hops
max
, 40 byte packet
1:172.23.14.254 (0 ms) (0 ms) (0 ms)
2:172.23.19.11 (0 ms) (0 ms) (0 ms)
traceroute done:
400
MSC1000G User’s Guide
CHAPTER
25
lcman Commands
This chapter shows you how to use the lcman commands to manage the line cards.
25.1 lcman Commands Summary
The following table lists the lcman commands. The P column on the right indicates the
administrator privilege level needed to use the command (H for high, M for middle or L for
low).
Table 167 lcman Commands
COMMAND
DESCRIPTION
P
lcman
disable
<slot>
Turns off the specified line card.
H
enable
<slot>
Turns on the specified line card.
H
reset
<slot>
Performs a hardware reset on the
specified line card.
H
show
[<slot>]
Displays information about the installed
cards.
L
25.2 lcman Commands
Use the lcman (line card manager) commands to manage the line cards.
25.2.1 lcman enable Command
Syntax:
ras> lcman enable <slot>
This command turns on the management of the specified line card. This also restarts the line
card.
The following example turns on the line card in slot 7.
ras> lcman enable 7
MSC1000G User’s Guide
401
Chapter 25 lcman Commands
25.2.2 lcman disable Command
Syntax:
ras> lcman disable <slot>
This command turns off the management of the specified line card. This command is for
troubleshooting.
The MSC1000G can automatically restart a line card that it is managing. If a line card is
unresponsive and the lcman reset command does not help, you may need to use lcman
disable before connecting to the line card’s console port and recovering the firmware. Do
this to keep the MSC1000G from turning the line card off during your firmware recovery.
The following example turns off the line card in slot 7.
ras> lcman disable 7
25.2.3 lcman reset Command
Syntax:
ras> lcman reset <slot>
This command performs a hardware reset on the specified line card. You can use this on an
unresponsive line card.
The following example resets the line card in slot 7.
ras> lcman reset 7
25.2.4 lcman show Command
Syntax:
ras> lcman show [<slot>]
This command displays information about the line cards in the system. This information
includes how many slots are under management, and the type of line card the MSC1000G is
managing in each slot (if any), as well as the line card’s uptime, firmware version and any
alarms.
402
MSC1000G User’s Guide
Chapter 25 lcman Commands
The following example shows an overview of all of the cards that are installed in the system’s
slots.
ras> lcman show
id state
card type
uptime f/w version
heat vol mon down out
-- -------- ----------- ------------- ------------------- --------------------1 standby MSC1000G
01:36:48 V3.70(LU.0)
2 active
MSC1000G
23:45:55 V3.70(LU.0)
3 4 ALC1248G-53
V3.70(ABE.0)
V
V
5 active
ALC1248G-53
22:45:41 V3.53(ABE.0)
6 7 ALC1248G-51
V3.70(ABD.0)
V
V
8 9 ALC1248G-53
V3.53(ABE.0)
V
V
10 ALC1248G-53
V3.53(ABE.0)
V
V
The following table describes labels in the example.
Table 168 lcman show Command
LABEL
DESCRIPTION
ID
This is the slot number.
state
This displays whether or not the installed card is turned on.
card type
This identifies the model of card that is installed or was last installed in the
slot.
uptime
This is how long the card has been active.
f/w version
This is the release of firmware that the card is using.
The following columns display a “V” if an alarm has been detected. “-”
displays if no related alarm has been detected.
heat
This displays whether or not there is an alarm due to the card’s temperature
being too high or too low.
vol
This displays whether or not there is an alarm due to the card’s voltage being
too high or too low.
mon
This displays whether or not the hardware monitor sensor has failed.
down
This displays whether or not the installed card is down (inactive).
out
This displays whether the card is installed or has been removed.
MSC1000G User’s Guide
403
Chapter 25 lcman Commands
The following example shows information about the line card installed in slot 1.
ras> lcman show 1
slot1 SLC1248G-22:
uptime: 01:33:24
status:
hardware sensor:
temperature
:
voltage
:
module exist
:
module status :
ok
ok
ok
ok
ok
inventory information:
hardware version: AA
hardware serial number: Z51854282
firmware version: V3.70(ABF.0)b5 | 11/07/2006
DSL driver version: 0.9.1.0
DSL modem version: 1.1-1.5.0__004
current voltage level:
current temperature:
1.8V: 1.777
Temp1: 37.000
3.3V: 3.320
Temp2: 41.000
15.0V: 14.961
Temp3: 38.000
'*' indicates a current alarm
The following table describes labels in the example.
Table 169 lcman show Command: Detailed Information
404
LABEL
DESCRIPTION
slot
This is the slot number followed by the model of card that is installed or was
last installed in the slot.
uptime
This is how long the card has been active.
f/w version
This is the release of firmware that the card is using.
status
The following columns display a “V” if an alarm has been detected. “-”
displays if no related alarm has been detected.
hardware sensor
This displays the condition of the card’s hardware monitor sensor.
temperature
This displays whether or not the card’s measured temperature is within the
configured operating thresholds.
voltage
This displays whether or not the card’s measured current is within the
configured operating thresholds.
module exist
This displays whether or not the card is installed.
module status
This displays whether or not the installed card is up (active).
hardware version
This is the version of the card’s physical hardware.
hardware serial
number
This is the card’s individual identification number assigned at the factory.
firmware version
This is the release of firmware that the card is using.
DSL driver version
This is the driver version that a DSL line card’s DSL chip is using.
DSL modem version
This is the release of modem code that a DSL line card is using.
MSC1000G User’s Guide
Chapter 25 lcman Commands
Table 169 lcman show Command: Detailed Information (continued)
LABEL
DESCRIPTION
current voltage level
These are the voltages (in volts) measured at the card’s sensors. An “*”
indicates the voltage is outside of the configured thresholds.
current temperature
These are the temperatures (in degrees Celsius) measured at the card’s
sensors. An “*” indicates the temperature is outside of the configured
thresholds.
MSC1000G User’s Guide
405
Chapter 25 lcman Commands
406
MSC1000G User’s Guide
CHAPTER
26
multicast Commands
This chapter shows you how to use the multicast commands.
26.1 multicast Commands Summary
The following table lists the multicast commands. The P column on the right indicates the
administrator privilege level needed to use the command (H for high, M for middle or L for
low).
Table 170 multicast Commands
COMMAND
DESCRIPTION
P
multicast
bandwidth
default
<bandwidth>
Sets the default bandwidth (between
1 and 100 000 kbps) allowed for
multicast channel(s) for which you
have not set the bandwidth settings.
M
delete
<index>
Removes the specified multicast
bandwidth configuration.
M
port
disable <slotport>
Deactivates multicast bandwidth
setting on a port.
M
enable <slotport>
Activates multicast bandwidth setting
on a port.
M
set <slot-port>
<bandwidth>
Sets the maximum multicast
bandwidth allowed on a port.
M
show
<slot>|<slotport>
Displays multicast bandwidth settings
on the specified line card or port.
L
<index> <startmcast-ip> <endmcast-ip>
<bandwidth>
Sets bandwidth allowed for the
specified multicast channel(s).
M
show
Displays multicast bandwidth settings
on the device.
L
disable
Turns off IGMP proxy or snooping.
M
set
igmp
MSC1000G User’s Guide
enable
proxy|snooping
[v2|v3]
Turns on IGMP proxy or snooping
using the specified version.
M
qryvid
delete
Removes an IGMP query VLAN ID.
M
set <vid>
Adds an IGMP query VLAN ID.
M
show
Displays the IGMP query VLAN IDs.
L
407
Chapter 26 multicast Commands
Table 170 multicast Commands (continued)
COMMAND
show
igmpcount
igmpfilter
mvlan
smcast
DESCRIPTION
P
Displays the IGMP mode (proxy,
snooping or disabled) and version (v2
or v3).
M
disable
<slot-port>
Turns off the IGMP count limit for a
DSL port(s).
M
enable
<slot-port>
Turns on the IGMP count limit for a
DSL port(s).
M
set
<slot-port>
<count>
Sets the IGMP count limit for a DSL
port(s).
M
show
<slot>
Displays the IGMP count limit setting
status for the specified slot.
L
set
<slot-port>
<igmpfilter>
Sets a DSL port(s) to use an IGMP
filter profile.
M
show
<slot>
Displays multicast group
configuration and dynamic group
member status.
L
delete
<vid>
Removes a multicast VLAN.
M
disable
<vid>
Deactivates a multicast VLAN.
M
enable
<vid>
Activates a multicast VLAN.
M
group
delete <vid>
<index>
Removes a multicast VLAN group.
M
set <vid>
<index> <startmcast-ip> <endmcast-ip>
Sets a multicast VLAN group.
M
name
<name>
Sets the name of the multicast VLAN
setting.
M
set
<vid> <slotport>
fix|forbid
Sets the port multicast group
membership settings.
M
show
<vid>
Displays multicast VLAN settings.
L
delete
<vid> <groupip>
Removes a static multicast group
entry.
M
set
<vid> <groupip>
all|sub1|sub2|u
p1|up2|<slotport>
fix|forbid|norm
al
Configures a static multicast group
entry.
M
Displays the static multicast group
configuration.
L
show
26.2 multicast bandwidth Commands
Use these commands to configure bandwidth requirements for multicast channels.
408
MSC1000G User’s Guide
Chapter 26 multicast Commands
26.2.1 multicast bandwidth default Command
Syntax:
multicast bandwidth default <bandwidth>
where
=
<bandwidth>
Allowed bandwidth between 1 and 1000 000 kbps (kilo bits per
second).
This command sets the default bandwidth for multicast channels for which you have not
configured bandwidth requirements yet. Multicast bandwidth settings on channels (using the
multicast bandwidth set command) have higher priority over this default setting.
The following example sets the default multicast bandwidth to 1000 kbps.
ras> multicast bandwidth default 1000
26.2.2 multicast bandwidth delete Command
Syntax:
multicast bandwidth delete <index>
This command removes the specified multicast bandwidth configuration profile.
26.2.3 multicast bandwidth set Command
Syntax:
multicast bandwidth set <index> <start-mcast-ip> <end-mcast-ip> <bandwidth>
where
<index>
=
A unique number for this setting.
<startmcast-ip>
=
The start of the multicast address range.
<end-mcastip>
=
The end of the multicast address range. For one multicast address,
enter the start multicast address again.
<bandwidth>
=
Allowed bandwidth between 1 and 1000 000 kbps (kilo bits per
second).
This command configures bandwidth allocation for the multicast channel(s). For multicast
channel(s) for which you have not configured bandwidth settings, the default multicast
bandwidth setting applies (refer to Section 26.2.1 on page 409).
The following example sets the bandwidth allowed for the specified multicast channels to
1000 Kbps.
ras> multi
MSC1000G User’s Guide
band set 1 230.230.1.1 230.230.1.10 1000
409
Chapter 26 multicast Commands
26.3 multicast bandwidth port Commands
Use these commands to configure multicast bandwidth limitation on specified ports.
26.3.1 multicast bandwidth port disable Command
Syntax:
multicast bandwidth port disable <slot-port>
This command deactivates multicast bandwidth settings of the specified port.
26.3.2 multicast bandwidth port enable Command
Syntax:
multicast bandwidth port enable <slot-port>
This command activates multicast bandwidth setting on the specified port.
26.3.3 multicast bandwidth port set Command
Syntax:
multicast bandwidth port set <slot-port> <bandwidth>
This command sets the bandwidth allowed for multicast traffic on the specified port(s).
This following example sets the multicast bandwidth limit to 1000 kbps on port 1 on the line
card in slot 3.
ras> multicast bandwidth port set 3-1 1000
26.3.4 multicast bandwidth port show Command
Syntax:
multicast bandwidth port show <slot-port>
This command displays the multicast bandwidth setting on the specified port. The following
example shows the multicast bandwidth setting for port 1 on the line card in slot 3.
ras> multicast bandwidth port show 3-1
card name: ALC1248G-53
port enable
bandwidth
------ ------ ----------3- 1
1000
ras>
26.4 multicast igmp Commands
Use these commands to enable or disable IGMP proxy or IGMP snooping.
410
MSC1000G User’s Guide
Chapter 26 multicast Commands
26.4.1 multicast igmp disable Command
Syntax:
multicast igmp disable
This command deactivates IGMP on the system. All IGMP packets will be ignored.
26.4.2 multicast igmp enable Command
Syntax:
multicast igmp enable proxy|snooping [v2|v3]
This command turns on IGMP proxy or snooping using the specified version.
Use proxy to have the device use IGMP proxy. Use IGMP snooping to have the switch
passively learn multicast groups.
If you use IGMPv2, the system discards IGMPv3 packets. This provides better security if none
of the devices in the network use IGMPv3. If you select IGMPv3, the system recognizes both
IGMPv2 and IGMPv3.
The following example sets the device to use IGMP proxy with IGMPv2.
ras> multicast igmp enable proxy v2
26.4.3 multicast igmp qryvid delete Command
Syntax:
multicast igmp qryvid delete <vid>
This command removes an IGMP query VLAN ID. The following example removes IGMP
query VLAN ID 6.
ras> multicast igmp qryvid delete 6
26.4.4 multicast igmp qryvid set Command
Syntax:
ras> multicast igmp qryvid set <vid>
This command adds an IGMP query VLAN ID. When using IGMP proxy, the device sends
IGMP queries to the members of the query VLANs. You must have already used the vlan
commands to create the VLAN before you use this command.
The following example sets VLAN ID 6 as an IGMP query VLAN.
ras> multicast igmp qryvid set 6
MSC1000G User’s Guide
411
Chapter 26 multicast Commands
26.4.5 multicast igmp qryvid show Command
Syntax:
ras> multicast qryvid show
This command displays the IGMP query VLAN IDs.
ras>
igmp
vid
---6
multicast igmp qryvid show
proxy query vlan table
static/dynamic
-------------static
26.4.6 multicast igmp show Command
Syntax:
ras> multicast igmp show
This command displays the IGMP mode and version. The following shows an example.
ras> multicast igmp show
Igmp is disabled
igmp version is v2
26.5 IGMP Count Limit
With the IGMP count feature, you can limit the number of IGMP groups a subscriber on a port
can join. This allows you to control the distribution of multicast services (such as content
information distribution) based on service plans and types of subscription.
IGMP count is useful for ensuring the service quality of high bandwidth services like video or
Internet Protocol television (IPTV). IGMP count can limit how many channels (IGMP groups)
the subscriber connected to a DSL port can use at a time. If each channel requires 4~5 Mbps of
download bandwidth, and the subscriber’s connection supports 11 Mbps, you can use IGMP
count to limit the subscriber to using just 2 channels at a time. This also effectively limits the
subscriber to using only two IPTVs with the DSL connection.
26.6 multicast igmpcount Commands
Use these commands to configure the IGMP count limit settings.
26.6.1 multicast igmpcount disable Command
Syntax:
multicast igmpcount disable <slot-port>
This command turns off the IGMP count limit for the specified DSL port(s).
412
MSC1000G User’s Guide
Chapter 26 multicast Commands
The following command turns off the IGMP count limit for DSL port 4 on the line card in slot
3.
ras> multicast igmpcount disable 3-4
26.6.2 multicast igmpcount enable Command
Syntax:
multicast igmpcount enable <slot-port>
This command turns on the IGMP count limit for the specified DSL port(s).
The following command turns on the IGMP count limit for DSL port 4 on the line card in slot
3.
ras> multicast igmpcount enable 3-4
26.6.3 multicast igmpcount set Command
Syntax:
multicast igmpcount set <slot-port> <count>
This command sets the IGMP count limit for the specified DSL port(s).
The following command sets a IGMP count limit of 2 for DSL port 4 on the line card in slot 3.
ras> multicast igmpcount set 3-4 2
26.6.4 multicast igmpcount show Command
Syntax:
multicast igmpcount show <slot>
MSC1000G User’s Guide
413
Chapter 26 multicast Commands
This command displays the IGMP count limit setting status for the DSL ports on the line card
in the specified slot. The following example displays the IGMP count limit settings for the
ports on the line card in slot 3.
ras> multicast igmpcount show 3
[slot9] igmpcount
port enable count
----- ------ ----3- 1
5
3- 2
5
3- 3
5
3- 4
5
3- 5
5
3- 6
5
-------------------------- [ snip ] -------------------------3-44
5
3-45
5
3-46
5
3-47
5
3-48
5
26.7 multicast igmpfilter Commands
Use the IGMP filter commands to define IGMP filter profiles and assign them to DSL ports.
IGMP filter profiles allow you to control access to IGMP multicast groups. You can have a
service available to a specific IGMP multicast group. You can configure an IGMP filter profile
for an IGMP multicast group that has access to a service (like a SIP server for example). Then
you can assign the IGMP filter profile to DSL ports that are allowed to use the service.
26.7.1 multicast igmpfilter set Command
Syntax:
switch igmpfilter set <slot-port> <igmpfilter>
where
<igmpfilter>
=
The name of an IGMP filter profile.
This command sets an ADSL port(s) to use an IGMP filter profile.
The following example sets ADSL port 9 in slot 7 to use the voice IGMP filter profile.
ras> multicast igmpfilter set 7-9 voice
26.7.2 multicast igmpfilter show Command
Syntax:
multicast igmpfilter show <slot>
This command displays which IGMP filter profile DSL ports are using.
414
MSC1000G User’s Guide
Chapter 26 multicast Commands
The following example displays which IGMP filter profiles the DSL ports in slot 3 are using.
ras> multicast igmpfilter show 3
<<slot3 igmpfilter configuration>>
port igmpfilter
---- ------------------------------1 DEFVAL
2 DEFVAL
3 DEFVAL
4 DEFVAL
5 DEFVAL
6 DEFVAL
7 DEFVAL
8 DEFVAL
9 DEFVAL
------------------------- [ snip ] ------------------------44 DEFVAL
45 DEFVAL
46 DEFVAL
47 DEFVAL
48 DEFVAL
26.8 multicast mvlan Commands
Use these commands to configure VLAN multicast settings and set multicast port members.
Multicast VLAN allows one single multicast VLAN to be shared among different subscriber
VLANs on the network. This improves bandwidth utilization by reducing multicast traffic in
the subscriber VLANs and simplifies multicast group management.
26.8.1 multicast mvlan delete Command
Syntax:
multicast mvlan delete <vid>
This command removes the specified multicast VLAN configuration.
26.8.2 multicast mvlan disable Command
Syntax:
multicast mvlan disable <vid>
This command deactivates the specified multicast VLAN. The following example disables
multicast VLAN 12.
ras> multicast mvlan disable 12
26.8.3 multicast mvlan enable Command
Syntax:
multicast mvlan enable <vid>
MSC1000G User’s Guide
415
Chapter 26 multicast Commands
This command activates the specified multicast VLAN.
26.8.4 multicast mvlan group delete Command
Syntax:
multicast mvlan group delete
<vid> <index>
This command removes the specified multicast VLAN group setting.
26.8.5 multicast mvlan group set Command
Syntax:
multicast mvlan group set <vid> <index> <start-mcast-ip> <end-mcast-ip>
where
<index>
=
Multicast group number (1 -16).
<start-mcast-ip>
=
Start of the multicast IP address range.
<end-mcast-ip>
=
End of the multicast IP address range.
This command creates a multicast VLAN group. The following example creates a multicast
VLAN with VID 10 and group index 1. The multicast address range is 224.224.224.1 ~
224.224.224.10.
ras> multicast mvlan group set 10 1 224.224.224.1 224.224.224.10
26.8.6 multicast mvlan group delete Command
Syntax:
multicast mvlan group delete <vid> <index>
This command removes the specified multicast VLAN group configuration.
26.8.7 multicast mvlan name Command
Syntax:
multicast mvlan name <vid> <name>
This command sets the name of the multicast VLAN. The following example sets the name of
the multicast VLAN (VID =10) to “example”.
ras> multicast mvlan name 10 example
26.8.8 multicast mvlan set Command
Syntax:
multicast mvlan set <vid> <slot-port> fix|forbid
416
MSC1000G User’s Guide
Chapter 26 multicast Commands
where
fix|forbid
=
fix sets the port to be a permanent member of this multicast VLAN.
forbid blocks the port from joining this multicast VLAN. The port
will not accept multicast traffic from this multicast VLAN.
This command sets a multicast VLAN and the allowed/blocked port member(s).
The following example creates a multicast VLAN (VID =10) and sets port 1 on the line card in
slot 3 to be a member of this multicast VLAN.
ras> multicast mvlan set 10 3-1 fix
26.8.9 multicast mvlan show Command
Syntax:
multicast mvlan show [vid]
This command displays the current multicast VLAN settings. In the state column, “-” indicates
the multicast VLAN is not active while “V” indicates the multicast VLAN is active.
ras> multicast
idx vid state
--- ---- ----1
10
V
2
12
ras>
mvlan show
name
------------------------------example
26.9 multicast smcast Commands
Use the following multicast commands to manage static multicast groups.
26.9.1 multicast smcast delete Command
Syntax:
multicast smcast delete <vid> <group-ip>
where
<group-ip>
=
A multicast IP address.
This command removes a static multicast group entry.
The following example removes a static multicast group for VLAN 23 with static multicast
address 239.255.255.255.
ras> multicast smcast delete 23 239.255.255.255
MSC1000G User’s Guide
417
Chapter 26 multicast Commands
26.9.2 multicast smcast set Command
Syntax:
multicast smcast set <vid> <group-ip> all|sub1|sub2|up1|up2|<slot-port>
fix|forbid|normal
where
<group-ip>
=
A multicast IP address.
all|sub1|sub2
|up1|up2|<slo
t-port>
=
The port or ports to which this static multicast group is to apply.
fix|forbid|no
rmal
=
This controls the static multicast group membership status of the port
(or ports).
fix sets the port to be a permanent member of the multicast group.
normal allows the port to join the multicast group when the device
adds it through IGMP protocol.
forbidden prohibits the port from joining the multicast group.
This command configures a static multicast group entry.
The following example creates a static multicast group for VLAN 23. The static multicast
address is 239.255.255.255 and DSL port 9 in slot 7 is a permanent member.
ras> multicast smcast set 23 239.255.255.255 7-9 fix
26.9.3 multicast smcast show Command
Syntax:
multicast smcast show
This command displays the system’s static multicast group configuration.
An example is shown next.
ras>
vid
---1
multicast smcast show
group
slot
port(F:fix, X:forbid, -:normal)
--------------- ---- -----------------------------------------------224.0.0.0
1
2
3
4
123456789012345678901234567890123456789012345678
1 XXXX
2 XXXXXXXXXXXXXXXXXXXXXXXXXXXXXXXXXXXXXXXXXXXXXXXX
3 XXXXXXXXXXXXXXXXXXXXXXXXXXXXXXXXXXXXXXXXXXXXXXXX
4 XXXXXXXXXXXXXXXXXXXXXXXXXXXXXXXXXXXXXXXXXXXXXXXX
5 ------------------------------------------------
Press any key to continue, 'e' to exit
ras>
418
MSC1000G User’s Guide
CHAPTER
27
port Commands
This chapter shows you how to use the port commands.
27.1 port Commands Summary
The following table lists the port commands. The P column on the right indicates the
administrator privilege level needed to use the command (H for high, M for middle or L for
low).
Table 171 port Commands
COMMAND
DESCRIPTION
P
port
ADSL port specific commands
adsl
alarmprof
<slot-port>
<alarmprofile>
Applies an ADSL alarm profile to the
subscriber port.
M
annexl
disable <slotport>
Turns off the Annex L reach extended
feature.
M
enable <slot-port>
[narrow]
Turns on the Annex L reach extended
feature. If the ‘narrow’ is not entered then
Annex L mode will be enabled as ‘wide’
PSD mode.
M
disable <slotport>
Turns off the Annex M double upstream
feature.
M
enable <slot-port>
Turns on the Annex M double upstream
feature (upstream tones from 6 to 63).
M
disable <slotport>
Turns off the Annex I all digital mode
feature.
M
enable <slot-port>
Turns on the Annex I all digital mode
feature.
M
dscarrier0
<slot-port> <m1>
<m2> <m3> <m4> <m5>
<m6> <m7>
Disables downstream carrier tones from 33
to 255.
<m1>~<m7> = carrier tones, 0~ffffffff,
'1' disables the corresponding tone.
M
dscarrier1
<slot-port> <m1>
<m2> <m3> <m4> <m5>
<m6> <m7>
Disables downstream carrier tones from
256 to 511.
<m1>~<m7> = carrier tones, 0~ffffffff,
'1' disables the corresponding tone.
M
inpmin
<slot-port>
<us_inp> <ds_inp>
Sets the upstream (us) and downstream
(ds) Impulse Noise Protection minimum
setting (0~6).
M
annexm
annexi
MSC1000G User’s Guide
419
Chapter 27 port Commands
Table 171 port Commands (continued)
COMMAND
P
optionmask
<slot-port>
<option_mask>
Sets the following attributes.
0x0001= disable Trellis
0x0002 = disable Reed-Solomon
0x0004 = disable upstream bitswap
0x0008 = disable downstream bitswap
0x0010 = disable 1-bit constellation
0x0020 = disable transmit windowing
(ADSL2+ only)
0x0040 = disable s=0.5 support (G.dmt
only)
0x0080 = disable G.lite rate limit (G.lite
only)
M
pmm
disable <slotport>
Turns off power management mode.
M
enable <slot-port>
[L2|L3]
Turns on power management mode.
L2 = power management mode L2
L3 = power management mode L2 and L3
M
param <slot-port>
[l0time <l0time>]
[l2time <l2time>]
[l2pcb <l2atpr>
<l2atprt>] [l2rate
<l2minrate>
<l2maxrate>
<l2threshold>]
Sets the L0 (full power) and L2 (low power)
power mode transition settings.
<l0time> = Time (10 ~ 65535 seconds)
to stay in L0 mode.
<l2time> = Time (10 ~ 65535 seconds)
to wait before performing another power
trims in L2 mode.
<l2atpr> = Maximum aggregated power
reduction (APTR) per trim in dB (0 ~
l2atprt).
<l2atprt> = Maximum total aggregate
power reduction in dB (0-15).
<l2minrate> = Minimum rate in L2 (32
~ 4096).
<l2maxrate> = Maximum rate in L2
(minimum L2 rate ~ maximum upstream
rate in kbps).
<l2threshold> = Line rate threshold to
stay in L2 mode. When the rate is not
within the threshold, the port switches to L0
mode immediately.
M
<slot-port>
fix|power|rate
<max_us_tx>
<max_ds_tx>
<max_rx>
Specifies the maximum allowed transmit
power and maximum aggregate received
power.
fix|power|rate = PSD and power
adaptivity
fix = fixed mode
power = priority to power
rate = priority to rate
<max_us_tx> = maximum upstream
transmit power, -130~200 in 0.1 dBm.
<max_ds_tx> = maximum downstream
transmit power, -50~200 in 0.1 dBm.
<max_rx> = maximum aggregate receive
power at atu-c, -255~255 in 0.1 dBm.
M
power
420
DESCRIPTION
MSC1000G User’s Guide
Chapter 27 port Commands
Table 171 port Commands (continued)
COMMAND
DESCRIPTION
P
psd
maximum [<slotSets/displays maximum upstream/
port> <us-psd> <ds- downstream nominal PSD values. This is
for testing purposes.
psd>]
<us-psd> = Upstream PSD (-400 ~ 40 in
0.1dBm/Hz).
<ds-psd> = Downstream PSD (-400 ~ 40 in
0.1dBm/Hz).
M
set
<slot-port>
<profile> <mode>
Sets ADSL port(s) to use a profile created
by the profile adsl set command.
<mode> = for Annex A, gdmt, t1413, glite,
auto, adsl2, adsl2+; for Annex B, gdmt,
etsi, auto, adsl2, adsl2+
M
uscarrier
<slot-port> <m0>
<m1>
Disables upstream carrier tones from 0 to
63.
<m0>, <m1> = carrier tones, 0~ffffffff,
'1' disables the corresponding tone.
M
copy
<source>
<destination>
Copies port settings from a source port to
destination ports on the same type of line
card.
M
disabl
e
<slot-port>
Turns off a subscriber port.
M
enable
<slot-port>
Turns on a subscriber port.
M
ipbpvc
arpproxy
flush all
|edgerouter [<ip>
<vid>] |interface
[<ip/mask> <vid>]
Manually flush the learned MAC addresses
from the ARP table.
M
age set <sec>
Sets the valid time interval for learned MAC
addresses in the ARP table. 10..10000
seconds
M
show
Displays the number of seconds a learned
MAC address remains valid in the ARP
table.
M
delete
<slot-port-vpi/
vci>
Remove the specified IP aware Bridge
PVC.
M
domain
delete <domainname>
Removes the specified domain. First delete
all VLANs belonging to this domain.
M
dhcpvlan disable
<domain name>
Disable DHCP VLAN in a domain
M
dhcpvlan enable
Enable DHCP VLAN in a domain
<domain name> <vid>
M
edgerouter
MSC1000G User’s Guide
set <domain name>
Create domain, maximum 8 domains in the
system.
M
show[<domain
name>]
Display domain setting
L
vlan <domain name>
<vid>
<registration>
Set vlan to join or leave specified domain,
maximum 8 VLANs in one domain.
M
delete <ip> <vid>
Delete specified edge router setting
M
421
Chapter 27 port Commands
Table 171 port Commands (continued)
COMMAND
DESCRIPTION
P
set <ip>/<mask>
<vid>
Sets the edge router
M
show [<vid>]
Displays the edge router setting.
L
delete <ip>/<mask>
<vid>
Delete an IP interface.
M
set <ip>/<mask>
<vid> [<slot-portvpi/vci>]
Sets the interface.
M
show all|<ip/
mask>|<vid>|<ip/
mask> <vid>
Displays the interface setting by optional
<ip>/<mask> and vlan id parameter
L
delete <domainname> <ip/mask>
<nexthop>
Deletes route entry from specified domain
M
set <domain-name>
<ip/mask>
<nexthop> <metric>
[<priority>]
Sets a new route to specified edgerouter
for a given domain. Maximum 16 routes in
a domain.
M
show [<domain name>
| <ip/mask> |
<domain> <ip/
mask>]
Displays current routing table for specific
domain.
L
set
<slot-port-vpi/
vci> <profile>
<vid> <priority>
<type>
Sets IP aware Bridge PVC.
M
show
<slot>|<slotport>|<slot-portvpi/vci>
Displays IP aware Bridge PVC settings.
L
vlan
<slot-port-vpi/
vci> <vid>
<registration>
<tag>
Sets VLAN attributes of a PVC.
M
Sets a name for a subscriber port.
M
interface
route
name
<slot-port>
<name>
Commands for configuring and displaying
PPPoA-to-PPPoE (PAE) PVC settings.
paepvc
delete
422
<slot-port-vpi/
vci>
Removes a PAE PVC.
M
MSC1000G User’s Guide
Chapter 27 port Commands
Table 171 port Commands (continued)
COMMAND
set
<slot-port-vpi/
vci> <profile>
<mux> <pvid>
<priority> [acname
<acname>]
[srvcname
<srvcname>]
[hellotime
<hellotime>]
DESCRIPTION
P
Configures a PVC for PAE translation.
<mux> = Encapsulation type (llc or
vcmux).
<acname> = Host name of the access
concentrator.
<srvcname> = Descriptive name for the
service that uses this PVC.
<hellotime> = Timeout (0-600 seconds)
for PPPoE session.
M
Note: Make sure the VID is not
already used for MVLAN or
TLS PVC.
show
<slot>|<slotport>|<slot-portvpi/vci>
Displays the PAE PVC settings for the
specified port and/or slot.
L
Priority PVC channel commands.
ppvc
delete
<slot-port-vpi/
vci>
Removes a priority-based PVC.
M
member
delete <slot-portvpi/vci> <vpi/vci>
Removes a PVC channel from a PVC
group.
M
set <slot-portvpi/vci> <vpi/vci>
<atmprofile>
<level>
Adds a priority-PVC into the group.
M
set
<slot-port-vpi/
vci> <mux> <pvid>
<priority>
Creates a priority-based PVC.
<mux> = encapsulation: llc, vcmux
<pvid> = default VLAN ID, 1~4094
<priority> = default priority, 0~7
M
show
<slot>|<slotport>|<slot-portvpi/vci> [detail]
Displays runtime configured virtual
channels.
L
vlan
<slot-port-vpi/
vci> <vid>
<registration>
<tag>
Adds a PVC channel to a VLAN.
M
<registration> = join or leave
<tag> = TX tagging, tag or untag
Permanent Virtual Circuit channel specific
commands.
pvc
delete
<slot-port-vpi/
vci>
Removes a PVC setting.
M
mvlan
disable <slotport-vpi/vci>
Deactivates multicast VLAN on the PVC.
M
enable <slot-portvpi/vci>
Activates the multicast VLAN in the PVC.
M
MSC1000G User’s Guide
423
Chapter 27 port Commands
Table 171 port Commands (continued)
COMMAND
DESCRIPTION
P
set
<slot-port-vpi/
vci> <profile>
<mux> <pvid>
<priority>
Creates or modifies a PVC setting.
<profile> = ATM profile
<mux> = encapsulation: llc, vcmux
<pvid> = default VLAN ID, 1~4094
<priority> = default priority, 0~7
M
show
<slot>|<slotport>|<slot-portvpi/vci> [detail]
Displays runtime configured virtual
channels.
L
usratelimit
enable <pvc>
Activates upstream rate limiting on the
PVC.
M
disable <pvc>
Deactivates upstream rate limiting on the
PVC.
M
set <pvc> <rate>
Sets the maximum upstream rate (in Kbps)
the PVC is allowed to use.
M
show <pvc>
Displays upstream rate limiting settings.
L
<slot-port-vpi/
vci> <vid>
<registration>
<tag>
Adds a PVC channel to a VLAN.
M
<registration> = join or leave
<tag> = TX tagging, tag or untag
vlan
SHDSL specific commands.
shdsl
alarmprof
<slot-port>
span|stuc|stur|*
<alarmprofile>
Sets SHDSL ports or end point(s) to use an
alarm profile.
span = set alarm profile for the whole
span
stuc = set alarm profile at stuc end point
stur = set alarm profile at stur end point
* = set alarm profile at both stuc and stur
M
pbo
<slot-port>
normal_epl|forced_
epl|forced_no_epl
<value>
Sets power backoff for SHDSL port(s).
normal_epl = Power backoff with EPL
(Estimated Power Loss).
forced_epl = Forced power backoff
with EPL.
forced_no_epl = Forced power
backoff without EPL.
<value> = 0~31 in dB
M
pmms
<slot-port> <mode>
Sets the negotiated noise margin mode of
the SHDSL port(s).
<mode> = negotiated noise margin mode,
M
Sets SHDSL port(s) to use a profile created
by the profile shdsl set
command.
M
normal|forced
set
show
<slot>|<slotport>
Displays port settings.
L
tel
<slot-port>
<telephoneno>
Records a DSL port(s) subscriber’s
telephone number.
M
tlspvc
424
<slot-port>
<profile_name>
Commands to configure Transparent LAN
Service (TLS) or VLAN stacking on the
PVCs.
MSC1000G User’s Guide
Chapter 27 port Commands
Table 171 port Commands (continued)
COMMAND
vdsl
DESCRIPTION
P
delete
<slot-port-vpi/
vci>
Removes a TLS PVC.
M
set
<slot-port-vpi/
vci> <profile>
llc|vcmux <vid>
<priority>
Sets/changes TLS PVC settings.
M
show
<slot>|<slotport>|<slot-portvpi/vci>
Displays the settings for a TLS PVC.
L
alarmprof
<slot-port>
<profile>
Sets the VDSL port(s) to use the specified
alarm profile.
M
frametype
<slot-port>
<all|tag>
Sets the acceptable frame type on the
VDSL port(s).
M
frequencyplan
<slot-port>
<997|998>
Sets the band plan the VDSL port(s) uses.
M
priority
<slot-port>
<priority>
Sets the VDSL port(s) VLAN priority (0 - 7).
M
pvid
<slot-port> <vid>
Sets the port VID on the VDSL port(s).
M
rfiband
<slot-port>
<disable|ansi|etsi
|custom>
Selects an RFI band or disables this
feature.
M
Uses these commands to set custom RFI
settings. The settings are applied to all
VDSL ports.
rficustom
set
disable <index>
Displays the settings of a custom RFI entry.
M
enable <index>
Activates the specified custom RFI entry.
M
set <index>
<start_freq>
<stop_freq>
Sets a custom RFI entry.
index = 1 - 8
start_freq = start of the frequency
range in kHz. start_freq cannot be
bigger than stop_freq.
stop_freq= end of the frequency range
in kHz.
M
show
Displays custom RFI settings.
L
<slot-port>
<profile>
<vdsl_profile>
Specifies the profiles on the VDSL port(s).
profile = custom line profile.
vdsl_profile =
M
disable <slotport>
Disables Transparent LAN Service (TLS).
The system does not insert additional
VLAN tags to packets.
M
enable <slot-port>
Disables Transparent LAN Service (TLS) to
insert additional VLAN tags to packets.
M
set <slot-port>
<svid> <spriority>
Sets/changes TLS settings on the VDSL
port(s).
M
8a|8b|8c|8d|12a|
tls
MSC1000G User’s Guide
425
Chapter 27 port Commands
Table 171 port Commands (continued)
COMMAND
DESCRIPTION
P
upbo
<slot-port>
<on|off>
Enables/disable Upstream Power Back Off
(UPBO).
M
vlan
<slot-port> <vid>
<registration>
<tag>
Sets the VLAN setting on the VDSL port(s).
M
27.2 port Commands
Use the port commands to configure the DSL ports.
27.3 port adsl Commands
Use the port adsl commands to configure the subscriber ADSL ports.
27.3.1 port adsl alarmprof Command
Syntax:
port adsl alarmprof <slot-port> <alarmprofile>
where
<alarmprofile>
=
The name of an ADSL alarm profile.
This command applies (maps) an ADSL alarm profile to the subscriber port(s).
The following example sets ADSL port 5 on the line card in slot 7 to use the SESalarm alarm
profile.
ras> port adsl alarmprofile 7-5 SESalarm
27.3.2 port adsl annexl disable Command
Syntax:
port adsl annexl disable <slot-port>
This command turns off the Annex L reach extended feature on the specified ADSL2 port(s).
The following example turns off the Annex L feature for port 5 on the line card in slot 75.
ras> port adsl annexl disable 5-7
27.3.3 port adsl annexl enable Command
Syntax:
port adsl annexl enable <slot-port> [narrow]
426
MSC1000G User’s Guide
Chapter 27 port Commands
where
[narrow]
=
The “narrow” PSD (Power Spectral Density) mode. The narrow
mode supports longer loop lengths but has lower transmission
speeds.
The “wide” PSD mode is used if you do not enter “narrow”. The
wide mode supports higher transmission speeds but requires shorter
loop lengths.
This command turns on the Annex L reach extended feature on the specified ADSL2 port(s).
Annex L can be used with Annex A (ADSL over POTS), not Annex B (ADSL over ISDN).
The following example turns on the Annex L feature for port 7 on the line card in slot 5.
ras> port adsl annexl enable 5-7
27.3.4 port adsl annexm disable Command
Syntax:
port adsl annexm disable <slot-port>
This command turns off the Annex M double upstream feature on the specified ADSL2/2+
port(s).
The following example turns off the Annex M feature for port 5 on the line card in slot 7.
ras> port adsl annexm disable 7-5
27.3.5 port adsl annexm enable Command
Syntax:
port adsl annexm enable <slot-port>
This command turns on the Annex M double upstream feature on the specified ADSL2/2+
port(s). This has the upstream connection use tones 6 to 63.
The following example turns on the Annex M feature for port 5 on the line card in slot 7.
ras> port adsl annexm enable 7-5
27.3.6 port adsl annexi disable Command
Syntax:
port adsl annexi disable <slot-port>
This command turns off the Annex I all digital mode feature on the specified ADSL2/2+
port(s).
MSC1000G User’s Guide
427
Chapter 27 port Commands
The following example turns off the Annex I feature for port 5 on the line card in slot 7.
ras> port adsl annexi disable 7-5
27.3.7 port adsl annexi enable Command
Syntax:
port adsl annexi enable <slot-port>
This command turns on the Annex I all digital mode feature on the specified ADSL2/2+
port(s). With Annex I, the ADSL connection uses the full spectrum of the physical line and the
user can not use POTS or ISDN service.
The following example turns on the Annex I feature for port 5 on the line card in slot 7.
ras> port adsl annexi enable 7-5
27.3.8 port adsl dscarrier0 Command
Syntax:
port adsl dscarrier0 <slot-port> <m1> <m2> <m3> <m4> <m5> <m6> <m7>
where
<m1> ~ <m7>
=
The downstream carrier tones to be disabled. Each <mx> can use
up to 8 hexadecimal digits (0~ffffffff). Each <mx> represents 32
carrier tones (each hexadecimal digit represents 4 tones).
<m1> = tones 32~63
<m2> = tones 64~95
<m3> = tones 96~127
<m4> = tones 128~159
<m5> = tones 160~191
<m6> = tones 192~223
<m7> = tones 224~255
The hexadecimal digit is converted to binary and a '1' disables the
corresponding tone. Disabling a carrier tone turns it off so the
system does not send data on it.
This command disables downstream carrier tones from 33 to 255 on the specified ADSL
port(s). Use this command to have the system not use an ADSL line’s tones that are known to
have a high noise level.
The following example disables downstream carrier tone 89 for ADSL port 5 on the line card
in slot 7.
ras> port adsl dscarrier0 7-5 0 01000000 0 0 0 0 0
428
MSC1000G User’s Guide
Chapter 27 port Commands
This example disables downstream carrier tones 89 and 90 for ADSL port 5 on the line card in
slot 7.
ras> port adsl dscarrier0 7-5 0 03000000 0 0 0 0 0
27.3.9 port adsl dscarrier1 Command
Syntax:
port adsl dscarrier1 <slot-port> <m0> <m1> <m2> <m3> <m4> <m5> <m6> <m7>
where
<m0> ~ <m7>
=
The downstream carrier tones to be disabled. Each <mx> can use
up to 8 hexadecimal digits (0~ffffffff). Each <mx> represents 32
carrier tones (each hexadecimal digit represents 4 tones).
<m0> = tones 256~287
<m1> = tones 288~319
<m2> = tones 320~351
<m3> = tones 352~383
<m4> = tones 384~415
<m5> = tones 416~447
<m6> = tones 448~479
<m7> = tones 480~511
The hexadecimal digit is converted to binary and a '1' disables the
corresponding tone. Disabling a carrier tone turns it off so the
system does not send data on it.
This command disables downstream carrier tones from 256 to 511 on the specified ADSL2+
port(s). Use this command to have the system not use an ADSL line’s tones that are known to
have a high noise level.
The following example disables downstream carrier tone 301 for ADSL2+ port 5 on the line
card in slot 7.
ras> port adsl dscarrier1 7-5 0 00001000 0 0 0 0 0 0
The following example disables downstream carrier tones 301 to 304 for ADSL2+ port 5 on
the line card in slot 7.
ras> port adsl dscarrier1 7-5 0 0000f000 0 0 0 0 0 0
27.3.10 port adsl inpmin Command
Syntax:
port adsl inpmin <slot-port> <us_inp> <ds_inp>
MSC1000G User’s Guide
429
Chapter 27 port Commands
where
<us_inp>
=
Sets the minimum upstream (us) impulse noise protection setting. Use
0~6 to define a number of DMT symbols. 0 = 0, 1 = 0.5, 2 = 1, 3 = 2,
4 = 4, 5 = 8, 6 = 16 DMT symbols
<ds_inp>
=
Sets the minimum downstream (ds) impulse noise protection setting
(0~6).
This command sets the minimum upstream (us) and downstream (ds) impulse noise protection
setting on the specified ADSL port(s). Sudden spikes in the line’s noise level (impulse noise)
can cause errors and result in lost packets. Set the impulse noise protection minimum to have a
buffer to protect the ADSL physical layer connection against impulse noise. This buffering
causes a delay that reduces transfer speeds. It is recommended that you use a non-zero setting
for real time traffic that has no error correction (like videoconferencing).
The following example sets the impulse noise protection minimum to 2 DMT symbols for
upstream and 4 DMT symbols for downstream for ADSL port 5 on the line card in slot 7.
ras> port adsl inpmin 7-5 3 4
27.3.11 port adsl optionmask Command
Syntax:
port adsl optionmask <slot-port> <option_mask>
430
MSC1000G User’s Guide
Chapter 27 port Commands
where
<option_mask>
=
0x0001= disable Trellis
Trellis encoding helps to reduce the noise in ADSL
transmissions. Trellis may reduce throughput but it makes the
connection more stable.
0x0002 = disable Reed-Solomon
Reed-Solomon performs transmission error correction.
0x0004 = disable upstream bitswap
0x0008 = disable downstream bit swap
Bit swapping allows the system to respond to noise on a tone by
sending it’s data on another tone. The subscriber (ATU-R)
equipment must also support this in order for it to work.
0x0010 = disable 1-bit constellation
1-bit constellation allows the system to send individual bits over
DMT tones that can only support one bit. This allows the
connection to use as many of the tones as possible.
0x0020 = disable transmit windowing (ADSL2+ only)
0x0040 = disable s=0.5 support option in G.dmt.
0.5 support maps two Reed-Solomon codewords into one data
frame (instead of one) to increase the maximum G.dmt
transmission rate.
0x0080 = disable G.lite rate limit (G.lite only).
Disabling the G.lite rate limit allows the G.lite upstream
transmission rate to be greater than 512 Kbps.
This command masks (turns off) attributes for the specified port(s). It is for advanced
troubleshooting. Use an entry with a “1” instead of “0” before the “x” in order to turn the
attribute back on (remove the option mask).
The following example sets ADSL port 5 on the line card in slot 7 to not use Trellis encoding.
ras> port adsl optionmask 7-5 0x0001
27.3.12 port adsl pmm disable Command
Syntax:
port adsl pmm disable <slot-port>
This command turns off the Power ManageMent (PMM) feature on the specified ADSL2/2+
port(s).
The following example sets ADSL2+ port 5 on the line card in slot 7 to not use power
management.
ras> port adsl pmm disable 7-5
MSC1000G User’s Guide
431
Chapter 27 port Commands
27.3.13 port adsl pmm enable Command
Syntax:
port adsl pmm enable <slot-port> [L2|L3]
where
L2
=
Power management mode L2. This is a power saving mode that scales back
the power usage to where there is just enough to support the transmission
rate that the subscriber is using.
L3
=
Power management mode L2 and L3. Power management mode L3 is a
power saving mode that puts the ADSL connection to sleep when there is
no traffic. The connection comes back up within three seconds when there
is traffic.
This command turns on the Power ManageMent (PMM) feature on the specified ADSL2/2+
port(s). This reduces the amount of power used overall and reduces the instances of the
connection going down. PMM increases or decreases the transmission power based on line
conditions.
The following example sets ADSL2+ port 5 on the line card in slot 7 to use power
management.
ras> port adsl pmm enable 7-5
27.3.14 port adsl power Command
Syntax:
port adsl power <slot-port> fix|power|rate <max_us_txpwr> <max_ds_txpwr>
<max_rxpwr>
where
fix|power|rate
=
The PSD (Power Spectral Density) and power adaptivity
mode.
fix = fixed mode sets the maximum downstream transmit
power to the number you specify (<max_ds_txpwr>).
power = power mode gives the saving of transmission power
priority over the transmission rate. The line card attempts to
reduce its transmit power as much as possible while still
maintaining the configured minimum rate. This only applies
to the downstream connection and the ADSL operational
mode must be G.dmt, ANSI T1.413 or G.lite.
rate = rate mode gives the transmission rate priority over the
saving of transmission power. The line card attempts to
achieve the maximum configured transmission rate before
reducing the transmit power.
<max_us_txpwr>
432
=
Maximum upstream transmit power, -130~200 in 0.1 dBm.
MSC1000G User’s Guide
Chapter 27 port Commands
<max_ds_txpwr>
=
Maximum downstream transmit power, -50~200 in 0.1 dBm.
<max_rxpwr>
=
Maximum aggregate receive power at atu-c, -255~255 in 0.1
dBm.This only applies to the ADSL2/2+ ADSL operational
modes.
This command specifies the maximum allowed transmit power and maximum aggregate
received power.
The following example sets ADSL port 5 on the line card in slot 7 to only use up to 10.0 dBm
of power for upstream transmissions, 11.5 dBm of power for downstream transmissions and 7.0 dBm of aggregated receive power.
ras> port adsl power 7-5 fix 100 115 -70
27.3.15 port adsl psd maximum Command
Syntax:
port adsl psd maximum <slot-port> <us-psd> <ds-psd>
where
<us-psd>
=
Maximum upstream PSD (Power Spectrum Density) mask
(between -400 to 40 in units of 0.1 dBm/Hz).
<ds-psd>
=
Maximum upstream PSD mask (between -400 to 40 in units of
0.1 dBm/Hz).
This command sets the PSD masks for the upstream and downstream channels. PSD defines
the distribution of a DSL line’s power in the frequency domain. A PSD mask is a template that
specifies the maximum allowable PSD for a line.
The following example sets the maximum upstream and downstream PSD masks of port 1 on
the line card in slot 2 to -200 (-20 dBm/Hz) and 10 (1 dBm/Hz) respectively.
ras> port adsl psd maximum 2-1 -200 10
27.3.16 port adsl set Command
Syntax:
port adsl set <slot-port> <profile> <mode>
MSC1000G User’s Guide
433
Chapter 27 port Commands
where
<profile>
=
The ADSL profile that will define the settings of this port.
<mode>
=
The ADSL operational mode.
for Annex A: gdmt, t1413, glite, auto, adsl2 or adsl2+
for Annex B: gdmt, etsi, auto, adsl2 or adsl2+
When set to auto, the port follows whatever mode is set on the
other end of the line.
This command assigns a specific profile to an ADSL port(s) and sets the port’s ADSL mode
(or standard). The profile defines the maximum and minimum upstream/downstream rates, the
target upstream/downstream signal noise margins, and the maximum and minimum upstream/
downstream acceptable noise margins of all the ADSL ports to which you assign the profile.
"
When the mode is set to auto, the connection rates are governed by the
negotiated ADSL mode regardless of the rates configured in the profile. For
example, if the profile is set to use a rate of 18000 Kbps, that speed is only
supported if the negotiated ADSL mode is ADSL 2+. Any other ADSL mode
will limit the rate to what is supported by the specific ADSL standard.
The following example sets ADSL port 5 on the line card in slot 7 to use the gold profile and
adsl2+ mode.
ras> port adsl set 7-5 gold adsl2+
27.3.17 port adsl uscarrier Command
Syntax:
port adsl uscarrier <slot-port> <m0> <m1>
where
<m0>,<m1>
=
The upstream subcarriers to be disabled. Each <mx> can use up to 8
hexadecimal digits (0~ffffffff). Each <mx> represents 32 carrier
tones (each hexadecimal digit represents 4 tones).
<m0> = tones 0~31
<m1> = tones 32~63
The hexadecimal digit is converted to binary and a '1' disables the
corresponding tone. Disabling a carrier tone turns it off so the system
does not send data on it.
434
MSC1000G User’s Guide
Chapter 27 port Commands
This command disables upstream carrier tones from 0 to 63 on the specified ADSL port(s).
Use this command to have the system not use an ADSL line’s tones that are known to have a
high noise level.
The following example disables upstream carrier tone 8 for ADSL port 5 on the line card in
slot 7.
ras> port adsl uscarrier 7-5 00000080 0
This example disables upstream carrier tones 8 and 9 for ADSL port 5 on the line card in slot
7.
ras> port adsl uscarrier 7-5 00000180 0
27.4 port copy Command
Syntax:
port copy <source> <destination>
where
<source>
=
The slot and port number from which you want to copy settings.
<destination>
=
The slot and port number(s) to which you want to copy settings.
This command copies the port settings from a source port to destination ports on the same type
of line card.
The following example copies the settings from DSL port 5 on the line card in slot 7 to all of
the DSL ports on the line card in slot 7.
ras> port copy 7-5 7-*
27.5 port disable Command
Syntax:
port disable <slot-port>
This command turns off the specified subscriber port(s).
The following example turns off DSL port 5 on the line card in slot 7.
ras> port disable 7-5
MSC1000G User’s Guide
435
Chapter 27 port Commands
27.6 port enable Command
Syntax:
port enable <slot-port>
This command turns on the specified subscriber port(s).
The following example turns on DSL port 5 on the line card in slot 7.
ras> port enable 7-5
27.7 IP Bridge Commands
These sections explain how to set up the IP bridge function in the MSC1000G.
The IP bridge function is designed for large-scale, flat, access networks, and it is ideal when
the network is based on Ethernet. When the IP bridge is enabled, the MSC1000G forwards
frames based on the destination IP address, instead of the destination MAC address, and it
replaces the source MAC address with its own MAC address.
You can follow these steps to set up a simple IP bridge.
1 Create a domain. (Each domain is an ISP.)
2 Create one or more VLANs in the domain. (For example, one VLAN is for high-speed
Internet, and another VLAN is for VoIP.)
3 Specify one or more edge routers for the domain.
4 Create routing table entries, so the MSC1000G forwards frames to the appropriate edge
router.
5 Create downlink interfaces, so the MSC1000G forwards frames to the appropriate
subscribers.
6 Create PVCs for the subscribers.
27.8 IP Bridge ARP Proxy Commands
Use these commands to look at and flush the Address Resolution Protocol (ARP) table for
each domain. You can also configure how long the MSC1000G keeps entries in the ARP table.
The MSC1000G is an ARP proxy for edge routers and subscribers in an IP bridge. You can
configure basic settings for this, and you can look at (and flush, in some cases) the (PVC,
MAC, IP, VID) information the MSC1000G has learned using DHCP snooping and ARP.
27.8.1 port ipbpvc arpproxy age Command
Syntax:
port ipbpvc arpproxy age <sec>
436
MSC1000G User’s Guide
Chapter 27 port Commands
where
<sec>
=
The number of seconds (10~10000) the device is to keep the
Address Resolution Protocol table’s entries of IP addresses in IP
bridges.
This command configures how long the device stores the IP addresses of CPE devices in IP
bridges in the Address Resolution Protocol table.
27.8.2 port ipbpvc arpproxy flush Command
Syntax:
port ipbpvc arpproxy flush <all | edgerouter [<ip> <vid>] | interface [<ip/
mask> <vid>]>
where
all
=
All ARP table entries.
<ip>
=
IP address, in dotted decimal notation.
<mask>
=
Number of bits <1..32> in the subnet mask.
<vid>
=
The ID (<1..4094>) of the VLAN.
This command clears the specified entries in the Address Resolution Protocol table(s).
27.8.3 port ipbpvc arpproxy show Command
Syntax:
port ipbpvc arpproxy show
This command displays how long the device stores the IP addresses of IP bridge devices in the
Address Resolution Protocol table.
The following is an example.
ras> port ipbpvc arpproxy show
age=300 (sec)
27.9 IP Bridge PVC Commands
Use the port ipbpvc delete, set (see Section 27.14.4 on page 446) and show (see
Section 27.14.5 on page 447) commands to set up and maintain PVCs for subscribers in an IP
bridge.
IP bridge PVCs are similar to regular PVCs and are endpoints of the IP bridge. In addition, IP
bridge PVCs are one of two types, IP over Ethernet or IP over ATM, depending on the
underlying network.
The PVID is used to identify the domain the PVC is in, so the PVID must be in a domain.
MSC1000G User’s Guide
437
Chapter 27 port Commands
27.10 port ipbpvc delete Command
Syntax:
port ipbpvc delete <slot-port-vpi/vci>
where
vpi/vci
=
The VPI and VCI of an individual PVC.
This command deletes the specified PVC channel in an IP bridge.
The following example deletes the IP bridge PVC on ADSL port 10 with VPI 40, VCI 73.
ras> port ipbpvc show 1-10
pvc
type
pvid pri ipbpvctype profile
--------------- ------- ---- --- ---------- --------------------------------1-10-40/73
ipb
402 2
llc
DEFVAL
ras> port ipbpvc delete 1-10-40/73
ras> port ipbpvc show 1-10
ras>
27.11 IP Bridge Domain Commands
Use these commands to set up and maintain domains in IP bridges.
A domain represents an ISP. Each domain is defined by (and dominates) the VLAN that are in
it and has its own routing table and ARP table. As a result, two or more VLANs in different
domains can use the same IP subnet, and one network can support multiple ISPs.
VLANs in IP bridges are exclusive. They can be in at most one domain. In addition, VLANs in
IP bridges share the same VLAN space as regular VLANs, so VLANs in IP bridges must have
different VLAN IDs than regular VLANs.
27.11.1 port ipbpvc domain delete Command
Syntax:
port ipbpvc domain delete <domain name>
where
<domain name>
=
The name of the domain.
This command deletes the specified domain.
"
438
You have to remove the VLANs that are in the domain first.
MSC1000G User’s Guide
Chapter 27 port Commands
27.11.2 port ipbpvc domain dhcpvlan enable Command
Syntax:
port ipbpvc domain dhcpvlan enable <domain name> <vid>
where
<domain name>
=
The name of the domain.
<vid>
=
The ID (<1..4094>) of the VLAN.
This setting has no effect on DHCP packets that come from VLANs where the MSC1000G’s
DHCP relay settings are active. (See Chapter 18 on page 347. The DHCP relay settings take
precedence over the IP bridge DHCP VLAN setting.)
This command specifies the VLAN where the domain’s DHCP server is located. The VLAN
must already be in the domain. The MSC1000G forwards subscribers’ DHCP packets to the
selected VLAN and changes the source MAC address to the MSC1000G’s MAC address.
The MSC1000G still adds whatever Option 82 information is specified for the VLAN in the
DHCP relay settings. (See Chapter 18 on page 347.)
In the following example, domain “example3” has its DHCP server in VLAN 401.
ras> port ipbpvc domain dhcpvlan enable example3 401
27.11.3 port ipbpvc domain dhcpvlan disable Command
Syntax:
port ipbpvc domain dhcpvlan disable <domain name>
where
<domain name>
=
The name of the domain.
This setting has no effect on DHCP packets that come from VLANs where the MSC1000G’s
DHCP relay settings are active. (See Chapter 18 on page 347. The DHCP relay settings take
precedence over the IP bridge DHCP VLAN setting.)
This command specifies that there is no DHCP server for the domain, in which case the
MSC1000G does not change the source MAC address in DHCP packets.
The MSC1000G still adds whatever Option 82 information is specified for the VLAN in the
DHCP relay settings. (See Chapter 18 on page 347.)
27.11.4 port ipbpvc domain set Command
Syntax:
port ipbpvc domain set <domain name>
where
<domain name>
MSC1000G User’s Guide
=
You can use 1-31 printable English keyboard characters. Spaces
are not allowed.
439
Chapter 27 port Commands
This command creates the domain with the specified name.
An example is shown next.
port ipbpvc domain set example
27.11.5 port ipbpvc domain show Command
Syntax:
port ipbpvc domain show [<domain name>]
where
<domain name>
=
The name of the domain.
This command displays the settings for the specified domain and the VLAN that are in the
domain.
An example is shown next.
ras> port ipbpvc domain show
domain
vid
------------------------------- ---------------------------------------ISP1
*101 102
example
The output values correspond to the input values of other IP bridge domain commands.
27.11.6 port ipbpvc domain vlan Command
Syntax:
port ipbpvc domain vlan <domain name> <vid> join|leave
where
<domain name>
=
The name of the domain.
<vid>
=
The ID (<1..4094>) of the VLAN.
join|leave
=
Specifies whether you want to add the specified VLAN to
(join) or remove the specified VLAN from (leave) the
domain.
This command adds the specified VLAN to (join) or removes the specified VLAN (leave)
from the specified domain. VLANs in IP bridges share the same VLAN space as regular
VLANs, so VLANs in IP bridges must have different VLAN IDs than regular VLANs. Use the
port ipbpvc VLAN command to configure the VLAN (see Section 27.18.10 on page 457).
"
440
You have to delete every IP bridge setting (including DHCP VLAN) that uses
the selected VLAN before you can remove it from the domain.
MSC1000G User’s Guide
Chapter 27 port Commands
In the following example, VLAN 402 is added to domain “example”.
ras> port ipbpvc domain vlan example 402 join
27.12 IP Bridge Edge Router Commands
Use these commands to set up and maintain edge routers in an IP bridge.
Edge routers are usually the gateways that are provided to the subscribers. They can also be
gateways that are specified in static routing table entries. Each edge router, in addition to its IP
address, has an associated VLAN ID. When the MSC1000G forwards a frame to an edge
router, it uses this VLAN ID to replace whatever VLAN ID the subscriber specified.
27.12.1 port ipbpvc edgerouter delete Command
Syntax:
port ipbpvc edgerouter delete <ip> <vid>
where
<ip>
=
IP address, in dotted decimal notation.
<vid>
=
The ID (<1..4094>) of the VLAN.
This command deletes the edge router with the specified IP address and VLAN ID.
The following example deletes edge router 192.168.1.244 with VID 402.
ras> port ipbpvc edgerouter delete 192.168.1.244 402
27.12.2 port ipbpvc edgerouter set Command
Syntax:
port ipbpvc edgerouter set <ip/mask> <vid>
where
<ip/mask>
=
Edge router’s IP address, in dotted decimal notation and number
of bits <1..32> in the subnet mask.
<vid>
=
The ID (<1..4094>) of the VLAN.
This command creates an edge router with the specified IP address, subnet mask, and VID.
The MSC1000G uses the VLAN ID when it forwards frames to the edge router. It also uses the
VLAN ID to identify the domain the edge router is in.
MSC1000G User’s Guide
441
Chapter 27 port Commands
The following example creates edge router 192.168.1.244 with subnet mask 255.255.255.0
and VID 402.
ras> port ipbpvc edgerouter set 192.168.1.244/24 402
27.12.3 port ipbpvc edgerouter show Command
Syntax:
port ipbpvc edgerouter show <all | domain-name [<vid>]>
where
<domain name>
=
The name of the domain.
<vid>
=
The ID (<1..4094>) of the VLAN.
This command displays the edge routers for the specified VLAN or for all VLAN.
An example is shown next.
ras> port ipbpvc edgerouter show all
domain
ip/mask
------------------------------- -----------------ISP1
172.23.19.249/24
ISP1
172.23.19.254/24
example
192.168.1.200/24
vid
-------102
101
402
The output values correspond to the input values of other IP bridge edge router commands.
27.13 IP Bridge Interface Commands
Use these commands to set up and maintain forwarding information for downstream traffic.
Downlink interfaces provide forwarding information for downstream traffic. The MSC1000G
learns some of this information by snooping DHCP packets. For static IP addresses, you
should provide this information manually. In this case, specify the VLAN ID and, optionally,
the PVC for a range of IP addresses. The MSC1000G uses the VLAN ID to identify the
domain the downlink interface is in. Downlink interfaces in the same domain cannot have
overlapping IP addresses.
27.13.1 port ipbpvc interface delete Command
Syntax:
port ipbpvc interface delete <ip/mask> <vid>
where
442
<ip/mask>
=
Downlink interface’s IP address, in dotted decimal notation and
number of bits <1..32> in the subnet mask.
<vid>
=
The ID (<1..4094>) of the VLAN.
MSC1000G User’s Guide
Chapter 27 port Commands
This command deletes the specified downlink interface. You can only remove downlink
interfaces that were added manually.
The following example removes the downlink interface for 192.168.1.200/24 in VLAN 402.
ras> port ipbpvc interface show 402
ip/mask
vid slot port vpi vci
------------------ ---- ---- ---- --- ---192.168.1.200/24
402 ras> port interface delete 192.168.1.200/24 402
ras> port ipbpvc interface show 402
ras>
27.13.2 port ipbpvc interface set Command
Syntax:
port ipbpvc interface set <ip/mask> <vid> [<slot-port-vpi/vci>]
where
<ip/mask>
=
Downlink interface’s IP address, in dotted decimal notation and
number of bits <1..32> in the subnet mask.
<vid>
=
The ID (<1..4094>) of the VLAN.
vpi/vci
=
The VPI and VCI of an individual PVC.
This command creates the specified downlink interface. The <ip>/<mask> specifies the IP
address and subnet mask of the VLAN or subscriber. If the destination IP address of a packet is
in this range, the MSC1000G forwards the frame to the specified VLAN and PVC, if any.
The MSC1000G uses the specified VLAN ID when it forwards frames to the VLAN or
subscriber. It also uses the VLAN ID to identify the domain the downlink interface is in.
"
Make sure you specify a valid IP bridge PVC. Do not specify PVCs that are not
set as the IPB PVCs (see Section 27.14.4 on page 446).
The following example creates a downlink interface that forwards frames for IP addresses
192.168.3.0~192.168.3.255 to VLAN 402.
ras> port ipbpvc interface set 192.168.3.0/24 402
27.13.3 port ipbpvc interface show Command
Syntax:
port ipbpvc interface show <all | ip/mask | vid | ip/mask vid>
MSC1000G User’s Guide
443
Chapter 27 port Commands
where
ip/mask
=
Downlink interface’s IP address, in dotted decimal notation and
number of bits <0..32> in the subnet mask.
vid
=
The ID (<1..4094>) of the VLAN.
This command displays downlink interfaces created manually. It does not show forwarding
information learned by snooping DHCP packets.
An example is shown next.
ras> port ipbpvc interface show 402
ip/mask
vid slot port vpi vci
------------------ ---- ---- ---- --- ---192.168.3.0/24
402 -
The output values correspond to the input values of other IP bridge downlink interface
commands.
27.14 IP Bridge Routing Table Commands
Use these commands to set up and maintain the routing table for each domain.
Each domain has its own routing table. Each routing table contains entries that, based on the
destination IP address, control where the MSC1000G forwards packets (for upstream and
downstream traffic). The MSC1000G automatically creates routing table entries for each
downlink interface and for each edge router in the domain. You can create additional entries by
specifying the edge router to which the MSC1000G should forward traffic for a particular
destination IP address or IP subnet.
27.14.1 port ipbpvc route delete Command
Syntax:
port ipbpvc route delete <domain-name> <ip/mask> <nexthop>
where
<domain-name>
=
The name of the domain.
<ip/mask>
=
IP address, in dotted decimal notation and number of bits
<0..32> in the subnet mask.
<nexthop>
=
IP address, in dotted decimal notation.
This command deletes the specified entry from the routing table of the specified domain. You
can only remove entries that were added manually.
444
MSC1000G User’s Guide
Chapter 27 port Commands
The following example removes the entry for 172.32.37.0~172.32.37.255 for domain
“example2”.
ras> adsl ipbpvc route show example2
domain name
ip/netmask
gateway ip
metric pri
-------------------- ------------------- --------------- ------ --example2
0.0.0.0/0
192.168.1.252
1
0
example2
172.23.37.0/24
192.168.1.250
1
0
example2
192.168.2.0/24
192.168.1.249
1
0
ras> adsl ipbpvc route delete example2 172.23.37.0/24 192.168.1.250
ras> adsl ipbpvc route show example2
domain name
ip/netmask
gateway ip
metric pri
-------------------- ------------------- --------------- ------ --example2
0.0.0.0/0
192.168.1.252
1
0
example2
192.168.2.0/24
192.168.1.249
1
0
27.14.2 port ipbpvc route set Command
Syntax:
port ipbpvc route set <domain-name> <ip/mask> <nexthop> <metric> [<priority>]
where
<domain-name>
=
The name of the domain.
<ip/mask>
=
IP address, in dotted decimal notation and number of bits
<0..32> in the subnet mask.
<nexthop>
=
IP address, in dotted decimal notation.
<metric>
=
The metric <1..15> represents the “cost” of transmission for
routing purposes. IP routing uses hop count as the measurement
of cost, with a minimum of 1 for directly-connected networks.
Select the number that approximates the cost for this link The
number need not be precise, but it must be between 1 and 15. In
practice, 2 or 3 is usually a good number.
If two entries have the same metric, the MSC1000G uses the
one with the lower IP address.
<priority>
=
The IEEE 802.1p priority value <0..7>.
This command creates the specified entry in the routing table of the specified domain.
The <ip>/<mask> specifies the range of IP addresses to which this entry applies. If the
destination IP address of a packet is in this range, the MSC1000G forwards the frame to the
specified IP address <nexthop>. If <nexthop> corresponds to an edge router configured
using the edge router commands (see Section 27.12 on page 441), the MSC1000G uses the
associated VLAN ID. In addition,
• If the edge router is in the same domain as the entry, the entry is used for upstream traffic.
• If the edge router is in a different domain than the entry, the entry is used for downstream
traffic.
If <nexthop> is not set up in the edge router screen, the MSC1000G uses the entry for
downstream traffic and does not change the VLAN ID.
MSC1000G User’s Guide
445
Chapter 27 port Commands
If the <priority> is not specified, the default value is zero. This is applied to incoming
frames without a <priority> tag.
The following example creates an entry in the routing table for domain “example3”. This entry
forwards traffic for IP addresses 192.168.4.0~192.168.4.255 to edge router 192.168.1.244.
ras>
port ipbpvc route set example3 192.168.4.0/24 192.168.1.244 1
27.14.3 adsl ipbpvc route show Command
Syntax:
adsl ipbpvc route show [all | <domain-name> | <ip/mask> | <domain-name> <ip>/
<mask>]
where
<domain-name>
=
The name of the domain.
<ip/mask>
=
IP address, in dotted decimal notation and number of bits
<0..32> in the subnet mask.
This command displays routing table entries created manually for the specified domain and/or
range of IP addresses. It does not show entries added automatically by the MSC1000G.
An example is shown next.
ras> port ipbpvc route show all
domain
------------------------------ISP1
ISP1
example3
ip/mask
-----------------0.0.0.0/0
192.169.1.0/24
192.168.4.0/24
nexthop
--------------172.23.19.254
172.23.19.249
192.168.1.244
mtrc
---15
5
1
pr
-0
0
-
The output values correspond to the input values of other IP bridge routing table commands.
27.14.4 port ipbpvc set Command
Syntax:
port ipbpvc set <slot-port-vpi/vci> <profile> <vid> <priority> <type>
where
446
<vpi/vci>
=
The VPI setting can be 0 to 255. The VCI setting can be 32 to
65535 if the vpi is 0 or 1 to 65535 if the vpi is not 0.
profile
=
Assign an ATM profile to use for this channel’s traffic shaping.
MSC1000G User’s Guide
Chapter 27 port Commands
<vid>
=
The default VID (1 to 4094). Each PVC must have a unique
VID since the MSC1000G forwards traffic back to the
subscribers based on the VLAN ID.
You must assign a default VID (1 to 4094) and IEEE 802.1p
default priority (0 to 7) to normal channels. Each PVC must
have a unique VID (since the MSC1000G forwards traffic back
to the subscribers based on the VLAN ID).
<priority>
=
This is the priority value (0 to 7) to add to incoming frames
without a (IEEE 802.1p) priority tag.
<type>
=
Specify the encapsulation type for the PVC.
llc and vc are for a PVC running on Ethernet (IPoE).
llc_r and vc_r are for a PVC running on ATM (IPoA).
This command allows the configuration of a PVC (permanent virtual circuit) for one or a
range of ADSL ports in an IP bridge.
The following example sets a PVC on slot 1, DSL port 10 with VPI 40, VCI 73, DEFVAL
profile, default VID 402 and priority 2. It uses LLC encapsulation over Ethernet.
ras> port ipbpvc set 1-10-40/73 DEFVAL 402 2 llc
ras> port ipbpvc show 1-10
pvc
type
pvid pri ipbpvctype profile
--------------- ------- ---- --- ---------- --------------------------------1-10-40/73
ipb
402 2
llc
DEFVAL
27.14.5 port ipbpvc show Command
Syntax:
port ipbpvc show
<slot>|<slot-port>|<slot-port-vpi/vci>
where
vpi/vci
=
The VPI and VCI of an individual PVC.
This command allows you to display the PVCs for subscribers in an IP bridge.
An example is shown next.
ras> port ipbpvc show 1-10
pvc
type
pvid pri ipbpvctype profile
--------------- ------- ---- --- ---------- --------------------------------1-10-40/73
ipb
402 2
llc
DEFVAL
The output values correspond to the input values of other IP bridge PVC commands.
MSC1000G User’s Guide
447
Chapter 27 port Commands
27.14.6 port ipbpvc vlan Command
Syntax:
port ipbpvc vlan <slot-port-vpi/vci> <vid> <registration> <tag>
where
vpi/vci
=
The VPI and VCI of an individual PVC.
<vid>
=
The default VID (1 to 4094). Each PVC must have a unique
VID since the MSC1000G forwards traffic back to the
subscribers based on the VLAN ID.
You must assign a default VID (1 to 4094) and IEEE 802.1p
default priority (0 to 7) to normal channels. Each PVC must
have a unique VID (since the MSC1000G forwards traffic back
to the subscribers based on the VLAN ID).
<registration>
=
Use join to have the port be a member of the specified VLAN.
Use leave to remove the port from the specified VLAN.
<tag>
=
Use tag to tag all frames transmitted on this PVC with the
port’s VID.
Use untag to not frames transmitted on this PVC with the
port’s VID.
Use this command to configure a IPB PVC’s VLAN settings.
The following example sets the PVC on slot 1, DSL port 10 with VPI 40, VCI 73 to be a
member of VLAN 402 and not tag the frames sent to this PVC.
ras> port ipbpvc vlan 1-10-40/73 402 join untag
27.15 port name Command
Syntax:
port name <slot-port> <name>
where
<name>
=
A name to identify the subscriber port.
This command sets a name for the specified subscriber port(s).
The following example sets DSL port 5 on the line card in slot 7 to use the name Bob.
ras> port name 7-5 bob
448
MSC1000G User’s Guide
Chapter 27 port Commands
27.16 PPPoA to PPPoE (PAE) Translation
Before migrating to an Ethernet infrastructure, a broadband network might consist of PPPoA
connections between the CPE devices and the DSLAM and PPPoE connections from the
DSLAM to the BRAS (Broadband Remote Access Server). The following figure shows a
network example.
Figure 191 Mixed PPPoA-to-PPPoE Broadband Network Example
BRAS
PPPoA
PPPoE
In order to allow communication between the end points (the CPE devices and the BRAS),
you need to configure the DSLAM (the MSC1000G) to translate PPPoA frames to PPPoE
packets and vise versa.
When PPPoA packets are received from the CPE, the ATM headers are removed and the
MSC1000G adds PPPoE and Ethernet headers before sending the packets to the BRAS. When
the MSC1000G receives PPPoE packets from the BRAS, PPPoE and Ethernet headers are
stripped and necessary PVC information (such as encapsulation type) is added before
forwarding to the designated CPE.
You can use the port paepvc command to create PVCs for PAE translation.
27.16.1 port paepvc delete Command
Syntax:
port paepvc delete <slot-port-vpi/vci>
This command removes a PAE PVC.
27.16.2 port paepvc set Command
Syntax:
port paepvc set <slot-port-vpi/vci> <profile> <mux> <pvid> <priority> [acname
<acname>] [srvcname <srvcname>] [hellotime <hellotime>]
where
<profile>
=
Name of an ATM profile.
<mux>
=
Encapsulation method (llc or vcmux).
MSC1000G User’s Guide
449
Chapter 27 port Commands
<acname>
=
This field is optional. Specify the hostname of a remote access
concentrator if there are two access concentrators (or BRAS) on
the network or that you want to allow PAE translation to the
specified access concentrator.
<srvname>
=
This field is optional. Specify the name of the service that uses this
PVC. This must be a service name that you configure on the
remote access concentrator.
This command creates a PPPoA-to-PPPoE PVC to allow communication between the ATM
(CPE) and Ethernet network (BRAS) segments. The PVC is mapped to a PPPoE session that
connects to the specified BRAS.
The following example creates a PPPoA-to-PPPoE PVC (1/33) for port 1 on the line card in
slot 3. The PVC uses llc encapsulation and the DEFVAL ATM profile with a priority of 1.
This configuration is for the video service on the vom access concentrator. The switch waits
until the hello time timeout before terminating the PPPoE session.
ras> port paepvc set 3-1-1/33 DEFVAL llc 2 1 acname vom srvcname video
hellotime 10
27.16.3 port paepvc show Command
Syntax:
port paepvc show <slot>|<slot-port>|<slot-port-vpi/vci>
This command displays the PPPoA-to-PPPoE PVC settings for the specified port and/or slot.
The following example displays the settings on the line card in slot 3.
ras> port paepvc show 3
pvc
type
mux
pvid pri htime profile/acname/srvcname
-------------- ------- ----- ------ ---- ----- -------------------------3-1-1/33
pae llc
2
1
10 DEFVAL/test/example
ras>
27.17 port ppvc Commands
Use the port ppvc commands to configure PPVCs and add and remove member PVCs.
27.17.1 port ppvc delete Command
Syntax:
port ppvc delete <slot-port-vpi/vci>
This command removes a PPVC. Removing a PPVC also deletes all of the member PVCs.
450
MSC1000G User’s Guide
Chapter 27 port Commands
The following example removes a PPVC with VPI 8 and VCI 35 for port 5 on the line card in
slot 7.
ras> port ppvc delete 7-5-8/35
27.17.2 port ppvc member delete Command
Syntax:
port ppvc member delete <slot-port-vpi/vci> <vpi/vci>
where
<slot-port-vpi/ =
vci>
<vpi/vci>
=
The slot and port(s) and VPI/VCI of the PPVC.
The VPI and VCI of the individual PVC that you are
removing from the PPVC.
This command removes a PVC from a PPVC.
The following example removes a PVC that uses VPI 8 and VCI 36 from a PPVC with VPI 8
and VCI 35 for port 5 on the line card in slot 7.
ras> port ppvc member delete 7-5-8/35 8/36
27.17.3 port ppvc member set Command
Syntax:
port ppvc member set <slot-port-vpi/vci> <vpi/vci> <atmprofile> <level>
where
<slot-port-vpi/ =
vci>
The slot and port(s) and VPI/VCI of the PPVC.
<vpi/vci>
=
The VPI and VCI of the individual PVC that you are
adding to the PPVC. The VPI setting can be 0 to 255. The
VCI setting can be 32 to 65535 with a VPI of 0 or 1 to
65535 if the VPI is not 0.
<atmprofile>
=
The name of an ATM profile.
<level>
=
The priority queue (0~3) to use for this PVC’s traffic. 3 is
the highest priority.
This command adds a member PVC to a PPVC. You must create the PPVC before you use this
command to add a member.
MSC1000G User’s Guide
451
Chapter 27 port Commands
The following example adds a PVC to a PPVC with VPI 8 and VCI 35 for port 5 on the line
card in slot 7. The PVC uses VPI 8 and VCI 36, the DEFVAL ATM profile and priority queue
2.
ras> port ppvc member set 7-5-8/35 8/36 DEFVAL 2
27.17.4 port ppvc set Command
Syntax:
port ppvc set <slot-port-vpi/vci> <mux> <pvid> <priority>
where
<slot-portvpi/vci>
=
The slot, port(s) and VPI/VCI of the PPVC.
<mux>
=
The type of encapsulation: llc, vcmux
<pvid>
=
Set a default VID (1 to 4094) for the channel. The channel can
only forward frames with this VLAN ID. The system would
drop any frames received from the subscriber that are tagged
with another VLAN ID.
Each PVC must have a unique VID since the system forwards
traffic back to the subscribers based on the VLAN ID.
<priority>
=
Set an IEEE 802.1p default priority (0 to 7) to add to incoming
frames without a (IEEE 802.1p) priority tag.
This command creates a PPVC.
The following example creates a PPVC with VPI 8 and VCI 35 for port 5 on the line card in
slot 7. The PPVC uses llc encapsulation and default VID 25. Any frames received without an
IEEE 802.1p priority tag will be assigned a priority of 3.
ras> port ppvc set 7-5-8/35 llc 25 3
27.17.5 port ppvc show Command
Syntax:
port ppvc show <slot>|<slot-port>|<slot-port-vpi/vci> [detail]
where
<slot-portvpi/vci>
452
=
The slot and port(s) and VPI/VCI of the PPVC.
MSC1000G User’s Guide
Chapter 27 port Commands
<vid>
=
The VLAN ID. Valid parameter range = [1 – 4094].
This must be the VLAN ID of a VLAN that is already
configured. The ports specified in this command must also be
set to the fixed status in the VLAN.
[detail]
=
Display the PPVC’s VLAN configuration in addition to the
other PPVC settings.
This command displays the runtime configured PPVCs.
The following example displays the PPVCs configured on the DSL port 5 on the line card in
slot 7. It also displays VLAN information.
ras> port ppvc show 7-5-8/35 detail
pvc
type
mux
pvid pri profile
-------------- ------ ----- ------ ---- -------------------------------7-5-8/35
prio
llc
25
3
member:
vpi/vci
level profile
--------- ----- -------------------------------8/36
2
DEFVAL
vlans:
idx vlanid
adv
untag
--- -------- -------- -------1
25
fix
untag
2
28
fix
untag
27.17.6 port ppvc vlan Command
Syntax:
port ppvc vlan <slot-port-vpi/vci> <vid> <registration> <tag>
where
<slot-portvpi/vci>
=
The slot and port(s) and VPI/VCI of the PPVC.
<vid>
=
The VLAN ID. Valid parameter range = [1 – 4094].
This must be the VLAN ID of a VLAN that is already
configured. The ports specified in this command must also be
set to the fixed status in the VLAN.
MSC1000G User’s Guide
453
Chapter 27 port Commands
<registratio
n>
=
The VLAN membership setting.
join = add the PVC to the VLAN.
leave = remove the PVC from the VLAN.
<tag>
=
The VLAN tagging setting.
tag = the specified port(s) accept only incoming Ethernet
frames that have a VLAN tag.
untag = the specified port(s) accept only incoming Ethernet
frames that do not have a VLAN tag.
This command adds a PPVC to a VLAN or removes a PPVC from a VLAN. It also sets
whether the PPVC accepts incoming Ethernet frames with or without a VLAN tag.
The following example adds the PPVC on ADSL port 5 in line card 7 with VPI 8 and VCI 35
to VLAN 28.
ras> port ppvc vlan 7-5-8/35 28 join untag
27.18 port pvc Commands
Use the following port pvc commands to configure PVCs (Permanent Virtual Circuits) on
the DSL ports.
27.18.1 port pvc delete Command
Syntax:
port pvc delete <slot-port-vpi/vci>
This command removes the specified PVC channel.
The following example removes the PVC on DSL port 5 on the line card in slot 7 with VPI 8
and VCI 35.
ras> port pvc delete 7-5-8/35
27.18.2 port pvc mvlan disable Command
Syntax:
port pvc mvlan disable <slot-port-vpi/vci>
This command deactivates multicast VLAN on the PVC. No multicast traffic will be sent to
this PVC.
27.18.3 port pvc mvlan enable Command
Syntax:
port pvc mvlan enable <slot-port-vpi/vci>
454
MSC1000G User’s Guide
Chapter 27 port Commands
This command enables multicast VLAN on the PVC.
27.18.4 port pvc set Command
Syntax:
port pvc set <slot-port-vpi/vci> <profile> <mux> <pvid> <priority>
where
<slot-port-vpi/ =
vci>
The slot and port(s) and VPI/VCI of the PVC.
<profile>
=
The name of an ATM profile.
<mux>
=
The type of encapsulation: llc, vcmux
<pvid>
=
Set a default VID (1 to 4094) for the channel. The channel
can only forward frames with this VLAN ID. The system
would drop any frames received from the subscriber that are
tagged with another VLAN ID.
Each PVC must have a unique VID since the system
forwards traffic back to the subscribers based on the VLAN
ID.
=
<priority>
Set an IEEE 802.1p default priority (0 to 7) to add to
incoming frames without a (IEEE 802.1p) priority tag.
This command creates or modifies a PVC setting.
The following example sets a PVC on DSL port 5 on the line card in slot 7 with VPI 8, VCI
35, the DEFVAL profile, default VID 2 and priority 3.
ras> port pvc set 7-5-8/35 DEFVAL vcmux 2 3
27.18.5 port pvc show Command
Syntax:
port pvc show <slot>|<slot-port>|<slot-port-vpi/vci> [detail]
where
<slot-portvpi/vci>
=
The slot and port(s) and VPI/VCI of the PVC.
[detail]
=
Display in depth information about the runtime configured
virtual channels.
This command displays the runtime configured virtual channels for the specified DSL port(s).
MSC1000G User’s Guide
455
Chapter 27 port Commands
The following example displays the virtual channels of DSL port 5 on the line card in slot 7.
ras> port pvc show 7-5
pvc
type
mux
pvid pri profile
-------------- ------ ----- ------ ---- -------------------------------7-5-0/33
bridge llc
1
0 DEFVAL
27.18.6 port pvc usratelimit enable Command
Syntax:
port pvc usratelimit enable <pvc>
This command activates upstream rate limiting on the PVC. The following example activates
upstream rate settings on the PVC (0/33 of port 1 on the line card in slot 5).
ras> port pvc usratelimit enable 5-1-0/33
27.18.7 port pvc usratelimit disable Command
Syntax:
port pvc usratelimit disable <pvc>
This command deactivates upstream rate limiting on the PVC.
27.18.8 port pvc usratelimit set Command
Syntax:
port pvc usratelimit set <pvc> <rate>
This command sets the maximum upstream rate (in Kbps) the PVC is allowed to use. The
following example sets the maximum PVC upstream rate to 1000 Kbps on port 1 of the line
card in slot 5.
ras> port pvc usratelimit enable 5-1-0/33
ras> port pvc usratelimit set 5-1-0/33 1000
ras> port pvc usratelimit show 5-1
pvc
en
rate
-------------- ---- -------------5-1-0/33
V
1000(kbps)
ras>
27.18.9 port pvc usratelimit show Command
Syntax:
port pvc usratelimit show <pvc>
456
MSC1000G User’s Guide
Chapter 27 port Commands
This command displays upstream rate limiting settings on a PVC. The following example
shows the PVC rate settings on port 1 of the line card in slot 5.
ras> port pvc usratelimit show 5-1
pvc
en
rate
-------------- ---- -------------5-1-0/33
1000(kbps)
ras>
27.18.10 port pvc vlan Command
Syntax:
port pvc vlan <slot-port-vpi/vci> <vid> <registration> <tag>
where
<slot-portvpi/vci>
=
The slot and port(s) and VPI/VCI of the PVC.
<vid>
=
The VLAN ID. Valid parameter range = [1 – 4094].
This must be the VLAN ID of a VLAN that is already
configured. The ports specified in this command must also
be set to the fixed status in the VLAN.
<registration>
=
The VLAN membership setting.
join = add the PVC to the VLAN.
leave = remove the PVC from the VLAN.
<tag>
=
The VLAN tagging setting.
tag = the specified port(s) accept only incoming Ethernet
frames that have a VLAN tag.
untag = the specified port(s) accept only incoming Ethernet
frames that do not have a VLAN tag.
This command adds a PVC to a VLAN or removes a PVC from a VLAN. It also sets whether
the PVC sends frames with or without a VLAN tag.
The following example adds the PVC on DSL port 5 on the line card in slot 7 with VPI 8 and
VCI 35 to VLAN 23.
ras> port pvc vlan 7-5-8/35 23 join untag
27.19 port shdsl Commands
Use the port shdsl commands to configure the subscriber SHDSL ports.
MSC1000G User’s Guide
457
Chapter 27 port Commands
27.19.1 port shdsl alarmprof Command
Syntax:
port shdsl alarmprof <slot-port> span|stuc|stur|* <alarmprofile>
where
=
span|stuc|stur
|*
span = set alarm profile for the whole span This is the entire
connection including any SHDSL regenerators that might be
located between the STU-C (SHDSL Termination Unit Central) and STU-R (SHDSL Termination Unit - Remote)
end points. An SHDSL regenerator amplifies the SHDSL
signal in order to increase the connection distance.
stuc = set alarm profile at STU-C (SHDSL Termination
Unit - Central) end point
stur = set alarm profile at STU-R (SHDSL Termination
Unit - Remote) end point
* = set alarm profile at both STU-C and STU-R
<alarmprofile> =
The name of an SHDSL alarm profile.
This command sets the specified SHDSL port(s) or end point(s) to use an alarm profile.
The following example sets SHDSL port 8 on the line card in slot 6 to use the SESalarm alarm
profile at both the STU-C and the STU-R.
ras> port shdsl alarmprof 6-8 * SESalarm
27.19.2 port shdsl pbo Command
Syntax:
port shdsl pbo <slot-port> normal_epl|forced_epl|forced_no_epl <value>
458
MSC1000G User’s Guide
Chapter 27 port Commands
where
normal_epl|for =
ced_epl|forced
_no_epl
normal_epl = Power backoff with EPL (Estimated Power
Loss). Each end calculates an EPL and uses it in determining
a power backoff value for the other end to use.
forced_epl = Forced power backoff with EPL. The STUC calculates an EPL and uses it in determining the power
backoff values for both ends. This can be used when the
STU-R device does not support EPL.
forced_no_epl = Forced power backoff without EPL. The
STU-C uses the value you specify in determining the power
backoff values for both ends. This can be used when you
have prior knowledge about the physical line (loop).
<value>
=
This sets the 0~31 in dB.
When using nornal_epl or forced_epl, this sets the
maximum power backoff value.
When using forced_no_epl, this sets the power backoff
value.
This command sets the power backoff feature setting on the specified SHDSL port(s). Power
backoff calculates how much power is needed for the connection. This allows the STU-C and
STU-R to use only enough power for the port’s maximum transmission rate (configured in the
SHDSL profile). You can normally just leave the default setting (normal_epl), you only
need to use this command if the STU-R does not support EPL or you need to configure the
port to use a specific power backoff setting.
This example sets SHDSL port 7 on the line card in slot 6 to use 13 dB of power backoff for
both downstream and upstream.
ras> port shdsl pbo 6-7 forced_no_epl 13
27.19.3 port shdsl pmms Command
Syntax:
port shdsl pmms <slot-port> <mode>
MSC1000G User’s Guide
459
Chapter 27 port Commands
where
<mode>
=
The PMMS (Power Measurement Modulation Session)
mode specifies how the target noise margin value is
acquired.
normal = Negotiated target noise margin mode. Each end
of the connection determines the target noise margin to be
used by the other end for the evaluation of the PMMS
results.
forced = Forced target noise margin mode. The upstream
and downstream parameters are set according to the target
noise margin value set in the SHDSL profile.
This command sets the PMMS (Power Measurement Modulation Session) mode of the
specified SHDSL port(s).
The following example sets SHDSL port 8 on the line card in slot 6 to use the negotiated target
noise margin mode.
ras> port shdsl pmms 6-8 normal
27.19.4 port shdsl set Command
Syntax:
port shdsl set <slot-port> <profile>
where
<profile>
=
The SHDSL profile that will define the settings of this port.
This command assigns a specific profile to an SHDSL port(s). The profile defines the
maximum and minimum transmission rates, the regional setting, the number of wire pairs to
be used, whether line-probing is enabled or disabled and the target and worst case noise
margins.
The following example sets SHDSL port 8 on the line card in slot 6 to use the gold profile.
ras> port shdsl set 6-8 gold
27.20 port show Command
Syntax:
port show <slot>|<slot-port>
460
MSC1000G User’s Guide
Chapter 27 port Commands
This command displays the settings of the specified port(s). An example is shown next.
ras> port show 7-5
port 7-5
name
:
tel. no
:
profile
: DEFVAL
alrm prof
: DEFVAL
state
: enable
mode
:
power mgmt : disable
annexl
:
annexm
: disable
annexi
:
power adap. : fix
max_us_txpwr:
max_ds_txpwr: 10.0
dBm
max_rxpower :
us_inpmin
: 3
ds_inpmin
:
option_mask : 0x0000
uscarrier
:
dscarrier (255~32) :
00000000 00000000
00000000 00000000
00000000
dscarrier (512~256) :
00000000 00000000
00000000 00000000
00000000
auto
disable
disable
10.0
dBm
10.0
dBm
3
00000000 00000000
00000000
00000000
00000000
00000000 00000000
27.21 port tel Command
Syntax:
port show <slot-port> <telephone-no>
where
<telephone-no>
=
The subscriber’s telephone number.
This command records a subscriber’s telephone number for the specified DSL port(s).
The following example records a telephone number of 123456789 for DSL port 5 on the line
card in slot 7.
ras> port tel 7-5 123456789
27.22 Transparent LAN Service (TLS)
Transparent LAN Service (also known as VLAN stacking or Q-in-Q) allows a service provider
to distinguish multiple customers VLANs, even those with the same (customer-assigned)
VLAN ID, within its network. Refer to Section 11.8.3 on page 166 for more information.
Use the port tlspvc commands to configure VLAN stacking settings for the specified
PVC(s).
"
You can NOT configure PPPoA-to-PPPoE and TLS settings on the same PVC.
MSC1000G User’s Guide
461
Chapter 27 port Commands
27.22.1 port tlspvc delete Command
Syntax:
port tlspvc delete <slot-port-vpi/vci>
This command clears TLS settings for the PVC.
27.22.2 port tlspvc set Command
Syntax:
port tlspvc set <slot-port-vpi/vci> <profile> llc|vcmux <vid> <priority>
where
<profile>
=
Name of an ATM profile.
llc|vcmux
=
Encapsulation method (llc or vcmux).
<vid>
=
The VLAN ID the switch adds to the traffic on the PVC. This is
the VLAN ID known in the service provider’s network.
Note: Make sure this VLAN ID is not already used for
MVLAN or PAE.
This command sets the second VLAN tag to add to the packets from the PVC.
The following example adds a VLAN tag (100) to the traffic using the DEFVAL ATM profile
on PVC (1/33) on port 2 of the line card in slot 3.
ras> port tlspvc set 3-2-1/33 DEFVAL llc 100 12
27.22.3 port tlspvc show Command
Syntax:
port tlspvc show <slot>|<slot-port>|<slot-port-vpi/vci>
This command displays the TLS settings for the specified slot/port/PVC.
ras> port tlspvc show 3-2
pvc
type
mux
pvid pri profile
-------------- ------- ----- ------ ---- ------------------3-2-1/33
tls llc
100
1 DEFVAL
ras>
27.23 port vdsl Commands
Use the port vdsl commands to configure the subscriber VDSL ports.
462
MSC1000G User’s Guide
Chapter 27 port Commands
27.23.1 port vdsl alarmprof Command
Syntax:
port vdsl alarmprof <slot-port> <profile>
This command sets the VDSL port(s) to use the specified alarm profile.
27.23.2 port vdsl frametype Command
Syntax:
port vdsl frametype <slot-port> <all|tag>
where
<all|tag>
=
Sets the selected VDSL port(s) to accept VLAN tagged and
untagged Ethernet frames or only tagged.
This command sets the acceptable frame type on the VDSL port(s).
27.23.3 port vdsl frequencyplan Command
Syntax:
port vdsl frequencyplan <slot-port> <997|998>
where
<997|998>
=
Selects a band plan to use. For symmetric connections, use 997.A
For asymmetric connections, enter 998.
A. Band plan 997 is not supported at the time of writing.
This command sets the band plan the VDSL port(s) uses.
27.23.4 port vdsl priority Command
Syntax:
port vdsl priority <slot-port> <priority>
This command sets the VDSL port(s) VLAN priority (0 - 7).
27.23.5 port vdsl pvid Command
Syntax:
port vdsl pvid <slot-port> <vid>
This command sets the port VID on the VDSL port(s).
27.23.6 port vdsl rfiband Command
Syntax:
port vdsl rfiband <slot-port> <disable|ansi|etsi|custom>
MSC1000G User’s Guide
463
Chapter 27 port Commands
where
<disable|ansi|ets
i|custom>
=
Enter ansi or etsi to use the pre-defined RFI band.
Enter disable to deactivate this feature.
Enter custom to use the RFI band settings configured using
the port vdsl rficustom command.
Use this command to specify an RFI mode or disable this feature.
27.23.7 port vdsl rficustom Commands
Syntax:
port
port
port
port
vdsl
vdsl
vdsl
vdsl
rficustom
rficustom
rficustom
rficustom
disable <index>
enable <index>
set <index> <start_freq> <stop_freq>
show
where
<index>
=
This is index number (1-8) of the custom RFI entry.
<start_freq>
=
This is the start of the frequency range in kHz (0~2147483647).
Note: <start_freq> cannot be bigger than <stop_freq>.
<stop_freq>
=
This is the end of the frequency range in kHz.
Use these commands to configure or display the settings of a custom RFI entry.
An example is show below:
• Creates a custom RFI entry with the frequency between 3500 and 3800 kHz.
• Activate the settings.
• Show the settings.
ras> port vdsl rficustom set 1 3500 3800
ras> port vdsl rficustom enable 1
ras> port vdsl rficustom show
index
state
start_freq
stop_freq
------- ------- ------------ ----------1
V
3500
3800
2
0
0
3
0
0
4
0
0
5
0
0
6
0
0
7
0
0
8
0
0
ras>
464
MSC1000G User’s Guide
Chapter 27 port Commands
27.23.8 port vdsl set Command
Syntax:
port vdsl set <slot-port> <profile> <vdsl_profile>
where
<profile>
=
Sets the custom line profile.
<vdsl_profile>
=
Sets the standard band plan profile (8a|8b|8c|8d|12a).
Use this command to set the VDSL line and band plan profiles the port(s) use.
The following example sets port 5 on the VDSL card in slot 4 to use the DEFVAL line profile
and the standard 8b band plan profile.
ras> port vdsl set 4-1 DEFVAL 8b
27.23.9 port vdsl tls Commands
Syntax:
port vdsl tls disable <slot-port>
port vdsl tls enable <slot-port>
port vdsl tls set <slot-port> <svid> <spriority>
where
<svid>
=
Sets the service provider ID (from 1 to 4094) to add on frames
received.
<spriority>
=
Sets the priority level (from 0 to 7) for the service provider’s
VLAN ID.
Use these commands to configure Transparent LAN Service (TLS) settings on the VDSL
port(s).
The following shows an example.
• Enables TLS on port 5 on the VDSL line card in slot 4.
• Configures the service provider’s VID to 10 and VLAN priority to 7 (highest priority).
ras> port vdsl tls enable 4-5
ras> port vdsl tls set 4-5 10 7
27.23.10 port vdsl upbo Commands
Syntax:
port vdsl upbo <slot-port> <on|off>
This command enables or disables Upstream Power Back Off (UPBO) on the VDSL port(s).
UPBO allows the switch to provide better service in a network environment with telephone
wiring of varying lengths.
MSC1000G User’s Guide
465
Chapter 27 port Commands
The following example enables UPBO on all ports on VDSL line card in slot 4.
ras> port vdsl upbo 4-* on
27.23.11 port vdsl vlan Commands
Syntax:
port vdsl vlan <slot-port> <vid> <registration> <tag>
where
<vid>
=
Enter a VID (VLAN ID) to add this channel as a member.
This must be the VLAN ID of a VLAN that is already
configured. The port that you are configuring must also be
set to the fixed status in the VLAN.
<registration>
=
Enter join to have the port be a member of the specified
VLAN.
Enter leave to remove the port from the specified VLAN.
<tag>
=
Enter tag to add a tag to all frames transmitted on this port.
Enter untag to not add tags.
This command sets the port VALN settings on the VDSL port(s).
The following example sets the VDSL port 5 on the line card in slot 4 to join VLAN 5. The
port also adds a tag to frames.
ras> port vdsl vlan 4-5 5 join tag
466
MSC1000G User’s Guide
CHAPTER
28
profile Commands
This chapter shows you how to use the profile commands.
28.1 Profiles Overview
Profiles are groups of settings that you can assign to a DSL port(s). This helps simplify and
speed up DSL port configuration.
28.2 profile Commands Summary
The following table lists the profile commands. The P column on the right indicates the
administrator privilege level needed to use the command (H for high, M for middle or L for
low).
Table 172 profile Commands
COMMAND
DESCRIPTION
P
ADSL profiles allow efficient
configuration of ADSL port settings.
M
profile
adsl
MSC1000G User’s Guide
delete
<profile>
Removes an unreferenced ADSL port
settings profile.
M
map
<profile>
Displays which ADSL ports reference
this profile.
L
467
Chapter 28 profile Commands
Table 172 profile Commands (continued)
COMMAND
DESCRIPTION
set
<profile> <usmax-rate> <dsmax-rate>
[fast|delay <usdelay> <dsdelay>][minrate
<us-min-rate>
<ds-min-rate>]
[usmgn <us-maxmgn> <us-min-mgn>
<us-tgtmgn>][dsmgn <dsmax-mgn> <ds-minmgn> <ds-tgtmgn>] [usra
fixed|startup|ru
ntime <us-us-mgn>
<us-dsmgn>][dsra
fixed|startup|ru
ntime <ds-us-mgn>
<ds-ds-mgn>]
Creates a profile of ADSL port settings. M
“us” is UpStream, “ds” is DownStream
us maximum rate = 64~4096 in Kbps
ds maximum rate = 64~32000 in Kbps
us/ds delay = 1~255 in ms
us minimum rate = 32~4096 in Kbps
ds minimum rat e= 32~32000 in Kbps
max noise margin = 0~310 in 0.1 dB
min. noise margin = 0~310 in 0.1 dB
target noise margin = 0~310 in 0.1 dB
fixed = no rate adaptation
startup = rate adaptation at
initialization
runtime = rate adaptation any time
up shift noise margin = 0~310 in 0.1 dB
us/ds down shift noise margin = 0~310
in 0.1 dB
show
[<profile>]
Lists the ADSL configuration profiles or
a specific profile’s detailed settings.
L
ADSL alarm profiles allow efficient
configuration of ADSL alarm settings.
alarmadsl
468
P
delete
<profile>
Removes an unreferenced ADSL
alarm profile.
M
map
<profile>
Displays which ADSL ports reference
this alarm profile.
L
MSC1000G User’s Guide
Chapter 28 profile Commands
Table 172 profile Commands (continued)
COMMAND
P
set
<profile> atuc
[lofs <lofs>]
[loss <loss>]
[lols <lols>]
[lprs <lprs>]
[ess <ess>] [ffr
<ffr>] [sesl
<sesl>] [uasl
<uasl>]
[fru <fru>] [iru
<iru>] [frd
<frd>] [ird
<ird>] [ift
<ift>]
or
<profile> atur
[lofs <lofs>]
[loss <loss>]
[lprs <lprs>]
[ess <ess>] [sesl
<sesl>] [uasl
<uasl>] [fru
<fru>][iru
<iru>][frd <frd>]
[ird <ird>]
Creates a profile of ADSL alarm
settings.
<profile> = profile name, up to 31
characters
atuc = near end
atur = far end
<lofs> = number of loss of framing
seconds, 0~900
<loss> = number of loss of signal
seconds, 0~900
<lols> = number of loss of link
seconds, 0~900
<lprs> = number of loss of power
seconds, 0~900
<ess> = number of error seconds,
0~900
<ffr> = number of failed fast retrains
seconds, 0~900
<sesl> = number of severely errored
seconds-line, 0~900
<uasl> = number of unavailable
seconds-line, 0~900
<fru> = fast rate up in Kbps,
0~2147483
<iru> = interleave rate up in Kbps,
0~2147483
<frd> = fast rate down in Kbps,
0~2147483
<ird> = interleave rate down in
Kbps, 0~2147483
<ift> = init failure trap enable, 1enable, 0-disable
M
show
[<profile>]
Lists the ADSL alarm profiles or a
specific profile’s settings.
L
SHDSL alarm profiles allow efficient
configuration of SHDSL alarm settings.
alarmshdsl
MSC1000G User’s Guide
DESCRIPTION
delete
<profile>
Removes an unreferenced SHDSL
alarm profile.
M
map
<profile>
Displays which SHDSL ports reference
this alarm profile.
L
469
Chapter 28 profile Commands
Table 172 profile Commands (continued)
COMMAND
P
set
<profile> [atten
<atten>] [snrmgn
<snrmgn>] [es
<es>] [ses
<ses>][crc <crc>]
[losws <losws>]
[uas <uas>]
Creates a profile of SHDSL alarm
settings.
<profile> = profile name, up to 31
characters
<atten> = loop attenuation
threshold, 0~127
<snrmgn> = snr margin threshold,
0~15
<es> = number of errored seconds,
0~900
<ses> = severely errored seconds,
0~900
<crc> = the number of CRC
anomalies, >=0
<losws> = number of loss of sync
word seconds, 0~900
<uas> = number of unavailable
seconds, 0~900
M
show
[<profile>]
Lists the SHDSL alarm profiles or a
specific profile’s settings.
L
ADSL alarm profiles allow efficient
configuration of ADSL alarm settings.
alarmadsl
470
DESCRIPTION
delete
<profile>
Removes an unreferenced ADSL
alarm profile.
M
map
<profile>
Displays which ADSL ports reference
this alarm profile.
L
MSC1000G User’s Guide
Chapter 28 profile Commands
Table 172 profile Commands (continued)
COMMAND
P
set
<profile> atuc
[lofs <lofs>]
[loss <loss>]
[lols <lols>]
[lprs <lprs>]
[ess <ess>] [ffr
<ffr>] [sesl
<sesl>] [uasl
<uasl>]
[fru <fru>] [iru
<iru>] [frd
<frd>] [ird
<ird>] [ift
<ift>]
or
<profile> atur
[lofs <lofs>]
[loss <loss>]
[lprs <lprs>]
[ess <ess>] [sesl
<sesl>] [uasl
<uasl>] [fru
<fru>][iru
<iru>][frd <frd>]
[ird <ird>]
Creates a profile of ADSL alarm
settings.
<profile> = profile name, up to 31
characters
atuc = near end
atur = far end
<lofs> = number of loss of framing
seconds, 0~900
<loss> = number of loss of signal
seconds, 0~900
<lols> = number of loss of link
seconds, 0~900
<lprs> = number of loss of power
seconds, 0~900
<ess> = number of error seconds,
0~900
<ffr> = number of failed fast retrains
seconds, 0~900
<sesl> = number of severely errored
seconds-line, 0~900
<uasl> = number of unavailable
seconds-line, 0~900
<fru> = fast rate up in Kbps,
0~2147483
<iru> = interleave rate up in Kbps,
0~2147483
<frd> = fast rate down in Kbps,
0~2147483
<ird> = interleave rate down in
Kbps, 0~2147483
<ift> = init failure trap enable, 1enable, 0-disable
M
show
[<profile>]
Lists the ADSL alarm profiles or a
specific profile’s settings.
L
VDSL alarm profiles allow efficient
configuration of VDSL alarm settings.
alarmvdsl
MSC1000G User’s Guide
DESCRIPTION
delete
<profile>
Removes an unreferenced VDSL
alarm profile.
M
map
<profile>
Displays which VDSL ports reference
this alarm profile.
L
471
Chapter 28 profile Commands
Table 172 profile Commands (continued)
COMMAND
P
set
<profile> [lofs
<lofs>] [loss
<loss>] [lols
<lols>] [lprs
<lprs>]
[ess <ess>]
[sesl <sesl>]
[uasl <uasl>]
[ift <ift>]
Creates a profile of VDSL alarm
settings.
<profile> = profile name, up to 31
characters
<lofs> = number of loss of framing
seconds, 0~900
<loss> = number of loss of signal
seconds, 0~900
<lols> = number of loss of link
seconds, 0~900
<lprs> = number of loss of power
seconds, 0~900
<ess> = number of error seconds,
0~900
<sesl> = number of severely errored
seconds-line, 0~900
<uasl> = number of unavailable
seconds-line, 0~900
<ift> = init failure trap enable, 1enable, 0-disable
M
show
[<profile>]
Lists the VDSL alarm profiles or a
specific profile’s settings.
L
ATM traffic profiles allow efficient
configuration of ATM traffic settings.
atm
delete
<profile>
Removes an unreferenced ATM traffic
profile.
M
map
<profile>
Displays which ports reference this
ATM profile.
L
set
<atmprofile>
cbr|ubr <pcr>
<cdvt>
or
<atmprofile> rtvbr|nrt-vbr <pcr>
<cdvt> <scr> <bt>
Creates a profile of ATM traffic
settings.
cbr = constant cell rate
ubr = unspecified cell rate
rt-vbr = realtime variable bit rate
nrt-vbr = non-realtime variable bit
rate
<pcr> = peak cell rate, 150~300000
<scr> = sustainable cell rate,
150~300000
<cdvt> = cell delay variation
tolerance, 0~255
<bt> = burst tolerance, 0~255
Note: <pcr>, <cdvt>, <scr> and <bt>
can be inputted '*' as default value
Note: use “*” to set <pcr>, <cdvt>,
<scr> or <bt> to the default value.
M
show
[<profile>]
Lists the ATM traffic profiles or a
specific profile’s settings.
L
IGMP filter profiles allow you to control
access to IGMP multicast groups.
igmpfilter
delete
472
DESCRIPTION
<igmpfilter>
Removes an unreferenced IGMP filter
profile.
M
MSC1000G User’s Guide
Chapter 28 profile Commands
Table 172 profile Commands (continued)
COMMAND
profsvr
P
L
map
<igmpfilter>
Displays which ports reference this
IGMP filter profile.
set
<igmpfilter>
<index> <startip>
<endip>
M
Creates an IGMP filter profile of ATM
traffic settings.
<igmpfilter> = profile name
<index> = index of address, 1~16
<startip> = start of address range
<endip> = end of address range
show
[igmpprofile]
Lists the IGMP filter profiles or a
specific profile’s settings.
L
Displays the current profile server
setting.
L
show
mode
client|server
Sets the profile server operation mode. M
clientlist
set <ip> <type>
Adds an entry to the profile server
client list.
M
delete <ip>
Removes an entry from the profile
server client list.
M
show
Displays the profile server client list.
L
<ip>
Sets the target profile server IP
address for synchronization.
M
Synchronize with the profile server.
M
serverset
sync
SHDSL profiles allow efficient
configuration of SHDSL port settings.
shdsl
MSC1000G User’s Guide
DESCRIPTION
delete
<profile>
Removes an unreferenced SHDSL
port settings profile.
M
map
<profile>
Displays which SHDSL ports reference
this profile.
L
set
<profile> <minrate> <max-rate>
[annexa|annexb
2wire|4wire|mpai
r4
[lp_off |
lp_on_cur
[curr_margin] |
lp_on_wc
[worst_margin]]]
Creates a profile of SHDSL port
settings.
<min-rate> = minimum rate,
192~4096 in Kbps
<max-rate> = maximum rate,
192~4096 in Kbps
annexa|annexb = regional setting,
'annexb' by default
<wire-pair> = the number of wire
pairs to be used, '2wire' by default
lp_off = disable line probe, default line
probe mode
lp_on_cur = enable line probe with
current target snr margin
lp_on_wc = enable line probe with
worst case target snr margin
<curr-margin> = current condition
target snr margin, -10~21 in dB
<worst-margin> = worse case
noise margin, -10~21 in dB
M
show
[<profile>]
Lists the SHDSL port setting profiles or
a specific profile’s settings.
L
473
Chapter 28 profile Commands
Table 172 profile Commands (continued)
COMMAND
DESCRIPTION
P
VDSL profiles allow efficient
configuration of VDSL port settings.
vdsl
delete
<profile>
Removes a VDSL port settings profile.
M
map
<profile>
Displays which VDSL ports reference
this profile.
L
set
<profile> <usmax-rate> <dsmax-rate>
[fast|delay <usdelay> <dsdelay>]
[minrate <us-minrate> <ds-minrate>]
[usmgn <us-maxmgn> <us-min-mgn>
<us-tgt-mgn>]
[dsmgn <ds-maxmgn> <ds-min-mgn>
<ds-tgt-mgn>]
Creates a VDSL line profile. “us” is
UpStream, “ds” is DownStream
us maximum rate = 64~45440 in Kbps
ds maximum rate = 64~100032 in
Kbps
us/ds delay = 1~255 in ms
us minimum rate = 64~4096 in Kbps
ds minimum rat e= 64~32000 in Kbps
max noise margin = 0~310 in 0.1 dB
min. noise margin = 0~310 in 0.1 dB
target noise margin = 0~310 in 0.1 dB
M
show
[<profile>]
Lists the VDSL port setting profiles or a
specific profile’s settings.
L
28.3 profile acl Commands
An ACL (Access Control Logic) profile allows the system to classify and perform actions on
the upstream traffic.
28.3.1 profile acl delete Command
Syntax:
profile acl delete <profile>
This command removes the specified ACL profile.
"
You cannot remove the ACL profile(s) that is currently in use.
28.3.2 profile acl map Command
Syntax:
profile acl map <profile>
This command displays the DSL port(s) to which the specified ACL profile is applied.
474
MSC1000G User’s Guide
Chapter 28 profile Commands
The following example displays the port mapping table for the example ACL profile.
ras> profile acl map example
port pvc
----- -----------------------------------------------------3- 1 0-33
28.3.3 profile acl set Command
Syntax:
profile acl set <rule> <action>
MSC1000G User’s Guide
475
Chapter 28 profile Commands
where
<rule>
=
The rule that classifies traffic flows. Ordering of the criteria
is important. The system first compares the layer 2 fields
first, the layer 3 fields and then the protocol type.
The following lists the set of criteria you can configure.
•
•
•
•
•
•
•
•
•
•
•
•
•
•
ether <etype> vlan <vid>
ether <etype> srcmac <mac>
ether <etype> dstmac <mac>
vlan < vid > srcmac <mac>
vlan < vid > dstmac <mac>
srcmac < mac > dstmac <mac>
vlan < vid > pri <priority>
ether <etype>
vlan <vid>
srcmac <mac>
dstmac <mac>
pri <priority>
protocol <protocol>
[srcip <ip>/<mask>[stip <ip>/<mask>[tos
<tos>[srcport <port>[dstport <port>]]]]]
where
•
•
•
•
•
•
•
•
•
•
•
<action>
=
ethper <etype> = Ethernet type (0~65535).
vlan <vid> = VLAN ID (1~4094).
srmac <mac> = Source MAC address.
drmac <mac> = Destination MAC address.
priority <priority> = Priority (0 ~ 7)
protocol <protocol> = Protocol type: tcp, udp, ospf,
igmp, ip, gre, icmp or user specified.
dstip <ip>/<mask> = Destination IP address and subnet
mask.
srcip <ip>/<mask> = Source IP address and subnet
mask.
tos <stos> <etos> = Sets the ToS (Type of Service)
range between 0 and 255.
dstport <sport> <eport> = Destination port range.
srcport <sport> <eport> = Source port range.
The action(s) to perform on the classified packets. The
following lists the actions you can set.
•
•
•
rate <rate> = Sets the transmission rate (1~65535 in kbps)
for the matched traffic.
rvlan <rvlan> = Replaces the VLAN ID with this VLAN ID
(1~4094).
rpri <rpri>|deny = Replaces the priority with this priority
(0 ~7) of the matched packets or drops (deny) the packets.
This command configures an ACL rule to classify the upstream traffic and perform action(s)
on the classified traffic.
The following creates an ACL rule example named test for traffic from VLAN 10 with a
priority level of 2. This rule limits the rate on the classified traffic to 1000 kbps and changes
the priority level to 7.
ras> profile acl set test vlan 10 priority 2 rate 1000 rpri 7
476
MSC1000G User’s Guide
Chapter 28 profile Commands
28.3.3.1 Configuration Guidelines
• You can apply one classifier for a protocol on a port’s PVC.
• You cannot create a classifier that contains matching criteria for layer 2 and layer 3 fields.
For example profile acl set test protocol tcp vlan 15 deny is not allowed
as protocol type and VLAN do not belong to the same network layer.
• Each type of criteria can only be used once in a classifier. For example, profile acl
set test protocol tcp protocol udp deny is not allowed. For this example,
you need to create a separate classifier for each protocol and apply them to the same
PVC(s).
28.3.4 profile acl show Command
Syntax:
profile acl show [<profile>]
This command displays the name(s) of the profile(s) you have configured.
ras> profile acl show
acl profile(s):
-------------1. example
ras>
28.4 profile adsl Commands
Use the profile adsl commands to configure ADSL profiles.
28.4.1 profile adsl set Command
Syntax:
profile adsl set <profile> <us-max-rate> <ds-max-rate>
[fast|delay <us-delay> <ds-delay>]
[minrate <us-min-rate> <ds-min-rate>]
[usmgn <us-max-mgn> <us-min-mgn> <us-tgt-mgn>]
[dsmgn <ds-max-mgn> <ds-min-mgn> <ds-tgt-mgn>]
[usra fixed|startup|runtime <us-us-mgn> <us-ds-mgn>]
[dsra fixed|startup|runtime <ds-us-mgn> <ds-ds-mgn>]
where
<profile>
=
The descriptive name for the profile.
<us-max-rate>
=
The maximum ADSL upstream transmission rate, 64~4096 in
upstream rate must be less than or equal to the
downstream rate.
<ds-max-rate>
=
Kbps. The
The maximum ADSL downstream transmission rate,
64~32000 in Kbps.
MSC1000G User’s Guide
477
Chapter 28 profile Commands
=
The latency mode. With interleave, you must also define the
upstream and downstream delay (1-255 ms). It is
recommended that you configure the same delay for both
upstream and downstream.
[minrate <us=
min-rate> <dsmin-rate>]
The minimum ADSL upstream transmission rate (32~4096
Kbps) and the minimum ADSL downstream transmission rate
(32~32000 Kbps).
[fast|delay
<us-delay>
<ds-delay>]
[usmgn <usmax-mgn> <usmin-mgn> <ustgt-mgn>]
=
The maximum, minimum and target acceptable ADSL
upstream signal to noise margins (0~310 in 0.1 dB
measurements).
[dsmgn <dsmax-mgn> <dsmin-mgn> <dstgt-mgn>]
=
The maximum, minimum and target acceptable ADSL
downstream signal to noise margins (0~310 in 0.1 dB
measurements).
usra
=
The upstream rate adaptation setting.
fixed = no rate adaptation
startup = rate adaptation at initialization
runtime = rate adaptation any time
dsra
=
The downstream rate adaptation setting.
<us-us-mgn>
=
The upstream up shift noise margin (0~310 in 0.1 dB).
<us-ds-mgn>
=
The upstream down shift noise margin (0~310 in 0.1 dB).
<ds-us-mgn>
=
The downstream up shift noise margin (0~310 in 0.1 dB).
<ds-ds-mgn>
=
The downstream down shift noise margin (0~310 in 0.1 dB).
The profile is a list of ADSL line configuration settings. After you create an ADSL profile,
you can assign it to any of the ADSL ports on any of the ADSL line cards.
Note that the default value will be used for any of the above fields that are omitted.
The ADSL up/down shift noise margins define the threshold that triggers rate adaptation. For
example:
The target SNR is 6, and the up/down shift noise margins are 9/3
If the signal becomes better and the SNR is higher than 9, rate adaptation is triggered and the
line rate becomes higher
If the signal becomes bad and the SNR is lower then 3, rate adaptation is triggered and the line
rate becomes lower.
The following example creates a premium profile (named gold) for providing subscribers with
very high connection speeds and no interleave delay. It uses the following settings.
•
•
•
•
478
The maximum upstream rate is set to 2048 Kbps.
The maximum downstream rate is set to 16000 Kbps.
No interleave delay.
The minimum upstream is set to 1024 Kbps.
MSC1000G User’s Guide
Chapter 28 profile Commands
• The minimum downstream is set to 3072 Kbps.
• The maximum, minimum and target acceptable ADSL upstream signal to noise margins
are set to 12, 0 and 6 dB respectively.
• The maximum, minimum and target acceptable ADSL downstream signal to noise
margins are also set to 12, 0 and 6 dB respectively.
• Upstream and downstream rate adaptation are both set to operate whenever the link is up.
• The upstream up/down shift noise margins are set to 9/3 dB.
• The downstream up/down shift noise margins are set to 9/3 dB.
ras> profile adsl set gold 2048 16000 fast minrate 1024 3072 usmgn 120 0 60
dsmgn 120 0 60 usra runtime 90 30 dsra runtime 90 30
This next example creates a similar premium profile (named goldi), except it sets an interleave
delay of 16 ms for both upstream and downstream traffic.
ras> profile adsl set gold 2048 16000 delay 16 16 minrate 1024 3072 usmgn 120
0 60 dsmgn 120 0 60 usra runtime 90 30 dsra runtime 90 30
28.4.2 profile adsl map Command
Syntax:
profile adsl map <profile>
where
<profile>
=
The name of the profile.
This command displays which ADSL ports reference a specific profile.
The following example displays which ADSL ports use the gold profile.
ras> profile adsl map gold
28.4.3 profile adsl delete Command
Syntax:
profile adsl delete <profile>
where
<profile>
=
A profile name.
This command allows you to delete an individual ADSL profile by its name. You cannot
delete a profile that is assigned to any of the DSL ports in the MSC1000G. Assign a different
profile to any DSL ports that are using the profile that you want to delete, and then you can
delete the profile.
MSC1000G User’s Guide
479
Chapter 28 profile Commands
The following example deletes the gold ADSL profile.
ras> adsl profile delete gold
28.4.4 profile adsl show Command
Syntax:
profile adsl show [<profile>]
where
<profile>
=
A profile name.
This command displays the details of the specified ADSL profile or lists all of the ADSL
profiles if you do not specify one.
The following example displays the ADSL profile named gold.
ras> profile adsl show gold
adsl profile: gold
upstream
-------max rate
(Kbps):
2048
min rate
(Kbps):
1024
latency delay
(ms):
fast
max margin
(dB):
12.0
min margin
(dB):
0.0
target margin
(dB):
6.0
sra mode
: runtime
up shift mgn
(dB):
9.0
down shift mgn (dB):
3.0
downstream
---------16000
3072
fast
12.0
0.0
6.0
runtime
9.0
3.0
28.5 profile alarmadsl Commands
Configure alarmadsl profiles to set alarm settings and thresholds for the ADSL ports.
28.5.1 profile alarmadsl show Command
Syntax:
profile alarmadsl show [<profile>]
where
<profile>
=
The name of an alarm profile.
This command displays the details of the specified alarm ADSL profile or lists all of the alarm
ADSL profiles if you do not specify one.
480
MSC1000G User’s Guide
Chapter 28 profile Commands
The following example displays the default alarm ADSL profile (DEFVAL).
ras> profile alarmadsl show DEFVAL
adsl alarm profile : DEFVAL
atuc
atur
---------- ---------15MinLofs(lofs)
(sec):
0
0
15MinLoss(loss)
(sec):
0
0
15MinLols(lols)
(sec):
0
15MinLprs(lprs)
(sec):
0
0
15MinESs(ess)
(sec):
0
0
15MinFailedFastR(ffr)
(sec):
0
15MinSesL(sesl)
(sec):
0
0
15MinUasL(uasl)
(sec):
0
0
FastRateUp(fru)
(kbps):
0
0
InterleaveRateUp(iru)
(kbps):
0
0
FastRateDown(frd)
(kbps):
0
0
InterleaveRateDown(ird) (kbps):
0
0
InitFailureTrap(ift)
:
ras>
28.5.2 profile alarmadsl set Command
Syntax:
profile alarmadsl set <profile> atuc [lofs <lofs>] [loss <loss>] [lols
<lols>][lprs <lprs>] [ess <ess>] [ffr <ffr>] [sesl <sesl>] [uasl <uasl>]
[fru <fru>] [iru <iru>] [frd <frd>] [ird <ird>] [ift <ift>]
or <profile> atur [lofs <lofs>] [loss <loss>] [lprs <lprs>][ess <ess>] [sesl
<sesl>] [uasl <uasl>] [fru <fru>][iru <iru>][frd <frd>] [ird <ird>]
where
<profile>
=
A name for the alarm profile (up to 31 English keyboard
characters).
atuc
=
Downstream. These parameters are for the connection (or traffic)
going from the IES-5000 to the subscriber’s device.
atur
=
Upstream. These parameters are for the connection (or traffic)
coming from the subscriber’s device to the IES-5000.
<lofs>
=
The number of Loss Of Frame Seconds (0~900) that are permitted
to occur within 15 minutes.
<loss>
=
The number of Loss Of Signal Seconds (0~900) that are permitted
to occur within 15 minutes.
<lols>
=
The number of Loss Of Link Seconds (0~900) that are permitted to
occur within 15 minutes.
<lprs>
=
The Number of Loss of PoweR seconds (0~900) permitted to occur
(on the ATUR) within 15 minutes.
<ess>
=
The number of Errored SecondS (0~900) that are permitted to occur
within 15 minutes.
MSC1000G User’s Guide
481
Chapter 28 profile Commands
<ffr>
=
The number of Failed Fast Retrain seconds (0~900) that are
permitted to occur within 15 minutes.
<sesl>
=
The number of Severely Errored Seconds (0~900) that are permitted
to occur within 15 minutes.
<uasl>
=
The number of UnAvailable Seconds (0~900) that are permitted to
occur within 15 minutes.
<fru>
=
A rate in kilobits per second (Kbps). If a fast mode connection’s
upstream transmission rate increases by more than this number, then
a trap is sent.
<iru>
=
A rate in kilobits per second (Kbps). If an interleave mode
connection’s upstream transmission rate increases by more than this
number, then a trap is sent.
<frd>
=
A rate in kilobits per second (Kbps). If a fast mode connection’s
downstream transmission rate decreases by more than this number,
then a trap is sent.
<ird>
=
A rate in kilobits per second (Kbps). If an interleave mode
connection’s downstream transmission rate decreases by more than
this number, then a trap is sent.
<ift>
=
“1” sets the profile to trigger an alarm for an initialization failure
trap. “0” sets the profile to not trigger an alarm for an initialization
failure trap.
The alarmprofile set command configures ADSL port alarm thresholds. The MSC1000G
sends an alarm trap and generates a syslog entry when the thresholds of the alarm profile are
exceeded.
Configure alarmadsl profiles first and then use the port adsl alarmprof command to
use them with specific ADSL ports.
The following example sets an alarm profile named SESalarm that has the MSC1000G send
an alarm trap and generate a syslog whenever the atuc connection (from the IES-5000 to the
subscriber) has more than 3 severely errored seconds within a 15 minute period.
ras> profile alarmadsl set SESalarm atuc ses 3
28.5.3 profile alarmadsl delete Command
Syntax:
profile alarmadsl delete <profile>
where
<profile>
=
The name of an alarm profile.
This command allows you to delete an individual ADSL alarm profile by its name. You cannot
delete the DEFVAL alarm profile.
482
MSC1000G User’s Guide
Chapter 28 profile Commands
The following example deletes the SESalarm alarm profile.
ras> profile alarmadsl delete SESalarm
28.5.4 profile alarmadsl map Command
Syntax:
profile alarmadsl map <profile>
where
<profile>
=
The name of an alarm profile.
This command displays which ADSL ports are set to use the specified alarmadsl profile.
The following example displays which ADSL ports use the SESalarm alarmadsl profile.
ras> profile alarmadsl map SESalarm
28.6 profile alarmshdsl Commands
Configure alarmshdsl profiles to set alarm settings and thresholds for the SHDSL ports.
28.6.1 profile alarmshdsl show Command
Syntax:
profile alarmshdsl show [<profile>]
where
<profile>
=
A profile name.
This command displays the details of the specified alarm SHDSL profile or lists all of the
alarm SHDSL profiles if you do not specify one.
The following example displays the default alarm SHDSL profile (DEFVAL).
ras> profile alarmshdsl show DEFVAL
shdsl alarm profile : DEFVAL
loop attenuation(atten) (dB):
snr margin(snrmgn)
(dB):
es
(sec):
ses
(sec):
crc anomalies(crc)
:
losws
(sec):
uas
(sec):
ras>
MSC1000G User’s Guide
0
0
0
0
0
0
0
483
Chapter 28 profile Commands
28.6.2 profile alarmshdsl set Command
Syntax:
<profile> [atten <atten>] [snrmgn <snrmgn>] [es <es>] [ses <ses>][crc <crc>]
[losws <losws>] [uas <uas>]
where
<profile>
=
A name for the alarm profile (up to 31 English keyboard
characters).
<atten>
=
The permitted loop attenuation of a port, 0~127
<snrmgn>
=
The permitted signal to noise ratio margin, 0~15.
<ess>
=
The number of Errored SecondS (0~900) that are permitted
to occur within 15 minutes.
<ses>
=
The number of Severely Errored Seconds (0~900) that are
permitted to occur within 15 minutes.
<crc>
The number of Cyclic Redundancy Checking anomalies that
are permitted to occur within 15 minutes.
<losws>
The number of Loss Of Sync Word Seconds (0~900) that are
permitted to occur within 15 minutes.
=
<uas>
The number of UnAvailable Seconds (0~900) that are
permitted to occur within 15 minutes.
This command configures SHDSL port alarm thresholds. The MSC1000G sends an alarm trap
and generates a syslog entry when the thresholds of the alarm profile are exceeded.
Configure alarmshdsl profiles first and then use the port shdsl alarmprof command to
to use them with specific SHDSL ports.
The following example sets an alarm profile named SESalarm that has the MSC1000G send
an alarm trap and generate a syslog whenever the connection’s number of severely errored
seconds exceeds three within a 15 minute period.
ras> profile alarmshdsl set SESalarm ses 3
28.6.3 profile alarmshdsl delete Command
Syntax:
profile alarmshdsl delete <profile>
where
<profile>
=
The name of an alarm profile.
This command allows you to delete an individual SHDSL alarm profile by its name. You
cannot delete the DEFVAL alarm profile.
484
MSC1000G User’s Guide
Chapter 28 profile Commands
The following example deletes the SESalarm alarm profile.
ras> profile alarmshdsl delete SESalarm
28.6.4 profile alarmshdsl map Command
Syntax:
profile alarmshdsl map <profile>
where
<profile>
=
The name of an alarm profile.
This command displays which SHDSL ports are set to use the specified alarmshdsl profile.
The following example displays which SHDSL ports use the SESalarm alarmshdsl profile.
ras> profile alarmshdsl map SESalarm
28.7 profile alarmvdsl Commands
Configure alarmadsl profiles to set alarm settings and thresholds for the VDSL ports.
28.7.1 profile alarmvdsl show Command
Syntax:
profile alarmvdsl show [<profile>]
where
<profile>
=
The name of an alarm profile.
This command displays the details of the specified alarm VDSL profile or lists all of the alarm
VDSL profiles if you do not specify one.
The following example displays the default alarm VDSL profile (DEFVAL).
ras> profile alarmvdsl show DEFVAL
vdsl alarm profile : DEFVAL
initFailure(ift)
:
15MinLofs(lofs)
(sec):
15MinLoss(loss)
(sec):
15MinLols(lols)
(sec):
15MinLprs(lprs)
(sec):
15MinESs(ess)
(sec):
15MinSesL(sesl)
(sec):
15MinUasL(uasl)
(sec):
ras>
MSC1000G User’s Guide
0
0
0
0
0
0
0
485
Chapter 28 profile Commands
28.7.2 profile alarmvdsl set Command
Syntax:
profile alarmadsl set <profile> [lofs <lofs>] [loss <loss>] [lols <lols>]
[lprs <lprs>] [ess <ess>] [sesl <sesl>] [uasl <uasl>] [ift <ift>]
where
<profile>
=
A name for the alarm profile (up to 31 English keyboard
characters).
<lofs>
=
The number of Loss Of Frame Seconds (0~900) that are
permitted to occur within 15 minutes.
<loss>
=
The number of Loss Of Signal Seconds (0~900) that are
permitted to occur within 15 minutes.
<lols>
=
The number of Loss Of Link Seconds (0~900) that are
permitted to occur within 15 minutes.
<lprs>
=
The Number of Loss of PoweR seconds (0~900) permitted to
occur (on the ATUR) within 15 minutes.
<ess>
=
The number of Errored SecondS (0~900) that are permitted
to occur within 15 minutes.
<sesl>
=
The number of Severely Errored Seconds (0~900) that are
permitted to occur within 15 minutes.
<uasl>
=
The number of UnAvailable Seconds (0~900) that are
permitted to occur within 15 minutes.
<iru>
=
A rate in kilobits per second (Kbps). If an interleave mode
connection’s upstream transmission rate increases by more
than this number, then a trap is sent.
<ift>
=
“1” sets the profile to trigger an alarm for an initialization
failure trap. “0” sets the profile to not trigger an alarm for an
initialization failure trap.
The alarmprofile set command configures VDSL port alarm thresholds. The MSC1000G
sends an alarm trap and generates a syslog entry when the thresholds of the alarm profile are
exceeded.
Configure alarmvdsl profiles first and then use the port vdsl alarmprof command to
use them with specific VDSL ports.
The following example sets an alarm profile named SESalarm that has the MSC1000G send
an alarm trap and generate a syslog whenever the connection (from the IES-5000 to the
subscriber) has more than 3 severely errored seconds within a 15-minute period.
ras> profile alarmvdsl set SESalarm sesl 3
486
MSC1000G User’s Guide
Chapter 28 profile Commands
28.7.3 profile alarmvdsl delete Command
Syntax:
profile alarmvdsl delete <profile>
where
<profile>
=
The name of an alarm profile.
This command allows you to delete an individual VDSL alarm profile by its name. You cannot
delete the DEFVAL alarm profile.
The following example deletes the SESalarm alarm profile.
ras> profile alarmvdsl delete SESalarm
28.7.4 profile alarmvdsl map Command
Syntax:
profile alarmvdsl map <profile>
where
<profile>
=
The name of an alarm profile.
This command displays which VDSL ports are set to use the specified alarmadsl profile.
The following example displays which VDSL ports use the SESalarm alarmadsl profile.
ras> profile alarmvdsl map SESalarm
slot side
port
---- ---- -----------------------------------------------1
2
3
4
123456789012345678901234567890123456789012345678
2
- -----------------------------------------------3
- -----------------------------------------------4
- -----------------------------------------------5
- -----------------------------------------------ras>
28.8 profile atm Commands
Use these commands to configure ATM traffic settings.
28.8.1 profile atm show Command
Syntax:
profile atm show [<profile>]
MSC1000G User’s Guide
487
Chapter 28 profile Commands
where
<profile>
=
A profile name.
This command displays the details of the specified ATM profile or lists all of the ATM profiles
if you do not specify one.
The following example displays the DEFVAL ATM profile.
ras> profile atm show DEFVAL
atm profile: DEFVAL
traffic class: ubr
pcr
: 300000
cdvt
: 0
ras>
28.8.2 profile atm set Command
Syntax:
profile atm set <atmprofile> cbr|ubr <pcr> <cdvt>
or
profile atm set <atmprofile> rt-vbr|nrt-vbr <pcr> <cdvt> <scr> <bt>
where
488
<atmprofile>
=
The name of the ATM profile (up to 31 English keyboard
characters). You cannot change the DEFVAL profile.
<ubr|cbr>
=
The ubr (unspecified bit rate) or cbr (constant bit rate) ATM
traffic class.
<pcr>
=
Peak Cell Rate (150~300000), the maximum rate (cells per
second) at which the sender can send cells. * sets the default
value.
[cdvt]
=
Cell Delay Variation Tolerance is the accepted tolerance of
the difference between a cell’s transfer delay and the
expected transfer delay (number of cells). 0 to 255 cells or *
for the default value.
rt-vbr)|nrtvbr
=
The Real-Time Variable Bit Rate (vbr) or Non Real-Time
Variable Bit Rate (nrt-vbr) Variable Bit Rate ATM traffic
class.
<scr>
=
The Sustainable Cell Rate (150~300000) sets the average
cell rate (long-term) that can be transmitted (cells per
second). SCR applies with the vbr traffic class. * sets the
default value.
<bt>
=
Burst Tolerance this is the maximum number of cells
(0~255) that the port is guaranteed to handle without any
discards. BT applies with the vbr traffic class. * sets the
default value.
MSC1000G User’s Guide
Chapter 28 profile Commands
This command creates a profile of ATM traffic settings.
After you create an ATM profile, you can use it with the port ppvc set or port pvc set
command to assign it to a virtual circuit.
The following example creates an ATM profile named gold. It uses constant bit rate and has
the maximum rate (peak cell rate) set to 300,000 cells per second. The acceptable tolerance of
the difference between a cell’s transfer delay and the expected transfer delay (CDVT) is set to
5 cells.
ras> profile atm set gold cbr 300000 5
The following example creates an ATM profile named silver. It uses real-time variable bit rate
and has the maximum rate (peak cell rate) set to 250,000 cells per second. The acceptable
tolerance of the difference between a cell’s transfer delay and the expected transfer delay
(CDVT) is set to 5 cells. The average cell rate that can be transmitted (SCR) is set to 100,000
cells per second. The maximum number of cells that the port is guaranteed to handle without
any discards (BT) is set to 200.
ras> profile atm set silver rt-vbr 250000 5 100000 200
The following example creates an ATM profile named economy. It uses unspecified bit rate
and has the maximum rate (peak cell rate) set to 10,000 cells per second. The acceptable
tolerance of the difference between a cell’s transfer delay and the expected transfer delay
(CDVT) is set to 100 cells.
ras> profile atm set economy ubr 10000 100
28.8.3 profile atm delete Command
Syntax:
profile atm delete <profile>
where
<profile>
=
The name of a profile.
This command allows you to delete an individual ATM profile by its name. You cannot delete
the DEFVAL profile.
You cannot delete an ATM profile that is assigned to any of the PVCs or PPVCs. Assign a
different profile to any PVCs or PPVCs that are using the profile that you want to delete, and
then you can delete the profile.
The following example deletes the silver ATM profile.
ras> profile atm delete silver
MSC1000G User’s Guide
489
Chapter 28 profile Commands
28.8.4 profile atm map Command
Syntax:
profile atm map <profile>
where
<profile>
=
The name of a profile.
This command displays which PVCs or PPVCs are set to use the specified ATM profile.
The following example displays which PVCs or PPVCs use the silver profile.
ras> profile atm map silver
28.9 Profile Server
The profile server feature manages profiles on multiple IES-5000’s. You can configure profiles
on one IES-5000 that you set to server mode. When you want to configure another IES-5000,
you can set it to client mode to get the profile settings from (synchronize with) the IES-5000 in
server mode. If you change the profile settings on the IES-5000 in server mode, you can have
it synchronize the profile settings on the clients to match.
28.10 profile profsvr Commands
Use these commands to configure the profile server feature settings.
28.10.1 profile profsvr show Command
Syntax:
profile profsvr show
This command displays the current profile server setting.
ras> profile profsvr show
mode
:server mode
no
Client Ip
type
---- --------------- -----01
1.2.3.4
0
28.10.2 profile profsvr mode Command
Syntax:
profile profsvr mode client|server
This command sets the profile server operation mode.
ras> profile profsvr mode server
490
MSC1000G User’s Guide
Chapter 28 profile Commands
28.10.3 profile profsvr clientlist set Command
Syntax:
profile profsvr clientlist set <ip> <type>
where
<type>
=
A profile client IES-5000 may have unused profiles on it
(profiles that are not mapped to any ports).
Use 0 to leave these unused profiles on the client IES-5000
when synchronizing the profiles.
Use 1 to delete these unused profiles from the client IES5000 when synchronizing the profiles.
This command adds an entry to the profile server client list. When the IES-5000 is in server
mode, use this command to add entries to the list of client IES-5000’s.
The following example sets a profile server client entry for an IES-5000 at IP address 1.2.3.4.
If there are any unused profiles on this client during the synchronization process, they will be
left on the client.
ras> profile profsvr clientlist set 1.2.3.4 0
28.10.4 profile profsvr clientlist delete Command
Syntax:
profile profsvr clientlist delete <ip>
This command removes an entry from the profile server client list.
The following example removes a profile server client entry for an IES-5000 at IP address
1.2.3.4.
ras> profile profsvr clientlist delete 1.2.3.4
28.10.5 profile profsvr clientlist show Command
Syntax:
profile profsvr clientlist show <ip>
This command displays the profile server client list.
ras> profile profsvr clientlist show
no
Client Ip
type
---- --------------- -----01
1.2.3.4
0
02
1.2.3.5
0
MSC1000G User’s Guide
491
Chapter 28 profile Commands
28.10.6 profile profsvr serverset Command
Syntax:
profile profsvr serverset <ip>
This command sets the target profile server IP address for synchronization. When the IES5000 is in client mode, use this command to specify the IP address of the IES-5000 in server
mode.
The following example sets an IP address of 5.6.7.8 to use in synchronizing profile settings.
ras> profile profsvr serverset 5.6.7.8
28.10.7 profile profsvr sync Command
Syntax:
profile profsvr sync
This command has the IES-5000 synchronize it’s profile settings. If the IES-5000 is in client
mode, it will attempt to get profile settings from the IES-5000 in server mode. If the IES-5000
is in server mode, it will send its profile settings to the IES-5000’s in the profile server client
list.
28.11 profile shdsl Commands
Use the profile shdsl commands to configure SHDSL profiles.
28.11.1 profile shdsl set Command
Syntax:
profile shdsl set <profile> <min-rate> <max-rate>
[annexa|annexb 2wire|4wire|mpair4
[lp_off | lp_on_cur [curr_margin] | lp_on_wc [worst_margin]]]
where
<profile>
=
The descriptive name for the profile.
<min-rate>
=
The minimum transmission rate in Kbps. (192~4096)
<max-rate>
=
The maximum transmission rate in Kbps. (192~4096)
annexa|annexb
=
The region setting, annexb is the default.
annexa = DSL over POTS.
annexb = DSL over ISDN.
492
MSC1000G User’s Guide
Chapter 28 profile Commands
2wire|4wire|mp
air4
=
The wire pair number.
2wire = a normal connection using a single SHDSL port’s
two wires, this is the default.
4wire = a 4-wire n-wire group (two SHDSL ports grouped
together).
mpair4 = an 8-wire n-wire group (four SHDSL ports
grouped together).
lp_off
=
Disable line probe.
The SHDSL line card and subscriber modem use line probes
to determine the best possible transmission rate. This is used
in rate adaptation. This is the default line probe mode.
If you disable line probe, the system skips the rate adaptation
phase to shorten connection set up time.
lp_on_cur
=
Enable line probe with current target Signal to Noise Ratio
margin.
lp_on_wc
=
Enable line probe with worst case target Signal to Noise
Ratio margin.
<curr-margin>
=
The current condition target Signal to Noise Ratio margin, 10 ~ 21 in dB. You only configure this if you enable line
probing using the current target Signal to Noise Ratio
margin.
<worst-margin>
=
The worst case Signal to Noise Ratio margin, -10 ~ 21 in dB.
You only configure this if you enable line probing using the
worst case target Signal to Noise Ratio margin.
The profile is a table that contains information on SHDSL line configuration. Each entry in
this table reflects a parameter defined by a manager, which can be used to configure the shdsl
line. After you create an SHDSL profile, assign it to SHDSL ports on an SHDSL line card.
You must specify at least the profile’s name and minimum and maximum rates. The default
value will be used for any of the other fields that you omit.
The minimum transmission rate must be less than or equal to the maximum transmission rate.
When using 4 or 8-wire groups, you must apply the profile to consecutive ports. A profile for a
4-wire group can be used with ports 1,2 or 3,4 or 5,6 and so forth (the first two ports, the
second two ports, the third two ports and so on). You cannot use a 4-wire group with ports 2,3
or 4,5. A profile for an 8-wire group can be used with ports 1,2,3,4 or 5,6,7,8 or 9,10,11,12 and
so forth (the first four ports, the second four ports, the third four ports and so on). You cannot
use an 8-wire group with ports 2,3,4,5 or 4,5,6,7.
MSC1000G User’s Guide
493
Chapter 28 profile Commands
The following example creates a premium profile (named gold) for providing subscribers with
very high connection speeds. The minimum transmission rate is 2112 Kbps and the maximum
transmission rate is 4096. It sets two ports to function as a 4-wire group. It uses Annex A (DSL
over POTS). It turns on line probes and has them use the current condition target signal to
noise ratio margin which it sets to 5 db.
ras> profile shdsl set gold 2112 4096 annexa 4wire lp_on_cur 5
28.11.2 profile shdsl map Command
Syntax:
profile shdsl map <profile>
where
=
<profile>
The name of the profile.
This command displays which SHDSL ports reference a specific profile.
The following example displays which SHDSL ports use the gold profile.
ras> profile shdsl map gold
28.11.3 profile shdsl delete Command
Syntax:
profile shdsl delete <profile>
where
<profile>
=
A profile name.
This command allows you to delete an individual shdsl profile by its name. You cannot delete
a profile that is assigned to any of the DSL ports in the MSC1000G. Assign a different profile
to any DSL ports that are using the profile that you want to delete, and then you can delete the
profile.
The following example deletes the gold SHDSL profile.
ras> profile shdsl delete gold
28.11.4 profile shdsl show Command
Syntax:
profile shdsl show [<profile>]
where
<profile>
494
=
A profile name.
MSC1000G User’s Guide
Chapter 28 profile Commands
This command displays the details of the specified SHDSL profile or lists all of the SHDSL
profiles if you do not specify one.
The following example displays the SHDSL profile named gold.
ras> profile shdsl show gold
shdsl profile: gold
max rate
(Kbps): 4096
min rate
(Kbps): 2112
annex mode
: annexa
wire pair
: 4wire
line probe
: enable with current target SNR margin
curr margin
(dB): 5
ras>
28.12 profile vdsl commands
Use the profile shdsl commands to configure VDSL profiles.
28.12.1 profile vdsl delete command
Syntax:
profile vdsl delete <profile>
where
<profile>
=
A profile name.
This command allows you to delete an individual shdsl profile by its name. You cannot delete
a profile that is assigned to any of the DSL ports in the MSC1000G. Assign a different profile
to any DSL ports that are using the profile that you want to delete, and then you can delete the
profile.
The following example deletes the standard VDSL profile.
ras> profile vdsl delete standard
28.12.2 profile vdsl map command
Syntax:
profile vdsl map <profile>
This command displays which VDSL ports reference a specific profile.
The following example displays which VDSL ports use the standard profile.
ras> profile shdsl map standard
MSC1000G User’s Guide
495
Chapter 28 profile Commands
28.12.3 profile vdsl set command
Syntax:
profile vdsl set <profile> <us-max-rate> <ds-max-rate> [fast|delay <us-delay>
<ds-delay>] [minrate <us-min-rate> <ds-min-rate>] [usmgn <us-max-mgn> <usmin-mgn> <us-tgt-mgn>] [dsmgn <ds-max-mgn> <ds-min-mgn> <ds-tgt-mgn>]
where
<profile>
=
The descriptive name for the profile.
<us-max-rate>
=
The maximum VDSL upstream transmission rate, 64~45440
in Kbps. The upstream rate must be less than or equal to the
downstream rate.
<ds-max-rate>
=
The maximum VDSL downstream transmission rate,
64~100032 in Kbps.
[fast|delay
<us-delay>
<ds-delay>]
=
The latency mode. With interleave, you must also define the
upstream and downstream delay (1-255 ms). It is
recommended that you configure the same delay for both
upstream and downstream.
[minrate <us=
min-rate> <dsmin-rate>]
The minimum VDSL upstream transmission rate (32~45440
Kbps) and the minimum ADSL downstream transmission
rate (32~100032 Kbps).
[usmgn <usmax-mgn> <usmin-mgn> <ustgt-mgn>]
=
The maximum, minimum and target acceptable VDSL
upstream signal to noise margins (0~310 in 0.1 dB
measurements).
[dsmgn <dsmax-mgn> <dsmin-mgn> <dstgt-mgn>]
=
The maximum, minimum and target acceptable VDSL
downstream signal to noise margins (0~310 in 0.1 dB
measurements).
The profile is a list of VDSL line configuration settings. After you create a VDSL profile, you
can assign it to any of the VDSL ports on any of the VDSL line cards.
"
The system rounds the signal to noise margin settings to the nearest multiple
of 0.25 dB.
The following example creates a VDSL profile (named standard) for providing subscribers
with very high connection speeds and no interleave delay. It uses the following settings.
•
•
•
•
•
496
The maximum upstream rate is set to 2048 Kbps.
The maximum downstream rate is set to 16000 Kbps.
No interleave delay.
The minimum upstream is set to 1024 Kbps.
The minimum downstream is set to 3072 Kbps.
MSC1000G User’s Guide
Chapter 28 profile Commands
• The maximum, minimum and target acceptable VDSL upstream signal to noise margins
are set to 12, 0 and 6 dB respectively.
• The maximum, minimum and target acceptable VDSL downstream signal to noise
margins are also set to 12, 0 and 6 dB respectively.
ras> profile vdsl set standard 2048 16000 fast minrate 1024 3072 usmgn 12 0
6 dsmgn 12 0 6
This next example creates a similar VDSL profile (named standardB), except it sets an
interleave delay of 16 ms for both upstream and downstream traffic.
ras> profile vdsl set standardB 2048 16000 delay 16 16 minrate 1024 3072 us
mgn 12 0 6 dsmgn 12 0 6
28.12.4 profile vdsl show Command
Syntax:
profile vdsl show [<profile>]
where
<profile>
=
The descriptive name for the profile.
This command displays the VDSL profile list of the settings of a VDSL profile configured on
the system.
The following example displays the profile list and the settings of the standard profile.
ras> profile vdsl show
vdsl profile(s):
---------------------1. DEFVAL
2. standard
3. standardB
ras> profile vdsl show standard
vdsl profile: standard
upstream
-------max rate
(Kbps):
2048
min rate
(Kbps):
1024
latency delay
(ms):
fast
max margin
(dB):
1.2
min margin
(dB):
0.0
target margin
(dB):
0.6
ras>
MSC1000G User’s Guide
downstream
---------16000
3072
fast
1.2
0.0
0.6
497
Chapter 28 profile Commands
498
MSC1000G User’s Guide
CHAPTER
29
show Commands
This chapter shows you how to use the show commands.
29.1 show Commands Overview
The show commands display runtime status information.
29.2 show Commands Summary
The following table lists the show commands. The P column on the right indicates the
administrator privilege level needed to use the command (H for high, M for middle or L for
low).
Table 173 show Commands
COMMAND
DESCRIPTION
P
Displays an ADSL port’s line bit
allocation.
L
show
adsl
linedata
<slot-port>
linegain
<slot-port>
L
linehlog
Displays ADSL line channel
characteristics. The format provides
magnitude values in a logarithmic
scale.
L
lineqln
Displays the Quiet Line Noise for a
DMT tone is the rms (root mean
square) level of the noise present on
the line, when no ADSL signals are
present. It is measured in dBm/Hz.
The QLN can be used in analyzing
crosstalk.
L
L
linetssi
arp
atm
<slotport>|<slotport-vpi/vci>
[reset]
dhcp
counter
MSC1000G User’s Guide
<slot>|<slo
t-port>
Displays the ARP table.
L
Displays ATM traffic counters.
L
Displays port DHCP statistics.
L
499
Chapter 29 show Commands
Table 173 show Commands (continued)
COMMAND
snoop
<slot-port>
dot3ad
P
Displays port DHCP snooping
information.
L
Displays the (IEEE 802.3ad) link
aggregation settings.
L
enet
<gigaport>|<slot>
Displays Ethernet packet counters.
L
igmp
info
Displays IGMP related statistics.
L
group
[<vid>
<group_ip>]
Displays the learned IGMP group
settings and status.
L
port
info <slotport>
Displays IGMP related information on
the port.
L
group
<slot-port>
Displays joint IGMP group information
on the port.
L
Displays management IP settings.
L
ip
ipbpvc
500
DESCRIPTION
arpproxy
all|domain
[<domain>]|
edgerouter
[<ip>
<vid>]|inte
rface [<ip/
mask>
<vid>]
Display whole ARP table.
Display learnt ARP table for a domain.
Display learnt ARP table for all/an
edge router.
Display learnt ARP table for all/an
interface.
Age time information is included.
L
interface
[<ip/
mask>|<vid|
<ip/mask>
<vid>]
Display runtime interfaces.
L
route
[<domain>]|
[<ip/
mask>]|[<do
main> <ip/
mask>]]
Display runtime routing table.
L
lineinfo
<slot-port>
Displays DSL line information.
L
lineperf
<slot-port>
Displays DSL line performance
statistics.
L
linerate
<slot-port>
Displays DSL line rate values.
L
linestat
<slot-port>
Displays DSL link status.
L
mac
[<gigaport>|<mac>|<slo
t>|<slotport>|vid
<vid1>[-<vid2>]]
Displays a port’s IEEE 802.1d MAC
address forwarding table.
L
monitor
<slot>
Displays a card’s hardware monitor
statistics.
L
mstp
<mstid>
[<end_mstid>]
Displays MSTP information for the
Ethernet ports.
L
packet
<slot-port>
Displays a port’s packet counter.
L
MSC1000G User’s Guide
Chapter 29 show Commands
Table 173 show Commands (continued)
COMMAND
paepvc
performance
<slotport>|<slot
-port-vpi/
vci>
Displays PAE PVC counter statistics.
L
session
<slotport>|<slot
-port-vpi/
vci>
Displays PAE PVC session
information.
L
Displays a DSL port’s performance
counters.
L
Displays the CPU utilization and
memory usage status.
L
Displays Gigabit Ethernet interface link
RMON information.
L
Displays information on logged in
users. * denotes your session.
L
Displays current VLANs.
L
<slot-port>
curr|15min|1day
stats|history
<giga-port>
user
vlan
P
counter
sys
rmon
DESCRIPTION
[<vid>]|[
<start-vid>
<end-vid>]
29.3 show Commands
Use these commands to display runtime status information.
29.3.1 show adsl Commands
Use the show adsl commands to display the line information for an active ADSL line.
29.3.1.1 show adsl linedata Command
Syntax:
show adsl linedata <slot-port>
This command displays a ADSL port's line bit allocation.
Discrete Multi-Tone (DMT) modulation divides up a line’s bandwidth into tones. This
command displays the number of bits transmitted for each tone. This can be used to determine
the quality of the connection, whether a given sub-carrier loop has sufficient margins to
support ADSL transmission rates, and possibly to determine whether certain specific types of
interference or line attenuation exist. Refer to the ITU-T G.992.1 recommendation for more
information on DMT.
The better (or shorter) the line, the higher the number of bits transmitted for a DMT tone. The
maximum number of bits that can be transmitted per DMT tone is 15.
“usBit table” displays the number (in hexadecimal format) of bits transmitted per DMT tone
for the upstream channel (from the subscriber’s DSL modem or router to the DSL line card).
“dsBit table” displays the number (in hexadecimal format) of bits received per DMT tone for
the downstream channel (from the DSL line card) to the subscriber’s DSL modem or router).
MSC1000G User’s Guide
501
Chapter 29 show Commands
“usSnr Table” displays the upstream (from the subscriber’s DSL modem or router to the DSL
line card) Signal to Noise Ratio. The higher the number, the better the line quality for that
tone.
The bit allocation contents are only valid when the link is up.
The following example displays the line bit allocation for DSL port 5 on the line card in slot 7.
In the following example, the upstream channel is carried on tones 8 to 17 and the downstream
channel is carried on tones 34 to 497 (space is left between the channels to avoid interference).
502
MSC1000G User’s Guide
Chapter 29 show Commands
ras> show adsl linedata 7-5
slot-port=7-5, DSL line data
link
= link_up
savedData=true
usBit Table
1:00 00 00 00 00 00 00 07 08 09
17:0d 0d 0d 0e 0d 0d 0d 0d 0d 0d
33:00 00 00 00 00 00 00 00 00 00
49:00 00 00 00 00 00 00 00 00 00
dsBit Table
1:00 00 00 00 00 00 00 00 00 00
17:00 00 00 00 00 00 00 00 00 00
33:00 09 0a 0a 0a 0b 0b 0b 0b 0c
49:0d 0d 0d 0d 0d 0e 0e 0e 0e 0e
65:00 0e 0e 0e 0e 0e 0e 0e 0e 0e
81:0e 0e 0e 0e 0e 0e 0e 0e 0e 0e
97:0e 0e 0e 0e 0e 0e 0e 0e 0e 0e
113:0e 0e 0e 0e 0e 0e 0e 0e 0e 0e
129:0e 0e 0e 0e 0e 0e 0e 0e 0e 0e
145:0e 0e 0e 0e 0e 0e 0e 0e 0e 0e
161:0e 0e 0e 0e 0e 0e 0e 0e 0e 0e
177:0e 0e 0e 0e 0e 0e 0e 0e 0e 0e
193:0e 0e 0e 0e 0e 0e 0e 0e 0e 0e
209:0e 0e 0e 0e 0e 0e 0e 0e 0e 0e
225:0e 0e 0e 0e 0e 0e 0e 0e 0e 0e
241:0e 0e 0e 0e 0e 0e 0e 0e 0e 0e
257:0e 0e 0e 0e 0e 0e 0e 0e 0e 0e
273:0e 0e 0e 0e 0d 0e 0e 0e 0e 0e
289:0e 0d 0d 0e 0d 0e 0e 0e 0e 0e
305:0e 0e 0e 0d 0d 0e 0e 0d 0e 0d
321:0e 0d 0d 0d 0d 0d 0e 0d 0e 0e
337:0e 0d 0d 0d 0d 0e 0e 0d 0d 0d
353:0d 0d 0d 0d 0d 0d 0d 0d 0d 0c
369:08 08 09 0a 0b 0c 0c 0c 0d 0d
385:0d 0d 0d 0d 0d 0d 0d 0d 0d 0d
401:0d 0d 0d 0d 0d 0d 0d 0d 0d 0d
417:0d 0d 0d 0d 0d 0d 0d 0d 0d 0d
433:0d 0d 0d 0d 0d 0d 0d 0d 0d 0d
449:0d 0d 0d 0d 0d 0d 0d 0d 0d 0d
465:0d 0c 0d 0c 0c 0c 0c 0c 0c 0c
481:0c 0c 0c 0c 0c 0c 0c 0c 0c 0c
497:0c 0c 0c 0c 0c 0b 0b 0b 0b 0b
usSnr Table(dB)
1~ 8:
0.00
0.00
0.00
9~16:
46.37
48.65
51.67
17~24:
59.91
59.85
59.22
25~32:
57.80
57.39
57.39
33~40:
0.00
0.00
0.00
41~48:
0.00
0.00
0.00
49~56:
0.00
0.00
0.00
57~64:
0.00
0.00
0.00
MSC1000G User’s Guide
0a
0d
00
00
0b
0c
00
00
0b
0b
00
00
0c
0a
00
00
0c
09
00
00
0d
08
00
00
00
00
0c
0e
0e
0e
0e
0e
0e
0e
0e
0e
0e
0e
0e
0e
0e
0e
0e
0d
0d
0d
0c
0d
0d
0d
0d
0d
0d
0c
0c
0a
00
00
0c
0e
0e
0e
0e
0e
0e
0e
0e
0e
0e
0e
0e
0e
0e
0e
0d
0e
0d
0d
0c
0d
0d
0d
0d
0d
0d
0c
0c
0a
00
00
0c
0e
0e
0e
0e
0e
0e
0e
0e
0e
0e
0e
0e
0e
0e
0e
0d
0e
0e
0d
0c
0d
0d
0d
0d
0d
0d
0c
0c
09
00
00
0c
0e
0e
0e
0e
0e
0e
0e
0e
0e
0e
0e
0e
0e
0e
0d
0e
0e
0d
0d
0b
0d
0d
0d
0d
0d
0d
0c
0c
08
00
00
0d
0e
0e
0e
0e
0e
0e
0e
0e
0e
0e
0e
0e
0e
0e
0d
0d
0e
0e
0d
0a
0d
0d
0d
0d
0d
0c
0c
0c
08
00
00
0d
0e
0e
0e
0e
0e
0e
0e
0e
0e
0e
0e
0e
0e
0e
0e
0e
0e
0d
0d
09
0d
0d
0d
0d
0d
0d
0c
0c
05
0.00
54.03
61.98
55.57
0.00
0.00
0.00
0.00
0.00
53.81
59.94
52.70
0.00
0.00
0.00
0.00
0.00
57.19
59.87
49.45
0.00
0.00
0.00
0.00
0.00
56.49
59.23
45.75
0.00
0.00
0.00
0.00
40.96
59.87
58.33
43.45
0.00
0.00
0.00
0.00
503
Chapter 29 show Commands
29.3.1.2 show adsl linegain Command
Syntax:
show adsl linegain <slot-port>
This command displays the gain parameter of the active ADSL line.
29.3.1.3 show adsl linehlog Command
Syntax:
show adsl linehlog <slot-port>
This command displays the HLOG parameter of the active ADSL line.
29.3.1.4 show adsl lineqln Command
Syntax:
show adsl lineqln <slot-port>
This command displays the QLN parameter of the active ADSL line.
29.3.1.5 show adsl linetssi Command
Syntax:
show adsl linetssi <slot-port>
This command displays the TSSI parameter of the active ADSL line.
29.3.2 show arp Command
Syntax:
show arp
This command displays the MSC1000G’s IP Address Resolution Protocol table. This is the list
of IP addresses and matching MAC addresses that the MSC1000G has resolved.
An example is shown next.
ras> show arp
ip address
time ether address
interface
--------------- ----- ----------------- ---------172.23.14.26
290 00:0d:60:cc:14:e9 outband
172.23.14.76
290 00:00:e8:97:70:64 outband
172.23.14.91
290 00:0a:e4:0a:76:21 outband
172.23.14.98
290 00:50:70:ff:f3:89 outband
172.23.15.97
300 08:00:46:74:0e:a5 outband
172.23.15.172
300 02:0e:a6:89:41:60 outband
172.23.15.254
300 00:04:80:9b:78:00 outband
arp entry: 7
29.3.3 show atm Command
Syntax:
show atm <slot-port>|<slot-port-vpi/vci> [reset]
504
MSC1000G User’s Guide
Chapter 29 show Commands
This command displays ATM traffic counters. It can also reset the counters.
The following example displays the ATM traffic counters for DSL port 5 on the line card in
slot 7.
ras> show atm 7-5
port 7-5
rx cells
:
tx cells
:
rx rate
(byte/s):
tx rate
(byte/s):
crc errors
:
since pvc create
since last reset
-------------------- -------------------0
0
0
0
0
0
0
0
0
0
The following table describes labels in this example.
Table 174 show atm Command Display
LABEL
DESCRIPTION
rx cells
This field shows the number of ATM cells received on this port.
tx cells
This field shows the number of ATM cells transmitted on this port.
rx rate
This field shows the number of kilobytes per second received on this port.
tx rate
This field shows the number of kilobytes per second transmitted on this port.
crc errors
This field shows the number of Cyclic Redundancy Check errors on this port.
since pvc
create
This column displays the ATM traffic statistics that have accumulated from when
the PVC was created (either via command or the building of the DSL link).
since last
reset
This column displays the ATM traffic statistics that have accumulated from the
most recent time that the counters were reset.
29.3.4 show dot3ad Command
Syntax:
show dot3ad
This command displays the (IEEE 802.3ad) link aggregation settings.
The following is an example.
ras> show dot3ad
[aggregator info]
tsub:
state : disable
members: sub1 sub2
links :
syncs :
tup:
state : disable
members: up1 up2
links :
syncs :
MSC1000G User’s Guide
505
Chapter 29 show Commands
29.3.5 show dhcp counter Command
Syntax:
show dhcp counter <slot>|<slot-port>
This command displays the number of DHCP related packets received on the port. The
following displays an example (refer to Table 85 on page 229 for field descriptions).
ras> show dhcp counter 2-2
card name: <NULL>
port discover offer
request
ack
overflow
----- -------- -------- -------- -------- -------2- 2
1
2
1
1
0
ras>
29.3.6 show dhcp snoop Command
Syntax:
show dhcp snoop <slot-port>
This command displays the DHCP snooping table on port 2 of the line card in slot 2 (refer to
Table 85 on page 229 for field descriptions).
ras> show dhcp snoop 2-2
port 2-2: overflow 0
idx
ip
mac
vid
--- --------------- ----------------- -----1
172.23.19.4 00:50:ba:2c:70:e1 1
ras>
29.3.7 show enet Command
Syntax:
show enet <sub1|sub2|up1|up2>|<slot>
This command displays Ethernet packet counters for the specified Ethernet interface or DSL
line card.
506
MSC1000G User’s Guide
Chapter 29 show Commands
The following example displays the Ethernet packet counters for the Ethernet connection to
the line card in slot 1.
ras> show enet up1
slot 1:
link status: up
rate: 1000Mbps
up time:
6:08:07:50
data rate (Tx/Rx): 0/0 kbps utilization (Tx/Rx): 0/0
Rx
Tx
-------------------- -------------------Bytes
:
357823090
115120466
Pkts
:
969653
1480867
UcastPkts
:
969652
975144
NUcastPkts
:
1
505723
McastPkts
:
0
0
BcastPkts
:
1
505723
Pause
:
0
0
Pkt64
:
0
Pkt65~127
:
2146102
Pkt128~255
:
68655
Pkt256~511
:
14110
Pkt512~1023
:
19605
Pkt1024~1518
:
202045
Press any key to continue, 'e' to exit
Rx
Tx
-------------------- -------------------OverSizPkt
:
0
UndSizPkt
:
0
FCSErr
:
0
AlignErr
:
0
Jabber
:
0
Fragment
:
0
Dropped
:
0
Underrun
:
0
ExCollisn
:
0
The following table describes labels in this example.
Table 175 show enet Command Display
LABEL
DESCRIPTION
link status
This shows whether or not the port has an active connection.
rate
This shows the connection speed for an active connection.
up time
This shows how long the connection has been active.
data rate
(Tx/Rx)
This shows at what rate the port is currently sending or receiving data.
utilization
(Tx/Rx): 0/0
This shows what percent the port’s current data rate is out of the connection’s
maximum rate.
Bytes
This is the number of octets of Ethernet frames received/transmitted that are from
0 to 1518 octets in size, counting the ones in bad packets, not counting framing
bits but counting FCS (Frame Check Sequence) octets. An octet is an 8-bit binary
digit (byte).
Pkts
This is the number of packets received/transmitted on this port (including
multicast, unicast, broadcast and bad packets).
MSC1000G User’s Guide
507
Chapter 29 show Commands
Table 175 show enet Command Display (continued)
508
LABEL
DESCRIPTION
UcastPkts
This is the number of good unicast frames received/transmitted.
NUcastPkts
This is the number of good non-unicast frames received/transmitted.
MCastPkts
This is the number of good multicast frames received/transmitted of 64 to 1518
octets in length (for non VLAN) or 1522 octets (for VLAN), not including Broadcast
frames. Frames with range or length errors are also not taken into account.
BCastPkts
This is the number of good broadcast frames received/transmitted of 64 to 1518
octets in length (for non VLAN) or 1522 octets (for VLAN), not including multicast
frames. Frames with range or length errors are also not taken into account.
Pause
This is the number of valid IEEE 802.3x Pause frames received/transmitted on this
port.
Pkt64
This is the number of frames received/transmitted (including bad frames) that
were 64 octets or less in length (this includes FCS octets but excludes framing
bits).
Pkt65~127
This is the number of frames received/transmitted (including bad frames) that
were 65 to 127 octets in length (this includes FCS octets but excludes framing
bits).
Pkt128~255
This is the number of frames received and transmitted (including bad frames) that
were 128 to 255 octets in length (this includes FCS octets but excludes framing
bits).
Pkt256~511
This is the number of frames received/transmitted (including bad frames) that
were 256 to 511 octets in length (this includes FCS octets but excludes framing
bits).
Pkt512~1023
This is the number of frames received/transmitted (including bad frames) that
were 512 to 1023 octets in length (this includes FCS octets but excludes framing
bits).
Pkt1024~1518
This is the number of frames received/transmitted (including bad frames) that
were 1024 to 1518 octets in length (this includes FCS octets but excludes framing
bits).
OverSizPkt
This is the number of frames received/transmitted that were bigger than 1518 (non
VLAN) or 1522 (VLAN) octets and contained a valid FCS.
UndSizPkt
This is the number of frames received/transmitted that were less than 64 octets
long and contained a valid FCS.
FCSErr
This is the number of frames received/transmitted with an integral length of 64 to
1518 octets and containing a Frame Check Sequence error.
AlignErr
This is the number of frames received/transmitted that were 64 to 1518 (non
VLAN) or 1522 (VLAN) octets long but contained an invalid FCS and a nonintegral number of octets.
Jabber
This is the number of frames received/transmitted that were longer than 1518
octets (non VLAN) or 1522 octets (VLAN) and contained an invalid FCS, including
alignment errors.
Fragment
This is the number of frames received/transmitted that were less than 64 octets
long, and contained an invalid FCS, including non-integral and integral lengths.
Dropped
This is the number of received/transmitted frames that were received by the
MSC1000G, but later dropped because of a lack of system resources.
Underrun
This is the number of outgoing frames that were less than 64 octets long.
ExCollisn
This is the number of frames for which transmission failed due to excessive
collisions. Excessive collision is defined as the number of maximum collisions
before the retransmission count is reset.
MSC1000G User’s Guide
Chapter 29 show Commands
29.3.8 show igmp Commands
Use the show igmp commands to display current IGMP settings and statistics. Use
multicast igmp enable to enable IGMP first.
29.3.8.1 show igmp info Command
Syntax:
show igmp info
This command displays the current IGMP settings and the number of IGMP-related packets
received. The following figure shows an example.
ras> show igmp info
mode is igmpsnooping
number of queries =
number of reports =
number of leaves
=
number of unknowns =
number of groups
=
ras>
0
0
0
0
0
29.3.8.2 show igmp group Command
Syntax:
show igmp group [<vid> <mcast_ip>]
where
<mcast_ip>
=
The multicast IP address.
This command displays the IGMP group information that is learned on the system or from the
specified VLAN.
ras> show igmp group
[multicast group info]
vid multicast group port
slot
timestamp
---- --------------- -------------------- ---------------- -------------ras>
29.3.8.3 show igmp port info Command
Syntax:
show igmp port info <slot-port>
MSC1000G User’s Guide
509
Chapter 29 show Commands
This command displays the current IGMP settings and the number of IGMP-related packets
received. The following figure shows the IGMP packet counters for port 1 on the line card in
slot 3.
ras> show igmp port info 3-1
port group_cnt query_cnt join_cnt leave_cnt
----- --------- --------- --------- --------3- 1
0
0
0
0
ras>
29.3.8.4 show igmp port group Command
Syntax:
show igmp port group <slot-port>
This command displays the IGMP groups a port joins. The following figure shows an example
for port 1 on the line card in slot 3.
ras> show igmp port group 3-1
port vid
mcast_ip
client ip
----- ------ ---------------- ---------------ras>
29.3.9 show ip Command
Syntax:
show ip
This command displays the management IP settings and statistics. An example is shown next.
ras> show ip
outband[enif0]
inband[swif0]
-------------- --------------- --------------inet
:
192.168.0.1
172.23.19.206
netmask
: 255.255.255.0
255.255.255.0
broadcast
: 192.168.0.255
172.23.19.255
mtu
:
1500
1500
vid
:
1
in octet
:
0
11201874
in unicast
:
0
26230
in multicast :
0
3676
in discard
:
0
749
in error
:
0
0
in unknown
:
0
749
out octet
:
0
265141
out unicast
:
0
1646
out multicast :
0
0
out discard
:
0
0
out error
:
0
0
ras>
510
MSC1000G User’s Guide
Chapter 29 show Commands
29.3.10 show ipbpvc arpproxy Command
Syntax:
show ipbpvc arpproxy < all | domain [<domain-name>] | edgerouter [<ip> <vid>]
| interface [<ip/mask> <vid>]
where
<domain-name>
=
The name of the domain.
<ip>
=
IP address, in dotted decimal notation.
<mask>
=
Number of bits <1..32> in the subnet mask.
<vid>
=
The ID (<1..4094>) of the VLAN.
This command displays the specified learned ARP table entries.
An example is shown below.
ras> show ipbpvc arpproxy show
Domain Name: d01
ip
mac
port vpi
vci interface
vid type
--------------- ----------------- ---- --- ----- ------------------ ---- --192.168.2.2
00:05:5d:03:99:3a
22
0
33 192.168.2.0/24
3
D
192.168.2.254
00:13:49:95:03:07
50
- 192.168.2.254
2
U
*: the ARP is learned from DHCP and can't be flushed.
The following table describes the labels in this screen.
Table 176 IPB ARP Proxy Show Command Output
LABEL
DESCRIPTION
Domain Name
This field displays the name of the domain which has this ARP table.
ip
This field displays the IP address assigned to the specific device.
mac
This field displays the MAC (Media Access Control) address of the device.
port
This field displays the port number to which the device is connected.
vpi/vci
This field displays the Virtual Path Identifier (VPI) and Virtual Circuit Identifier
(VCI) the device is using. The VPI and VCI identify a channel on this port.
interface
This field displays the name of the interface the device is using.
vid
This field displays the VLAN ID the device is using.
type
This field indicates whether this entry is used for upstream traffic (U, or uplink
interface) or downstream traffic (D, or downlink interface). By default, all entries
are for downstream traffic, unless the edge router is configured using the edge
router commands (see Section 27.12 on page 441).
29.3.11 show ipbpvc interface Command
Syntax:
show ipbpvc interface [<ip/mask>|<vid>|<ip/mask> <vid>]
MSC1000G User’s Guide
511
Chapter 29 show Commands
where
<ip/mask>
=
IP address, in dotted decimal notation. Number of bits <0..32>
in the subnet mask.
<vid>
=
The ID (<1..4094>) of the VLAN.
This command displays the (run-time) downlink interfaces for the selected range of IP
addresses and/or VLAN. This table includes all the forwarding information for downstream
traffic, whether learned by snooping DHCP packets or provided manually.
An example is shown next.
ras> show ipbpvc interface
ip/mask
vid slot port vpi vci
------------------ ---- ---- ---- --- ---192.168.3.0/24
402 -
29.3.12 show ipbpvc route Command
Syntax:
show ipbpvc route [<domain-name>|<ip/mask>|<domain-name> <ip/mask>]
where
<domain-name>
=
The name of the domain.
<ip/mask>
=
IP address, in dotted decimal notation. Number of bits <1..32>
in the subnet mask.
This command displays the (run-time) routing table(s) for the selected domain or range of IP
addresses. This table includes all the entries, whether added automatically by the MSC1000G
or provided manually.
An example is shown next.
ras> show ipbpvc route
domain
ip/mask
nexthop
mtrc pr
------------------------------- ------------------ --------------- ----ISP1
0.0.0.0/0
172.23.19.254
15
ISP1
172.23.19.249/32
ISP1
172.23.19.254/32
ISP1
192.169.1.0/24
172.23.19.249
5
example
192.168.1.200/32
-
type
-- 0
0
-
U
U
U
U
U
The type field indicates whether this entry is used for upstream traffic (U, or uplink
interface) or downstream traffic (D, or downlink interface). By default, all entries are for
downstream traffic, unless the Edge Router IP is configured in the edge router commands
(see Section 27.12 on page 441).
The other output values correspond to the input values of other IP bridge routing table
commands.
512
MSC1000G User’s Guide
Chapter 29 show Commands
29.3.13 show lineinfo Command
Syntax:
show lineinfo <slot-port>
This command shows the line operating values of an ADSL port.
The following example displays the line operating values for ADSL port 5 on the line card in
slot 7.
ras> show lineinfo 1-1
slot-port=1-1, DSL line info
link
= link_up
service type
= adsl2plus_mode
coding mode
= Concatenated (trellis and RS) coding
us interleave delay = 18 ms
ds interleave delay = 6 ms
us inp
= 2.1 DMT symbol(s)
ds inp
= 0.5 DMT symbol(s)
us output power
= 9.6 dBm
ds output power
= 13.7 dBm
country code
= 0000
provider code
= 5443544e("TCTN")
The following table describes labels in this example.
Table 177 show lineinfo Command Display
LABEL
DESCRIPTION
link
This displays the connection status of the DSL link.
service type
This is the ADSL standard that the port is using.
coding mode
Trellis coding helps to reduce the noise in ADSL transmissions. Trellis may reduce
throughput but it makes the connection more stable.
“RS” coding stands for Reed-Solomon error correction.
us interleave
delay
This is the numbers of milliseconds of interleave delay for upstream
transmissions.
ds interleave
delay
This is the numbers of milliseconds of interleave delay for downstream
transmissions.
us inp
This is the number of impulse noise protection DMT symbols for upstream
transmissions.
ds inp
This is the number of impulse noise protection DMT symbols for downstream
transmissions.
us output
power
This is the power output of the subscriber’s DSL modem or router. The total output
power of the transceiver varies with the line length and quality.
ds output
power
This is the DSP port’s output power. The total output power of the transceiver
varies with the length and line quality. The farther away the subscriber’s ADSL
modem or router is or the more interference there is on the line, the higher the
power will be.
country code
This is the country code acquired from the subscriber’s ADSL device during
negotiation/provisioning message interchanges. The country code is from the
Vendor ID (see ITU-T G.994.1).
provider code
This is the provider code acquired from the subscriber’s ADSL device during
negotiation/provisioning message interchanges. The provider code includes the
Vendor ID and Version Number obtained from the Vendor ID.
MSC1000G User’s Guide
513
Chapter 29 show Commands
29.3.14 show lineperf Command
Syntax:
show lineperf <slot-port>
This command shows the line performance counters of an ADSL port.
The following example displays the line performance counters for ADSL port 5 on the line
card in slot 7.
ras> show lineperf 7-5
slot-port=7-5, DSL line perf
fast
interleave
---------- ---------FeCrc =
0
0
NeCrc =
0
7
FeFec =
0
3675
NeFec =
0
1
upstream
downstream
---------- ---------Es
=
3
2
Ses
=
2
1
Uas
=
0
0
Lofs =
0
1
Loss =
1
1
Lprs =
0
0
ras>
These counters display line performance data that has been accumulated since the system
started. The definitions of near end/far end are relative to the ATU-C (ADSL Termination
Unit-Central Office). Downstream refers to data from the ATU-C and upstream refers to data
from the ATU-R. “interleave” stands for interleaved and “fast” stands for non-interleaved (fast
mode).
A block is a set of consecutive bits associated with the path; each bit belongs to one and only
one block. Consecutive bits may not be contiguous in time.
Table 178 Line Performance Counters
514
LABEL
DESCRIPTION
FeCrc
Far End Cyclic Redundancy Checks.
NeCrc
Near End Cyclic Redundancy Checks.
FeFec
The Far End Corrected blocks.
NeFec
The Near End Corrected blocks.
Es
The number of Errored Seconds. This is how many seconds contained at least
one errored block or at least one defect.
Ses
The number of Severely Errored Seconds. This is how many seconds contained
30% or more errored blocks or at least one defect. This is a subset of Es.
Uas
The number of Unavailable Seconds.
Lofs
The number of Loss Of Frame Seconds.
Loss
The number of Loss Of Signal Seconds.
Lprs
The number of times a Loss of PoweR (on the ATUR) has occurred.
MSC1000G User’s Guide
Chapter 29 show Commands
29.3.15 show linerate Command
Syntax:
show linerate <slot-port>
This command displays an ADSL port's line rate information.
The following example displays the line operating values for ADSL port 5 on the line card in
slot 7.
ras> show linerate 7-5
slot-port=7-5, DSL line rate
link
= link_up
upstream
downstream
---------- ---------payload rate
(kbps)=
999
23995
actual rate
(kbps)=
1008
24004
attainable rate(kbps)=
1013
24634
noise margin
(dB)=
18.8
12.5
attenuation
(dB)=
0.8
0.0
The following table describes labels in this example.
Table 179 Line Rate Information
LABEL
DESCRIPTION
The rate fields display the transmission rates. “Line Down” indicates that the ADSL port is not
connected to a subscriber.
up/down
stream
Upstream refers to traffic coming into the DSL line card from the subscriber's
ADSL modem or router. Downstream refers to traffic going out from the DSL line
card to the subscriber's ADSL modem or router.
payload rate
These are the data (the payload data without transport layer protocol headers and
traffic) transfer rates (in Kbps) at which the port is receiving and sending data.
actual rate
These are the data transfer rates (in Kbps) at which the port is receiving and
sending data.
attainable
rate
These are the highest theoretically possible transfer rates (in Kbps) at which the
port could receive and send data.
noise margin
These are the DSL line’s noise margins. Measured in decibels (dB).
attenuation
These are the reductions in amplitude of the DSL signals. Measured in decibels
(dB).
29.3.16 show linestat Command
Syntax:
show linestat <slot-port>
This command displays an ADSL port's link status.
MSC1000G User’s Guide
515
Chapter 29 show Commands
The following example displays the link status for ADSL port 5 on the line card in slot 7.
ras> show linestat 7-5
usPayLoadRate dsPayLoadRate
port link
(kpbs)
(kpbs)
protocol
up time
---- ----------- ------------- ------------- -------------- -------------5 up
999
23995 adsl2plus
4h58m
29.3.17 show mac Command
Syntax:
show mac [sub1|sub2|up1|up2|enet|<mac>|<slot>|<slot-port>|{vid <vid1>[<vid2>]
This command displays the IEEE 802.1d MAC address forwarding table. The following
example displays the IEEE 802.1d MAC address forwarding table on uplink port 1.
ras> show mac up1
total count: 41
vid mac
---- ----------------1 00:00:04:a0:00:31
1 00:00:e2:82:7d:90
1 00:02:44:84:02:4d
1 00:04:80:9b:78:00
1 00:05:5d:8d:e0:52
1 00:07:40:ca:35:a8
1 00:0d:68:72:20:06
1 00:0f:fe:25:a1:9e
port
----enet6
enet6
enet6
enet6
enet6
enet6
enet6
enet6
29.3.18 show monitor Command
Syntax:
show monitor <slot>
This command displays a card’s hardware monitor statistics.
516
MSC1000G User’s Guide
Chapter 29 show Commands
The following example displays the hardware monitor statistics for the line card in slot 7.
ras> show monitor 7
'*' indicates a current alarm
voltage:
idx volt
current
--- ---------------- -------1
1.2V
1.187
2 * 1.8V
1.976
3
3.3V
3.263
4 20.5V
20.596
temperature:
idx temperature
current
--- ---------------- -------1 Temp1
58.000
2 Temp2
54.000
3 Temp3
51.000
ras>
nominal high_lmt low_lmt
-------- -------- -------1.200
1.284
1.116
1.800
1.926
1.674
3.300
3.531
3.069
20.500
22.550
18.450
high_lmt low_lmt
-------- -------95.000 -50.000
90.000 -50.000
85.000 -50.000
This table describes labels in the example.
Table 180 show monitor Command Information
LABEL
DESCRIPTION
voltage
The power supply for each voltage has a sensor that can detect and report the
voltage.
current
This is the present voltage reading.
nominal
This field displays the average voltage measured at this sensor.
high_lmt
This field displays the high voltage threshold for this sensor.
low_lmt
This field displays the low voltage threshold for this sensor.
temperature
This example displays the temperature measurements in degrees Celsius.
Each temperature sensor can detect and report the temperature. Temperature
sensor 1 is near the ADSL line driver. Temperature sensor 2 is near the ADSL
chipset. Temperature sensor 3 is near the central processing unit.
current
This shows the current temperature at this sensor.
high_lmt
This field displays the high temperature threshold for this sensor.
low_lmt
This field displays the low temperature threshold for this sensor.
29.3.19 show mstp Command
Syntax:
show mstp <mstid> [<end_mstid>]
where
<mstid>
=
The first MST region ID.
<end_mstid>
=
The last MST region ID.
This command displays information (such as bridge ID, topology change counter, etc.) of the
specified MST region(s).
MSC1000G User’s Guide
517
Chapter 29 show Commands
The following example displays MST region information for MST IDs 1 and 2.
ras> show mstp 1 2
[mstid 1]
BridgeID
TimeSinceTopoChange
TopoChangeCount
TopoIsChanging
IntRootPortID
IntRootID
IntRootPathCost
:
:
:
:
:
:
:
0x8001-00a0c5da46eb
3:08:23:03
0
false
0x0000
0x8001-00a0c5da46eb
0
[mstid 2]
BridgeID
TimeSinceTopoChange
TopoChangeCount
TopoIsChanging
IntRootPortID
IntRootID
IntRootPathCost
:
:
:
:
:
:
:
0x8002-00a0c5da46eb
3:08:22:54
0
false
0x0000
0x8002-00a0c5da46eb
0
ras>
29.3.20 show packet Command
Syntax:
show packet <slot-port>
This command displays a port’s packet counter.
The following example displays the hardware monitor statistics for ADSL port 5 on the line
card in slot 7.
ras> show packet 7-5
ifInOctets
= 66240
ifInUcastPkts
= 1029
ifInMcastPkts
= 149
ifInBcastPkts
= 202
ifInNUcastPkts
= 351
ifInDiscards
= 86
ifInErrors
= 0
ifInUnknownProtos = 0
ifOutOctets
= 2706192
ifOutUcastPkts
= 333
ifOutMcastPkts
= 55844
ifOutBcastPkts
= 111055
ifOutNUcastPkts
= 166899
ifOutDiscards
= 0
ifOutErrors
= 0
ras>
518
MSC1000G User’s Guide
Chapter 29 show Commands
29.3.21 show paepvc counter Command
Syntax:
show paepvc counter <slot-port>|<slot-port-vpi/vci>
This command displays the PAE PVC statistics. The following example displays all PAE PVC
counters for port 1 on the line card in slot 2.
ras> show paepvc counter 2-1
pvc 2-1-1/33
ppp lcp config-request
ppp lcp echo-request
ppp lcp echo-reply
pppoe padi
pppoe pado
pppoe padr
pppoe pads
pppoe padt
pppoe srvcname error
pppoe acname error
pppoe generic error
:
:
:
:
:
:
:
:
:
:
:
tx
rx
---------------- ---------------0
0
0
0
0
0
0
0
0
0
0
0
0
Press any key to continue, 'e' to exit
ras>
The following table describes the counters.
Table 181 show paepvc counter Command Fields
FIELD
DESCRIPTION
ppp lcp config-request
This field displays the number of PPP config-request packets
received.
ppp lcp echo-request
This field displays the number of PPP echo-request packets received.
ppp lcp echo-reply
This field displays the number of PPP echo-reply packets received.
pppoe padi
This field displays the number of PPPoE Active Discovery Initialization
(PADI) packets transmitted.
pppoe pado
This field displays the number of PPPoE Active Discovery Offer
(PADO) packets received.
pppoe padr
This field displays the number of PPPoE Active Discovery Request
(PADR) packets transmitted.
pppoe pads
This field displays the number of PPPoE Active Discovery SessionConfirmation (PADS) packets received.
pppoe padt
This field displays the number of PPPoE Active Discovery Termination
(PADT) packets received/transmitted.
pppoe srvcname error
This field displays the number of errors received for which the servicename request failed.
pppoe acname error
This field displays the number of errors received when the access
concentrator experienced an error performing the host request.
pppoe generic error
This field displays the number of unrecoverable errors occurred.
MSC1000G User’s Guide
519
Chapter 29 show Commands
29.3.22 show paepvc session Command
Syntax:
show paepvc session <slot-port>|<slot-port-vpi/vci>
This command displays the PAE PVC session status. The following example displays the
session status of all PAE PVC(s) on port 1 of the line card in slot 2.
ras> show paepvc session 2-1
pvc 2-1-1/33
session state : down
session id
: 0
session uptime: 0 secs
acname
:
srvcname
:
ras>
29.3.23 show performance Command
Syntax:
show performance <slot-port> curr|15min|1day
This command displays a DSL port’s performance counters.
The following example displays the current performance counters for ADSL port 5 on the line
card in slot 7.
ras> show perform 7-5 curr
PhysEntry
--------atuc/atur
atuc/atur
atuc/atur
atuc/atur
CurrSnrMgn
CurrAtn
CurrOutputPwr
CurrAttainableRate
=
=
=
=
12.5/5.5 dB
1.9/0.0 dB
13.3/12.3 dBm
24989/1013 kbps
ChanEntry
--------atuc/atur ChanInterleaveDelay = 5/14 ms
atuc/atur ChanCurrTxRate
= 22912/999 kbps
atuc/atur ChanPrevTxRate
= 22912/999 kbps
PerfDataEntry
------------atuc/atur PerfLofs
atuc/atur PerfLoss
atuc
PerfLols
atur
PerfLprs
atuc/atur PerfESs
atuc
PerfInits
atuc/atur PerfStatSesL
atuc/atur PerfStatUasL
ras>
520
=
=
=
=
=
=
=
=
3/0
3/0
3
0
0/1 seconds
4
0/1 seconds
0/131 seconds
MSC1000G User’s Guide
Chapter 29 show Commands
This table describes the fields.
“atuc” statistics are for the downstream connection (or traffic). This is the connection going
from the IES-5000 to the subscriber’s device.
“atur” statistics are for the upstream connection (or traffic). This is the connection coming
from the subscriber’s device to the IES-5000.
Table 182 show performance curr
LABEL
DESCRIPTION
CurrSnrMgn
These are the ADSL line’s current downstream and upstream signal to noise
margins in decibels.
CurrAtn
These are the ADSL line’s current downstream and upstream line attenuation in
decibels.
CurrOutputPwr
These are the ADSL line’s current downstream and upstream output powers in
decibels.
CurrAttainabl
eRate
These are the ADSL line’s current downstream and upstream attainable rates in
decibels.
ChanInterleav
eDelay
These are the numbers of milliseconds of interleave delay for downstream and
upstream transmissions.
ChanCurrTxRat
e
These are the ADSL line’s current downstream and upstream transmission rates
in decibels.
ChanPrevTxRat
e
These are the ADSL line’s previous downstream and upstream transmission rates
in decibels.
PerfLofs
These are the ADSL line’s downstream and upstream numbers of Loss of frame
Seconds that have occurred within the current 15 minute period.
PerfLoss
These are the ADSL line’s downstream and upstream numbers of Loss of signal
Seconds that have occurred within the current 15 minute period.
PerfLols
These are the ADSL line’s downstream and upstream numbers of Loss of link
Seconds that have occurred within the current 15 minute period.
PerfLprs
These are the ADSL line’s downstream and upstream numbers of Loss of power
Seconds that have occurred within the current 15 minute period.
PerfESs
These are the ADSL line’s downstream and upstream numbers of Errored
Seconds that have occurred within the current 15 minute period.
PerfInits
These are the ADSL line’s downstream and upstream numbers of initialization
failure traps that have occurred within the current 15 minute period.
PerfStatSesL
These are the ADSL line’s downstream and upstream numbers of Severely
errored seconds that have occurred within the current 15 minute period.
PerfStatUasL
These are the ADSL line’s downstream and upstream numbers of UnAvailable
Seconds that have occurred within the current 15 minute period.
MSC1000G User’s Guide
521
Chapter 29 show Commands
The following example displays the one day performance counters for ADSL port 5 on the line
card in slot 7.
ras> show performance 7-5 1day
PerfCurr1Day
------------atuc/atur TimeElapsed
=
atuc/atur Lofs
=
atuc/atur Loss
=
atuc
Lols
=
atuc
Lol
=
atur
Lprs
=
atur
Lpr
=
atuc/atur ESs
=
atuc
Inits
=
atuc/atur SesL
=
atuc/atur UasL
=
ChanPerfCurr1Day
----------------atuc/atur TimeElapsed
57163/57163 seconds
0/0 seconds
0/0 seconds
0 seconds
0
0 seconds
0
0/0 seconds
1
0/0 seconds
0/0 seconds
= 57163/57163 seconds
Press any key to continue, 'e' to exit
PerfPrev1Day
-----------atuc/atur MoniSecs
= 0/0 seconds
atuc/atur Lofs
= 0/0 seconds
atuc/atur Loss
= 0/0 seconds
atuc
Lols
= 0 seconds
atuc
Lol
= 0
atur
Lprs
= 0 seconds
atur
Lpr
= 0
atuc/atur ESs
= 0/0 seconds
atuc
Inits
= 0
atuc/atur SesL
= 0/0 seconds
atuc/atur UasL
= 0/0 seconds
ChanPerfPrev1Day
---------------atuc/atur MoniSecs
= 0/0 seconds
ras>
This table describes the fields that have not already been addressed.
Table 183 show performance 1day
LABEL
DESCRIPTION
TimeElapsed
This is the number of seconds that the DSL line card has been active.
MoniSecs
This is the number of seconds that the DSL line card was active during the
measured period.
29.3.24 show rmon Command
Syntax:
show rmon stats|history <giga-port>
522
MSC1000G User’s Guide
Chapter 29 show Commands
This command displays subtending or uplink RMON MIB information. See RFC 1757 for
information on the RMON MIBs.
The following example displays RMON history information for the Gigabit Ethernet uplink 1
interface.
ras> show rmon history up1
historyControlInterval = 30 seconds
Index
SampleIndex
IntervalStart
Pkts
BroadcastPkts MulticastPkts
OversizePkts
Fragments
Jabbers
-------------- -------------- -------------1
227
6857
0
0
0
0
0
0
DropEvents
CRCAlignErrors
Collisions
-------------0
0
0
Octets
UndersizePkts
Utilization
-------------0
0
0
1
0
0
226
0
0
6827
0
0
0
0
0
0
0
0
1
0
0
225
0
0
6797
0
0
0
0
0
0
0
0
1
0
0
224
0
0
6767
0
0
0
0
0
0
0
0
1
0
0
223
0
0
6737
0
0
0
0
0
0
0
0
The following example displays RMON statistics for the Gigabit Ethernet uplink 1 interface.
ras> show rmon stats up1
etherStatsDropEvents
etherStatsOctets
etherStatsPkts
etherStatsBroadcastPkts
etherStatsMulticastPkts
etherStatsCRCAlignErrors
etherStatsUndersizePkts
etherStatsOversizePkts
etherStatsFragments
etherStatsJabbers
etherStatsCollisions
etherStatsPkts64Octets
etherStatsPkts65to127Octets
etherStatsPkts128to255Octets
etherStatsPkts256to511Octets
etherStatsPkts512to1023Octets
etherStatsPkts1024to1518Octets
MSC1000G User’s Guide
=
=
=
=
=
=
=
=
=
=
=
=
=
=
=
=
=
0
0
0
0
0
0
0
0
0
0
0
0
0
0
0
0
0
523
Chapter 29 show Commands
29.3.25 show sys Command
Syntax:
show sys
This command displays the system CPU utilization for the last 60 seconds and memory usage
status. The following figure shows an example.
ras> show sys
CPU usage status:
baseline 1456794 ticks
sec
ticks
util sec
0 1356594
6.87
1
4 1187472 18.48
5
8 1321237
9.30
9
12 1354417
7.02
13
16 1306692 10.30
17
20 1367778
6.11
21
24 1306006 10.35
25
28 1359724
6.66
29
32 1359435
6.68
33
36 1371992
5.82
37
40 1362797
6.45
41
44 1313818
9.81
45
48 1350648
7.28
49
52 1347292
7.51
53
56 1364073
6.36
57
60 1377002
5.47
61
ticks
1363056
1366325
1361335
1315779
1364969
1378912
1246119
1304459
1356803
1188738
1353548
1380668
1315303
1325328
1370602
1369616
util
6.43
6.21
6.55
9.68
6.30
5.34
14.46
10.45
6.86
18.40
7.08
5.22
9.71
9.02
5.91
5.98
sec
2
6
10
14
18
22
26
30
34
38
42
46
50
54
58
62
ticks
1337785
1377483
1367923
1366581
1370533
1363950
1364775
1377936
1141058
1355139
1340872
1294721
1358785
1327612
1336428
1355618
util
8.16
5.44
6.10
6.19
5.92
6.37
6.31
5.41
21.67
6.97
7.95
11.12
6.72
8.86
8.26
6.94
sec
3
7
11
15
19
23
27
31
35
39
43
47
51
55
59
ticks
1340022
1153896
1365289
1373105
1301424
1360289
1372262
1367812
1358068
1326071
1329488
1358091
1356484
1245649
1330460
util
8.01
20.79
6.28
5.74
10.66
6.62
5.80
6.10
6.77
8.97
8.73
6.77
6.88
14.49
8.67
Press any key to continue, 'e' to exit
Memory usage status:
------Heap status-----heap size: 42115743 bytes
Heap usage: 31954492 bytes
Heap max. available block size: 10128472
mem alloc count: 226, mem free count: 0
29.3.26 show user Command
Syntax:
show user
This command displays information on logged in administrators. This information includes
the type of session, user name, user’s IP address and what time the management session
started.
The following example shows one logged in user.
ras> show user
[session info ('*' denotes your session)]
session
user
remote ip
login time
---------- ---------------- --------------- ------------------*telnet
admin
172.23.19.11
13:04:46 2005/06/01
524
MSC1000G User’s Guide
Chapter 29 show Commands
29.3.27 show vlan Command
Syntax:
show vlan [<vid>]
or
show vlan <start-vid> <end-vid>
This command displays the current VLANs.
The following example shows VLAN 1. It is set to send untagged Ethernet frames to the
Gigabit Ethernet interfaces.
ras> show vlan
vid sub1 sub2 up1
up2
---- ----- ----- ----- ----1
U
U
U
U
3
5
101
4094
T
T
T
T
MSC1000G User’s Guide
525
Chapter 29 show Commands
526
MSC1000G User’s Guide
CHAPTER
30
switch Commands
This chapter shows you how to use the switch commands.
30.1 switch Commands Overview
The switch commands configure switching functions and manage the Ethernet interfaces.
30.2 switch Commands Summary
The following table lists the switch commands. The P column on the right indicates the
administrator privilege level needed to use the command (H for high, M for middle or L for
low).
Table 184 switch Commands
COMMAND
DESCRIPTION
P
switch
bandwidth
bcastctrl
dot3ad
disable
<giga-port>
Turns off bandwidth control on the
specified port(s).
M
enable
<giga-port>
Turns on bandwidth control on the
specified port(s).
M
set
<giga-port>
<ingress-rate>
<egress-rate>
Sets the incoming or outgoing bandwidth
control for the specified port(s). 0~1000
(Mbps).
M
show
Displays the bandwidth control settings.
L
show
Displays broadcast and multicast storm
control settings.
L
threshold <giga-port> <bclimit> <mc-limit>
<uu-limit>
Sets the limitations of broadcast, multicast
and unknown unicast packets, in packets
per second for each trunk port (0~262143,
-1 means no limit).
<bc-limit> = broadcast packet limit
<mc-limit> = multicast packet limit
<uu-limit> = unknown unicast packet
limit
M
aggport
<portlist>
t1|t2|t3|t4|none
Creates a link aggregation trunk groups.
M
disable
[t1|t2|t3|t4]
Turns off link aggregation on the specified
trunk group.
M
MSC1000G User’s Guide
527
Chapter 30 switch Commands
Table 184 switch Commands (continued)
COMMAND
isolation
[t1|t2|t3|t4]
[lacp]
Turns on link aggregation on the specified
trunk group. lacp turns on LACP
protocol.
M
lacp
priority
<priority>
Sets the LACP system priority (0~65535).
M
show
Displays LACP settings.
L
timeout short|long
Sets the time interval between exchanging
LACP packets.
M
Displays the link aggregation state.
L
join
<join-msec>
Sets the GARP timer’s Join Timer in
milliseconds, 100~32766.
M
leave
<leave-msec>
Sets the GARP timer’s Leave Timer in
milliseconds, 201~65534.
M
leaveall
<leaveall-msec>
Sets the GARP timer’s Leave All Timer in
milliseconds, 202~65535.
M
set
<join-msec>
<leave-msec>
<leaveall-msec>
Sets GARP timers.
M
show
Displays the GARP timer settings.
L
disable
Turns off the subscriber isolation feature.
M
enable
Turns on the subscriber isolation feature.
M
delete <vid>
Deletes the specified isolation VLAN.
M
set <vid>
Creates the specified isolation VLAN.
M
Displays the subscriber isolation feature’s
current setting.
L
vlan
show
mac
flush
enet|all
Clears the MAC table on the Ethernet ports
or all ports (Ethernet and subscriber ports).
M
mstp
cfgname
<config name>
Sets a descriptive name for the MSTP
configuration.
M
disable
Deactivates MSTP on the system.
M
enable
Activates MSTP on the system.
M
Sets the maximum time (between 4 and 30
seconds) a switch will wait before changing
states
M
hellotime <hellotime-sec>
Sets the time interval (between 1 and 10
seconds) between BPDU (Bridge Protocol
Data Units) configuration message
generations by the root switch.
M
maxage
<maxage-sec>
Sets the maximum time (between 6 and 40
seconds) a switch can wait without
receiving a BPDU before attempting to
reconfigure.
M
maxhops
<max-hops>
Sets the number of hops (between 1 and
255) in an MSTP region before the BPDU
is discarded and the port information is
aged.
M
fwdelay
528
P
enable
show
garptimer
DESCRIPTION
<fwdelay-sec>
MSC1000G User’s Guide
Chapter 30 switch Commands
Table 184 switch Commands (continued)
COMMAND
P
priority
<mstid> <priority>
Sets the priority of the switch for the
instance ranges. The lower the number,
the more likely the switch will be chosen as
the root bridge.
Enter 0, 4096, 8192, 12288, 16384, 20480,
24576, 28672, 32768, 36864, 40960,
45056, 49152, 53248, 57344 or 61440 in
this field.
M
revision
<revision level>
Sets the configuration version number (0 65535).
M
Displays MSTP settings.
L
show
port
DESCRIPTION
version
rstp|mstp
Sets the spanning tree protocol version the
switch uses.
M
vlanmap
<mstid> <vid>
[<end_vid>]
Sets the VLAN-MSTID mapping.
M
disable
<giga-port>
Turns off data transmission on a port.
M
dscp
disable <gigaport>
Deactivates DSCP-IEEE 802.1p mappings
on this port.
M
enable <giga-port>
Activates DSCP-IEEE 802.1p mappings on
this port.
M
set <giga-port>
<srccp> <mapcp>
<mappri>
Sets DSCP-IEEE 802.1p mappings on this
port.
<srccp>: source code point, 0~63,
example: 1,3~5,10~15
<mapcp>: code point, 0~63
<mappri>: priority, 0~7
M
show [<giga-port>]
Displays DSCP-IEEE 802.1p mappings on
this port.
L
enable
<giga-port>
Turns on data transmission on a port.
M
flowctrl
disable <gigaport>
Turns off flow control on a port.
M
enable <giga-port>
Turns on flow control on a port.
M
frametype <giga-port>
all|tag
Sets the port(s) to accept VLAN tagged
and untagged Ethernet frames or only
tagged.
M
gvrp
disable <gigaport>
Turns on GVRP for a port(s).
M
enable <giga-port>
Turns off GVRP for a port(s).
M
mode
<giga-port>
uplink|subtend
Sets a port to operate as uplink or
subtending.
M
mstp
disable <gigaport> <mstid>
Deactivates MSTP on the port in the
spanning tree instance.
M
enable <giga-port>
<mstid>
Activates MSTP on the port in the
spanning tree instance.
M
pathcost <gigaport> <mstid>
<pathcost>
Sets the path cost (between 0 and
200000000). Enter 0 to have the system
automatically set the path cost based on
the link speed.
M
MSC1000G User’s Guide
529
Chapter 30 switch Commands
Table 184 switch Commands (continued)
COMMAND
DESCRIPTION
P
p2plink <gigaport>
auto|enable|disabl
e
Enables point-to-point connection.
M
priority <gigaport> <mstid>
<priority>
Specify the priority (0 - 255) of the Ethernet
port in the MST region. The system
automatically rounds the number to the
nearest multiple of 16.
M
show <mstid>
[<end_mstid>]
Displays MSTP settings.
L
name
<giga-port> <name>
Sets the name of a port.
M
priority
<giga-port>
<priority>
Sets a port’s default ingress user priority
(0~7).
M
pvid
<giga-port> <vid>
Sets the PVID (Port VLAN ID) (1~4094)
assigned to untagged frames or priority
frames (0 VID) received on this port(s).
M
Displays port settings.
L
Sets a port’s speed and duplex mode.
M
Turns off VLAN trunking on a port to have it
only accept frames with registered VIDs.
M
enable <giga-port>
Turns on VLAN trunking on a port to have it
accept frames with any VID.
M
<giga-port>
or
<giga-port>
<wt0> <wt1>
<wt3> <wt4>
<wt6> <wt7>
Sets a port’s queuing method and/or
priority weight.
spq = strict priority queuing algorithm
wrr = weighted round robin queue
algorithm
<wt0>~<wt7> = priority weight, 0~15
M
Displays the queuing settings.
L
Sets a queue’s priority.
M
Displays the queues’ priorities.
L
show
speed
<giga-port>
<speed>
vlantrunk disable <gigaport>
qschedule
set
spq
wrr
<wt2>
<wt5>
show
queuemap
set
<priority> <queue>
show
30.3 switch bandwidth Commands
Use the switch bandwidth commands to configure bandwidth control.
30.3.1 switch bandwidth disable Command
Syntax:
switch bandwidth enable <giga-port>
530
MSC1000G User’s Guide
Chapter 30 switch Commands
where
<giga-port>
= This represents Gigabit Ethernet uplink ports, subtending ports or
all ports. Use sub1|sub2|up1|up2|all if trunking is not
enabled. Use sub|up|all if trunking is enabled.
This command turns on bandwidth control on the specified Gigabit Ethernet interface (or all of
them).
This example turns off bandwidth control for the uplink 1 port.
ras>
switch bandwidth disable up1
30.3.2 switch bandwidth enable Command
Syntax:
switch bandwidth enable <giga-port>
where
<giga-port>
= This represents Gigabit Ethernet uplink ports, subtending ports or
all ports. Use sub1|sub2|up1|up2|all if trunking is not
enabled. Use tsub|tup|all if trunking is enabled.
This command turns on bandwidth control on the specified port(s).
This example turns on bandwidth control for the subtending 2 port.
ras>
switch bandwidth enable sub2
30.3.3 switch bandwidth set Command
Syntax:
switch bandwidth set <giga-port> <ingress-rate> <egress-rate>
where
<giga-port>
= This represents Gigabit Ethernet uplink ports, subtending ports or
all ports. Use sub1|sub2|up1|up2|all if trunking is not
enabled. Use sub|up|all if trunking is enabled.
<ingress-rate>
= The maximum bandwidth allowed in megabits per second (Mbps)
for the incoming traffic flow on a port. Use a number between 1 and
1000.
<egress-rate>
= The maximum bandwidth allowed in megabits per second (Mbps)
for the out-going traffic flow on a port. Use a number between 1
and 1000.
This command sets the incoming or outgoing bandwidth control for the specified port(s).
MSC1000G User’s Guide
531
Chapter 30 switch Commands
This example sets the subtending 2 port to only allow 128 Mbps for incoming traffic and 512
Mbps for outgoing traffic.
ras>
switch bandwidth set sub2 128 512
30.3.4 switch bandwidth show Command
Syntax:
switch bandwidth show
This command displays the bandwidth control settings on the Gigabit Ethernet interfaces.
This example displays the bandwidth control settings on the Ethernet ports.
ras> switch bandwidth show
port enable ingress(Mbps) egress(Mbps)
----- ------ ------------- ------------sub1
0
0
sub2
0
0
up1
0
0
up2
0
0
'0' = disable
“V” displays for ports that have bandwidth control enabled “-” displays for ports that do not.
30.4 switch bcasctrl Commands
Use the switch bcasctrl commands to configure broadcast storm control.
30.4.1 switch bcastctrl threshold Command
Syntax:
switch bcasctrl threshold <giga-port> <bc-limit> <mc-limit> <uu-limit>
where
<giga-port>
= This represents Gigabit Ethernet uplink ports, subtending ports or
all ports. Use sub1|sub2|up1|up2|all if trunking is not
enabled. Use sub|up|all if trunking is enabled.
<bc-limit>
= Sets how many broadcast packets the interface is allowed to receive
per second. 0~262143, use -1 to disable.
<mc-limit>
= Sets how many multicast packets the interface is allowed to receive
per second. 0~262143, use -1 to disable.
<uu-limit>
= Sets how many unknown unicast packets the interface is allowed to
receive per second. 0~262143, use -1 to disable.
This command sets the limitations of broadcast, multicast and unknown unicast packets, in
packets per second for each Gigabit Ethernet port.
532
MSC1000G User’s Guide
Chapter 30 switch Commands
This example sets the subtending 1 interface to accept up to 80,000 broadcast packets, 100,000
multicast packets and 60,000 unknown unicast packets per second.
ras> switch bcastctrl threshold sub1 80000 100000 60000
30.4.2 switch bcastctrl show Command
Syntax:
switch bcasctrl show
This command displays the broadcast storm control settings. The following shows an
example.
ras> switch bcastctrl show
port broadcast(pkt/s) multicast(pkt/s) uucast(pkt/s)
---- ---------------- ---------------- ---------------sub1
80000
100000
60000
sub2
up1
up2
ras>
30.5 switch dot3ad Commands
Use the switch dot31d commands to configure static and dynamic (LACP) port trunking.
30.5.1 switch dot3ad lacp priority Command
Syntax:
switch dot3ad lacp priority <priority>
where
<priority>
= LACP system priority is a number between 1 and 65,535. The
switch with the lowest system priority (and lowest port number if
system priority is the same) becomes the LACP “server”. The
LACP “server” controls the operation of LACP setup. Enter a
number to set the priority of an active port using Link Aggregate
Control Protocol (LACP). The smaller the number, the higher the
priority level.
This command sets the LACP system priority.
This example sets the MSC1000G’s priority to 1000.
ras> switch dot3ad lacp priority 1000
MSC1000G User’s Guide
533
Chapter 30 switch Commands
30.5.2 switch dot3ad lacp timeout Command
Syntax:
switch dot3ad lacp priority timeout short|long
where
timeout
short|long
= Timeout is the time interval between the individual port
exchanges of LACP packets in order to check that the peer port in
the trunk group is still up. If a port does not respond after three
tries, then it is deemed to be “down” and is removed from the
trunk. Set a short timeout (one second) for busy trunked links to
ensure that disabled ports are removed from the trunk group as
soon as possible. Select either short (1 second) or long (30
seconds).
This command sets the time interval between exchanging LACP packets.
This example sets the MSC1000G’s to exchange LACP packets with the peer every second
ras> switch dot3ad lacp timeout short
30.5.3 switch dot3ad lacp show Command
Syntax:
switch dot3ad lacp show
This command displays the MSC1000G’s LACP settings. The following shows an example.
ras> switch dot3ad lacp show
priority : 1000
time out : short (1 sec)
ras>
30.5.4 switch dot3ad enable Command
Syntax:
switch dot3ad enable sub|up [lacp]
where
sub
= The subtending ports
up
= The uplink ports.
[lacp}
= Turns on LACP protocol.
This command turns on link aggregation on subtending or uplink ports.
534
MSC1000G User’s Guide
Chapter 30 switch Commands
This example sets the MSC to use link aggregation on the subtending ports. This also copies
the configuration of subtending port one to subtending port two. The system asks you to
confirm if this is what you want to do.
ras> switch dot3ad enable sub
Enabling sub trunking will copy configurations of port sub1 to port sub2
Configurations of port sub2 will be lost!
Do you wish to continue? ('y' to continue)
30.5.5 switch dot3ad disable Command
Syntax:
switch dot3ad disable sub|up
where
sub
= The subtending ports
up
= The uplink ports.
This command turns off link aggregation on subtending or uplink ports.
This example sets the MSC to not use link aggregation on the uplink ports.
ras> switch dot3ad disable up
30.5.6 switch dot3ad show Command
Syntax:
switch dot3ad show
This command displays the link aggregation state of the trunk groups.
This command displays the link aggregation state of the subtending and uplink ports.
Here is an example.
ras> switch dot3ad show
agg enable type port
---- ------ ------ ----------------------------------------------tsub
static sub1 sub2
tup
static up1 up2
“V” displays for trunking groups that have link aggregation enabled “-” displays for ports that
do not.
30.6 switch garptimer Commands
Use the switch garptimer commands to configure GARP timeout periods.
MSC1000G User’s Guide
535
Chapter 30 switch Commands
30.6.1 switch garptimer show Command
Syntax:
switch garptimer show
This command displays the MSC1000G’s GARP timer settings, including the join, leave and
leave-all timers. An example is shown next.
ras> switch garptimer show
join time
(ms): 200
leave time
(ms): 600
leaveall time (ms): 10000
ras>
30.6.2 switch garptimer join Command
Syntax:
switch garptimer join <join msec>
where
<join msec>
=
This sets the duration of the Join Period timer for GVRP in
milliseconds. Each port has a Join Period timer. The allowed Join
Time range is between 100 and 32767 milliseconds; the default is
200 milliseconds.
This command sets the MSC1000G’s join period timer for GVRP in milliseconds.
Switches join VLANs by making a declaration. A declaration is made by issuing a Join
message using GARP. GARP timers set declaration timeout values.
The following example sets the Join Timer to 300 milliseconds.
ras> switch garptimer join 300
30.6.3 switch garptimer leave Command
Syntax:
switch garptimer leave <leave msec>
where
<leave msec>
=
This sets the duration of the Leave Period timer for GVRP in
milliseconds. Each port has a single Leave Period timer. Leave
Time must be two times larger than Join Timer; the default is 600
milliseconds. The allowed Leave Time range is between 201 and
65534 milliseconds; the default is 600 milliseconds.
This command sets the MSC1000G’s leave period timer for GVRP in milliseconds.
Switches join VLANs by making a declaration. Declarations are withdrawn by issuing a Leave
message. GARP timers set declaration timeout values.
536
MSC1000G User’s Guide
Chapter 30 switch Commands
The following example sets the Leave Timer to 800 milliseconds.
ras> switch garptimer leave 800
30.6.4 switch garptimer leaveall Command
Syntax:
switch garptimer leaveall <leaveall msec>
where
<leaveall msec>
=
This sets the duration of the Leave All Period timer for GVRP
in milliseconds. Each port has a single Leave All Period timer.
Leave All Timer must be larger than Leave Timer. The allowed
Leave Time range is between 201 and 65535 milliseconds; the
default is 10000 milliseconds.
This command sets the MSC1000G’s leave all period timer for GVRP in milliseconds.
Switches join VLANs by making a declaration. A declaration is made by issuing a Join
message using GARP. A Leave All message terminates all registrations. GARP timers set
declaration timeout values.
The following example sets the Leave All Timer to 11000 milliseconds.
ras> switch garptimer leaveall 11000
30.6.5 switch garptimer set Command
Syntax:
switch garptimer set <join-msec> <leave-msec> <leaveall-msec>
where
<join msec>
=
This sets the duration of the Join Period timer for GVRP in
milliseconds. Each port has a Join Period timer. The allowed
Join Time range is between 100 and 32767 milliseconds; the
default is 200 milliseconds.
<leave msec>
=
This sets the duration of the Leave Period timer for GVRP in
milliseconds. Each port has a single Leave Period timer. Leave
Time must be two times larger than Join Timer; the default is
600 milliseconds. The allowed Leave Time range is between
201 and 65534 milliseconds; the default is 600 milliseconds.
<leaveall msec>
=
This sets the duration of the Leave All Period timer for GVRP
in milliseconds. Each port has a single Leave All Period timer.
Leave All Timer must be larger than Leave Timer. The allowed
Leave Time range is between 201 and 65535 milliseconds; the
default is 10000 milliseconds.
MSC1000G User’s Guide
537
Chapter 30 switch Commands
This command sets the MSC1000G’s Join, Leave and Leave All timers.
The following example sets the Join Timer to 300 milliseconds, the Leave Timer to 900
milliseconds and the Leave All Timer to 12000 milliseconds.
ras> switch garptimer join 300 900 12000
30.7 switch isolation Commands
Use the switch isolation commands to configure the subscriber isolation feature. Use
subscriber isolation to block communications between subscriber ports. When you enable
subscriber isolation you do not need to configure the VLAN to isolate subscribers.
Turn on VLAN isolation to block communications between subscribers in different VLANs if
you do not block communications between subscriber ports. For example, you might want to
isolate some VLANs (for example, high-speed Internet) and not isolate other VLANs (for
example, VoIP).
30.7.1 switch isolation show Command
Syntax:
switch isolation show
This command displays the MSC1000G’s subscriber isolation and VLAN isolation settings.
An example is shown next.
ras> switch isolation show
port isolation :disabled
isolated vlan list:
---5
938
30.7.2 switch isolation enable Command
Syntax:
switch isolation enable
This command turns on the MSC1000G’s subscriber isolation setting. An example is shown
next.
ras> switch isolation enable
port isolation :enabled
ras>
30.7.3 switch isolation disable Command
Syntax:
switch isolation disable
538
MSC1000G User’s Guide
Chapter 30 switch Commands
This command turns off the MSC1000G’s subscriber isolation setting. An example is shown
next.
ras> switch isolation disable
port isolation :enabled
ras>
30.7.4 switch isolation vlan delete Command
Syntax:
switch isolation vlan delete <vid>
where
<vid>
=
The VLAN ID [1 – 4094].
This command turns off per-VLAN isolation for the specified VLAN.
"
Per-VLAN isolation only works when the regular switch isolation feature is
disabled (see Section 30.7.3 on page 538).
The following example turns off per-VLAN isolation for VLAN 5.
ras> switch isolation vlan delete 5
ras> switch isolation show
port isolation :disabled
isolated vlan list:
---938
30.7.5 switch isolation vlan set Command
Syntax:
switch isolation vlan set <vid>
where
<vid>
=
The VLAN ID [1 – 4094].
This command turns on per-VLAN isolation for the specified VLAN.
"
Per-VLAN isolation only works when the regular switch isolation feature is
disabled (see Section 30.7.3 on page 538).
MSC1000G User’s Guide
539
Chapter 30 switch Commands
The following example turns on per-VLAN isolation for VLAN 5.
ras> switch isolation vlan set 5
ras> switch isolation show
port isolation :disabled
isolated vlan list:
---5
938
30.8 switch mstp Commands
Use the switch mstp commands to configure multiple spanning tree settings on the system.
30.8.1 switch mstp cfgname Command
Syntax:
switch mstp cfgname <config name>
where
<config name> =
A unique name (up to 31 characters) that identifies an MST region.
This command sets the switch to belong to the specified MST region.
The following example sets the switch to be a member of the test MST region.
ras> switch mstp cfgname test
30.8.2 switch mstp disable Command
Syntax:
switch mstp disable
This command deactivates the MSTP feature on the switch.
30.8.3 switch mstp enable Command
Syntax:
switch mstp enable
This command activates the MSTP feature on the system.
30.8.4 switch mstp fwdelay Command
Syntax:
switch mstp fwdelay <fwdelay-sec>
540
MSC1000G User’s Guide
Chapter 30 switch Commands
This command sets the forward delay period (between 4 and 30 seconds) the switch waits
before changing states.
The following example sets the forward delay time to 15 seconds.
ras> switch mstp fwdelay 15
30.8.5 switch mstp hellotime Command
Syntax:
switch mstp hellotime <hellotime-sec>
This command sets the time interval (between 1 and 10 seconds) between BPDU (Bridge
Protocol Data Units) configuration message generations by the root switch.
The following example sets the hello time to 5 seconds.
ras> switch mstp hellotime 5
30.8.6 switch mstp maxage Command
Syntax:
switch mstp maxage <maxage-sec>
This command sets the maximum time (between 6 and 40 seconds) a switch can wait without
receiving a BPDU before attempting to reconfigure.
The following example sets the maximum age to 20 seconds.
ras> switch mstp maxage 20
30.8.7 switch mstp maxhops Command
Syntax:
switch mstp maxhops <max-hops>
This command sets the number of hops (between 1 and 255) in an MSTP region before the
BPDU is discarded and the port information is aged.
The following example sets the maximum hop count to 20. After 20 hops (or passing through
20 devices), a BPDU is dropped.
ras> switch mstp maxhops 20
30.8.8 switch mstp priority Command
Syntax:
switch mstp priority <mstid> <priority>
MSC1000G User’s Guide
541
Chapter 30 switch Commands
where
<mstid>
=
Index number (between 0-16) to identify a spanning tree instance. For
CIST, enter 0. To identify an MSTI, enter a number between 1 and 16.
<priority>
=
Priority level (0 ~ 61440) in increments of 4096. The system
automatically rounds the number to the nearest multiples of 4096.
This command sets the priority of the switch for the specific spanning tree instance. The lower
the number, the more likely the switch will be chosen as the root bridge within the spanning
tree instance.
The following example sets the priority of the switch to 24576 in the spanning tree instance
10.
ras> switch mstp priority 10 24576
30.8.9 switch mstp revision Command
Syntax:
switch mstp revision <revision>
This command sets a number to identify a region’s configuration. Devices must have the same
revision level to belong to the same region.
The following example sets the revision number of the switch to 1.
ras> switch mstp revision 1
30.8.10 switch mstp show Command
Syntax:
switch mstp show
542
MSC1000G User’s Guide
Chapter 30 switch Commands
This command displays the general MSTP settings on the switch. The following figure shows
an example.
ras> switch mstp show
config name
: test
revision level
: 1
status
: disabled
priority
: 32768
hello time
(s): 5
max age
(s): 20
forward delay (s): 15
force version
: mstp
max hops
: 20
msti
----1- 8
9-16
priority
----------------------------------------------32768 32768 32768 32768 32768 32768 32768 32768
32768 24576 32768 32768 32768 32768 32768 32768
mstid
----0
1
2
vid
----------------------------------------------1,11-4094
2
3-10
vid
mstid
--------- ----1
0
2
1
3- 10
2
11-4094
0
ras>
30.8.11 switch mstp version Command
Syntax:
switch mstp version <rstp|mstp>
This command sets the system to use and send BPDUs for the specified spanning tree
protocol.
The following example sets the spanning tree protocol to RSTP.
ras> switch mstp version rstp
30.8.12 switch mstp vlanmap Command
Syntax:
switch mstp vlanmap <mstid> <start_vid> <end_vid>
MSC1000G User’s Guide
543
Chapter 30 switch Commands
where
<mstid>
=
Index number (between 0-16) to identify a spanning tree instance.
For CIST, enter 0. To identify an MSTI, enter a number between 1
and 16.
<start_vid>
=
Start of the VLAN range.
<end_vid>
=
End of the VLAN range.
This command creates a mapping of the specified VLAN range and spanning tree instance.
You can map multiple VLANs to the same spanning tree instance. You cannot map a VLAN to
multiple spanning tree instances. Devices in the same MST region must have the same VLANto-MST instance mapping(s).
"
Make sure the VLAN(s) is not already configured for multicasting or VLAN
stacking.
The following example maps VLAN 2 to instance 1 and the VLAN range (3~10) to instance 2.
ras> switch mstp vlanmap 1 2 2
ras> switch mstp vlanmap 2 3 10
30.9 switch port Commands
Use these commands to manage the MSC1000G’s Gigabit Ethernet interfaces.
30.9.1 switch port disable Command
Syntax:
switch port disable <giga-port>
This command turns off data transmission on a Gigabit Ethernet interface.
The following example turns off the subtending 1 Gigabit Ethernet interface.
ras> switch port disable sub1
30.9.2 DSCP Overview
DiffServ Code Point (DSCP) is a field used for packet classification on DiffServ networks.
The higher the value, the higher the priority. Lower-priority packets may be dropped if the
total traffic exceeds the capacity of the network.
544
MSC1000G User’s Guide
Chapter 30 switch Commands
30.9.3 switch port dscp Commands
Use the switch port DSCP commands to show and configure the DSCP mapping and
DSCP to IEEE 802.1p mapping for the Gigabit Ethernet interfaces.
30.9.3.1 switch port dscp disable Command
Syntax:
switch port dscp disable <giga-port>
This command turns off DSCP to DSCP mapping and DSCP to IEEE 802.1p mapping on a
Gigabit Ethernet interface.
The following example turns off DSCP to DSCP mapping and DSCP to IEEE 802.1p mapping
on the subtending 1 Gigabit Ethernet interface.
ras> switch port dscp disable sub1
30.9.3.2 switch port dscp enable Command
Syntax:
switch port dscp enable <giga-port>
This command turns on DSCP to DSCP mapping and DSCP to IEEE 802.1p mapping on a
Gigabit Ethernet interface.
The following example turns on DSCP to DSCP mapping and DSCP to IEEE 802.1p mapping
on the subtending 1 Gigabit Ethernet interface.
ras> switch port dscp enable sub1
30.9.3.3 switch port dscp set Command
Syntax:
switch port dscp set <giga-port> <srccp> <mapcp> <mappri>
where
<srccp>
Specify a source DiffServ Code Point (DSCP) or points, 0~63. For
example: 1,3~5,10~15
<mapcp>
Specify the DSCP (0~63) to which you want to map the source
DSCP (or DSCPs).
<mappri>
Specify the IEEE 802.1p priority (0~7) to which you would like to
map the source DSCP (or DSCPs).
This command configures DSCP to DSCP mapping and DSCP to IEEE 802.1p mapping on a
Gigabit Ethernet interface. You can change the DSCP of received (IEEE 802.1p tagged)
packets to a different DSCP. You can also map it to a specific IEEE 802.1p priority.
MSC1000G User’s Guide
545
Chapter 30 switch Commands
The following example sets subtending 1 Gigabit Ethernet interface to map packets with a
source DSCP of 7 to a DSCP of 5 and a IEEE 802.1p priority of 1.
ras> switch port dscp set sub1 7 5 1
30.9.3.4 switch port dscp show Command
Syntax:
switch port dscp show [<giga-port>]
This command displays the DSCP to DSCP mapping and DSCP to IEEE 802.1p mapping
settings on a Gigabit Ethernet interface.
The following example displays the subtending 1 Gigabit Ethernet interface’s DSCP to DSCP
mapping and DSCP to IEEE 802.1p mapping settings.
ras> switch port dscp show sub1
sub1 dscp mapping(codepoint/priority): disabled
00
01
02
03
04
05
06
07
08
---- ---- ---- ---- ---- ---- ---- ---- ---00 0/0 1/0 2/0 3/0 4/0 5/0 6/0 5/1 8/1
10 10/1 11/1 12/1 13/1 14/1 15/1 16/2 17/2 18/2
20 20/2 21/2 22/2 23/2 24/3 25/3 26/3 27/3 28/3
30 30/3 31/3 32/4 33/4 34/4 35/4 36/4 37/4 38/4
40 40/5 41/5 42/5 43/5 44/5 45/5 46/5 47/5 48/6
50 50/6 51/6 52/6 53/6 54/6 55/6 56/7 57/7 58/7
60 60/7 61/7 62/7 63/7
09
---9/1
19/2
29/3
39/4
49/6
59/7
The top row and first column identify the source DSCP. The other rows identify the DSCP to
which the source DSCP is mapped followed by the IEEE 802.1p priority to which it is
mapped. The bolded section in this example shows that packets received with a DSCP of 7 get
their code point changed to 5 and are given an IEEE 802.1p priority of 1.
30.9.4 switch port enable Command
Syntax:
switch port enable <giga-port>
This command turns on data transmission on a Gigabit Ethernet interface.
The following example turns on the subtending 1 Gigabit Ethernet interface.
ras> switch port enable sub1
30.9.5 switch port flowctrl disable Command
Syntax:
switch port flowctrl disable <giga-port>
This command turns off flow control on a Gigabit Ethernet interface.
546
MSC1000G User’s Guide
Chapter 30 switch Commands
The following example turns off the flow control on the subtending 1 Gigabit Ethernet
interface.
ras> switch port flowctrl disable sub1
30.9.6 switch port flowctrl enable Command
Syntax:
switch port flowctrl enable <giga-port>
This command turns on flow control on a Gigabit Ethernet interface.
The following example turns on the flow control on the subtending 1 Gigabit Ethernet
interface. .
Figure 192 switch port flowctrl enable Command Example
ras> switch port flowctrl enable sub1
30.9.7 switch port frametype Command
Syntax:
switch port frametype <giga-port> all|tag
where
all|tag
=
Specifies all Ethernet frames (tagged and untagged) or only tagged
Ethernet frames.
This command sets the specified port to accept all Ethernet frames or only those with an IEEE
802.1Q VLAN tag.
The following example sets ports the subtending 1 Gigabit Ethernet interface to accept only
tagged frames.
ras switch port frametype sub1 tag
30.9.8 switch port gvrp Commands
Use the switch port gvrp commands to configure GVRP settings for the Gigabit Ethernet
interfaces.
30.9.8.1 switch port gvrp disable Command
Syntax:
switch port gvrp disable <giga-port>
This command turns off GVRP on a Gigabit Ethernet interface.
MSC1000G User’s Guide
547
Chapter 30 switch Commands
GVRP (GARP VLAN Registration Protocol) is a registration protocol that defines a way for
switches to register necessary VLAN members on ports across the network. Disable GVRP to
have the MSC1000G not propagate VLAN information to other devices.
The following example turns off GVRP on the subtending 1 Gigabit Ethernet interface.
ras> switch port gvrp disable sub1
30.9.8.2 switch port gvrp enable Command
Syntax:
switch port gvrp enable <giga-port>
This command turns on GVRP on a Gigabit Ethernet interface.
GVRP (GARP VLAN Registration Protocol) is a registration protocol that defines a way for
switches to register necessary VLAN members on ports across the network. The MSC1000G
propagates VLAN information to other devices when you enable GVRP.
The following example turns on GVRP on the subtending 1 Gigabit Ethernet interface.
ras> switch port gvrp enable sub1
30.9.9 switch port mode Command
Syntax:
switch port mode sub1|sub2|up1|up2 <uplink|subtend>
This command sets a Gigabit Ethernet interface to function as uplink or subtending.
The following example sets the subtending 1 Gigabit Ethernet interface to uplink mode.
ras> switch port mode sub1 uplink
30.9.10 switch port mstp Commands
Use the switch port mstp commands to configure multiple spanning tree settings for the
Gigabit Ethernet interfaces.
30.9.10.1 switch port mstp disable Command
Syntax:
switch port mstp disable sub1|sub2|up1|up2|all <mstid>
where
<mstid>
=
A unique number to identify an MST region. Enter 0 to for
CIST. For MSTI, enter a number between 1 and 16.
This command disables MSTP on the specified Gigabit Ethernet interface port (or all of them)
in the specified spanning tree instance. All MSTP packets to/from the specified spanning tree
instance will be dropped on the port.
548
MSC1000G User’s Guide
Chapter 30 switch Commands
The following example disables MSTP on unlink port 1 in spanning tree instance 2.
ras> switch port mstp disable up1 2
30.9.10.2 switch port mstp edgeport Command
Syntax:
switch port mstp edgeport <giga-port> <mstid> <enable|disable>
This command enables or disables the specified Gigabit Ethernet interface as an edge port that
connects to a non-SPT device (such as a computer or hub).
The following example sets subtending port 2 as an edge port.
ras> switch port mstp edgeport sub2 enable
30.9.10.3 switch port mstp enable Command
Syntax:
switch port mstp enable sub1|sub2|up1|up2|all <mstid>
This command sets the specified Gigabit Ethernet interface to participate in the spanning tree
instance.
The following example activates MSTP on all Gigabit Ethernet interfaces in the spanning tree
instance 3.
ras> switch port mstp enable all 3
30.9.10.4 switch port mstp p2plink Command
Syntax:
switch port mstp p2plink <giga-port> auto|enable|disable
where
auto
=
The switch automatically determines if the link is point-to-point
based on the port’s duplex mode setting.
enable
=
Activates this feature on a full-duplex port that is connected directly
to another switch port.
disable
=
Deactivates this feature on the port that is in half-duplex mode.
Enable a point-to-point link between Gigabit Ethernet interfaces to increase the speed of
convergence by allowing the network to determine the designated port faster. The port must be
connected directly to another switch port.
The following example activates point-to-point link on uplink port 2.
ras> switch port mstp p2plink up2 enable
MSC1000G User’s Guide
549
Chapter 30 switch Commands
30.9.10.5 switch port mstp pathcost Command
Syntax:
switch port mstp pathcost <giga-port> <mstid> <cost>
This command sets the path cost of the specified Gigabit Ethernet interface in the spanning
tree. The path cost can be between 0 and 200000000. A smaller number means a lower path
cost. For paths with the same priority, the switch will select the one on lower interface number
first. 0 sets the system automatically determines the path cost based on the line speed.
The following example sets the path cost of uplink interface 1 to 200 in spanning tree 10.
ras> switch port mstp pathcost up1 10 200
30.9.10.6 switch port mstp priority Command
Syntax:
switch port mstp priority <giga-port> |all <mstid> <priority>
This command sets the priority (between 0 and 255 in multiples of 16) of the Gigabit Ethernet
interface in the specified spanning tree. When a loop occurs and two root ports have the same
cost, the port with higher priority (lower numerical value) becomes the root port and the other
port becomes an alternate port. For ports with the same priority, the switch will select the one
on lower interface number first.
The following example sets the port priority of uplink interface 1 to 16 in spanning tree 10.
ras> switch port mstp priority up1 10 16
30.9.10.7 switch port mstp show Command
Syntax:
switch port mstp show <mstid> [<end_mstid>]
This command displays the specified MSTP’s settings on each Gigabit Ethernet interface. The
following example displays the port MSTP setting for spanning tree 10.
ras> switch port mstp show 10
[msti 10]
port en prio pathcost
---- ---- ---- --------sub1 128
0
sub2 128
0
up1 V
128
16
up2 128
0
30.9.11 switch port name Command
Syntax:
switch port name <giga-port> <name>
550
MSC1000G User’s Guide
Chapter 30 switch Commands
where
=
<name>
A name to identify the port.
This command sets the name of a Gigabit Ethernet interface.
The following example sets the name of uplink interface 1 to xyz.
ras>
switch port name up1 xyz
30.9.12 switch port priority Command
Syntax:
switch port priority <giga-port> <priority>
where
=
<priority>
The default ingress priority (0~7).
This command sets the default ingress user priority of a Gigabit Ethernet interface.
The following example sets the default priority of uplink interface 1 to 3.
ras> switch port priority up1 3
30.9.13 switch port pvid Command
Syntax:
switch port pvid <giga-port> <vid>
where
<pvid>
=
The default Port VLAN ID (PVID) assigned to untagged frames
or priority-tagged frames received on this port. 1~4094.
This command sets the Port VLAN ID assigned to untagged frames or priority frames (0 VID)
received on this port(s).
The following example sets the PVID of uplink interface 1 to 76.
ras>
switch port pvid up1 76
30.9.14 switch port show Command
Syntax:
switch port show
MSC1000G User’s Guide
551
Chapter 30 switch Commands
This command displays the settings for the MSC1000G’s Gigabit Ethernet interfaces. An
example is shown next.
ras> switch port show
port
name
en mode speed
fc pvid
----- --------------- ---- ---- ------ ---- ---sub1 Subtend1
V
up auto
1
sub2 Subtend2
V
up auto
1
up1 Uplink1
V
up auto
1
up2 Uplink2
V
up auto
1
prio gvrp ftype vt dscp
---- ---- ----- ---- ---0
all
0
all
0
all
0
all
-
30.9.15 switch port speed Command
Syntax:
switch port speed <giga-port> <speed>
where
<giga-port>
=
This represents 1000BaseT uplink ports. The port speed is fixed
for subtending ports and/or SFP slots that use a fiber-optic
interface. Use up1|up2|all if trunking is not enabled. Use
tup|all if trunking is enabled.
<speed>
=
The port’s speed and duplex mode.
Use auto|1000F|100F|100H.
Auto or 1000 (Mbps) or 100 (Mbps) is to match the port speed
of the WAN switch to which this port is to connect.
F is for full duplex communications or H for half duplex
communications.
This command sets the port speed and duplex of a 1000BaseT uplink port(s).
The following example sets the speed of the uplink 1 Gigabit Ethernet interface to 1000 Mbps
and the duplex to full.
ras>
switch port speed up1 1000F
30.10 switch port vlantrunk Commands
Use these commands to turn VLAN trunking on or off for the Gigabit Ethernet interfaces.
30.10.1 switch port vlantrunk enable Command
Syntax:
switch port vlantrunk enable <giga-port>
552
MSC1000G User’s Guide
Chapter 30 switch Commands
where
<giga-port>
=
This represents Gigabit Ethernet uplink ports, subtending ports
or all ports. Use sub1|sub2|up1|up2|all if trunking is not
enabled. Use tsub|tup|all if trunking is enabled.
This command sets a Gigabit Ethernet interface(s) to use VLAN trunking in order to accept
frames with any VID.
The following example sets the subtending 1Gigabit Ethernet interface to use VLAN trunking.
ras>
switch port vlantrunk enable sub1
30.10.2 switch port vlantrunk disable Command
Syntax:
switch port vlantrunk disable <giga-port>
where
<giga-port>
=
This represents Gigabit Ethernet uplink ports, subtending ports
or all ports. Use sub1|sub2|up1|up2|all if trunking is not
enabled. Use tsub|tup|all if trunking is enabled.
This command sets a Gigabit Ethernet interface(s) to not use VLAN trunking so the port only
accepts frames with registered VIDs.
The following example sets the subtending 1Gigabit Ethernet interface to not use VLAN
trunking.
ras>
switch port vlantrunk disable sub1
30.11 switch qschedule Commands
Use these commands to set a port’s queuing method and/or priority weight.
30.11.1 switch qschedule set Command
Syntax:
switch qschedule set <giga-port> spq
or
<giga-port> wrr <wt0> <wt1> <wt2> <wt3> <wt4> <wt5> <wt6> <wt7>
MSC1000G User’s Guide
553
Chapter 30 switch Commands
where
spq
=
Strict Priority Queuing (SPQ) services queues based on priority
only. When the highest priority queue empties, traffic on the
next highest-priority queue begins.
wrr
=
Weighted Round Robin services queues based on their priority
and queue weight. WRR is activated only when a port has more
traffic than it can handle.
=
The priority weight for each queue, 0~15.
<wt0>
<wt2>
<wt4>
<wt6>
<wt1>
<wt3>
<wt5>
<wt7>
This command sets a Gigabit Ethernet interface’s queuing method and/or priority weight.
The following example sets the subtending interface 1 to use strict priority queuing.
ras>
switch qschedule set sub1 spq
30.11.2 switch qschedule show Command
Syntax:
switch qschedule show
This command shows the queuing methods and/or priority weights of the Gigabit Ethernet
interfaces. This is an example.
ras> switch qschedule show
port algo_type wt0 wt1 wt2 wt3 wt4 wt5 wt6 wt7
----- --------- --- --- --- --- --- --- --- --sub1 spq
sub2 spq
up1 spq
up2 spq
-
30.12 switch queuemap Commands
Use these commands to set the priorities of the individual queues.
30.12.1 switch queuemap set Command
Syntax:
switch queuemap set <priority> <queue>
where
554
<priority>
=
The IEEE 802.1p priority for each queue, 0~7.
<queue>
=
A physical queue in the MSC1000G, 0~7.
MSC1000G User’s Guide
Chapter 30 switch Commands
This command sets the MSC1000G to use a particular queue for traffic of a specific IEEE
802.1p priority.
The following example sets the MSC1000G to use queue 3 for traffic with priority 3.
ras>
switch queuemap set 3 3
30.12.2 switch queuemap show Command
Syntax:
switch queuemap show
This command shows which queue the MSC1000G uses for traffic of each priority. The
following is an example.
ras> switch queuemap show
priority queue
-------- ----0
2
1
0
2
1
3
3
4
4
5
5
6
6
7
7
ras>
MSC1000G User’s Guide
555
Chapter 30 switch Commands
556
MSC1000G User’s Guide
CHAPTER
31
sys Commands
This chapter shows you how to use the sys commands.
31.1 sys Commands Overview
The sys commands are for system management and maintenance.
31.2 sys Commands Summary
The following table lists the sys commands. The P column on the right indicates the
administrator privilege level needed to use the command (H for high, M for middle or L for
low).
Table 185 sys Commands
COMMAND
DESCRIPTION
P
set
9600|19200|3
8400|57600|1
15200
Sets the console port speed.
M
show
Displays the console port speed.
L
chsh
[engsh|stdsh
]
Changes to normal or privileged
command shell.
H
client
disable
<index>
Turns off a secured client set.
M
enable
<index>
Turns on a secured client set.
M
set
<index> <start-ip>
<end-ip> [telnet]
[ftp] [web] [icmp]
[ssh] [snmp]
Sets a group of trusted computers from
which you can manage the switch.
M
Displays the secured client sets.
L
Sets the system date.
M
Displays the current system date.
L
sys
baud
show
date
set
<yyyy> <mm> <dd>
show
info
chassis
<chassis>
Sets the system chassis number (1~64).
M
contact
<contact>
Sets contact person information.
M
frame
<frame>
Sets the system frame number.
M
hostname
<hostname>
Sets the system name.
M
MSC1000G User’s Guide
557
Chapter 31 sys Commands
Table 185 sys Commands (continued)
COMMAND
location
<location>
show
monitor
multilogin
M
Displays general system and MSC1000G
information.
L
Sets the hardware monitor threshold
settings.
M
show
<slot>
Displays the hardware monitor threshold
settings of a slot.
L
disable
Turns off multiple concurrent logins.
M
enable
Turns on multiple concurrent logins.
M
show
Displays the multiple login setting.
L
Restarts the system.
H
[show]
Displays the reboot schedule.
H
<sec>
Sets the number of seconds
(1~2147483647) before the system
reboots. If there is no time specified, the
system reboots immediately.
H
[cancel]
Aborts the scheduled system rebooting.
H
enable
telnet|ssh|ftp|web
|icmp|snmp
Turns on service access to the switch.
M
disable
telnet|ssh|ftp|web
|icmp|snmp
Turns off service access to the switch.
M
port
telnet|ftp|web|snm
p|ssh <port>
Sets a port for a service.
M
Displays service access control settings.
L
getcommunity
<community>
Sets the SNMP GetRequest community.
M
setcommunity
<community>
Sets the SNMP SetRequest community.
M
Displays SNMP settings.
L
trapcommunit
y
<community>
Sets the SNMP Trap community.
M
trapdst
<index>
<destination>
[<port>]
[v1|v2c|v3]
[<name>]
Sets the IP addresses and listening ports
for up to four SNMP trap server IP
addresses and listening ports. Set 0.0.0.0
to not send any SNMP traps.
<name> = username to be included in
trap packets. Only applicable for V3.
M
user
<name>
noauth|auth|priv
md5|sha des|aes
Sets SNMPv3 user name and security
settings.
noauth = disables user authentication
and data encryption.
auth = enables user authentication.
pri = enables user authentication and
data encryption.
md5|sha = authentication method.
des|aes = encryption method.
M
show
558
Sets the geographic location of the
system.
<slot>
<volt|temp|fan|cup
> <index> <highlimit> <low-limit>
show
snmp
P
set
reboot
server
DESCRIPTION
MSC1000G User’s Guide
Chapter 31 sys Commands
Table 185 sys Commands (continued)
COMMAND
DESCRIPTION
P
Sets the system to use the specified
SNMP version and access.
v2c = SNMPv2 read/write
v3 = SNMPv3 read/write
v3v2c = SNMPv3 read/write and
SNMPv2 read-only.
M
disable
Turns off syslog logging.
M
enable
Turns on syslog logging.
M
Sets the log facility (local1~local7) to log
the syslog messages to a specific file in
the syslog server. See your syslog
program’s documentation for details. Sets
the syslog server IP address.
M
Displays the syslog settings.
L
Sets the system time.
M
Displays the current system time.
L
none
Clears the time server settings.
M
daytime <ip>
[sync]
or
time|ntp <ip>
<utc[<+|>0100~1200]>
[sync]
Sets the time service protocol and IP
address of a time server.
[sync] = Gets the time and date.
M
show
Displays the time server settings.
L
sync
Gets the time and date from a predefined
time server.
M
version
syslog
server
v2c|v3|v3v2c
<fac> <ip>
show
time
set
<hh> [<mm> [<ss>]]
show
timeserver
user
set
auth
<mode>
Select which database the switch uses to
authenticate a user. 1= local, 2 = radius,
3 = local then radius.
H
delete
<name>
Removes a user account.
H
disable
<name>
Stops a user from logging in.
H
enable
<name>
Allows a user to log in.
H
Displays information about online users
that are logged into the switch. * denotes
your session.
L
online
MSC1000G User’s Guide
559
Chapter 31 sys Commands
Table 185 sys Commands (continued)
COMMAND
DESCRIPTION
P
server
<ip> <port>
<secret>
[high|middle|low|d
eny]
Sets a RADIUS server’s IP address and
port number and the password to access
the server.
low = assigns the login accounts a low
privilege level if the received service type
is “login”.
medium = assigns the login accounts a
medium privilege level if the received
service type is “nas-prompt”.
high = assign the login accounts a high
privilege level if the received service type
is “admin”.
deny = block access from this login
account if no service type is received.
H
set
<username>
<password>
high|middle|low
Sets a user account and its level of
access privileges.
H
Displays authentication settings and user
accounts.
L
Displays the MSC1000G’s general
information such as the model name and
firmware version.
L
show
version
31.3 sys Commands
Use these commands for system management and maintenance.
31.3.1 sys version Command
Syntax:
sys version
This command displays general information about the MSC1000G such as the model name
and firmware version. This is an example.
ras> sys version
[master card version info]
product model
: MSC1000G
system up time :
1:00:13:39
f/w version
: V3.70(LU.0) | 11/29/2006
bootbase version: VLU1.02 | 04/01/2005
database version : 09:16:57 2006/12/14
31.3.2 sys baud set Command
Syntax:
sys baud set 9600|19200|38400|57600|115200
This command sets the console port speed in bps.
560
MSC1000G User’s Guide
Chapter 31 sys Commands
The following example sets the console port speed to 115200 bps.
ras>
sys baud set 115200
31.3.3 sys baud show Command
Syntax:
sys baud show
This command displays the console port speed. This is an example.
ras> sys baud show
current baud rate is: 115200
ras>
31.3.4 sys client set Command
Syntax:
sys client set <index> <start-ip> <end-ip> [telnet] [ftp] [web] [icmp] [ssh]
[snmp]
This command configures a secured client entry consisting of an IP address range of trusted
computers that may manage the IES-5000 and the services that they can use.4
The following example creates a client set for IP addresses 192.138.1.7 to 192.168.1.35 to use
FTP to manage the MSC1000G.
ras> sys client set 1 192.168.1.7 192.168.1.35 ftp
31.3.5 sys client enable Command
Syntax:
sys client enable <index>
This command turns on a secured client set.
The following example turns on secured client set 1.
ras> sys client enable 1
31.3.6 sys client disable Command
Syntax:
sys client disable <index>
This command turns off a secured client set.
4.
Web-based management was not available at the time of writing.
MSC1000G User’s Guide
561
Chapter 31 sys Commands
The following example turns off secured client set 1.
ras> sys client disable 1
31.3.7 sys client show Command
Syntax:
sys client show
This command displays the secured client settings. These are the IP addresses of trusted
computers that can manage the MSC1000G and the services that they can use.
An example is shown next. A “V” in a column means that the secured client set is activated or
the services can be used for managing the MSC1000G.
ras> sys client show
secured client:
idx enable start ip
--- ------ --------------1
yes 0.0.0.0
2
no
0.0.0.0
3
no
0.0.0.0
4
no
0.0.0.0
ras>
end ip
telnet ftp web icmp ssh snmp
--------------- ------ --- --- ---- --- ---0.0.0.0
V
V
V
V
V
V
0.0.0.0
0.0.0.0
0.0.0.0
-
31.3.8 sys time show Command
Syntax:
sys time show
This command displays the system’s current time. An example is shown next.
ras> sys time show
current time is 17:57:01
ras>
31.3.9 sys time set Command
Syntax:
sys time set <hh> [<mm> [<ss>]]
This command sets the system’s time. An example is shown next.
ras> sys time set 10 01 45
31.3.10 sys date show Command
Syntax:
sys date show
562
MSC1000G User’s Guide
Chapter 31 sys Commands
This command displays the system’s current date. An example is shown next.
ras> sys date show
current date is Wed 2006/01/25
ras>
31.3.11 sys date set Command
Syntax:
sys date set <yyyy> <mm> <dd>
This command sets the system’s date. An example is shown next.
ras> sys date set 2006 01 27
31.3.12 sys timeserver show Command
Syntax:
sys timeserver show
This command displays the system’s time server settings. An example is shown next.
ras> sys timeserver show
protocol: none
server : 0.0.0.0
timezone: utc
ras>
31.3.13 sys timeserver set Command
Syntax:
sys timeserver none
sys timeserver daytime <ip> [sync]
sys timeserver time|ntp <ip> <utc[<+|->0100~1200]> [sync]
where
none
=
Sets the system to not use a time server.
daytime
=
The Daytime time service protocol (RFC 867). When you select
this format, the switch displays the day, month, year and time
with no time zone adjustment. When you use this format it is
recommended that you use a Daytime timeserver within your
geographical time zone.
MSC1000G User’s Guide
563
Chapter 31 sys Commands
time|ntp
=
The time service protocol.
<time> Time (RFC 868) format displays a 4-byte integer giving
the total number of seconds since 1970/1/1 at 0:0:0.
<ntp> NTP Network Time Protocol (RFC 1305) is similar to
Time (RFC 868).
<ip>
=
The IP address of the time server.
<utc[<+|->
0100~1200]>
=
The time difference between UTC (Universal Time Coordinated,
formerly known as GMT, Greenwich Mean Time) and your time
zone.
[sync]
=
This sets the system to synchronize with the time server.
This command sets the MSC1000G to use a time server.
The following example sets the MSC1000G to use NTP protocol to access a time server at IP
address 140.112.2.189 and sets the MSC1000G’s time zone to eight hours ahead of UTC. It
also has the system synchronize the time with the time server.
ras> sys timeserver set ntp 140.112.2.189 utc +0800 sync
sync with time server...success
ras>
31.3.14 sys timeserver sync Command
Syntax:
sys timeserver sync
This command has the MSC1000G get the time and date from the time server. An example is
shown next.
ras> sys timeserver sync
sync with time server...success
ras>
31.3.15 sys info chassis Command
Syntax:
sys info chassis <chassis>
where
<chassis>
=
The chassis number (an integer from 1 to 64). The chassis
number helps to keep track of this individual unit in a multiple
unit application.
This command sets the system chassis number.
564
MSC1000G User’s Guide
Chapter 31 sys Commands
The following example sets the system’s chassis number to 3.
ras> sys info chassis 3
31.3.16 sys info contact Command
Syntax:
sys info contact <contact>
where
<contact>
=
The name (up to 31 characters) and contact information of the
person in charge of this device.
This command sets the system contact person information.
The following example sets Bob_ext1234 as the system’s contact person information.
ras> sys info contact Bob_ext1234
31.3.17 sys info frame Command
Syntax:
sys info frame <frame>
where
<frame>
=
Number (an integer from 1 to 65535) of the frame (rack) where
the system is installed.
This command sets the system’s frame number.
The following example sets 12345 as the system’s frame number.
ras> sys info frame 12345
31.3.18 sys info hostname Command
Syntax:
sys info hostname <hostname>
where
<hostname>
=
A descriptive name for identification purposes. This name can
be up to 30 alphanumeric characters long.
This command sets the system name.
MSC1000G User’s Guide
565
Chapter 31 sys Commands
The following example sets “OurSystem” as the system’s name.
ras> sys info hostname OurSystem
31.3.19 sys info location Command
Syntax:
sys info location <location>
where
=
<location>
The geographic location (up to 31 characters) of your device.
This command sets the geographic location of the system.
The following example sets Taiwan as the system’s geographic location.
ras> sys info location Taiwan
31.3.20 sys info show Command
Syntax:
sys info show
This command shows general system information, such as the RAS code, firmware version,
system uptime and bootbase version. An example is shown next.
ras> sys info show
[system info]
hostname
location
contact
frame
chassis
:
:
:
:
:
[master card version info]
product model
: MSC1000G
system up time : 01:28:29
f/w version
: V3.70(AIN.0)b6 | 11/16/2006
bootbase version: VAIN(1.02) | 07/25/2006
database version : 18:28:38 2006/11/13ras>
31.3.21 sys monitor set Command
Syntax:
sys monitor set <slot> volt|temp|fan|cpu <index> <high-limit> <low-limit>
566
MSC1000G User’s Guide
Chapter 31 sys Commands
where
<slot>
=
volt|temp| =
fan|cpu
The main chassis slot where the card is located. Use the slot
number of the MSC1000G when you configure the fan limits.
voltage = Set the voltage tolerance range.
temp = Set the temperature tolerance range.
fan = Set the rotations per minute (RPM) tolerance range for a
fan.
cpu = Set the threshold for CPU usage.
<index>
=
The index number of the sensor.
The power supply for each voltage has a sensor that is capable of
detecting and reporting if the voltage falls out of the tolerance
range. The card voltage sensors are as follows.
MSC1000G: 1 = 2.5 V, 2 = 1.25 V, 3 = 3.3 V, 4 = 1.3 V, 5 = 15 V
ADSL line card: 1 = 1.2 V, 2 = 1.8 V, 3 = 3.3 V, 4 = 20.5 V
SHDSL line card: 1 = 1.8 V, 2 = 3.3 V, 3 = 15.0 V
The management switch card has temperature sensors that are
capable of detecting and reporting if the temperature rises above
the threshold.
Each card has three temperature sensors (1~3).
Each fan has a sensor that is capable of detecting and reporting if
the fan speed falls below the threshold of 2000 RPM.
The system has six fans (1~6).
MSC1000G User’s Guide
567
Chapter 31 sys Commands
<highlimit>
=
A sensor’s maximum voltage, temperature or fan RPM limit.
The maximum voltage for each voltage sensor must be within the
following ranges. Measured in millivolts (mV).
MSC1000G: 1 = 2575~2750, 2 = 1287~1375, 3 = 3399~3630, 4 =
1339~1430, 5 = 15450~16500
ADSL line card: 1 = 1236~1320, 2 = 1854~1980, 3 = 3399~3630,
4 = 21115~22550
SHDSL line card 1 = 1854~1980, 2 = 3399~3630, 3 =
15450~16500
The maximum temperature for each temperature sensor must be
within 50~100 (degrees centigrade).
The maximum RPM for each fan must be within 1000~8000.
<low-limit>
=
A sensor’s minimum voltage, temperature or fan RPM limit.
The minimum voltage for each voltage sensor must be within the
following ranges. Measured in millivolts (mV).
MSC1000G:1= 2250~2425, 2 = 1125~1212, 3 = 2970~3201, 4 =
1170~1261, 5 = 13500~14550.
ADSL line card: 1= 1080~1164, 2 = 1620~1746, 3 = 2970~3201, 4
= 18450~19885
SHDSL line card: 1 = 1620~1746, 2 = 2970~3201, 3 =
13500~14550
The minimum temperature for each temperature sensor must be
within -50~10 (degrees centigrade).
The minimum RPM for each fan must be within 1000~8000.
This commands sets the hardware monitor high and low thresholds.
The following example sets fan 1’s maximum RPM threshold to 7500 and minimum RPM
threshold to 5000. The MSC1000G is in slot 2.
ras> sys monitor set 2 fan 1 7500 5000
31.3.22 sys monitor show command
Syntax:
sys monitor show <slot>
where
<slot>
=
The main chassis slot where the card is located. The fan
statistics are included with the MSC1000G statistics.
This command displays the hardware monitor’s statistics.
568
MSC1000G User’s Guide
Chapter 31 sys Commands
The following example shows the MSC1000G statistics.
ras> sys monitor show 2
'*' indicates a current alarm
voltage:
idx volt
current
--- ---------------- -------1 2.5V
2.582
2 1.25V
1.236
3 3.3V
3.338
4 1.3V
1.341
5 15V
15.159
temperature:
idx temperature
current
--- ---------------- -------1 Temp1
43.000
2 Temp2
48.750
3 Temp3
53.000
fan:
idx fan speed
current
--- ---------------- -------1 *FAN1
0
2 *FAN2
0
3 *FAN3
0
4 *FAN4
0
5 *FAN5
0
6 *FAN6
0
ras>
nominal high_lmt low_lmt
-------- -------- -------2.500
2.700
2.300
1.250
1.350
1.150
3.300
3.564
3.036
1.300
1.404
1.196
15.000
16.200
13.800
high_lmt low_lmt
-------- -------65.000 -10.000
65.000 -10.000
65.000 -10.000
high_lmt low_lmt
-------- -------6500
2000
6500
2000
6500
2000
6500
2000
6500
2000
6500
2000
31.3.23 sys multilogin enable Command
Syntax:
sys multilogin enable
This command turns on multiple login. Multiple login allows multiple administrators to be
logged into the system at the same time. The following table describes how many sessions can
be used at the same time.
Table 186 Multiple Login Overview
Console Port
SSH
Telnet
One session.
SSH and Telnet share four
sessions. SSH has priority.
Multiple users can login
using the same user name
and password.
Web (HTTP)
FTP/SFTP
SNMP
ICMP
Three sessions
(one session per
user account)
One
session
No limit
No limit
The following is an example.
ras> sys multilogin enable
31.3.24 sys multilogin disable Command
Syntax:
sys multilogin disable
MSC1000G User’s Guide
569
Chapter 31 sys Commands
This command turns off multiple login. The following is an example.
ras> sys multilogin disable
31.3.25 sys multilogin show Command
Syntax:
sys multilogin show
This command displays the multiple login setting. The following is an example.
ras> sys multilogin show
multilogin is enabled
ras>
31.3.26 sys reboot Command
Syntax:
sys reboot [show] <sec> [cancel]
where
[show]
=
Displays the reboot schedule.
<sec>
=
The number of seconds (1~2147483647) before the system
reboots. If there is no time specified, the system reboots
immediately.
[cancel]
=
Aborts the scheduled system rebooting.
This command restarts the system.
The following example shows the administrator at IP address 172.23.19.11 ordering a reboot
to occur after 1200 seconds, displaying the reboot schedule and then canceling the
reboot.
ras> sys reboot 1200
telnet-1(172.23.19.11) has initiated reboot, system reboot in 1200 seconds!
ras> sys reboot show
issued by
remaining time issue time
-------------------------- -------------- -----------------------telnet-1(172.23.19.11)
1196 Wed Jun 8 15:26:54 2005
ras> sys reboot cancel
telnet-1(172.23.19.11) has cancelled system reboot!
570
MSC1000G User’s Guide
Chapter 31 sys Commands
31.3.27 sys server port Command
Syntax:
sys server port telnet|ftp|web|snmp|ssh <port>
This command changes the port for a service on the MSC1000G.
The following example sets the MSC1000G to use port 24 for Telnet sessions.
ras> sys server port telnet 24
31.3.28 sys server disable Command
Syntax:
sys server enable telnet|ftp|web|snmp|ssh
This command turns off access for a service on the MSC1000G.
The following example sets the MSC1000G to block Telnet sessions.
ras> sys server disable telnet
31.3.29 sys server enable Command
Syntax:
sys server enable telnet|ftp|web|snmp|ssh
This command turns on access for a service on the MSC1000G.
The following example sets the MSC1000G to allow Telnet sessions.
ras> sys server enable telnet
31.3.30 sys server show Command
Syntax:
sys server show
This command displays the MSC1000G’s service access control settings. The following is an
example.
ras> sys server show
server status port
------ ------ ----telnet
V
23
ftp
V
21
web
V
80
icmp
V
snmp
V
161
ssh
V
22
ras>
MSC1000G User’s Guide
571
Chapter 31 sys Commands
31.4 sys snmp Commands
Use these commands to configure the MSC1000G’s SNMP settings.
31.4.1 sys snmp getcommunity Command
Syntax:
sys snmp getcommunity <community>
where
<community>
=
The password for the incoming Get- and GetNext- requests from the
management station.
Enter this command with the community to set the password.
The following example sets the password for incoming Get- and GetNext requests to
“Get123”.
ras> sys snmp getcommunity Get123
31.4.2 sys snmp setcommunity Command
Syntax:
sys snmp setcommunity <community>
where
<community>
=
The password for the incoming Set- requests from the management
station.
Enter this command with the community to set the password.
The following example sets the password for incoming Set- requests to “Set123”.
ras> sys snmp setcommunity Set123
31.4.3 sys snmp trapcommunity Command
Syntax:
sys snmp trapcommunity <community>
where
<community>
=
The password sent with each trap to the SNMP manager.
Enter this command with the community to set the password.
572
MSC1000G User’s Guide
Chapter 31 sys Commands
The following example sets the MSC1000G to send a password of “public” with the traps it
sends to the SNMP manager.
ras> sys snmp trapcommunity public
31.4.4 sys snmp trapdst Command
Syntax:
sys snmp trapdst <index> <ip> [<port>] [v1|v2|v3] [<name>]
where
<index>
=
The number of the trap server (1~4).
<ip>
=
The IP address of the trap server.
[<port>]
=
The port number upon which the trap server listens for SNMP traps.
The MSC1000G uses the default of 162 if you do not specify a trap
port.
[v1|v2c|v3]
=
Format of the SNMP trap PDU (Protocol Data Unit) to be sent. The
default is v2c.
[<name>]
=
The username to be included in the trap PDUs. This is only
applicable for SNMPv3.
Use this command to specify the IP address (and port number) of a trap server to which the
MSC1000G sends SNMP traps. If you leave the trap destination set to 0.0.0.0 (default), the
MSC1000G will not send any SNMP traps.
The following example sets the MSC1000G to send traps to a server at IP address
192.168.1.36. The traps are sent using SNMP v3 and include the user name example.
ras> sys snmp trapdst 1 192.168.1.36 v3 example
31.4.5 sys snmp show Command
Syntax:
sys snmp show
MSC1000G User’s Guide
573
Chapter 31 sys Commands
This command displays the current SNMP get community, set community, trap community
and trap destination settings. The following is an example.
ras> sys snmp show
[community]
get community : Get123
set community : Set123
trap community: public
[trap destination]
1: 192.168.1.36:162
2: 0.0.0.0:0
3: 0.0.0.0:0
4: 0.0.0.0:0
ras>
31.4.6 sys snmp user Command
Syntax:
sys snmp user <name> noauth|auth|priv md5|sha des|aes
where
<name>
=
User name for SNMPv3 authentication.
noauth
=
Disables (noauth) SNMPv3 user authentication and encryption for
SNMP communication.
auth
=
Enables SNMPv3 user authentication.
priv
=
Enables SNMPv3 user authentication and encryption for SNMP
communication using a private key generated from the password.
md5|sha
=
Authentication method. MD5 (Message Digest 5) produces a 128-bit
digest to authenticate packet data. SHA (Secure Hash Algorithm)
produces a 160-bit digest to authenticate packet data.
Use md5 for minimal security and sha for maximum security.
des|aes
=
Encryption method. Data Encryption Standard (DES) is a widely used
method of data encryption using a secret key. DES applies a 56-bit key
to each 64-bit block of data.
Advanced Encryption Standard (AES) is a newer method of data
encryption that also uses a secret key. AES is more secure than DES.
This command sets the user authentication and data encryption settings for SNMPv3. The
following example enables SNMPv3 SHA user authentication with AES data encryption.
ras> sys snmp user example auth sha aes
574
MSC1000G User’s Guide
Chapter 31 sys Commands
31.4.7 sys snmp version Command
Syntax:
sys snmp version v2c|v3|v3v2c
where
=
v2c|v3|v3v2c
Sets the SNMP version and access mode.
v2c = SNMPv2 read/write
v3 = SNMPv3 read/write with additional user authentication and
data encryption options.
v3v2c = SNMPv3 read/write and SNMPv2 read-only.
This command sets the system to use the specified SNMP version and access mode.
The following example configures the system to use SNMPv3 with read-only access for
SNMPv2.
ras> sys snmp version v3v2c
31.5 sys syslog Commands
Use these commands to configure the MSC1000G’s syslog settings.
31.5.1 sys syslog server Command
Syntax:
sys syslog server <fac> <ip>
where
<fac>
=
Sets the log facility (local1~local7) to log the syslog messages to a
specific file in the syslog server. See your syslog program’s
documentation for details. Sets the syslog server IP address.
<ip>
=
The IP address of the syslog server.
This command sets the syslog server’s IP address and log facility.
The following example sets a syslog server log facility of 3 and IP address of 192.168.1.43.
ras> sys syslog server local3 192.168.1.43
31.5.2 sys syslog enable Command
Syntax:
sys syslog enable
MSC1000G User’s Guide
575
Chapter 31 sys Commands
This command sets the MSC1000G to send logs to an external syslog server. An example is
shown next.
ras> sys syslog enable
31.5.3 sys syslog disable Command
Syntax:
sys syslog disable
This command sets the MSC1000G to not send logs to an external syslog server. An example
is shown next.
ras> sys syslog disable
31.5.4 sys syslog show Command
Syntax:
sys syslog show
This command displays the syslog settings. An example is shown next.
ras> sys
status
facility
-------local1
local2
local3
local4
local5
local6
local7
ras>
syslog show
: disabled
server ip
--------------0.0.0.0
0.0.0.0
192.168.1.43
0.0.0.0
0.0.0.0
0.0.0.0
0.0.0.0
31.6 sys user Commands
Use these commands to configure the MSC1000G’s administrator account and authentication
settings.
31.6.1 sys user auth Command
Syntax:
sys user auth <mode>
576
MSC1000G User’s Guide
Chapter 31 sys Commands
where
<mode>
=
Sets which database the switch uses to authenticate a user.
4:tacacs+, 5:local then tacacs+
1 = local
2 = radius
3 = local first and then radius
4 = TACACS+
5 = local first then TACACS+
This command sets which database the MSC1000G uses to authenticate a user.
The following example sets the MSC1000G to check a user’s username and password against
the local database.
ras> sys user auth 1
31.6.2 sys user server Command
Syntax:
sys user server <ip> <port> <secret> [high|middle|low|deny]
where
<ip>
=
The IP address of the RADIUS server.
<port>
=
The RADIUS server’s listening port number.
The MSC1000G uses the default of 1812 if you do not specify a
port.
<secret>
=
The password for the RADIUS server.
[high|middle|
low|deny]
=
The default account privilege assignment if the RADIUS server
does not send the service type information after user authentication
is successful.
low = assigns the login accounts a low privilege level.
medium = assigns the login accounts a medium privilege level.
high = assign the login accounts a high privilege level.
deny = block access from this login account.
This command sets a RADIUS server’s IP address, port number and the password to access
the server. This command also sets the default account privilege assignment if the RADIUS
server does not send the service type information after user authentication is successful.
MSC1000G User’s Guide
577
Chapter 31 sys Commands
"
You will be blocked access to the system for remote management if you enter
deny and the system uses only RADIUS authentication with no system type
information. In this case, you can only access and manage the device through
the console port.
The following example sets a RADIUS server IP address of 192.168.1.77, port number of
1813 and password of “pwd1234”. The account is assigned a medium privilege if no service
type information is received from the RADIUS server.
ras> sys user server 192.168.1.77 1813 pwd1234 medium
31.6.3 sys user set Command
Syntax:
sys user set <username> <password> high|middle|low
where
<username>
=
The user name for the account
<password>
=
The password for the account.
high|middle| =
low
The user account’s level of access privileges.
high = Can use all commands.
middle = Can use middle or low privilege commands. Middle
privilege commands include things like general feature
configuration.
low = Can only use low privilege commands. Low privilege
commands are read only and consist of displaying feature
settings or configuration.
This command sets a local user administrator account and its level of access privileges.
The following example sets an administrator account with a user name of “bob” password of
“smith” and middle level access privileges.
ras> sys user set bob smith middle
31.6.4 sys user delete Command
Syntax:
sys user delete <name>
where
<name>
578
=
The user name for the account
MSC1000G User’s Guide
Chapter 31 sys Commands
This command removes a local user administrator account.
The following example removes the “fred” administrator account.
ras> sys user delete fred
31.6.5 sys user enable Command
Syntax:
sys user enable <name>
where
<name>
=
The user name for the account
This command turns on an administrator account.
The following example turns on the “bob” administrator account.
ras> sys user enable bob
31.6.6 sys user disable Command
Syntax:
sys user disable <name>
where
<name>
=
The user name for the account
This command turns off an administrator account.
The following example turns off the “bob” administrator account.
ras> sys user disable bob
31.6.7 sys user show Command
Syntax:
sys user show
MSC1000G User’s Guide
579
Chapter 31 sys Commands
This command displays authentication settings and user accounts. The following is an
example.
ras> sys user show
auth mode: local then radius
radius server ip: 0.0.0.0 port: 1812
index en name
privilege
----- -- ---------------- --------1 V admin
high
ras>
secret: 1234
31.6.8 sys user online Command
Syntax:
sys user online
This command displays information administrators that are logged into the switch.
The following is an example. * denotes your session.
ras> sys user online
[session info ('*' denotes your session)]
session
user
remote ip
login time
---------- ---------------- --------------- ------------------*telnet
admin
172.23.19.11
13:08:27 2005/06/09
ras>
580
MSC1000G User’s Guide
CHAPTER
32
vlan Commands
This chapter shows you how to use the vlan commands.
32.1 vlan Commands Overview
The vlan commands are for static VLAN management.
32.2 vlan Commands Summary
The following table lists the vlan commands. The P column on the right indicates the
administrator privilege level needed to use the command (H for high, M for middle or L for
low).
Table 187 vlan Commands
COMMAND
DESCRIPTION
P
vlan
delete
<vid>
Removes a static VLAN.
M
disable
<vid>
Turns off a VLAN.
M
enable
<vid>
Turns on a VLAN.
M
name
<vid> <name>
Sets the name of a VLAN.
M
set
<vid> <giga-port>
fix|forbid|normal
tag|untag
Adds a static VLAN.
M
show
[<vid>]|[<startvid> <end-vid>]
Displays all VLANs’ settings, a specified
VLAN’s settings or a range of static
VLANs’ settings.
L
32.3 vlan Commands
Use the vlan commands to configure static VLANs (SVLANs).
32.3.1 vlan delete Command
Syntax:
vlan delete <vid>
MSC1000G User’s Guide
581
Chapter 32 vlan Commands
This command removes a static VLAN.
The following example removes static VLAN entry 27.
ras> vlan delete 27
32.3.2 vlan disable Command
Syntax:
vlan disable <vid>
This command turns off the static VLAN.
The following example turns off static VLAN entry 27.
ras> vlan disable 27
32.3.3 vlan enable Command
Syntax:
vlan enable <vid>
This command turns on the static VLAN.
The following example turns on static VLAN entry 27.
ras> vlan enable 27
32.3.4 vlan name Command
Syntax:
vlan name <vid> <name>
where
<vid>
=
The VLAN ID [1 – 4094].
<name>
=
A name to identify the SVLAN entry.
This command sets the name for an entry in the static VLAN table.
The following example names static VLAN entry 27 “sub1”.
ras> vlan name 27 sub1
32.3.5 vlan set Command
Syntax:
vlan set <vid> <giga-port> <fix|forbid|normal> <tag|untag>
582
MSC1000G User’s Guide
Chapter 32 vlan Commands
where
<vid>
=
The VLAN ID [1 – 4094].
<giga-port>
=
This represents Gigabit Ethernet uplink ports, subtending ports
or all ports. Use sub1|sub2|up1|up2|all if trunking is not
enabled. Use sub|up|all if trunking is enabled.
fix|forbid|normal
=
fix = Makes the port a permanent member of this VLAN
group.
forbid = Prohibits the port from joining this VLAN group.
normal = The port can dynamically join this VLAN group
using GVRP. This is available for the Ethernet ports.
You cannot change a port from the fixed state to another state if
the port’s PVID is set to this VLAN.
The VLAN must have at least one port set to the fixed status if
the VLAN is the CPU (management) VLAN.
tag|untag
=
tag = Add an IEEE 802.1Q tag to frames going out through
this port(s).
untag = Send frames out through this port(s) without an IEEE
802.1Q tag.
This command adds or modifies an entry in the static VLAN table.
The following example creates a static VLAN entry for VLAN 27 with the subtending 1 port
as a fixed member and it tags all frames going out through the port.
ras> vlan set 27 sub1 fix tag
32.3.6 vlan show Command
Syntax:
vlan show [<vid>]|[<start-vid> <end-vid>]
where
[<vid>]|[<start =
-vid> <endvid>]
You can specify a single VID: <1>, or a range of VIDs: <6>
<10>.
This command shows information about the specified VLAN’s settings. It displays the settings
of all of the VLANs if you do not specify a VLAN.
MSC1000G User’s Guide
583
Chapter 32 vlan Commands
The following example shows the settings for all VIDs.
ras> vlan show
1
2
3
4
idx name
vid en slot
123456789012345678901234567890123456789012345678
---- ---------- ---- --- ---- ----------------------------------------------1 1
1 V
2 FFFF
UUUU
3 XXXXXXXXXXXXXXXXXXXXXXXXXXXXXXXXXXXXXXXXXXXXXXXX
4 XXXXXXXXXXXXXXXXXXXXXXXXXXXXXXXXXXXXXXXXXXXXXXXX
5 FFFFFFFFFFFFFFFFFFFFFFFFFFFFFFFFFFFFFFFFFFFFFFFF
6 XXXXXXXXXXXXXXXXXXXXXXXXXXXXXXXXXXXXXXXXXXXXXXXX
7 FFFFFFFFFFFFFFFFFFFFFFFFFFFFFFFFFFFFFFFFFFFFFFFF
8 XXXXXXXXXXXXXXXXXXXXXXXXXXXXXXXXXXXXXXXXXXXXXXXX
9 FFFFFFFFFFFFFFFFFFFFFFFFFFFFFFFFFFFFFFFFFFFFFFFF
10 XXXXXXXXXXXXXXXXXXXXXXXXXXXXXXXXXXXXXXXXXXXXXXXX
Press any key to continue, 'e' to exit
584
MSC1000G User’s Guide
CHAPTER
33
Firmware and Configuration File
Maintenance
This chapter tells you how to upload a new firmware file and how to upload and download
configuration files.
33.1 Firmware and Configuration File Maintenance Overview
The MSC1000G’s built-in FTP (and SFTP) servers allow you to use any FTP (or SFTP) client
(for example, ftp.exe in Windows) to upgrade MSC1000G or MSC1000G firmware or
configuration files. The firmware or configuration file upgrade is done during operation (runtime).
1
"
Do not interrupt the file transfer process, as it may permanently damage your
MSC1000G.
When you upload the MSC1000G’s firmware, the MSC1000G automatically
restarts when the upgrade process is complete.
33.2 Filename Conventions
The configuration file contains the whole system settings in the menus such as password, IP
address, VLANs and so on. The configuration file is called “config.dat” when you obtain it
from ZyXEL and “config-0” in the system.
ZyNOS (ZyXEL Network Operating System) is the system firmware. It has a “bin” filename
extension when you get it from ZyXEL and is called “ras” in the system. With many FTP and
SFTP clients, the filenames are similar to those shown next.
ftp> put firmware.bin ras
MSC1000G User’s Guide
585
Chapter 33 Firmware and Configuration File Maintenance
This is a sample from a FTP session to transfer the computer file firmware.bin to the
MSC1000G.
ftp> get config-0 config.dat
This is a sample from a FTP session to transfer the MSC1000G’s current configuration file
(including the configuration files of all the line cards) to the computer file config.dat.
If your FTP or SFTP client does not allow you to have a destination filename different than the
source, you will need to rename them as the MSC1000G only recognizes “config-0” and “ras”.
Be sure you keep unaltered copies of the files for later use.
The following table is a summary. Please note that the internal filename refers to the filename
on the MSC1000G and the external filename refers to the filename not on the MSC1000G, that
is, on your computer, local network or FTP site and so the name (but not the extension) may
vary. After uploading new firmware, use the sys version command to confirm that you
have uploaded the correct firmware version.
Table 188 File Name Conventions
FILE TYPE
INTERNAL
NAME
EXTERNAL
NAME
DESCRIPTION
Configuration File
config-0
*.dat
This is the configuration filename for the
MSC1000G.
Firmware
ras
*.bin
This is the generic name for the ZyNOS
firmware on the MSC1000G.
33.3 Editable Configuration File
The configuration file can be downloaded as a plain-text (English keyboard characters) file.
Edits to the configuration can be made to this file before it is uploaded again to the IES-5000.
"
You can change the “.dat” file to a “.txt” file and still upload it to the IES-5000
as long as you rename it to “config-0” when you upload it to the IES-5000.
33.3.1 Editable Configuration File Backup
Configure your system, and then use FTP or SFTP to backup the plain-text configuration file
onto your computer. Do the following to backup the configuration file:
Use an FTP or SFTP client to connect to the IES-5000.
C:\> ftp <IES-5000 IP address>
Type your user name and press [ENTER].
User (172.23.15.86:(none)): admin
Enter the management password (1234 by default).
Password: 1234
230 Logged in
586
MSC1000G User’s Guide
Chapter 33 Firmware and Configuration File Maintenance
Use get to transfer the configuration file to the computer. The configuration file on the system
(that you want to backup to the computer) is named config-0.
ftp> get config-0 config.dat
Quit FTP.
ftp> quit
33.3.2 Edit Configuration File
Open the config.dat file via a text editor (see the following example) and edit to the desired
configuration.
"
Ensure that any changes you make to the commands in the configuration file
correspond to the commands documented in this User’s Guide. The system
user password is encrypted and you cannot edit it in a text editor.
$$ system configuration file
[version]
1.00
$$ msc configuration
[confuser]
sys user auth 3
sys user set admin d4:88:dd:79:63:7c:78:11:87:92:cb:3b:c5:41:0c:21 high
sys user enable admin
sys user server 0.0.0.0 1812 1234
[confsyslog]
sys syslog disable
sys syslog server local1 0.0.0.0
sys syslog server local2 0.0.0.0
sys syslog server local3 0.0.0.0
sys syslog server local4 0.0.0.0
sys syslog server local5 0.0.0.0
sys syslog server local6 0.0.0.0
sys syslog server local7 0.0.0.0
[msc]
sys info hostname TGE1
sys snmp getcommunity public
sys snmp setcommunity public
sys snmp trapcommunity public
sys server port telnet 23
33.3.3 Editable Configuration File Upload
You can upload the configuration file by following the steps below.
Use an FTP or SFTP client to connect to the IES-5000.
C:\> ftp <IES-5000 IP address>
MSC1000G User’s Guide
587
Chapter 33 Firmware and Configuration File Maintenance
Type your user name and press [ENTER].
User (172.23.15.86:(none)): admin
Enter the management password (1234 by default).
Password: 1234
230 Logged in
ftp> put xxx.dat config-0
Quit FTP.
ftp> quit
Wait for the update to finish. The system restarts automatically.
33.4 Firmware File Upgrade
Use the following procedure to upload firmware to the management switch card, DSL line
card or DSL line cards.
Use an FTP or SFTP client to connect to the management switch card.
C:\> ftp <IES-5000 IP address>
Type your user name and press [ENTER].
User (172.23.15.86:(none)): admin
Enter the management password (1234 by default).
Password: 1234
230 Logged in
Use the ls FTP command to list the files that you can work with on the IES-5000. The
following is an example. Use entries from the list to transfer the firmware file to the
management switch card, DSL line card or all of DSL line cards of a certain model.
ftp> ls
200 Port command okay
150 Opening data connection for LIST
--w--w--w1 owner
group
3570592 Jul 01 12:00
-rw-rw-rw1 owner
group
16106 Jul 01 12:00
-r--r--r-1 owner
group
47813 Jul 01 12:00
--w--w--w1 owner
group
0 Jul 01 12:00
--w--w--w1 owner
group
0 Jul 01 12:00
--w--w--w1 owner
group
0 Jul 01 12:00
--w--w--w1 owner
group
0 Jul 01 12:00
--w--w--w1 owner
group
0 Jul 01 12:00
--w--w--w1 owner
group
0 Jul 01 12:00
--w--w--w1 owner
group
0 Jul 01 12:00
--w--w--w1 owner
group
0 Jul 01 12:00
--w--w--w1 owner
group
0 Jul 01 12:00
--w--w--w1 owner
group
0 Jul 01 12:00
--w--w--w1 owner
group
0 Jul 01 12:00
--w--w--w1 owner
group
0 Jul 01 12:00
--w--w--w1 owner
group
0 Jul 01 12:00
226 File sent OK
ftp: 1096 bytes received in 0.19Seconds 5.86Kbytes/sec.
588
ras
config-0
almhis
fw-ALC1248G-51
fw-ALC1248G-53
fw-SLC1248G-22
fw-VLC1224G-41
fw-ALC1272G-51
fw-3
fw-4
fw-5
fw-6
fw-7
fw-8
fw-9
fw-10
MSC1000G User’s Guide
Chapter 33 Firmware and Configuration File Maintenance
In this example, the firmware file on your computer (that you want to put onto a card or cards)
is named firmware.bin.
• Use this command to transfer the firmware file to the management switch card that you are
using (the internal firmware file is named ras).
ftp> put firmware.bin ras
• Use this command to transfer the firmware file to a DSL line card or the management
switch card that you are not currently using. Use “fw-” followed by the number of the slot.
ftp> put firmware.bin fw-3
• Use this command to transfer the firmware file to all of the IES-5000 DSL line cards of the
same type. Use “fw-” followed by ALC1248G-51, ALC1248G-53, ALC1272G-51,
SLC1248G-22, or VLC1224G-41. The following example uploads firmware to all of the
ALC1248G-51 line cards in the IES-5000.
ftp> put firmware.bin fw-ALC1248G-51
33.5 Configuration File Upgrade
Use an FTP or SFTP client to connect to the IES-5000.
C:\> ftp <IES-5000 IP address>
Type your user name and press [ENTER].
User (172.23.15.86:(none)): admin
Enter the management password (1234 by default).
Password: 1234
230 Logged in
Transfer the configuration file to the management switch card. The configuration file on your
computer (that you want to put onto the management switch card) is named config.dat. The
internal configuration file on the management switch card is named config-0.
ftp> put config.dat config-0
Quit FTP.
ftp> quit
Wait for the update to finish. The system restarts automatically.
MSC1000G User’s Guide
589
Chapter 33 Firmware and Configuration File Maintenance
590
MSC1000G User’s Guide
P ART IV
Troubleshooting
Troubleshooting (593)
591
592
CHAPTER
34
Troubleshooting
This chapter offers some suggestions to solve problems you might encounter. The potential
problems are divided into the following categories. See Appendix A on page 603 for default
settings.
34.1 Power, Hardware Connections, and LEDs
V
The MSC1000G does not turn on. None of the LEDs turn on.
Make sure the MSC1000G is properly installed in the slot and the system power is properly
connected and turned on.
1
V
Refer to the IES-5000 Series User’s Guide for directions and safety warnings
on installing the management switch card and power connections for the IES5000.
The ALM LED is on.
An alarm has been detected on the MSC1000G, the Integrated Ethernet Switch fan or the
INPUT ALARM terminals. Examples of an alarm on the MSC1000G are when the
MSC1000G’s voltage or temperature is outside of the normal range.
Check the logs to see the cause of the alarm. Take appropriate measures to remove the cause of
the alarm. For example, you may need to change the fan module if the fans are not operating
normally (see the IES-5000 Series User’s Guide for directions).
V
One of the LEDs does not behave as expected.
MSC1000G User’s Guide
593
Chapter 34 Troubleshooting
1
2
3
4
5
V
Make sure you understand the normal behavior of the LED. See Section 2.2 on page 57.
Check the hardware connections. See Section 2.3 on page 58.
Inspect your cables for damage. Replace any damaged cables.
Turn the power off and on.
If the problem continues, contact the vendor.
A Gigabit Ethernet interface’s LEDs are not on.
1 Make sure the interface is enabled.
2 Make sure that the interface’s connection speed is set to match that of the port on the
peer Ethernet device.
3 Check the copper or fiber optic Ethernet cable and connections between the interface and
the Ethernet switch or router.
4 If the interface is an SFP slot, check the transceiver.
5 Make sure that the peer Ethernet device is functioning properly.
6 If the Ethernet cable and peer Ethernet device are both OK and the LEDs stay off, there
may be a problem with the interface. Contact the distributor.
V
A SFP slot’s LNK LED turns on and off intermittently.
1 Check the copper or fiber optic Ethernet cable and connections between the uplink or
subtending interface and the Ethernet switch or router.
2 Make sure that the peer Ethernet device is functioning properly.
3 If the Ethernet cable and peer Ethernet device are both OK and the LNK LED keeps
turning off and on, there may be a problem with the port. Contact the distributor.
34.2 MSC1000G Access and Login
V
I forgot the IP address for the MSC1000G.
1 If you forgot the IP address of the in-band management port, try to log into the out-ofband management port. If you were using the out-of-band management port, try the inband management port.
1 The default in-band IP address is 192.168.1.1. The default out-of-band IP address is
192.168.0.1
2 Use the console port to log in to the MSC1000G.
594
MSC1000G User’s Guide
Chapter 34 Troubleshooting
V
I forgot the password.
1 The default password is 1234.
2 Contact customer support for how to reset your device to the factory defaults if you have
forgotten the password.
V
I cannot see or access the Login screen in the web configurator.
1 Make sure you are using the correct IP address.
• The default in-band IP address is 192.168.1.1. The default out-of-band IP address is
192.168.0.1
• If you changed the IP address, use the new IP address.
• If you changed the IP address and have forgotten it, see the troubleshooting
suggestions for I forgot the IP address for the MSC1000G.
2 Check the hardware connections, and make sure the LEDs are behaving as expected. See
IES-5000 Series User’s Guide and Chapter 2 on page 57.
3 Make sure your Internet browser does not block pop-up windows and has JavaScripts
and Java enabled.
4 Make sure your computer is in the same subnet as the MSC1000G. (If you know that
there are routers between your computer and the MSC1000G, skip this step.)
5 Reset the device to its factory defaults, and try to access the MSC1000G with the default
IP address. See Section 34.7 on page 598.
6 If the problem continues, contact the network administrator or vendor, or try one of the
following.
• Try to access the MSC1000G using another service, such as Telnet. If you can access the
MSC1000G, use the sys client show, sys user show, and sys server
show commands to find out why the MSC1000G does not respond to HTTP.
• If you are using in-band management, try connecting to the out-of-band management port
or the console port.
V
I can see the Login screen, but I cannot log in to the MSC1000G.
1 Make sure you have entered the user name and password correctly. The default user
name is admin, and the default password is 1234. These fields are case-sensitive, so
make sure [Caps Lock] is not on.
2 Turn the system off and on.
3 If this does not work, you have to reset the device to its factory defaults. See Section
34.7 on page 598.
MSC1000G User’s Guide
595
Chapter 34 Troubleshooting
V
I cannot use FTP to upload / download the configuration file. / I cannot use
FTP to upload new firmware.
See the troubleshooting suggestions for I cannot see or access the Login screen in the web
configurator. Ignore the suggestions about your browser.
V
The SNMP manager server cannot get information from the MSC1000G.
1 Ping the MSC1000G from the SNMP server. If you cannot, check the cable, connections
and IP configuration.
2 Check to see that the community (or trusted host) in the MSC1000G matches the SNMP
server’s community.
3 Make sure that your computer’s IP address matches a configured trusted host IP address
(if configured).
V
I cannot telnet into the MSC1000G.
1 Make sure that a telnet session(s) is not already operating. The MSC1000G only accepts
one telnet session at a time (or a total of four Telnet and SSH sessions with multiple
login enabled).
2 Make sure that your computer’s IP address matches a configured secured client IP
address (if configured). The MSC1000G immediately disconnects the telnet session if
secured host IP addresses are configured and your computer’s IP address does not match
one of them.
3 Make sure that you have not disabled the Telnet service or changed the server port
number that the MSC1000G uses for Telnet.
4 Ping the MSC1000G from your computer.
5 If you are able to ping the MSC1000G but are still unable to telnet, contact the
distributor.
6 If you cannot ping the MSC1000G, check the cable, connections and IP configuration.
7 See the troubleshooting suggestions for I cannot see or access the Login screen in the
web configurator. Ignore the suggestions about your browser.
V
I cannot use the console port to access the MSC1000G.
Make sure you use terminal emulation software with the correct settings (default VT100
terminal emulation, 9600 bps, No parity, 8 data bits, 1 stop bit, and no flow control).
596
MSC1000G User’s Guide
Chapter 34 Troubleshooting
34.3 Data Transmission
V
The Gigabit Ethernet interface’s LED is on, but data cannot be transmitted.
1
2
3
4
5
Make sure that the port has the appropriate uplink or subtending mode setting.
Make sure that the IP settings are properly configured.
Check the VLAN configuration.
Ping the MSC1000G from a computer behind the peer Ethernet device.
If you cannot ping, check the Ethernet cable and connections between the uplink or
subtending port and the Ethernet switch or router.
34.4 Redundant Management Switch Cards
V
I cannot get a redundant (second) management switch card to work as a
standby.
1 Make sure that the management switch cards are in slots 1 and 2 of the IES-5000 main
chassis. The two management switch cards must have the same types of uplink and
subtending connections.
2 Make sure that the management switch cards both have firmware version V3.50(LU.1)
or later. Earlier firmware versions do not support the use of a redundant management
switch card.
34.5 Management Lockout
You could lock yourself (and all others) out from the MSC1000G by:
1 Misconfiguring the text configuration file.
2 Forgetting the password.
"
Be careful not to lock yourself and others out of the MSC1000G.
MSC1000G User’s Guide
597
Chapter 34 Troubleshooting
34.6 A Line Card Does Not Become Active
V
A line card is stuck in the inactive state.
It is normal for a line card to be in the inactive state when it is starting up or the firmware is
being upgraded. If neither of these is the case, the line card may be malfunctioning. Try the
following.
1 The MSC1000G can automatically restart a line card that it is managing. If the line card
is unresponsive, use the lcman reset command to perform a hardware reset on the
line card.
2 Try removing the line card from the slot and re-installing it.
3 If neither of these steps work, use the lcman disable command. Then connect to the
line card’s console port and recover the firmware. The procedure to recover the line card
firmware is similar to the procedure for recovering the MSC1000G firmware (see
Section 34.7.2 on page 599).
4 After you have recovered the line card’s firmware, use the lcman enable command
to turn the MSC1000G’s management of the line card back on.
34.7 Resetting the Defaults
You can upload the factory-default configuration file to reset the MSC1000G to the default
settings. This means that you will lose all previous configurations and the speed of the console
port will be reset to the default of 9600 bps with 8 data bit, no parity, one stop bit and flow
control set to none. The user name and password will also be reset to “admin” and “1234”. The
default in-band IP address is 192.168.1.1. The default out-of-band IP address is 192.168.0.1.
If you forget your password or cannot access the MSC1000G, contact customer support for
how to reset your device to the factory defaults.
34.7.1 Resetting the Defaults Via CLI Command
If you know the password, you can reload the factory-default configuration file via Command
Line Interface (CLI) command. Use the following procedure.
1 Connect to the console port using a computer with terminal emulation software. See the
chapter on hardware connections for details.
2 Enter your password.
3 Type config default.
4 Type y at the question “reset configuration to factory default needs
system restart! proceed(y/n)? >)?”
5 After restarting, the MSC1000G is re-initialized with a default configuration file the
default user name of “admin” and password of “1234”.
598
MSC1000G User’s Guide
Chapter 34 Troubleshooting
34.7.2 Recovering the Firmware
Usually you should use FTP or the console port to upload the MSC1000G’s firmware. If the
MSC1000G will not start up, the firmware may be lost or corrupted. Use the following
procedure to upload firmware to the MSC1000G only when you are unable to use another
method to upload firmware.
"
This procedure is for emergency situations only.
1 Obtain the firmware file, unzip it and save it in a folder on your computer.
2 Connect your computer to the console port and use terminal emulation software
configured to the following parameters:
•
VT100 terminal emulation
•
9600 bps
•
No parity, 8 data bits, 1 stop bit
•
No flow control
3 Turn off the IES-5000 and turn it back on to restart it and begin a session.
4 When you see the Press any key to enter Debug Mode within 3 seconds
message, press a key to enter debug mode.
5 Type atba5 after the Enter Debug Mode message (this changes the console port
speed to 115200 bps).
6 Change the configuration of your terminal emulation software to use 115200 bps and
reconnect to the MSC1000G.
7 Type atur after the Enter Debug Mode message.
8 Wait for the Starting XMODEM upload message before activating XMODEM upload
on your terminal.
9 This is an example Xmodem configuration upload using HyperTerminal. Click
Transfer, then Send File to display the following screen.
Figure 193 Example Xmodem Upload
Type the firmware file's
location, or click Browse to
search for it.
Choose the 1K Xmodem
protocol.
Then click Send.
10 After a successful firmware upload, type atgo to restart the MSC1000G. The console
port speed automatically changes back to 9600 bps when the MSC1000G restarts.
MSC1000G User’s Guide
599
Chapter 34 Troubleshooting
600
MSC1000G User’s Guide
P ART V
Appendices and
Index
Product Specifications (603)
Virtual Circuit Topology (613)
Legal Information (615)
Customer Support (619)
Index (623)
601
602
APPENDIX
A
Product Specifications
This appendix gives details about the IES-5000 default settings and MSC1000G hardware and
features.
IES-5000 Default Settings
This table lists major default settings.
Table 189 Default Settings
Default In-band IP Address
192.168.1.1
Default In-band Subnet Mask
255.255.255.0 (24 bits)
Default Out-of-band IP Address
192.168.0.1
Default Out-of-band Subnet Mask
255.255.255.0 (24 bits)
Default User Name
admin
Default Password
1234
Default Console Port Settings
VT100 terminal emulation, 9600 bps, No parity, 8 data bits, 1 stop
bit, and no flow control
VLAN Default Settings
One VLAN is created (this is also the management VLAN).
VID
1
Registration
Fixed for the Ethernet and ADSL ports
Tagging
Untagged for all ports
STP Default Settings
Enable/Disable State
Disabled
STP Version
MSTP
Operational Mode:
auto
ADSL Profile Default Settings
Name:
DEFVAL
Latency Mode
Interleave
Upstream ADSL Settings:
Downstream ADSL Settings:
Maximum Rate
1000 Kbps
24000 Kbps
Minimum Rate
32 Kbps
64 Kbps
Interleave Delay
20 ms
20 ms
Maximum Signal to Noise Ratio
31 db
31 db
Minimum Signal to Noise Ratio
6 db
6 db
MSC1000G User’s Guide
603
Appendix A Product Specifications
Table 189 Default Settings
Target Signal to Noise Ratio
12 db
12 db
Rate Adaptation Mode
Startup
Startup
Up Shift Margin
15 db
15 db
Down Shift Margin
9 db
9 db
SHDSL Profile Default Settings
Name:
DEFVAL
Maximum Rate
2304 Kbps
Minimum Rate
192 Kbps
Annex Mode
annex b
Wire Pair
2wire
Line Probe
disable
VDSL General Settings
State
Disable
Upstream Power Back-off
Off
Frequency Plan
998
VDSL Profile Plan
12a
RFI Band
Disable
RFI Custom
Disable, all customized entries are 0~0
VDSL Profile Default Settings
Name:
DEFVAL
Latency Mode
Interleave
Maximum Rate
Upstream Settings:
Downstream Settings:
45440 kbps
100032 kbps
Minimum Rate
64 Kbps
64 Kbps
Interleave Delay
8 ms
8 ms
Maximum Signal to Noise Ratio
31 db
31 db
Minimum Signal to Noise Ratio
0 db
0 db
Target Signal to Noise Ratio
9 db
9 db
Rate Adaptation Mode
Startup
Startup
Up Shift Margin
15 db
15 db
Down Shift Margin
9 db
9 db
Default ATM Profile Settings
Name:
DEFVAL
Traffic Class:
UBR
PCR:
300000 cell/sec.
CDVT:
Virtual Channel Default
604
0
SettingsA
VPI:
0
VCI:
33
MSC1000G User’s Guide
Appendix A Product Specifications
Table 189 Default Settings
Multiplexing:
LLC-based
PVID:
1
Priority
0
ATM Profile:
DEFVAL
Default IGMP Filter Profile Settings
The DEFVAL IGMP filter profile is assigned to all of the ADSL ports by default. It allows a port to join all
multicast IP addresses (224.0.0.0~239.255.255.255).
A. The ADSL ports' PVCs use ATM Adaptation Layer (AAL) 5. They also use RFC 1483 encapsulation.
Specifications
Table 190 MSC1000G Specifications
Dimensions
267.4mm(w) x 231.0mm(D) x 37.55mm(H)
Device Weight
1 Kg
Management Interfaces
In-band Ethernet management
One 100 Mbps Fast Ethernet RJ-45 port for out of band management
One RS-232 (DB-9 type) console port for local management
Power Specification
Power Rating: 1A MAX
Power Consumption: 30W
Switching
Switching fabric capability: 24Gbps, non-blocking full duplex
Forwards IEEE 802.3, IEEE 802.1Q, Ethernet II frames
Prevents the forwarding of corrupted packets
Operates at L2 switch mode
Supports 16K MAC entries
Supports 4K VLAN entries
Standards Compliance
IEEE 802.1p, 802.1Q
IEEE 802.3u/3z/3x/3ab
SFF committee INF-8074i Specification SFP (Small Form factor Pluggable)
transceiver rev.1.0
Operation Temperature
0 ~ 50 degrees C
Storage Temperature
-40 ~ 70 degrees C
Operation Humidity
20% ~ 95% RH (non-condensing)
MSC1000G User’s Guide
605
Appendix A Product Specifications
Table 190 MSC1000G Specifications
Storage Humidity
5% ~ 95% RH (non-condensing)
Certifications
CE Conformity
FCC
ITU-T K.20
Safety
IEC 60950-1
EN 60950-1
CSA 60950-1
UL 60950-1
EMC
EN 300386
EN 55022
EN 61000-3-2
EN 61000-3-3
EN 55024
Features
This section introduces the IES-5000 features.
Table 191 IES-5000 Features
606
Basic Function
Power-On System Test (POST)
LED display (SYS/ST/ALM)
Uplink Interface
Gigabit Ethernet
Thermal cutoff protection
Temperature and voltage monitoring and threshold setting
Management Interfaces
In-band Ethernet management
External alarm inputs interface
One 100 Mbps Fast Ethernet RJ-45 port for out of band management
One RS-232 (DB-9 type) console port for local management
MSC1000G User’s Guide
Appendix A Product Specifications
Table 191 IES-5000 Features (continued)
Management Features
Command Line Interface (CLI)
DSL profile function for managing DSL line card connections
Firmware upgrade through FTP or SFTP and serial console port
Telnet or SSH management (up to 4 concurrent sessions)
IEEE 802.1X port-based authentication
RADIUS client support for user’s name and password
Text-based configuration file via FTP or SFTP
UNIX syslog
SSH version 2
SFTP (secure FTP)
NTP
IP ping and traceroute functions
SNMP
Firmware download
Database backup/restore
Fault and alarm management
Programmable alarm filters (threshold)
Configuration management
Performance counters
Performance statistics (15m/24h)
Access control
Event log
Internal trace and debug
Security Features
Detection of DOS attacks*
SNMP Management
SNMPv1/v2
SNMPv3 with optional SNMPv2c read-only
SNMP Trap v1/v2/v3
SNMP agent
MIBs
RFC1213 MIBII (system, interface, …)
ADSL line MIB
ADSL extension line MIB
SHDSL line MIB
Bridge MIB
Bridge MIB Extension
RMON MIB
VLAN
VLAN cross-connect
VLAN cross-connect: map DSL line (VPI/VCI) to one VLAN (maximum 4K
VLAN)
Residential bridging: user to user traffic can be blocked
VLAN Tag-based
Transparent LAN Service (TLS) or Q-in-Q/VLAN stacking
Number of VLAN IDs: 4096
MAX number of VLAN + MAC per ADSL port: 256
UI Isolation
ADSL2/2+, SHDSL: accept untagged frame from CPE
MSC1000G User’s Guide
607
Appendix A Product Specifications
Table 191 IES-5000 Features (continued)
608
Quality of Service
IEEE 802.1p
IEEE 802.1p for QoS function at VLAN level
Minimum of priority queues
SPQ and WRR support for the queues
Mapping of priority to a queue by a configurable table
PVC default priority
DSCP-IEEE 802.1p mapping
Priority queuing
The priority queues are configurable based on the PVC: ATM QoS to IEEE
802.1p
priority mapping
The priority queues shall be configurable based on the PVC ATM service
types
(UBR/ CBR /rt-VBR/nrt-VBR) to 802.1p priority mapping
Layer 2 Bridging
LLC and VC MUX bridging (RFC2684)
MAC address table: Up to 16K entries
MAC addresses per port: Up to 128
IEEE 802.1d transparent bridging
IEEE 802.1w rapid spanning tree protocol for network interface ports
Auto MAC address learning
MAC aging-out time
IEEE 802.1p priority queue mapping (static mapping)
Limiting number of MAC per port
Static MAC address filtering
Port Isolation (per system)
DHCP relay option 82 (globally, per VLAN)
Port-based VLAN tagging on subtending network interface port
Broadcast storm control
Multicast Features
IP multicast forwarding
IGMP Proxy
IGMP snooping
v1&v2 (port based)
VLAN-aware IGMP snooping
IGMP multicast channel limiting by group count or bandwidth usage
Static multicast addresses 128
Broadcast methodology
IGMP membership reports
All video group address are configured in the system
Tracking MAC address with IGMP
Multicast VLAN (16 VLANs)
ACL/Filtering
L2 frame filtering, such as based on source MAC address, port etc.
PPPoE filtering
Layer 3 filtering based on IP header: source addresses, destination
addresses,
protocol ID, UDP/TCP port number
ARP broadcast filtering
NetBIOS filtering
DHCP broadcast filtering
IGMP filtering
Rate limiting
Rate limiting per XDSL port
Rate limiting per XDSL VC
Rate limiting per Ethernet port (MSC1000G ports in subtending mode)
MSC1000G User’s Guide
Appendix A Product Specifications
Table 191 IES-5000 Features (continued)
Per DSL Port
Provisioning
Per port limitations:
Number of ACL Profile: 8
Number of DHCP snooping table entries: 32
Number of static DHCP snooping table entries: 3
Number of MAC filters: 10
Number of MVLAN: 4
Number of OUI Filter: 10
Number of PVCs (PVC, PPVC member, TLS PVC, PAEPVC): 8
Number of PPVCs: 2
Number of VLANs: 16
System-wide
Provisioning
Number of VLANs: 4094
ADSL profiles: 128
SHDSL profiles: 128
ATM profiles: 128
IGMP filter profiles: 128
ALARMADSL profiles: 128
ALARMSHDSL profiles: 128
DHCP relay servers: 32
IP routes: 16
Static multicast addresses: 128
MAC filters: 512
MVLAN: 16
Multicast groups per MVLAN: 16
Multicast bandwidth control groups: 96
IGMP groups: 16 VLANs, 256 groups per linecard
User (administrator) accounts: 16
Table 192 Supported Standards
STANDARD
DESCRIPTION
RFC 867
RFC 868
RFC 1305
Daytime protocol
Time protocol
Network Time Protocol (NTP)
RFC 1112
RFC 2236
RFC 3376
Internet Group Multicast Protocol (IGMP)
RFC 1213
RFC 1573
RFC 1757
RFC 2662
RFC 2665
RFC 2674
RFC 2863
RFC 3440
RFC 3635
RFC 3636
Simple Network Management Protocol (SNMP)
RFC 1483
Multiprotocol Encapsulation over ATM Adaptation Layer 5
RFC 2131
RFC 2132
RFC 3046
Dynamic Host Configuration Protocol (DHCP)
MSC1000G User’s Guide
609
Appendix A Product Specifications
Table 192 Supported Standards (continued)
STANDARD
DESCRIPTION
RFC 2138
RFC 2139
Remote Authentication Dial In User Service (RADIUS)
RFC 2486
Extensible Authentication Protocol (EAP)
RFC 2684
LLC and VC MUX Bridging
IEEE 802.1D
IEEE 802.1w
IEEE 802.1s
Spanning Tree Protocol (STP)
Rapid Spanning Tree Protocol (STP)
Multiple Spanning Tree Protocol (MSTP)
IEEE 802.1d
Transparent Bridging
IEEE 802.1p
Layer 2 Traffic Prioritization
IEEE 802.1Q
Virtual Local Area Network (VLAN)
IEEE 802.1x
Network Authentication
IEEE 802.3ab
1000Base-T
IEEE 802.3ad
Link Aggregate Control Protocol (LACP)
IEEE 802.3u
100Base-T
IEEE 802.3x
Flow Control, Fast Ethernet
IEEE 802.3z
1000Base-X
ANSI T1.413 issue 2
ADSL Operational Mode
Firmware Naming Conventions
A firmware version includes the model code and release number as shown in the following
example.
Firmware Version: V3.70(LU.0)
"LU" is the model code.
"0" is this firmware's release number. This varies as new firmware is released. Your
firmware's release number may not match what is displayed in this User's Guide.
Console Port Pin Assignments
In a serial communications connection, generally a computer is DTE (Data Terminal
Equipment) and a modem is DCE (Data Circuit-terminating Equipment). The MSC1000G is
DCE when you connect a computer to the console port.
610
MSC1000G User’s Guide
Appendix A Product Specifications
Figure 194 Console Port Pin Layout
Table 193 Console Port Pin Assignments
CONSOLE PORT RS – 232 (FEMALE) DB-9F
Pin 1 = NON
Pin 2 = DCE-TXD
Pin 3 = DCE –RXD
Pin 4 = DCE –DSR
Pin 5 = GND
Pin 6 = DCE –DTR
Pin 7 = DCE –CTS
Pin 8 = DCE –RTS
PIN 9 = NON
The CON/AUX port also has these pin assignments. The CON/AUX switch changes the setting in
the firmware only and does not change the CON/AUX port’s pin assignments.
ALARM Connector Pin Assignments
The ALARM connector is a DB15F connector.
Figure 195 ALARM Connector Pin Layout
Table 194 ALARM Connector Pin Assignments
PIN
DESCRIPTION
1
Common pin for alarm input 1
2
Common pin for alarm input 2
3
Common pin for alarm input 3
4
Normal close for minor alarm output
5
Normal open for minor alarm output
6
Common pin for major alarm output
7
Normal close for critical alarm output
MSC1000G User’s Guide
611
Appendix A Product Specifications
Table 194 ALARM Connector Pin Assignments
612
PIN
DESCRIPTION
8
Normal open for critical alarm output
9
Normal close for alarm input 1
10
Normal close for alarm input 2
11
Normal close for alarm input 3
12
Common pin for minor alarm output
13
Normal close for major alarm output
14
Normal open for major alarm output
15
Common contact for critical alarm output
MSC1000G User’s Guide
APPENDIX
B
Virtual Circuit Topology
ATM is a connection-oriented technology, meaning that it sets up virtual circuits over which
end systems communicate. The terminology for virtual circuits is as follows:
• Virtual Channel
Logical connections between ATM switches
• Virtual Path
A bundle of virtual channels
• Virtual Circuits
A series of virtual paths between circuit end point
Figure 196 Virtual Circuit Topology
Think of a virtual path as a cable that contains a bundle of wires. The cable connects two
points and wires within the cable provide individual circuits between the two points. In an
ATM cell header, a VPI (Virtual Path Identifier) identifies a link formed by a virtual path; a
VCI (Virtual Channel Identifier) identifies a channel within a virtual path.
The VPI and VCI identify a virtual path, that is, termination points between ATM switches. A
series of virtual paths make up a virtual circuit.
MSC1000G User’s Guide
613
Appendix B Virtual Circuit Topology
614
MSC1000G User’s Guide
APPENDIX
C
Legal Information
Copyright
Copyright © 2007 by ZyXEL Communications Corporation.
The contents of this publication may not be reproduced in any part or as a whole, transcribed,
stored in a retrieval system, translated into any language, or transmitted in any form or by any
means, electronic, mechanical, magnetic, optical, chemical, photocopying, manual, or
otherwise, without the prior written permission of ZyXEL Communications Corporation.
Published by ZyXEL Communications Corporation. All rights reserved.
Disclaimer
ZyXEL does not assume any liability arising out of the application or use of any products, or
software described herein. Neither does it convey any license under its patent rights nor the
patent rights of others. ZyXEL further reserves the right to make changes in any products
described herein without notice. This publication is subject to change without notice.
Trademarks
ZyNOS (ZyXEL Network Operating System) is a registered trademark of ZyXEL
Communications, Inc. Other trademarks mentioned in this publication are used for
identification purposes only and may be properties of their respective owners.
Certifications
Federal Communications Commission (FCC) Interference Statement
This device complies with Part 15 of FCC rules. Operation is subject to the following two
conditions:
• This device may not cause harmful interference.
• This device must accept any interference received, including interference that may cause
undesired operations.
MSC1000G User’s Guide
615
Appendix C Legal Information
FCC Warning
This device has been tested and found to comply with the limits for a Class A digital switch,
pursuant to Part 15 of the FCC Rules. These limits are designed to provide reasonable
protection against harmful interference in a commercial environment. This device generates,
uses, and can radiate radio frequency energy and, if not installed and used in accordance with
the instruction manual, may cause harmful interference to radio communications. Operation of
this device in a residential area is likely to cause harmful interference in which case the user
will be required to correct the interference at his own expense.
CE Mark Warning:
This is a class A product. In a domestic environment this product may cause radio interference
in which case the user may be required to take adequate measures.
Taiwanese BSMI (Bureau of Standards, Metrology and Inspection) A Warning:
Notices
Changes or modifications not expressly approved by the party responsible for compliance
could void the user's authority to operate the equipment.
This Class A digital apparatus complies with Canadian ICES-003.
Cet appareil numérique de la classe A est conforme à la norme NMB-003 du Canada.
CLASS 1 LASER PRODUCT
APPAREIL A LASER DE CLASS 1
PRODUCT COMPLIES WITH 21 CFR 1040.10 AND 1040.11.
PRODUIT CONFORME SELON 21 CFR 1040.10 ET 1040.11.
Viewing Certifications
1 Go to http://www.zyxel.com.
2 Select your product on the ZyXEL home page to go to that product's page.
3 Select the certification you wish to view from this page.
ZyXEL Limited Warranty
ZyXEL warrants to the original end user (purchaser) that this product is free from any defects
in materials or workmanship for a period of up to two years from the date of purchase. During
the warranty period, and upon proof of purchase, should the product have indications of failure
due to faulty workmanship and/or materials, ZyXEL will, at its discretion, repair or replace the
defective products or components without charge for either parts or labor, and to whatever
extent it shall deem necessary to restore the product or components to proper operating
616
MSC1000G User’s Guide
Appendix C Legal Information
condition. Any replacement will consist of a new or re-manufactured functionally equivalent
product of equal or higher value, and will be solely at the discretion of ZyXEL. This warranty
shall not apply if the product has been modified, misused, tampered with, damaged by an act
of God, or subjected to abnormal working conditions.
Note
Repair or replacement, as provided under this warranty, is the exclusive remedy of the
purchaser. This warranty is in lieu of all other warranties, express or implied, including any
implied warranty of merchantability or fitness for a particular use or purpose. ZyXEL shall in
no event be held liable for indirect or consequential damages of any kind to the purchaser.
To obtain the services of this warranty, contact ZyXEL's Service Center for your Return
Material Authorization number (RMA). Products must be returned Postage Prepaid. It is
recommended that the unit be insured when shipped. Any returned products without proof of
purchase or those with an out-dated warranty will be repaired or replaced (at the discretion of
ZyXEL) and the customer will be billed for parts and labor. All repaired or replaced products
will be shipped by ZyXEL to the corresponding return address, Postage Paid. This warranty
gives you specific legal rights, and you may also have other rights that vary from country to
country.
Registration
Register your product online to receive e-mail notices of firmware upgrades and information
at www.zyxel.com for global products, or at www.us.zyxel.com for North American products.
MSC1000G User’s Guide
617
Appendix C Legal Information
618
MSC1000G User’s Guide
APPENDIX
D
Customer Support
Please have the following information ready when you contact customer support.
Required Information
•
•
•
•
Product model and serial number.
Warranty Information.
Date that you received your device.
Brief description of the problem and the steps you took to solve it.
Corporate Headquarters (Worldwide)
•
•
•
•
•
•
•
Support E-mail: [email protected]
Sales E-mail: [email protected]
Telephone: +886-3-578-3942
Fax: +886-3-578-2439
Web Site: www.zyxel.com, www.europe.zyxel.com
FTP Site: ftp.zyxel.com, ftp.europe.zyxel.com
Regular Mail: ZyXEL Communications Corp., 6 Innovation Road II, Science Park,
Hsinchu 300, Taiwan
Costa Rica
•
•
•
•
•
•
•
Support E-mail: [email protected]
Sales E-mail: [email protected]
Telephone: +506-2017878
Fax: +506-2015098
Web Site: www.zyxel.co.cr
FTP Site: ftp.zyxel.co.cr
Regular Mail: ZyXEL Costa Rica, Plaza Roble Escazú, Etapa El Patio, Tercer Piso, San
José, Costa Rica
Czech Republic
•
•
•
•
•
E-mail: [email protected]
Telephone: +420-241-091-350
Fax: +420-241-091-359
Web Site: www.zyxel.cz
Regular Mail: ZyXEL Communications, Czech s.r.o., Modranská 621, 143 01 Praha 4 Modrany, Ceská Republika
MSC1000G User’s Guide
619
Appendix D Customer Support
Denmark
•
•
•
•
•
•
Support E-mail: [email protected]
Sales E-mail: [email protected]
Telephone: +45-39-55-07-00
Fax: +45-39-55-07-07
Web Site: www.zyxel.dk
Regular Mail: ZyXEL Communications A/S, Columbusvej, 2860 Soeborg, Denmark
Finland
•
•
•
•
•
•
Support E-mail: [email protected]
Sales E-mail: [email protected]
Telephone: +358-9-4780-8411
Fax: +358-9-4780 8448
Web Site: www.zyxel.fi
Regular Mail: ZyXEL Communications Oy, Malminkaari 10, 00700 Helsinki, Finland
France
•
•
•
•
•
E-mail: [email protected]
Telephone: +33-4-72-52-97-97
Fax: +33-4-72-52-19-20
Web Site: www.zyxel.fr
Regular Mail: ZyXEL France, 1 rue des Vergers, Bat. 1 / C, 69760 Limonest, France
Germany
•
•
•
•
•
•
Support E-mail: [email protected]
Sales E-mail: [email protected]
Telephone: +49-2405-6909-0
Fax: +49-2405-6909-99
Web Site: www.zyxel.de
Regular Mail: ZyXEL Deutschland GmbH., Adenauerstr. 20/A2 D-52146, Wuerselen,
Germany
Hungary
•
•
•
•
•
•
Support E-mail: [email protected]
Sales E-mail: [email protected]
Telephone: +36-1-3361649
Fax: +36-1-3259100
Web Site: www.zyxel.hu
Regular Mail: ZyXEL Hungary, 48, Zoldlomb Str., H-1025, Budapest, Hungary
Kazakhstan
• Support: http://zyxel.kz/support
• Sales E-mail: [email protected]
620
MSC1000G User’s Guide
Appendix D Customer Support
•
•
•
•
Telephone: +7-3272-590-698
Fax: +7-3272-590-689
Web Site: www.zyxel.kz
Regular Mail: ZyXEL Kazakhstan, 43, Dostyk ave.,Office 414, Dostyk Business Centre,
050010, Almaty, Republic of Kazakhstan
North America
•
•
•
•
•
•
•
Support E-mail: [email protected]
Sales E-mail: [email protected]
Telephone: +1-800-255-4101, +1-714-632-0882
Fax: +1-714-632-0858
Web Site: www.us.zyxel.com
FTP Site: ftp.us.zyxel.com
Regular Mail: ZyXEL Communications Inc., 1130 N. Miller St., Anaheim, CA 928062001, U.S.A.
Norway
•
•
•
•
•
•
Support E-mail: [email protected]
Sales E-mail: [email protected]
Telephone: +47-22-80-61-80
Fax: +47-22-80-61-81
Web Site: www.zyxel.no
Regular Mail: ZyXEL Communications A/S, Nils Hansens vei 13, 0667 Oslo, Norway
Poland
•
•
•
•
•
E-mail: [email protected]
Telephone: +48 (22) 333 8250
Fax: +48 (22) 333 8251
Web Site: www.pl.zyxel.com
Regular Mail: ZyXEL Communications, ul. Okrzei 1A, 03-715 Warszawa, Poland
Russia
•
•
•
•
•
•
Support: http://zyxel.ru/support
Sales E-mail: [email protected]
Telephone: +7-095-542-89-29
Fax: +7-095-542-89-25
Web Site: www.zyxel.ru
Regular Mail: ZyXEL Russia, Ostrovityanova 37a Str., Moscow, 117279, Russia
Spain
•
•
•
•
Support E-mail: [email protected]
Sales E-mail: [email protected]
Telephone: +34-902-195-420
Fax: +34-913-005-345
MSC1000G User’s Guide
621
Appendix D Customer Support
• Web Site: www.zyxel.es
• Regular Mail: ZyXEL Communications, Arte, 21 5ª planta, 28033 Madrid, Spain
Sweden
•
•
•
•
•
•
Support E-mail: [email protected]
Sales E-mail: [email protected]
Telephone: +46-31-744-7700
Fax: +46-31-744-7701
Web Site: www.zyxel.se
Regular Mail: ZyXEL Communications A/S, Sjöporten 4, 41764 Göteborg, Sweden
Ukraine
•
•
•
•
•
•
Support E-mail: [email protected]
Sales E-mail: [email protected]
Telephone: +380-44-247-69-78
Fax: +380-44-494-49-32
Web Site: www.ua.zyxel.com
Regular Mail: ZyXEL Ukraine, 13, Pimonenko Str., Kiev, 04050, Ukraine
United Kingdom
•
•
•
•
•
•
•
Support E-mail: [email protected]
Sales E-mail: [email protected]
Telephone: +44-1344 303044, 08707 555779 (UK only)
Fax: +44-1344 303034
Web Site: www.zyxel.co.uk
FTP Site: ftp.zyxel.co.uk
Regular Mail: ZyXEL Communications UK, Ltd.,11 The Courtyard, Eastern Road,
Bracknell, Berkshire, RG12 2XB, United Kingdom (UK)
“+” is the (prefix) number you dial to make an international telephone call.
622
MSC1000G User’s Guide
Index
Index
Numerics
1000/100 Ethernet ports 59
1000Base-T 59
100Base-Tx 2 59
1-bit constellation 160
802.1X PNAC 105
8-wire 212
A
abbreviating commands 309
acceptable frame type 301
access control 290
Access Control List 81
commands 347
ACL 81
acl commands 347
acl dhcprelay82 commands 351
acl macfilter commands 362
acl ouifilter commands 364
acl rule commands 369
ACO 58
ACT LED 58
Address Resolution Protocol, See ARP 227, 366, 396
administrator account 576, 579
ADSL
advanced port setup 157
alarm profile 218, 480
disable features 160
downstream rate 208
Extension Line MIB (RFC 3440) 288
Line MIB (RFC 2662) 288
loopback 133, 393
operational mode 434
port setup 153, 155
profile 206, 477
rate 207, 208
rates 206
upstream rate 207
adsl commands 426
ADSL standards 151
ADSL2/2+ features 158
age 276
MSC1000G User’s Guide
ALARM 58
alarm 122
ADSL profile 218
command parameters 372
commands 371, 373
descriptions 119
history 112
input 59
management 111
port 114
profile 480, 483, 485
screens 111
severity assignment 117
SHDSL profile 222
VDSL profile 220
alarm connections 59
Alarm Cut Off button 58
alarm profile 152
span 175
Stuc 175
Stur 175
all digital mode 158, 428
annex A 213
annex B 213
Annex I 158, 428
Annex L 426, 427
Annex M 158, 427
annex mode 213
anti-IP address spoofing 51, 86
applications 49
ARP 102, 227, 366, 396
filter 102
Asynchronous Transfer Mode, See ATM. 177
ATM 177
profile 177, 216, 487
QoS 214
traffic classes 214
traffic counters 505
traffic settings 487
authentication
mode 298
settings 576
available commands 310
623
Index
B
back pressure flow control 281
band plan 165
bandwidth control 281, 530
bit number 311
bitswap 160
BPDUs 271
BRIDGE Extension MIB (RFC 2674) 288
BRIDGE MIB (RFC 1573) 288
Bridge Protocol Data Units, See BPDUs. 271
broadcast storm control 53, 282, 532
BT 216
Burst Tolerance, See BT. 216
C
cable dust covers 61
Canonical Format Indicator, See CFI. 299
carrier setup 159
carrier tones 159, 428, 435
CBR 214
CDVT 216
cell counter 246
Cell Delay Variation Tolerance, See CDVT. 216
certifications 615
notices 616
viewing 616
chassis 564
number 293
slot 311
CI commands 309
CIST 274
Class of Service (CoS) 54
classifier 52
clear 122
alarm 122
commands 379
CLI 309
cluster
commands 381
disable command 381
enable manager command 382
enable member command 382
login command 382
management disable 381
manager 125
member 125
member candidate flush command 383
member candidate show command 383
624
member delete command 383
member set command 384
member show command 384
show command 384
vlan command 386
cluster management 51, 125
and switch passwords 128, 129
cluster manager 125
cluster member 125, 128
cluster member firmware upgrade 386
member candidate flush 383
member candidate show 383
member delete 383
member set 384
member show 384
network example 125
setup 127
show 384
specification 125
status 126
switch models 125
VID 128
vlan 386
web configurator 129
command
abbreviation 309
acl 347
bit number parameter 311
common notation 311
config save 312
conventions 309
details 310
help 310
high privilege 311
IP address parameter 311
list 310
low privilege 312
MAC address parameter 311
middle privilege 311
notation 311
parameters 311
port parameter 311
privilege levels 311
slot parameter 311
subnet mask parameter 311
summary 312
UDP or TCP port number 311
VCI parameter 311
VLAN ID parameter 311
VPI parameter 311
Command Line Interface, See CLI. 309
commands
acl dhcosnoop pool delete 357
acl dhcprelay82 351
acl dhcprelay82 clearinfo 351
acl dhcprelay82 enable 351
acl dhcprelay82 info 352
acl dhcprelay82 relaymode 352
MSC1000G User’s Guide
Index
acl dhcprelay82 server active 353
acl dhcprelay82 server delete 353
acl dhcprelay82 server set 354
acl dhcprelay82 set 354
acl dhcprelay82 show 354
acl dhcpsnoop disable 356
acl dhcpsnoop enable 356
acl dhcpsnoop flush 356
acl dhcpsnoop pool set 357
acl dhcpsnoop show 357
acl dot1x disable 358
acl dot1x enable 358
acl dot1x port control 358
acl dot1x port disable 358
acl dot1x port enable 358
acl dot1x port period 358
acl dot1x port reauth 359
acl dot1x port show 359
acl dot1x radius ip 359
acl dot1x radius port 360
acl dot1x radius secret 360
acl dot1x show 360
acl maccount disable 361
acl maccount enable 361
acl maccount set 361
acl maccount show 362
acl macfilter delete 362
acl macfilter disable 363
acl macfilter enable 363
acl macfilter mode 363
acl macfilter set 363
acl macfilter show 364
acl ouifilter disable 364
acl ouifilter enable 365
acl ouifilter mode 365
acl ouifilter set 365
acl ouifilter show 365
acl pktfilter set 366
acl pktfilter show 367
acl pppoeagent clearinfo 367
acl pppoeagent delete 368
acl pppoeagent disable 368
acl pppoeagent enable 368
acl pppoeagent info 368
acl pppoeagent set 369
acl pppoeagent show 369
acl rule delete 369
acl rule set 370
acl rule show 370
adsl ipbpvc route show 446
alarm clear 373
alarm cutoff 373
alarm edit 373
alarm history clear 373
alarm history show 374
alarm port set 374
alarm port show 375
alarm show 375
alarm tablelist 376
MSC1000G User’s Guide
alarm xedit 377
cluster disable 381
cluster enable manager 382
cluster enable member 382
cluster login 382
cluster member candidate flush 383
cluster member candidate show 383
cluster member delete 383
cluster member set 384
cluster member show 384
cluster show 384
cluster vlan 386
config default 389
config save 389
config show 390
diagnostic ldm show 392
diagnostic ldm test 393
diagnostic loopback f5 393
diagnostic selt show 394
diagnostic selt test 394
ip arp flush 396
ip arp show 396
ip gateway 396
ip ping 397
ip route delete 397
ip route set 398
ip route show 398
ip set 399
ip show 398
ip tracert 400
lcman disable 402
lcman enable 401
lcman reset 402
lcman show 402
multicast bandwidth default 409
multicast bandwidth delete 409
multicast bandwidth port disable 410
multicast bandwidth port enable 410
multicast bandwidth port set 410
multicast bandwidth port show 410
multicast bandwidth set 409
multicast igmp disable 411
multicast igmp enable 411
multicast igmp qryvid delete 411
multicast igmp qryvid set 411
multicast igmp qryvid show 412
multicast igmp show 412
multicast igmpcount disable 412
multicast igmpcount enable 413
multicast igmpcount set 413
multicast igmpcount show 413
multicast igmpfilter set 414
multicast igmpfilter show 414
multicast mvlan delete 415
multicast mvlan disable 415
multicast mvlan enable 415
multicast mvlan group delete 416
multicast mvlan group set 416
multicast mvlan name 416
625
Index
multicast mvlan set 416
multicast mvlan show 417
multicast smcast delete 417
multicast smcast set 418
multicast smcast show 418
port adsl alarmprof 426
port adsl annexi disable 427
port adsl annexi enable 428
port adsl annexl disable 426
port adsl annexl enable 426
port adsl annexm disable 427
port adsl annexm enable 427
port adsl dscarrier0 428
port adsl dscarrier1 429
port adsl inpmin 429
port adsl optionmask 430
port adsl pmm disable 431
port adsl pmm enable 432
port adsl power 432
port adsl psd maximum 433
port adsl set 433
port adsl uscarrier 434
port copy 435
port disable 435
port enable 436
port ipbpvc arpproxy age 436
port ipbpvc arpproxy flush 437
port ipbpvc arpproxy show 437
port ipbpvc delete 438
port ipbpvc domain delete 438
port ipbpvc domain dhcpvlan disable 439
port ipbpvc domain dhcpvlan enable 439
port ipbpvc domain set 439
port ipbpvc domain show 440
port ipbpvc domain vlan 440
port ipbpvc route delete 444
port ipbpvc route set 445
port ipbpvc set 446
port ipbpvc show 447
port ipbpvc vlan 448
port name 448
port paepvc delete 449
port paepvc set 449
port paepvc show 450
port ppvc delete 450
port ppvc member delete 451
port ppvc member set 451
port ppvc set 452
port ppvc show 452
port ppvc vlan 453
port pvc delete 454
port pvc mvlan disable 454
port pvc mvlan enable 454
port pvc set 455
port pvc show 455
port pvc usratelimit disable 456
port pvc usratelimit enable 456
port pvc usratelimit set 456
port pvc usratelimit show 456
626
port pvc vlan 457
port shdsl alarmprof 458
port shdsl pbo 458
port shdsl pmms 459
port shdsl set 460
port show 460
port tel 461
port tlspvc delete 462
port tlspvc show 462
profile acl delete 474
profile acl set 475
profile acl show 477
profile adsl delete 479
profile adsl map 479
profile adsl set 477
profile adsl show 480
profile alarmadsl delete 482
profile alarmadsl map 483
profile alarmadsl set 481
profile alarmadsl show 480
profile alarmshdsl delete 484
profile alarmshdsl map 485
profile alarmshdsl set 484
profile alarmshdsl show 483
profile alarmvdsl delete 487
profile alarmvdsl map 487
profile alarmvdsl set 486
profile alarmvdsl show 485
profile atm delete 489
profile atm map 490
profile atm set 488
profile atm show 487
profile profsvr clientlist delete 491
profile profsvr clientlist set 491
profile profsvr clientlist show 491
profile profsvr mode 490
profile profsvr serverset 492
profile profsvr show 490
profile profsvr sync 492
profile shdsl delete 494
profile shdsl map 494
profile shdsl set 492
profile shdsl show 494
show adsl 501
show adsl linedata 501
show adsl linegain 504
show adsl linehlog 504
show adsl lineqln 504
show adsl linetssi 504
show arp 504
show atm 504
show dhcp counter 506
show dhcp snoop 506
show dot3ad 505
show enet 506
show igmp 509
show igmp group 509
show igmp info 509
show igmp port group 510
MSC1000G User’s Guide
Index
show igmp port info 509
show ip 510
show lineinfo 513
show lineperf 514
show linerate 515
show linestat 515
show mac 516
show monitor 516
show mstp 517
show packet 518
show paepvc counter 519
show paepvc session 520
show performance 520
show rmon 522
show sys 524
show user 524
show vlan 525
switch bandwidth disable 530
switch bandwidth enable 531
switch bandwidth set 531
switch bandwidth show 532
switch bcastctrl show 533
switch bcastctrl threshold 532
switch dot3ad disable 535
switch dot3ad enable 534
switch dot3ad lacp priority 533
switch dot3ad lacp show 534
switch dot3ad lacp timeout 534
switch dot3ad show 535
switch garptimer join 536
switch garptimer leave 536
switch garptimer leaveall 537
switch garptimer set 537
switch garptimer show 536
switch isolation disable 538
switch isolation enable 538
switch isolation show 538
switch isolation vlan delete 539
switch isolation vlan set 539
switch mstp cfgname 540
switch mstp disable 540
switch mstp fwdelay 540
switch mstp hellotime 541
switch mstp maxage 541
switch mstp maxhops 541
switch mstp priority 541
switch mstp revision 542
switch mstp show 542
switch mstp version 543
switch mstp vlanmap 543
switch port disable 544
switch port dscp 545
switch port dscp disable 545
switch port dscp enable 545
switch port dscp set 545
switch port dscp show 546
switch port enable 546
switch port flowctrl disable 546
switch port flowctrl enable 547
MSC1000G User’s Guide
switch port frametype 547
switch port gvrp 547
switch port gvrp disable 547
switch port gvrp enable 548
switch port mode 548
switch port mstp disable 548
switch port mstp edgeport 549
switch port mstp enable 549
switch port mstp p2plink 549
switch port mstp pathcost 550
switch port mstp priority 550
switch port mstp show 550
switch port name 550
switch port priority 551
switch port pvid 551
switch port show 551
switch port speed 552
switch port vlantrunk disable 553
switch port vlantrunk enable 552
switch qschedule set 553
switch qschedule show 554
switch queuemap set 554
switch queuemap show 555
sys baud set 560
sys baud show 561
sys client disable 561
sys client enable 561
sys client set 561
sys client show 562
sys date set 563
sys date show 562
sys info chassis 564
sys info contact 565
sys info frame 565
sys info hostname 565
sys info location 566
sys info show 566
sys monitor set 566
sys monitor show 568
sys multilogin disable 569
sys multilogin enable 569
sys multilogin show 570
sys reboot 570
sys server disable 571
sys server enable 571
sys server port 571
sys server show 571
sys snmp getcommunity 572
sys snmp setcommunity 572
sys snmp show 573
sys snmp trapcommunity 572
sys snmp trapdst 573
sys snmp user 574
sys snmp version 575
sys syslog disable 576
sys syslog enable 575
sys syslog server 575
sys syslog show 576
sys time set 562
627
Index
sys time show 562
sys timeserver set 563
sys timeserver show 563
sys timeserver sync 564
sys user auth 576
sys user delete 578
sys user disable 579
sys user enable 579
sys user online 580
sys user server 577
sys user set 578
sys user show 579
sys version 560
vlan delete 581
vlan disable 582
vlan enable 582
vlan name 582
vlan set 582
vlan show 583
Common and Internal Spanning Tree, See CIST. 274
config commands 389
Config Save 71
config save command 312, 389
configurable alarms 53
configuration backup 137
configuration digest 276
configuration file 586
backup 137, 586
edit 587
reset 138
restore 137
connection rates 434
CONSOLE 59
console port 50, 62, 569, 599
pin assignments 610
Constant Bit Rate, See CBR. 214
contact information 619
contact person 565
contact person’s name 292
copy port settings 203
copyright 615
CRC 484
critical alarm 59
customer support 619
Cyclic Redundancy Checking, See CRC 484
D
default configuration 389
default settings 603
DELT 131
detailed command information 310
DHCP 50, 103, 366
filter 103
relay commands 351
statistics 228
DHCP relay 81
DHCP relay agent information 81
DHCP relay agent82 50
DHCP snooping 51, 85, 356
anti-IP address spoofing 51, 86
diagnostic 131
commands 391
port test 133
DiffServ
DSCP 54
DSCP-to-IEEE 802.1p mapping 54
disable
ADSL features 160
carrier tones 159
disclaimer 615
Discrete Multi-Tone, See DMT 501
DMT 501
dot1x commands 357
Dot3 MIB (RFC 2665) 288
Dot3ad 254
dot3ad commands 533
double upstream 427
double upstream mode 158
double-tagged frames 52, 167
down-shift noise margin 208, 478
downstream 152, 514
carrier tones 428
rates 208
transmit power 158
DSCP
DSCP-to-IEEE 802.1p mapping 54
dscp Commands 545
DSL profile 152
Dual End Loop Test, See DELT 131
duplex 282
Dynamic Host Configuration Protocol, See DHCP 50,
81, 103, 366
dynamic link aggregation 263
dynamic query VID 143
dynamic VLAN 301
damage 585
database version 293
date 563
628
MSC1000G User’s Guide
Index
E
EAP 103, 366
EAPoL 366
filter 103
edge 277
electrical Ethernet interface 59
EPL 175, 459
error log 53
errored seconds 219, 221, 484
ES 219, 221
Estimated Power Loss, See EPL 175, 459
Ethernet port
statistics 237, 238
trunking 263
Ethernet port setup 282
bandwidth 284
broadcast 285
IEEE 802.1p 283
IEEE 802.1Q 283
Ethernet ports 60
explicit tagging 299
Extensible Authentication Protocol, See EAP. 103
F
F5 133, 393
F5 loopback 133
facility 295
factory defaults 138
failed fast retrain 220, 221
fan 567
fast mode 205
fast rate 220
FCC interference statement 615
features 606
file upload 587
filename conventions 585
filter
ARP 102
DHCP 103
EAPoL 103
IGMP 103, 223
MAC 362
NetBIOS 102
PPPoE 102
filtering
VLAN ingress 301
firmware
recovery 599
MSC1000G User’s Guide
upgrade 139
upload to line card 589
fix 583
fixed mode 432
fixed registration 301
flow control 54, 281
back pressure 281
IEEE 802.3x 281
forbid 583
forbidden registration 301
force version 276
forwarding
delay 276
tagged frames 301
untagged frames 301
frame number 292, 565
frequency band plan 165
front panel 57
FTP 569
to cluster member 386
G
G.991.2 212
G.992.1 501
G.992.3 132
G.lite rate limit 160
GARP 300
GARP timer 266, 300
GARP VLAN Registration Protocol, See GVRP. 301
garptimer commands 535
general IP commands 396
general system setup 292
Generic Attribute Registration Protocol, See GARP.
300
Get 288
GetNext 288
Gigabit Ethernet 311
Gigabit Ethernet interface 60
management 544
Gigabit Ethernet port setup 282
bandwidth 284
broadcast 285
IEEE 802.1p 283
IEEE 802.1Q 283
Gigabit interface
interface 3 311
interface 4 311
GMT 564
Greenwich Mean Time, See GMT 564
629
Index
GVRP 301
gvrp commands 547
H
hello time 276
help facility 310
high privilege 311
hops 276
host name 292
HTTP 569
Internet Protocol 366
introduction 47
IP 366
IP address 311
IP address spoofing 51, 86
IP bridge
ARP proxy commands 436
domain commands 438
PVC commands 437
ip commands 395
IP multicast addresses 141
IP setup 293
IP statistics 261
ISDN 213
isolation 51, 268
commands 538
I
ICMP 569
IEEE 802.1p priority 52
IEEE 802.1Q 301
terminology 301
IEEE 802.1Q tagged VLAN 51, 299
IEEE 802.1x 52, 105
IEEE 802.3 54
IEEE 802.3ad 254, 263, 505
IEEE 802.3x 281
ies5000 MIB 288
ifXTable MIB (RFC 2863) 288
IGMP 103, 141, 367
count 53, 412
filter 103, 144
filter profile 223, 414
filter setup 144
proxy 53, 141
query VLAN ID 411
setup 143
snooping 53, 141
status 231
v2 141, 142
v3 141, 142
igmpcount commands 412
implicit tagging 299
impulse noise protection 159, 430
in-band management 294, 400
info show command 564
ingress filtering 301
initial setup example 75
initialization failure 220, 221
interleave delay 205, 207, 210, 248, 513
interleave rate 220
Internet Group Multicast Protocol, See IGMP. 103, 141
630
J
join timer 536
L
LACP 263, 267
aggregation ID 264
system priority 533
latch 61
latency mode 207, 210
lcman commands 401
LDM 131
test 131
leave all timer 537
leave timer 537
LEDs 57
level of access privileges 578
limit MAC addresses 93, 360
line
diagnostics 393
performance 249
performance counters 514
probing 213
line card 589
firmware upload 589
statistics 243
status 73
line detail 247
Link Aggregate Control Protocol, See LACP. 263
link aggregation 51, 254, 505
MSC1000G User’s Guide
Index
dynamic 263
ID 264
ID information 264
LLC 176
LNK LED 58
lockout 597
LOF 219, 221
log 53
log facility 575
login 65
logout 72
LOL 219, 221
Loop Diagnostic Mode, See LDM 131
loop diagnostics 393
loopback 133, 393
LOS 219, 221
Loss Of Frame, See LOF 219
Loss Of Link, See LOL. 219
Loss of Power, See LPR. 219
Loss Of Signal, See LOS. 219
loss of sync word seconds 484
low privilege 312
LPR 219, 221
M
MAC 227
address 311
count 93, 360
count filter 53
filter 53, 96, 97, 362
table 229, 230
MAC count 93
maccount command 360
machine address 227
maintenance 137
major alarm 59
Management Information Base, See MIB. 288
management VLAN 399
managing the device
good habits 49
using FTP. See FTP.
using Telnet. See command interface.
using the command interface. See command
interface.
mask carrier tones 159
max
age 276
hops 276
Maximum Burst Size, See MBS. 215
MSC1000G User’s Guide
MBS 215
Media Access Control, See MAC. 227
memory 312
MGMT 59
MGMT LEDs 58
MIB 288
middle privilege 311
mini GBIC ports 60
connection speed 60
connector type 60
minimum impulse noise protection 159
minor alarm 59
mpair4 212
MSA (MultiSource Agreement) 60
MST ID 273
MST Instance, See MSTI. 273
MST region 273
MSTI 273
MSTP 52, 270, 272
bridge setup 274
CIST statistics 256, 258
MSTI statistics 260
path cost 270
port setup 277
setup 274
statistics 256
MTU 299
multicast 141
bandwidth commands 408
bandwidth port commands 410
commands 407
igmp commands 410
igmpcount commands 412
igmpfilter commands 414
IP address 417
mvlan commands 415
smcast commands 417
Multicast VLAN, See MVLAN 52, 415
multiple login 569
Multiple Spanning Tree Protocol, See MSTP. 270, 272
Multiple STP, See MSTP 52
Multi-Tenant Unit, See MTU. 299
MVLAN 52, 415
N
navigation panel 66
negotiated noise margin mode 176
NetBIOS 102, 367
filter 102
631
Index
Network Basic Input/Output System, See NetBIOS
102, 367
Network Time Protocol, See NTP 564
noise 159, 176, 207, 208, 210, 213, 430, 478, 499
non real-time Variable Bit Rate 214
nonvolatile memory 312
normal registration 301
nrt-VBR 214
NTP 564
n-wire mode 212
O
OAMF5 133, 393
OAMF5 loopback 133, 393
online users 236
operational mode 393, 434
Operational, Administration and Maintenance
Function 5 test, See OAMF5. 133, 393
option 82 enable command 352
option mask 158, 160
Organizationally Unique Identifier, See OUI 99
OSPF 147
OUI 99
filter 99
out-of-band management 294, 400
P
P2P 277
packet
counter 244
filter 101
PAE 52, 449
path cost 270, 277
PCR 215
Peak Cell Rate, See PCR. 215
Permanent Virtual Circuit, See PVC. 176, 311
permanent VLAN 301
physical machine address 227
physical queues 264
ping 133, 397
pktfilter commands 366
PMM 432
PMMS 460
PNAC 105
632
Point-to-Point Protocol over Ethernet, See PPPoE.
366
policy 52
port 311
adsl commands 426
ADSL setup 153, 155, 157
alarm setup 114
commands 419
copy 203
ID 81
number 311
ppvc commands 450
pvc commands 454
redundancy 263
shdsl commands 457
states 271
statistics 236
trunking 263
VID 301
VLAN trunking 281
port-based authentication 52
Port-based Network Access Control, See PNAC. 105
POTS 213
power 158
power backoff 175, 459
power management mode 158
Power Management, See PMM 432
Power Measurement Modulation Session, See PMMS
460
power mode 158, 432
Power Spectral Density, See PSD 152, 427
PPPoA-to-PPPoE PVC 52
PPPoE 366
agent information 367
filter 102
intermediate agent information 52
PPVC 54, 181
setup 181
ppvc commands 450
priority 52
Priority-based PVC, See PPVC 54, 181
private MIB 288
privilege levels 311
product
model 293
product registration 617
profile 205
acl commands 474
ADSL 206
ADSL alarm 480
adsl commands 477
alarm 152
alarm ADSL 218
alarm SHDSL 222
MSC1000G User’s Guide
Index
alarm VDSL 220
alarmadsl commands 480
alarmshdsl commands 483
alarmvdsl commands 485
ATM 177, 216, 487
atm commands 487
commands 467
DSL 152
profsvr commands 490
server 53, 490
SHDSL 212, 492
SHDSL alarm 483
shdsl commands 492
span alarm 175
Stuc alarm 175
Stur alarm 175
VDSL alarm 485
proxy 141
PSD 152, 427, 432, 433
PVC 176, 311
setup 177
pvc commands 454
Q
Q-in-Q 166, 169, 461
QoS 214
qschedule commands 553
Quality of Service, See QoS 214
query 411
VID 143
VLAN ID 411
queue
physical 264
priority 554
weight 265
queuemap commands 554
queuing 51, 264
algorithm 264
quiet line noise 336, 392, 499
R
Radio Frequency Interference, See RFI. 152, 166
RADIUS 105
server 577
Rapid Spanning Tree Protocol, See RSTP. 270
Rapid STP, See RSTP. 52
rate 207, 208, 210
rate adaptation 208
MSC1000G User’s Guide
rate mode 432
rates 206, 211
configured versus actual 206, 211
reach extended ADSL2 158
real-time Variable Bit Rate 214
reboot 140
receive power 158
recovering firmware 599
redundancy 263
Reed Solomon 160
region setting 213
registration
fixed 301
forbidden 301
normal 301
product 617
related documentation 3
Remote Authentication Dial In User Service, See
RADIUS. 105
removing a transceiver 61
reset 138
resetting the defaults 598
revision level 275
RFC 1213 288
RFC 1305 293, 564
RFC 1573 288
RFC 1757 288, 523
RFC 2131 50, 81
RFC 2132 50, 81
RFC 2138 105
RFC 2139 105
RFC 2486 103, 366
RFC 2662 288
RFC 2665 288
RFC 2674 288
RFC 2863 288
RFC 3046 81
RFC 3440 288
RFC 3635 288
RFC 3636 288
RFC 867 293
RFC 868 293, 564
RFI 152, 166
RIP 147
RMON
history details 243
history statistics 242
MIB (RFC 1757) 288
MIBs 523
statistics 240
Rotations Per Minute, See RPM 567
633
Index
round robin scheduling 265
routing protocols 147
RPM 567
RSTP 52, 270
path cost 270
port states 271
rt-VBR 214
run time memory 312
S
S=0.5 support 160
safety warnings 6
saving configuration 71, 312, 389
SCR 215
screen summary 69
secured client 53, 291
security 54
SELT 394
sensor 567
Service Provider Tag Protocol Identifier, See SP TPID.
167
Service Provider’s Network, See SPN 167
Set 288
severely errored seconds 220, 221, 484
severity assignment 117
SFP Slot 1 311
SFP slot 2 311
SFP slots 59, 60
SFTP 569, 585
shared secret 109
SHDSL
advanced port setup 174
alarm profile 222, 483
line probing 213
port setup 170
profile 212, 492
rate 211, 213
rates 211
shielded Ethernet cable 59
shift noise margin 478
show commands 499
signal to noise margin 207, 208, 210, 213
Signal to Noise Ratio, See SNR. 207, 208, 210, 213,
392
Signal-to-Noise Ratio Margin 132
Simple Network Manag