1
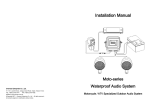
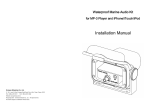
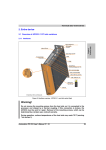
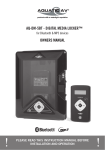
SM-300 installation manual 4. Specification Step 1 – Prepare the mounting surface for Waterproof Amplifier Audio Housing for iPod/iPhone/MP3 player SM-300 installation Small and deft design for multiple applications as motorcycle 1) Using the gasket as a template, mark Waterproof and corrosion-proof plastic housing and bracket the positions of the four screw holes plus Waterproof fuse holder the hole used to insert the housing on the Adjustable ON/OFF volume control mounting surface. AUX 3.5 mm jack 2) Cut out the surface marked for housing Handsfree mini MIC for iPhone insertion. Accessories:4 pins 3.5 plug cable, stainless hardware, packing/gasket, U-type bracket and thumbwheel screws 3) Drill the holes using a 1/6” / 3.2mm drill bit. 600 hrs UV Stabilized(ASTM D4329 & ASTM D2244) If you are in doubt with the stability of the 400 hrs Saltwater Spray Test (ASTM B117) mounting surface, please consult your IP 65 Rating local dealer. RoHS confirmed Step 2 – Position the gasket into the back CE Certificate of SM-300 unit FCC Certificate The groove of of the audio housing unit. Trace the groove with the gasket and groove can canbe befound foundon onthe theback back Power supply:13.8V / DC 12V align the gasket with theTrace holes the on the front panel of the housing unit as shown in Figure 6. the audio housing unit. groove Max power handling:40W Step 3 – gasket Connect thealign wiresthe to gasket the corresponding terminals with the and with Impedance:4 ohms Identify eachoncolor-coded and of connect the holes the front wire panel the each wire to the corresponding terminal as instructed in Frequency response:20Hz – 20K Hz Figure 6. A summary of SM-300 installation. Figure housing3.unit as shown in Figure 6. Step 4 – secure the housing unit on the mounting surface Align the housing unit with the holes on the mounting surface as shown in Figure 6. Insert and tighten the mounting screws into the mounting surface to complete the installation. 5. Parts List Please check the parts and their quantity before installing SM-200 / SM-300. Contact your local dealer if anything is missing as soon as possible. Item Qnty Description A 1 SM-200 audio housing B 8 Mounting screw C 1 Audio cable with 3.5mm 4-pin plugs D 2 Thumbwheel screw E 1 Housing holder F 1 Bracket Table 1 lists all the parts included in the SM-200 package. 5 Figure 1. Parts of SM-200. (A) SM-200 audio housing (B) mounting screw ×8 (C) audio cable with 3.5mm 4-pin plugs (D) thumbwheel screw ×2 (E) housing holder (F) Bracket 2