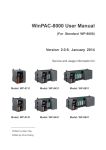
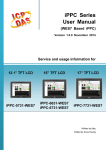
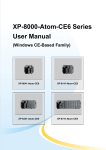
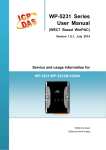
1
XP-8000-Atom-CE6 Series User Manual (Windows CE-Based Family) Warranty All products manufactured by ICP DAS are under warranty regarding defective materials for a period of one year, beginning from the date of delivery to the original purchaser. Warning ICP DAS assumes no liability for any damage resulting from the use of this product. ICP DAS reserves the right to change this manual at any time without notice. The information furnished by ICP DAS is believed to be accurate and reliable. However, no responsibility is assumed by ICP DAS for its use, not for any infringements of patents or other rights of third parties resulting from its use. Copyright Copyright @ 2011 by ICP DAS Co., Ltd. All rights are reserved. Trademark The names used for identification only may be registered trademarks of their respective companies. Contact US If you have any problem, please feel free to contact us. You can count on us for quick response. Email: [email protected] XP-8000-Atom-CE6 User Manual v1.0.4 Page: 2 Copyright © 2011 ICP DAS Co., Ltd. All Rights Reserved. E-mail: [email protected] Table of Contents 1. Introduction .................................................. 7 1.1. Features ..................................................................... 9 1.2. Specifications ........................................................... 13 1.3. Overview .................................................................. 15 1.4. Dimension ................................................................ 22 1.5. Companion CD ........................................................ 24 1.6. Rescue CF Card ...................................................... 25 2. Getting Started ........................................... 26 2.1. Mounting the Hardware ............................................ 28 2.1.1. Mounting the XP-8000-Atom-CE6 .............. 29 2.1.2. Deploying a Basic XP-8000-Atom-CE6 System 32 2.1.3. Inserting the I/O Modules............................ 33 2.1.4. Powering up the XP-8000-Atom-CE6 ......... 35 2.2. Installing the Tools and Utilities................................ 39 2.3. Configure the Boot Mode ......................................... 40 2.4. Changing the User Interface Language ................... 42 2.5. Using XPAC Utility to Configure XP-8000-Atom-CE6 Basic Functionality 44 2.6. Using Remote Display to Control the XP-8000-Atom-CE6 Remotely 46 2.7. Using DCON Utility to Configure the I/O Module...... 48 3. Tools and Tasks ......................................... 52 3.1. Tools and Tasks on XPAC ....................................... 54 3.1.1. DCON_CE .................................................. 55 3.1.2. ISQLW35 .................................................... 56 3.1.3. modbus_master_tool .................................. 57 3.1.4. NAPOPC_CE6 ........................................... 58 3.1.5. INotepad ..................................................... 59 XP-8000-Atom-CE6 User Manual v1.0.4 Page: 3 Copyright © 2011 ICP DAS Co., Ltd. All Rights Reserved. E-mail: [email protected] 3.1.6. RegEdit ....................................................... 60 3.1.7. Remote_Display ......................................... 61 3.1.8. Send ToCOM.............................................. 62 3.1.9. TaskMgr...................................................... 63 3.1.10. VCEP ........................................................ 64 3.1.11. XPAC_Utility ............................................. 65 3.2. Tools and Tasks on PC ............................................ 80 3.2.1. DCON_Utility .............................................. 81 3.2.2. Remote_Display ......................................... 82 4. Your First XP-8000-Atom-CE6 Program ... 83 4.1. Selecting a Development Tools ............................... 85 4.2. Installing the XP-8000-Atom-CE6 SDKs .................. 86 4.3. Creating Your First XP-8000-Atom-CE6 Program.... 91 4.3.1. Your First Program with the VB.net ............ 92 4.3.2. Your First Program with the Visual C# ........ 106 4.3.3. Your First Program with the Visual C++...... 120 5. APIs and Demo References .................... 137 5.1. Demo Programs using with VB.NET ...................... 138 5.1.1. VB.NET Demo Programs for the XPAC Standard API 139 5.1.2. VB.NET Demo Programs for the PAC IO API. 141 5.2. Demo Programs using C# ...................................... 144 5.2.1. C# Demo Programs for the XPAC Standard API 145 5.2.2. C# Demo Programs for the PAC IO API ..... 147 5.3. Demo Programs using Visual C++ ......................... 150 5.3.1. VC++ Demo Programs for the XPAC Standard API 151 5.3.2. VC++ Demo programs for PAC IO API ....... 153 6. I/O Modules and SDK Selection .............. 156 6.1. I/O Modules and SDK Selection............................. 157 XP-8000-Atom-CE6 User Manual v1.0.4 Page: 4 Copyright © 2011 ICP DAS Co., Ltd. All Rights Reserved. E-mail: [email protected] 7. Restore and Recovery ............................. 161 7.1. Recovering the XP-8000-Atom-CE6 ...................... 163 7.2. Restoring the Rescue CF Card .............................. 167 8. XP-8000-Atom-CE6 Updates ................... 171 8.1. OS updates ............................................................ 173 8.1.1. OS Updates from Files ............................... 174 8.1.2. OS Updates using the Rescue CF Card ..... 175 8.2. SDK updates .......................................................... 176 9. XPAC Download Center ........................... 177 9.1. XPAC Download Center ........................................ 178 Appendix A. Application of RS-485 Network180 A.1. Basic RS-485 Network .......................................... 182 A.2. Daisy Chain RS-485 Network ................................ 183 A.3. Star Type RS-485 Network .................................... 184 A.4. Random RS-485 Network ...................................... 186 A.5. Master/Slave Settings ............................................ 187 A.1.1. XPAC as a Master (Default) ....................... 188 A.1.1. XPAC as a Slave ........................................ 190 Appendix B. Tips – How to .......................... 192 B.1. How to use the Printer ........................................... 193 B.1.1. How to use the network printer................... 194 B.1.2. How to use the USB printer ........................ 196 B.2. How to Online Debug the XP-8000-Atom-CE6 ...... 197 B.3. How to automatically synchronize the XPAC clock with an Internet Time Server ........................................................................... 205 B.4. How to add a user account to remote login the XPAC from PC 207 B.4.1. How to add a user account......................... 208 XP-8000-Atom-CE6 User Manual v1.0.4 Page: 5 Copyright © 2011 ICP DAS Co., Ltd. All Rights Reserved. E-mail: [email protected] B.4.2. How to Use telnet to remote login the XPAC from PC 210 B.4.3. How to remove the user from the login list . 212 B.5. How to use PACSDK library to program the XP-8000-Atom-CE6 213 B.5.1. How to Read the XPAC Mode with PACSDK library 214 B.5.2. How to Read the Module ID with XPAC API .. 215 B.5.3. How to Use the Multi-IO Module with XPAC API 216 B.6. How to update software from XP-8000-CE6 to XP-8000-Atom-CE 218 B.6. How to change the battery ..................................... 219 Appendix C. I-8K and I-87K Modules ....... 222 C.1. I-8K and I-87K Modules ......................................... 223 Appendix D. Revision History ..................... 224 XP-8000-Atom-CE6 User Manual v1.0.4 Page: 6 Copyright © 2011 ICP DAS Co., Ltd. All Rights Reserved. E-mail: [email protected] 1. Introduction This chapter provides an overview of the XP-8000-Atom-CE6 and its components that introduces the fundamental concepts for user familiar with the XP-8000-Atom-CE6. XP-8000-Atom-CE6 User Manual v1.0.4 Page: 7 Copyright © 2011 ICP DAS Co., Ltd. All Rights Reserved. E-mail: [email protected] XP-8000-Atom-CE6 family is the new generation Windows CE 6.0 based PACs of ICP DAS. It is equipped with an Intel Atom Z500 Series CPU, various connectivity (VGA, USB, Ethernet, RS-232/485) and 1/3/7 I/O slots for high performance parallel I/O modules (high profile I-8K Series) and serial I/O modules (high profile I-87K series). The benefits of running Windows CE 6.0 on XP-8000-Atom-CE6 include hard real-time capability, small core size, fast boot speed, interrupt handling at a deeper level and achievable deterministic control. XP-8000-Atom-CE6 is also capable of running PC-based control software such as Visual Basic .NET, Visual C# ..., etc. It has all of the best features of both traditional PLCs and Windows capable PCs. For software copy protection, programmers can design software based on the 64-bit hardware serial number for making software copy protected. XP-8000-Atom-CE6 User Manual v1.0.4 Page: 8 Copyright © 2011 ICP DAS Co., Ltd. All Rights Reserved. E-mail: [email protected] 1.1. Features The XP-8000-Atom-CE6 family offers the most comprehensive configuration and remote system upgrade solutions to meet specific application requirements. The following list shows the hardware and software features designed to simplify installation, configuration and application. Hardware Features Power CPU Module The most important features of the CPU module are 1. Intel Atom Z510 CPU (1.1 GHz) 2. DDR (512 MB), Built-in Flash Disk (2 GB) 3. EEPROM (16 KB), CF Card (2 GB) Built-in 1 VGA Port and 4 USB 2.0 Port The built-in VGA port and USB port can be directly connected to a regular LCD display and USB equipment (keyboard, mouse, memory stick). Users can operate the HMI or SCADA software (running on the XP-8000-Atom-CE6) with display, keyboard and mouse just as how they usually did on regular PCs. Audio with Microphone and Earphone jacks The microphone and earphone jacks enable connection to external audio device for playing and recording sounds. 64-bit Hardware Serial Number The 64-bit hardware serial number is unique and individual. Every serial number of XP-8000-Atom-CE6 is different. Users can add a checking mechanism to their AP to prevent software from pirating. XP-8000-Atom-CE6 User Manual v1.0.4 Page: 9 Copyright © 2011 ICP DAS Co., Ltd. All Rights Reserved. E-mail: [email protected] Built-in Flash Disk (2 GB) In normal situation, users can store their AP or data to the CF card or USB Flash disk. But in some vibration environment (for example, like driving ships), the two storage media would be bad connection. Then the built-in Flash disk will be the best storage media in such the vibration environment. Rich I/O Expansion Ability (RS-232/485, Ethernet, FRnet, CAN) Beside the local I/O slots, XP-8000-Atom-CE6 also equips several RS-232/485 ports, two Ethernet ports to connect serial I/O and Ethernet I/O. And with FRnet and CAN communication module in local slot, FRnet I/O and CAN devices are easy to be integrated. Dual Watchdog Timer A system might be hanged up when the OS or the AP fails. There are two watchdogs (OS watchdog and Hardware watchdog) designed to automatically reset the CPU when the situations happen. The design will increase the reliability of the system. Dual Battery-Backup SRAM (512 KB) To maintain important data while power off, non-volatile memory is the ideal design. The XP-8000-Atom-CE6 equips a 512 KB SRAM with two Li-batteries to maintain data while power off. The two Li-batteries can continually supply power to the 512 KB SRAM to retain the data for 5 years; and the dual-battery design can avoid data lost while replacing a new battery. The initial voltage should be around 2.8~3.0V, When below 2.1V, the XPAC Utility will show the low power warning. When below 1.5V, the data in the RTC (real time clock) and 512KB SRAM will be lost. Dual Ethernet Ports XP-8000-Atom-CE6 provides two Ethernet ports. The two Ethernet ports can be used to implement redundant Ethernet communication and separate Ethernet communication (one for global Internet, one for private Ethernet). Redundant Power Input To prevent the XP-8000-Atom-CE6 from failing by the power loss, the power module is designed with two input connectors. Once a power input fails, the power module XP-8000-Atom-CE6 User Manual v1.0.4 Page: 10 Copyright © 2011 ICP DAS Co., Ltd. All Rights Reserved. E-mail: [email protected] switches to the other power input. And there is a relay output for informing the power failure. Ventilated Housing Design Allows Operation Between -25 ~ +75 ˚C Each XP-8000-Atom-CE6 is housed in a plastic-based box with a column-like ventilator that can help to cool the working environment inside the box and allow the XP-8000-Atom-CE6 operating between -25 ˚C and +75 ˚C Software Features Windows Compact Edition CE 6.0 Most of the popular features in MS software are included, such as 1. FTP Server 2. HTTP Server 3. ASP (Java script, VB script) 4. SQL Server Compact Edition 3.5 5. .NET Compact Framework 3.5 System Rescue Mechanism The XP-8000-Atom-CE6 supports Ghost solution suite. Ghost is a popular data backup and recovery utility that can be used to restore your XP-8000-Atom-CE6 hard drive in the event of a hard-drive crash, or any other catastrophe that leaves your computer out of commission. For more information about backing up and restoring data via Ghost, please refer to “Chapter 5. Restore and Recovery”. Remote Display (VCEP) ICPDAS VCEP is designed for managing your XP-8000-Atom-CE6 anywhere. No matter where you are, ICPDAS VCEP provides a convenient environment on the Desktop PC and lets XP-8000-Atom-CE6 User Manual v1.0.4 Page: 11 Copyright © 2011 ICP DAS Co., Ltd. All Rights Reserved. E-mail: [email protected] you control your XP-8000-Atom-CE6 remotely. Built-In OPC Server NAPOPC_CE6 is an OPC server and SCADA software can easily integrate I/O modules through it. Furthermore, it also provides a library which users can use to develop their AP by VC++, C# or VB.Net. NAPOPC_CE6 not only supports I/O modules in local slots, but also supports remote I/O modules with the following protocols via the RS-232/485 or Ethernet: 1. Modbus/RTU 2. Modbus/ASCII 3. Modbus/TCP 4. DCON Rich Software Solutions On the XP-8000-Atom-CE6, ICP DAS provides the following software solutions to fit in different applications. 1. Visual Studio .NET 2005/2008 solution: SDK as well as demo programs for Visual C# .NET, Visual Basic .NET and Visual C++ are provided. 2. SoftPLC solution: A. ISaGRAF supports IEC61131-3 languages, Ladder Diagram (LD), Structured Text (ST), Function Block Diagram (FBD), Sequential Function Chart (SFC), Instruction List (IL), and Flow Chart (FC). B. KW-software supports IEC61131-3 languages and HMI features. 3. SCADA solution: InduSoft provides simple “drag and drop”, “point and click” developing environment for HMI and SCADA applications. XP-8000-Atom-CE6 User Manual v1.0.4 Page: 12 Copyright © 2011 ICP DAS Co., Ltd. All Rights Reserved. E-mail: [email protected] 1.2. Specifications The table below summarizes the specifications of the XP-8000-Atom-CE6, and lists the accessories that XP-8000-Atom-CE6 supports. Specification Model XP-8141-Atom-CE6 XP-8341-Atom-CE6 XP-8741-Atom-CE6 Software System Operating System Windows CE 6.0 core version .Net Compact Framework 3.5 Embedded Service FTP server, ASP Web server (supports VB script, JAVA script), SQL compact edition 3.5 SDK Provided Dll for Visual Studio.Net 2005/2008 Multilanguage Support English, German, French, Spanish, Russian, Italian, Japanese, Simplified Chinese, Traditional Chinese, Korean, Portuguese CPU Module CPU Intel Atom Z510 CPU (1.1 GHz) System Memory 512 MB DDR2 Dual Battery Backup SRAM 512 KB (for 5 years data retain while power off) Flash 2 GB as IDE Master EEPROM 16 KB, Data Retention: 40 years, 1,000,000 erase/write cycles CF Card 2 GB (support up to 32 GB) RTC (Real Time Clock) Provide seconds, minutes, hours, day of week/month, month and year Programmable LED Indicator 2 64-bit Hardware Serial Number Yes, for software copy protection Dual Watchdog Timers Yes Rotary Switch Yes (0 ~ 9) DIP Switch Yes (8 bits) Audio Microphone-In and Earphone-Out VGA & Communication Ports VGA Yes (resolution: 1400 x 1050, 1280 x 1024, 1024 x 768, 800 x 600, 640 x 480) Ethernet (Giga bit) RJ-45 x 2, 10/100/1000 Base-T (Auto-negotiating, Auto MDI/MDI-X, LED indicators) USB 2.0 4 COM 1 Internal communication with the high profile I-87K series modules in slots COM 2 RS-232 (RXD, TXD and GND); non-isolated RS-485 D+, D-; self-tuner ASIC inside Isolation 3000 VDC COM 3 COM 4 RS-232/RS-485 (RxD, TxD, CTS, RTS and GND for RS-232, Data+ and Data – for RS-485); non-isolated COM 5 RS-232 (RxD, TxD, CTS, RTS, DSR, DTR, CD, RI and GND); non-isolated XP-8000-Atom-CE6 User Manual v1.0.4 Page: 13 Copyright © 2011 ICP DAS Co., Ltd. All Rights Reserved. E-mail: [email protected] I/O Expansion Slots (for high profile I-8K and I-87K modules only) Slot Number 1 slot Hot Swap * will be available For high profile I-87K modules only 4 slots 8 slots 231 x 132 x 125 mm 355 x 132 x 125 mm Mechanical Dimensions (W x L x H) 169 mm x 132 mm x 125 mm Installation DIN-Rail or wall mounting Environmental Operating Temperature -25 ~ +75 °C Storage Temperature -30 ~ +85 °C Ambient Relative Humidity 5 ~ 90 % RH, non-condensing Power Input Range +10 ~ +30 VDC Isolation 1 kV Redundant Power Inputs Yes, with one power relay (1A @ 24 VDC) for alarm Capacity 25 W 35 W 35 W Consumption 16.6 W (0.69 A @ 24 VDC) 16.8 W (0.7 A @ 24 VDC) 18 W (0.75 A @ 24 VDC) Accessories Model DRS-125 125 mm length , Stainless 35 mm DIN-Rail DRS-240 240 mm length , Stainless 35 mm DIN-Rail DRS-360 360 mm length , Stainless 35 mm DIN-Rail DP-660 24 VDC/2.5 A, 60 W and 5 VDC/0.5 A, 2.5 W Power Supply with DIN-Rail Mounting DP-1200 24 VDC/5.0 A, 120 W Power Supply with DIN-Rail Mounting MDR-20-24 24 VDC/1.0 A, 24 W Power Supply with DIN-Rail Mounting MDR-60-24 24 VDC/2.5 A, 60 W Power Supply with DIN-Rail Mounting XP-8000-Atom-CE6 User Manual v1.0.4 Page: 14 Copyright © 2011 ICP DAS Co., Ltd. All Rights Reserved. E-mail: [email protected] 1.3. Overview The XPAC contains several interfaces and peripherals that can be integrated with external systems. Here is an overview of the components and its descriptions. The details of these items are as follows: XP-8141 XP-8000-Atom-CE6 User Manual v1.0.4 Page: 15 Copyright © 2011 ICP DAS Co., Ltd. All Rights Reserved. E-mail: [email protected] XP-8341 XP-8741 XP-8000-Atom-CE6 User Manual v1.0.4 Page: 16 Copyright © 2011 ICP DAS Co., Ltd. All Rights Reserved. E-mail: [email protected] 1. Rotary Switch The Rotary Switch is an operating mode selector switch which provides four functions, the selection of operating mode and authorization control for the XP-8000-Atom-CE6. For more information about the operating mode, please refer to “2.3. Configuring the Boot Mode” 2. LED Indicators The XP-8000-Atom-CE6 contains four LED indicators. The first is labeled PWR, located near the power switch and shows the power status. The three other are located next the rotary switch, the left one is labeled RUN and shows the operation status, the two other are denoted L1 and L2 and used for user defined. LED Indicator Color (On state) Meaning PWR Red Power is on RUN Green OS is running L1 Yellow User programmable LED L2 Red User programmable LED XP-8000-Atom-CE6 User Manual v1.0.4 Page: 17 Copyright © 2011 ICP DAS Co., Ltd. All Rights Reserved. E-mail: [email protected] 3. USB Ports (P1 ~ P4) The XP-8000-Atom-CE6 contains four USB ports that allow support for the USB devices such as mouse, keyboard or an external USB hard drive. These ports are denoted as P1, P2, P3 and P4. 4. Ethernet Port (LAN1, LAN2) The XP-8000-Atom-CE6 contains two Ethernet ports denoted for use with network devices. 5. Power Switch The power switch is a small switch that enables or disables power to electric circuits and loads in the XP-8000-Atom-CE6. XP-8000-Atom-CE6 User Manual v1.0.4 Page: 18 Copyright © 2011 ICP DAS Co., Ltd. All Rights Reserved. E-mail: [email protected] 6. Connector The connector has 10 pins arranged in 2 rows as follows: Pin Signal 1 PWR1 2 P.GND 3 D+ 4 D- 5 F.G. 6 PWR2 7 P.GND 8 R.COM 9 R.NO 10 F.G. Description Power input 1 COM3: RS-485 Frame ground Power input 2 Relay output Frame ground 7. Microphone and Earphone Jacks The XP-8000-Atom-CE6 contains the microphone and earphone jack to the input and output of sound system. 8. CF Card Expansion Slot The CF card expansion slot is an interface that is used to access and download information on a CF card to a XP-8000-Atom-CE6. The CF card can be used to expand the memory up to 32 GB. XP-8000-Atom-CE6 User Manual v1.0.4 Page: 19 Copyright © 2011 ICP DAS Co., Ltd. All Rights Reserved. E-mail: [email protected] 9. VGA Connector A VGA connector is a 3-row 15-pin connector that can be used with a variety of supported VGA resolutions, and ranged from 640 x 400 to 1400 x 1050. 10. DIP Switch The DIP switch can be used to set the Module ID to a number from 0 to 255. Do not use Module ID 0 for communication. 11. COM2 (RS-232) Port Type: Female Baud Rate: 115200, 57600, 38400, 19200, 9600, 4800, 2400, 1200 bps Data Bits: 7, 8 Parity: None, Even, Odd Stop Bits: 1 FIFO: 1 byte XP-8000-Atom-CE6 User Manual v1.0.4 Page: 20 Copyright © 2011 ICP DAS Co., Ltd. All Rights Reserved. E-mail: [email protected] 12. COM4 (RS-232/RS-485) Port Type: Male Baud Rate: 115200, 57600, 38400, 19200, 9600, 4800, 2400, 1200 bps Data Bits: 5, 6, 7, 8 Parity: None, Even, Odd, Mark (Always 1), Space (Always 0) COM4 can be configured as either RS-232 or RS-485, that only can select one at a time and its configuration depends on the pin connections as follows: RS-232 (RXD, TXD, CTS, RTS and GND) RS-485 (Data+ and Data-) There is no software configuration or hardware jumper needed. 13. COM5 (RS-232) Port Type: Male Baud Rate: 115200, 57600, 38400, 19200, 9600, 4800, 2400, 1200 bps Data Bits: 5, 6, 7, 8 Parity: None, Even, Odd, Mark (Always 1), Space (Always 0) Stop Bits: 1, 2 FIFO: 16 bytes 14. I/O Slots The XP-8000-Atom-CE6 contains I/O slots for expanding I/O functions to meet the needs and requests of a variety of customers. The number of expansion I/O slots on each model: XP-8141: 1 I/O slot XP-8341: 3 I/O slots XP-8741: 7 I/O slots XP-8000-Atom-CE6 User Manual v1.0.4 Page: 21 Copyright © 2011 ICP DAS Co., Ltd. All Rights Reserved. E-mail: [email protected] 1.4. Dimension The diagrams below provide the dimensions of the XP-8000-Atom-CE6 to use in defining your enclosure specifications. Remember to leave room for potential expansion if you are using other components in your system. The height dimension is the same for all XP-8000-Atom-CE6. The width depending on your choose of I/O expansion slots. All dimensions are in millimeters. XP-8141-Atom-CE6 XP-8000-Atom-CE6 User Manual v1.0.4 Page: 22 Copyright © 2011 ICP DAS Co., Ltd. All Rights Reserved. E-mail: [email protected] XP-8341-Atom-CE6 XP-8741-Atom-CE6 XP-8000-Atom-CE6 User Manual v1.0.4 Page: 23 Copyright © 2011 ICP DAS Co., Ltd. All Rights Reserved. E-mail: [email protected] 1.5. Companion CD This package comes with a CD that provides a collection of the software utility, documentation, drivers, demo program and application. The CD contains several subdirectories located in \XP-8000-Atom-CE6 directory. All of them are listed below. XP-8000-Atom-CE6 User Manual v1.0.4 Page: 24 Copyright © 2011 ICP DAS Co., Ltd. All Rights Reserved. E-mail: [email protected] 1.6. Rescue CF Card The XP-8000-Atom-CE6 comes with a Rescue Compact Flash Card that not only supports rescue mechanism but also contains full usage documents, software tools and development resources related to the XP-8000-Atom-CE6. All of them are listed below. XP-8000-Atom-CE6 User Manual v1.0.4 Page: 25 Copyright © 2011 ICP DAS Co., Ltd. All Rights Reserved. E-mail: [email protected] 2. Getting Started This chapter provides a guided tour that describes the steps needed to download, install, configure, and run the basic procedures for user working with the XP-8000-Atom-CE6 for the first time. XP-8000-Atom-CE6 User Manual v1.0.4 Page: 26 Copyright © 2011 ICP DAS Co., Ltd. All Rights Reserved. E-mail: [email protected] Before starting any task, please check the package contents. If any of the following package contents are missing or damaged, contact your dealer, distributor. XP-8000-Atom-CE6 Module Software Utility CD XP-8000-Atom-CE6 User Manual Quick Start Guide Screw Driver (1C016) v1.0.4 Page: 27 Copyright © 2011 ICP DAS Co., Ltd. All Rights Reserved. E-mail: [email protected] 2.1. Mounting the Hardware Before you work with the XP-8000-Atom-CE6, you should have a basic understanding of hardware specification, such as the dimensions, the usable input-voltage range of the power supply, and the type of communication interfaces. For more information about the hardware details, please refer to “1.2. Specifications” For more information about the hardware dimensions, please refer to “1.4. Dimension” XP-8000-Atom-CE6 User Manual v1.0.4 Page: 28 Copyright © 2011 ICP DAS Co., Ltd. All Rights Reserved. E-mail: [email protected] 2.1.1. Mounting the XP-8000-Atom-CE6 The XP-8000-Atom-CE6 can be mounted with the bottom of the chassis in the standard 35 mm DIN rail, or any other screw-mountable surface. Tips & Warnings There must be a minimum clearance of 50mm between the XP-8000-Atom-CE6 and the top and bottom side of the enclosure panels must be provided. XP-8000-Atom-CE6 User Manual v1.0.4 Page: 29 Copyright © 2011 ICP DAS Co., Ltd. All Rights Reserved. E-mail: [email protected] Mount the Chassis on a DIN Rail i. Hook upper tab over upper flange of DIN rail. ii. Tilt the module toward DIN rail until it snaps securely to DIN rail. iii. Push up retaining clips. XP-8000-Atom-CE6 User Manual v1.0.4 Page: 30 Copyright © 2011 ICP DAS Co., Ltd. All Rights Reserved. E-mail: [email protected] Tips & Warnings Grounding A good common ground reference (earth ground) is essential for proper operation of the XP-8000-Atom-CE6. One side of all control circuits, power circuits and the ground lead must be properly connected to earth ground by either installing a ground rod in close proximity to the enclosure or by connecting to the incoming power system ground. There must be a single-point ground (i.e. copper bus bar) for all devices in the enclosure that require an earth ground. Surface Mounting i. Install the four mounting screws into the 4 keyhole mounting holes. ii. Fasten the screws securely. XP-8000-Atom-CE6 User Manual v1.0.4 Page: 31 Copyright © 2011 ICP DAS Co., Ltd. All Rights Reserved. E-mail: [email protected] 2.1.2. Deploying a Basic XP-8000-Atom-CE6 System The XP-8000-Atom-CE6 provides a variety of communication interface to suit a range of applications. Here is a simple application for using the XP-8000-Atom-CE6 that is shown below. i. Use the LAN1 or LAN2 to connect to PC via the router. ii. Use USB 2.0 ports to connect to the USB mouse and keyboard. iii. Use the VGA port to connect to the monitor. XP-8000-Atom-CE6 User Manual v1.0.4 Page: 32 Copyright © 2011 ICP DAS Co., Ltd. All Rights Reserved. E-mail: [email protected] 2.1.3. Inserting the I/O Modules The XP-8000-Atom-CE6 has 1/3/7 I/O expansion slots to expand the I/O functions. Before choosing the right I/O modules, you first need to know the I/O expansion capacities in order to choose the best expansion module for achieving maximal efficiency. There are more than 30 high profile I/O modules available for interfacing many different measurements, including thermocouple, voltage, RTD, current, resistance, strain, digital, etc., and these modules have their own manuals, so if you are using them you should supplement this manual with the manual specifically designed for the special module. For more information about the I/O expansion modules that are compatible with the XP-8000-Atom-CE6, please refer to http://www.icpdas.com/products/PAC/i-8000/8000_IO_modules.htm#i87 Here are step by step instructions on how to inserting the I/O modules. Step 1 Align circuit card with slot and press firmly to seat module into connector XP-8000-Atom-CE6 User Manual v1.0.4 Page: 33 Copyright © 2011 ICP DAS Co., Ltd. All Rights Reserved. E-mail: [email protected] Step 2 Pull top and bottom locking tabs toward module face. Click indicates lock is engaged Step 3 Attach field wiring using the terminal block, and then insert the terminal block XP-8000-Atom-CE6 User Manual v1.0.4 Page: 34 Copyright © 2011 ICP DAS Co., Ltd. All Rights Reserved. E-mail: [email protected] 2.1.4. Powering up the XP-8000-Atom-CE6 The XP-8000-Atom-CE6 works with 24 VDC power and provides redundant power inputs with two terminal blocks for PWR1 and PWR2 input. Step 1 Wire to power supply There are two ways to supply power to the XP-8000-Atom-CE6. Single power supply Tips & Warnings Once you wire and power up the power supply, confirm the PWR indicator (Red LED) on the CPU module is on. If the indicator is not on, check the voltage on the terminal block with a voltage meter. If you measure 24 VDC on the terminal block, the CPU module may be defective. Please contact us. XP-8000-Atom-CE6 User Manual v1.0.4 Page: 35 Copyright © 2011 ICP DAS Co., Ltd. All Rights Reserved. E-mail: [email protected] Redundant power supply The redundant power can be used single and used two self-governed power to supply to the system, PWR1 and PWR2 input at the same time, when one power fails, the other power acts as a backup, and automatically supplies power needs. XP-8000-Atom-CE6 User Manual v1.0.4 Page: 36 Copyright © 2011 ICP DAS Co., Ltd. All Rights Reserved. E-mail: [email protected] Step 2 Check the boot status When powering on the XP-8000-Atom-CE6, please note the four LED statues to make sure the boot is correct. The check process may take about 40~50 seconds. i. Switch the power switch to the on position After waiting 2.5 seconds, the RUN LED indicator will be on ii. Load BIOS iii. Enter the welcome screen XP-8000-Atom-CE6 User Manual v1.0.4 Page: 37 Copyright © 2011 ICP DAS Co., Ltd. All Rights Reserved. E-mail: [email protected] iv. Start to load OS v. OS load successfully vi. The boot process has been finished successfully. Tips & Warnings After the boot process has been finished, the L1 and L2 LED indicators will be released. The user can use XPAC API to control them. XP-8000-Atom-CE6 User Manual v1.0.4 Page: 38 Copyright © 2011 ICP DAS Co., Ltd. All Rights Reserved. E-mail: [email protected] 2.2. Installing the Tools and Utilities The XP-8000-Atom-CE6 has several tools and utility that allows and supports you quickly and easily to manage the XP-8000-Atom-CE6. Here we will introduce two practical of them and guide you through the installation. Remote Display is one of the Windows CE operating system toolkits. If your XP-8000-Atom-CE6 is connected to PC through the network, you can use this utility to display the device screen on the host PC and control the XP-8000-Atom-CE6 remotely through this interface. For more information on how to use Remote Display to control the XP-8000-Atom-CE6 remotely, please refer to section 2.6. Using Remote Display to Control the XP-8000-Atom-CE6 Remotely. DCON Utility is a toolkit that is designed to configure, manage and monitor the I/O modules from PC via COM port or Ethernet. For more information on how to use DCON Utility to configure the I/O module, please refer to section 2.7. Using DCON Utility to Configure the I/O Module. Step 1 Get the DCON Utility and Remote Display The DCON Utility and Remote Display can be installed from the CD that was provided with the package or by downloading the latest version from ICP DAS web site. CD:\XP-8000-Atom-CE6\PC_Tools\ ftp://ftp.icpdas.com/pub/cd/ xpac-atom-ce6 /pc_tools/ Step 2 Follow the prompts until the installation is complete XP-8000-Atom-CE6 User Manual v1.0.4 Page: 39 Copyright © 2011 ICP DAS Co., Ltd. All Rights Reserved. E-mail: [email protected] 2.3. Configure the Boot Mode The XP-8000-Atom-CE6 has the following main operating modes, which can be selected by a rotary switch. Rotary Switch Position Operating Mode 0 1 2 3 4 5 6 7~9 Normal mode (Default) Safe mode (For user defined mode) (For user defined mode) (For user defined mode) DCON_CE mode Remote Display mode (For user defined mode) The following is a brief introduction of these modes. Normal Mode (Default mode) Normal mode is the default mode of operation and the one you will use most of the time. Use this mode for more tasks and configurations. Programs also are executed in this mode. Safe Mode Safe mode is a trouble shooting. All settings will be set to factory default on this mode. If you have malicious software or a program caused the XP-8000-Atom-CE6 cannot be boot or run the normal mode, you can boot in safe mode to solve the problem. DCON_CE In this mode, the VCEP will be run automatically, and other settings are same as the normal mode. For more information about the DCON CE, please refer to section 3.1.1. DCON CE. XP-8000-Atom-CE6 User Manual v1.0.4 Page: 40 Copyright © 2011 ICP DAS Co., Ltd. All Rights Reserved. E-mail: [email protected] Remote Display In this mode, the cerdisp.exe will be run automatically, and other settings are same as the normal mode. For more information about the Remote Display, please refer to section 2.6. Using Remote Display to Control the XP-8000-Atom-CE6 Remotely. User Mode The positions 2, 3, 4, 7, 8, 9 of rotary switch are reserved for user‟s applications. When XP-8000-Atom-CE6 is boot with one of these positions, it is boot at normal mode. User‟s application can check the rotary switch position to run at different mode. XP-8000-Atom-CE6 User Manual v1.0.4 Page: 41 Copyright © 2011 ICP DAS Co., Ltd. All Rights Reserved. E-mail: [email protected] 2.4. Changing the User Interface Language The "Regional Settings" is a Windows CE functionality that allows users to easily change the XP-8000-Atom-CE6 user interface with your native language. Here are step by step instructions on how to change the XP-8000-Atom-CE6 user interface language. Step 1 Click Start menu, point to Settings, click Control Panel, and then click Regional Options XP-8000-Atom-CE6 User Manual v1.0.4 Page: 42 Copyright © 2011 ICP DAS Co., Ltd. All Rights Reserved. E-mail: [email protected] Step 2 Click User Interface Language tab, choose to your local language, and then click OK Step 3 Click OK, and then reboot XP-8000-Atom-CE6 for changes to take effect XP-8000-Atom-CE6 User Manual v1.0.4 Page: 43 Copyright © 2011 ICP DAS Co., Ltd. All Rights Reserved. E-mail: [email protected] 2.5. Using XPAC Utility to Configure XP-8000-Atom-CE6 Basic Functionality The XPAC Utility is a collection of the XP-8000-Atom-CE6 system tool that allows user quickly and easily manage and configure the XP-8000-Atom-CE6. Here are step by step instructions on how to use XPAC Utility to configure XP-8000-Atom-CE6 basic functionality. Step 1 Run the XPAC Utility Step 2 Configure IP (DHCP), FTP Server, Auto Execution and any function if needed. XP-8000-Atom-CE6 User Manual v1.0.4 Page: 44 Copyright © 2011 ICP DAS Co., Ltd. All Rights Reserved. E-mail: [email protected] Step 3 On the File menu, click Save and Reboot For more information about the XP-8000-Atom-CE6 basic functionality, refer to section 3.1.11. XPAC Utility. XP-8000-Atom-CE6 User Manual v1.0.4 Page: 45 Copyright © 2011 ICP DAS Co., Ltd. All Rights Reserved. E-mail: [email protected] 2.6. Using Remote Display to Control the XP-8000-Atom-CE6 Remotely The "Remote Display" is a Windows CE functionality that allows XP-8000-Atom-CE6 to be controlled and monitored from a remote location. This tool is composed of two parts, a client and a server. The server is a program named cerdisp.exe running on XP-8000-Atom-CE6. The client is a PC-based program named cerhost.exe running on the PC. Here are step by step instructions on how to use Remote Display to control XP-8000-Atom-CE6 remotely. Step 1 On PC side, click client program, cerhost.exe The Remote Display can be installed from the CD or by downloading the latest version from ICP DAS web site. CD:\XP-8000-Atom-CE6\PC_Tools\Remote_Display\ ftp://ftp.icpdas.com/pub/cd/xpac-atom-ce6/pc_tools/remote_display/ Step 2 On XPAC side, click server program, cerdisp.exe The cerdisp.exe are pre-installed on the XP-8000-Atom-CE6, located under \System_Disk\Tools\Remote_Display XP-8000-Atom-CE6 User Manual v1.0.4 Page: 46 Copyright © 2011 ICP DAS Co., Ltd. All Rights Reserved. E-mail: [email protected] Step 3 Click OK button, click Connect button, type the IP address of the host PC Step 4 The remote connection has been established XP-8000-Atom-CE6 User Manual v1.0.4 Page: 47 Copyright © 2011 ICP DAS Co., Ltd. All Rights Reserved. E-mail: [email protected] 2.7. Using DCON Utility to Configure the I/O Module The DCON Utility is a client utility that runs on PC, and communicates with XP-8000-Atom-CE6 via DCON protocol. The DCON Utility allows users to remotely connect to I-7K and I-87K series I/O modules for management through the COM port and Ethernet port. This tool is composed of two parts, a client and a server. The server is a program named DCON_CE_Vxxx running on XP-8000-Atom-CE6. The client is a PC-based program named DCON Utility running on the PC. Here are step by step instructions on how to use DCON Utility to configure the I/O modules. Step 1 On XPAC side, click server program, DCON_CE_Vxxx The DCON_CE_Vxxx are pre-installed on the XP-8000-Atom-CE6, located under \System_Disk\Tools\DCON_CE XP-8000-Atom-CE6 User Manual v1.0.4 Page: 48 Copyright © 2011 ICP DAS Co., Ltd. All Rights Reserved. E-mail: [email protected] Step 2 On PC side, Run the DCON Utility The DCON Utility can be installed from the CD that was provided with the package or by downloading the latest version from ICP DAS web site. CD:\XP-8000-Atom-CE6\PC_Tools\DCON_Utility\ ftp://ftp.icpdas.com/pub/cd/xpac-atom-ce6/pc_tools/dcon_utility/ Step 3 Click WINCE common button XP-8000-Atom-CE6 User Manual v1.0.4 Page: 49 Copyright © 2011 ICP DAS Co., Ltd. All Rights Reserved. E-mail: [email protected] Step 4 Click XPAC_CE tab, type the IP address of the XPAC, and then click Connect to XPAC_CE button Tips & Warnings If DCON Utility cannot connect to XP-8000-Atom-CE6, the Ethernet connection between Host PC and XP-8000-Atom-CE6 might be rejected by fire wall, please contact with MIS to open the Ethernet port. XP-8000-Atom-CE6 User Manual v1.0.4 Page: 50 Copyright © 2011 ICP DAS Co., Ltd. All Rights Reserved. E-mail: [email protected] Step 5 Click on the module name from the list to configure the settings form Tips & Warnings If there is no operation within 30 seconds, the connection will automatically close to release the COM port occupied. XP-8000-Atom-CE6 User Manual v1.0.4 Page: 51 Copyright © 2011 ICP DAS Co., Ltd. All Rights Reserved. E-mail: [email protected] 3. Tools and Tasks This chapter provides information of the XP-8000-Atom-CE6 and its components that introduces the fundamental concepts for user familiar with the XP-8000-Atom-CE6. XP-8000-Atom-CE6 User Manual v1.0.4 Page: 52 Copyright © 2011 ICP DAS Co., Ltd. All Rights Reserved. E-mail: [email protected] There are several tools and utilities built-in and designed for use with the XPAC-8000. Some of these tools and utilities are installed on the XP-8000-Atom-CE6 controller, some are available on PC. Both the XP-8000-Atom-CE6 side and PC side tools and utilities can be found separately on the CD that was provided with the package or by downloading the latest version from ICP DAS web site. Tools and Utilities on XPAC Tools and Utilities on PC XP-8000-Atom-CE6 User Manual Page: 53 Copyright © 2011 ICP DAS Co., Ltd. All Rights Reserved. E-mail: [email protected] 3.1. Tools and Tasks on XPAC XP-8000-Atom-CE6 User Manual Page: 54 Copyright © 2011 ICP DAS Co., Ltd. All Rights Reserved. E-mail: [email protected] 3.1.1. DCON_CE The DCON_CE is a server program based that runs on XP-8000-Atom-CE6, and communicates with PC via DCON protocol. The DCON Utility is a client utility that runs on PC, and communicates with XP-8000-Atom-CE6 via DCON protocol. The DCON Utility allows users to remotely connect to I-7K and I-87K series I/O modules for management through the COM port and Ethernet port. This tool is composed of two parts, a client and a server. The server is a program named DCON_CE_Vxxx running on XP-8000-Atom-CE6. The client is a PC-based program named DCON Utility running on the PC. XP-8000-Atom-CE6 User Manual Page: 55 Copyright © 2011 ICP DAS Co., Ltd. All Rights Reserved. E-mail: [email protected] 3.1.2. ISQLW35 The "ISQLW35" is a Windows CE functionality that implements SQL Server Compact 3.5 Query XP-8000-Atom-CE6 User Manual Page: 56 Copyright © 2011 ICP DAS Co., Ltd. All Rights Reserved. E-mail: [email protected] 3.1.3. modbus_master_tool XP-8000-Atom-CE6 User Manual Page: 57 Copyright © 2011 ICP DAS Co., Ltd. All Rights Reserved. E-mail: [email protected] 3.1.4. NAPOPC_CE6 NAPOPC_CE6 DA Server is a free OPC DA Server (The "OPC" stands for "OLE for Process Control" and the "DA" stands for " Data Access") working on XPAC, ViewPAC & WinPAC controllers provided by ICP DAS Ltd. The first standard (originally called simply the OPC Specification and now called the Data Access Specification) resulted from the collaboration of a number of leading worldwide automation suppliers working in cooperation with Microsoft. Originally based on Microsoft's OLE COM (component object model) and DCOM (distributed component object model) technologies, the specification defined a standard set of objects, interfaces and methods for use in process control and manufacturing automation applications to facilitate interoperability. NAPOPC_CE6 DA Server integrates OPC, Modbus TCP Slave and Modbus RTU Slave three kind Slave services, as well as integrates Modbus TCP Master, Modbus RTU Master and DCON three kind Master communication protocols. It also provides one advanced function “Rule Script” for use in the I/O integration and transformation, and some conditional Logic operation. XP-8000-Atom-CE6 User Manual Page: 58 Copyright © 2011 ICP DAS Co., Ltd. All Rights Reserved. E-mail: [email protected] 3.1.5. INotepad The INotepad is a Windows CE application, which is a common text-only editor. The resulting files have no format tags or styles, making the program suitable for editing system files that are to be used in a DOS environment. XP-8000-Atom-CE6 User Manual Page: 59 Copyright © 2011 ICP DAS Co., Ltd. All Rights Reserved. E-mail: [email protected] 3.1.6. RegEdit The RegEdit is a Windows CE application, which provides a hierarchical representation of the registry on a target computer, similar in appearance to the Windows Registry Editor. The standard registry roots are represented; you can add keys beneath a root to point to existing registry keys, or you can add your own keys. Values can be changed for existing keys, or added for new keys, and default keys can be specified. For more information, see Registry Settings Management in Deployment. XP-8000-Atom-CE6 User Manual Page: 60 Copyright © 2011 ICP DAS Co., Ltd. All Rights Reserved. E-mail: [email protected] 3.1.7. Remote_Display The "Remote Display" is a Windows CE functionality that allows XP-8000-Atom-CE6 to be controlled and monitored from a remote location. This tool is composed of two parts, a client and a server. The server is a program named cerdisp.exe running on XP-8000-Atom-CE6. The client is a PC-based program named cerhost.exe running on the PC. For more information on how to use remote display to control the XP-8000-Atom-CE6 remotely, please refer to section 2.6. Using Remote Display to Control the XP-8000-Atom-CE6 Remotely. XP-8000-Atom-CE6 User Manual Page: 61 Copyright © 2011 ICP DAS Co., Ltd. All Rights Reserved. E-mail: [email protected] 3.1.8. Send ToCOM The SendToCOM uses the serial port to communicate with expansion module. To use the SendToCOM, you can send data to expansion module through the serial port, and receive data from other device through the serial port. For more information about these commands for communicating with expansion module, please refer to: CD:\Napdos\io_module\87k_high_profile_modules.htm XP-8000-Atom-CE6 User Manual Page: 62 Copyright © 2011 ICP DAS Co., Ltd. All Rights Reserved. E-mail: [email protected] 3.1.9. TaskMgr The TaskMgr is a Windows CE application, which provides real time info on all processes and threads including System threads, similar in appearance to the Windows Task Manager. XP-8000-Atom-CE6 User Manual Page: 63 Copyright © 2011 ICP DAS Co., Ltd. All Rights Reserved. E-mail: [email protected] 3.1.10. VCEP ICPDAS VCEP is designed for managing your XP-8000-Atom-CE6 anywhere. No matter where you are, ICPDAS VCEP provides a convenient environment on the Desktop PC and lets you control your XP-8000-Atom-CE6 remotely. ICPDAS VCEP is composed of two main components: The “Server” which runs on XP-8000-Atom-CE6 and the „Client‟ which runs on a Desktop PC. Once a connection is established between the client and server (initiated by the client), the client will periodically send requests for screen updates and send mouse/key click information to the server to simulate. Each video frame is inter-compressed against the previous frame and then intra-compressed with a modified LZW scheme to minimize the amount of data transmitted from server to client. For more information on VCEP application, please refer to http://www.icpdas.com/products/PAC/wincon-8000/wincon_VirtualCE.htm XP-8000-Atom-CE6 User Manual Page: 64 Copyright © 2011 ICP DAS Co., Ltd. All Rights Reserved. E-mail: [email protected] 3.1.11. XPAC_Utility XP-8000-Atom-CE6 Utility is a collection of software applications that enable management and configuration of XP-8000-Atom-CE6 system and features. XP-8000-Atom-CE6 User Manual Page: 65 Copyright © 2011 ICP DAS Co., Ltd. All Rights Reserved. E-mail: [email protected] 3.1.11.1. Menu Bar The XPAC Utility includes the following function menu. All function menus will be explained later. File menu The menu commands Used to Save Saves the settings into Flash. The new settings don‟t take effect until the XPAC restart. Save and Reboot Saves the settings into Flash and restart the XPAC. The new settings will take effect after the XPAC restart. Reboot Restart the XPAC Restore Utility Default Settings Restore the settings of XPAC Utility to its default Exit Exit the XPAC Utility. XP-8000-Atom-CE6 User Manual Page: 66 Copyright © 2011 ICP DAS Co., Ltd. All Rights Reserved. E-mail: [email protected] Help menu The menu commands Used to About Display a dialog box with information about XPAC Utility, including the current version and copyright information. XP-8000-Atom-CE6 User Manual Page: 67 Copyright © 2011 ICP DAS Co., Ltd. All Rights Reserved. E-mail: [email protected] 3.1.11.2. Property Tabs The XPAC Utility includes the following property tabs, all property tabs will be explained later. General Display IP Configure Network Device Information Auto Execution Rotary Execution Multi-IO Modules XP-8000-Atom-CE6 User Manual Page: 68 Copyright © 2011 ICP DAS Co., Ltd. All Rights Reserved. E-mail: [email protected] General tab The System Setting tab provides functions to configure the task bar, HIVE registry and monitor RTC battery. The tab use to How to use Lock or Auto-Hide the taskbar Auto-Hide: Select the Auto Hide check box Auto or Manual save to Flash Auto Save To Flash (Default): Lock: Select the Always On Top check box. Select the Auto Save To Flash (Default) option Manual Save To Flash: Select the Manual Save To Flash option Check the status of the battery See the Battery1 and Battery2 field that displays the battery status. Automatic synchronization of system time Refer to the AppendixB.2 How to configure the service for automatically synchronizing with the internet time server XP-8000-Atom-CE6 User Manual Page: 69 Copyright © 2011 ICP DAS Co., Ltd. All Rights Reserved. E-mail: [email protected] Display tab The Display tab provides functions to configure the monitor setting. The tab use to How to use Adjust the screen resolution Move the slider to the resolution you want, and then click apply button Change the Screen Refresh Rate Select a screen refresh rate, and then click apply button XP-8000-Atom-CE6 User Manual Page: 70 Copyright © 2011 ICP DAS Co., Ltd. All Rights Reserved. E-mail: [email protected] IP Config tab The IP Config tab provides functions to configure either DHCP (Roaming) or manually configured (Static) network settings and to monitor the MAC address. Generally, DHCP is the default settings, but if you don‟t have a DHCP server, you must configure the network settings by using manual configuration. The tab use to How to use Check the MAC address See the MAC Address 1 and MAC Address 2 fields that display the physical address of LAN1 and LAN2. Configure the network settings Obtaining an IP address automatically from DHCP: Select the Use DHCP to get IP address option. Manually assign an IP address: Select the Assign IP address option. XP-8000-Atom-CE6 User Manual Page: 71 Copyright © 2011 ICP DAS Co., Ltd. All Rights Reserved. E-mail: [email protected] Network tab The Network tab consists of two tabs, Access and Login, which provides functions to enable/disable the FTP access, enable/disable anonymous FTP access, configure the FTP directory path, change HTTP document root directory and maintain the FTP accounts. XP-8000-Atom-CE6 User Manual Page: 72 Copyright © 2011 ICP DAS Co., Ltd. All Rights Reserved. E-mail: [email protected] Access tab This tab provides functions to enable/disable the FTP access, enable/disable anonymous FTP access, configure the FTP directory path, and change HTTP document root directory. The tab use to How to use Enable/disable the FTP access Enable: Select the Enable option Disable: Select the Disable option. Enable/disable Enable: Select the Enable option anonymous FTP access Disable: Select the Disable option. Change the FTP directory path Enter a new path in the Set FTP default download directory to field, and then press the Apply button. Change the HTTP directory path Enter a new path in the Set HTTP document root directory to field, and then press the Apply button. XP-8000-Atom-CE6 User Manual Page: 73 Copyright © 2011 ICP DAS Co., Ltd. All Rights Reserved. E-mail: [email protected] Login Access tab This tab provides functions to maintain the FTP accounts. The tab use to How to use Maintain the FTP accounts Refer to the AppendixB.3 How to add a user account to remote login the XPAC from PC. XP-8000-Atom-CE6 User Manual Page: 74 Copyright © 2011 ICP DAS Co., Ltd. All Rights Reserved. E-mail: [email protected] Device Information tab The Device Information tab provides functions to monitor necessary device information of the XPAC. The system information is the most important note of version control for upgrading system. XP-8000-Atom-CE6 User Manual Page: 75 Copyright © 2011 ICP DAS Co., Ltd. All Rights Reserved. E-mail: [email protected] Auto Execution tab The Auto Execute tab provides functions to configure programs running at XPAC startup, it allows users to configure ten execute files at most. Tips & Warnings The allowed file types are .exe and .bat, and they are executed in order of program 1, program 2, etc. The tab use to How to use Configure programs running at startup Press the Browse button to select the execute file which you want, and then press the Apply button. XP-8000-Atom-CE6 User Manual Page: 76 Copyright © 2011 ICP DAS Co., Ltd. All Rights Reserved. E-mail: [email protected] Rotary Execution tab The Rotary Execution tab provides function to decide which mode XP-8000-Atom-CE6 executes at startup. The tab used to How to use Run at Normal Mode Rotary Switch to 0 and reboot XP-8000-Atom-CE6, and then it is in the Normal Mode. Run at Safe Mode Rotary Switch to 1 and reboot XP-8000-Atom-CE6, and then it is in the Safe Mode. (In Safe Mode, XP-8000-Atom-CE6 clears the data saved in the registry, starts as factory default, and no applications run at startup.) Run at Normal Mode but execute DCON_CE_V600.exe Rotary Switch to 8 and reboot XP-8000-Atom-CE6, and then it is in the Normal Mode but executes DCON_CE_V600.exe. This makes users can use DCON Utility on PC side to configure I/O XP-8000-Atom-CE6 User Manual Page: 77 Copyright © 2011 ICP DAS Co., Ltd. All Rights Reserved. E-mail: [email protected] modules without a monitor. Run at Normal Mode but execute cerdisp.exe Rotary Switch to 9 and reboot XP-8000-Atom-CE6, and then it is in the Normal Mode but executes cerdisp.exe. This makes users can use cerhost.exe on PC side to remote display Windows CE without a monitor. Run at Normal Mode but execute user-specified program. Rotary Switch to 2 ~ 7 and reboot XP-8000-Atom-CE6, and then it is in the Normal Mode but executes the program user specified in the field of “Rotary Switch 2 ~ 7”. XP-8000-Atom-CE6 User Manual Page: 78 Copyright © 2011 ICP DAS Co., Ltd. All Rights Reserved. E-mail: [email protected] Multi-IO Modules tab The Multi-IO Modules tab provides function to check the driver of multi-IO modules, such as 8114, 8144, 8142, and 8112. Each serial port of the Multi-IO modules has different numbers for use. The 8144 has four serial ports that are numbered MSB1~3. For more information about expansion RS-232/RS-422/RS-485 communication module that are compatible with the XP-8000-Atom-CE6, please refer to http://www.icpdas.com/products/Remote_IO/i-8ke/selection_rs232_i8k.htm XP-8000-Atom-CE6 User Manual Page: 79 Copyright © 2011 ICP DAS Co., Ltd. All Rights Reserved. E-mail: [email protected] 3.2. Tools and Tasks on PC XP-8000-Atom-CE6 User Manual Page: 80 Copyright © 2011 ICP DAS Co., Ltd. All Rights Reserved. E-mail: [email protected] 3.2.1. DCON_Utility The DCON Utility is a client utility that runs on PC, and communicates with XP-8000-Atom-CE6 via DCON protocol. The DCON Utility allows users to remotely connect to I-7K and I-87K series I/O modules for management through the COM port and Ethernet port. This tool is composed of two parts, a client and a server. The server is a program named DCON_CE_Vxxx running on XP-8000-Atom-CE6. The client is a PC-based program named DCON Utility running on the PC. For more information on how to use DCON Utility to configure I/O modules, please refer to section 2.7. Using DCON Utility to Configure I/O Module. XP-8000-Atom-CE6 User Manual Page: 81 Copyright © 2011 ICP DAS Co., Ltd. All Rights Reserved. E-mail: [email protected] 3.2.2. Remote_Display The "Remote Display" is a Windows CE functionality that allows XP-8000-Atom-CE6 to be controlled and monitored from a remote location. This tool is composed of two parts, a client and a server. The server is a program named cerdisp.exe running on XP-8000-Atom-CE6. The client is a PC-based program named cerhost.exe running on the PC. For more information on how to use remote display to control the XP-8000-Atom-CE6 remotely, please refer to section 2.6. Using Remote Display to Control the XP-8000-Atom-CE6 Remotely. XP-8000-Atom-CE6 User Manual Page: 82 Copyright © 2011 ICP DAS Co., Ltd. All Rights Reserved. E-mail: [email protected] 4. Your First XP-8000-Atom-CE6 Program This chapter provides a guided tour that describes the steps needed to set-up a development environment, download, install, configure for user programming with the XP-8000-Atom-CE6. XP-8000-Atom-CE6 User Manual Page: 83 Copyright © 2011 ICP DAS Co., Ltd. All Rights Reserved. E-mail: [email protected] Before writing your first program, ensure that you have the necessary development tool and the corresponding XP-8000-Atom-CE6 SDKs are installed on your system. XP-8000-Atom-CE6 User Manual Page: 84 Copyright © 2011 ICP DAS Co., Ltd. All Rights Reserved. E-mail: [email protected] 4.1. Selecting a Development Tools XP-8000-Atom-CE6 is a Windows CE-based unit. Windows CE is a mature embedded operating system which supports rapid development. Two standard development tools are list as follows which are highly integrated, with comprehensive support for developing applications of Windows CE-based XP-8000-Atom-CE6. Visual Studio Visual Studio XP-8000-Atom-CE6 has .NET Compact Framework 3.5 installed. Visual Studio takes full advantage of the .NET Compact Framework, which uses public Internet standards to enable integration with new and existing applications running on any platform. Supported languages include Visual C#, Visual C++ and Visual Basic .NET. Notes: 1. There is no support for development of both managed and unmanaged code on XPAC series platform in VS2010/VS2012. 2. WinCE-based platform development is only supported in Visual studio Professional edition or better, no Express or Standard edition. XP-8000-Atom-CE6 User Manual Page: 85 Copyright © 2011 ICP DAS Co., Ltd. All Rights Reserved. E-mail: [email protected] 4.2. Installing the XP-8000-Atom-CE6 SDKs The XPAC SDK is a Software Development Kit (SDK) that contains C header files, C libraries and documents. Step 1 Get the XP-8000-Atom-CE6 platform SDK The XP-8000-Atom-CE6 platform SDK can be installed from the CD that was provided with the package or by downloading the latest version from ICP DAS web site. Platform SDK: CD:\XP-8000-Atom-CE6\SDK\PlatformSDK\ ftp://ftp.icpdas.com/pub/cd/xpac-atom-ce6/sdk/platformsdk/ File name: xpacsdk_ce_n.n.n_vsxxxx.msi (n.n.n : platform sdk version number, xxxx: 2005 indicates VS2005, 2008 indicates VS2008) Tips & Warnings The version number of SDK that provides the PACSDK library must be later than or equal to 1.4.0, such as XPacSDK_CE_1.4.0_VS2008.msi or XPacSDK_CE_1.4.0_VS2005.msi XP-8000-Atom-CE6 User Manual Page: 86 Copyright © 2011 ICP DAS Co., Ltd. All Rights Reserved. E-mail: [email protected] Step 2 Install the XP-8000-Atom-CE6 platform SDK i. Double-Click XP-8000-Atom-CE6 platform SDK installation file ii. On the first page of the wizard, click Next button iii. On the next page of the wizard, click Accept option, and then click Next button XP-8000-Atom-CE6 User Manual Page: 87 Copyright © 2011 ICP DAS Co., Ltd. All Rights Reserved. E-mail: [email protected] iv. On the next page of the wizard, fill the User Name and Organization fields, and then click Next button v. Choose setup type XP-8000-Atom-CE6 User Manual Page: 88 Copyright © 2011 ICP DAS Co., Ltd. All Rights Reserved. E-mail: [email protected] Tips & Warnings If your PC only has installed Microsoft Visual Studio 2008 without installing Microsoft Visual Studio 2005, in this step, please choose custom type, and then make the Documentation unavailable. If you fail this step, you might encounter an error message as below. Please reinstall again and be sure to follow this step. XP-8000-Atom-CE6 User Manual Page: 89 Copyright © 2011 ICP DAS Co., Ltd. All Rights Reserved. E-mail: [email protected] Step 3 Follow the prompts until the installation is complete Step 4 Get the XP-8000-Atom-CE6 SDK and copy it to the PC The XP-8000-Atom-CE6 SDK can be obtained from the CD or by downloading the latest version from ICP DAS web site. You can copy it to a location that you have specified. CD:\XP-8000-Atom-CE6\SDK\XPACSDK\ ftp://ftp.icpdas.com/pub/cd/xpac-atom-ce6/sdk/xpacsdk/ XP-8000-Atom-CE6 User Manual Page: 90 Copyright © 2011 ICP DAS Co., Ltd. All Rights Reserved. E-mail: [email protected] 4.3. Creating Your First XP-8000-Atom-CE6 Program The best way to learn programming with XP-8000-Atom-CE6 is to actually create a XP-8000-Atom-CE6 program. Here we will guide you through creating this simple program in VB.net, C# and C++. XP-8000-Atom-CE6 User Manual Page: 91 Copyright © 2011 ICP DAS Co., Ltd. All Rights Reserved. E-mail: [email protected] 4.3.1. Your First Program with the VB.net Here we will demonstrate how to create a VB.net program running on XP-8000-Atom-CE6 with the VB.net development tool 1. Create a new project 2. Specify the path of the XPAC reference 3. Add the control to the form 4. Add the event handling for the control 5. Upload the application to XP-8000-Atom-CE6 6. Execute the application on XP-8000-Atom-CE6 In this tutorial, we will assume that you have installed XPAC platform SDK on PC and used the Visual Studio 2008 for application development. XP-8000-Atom-CE6 User Manual Page: 92 Copyright © 2011 ICP DAS Co., Ltd. All Rights Reserved. E-mail: [email protected] 4.3.1.1. Creating a New Project The Visual VB.net project template is a composite control that you use in this example creates a new project with this user control. Step 1 Start Visual Studio 2008 Visual Studio 2008 Step 2 On the File menu, point to New, and then click Project XP-8000-Atom-CE6 User Manual Page: 93 Copyright © 2011 ICP DAS Co., Ltd. All Rights Reserved. E-mail: [email protected] Step 3 In the Project types pane, expand Visual Basic, and then click Smart Device Step 4 In the Templates pane, click Smart Device Step 5 Type a name in the Name field, and then click OK Here we will enter the name “SDKInformation” and a different location for the project if you wish XP-8000-Atom-CE6 User Manual Page: 94 Copyright © 2011 ICP DAS Co., Ltd. All Rights Reserved. E-mail: [email protected] Step 6 In the Target platform item, choose Windows CE Step 7 in the .NET Compact Formwork version item, choose .NET Compact Framework Version 3.5 Step 8 in the Templates pane, choose Device Application, and then click Next XP-8000-Atom-CE6 User Manual Page: 95 Copyright © 2011 ICP DAS Co., Ltd. All Rights Reserved. E-mail: [email protected] 4.3.1.2. Specifying the Path of the XPAC Reference The XPAC SDK provides a complete solution to integrate with XPAC and it‟s compatible with Visual C#, Visual Basic .net and C++. In order to use a component in your application, you must first add a reference to it. Step 1 Get the PACNET.dll and copy it to the project folder The PACNET.dll can be obtained from the link below that has been provided on the CD or by downloading the latest version from ICP DAS web site. CD:\XPAC-ATOM-CE6\SDK\XPacNET\PACNET ftp://ftp.icpdas.com/pub/cd/xpac-atom-ce6/sdk/xpacnet/pacnet/ XP-8000-Atom-CE6 User Manual Page: 96 Copyright © 2011 ICP DAS Co., Ltd. All Rights Reserved. E-mail: [email protected] Step 2 In Solution Explorer, right-click the References node, and then click Add Reference… XP-8000-Atom-CE6 User Manual Page: 97 Copyright © 2011 ICP DAS Co., Ltd. All Rights Reserved. E-mail: [email protected] Step 3 Select “Browse” tab and add the PACNET.dll XP-8000-Atom-CE6 User Manual Page: 98 Copyright © 2011 ICP DAS Co., Ltd. All Rights Reserved. E-mail: [email protected] 4.3.1.3. Adding the Control to the Form You can drag various controls from the Toolbox onto the form. These controls are not really "live"; they are just images that are convenient to move around on the form into a precise location. After you add a control to your form, you can use the Properties window to set its properties, such as background color and default text. The values that you specify in the Properties window are the initial values that will be assigned to that property when the control is created at run time. Step 1 From the Toolbox, drag a Button control onto the form XP-8000-Atom-CE6 User Manual Page: 99 Copyright © 2011 ICP DAS Co., Ltd. All Rights Reserved. E-mail: [email protected] Step 2 Right-click the Button control, and then click Properties Step 3 In the Properties window, type Check the SDK version, and press ENTER to set the Text property XP-8000-Atom-CE6 User Manual Page: 100 Copyright © 2011 ICP DAS Co., Ltd. All Rights Reserved. E-mail: [email protected] 4.3.1.4. Adding the Event Handling to the Control You have finished the design stage of your application and are at the point when you can start adding some code to provide the program's functionality. Step 1 Double-click the button on the form XP-8000-Atom-CE6 User Manual Page: 101 Copyright © 2011 ICP DAS Co., Ltd. All Rights Reserved. E-mail: [email protected] Step 2 Inserting the following code Dim data(30) As Byte PACNET.System.GetSDKVersion(data) MessageBox.Show(PACNET.MISC.WideString(data)) Tips & Warnings The “PACNET” of “using PACNET” is case- sensitive. XP-8000-Atom-CE6 User Manual Page: 102 Copyright © 2011 ICP DAS Co., Ltd. All Rights Reserved. E-mail: [email protected] 4.3.1.5. Uploading the Application to XP-8000-Atom-CE6 XP-8000-Atom-CE6 provide FTP server service, you can upload files to XP-8000-Atom-CE6 or download files from a public FTP server. Step 1 On the Build menu, click Build SDKInformation XP-8000-Atom-CE6 User Manual Page: 103 Copyright © 2011 ICP DAS Co., Ltd. All Rights Reserved. E-mail: [email protected] Step 2 Open the browser and type the IP address of XP-8000-Atom-CE6 Step 3 Upload the SDKInformation.exe application and the corresponding PACSDK.dll and PACNET.dll files to the XPAC Tips & Warnings For applications programming in C# and VB.net with .net compact framework, when executing these application on the XP-8000-Atom-CE6, the corresponding PACSDK.dll and PACNET.dll must be in the same directory as the .exe file. XP-8000-Atom-CE6 User Manual Page: 104 Copyright © 2011 ICP DAS Co., Ltd. All Rights Reserved. E-mail: [email protected] 4.3.1.6. Executing the Application on XP-8000-Atom-CE6 After uploading the application to XP-8000-Atom-CE6, you can just double-click it on XP-8000-Atom-CE6 to execute it. XP-8000-Atom-CE6 User Manual Page: 105 Copyright © 2011 ICP DAS Co., Ltd. All Rights Reserved. E-mail: [email protected] 4.3.2. Your First Program with the Visual C# Here we will demonstrate how to create a Visual C# program running on XP-8000-Atom-CE6 with the Visual C# development tool 1. Create a new project 2. Specify the path of the XPAC reference 3. Add the control to the form 4. Add the event handling for the control 5. Upload the application to XP-8000-Atom-CE6 6. Execute the application on XP-8000-Atom-CE6 In this tutorial, we will assume that you have installed XPAC platform SDK on PC and used the Visual Studio 2008 for application development. XP-8000-Atom-CE6 User Manual Page: 106 Copyright © 2011 ICP DAS Co., Ltd. All Rights Reserved. E-mail: [email protected] 4.3.2.1. Creating a New Project The Visual C# project template is a composite control that you use in this example creates a new project with this user control. Step 1 Start Visual Studio 2008 Visual Studio 2008 Step 2 On the File menu, point to New, and then click Project XP-8000-Atom-CE6 User Manual Page: 107 Copyright © 2011 ICP DAS Co., Ltd. All Rights Reserved. E-mail: [email protected] Step 3 In the Project types pane, expand Visual C#, and then click Smart Device Step 4 In the Templates pane, click Smart Device Step 5 Type a name in the Name field, and then click OK Here we will enter the name “SDKInformation” and a different location for the project if you wish XP-8000-Atom-CE6 User Manual Page: 108 Copyright © 2011 ICP DAS Co., Ltd. All Rights Reserved. E-mail: [email protected] Step 6 In the Target platform item, choose Windows CE Step 7 in the .NET Compact Formwork version item, choose .NET Compact Framework Version 3.5 Step 8 in the Templates pane, choose Device Application, and then click Next XP-8000-Atom-CE6 User Manual Page: 109 Copyright © 2011 ICP DAS Co., Ltd. All Rights Reserved. E-mail: [email protected] 4.3.2.2. Specifying the Path of the XPAC Reference The XPAC SDKs provides a complete solution to integrate with XPAC and it‟s compatible with Visual C#, Visual Basic .net and C++. In order to use a component in your application, you must first add a reference to it. Step 1 Get the PACNET.dll and copy it to the project folder The PACNET.dll can be obtained from the link below that has been provided on the CD or by downloading the latest version from ICP DAS web site. CD:\XPAC-ATOM-CE6\SDK\XPacNET\PACNET ftp://ftp.icpdas.com/pub/cd/xpac-atom-ce6/sdk/xpacnet/pacnet/ XP-8000-Atom-CE6 User Manual Page: 110 Copyright © 2011 ICP DAS Co., Ltd. All Rights Reserved. E-mail: [email protected] Step 2 In Solution Explorer, right-click the References node and then click Add Reference… XP-8000-Atom-CE6 User Manual Page: 111 Copyright © 2011 ICP DAS Co., Ltd. All Rights Reserved. E-mail: [email protected] Step 3 Select “Browse” tab and add the PACNET.dll XP-8000-Atom-CE6 User Manual Page: 112 Copyright © 2011 ICP DAS Co., Ltd. All Rights Reserved. E-mail: [email protected] 4.3.2.3. Adding the Control to the Form You can drag various controls from the Toolbox onto the form. These controls are not really "live"; they are just images that are convenient to move around on the form into a precise location. After you add a control to your form, you can use the Properties window to set its properties, such as background color and default text. The values that you specify in the Properties window are the initial values that will be assigned to that property when the control is created at run time. Step 1 From the Toolbox, drag a Button control onto the form XP-8000-Atom-CE6 User Manual Page: 113 Copyright © 2011 ICP DAS Co., Ltd. All Rights Reserved. E-mail: [email protected] Step 2 Right-click the Button control, and then click Properties Step 3 In the Properties window, type Check the SDK version, and press ENTER to set the Text property XP-8000-Atom-CE6 User Manual Page: 114 Copyright © 2011 ICP DAS Co., Ltd. All Rights Reserved. E-mail: [email protected] 4.3.2.4. Adding the Event Handling to the Control You have finished the design stage of your application and are at the point when you can start adding some code to provide the program's functionality. Step 1 Double-click the button on the form XP-8000-Atom-CE6 User Manual Page: 115 Copyright © 2011 ICP DAS Co., Ltd. All Rights Reserved. E-mail: [email protected] Step 2 Inserting the following code byte []data = new byte[30]; PACNET.Sys.GetSDKVersion(data); MessageBox.Show(PACNET.MISC.WideString(data)); XP-8000-Atom-CE6 User Manual Page: 116 Copyright © 2011 ICP DAS Co., Ltd. All Rights Reserved. E-mail: [email protected] 4.3.2.5. Uploading the Application to XP-8000-Atom-CE6 XP-8000-Atom-CE6 provide FTP server service, you can upload files to XP-8000-Atom-CE6 or download files from a public FTP server. Step 1 On the Build menu, click Build SDKInformation XP-8000-Atom-CE6 User Manual Page: 117 Copyright © 2011 ICP DAS Co., Ltd. All Rights Reserved. E-mail: [email protected] Step 2 Open the browser and type the IP address of XP-8000-Atom-CE6 Step 3 Upload the SDKInformation.exe application and the corresponding PACSDK.dll and PACNET.dll files to the XPAC Tips & Warnings For applications programming in C# and VB.net with .net compact framework, when executing these application on the XP-8000-Atom-CE6, the corresponding PACSDK.dll and PACNET.dll must be in the same directory as the .exe file. XP-8000-Atom-CE6 User Manual Page: 118 Copyright © 2011 ICP DAS Co., Ltd. All Rights Reserved. E-mail: [email protected] 4.3.2.6. Executing the Application on XP-8000-Atom-CE6 After uploading the application to XP-8000-Atom-CE6, you can just double-click it on XP-8000-Atom-CE6 to execute it. XP-8000-Atom-CE6 User Manual Page: 119 Copyright © 2011 ICP DAS Co., Ltd. All Rights Reserved. E-mail: [email protected] 4.3.3. Your First Program with the Visual C++ Here we will demonstrate how to create a C++ program running on XP-8000-Atom-CE6 with the Visual C++ development tool 1. Create a new project 2. Configure the platform 3. Specify the path of the XPAC reference 4. Add the control to the form 5. Add the event handling for the control 6. Upload the application to XP-8000-Atom-CE6 7. Execute the application on XP-8000-Atom-CE6 In this tutorial, we will assume that you have installed XPAC platform SDK on PC and used the Visual Studio 2008 for application development. XP-8000-Atom-CE6 User Manual Page: 120 Copyright © 2011 ICP DAS Co., Ltd. All Rights Reserved. E-mail: [email protected] 4.3.3.1. Creating a New Project The Visual C++ project template is a composite control that you use in this example creates a new project with this user control. Step 1 Start Visual Studio 2008 Visual Studio 2008 Step 2 On the File menu, point to New, and then click Project XP-8000-Atom-CE6 User Manual Page: 121 Copyright © 2011 ICP DAS Co., Ltd. All Rights Reserved. E-mail: [email protected] Step 3 In the Project types pane, expand Visual C++, and then click Smart Device Step 4 In the Templates pane, click MFC Smart Device Application Step 5 Type a name in the Name field, and then click OK Here we will enter the name “SDKInformation” and a different location for the project if you wish XP-8000-Atom-CE6 User Manual Page: 122 Copyright © 2011 ICP DAS Co., Ltd. All Rights Reserved. E-mail: [email protected] Step 6 On the first page of the wizard, click Next Step 7 On the next page of the wizard, select XPacSDK_CE to be added to the project, and then click Next XP-8000-Atom-CE6 User Manual Page: 123 Copyright © 2011 ICP DAS Co., Ltd. All Rights Reserved. E-mail: [email protected] Step 8 On the next page of the wizard, select Dialog based, and then click next Step 9 On the next page of the wizard, click next XP-8000-Atom-CE6 User Manual Page: 124 Copyright © 2011 ICP DAS Co., Ltd. All Rights Reserved. E-mail: [email protected] Step 10 On the next page of the wizard, click next Step 11 On the next page of the wizard, click Finish XP-8000-Atom-CE6 User Manual Page: 125 Copyright © 2011 ICP DAS Co., Ltd. All Rights Reserved. E-mail: [email protected] 4.3.3.2. Configuring the Platform When developing applications by using Visual C++, you must configure the Platform to indicate what platform and device you intend to download the application to. Before you deploy your project, check the platform. On the Debug configuration toolbar, select Release, and then on the Pocket PC 2003 (ARMV4) configuration toolbar, select XPacSDK_CE (x86), as shown in the following illustration. XP-8000-Atom-CE6 User Manual Page: 126 Copyright © 2011 ICP DAS Co., Ltd. All Rights Reserved. E-mail: [email protected] 4.3.3.3. Specifying the Path of the XPAC Reference The XPAC SDKs provides a complete solution to integrate with XPAC and it‟s compatible with Visual C#, Visual Basic .net and C++. In order to use a component in your application, you must first add a reference to it. Step 1 Right-click the project name, and then click Properties XP-8000-Atom-CE6 User Manual Page: 127 Copyright © 2011 ICP DAS Co., Ltd. All Rights Reserved. E-mail: [email protected] Step 2 In left pane, expand Configuration Properties, and then click Link Step 3 In the right pane, choose the PACSDK_CE.lib in the Additional Dependencies item XP-8000-Atom-CE6 User Manual Page: 128 Copyright © 2011 ICP DAS Co., Ltd. All Rights Reserved. E-mail: [email protected] 4.3.3.4. Adding the Control to the Form You can drag various controls from the Toolbox onto the form. These controls are not really "live"; they are just images that are convenient to move around on the form into a precise location. After you add a control to your form, you can use the Properties window to set its properties, such as background color and default text. The values that you specify in the Properties window are the initial values that will be assigned to that property when the control is created at run time. Step 1 In Resource View, expand the resources tree by opening the top level folder Step 2 Open the Dialog folder and then double-click the dialog resource name IDD_SDKINFORMATION_DIALOG The resource editor appears in the right pane. XP-8000-Atom-CE6 User Manual Page: 129 Copyright © 2011 ICP DAS Co., Ltd. All Rights Reserved. E-mail: [email protected] Step 3 From the Toolbox, drag a Button control onto the form Step 4 Right-click the Button control, and then click Properties XP-8000-Atom-CE6 User Manual Page: 130 Copyright © 2011 ICP DAS Co., Ltd. All Rights Reserved. E-mail: [email protected] Step 5 In the Properties window, type Check the SDK version, and press ENTER to set the Text property XP-8000-Atom-CE6 User Manual Page: 131 Copyright © 2011 ICP DAS Co., Ltd. All Rights Reserved. E-mail: [email protected] 4.3.3.5. Adding the Event Handling to the Control You have finished the design stage of your application and are at the point when you can start adding some code to provide the program's functionality. Step 1 Double-click the button on the form XP-8000-Atom-CE6 User Manual Page: 132 Copyright © 2011 ICP DAS Co., Ltd. All Rights Reserved. E-mail: [email protected] Step 2 Inserting the following code char sdk_version[32]; TCHAR buf[32]; pac_GetSDKVersion(sdk_version); pac_AnsiToWideString(sdk_version, buf); MessageBox(buf,0,MB_OK); Step 3 Inserting the following code into the header area #include “PACSDK.h” XP-8000-Atom-CE6 User Manual Page: 133 Copyright © 2011 ICP DAS Co., Ltd. All Rights Reserved. E-mail: [email protected] 4.3.3.6. Uploading the Application to XP-8000-Atom-CE6 XP-8000-Atom-CE6 provide FTP server service, you can upload files to XP-8000-Atom-CE6 or download files from a public FTP server. Step 1 On the Build menu, click Build SDKInformation XP-8000-Atom-CE6 User Manual Page: 134 Copyright © 2011 ICP DAS Co., Ltd. All Rights Reserved. E-mail: [email protected] Step 2 Open the browser and type the IP address of XP-8000-Atom-CE6 Step 3 Upload the SDKInformation.exe application XP-8000-Atom-CE6 User Manual Page: 135 Copyright © 2011 ICP DAS Co., Ltd. All Rights Reserved. E-mail: [email protected] 4.3.3.7. Executing the Application on XP-8000-Atom-CE6 After uploading the application to XP-8000-Atom-CE6, you can just double-click it on XP-8000-Atom-CE6 to execute it. XP-8000-Atom-CE6 User Manual Page: 136 Copyright © 2011 ICP DAS Co., Ltd. All Rights Reserved. E-mail: [email protected] 5. APIs and Demo References This chapter provides an introduction to the included demo programs that have been designed for the XPAC. By examining the source code of each demo program, which includes detailed comments, you will be able to familiarize yourself with the XPAC API allowing you to quickly develop your own custom applications by modifying these demo programs. The following details the contents of the XPAC demo programs. XP-8000-Atom-CE6 User Manual Page: 137 Copyright © 2011 ICP DAS Co., Ltd. All Rights Reserved. E-mail: [email protected] 5.1. Demo Programs using with VB.NET The following VB.NET programs have been designed to demonstrate the various features of the XPAC. XP-8000-Atom-CE6 User Manual Page: 138 Copyright © 2011 ICP DAS Co., Ltd. All Rights Reserved. E-mail: [email protected] 5.1.1. VB.NET Demo Programs for the XPAC Standard API The table below provides an overview of the XPAC demos programs that have been designed to demonstrate the standard operation features of the XPAC. System Information Watchdog Backplane Access UART Interrupt Registry Memory Access Backplane Timer System Operation XP-8000-Atom-CE6 User Manual Page: 139 Copyright © 2011 ICP DAS Co., Ltd. All Rights Reserved. E-mail: [email protected] XPAC Standard API: Folder DeviceInforma tion Diagnostic Demo Explanation DeviceInformation Retrieves information about the OS version, the CPU version and the SDK version, etc. Diagnostic Retrieves information about the slot count and the module inserted in the backplane. DIP Memory DIP Memory Retrieves information about the status of the DIP switch Shows how to read/write data values from/to the EEPROM or the backplane of the SRAM Displays information about how to operate the watchdog watchdog watchdog BPtimer BPTimer registry registry Shows how to read/write data values from/to the registry Uart UART Shows how to read the name of a local I/O modules via a UART Shows how to enables or disables the backplane timer Demo programs for VB.NET applications, these demo programs can be obtained from: CD:\ XPAC-ATOM-CE6\demo\XPAC\VB.NET\Standard or ftp://ftp.icpdas.com/pub/cd/xpac-atom-ce6/demo/xpac/vb.net/standard/ XP-8000-Atom-CE6 User Manual Page: 140 Copyright © 2011 ICP DAS Co., Ltd. All Rights Reserved. E-mail: [email protected] 5.1.2. VB.NET Demo Programs for the PAC IO API The table below provides an overview of the XPAC demos programs that have been designed to demonstrate the expansion I/O module features of the XPAC. PAC_IO Remote I/O XP-8000-Atom-CE6 User Manual Local I/O Page: 141 Copyright © 2011 ICP DAS Co., Ltd. All Rights Reserved. E-mail: [email protected] PAC IO API: Folder Demo 8k_di 8k_do 8k_dio Explanation Shows how to read DI values from a DI module. This demo is applicable to 8K series DI modules. Shows how to write DO values to a DO module. This demo is applicable to 8K series DO modules. Shows how to read DI and DO values from a DIO module. This demo is applicable to 8K series DIO modules. 87k_basic Shows how to send/receive a command/response application. This demo is applicable to 87K series modules. 87K_demo Shows how to use the UART API and the IO modules located in the slots. This demo is applicable to 87K series modules. Local 87k_ai 87k_ao 87k_di 87k_do Shows how to read AI values from an AI module. This demo is applicable to 87K series AI modules. Shows how to write AO values to an AO module. This demo is applicable to 87K series AO modules. Shows how to read DI values from a DI module. This demo is applicable to 87K series DI modules. Shows how to write DO values to a DO module. This demo is applicable to 87K series DO modules. Shows how to read the DI and the DO values from a DIO module. 87k_dio XP-8000-Atom-CE6 User Manual This demo is applicable to 87K series DIO modules. Page: 142 Copyright © 2011 ICP DAS Co., Ltd. All Rights Reserved. E-mail: [email protected] Folder Demo Explanation Shows how to send/receive a command/response 7k87k_basic application. This demo is applicable to 7K or 87K series. AI modules that are connected through a COM port. Shows how to read AI values from an AI module. 7k87k_ai This demo is applicable to 7K or 87K series AI modules that are connected through a COM port. Shows how to write AO values to an AO module. 7k87k_ao This demo is applicable to 7K or 87K series AO modules that are connected through a COM port. Remote Shows how to read DI values from a DI module. 7k87k_di This demo is applicable to 7K or 87K series DI modules which connected through a COM port. Shows how to write DO values to a DO module. 7k87k_do 7k87k_dio This demo is applicable to 7K or 87K series DO modules which connected through a COM port. Shows how to read DI and DO values from a DIO module. This demo is applicable to 7K or 87K series DIO modules that are connected through a COM port. Demo programs for VB.NET applications can be obtained from: CD:\ XPAC-ATOM-CE6\demo\XPAC\VB.Net\IO Or ftp://ftp.icpdas.com/pub/cd/xpac-atom-ce6/demo/xpac/vb.net/io/ XP-8000-Atom-CE6 User Manual Page: 143 Copyright © 2011 ICP DAS Co., Ltd. All Rights Reserved. E-mail: [email protected] 5.2. Demo Programs using C# The following C# programs have been designed to demonstrate the various features of the XPAC. XP-8000-Atom-CE6 User Manual Page: 144 Copyright © 2011 ICP DAS Co., Ltd. All Rights Reserved. E-mail: [email protected] 5.2.1. C# Demo Programs for the XPAC Standard API The table below provides an overview of the XPAC demos programs that have been designed to demonstrate the standard operation features of the XPAC. Device Information Watchdog Diagnostics UART Interrupt Registry Memory Access Backplane Timer System Operation XP-8000-Atom-CE6 User Manual Page: 145 Copyright © 2011 ICP DAS Co., Ltd. All Rights Reserved. E-mail: [email protected] XPAC Standard API: Folder DeviceInforma tion Diagnostic Demo Explanation DeviceInformation Retrieves information about the OS version, the CPU version, and the SDK version, etc. Diagnostic Retrieves information about the slot count and module inserted in the backplane. DIP Memory DIP Memory Retrieves information about the status of the DIP switch Shows how to read/write data values from/to the EEPROM or the backplane of the SRAM watchdog watchdog BPtimer BPTimer registry registry Uart UART Displays information about how to operate the watchdog Shows how to enables or disable the backplane timer Shows how to read/write data values from/to the registry Shows how to read the name of a local I/O modules via a UART Demo programs for C# applications, these demo programs can be obtained from: CD:\ XPAC-ATOM-CE6\demo\XPAC\C#\Standard or ftp://ftp.icpdas.com/pub/cd/xpac-atom-ce6/demo/xpac/c%23/standard/ XP-8000-Atom-CE6 User Manual Page: 146 Copyright © 2011 ICP DAS Co., Ltd. All Rights Reserved. E-mail: [email protected] 5.2.2. C# Demo Programs for the PAC IO API The table below provides an overview of the XPAC demos programs that have been designed to demonstrate the expansion I/O module features of the XPAC. PAC_IO Remote I/O XP-8000-Atom-CE6 User Manual Local I/O Page: 147 Copyright © 2011 ICP DAS Co., Ltd. All Rights Reserved. E-mail: [email protected] PAC IO API: Folder Demo Explanation Shows how to read DI values from a DI module. 8k_di This demo is applicable to 8K series DI modules. Shows how to write DO values to a DO module. 8k_do 8k_dio This demo is applicable to 8K series DO modules. Shows how to read DI and DO values from a DIO module. This demo is applicable to 8K series DIO modules. Shows how to send/receive a command/response 87k_basic application. This demo is used by 87K series modules. 87K_demo Shows how use the UART API and the IO modules located in the slots. This demo is applicable to 87K series modules. Local Shows how to read AI values from an AI module. 87k_ai This demo is applicable to 87K series AI modules. Shows how to write AO values to an AO module. 87k_ao This demo is applicable to 87K series AO modules. Shows how to read DI values from a DI module. 87k_di This demo is applicable to 87K series DI modules. Shows how to write DO values to a DO module. 87k_do This demo is applicable 87K series DO modules. Shows how to read DI and the DO values from a DIO module. 87k_dio XP-8000-Atom-CE6 User Manual This demo is applicable to 87K series DIO modules. Page: 148 Copyright © 2011 ICP DAS Co., Ltd. All Rights Reserved. E-mail: [email protected] Folder Demo Explanation Shows how to send/receive a command/response 7k87k_ basic application. This demo is applicable to 7K or 87K series modules that are connected through a COM port. Shows how to read AI values from an AI module. 7k87k_ai This demo is applicable to 7K or 87K series AI modules that are connected through a COM port. Shows how to write AO values to an AO module. 7k87k_ao This demo is applicable to 7K or 87K series AO modules that are connected through a COM port. Remote Shows how to read DI values from a DI module. 7k87k_di This demo is applicable to 7K or 87K series DI modules that are connected through a COM port. Shows how to write DO values to a DO module. 7k87k_do This demo is applicable to 7K or 87K series AI modules that are connected through a COM port. Shows how to read DI and DO values from a DIO module. 7k87k_dio This demo is applicable to 7K or 87K series DIO modules that are connected through a COM port. Demo programs for C# applications can be obtained from: CD:\ XPAC-ATOM-CE6\demo\XPAC\C#\IO or ftp://ftp.icpdas.com/pub/cd/xpac-atom-ce6/demo/xpac/c%23/io/ XP-8000-Atom-CE6 User Manual Page: 149 Copyright © 2011 ICP DAS Co., Ltd. All Rights Reserved. E-mail: [email protected] 5.3. Demo Programs using Visual C++ The following VC++ programs have been designed to demonstrate the various features of the XPAC. XP-8000-Atom-CE6 User Manual Page: 150 Copyright © 2011 ICP DAS Co., Ltd. All Rights Reserved. E-mail: [email protected] 5.3.1. VC++ Demo Programs for the XPAC Standard API The table below provides an overview of the XPAC demo programs that have been designed to demonstrate the standard operation features of the XPAC. System Information Watchdog Backplane Access UART Interrupt Registry Memory Access Backplane Timer System Operation XP-8000-Atom-CE6 User Manual Page: 151 Copyright © 2011 ICP DAS Co., Ltd. All Rights Reserved. E-mail: [email protected] XPAC Standard API: Folder DeviceInforma tion Diagnostic Demo Explanation DeviceInformation Retrieves information about the OS version, the CPU version, and the SDK version, etc. Diagnostic Retrieves information about the slot count and module inserted in the backplane. DIP Memory DIP Memory Retrieves information about the status of the DIP switch Shows how to read/write data values from/to the EEPROM or the backplane of the SRAM watchdog watchdog Displays information about how to operate the watchdog BPtimer BPTimer Shows how to enables or disable the backplane timer registry registry Shows how to read/write data values from/to the registry Uart UART Shows how to read the name of a local I/O modules via a UART Demo programs for eVC applications can be obtained from: CD:\XPAC-ATOM-CE6\demo\XPAC\VC2005\Standard or ftp://ftp.icpdas.com/pub/cd/xpac-atom-ce6/demo/xpac/vc2005/standard/ XP-8000-Atom-CE6 User Manual Page: 152 Copyright © 2011 ICP DAS Co., Ltd. All Rights Reserved. E-mail: [email protected] 5.3.2. VC++ Demo programs for PAC IO API The table below provides an overview of the XPAC demos programs that have been designed to demonstrate the expansion I/O module features of the XPAC. PAC_IO Remote I/O XP-8000-Atom-CE6 User Manual Local I/O Page: 153 Copyright © 2011 ICP DAS Co., Ltd. All Rights Reserved. E-mail: [email protected] PAC IO API: Folder Demo 8k_di 8k_do 8k_dio Explanation Shows how to read DI values from a DI module. This demo is applicable to 8K series DI modules. Shows how to write DO values to a DO module. This demo is applicable to 8K series DO modules. Shows how to read DI and DO values from a DIO module. This demo is applicable to 8K series DIO modules. 87k_basic Shows how to send/receive a command/response application. This demo is used by 87K series modules. 87K_demo Local Shows how use the UART API and the IO modules located in the slots. This demo is applicable to 87K series modules. 87k_ai Shows how to read AI values from an AI module. This demo is applicable to 87K series AI modules. Shows how to write AO values to an AO module. 87k_ao 87k_di 87k_do 87k_dio XP-8000-Atom-CE6 User Manual This demo is applicable to 87K series AO modules. Shows how to read DI values from a DI module. This demo is applicable to 87K series DI modules. Shows how to write DO values to a DO module. This demo is applicable 87K series DO modules. Shows how to read DI and the DO values from a DIO module. This demo is applicable to 87K series DIO modules. Page: 154 Copyright © 2011 ICP DAS Co., Ltd. All Rights Reserved. E-mail: [email protected] Folder Demo Explanation Shows how to send/receive a command/response application. 7k87k_basic This demo is applicable to 7K or 87K series modules that are connected through a COM port. Shows how to read AI values from an AI module. 7k87k_ai This demo is applicable to 7K or 87K series AI modules that are connected through a COM port. Shows how to write AO values to an AO module. 7k87k_ao Remote This demo is applicable to 7K or 87K series AO modules that are connected through a COM port. Shows how to read DI values from a DI module. 7k87k_di This demo is applicable to 7K or 87K series DI modules that are connected through a COM port. Shows how to write DO values to a DO module. 7k87k_do 7k87k_dio This demo is applicable to 7K or 87K series AI modules that are connected through a COM port. Shows how to read DI and DO values from a DIO module. This demo is applicable to 7K or 87K series DIO modules that are connected through a COM port. Demo programs for VC++ applications can be obtained from: CD:\XPAC-ATOM-CE6\demo\XPAC\VC2005\IO or ftp://ftp.icpdas.com/pub/cd/xpac-atom-ce6/demo/xpac/vc2005/io/ XP-8000-Atom-CE6 User Manual Page: 155 Copyright © 2011 ICP DAS Co., Ltd. All Rights Reserved. E-mail: [email protected] 6. I/O Modules and SDK Selection This chapter describes how to select a suitable I/O expansion module and the corresponding SDK library to be used for developing programs on XPAC series devices. XP-8000-Atom-CE6 User Manual Page: 156 Copyright © 2011 ICP DAS Co., Ltd. All Rights Reserved. E-mail: [email protected] 6.1. I/O Modules and SDK Selection Selecting an SDK Library for I/O Expansion 2 5 3 4 1 1. Local I/O (I-8K Series & I-87K Series) Two types of I/O modules that can be inserted into the local bus of an XPAC device, Parallel and Serial. Parallel modules (I-8K Series) are high-speed modules and only support an MCU (Main Control Unit). Serial modules (I-87K Series) can support either an MCU or an I/O expansion unit. The following indicates the appropriate SDK library to be used for I/O modules Modules SDK I-87K series I-87K series with PWM functions I-8K series Specified I-8K series Native SDK PACSDK.dll PACSDK_PWM.dll PACSDK.dll Specified SDK .NET CF SDK PACNET.dll PACNET.dll PACNET.dll Specified SDK XP-8000-Atom-CE6 User Manual Page: 157 Copyright © 2011 ICP DAS Co., Ltd. All Rights Reserved. E-mail: [email protected] The detail of the SDK library to be used for a specific I/O Module is as follows Module Native SDK .NET CF SDK I-8017HW pac_i8017HW.dll pac_i8017HWNet.dll I-8014W pac_i8014W.dll pac_i8014WNet.dll I-8024W pac_i8024W.dll pac8024WNet.dll I-8026W pac_i8026W.dll pac_i8026WNet.dll I-8048W pac_i8048W.dll pac_i8048WNet.dll I-8050W pac_i8050W.dll pac_i8050WNet.dll I-8084W pac_i8084W.dll pac_i8084WNet.dll I-8088W pac_i8088W.dll pac_i8088WNet.dll I-8093W pac_i8093W.dll pac8093WNet.dll I-87088W PACSDK_PWM.dll PACNET.dll Other I-8K & I-87K modules PACSDK.dll PACNET.dll 2. RS-485 (I-7K Series & M-7K series) I-7000, M-7000, RU-87Pn and high profile I-87K series modules are connected to XPAC series devices via a twisted-pair, multi-drop, 2-wire RS-485 network. Module SDK I-7K series I-7K series with PWM functions M-7K series RU-87Pn + I-87K Native SDK PACSDK.dll PACSDK_PWM.dll Modbus Demo Refer to the I-8K & I-87K Series .NET CF SDK PACNET.dll PACNET.dll Modbus Demo Refer to the I-8K & I-87K Series XP-8000-Atom-CE6 User Manual Page: 158 Copyright © 2011 ICP DAS Co., Ltd. All Rights Reserved. E-mail: [email protected] The SDK library to be used for a specific I/O Module is as follows Module Native SDK .NET CF SDK M7000 series Modbus Demo Modbus Demo I-7088W PACSDK_PWM.dll PACNET.dll Other I-7K modules PACSDK.dll PACNET.dll 3. Ethernet The Ethernet I/O devices available include ET-6000, ET-7000, I-8KE4/8 and I-8KE4/8-MTCP, and support either the DCON or the Modbus/TCP communication protocol. Module Native SDK .NET CF SDK ET-6K/ET-7K series Modbus Demo Modbus Demo 4. FRnet FRnet is an innovative industrial field bus technology that uses twisted pair cable as the transmission medium. The status of all I/O devices is updated on a fixed cycle, no matter how many FRnet I/O modules are connected to the FRnet network. Module Native SDK .NET CF SDK I-8172W pac_i8172W.dll pac8172WNet.dll 5. CAN Bus A Controller Area Network (CAN) is a serial communication way protocol that efficiently supports distributed real-time control with a very high level of security. It provides the error-processing mechanisms and concepts of message priority concepts that can improve the network reliability and transmission efficiency. Module Native SDK .NET CF SDK I-8120W I8120.dll I8120net_pac.dll XP-8000-Atom-CE6 User Manual Page: 159 Copyright © 2011 ICP DAS Co., Ltd. All Rights Reserved. E-mail: [email protected] I/O Module Demo Program Selection Guide I-7K Series: ftp://ftp.icpdas.com/pub/cd/xpac-atom-ce6/demo/xpac/applicabled_demo_for_7k _module.pdf I-87K Series: ftp://ftp.icpdas.com/pub/cd/xpac-atom-ce6/demo/xpac/applicabled_demo_for_87 k_module.pdf I-8K Series: ftp://ftp.icpdas.com/pub/cd/xpac-atom-ce6/demo/xpac/applicabled_demo_for_8k _module.pdf Modbus Demo: ftp://ftp.icpdas.com/pub/cd/xpac-atom-ce6/demo/nmodbus/ CAN bus Demo: ftp://ftp.icpdas.com/pub/cd/fieldbus_cd/can/slotmodule/i_8120w/demos/ XP-8000-Atom-CE6 User Manual Page: 160 Copyright © 2011 ICP DAS Co., Ltd. All Rights Reserved. E-mail: [email protected] 7. Restore and Recovery This chapter provides information of the XP-8000-Atom-CE6 restore and recovery, and a guided tour that describes the steps needed to restore and recovery the XP-8000-Atom-CE6. XP-8000-Atom-CE6 User Manual Page: 161 Copyright © 2011 ICP DAS Co., Ltd. All Rights Reserved. E-mail: [email protected] The XP-8000-Atom-CE6 comes with a rescue CF card that is a tool that you can use to boot the XP-8000-Atom-CE6 in the event that the operating system on the XP-8000-Atom-CE6 fails to start. The recovery file of the rescue CF card can be found separately on the CD that was provided with the package or by downloading the latest version from ICP DAS web site. There is a ghost file, Atom_Rescue_Disk.gho that is used to restore the rescue CF card if it has partitioned or formatted. The Atom_Rescue_Disk.gho file can be found from the CD that was provided with the package or by downloading the latest version from ICP DAS web site. CD:\ XP-8000-Atom-CE6\Rescue_Disk\ ftp://ftp.icpdas.com/pub/cd/xpac-atom-ce6/rescue_disk/ XP-8000-Atom-CE6 User Manual Page: 162 Copyright © 2011 ICP DAS Co., Ltd. All Rights Reserved. E-mail: [email protected] 7.1. Recovering the XP-8000-Atom-CE6 The XP-8000-Atom-CE6 comes with a rescue CF card that is a tool that allows users to restore the XP-8000-Atom-CE6 to factory default settings by reinstalling the XP-8000-Atom-CE6 OS image. If the XP-8000-Atom-CE6 crashes and won‟t start up, you can use the rescue CF card to start up the XP-8000-Atom-CE6 computer and then fix the problem that caused the crash. Here are step by step instructions on how to recovering the XP-8000-Atom-CE6. Step 1 Place the rotary switch in position 0, Normal mode Step 2 Reboot the XP-8000-Atom-CE6 and go to the BIOS by pressing the DEL key XP-8000-Atom-CE6 User Manual Page: 163 Copyright © 2011 ICP DAS Co., Ltd. All Rights Reserved. E-mail: [email protected] Step 3 Select Boot menu, and then select Hard Disk Drives Step 4 Set 1st Drive as PS-Flash Module, PS-Flash Module means compact CF card XP-8000-Atom-CE6 User Manual Page: 164 Copyright © 2011 ICP DAS Co., Ltd. All Rights Reserved. E-mail: [email protected] Step 5 Press F10 to save and exit setup Step 6 After restarting, the system will enter the XP-8000-Atom-CE6 Rescue Utility, and then enter (1), create XPAC_CE default partition XP-8000-Atom-CE6 User Manual Page: 165 Copyright © 2011 ICP DAS Co., Ltd. All Rights Reserved. E-mail: [email protected] Step 7 Wait a while until we enter the XP-8000-Atom-CE6 Rescue Utility again, and then enter (2), format and restore XPAC_CE to factory default OS Step 8 Wait a while until we enter the XP-8000-Atom-CE6 Rescue Utility again, and then enter (3), reboot Step 9 Repeat step 1 ~ 4 to set 1st Drive as PM-2GB-ATA F1, PM-2GB-ATA F1 means Built-in flash, and then reboot the XP-8000-Atom-CE6 Step 10 The XP-8000-Atom-CE6 has been recovered XP-8000-Atom-CE6 User Manual Page: 166 Copyright © 2011 ICP DAS Co., Ltd. All Rights Reserved. E-mail: [email protected] 7.2. Restoring the Rescue CF Card The rescue CF card is rescue equipment that allows you to perform some maintenance tasks on your system in case of failure. Once the rescue CF card are partitioned or formatted, you must restore the rescue CF card. Requirements For restoring the Rescue CF card, you should prepare Ghost 11 or later, which you could obtain by contacting Symantec (http://www.symantec.com) Here are step by step instructions on how to restore the rescue CF card. In this demonstration, we will use Symantec Norton Ghost32 V.11 (The Symantec Norton Ghost V.11 or above version are recommend). Step 1 Get the rescue ghost file, Atom_Rescue_Disk.gho The Atom_Rescue_Disk.gho file can be installed from the CD that was provided with the package or by downloading the latest version from ICP DAS web site. CD:\XP-8000-Atom-CE6\Rescue_Disk\ ftp://ftp.icpdas.com/pub/cd/xpac-atom-ce6/rescue_disk/ XP-8000-Atom-CE6 User Manual Page: 167 Copyright © 2011 ICP DAS Co., Ltd. All Rights Reserved. E-mail: [email protected] Step 2 Start the Symantec Norton Ghost32 V.11, and then click OK Step 3 Click Function Menu, point to Local, point to Disk, and then click From Image XP-8000-Atom-CE6 User Manual Page: 168 Copyright © 2011 ICP DAS Co., Ltd. All Rights Reserved. E-mail: [email protected] Step 4 Select rescue ghost file, Atom_Rescue_Disk.gho, that you saved and then click Open Step 5 Select the destination to CF card and click then OK XP-8000-Atom-CE6 User Manual Page: 169 Copyright © 2011 ICP DAS Co., Ltd. All Rights Reserved. E-mail: [email protected] Step 6 Recovery the rescue ghost file, Atom_Rescue_Disk.gho, into CF card and then click OK Step 7 The rescue CF card has been done XP-8000-Atom-CE6 User Manual Page: 170 Copyright © 2011 ICP DAS Co., Ltd. All Rights Reserved. E-mail: [email protected] 8. XP-8000-Atom-CE6 Updates This chapter provides information of the XP-8000-Atom-CE6 OS and firmware, and a guided tour that describes the steps needed to update the XP-8000-Atom-CE6 OS or firmware. XP-8000-Atom-CE6 User Manual Page: 171 Copyright © 2011 ICP DAS Co., Ltd. All Rights Reserved. E-mail: [email protected] ICP DAS will continue to add additional features to XP-8000-Atom-CE6 SDK and OS in the future, so we advise you to periodically check the ICP DAS web site for the latest updates. XP-8000-Atom-CE6 updates services provides a software update service for XP-8000-Atom-CE6. It can be divided into two categories, OS updates and SDK updates. Both the OS updates services and SDK updates services can be found separately on the CD that was provided with the package or by downloading the latest version from ICP DAS web site. 1. OS updates 2. SDK updates XP-8000-Atom-CE6 User Manual Page: 172 Copyright © 2011 ICP DAS Co., Ltd. All Rights Reserved. E-mail: [email protected] 8.1. OS updates OS updates are part of the XP-8000-Atom-CE6 updates services to provide additional and more efficient features and functionality for XP-8000-Atom-CE6 operating system. There are two ways to update the OS: 1. Update from file (Please refer to section 7.1.1) (We recommend that you use this one for more quicker and easier to update) 2. Update from rescue CF card (Please refer to section 7.1.2) XP-8000-Atom-CE6 User Manual Page: 173 Copyright © 2011 ICP DAS Co., Ltd. All Rights Reserved. E-mail: [email protected] 8.1.1. OS Updates from Files Here are step by step instructions on how to update the XP-8000-Atom-CE6 OS. Step 1 Get the latest version of the XP-8000-Atom-CE6 OS image, NK.BIN The latest version of the XP-8000-Atom-CE6 OS image, NK.BIN, can be obtained from ICP DAS web site. ftp://ftp.icpdas.com/pub/cd/ xpac-atom-ce6/rescue/ce6/nk.bin Step 2 Replace the order XP-8000-Atom-CE6 OS image The XP-8000-Atom-CE6 OS image, NB.BIN are pre-installed on the XP-8000-Atom-CE6, located under \System_Disk Step 3 Reboot the XP-8000-Atom-CE6, the XP-8000-Atom-CE6 OS image has been updated completely XP-8000-Atom-CE6 User Manual Page: 174 Copyright © 2011 ICP DAS Co., Ltd. All Rights Reserved. E-mail: [email protected] 8.1.2. OS Updates using the Rescue CF Card The XP-8000-Atom-CE6 can be reinstalled with the XP-8000-Atom-CE6 Rescue Utility. Before reinstalling the XP-8000-Atom-CE6, make sure the necessary updating files have been are available on your CF card. For more information on how to reinstall the XP-8000-Atom-CE6, please refer to section 6.1. Recovering the XP-8000-Atom-CE6 XP-8000-Atom-CE6 User Manual Page: 175 Copyright © 2011 ICP DAS Co., Ltd. All Rights Reserved. E-mail: [email protected] 8.2. SDK updates SDK updates are part of the XP-8000-Atom-CE6 updates services to provide additional and more efficient features and functionality for XP-8000-Atom-CE6 applications. Here are step by step instructions on how to update the XPAC SDK. Step 1 Get the latest version of the XPAC SDK components The latest version of the XPAC SDK components can be obtained from ICP DAS web site. http://ftp.icpdas.com/pub/cd/XP-8000-Atom-CE6-\atom-ce6/sdk/ Step 2 Copy the latest version of DLL to PC and XPAC The DLL files on PC are located at anywhere only the solution can reference it. The DLL files on XP-8000-Atom-CE6 are located at the same directory as the .exe file. XP-8000-Atom-CE6 User Manual Page: 176 Copyright © 2011 ICP DAS Co., Ltd. All Rights Reserved. E-mail: [email protected] 9. XPAC Download Center This chapter provides an introduction to the XPAC Download Center. XP-8000-Atom-CE6 User Manual Page: 177 Copyright © 2011 ICP DAS Co., Ltd. All Rights Reserved. E-mail: [email protected] 9.1. XPAC Download Center This section gives an overview of the functions and features of the XPAC Download Center. Visit the XPAC Download Center at: http://www.icpdas.com/products/PAC/xpac/download/xpac_atom_ce6/download_o s_images.htm The categories of updates available from the XPAC Download Center include: OS images: This category contains the latest version of the XPAC OS. SDK: This category contains the latest version of the SDK for each XPAC component SDK, such as XPAC SDK, NAPOPC_CE5 SDK, and Modbus SDK, etc. XP-8000-Atom-CE6 User Manual Page: 178 Copyright © 2011 ICP DAS Co., Ltd. All Rights Reserved. E-mail: [email protected] Utility & Tools: This category contains the latest version of the XPAC toolkits. Demo: This category contains all demo programs related to the XPAC. Documents: This category contains the latest versions of documents related to the XPAC. System Disk: This category contains the latest version of the XPAC toolkits. FAQ: This category contains answers to some common issues you may encounter while troubleshooting the XPAC. XP-8000-Atom-CE6 User Manual Page: 179 Copyright © 2011 ICP DAS Co., Ltd. All Rights Reserved. E-mail: [email protected] Appendix A. Application of RS-485 Network This chapter provides tips and a guided tour on using and maintaining the XP-8000-Atom-CE6. XP-8000-Atom-CE6 User Manual Page: 180 Copyright © 2011 ICP DAS Co., Ltd. All Rights Reserved. E-mail: [email protected] The RS-485 length can be up to 4000 ft or 1.2 km over a single set of twisted–pair cables, if the RS-485 network is over 4000 ft or 1.2Km, the RS-485 repeater must be added to extend the RS-485 network. XP-8000-Atom-CE6 User Manual Page: 181 Copyright © 2011 ICP DAS Co., Ltd. All Rights Reserved. E-mail: [email protected] A.1. Basic RS-485 Network The basic component of the RS-485 network consist of a Master Controller (or using a PC as a host controller), and some RS-485 devices. XP-8000-Atom-CE6 User Manual Page: 182 Copyright © 2011 ICP DAS Co., Ltd. All Rights Reserved. E-mail: [email protected] A.2. Daisy Chain RS-485 Network All RS-485 devices are wired directly to the main network, If the network is up to 1.2 km, it will need a repeater (7510 series) to extend the network length. XP-8000-Atom-CE6 User Manual Page: 183 Copyright © 2011 ICP DAS Co., Ltd. All Rights Reserved. E-mail: [email protected] A.3. Star Type RS-485 Network There are branches along the main network. In this case, it is better to have a repeater to isolate or filter the noise that is made by devices. XP-8000-Atom-CE6 User Manual Page: 184 Copyright © 2011 ICP DAS Co., Ltd. All Rights Reserved. E-mail: [email protected] There is a better choice to use 7513 as a RS-485 hub on start type network. XP-8000-Atom-CE6 User Manual Page: 185 Copyright © 2011 ICP DAS Co., Ltd. All Rights Reserved. E-mail: [email protected] A.4. Random RS-485 Network There are branches along the main wire. In this case, it is better to have a repeater to isolate or filter the noise that is made by devices. XP-8000-Atom-CE6 User Manual Page: 186 Copyright © 2011 ICP DAS Co., Ltd. All Rights Reserved. E-mail: [email protected] A.5. Master/Slave Settings The RS-485 network based on master-slave architecture consists of a single master device and one or more slave devices. The XPAC provides two RS-485 communication interfaces based on the master-slave system architecture, all of which have a pull-high/pull-low resistor, user can set it to master or slave for implementing an RS-485 multi-drop network. One of the RS-485 communications, COM3, its pull-high/pull-low resistor located on power board, the other, COM4, located on the right side and its pull-high/pull-low resistor located on the bottom of the right side, as shown below. XP-8000-Atom-CE6 User Manual Page: 187 Copyright © 2011 ICP DAS Co., Ltd. All Rights Reserved. E-mail: [email protected] A.1.1. XPAC as a Master (Default) When one of XPAC is set to master, then all the other devices on the same network must be slave mode. If the network is up to 1.2 KM, it will need a repeater (7510 series) to extend the network length. XP-8000-Atom-CE6 User Manual Page: 188 Copyright © 2011 ICP DAS Co., Ltd. All Rights Reserved. E-mail: [email protected] When XPAC as a master using COM3 communication interface, the pull-high/pull-low resistor located on the power board must adjust to enable as shown below. When XPAC as a master using COM4 communication interface, the pull-high/pull-low resistor located on the power board must adjust to enable as shown below. XP-8000-Atom-CE6 User Manual Page: 189 Copyright © 2011 ICP DAS Co., Ltd. All Rights Reserved. E-mail: [email protected] A.1.1. XPAC as a Slave For most of application, when using one 7520 series as RS-232/485 converter, its pull-high/pull-low resistors are set to enabled. Then the XP-8000-Atom-CE6 and all the other devices on this network must be slave mode (the pull-high/pull-low resistors must be disabled). If there are repeaters on the RS-485 network, there will be pull-high/pull-low resistors on both sides of the repeaters (I-7510) XP-8000-Atom-CE6 User Manual Page: 190 Copyright © 2011 ICP DAS Co., Ltd. All Rights Reserved. E-mail: [email protected] When XPAC as a master using COM3 communication interface, the pull-high/pull-low resistor located on the power board must adjust to enable as shown below. When XPAC as a master using COM4 communication interface, the pull-high/pull-low resistor located on the power board must adjust to enable as shown below. XP-8000-Atom-CE6 User Manual Page: 191 Copyright © 2011 ICP DAS Co., Ltd. All Rights Reserved. E-mail: [email protected] Appendix B. Tips – How to This chapter provides tips and a guided tour on using and maintaining the XP-8000-Atom-CE6. XP-8000-Atom-CE6 User Manual Page: 192 Copyright © 2011 ICP DAS Co., Ltd. All Rights Reserved. E-mail: [email protected] B.1. How to use the Printer XP-8000-Atom-CE6 have ability to access the printer, you can connect to the printer via Ethernet network or USB. Tips & Warnings XPAC only supports HP Laser Jet Printers which support PCL6 driver. XP-8000-Atom-CE6 User Manual Page: 193 Copyright © 2011 ICP DAS Co., Ltd. All Rights Reserved. E-mail: [email protected] B.1.1. How to use the network printer Here are step by step instructions on how to use a shared printer. Step 1 On PC side, check the name of the PC and the shared printer XP-8000-Atom-CE6 User Manual Page: 194 Copyright © 2011 ICP DAS Co., Ltd. All Rights Reserved. E-mail: [email protected] Step 2 On XPAC side, open a WordPad format file Step 3 Set up the printer 1. Printer: PCL Laser 2. Port: Networ 3. Net Path: \\ServerName\PrinterName The “ServerName” is the name or IP of the PC. The “PrinterName” is the name of share printer of the PC. 4. Paper Size: Select the paper size XP-8000-Atom-CE6 User Manual Page: 195 Copyright © 2011 ICP DAS Co., Ltd. All Rights Reserved. E-mail: [email protected] B.1.2. How to use the USB printer Here are step by step instructions on how to use a shared printer. Step 1 On XPAC side, open a WordPad format file Step 2 Set up the printer 1. Printer: Hewlett-Packard LaserJet 2. Port: LPT1 3. Paper Size: Select the paper size XP-8000-Atom-CE6 User Manual Page: 196 Copyright © 2011 ICP DAS Co., Ltd. All Rights Reserved. E-mail: [email protected] B.2. How to Online Debug the XP-8000-Atom-CE6 Debug XP-8000-ATOM-CE6 programs in Visual Studio 2005/2008 Step 1 Make sure the following file are listed with the matching version numbers Path File C:\Program Files\Common Files\Microsoft Shared\CoreCon\1.0\Bin 1. ActiveSyncBootstrap.dll 2. ConMan2.dll 3. ConManPS.dll 4. DesktopDMA.dll 5. eDbgTL.dll 6. TcpConnectionC.dll C:\Program Files\Common Files\Microsoft Shared\CoreCon\1.0\Bin\1033 conmanui.dll C:\Program Files\Common Files\Microsoft Shared\CoreCon\1.0\Target\wce400\X86 1. Device Agent Transport.dll 2. eDbgTL.dll 3. TcpConnectionA.dll 4. clientshutdown.exe 5. CMAccept.exe 6. ConmanClient2.exe XP-8000-Atom-CE6 User Manual Page: 197 Copyright © 2011 ICP DAS Co., Ltd. All Rights Reserved. E-mail: [email protected] Step 2 If the version matches correctly and the entire file are there, copy the following files to XP-8000-ATOM-CE6 :\ System_Disk\ICPDAS\System folder ● Clientshutdown.exe ● ConmanClient2.exe ● CMaccept.exe ● eDbgTL.dll ● TcpConnectionA.dll Step 3 On the “Tools” menu, click “Options…” command XP-8000-Atom-CE6 User Manual Page: 198 Copyright © 2011 ICP DAS Co., Ltd. All Rights Reserved. E-mail: [email protected] Step 4 On the “Options” dialog, select “XPacSDK_CE” from the “Show devices platform” list, and then click the “Properties…” button Step 5 On the “XPacSDK_CE x86 Device Properties” dialog, click the “Configure…” button XP-8000-Atom-CE6 User Manual Page: 199 Copyright © 2011 ICP DAS Co., Ltd. All Rights Reserved. E-mail: [email protected] Step 6 On the “Configure TCP/IP Transport” dialog, select the “Use specific IP address” option and type the IP address of XP-8X4X-CE6, and then click the “OK” button Step 7 On the “XPacSDK_CE x86 Device Properties” dialog, click the “OK” button XP-8000-Atom-CE6 User Manual Page: 200 Copyright © 2011 ICP DAS Co., Ltd. All Rights Reserved. E-mail: [email protected] Step 8 On the “Options” dialog, click the “OK” button Step 9 On the XP-8000-ATOM-CE6 controller side, run the “ConmanClient2” and the “CMAccept.exe” applications which is located at: \System_Disk\ICPDAS\System XP-8000-Atom-CE6 User Manual Page: 201 Copyright © 2011 ICP DAS Co., Ltd. All Rights Reserved. E-mail: [email protected] Step 10 On the “Tools” menu, click “Connect to Device…” command Step 11 On the “Connect to Device” dialog, select “XPacSDK_CE” from “Platform” list and then click the “Connect” button XP-8000-Atom-CE6 User Manual Page: 202 Copyright © 2011 ICP DAS Co., Ltd. All Rights Reserved. E-mail: [email protected] Step 12 On the “Tools” menu, click “Connect to Device…” command Step 13 Connection established. Then you can debug on line XP-8000-Atom-CE6 User Manual Page: 203 Copyright © 2011 ICP DAS Co., Ltd. All Rights Reserved. E-mail: [email protected] FAQ If the connection fails shown as follow, return to step 11 to do the action below Open the command prompt, run the “ConmanClient2.exe/transport:tcpconnectiona.dll/property:port=5000/id:Con” at: \System_Disk\ICPDAS\System, and then run the “CMAccept.exe” XP-8000-Atom-CE6 User Manual Page: 204 Copyright © 2011 ICP DAS Co., Ltd. All Rights Reserved. E-mail: [email protected] B.3. How to automatically synchronize the XPAC clock with an Internet Time Server Here are step by step instructions on how to automatically synchronize the XPAC clock with an Internet Time Server. Step 1 Run the XPAC Utility Step 2 On the General tab, press Configure button XP-8000-Atom-CE6 User Manual Page: 205 Copyright © 2011 ICP DAS Co., Ltd. All Rights Reserved. E-mail: [email protected] Step 3 Select the domain name in the Server drop down list, and then enter a value in the Autoupdate Frequency field Step 4 Check the Automatically synchronize with an internet time server check box Step 5 On the File menu, click Save and Reboot Step 6 The XPAC will automatically synchronize with an internet time server regularly Step 7 Press Update Now to synchronize XPAC clock immediately XP-8000-Atom-CE6 User Manual Page: 206 Copyright © 2011 ICP DAS Co., Ltd. All Rights Reserved. E-mail: [email protected] B.4. How to add a user account to remote login the XPAC from PC XP-8000-Atom-CE6 User Manual Page: 207 Copyright © 2011 ICP DAS Co., Ltd. All Rights Reserved. E-mail: [email protected] B.4.1. How to add a user account Here are step by step instructions on how to add a user account. Step 1 Run the XPAC Utility Step 2 On the Network tab, click Login tab, type the User Name and Password, and then click Add button XP-8000-Atom-CE6 User Manual Page: 208 Copyright © 2011 ICP DAS Co., Ltd. All Rights Reserved. E-mail: [email protected] Step 3 The user has been added to the allowed under the remote login and included in the following list Step 4 On the File menu, click Save and Reboot for changes to take effect XP-8000-Atom-CE6 User Manual Page: 209 Copyright © 2011 ICP DAS Co., Ltd. All Rights Reserved. E-mail: [email protected] B.4.2. How to Use telnet to remote login the XPAC from PC Here are step by step instructions on how to use telnet to remote login the XPAC from PC. Step 1 On the PC, open a MS-DOS command prompt 2. Type “cmd” and press Enter 1 Step 2 At the command prompt, type “telnet (IP address)” XP-8000-Atom-CE6 User Manual Page: 210 Copyright © 2011 ICP DAS Co., Ltd. All Rights Reserved. E-mail: [email protected] Step 3 The connection has been set up, and then type the name and password Step 4 The remote login has been completed XP-8000-Atom-CE6 User Manual Page: 211 Copyright © 2011 ICP DAS Co., Ltd. All Rights Reserved. E-mail: [email protected] B.4.3. How to remove the user from the login list Here are step by step instructions on how to remote the user from the login list. Step 1 Click a user from the list which you want to remove, and the user will display in the field, and then press Delete to delete the user from the login list Step 2 On the File menu, click Save and Reboot for changes to take effect XP-8000-Atom-CE6 User Manual Page: 212 Copyright © 2011 ICP DAS Co., Ltd. All Rights Reserved. E-mail: [email protected] B.5. How to use PACSDK library to program the XP-8000-Atom-CE6 XP-8000-Atom-CE6 User Manual Page: 213 Copyright © 2011 ICP DAS Co., Ltd. All Rights Reserved. E-mail: [email protected] B.5.1. How to Read the XPAC Mode with PACSDK library The rotary switch is used to set the operating mode. During normal operation, the position of the rotary switch has no effects on XP-8000-ATOM-CE6. You can use PACSDK API to read back the value of the rotary switch. int pac_GetRotaryID(); The returning value of pac_GetRotaryID() is what the arrow points to. XP-8000-Atom-CE6 User Manual Page: 214 Copyright © 2011 ICP DAS Co., Ltd. All Rights Reserved. E-mail: [email protected] B.5.2. How to Read the Module ID with XPAC API The DIP switch can be used to set the Module ID to a number from 0 to 255. Do not use Module ID 0 for communication. During normal operation, the positions of the DIP switches have no effects on XP-8000-ATOM-CE6. You can use PACSDK API to read back the value of the DIP switches. int pac_GetDIPSwitch(); Below is the figure of DIP switches similar to that of XP-8000-ATOM-CE6. The first DIP switch is the LSB and the 8th DIP switch is the MSB. If the DIP switch slides up to the “ON” side, it represents 1. If the DIP switch slides down to the number side, it represents 0. In this way, the eight-bit DIP switches can be represented by 0 ~ 255. XP-8000-Atom-CE6 User Manual Page: 215 Copyright © 2011 ICP DAS Co., Ltd. All Rights Reserved. E-mail: [email protected] B.5.3. How to Use the Multi-IO Module with XPAC API The Multi-IO Modules tab provides function to check the driver of multi-IO modules, such as 8114, 8144, 8142, and 8112. For more information about expansion RS-232/RS-422/RS-485 communication module that are compatible with the XP-8000-Atom-CE6, please refer to http://www.icpdas.com/products/Remote_IO/i-8ke/selection_rs232_i8k.htm Step 1 Insert the multi-IO module into XP-8000-ATOM-CE6 Step 2 Run the XPAC Utility Step 3 On the Multi-IO Modules tab, check the driver of the I/O modules XP-8000-Atom-CE6 User Manual Page: 216 Copyright © 2011 ICP DAS Co., Ltd. All Rights Reserved. E-mail: [email protected] Step 4 Program the multi-IO module Opening 8144 in Slot 1 Code Snippets { BOOL ret; HANDLE hOpen; char buf[4096]; hOpen = uart_Open("MSA1"); ret = uart_SendCmd(hOpen,"$01M", buf); uart_Close(hPort); } For more information about expansion RS-232/RS-422/RS-485 communication module that are compatible with the XP-8000-ATOM-CE6, please refer to http://www.icpdas.com/products/Remote_IO/i-8ke/selection_rs232_i8k.htm XP-8000-Atom-CE6 User Manual Page: 217 Copyright © 2011 ICP DAS Co., Ltd. All Rights Reserved. E-mail: [email protected] B.6. How to update software from XP-8000-CE6 to XP-8000-Atom-CE The CPU type of XP-8000-CE6 and XP-8000-Atom-CE6 is x86-based and the OS is also Windows CE6.0, so all software are compatible. All old programs and applications on XP-8000-CE6 can run smoothly on XP-8000-Atom-CE6 without any modification and re-compiling. Upgrading applications only just copy and play from XP-8000-CE6 to XP-8000-Atom-CE6. The software compatibility is listed as following: Software compatibility with XP-8000-CE6 (LX800) Ο: Compatible, X: Incompatible Compatibility Comparison Items Compatibility OS image X Rescue Disk X VC/C#/VB.net programs Ο XPacSDK_CE6 SDK (DLL file) Ο (Since V2.0.0.5 and later) PACSDK (DLL file) Ο All DCON 8K series library Ο XPAC utility Ο (Since V1.0.2.7 and later) NAPOPC_CE6 Ο Tools on System_Disk Ο Ο: Work, X: Doesn’t Work Compatibility Comparison API Functions XP-8000-CE6 XP-8000-Atom-CE6 pac_EnableLED X Ο The others Ο Ο Note: The version of XPacSDK_CE6 must be V2.0.0.5 or later. XP-8000-Atom-CE6 User Manual Page: 218 Copyright © 2011 ICP DAS Co., Ltd. All Rights Reserved. E-mail: [email protected] B.6. How to change the battery The XPAC device is equipped with two Li-ion batteries to ensure that any data stored in the SRAM is retained if a power loss occurs. The batteries supply continuous power to the SRAM enabling the data to be retained for up to 5 years. An added benefit of the dual-battery design is that either of the batteries can be replaced without losing data, so when one battery is removed, the other continues to provide power to the SRAM. The following figures show the location of the two batteries installed on the XPAC device. XP-8000-Atom-CE6 User Manual Page: 219 Copyright © 2011 ICP DAS Co., Ltd. All Rights Reserved. E-mail: [email protected] Checking the current battery power level: 1. Run the XPAC Utility and check the Battery1 and Battery2 fields in the “General Tab”. These fields indicate the current status of each battery. Refer to “Section 3.1.11.2 XPAC Utility Property Tabs“ for more details. If the power level for either of the batteries is shown as low, both batteries should be replaced. Take note of which battery has the lowest power level. 2. When creating a custom application, call the pac_GetBatteryLevel() API function in the PACSDK.dll to check the power level of the batteries, If the power for the either of the batteries sown as low, it is recommended that both batteries are immediately replaced, otherwise any data contained in the SRAM may be lost. 1. Replacing the batteries without losing data – Method 1 1.1. Power off the XPAC device. 1.2. Remove the cover from the module inserted into the slot. 1.3. Remove the battery that has the lowest power level from the battery holder. 1.4. Insert a new battery. 1.5. Remove the other battery from its battery holder. 1.6. Insert a new battery. XP-8000-Atom-CE6 User Manual Page: 220 Copyright © 2011 ICP DAS Co., Ltd. All Rights Reserved. E-mail: [email protected] Notes: 1. The power supply for the SRAM is selected from whichever of the batteries has the highest voltage. If the battery power for only one of the two batteries is low, you can use this method to replace that particular battery so as to prevent data from being lost. (In the circuit design for the XPAC series, if the power for one of the batteries is low, the power supply will be automatically switched to the other battery to ensure continued battery power) 2. If power for both batteries has expired all data stored in the SRAM will be lost, even if this method is used to replace the batteries. 2. Replacing the batteries – Method 2 2.1. Back up the SRAM data using a backup utility before replacing the batteries. Refer the attachment for details of to back up and restore the SRAM data. 2.2. Run the backup utility to back up the SRAM data. 2.3. Power off the XPAC device. 2.4. Remove the cover from the module inserted into the slot. 2.5. Remove both batteries from their respective battery holders. 2.6. Insert two new batteries. 2.7. Power on the XPAC device. 2.8. Run the backup utility to restore the original SRAM data. Ordering information: Battery type: BR1632 (the ICPDAS part number is 2LB010 for ICP DAS) For more detailed information, contact your local sales office or distributor XP-8000-Atom-CE6 User Manual Page: 221 Copyright © 2011 ICP DAS Co., Ltd. All Rights Reserved. E-mail: [email protected] Appendix C. I-8K and I-87K Modules This section provides tips and a guided tour on using I-8K and I-87K module. XP-8000-Atom-CE6 User Manual Page: 222 Copyright © 2011 ICP DAS Co., Ltd. All Rights Reserved. E-mail: [email protected] C.1. I-8K and I-87K Modules I-8K and I-87K modules provide the option to expand the local I/O to 1, 3, or 7 slots and the bus type for the modules can be either parallel (high profile I-8K series) or serial (high profile I-87K series). The differences between the two module types is as follows. Item I-8K Series I-87K Series Microprocessor No Yes (8051) Communication Interface Parallel Bus Serial Bus Communication Speed Fast Slow Latched DI Function No Yes Counter Input (for digital input modules) No Yes (100 Hz) Power-on Value No Yes Safe Value No Yes Programmable Slew-Rate for AO modules No Yes XP-8000-Atom-CE6 User Manual Page: 223 Copyright © 2011 ICP DAS Co., Ltd. All Rights Reserved. E-mail: [email protected] Appendix D. Revision History The table below shows the revision history. Revision Date Description 1.0.0 February 2011 Initial issue September 2013 1. Added limitations for using Visual Studio in section 4.1. 2. Added demo programs and SDK library selection in section 5. 3. Added introduce XPAC download center. 1.0.1 1.0.2 1.0.3 1.0.4 August 2014 Added information on how to change the battery in appendix B.7. XP-8000-Atom-CE6 User Manual Page: 224 Copyright © 2011 ICP DAS Co., Ltd. All Rights Reserved. E-mail: [email protected]