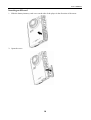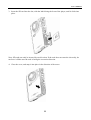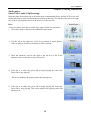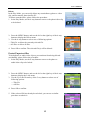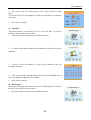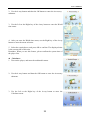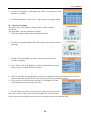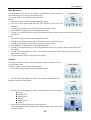
1
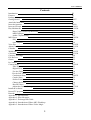
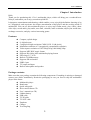
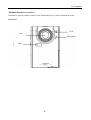
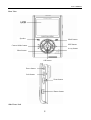
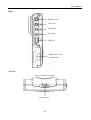
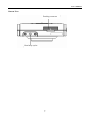
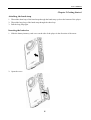
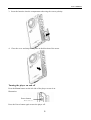
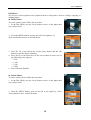
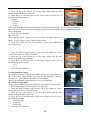
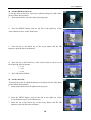
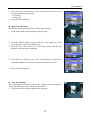
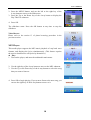
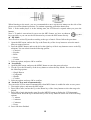
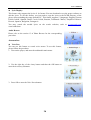
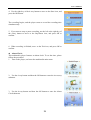
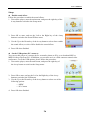
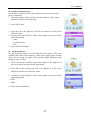
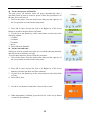
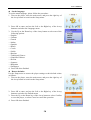
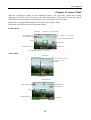
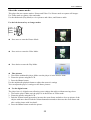
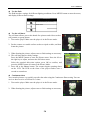
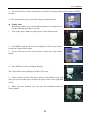
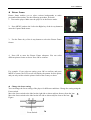
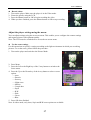
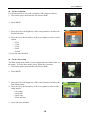
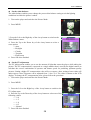
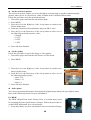
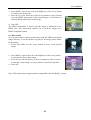
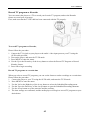
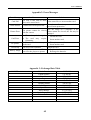
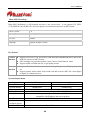
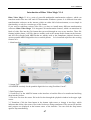
User’s Manual
User’s Manual
1
User’s Manual
Contents
Introduction
Features
Package contents
Getting Started
Attach the hand strap
Insert the batteries
Insert an SD card
Play Multimedia
-Photo/Video/Audio Clip Browsing
-MPEG4 Player
-Audio Clip Browsing
MP3 Player
-Play
-Lyric Display
Voice Pen
Alarm Clock
Calendar
World time
Calculator
Currency Exchange
File Browser
Games
Pc-Camera
Camera Mode
-Take Pictures
-Digital Zoom
-Use the Flash
-Use the Self-Timer
-Continuous Shots
-Couple Shots
-Picture Frame
-Change the Focus
-Record Videos
-Adjust the Camera Settings
Install the software
Record TV program
Karaoke
Appendix 1: Specifications
Appendix 2: Error Messages
Appendix 3: Exchange Rate Table
Appendix 4: Introduction of Blaze MP3 Workshop
Appendix 5: Introduction of Blaze Video Magic
2
P3
P3
P3
P4-P7
P8
P8-P9
P10-P11
P12-P20
P12
P12
P12
P18-P20
P18
P20
P21-P22
P21-P22
P22
P22-P23
P23-P24
P24
P25
P25
P26
P32-P41
P33
P33
P34
P34
P34-P35
P35
P36
P36
P37
P37-P41
P42
P43
P43
User’s Manual
Chapter 1 Introduction
Hello.
Thank you for purchasing this 15 in 1 multimedia player, which will bring you a wonderful new
lifestyle, and enable you to enjoy a modern stylish life.
It integrates entertainment and shooting, which enables you to enjoy high definition shooting of up
to 5 megapixels, and experience the unique entertainment of this player and the exciting world of
multimedia. You can use this multimedia player to enjoy mp3 format music, play videos, shoot
video clips, record audio, play audio, store data, calculate, make a calendar, adjust your world time,
exchange currencies, and play various interesting games.
Features:
z
z
z
z
z
z
z
z
z
z
z
z
z
Compact, stylish design
8× digital zoom
5 megapixels high-resolution CMOS (2592 *1944 pixels)
Maximum resolution of 12 megapixels (extrapolated resolution)
Video capture resolution of 320*240@30 fps, 640*480@30fps
Supports MP3/WAV music format
Supports Divx/Mov/ASF multimedia playing format
Ultra-large 2.5” LCD
Built-in 128 MB memory
Supports SD card media
USB2.0 port
TV output and input
Built-in microphone and speaker
Package contents:
Make sure that your package contains the following components. If anything is missing or damaged,
contact your dealer immediately. Retain the packaging in case you need to ship the multimedia
player in the future.
z Multimedia player
z Hand strap
z Quick start guide
z Driver and software CD
z User’s manual (on CD)
z Lithium battery
z USB cable
z TV-IN cable
z TV-OUT cable
z Earphone
z Charger
z Traveling Bag
3
User’s Manual
Multimedia player overview:
Familiarize yourself with the controls of the multimedia player with the illustrations below.
Front view
LED
Lens
Microphone
Flash
4
User’s Manual
Rear View
Speaker
Mode button
MP3 button
Camera Mode button
4-way button
Menu button
OK button
Power button
Lock button
Zoom button
Shutter button
Side Views: Left
5
User’s Manual
Right
Earphone jack
TV-in jack
TV-out jack
DC in jack
USB port
Battery/SD card
compartment
Top View
Focus button
6
User’s Manual
Bottom View
Docking connector
Hand strap eyelet
7
User’s Manual
Chapter 2 Getting Started
Attaching the hand strap
1.Thread the short loop of the hand strap through the hand strap eyelet at the bottom of the player.
2.Thread the long loop of the hand strap through the short loop.
3.Pull the long loop tight.
Inserting the batteries:
1.Slide the battery/memory card cover on the side of the player in the direction of the arrow.
2.Open the cover.
8
User’s Manual
3.Insert the batteries into the compartment observing the correct polarity.
4.Close the cover and snap it into place in the direction of the arrow.
Turning the player on and off
Press the Power button on the left side of the player to turn it on.
Illustration:
Power button
Press the Power button again to turn the player off.
9
User’s Manual
Inserting an SD card
1.Slide the battery/memory card cover on the side of the player in the direction of the arrow.
2.Open the cover.
10
User’s Manual
3.Insert the SD card into the slot, with the label facing the front of the player, until it clicks into
place.
Note: SD cards can only be inserted by one direction. If the card does not enter the slot easily, do
not force it. Make sure the card is facing the correction direction.
4.Close the cover, and snap it into place in the direction of the arrow.
11
User’s Manual
Chapter 3 Playing Multimedia
Media player
Photo/Video/Audio Clip Browsing:
Enter the photo browsing mode in the main menu of multimedia player, and the LCD screen will
display the photos/video clip thumbnails according to the time. You can press the left or the right
key of the 4-way button to move to the previous or the next file.
Play:
To browse photos and video or audio clips, please follow the procedure:
1.Turn on the player, and enter the multimedia main menu.
2.Use the left or the right key of the 4-way button to select photos,
video or audio to be browsed, and press OK to confirm.
3.Enter the submenu, and use the right or the left key of the 4-way
button to move to the next or the previous file.
4.If the file is a video clip, press OK to begin playing the video clip.
Press OK to stop playing.
The screen displays the playing status and playing icon.
5.If the file is an audio clip, press OK to begin playing the audio clip.
Press OK to stop playing. The screen displays the playing status and
playing icon.
12
User’s Manual
Delete:
In the Play Mode, you can easily delete any unsatisfactory photo or video
clip, and not transfer them into the PC.
To delete unneeded files, please follow the procedure:
1.In the Play Mode, use the 4-way button to move to the photo/video clip
to be deleted.
2.Press the MENU button, and use the left or the right key of the 4-way
button to display the Delete menu.
3.Use the 4-way button to select one of following options:
----This file: to delete the currently selected file.
----All files: to delete all files.
4.Press OK to confirm. The selected file(s) will be deleted.
Protect/Unprotect files
To lock photos or audio/video clips to prevent them from being deleted
accidentally, please follow the procedure:
1.In the Play Mode, use the 4-way button to move to the photo or
audio/video clip to be locked.
2.Press the MENU button, and use the left or the right key of the 4-way
button to display the Lock menu.
3.Use the Up or the Down key of the 5-way button to select one of
following options:
----This file
----All files
4.Press OK to confirm.
5.If the selected file has already been locked, you can use a similar
procedure to unlock it.
13
User’s Manual
Edit Photos
You can use various options in the playback menu to edit photos, such as resizing, cropping, or
rotating photos.
z Resize Photos
To resize a photo, please follow the procedure:
1.In the Play Mode, use the 4-way button to move to the photo that
you want to resize.
2.Press the MENU button, and use the left or the right key of
the 4-way button to move to the Edit menu.
3.Press the Up or the Down key of the 4-way button and the OK
button to open the Resize submenu.
4.Press the Up or the Down key of the 4-way button to select one of
the following resize options:
----VGA
----1.3M
----3.1M
----5.0M
5.Press OK when finished.
z Rotate Photos
To rotate a photo, please follow the procedure:
1.In the Play Mode, use the 4-way button to move to the photo that
you want to rotate.
2.Press the MENU button, and use the left or the right key of the
4-way button to move to the Edit menu.
14
User’s Manual
3.Press the Up or the Down key of the 4-way button and the OK
button to open the Rotate submenu.
4.Press the Up or the Down key of the 4-way button to select one of
the following rotate options:
5.Options:
----Rotate
----Save
----Cancel
When you select Rotate, the photo will rotate 90 degrees automatically. You can view the effect on
the screen. If you want to continue rotating, please keep on pressing the Rotate button until it meets
your requirement.
6.Press OK when finished.
z Crop Files
The cropping feature enables you to cut off the unwanted parts of a
photo. To crop a photo, please follow the procedure:
1.In the Play Mode, use the 4-way button to move to the photo that
you want to crop.
2.Press the MENU button, and use the left or the right key of the
4-way button to move to the Edit menu.
3.Press the Up or the Down key of the 4-way button and the OK
button to open the Crop submenu.
4.Press the Up or the Down key of the 4-way button to select one of
the following resize options:
----4: 3
----3: 2
5.Press OK when finished.
Use the slideshow feature
The slideshow feature of the player enables you to view all the photos on
the LCD screen automatically. You can set the slideshow interval,
direction, etc. and customize the slideshow as required.
Refer to the following sections on how to set up a slideshow.
z Set the starting point
To specify the starting point of a slideshow, please follow the procedure:
1.In the photo mode, enter the photo browsing state.
2.Press the MENU button, and use the left or the right key of the
4-way button to move to the Slide menu.
3.Press the Up or the Down key of the 4-way button and the OK
button to open the Show submenu.
4.Press the Up or the Down key of the 4-way button to select one of
the following options:
----From current
----From first
----From last
5.Press OK when finished.
15
User’s Manual
z Set the slideshow interval
To set the interval between consecutive photos during the slide show,
please follow the procedure:
1. In the photo mode, enter the photo browsing state.
2. Press the MENU button, and use the left or the right key of the
4-way button to move to the Slide menu.
3. Press the Up or the Down key of the 4-way button and the OK
button to open the Interval submenu.
4. Press the Up or the Down key of the 4-way button to select one of
the following interval options:
----1 sec
----3 sec
----5 sec
5. Press OK when finished.
z Set the direction
To specify the order in which the photos are displayed in the slide show,
please follow the procedure:
1.In the photo mode, enter the photo browsing state.
2.Press the MENU button, and use the left or the right key of the
4-way button to move to the Slide menu.
3.Press the Up or the Down key of the 4-way button and the OK
button to open the Direction submenu.
16
User’s Manual
4.Press the Up or the Down key of the 4-way button to select one of
the following direction options:
----Forward
----Backward
5.Press OK when finished.
z Repeat the slideshow
To show the slides repeatedly, please follow the procedure:
1.In the photo mode, enter the photo browsing state.
2.Press the MENU button, and use the left or the right key of the
4-way button to move to the Slide menu.
3.Press the Up or the Down key of the 4-way button and the OK
button to open the Repeat submenu.
4.Press the Up or the Down key of the 4-way button to select Yes to
repeat the slideshow, or select No to show the slides only once.
5.Press OK when finished.
z Start the slideshow
After setting up the slideshow, you are now ready to start the slideshow.
To start the slideshow, please follow the procedure:
1.In the photo mode, enter the photo browsing state.
17
User’s Manual
2.Press the MENU button, and use the left or the right key of the
4-way button to move to the Slide menu.
3.Press the Up or the Down key of the 4-way button to display the
Play This File submenu.
4.Press OK.
The slideshow starts. Press the OK button at any time to stop the
slideshow.
Video Browse:
Please refer to the section 13 of photo browsing procedure in the
previous section.
MP3 Player:
This media player supports the MP3 music playback of .mp3 and .wmv
formats, and displays the lyrics simultaneously. (This feature requires
the users to download or edit lyrics by themselves).
z Play:
1.Turn on the player, and enter the multimedia main menu.
2.Use the right key of the 4-way button to move to the MP3 submenu.
3.Use the Up or the Down key of the 4-way button to select the song
that you want to listen to.
4.Press OK to begin playing. If you want to listen to the next song, you
can use the right key of the 4-way button to move to it.
18
User’s Manual
You can use the Volume Control Button on the side of the player to control the volume by yourself.
When listening to the music, you are recommended to move up the lock button on the side of the
player to avoid accidental operations. To continue operating, unlock the button first.
Note 1: If the media player is in the locking state, the LCD doesn’t respond when you press the
buttons.
Note 2: To make it convenient for you to use the MP3 feature, we have set shortcut
keys specially, so you can use the left shortcut key to enter the MP3 menu directly.
z EQ Mode:
You can select various EQ modes according to the type of music. Please follow the procedure:
1.Open the MP3 menu, and use the Up or the Down key of the 4-way button to select the music
that you want to listen to.
2.Press the MENU button, and use the left or the right key of the 4-way button to move to the EQ
submenu. You can select from the following options:
----Classical
----Popular
----Rock
----Jazzy
----Custom
3.Select an option, and press OK to confirm.
z Loop Mode:
1.Open the MP3 menu, and press the MENU button to enter the menu selection.
2.Use the Up or the Down key of the 4-way button to select the Play Modes. You can select from
the following options:
----Single Repeat
----Continuous
----Shuffle
----Circular
3.Select an option, and press OK to confirm.
z Set the LCD to turn off automatically:
You can set the LCD to turn off automatically when MP3 feature is enabled in order to save power.
1.Turn on the player, and enter the MP3 menu.
2.Press OK to enter, and use the Up or the Down key of the 4-way button to select the song to be
played.
3.Press OK to begin playing the song. Press the MENU button to display the LCD Automatic
Turnoff menu. Press the Up or the Down key of the 4-way button to select one of the following
options:
----1 minute
----2 minutes
----5 minutes
----Never
4.Press OK when finished.
19
User’s Manual
z Lyric Display:
This feature only supports the lyrics of .lrc format. You can download or use the proper software to
edit the lyrics. To use this feature, you just need to copy the lyrics to the DCIM directory of the
player when uploading the songs from the PC. This feature supports 13 languages: English, German,
French, Italian, Spanish, Dutch, Czech, Polish, Russian, Traditional Chinese, Simplified Chinese,
Korean, Japanese, Bulgarian, Portuguese.
You may search the needed lyrics on the search websites, such as www.google.com,
www.baidu.dom.
Audio Browse:
Please refer to the section 13 of Photo Browse for the corresponding
procedure.
Accessories:
z Voice Pen:
You can use this feature to record voice memo. To use this feature,
please follow the procedure:
1.Turn on the player, and enter the multimedia main menu.
2.Use the right key of the 4-way button and then the OK button to
enter the Accessory submenu.
3.Press OK to enter the Voice Pen submenu.
20
User’s Manual
4.Use the right key of the 4-way button to move to the Start icon, and
press the OK button.
The recording begins, and the player starts to record the recording time
simultaneously.
5.If you want to stop or pause recording, use the left or the right key of
the 4-way button to move to the Stop/Pause icon, and press OK to
confirm.
6.When recording is finished, move to the Exit icon, and press OK to
confirm.
z Alarm Clock:
This multimedia player features an alarm clock. To set the time, please
follow the procedure:
1. Turn on the player, and enter the multimedia main menu.
2. Use the 4-way button and then the OK button to enter the Accessory
submenu.
3. Use the 4-way button and then the OK button to enter the Alarm
Clock submenu.
21
User’s Manual
4. You can use the Up or Down key of the 4-way button to select
items.
You can use the Left or the Right key of the 4-way button to set the time
and alarm.
5. Press OK to confirm.
z Calendar:
This feature makes it convenient for you to view the date. To create a
calendar, please follow the procedure:
1. Turn on the player, and enter the multimedia menu.
2. Use the 4-way button and then the OK button to enter the Accessory
submenu.
3. Use the Left or the Right key of the 4-way button to enter the
Calendar submenu.
4. After you enter the Calendar menu, use the Left or the Right key of
the 4-way button to adjust the current date.
5. Press OK to confirm.
z World time:
This feature helps you check the current time of different areas. To check
the time, please follow the procedure:
1.Turn on the player, and enter the multimedia menu.
22
User’s Manual
2.Use the 4-way button and then the OK button to enter the Accessory
submenu.
3.Use the Left or the Right key of the 4-way button to enter the World
time menu.
4.After you enter the World time menu, use the Right key of the 4-way
button to enter the menu selection.
5.Select the required area, and press OK to confirm. The displayed time
is the current time of this area.
Reminder: When you use this feature, please confirm the system time of
the player first.
z Calculator:
1.Turn on the player, and enter the multimedia menu.
2.Use the 4-way button and then the OK button to enter the Accessory
submenu.
3.Use the Left or the Right key of the 4-way button to enter the
Calculator menu.
23
User’s Manual
4.Use the Left, Right, Up, and Down key of the 4-way button to enter
numbers or symbols.
5.To finish calculation, move to the = sign, and you can get the result.
z Currency Exchange:
This player uses a set of basic exchange rates to make currency
conversion.
(See Appendix 3 for the exchange rate table)
1.Turn on the player, and enter the multimedia menu.
2.Use the 4-way button and then the OK button to enter the Accessory
submenu.
3.Use the Left or the Right key of the 4-way button to enter the
Currency submenu.
4.First, use the Left or the Right key of the 4-way button to set your
basic currency (usually the local currency).
5.Then, use the Down or the Right key of the 4-way button to enter the amount that you need to
convert, and when you finish, press the Left key of the 4-way button to return.
6.Now you can use the Down key and the Left or Right key of the
4-way button to select the target currency.
7.Use the Down key of the 4-way button to get the conversion result.
Note: If you enter a value in the second amount field, you can make a
reverse conversion, and the conversion result is displayed in the first amount field.
24
User’s Manual
File Browser:
It can display all the files in the folders of this player, which makes it
convenient for you to copy or delete these files.
To use this feature, please follow the procedure:
Delete:
1.Turn on the player, and enter the multimedia menu.
2.Use the 4-way button and then the OK button to enter the File
Browser.
3.Use the 4-way button to select the file that you want to delete.
4.Press MENU to display the File Management menu.
5.Use the Up or the Down key of the 4-way button to select Delete option, and the current file will
be deleted.
Copy:
1.Turn on the player, and enter the multimedia menu.
2.Use the 4-way button and then the OK button to enter the File Browser.
3.Use the 4-way button to select the file that you want to copy.
4.Press MENU to display the File Management menu.
5.Use the Up or the Down key of the 4-way button to select Copy option, and the current file will
be copied.
6.Use the Left or the Right key of the 4-way button to select the folder that you want to paste, and
press OK to confirm.
7.The previous file will be copied into this folder.
Games:
This player provides various interesting games, which entertain can you
in your leisure time.
To select a game, please follow the procedure:
1.Turn on the player, and enter the multimedia menu.
2.Use the Left or the Right key of the 4-way button and then the OK
button to enter the Game menu.
3.Use the Left or the Right key of the 4-way button to select your game.
z Tetris:
z OTHELLO:
z Moving box:
z Puzzle:
z Magic beads:
z Lottery:
4.Press OK to confirm and begin to play the game.
(Press the Shutter button at any time to stop the game and return to the
previous menu.)
25
User’s Manual
Setup
z Enable sound effect:
Follow the procedure to enable the sound effects:
1.Turn on the player, enter the main menu, and press the right key of the
4-way button to switch to the Setup menu.
2.Press OK to enter, and use the Left or the Right key of the 4-way
button to switch to the Sound Effects menu.
3.Use the Up or the Down key of the 4-way button to select On to enable
the sound effects, or select Off to disable the sound effects.
4.Press OK when finished.
z Set the USB options (PC- camera):
You can use this player as a storage device to transfer photos to PCs, or to download MP3 or
MPEG4 video clips from PCs. In addition, you can also use it as a Web camera to attend video
conferences. To set the USB options, please follow the procedure:
1.Turn on the player, enter the main menu, and press the right key of
the 4-way button to switch to the Setup menu.
2.Press OK to enter, and use the Left or the Right key of the 4-way
button to switch to the USB menu.
3.Use the Up or the Down key of the 4-way button to select one of the
following options:
----MSDC
----PC-Camera
4.Press OK when finished.
26
User’s Manual
z Set the welcome picture:
Follow the procedure to specify the welcome picture shown when the
player is turned on.
1.Turn on the player, and press the left or the right key of the 4-way
button to switch to the Setup menu.
2.Press OK to enter.
3.Press the left or the right key of the 4-way button to switch to the
Welcome menu.
4.Use the Up or the Down key of the 4-way button to select one of the
following options:
----Auto
----Custom picture
----Off
5.Press OK when finished.
z Set the frequency:
Use the Frequency menu to set the frequency of the player. This value
should be the same as the frequency of the power supply at the location
where you are using the player. This prevents lights flickering when
taking pictures or video.
1.Turn on the player, enter the main menu, and press the right key of
the 4-way button to switch to the Setup menu.
2.Press OK to enter, and use the Left or the Right key of the 4-way
button to switch to the Frequency menu.
3.Use the Up or the Down key of the 4-way button to select one of the
following options:
----50Hz
----60Hz
4.Press OK when finished.
27
User’s Manual
z Set the TV out:
You can connect the multimedia player to a TV, and use the TV screen to
view photos and play video clips.
Set the output mode:
Before connecting the player to a TV, you need to set the TV output
mode and make sure that it matches your TV. To set the TV output mode,
follow the procedure:
1.Turn on the player, enter the main menu, and press the right key of
the 4-way button to switch to the Setup menu.
2.Press OK to enter, and use the Left or the Right key of the 4-way
button to switch to the TV Out menu.
3.Use the Up or the Down key of the 4-way button to select the NTSC or
PAL option:
4.Press OK when finished.
z
To view photos and videos on the TV, please follow the procedure:
1.Turn on the player, and press the button 3 times to enter the Playback menu.
2.Select a photo or video, and press OK to enter.
3.Connect the TV out jack on your player to the audio / video input ports on your TV using the
AV cable provided. The LCD screen turns off.
4.Follow the procedures described in “Reviewing photos or movie clips” on page 13 to play the
files in your machine.
28
User’s Manual
z Set the auto power off function:
The auto power off function turns off power automatically after a
specified period in order to conserve power. Follow the procedure to set
the auto power off interval.
1.Turn on the player, enter the main menu, and press the right key of
the 4-way button to switch to the Setup menu.
2.Press OK to enter, and use the Left or the Right key of the 4-way
button to switch to the Auto Power Off menu.
3.Use the Up or the Down key of the 4-way button to select one of the
following options:
----1 minute
----2 minutes
----5 minutes
----Never
4.Press OK when finished.
z Set the date and time:
Setting an accurate system time helps you record the shooting duration,
and convert the world time correctly.
To set the date and time, please follow the procedure:
1.Turn on the player, enter the main menu, and press the right key of
the 4-way button to switch to the Setup menu.
2.Press OK to enter, and use the Left or the Right key of the 4-way
button to switch to the Date and Time submenu.
3.Use the Up or the Down key of the 4-way button to select from Date
or Time.
4.Press OK to enter.
5.Use the 4-way button to adjust the values of date or time.
6.When adjustment is finished, press the Left key of the 4-way button
to return to the submenu.
29
User’s Manual
z Set the language:
To set the menu language, please follow the procedure:
1.Turn on the player, enter the main menu, and press the right key of
the 4-way button to switch to the Setup menu.
2.Press OK to enter, and use the Left or the Right key of the 4-way
button to switch to the Language menu.
3.Use the Up or the Down key of the 4-way button to select one of the
following options:
----English
----German
----French
----Italian
----Spanish
----Dutch
----Czech
----Polish
----Russian
----Traditional Chinese
----Simplified Chinese
----Korean
----Japanese
----Bulgarian
----Portuguese
4.Press OK when finished.
z Restore defaults:
Use the Setup menu to restore the player settings to their default values
as follows:
1.Turn on the player, enter the main menu, and press the right key of
the 4-way button to switch to the Setup menu.
2.Press OK to enter, and use the Left or the Right key of the 4-way
button to switch to the Default menu.
3.Press the Up or the Down key of the 4-way button to select Confirm
to reset the player, or select Cancel to cancel the operation.
4.Press OK when finished.
30
User’s Manual
z Format the memory:
Follow the procedure to format the camera’s memory:
1.Turn on the player, enter the main menu, and press the right key of
the 4-way button to switch to the Setup menu.
2.Press OK to enter, and use the Left or the Right key of the 4-way
button to switch to the Format menu.
3.Press the Up or the Down key of the 4-way button to select Confirm
to format the player, or select Cancel to cancel the operation.
4.Press OK when finished.
The camera’s memory is formatted and all the files including the
protected files are deleted.
Warning: Formatting memory will cause all files stored in memory to be
erased. Make sure you have backed up any files you want to keep.
31
User’s Manual
Chapter 4 Camera Mode
With the 5-megapixel setting of this multimedia player, you can easily capture the exciting
segments of your life. First, you can use the right shortcut key of the player to enter the camera
mode directly, which makes it convenient for you to take photos or record videos.
Before that, you should understand the LCD icons in the camera mode:
Each mode uses different icons to represent settings:
Picture Mode:
Flash Icon
Resolution
Picture Quality
Picture Mode Icon
Scene Setting Icon
The quantity of remaining
pictures in the current memory
Zoom
Couple shot
Battery Status Icon
Current Time
EV Adjustment Setting
Focus Frame
Video Mode:
DPOF Icon
Current File’s Serial Number /
Total Number of Files
Resolution
Protect Icon
Video Resolution
Video Mode Icon
Video Duration
Recording Icon
Zoom
Battery Status Icon
Current Time
Focus Frame
32
User’s Manual
Select the camera mode:
This player has two capture modes: Picture and Video. Use Picture mode to capture still images.
Use Video mode to capture video and audio.
Use the third mode (Play Mode) to view pictures and videos, and listen to audio.
Use the left shortcut key to change modes:
Camera
Mode
Button
z
Press once to enter the Picture Mode.
z
Press twice to enter the Video Mode.
z
Press thrice to enter the Play Mode.
z Take pictures
1.Turn on the multimedia player. Make sure the player is in the Picture mode.
2.Frame the picture using the LCD.
3.Press the Shutter button.
Use the multimedia playback button to adjust the camera’s settings
You can adjust the player’s settings to take better pictures.
z Use the digital zoom
The player has a 8× digital zoom, allowing you to enlarge the subject without moving closer.
1.Turn on the player. Make sure the player is in the Picture or Video mode.
2.Frame the picture using the LCD.
3.Push the Volume button upwards to increase the zoom factor and take a close up picture of the
subject with more detail. Push the Volume button downwards to decrease the zoom factor and
take a wider picture with less detail.
4.Press the Shutter button to take the picture.
33
User’s Manual
z Use the flash
The flash has three settings for different lighting conditions. Press MENU button to enter the menu,
and display different flash settings.
Icon
Description
Flash automatically as necessary
Enable flash
Disable flash
z Use the self-timer
The self-timer allows you to take hands-free pictures and videos such as
self portraits or group photos.
1.Turn on the player. Make sure the player is in the Picture mode.
2.Put the camera on a stable surface such as a tripod or table, and then
frame the picture.
3.When framing the picture, adjust zoom or flash settings as necessary.
4.The self-timer has two delay settings.
Press the MENU button to enter the Picture menu. Press the left or
the right key to adjust, and enter the Self-timer menu.
Select the required delay-time option, press OK to confirm, and
press the MENU button to return to the Picture Mode.
5.Press OK or the Shutter button. The counter begins counting down
on the LCD. The LED on the front of the player flashes once a
second to countdown.
z Continuous shots
You can take pictures very quickly one after the other using the Continuous Shots setting. You can
use it to shoot a series of actions for 3 times.
1.Turn on the player. Make sure the player is in the Picture mode.
2.When framing the picture, adjust zoom or flash settings as necessary.
34
User’s Manual
3. Use the Down key of the 4-way button to select the Continuous Shots option, and press MENU
to return.
4.This feature has been set. Press OK to begin continuous shots.
z
Couple Shots
This feature enables you to shoot different objects on a single screen.
See the following procedure for detail:
1. Turn on the player. Make sure the player is in the Picture mode.
2. Press MENU, and use the Left or the Right key of the 4-way button
to enter the Capture Mode menu.
3. Use the Down key of the 4-way button to select the Couple Shots
feature.
4. Press MENU to return, and begin shooting.
The Couple Shots icon is displayed on the LCD screen.
5. Select an object to shoot. The player will save the left half screen, and
when you select another object to shoot, the player will save the right half
screen.
6. When you have finished, you can enter the multimedia menu to
browse photos.
35
User’s Manual
z Picture Frame
Picture frame enables you to select various backgrounds to make
personalized decoration. See the following procedure for detail:
1.Turn on the player. Make sure the player is in the Picture mode.
2. Press MENU, and use the Left or the Right key of the 4-way button to
enter the Capture Mode menu.
3. Use the Down key of the 4-way button to select the Picture Frame
feature.
4. Press OK to enter the Picture Frame submenu. You can select
different picture frames to shoot. Press OK to confirm.
For example: If you select an option, press OK to confirm, and press
MENU to return, the LCD screen will display the pattern for this option,
and you only need to aim the picture frame at the scenery to shoot.
z Change the focus setting:
You can change the focus setting of the player for different conditions. Change the setting using the
Focus switch.
Move the focus switch to the label on the right side to shoot subjects faraway from the lens.
Move the focus switch to the label on the left side to shoot subjects close to the lens.
Figure:
Focus Switch
36
User’s Manual
z Record videos
1.Turn on the player. Make sure the player is in the Video mode.
2.Frame the picture using the LCD.
3.Press the Shutter button or OK to begin recording the video.
4.When you have finished, press the Shutter button or OK to stop recording.
Adjust the player settings using the menu:
You can adjust settings using the on-screen menu. This enables you to configure the camera settings
and capture pictures with optimum quality.
Note: The LCD must be switched on to access the on-screen menu.
z Use the scene settings
Use this menu item to specify a setting according to the light environment in which you are taking
pictures. To set the scene, please follow the procedure:
1.Turn on the player and switch to the Picture Mode.
2.Press Menu.
3.Press the Left or the Right key of the 5-way button to switch to the
Scene menu.
4.Press the Up or the Down key of the 4-way button to select a scene
option:
----Auto
----Portrait
----Scenery
----Night scene
----Motion
----Couple shot
----Sepia
----B/W
----Pink
----Green
----Blue
5.Press OK when finished.
Note: In video mode, only Auto, Sepia and B/W scene options are available.
37
User’s Manual
z Set the resolution:
Use this menu item to select the resolution of the image as follows:
1.Turn on the player and switch to the Picture Mode.
2.Press MENU.
3.Press the Left or the Right key of the 4-way button to switch to the
Resolution menu.
4.Press the Up or the Down key of the 4-way button to select a scene
option:
----VGA
----1.3M
----3.1M
----5.0M
----10.0M
5. Press OK when finished.
z Set the date stamp
The Date Stamp menu enables you to imprint the time and the date on
the image. To set the date stamp, please follow the procedure:
1.Turn on the player and switch to the Picture Mode.
2.Press MENU.
3.Press the Left or the Right key of the 4-way button to switch to the
Date Stamp menu.
4.Press the Up or the Down key of the 4-way button to select a date
stamp option:
----No stamp
----Only date
----Only time
----Date and time
5.Press OK when finished.
38
User’s Manual
z Set the white balance:
The white balance enables you to change the preset white balance setting to suit the lighting
conditions in which the picture is taken.
1.Turn on the player and switch to the Picture Mode.
2.Press MENU.
3.Press the Left or the Right key of the 4-way button to switch to the
White Balance menu.
4.Press the Up or the Down key of the 4-way button to select a
scene option:
----Auto
----Daylight
----Cloudy
----Tungsten
----Fluorescent
6.Press OK when finished.
z Set the EV adjustment
The EV Adjust menu enables you to set the amount of light that enters the player while taking the
picture. The EV compensation is expressed as a single number that is used by the digital camera to
calculate the correct combination of aperture and shutter speed for producing optimum quality
pictures. Setting a higher EV compensation value will over-expose a shot; setting a lower value will
under-expose a shot. Exposure can be adjusted from –2.0 to +2.0. The value is shown on the LCD
display. To change the EV compensation value, please follow the procedure:
1.Turn on the player and switch to the Picture Mode.
2.Press MENU.
3.Press the Left or the Right key of the 4-way button to switch to the
EV Adjust menu.
4.Press the Up or the Down key of the 4-way button to select one of the
following values:
---- -2.0
---- -1.5
---- -1.0
---- -0.5
---- Normal
7.Press OK when finished.
39
User’s Manual
z Set the encircled exposure
The encircled exposure enables you to use the light in a certain range to produce optimum quality
pictures when you are at a fixed scene. (Only available in the Continuous Shots mode)
Follow the procedure to set the encircled exposure:
1.Turn on the player and switch to the Picture Mode.
2.Press MENU.
3.Press the Left or the Right key of the 4-way button to switch to the
Picture Mode menu.
4.Select the Continuous Shots submenu, and press OK to enter.
5.Press the Up or the Down key of the 4-way button to select one of
the following encircled exposure values:
----Normal
----0.3 EV
----0.5EV
----1.0EV
6.Press OK when finished.
z Set the quality
Follow the procedure to specify the image or video quality:
1.Turn on the player and switch to the Picture or Video mode.
2.Press MENU.
3.Press the Left or the Right key of the 4-way button to switch to the
Image Quality menu.
4.Press the Up or the Down key of the 4-way button to select one of
the following quality options:
----Basic 1:16
----Better 1:12
----Best 1:8
5.Press OK when finished.
z Order prints
You can set up printing information for printing the digital images taken with your digital camera.
Refer to the following sections for more information:
Use DPOF
The DPOF (Digital Print Order Format) refers to a format that is used
for recording the print specifications of images. Follow the procedure to
set the DPOF information for a selected image.
1.In the Play Mode, use the 4-way button to move to the desired image.
40
User’s Manual
2.Press MENU, and use the Left or the Right key of the 4-way button
to switch to the Print menu.
3.Press the Up or the Down key of the 4-way button to select Current
to set the DPOF information of the current image, or select Reset to
clear the DPOF information of the image.
4.Press OK.
The DPOF information is stored with the image as indicated by the
DPOF icon. This information enables you to print the images on a
DPOF-compatible printer.
Use Direct-Print
You can also connect a printer to the player using the USB port and print
images directly. To set the number of prints for an image, please follow
the procedure:
1.In the Play Mode, use the 4-way button to move to the desired
image.
2.Press MENU, and use the Left or the Right key of the 4-way button
to switch to the Direct-Print menu.
3.Press the Up or the Down key of the 4-way button to select Current
to print the current image, or select Cancel to cancel the operation.
4.Press OK.
Note: This media player supports printers compatible with “PictBridge” system.
41
User’s Manual
Chapter 5 Connect to a PC or TV
This chapter describes how to connect the media player to a TV for reviewing your pictures and
videos.
Install the software
The software CD provided with the player contains the software driver required to use the player as
a web camera and to transfer data from it. It also contains various software applications to help you
view and edit your digital photos and videos. To install the software, please follow the procedure:
1.Insert the CD into your PC’s CD drive. The CD menu is displayed.
2.Select one of the following options:
----Multimedia Player Driver
----Ulead Photo Explorer 8.0SE
----Ulead Video Studio 7.0SE
----Ulead Cool 360
----MP3 Workshop
----Video Magic
---Adobe Acrobat Reader
----User’s Manual
3.Click Install to start the installation. Follow the instructions on the screen to complete the
installation.
Connect to a PC
To connect the camera to your PC, please follow the procedure:
1.Turn on the player.
2.Connect the player to the computer with the USB cable.
3.The LCD screen displays MSDC and then turns off. All the buttons of the player are disabled.
Note: Please confirm the setting of the USB option correctly. See page 27 for re-setting.
Connect to a TV
You can connect the player to a TV and use the TV screen to review your images and play back
your video clips. In addition, you can also use this player to record your favorite TV programs, and
select the Karaoke feature to record your favorite songs.
Before using the feature, you need to make sure that the output mode is correct. See page 28 on how
to set the output mode.
To review your images and videos on the TV, please follow the procedure:
1.Turn on the player, and make sure that it is in the Play Mode.
2.Connect the TV out jack on your player to the audio / video input ports on your TV using the
AV cable provided. The LCD screen turns off.
3.Follow the procedures described in the previous section “Reviewing photos or movie clips” to
play the files in your machine.
42
User’s Manual
Record TV program or Karaoke
You can connect the player to a TV to record your favorite TV program, and use the Karaoke
feature to record your own songs.
First, make sure that the TV-IN cable has been connected with the TV properly:
To record TV programs or Karaoke,
Please follow the procedure:
1.Connect the TV-in jack on your player to the audio / video input ports on your TV using the
AV-IN cable provided.
2.Turn on the player, and enter the TV-IN mode.
3.Press MENU to enter the menu.
4.Use the Up or the Down key of the 4-way button to select the Record TV Program or Record
Karaoke feature.
5.Press OK to begin recording.
Record TV programs at a certain time
When you select to record TV programs, you can set the feature to make recordings at a certain time.
Please follow the procedure:
1. Connect the player to your TV using the AV-IN cable, and enter the TV-IN mode.
2. Press MENU to enter the menu.
3. Use the Left or the Right key of the 4-way button to select the Scheduled Recording menu.
4. Use the Up or the Down key of the 4-way button to open the Scheduled Recording submenu.
5. Use the 4-way button to set the start time and the end time.
6. The time settings are confirmed, and the media player will begin to record TV programs at your
desired time.
43
User’s Manual
Appendix 1: Specifications
Image sensor
Resolution
Extrapolated resolution
Shutter speed
Zoom
LCD
Internal memory
Supported media
Format:
Image
Video
Audio
Connections
Power
Weight
1/1.8-inch CMOS
5 megapixels (2592 × 1944 pixels)
12 megapixels
1/6~1/1000 second
8x digital zoom
2.5-inch TFT
128 MB
SD (Secure Digital) Card
JPEG/EXIF2.1/DPOF
AVI(CIF)/ Divx/Mov/ASF
WAV/MP3
USB2.0
TV (Audio/Video) out
Lithium battery
123g
44
User’s Manual
Appendix 2: Error Messages
Error Message
Possible causes
Solutions
The card is full, and no more
Card Full
Delete some files or insert another card.
files can be stored on it.
Move the card’s write-protect switch to
Write-Protect Card has been write-protected.
turn off write protection
View the image on a computer. If the
The picture cannot be viewed
Picture Error
picture cannot be viewed, the file may be
with the camera
damaged.
z The card may be damaged.
z Format the card
Card Error
z The card may require
z Insert another card.
formatting.
No files exist in the memory or z Take pictures or videos.
No picture
on the card
z Insert another card.
Card Setup
The card is not formatted
Format the card
Battery does not have sufficient z Replace the batteries.
Battery Empty
power for the player to operate. z Recharge the batteries.
Appendix 3: Exchange Rate Table
per 100 USD
Britain Pounds
Canada Dollars
China Yuan
Euro
France Francs
Germany Marks
India Rupee
Japan Yen
Russia Rubles
South Korea Won
Taiwan Dollars
45
52.371258
123.886381
827.663853
75.782560
865.576654
258.083796
4360.009753
10534.323718
2773.975815
100771.22507
3117.687159
User’s Manual
Blaze MP3 Workshop
Blaze MP3 Workshop is a full featured and easy to use convert tool. It can support CD, DVD,
VCD, MPEG4 convert MP3 file, and also support record function and save as MP3 format.
Latest Version:
1.0
Release Date:
Apr. 15, 2004
File Size:
0.8MB
Language:
English, Simple Chinese,
Key Feature
Convert z
function
z
z
Support CD, DVD, VCD, WAV,OGG,VOB,DAT,MPG,RM,RMVB,MOV and all the
audio file convert to MP3 Format.
Offer multiple out-put audio module: stereo, Jstereo, Dual channel, mono.
Support enable available bit rate, to get quality sound.
Record z
function
z
Support all kinds of audio to record, including Mic-phone, CD-player, Line-in,
etc.
Support capture all the audio from sound card and record to MP3 file, from digital
to digital, so without any loss.
System Requirements
CPU
System memory
Operating system
Display card
Sound card
Device
Hard-disk
available apacity
DirectX
Basic
Recommended
Intel Celeron 400MHz
Intel Pentium III 700MHz
64MB RAM
128MB RAM
Windows 98, Windows 98SE, Windows Me, Windows 2000, Windows XP
Have 24 Bits resolution and support DirectX, 8MB or more
PCI sound cards, Integration chipset on mainboard, USB udio devices etc.
compatible with Windows and stereo speakers
All DVD drives
At least 10 MB
DirectX 8.0 or later
46
User’s Manual
Introduction of Blaze Video Magic V1.0
Blaze Video Magic V1.0 is a suite of powerful multimedia transformation software, which can
transform media files into ASF and AVI format under Windows systems. It is different from other
transformation softwares on the internet, which are either full of advertisements, or too simple in
functionality, or only for a certain type of file format.
If you need to transform various video files, you have to install many different transformation
softwares. Blaze Video Magic V1.0 integrates all transformation features, which can transform all
kinds of video files into the file formats that you need through an easy-to-use interface. These file
formats include photos, ASF files that are mainly used as the stream media format on the internet,
and AVI files encoded with MPEG4 that are mainly used as the Smatphone playback format on
various portable MPEG4 digital devices or mobile phones. Let’s learn and experience the exciting
features of it.
1. Main Interface
2. Output Type
AVI-MPEG4 is mainly for the portable digital devices using Excellent Coach 7.
3. Brief Instructions
3.1 Load files: Use the Add File button on the interface to load the files to be transformed and drag
them into the list box.
3.2 Preview: Preview the source file in the list box through the playback window in the upper right
corner.
3.3 Transform: Click the Start button in the bottom right corner to change it into Stop, which
indicates that all the video source files in the list box are being transformed. The current file and the
total progress are displayed at the bottom center of the interface. You can click the Stop button
again to stop transforming.
47
User’s Manual
3.4 Delete files: Delete the highlighted files in the current list box.
3.5 Select all: Select all the files in the list box.
3.6 Output setting: Click the Setting button to show an Output Setting box, which is used to set
parameters.
3.6.1 The Edit button can only be used to set the files of a certain transformation type in the list box,
and it will show the following setting box.
3.6.2 The Setting button after the Output Type
is a
global setting, which affects the parameters of all the options in the list box.
3.6.3 Users can change the resolution of video files in the output settings, which are usually
320*240, 640*480. The setting of quality can affect the video quality.
4. System requirements
Main Frequency: 433MGHZ and above
Memory: 64M and above
Hard Disk: Depending on the size and coding of the transformed files. The system disk should
have 1G free space at least.
OS: Win9x, WIN2000,WINXP
Required software:
DirectX8.0 and above;
Window media player 9.0 and above;
Real one player (recommend to use the latest version);
QuickTime Player (recommend to use the latest version).
48
User’s Manual
5 Supported video file formats:
Real Media Files (*.RM;*.RMVB)
Windows AVI Files (*.AVI)
Windows Media Video Files (*.WMV)
Advanced System Format (*.ASF)
MPEG(*.MPG;*.MPEG;*.MPE)
MPEG4 Files(*.MP4)
VCD(*.DAT)
Quicktime Files(*.MOV)
DVD(*.VOB)
Output Type:
AVI (Video format: MPEG-4, Audio format: MPEG-1)
49