1
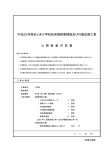
Operators Manual 9m, 12m & 18m GPN 222969 REVISION * 05/12 COPYRIGHT Neither this manual or part thereof may be reproduced or published without the prior permission of A.F. Gason Pty. Ltd. Contents Company Name A.F. GASON PTY. LTD. A hazard identification, risk assessment and risk control procedure has been carried out on a representative example of the under mentioned product(s) in accordance with the Occupational Health and Safety requirements of all states and territories of Australia and where found necessary the appropriate risk control measures have been incorporated in the product specifications. The operator’s manual contains the necessary health and safety information and safety warnings are applied to the product where necessary. Product Description ParaMAXX Models No. or No.’s PM 12, PM 18. Signed on behalf of the above named company Name (printed) Richard Davis Position Quality Manager Date 22/02/2010 Details of the Unit Assessed for the Purpose of Compliance Model No. PM 18 - 375 Serial No. 222756-10461 Date of Inspection 22/02/2010 Location of Inspection ARARAT, VICTORIA Contents Introduction Welcome ...................................................1 To The Dealer ............................................2 Para- Maxx Circuit ................................... 16 Tractor About this Manual ....................................2 Requirements.......................................... 19 To The Owner............................................3 Connection .............................................. 19 Machine Record ........................................3 Pre - operation Checklist......................... 20 Why is SAFETY so important? ...................5 Transporting:........................................... 21 Safety Alert Symbol ...................................5 Signal Words .............................................5 General Safety Field Operation Operating the150 Para-Maxx: ................ 22 Adjustments: ........................................... 23 General Safety ...........................................6 Safety Rules & Accident Prevention .........7 Maintenance & Service Hydraulic Safety ........................................8 Before you Begin..................................... 25 Disclaimer..................................................8 10 Hours (Daily) ...................................... 25 50 Hours .................................................. 25 Specifications 500 Hours or Seasonally ......................... 26 Single Fold Models 9m, 12m & 18m .........9 End of Season Checklist – Storage and Cleaning .................................................. 26 Assembly Tyre Care ................................................. 27 Press Wheel Tyre & Rim ......................... 27 Unloading From Transport ......................11 DU Bush Replacement ............................ 28 Initial Assembly .......................................11 Hardened Steel Bush Replacement ........ 28 Torque Specifications.............................. 13 Wheel Bearing Maintenance .................. 29 Hydraulic System Cylinder Care ........................................... 30 Trouble Shooting Introduction ............................................14 Wing Fold Circuit .....................................14 Depth Control Circuit .............................. 15 Introduction Welcome A.F. Gason Pty Ltd (Gason) is an Australian owned family business operating from within rural Victoria. The Gason Company has been servicing the needs of rural Australians for more than 60 years. We operate through a local dealer support network that spans the country. Gason would like to thank you for purchasing your Australian made tillage implement, and trust that you will have many years of trouble free service. The Gason Para-Maxx is the only known multipurpose parallelogram planter which features instant parallelogram and tine pressure management, on the run from the tractor seat. The dual hydraulic control system is unique in modern day farming. The problem of bulldozing and skipping in various soil conditions is eliminated (that is, in hard, soft, fluffy or wet soil) with the simple control of hydraulic pressures from within the tractor cab. The dual control system also allows for managing both surface and subsurface conditions independently. Gason Para-Maxx frames are manufactured with high quality 150x150x9 RHS and I-beam construction spreader supports. The 3-row frame provides a versatile platform fitted with the Gason Para-Maxx Parallelogram row unit assembly in various row spacing’s. contact. The Para-Maxx row unit features instant parallelogram and tine pressure management. The row unit and tines accept a 75mm x 25mm vertical shank with upper holes enabling vertical adjustment for seed placement. Various points and sowing boots are available. Ideally coupled to a Gason Air Seeder to act as a Minimum/No- till planter, the 150 series can also be used for conventional weed kill/soil preparation. With various tools and options the 150 series implement/ planter can be setup to perform a variety of tasks depending on specific agronomic requirements. These may include: Direct drilling: With a narrow edged tine and a direct drill point, deep moisture seeking to 250mm depth is easily achieved. Minimum-till: Sowing systems aimed at minimizing soil disturbance and retaining crop residues. No-till: One pass sowing system using narrow points or discs for minimal disturbance Fertilizing: Using double disc openers. The frame is equipped with front castor wheels which ensure easy turning and contouring, without any sideways wheel drag. The rear wheels are positioned to obtain maximum clearance for working tools and also cater for tight turning. The frame has been designed to maximize stubble flow and provide uniform finishes while accommodating multiple layouts. The Para-Maxx 150 row unit is a multipurpose parallelogram utilizing a drum coulter for trash management and depth control, adjustable shank for seed positioning and independent press wheel for optimum seed to soil 1 Introduction Caution: This implement has been developed for maximum residue stubble flow. If working around hillsides, pairing of rows may occur. Caution: Correct seed depth is critical to success. Sowing too deep reduces vigour and plant establishment. Sowing too shallow can cause reduced emergence if moisture is not adequate for germination and can increase the risk of herbicide damage from preemergent herbicides. Check seeding depth regularly during sowing. Caution: Additional attachments such as anhydrous ammonia tanks and prickle chains, which may place significant loads on the frame, will void warranty on the frame and any related components. If unsure as to the warranty implications to any attachment or modification that you wish to make to your 150 Series Para-Maxx, consult your local authorized Gason Dealer. To The Dealer About this Manual This manual endeavors to provide the owner with a complete understanding of the 150 series implement’s safety, assembly, maintenance and operation including the processes required to obtain the highest level of performance possible. Caution: It is of the utmost importance that the owner/operator read this manual, and any other literature that has been supplied with the machine, to ensure a safe and trouble free operation. References to the left and right hand sides of the Implement are from the rear of the machine looking forward in direction of travel as shown. LEFT RIGHT Assembly and proper installation of this product is the responsibility of the Gason dealer. The dealer and owner/operator must complete & sign the Installation and Warranty Registration Form included with this manual before releasing the Implement to the new owner. Purchaser copy to be supplied to owner. Dealer copy to be retained by dealer Company copy to be returned to Gason. In addition, the dealer must complete the Dealer Pre-Delivery & In-field Commissioning Check List included within this manual. Gason strongly recommend a risk assessment be carried out prior to the machine being operated to ensure the operators fully understand the dangers involved in the operation of the Gason Tillage Implement. 2 Introduction To The Owner Machine Record Caution: Read & understand this manual before operating your Gason Implement. The information presented will prepare you to operate your machine in a more efficient and safer manner. This manual should ideally be kept in its protective satchel and stored with the machine. Replacement manuals are available upon request from Gason or online at www.gason.com.au. Replacement “holders” are available through your nearest dealer. The manual includes an Installation and Warranty Registration Form, of which, requires the dealer & the owner/operator to sign. The Purchaser copy of this form is to remain with the owner/operator. Caution: Ensure you carry out, and keep up to date, a Risk Assessment. All operators must read the manual carefully and become acquainted with all the adjustments and operating procedures before attempting to operate. The Implement you have purchased has been carefully engineered and manufactured to provide dependable and satisfactory use when operated & maintained in line with this manual. Like all mechanical products, it will require routine cleaning, upkeep and maintenance. Lubricate the implement as specified in this manual. Observe all safety information in this manual and obey all safety decals located on the machine. Please be aware that in an effort to bring you the best products Gason are always implementing continuous improvements that may change the designs and specifications of the implements. In doing this, Gason, together with its dealers and distributors, are under no obligation to implement such changes, free of charge, on any previously delivered machines. SERIAL TAG Serial No Tag Located at the rear left side of the centre frame. Tine/Row Unit Type (CIRCLE) Para-Maxx Frame Type - Cut Width (CIRCLE) 9m 12m 18m Spacing: _________________________ Number of Tines/Row Units _________ Serial Number: ___________________ Model: __________________________ Date Purchased: __________________ Owner Name: ____________________ Owners Address: __________________ ________________________________ ________________________________ Options Fitted: ____________________ _________________________________ _________________________________ _________________________________ _________________________________ 3 Introduction Dealer Pre-Delivery & In-Field Commissioning Check List The following must be carried out upon machine delivery to customer Tick to confirm action Customer has ensured that Machine is correct for the required application. Customer has checked tractor specification to ensure machine is suited to trac- √ tor. Customer has checked all items are received as per order. Machine Assembled Correctly as per Operators Manual instructions. Check Wheel Nuts for correct tightness (refer maintenance section) Tyre Pressures are correct to recommend amounts refer tyre care. Grease all grease nipples; hinges, drawbar and wheel assembly pivots. Check for Hydraulic Oil leaks. Air purged from Hydraulic Circuits and tractor’s hydraulic oil level is OK. Ensure Depth Control cylinders are phasing correctly (synchronized). Check for correct tractor to drawbar connection. Implement safety chain fitted to tractor. Transport/safety stands lifted into the fully raised position. Ensure all shanks and press wheels set at consistent settings across machine, (If practical set machine to operators initial operation settings). Check Air Seeder Distribution for kinks and obstruction through all working ranges (where applicable). Check row spacing is correct. (At initial operation, drive in straight line, lightly scratching machine along flat ground. Measure distance between marks). Owner has viewed the Operators Manual. Owner instructed on correct maintenance and safe operation of machine. Owner and operators instructed on phasing cylinders depth stop use and positioning of the wing fold cylinders to full extension when operating. Owner has agreed to train all operators in the safe use of the machine. Pre delivery and in field commissioning by: NAME: DATE: SIGNED: 4 Safety Why is SAFETY so important? Safety Alert Symbol The team at Gason rate operator Safety as one of the highest priorities when designing new features and machines. Every effort is taken to consider the end user and the safety risks they may face. Accidents can Disable & Kill Accidents are Costly Accidents Can be Avoided The Safety Alter Symbol means: ATTENTION! BECOME ALERT! YOUR SAFETY IS INVOLVED! The Safety Alert Symbol identifies important safety messages applied to the Implement in this manual. When you see this symbol, be alert to the possibility of injury or death. Follow the instructions provided on the safety messages. Throughout this Manual the Safety Alert Symbol will be seen followed by one of the words. Signal Words DANGER: indicates an imminently hazardous situation that, if not avoided, WILL result in death of serious injury if proper precautions are not taken. WARNING: Indicates a potentially hazardous situation that, if not avoided, COULD result in death or serious injury if proper precautions are not taken CAUTION: Indicates a potentially hazardous situation that, if not avoided, MAY result in minor or moderate injury if proper precautions are not taken, or, serves as a reminder to follow appropriate safety practices. 5 Safety General Safety Personal Protective Equipment (PPE) Gason recommends the following personal protective equipment be used when operating the Implement. Whilst great care and every effort has been made by Gason to provide a machine to the highest possible safety standards, tillage implements by their nature are potentially dangerous. In addition to the design and configuration of equipment, hazard control and accident prevention are dependent upon the awareness, concern, prudence and proper training of personnel involved in the operation, transport, maintenance and storage of equipment. Be Prepared In the event of an emergency it is best to be prepared. Gason recommend whilst operating the Implement, a fire extinguisher and first aid kit should be readily available in the event that they might be required. Danger: Do not operate the tractor or Implement until you have fully read and completely understand this operator’s manual, your tractors operator’s manual, and all safety messages found within these manuals, on the products, or other included material. Safety glasses Hearing protection Gloves (when removing debris from tines ) Breathing mask (dusty work environment and when handling chemicals) Sturdy Footwear. Figure hugging clothing. Hair Net/Tie (for long haired operators) Safe operation of the Gason Tillage Implements requires the full attention of the operator. Do not wear radio headphones, or talk on your mobile phone while operating these machines. Never operate while under the influence of alcohol or drugs or allow anyone under the influence to operate the tractor or Tillage Implement. Safety Decals All Gason Tillage Implements are provided with a complete set of decals which include important safety information and are required to ensure the machine complies with the relevant work safe regulations. Every effort should be made to ensure the decals are legible at all times. Any decal which can be seen to be worn or can no longer be read should be replaced. For a detailed list of Decals and their positions on the machines refer to your Parts manual. 6 Safety Safety Rules & Accident Prevention Caution: Customers MUST carry out their own Risk Assessment and/or “HazCheck” on every machine on their property. If you do not understand any part of this manual and need assistance please call either the dealer or Gason who will direct you to the appropriate training persons. Warning: Keep hands and body away from pressurized lines. Use paper or a rag to check for leaks, not hands or other body parts. Wear safety glasses to protect eyes. Hydraulic fluid (oil) under pressure can easily penetrate the skin and could cause serious injury or death. Warning: Ensure all operators and service personnel are aware that if hydraulic fluid (oil) penetrates the skin it will need to be surgically removed as soon as possible. Failure to do so may result in serious injury or death. Know your controls and how to stop the machine quickly in an emergency. Use a signal person when maneuvering machine and the tractor operator's view is obstructed. Check that all hardware is tight and properly installed. Refer Assembly Torque table. Ensure the tillage implement is properly attached, adjusted and in good working order before operating the machine. Remove any debris that has accumulated on the implement or tractor. Do not operate Gason Implement unless in good working condition. Carry out regular checks for damaged or fatigued parts and replace or repair as required. Watch for hidden hazards on the terrain and remove any hazards or objects that may cause injury or damage. Keep all people and animals away from the implement during start-up, operation, when stopping, maintaining or adjusting. When operating at night ensure adequate artificial light. Danger: Do Not allow persons to ride on machine during operations or transport. Ensure all operators are properly instructed on the operation of the machine and position of controls. Do not allow anyone to operate the machine without proper instruction. Do not allow children or untrained persons to operate equipment. Danger: Stand clear when folding or unfolding wings. Caution: For transportation on public roads the operator must ensure that the tractor and Implement complies with current state and federal laws and must strictly adhere to all road traffic regulations in force in his/her particular state. Operate tractor at the specified speeds. Always ensure the correct setting on your tractor before start-up. Use Extreme care and reduce ground speed on slopes and rough terrain. 7 Safety Warning: Do Not stop, start or change direction suddenly on steep slopes. Working up and down is preferred. Use cardboard or wood to detect leaks - never your hands. Caution: Stop tractor, immediately upon striking an obstruction. Turn off engine, remove key, inspect and repair any damage before resuming operations. Caution: Always double check before reversing machine. Danger: Never place any part of the body underneath Tines or Row Units without first fitting/ adjusting safety stands. Hydraulic systems can “creep” (i.e. slowly lower). Any movement of the control levers can cause the implement to drop or move unexpectedly causing severe injury or death. Hydraulic Safety Warning: Do Not adjust Hydraulic fitting while under pressure. Ensure pressure is released using tractor’s hydraulic system before adjusting or disconnecting Implement. Danger: Do not search for high pressure hydraulic leaks without hand and face protection. A tiny, almost invisible leak can penetrate skin, thereby requiring immediate medical attention. Never remove hydraulic hoses or ends with machine elevated. Relieve hydraulic pressure before disconnecting hydraulic hoses or ends. Maintain sufficient hydraulic fluid levels in tractor to ensure air is not introduced into the system. Keep all connectors clean for positive connections. Ensure all fittings and hoses are in good condition. Double check that all is clear before operating hydraulics. Disclaimer Gason accepts no responsibility or liability for any losses, injuries or damages that may result from failing to observe these safety rules and the safety decals on the Implement. 8 Specifications Single Fold Models 9m, 12m & 18m 9m (30ft) 9.8m 3.0m SIZE 12m (40 ft) 9.8m 3.0m Overall transport width ¹ 6.0m 6.0m Overall transport height ² 4.0m 5.1m 12000kgs 16000kgs 18m (60 ft) 11.2m 3.0m 8.0m for 333 & 375 7.7m for 400 5.0m for 333 & 375 5.5 for 400 24000kgs 27 N/A N/A N/A 36 32 30 24 54 5 49 45 N/A DIMENSIONSALL DIMENSIONS IN METRIC & (IMPERIAL) Overall Length (tractor hitch to rear wheels) Frame Depth (Front to rear) Overall Mass (approximate) 3 Number of Shanks: 333mm spacing 375mm spacing 400mm spacing 500mm spacing Road Clearance: 280mm (11”) Max. Recommended Working Depth: 250mm (10”) No. of Tool bar Rows: 3 Tool bar Spacing (centre to centre) 1.5m • Narrow – 9m & 12m (hinge to hinge) – 4.4m • Wide 18m (hinge to hinge) – 6.0m 3 tonne capacity 150 x 150 x 9.0mm RHS Grade 450 & 100 x 100 x 6.0mm RHS Grade 450 Centre Frame Width: Jack: Frame Section: Drawbar Section: Para-Maxx: 1 2 3 4 Toolbars 150 x 100 x 9.0mm RHS Grade 450 4 Breakout Force Hydraulic • 160kg to 500kg (350lbf to 1,100lbf) Underframe Clearance Floating Parallelogram 305mm Float. 755mm to 465mm to the bottom of drum coulter. Overall width based on wings folded and tines fully extended. This width can be reduced by 1.2m overall upon removal of some inner wing shanks, if necessary. If Para-Maxx row units can be lifted up to reduce width. Overall height based on wings folded and tines fully extended. This height can be reduced by removal of outermost shanks fitted to the wings. If Para-Maxx row units can be lifted up to reduce height. Mass will depend on number of row units fitted. Breakout at approximately 100mm depth of cut. 9 Specifications 9m & 12m (Single Fold 12m 333 shown) 18M (Double Fold 333 with wing wheels retracted shown) 10 Assembly Instructions Unloading From Transport Machines must be lifted by approved overhead lifting gear and licensed operators. Initial Assembly Set up instructions detailed as follows are a guide only. Warning: Only personnel with correct licenses are to be involved with the lifting of machine. Instruct general public to keep clear at all times. Machines are dispatched ex factory with components requiring attachment and/or assembly. Use machine lift areas for safe maneuvering as shown below. Locations of lifting points vary between models but all are equipped with similar lifting points identified with decals, see example shown below. If lifting points are around the RHS frame “with rounded corners” use soft slings. If lifting points identified through holes in plates uses shackles. The Main items of assembly in most cases will be as follows: Fitment of pull. Repositioning and fitment of rear depth control wheels and front castor wheels. The series 150 may be delivered with the front castor wheel assemblies positioned on top of frame. Fitting wheels and tensioning to correct torque. Wheels may have been removed depending on transport height required. Lifting Point (Typ. both sides) Danger: Ensure that all lifting equipment is in good condition and has the capacity to lift the load. Do not lift unless a reasonable assumption of weight is determined. Avoid excessive paint damage, if chains must be used, ensure paintwork is protected. Ensure machine is placed on firm level ground with adequate access around machine for assembly. Leave transports stands in place to support machine until assembled. Warning: Ensure wing fold cylinders are fitted with locking plates to lock wings in position for lifting. Ensure 2 plates per cylinder. Wing Lock Plate Reconnection of hydraulic hoses, securing hoses in clamps and priming hydraulic circuits. Fitment of row units / tines / press wheels to the marked position. Where rear row has been removed for narrow transport width. Shank Fitment. Ground tool Fitment. Touchup of paint work if required. Fitting Pull – the pull may be mounted on top of centre frame. Connect crane before loosening transport stand hardware. Using a crane, position & fit the drawbar to the front of the centre frame using the connecting pins on the assembly. Lower the jack to support the front of the drawbar and fit safety tow chain. 11 Assembly Instructions Front Castor Wheels - Care needs to be taken as assembly will become unstable. Danger: Proceed with Extreme Caution. If wheels have been positioned over centre for transport the will need to be lifted in position with a crane. Follow instruction below. Connect crane using a shackle to support castor wheel, allow for rotation of assembly when re-positioning. Ensure Hydrulic cylinder is set to 850mm ± 10mm. With plates still in position, lift and rotate assembly around bottom Pin until wheel or hub rests on the ground. fied for M18 wheel studs. Alternate tightening of nuts in a star pattern. It will be necessary to lift and pin the row unit and reposition the crank arm to fit the rear wheels. Hydraulic Circuit - In setting up the hydraulic circuit, it is imperative that the cylinders are correctly located, refer parts section for positions. Likewise, the plumbing of the hoses must be connected to produce the correct circuit and care taken to maintain cleanliness of the system. Similarly, when securing the hydraulic hoses to the frames, care needs to be taken to ensure that sufficient slack is provided in areas where a pivot joins members or the connection is to a moving component. Caution: Before operating the hydraulics, read and understand the “Hydraulic System” section of this manual. Caution: Maintain a close watch on tractor oil level and top-up with new clean oil as required, (not aerated oil). Observe closely as too low an oil level may introduce more air into the system. Warning: The presence of air in the hydraulic circuits will cause the implement to operate erratically and is potentially very dangerous when folding wings or transporting the implement. Whilst castor frame is supported by cane, carefully remove bottom pins and plates. Connect lower parallel link to main frame and secure pin with locking bolt. Note: Reverse procedure if machine is to be packed up for transport. Wheel Fitment - If wheels have been removed for transport, loosely mount wheels on hubs. Be Gentle. Avoid damage to threads. Tighten all nuts firmly then proceed to torque each wheel nut to torque speci- Depth Control - The depth control circuit consists of master/slave phasing cylinders in series. Generally the depth control system will be factory primed. If not refer “Hydraulics Systems” section of this manual. Wing Fold - A hydraulic circuit is employed to fold the wings from the working position for transport or storage. This circuit is independent of the depth control circuit. The wing fold circuit consists of a number of non-phasing double acting cylinders connected in parallel. Generally the wing fold system will be factory primed. If not refer “Hydraulics Systems” section of this manual. 12 Assembly Instructions Tine / Row Unit Fitment - Tine location decals (arrows) should be fitted to the toolbar to indicate the tine locations for tines/row units not fitted or not fitted in the correct location. Upon fitment of these, ensure the correct hardware is used i.e. M20 Grade 8.8 bolts and Class 8 Nyloc nuts. Secure the four fasteners in stages to pull up the tine evenly and squarely onto the toolbar. Caution: Assembly torque settings are critical to ensure tine assemblies remain secure to the toolbar at all times. Torque to 240Nm (177 lbf.ft). Confirm this setting with a good quality torque wrench. Shank Fitment - Fully raise implement off its stands, fit the tine shanks to the upper tine assemblies. Ensure positioning pins are in the same hole in both the shank and the pivot bracket to the tine tower. Note: Ensure all shanks are set at consistent settings across machine. This is critical for consistent seed placement. Ground Tool Fitment - There are a growing range of ground engaging tools available to suit the range of shanks. Selection of the most appropriate ground tool will depend on your agricultural practices, ground conditions and sowing boot design. Recommended assembly torques may be obtained by multiplying the torque figures in the table below by: 0.78 – for degreased zinc plated bolts. 1.10 – for black oxide finished bolts. 0.71 – for M20x2.5P 150 row unit toolbar Hardware (177lbf.ft / 240Nm). Thread Pitch S.A.E Grade Number Size Recommended Assembly Torque lbf.ft Nm lbf.ft Nm lbf.ft Nm 5 8 Wheel Stud Head Markings (Manufacturers marks may vary) 7/16 7/16 1/2 1/2 5/8 5/8 3/4 3/4 7/8 7/8 1 1 UNF UNC UNF UNC UNF UNC UNF UNC UNF UNC UNF UNC 43 39 67 59 135 117 235 210 370 335 550 505 Metric Grade Number 59 53 91 81 184 159 319 285 502 455 746 685 8.8 60 54 94 83 186 165 325 290 520 470 775 710 82 74 128 113 253 224 441 394 706 638 1052 963 10.9 - Wheel Stud Head Markings (Manufacturers marks may vary) M10 M12 M16 M16 M18 M20 M20 M22 M24 M24 1.5 1.75 2.0 1.5 1.5 2.5 1.5 3.0 29 51 126 247 425 40 70 171 335 577 41 73 180 351 608 56 100 245 477 825 170 254 376 475 500 - Torque Specifications Caution: Torque values listed below should be used as a guide only. If a different torque value or tightening procedure is specified for a specific application, do not use these values. - Caution: Loose bolts can cause elongation of holes and part failures resulting in dangerous operating conditions and equipment breakdown. Check all bolts & nuts periodically during equipment operation and keep them tightened to torque specified. Refer to the Parts section for proper grade and length of bolts for replacement parts. Do not replace nyloc nuts with nuts and spring washers. Replace all parts with original specified parts only. (note grade). Do nut re-use nyloc nuts. The following torque figures are those recommended for zinc plated, lightly oiled bolts. 13 231 345 510 645 679 - Hydraulic System Introduction The hydraulic system of the 150 series ParaMaxx frame consists of four independent circuits i.e. depth control, wing fold, tine breakout and drum coulter pressure. Both tine breakout and drum coulter pressure include a hydraulic accumulator. to be connected to the tractor are fitted with ½” BSPT male fittings and are supplied with ½” type A ISO quick release breakaways. Before operating the tractor hydraulics a careful check should be made of the following: Cylinders are correctly located and aligned i.e. the cylinders are not under stress due to misalignment or tight pins. Caution: Hydraulic oil cleanliness is imperative, especially if trouble free performance is expected. 1. Caution: Maintain a close watch on tractor oil level and top-up with new clean oil as required, (not aerated oil). 2. Caution: All work on the hydraulic connections to the accumulator shall only be carried out by suitably trained staff. Improper installation or handling can lead to serious accidents. Warning: Hydraulic accumulators must only be filled with pure nitrogen N2 (oxygenfree), not with oxygen or air. Warning: Risk of burns as the accumulator can become hot. Danger: On no account must any welding, soldering or mechanical work be carried out on the accumulator. Important: When loosening fittings to bleed, always select the JIC fitting, if there is a choice. Do not bleed from the UNO fittings which screw directly into the cylinders. Damage to the sealing O-rings may result. Note: Accumulator pre-charge information is recorded on the aluminum identification plate on the gas end of the accumulator. Tractor Requirements – The implement hydraulic systems are designed to function with modern tractors. All components within the implement’s hydraulic circuits are designed to handle a maximum working pressure of 24MPa, (3500 psi). The tractor hydraulic flow rate must be set between 60 and 120 l/min, (16-32 US gpm). All circuits Hoses are correctly connected, firmly fixed and clear of any sharp edges or other obstructions that may cause pinching or wear on the outside of the hose. 3. No visible leaks from any hydraulic fittings. All hydraulic tubes, hoses and fittings should be regularly inspected for damage and wear. 4. Important: Do not over tighten hydraulic fittings. Install and tighten nut finger tight until it bottoms on the seat, then tighten a further 1/3 turn only. All threaded pipe connections should be treated with a thread sealant compatible with hydraulic systems; e.g. Loctite 569. Only apply sealant to the male threads. Do not use thread sealant on flare type fittings. Wing Fold Circuit The wing fold circuit comprises of a number of double acting cylinders, and restrictors. The circuit will have a 2 way rotary flow divider fitted which will allow each set of cylinders to operate simultaneously. The following procedure should be adopted to achieve complete removal of air when priming. Disconnect the bolt and clevis roller from the rod end of the cylinders body to allow free movement. Using suitable size blocks, support the rod end of the wing fold cylinders ensuring that the rods will have freedom to fully extend without fouling. 14 Hydraulic System Warm tractor engine, and then set at idle. Actuate tractor hydraulics to slowly fully extend implement wing fold cylinders and then fully retract. Repeat this process a number of times to ensure all cylinders operate smoothly and simultaneously before reconnecting. Depth Control Circuit The depth control circuit found on the implement consists of a master/slave rephasing cylinder system connected in series for each half or quarter of the machine. The master/slave system means that the rod end of the largest (master) cylinder is connected to the base of the first slave cylinder, and then the rod of the first slave cylinder is connected to the base of the second slave cylinder. The sizes of the cylinders and rods are matched such that a certain extension of the larger cylinder will displace a volume of fluid (from the rod end), which will match the volume required by the next cylinder (at its base end) to extend the same distance. These rephasing cylinders allows oil to pass the piston when it is fully extended or retracted. The benefits of this feature are twofold. i.e. the cylinders are able to re-synchronize (rephase), compensating for any leakage (internal or external), and at the same time purge air from the cylinders and hoses back to the tractor. Note: With these rephasing cylinders, it is NOT necessary to remove hoses or fittings to achieve bleeding of the depth control circuits. Depending on model the circuit will be fitted with either a 2 way or 4 way rotary flow divider. This will evenly split oil flow synchronizing the two or four master cylinders in the circuit. 2 masters on the single fold machines and 4 masters on the double fold machines. If master cylinders become out of sync they will be re synchronize when fully retracted to the end of stroke (or against depth stop donuts). This is accomplished as excess fluid is bleed off over the flow dividers internal relief valves. Wing Wheel shut off valve- The circuit incorporates a wing wheel shut off valve. This enables the wing wheels to bfe retracted for transport. To retract the wheels, fully lower machine switch of tap to the off position allowing the machine to raise and lower without the wing wheels moving. Priming the Depth Control Circuit – Note: Ensure the tractor’s hydraulic flow rate to the implement is between 65 and 120l/min. If the hydraulic flow rate is less than 65 l/min, the time to change the implement’s depth may not be acceptable. If the hydraulic flow rate is greater than 120 l/min, damage to circuit components may occur. The following procedure should be adopted to achieve complete removal of air from the depth control system. Warm tractor engine, and then set at idle. Actuate tractor hydraulics to fully extend or fully retract implement cylinders, (rephasing positions), and hold for 2 minutes. This should be enough time for all the air within the circuit to be dumped into the tractor reservoir. Fully retract implement cylinders and hold for another 2 minutes. All cylinders should operate simultaneously and evenly. If not, repeat steps 2, 3 and 4 again. Caution: To allow the rephasing system to work correctly, all air must be purged from the system. Air within the system may exhibit any of the following symptoms: Uneven frame heights, Spongy feel, sagging of frame, Hoses vibrate and squeal and erratic movement of cylinders. 15 Hydraulic System Para- Maxx Circuit The Para-Maxx utilizes 2 dedicated single acting Hydraulic circuits with pre-charged accumulators as a means of allowing the tine mechanism to breakout and coulterparallelogram down force to be adjusted. Both circuits can be independently adjusted by increasing or decreasing circuit pressure within specified range. Note: Maximum system pressure is: Coulter-Parallelogram 10.4MPa (1500psi) Tine circuit 18.6MPa (2700psi) Warranty will be void if these pressures are exceeded, and/or accumulator pre-charge increased. Exceeding these pressures will significantly reduce the number of tines capable of jumping. In conditions where a large number of tines attempt to jump, hydraulic lock-up will occur – no tines will move and consequently, damage to either tine or implement will result. Priming the Coulter Circuit: 1. Prime the coulter circuit first. 2. To assist in purging all air from the system, loosen the last hydraulic hose on the end of each wing manifold. Do this for both the coulter and tine circuit. By having the tine circuit open will ensure no hoses have been plumbed incorrectly. 3. Once the implement is ready to be primed, lower the so that the implement is resting on coulters or ground tools. Ensure the coulters are on soft ground. 4. Attach the coulter hydraulic circuit to a remote port on the tractor. 5. Slowly introduce hydraulic oil to the system. 6. As the cylinders fill, oil will begin to emerge from the loosened fittings. 7. Do not tighten until only oil is present. i.e. no air. If oil emerges from the tine circuit check both circuits’ plumbing. 8. Nip up fittings and continue to force oil into the circuit. Pressurize up to 1300psi. 9. Raise implement, oil pressure will return to zero as the coulters come to rest. Priming the Tine Circuit: 10. To assist in purging all air from the system, loosen the last hydraulic hose on the end of each wing manifold. 11. Once the implement is ready to be primed, lower until the implement is resting on coulters or ground tools. Ensure the coulters are on soft ground. 12. Repeat steps 4 to 8 for the tine circuit (not the coulter circuit). 13. Increase hydraulic pressure until desired working pressure is reached. Following is a table of theoretical values of desired breakout at approximately 100mm depth of cut and the corresponding hydraulic pressure. 84bar (1200psi) precharge Breakout [lbf] at Hydraulic 100mm deep. Pressure [psi] 500 1225 702 1580 877 1975 1054 2370 1200 2690 Note: If the tines appear to behave erratically during working, further air may need to be bled from the system. Dump system pressure using the tractor, then proceed to gently loosen the hose fitting at the top of each tine cylinder until clear oil is present. Note: “As a rule of thumb” quick approximation of tine breakout in pounds “Divide Pressure (psi) by 2” Note: As the tines depth increases so does the pressure necessary for maintaining a given breakout. Eg. Higher breakout is achieved with shorter shank position. 16 Hydraulic System 18m Double Fold - Depth Control Circuit 17 Hydraulic System 12m Single Fold - Depth Control Circuit 18 Tractor Requirements Ensure tractor is compatible with your 150 series Para-Maxx and seeder combination. Check the following: 1. Does the tractor have sufficient power to pull this combination in the field? Generally you will require between 5-9hp per tine and 8hp per ton of seeder. 1. Reverse the tractor to the drawbar, adjust jack to suit drawbar height and fit drawbar pin. Ensure draw bar pin is installed with an appropriate retaining pin/clip fitted. Example: 36 tines Para-Maxx with 1890 seeder (9 ton). (36 x 5)+ (9 x 8) = 252hp. 2. Attach depth control and wing fold hydraulic hoses to appropriate tractor hydraulic remotes. 2. Does tractor have sufficient weight to tow combination safely on public roads? Refer “Transporting” section of this manual. Caution: Ensure Hoses are paired into correct remote sets. Hydraulic hoses can be identified by tags fitted near the tip, as shown below. 3. Does the tractor of have sufficient hydraulics to handle the combination. 4 sets of remotes plus the seeder’s requirements. For more info refer “Hydraulics” section of the manual. GPN: 227170 Important: These are only rough guidelines; hills and soil conditions can have a large impact on tractor power requirements. Caution: Ensure couplings are clean of dirt and are not damaged. Always carry clean rags with the tractor. Note: The implement hitch has been designed to perform at its optimum with a Category 4 drawbar (2” dia. pin). If a Category 3 drawbar is used (1.5” dia. pin), undesirable effects may result due to sloppiness. 3. Check machine hydraulic actuation responds to desired lever/control movement, i.e. pull lever back to raise machine, push lever forward to lower machine. It may be desirable to mark the tags with a permanent marker for future reference, e.g. “left” for left side of remote pair. Connection Ensure that the implement is always disconnected/ connected on flat, level ground and these general rules are followed: Warning: Read your tractors operator’s manual and become familiar with all controls before commencing connection. Warning: Only personnel involved with the connection of machine to tractor are to be present, instruct general public to keep clear at all times. When tractor is not being operated, ensure key is removed from ignition. GPN: 227171 Note: On the wing fold circuit it is good practice to use the tractor’s timed detent operation. Set to approximately “30” seconds. 4. Check that the tractor hydraulic fluid reservoir is full. There is a significant volume of fluid required to fill all cylinders and hoses when connecting a new implement. Low reservoir levels may introduce air into the hydraulic circuits! Danger: The presence of air in the hydraulic circuits will cause the implement to operate erratically and is potentially very dangerous 19 Tractor when folding wings or transporting the implement. 5. Install a suitably rated implement safety tow chain (supplied with machine), from drawbar to a secure location on the tractor. A shackle attachment point is located near the front of the drawbar. Pre - operation Checklist Read and understand the operator’s manual and all safety decals. Read and understand tractor’s operator’s manual. Inspect all tyres (where applicable) are in good working condition and correct pressure. Refer to “Tyre Care” in the “General Maintenance”. Inspect all points & hardware are in good working condition. Caution: Do not operate depth control hydraulics until jack is rotated into storage position. Check that all hardware is in place and is tight. Refer to “Torque Specifications” section for assembly torques. 7. Phase depth control cylinders, by fully retracting or extending and holding oil flow until all cylinders are fully extended. Check that the hydraulics are primed and bled of all air as detailed in the “Hydraulic System” section. Check that all hydraulic hoses are routed to accommodate working angles between implement members joined by pivots, checking for potential pinching, fouling or rubbing of hoses. Check that all accessories do not foul with implement wheels or framework through their working/transporting range. Check all hydraulic connections for leaks. 6. Raise the parking jack base plate off the ground and rotate into its storage position. 8. Raise safety stands across the front and rear of main frame. These may have been lowered to support machine during storage or for safety reasons when carrying out servicing. Check safety tow chain is fitted to implement. If additional length is required, use only Grade 80 tow equipment. 20 Transporting Transporting: The 150 Para-Maxx should always be transported with the wings completely folded. Transporting in the fully raised position will give maximum road clearance; however, this does increase the overall height of the machine. Before transporting, ensure the following procedures are considered: 1. Tractor has sufficient weight to handle machine. Generally the tractor needs to be 2/3 the weight of the Implement combination. Caution: Prevent collisions between motorists and slow moving equipment on public roads. Frequently check for traffic from the rear, especially in turns, and use the turn signals. 2. Tractor has sufficent braking capacity for emergency stops. Maximum of 15m stopping distance. 3. Release hydraulic pressure from hydraulic tines or row units enabling them to freely move if they hit an object. Pins have been provided to pin row units in elevated position to reduce transport dimensions as required. 4. Understand and abide by all state and local authority regulations for transport of agricultural machines. Always abide by these regulations. e.g. dimensions, weight, time of day, road and bridge restrictions, piloting, beacons, signs, flags, etc. 5. Centre frame wheels have the maximum tyre presure, refer to “Tyre Care” in the Maintence and Servicing section of this manual. Doing so will prevent excessive tyre side wall heat and distortion and rapid tyre wear occurring. during road transport to provide greater stability. 7. The safety tow chain must be fitted around a substantial part of the towing implement and hooked back onto itself. Ensure hook safety catch is engaged. The chain must be fitted to allow normal angular movement of the coupling without unnecessary slack. If practicable, the chain must be connected so the drawbar of the implement is prevented from hitting the ground if the coupling accidentally detaches. If towing a combination, ensure safety chain tow capacity is adequate. An additional chain may be required. Caution: Never travel with wings in any other position except fully up or down. Danger: BEWARE of power lines and other obstructions when transporting with wings folded. During transportation ensure: 1. The maximum transport speed of 20km/h is not exceed. 2. Reduce speed when travelling over rough terrain and shift into low gear down steep slopes. 3. After transporting for a few kilometres, stop and check all wheel nuts, connector bars, clevis pins and lynch pins. This should be repeated again if transporting any extended distances. In particular, wheel nuts can work loose until they have bedded in. Refer “Torque Specifications” in Assembly Instruction section of this manual. Important: It is the responsibility of the owner/operator to review the state or local requirements before towing on public roads. 6. Centrally locate & fix the tractor and airseeder (for front tow seeders) drawbars 21 Field Operation Operating the150 Para-Maxx: The design of your Para-Maxx provides flexibility in spacings, layouts, individual working depths, ground engaging tools and provision for a multitude of attachments, allowing its use for more than just one application or practice. Caution: Ensure wing fold cylinders are always fully extended when operating. This will allow for even float of wings. When folding wings down, the cylinders need to continue to full extension after the wheels touch the ground. variation and keep observing the entire implement for any blockages of mud, stubble or any other obstructions. 8. Regularly inspect sowing boots for blockages. Tip: Whilst stationary, operate the seeder to dump a small sample of product. Then check all boots are receiving product. 9. Avoid working on excessively steep slopes or rocky terrain. Such conditions place extreme loads on the implement and will dramatically reduce its working life. 10. Regardless of the practices being employed, there are a number of general rules that should be followed. 1. Whenever starting, the tines should always be out of the ground. When commencing work, move off slowly and lower the implement to the required depth; then increase to the desired working speed (up to a maximum recommended speed of 12 km/h). 2. Do not turn too sharply whilst tines are in the ground as this will place excessive loads on the tines, ground tools and frame. Tines must be raised out of the ground when turning at headlands or in other tight situations. 3. Do not work with the wings folded, whether partially or completely. 4. Become familiar and aware of the limitation of the implement and work within these limits. 5. Assess your specific application and determine the risks involved and appropriate action. 6. Upon selecting the desired frame height, set the depth stop mechanism to control the height as per “Frame Adjustments – Depth Stops”. The implement should never be worked with the tine shanks constantly jumping or laying back from the vertical. This may result in premature wear of the tine assembly and will not be covered under warranty. If such a situation persists, the load on the tine must be reduced by: Decreasing ground speed Reducing working depth Replacing ground tool with one which produces less draft Shortening the tine shank Delaying working until more suitable soil conditions prevail The tine is protected by either a spring or hydraulic breakout mechanism. This system is designed to absorb minor over-loads and shocks. Note: Contractors should discuss ground conditions with the property owner/manager to highlight potential risks on the property before commencing contracted work task. Caution: This implement is not designed to work in rocky ground! However, the tines do have limited ability to negotiate the occasional object. Important: Warranty will be void if machine is working rocky ground. 7. Whilst working, regularly observe the depth indicator and frame, for any signs of 22 Field Operation Adjustments: The Para-Maxx 150 gives independent control over seed depth on each row unit assembly. This allows the operator to set each row unit independently to a specified depth and at all times have independent control over the position of this depth via the drum coulter and hydraulic breakout on the tine. horizontal. This allows adequate up and down movement over the contours of the land, thus facilitating minimum ground compression of both depth wheels and parallelogram units. COULTER/GAUGE WHEEL CYLINDER TINE BREACKOUT CYLINDER ADJUST SHANK TO SET SEED DEPTH Appro DEPTH STOP DONUTS SHANK TO PRESS WHEEL LEAD Seed depth is adjusted by vertically repositioning the shank via the series of holes in the shank and tine holder. When adjusting seed depth, always conduct a test run. Adjust a few shanks across the machine to confirm desired seeding depth before adjusting the remaining tines. The shank to press wheel lead is adjusted by removing the mount bolt and sliding the lower assembly in or out via the telescoping tube. Re-fit and tighten the mount hardware after adjustment. Use the master cylinder depth stop donuts to achieve a repeatable frame position. 2 cylinders on the single fold machines positioned on the front of the centre frame. 6 cylinders on the double fold machines, the front 2 centre frame cylinders and the all 4 paired masters on the either side of the centre frame. Note: On the double fold model, the back paired master is equal to the front single master. The paired master allows wheels to walk from inner to outer when raised for transport. Caution: Ensure all master cylinders have donuts fitted and ensure the donuts thickness matches across all master cylinders. Caution: When removing donuts from the master cylinders ensure the cylinder rod is clean and free of damage before proceeding to operate machine. Once frame working position is set, all operating pressures are controlled from the tractor seat except press wheel pressures. The Para-Maxx 150 frame height does not set the seeding depth. However, it is important to maintain a constant frame height positioning the row unit’s arm to approximately 5° below The pressure control on the coulter/gauge wheel can eliminate bulldozing and skipping over various soft, fluffy or hard surface soil conditions. The optimal operating trait of the Para-Maxx planter unit is for the coulter/gauge wheel to glide evenly over the surface. If the row units 23 Field Operation begin to bulldoze, ease coulter cylinder circuit pressure until coulter/gauge wheel levels out on the ground surface. If the row unit begins to skip, then increase pressure until the coulter/gauge wheel returns to optimal position. If the tine begins to trip back, increase tine pressure until tine remains static during working. Avoid using excess tine pressure as this will limit the number of tines able to trip at any one time. If machine goes into hydraulic lock-up, damage may result. LOWER NUT (Set Height) TOP NUTS (Set Pressure) The height of the press wheel to the row unit is adjusted via the lower lock nut. Once the height is set adjust the spring settings using the top nuts. The spring setting adjusts the press wheel pressure and is manually set via a compression spring to desired pressure subject to ground surface conditions. Danger: Beware of tine shank or press wheel arm in a situation where the tine lifts off its resting position. E.g. becomes jammed with an obstruction (tree branch) in the jumped position. The coulter pressure should be set to an easily accessible remote lever, depending on conditions this will be adjusted regularly. The tine will be adjusted less often and best set to a remote lever and locked out. If adjustment on the run is not required, set pressure and turn off the oil flow with the lock out valve. COULTER Warning: Coulter has sharp edges, take extreme care when adjusting or servicing. TINE If working the machine in areas known to have rocks or other submerged objects, slow down and reduce the tine breakout pressure. 24 Maintenance & Service Before you Begin 10 Hours (Daily) Your Para-Maxx 150 has been designed with minimum maintenance in mind, however regular maintenance will ensure trouble free operation for the life of the implement. It is recommended that when replacing parts you use genuine components and fasteners of the same grade and quality as the ones used on the original implement. General: Inspect all points and sowing boots for excessive wear, chips, cracks and bends. Replace or repair when necessary. Check the state of ground tool hardware to ensure spear points/sweeps remain tight and in place. Check sowing boots, for blockages, damage or excessive wear. Inspect all coulters, drums & mudscrapers for excessive wear & chips. Ensure all hardware is tightened and desired clearances maintained. Check the tightness of any newly replaced nuts and bolts after the first 10 hours of operation, then weekly. Check all hardware is tight and secure. Gason require all service personnel read the Safety Rules & Accident Prevention section of this manual. It is also suggested that the following be completed prior to beginning any service or maintenance. 1. Park Tractor and Implement on flat level ground. 2. Shut off tractor engine and remove ignition key. 3. Hydraulics: Check all hydraulic fittings and components for any signs of external leaks. Check depth control circuit remains phased by regularly fully extending cylinders. Relieve all pressure in hydraulic lines. 4. Place approved safety stands in secure locations under centre frame and wing section, NOT under axles or wheel supports. 5. Ensure all moving parts are in the resting position and not lodged eg. Tines, Parallelograms, press wheel arms. If lodged, these components may risk falling into the resting position. Press Wheel Assemblies: Check for mud and/or stubble build-up around tyres and clear as necessary to reduce the likelihood of excessive tyre wear. 50 Hours General: Where grease nipples are provided, regrease using any high quality lithium based extreme pressure multi-purpose grease containing Molybdenum Disulphide, e.g. MOBIL GREASE SPECIAL. Check hubs for bearing play and condition of seal. Rotate wheels feeling for any sideways movement or notchiness. Check tyres for wear. Check press wheel tyres for splits. Grease Front Castor Arm pivots via grease nipples. Grease all linkage Bosses. Danger: Failure to understand the dangers involved in the product being serviced may result in death or serious injury. 25 Maintenance & Service Grease wing Pivots. Hydraulics: Inspect all hydraulic hoses for external wear. Protect exposed hydraulic cylinder rods by applying light grease on the rods. This should be done if cylinders are left in the extended position for more than three weeks. 500 Hours or Seasonally The amount of maintenance required will depend on the area of seeding and the conditions. Carry out a random check of wear on the bushes used across the implement i.e. tine, castor wheel, and drawbar pivots. Replace bushes if noticeable wear has occurred. Refer to “DU Bush Replacement” in this section of the manual for DU bush replacement. Grease all main axle hub bearings. Be carefull not to over grease. Randomly check the tension on fasteners across the implement, especially those attaching tines/row units. Check drum coulter for endplay and retension with lock nuts. Check press wheel hubs for end play. Refer to “Press Wheel Tyre & Rim” in this section of the manual. End of Season Checklist – Storage and Cleaning To maximize the life of your Para-Maxx 150, we recommend that basic cleaning and protection of some areas be performed at the end of the working season. If the implement is covered in mud, spray clean with a high-pressure water jet cleaner. Locate the implement into the storage area, ideally under cover, and remove load from wheels i.e. rest implement on tines or stands provided. 26 Maintenance & Service Tyre Care For optimum tyre performance, tyre pressures should be checked and maintained regularly. Under-inflation may cause tyres to slip on rims or over flex and over heat, whereas over-inflation reduces both the flotation effect of tyres and the resistance to punctures. Tyre pressures may need to be varied depending on soil conditions. Equal tyre pressure across the width of an implement is critical to ensure even load distribution and to maintain stable tracking. When working the implement, tyres should be initially inflated to 70% of the maximum recommended “cold” tyre pressures. To ensure that the tyre is capable of carrying its maximum load during any road transportation, centreframe tyres should be inflated to the ma imum recommended “cold” tyre pressures. MAXIMUM RECOMMENDED “COLD” TYRE PRESSURES PRESSURE TYRE kPa psi 400/60-22.5 18PR 430 62 Press Wheel Tyre & Rim In most conditions, and on most properties, minimal maintenance will be necessary. However, more vigilance is required in hostile areas, or when seasons of extended dry seeding are experienced, or on large acreage. Split Tyre – Small splits in the tyres can be caused by sharp rocks, wire, wood etc. Corrective action, if the split is detected early is as follows: Clean out split from any lodged dirt. Fill split with a glue or silicon (this will stop the split opening up). Note, if the split is left, it will gradually open up as dirt is forced in and eventually cause tyre failure. If this occurs replace the tyre. Worn Tyre – Press wheel tyres are made from a relatively soft rubber compound. They will wear out at the rate of approximately 10% per year depending on the abrasiveness of the soil, the amount of dry seeding or the amount of acres sown. At some stage, the tyres will reach a point that the wear will cause any small splits to open up very quickly and the tyre will fail. Monitor wear and replace prior to a state of failure occurring. Consider alternative tyre profiles & constructions, which may improve tyre life. Alternatively, consider running two sets of tyres, one for the wet sticky soils and one for the dry abrasive soils. (This may save you money in the long run.) Missing Components – Check for grease caps, grease screws, dust caps, dust cap clips, axle housing bolts and lock nuts, seals, tyres and complete wheels. Loose Wheel – (A) If the wheel has just started to become loose (i.e. sideways movement on the shaft), this is most likely because the pretension has come off the bearings. Corrective Action; remove the dust cap and split pin and re-tension the castle nut so as to remove any sideways movement. i.e. nip-up axle nut then back off to nearest slot to allow fitment of split pin. Ensure wheel can rotate freely. Refit the dust cap and clips. It is also good at any time that the dust cap is removed to remove the spent grease from inside the dust cap and to purge some fresh grease through the grease nipple out through the small bearing. (B) A loose wheel can also mean wear in the bearings and that the bearings have failed or about to fail. Normally this can be detected by some notchiness as the wheel rotates. Corrective Action; Carry out a complete bearing changeover at the next planned maintenance opportunity. Seized Wheel – Normally this will be caused either by a bearing failure or by dust contamination of the grease either through the back seal or through the dustcap. Corrective Action; Remove the wheel and replace with a spare, do a complete bearing and seal changeover at the earliest opportunity on the failed wheel. 27 Maintenance & Service Every 10,000 Acres or end of second season: 1. Visual inspection of wheels. See notes above for corrective actions. 2. Mechanical inspection. Rotate wheels feeling for any sideways movement or notchiness. Check all nuts and bolts. See notes above for corrective actions. 3. Regrease. Remove grease purge screw and apply one pump of grease into the hub through the grease nipple. Replace the grease purge screw. 4. Remove the dustcap and remove the spent grease from inside the dustcap cavity. Apply a second pump of grease through the grease nipple to purge grease through the small bearing. Replace the dustcap and dustcap clips. Do not be tempted to over grease the wheels. For this reason, a grease purge screw is fitted at 180 degrees to the grease nipple. Whenever applying grease through the nipple (and the dustcap is on), ensure the grease purge screw is removed, this will allow any excess, or spent grease, or pressure to be released. Before re-fitting the purge screw, spin the wheel. This will also help to reduce the pressure. Make sure that the purge screw is refitted. Periodically when greasing, remove the dustcap and remove any spent grease out of the dustcap cavity. DU Bush Replacement The self-lubricated bushes used on your ParaMaxx 150 are designed to run dry, without any form of additional lubrication. These bushes are used Para-Maxx row unit The self-lubricated bushes are steel, backed with a PTFE (Polytetrafluoroethylene) and lead lined composite bearing material. During normal operation, a thin film from the PTFE lining migrates to the hard chrome pin and remains there throughout the working life of the bearing. If the lubricant layer has worn away, replacement is necessary. The bush is installed in its housing at the factory to the procedure, below. Bushes can be removed by placing a screwdriver on the inside edge of the bush and tapping it outwards (breaking its adhesion). Important: Care must be taken to ensure no damage is done to the housing internal diameter with the screwdriver. Installation of the bush must be done as follows: 1. Clean housing internal diameter with non-oil based thinners. 2. Apply light coating of Loctite 601 or 609 retaining compound to the bush outside diameter only. 3. Press bush squarely into housing with a nylon hammer, taking great care in maintaining the bush’s squareness until the end is flush with the housing. 4. Allow adhesive to cure for 12 hours minimum before fitting mating pins. This time can be reduced by using a suitable Loctite activator and/or by increasing the ambient temperature. Important: Take extreme care not to damage or remove the inner surface of the bush. Ensure no adhesive contacts the bush’s inner surface. Ensure bush splits are orientated at 12 o’clock i.e. on top, or on opposing side to where the load will generally be applied. Hardened Steel Bush Replacement For pivots using steel pins and bushes, follow the procedure below: Removal and installation of the bush must be done as follows: 1. Remove worn bush from its housing by placing a screwdriver on the inside edge of the bush and tapping it outwards (breaking its 28 Maintenance & Service adhesion). Care must be taken to ensure no damage is done to the housing internal diameter with the screwdriver. 2. Clean and degrease the housing internal diameter and the bush external diameter with a contact cleaner or Loctite 770. 3. 7. Rotate the wheel. There should be only a slight drag. 8. Replace the hubcap. 9. Grease hub via grease nipple. Be careful not to over grease as this may dislodge either the triple-lip seal behind the inner bearing, or the hubcap. Allow to dry. 4. Apply Loctite Primer N to the external diameter only of the replacement bush and allow drying for 5 minutes. 5. Apply a light coating of Loctite 620 or 680 retaining compound to the leading chamfered edge of the replacement bush external diameter only. 6. Note: Ensure that the bearing endplay is not apparent. Tapered roller bearings on agricultural tractor and implement wheels are generally set with a free running clearance or end play of somewhere between .03 to .18mm (.001 to .007 inches). Press fit into housing until flush. Important: Take extreme care not to damage or remove the inner surface of the bush. Ensure no adhesive contacts the bush’s inner surface. Wheel Bearing Maintenance Wheel bearings should be checked at the end of each working season and adjustments made when necessary. To check and adjust wheel bearings: 1. Raise wheels, and support, to facilitate rotation. 2. Check for endplay by pulling back and forth on wheel. 3. If bearing endplay is present, remove hubcap and cotter pin. 4. Tighten slotted nut whilst rotating wheel until resistance locks hub. 5. Back off the slotted nut one full turn. 6. Retighten until nut locks up and back off to nearest slot in nut, but no more than 30°. Important: When replacing bearings, care should be taken to ensure that the bearings, tools and work areas are clean. Kerosene is recommended for washing bearings, though it is not necessary to wash new bearings. Before storage or assembly of washed bearings, they must be immersed in a light mineral oil after thoroughly dry from the kerosene. Bearing cups can be pressed or driven into hub. If special drivers are not available, mild steel bars can be used (do not use hardened drifts or brass bars). Care must be taken to ensure that the cup or cone is solidly seated against the shoulders. Before fitting bearings, check condition of triple-lip seal and replace if necessary. Lightly grease seal before fitment. Ensure bearings are fully greased; i.e. grease must completely penetrate within rollers and cage to inner race. 29 Maintenance & Service Cylinder Care Maintenance Notes The resealing of cylinders should only be carried out by competent personnel in a well equipped cylinder repair shop. If there is any doubt we recommend the purchase of new cylinders. __________________________________ __________________________________ __________________________________ __________________________________ Removal Of The Rod Assembly From The Cylinder TBA Testing The Cylinder. Cycle the cylinder and check that oil bypasses the piston at each end of the stroke. While still full of oil, plug the base port and pressurize the rod port to 3000psi. This will pressurize both sides of the piston. Check for external leaks. To check for internal leaks, pin the cylinder mid stroke while still full of oil. Leaving the rod port open, pressurize the base port to 1000psi and check for oil flowing out of the rod port. (If the cylinder is full of oil it is easy to detect very small leakage by watching the meniscus of the oil in the port.) A leak rate of up to 5 drops a minute is acceptable. Repeat the above but leave the base port open and pressurize the rod port to 1000psi and check for oil flowing out of the base port. If there is any bypass the piston seal/phasing valve seats will require rechecking. __________________________________ __________________________________ __________________________________ __________________________________ __________________________________ __________________________________ __________________________________ 30 Owner Acknowledgement Gason Recommend all operators read this manual prior to operating the machine. It is recommended that the owner, when they are not the operator, ensure all operators of the machine fully understand its contents and ask that each operator sign below as an acknowledgement of having done so. Owners name: ………………………………………………………………………………………………………. (please print) Owners signature: ………………………………………………………………………………………………… Date: …….../………/…………. Operator Acknowledgement of manual contents (When the owner is not the operator) Operators Name Operators Signature Date …./…./…….. …./…./…….. …./…./…….. …./…./…….. …./…./…….. …./…./…….. …./…./…….. …./…./…….. …./…./…….. 31 Trouble Shooting Symptom Tines not digging, Tines jump excessively. Seed placement varies. Problem Solution If parallelogram arms or tine cylinders lose pressure. Parallelogram unit is bouncing and cannot be controlled from tractor. Check accumulator is charged to correct pressure. Check for hydraulic oil leaks, check accumulator pressure is holding and check for air contamination in hydraulic lines. Bleed if necessary. Seeder shank is chattering or does not maintain static position when working. Increase Oil Presure Check for hydraulic oil leaks. Check accumulator pressure is holding and check for air contamination in hydraulic lines. Bleed if necessary. Ground too hard Wait for moisture or change ground tools. Uneven digging depth or lack of penetration. Check that all tyre pressures are consistent and within the limits specified in “Tyre Care” in the “Maintenance and Service” section. Check that all tine assembly shank heights have been set correctly. Check that the depth control hydraulic circuit is free of air or foreign matter. Rephase the circuit as outlined in “Priming the Depth Control Circuit” in the “Hydraulic System” section. Check that all hydraulic cylinder mechanical depth stops are set at the correct setting. If the ground is hard, narrower ground tools may need to be fitted. Check for worn ground tools and replace as required. 32 Trouble Shooting Symptom Paired rows. Problem Solution Implement not tracking straight when working. Check that the frames are level both fore and aft, and across the width. Refer to “Adjustments” in the “Field Operation” section. Check that all tyre pressures are consistent and within the limits specified in “Tyre Care” in the “General Maintenance” section. Check the tine layout to verify tines are located correctly. Check that the depth control hydraulic circuit is free of air or foreign matter i.e. rephase the circuit as outlined in “Priming the Depth Control Circuit” in the “Hydraulic System” section. Check that the crankarms and walking beams are square/parallel to the frame. The implement wheels should be in-line with the direction of travel and must not be cambered or toed in or out. Hydraulic depth control not functioning properly. Check that all hoses and valves are plumbed correctly. Check that the depth control hydraulic circuit is free of air or foreign matter i.e. rephase the circuit as outlined in “Priming the Depth Control Circuit” in the “Hydraulic System” section. Check that sufficient oil supply is being delivered from tractor. A minimum tractor hydraulic flow rate of 45 l/min (12 US gpm) is required. Check for internal leaks, i.e. extend cylinders to full transport, disconnect hydraulics from tractor and leave overnight. If any cylinder relaxes significantly, replace seals. For cylinder seal and valve replacement, refer “Cylinder Care” section. Pass to Pass row is inconsistent Frame is not level and lifting slowing 33 Trouble Shooting Symptom Outer wing wheels do not close to working position Wings not unfolding. Parallelogram arms or tyne cylinders lose pressure Problem Solution Gauge wheels do not lift to transport position Check that hydraulic lines are in the correct ports on the tractor and ensure that all line taps are in the correct position Ensure that lock-out valve tap is in correct position Wings remain static when hydraulics engaged. Ensure hydraulic line tap is open Ensure that travel lock pins have been removed Gauge pressure is varying or inconsistent during working. Check accumulator is charged to correct pressure. Check for leaks Ensure frame is returning to same positions at each run 34