1
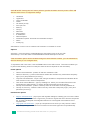
PAYG Cloud - OnApp User Guide 1 Release Released by Date 1.0 Crucial Operations 17/12/2012 1.1 Crucial Operations 08/01/2013 1.2 Crucial Operations 09/01/2013 1.3.1 Crucial Operations 07/03/2013 1.3.2 Crucial Operations 10/03/2013 1.3.3 Crucial Operations 18/04/2013 1.4 Crucial Operations 27/05/2013 1.5 Crucial Operations 24/10/2013 1.5.1 Crucial Operations 07/03/2013 Crucial Cloud Hosting | PAYG Cloud User Guide v1.4 | May 2013 Contents ................................................................................................................................................................ 1 PAYG Cloud - OnApp User Guide .......................................................................................................... 1 Billing ................................................................................................................................................... 4 Cancellations ....................................................................................................................................... 4 Portals.................................................................................................................................................. 4 Control Panel ................................................................................................................................... 4 PAYG Cloud Management .............................................................................................................. 4 Technical Support ................................................................................................................................ 5 FAQs (General): ............................................................................................................................... 5 Knowledge Base and Flash Tutorials: ............................................................................................. 5 Forums: ............................................................................................................................................ 5 Bandwidth Graphs, Usage and Limits ................................................................................................. 5 Network Status Page ........................................................................................................................... 5 DNS Servers ........................................................................................................................................ 5 General VM Usage .............................................................................................................................. 6 View VMs ......................................................................................................................................... 6 VM Properties .................................................................................................................................. 6 Create VM ........................................................................................................................................ 8 Build VM Manually ......................................................................................................................... 11 Edit VM .......................................................................................................................................... 11 Autoscale VM ................................................................................................................................. 12 Segregate VM ................................................................................................................................ 13 Delete VM ...................................................................................................................................... 13 VM Integrated Console .................................................................................................................. 13 VM Transactions and Logs ............................................................................................................ 14 Manage VM Networks ....................................................................................................................... 14 Configure Network Interface .......................................................................................................... 14 Rebuild VM Network ...................................................................................................................... 15 Set Firewall Rules .......................................................................................................................... 16 Allocate/Remove IP Addresses ..................................................................................................... 17 Display Network Speed for Network Interfaces on Virtual Machine Page ..................................... 17 Edit Virtual Machine Network Speed ............................................................................................. 18 Manage VM Disk Space .................................................................................................................... 19 Add Disks to VM ............................................................................................................................ 19 Edit VM Disks................................................................................................................................. 19 Delete VM Disks ............................................................................................................................ 19 Backup VM Disks ........................................................................................................................... 20 Schedule VM Backups ................................................................................................................... 20 2 Crucial Cloud Hosting | PAYG Cloud User Guide v1.4 | May 2013 Manage Backups ........................................................................................................................... 21 VM Statistics ...................................................................................................................................... 22 VM CPU Utilization ........................................................................................................................ 22 VM Billing Statistics........................................................................................................................ 22 Network Interface Statistics ........................................................................................................... 23 Disk IOPS ...................................................................................................................................... 23 Load Balancers .................................................................................................................................. 24 View Load Balancer Details ........................................................................................................... 24 Create Load Balancer Cluster ....................................................................................................... 25 Create Autoscaling Cluster ............................................................................................................ 25 Edit/Delete Load Balancer ............................................................................................................. 27 Templates .......................................................................................................................................... 28 Create Custom Templates ............................................................................................................. 28 Edit/Delete Custom Templates ...................................................................................................... 28 Tools .................................................................................................................................................. 29 Cloud Usage .................................................................................................................................. 29 IMPORTANT: Some portions of the user guide may contain features which are currently not present or are limited in functionality, for any additional information regarding features present please login to your PAYG Cloud Management portal. 3 Crucial Cloud Hosting | PAYG Cloud User Guide v1.4 | May 2013 Billing The PAYG Cloud service is a self-service Pay-As-You-Go Cloud platform. This means your billing is calculated on an hourly basis, all resources are billed whether they on or off. Your invoice will be generated 48 hours after the end of the calendar month; if payment is overdue your service may be suspended at any time at the discretion of Crucial Cloud Hosting. For current pricing please visit our website: https://www.crucial.com.au/cloud/cloud-server PLEASE NOTE: Crucial only accepts Credit Card payments for the PAYG Cloud service. If your typical business payment method is Direct Deposit, you can alternatively ‘Add Funds’ for amounts larger than $1000.00 by contacting [email protected] – we typically allow for Add Funds amounts up to $15,000.00. Cancellations We require seven (7) days notice prior to the end of the existing calendar month when cancelling the PAYG Cloud service. All cancellation requests must also be submitted through the Control Panel: https://control.crucial.com.au. After a cancellation request has been processed, any resources used in the same calendar month will be billed accordingly. Portals Control Panel Crucial Control Panel (billing, new accounts, invoices etc.): https://control.crucial.com.au PAYG Cloud Management Advanced control for your PAYG Cloud and associated Virtual Machines (create, destroy, network, power-manage, reporting, rebuild): https://cloud.crucial.com.au 4 Crucial Cloud Hosting | PAYG Cloud User Guide v1.4 | May 2013 Technical Support Technical Support is not currently provided on the PAYG Cloud service at present; however you can still submit a general inquiry regarding connection issues and service uptime. Additionally we have a range Support resources available: FAQs (General): http://www.crucial.com.au/faqs Knowledge Base and Flash Tutorials: http://www.crucial.com.au/support Forums: http://forum.crucial.com.au Bandwidth Graphs, Usage and Limits Standard bandwidth charges are $0.50/GB. Incoming and outgoing bandwidth are counted towards your total bandwidth limit. For example if you use 1GB incoming data and 15GB outgoing data, your total usage is 16GB, and you will be billed for 16GB - or $8.00 (inc. GST). You can view your bandwidth graphs, usage, and limits from within the PAYG Cloud Management portal (https://cloud.crucial.com.au). Network Status Page The Network Status page will provide all customers with visibility during unforeseen outages and events, in addition to any scheduled maintenance that incurs service downtime. AU Network Status: http://status.crucial.com.au We recommend all customers check the status page and our Forums prior to submitting a ticket about a possible network issue; this will improve Support Desk response times and provide information to our customers in a much faster way. DNS Servers If you do not want to run DNS on your VPS, then you are more than welcome to use our DNS servers nssyd01.crucial.com.au and nsdal01.crucial.com.au - just submit a tech support ticket and provide us with the zone details and this will be done for you. NOTE - NETWORK ABUSE: We have very strict policies in regards to mass mailing, although we do allow double-opt-in mailing, if complaints are received, your server will be shut down immediately and you will be charged a processing fee of $75/complaint if you are found to be knowingly sending spam. This policy is in place to prevent abuse of our network, and keep it spam free. 5 Crucial Cloud Hosting | PAYG Cloud User Guide v1.4 | May 2013 General VM Usage View VMs Go to your Control Panel's Virtual Machines menu to see an overview of all virtual machines in the cloud: their label, operating system, VIP status (enabled or disabled), IP addresses, allocated disk size, RAM, backups, power status (with on/off buttons),. Click the Actions button next to the VM for the quick access to the list of VM actions (the list of actions displayed depends on the VM status): Reboot a VM Recovery reboot Power off a VM CPU usage Backups Shutdown Start up Recovery start up Unlock To search for a particular virtual machine, type the text you want to search for in the search box and click the Search button. To view details of a specific virtual machine: 1. 2. 3. 4. 5. Go to your Control Panel's Virtual Machines menu. Click the label of the virtual machine you're interested in. On the screen that appears, you'll see the VM Properties table and activity log. Click the Tools button to expand the Tools menu. Use the top menu to manage your virtual machines. The schematic menu navigation with the references to appropriate sections is presented in the table below. CPU Usage Overview shows VM information and gives access to most of the VM actions Billing Statistics Autoscaling Networking Network Interfaces gives access to VM networks Firewall IP Addresses Storage Disks gives access to VM disks and backups/snapshots Backups VM Properties VM properties page gives general overview of the VM details: 6 Template this VM is built on Power status & On/Off/Reboot buttons. Crucial Cloud Hosting | PAYG Cloud User Guide v1.4 | May 2013 PLEASE NOTE: Clicking the OFF button performs graceful shutdown and then powers off the VM after the timeout set in Configuration settings. Hostname Hypervisor Login credentials Owner VIP status (on/off) Price per hour Memory CPU(s) Disk Size Disk backups IP Addresses Network Speed Automation options: autoscale and automatic backups Notes Activity log Add admin's or user's note to create a brief comment or reminder for a VM. Options: Autoscale - move the slider to enable/disable the autoscaling rules set for this VM. Autobackups - move the slider to enable/disable automatic backups for this VM. If the automation options weren’t enabled during this virtual machine creation, you’ll be redirected to the form where you can configure them. To expand the VM Tools menu, click the Tools button on the VM's screen. Tools menu enables you to perform the following actions on VMs (the exact list shown depends on the VM status): Power options Reboot Virtual Machine - powers off and then restarts the VM. Reboot in Recovery - powers off and then restarts the VM Recovery mode with a temporary login ("root") and password ("recovery"). Suspend Virtual Machine - stops a VM, changes its status to suspended and disables all the other actions on VM, unless unsuspended. Shut Down Virtual Machine – pops up a dialog box, where you can either Shut Down VM (terminates the VM gracefully), or Power Off VM (terminates the VM forcefully). Startup Virtual Machine - queues a start-up action for a VM that's currently powered off. Startup on Recovery - starts the VM in recovery mode with a temporary login ("root") and password ("recovery"). Performance options 7 Migrate Virtual Machine - pops up the VM migration dialogue, enabling you to move the VM to a different hypervisor. Choose a hypervisor you want to migrate the VM to from the drop down list. Tick the Cold Migrate if Hot Migration fails box to cold-migrate virtual machine if hot migration fails. Segregate Virtual Machine – pops up a drop-down menu where you may choose a VM to keep away from (your VM will never be booted on the same hypervisor as specified VM). Crucial Cloud Hosting | PAYG Cloud User Guide v1.4 | May 2013 Administrative options Reset Root Password - resets the root password for this VM (the password is displayed in VM Information). Change Owner - pops up a dialogue box with a drop-down of all users on the system, enabling you to pass ownership of the VM to the user selected from the list. Set SSH keys - assigns SSH keys of the admin and a VM owner to the VM. If a VM owner does not have any SSH keys, the system will assign only admin keys. Edit Administrator's note - makes an optional note, which will be displayed in VM information. VM options Rebuild Virtual Machine - pops up the VM rebuild dialogue, where you can rebuild the VM on the same (or another) template. All data will be lost! Edit VM - opens the Adjust Resource Allocations screen for resizing this VM, where you can change number of CPUs, size of RAM, CPU priority and change VM label. Note, that resizing the VM may lead to reboot (depends on the template)! Migrate Virtual Machine - pops up the VM migration dialogue, enabling you to move the VM to a different hypervisor. Choose a hypervisor you want to migrate the VM to from the drop down list. Tick the Cold Migrate if Hot Migration fails box to cold-migrate virtual machine if hot migration fails. Delete Virtual Machine - removes the VM from the system. Network options Edit Firewall Rules - redirects you to Networking -> Firewall menu, where you can set firewall rules. Manage Network Interface - redirects to Network Interfaces screen, where you can configure VM's network interface. Rebuild Network - rebuilds network join, added to this VM (required after allocating new IP addresses) Create VM Virtual machines are created from templates. To create a virtual machine: 1. Go to your Control Panel's Virtual Machines menu and press the "+" button, or click the Create New Virtual Machine button at the bottom of the screen. 2. Fill in the VM creation form step by step: Step 1 of 4. Templates Click the down arrow next to the required Operating system label (Windows, Linux or Jumpbox) to expand the list of template groups. Distribution - choose a template Distribution. Template - select the template. Click Next. Licensing cPanel or CloudLinux This option require you to request licensing of the IP address through our 24x7 Support Desk. Email [email protected] and provide the following details: 8 Crucial Cloud Hosting | PAYG Cloud User Guide v1.4 | May 2013 Subject: PAYG Cloud – cPanel/CloudLinux IP license required Body: PAYG Cloud hostname, IP address, request the Support team to license the relevant IP address. For cPanel licensing, once our Support team have confirmed the IP has been licensed, please run the following command from the command line within the VPS: /usr/local/cpanel/cpkeyclt Access cPanel via the following URL: https://<serverIPaddress>:2083 U: root P: server password Access WHM via the following URL: https://<serverIPaddress>:2087 U: root P: server password When a VM is destroyed, please ensure you request the IP is de-licensed via the same method as above Licensing Plesk This option requires you to request licensing of the IP address through our 24x7 Support Desk. Email [email protected] and provide the following details: Subject: PAYG Cloud – Plesk IP license required Body: PAYG Cloud hostname, IP address, request the Support team to license the relevant IP address. To access the Plesk Control Panel, first RDP (Remote Desktop) into the VPS and allow Windows to start up for the first time. Once this is complete you can access Plesk via the following URL: https://<serverIPaddress>:8443 U: administrator P: server password When a VM is destroyed, please ensure you request the IP is de-licensed via the same method as above Windows Licensing Type This option only appears if your billing plan allows it, and if the relevant licensing options have been configured for the template group this template belongs to. If this option is available, choose the license type you require: 9 For the KMS type, choose the licensing server For your own license, type your license key If you don't specify the licensing type, MAK licensing will be set by default. Crucial Cloud Hosting | PAYG Cloud User Guide v1.4 | May 2013 JumpBox Templates This option appears under the Linux subset, all templates are free to use. For information and assistance with JumpBox please view the following link: https://support.crucialp.com/staff/index.php?/Knowledgebase/ViewKnowledgebase/Article/1432/37 Step 2 of 4. Virtual Machine Properties Give your virtual machine a label and a hostname. The hostname should consist of letters [A-Z a-z], digits [0-9] and dash [ - ]. For more info on hostname validation, refer to RFC standard documentation. Label and hostname are required parameters. You can create a virtual machine having specified only the required parameters and configure it later. Choose a hypervisor zone to build this VM on. Choose a specific hypervisor to build this VM on. Give your virtual machine a secure password. It can consist of 6-32 characters, letters [A-Zaz], digits [0-9], dash [ - ] and lower dash [ _ ]. You can use both lower- and uppercase letters. To encrypt your password, move the Encrypt Password slider to the right, then enter an encryption key in the field that appears. Click Next. Step 3 of 4. Resources Set the resources needed for this VM: RAM 1. Set the RAM required for the VM (Minimum is 1GB). CPU cores 1. Set the number of cores required for the VM (Minimum is 1). Primary disk 1. Choose a data store zone for this VM's primary disk. 2. Set the primary disk size. (Minimum is 50GB, as per volume specifications on the SolidFire SSD SAN) Swap disk 1. Choose a data store zone for this VM's swap disk. 2. Set the swap disk size (there is a hard limit for this setting) There is no swap disk for Windows-based VMs. In all other cases, swap disk size must be greater than zero. Network configuration 1. Choose a network zone from the drop-down box. 2. If the option is available, you can also assign an IP address for the VM from the drop-down menu. Indicate HV and network to have the list of available IPs. Tick the Show Only My IP Addresses checkbox to view only own IP addresses in the IP addresses dropbox. 3. Set the port speed for this VM. (default setting is 20Mbit) 10 Crucial Cloud Hosting | PAYG Cloud User Guide v1.4 | May 2013 Public IP Network (IPv4): IP & bandwidth are charged Shared Backend Network (IPv4): IP & bandwidth are free IPv6 Network Zone: IP is free, bandwidth is charged See: http://www.crucial.com.au/cloud/cloud-server for more details Click Next. Step 4 of 4. Automation settings 1. Move the slider to the right you want this VM to be backed up automatically (according to the backup settings configured in the Settings/Autobackup Presets menu) 2. Move the Build Virtual Machine Automatically slider to the right if you want the system to automatically build the VM. If you leave this box blank, you will have to build your machine manually after it is created. 3. Move the Startup Virtual Machine Automatically slider to the right if you want the virtual machine to be started up automatically. 4. Move the Enable ext4 File System for VM slider if you want to use ext4 file system instead of ext3 (for CentOS6 and RHES6 templates only!) 5. Move the Enable Autoscale slider to the right to set autoscaling rules for this VM. Click the Create Virtual Machine button to start the creation process. You will be taken to the virtual machine details screen. Windows Server 2008 and 2012 VMs require up to 30 minutes to deploy. The VM will force multiple reboots during the creation process whilst services are installed and started within the operating system. Build VM Manually If you haven't checked the Build Virtual Machine Automatically option during the VM creation process, you will have to do this manually after the VM has been created. Building a virtual machine is the process of allocating physical resources to that VM. To build a virtual machine manually: 1. 2. 3. 4. Go to your Control Panel's Virtual Machines menu. Click the label of the virtual machine you're interested in. On the screen that appears, click the Tools button and then click Rebuild Virtual Machine. On the screen that pops up, use the drop-down menu to choose a template with which to build the VM. 5. Tick the Required Start Up box to have your VM started automatically after it is built. 6. Click the Build Virtual Machine button to finish. Edit VM You can edit CPU and RAM resources for all VMs. Depending on the OS it is built on, some VMs can have their CPU and RAM resized without needing to be powered off ("resize without reboot"). Windows 2008 and Windows 7 VMs can be resized without rebooting: Windows 2003 requires a reboot. With Linux it depends on kernel. E.g. CentOS with kernel 2.6.18 can be resized; Ubuntu cannot. Whether a template allows resize without reboot is shown on the main Templates menu screen. 11 Crucial Cloud Hosting | PAYG Cloud User Guide v1.4 | May 2013 To adjust VM CPU & RAM resources: 1. 2. 3. 4. Go to your Control Panel's Virtual Machines menu. Click the label of the machine you want to resize, to show its details screen. Click the Tools button and select the Edit VM link. Change CPU core/priority and RAM values and click the Save Virtual Machine button: If the VM template allows resize without reboot, the resize should be completed automatically: you will be returned to the VM details screen and see a message indicating the resize was successful. If the template does not allow this, you will be asked to confirm that the VM will need rebooting so that the resize can take place. NOTE: CPU Priority is note a billed resource, however it is limited per resource tier. We recommend you set a minimum of 5% CPU Priority per core. Autoscale VM VM autoscaling allows you to automatically increase the RAM, CPU and disk size of a virtual machine. VM resources are scaled based on rules you specify. For example, you can set up a rule that will add 1000MB of memory to a VM if RAM usage has been above 90% for the last 10 minutes but add no more than 5000MB in total in 24 hours. Once the RAM, CPU and disk size are increased, the values are not scaled down. For Linux-based VMs only. If the VM is based on Xen and the template allows resizing without reboot - see the Edit VM section – then virtual machine RAM and CPU will be increased without rebooting the VM.Disk space autoscaling requires a VM reboot. If you autoscale a VM's memory to a value greater than current VM RAM x 16 (which is a max_mem parameter in a configuration file and database), the VM will be rebooted anyway, regardless of the template it is built on. To configure autoscaling: 1. 2. 3. 4. Go to your Control Panel's Virtual Machines menu. Click the label of the appropriate VM. On the page that follows, click the Overview tab, and then click Autoscaling. Add autoscaling rules, explained below: If RAM usage exceeds X% for a specific time period, add Y MB – but no more than Z MB in a 24 hour period. If CPU usage exceeds X % for a specific time period, add Y% - but no more than Z% in a 24 hour period. If disk usage exceeds X % for a specific time period, add Y GB - but no more than Z GB in a 24 hour period. Move the Allow decreasing slider to the right to enable autoscaling down Click Apply. To delete an autoscaling rule: 1. Go to your Control Panel's Virtual Machines menu. 2. Click the label of the appropriate VM. 3. On the page that follows, click the Overview tab, and then click Autoscaling. 12 Crucial Cloud Hosting | PAYG Cloud User Guide v1.4 | May 2013 4. Click Delete. This will delete all autoscaling rules. Segregate VM If required, you can instruct OnApp to make sure a VM is never booted on the same hypervisor as another specific VM. This may be important if, for example, you have two name servers or a load balanced web server, and you need to keep VMs on separate physical machines. To isolate one VM from another: 1. 2. 3. 4. Go to your Control Panel's Virtual Machines menu. Click the label of the virtual machine you want to segregate. On the screen that appears, click the Tools button, then click Segregate Virtual Machine. In the dialog box that pops up, use the drop-down menu to choose a VM you want to keep away from. 5. Click the Segregate VM button to finish. Delete VM Shut down the VM before destroying it. If you are deleting a VM that is running, the VM will be deleted after the time set in Timeout Before Shutting Down VMs configuration parameter. To remove the virtual machine from the cloud: 1. Go to your Control Panel's Virtual Machines menu. 2. On the screen that appears, you'll see the list of all virtual machines in the cloud. Click the label of the virtual machine you want to delete. 3. On the VM's screen, click the Tools button, then select Delete Virtual Machine. 4. Tick the Move Last Backup to My Templates box if it is present to save the last VM's backup as a template. 5. Tick the Destroy All Existing Backups box if you want to remove all existing backups of this virtual machine. IMPORTANT: You won't be able to restore a VM after deleting it. Deleting a virtual machine removed all data stored on that VM. To save data saved on the VM, back up your virtual machine and tick the Destroy All Existing Backups box when following the instructions described in this section. NOTE: Backups are deleted automatically when the virtual machine is deleted. To prevent backups from deletion, please contact the support. This this will fill up your disk over time and requires administrator assistance to change the current behaviour. VM Integrated Console OnApp includes an integrated VNC console that gives users direct access to their virtual machines through the OnApp Control Panel, if their user role permits. Administrators can access all virtual machine consoles for support and troubleshooting purposes. The console connects the user's browser to the VNC port made available via the hypervisor for the guest console. Both the administrator and the end user web UIs offer a console connection, regardless of the OS. 13 Crucial Cloud Hosting | PAYG Cloud User Guide v1.4 | May 2013 VM Transactions and Logs The system records a detailed log of all the transactions happening to your virtual machines. The list of transactions logged by the system includes: Provision virtual machine Startup virtual machine Stop virtual machine Resize virtual machine without reboot Configure Operating System Build disk Resize disk Format disk Destroy disk Take backup Convert backup Restore backup Destroy backups Destroy virtual machine Destroy template Download template Update firewall To view transactions for a virtual machine: 1. Go to your Control Panel's Virtual Machines menu. 2. Click the label of the virtual machine you're interested in. 3. The details screen for that virtual machine shows recent transactions in the Activity Log section. To view more transactions, click the More Logs button. To cancel pending tasks, click Cancel All Pending Tasks for this virtual machine. Manage VM Networks Configure Network Interface The Networking -> Network Interfaces menu shows the virtual network interfaces allocated to this VM. Network interfaces join the physical network to the VM. When you create a VM a network interface is added automatically. This network interface will be assigned to the existing physical network using a spare IP (IPv4) and will be set primary by default. OnApp supports IPv4 and IPv6. Since not every application supports IPv6, at least one IPv4 address must be allocated to a VM's primary network interface. To see the list of all network interfaces allocated to the VM: 1. Go to your Control Panel's Virtual Machines menu. 2. Click the label of the virtual machine you're interested in. 3. Click the Networking tab, and then click Network Interfaces. 14 Crucial Cloud Hosting | PAYG Cloud User Guide v1.4 | May 2013 4. On the page that follows you will see the following fields: Interface – optional label of the network interface. Network join – name of the network and a hypervisor or hypervisor zone this network is joined to. Port speed – the speed set to the interface. Primary interface – indication whether the interface is primary or not. Public IP Network (IPv4): IP & bandwidth are charged Shared Backend Network (IPv4): IP & bandwidth are free This network connects to the shared 1Gbit backend network, utilised by other customer VMs and our backup servers. Private Backend Network (IPv4): IP & bandwidth are free This is a private network accessible ONLY by the Virtual Machines within your PAYG Cloud account. IPv6 Network Zone: IP is free, bandwidth is charged See: http://www.crucial.com.au/cloud/cloud-server for more details Here you can also view Interface Usage, Edit and Delete network interface (using icon controls) and Add a new network interface using the button at the bottom of the screen. To add a network interface: 1. 2. 3. 4. 5. Go to your Control Panel's Virtual Machines menu. Click the label of the virtual machine you're interested in. Click the Networking tab, and then click Network Interfaces. Click the Add New Network Interface button at the bottom of the screen. On the screen that appears, input values for the following parameters: Label – a human-friendly name for the new interface. Physical Network – choose a network join from the drop-down menu, which lists network joins assigned to the hypervisor/hypervisor zone on which the VM runs). Port speed – set port speed in Mbps, or make it unlimited. 1. Click the Add Network Interface button. To edit network interface label, port speed or set it as primary (if none is marked as primary), click Edit icon next to the appropriate network interface. After editing the port speed, the virtual machine should be power cycled for the change to take effect. To delete a network interface, click the Delete icon next to the interface you want to delete. To run the VM, at least one network interface with an assigned IP address (or addresses) is required! To allocate another physical network, add a new network interface. Rebuild VM Network To rebuild network join, added to the virtual machine (required after allocating new IP addresses): 1. Go to your Control Panel's Virtual Machines menu. 2. Click the label of a required VM. 3. On the screen that appears, click the Tools button, and then click Rebuild Network. 15 Crucial Cloud Hosting | PAYG Cloud User Guide v1.4 | May 2013 4. In the pop-up window that appears, move the Force Reboot slider to the right, then select the VM shutdown type: Power OFF virtual machine Shutdown virtual machine Gracefully shutdown virtual machine PLEASE NOTE: Windows and Linux virtual machines are rebooted by default after rebuilding the network. 1. Move the Required Startup slider to the right to startup the VM automatically after the network is rebuilt. 2. Click the Rebuild Network button. Set Firewall Rules With OnApp you can set firewall rules for the network interfaces of virtual machines. There are two types of firewall rule: ACCEPT – defines the packets that will be accepted by the firewall DROP – define the packets that will be rejected by the firewall To configure a firewall rule: 1. 2. 3. 4. Go to your Control Panel's Virtual Machines menu. Click the label of the VM for which you want to configure a firewall rule. Click the Networking tab, and then click Firewall. On the page that appears, set the following: a. Choose the network interface. b. Specify if the rule defines requests that should be accepted or dropped. c. Set the IP address for which this rule is active. Leave the empty field to apply this rule to all IPs Enter hyphen-separated IPs to apply the rule to an IP range (e.g. 192.168.1.1-192.168.1.10) Enter the IPs with slash to apply the rule to CIDR (e.g. 192.168.1.1/24) d. Set the port for which this rule will is effective. Leave the empty field to apply the rule to all ports Enter colon-separated ports to apply the rule to a port range (e.g. 1024:1028) Enter comma-separated ports to apply the rule to the list of ports (e.g. 80,443,21) e. Choose the protocol (TCP, UDP or ICMP). 5. Save the rule. The rule will be saved in the UI, but the transaction won't be started until you click the Apply Firewall Rules button. 6. To start the transaction which runs firewall rules for a VM, click Apply firewall rules button. 7. Use Up and Down arrow buttons in the left column to change firewall rule position. Example: the Int1 ACCEPT 122.158.111.21 22 TCP firewall rule means that the Int1 network interface will accept all requests and packets addressed from 122.158.111.21 using the TCP protocol on port 22. The Int2 DROP 122.158.111.21 22 UDP firewall rule means that the Int2 network interface will reject all requests and packets from 122.158.111.21 using the UDP protocol on port 22. 16 Crucial Cloud Hosting | PAYG Cloud User Guide v1.4 | May 2013 PLEASE NOTE: if you reboot a Xen-based VM from the console, the firewall rules for this VM will be lost, and you will need to update the firewall rules again. Allocate/Remove IP Addresses In the Networking -> IP Addresses tab you can find the list of assigned IP addresses, allocate new IP addresses and rebuild a network. To allocate a new IP Address to the VM: 1. 2. 3. 4. 5. Go to your Control Panel's Virtual Machines menu. Click the label of the virtual machine you're interested in. Click the Networking tab, and then click IP Addresses. Click the Allocate New IP Assignment button. Select a network interface from the drop-down menu (only the network interfaces you added to the VM will be available) 6. Select an IP address from the IP Pool associated with the network interface. You may select an IP address that's already assigned to a VM, but only one VM should be online at a time. Use Please show me used IP Pool, Show only my IPs and Show only IPv6 checkboxes to narrow the list of IP in the drop-down list. 7. Click the Add IP Address Assignment button. 8. Click the Rebuild Network button to rebuild the network. You must rebuild the network after making changes to IP address allocations. Public IP Network (IPv4): IP & bandwidth are charged Shared Backend Network (IPv4): IP & bandwidth are free IPv6 Network Zone: IP is free, bandwidth is charged See: http://www.crucial.com.au/cloud/cloud-server for more details To remove an IP address from a VM: 1. 2. 3. 4. 5. Go to your Control Panel's Virtual Machines menu. Click the label of the virtual machine you're interested in. Click the Networking -> IP Addresses tab. Click the Delete icon next to the IP address you want to delete. In the pop up window that appears: 6. Choose Delete with Reboot option if you want to reboot a VM and rebuild the network immediately after deleting the IP address. After choosing the Delete with Reboot option you will be redirected to the VM's Overview page. 7. Choose Delete without Reboot option if you don't want to reboot a VM. In this case to apply the changes, you will have to the reboot the VM additionally. PLEASE NOTE: You can't delete an IP address that is in use. Display Network Speed for Network Interfaces on Virtual Machine Page The main Virtual Machines screen displays the network speed of each VM's primary network interface. To see the speed of all interfaces assigned to a VM: 1. Go to your Control Panel's Virtual Machines menu. 17 Crucial Cloud Hosting | PAYG Cloud User Guide v1.4 | May 2013 2. Click the label of the virtual machine you are interested in. 3. Click the Networking > Network Interfaces tab. 4. On the screen that appears, the Port Speed column shows the network speed of the network interface. Edit Virtual Machine Network Speed To edit a virtual machine's network speed: 1. 2. 3. 4. 18 Go to your Control Panel's Virtual Machines menu. Select the virtual machine you want to change. Go to the Network tab-> Network Interfaces, and edit the network speed accordingly. Click the Save Network Interface button to save changes. Crucial Cloud Hosting | PAYG Cloud User Guide v1.4 | May 2013 Manage VM Disk Space Add Disks to VM Adding a disk to a virtual machine will require that VM to be rebooted. If a VM is running when you try to add a new disk to it, you'll be asked to confirm the reboot. To add a disk to a virtual machine: 1. 2. 3. 4. 5. Go to your Control Panel's Virtual Machines menu. Click a VM's label to open its details screen. Click the Storage tab -> Disks. Click the Add New Disk button. Fill in the details: Specify disk's label Choose the Data Store to create a disk on from the drop-down menu. Set the desired disk size. Specify if this disk is swap space, and requires formatting. Specify whether the disk should be added to Linux FSTAB, and its mount point. The maximum length of a Mount Point is 256 characters. Spaces are not allowed. No more than one slash is allowed. 6. Click the Add Disk button to finish. PLEASE NOTE: The minimum disk size you can create is 50GB, failure to adhere to this minimum size will result in our Support team contacting you, and requesting an upgrade in your disk size. When you add a new disk to a virtual machine it will automatically become available to that machine. Edit VM Disks You can easily resize disks when needed. The resize will fail if your current usage is greater than the new size you request. Note, that any changes on disk size will lead to reboot of your VM. To change disk size: 1. 2. 3. 4. 5. 6. Go to your Control Panel's Virtual Machines menu. Make sure your virtual machine is powered off, then click its label to open its details screen. Click the Storage tab -> Disks. Click the Actions button next to the disk you want to change, and then click the Edit link. Enter a new disk label and size in GB in the fields provided. Click the Save Disk button. Disk size increases may cause Linux operating systems to fail; this feature is typically reserved for Windows 2008 VMs only. Delete VM Disks To delete a disk: 19 Crucial Cloud Hosting | PAYG Cloud User Guide v1.4 | May 2013 1. 2. 3. 4. Go to your Control Panel's Virtual Machines menu. Make sure your virtual machine is powered off, then click its label to open its details screen. Click the Storage -> Disks tab. Click the Actions button next to the disk you want to delete, and then click Delete. Backup VM Disks To back up a virtual machine: 1. 2. 3. 4. Go to your Control Panel's Virtual Machines menu. Click the label of the machine you want to back up. Click the Storage tab -> Disks. You'll see a list of the disks allocated to that virtual machine. Click the Actions icon next to a disk you want to take a backup of, and then click Backup. You'll see a list of all the backups taken and pending for that disk, along with the tools to restore backups, delete them, and convert them to templates. To make a backup, click the Take Backup button at the end of the list. To restore a backup, click the Restore link next to the backup you want to revert to. To convert a backup into the custom template, click Convert to Template link next to the backup (see Create custom templates). PLEASE NOTE: Backups in the OnApp Control Panel are associated with a particular user instead of being associated with a virtual machine. To view the list of user backups, refer to View User Backups section. Schedule VM Backups In addition to the system autobackup presets, you can schedule backups of VMs (VM disks) as required. For example, you can set up a schedule to back up your disks once a week. To add a backup schedule: 1. 2. 3. 4. Go to your Control Panel's Virtual Machines menu. Click the label of the virtual machine you want to schedule a backup for. Click the Storage tab -> Disks. On the screen that appears, click the Actions button next to the disk you want to back up, then click Schedule for Backups. 5. On the screen that follows, click the New Schedule button. 6. Next, enter duration and choose a period from the drop-down menu: daily, weekly, monthly or yearly. The duration determines how frequently the backup will take place according to the period set. For example, duration of 2 and a period of days will take a backup every 2 days. 7. Click the Save button to finish. Editing and deleting backup schedules is handled through the Control Panel's Settings menu, in the Schedules section. The combination of Scheduled VM backups and Autobackup Presets provides a great deal of flexibility in the way backups are handled for the cloud, and for individual VMs. Autobackup Presets can be applied to all new VMs added to the cloud. Scheduled VM backups enable specific backups to be scheduled for individual VMs, outside of the autobackup pattern. 20 Crucial Cloud Hosting | PAYG Cloud User Guide v1.4 | May 2013 Manage Backups Backups tab lists all backups performed for the VM (of all disks) and enables you to restore or convert them into custom templates. To restore backups or convert them to custom templates: 1. 2. 3. 4. Go to your Control Panel's Virtual Machines menu. Click the label of the required virtual machine. Click the Storage tab -> Backups. On the screen that appears, you'll see a list of all the backups taken and pending for that virtual machine, along with the tools to restore backups, delete them, and convert them to templates. To restore a backup, click the Restore link next to the backup you want to revert to. To convert a backup into the custom template, click Convert to Template link next to the backup (see Create custom templates). 21 Crucial Cloud Hosting | PAYG Cloud User Guide v1.4 | May 2013 VM Statistics VM CPU Utilization OnApp tracks CPU usage for virtual machines and generates charts that help analyse VM performance. The charts show the total CPU usage for all the cores of this particular VM for a specified time period. The vertical axis has a scale of 0.0-X.0, where 0.0 is 0% and X.0% is 100% of CPU utilization - X depends on the total number of cores used by the VM. The horizontal axis defines a time period. To see CPU usage statistics: 1. 2. 3. 4. Go to your Control Panel's Virtual Machines menu. Click the label of the virtual machine you're interested in. Click the Overview tab -> CPU Usage. On the screen that appears, the top chart shows CPU usage for the last 24 hours. The bottom chart shows usage for the last three months (if there is enough data). If there less data available, the chart will show utilization for the time available. 5. Tick the Show in My Timezone box to show bandwidth statistics according to your profile's timezone settings. 6. To zoom into a time period, click and drag in a chart. Click the Show All button to zoom out again. To see what percentage of hypervisor CPU resource a VM takes, go to your Control Panel's Virtual Machines menu and click the label of the VM you're interested in. On the screen that appears, the CPU priority will show the amount of CPU resource given to this VM. VM Billing Statistics OnApp has a record of all the charges applied to your VMs for the last three month period. If a virtual machine was created less than three months ago, statistics are recorded for the VM's existence to date. You can view all statistics available, or those for a shorter period by setting a Start and End time. To view billing statistics for a virtual machine: 1. 2. 3. 4. Go to your Control Panel's Virtual Machines menu. Click the label of the virtual machine you're interested in. Click the Overview -> Billing Statistics tab. Set Start and End time. By default the statistics are generated for the last three months or the actual VM existence period. 5. Tick the Show in my Timezone box to show bandwidth statistics according to your profile's timezone settings. 6. On the page that appears: 22 Date – particular date and time for the generated statistics Users – the virtual machine owner. Click the owner name to see the User Profile (user details) Virtual Machines – the virtual machine name with the total due for VM resources (CPU priority, CPUs, memory and template resources) for the point of time specified in the Date column. Crucial Cloud Hosting | PAYG Cloud User Guide v1.4 | May 2013 Network Interfaces – the total due for the network interfaces used by this VM for the point of time specified in the Date column. Click the network interface name to see its details. Disks – the list of disks assigned to this VM with the total due for the disk space resources (disk size, data read/written, reads/writes completed) for the point of time specified in the Date column. Click the disk name to see its details. Costs – the total due for the Virtual Machines, Network Interfaces and Disks resources for the point of time specified in the Date column. Scroll down to see Total Amount (the total due for the whole billing statistics period). Network Interface Statistics OnApp tracks network usage for virtual machines and generates charts that help analyse network performance. To see network utilization statistics for a virtual machine: 1. 2. 3. 4. 5. Go to your Control Panel's Virtual Machines menu. Click the label of the virtual machine you're interested in. Click the Networking -> Network Interfaces tab. Click the Statistics (chart) icon next to the network you're interested in. On the screen that appears, the top chart shows bandwidth usage for the last 24 hours. The bottom chart shows usage for the last three months. 6. To zoom into a time period, click and drag in a chart. Click the Show all button to zoom out again. Disk IOPS The system tracks IOPS (Input/Output Operations per Second) for virtual machines and generates charts that help analyse VM disk performance. To see IOPS for a virtual machine: 1. 2. 3. 4. Go to your Control Panel's Virtual Machines menu. Click the label of the virtual machine you're interested in. Click the Storage -> Disks tab. Click the Statistics (chart) icon next to the disk you're interested in. There are four charts on the screen that appears: IOPS for the last hour IOPS for the last 24 hours Data written/read for the last 24 hours Data written/read for the last hour 5. To zoom into a time period, click and drag in a chart. Click the Show All button to zoom out again. The OnApp API allows you to limit the Hourly IOPS and Hourly data by setting the limit=N parameter, where the N variable is the number of hours for which the charts will display the info. 23 Crucial Cloud Hosting | PAYG Cloud User Guide v1.4 | May 2013 Load Balancers View Load Balancer Details Load balancers are also virtual machines, so you can perform the same basic actions on them as for other VMs. To view load balancer details: 1. Go to your Control Panel's Load Balancers menu. 2. On the screen that appears, click the label of the load balancer required. 3. You'll see the information on the load balancers with the range of tools available for the balancer: LB information Hostname and login Power status & On/Off buttons Template this LB is built on Resources allocated to this LB Hypervisor and IPs Owner Prices per hour Notes - administrator's/user's notes Activity log Tabs with additional tools Billing Stats – Shows costs due for this LB for a specified time period. Monitis monitors – Shows the cluster load. Actions (the exact list shown depends on Balancer status): Startup Balancer - Queues a start-up action for a Balancer that's currently powered off. Reboot Balancer - Powers off and then restarts the Balancer. Shut Down Balancer - Terminates the Balancer forcefully. Delete Balancer - Removes the Balancer from the system. Suspend Balancer - Stops a Balancer, and changes its status to suspended. Migrate Balancer - Pops up the Balancer migration dialogue, enabling you to move the Balancer to a different hypervisor. Rebuild Balancer - Pops up the Balancer rebuild dialogue, where you can rebuild the Balancer on the same (or another) template. All data will be lost! Notes – Click the Actions button, then select Add Admin's Note or Add User's Note to create a brief comment or reminder for a Balancer. Monitis Monitors - Shows the cluster load. Cluster Nodes This is the list of the nodes which form the load balancer. Here you can: 24 Power on/off the node. Delete a node from a cluster. Crucial Cloud Hosting | PAYG Cloud User Guide v1.4 | May 2013 Create Load Balancer Cluster In this scheme, load balancers manage incoming requests one by one, rotating them between the servers added to a cluster (a round-robin method). OnApp load balancers are based on Layer 4 load balancing which means that requests are distributed at the transport layer, such as TCP/UDP transport protocols. To add an LB cluster: 1. Go to your Control Panel's Load Balancers menu. 2. Click the Add a New Balancer button. 3. On the page that follows, fill in the form that appears: Cluster Configuration Port - specify the port for this load balancer to run on (e.g. 9090, 8080, 9008 etc.) To add multiple load balancer ports, click the "+" button next to the first port. Load Balancer Instance Label – give a name to your load balancer instance. Hostname – specify a host name that will identify your load balancer. Hypervisor zone – choose a hypervisor zone. Hypervisor – select a hypervisor that will be enabled for the cluster. Network zone – choose a network zone for this load balancer. Port Speed – use the slider to set a port speed or tick the Unlimited box if required. Load Balancer Type Choose the Cluster option and click Next. Cluster Nodes This is where you add and configure the nodes in this load balancing cluster. A node is a combination of a VM and an IP address. Select a virtual machine from the drop-down box and click the Add Node button. PLEASE NOTE that the only VMs you can add to a cluster are those which are based on the selected hypervisor/hypervisor zone, have an IP in the defined network zone and are located in the same IP range. Click Save. Create Autoscaling Cluster To add an autoscaling cluster to your cloud: 1. Go to your Control Panel's Load Balancers menu. 2. Click the Add a Balancer button. On the page that follows, fill in the form that appears: 25 Crucial Cloud Hosting | PAYG Cloud User Guide v1.4 | May 2013 Cluster Configuration Port - specify the port for this load balancer to run on (e.g. 9090, 8080) Load Balancer Instance Label – give a name for your load balancer instance. Hostname – specify a host name which will identify your load balancer. Hypervisor zone – choose a hypervisor zone. Hypervisor – select a hypervisor that will be enabled for the cluster. Network zone – choose a network zone for this load balancer. Port Speed – use the slider to set a port speed or tick the Unlimited box if required. Load Balancer Type Choose the Autoscaling option and click Next. Cluster Nodes These settings configure the nodes that will be added to your cluster. Image template – choose a template from the drop-down box: nodes will be built on this template Min node amount – the minimum number of nodes in this cluster. Max node amount – the maximum number of nodes in this cluster. Example: if you set Min node amount = 2 and Max node amount = 5, then the system will scale out the cluster up to 5 nodes, and scale in to 2 nodes if required. PLEASE NOTE: the only templates you can add to a cluster are those based on the selected hypervisor/hypervisor zone. Cluster Node Parameters These are the settings for each node of a cluster. Each node added to a cluster will have the following parameters: Memory – set the amount of memory allocated per node in MB. CPUs – the number CPUs which will form each node. CPU Priority – specify CPU priority. For more info on CPU priority, refer to Create VMs section. Rate Limit – set the port speed for a node. Autoscale Out Parameters Set the rules defining when the system should add more nodes to your autoscaling cluster. The system will add nodes until the limit set in the Max node amount field is reached. Autoscale In Parameters Set the rules defining when the system should remove the nodes from your autoscaling cluster. The system will remove nodes until the limit set in the Min node amount field is reached. Click Save. 26 Crucial Cloud Hosting | PAYG Cloud User Guide v1.4 | May 2013 Edit/Delete Load Balancer To edit a load balancer: 1. Go to your Control Panel's Load Balancers menu. 2. Click the Actions icon next to a required load balancer, then choose Edit Cluster. 3. When the page loads, edit necessary parameters and click Save. When you increase the RAM of the nodes of a load balancer (autoscaling type) to a value greater than the current node RAMx16 (which is a max_mem parameter in a configuration file and database), the load balancer will be cold resized. When deleting load balancer ports, you can remove all but the first port. To delete a load balancer: 1. Go to your Control Panel's Load Balancers menu. 2. Click the Delete icon next to a required load balancer. 3. When the confirmation window pops up, click OK. 27 Crucial Cloud Hosting | PAYG Cloud User Guide v1.4 | May 2013 Templates Create Custom Templates You can create custom templates by making a backup of an existing virtual machine and saving it as a template for future use. To create a custom template: 1. 2. 3. 4. 5. Create a new virtual machine and configure it as you would like for your template. Click the Actions icon next to this virtual machine, then choose Backups. In the list of backups, click Convert to Template next to the backup you want to convert. Click OK to proceed. On the next screen, enter the following: a. A label for your template. b. The minimum memory size: make sure the minimum memory size takes into account the settings for the template on which the VM was built, plus any modifications you may have made to the template before making the backup. c. The minimum disk size: ensure the value is based on the template settings and any possible modifications you may have made, e.g. installing additional software. d. Click the Convert Backup button. 6. The backup will be scheduled for creation. When conversion is complete, it will be then listed on the Templates > Templates List > User Templates tab, from where you can edit it. PLEASE NOTE: During the custom Windows template creation the Admin account is created anew. If you update a custom template (by converting a more recent backup of a VM, for example) it will not update existing VMs built on the previous version. Only new VMs, or those that are rebuilt, will use the new template. PLEASE NOTE: At present OnApp does not support VMs/templates with Active Directory Domain Controllers due to the local/username that is changed to a domain/username, however some customers do run Domain Controllers on OnApp clouds. In this case the VM runs with limited functionality. Edit/Delete Custom Templates You can edit your custom templates at any time. To do so: 1. Go to your Control Panel's Templates > Templates List menu and click the User Templates tab. Your custom templates will be listed there. 2. Click the Edit icon next to the template you wish to edit, make your changes on the screen that follows, and click Save Template. 3. Click the Delete icon next to a template if you want to delete it. 28 Crucial Cloud Hosting | PAYG Cloud User Guide v1.4 | May 2013 Tools Cloud Usage The Usage Statistics screen lists every virtual machine in the cloud, along with their details: Owner - the owner's username. CPU used - shows how long (in seconds) the VM has been using the CPU for the last 72 hours or during the specified period Disk reads completed - the number of read operations performed by the disk. Disk writes completed - the number of write operations performed by the disk. Disk data read - the amount of data read from a disk. Disk data written - the amount of data written to a disk. Bandwidth sent - the number of Bytes sent by this VM. Bandwidth received - the number of Bytes received by this VM. By default, statistics are generated for the last 72 hours. To specify another period, set the Start and End time and click the Apply button. You can sort by all categories except the virtual machine name: click a column label to sort in ascending order (you'll see an arrow appear to show how the data is being sorted). Click it again to sort in descending order. You can also drill into a specific VM, or its owner, by clicking the relevant links in the list 29 Crucial Cloud Hosting | PAYG Cloud User Guide v1.4 | May 2013