1
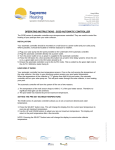
SUNSWITCH INSTALLATION INSTRUCTIONS - OPTION 2.
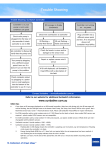
PLEASE NOTE: To simplify this SunSwitch diagram, the Collector area (A) is shown as
a block of solar tubes. This is NOT the way your solar system should be set up. To see
how to assemble your Flexible Strip or a Rigid Panel solar collector correctly, please
refer to the instructions provided with the collector, or visit the Sunbather website.
E
Step 1
Fix wall mounting bracket on a vertical wall protected from direct rain and sun.
Step 2
Locate Roof Sensor (15.0m) on separate solar pad fixed adjacent to the
solar collector. This pad must receive similar sun to the solar collector but not
be in contact with it.
Step 3
A ‘barb and grommet’ sensor pocket is provided. Drill 13mm hole and install
into a section of pipework before the solar collector take-off and insert the
Pool Sensor (1.8m) into the well.
Step 4
Connect both Pool and Roof sensors to the colour-matched connections on
the controller. Then slide unit into mounting bracket.
Step 5
Plug in solar circulation pump and switch ON. Set the Pool Temp to 30oC for
the initial start up.
A
NOTES: [a] Joins in sensor cables must be soldered and waterproofed.
[b] Installation Option 2 requires the Time Clock to be set for daylight hours.
[c] SunSwitches are NOT designed to switch DC motors or Multi-speed
pumps as damage may occur to the electronics.
[d] Do not coil up excess sensor wire as this weakens the signals.
C
Always cut and join to give the correct length.
[e] For any repairs simply return to the place of purchase.
ON
OFF
MAN
J
F
A
SOLAR COLLECTOR
B
SOLAR PUMP
C
SUNSWTICH CONTROLLER
D
POOL SENSOR
E
ROOF TEMPERATURE TRANSMITTER
F
TIME CLOCK
G
POOL FILTER
H
POOL PUMP
AUTO
SET
TEMP
SunSwitch
SOLAR
POOL HEATING
RCM 5209
240VAC/50Hz/10A
230V
B
Installation Video
D
COLD WATER FROM POOL
J
G
J
H
WARM WATER
RETURNS TO
THE POOL
OPTION 2: For existing pools with the solar system
tapped into the pool’s filtration system.