1
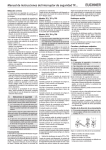
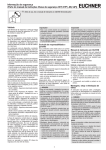
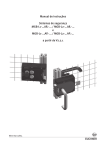
Operating Instructions Safety Switch TX... Correct use Safety switches series TX are electromagnetic interlock devices with guard locking. They interlock movable safety guards so that dangerous work on machines can only be carried out if the safety guard is closed and locked the safety guard cannot be opened when the machine is running. For the control system, this means that starting commands which cause hazardous situations must become active only when the safety guard is in protective position and the guard locking is in locked position. The locked position of the guard locking must be released only when the hazardous situation is no longer present. Before safety switches are used, a risk assessment must be performed on the machine in accordance with EN 954-1, Safety of machinery. Safety related parts of control systems. General principles for design, Annex B EN 1050, Safety of machinery. Principles for risk assessment IEC 62061, Safety of machinery - Functional safety of safety-related electrical, electronic and programmable electronic control systems. Correct use includes compliance with the relevant requirements for installation and operation, in particular EN 954-1, Safety of machinery. Safety related parts of control systems. General principles for design EN 1088, Safety of machinery. Interlocking devices associated with guards. Principles for design and selection EN 60 204-1, Safety of machinery. Electrical equipment of machines. General requirements. Safety Precautions The guard locking pin is held in locked position by electromagnetic force and released by spring force. The guard locking operates in accordance with the open-circuit current principle. Closing and locking The guard locking pin is released by insertion of the actuator into the safety switch. TX1 and TX3: The guard locking pin is moved to locked position by spring force. The safety contacts are closed. Figure 1: Changing the actuating direction Unlocking TX1 and TX3...110/230: When the operating voltage is applied to the solenoid, the guard locking pin unlocks the actuator / safety guard to the switch position Unlocked (see Figure 2). TX3...024: On the application of the control voltage when the solenoid operating voltage is present, the guard locking pin unlocks the actuator / safety guard to the switch position Unlocked (see Figure 2). TX2 and TX4...110/230: When the operating voltage is removed from the solenoid, the guard locking pin unlocks the actuator / safety guard to the switch position Unlocked (see Figure 2). TX4...024: When the operating voltage is removed from the solenoid and/or the control voltage is removed, the guard locking pin unlocks the actuator / safety guard to the switch position Unlocked (see Figure 2). On the versions TX3 and TX4 the actuator can be unlocked by pulling it. The safety contacts are opened. Opening Safety switches must not be bypassed (bridging of contacts), turned away, removed or otherwise rendered ineffective. Only switching elements marked with the positive opening symbol shall be used for the safety circuit. Mechanical release Safety switches series TX permit locking of movable safety guards. In the event of malfunctions, the guard locking can be released with the mechanical release irrespective of the state of the solenoid (see Figure 3). Unscrew locking screw Using a screwdriver, turn the mechanical release by around 180° in the direction of the arrow Position monitoring of the safety guard and monitoring of interlocking are performed via the same switching element. The locking screw must be returned to its original position and sealed after use (for example with sealing lacquer). Version TX1 and TX3 Mounting (spring interlock) The guard locking pin is held in locked position by spring force and released by electromagnetic actuation. The guard locking functions in accordance with the closed-circuit current principle. The safety guard cannot be opened immediately in the event of interruption of the solenoid power supply. Version TX2 and TX4 (solenoid interlock) This type may be used only in special cases after strict assessment of the accident risk! The safety guard can be opened immediately in the event of interruption of the solenoid power supply! A TX4...024: The guard locking pin is moved to locked position by applying the control voltage when the solenoid operating voltage is present. The guard locking pin is blocked when the actuator is pulled out. The safety contacts remain positively opened. Function Changing the actuating direction TX2 and TX4...110/230: The guard locking pin is moved to locked position when the solenoid operating voltage is applied. Safety switches perform a personal protection function. Incorrect installation or tampering can lead to severe injuries to personnel. The switching operation must only be triggered by actuators specifically provided for this purpose which are permanently connected to the safety guard. Permanently connect the actuator to the safety guard so that it cannot be detached, e.g. using the enclosed non-removable screws, rivets or welding. Fit an additional stop for the movable part of the safety guard. Mounting must be performed only by authorized personnel. Assemble the safety switch so that access to the switch is difficult for operating personnel when the safety guard is open it is possible to operate the mechanical release and check and replace the safety switch. Safety switches and actuators must not be used as an end stop. Mount the safety switch only in assembled condition! Insert the actuator in the actuating head. Mount the safety switch positively. Unscrew and open switch cover. Remove actuating head from the switch by turning and refit in the required position (bayonet fastening). Fit locking pins supplied for protection against twisting. Close the cover and screw in position. Cover the unused actuating slot with the enclosed slot covers. Protection against environmental effects A lasting and correct safety function requires that the actuating head must be protected against the penetration of foreign bodies such as swarf, sand, blasting shot, etc. Cover the actuating slot, the actuator and the rating plate during painting work! Electrical connection Electrical connection must be performed only by authorized personnel. The solenoid operating voltage, the LED operating voltage and the control voltage (only TX3...024 and TX4...024) for the locking solenoid must comply with the information on the rating plate (e.g. UB = AC/DC 24 V). Solenoid operating voltage and control voltage can be bridged if a current of 2A can be supplied for TIMP = 250ms on switching on the solenoid. Version TX...M/N (cable entry) Unscrew locking screw for the required insertion opening. Fit the cable gland with the appropriate degree of protection. For pin assignment see Figure 5. Tighten the screws for the switching element with a torque of 0.5 Nm. Check that the cable entry is sealed. Close the cover and screw in position. Version TX..RC18/BH12 (plug connector) For pin assignment see Figure 6. Setup Mechanical function test The actuator must slide easily into the actuating head. Close the safety guard several times to check the function. Electrical function test Close the safety guard. Start the machine. It must not be possible to open the safety guard! Switch off the machine. Open the safety guard. The machine must not start when the safety guard is open! Actuator inserted locked unlocked locked Service and inspection Actuator removed open & 41 33 21 13 42 34 22 14 41 33 21 13 42 34 22 14 41 33 21 13 42 34 22 14 41 33 21 13 42 TX.A-... 34 22 14 41 33 21 11 42 34 22 12 41 33 21 11 42 34 22 12 41 33 21 11 42 34 22 12 41 33 21 11 42 TX.B-... 34 22 12 41 33 21 13 42 34 22 14 41 33 21 13 42 34 22 14 41 33 21 13 42 34 22 14 41 33 21 13 42 TX.C-... 34 22 14 Figure 2: Switching elements and switching functions 4. 3. 2. 1. 4. 3. 2. 1. 1 2 4 3 5 2 1 U B LED LED U S 0V GN RD Insertion depth s 134 GN TX3...024 TX4...024 Exclusion of liability under the following conditions: Leading with screen spring 12 1 18 17 10 13 2 19 16 9 14 3 15 4 8 7 5 6 1 GN 2 25,5 15 4 3 39 19 RD 7 41 42 8 13 33 34 14 9 21 22 10 11 11/13 12/14 5 PE/12 G 21,5 59 Figure 3a: TX...M G = M20x1.5 TX...N G = 1“ NPT 1 6 TX3...RC18 TX4...RC18 4,5 8,5 4 17 GN 2 15 Figure 3b: 5 3 16 22 TX...C18 19 RD 65 inserted 80 Figure 3c: TX...BH12 Approach speed, max. 20 m/min Switching principle Slow-action switching element Contact material Silver alloy, gold flashed Connection type on switching element Screw terminals Connection type on circuit board Cage-pull clamps Conductor cross-section Max. 1.5 mm2 Ui = 250 V Ui = 50 V 9 21 22 10 Utilization category for the switching element to IEC 947-5-1 11 11/13 12/14 5 AC-15 DC-13 4 A 230 V 4 A 24 V Switching voltage, min. 12 V Short circuit protection (control circuit fuse) 11 29 R 10 6 5 1 Duty cycle 100 % Operating frequency max. on TX3 and TX4 45 min-1 Control voltage US on TX3...024 / TX4...024 AC/DC 24 V Actuating force 35 N Extraction force 35 N Retention force 20 N Locking force Fmax 1700 N Locking force Fzh in accordance (F = Fmax) = 1300 N Zh with Test Principles GS-ET-19 1.3 3 2 GN 1 5 RD 4 A gG Solenoid operating voltage UB / AC/DC 24 V 8 W power input (TX3...024 and TX 4...024: AC/DC 110 V 10 W IB = 2 A for TIMP = 250 ms) AC/DC 230 V 11 W 12 7 3 3 Figure 4: Insertion depth and approach radii Any, actuating head down preferred 14 8 9 2 10 4 TX3...BH12 TX4...BH12 > 440 -20...+80°C Installation position 34 5 > 300 >1x10⁶ Ambient temperature 42 4 32 + 8 Mech. operating cycles 41 R 32 + 1 IP 67 IP 65 33 Figure 3: Dimension drawings Standard Degree of protection according to IEC 529 with cable gland with plug connector 13 60 inserted 75 1 Pin assignment Plug connector BH12 Overtravel Die-cast alloy, cathodically dipped Switching current, min., at 24 V 1 mA 58 Insertion depth s Approach radius R Value Housing material 7 ∅26 Actuator Parameters Rated insulation voltage with cable gland with plug connector Leading with screen spring R 8 PE/12 ∅26 if the unit is not used for its intended purpose non-compliance with safety regulations installation and electrical connection not performed by authorized personnel failure to perform functional checks. Technical data 6 16 Replacement of individual parts or assemblies is not permitted! Safety switches must be exchanged completely after 1 million switching operations. TX1/TX2 TX...110/230 11 Pin assignment Plug connector RC18 TX1...RC18 TX2...RC18 30 42 4 Figure 5: Circuit diagrams Locking screw 18,8 3 U B LED LED 0V GN RD Insertion depth for M5 > 45 mm ISO 1207 (DIN 84), ISO 4762 (DIN 912) Mechanical RD release 4. 3. 2. 1. If damage or wear is found, the complete switch and actuator assembly must be replaced. s 58,5 46 4,5 240 4. 3. 2. 1. No servicing is required, but regular inspection of the following is necessary to ensure trouble-free long-term operation: correct switching function secure mounting of components dirt and wear sealing of cable entry loose cable connections or plug connectors. 12 41 42 33 34 21 22 11/13 12/14 4 6 2 11 PE/9 Figure 6: Pin assignment EUCHNER GmbH + Co. KG Kohlhammerstraße 16 D-70771 Leinfelden-Echterdingen Tel. +49/711/75 97-0 Fax +49/711/75 33 16 www.euchner.de [email protected] Subject to technical modifications; no responsibility is accepted for the accuracy of this information. © EUCHNER GmbH + Co. KG 079777-03-10/06 Operating Instructions Safety Switch TX...