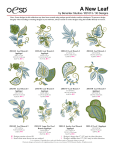
1
Clamp Frame Installation Manual
PR-1000/PR1000e (ver. 4.10 -)
PR655/PR655C
Items that can be
embroidered
About the Clamp Frame
This frame will be used for embroidering specially
shaped items that cannot be held in a traditional
frame, such as shoes and gloves.
When using the clamp frame, a wide variety of
items can be embroidered, except extremely hard
or thick materials.
Verifying the package
contents
Note
● When embroidering thin materials, be
sure to use a stabilizing product.
● Shoes with the size less than 23 cm (US5/
UK4/EUR37) cannot be embroidered.
● The maximum embroidery area may be
smaller than 24 mm × 45 mm (7/8 inch ×
1 3/4 inches) depending on the size,
depth, shape or the kind of item you are
embroidering.
Check that the following parts are included. The
package contents differ depending on the clamp
frame kit that you have purchased. If any item is
missing or damaged, contact your authorized sales
representative.
Note
● This Installation Manual is included with
both kits.
● The maximum embroidery area of the
clamp frame is 24 mm × 45 mm (7/8 inch
× 1 3/4 inches)
■ Sample projects
Shoes (front)
Shoes (side)
Gloves (strap)
Small bag
■ Contents of clamp frame Kit 1
1.
1
2
3
2.
3.
Embroidery frame holder D
Clamp frame S
Installation Manual
* Install embroidery frame holder D in order to
attach the clamp frame.
■ Contents of clamp frame Kit 2
Used to embroider shoes when size is greater
than 27 cm (US9/UK8/EUR42).
1.
1
2
3
2.
3.
Clamp frame SR
Clamp frame SL
Installation Manual
* Embroidery frame holder D (included in clamp
frame Kit 1) is necessary for attaching the clamp
frames.
1/5
Shoes (tongue)
ENGLISH
—————————————————————————————————————————————————————————————————————————————————————
———————————————————————————————————————————————————————————————————————————————————
Firmly tighten the two nuts on the frame,
3 and then pull the item to check that it is
Hooping the item
within the frame and correctly aligned.
The procedure for using the clamp frame S is
described below.
Loosen the two nuts on the frame, and then
1 lift up the presser clamp.
b
a
• When pulling the item, be sure to firmly
hold the frame with one hand.
a
1
1 Screw
2 Presser clamp
Pass the item between the presser clamp and
2 frame.
a
1 Area between the two nuts
• The screws can be firmly tightened if you
press the area between the two nuts with
your fingers while tightening the screws.
• The screws can be further tightened by using
the wrench included with the embroidery
machine.
b
1 Presser clamp
2 Frame
Note
● Tighten the nuts until the screw tips are
flush with the tops of the nuts or protrude
from them, as shown below.
If the screw tips are recessed within the
nuts when embroidering is started, the
screws may hit the embroidery machine,
preventing embroidering from continuing.
Memo
● If the item does not fit between the presser
clamp and frame, completely remove the
two nuts.
Raise the presser clamp to its highest
position. Insert the item and then lower
the presser clamp into place.
When you remove the nuts make sure that
the screw side is facing up.
1
1
1
2
2
2
1 Screw tip
2 Nut
● When hooping the shoe, loosen the lacing
to open the shoe wide enough, and then
hoop to the frame.
2/5
—————————————————————————————————————————————————————————————————————————————————————
● When hooping a shoe in the clamp frame,
the heel of the shoe should extend out
from the notch in the frame. If the heel of
the shoe is inside the notch, the shoe may
hit the embroidery machine, preventing
embroidering.
a
Loosen and remove the two thumb screws
1 on the embroidery machine, and then
remove the embroidery frame holder from
the carriage.
a
1 Thumb screws
• The removed thumb screws will be used to
install embroidery frame holder D.
1 Notch
Insert the pins on the frame-mounting plate
2 of the carriage into the holes on both sides of
● If the shoe is hooped with the sole and
clamp frame at an angle greater than 45°,
we recommend using clamp frame S, even
if the shoe is a size 27 cm (US9/UK8/
EUR42) or more.
the mounting plate of embroidery frame
holder D.
a
Memo
● If the nuts are tightened too firmly when
removing the item from the frame after
embroidering, press the area between the
two screws with your fingers and use the
wrench included with the embroidery
machine to loosen the nuts.
b
Attaching the embroidery
frame
1 Pins on the frame-mounting plate of the
carriage
2 Holes in the mounting plate of embroidery
frame holder D
After hooping the item in the clamp frame, attach
the frame to the embroidery machine.
Install and tighten the two thumb screws
1.
3 removed in step
Note
● When attaching or removing the clamp
frame, make sure that the start/stop button
of the embroidery machine is lit in red. If
the start/stop button is flashing in green,
the embroidery machine may start sewing.
If the embroidery machine accidentally
starts operating, injuries may result.
● Before attaching the clamp frame, install
embroidery frame holder D on the
embroidery machine.
3/5
———————————————————————————————————————————————————————————————————————————————————
Note
Note
● Please firmly tighten the two thumb screws
with the disc-shaped screwdriver included
with the embroidery machine. The wrong
frame size may be indicated on the
machine's screen if the two screws are not
tightened.
● Be careful not to pinch your fingers with
the springs.
Embroidering with the
Clamp Frame
Use both hands to grasp the frame hooped
4 with the item, and then attach it to embroidery
frame holder D.
Note
● For 10-needle embroidery machine users;
Make sure that the embroidery machine is
version 4.10 or later.
If the embroidery machine is prior to
version 4.10, you must install the upgrade
or the machine will not recognize the
clamp frame.
Frame Display setting
Insert the pins on embroidery frame holder
5 D into the holes on both sides of the clamp
frame to secure it.
When using the clamp frame, select the following
Frame Display setting.
The differences between clamp frame SR and
clamp frame SL will not show in the Frame Display
screen.
a
1 Make sure that the pins on the embroidery frame
holder fit into the positioning slot and hole on
the embroidery frame.
Starting embroidering
■ Removing the clamp frame
While grasping the clamp frame with both
hands, lift up both springs with your fingers, and
then pull off the clamp frame toward you.
Note
● When the clamp frame is attached,
cutwork, basting and appliqué functions
cannot be sewn.
● When the clamp frame is attached to the
10-needle embroidery machine, the
embroidery position alignment using the
built-in camera is not available.
● The maximum sewing speed can be set to
one of five levels between 400 and 600
spm when the clamp frame is used. The
maximum sewing speed setting is
specified from the embroidering screen.
4/5
—————————————————————————————————————————————————————————————————————————————————————
Touch
to check the embroidering
4 area.
Memo
• Embroidery machines equipped with
an LED pointer can use it to
automatically adjust the position of the
attached clamp frame. With material
that has a very uneven or textured
surface, such as shoes, etc., the position
of the LED pointer may not be correctly
aligned. In this case, the pointer
indication should be used only as a
reference.
Note
● Be sure to check the embroidering area
before starting to embroider, to make sure
if the item is not pulled and if the position
of the frame is aligned to the item. When
the item is pulled forcibly or the frame
position is not aligned with the item, the
item can not be used with the clamp
frame.
Attach the clamp frame, and then select a
1 stitch.
Memo
● Touching
will return you to the
pattern editing screen. The settings screen
reverts the pattern back to its original
setting before design was changed.
● Changes specified in the embroidering
setting screen will not be applied, even if
Touch
was touched to save the pattern.
The orientation and position for the
design, will revert back to the original
settings.
● While using the clamp frame SL/SR, when
the embroidering setting screen is
displayed after creating a border pattern in
step 2, the pattern will be ungrouped.
Select each pattern in order to move or
rotate it.
● If the machine is turned off in the middle
of embroidering, the machine will
automatically save the design position
when turned on again, except the changes
specified in the embroidering setting
screen.
, and then edit the pattern in
2 the pattern editing screen.
The same screen appears, regardless of
whether clamp frame S, SL or SR is attached.
Memo
● It is recommended to use 3 embroidery
colors or less.
Touch
to display the embroidering
3 settings screen.
The frame appears in the screen with the
same orientation when clamp frame SL or SR
is attached.
5
5/5
After checking the embroidering area, touch
to begin embroidering.