1
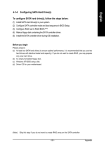
POS Expert Front
Restaurant Version
User Manual
Ver 1.23 21 Feb 2012
Page 1 of 50
Revision Sheet
Release No.
1.10
1.20
1.21
1.22
1.23
Date
10/2/2012
15/2/2012
16/2/2012
20/2/2012
21/2/2012
Revision Description
Updated by Riche
Added cover and index, content copied from quick start guide
Update figure numbers and other fonts.
Copied document from a quick installation guide
Copied and added for “Options”
Page 2 of 50
POS Expert Front Restaurant User Manual
Table of Contents
1
2
3
4
Welcome to POS Expert Front ............................................................................... 4
1.1
Introduction ................................................................................................ 4
1.2
POS Expert Front Overview ...................................................................... 4
1.2.1
Login .............................................................................................. 4
1.2.2
POS Expert Front Main Window................................................... 5
Preparations for POS Expert ................................................................................... 6
2.1
Preparations set in POS Expert Back Office.............................................. 6
2.1.1
Staff ................................................................................................ 6
2.1.2
Stock .............................................................................................. 6
2.1.3
Customer ........................................................................................ 6
2.2
Preparations set in POS Expert Front ........................................................ 6
2.2.1
EFTPOS Device ............................................................................. 7
POS Expert Front Operations ................................................................................. 8
3.1
Sale............................................................................................................. 8
3.1.1
Dine in Orders ................................................................................ 8
3.1.2
Take Away Orders ....................................................................... 10
3.1.3
Telephone orders .......................................................................... 11
3.1.4
Enter products .............................................................................. 13
3.1.5
Taste/Extra of a certain product ................................................... 14
3.1.6
Change the quantity ..................................................................... 17
3.1.7
Price/Quantity Modification ........................................................ 19
3.1.8
Payment Input .............................................................................. 20
3.1.9
Finish your transaction ................................................................. 23
3.1.10
Delete a particular item ................................................................ 23
3.1.11
Clear the entire order ................................................................... 24
3.1.12
Membership card ......................................................................... 25
3.2
Payment.................................................................................................... 26
3.2.1
Cash Payment............................................................................... 27
3.2.2
Card Payment ............................................................................... 28
3.2.3
Mixed Payment ............................................................................ 28
3.3
Advance POS Expert Front Operation ..................................................... 28
3.3.1
Discount Setting ........................................................................... 29
3.3.2
Binding a Customer to the Sale ................................................... 31
3.3.3
Void Item ..................................................................................... 32
3.3.4
Refund .......................................................................................... 33
3.3.5
Cash In/Out .................................................................................. 35
3.3.6
Cash Up ........................................................................................ 36
3.3.7
EFTPOS Device ........................................................................... 36
3.3.8
Sale Record .................................................................................. 38
3.3.9
Price Level ................................................................................... 39
3.3.10
Attendance ................................................................................... 39
3.3.11
Other modules POS Expert Front ................................................ 40
Options .................................................................................................................. 40
Page 3 of 50
4.1
General ..................................................................................................... 40
4.1.1
Overview ...................................................................................... 40
4.1.2
Field Definition ............................................................................ 41
4.2 Periperals........................................................................................................ 41
4.2.1 Overview ............................................................................................. 41
4.2.2 Field Definition ................................................................................... 42
4.3
OPOS / EFTPOS ...................................................................................... 43
4.4
Payments .................................................................................................. 44
4.4.1
Overview ...................................................................................... 44
4.4.2
Field Definition ............................................................................ 44
4.5
Prices ........................................................................................................ 45
4.6
Membership settings ................................................................................ 46
4.7
Display ..................................................................................................... 47
4.8
Touch Keypad .......................................................................................... 47
4.9
Others ....................................................................................................... 48
1 Welcome to POS Expert Front
1.1 Introduction
Welcome to POS Expert Front, and welcome to be a part of POS Expert family! This
manual is best read by those who will be primarily concerned with the operation of the
point of sale system: cashiers, store managers, sale associates, or other employees
who will be responsible for the sales.
POS Expert Restaurant Version is a part of the POS Expert Family. It comprises of two
main applications which are POS Expert Desk Front and POS Expert Back Office. The
POS Expert Desk front features 3 main Functions like sales, customer traffic control
and the management of the entire restaurant’s running; The POS Expert Back Office is
significantly for the managers or the owners to manage and maintain the relationship
between restaurants and their suppliers and customers as well as the internal staff. In
addition, POS Expert Back Office provides the function to view the kinds of previous
sales reports which can focus on a particular product or a particular period.
1.2 POS Expert Front Overview
1.2.1 Login
Once you have finished your stock and customer as well as the staff information
importing, you are able to utilize most of the functions of the POS Expert Desk Front.
At the very beginning, find the shortcut of the POS Expert Desk Front which is named
“POS Restaurant” on the desktop. Double click it and then you will see a “Login”
window, typing the password which is also the staff ID, finish with one click of the
green ‘Ok’ button. Then the POS Expert Front Desk main window will be opened up
immediately. Be aware that please keep your password secure all the time.
Page 4 of 50
Figure 1
1.2.2 POS Expert Front Main Window
Figure 2
The POS Expert Front Main Window is shown above, with the five main areas of the
screen. The four main areas of the POS screen are comprised of the following:
Scanning Panel, Sale Panel, Product Panel, Amount / Quantity Control Panel
and Function Panel.
Page 5 of 50
Figure 3
2 Preparations for POS Expert
Before using POS Expert Front, several preparations are required. All the preparations
are necessary to run POS Expert Front smoothly.. Be aware that preparations do not
contain installation.
2.1 Preparations set in POS Expert Back Office
Several preparations are set in POS Expert Back Office. They are the most crucial
part of all preparations.
2.1.1 Staff
The Staff concept is important in both POS Expert Front and POS Expert Back
Office. In POS Expert you are logged in using a staff number (Staff No). All the
transactions and system maintenances tasks will record the staff number for review
purposes.
Please refer to section 2.2 in POS Expert Back Office for more information.
2.1.2 Stock
Stock in POS Expert is considered as products with purchase/sale information such
as barcode, price and inventory quantity. Without a Stock setting, you are not able to
make a sale in POS Expert Front.
Please refer to section 2.4 in POS Expert Back Office for more information.
2.1.3 Customer
If transactions are associated with customers, you are allowed to review the
transaction record group by customer. Further, POS Expert Back Office allows you
to set up accounts for your customers with full reporting facilities, for example you can
give a particular customer payment credit for sales.
Please refer to section 2.5 in POS Expert Back Office for more information.
2.2 Preparations set in POS Expert Front
Preparations set in POS Expert Front are optional. They are only necessary for some
specific devices or specific actions.
Page 6 of 50
2.2.1 EFTPOS Device
If you are using an EFTPOS Device, you need to enable the EFTPOS options in the
Options window.
To open the Options window, click the Other Func button to open the other
Functions window, then apply the Options button.
Figure 4
The Options window is shown in the above figure. Select the OPOS/EFTPOS page.
Figure 5
Page 7 of 50
Figure 6
In the above figure, there is a check box for enabling EFTPOS called Enable
EFTPOS, and two types of EFTPOS machine called Ingenico PC EFTPOS and
Quest EftplsPlus respectively. To enable the EFTPOS device, check the box first,
then select the proper type of your EFTPOS machine and press Apply to confirm the
settings.
3 POS Expert Front Operations
3.1 Sale
In this section, we are going to introduce the standard POS Expert Front Operation,
including barcode scanning, price/quantity modification and payment input. These
steps are the basic skills for you to be a professional user of our POS Expert system.
Like other popular software in the computer world, POS Expert Front operation is as
easy as you pressing the “Enter” key!
Usually, customers have three main options to consume products in a restaurant:
• Dining in orders
• taking away orders
• Telephone orders
POS Expert therefore provides different buttons on the main window for dealing with
different types of the customers to distinguish the process of the different actions.
3.1.1 Dine in Orders
When the customers coming into the restaurant, the first you need to do is to ask the
idea table that they want to be seated or arrange an appropriate table for them. To
operate on the POS Expert:
Page 8 of 50
Simply click the “Dine in” button once which is on the top right hand corner of the
screen.
Figure 7
Choose the right table number in the coming window by one click on the desired table.
Suppose we choose table ‘t6’ so that we just click on the ‘t6’ straightaway.
Figure 8
If there are 5 people coming for dinner, click the 5 button once followed by one click
of the green “Enter” button.
Page 9 of 50
Figure 9
Figure 10
Now you can take orders for the customers on the next coming screen. Certainly,
whenever you want to check the status of each table within the restaurant, especially
during the rushing hours, just go back to the “dine in” window and then you can
identify which table is available ( in white ) for customers or occupied ( in red ).
3.1.2 Take Away Orders
Customers also can take food away rather than sit in the restaurant. 1. Click the “Take Away” button (
) from the top right hand corner
of the main screen.
2. On the coming screen, click the “Take Away” button, then you are able to
choose the dishes of what the customers want from the current window. Also,
you can identify the order number which is on the left top of the screen.
Page 10 of 50
Figure 11 3.1.3 Telephone orders
Taking telephone order is pretty much same like dealing with the taking away order.
1. Once you get an order on the telephone, click the “Take Away” button once.
2. Choose “Telephone Orders” from the coming window.
Figure 12
3. Then you will see there is another window coming up which is called “customer”. Ask
for the phone number from the customer and then put it into the single table named
“Cust. No.” by using the on-screen keyboard which is on the bottom of the current
window.
Page 11 of 50
Figure 13
4. One click the green “Enter” button, there are two possibilities that could happen.
•
If the customer exists in your database already, all the information about this
particular customer will come up to the window automatically, what you need
to do is just one click of the green “select” button from the top right hand
corner of the screen and then you can proceed to take orders from the
customer.
•
However, if you are dealing with a new customer, the system would tell you
that the customer is not found, do you want to create it. Select “yes” to
proceed, then put the customer’s basic information like family name, given
name, etc. into the tables, finishing with one click of the “commit” button
which is in the top left hand corner of the window.
The next coming window is the same like the one presented above. And you can identify this
order is for which person from the left top of the screen.
Page 12 of 50
Figure 14
3.1.4 Enter products
When the main window loads, your cursor will be initially located in the Barcode field
Figure 15
There are three ways to enter the products.
• When the cursor is in this field, you can simply scan the barcode.
• You can enter the product barcode by keyboard or touch keyboard
Page 13 of 50
•
You can also click the category on screen, then click the product panel to
select the product
Once the item is found, it will be shown in the Sale Panel as in the following figures.
Figure 16
If it is not necessary to modify the price and quantity, you can keep entering the items
until you get to the payment step. Otherwise, read through the next section
Price/Quantity Modification for more information.
3.1.5 Taste/Extra of a certain product
Customers are entitled to ask for the choices of flavours or some extra stuff.
Sometimes for a particular product, it may have several options for the ingredients and
flavours so that customers can choose their favourite ingredients and flavours from the
restaurant’s available options. The operation regarding this is demonstrated as
following:
1. Customer orders a medium size BBQ chicken Gourmet Wood fire Pizza. Find the “GW
Pizzas” from the category buttons and click it. Now all kinds of pizza belonging to this
category have been shown on the screen.
Page 14 of 50
Figure 17
2. Click the first one “Gourmet Woodfire Pizza (medium)” which is what the customer
wanted. At the next coming window, all kinds of GW Pizzas have been listed on the
screen, tick the BBQ chicken from those and then press the ‘OK’ button. Then you will
see the “Gourmet Wood fire Pizza (Medium)” with “BBQ Chicken” has been shown on the
order list area.
Figure 18
Page 15 of 50
3. Click the ‘change Orders’ button once and you will see the function panel
coming up.
4. Sometimes customers have their own preferences on taste and flavor. The
system therefore provides the options of special flavor for customers. As we
mentioned above, customer ordered a medium size “Gourmet BBQ chicken
pizza” which contains some garlic, feta cheese and some herbs on the
original recipe. If the customer does not like the garlic, feta cheese and
coriander on the pizza, simply highlight the specific item by one touching from
the orders window and then find the “Taste” button below the orders window.
Click it once and you will find out all the special tastes have been ranked on
the right hand side of the screen. Tick the options of “No garlic”, “No feta” and
“No coriander” from them finished with one click of the green “ok” button on
the bottom. A customized order has been done and you will see all the
options according to the customer’s request have been listed on the orders
window.
Figure 19
5. Certainly, if customers want to put some extra stuff on their ordered products,
you are able to do it in a similar way like changing the “taste” mentioned
above. Find the “extra” button from the same area and then tick the options
on the right hand side of the screen finished with one click of the green “ok”
button. Then the extra stuff has been successfully added on the customer’s
orders.
Figure 20
Page 16 of 50
Figure 21 Basic functions and operation skills
For considering the frequently happened matters in a real restaurant, the system
provides the operators a bunch of keys and buttons to simplifiers their work to make
the workplace efficient and effective. The followings are the most frequent actions you
may experience:
3.1.6 Change the quantity
A customer ordered 5 cans of coke. For this circumstance, you do not need to waste
your time to click the ‘coke’ button for five times. There are three simple ways to get it
done:
Method 1
1. Swap to the ‘Payment Panel’ by one click of the ‘Tender’ button.
2. Press the quantity you want to enter, for this case, we have 5 cans of coke,
press the ‘5’ button followed with one click of the ‘*’ button, and then click the
coke button. The 5 cans of coke have been listed on the orders window.
Page 17 of 50
Figure 22 Method 2
1. Click the coke button once.
2. Click the ‘Quantity’ from the ‘function Panel’.
Figure 23
In the coming window, press the ‘5’ button followed with one click of the ‘enter’ button.
Now you can see the 5 cans of coke have been shown on the order list window.
Method 3
1. Click the coke button once.
2. Change the quantity by clicking the ‘+1’ or ‘-1’ button to adjust it to 5.
Page 18 of 50
Figure 24
3.1.7 Price/Quantity Modification
How can you change the price and quantity? Select the item in the Sale Panel, and
once it is highlighted, a copy appears in the barcode scanning area.
If you wish to change the quantity, click the “Qty” button in Amount / Quantity Control
area, or the “Price” button for price modification.
For example, if you will like to change the price of “Peroni” item’s price and the quantity
Figure 25
Page 19 of 50
Select the “Peroni” item in the Sale Panel as in the above figure. The item in the Sale
Panel will be highlighted, and in the barcode scanning area, there is a copy indicating
the price and quantity.
Figure 26
Once you press the Change Order button, then press the price button, and enter the
desired price directly using the popup number keys as the following figure.
Figure 27
Quantity modification is similar to modifying the price, except for pressing the Quantity
button rather than Price key.
3.1.8 Payment Input
As soon as all items have been input, you are allowed to finalise the payment step.
The standard method of payment input is by entering the payment amount in the
Barcode/Tender/Disc field and then selecting the payment type as shown in the
following figure.
Page 20 of 50
Figure 28
According to Figure 28, the bill is $47.00 and the customer pays $50 cash. Enter 50
in the Barcode/Tender/Disc field or press the amount buttons. (Click “$50”). Then
click CASH button to get the confirm window.
Figure 29
The System asks whether to commit the transaction, with $3.00 change. If yes,
simply select yes to print a docket, otherwise click No to step into the Other
Payments window.
Page 21 of 50
Figure 30
There are four columns in the payment table: payment method, abbreviation of the
payment method, foreign exchange rate (base on AUD) and amount.
Payment method(s) can be initialised in section 4.4 Payments. Normally (Figure 30),
the first row is always cash input and you only need to input the amount to continue. if
customer wishes to pay AU$20.00 cash and AU$27.00 as EFTPOS, type the amount
as shown in the above figure.
Figure 31
______________________________________________________
If the payment amount is same as the bill amount, and the customer is
paying by cash or EFTPOS, you can simply click the CASH button or
EFTPOS button without entering the amount in the Barcode/Tender/Disc
field to make the payment.
Page 22 of 50
______________________________________________________
3.1.9 Finish your transaction
Click Yes in the Confirmation window as shown in the following figure, to open the
Docket Summary window.
Figure 32
In the Docket Summary window, docket will be printed and the till will be opened as
well. Finally, select Close to start a new sale.
Figure 33
Please be aware that in Figure 33, the small docket will print automatically. If you will
like to print the A4 docket, please refer to section 0
Delete an item
3.1.10
Delete a particular item
1. Customer wants to cancel his ‘Choc Fudge Brownie’. So what you need to do is
just one click of that item to highlight it.
2. Press the ‘Void” button once from ‘function Panel’ and then that item has been
completely removed.
Page 23 of 50
Figure 34 3.1.11
Clear the entire order
1. Get into that order no matter what it is. (Dining in, Taking away)
2. Click the ‘Clear Table’ button once.
3. In the coming window, click ‘yes’ to confirm. Then that order has been removed
from system.
Figure 35
Page 24 of 50
3.1.12
Membership card
Customers can hold membership cards to get points on a sale. The sale would change into
points and put into the membership account. They can claim it later to buy other products.
There are 2 ways to a membership card in a sale, you need to do it on the sale window,
before payment, or before sale.
• Select a patient.
Click on the button “Customer” (
) at the top-right corner, then click on
“Browse”, or enter conditions to search, then click on the line, and at last click on “Select”
button.
•
Scan or enter a membership card number (Usually starts with “M”).
After the above you have selected the customer. The points gained would be displayed on the
bottom bar of the window.
You can also go to Sale window \ Customer, then browse and select a customer. On the
“Sales” tab of the customer information, you can view the points and value.
Figure 36
To change the points getting from sales, and the value of the points, see section 4.6 .
To claim the points, before you make a payment in a sales, enter “-“ and scan the
membership card, and the value of the points will be deducted from the sale.
Page 25 of 50
Figure 37
If free bonus is set, when “Claim when quantity >” is set to 6, the customer can get his sixth
product for free.
Figure 38
3.2 Payment
POS Expert gives you flexible payment options to fit your business requirements. It
accepts kinds of payment methods that generally include cash, credit card and Eftpos.
Page 26 of 50
All you need to do is to use the different buttons on the ‘payment pad’ to finish the
transaction.
3.2.1 Cash Payment
For that order, the bill is $77.5. If customer gives you the exact amount of that bill,
click the ‘Cash’ button once only; If customer gives you one $50, one $20 and one
$10 notes as well as ‘Cash’ button, press those four buttons once; If customer gives
you $78, simply click ‘7’, ‘8’ and ‘Cash’ button.
2. Meanwhile, the cash draw will be opened up to and then you need to confirm the payment by clicking the ‘yes’ button in the coming window. Obviously, from that window, you also can identify how much change you need to give to the customers. Page 27 of 50
3.2.2 Card Payment
If customer wants to pay for the bill by card, press the ‘Other Types’ button from the
payment pad. In the next coming window, choose which kind of payment method you
are applying, finish with one click of the ‘Commit’ button.
3.2.3 Mixed Payment
In that order, if customer would like to pay $30 in cash and $47.5 in EFTPOS. You
still need to choose ‘Other Types’ from the payment pad. In the coming window,
input the cash amount of $30 in the cash table by using the pin pad and $47.5 in the
EFTPOS table.
Click the ‘commit’ button followed by one click of the “yes’ button to finish the
transaction.
3.3 Advance POS Expert Front Operation
You are a junior POS Expert Front operator and you are able to finish a standard POS
Expert Front implementation now! However, not all the transactions are as simple as
the examples above. How will you apply a discount to the item? How will you handle an
Page 28 of 50
incorrect item input? In the following section, we will introduce more advanced
operations to make you a professional!
3.3.1 Discount Setting
In POS Expert system, the “discount” setting is applied for one transaction only. In
other words, when you set a discount for the current transaction, it will be returned to
“No Discount” after the transaction is completed. There are four ways to apply the
discount:
(1) Use the price window .
Figure 39
Discounts are available in three types: The % shortcut uses percentage based
discounts, the direct value input applies a “dollar-off” type of discount and
“Rounding” is “$XX.X0” or “$XX.00”.
For example, if an item were selling at $27.60, If you will like to apply 5% off,
input “5%” to get $26.20.
(2) Set the customer grade for discount (Please refer to section 8.5 in POS Expert
Back Office for more detail)
(3) Set the discount/customer card (Please refer to section 2.8 and 2.9 in POS
Expert Back Office for more detail)
(4) Set the Docket Discount / Discount Code in the option page:
Click Other Func to open the Other Functions window as shown in Figure 40,
then apply the Options buttons to open the Options window. Select the
Payments page, you will find Docket Discount and Disc Code for discount
setting (Figure 41).
Page 29 of 50
Figure 40
Figure 41
For example, if your shop is running a promotion, and all products are 10% off, it
is easy to adjust the discount by Docket Discount value. Just type 10 in the
Docket Discount field and check the Auto Discount .
If you will like to produce a special code (the code is only applied to the
Barcode/Tender/Disc field of the Main Window) for discount, type the value in
both the Disc Code and Docket Discount field. (the Auto Discount Option
should be unchecked)
For example, suppose the Docket Discount is “18” while the Disc Code is
“181818”. Type“181818” plus the Enter key in the Barcode/Tender/Disc field
(see below) and “18% off” will be displayed on the discount button (Figure 43).
Page 30 of 50
Figure 42
Figure 43
__________________________________________________
Disc Code can be printed as a barcode label in POS
Expert Back Office, such that whenever you scan the
barcode label, the system will smartly change the discount
to the value you pre – defined.
_____________________________________________
3.3.2 Binding a Customer to the Sale
To attach a specific customer to a sale, click Other Func then Customer to get the
Customer window. Apply the Select button to attach the customer highlighted to your
current transaction and the window will close automatically.
Page 31 of 50
Figure 44
3.3.3 Void Item
You may need delete item during POS Expert Front operation. Click the item you
want to delete to make it highlight, then click Change order button, you will see void
button , click it ,you will delete the item from the list
Figure 45
Page 32 of 50
Figure 46
If you want to clear all items of this transaction, click “clear table” button, see the
above figure.
3.3.4 Refund
There are several situations where a refund transaction is necessary, each differs
slightly in process. This is, of course, assuming that the refund is valid and authorized
– the following section describes how to perform refund transactions in POS Expert
Front.
The two main methods of entering a refund into the system are as a newly scanned
transaction or by reloading an old sale.
(1) Newly scanned transaction: This is similar to the standard POS Expert Front
sale, except the quantity input requires a “minus” value. For example, in the
following figure, modify the Qty then press Enter to reverse the quantity.
Page 33 of 50
Figure 47
(2) Reloading an old sale: You can reload the previous sale details using the
History button. The window in the following figure is the browsing window
helping you to choose the specific sale. Once you find your sale, apply the Select
key and all data will be transferred to the POS Expert Front Sell table. You can
simply press the Refund button to reverse the quantity or void the non - refund
record(s) and reverse the dedicated item(s) in turn (Figure 49).
Figure 48
Page 34 of 50
Figure 49
__________________________________________
If a new sale exists whose content (item list) is the
same or similar to a previous one, a short-cut can be
used: Reload the old sale first, and then apply the
Refund button twice!
__________________________________________
3.3.5 Cash In/Out
If it is necessary to record any cash procedures without a sale transaction, Cash
In/Out is the best way to process. Try to click the Cash In/Out button to activate a
cash operation window as Error! Reference source not found..
Figure 50
Type the amount in the Amount text box, add comments (optional) then simply click
the Cash In or Cash Out button depending on your circumstances. (Comments are
defined in the Cash In/Out Module of POS Expert Back Office, please refer to section
8.4 in POS Expert Back Office)
Page 35 of 50
3.3.6 Cash Up
The Cash Up function allows you “Reset” your drawer’s cash status, helping you
check your transaction result compared with the drawer status in reality. In POS
Expert Front, there are two types of Cash Up: by Session or By Daily.
It is obviously that the two methods are different from the period calculation. The start
date of Cash Up by Session is the last ending date of Cash Up by Session. In other
words, there is no limit to the Date and Time for cash up, and the period is not
separated by date logically. However, Cash Up By Daily is critically dependent on the
“Date”.
To run the Cash Up, click the Other Func button then select the Cashup (Session)
or Cashup (Daily) key. The Cash Up by Session message window is shown below.
The user will need to enter the details of the drawer summary.
Figure 51
The Cash Up By Daily message window is shown in as below.
Figure 52
3.3.7 EFTPOS Device
POS Expert Front supports two types of EFTPOS devices: Ingenico PC EFTPOS
and Quest EftposPlus. To use the EFTPOS device, you must set up the EFTPOS
device software (Please refer to section 2.2.1 EFTPOS Device) and enable the
EFTPOS in POS Expert Front. (Please refer to the section 4.3 OPOS / EFTPOS)
If you are at the stage of starting to make a payment like in the following figure, press
the EFTPOS button to open the EFTPOS status window as shown in Figure 54.
Page 36 of 50
Figure 53
Figure 54
On the side of your EFTPOS device, as soon as you swipe the card, select the
account and enter the pin number in order, the EFTPOS status window will be
displayed as Error! Reference source not found. if the account input is correct.
Figure 55
In the above figure, the transaction of EFTPOS transaction is approved. If the pin
number combined with the account type is incorrect, the transaction will be declined.
At the same time, no matter what the transaction result is, docket printer will print the
EFTPOS transaction record.
Finally, if the EFTPOS transaction is approved, confirm and finish the transaction as
usual and create a new sale in sequence.
Page 37 of 50
If you are at the stage of starting to make a payment, press Other Payments to open
the Other Payment status window. Select the correct type of payment and press on
Commit to proceed with the transaction. You will be able to place a surcharge for
using a credit card.
3.3.8 Sale Record
Normally, the Sale Record and Sale Summary are shown in POS Expert Back Office.
In POS Expert Front, it is also a possible to check the Sale Record for convenience.
(1) If you are going to browse a sale record, use the History button to open the
Search For Sales window.
Figure 56
(2) Another way to browse the sale record is by reviewing the docket. Dockets are
permanently backed up as photographical type on your hard disk. (Unless your
computer is out of space to store the graphics or you do not check the Backup
Docket to File in Options setting). Click Other Func then the Browse Dockets
button.The following window will open for docket review.
Page 38 of 50
Figure 57
3.3.9 Price Level
You can schedule price change of certain products at a specific time. To setup the
schedule, click the Other Func button then select the Price level (Figure 58) Here,
Figure 58
3.3.10
Attendance
With the attendance function, staff can Check In/Check Out of the cash drawer. This
will create a log in the POS Back Office so you will be able to see which staff were
working on a particular cash drawer during that time. Before the staff begin work, they
check in by pressing the Other Func key, then the Attendance key.
Staff put in their password and press Check In key, then Yes key to login. After work,
do the same to check out.
Page 39 of 50
Figure 3.2.14.1
Figure 59
3.3.11
Other modules POS Expert Front
In POS Expert Front, besides the functions mentioned above, some other modules
are also useful for your POS operation. For example, you are allowed to change the
staff (user) without restarting the program, or print the last transaction’s receipt with
only one click!
(1) Open Till
If you do not check Don’t Open Till in the Options window, you can open the till
(drawer) by clicking Other Func then the Open Till button.
(2) Logout
Press the Logout button in the Other Functions window to log off from a current
staff member(user). A login window will pop up, allowing you re-login with a
different staff member(user).
(3) Exit Program
Close POS Expert Front.
4 Options
POS Expert Front provides user-friendly modification options, allowing much easier
front control. In the Main Window, click Other Func then Option, and you will be
guided to an option panel. It is divided into four categories: General, Peripherals,
OPOS/EFTPOS and Payment. In this section we will introduce these four categories in
detail.
4.1 General
4.1.1 Overview
As shown in the following figure, the General page is composed of three parts:
General Options, Skip Fields and Rounding.
Page 40 of 50
Figure 60
4.1.2 Field Definition
General Options
Auto Remind – Low Stock: Remind the user if the stock is lower than the limit.
Be aware that the limit is set in the POS Expert Back Office.
Don’t open till: Till (Drawer)cannot be opened if this box is checked.
Back up docket to file: The invoices will be stored in PDF file into your
designated path automatically.
Multilanguage Stock Description: The item description will be printed out in
both languages in the dockets.
Beep When Enter Non-existing Stock: Set the Beeping type for when an item
cannot be found.
Skip Fields: < to be filled in >
Rounding: Depends on the business’ requirements, you can choose from ‘No
rounding’, ‘Nearest 5 cents’, ‘Nearest 10 cents’ or ‘Nearest dollar’.
Opening Till Need Password: This option is temporarily not available.
Backup Docket to File: It is suggested to check this option so that the
system could stores the docket as a graphical files. It is a copy of your
docket printed out from your docket printer.
4.2 Periperals
4.2.1 Overview
Page 41 of 50
Figure 61
As in the above figure, the Peripherals option allows you initialise the docket printer,
customer display, electronic scale and cash drawer.
4.2.2 Field Definition
(1) Peripherals
Use Serial Scanner: the scanner is serial port instead of USB port. Choose the serial
port.
Use Customer Display: To enable the customer display, you need to tick the box in
front of the ‘Customer Display’. In addition, the selected com port must be exactly
same with the com port where you plug the customer display data cable in.
Use Electronic Scale: Same settings as the customer display. Also, you already
have some options to choose from the list underneath.
Cash Drawer Used: It is significantly important for the premises where there is more
than one cash register. You must distinguish the cash draw in different letters from
here. Duplicated cash draws may lead misleading sales reports.
(2) Docket Printer
Set Printer: Set the docket printer module in the Printer window.
Don’t Print Sales Dockets: Checked if you are not required to print docket or you
do not use the docket printer at all.
Preview: If unchecked, docket will be printed automatically at the end of each
transaction. Otherwise, you press apply Print Docket button in Figure 33 for
printing.
Print Docket Logo: Logo is printed on the docket if checked.
(3) Label Printer
There are maximum two label printers which could be set for you to print every
single item in label format. The configuration method is the same as the settings of
Page 42 of 50
the docket printer. However, as soon as you finish your label printed setting s here,
you still need to edit its configuration in your POS.ini file to assign print task for one
printer or one of each. Please refer POS.ini file explanation for details.
(4) Docket Printer Type / Cash Drawer
Some control commands are sent directly to the printer. Please refer to the
command code manuals for the printer you are using.
Drawer Trigger: The drawer is connected to the printer, and this command will
open the drawer.
Customer Displ: This command will send text to the LED display that connects to
the printer
Cutter: This command will cut the paper fully or partially
Double Width: The upper one is the command to start double width. The lower
one is the command the end double width.
Printer: This is the profile number associated with Peripherals.ini file. The docket
name is [Docket Printer <number> ]. See also the Peripherals.ini comments.
(5) We recommend you set up the other fields in Peripherals Options as default. The
option values depend on the hardware connection and the
printer/drawer/scale/customer display driver.
4.3 OPOS / EFTPOS
This Option page allows you set up the OPOS / EFTPOS driver and the Touch
Screen Keyboard.
Figure 62
You can set up your OPOS devices to connect with the systems by simply putting the
devices’ names into each text box.
Page 43 of 50
4.4 Payments
4.4.1 Overview
Payment Option allows you initialise the payment methods and the exchange rate for
foreign currency respectively.
Figure 63
4.4.2 Field Definition
(1) Available Payment Types: Different payment methods can be input using the
Add button on the right of the table. Some Payment types are fixed such as Cash
and Account due to special requirements in the transaction.
• To add a new payment type, click the ‘Add’ button once, put the name into the
‘Payment type’ finish with one click of the ‘Enter’. The surcharge is also
available to be edited. For instance, the surcharge for ‘American Express’
card user is 10% of the whole amount of the bill, so we put 10 into the
surcharge field of the ‘AMEX’.
•
To delete a particular payment type, highlight that one and then click the
‘delete’ button once.
•
If you click the ‘Reset’ button, all the initial payment types will be listed into
the payment type field.
Exchange Rate: This system supports multi currency as part of the payment
methods. The settings are pretty much the same as what you do for the payment type.
However, you must put the AUD at the first as the default currency.
Page 44 of 50
Last Daily Cash up Time: For some restaurants, the closing time may vary from the
calendar day so that you need to define your business daily cash up time from here.
(2) Docket Options: If checked, RRP / GST / Extended Description will be printed
on docket as well.
Include RRP on docket: The Recommended Retail Price (RRP) for each item will be
shown on the docket. For example, if you give customer a 1dollar off discount on a
bottle of coke, the original price $3.5 and the after discount price $2.5 both will be
presented on the docket.
Include GST Amount: The sale price and GST charge both will be shown on the
docket.
Include Ext Description: The extended item description will be shown on the docket.
ABN No.: You can input your ABN (Australia Business Number) here and it can be
printed on the docket.
No Tender (Order Only): If you have more than one POS terminal at your premise
and you only want one or two terminals doing the transactions, tick this option to
disable the payment function for those which only can take orders from customers.
Open Till For Cash Sales Only: The cash draw will not open unless otherwise you
are preceding the cash transactions.
Show Category Summary in Cash up Docket: In your cash up docket, the category
summary will be shown if you enable this option.
No payment Confirm Dialog: For some fast food restaurants or cafes, they want to
finish each transaction in a very short time during the rush hours. Tick this option to
avoid the payment confirmation window coming up.
4.5 Prices
Figure 64
Page 45 of 50
It is common that the prices are different between dining in and taking away. POS
Expert provides four levels of prices for every single item. For setting the price levels,
please refer the POSBACK manuals for details.
Dine In Price Level/Take Away Price Level/Telephone Order Price Level: You
can choose same or different price levels from level1, 2, 3 or 4 for those three options.
Docket Discount: You can set a particular discount for every single docket like 10%
off of the docket amount when your shop is in sales promotion.
Disc Code: If you enter this code in the “barcode”, the discount is valid for this docket.
Auto Disc: If you tick this option, the system will deduct the equivalent amount
discount as you setting in ‘Docket Discount’ from every docket.
Max Discount: This means the maximum discount that POS operators are allowed to
give customers cannot exceed the percentage you set from here.
Delivery fee: You can set a particular amount here like $5 as delivery charge for
every telephone delivery order.
Select Price in Sidebar: A price button will be shown on the right side of your POS
window to let you select the price level flexibly.
4.6 Membership settings
•
•
Figure 65
There are 2 options, and usually you just use one of them
Use Point System
For example, if you check “Use Point System”, and set “$1 Sales = Points” as 10,
and “Point Claim Value$” as 0.01, it means for every dollar the customer spends
in your shop, he gets 10 points, which equals to 10 x 0.01 = 0.10 . The customer
can claim it later when he buys other products.
Get Free Bonus
For example, if you check “Give Free Bonus”, and “Bonus Categories” is set as
th
“Hot Drinks”, and “Claim When Qty>” is 6 , it means the 6 product the customer
purchase(accumulated) in this category will be free.
Page 46 of 50
Prefixes
• Membership Barcode Prefix : Membership holders can get points from sales.
• Gift Card Barcode Prefix: When the barcode entered starts with this, this card
will be consider as gift card. The customer can charge whatever amount, and give the
gift card to a friend.
• Prepaid Barcode Prefix : When the barcode entered starts with this, this card
will be consider as a prepaid card.
4.7 Display
Figure 66
Enable Second Screen Display: In some shops, the POS terminal may have dual
screens that one for the operator and the other faces to the customers side. The
second screen display can present the sale information at the same time while
operator taking orders, but also it can play some advertisements when POS terminal
is idle. You have two styles to choose from for the second screen display.
Enable Kitchen Ready Notification: When the food is ready (from Kitch Touch), the
number will be displayed on POS Front. (For Pro version only)
Enable DVR POS Display: The real time sales information can be shown on your
DVR screen of your internal CCTV system synchronistically
Enable LED Display: You can enable LED display connecting with POS terminal.
Set the ‘LED IP Address’ and ‘LED Port’ to get connected.
4.8 Touch Keypad
Page 47 of 50
Figure 67
4.9 Others
Page 48 of 50
Figure 68
Sale Grid Row Height: You can adjust the sale grid row height from here. The
default size is 300. You can widen it or narrow it by changing the value of it.
Sale Grid Font Size: You also can adjust the font size to make it bigger or smaller by
altering the value of font size to make it greater or lower than the default size 12.
No Sequence Number in Sale Grid: There is no sequence number in the front of
each single item in the sale grid.
Show Item status in Sale Grid: Whether the item has been sent to the kitchen or not,
you can identity from the text colour on the screen.
Default Staff: Input the default staff number in here. The system will recognize this
staff as the logged on staff no matter who log into the system while POS opening.
Default customer: If no customer is entered, use this default customer.
Default Site: If your premise has been divided into more than one site in the POS as
the dining in area, you can put the name of the most frequent one here as the default
site. The system will bring you to this site when you click the ‘Dine In’ button.
Shut Down Computer When Exiting Program: The computer will shut down
automatically when you close the program.
Keep uncommitted orders for: Keep it for certain seconds.
Closing MSG Dialog after _ seconds: The system will close the message dialogue
box after indicated time period.
Sale Idle Mode starts after _ seconds: The system will go back into the idle mode
in a indicated time period.
Kitchen Picture Folder: You can define your kitchen picture path from here.
Add Group Line for Kitchen Docket:
No Guest Number: Only for ‘Dine in’ mode. When you press the ‘Dine in’ button,
there is no guest number window coming out.
No docket discount: The docket discount function is disabled.
Audit Voided Items: All the items, which are voided by operator from the system, will
be audited automatically into database.
Use Size: The size option can be displayed on the
Delay sending orders for take away: If you have a lot of orders going to the kitchen,
the system will send the take away orders after dining orders.
Page 49 of 50
Print take away ticket: The printer will print out the take away tickets for take away
orders by enabling this option.
Enable Telephone Order: You can enable or disable the telephone order function
from here.
Print Docket for Voided Items: When you delete any sent items from the system,
the printer will print out those items automatically.
Use Random No. for Take Away: The take away order number will be ranked in
desultory.
Page 50 of 50