1
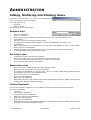
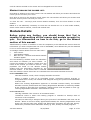
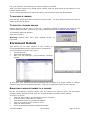
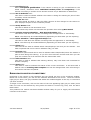
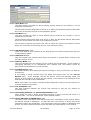
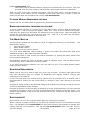
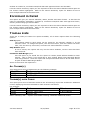
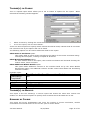
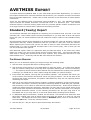
All mail to: GPO Box 2705 Melbourne, Victoria 3001 Telephone: 1300 660 152 Facsimile: (03) 8610 2186 Email: [email protected] Ted User Manual TABLE OF CONTENTS Table of Contents ......................................................................................................... 1 Administration.............................................................................................................. 2 Adding, Modifying and Deleting Users............................................................................ 2 Provider Details .......................................................................................................... 3 Delivery Location Details ............................................................................................. 3 Moving Ted to a Server ............................................................................................... 4 Backup of Ted data ..................................................................................................... 4 Entering AVETMISS Standard Data ............................................................................... 4 Postcode finder .......................................................................................................... 5 Updating Ted ............................................................................................................. 5 Main Menu Options ..................................................................................................... 5 Courses and Modules .................................................................................................... 9 Course Details ............................................................................................................ 9 Module Details ......................................................................................................... 11 Entry Wizards .......................................................................................................... 13 Inserting Modules into a Course ................................................................................. 14 Trainees .................................................................................................................... 16 Trainee Details ......................................................................................................... 16 Enrolment Details ..................................................................................................... 19 Marking Enrolments .................................................................................................. 23 Marking Captions...................................................................................................... 23 Print Functions ........................................................................................................... 25 Provider Summary .................................................................................................... 25 Course Summary...................................................................................................... 25 Module Summary ..................................................................................................... 25 Trainee Summary ..................................................................................................... 25 Enrolment Summary (Best option for printing) ............................................................. 25 Enrolment in Detail ................................................................................................... 26 Trainee Lists ............................................................................................................ 26 AVETMISS Export ....................................................................................................... 29 Standard (Yearly) Export ........................................................................................... 29 Funding Exports ....................................................................................................... 30 Avetmiss in Victoria .................................................................................................. 31 Avetmiss in Queensland ............................................................................................ 31 Avetmiss in New South Wales .................................................................................... 31 Avetmiss in other States............................................................................................ 31 Ted User Manual 27/07/2009 Page 1 of 31 ADMINISTRATION Adding, Modifying and Deleting Users In order to access Ted, you must be a designated user; this is achieved in this section. From the main menu: Click File Click Security. The following screen will appear: ADDING A USER Click the Add button. Enter a username If the person you are adding is to administer Ted, click the Administrator box Click ENTER Save the record by clicking the Save button. The password dialogue window appears. Enter the password for the new user Click ENTER Verify the password you entered for the new user then ENTER. If both entries match, focus is set to the OK button. Click Ok to apply the password to the new user and close the password dialogue. To add additional users, repeat these steps. DELETING A USER To delete a current user from the system Click on the user name to remove then, click the Delete button. If you are sure that you want to continue, click the Yes button. If you are not sure, click the No button. MODIFYING A USER Click on the user name to edit then, click the Edit button. Enter the new values then click the Save button. To change the password of a current user, click on the user name whose password is to be changed, then click the Password button. Enter the current or old password, Enter the new password Verify the new password Click OK to save the new password and close the dialogue window or Cancel to ignore the changes and close the dialogue window. CHANGE PASSWORD The current user can change his or her password without opening the security window. From the main menu: Click File Click Change Password The following window appears Enter the current or old password Enter the new password Verify the new password Click OK to save the new password and close the dialogue window or Cancel to ignore the changes and close the dialogue window. Ted User Manual 27/07/2009 Page 2 of 31 Provider Details Provider information is entered in the setup phase of Ted. It is important to update this screen when changes occur. From the main menu Click Provider Click Provider Details The screen opposite should appear. Click Edit and amend details Click Save and then Close Delivery Location Details At least one (1) location record must exist in order to enrol trainees in courses and modules. This will be evident later when talking about enrolling trainees to a course. To manage location details, from the main menu: Click Provider. Click Location Details Both the List – Location and Location details windows appear. The List – Location window shows the location identifier and name of each location you have entered. To retrieve, and show the location details of a location appearing in the list, double click its name, this will populate the fields in the location details window with the recorded information. Identifier field: Each location must have a number or code as its identifier. This identifier can be made up by the RTO; one suggested method is to use the location's postcode. Name field: This is the name of the delivery location as referred to by the RTO. Suburb field: This field contains the suburb or town of the location. This field is validated using built in postcodes. Postcode field: This field contains the postcode of the location; it is automatically inserted after you have entered a valid suburb or town. State field: This field contains the state in which the location is situated. It is automatically inserted for you after the postcode of the suburb or town is applied to the postcode field. TO EDIT AN EXISTING RECORD Double click the location name in the List – Location window. Switch to the location details window by clicking the window caption or body of the location details window. Enter the changes as required. Click the Save button. TO DELETE A LOCATION RECORD. Double click the location name in the List – Location window. Switch to the location details window by clicking the window caption or body of the location details window. Click the Delete button. The following dialogue appears. Ted User Manual 27/07/2009 Page 3 of 31 If you are sure that you want to continue and delete the record, click Yes. NOTE: Any record you delete cannot be recovered. MOVING THROUGH THE LOCATION LIST Click Next to advance to the next record. The List window will follow your actions and show the record you are currently on in blue. Click Prev to move to the previous record. Again the List window will follow your actions and show the record you are currently on in blue. To close the List – Location and Location Details windows click the Close button on each window. Moving Ted to a Server Ted can be moved onto a server for the use of others at their stations. Whilst Ted can be viewed by many users unless extra licences are bought by the school only 1 person may enter details at a time. Copy the current Ted folder (with all included files & folders) onto a server drive. NOTE: The server drive needs to be seen with a mapped drive letter by the machines where Ted will be run from. For each machine that you want to run Ted on create a shortcut to the Ted Central.exe (e.g. to M:\Apps\Ted\Ted Central.exe). Backup of Ted data It is most important that Ted is backed up regularly to protect you from the need to re enter data. Ted has a data file listed in the Ted directory called Ted.mdb. It is necessary to follow normal backup procedures when backing up your database. Entering AVETMISS Standard Data The AVETMISS validation system ensures that the information you enter complies with the business rules of AVETMISS. Fields (not being drop down list boxes) where these rules apply are checked against the lookup tables of the validation system. If the information you enter cannot be validated, one of the classification windows opposite will be activated. The validation system finds the closest matching record and highlights this record. If there is more than one record that closely matches the entry, the possible choices are shown as a result of closest match at the top of the classification list. If you type an entry that is an exact match, the system validates the field and moves to the next data entry field without calling up the classification list. If you are satisfied that a code description appearing in the list is correct, double click the description or click the Select button. In either case, the information will be transferred to the field from which the validation system was called. While a classification list is open, you can initiate a new search by entering the criteria and clicking the Search button. Information appearing in the lists is hierarchal in nature. A + symbol appearing at the beginning of code descriptions indicate that the branch can be expanded to show child members of the parent branch. As you expand each level in the hierarchal tree, the + symbol is replaced by a – symbol. The lowest level in any particular branch is also indicated by a – (negative) symbol. To expand a branch with a + symbol, double click the branch description. Ted User Manual 27/07/2009 Page 4 of 31 To collapse a branch with a – symbol, double click the branch description. Fields, which are drop down list boxes, are filled with valid AVETMISS code descriptions only. This also applies to fields that are state specific and required to be exported for statistical collections. Postcode finder Ted does not allow you to enter postcodes directly into the postcode fields; neither does it allow you to select the abbreviated state names required for export. Instead, you are required to enter a valid suburb or town name, if the name you enter is accepted, Ted will populate the postcode field with the correct code and select the abbreviated state name based on the postcode. It will also, correctly distinguish state name codes from both NSW and the ACT whose postcodes both begin with 2. If you enter a suburb or town name that exists in more than one state, Ted will call the postcode finder with the first of the duplicate locations highlighted. To accept one of the localities, double click the name or click the name, then click the OK button. You can also initiate a new search by typing a name in the ‘Search for’ field of the postcode finder, as you type, the first of the locations beginning with the letters that you type is highlighted. This is designed to speed up the process of finding postcodes and in the majority of cases you will find the suburb before typing its full name. The search can also be made against the postcode itself, to do this, the ‘Order by’ option should be set to Postcode. Updating Ted Ted will periodically require updating as newer versions are released. Always click the Update to latest version of Ted option on the first screen before you sign on. Main Menu Options The main menu bar has eleven (11) items; these are used to access the various data entry windows of Ted. Each will be explained in order of appearance. FILE MENU Configure menu item: After the first running of Ted, this option allows you to indicate if Ted is to automatically generate the trainee identifiers or go back to manual entry of trainee identifiers if already set to automatic. Security menu item: This option allows you to manage user information. You can Add, Edit and Delete users. Change the passwords of users and change the user type. Marking Captions menu item: The option allows you to mange the marking captions (such as Competent, Withdrawn etc…). You can use your own terminology and link these captions to the AVETMISS result codes. Show Internal Identifier menu item: This option is only needed when receiving support from Omniscient Australia. Change Password menu item: This option allows the current user to change his / her password without the need of opening the Security window. Log Off menu item: This option allows the current user to log off and prepare the system for the next user. Ted User Manual 27/07/2009 Page 5 of 31 Exit menu item: This option ends the execution of the program and returns to the Ted Central screen. PROVIDER MENU Provider Details menu item: This option allows you to edit the provider details entered when Ted is first run. Location Details menu item: This option allows you to enter as many provider location details as you require. Each location record is linked to the provider record and can be edited or deleted as required. CLIENT MENU Client School menu item: This option allows you to enter and edit client details. These can represent companies that have multiple trainees training with you. Alternatively you can use these client details to represent anything you wish where you would like to print lists of trainees under a particular category (client) SUBCONTRACTOR MENU Subcontractor Details menu item: This option allows you to enter and edit Subcontractor details. This field is used to define RTOs to who training delivery may have been sub contracted. COURSE MENU Course Details menu item: This option allows you to manually enter course information and link modules to courses. Course Streams menu item: This option allows you to enter and edit Streams that can group Modules inside each Course. Streams could represent the Elective Modules or any other grouping of Modules. Module Details menu item: This option allows you to manually enter module information. Qualification Wizard menu item: This option allows you to build Training Package Qualifications by searching rather than manually entering the information using the Course Details menu above. Unit of Competency Wizard menu item: This option allows you to build Training Package Unit of Competencies by searching rather than manually entering the information using the Module Details menu above. Apply known classification codes menu item: This option will run from the wizard database and update all classification codes, such as field of education codes. TRAINEE MENU Trainee Details menu item: This option allows you to manage the personal details of trainees. General History menu item: The option allows you to enter additional general details per trainee, these details are dated and can be used as a history or general notes area. Filter menu item: This enables you to define only certain Trainees by selected criteria, for example only those trainees enrolled in a particular Course. Ted User Manual 27/07/2009 Page 6 of 31 Show only active menu item: If this is selected it will only list the active students, not the ones that have been archived. ENROLMENT MENU Enrolment Details menu item: This option allows you to enrol the client in a Training Package Qualification, or Course, and then the associated units of competency, or modules. FIND MENU Course menu item: This option allows you to find a Course or Qualification. identifier. This is either by name or Module menu item: This option allows you to find a Module or a Unit of Competency. This is either by name or identifier. Trainee menu item: This option allows you to find a Client. identifier. This is either by surname, given name or PRINT MENU Provider Summary menu item: This option allows you to print out a summary of the Provider and Location details you have entered into Ted. Course Summary menu item: This option allows you to print out a summary of the selected Course or Qualification details you have entered into Ted. You are required to have selected the course or qualification in Ted to obtain the relevant report. Module Summary menu item: This option allows you to print out a summary of the selected Module or Unit of Competency details you have entered into Ted. You are required to have selected the module or unit of competency in Ted to obtain the relevant report. Trainee Summary menu item: This option allows you to print out a summary of the selected Trainees details you have entered into Ted. You are required to have selected the trainee in Ted to obtain the relevant report. General History menu item: This option allows you to print out the General History details for an individual trainee. You are required to have selected the trainee in Ted to obtain the relevant report. Enrolment Summary menu item: This option allows you to print out a summary of an enrolment details for a selected Trainee you have entered into Ted. You are required to have selected the trainee in Ted to obtain the relevant report. Enrolment in Detail menu item: This option allows you to print out a very detailed summary of an enrolment details for a selected Trainee you have entered into Ted. You are required to have selected the trainee in Ted to obtain the relevant report. Enrolment Statistics menu item: This option allows you to print out a summary of training in a selected year. The summary gives totals and percentages of enrolments for each marking caption and each course. Ted User Manual 27/07/2009 Page 7 of 31 Victorian Claim Report menu item: This option allows you to print out a sheet that may help in monitoring claiming done on the Victorian GFTP website. Statement of Results menu item: This option allows you to print out a Statement of Results. Trainee List menu item: This option allows you to print out a summary of trainees by selected criteria, that being either by course, module, VET Program, or all trainees in your Ted database. Summary By Course menu item: This option allows you to print a summary of the number of enrolments in all courses for the given year. Audit Report menu item: This option allows you to print all training records in Ted into an Excel sheet. Enrolment Exception List menu item: This option allows you to print out a summary of enrolments by selected criteria, that being either by various criteria, or all enrolments in your Ted database. Blank Fields menu item: This report identifies if any blank fields exist in your Ted database. If all fields have data entered into them, a message will flash stating that all fields are OK! AVETMISS MENU Create <YEAR> Report menu item: This option is used in reporting results to the State Training Department. It will export all training performed in the year selected. Create Mid-Year Report menu item: This option is used in reporting results to the State Training Department. It will export all training performed in the year upto the Mid-Year point selected. Create Trainee Export menu item: This option can be used to export only one or a few trainees rather than all trainees that have done some training in the current year. Create Course/Site or Booking Export menu item: This option is primarily used in making claims on the NSW APL website. WINDOW MENU The first 4 items relate to the arrangement of windows and is fully covered in your Windows manuals. List menu item: This option shows a list of open windows by which you can switch to any one of them by selecting a window appearing in the list. This is dynamic, meaning that as you open or close windows the list will update itself automatically. HELP MENU Contents menu item: This option takes you to the contents section of the help system. Access this any time by pressing the F1 key. How To menu item: This option takes you to the How To section of the help system. This gives step by step instruction on how to perform tasks throughout Ted About Ted menu item: This option shows a splash screen with useful information like the name of the registered user and current version of the software. Ted User Manual 27/07/2009 Page 8 of 31 COURSES AND MODULES Course Details Before going any further, you should know that Ted is capable of generating all the course and module records for you. For information on how to do this, go to the Wizard section of this manual. Ted allows you to enter the details of any number of courses and ensures that throughout the data entry process, the information you enter complies with the rules of AVETMISS. To manage course details and the modules attached to a course, from the main menu: Click Course. Click Course Details. Both the List – Course(s) window and the Course details window appears. The List Course(s) window shows the identifiers and name of courses that you have entered. To retrieve the details of a course, double click the name of the course you want to retrieve. This populates the fields on the Course Details window with the information recorded for the selected course. Course Identifier field: This field contains the course identifier, if the course is recognised at the national level; this must be the national identifier. Course Is Vet field: This flag indicates if the course is of Vocational Intent. Course Active field: This flag indicates if course is active or archived. Course Name field: The full name of the course or the full name of the qualification. Where the course is nationally accredited and does not lead to a qualification specified in a national Training Package, the Course Name must be the nationally accredited course name. Where the course is State/Territory accredited, the Course Name must be the State/ Territory accredited course name. Course Field of Education field: This field contains a code that uniquely identifies the major level field of Education of a course. The course must be classified to a field of study according to the course’s intended major vocational outcome and content. To set this field, click in the body of the list box or click the down arrow to expose the choices available. Course Recognition field: This field contains a code that uniquely identifies the organisational level of the authority that has granted recognition of a course. Training Organisations reporting locally accredited courses are requested to assign a Recognition Status Identifier of ‘14 – Other’. Courses are classified against a single recognition status. Where more than one Ted User Manual 27/07/2009 Page 9 of 31 recognition level applies to a course, the highest level should be reported. To set this field, click in the body of the list box or click the down arrow to expose the choices available. Course Qualification field: This field contains a code that uniquely identifies the recognised qualification awarded to an individual on successful completion of a course. The training organisation is required to provide the appropriate code as specified in the curriculum document for each course. Courses are assigned this code during the process of National/State accreditation. To set this field, click in the body of the list box or click the down arrow to expose the choices available. ANZSCO This field contains a code occupation(s) to which a course relates. that uniquely identifies the type of Training Organisations reporting activity in locally accredited courses are requested to classify each course to a single ANZSCO Identifier according to the most common occupational outcome that the course is designed to provide. Where a course relates to more than one ANZSCO code, the ANZSCO Identifier must reflect the primary (or most significant) occupational type to which the course relates. Where the training spans major ANZSCO groups, ANTA extension codes GEN16, GEN17 and GEN18 must be assigned. Where the training is general education and not occupationally specific, ANTA extension GEN19 must be assigned. Where the training has no occupational outcome, ANTA extension code NON-VET must be assigned. The validation process of TED will ensure that you select a valid code from the built in ANZSCO codes of the AVETMISS classifications. How validation occurs will be explained later in this manual. Course Nominal Hours field: This field contains the value of Nominal Hours – Supervised for a training program and must be the value of supervised nominal hours as determined by its accrediting body. The value of Nominal Hours – Supervised is generally obtained from a curriculum document and usually represents the anticipated hours of supervised training. The value for Nominal Hours – Supervised must be a whole number of hours. Where a curriculum document shows fractional hours, the value must be rounded to the nearest whole number of hours with exact half-hours resolved by rounding to the odd number. Where a curriculum document shows a range of hours, the value must be midpoint of the range. TO EDIT THE DETAILS OF A COURSE Double click the course name in the List – Course(s) window; this populates the fields on the Course details window with the recorded information. Switch to the Course Details window, then click the Edit button, enter the new values then click the Save button. TO DELETE COURSE DETAILS Double click the course name in the List – Course(s) window; this populates the fields on the Course details window with the recorded information. Switch to the Course Details window, then click the Delete button. The following dialogue appears: If you click the Yes button while trainees are enrolled in the course, the following dialogue window appears. In this case, TED will not allow you to delete the course details Ted User Manual 27/07/2009 Page 10 of 31 until all trainee enrolled in the course are first dropped from the course. MOVING THROUGH THE COURSE LIST . Click Next to advance to the next record. The List window will follow your actions and show the record you are currently on in blue. Click Prev to move to the previous record. Again the List window will follow your actions and show the record you are currently on in blue. To close the List – Course(s) and Course Details windows, click the Close button on each window. NOTE: It is not absolutely necessary to close the List window as it is a multi mode window, which is also used for trainee, course and module lists. Module Details Before going any further, you should know that Ted is capable of generating all the course and module records for you. For information on how to do this, go to the Wizard section of this manual. TED allows any number of modules or Units of Competency to be defined and ensures that the information you enter complies with the rules of AVETMISS, once defined they can be attached to one or more courses or qualifications. To manage module details from the main menu: Click Course. Click Module Details. Both the List – Modules and Module Details windows appear. The List Module(s) window shows the identifiers and names of modules you have entered. To retrieve the details of a module, double click the name of the module you want to retrieve. This populates the fields on the Module Details window with the information recorded for the selected module. If the Active field is checked then the module is active if this box isn’t checked then the module has been archived. Module Identifier field: This field contains a code, which uniquely identifies a module. Where a module is part of an accredited course, recognised training program or recognised short course, the module code assigned during the process of accreditation must be used. Where the Training Organisation approves or accredits modules locally, the Module Identifier must be prefixed with the Training Organisation Identifier as issued by ACFEB. If this number is less than four characters, leading zeroes must be placed in front (eg. Training Organisation Identifier: 205 should be 0205). Module Is Vet field: This flag indicates if the course is of Vocational Intent. ‘Vocational’ intent is where the training program is intended to develop skills of relevance in the workplace. The VET/non-VET Flag is assigned during the process of accreditation and must not be altered. Where a course is locally approved/accredited, the Training Organisation must assign the VET/non-VET Flag. Hobby and Enrichment programs are Non-VET activity. VET activity includes further education activity eg. ESL, literacy and VCE programs. Ted User Manual 27/07/2009 Page 11 of 31 General and pre-vocational programs that are designed as pre-requisites for other VET programs should also be classified as VET. The presence of some potential vocational content in a program does not, of itself, make a program VET. If the intention of the training program is vocational the VET/Non-VET Flag is set to "Yes". If the intention of the training program is not vocational the VET/Non-VET Flag is set to "No". Where the Module/Unit of Competency Flag on the Module/Unit of Competency (NAT00060) file is ‘C – Unit of Competency’, the VET/non-VET Flag must be ‘Y’ (as all units of competency are of vocational intent). Module Active field: This flag indicates if module is active or archived. Module / Unit of Competency field: This flag indicates whether the record is a module or a unit of competency. Where the Module/Unit of Competency (NAT00060) file reports a Module Identifier, the Module/Unit of Competency Flag must be ‘M’. Where the Module/Unit of Competency (NAT00060) file reports a Unit of Competency Identifier (as specified within a national Training Package), the Module/Unit of Competency Flag must be ‘C’. Module Name field: This field contains the title of the module associated with a module identifier. Where the module is nationally accredited, the Module Name must be the nationally accredited module name. Where the module is State/Territory accredited, the Module Name must be the State/Territory accredited module name. Where the module is accredited by the Training Organisation, the Module Name must be the Training Organisation approved/accredited module name. Module Field of Education field: This field contains a code that uniquely identifies the Field of Education group of a module or unit of competency. A module or unit of competency must be classified according to its primary content, independent of the context in which it may be delivered. A module is assigned a Field of Education group during the process of accreditation. The Field of Education Group Identifier must be a valid major level group. The validation process of TED will ensure that you select a valid code from the built in Field of Education Group codes of the AVETMISS classifications. How validation occurs will be explained later in this manual. Module Nominal Hours (Supervised) field: This field contains the value of Nominal Hours – Supervised for a training program and must be the value of supervised nominal hours as determined by its accrediting body. The sum of Nominal Hours – Supervised and Nominal Hours – unsupervised for a module or unit of competency must not be zero. TO ADD MODULE DEFINITIONS. Click the Add button then enter the information in accordance with the field descriptions shown in the field list. Once changes have been made it is necessary to save. TO EDIT MODULE DETAILS. Double click the module name in the List – Modules(s) window; this populates the fields on the Module details window with the recorded information. Switch to the Module Details window, then click the Edit button, enter the new values then click the Save button. Ted User Manual 27/07/2009 Page 12 of 31 TO DELETE MODULE DETAILS Double click the course name in the List – Module(s) window; this populates the fields on the Module details window with the recorded information. Switch to the Module Details window, then click the Delete button. The following dialogue appears. If you click the Yes button while trainees are enrolled in a course containing the module or enrolled in the module on its own, the following dialogue window appears. In this case, TED will not allow you to delete the module details until all trainees enrolled in the module are first dropped from the module. MOVING THROUGH THE MODULE LIST Click Next to advance to the next record. The List window will follow your actions and show the record you are currently on in blue. Click Prev to move to the previous record. Again the List window will follow your actions and show the record you are currently on in blue. To close the List – Module(s) and Module Details windows, click the Close button on each window. Note: It is not absolutely necessary to close the List window as it is a multi mode window, which is also used for trainee, course and module lists. Entry Wizards TED is currently equipped with most course/Training Package Qualification details and Unit of Competency module details, both the course and module details come complete with the AVETMISS classifications making your job that much easier. The intention of the wizard is to generate all the course and module records for you. A course or module not found by the wizard means that you are required to enter those details manually. However, please contact Omniscient Australia first to ensure that you have the latest version of Ted, one which may have the required information entered into it. QUALIFICATION WIZARD To create a course using the Qualification Wizard, from the main menu. Click Course. Click Qualification Wizard. The window (or similar) opposite appears. Select the type of search, course, module or Training Package. Enter a qualification or unit identifier or Enter a qualification or unit name. Click the search button. For both the identifier and name, you are not required to enter the full identifier or name description, Ted will search on partial entries. If you enter a single word or phrase, Ted will find any reference to the word or phrase in any part of the description. For example; if you type the word FOOD, the result of the search will list Cookery Food Freezing, Seafood Cooking, and Food Hygiene etc. The same applies with the identifiers. Ted User Manual Typing in BSB in the Qualification Identifier box and 27/07/2009 Page 13 of 31 clicking search will show all qualifications in the BSB Training Package. When you have located the qualification or unit you want Ted to generate click on the qualification then click the Create Qualification button. If you want more than one qualification from the list then by holding down the Shift key and highlighting first and last, all qualifications will be created but if you wish to be selective hold down the Ctrl key and highlight the specific qualifications required. The Course Creation wizard window will appear: You will see that the fields on this window are populated with all the relevant information required to create the course record. If the Field of Education and ANZSCO fields are empty please call Omniscient Australia for support. You will need to enter the Nominal Hours. At the qualification level the hours can be approximate as it will change depending on the electives chosen. Then click Create and the qualification will be added to the Course list available within Ted. UNIT OF COMPETENCY WIZARD It is now necessary to create the units of competencies. Click on Course then the Unit of Competency wizard. The options are to select a package and click Search; this will produce a list of all units of competencies that belong to the Training Package selected or type in a Unit identifier or a Unit name. Once the full list of units are displayed you can select the required units by either holding down the shift key and clicking on the top unit and then the bottom unit and all will be included or if you wish to be selective you can hold down the Ctrl key and click on the units required (as shown). Then click Create units. You should now only have to enter the Nominal Hours (Supervised). Once this is done click on the next button. You will be asked 'Do you wish to enter only Nominal Hours for the remainder of the Units?' All other fields will be defaulted to the values currently showing. If you click on Yes then you will be prompted to add the hours for all the other units and then on the final one click on the Create button. Whichever choice you make click the Create button to finalise the course creation process. When finished creating courses or module records, click the close button to exit the Entry Wizard. Inserting Modules into a Course You have now created the qualification and the units of competency but the appropriate units Ted User Manual 27/07/2009 Page 14 of 31 need to be tied to the qualification. Highlight the qualification then click details and the following screen appears Then click the Modules tab to see the following screen. If the Unit of competency required is not included then click the Insert button and a list of units will be displayed. Highlight the appropriate units either by holding the Shift key and clicking on unit to select a whole group of hold down the Control key and click on units to be selective. As shown below. Click the select button and the units will be tied to the qualification. Once tied to the qualification, modules can be grouped together in a Stream, highlight a module then click the Stream button, you will be able to select which stream the module should be listed under. Ted User Manual 27/07/2009 Page 15 of 31 TRAINEES Trainee Details When entering trainee details, Ted ensures that the information you enter complies with the requirements of both AVETMISS and the state training authority you are required to report your statistical data. To manage trainee details, from the main menu: Click Trainee. Click Trainee Details. The List-Trainee and Trainee Details window appears. If any details are unknown, enter @ or Not Stated. The List Trainee(s) window shows the identifiers and names of trainees you have entered. To retrieve the details of a trainee, double click the name of the trainee you want to retrieve. This populates the fields on the Trainee Details window with the information recorded for the selected trainee. Trainee Identifier field: Each trainee needs a unique identifier (which can be a number or code) created by the RTO. Ted can be configured to automatically create an Identifier for each Trainee as they are added, this can be done on the Configuration screen under the File menu. Trainee Gender field: This field contains a flag which identifies the gender of the trainee (Male or Female). The entry @ means not stated Trainee Date of Birth field: This field contains the date on which the trainee was born. The year of birth must precede the collection year. All components must represent a valid date. The age of a trainee is expected to fall between 5 and 95 years. Trainee Active field: This flag indicates if student is active or archived. Trainee Title field: This field contains the trainee’s title, for example Mr/Mrs/Miss etc… Trainee Surname field: This field contains the trainee’s surname. Trainee Given Name field: This field contains the trainee’s given name. Each trainee has two addresses, a Best Contact Address and a Residential Address. Only one address is show at a time, you can show the other address by clicking the Tab below the address details. When entering in trainee details you will fill in the Best Contact address first. Trainee Street field: This field contains the suburb or town of the location. This field is validated using the built in postcodes. More on this later. Trainee Suburb field: This field contains the suburb or town of the location. This field is validated using the built in postcodes. Remember to press the ENTER key start this validation. NOTE: Pressing ENTER on the Best Contact Suburb will also copy the Best Contact Address details into the Residential Address details on the to reduce your typing when Ted User Manual 27/07/2009 Page 16 of 31 they are the same. Trainee Postcode field: This field contains the postcode of the residential address; it is automatically inserted after you have entered a valid suburb or town. Trainee State field: This field contains the state in which the trainee resides. It is automatically inserted for you after the postcode of the suburb or town is applied to the postcode field. Trainee Phone field: This field contains a home number by which a student may be contacted. Trainee Email field: Enter email address if applicable Trainee Comment field: You can type anything you like into this field. ALL of the remaining fields are questions on your Enrolment Form that the trainee is asked to answer. The trainee can elect not to answer these fields, if they do not answer a question record this in Ted with an @ or Not Stated. Trainee born in Australia and speaks English at home? field: If this box is selected the following Country of Birth and Language (Spoken at Home) boxes with have Australia and English entered in the fields. Trainee Country of Birth field: This field contains a code that uniquely identifies the country of birth of the trainee. The country of birth specified by the trainee should be matched with a valid Australian Bureau of Statistics ‘Standard Australian Classification of Countries’ (SACC) 4 digit code. Where the country of birth is inadequately described the Country (of Birth) Identifier must be ‘0000’. This field is validated using the built in AVETMISS classifications Trainee Language (Spoken at Home) field: This field contains a code that uniquely identifies the trainee’s main language spoken at home. The language specified by the trainee must be matched with a valid 4 digit Australian Bureau of Statistics ‘Australian Standard Classification of Languages’ code. If the main language spoken at home is inadequately described, the Language Identifier must be '0000'. If the main language spoken at home is not stated, the Language Identifier must be ‘@’ filled. This field is validated using the built in AVETMISS classifications. Trainee Proficiency in English field: This field is used to record how well the student identified that they speak English. If the Language (spoken at home) is English then this field must be have the value English (at home) selected. Trainee Employment Category field: This field is used to record the trainee’s employment status. Trainee Learner Unique Identifier field: This field is only used if the trainee is still at school and the school has supplied the LUI number. This field is primarily used in Queensland. Trainee Highest School Level Completed field: This field contains a code that identifies the highest year level of school that a trainee as completed. It also describes the calendar year that they completed that level. Trainee Attending Secondary School field: This field is used to record whether a trainee is still attending secondary school. Ted User Manual 27/07/2009 Page 17 of 31 Trainee Indigenous Status field: This field contains a flag that indicates whether or not the trainee has declared himself or herself to be of Aboriginal and/or Torres Strait Islander origin. Aboriginal/Torres Strait Islanders (ATSI) are trainees who identify themselves as being of Aboriginal or Torres Strait Islander origin. ATSI information is normally collected by the school via a standard question on the client's enrolment form. Trainee Prior Education field: This field contains a code that uniquely identifies a type of prior educational achievement completed by the student. It is not referring to Grade 10 as prior education. If a student has completed Certificate I and is now doing Certificate II then Certificate I should be entered in this field. Trainees may have more than one prior educational achievement. If a student identifies that he or she has completed a prior educational achievement but has not specified the type(s) of educational achievement, Educational Achievement Identifier must be coded to ‘Miscellaneous Education’. To set these achievements, click this button to produce a list of prior education options. If they have stated ‘None’ on their enrolment form then click on the check box next to Not Stated and this will record this as none. Or double click the option to include it in the list of achievements then click OK. You can enter more than one prior educational achievement. Trainee Disability field: This field contains a code that uniquely identifies the type of disability of the trainee. A client may be classified as having any number of disability types. The Disability Type Identifier classification is consistent with the International Classification of Impairments, Disabilities and Handicaps as published by the World Health Organisation (Geneva 1980) upon which the Australian Bureau of Statistics bases the national surveys. To set disabilities, click this button to produce a list of disability options. If they have stated ‘None’ on their enrolment form then click on the check box next to Not Stated and this will record this as none. Or double click the option to include it in the list of disabilities then click OK. You can enter more than one disability. TO ADD NEW TRAINEE RECORDS Click the Add button then enter the information as described in the fields list. TO EDIT TRAINEE DETAILS Double click the trainee name in the List – Trainee(s) window to populate the fields on the Trainee Details window. Switch to the trainee details window then click the Edit button. Enter the new values then click the Save button. TO FIND A TRAINEE You can find a trainee by browsing through the trainee list or by using the Find option from the main menu: Click the Find menu Click the Trainee… menu item The trainee details screen will appear with all fields blank, you can the type in a partial identifier, surname or given name. You do not need to fill in all three fields. Some trainee’s names are quite unique and you will only need to type in a few letters, other names are more common: for example to find Anne Smith you might type in SMI into the surname and A into Ted User Manual 27/07/2009 Page 18 of 31 the given name to avoid finding the trainee named Craig Smith. After you have typed in the partial search details click the Find button at the bottom of the trainee details screen. If your search matches more than one trainee, only the first trainee will be displayed. TO ARCHIVE A TRAINEE Click the edit button and then uncheck the active button. The drop down Trainee menu has an option of Show only active. TO DELETE A TRAINEE RECORD Double click the trainee name in the List – Trainee(s) window to populate the fields on the Trainee Details window. Switch to the trainee details window then click the Delete button. The following dialogue appears. Click Yes to delete. Warning! Records that have been deleted cannot be recovered. Enrolment Details TED allows you to enrol trainees in any number of courses/qualifications and modules/units of competency. To enrol trainees from the main menu: Click Enrolment. Click Enrolment Details. Both the List-Trainee(s) and Enrolment windows appear. At this point, you should know that enrolments can be made for a single trainee or multiple trainees using the bulk enrolment process. This will be explained further as we progress. ENROLLING A SINGLE TRAINEE TO A COURSE . On the List-Trainee(s) window, double click the trainee you want to enrol. The Enrolment [trainee name] window will now show the courses already enrolled or show nothing. To enrol in a course Click the Menu button; this produces a menu of options. From the menu, select Enrol in Course. An available course list window will appear. Click on the name of the course to enrol. Click the Select button A Course Enrolment Details window will appear Ted User Manual 27/07/2009 Page 19 of 31 Course Enrolling in field: Select Completed Qualification if the trainee is aiming to get a Certificate for the whole course, otherwise select Individual Module/Units of Competency if the trainee is enrolling in a short course and will receive only a Statement of Attainment. Course VET in Schools? field: This field is used to indicate whether the trainee is doing this training as part of their secondary school enrolment. Course Tuition Fee field: This field should be filled in with the dollar amount of fees charged to the trainee or their employer as part of the enrolment process. Course Study Reason field: This field is asked on the Enrolment Form. If the trainee may elects not to answer the question then select @ Not Stated. Course Training Contract Identifier – New Apprenticeships field: This field is used when the trainee is training under an Apprentice or Traineeship. NOTE: This field may be worded differently depending on what state you are reporting. Course Client Identifier – New Apprenticeships field: This field is used when the trainee is training under an Apprentice or Traineeship. NOTE: This field may be worded differently depending on what state you are reporting. Course Client field: This field can be used to indicate which client/employer has sent you this trainee. This field is optional and can be used in whatever way you wish. Course Program field: This field is optional and can be used to indicate what class/intake/course the trainee is part of while doing this training. If you fill in this field with a Class Code then you can print out a Class List of all trainee’s with the same Class Code. Course Subcontractor field: This field is used to indicate that training delivery may have been sub contracted to another company. Course Status field: This fields is used to indicate the status of the course enrollment. It will start with a default value of Training NOT Complete and can be changed later once all training in this course has been completed. ENROLLING IN UNITS OF COMPETENCY Enrolment in the course is now complete and you should see this in the enrolment window. Below the course name, you will see the modules attributed to the course. These are shown light grey on white; the grey indicates that whilst the modules appear in the list, no units have yet been enrolled. To begin a unit enrolment, click on the name of the unit appearing light grey on white (more than one unit can be selected by using either the Shift or Control key) then, click the Enrol Now button. This produces the module enrolment details window ready for you to supply the information relevant to the trainee. Ted User Manual 27/07/2009 Page 20 of 31 Module Start Date field: This field contains the date on which training activity starts for the module or unit of competency enrolment. The Enrolment Activity Start Date must be on or before the Enrolment Activity End Date and must not be after the end of the submission period. Module End Date field: This field contains the date on which training activity ends for the module or unit of competency enrolment. The Enrolment Activity End Date must be on or after the Enrolment Activity Start Date and must not be before the start of the submission period. The Enrolment Activity End Date must only be after the end of the collection period where the enrolment is continuing into the next collection period. Module Scheduled Hours field: There is no need to enter anything in this field as the hours where entered with the Unit of Competency details. Module Delivered at field: This field contains the location name where the trainee is enrolled and is linked to the provider location record. Module Delivery Mode field: This field indicates how the training for this module will be delivered. If the module is undergoing RPL/RCC or CT assessment then indicate how the training would be delivered if the assessment is not successful. Module Funding Source field: This field indicates what State Government Funding is being received by the RTO for this training. If no funding is being received from the State Government then use the Fee for Service entry. As an example, the Fee for Service covers the following cases: the trainee or their employer is paying for the training, or the trainee is an employee of the RTO and the training is being subsidised. NOTE: This field is not used to indicate whether National Funding is being received, for example Employee Incentives. Module Fee Exemption field: This field indicates whether the trainee was required to pay the full amount of enrollment fees. Module Purchasing Contract and Purchasing Schedule fields: These fields are used if state government funding is being received and there is a Contract code. The use of these fields varies between states. Module Hours Attended (if Withdrawn) field: This field is only used when some training has been undertaken in this module before the trainee cancels or withdraws. In that case fill in the amount of hours that where undertaken before the withdrawal. You should also mark this module as Withdrawn and answer Yes when Ted asks whether there has been any participation in this module. Ted User Manual 27/07/2009 Page 21 of 31 Module Participated? field: This field is used to indicate whether training has commenced in the module. Only tick this field once you have evidence that training in this module has been undertaken. After you have entered the required information, click the Save button. This will change the colour coding of the module on the enrolment window from light grey on white to blue on white with the start and end dates and a mark of No Participation. TO VIEW MODULE ENROLMENT DETAILS Double click the enrolled module to produce the module enrolment window. ENROLLING MULTIPLE TRAINEES IN A COURSE To enrol multiple trainees in a course click on the Menu button and then Bulk Enrolment and select course. A list of courses will appear, select one. Then a list of trainees will appear. Hold down the Control key and select the trainees to enrol in that course. Next hold down the Control key and select the units and click enrol now. Then fill in the start and end dates, delivered at and sub-contracted to and click save. THE MENU BUTTON The Enrolment window has the ability to show an additional column(s) of information. Menu Button options: Click the Menu button Select Detail Column. Select one of the column options. The The most useful additional column setting is Start & End Date plus Mark that adds three additional columns: Start Date, End Date and Mark. You can also show or hide course and module Identifiers by clicking the Menu button then selecting Show Identifiers. The displayed records can either be sorted in name or identifier order, click the Menu button, select Sort by, then choose one of the sort options. If you have setup Course Streams you may also want to turn on the Show Stream option under the Menu button. DROPPING E NROLMENTS NOTE: This is only to be used if data entry error has occurred! If training was planned and then later cancelled mark the module as Withdrawn and indicate whether training was undertaken in that module. A time will come where you need to drop a trainee from an enrolled course or module; this is accomplished by clicking on the course name or module to drop, then clicking on the Drop button. Dropping a course results in the following dialogue being produced warning you that the course and all its dependants will be dropped. Dropping a module is much the same as dropping a course except that after you have selected a module or modules to drop, you click the Drop Now button instead of the Drop button. The dialogue that appears is also much the same as that for the course and has the same set of button options. PARTICIPATED? Each module can be in one of three states: planned, training and complete. When a trainee is initially enrolled you can enroll all modules that are on the trainee’s training plan. You will NOT tick the Participated tick box whilst enrolling the modules to indicate that training has not yet commenced. Ted will show No Participation under the mark column. Ted User Manual 27/07/2009 Page 22 of 31 These enrolments will not be reported to AVETMISS for most states. Once you have evidence of training in a module you can tick the Participated tick box. Ted will show Unmarked under the mark column. Once all training in a module has been completed you can mark the module, please refer to the next section. Marking Enrolments From the enrolment window: Click the module or modules to mark. Click the Mark button Select the Mark Caption from the menu Choose one of the following options described in the table below: Unmarked Student has been enrolled in units Competent Assessed as Competent Not yet Competent Assessed as Not Competent Withdrawn When selecting this option you will be asked ‘Has trainee participated in this Module/Unit of Competency Enrolment?’ This means did they attend any classes? If you answer Yes than a mark of Withdrawn will be shown. If you answer No than a mark of Cancelled will be shown and this will not be included in the AVETMISS export RPL – Granted Recognition of Prior Learning Granted RPL – Not Granted Recognition of Prior Learning Not Granted RCC – Granted Recognition of Current Competency Granted RCC – Not Granted Recognition of Current Competency Not Granted Credit Transfer Credit Transfer If you have elected to show the mark column on the enrolment form, the column will now show the mark applied to the module(s). Marking Captions You can alter the list of Marking Captions to add special state specific entries or change the names to match your systems. From the main menu: Click File Click Marking Captions. Caption field: You can name each marking caption how ever you like, there is no requirement to match your name with the AVETMISS codes. For example you might want a High Distinction caption that is linked to the 20 Competent AVETMISS code. NOTE: When you rename a marking caption that has already been used to mark modules, the mark on all of those modules will now show the new name. Ted User Manual 27/07/2009 Page 23 of 31 Code field: Each marking caption has a unique code up to 3 characters long. This code can also be freely changed and does not need to match any AVETMISS requirements. AVETMISS Code field: Each marking caption must be linked to an AVETMISS code. Two marking captions may be linked to the same AVETMISS code, for example you may wish to distinguish a Distinction from a Pass both of which use the 20 Competent AVETMISS code. Most of the AVETMISS codes are common across all states. Some states have additional state specific codes that you may wish to add to your marking caption list. As an example Queensland has a code 12 Underpinning knowledge of off the job training completed. NOTE: You do not need to setup a marking caption for the AVETMISS code 70 Continuing Studies, Ted will automatically export this code under the following conditions. Ted reports this code when a module is Unmarked and has an End Date in the next calendar year. Ted User Manual 27/07/2009 Page 24 of 31 PRINT FUNCTIONS TED does not come with an add-hoc report tool, but this does not mean you cannot get the types of reports that you want. For each report Ted generates an RTF formatted document and loads it into your word processor, you then have the option of saving the document or sending the report to your printer. There are a number of standard reports in Ted accessed from the Print menu option show below: Provider Summary To run this report, simply click the Print menu option, and then click Provider Summary. The provider summary report also includes a list of provider location records. Course Summary To run this report you need to have the course detail’s window open with the chosen course highlighted. You can print multiple courses at a time by changing the Show drop down box at the top of the List window from Course(s) to Selected Course(s) to Print / Active. You can then highlight more that one course by holding down either Shift or Ctrl key and selecting the courses required. When you have highlighted the courses you wish to print, click the Print menu option then select Course Summary. For each course there will be a list of attached modules giving the identifier and module name. Module Summary To run this report you need to have the module detail’s window open with the chosen module highlighted. You can print multiple modules at a time by changing the Show drop down box at the top of the List window from Module(s) to Selected Module(s) to Print / Active. You can then highlight more that one module by holding down either Shift or Ctrl key and selecting the modules required. When you have highlighted the modules you wish to print, click the Print menu option then select Module Summary. Trainee Summary To run this report you need to have the trainee detail’s window open with the chosen trainee highlighted. You can print multiple trainees at a time by changing the Show drop down box at the top of the List window from Trainee(s) to Selected Trainee(s) to Print / Active. You can then highlight more that one trainee by holding down either Shift or Ctrl key and selecting the trainees required. When you have highlighted the trainees you wish to print, click the Print menu option then select Trainee Summary. Enrolment Summary (Best option for printing) This option will give you Trainee Identifier, Name, Gender and Date of Birth. It also has the Qualification Code and Title with the Units of Competency Identifiers and Names that the Ted User Manual 27/07/2009 Page 25 of 31 student is enrolled in, enrolment start/end date with approved hours and the Mark. Like the trainee summary report you are required to have the trainee details window open wit the chosen trainee highlighted. Refer to the Trainee Summary report for details of how to print multiple trainees at the same time. Enrolment in Detail This option will give you Trainee Identifier, Name, Gender and Date of Birth. It also has the Units of Competency Identifiers, enrolled at, enrolment start/end date with approved hours, delivery and funding type and the Mark. Like the trainee summary report you are required to have the trainee details window open wit the chosen trainee highlighted. Refer to the Trainee Summary report for details of how to print multiple trainees at the same time. Trainee Lists There are a variety of trainee list reports available, all of these reports share the following options: Sort by option The trainees listed by each report can be sorted by the trainee’s idetifier or by the trainee’s name. To change this option, click the Print menu, click the Trainee List menu item, click the Sort by menu item, and then tick either Identifier or Name. Only Active? option If this is ticked, the reports will only list the active students, not the ones that have been archived. Format for Mail Merge option Use this option if you would like the report to contain postal address details for each trainee. This is useful if you would like to print mailing labels using Microsoft Word’s mail merge feature. Save the report that Ted produces and select it as the Data Source as part of Word’s Mail Merge Wizard. Some of the trainee list reports are: ALL TRAINEE (S ) This report prints a list of trainees as per the following example. Identifier 00001 00002 TRAINEE( S) Trainee SMITH, MALCOLM SMITH, BO WITH CLIENT This report prints a list of trainees similar to the All Trainee(s) report but includes an additional column displaying the Client selected for each Trainee’s enrolment. For example: Identifier 00001 00002 Trainee SMITH, MALCOLM SMITH, BO Client F & G Dairies Other Trainee(s) with … reports are available showing a different additional column. Ted User Manual 27/07/2009 Page 26 of 31 TRAINEE( S) IN COURSE This is a special report which allows you to set a number of options for the report. selected the following window appears. When Select a course by clicking the Course button To run the report, click the Print button. There are various options to specify which trainees should be listed, trainees that do not meet the criteria set out by the options will not be listed. The following options can be used to add extra detail to the report: Show State of Enrolment option This option adds an extra column identifying the status of the course enrolment listing: Training NOT Complete, Training Complete or Achieved. Show Module Enrolments option For each trainee listed in the report, their module enrolments will be listed showing the module name, hours and mark. Show Additional Module Details option This option adds additional columns to the modules listed as by the Show Module Enrolements option, the additional columns include: Start & End Dates and Purchasing Contract numbers. Example report. Course Qualification Completed? Certificate I in Food Processing (Dairy) No Identifier 00001 00002 Trainee SMITH, MALCOLM SMITH, BO TRAINEE( S) IN MODULE . This report is like the Trainee(s) in Course report and shares the same Print Trainee List window .on which various options to specify which trainees should be listed can be set. SUMMARY BY COURSE This report will list all qualifications and count the number of course enrolments, module enrolments and nominal hours for the current year as shown below. Ted User Manual 27/07/2009 Page 27 of 31 Summary by Course – example report 01/01/2006 to 31/12/2008 Identifier Module 69992 BCG10198 Certificate I in Workplace Skills Certificate I in Construction Ted User Manual 27/07/2009 Course Enrolme nts 12 1 Module Enrolme nts 61 6 Total Hours 870 151 Page 28 of 31 AVETMISS EXPORT To submit Avetmiss statistical data to your local state government department, you need to first export the data from Ted into Avetmiss files stored on your computer and then send these files to the state department. Please refer to later sections of this document for state specific instructions. There are two different types of Avetmiss export available in Ted. The standard Avetmiss export includes all module enrolment records that occur in a particular year. The second Avetmiss export is used for funding claims and only includes specific module enrolments such as a single Trainee or records with a particular Purchasing Contract. Standard (Yearly) Export The Avetmiss standard was designed for exporting the enrolments that occurred in the last calendar year. Some states require monthly submissions or you may want to do a trial export during the year, for these situations Ted has a Mid-Year export variant of the standard Yearly export. Since Avetmiss exports where designed to be performed after the year has finished, it has the requirement that any module enrolments with an end date in that year must be marked. When exporting the current year you do not want to have to mark enrolments that have not finished year (i.e. have a proposed end date later in the current year), this is when you will use one of the Mid-Year options. Each Mid-Year option refers to a particular date (the Mid-Year date) in the menu title, these dates are: today, the end of last month and the month before that. Ted uses the Mid-Year date when it checks that enrolments have been marked; only enrolments that have an end st date between the 1 of January and the Mid-Year date will be checked. THE EXPORT PROCESS When you run an Avetmiss export you will go through the following steps: 1. Ted will show a progress bar titled “Creating Report...” 2. Ted performs some checks on your data before it does the export. If it finds some details that you need to change then it will stop with a question starting with “Some enrolment(s) …”. The export process will have been aborted and no Avetmiss files created, the question is asking if you would like to view a report listing the details you need to change. 3. If all checks are passed, Ted may ask you another question. This question will inform you of the number of enrolment records that Ted is not going to export. You do not have to do anything with these enrolments, but please understand why they are not reporting before continuing the export. 4. After all of the export files have been created a “Collection Statistics” screen will be shown. This screen will create a summary document containing details of what was just exported, this document is a lot easier to read than the native Avetmiss files. Press the OK button to create the default summary document, otherwise you may wish to turn on/off some of the check boxes that represent the different sections of the summary document. For example the Module Enrolment section of the summary document can be quite long and of no immediate use so you may elect to un-tick that option before pressing the OK button. 5. A “Statistical Report Successful!” window will be shown. This window lists what files that have been created, take note of which folder these files are stored in so that you can find them later. Ted always saves the files inside an Avetmiss folder, which is a sub-folder of the main Ted folder. Press the Continue button. 6. Ted will ask you: “Do you wish to open the Summary document?” Ted User Manual 27/07/2009 Page 29 of 31 AVETMISS FILES CREATED The following Avetmiss files are created: NAT00010.txt Provider details NAT00020.txt Location details NAT00030.txt Course details NAT00060.txt Module details NAT00080.txt Trainee details NAT00085.txt Trainee Postal details NAT00090.txt Trainee Disability details NAT00100.txt Trainee Prior Education details NAT00120.txt Module Enrolment details NAT00130.txt Qualification Completed details These NAT files are created in the Avetmiss folder (which is inside the Ted folder). Every time you do an export (any type of export) these NAT files will be overwritten. It is sometimes useful to have a record of past exports, Ted does this for you by zipping up the Avetmiss files into a file with a name like: RTO# YYYY-MM-DD avetmiss.zip where RTO# is the number entered on your Provider details screen and YYYY-MM-DD is the date you created the export formatted as a four digit year, two digit month and two digit day of the month. Funding Exports There are four specific exports that can be used for making funding claims, not all are used in all states so please refer to the state specific instructions later in this document. NOTE: These four exports are not restricted by dates (unlike the standard yearly exports), if a course enrolment has modules that span across multiple years, then all modules in that course will still be exported. The four exports are: Create Trainee export To use this option you will first need to open the Trainee details screen and select a trainee to export. You may also export more than one trainee at a time by changing the Show drop down box at the top of the List window from Trainee(s) to Selected Trainee(s) to Print / Active. You can then highlight more that one trainee by holding down either Shift or Control key and selecting the trainees required. When reporting to NSW, Ted will ask you to select which Course/Sites or Bookings you wish to export. This is useful for when a trainee is in a second Course/Site and you only want to export that contract. This export will follow the same steps as those for the standard yearly export. Create Purchasing Contract Export and Create Purchasing Schedule Export This will export all trainee with a particular Purchasing Contract or Purchasing Schedule. This export will follow the same steps as those for the standard yearly export. Create Course/Site or Booking Export This is principally used for NSW APL Funding claims. Ted will ask you to select a specific Course/Site or Booking you wish to export, all trainees connected to that contract will be exported. Ted User Manual 27/07/2009 Page 30 of 31 This export will follow the same steps as those for the standard yearly export. Avetmiss in Victoria Avetmiss is submitted in Victoria at the following website: Statistical Data Submission and Validation https://secure.otte.vic.gov.au/osdc/ You can submit Avetmiss data as often as you like on this website during the year so you will want to use the Mid-Year export options of Ted. If you are receiving state government funding (ATTP or PEPT) then any Avetmiss data submitted to this site will also processed by the GFTP funding website. Avetmiss in Queensland Avetmiss is submitted in Queensland at the following website: DETConnect http://www.detconnect.qld.gov.au/ Avetmiss in New South Wales Avetmiss data is submitted in two different ways in New South Wales, both use the following website: Training Market NSW https://www.det.nsw.edu.au/trainingmarket/ You will need to login to the Your APL Page section. E-PAYMENT L ODGEMENTS You make e-Payment lodgements to trigger funding payments for particular trainees. You will use either the Create Trainee Export or the Create Course/Site or Booking Export options of Ted so that you only submit the details of trainees that you wish to make a claim for. NON-APL L ODGEMENTS You can also submit all details (state funded, nationally funded & fee for service) on this website. You will use Ted’s Create YEAR Export or one of the Mid-Year exports in this case. Avetmiss in Tasmania Avetmiss files are submitted by emailing the ten NAT files to: [email protected] Avetmiss in other States Please contact Omniscient Australia Pty Ltd on 1300 660 152 or [email protected] for details on exporting in other states. Ted User Manual 27/07/2009 Page 31 of 31