1
User guide
| GB |
891075B
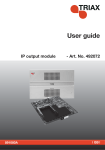
PAL module 492050/51
PAL HD downscale module 492052/53
TRIAX - your ultimate connection
TRIAX - your ultimate connection
Contents
Contents
Box content............................................................................................................................. 3
PAL module............................................................................................................................. 3
Labels...................................................................................................................................... 4
Module installation................................................................................................................. 4
Module removal...................................................................................................................... 5
CAM/Smart card..................................................................................................................... 5
Status LED.............................................................................................................................. 6
Log in....................................................................................................................................... 7
CA Modules window.............................................................................................................. 8
CA Modules configuration window....................................................................................... 9
Status information............................................................................................................... 15
Output window..................................................................................................................... 16
Configuration of output modules........................................................................................ 17
Status information .............................................................................................................. 23
Delete output modules ...................................................................................................... 25
Network window................................................................................................................... 26
Channel list........................................................................................................................... 28
Save configuration............................................................................................................... 29
Manufacturer........................................................................................................................ 30
Your notes............................................................................................................................. 31
2
Introduction
Disposal
Within in the European Union this label indicates that the product
cannot be disposed of with the general household waste. Neither
the headend nor the input and output modules can be disposed of
with the general household waste.
For proper treatment and recycling of old products, please take
them to designated collection points in accordance with your national legislation.
Box content
A new output module is wrapped in antistatic bubble wrap and packed in a
cardboard box when you receive it.
Included in the box is a user guide instructing you in how to use the TDX
Service Tool to configure the module.
PAL module
The PAL output module is one of the output modules that you can install in
the output section of your TDX headend unit.
The PAL output module is available in four versions:
• PAL
• PAL with Common Interface (CI)
• PAL HD downscale
• PAL HD downscale with Common Interface (CI)
The PAL HD downscaling module enables the TDX system to downscale HD
services to SD services before they are output.
Below you can see an illustrated description of a PAL module with CI slots.
3
Basics
Labels
A label is placed on the output module where you can write the information
regarding the configuration of the module.
Besides the information that you write on the label, the module type and part
number are also displayed on the label.
Note
The coloured part of the label informs you of the module type.
Each type of module is allocated a unique coloured label.
On the bottom of the module you will find a label with the bar code and a serial number printed on it.
Module installation
You install an output module by sliding the module into a module slot in the
lower section of the headend unit and click it into place.
Note
You can use hot swapping when you insert an output module into
or remove an output module from the TDX system.
4
Basics
Module
removal
You release an output module from a slot by using the lock mechanism that
is placed to the right of the modules in the output section.
Move the lock mechanism slightly to release the module.
CAM/Smart
card
You can insert 2 Conditional Access modules (CA) into each of those output
modules that have Common Interface (CI) slots.
Each CA module is able to unscramble at least one service. Which services
depend on the service provider of the CA module and smart card.
5
Basics
Status LED
There is a status LED on the front of each module. The LED indicates whether the module functions according to its purpose or fails.
Green - flashing
The output module receives data.
Green - constant on The output module receives valid services.
Red
When starting the TDX system the output module and
the system controller negotiate connection speed. If
the LED continues to be red either the output module
or the system controller has not been inserted correctly.
No colour
The output module has not been configured yet or the
module has not been inserted correctly.
When you update the software of a module the status LED provides you with
information about the updating process.
Orange
Boot loader state.
Temporary off
Initiation of the software update.
Temporary green
Every time the modules receives a valid data package.
Repeated until the update is completed without errors.
Red
Software update failed.
6
TDX Service Tool
Log in
When you have loaded the TDX Service Tool from your TDX headend system
to your laptop/computer the Login window of TDX Service Tool is displayed.
When you have pressed the Log in button the System window is displayed.
7
TDX Service Tool
CA Modules
window
Click the CA Modules tab in the TDX Service Tool to display the CA Modules
window.
The first time you display the CA Modules window in a new configuration the
module list only displays the number and type of the CA modules that you
have inserted in the main and subunits.
You configure the CA modules individually.
To display the Configuration window, click the Setup button of the CA module you want to configure.
8
TDX Service Tool
CA Modules con- The first time the TDX Service Tool displays the Configuration window for a
figuration window CA module in a new configuration the fields and radio buttons display default
values and nothing is selected in the service list area.
Card speed
If your smart card is able to use a higher card speed than
the default card speed, open the drop-down list with the
card speeds you can choose from.
Select the card speed you want to use.
9
TDX Service Tool
Card function
You can use the Card function radio buttons to determine
whether you want the CA module to descramble services
that are scrambled or you want the module to scramble
services that are not scrambled .
Click the Descramble (default) button if you want to descramble services .
Click the Scramble (PanAccess) button if you want to
scramble services using the PanAccess Scrambler.
In the Service list area you can select the service or services that you want to
descramble and you can set up individual filter options for each service.
The services that are scrambled are marked with a dollar sign - $.
10
TDX Service Tool
To select a service, click the check box (square) to the right of the service in
question.
If you want to change the filter options for a service, click the Setup button of
the service in question to open the Filter options window.
The first time you open the Filter options window the default value Descramble all audio PIDs has been selected.
11
TDX Service Tool
If you want to descramble PIDs (Packet Identifier) that are not audio or video
PIDs, click the Descramble non audio/video PIDs check box.
In case you do not want to descramble all audio PIDs you can select which
audio PIDs you want to descramble.
To descramble only selected audio PIDs you have to deselect the Descramble all audio PIDs check box.
When you have deselected the Descramble all audio PIDs check box a field
with a drop-down list is displayed below the check box.
To select which audio PID you want to descramble, open the drop-down list
with the languages you can choose from.
12
TDX Service Tool
Select the language of the audio PID you want to descramble.
When you have selected the required language, a second field is displayed
below the first field so you can descramble another audio PID. You can descramble as many audio PIDs as you need.
If the language of the audio PID you want to descramble is not displayed in
the list you can enter a three letter string signifying the language you need.
To remove your selection leave the field empty.
Click OK to return to the Configuration window.
When you have selected the services you want to descramble and changed
the filter options you want to change, you have to click the Submit button to
save this information in the headend system and return to the CA Modules
window.
13
TDX Service Tool
You use the Common interface button to open the common interface menu.
Clicking the Common interface button gives you access to information from
the smart card inserted in the CA module. The type of information provided
by the smart card depends on the card itself and its make.
Below is an example of the interface of a Conax card.
Please refer to the user guides of the CA modules and smart cards you have
inserted in the output modules for further information.
If you need to reboot the CA module you can use the Reset CAM button.
Click the Reset CAM button to reboot the TDX headend system.
14
TDX Service Tool
When you have selected the services you want to descramble or scramble
you have to click the Submit button to enter this information into the headend system and return to the CA Modules window.
When you return to the CA Modules window the descrambled services will
be displayed next to the CA module you have configured.
Remember to click the Apply button in the upper right-hand corner to save
new settings in the configuration.
Status information
To be implemented later.
15
TDX Service Tool
Output window
Click the Output tab in the TDX Service Tool to display the Output window.
The first time you display the Output window in a new configuration the
module list only displays the number and type of output modules that you
have inserted in the main and subunits.
You have to configure the output modules individually.
Note
The four channels on an output module is locked together so you
can only change the first channel.
To display the Configuration window, click the Setup button of either the PAL
module or the PAL HD downscaling module you want to configure.
16
TDX Service Tool
Configuration of
output modules
The first time the TDX Service Tool displays the Configuration window for an
output module in a new configuration the fields in the window will either display a default value or be empty.
Note
The only difference between the configuration windows of a PAL
module and a PAL HD downscale module is the module name
next to the Back button.
Disabled output
If you want to disable this output, click the Disabled
output check box.
Colour system
To select another colour system, open the drop-down
list with the systems you can choose from.
Select the system you want to use.
17
TDX Service Tool
Broadcast system
To select another TV system open the drop-down list
with the systems you can choose from.
Select the system you want to use.
Channel, Frequen- You have two possibilities when you configure a PAL
cy and Channel
module:
spacing
• You can use the specifications of the channel plan,
or
• You can enter a frequency manually.
Using the channel plans:
To select the required channel, open the drop-down list
with the channels you can choose from.
Select the channel you want to use.
When you have selected a channel the Frequency and
Channel spacing fields are automatically filled in.
Enter a frequency manually:
To be able to enter a frequency manually, open the
drop-down list with the channels you can choose from.
Select “Frequency” from the drop-down list.
Enter the desired frequency in kHz in the Frequency
field.
To select the required channel spacing, open the dropdown list with the channels spacings you can choose
from.
Select the channel spacing you want to use.
18
TDX Service Tool
Note
Select input
When you have selected a channel on the first
output of the output module using the channel
plan or entered a frequency manually then you
have also set up the other three RF channels
on the module in question.
You only need to select services for each of
the three other RF channels, or disable one or
more of the three channels.
To select services, click the Services... button next to
Select input label to open the Select services window.
19
TDX Service Tool
Note
Using a PAL or PAL HD downscale module
you can only output one service on each RF
channel.
In the Select Services window you can select the service that you want to output.
Note
By clicking one of those column headlines
that are underlined in the Select services window you can sort the list into alphabetical or
numerical order depending on which column
headline you click.
To select a service, click the check box (square) to the
right of the service you want.
Click OK to return to the Configuration window.
Now you continue to select or enter values in the other
fields in the Configuration window.
RF level correction
To select another RF level correction, open the dropdown list with the levels you can choose from.
Select the level you want to use.
Aspect ratio
To select the desired picture format, open the dropdown list with the formats you can choose from.
Select the format you want to use.
20
TDX Service Tool
First audio language
To select the preferred audio language, open the dropdown list with the languages you can choose from.
Select the language you want to use.
Second audio language
To select the second choice of audio language, open
the drop-down list with the languages you can choose
from.
Select the language you want to use.
Audio system
To select audio system, open the drop-down list with
the audio systems you can choose from.
Select the audio system you want to use.
Audio level correc- To make a correction to the audio level, open the dropdown list with the correction in decibel (dB) you can
tion
choose from.
Select the audio level correction you want to use
First subtitle language
To select the preferred subtile language, open the dropdown list with the languages you can choose from.
Select the language you want to use.
21
TDX Service Tool
Second subtitle
language
To select the second choice of subtitle language, open
the drop-down list with the languages you can choose
from.
Select the language you want to use.
Preferred subtitling To select the desired subtitling type or to turn subtitling
off, open the drop-down list with the options you can
type
choose from.
Select the subtitling type you want to use.
Subtitles offset
To move the position of the subtitles on a TV screen
a bit up or down you can enter the number of pixels
(from -40 to +40) you want to move the subtitles up or
down in the Subtitles offset field.
Disable teletext
If you want to make teletext unavailable, click the Disabled teletext check box.
Note
When you display the Configuration window for an output module
that has been configured, all fields are filled in and services have
been selected.
If you want to change the existing values or services just follow
the same procedure as when you configure an output module for
the very first time.
When you have selected or inserted the values you want, you have to click
the Submit button to enter this information into the headend system and return to the Output window.
22
TDX Service Tool
Remember to click the Apply button in the upper right-hand corner to save
new settings in the configuration.
Status information
Status information is placed at the bottom of the Configuration window. The
information displayed in the configuration window of a PAL module includes
status and revision of software.
Status
Informs you about the state of the output module.
SW revision
Displays the software version of the output module.
23
TDX Service Tool
When you return to the Output window the configuration of the output module is displayed in the module list.
Now you can continue to configure the other output modules one by one, following the procedure described on the previous pages.
24
TDX Service Tool
Delete output
modules
If you want to remove an output module and the associated configuration
you can use the Delete button of the module in question in the Output window.
Click the Delete button of the PAL or PAL HD downscale output module you
want to remove.
A message window is displayed asking you to confirm that you want to remove the output module.
Until you have removed the output module physically from the headend unit
the module list will display four lines with the writing in red.
25
TDX Service Tool
Network
window
Click the Network tab in the TDX Service Tool to display the Network window.
The first time you display the Network window the fields in the window will
display a default value. The service list area will display all the digital services
you have configured to output using the Output tab.
End-users may need the network ID if they have to make a NIT (Network
Information Table) search when searching for services on their televisions or
set-top boxes. Some set-top boxes may also need the original network ID in
connection with a NIT search.
You have to state network ID’s and names for both DVB-T and DVB-C.
Network ID
Enter the required network ID in the Network ID field.
If it is an open network, the network ID has to follow
the “ETSI TR 101 211” guidelines. If it a closed network
you can determine the ID yourself.
Network name
Enter a network name in the Network name field. The
maximum number of characters you can enter in the
field is 255.
Set original ID
If you want to change the default values of the original
network ID, click Set original ID check box to enable
the Orig. network ID field.
Orig. network ID
Enter the required original network ID in the Orig. network ID field.
A barker channel carries all EIT information for a number of services.
26
TDX Service Tool
Using a barker channel all EIT information will be transferred from the individual outputs to the barker channel thereby making more room/ payload
available to the output of services.
Note
If you to use a barker channel to carry the EIT information you have
to make sure that the set-top boxes used by end-users are NorDig
compliant, i.e. they can read a Linkage Descriptor from a NIT.
Enable barker
Click the this check box to enable a barker channel for
channel for DVB-T/ DVB-T and/or DVB-C .
DVB-C
Unit
Enter the ID number of the unit you where you want to
place the barker channel. You can enter values 1-3.
“1” = main unit
“2” = unit 1
“3” = unit 2
Backend
Enter the number of the output module where you want
to place the barker channel. You can enter values 1-6
Output
Enter the number of the output where you want to
place the barker channel. You can enter values 1-4.
In the service list area you determine the numerical output order of the digital
services on the television or set-top box of the end-user.
LCN number
Enter the desired number in the LCN number field to
the right of each service in the service list area.
Note
You cannot give the same LCN number to
more services.
When you have inserted the values you require you have to click the Submit
button to enter this information in to the headend system.
27
TDX Service Tool
Remember to click the Apply button in the upper right-hand corner to save
new settings.
Channel list
Click the Channel list tab in the TDX Service Tool to display the Channel list
window.
When you have finished configuring all the output modules you have inserted
in to the headend units the Channel list tab displays a list with all the channels and services that you have selected.
28
TDX Service Tool
Save configuration
An important button when you change your configuration of the headend
system is the Apply button placed in the upper right-hand corner of the TDX
Service Tool window.
Apply
Whenever you have made changes in your configuration,
“Apply” on the Apply button turns red to tell you that you
have unsaved changes that need to be saved.
Click the Apply button to save the changes. When changes have been saved the “Apply” text looses the red colour.
29
Manufacturer
Manufacturer
Dear Customer,
Should you require technical assistance in the event that your expert dealer
is unable to help you, please contact us at:
Triax A/S
Bjørnkærvej 3
8783 Hornsyld
Denmark
Tel.: +45 76 82 22 00
[email protected]
www.triax.dk
30
Your notes
Your notes
31
891075B
01 - 2012
TRIAX - your ultimate connection
TRIAX - your ultimate connection