1
Advanced Range Testing Using a Flight Log
The Standard Range Testing procedure is recommended for most sport
aircraft. For sophisticated aircraft that contain significant amounts of
conductive materials (e.g. turbine powered jets, some types of scale
aircraft, aircraft with carbon fuselages, etc.), the following advanced range
check will confirm that all remote receivers are operating optimally and
that the installation (position of the receivers) is optimized for the specific
aircraft. This Advanced Range Check allows the RF performance of each
remote receiver to be evaluated and to optimize the locations of each
individual remote receiver.
Advanced Range Testing
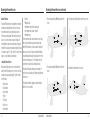
1. Plug a Flight Log into the Bind/Data port in the AR9200 and turn on the
system (Tx and Rx).
2. Advance the Flight Log until frame losses are displayed by pressing the
button on the Flight Log.
3. Have a helper hold your aircraft while observing the Flight Log data.
4. Standing 30 paces away from the model, face the model with the
transmitter in your normal flying position and put your transmitter into
range test mode. This causes reduced power output from the transmitter.
5. Have your helper position the model in various orientations (nose up,
nose down, nose toward the Tx, nose away from the Tx, etc.) while
your helper watches the Flight Log noting any correlation between
the aircraft’s orientation and frame losses. Do this for 1 minute. The
17
Flight Log
timer on the transmitter can be used here. For giant-scale aircraft it’s
recommended that the airplane be tipped up on its nose and rotated 360
degrees for one minute then the data recorded. Next place the airplane
on its wheels and do a second test rotating the aircraft in all directions
for one minute.
6. After one minute, a successful range check will have less than ten
recorded frame losses. Scrolling the Flight Log through the antenna
fades (A, B, L,) allows you to evaluate the performance of each receiver.
Antenna fades should be relatively uniform. If a specific antenna is
experiencing a high degree of fades then that antenna should be moved
to a different location.
7. A successful advanced test will yield the following:
H - 0 holds
F - less than 10 frame losses
A, B, L - Frame losses will typically be less than 100. It’s
important to compare the relative frame losses. If a particular
receiver has a significantly higher frame loss value (2 to 3X)
then the test should be redone and if the same results occur,
move the offending receiver to a different location.
Spektrum AR9200
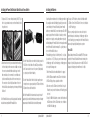
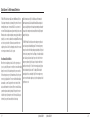
Spektrum’s Flight Log (SPM9540) is compatible with the AR9200 PowerSafe
Evolution. The Flight Log displays overall RF link performance as well as
the individual internal and external receiver link data. Additionally it displays
receiver voltage.
Using the Flight Log
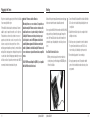
After a flight and before turning off the receiver or transmitter, plug the Flight
Log into the Data port on the PowerSafe. The screen will automatically
display voltage e.g. 6v2= 6.2 volts.
Note: When the voltage reaches 4.8 volts or less, the screen will flash indicating
low voltage.
Press the button to display the following information:
A - Antenna fades on antenna A
Spektrum AR9200
B - Antenna fades on antenna B
L - Antenna fades on the left antenna
F - Frame loss
H - Holds
Antenna fades—represents the loss of a bit of information on that specific
antenna. Typically it’s normal to have as many as 50 to 100 antenna fades
during a flight. If any single antenna experiences over 500 fades in a single
flight, the antenna should be repositioned in the aircraft to optimize the RF link.
Frame loss—represents simultaneous antenna fades on all attached receivers.
If the RF link is performing optimally, frame losses per flight should be less
than 20. The antenna fades that caused the frame loss are recorded and will be
added to the total antenna fades.
A Hold occurs when 45 consecutive frame losses occur. This takes about one
second. If a hold occurs during a flight, it’s important to reevaluate the system,
moving the antennas to different locations and/or checking to be sure the transmitter and receivers are all working correctly. The frame losses that led to the
hold are not added to the total frame losses.
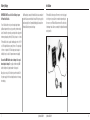
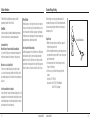
Note: A servo extension can be used to allow the Flight Log to more conveniently be
plugged in without having to remove the aircraft’s hatch or canopy. On some models, the
Flight Log can be plugged in, attached and left on the model using double-sided tape.
This is common with helicopters, mounting the Flight Log conveniently to the side frame.
18