1
14
STEP ELEVEN (ALTERNATE INSTALLATION)
In ponds where the water level fluctuates significantly, you may need to suspend a small weight (12”
of 1” galvanize pipe works well) at the mid-point of
the rope to take up any slack as the water level drops.
The weight should be light enough so the Fountain
can rise as the water level rises. This can also help
hide ropes by sinking them further below the surface.
STEP TWELVE
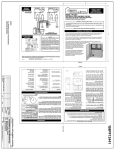
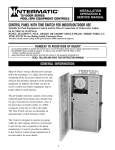
Install the C-75 control panel on the post with the
power supply. Use the #10 x 1” long or longer
screws and the screw placements on the control panel
to secure the panel to the post. NOTE: The control
panel must be hung upright in order to be waterproof.
STEP FOURTEEN
Hardwire the 240V/208V, 4 wire power into the C-75
control panel per the Instructions on page 7 of this
manual. The aerating fountain can either be plugged
into the 240V outlet on the right hand side of the C75 panel or hardwired into the panel.
PLUG: Test the GFCB with the test button now
and every 30 days. Insert the plug on the unit into the
outlet and securely close the outlet cover until it
snaps into place.
HARDWIRE: The bottom of the C-75 control panel
has several knock-outs for hardwiring the unit and
lights. Remove a knock-out that is not used for the
main power or lights (secondary side wires). Remove
the plug from the power cord on the unit and strip
back 12” of cord jacket to expose the wires (2 hot and
1 ground). With the main power disconnected, connect the bare wire (stripped) portion of the GREEN
ground wire to the grounding strip (GND) at the bottom of the panel and secure tightly. Locate and remove the plastic shield under the yellow timer (black
or clear depending on model). Under shield, lug #2
and #4 are LOAD lugs. Loosen the screws and insert
the bare wire (stripped) portion of the WHITE wire
into #2 and the bare wire (stripped) portion of the
BLACK wire into #4. Tighten both lugs securely.
Test the GFCB with the test button now and every
30 days. If lights are installed, they can now be wired
per Instructions on page 8 of this manual.
STEP THIRTEEN
Set Timer in the control panel to desired ON and OFF
times per the Instructions on page 7.
Once completed, power can be restored to the panel.
ENJOY YOUR NEW KASCO AERATING
FOUNTAIN!