1
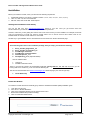
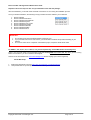
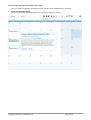
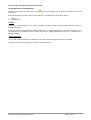
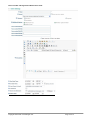
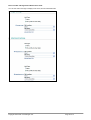
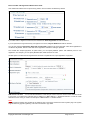
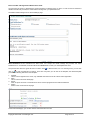
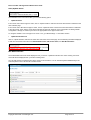
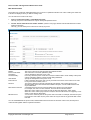
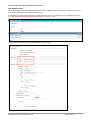
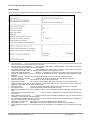
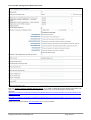
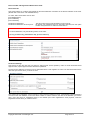
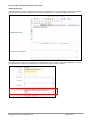
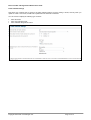
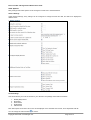
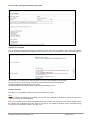
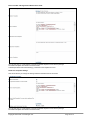
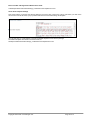
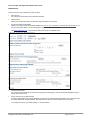
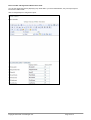
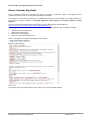
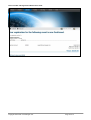
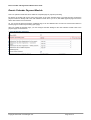
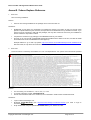
Event Calendar and Registration 4.0
www.invenmanager.com
Complete out-of-the-box solution for events management and registration.
User Guide
Copyright 2002-2010 invenmanager.com
Module Version: 4.0
DNN Version: 4.7.x – 5.x
Document Version 3.0
Last Update: 22 April 2010
This module is developed for DotnetNuke (DNN) 4.7 and above only. For new release compatibility, please refer to
developer website for more details. For more information on DotnetNuke, go to website www.dotnetnuke.com.
For technical support, please visit support forum at www.invenmanager.com
Or send email to [email protected]
Event Calendar and Registration Module User Guide
Features Overview
General Features
Fully Customizable, Template Based With Tokens
Ready To Use With Factory Settings
Easily Configurable View
Support Events Registration
Support Payment Gateway
RSS Feed
Import & Export
Event Search and Integrated DNN Search
Ajax with JQuery for Better User Experience
Unlimited Custom Properties
Events Management
Calendar View
Events Categories with Permission
List View
Sub-Calendars with Linked Modules
Detail View
Enhanced Venue Management
Day View
Email Notification
Supports Recurring Events
Time Zone Settings
Allow Export Events To Outlook
Flash Calendar for Highlighted Events
Unlimited Event Reminder
Enhanced Role Based Permission
Related Events
Allow Comments and Ratings
Events Registration
Max Participants Allowed
Registration Start and End Date
Free or Paid Event
Multiple Payment Gateways
Customized Registration Manager View
Email to Event Participants
Export Participants Information
Different Detail View For Registered Users
Bulk Registration For More Than One Event
Page Redirection After Registration
Multiple Attendees Profile
Event Registration Report
Bundled Item Sale
Promo Code and Discounts
Satellite Module
Perfect for Highlighting Events At a Separate Page
Linked to Sub Calendars
Fully Customizable View With Tokens
Filter By Categories
Flash Calendar
Highlighting Events At Your Landing Page
Link To Event Detail Page
Quick Add Event
Handy Tool to Add Event Quickly
Copyright 2002-2009 invenmanager.com
Link to Main Calendar
Page 2 of 73
Event Calendar and Registration Module User Guide
Installation
Before you install the module, check your site meet the following requirement:
1.
2.
3.
DotnetNuke (DNN) 4.7 and above. (Tested on DNN 4.7, 4.8.x, 4.9.x, 5.0.x, 5.1, 5.2.x, 5.3, 5.4)
.NET 2.0, .NET 3.0, .NET 3.5 Framework
MS SQL 2000, 2005 or MS SQL 2005 Express
Getting the Installation Files Ready
You can get trial copy from www.invenmanager.com, install on your site. Once you get license code from
Snowcovered.com, just activate the license, all your data will be preserved.
However, make sure you are getting the License code for the same version you have installed. For example, the license
code you purchased for v4.0 will only work for module version v4.0. It will not work for other version such as v3.1
installed. Refer to Activate License section for more detail.
Another way to get installation file is to download from Snowcovered.com Product Download page.
VERY IMPORTANT:
There following files come in the installation package, after you unzip, you should see following:
1.
2.
3.
4.
5.
6.
Event_Calendar_Registration_4.0
Event_Calendar_PromoCodes_4.0
InvenManager.Comments
InvenManager.Comments.Admin
CustomProperties_1.2.1
FacilityBooking_2.1.3 (Optional Module)
And two additional files:
1.
2.
License.txt
Installation-Readme-First.txt
There is one more file needs to be downloaded if you are running DNN 4.7, 4.8, 4.9, 5.0, 5.1, 5.2. If you are
running DNN 5.2.3 and above, you do not need the following file:
This file can be downloaded from www.invenmanager.com Download page (You need to login first)
1.
Telerik.Web.UI.zip
Install the Module
To install the module with Private Assembly (PA), follow the standard DotnetNuke (DNN) installation guide.
1.
2.
3.
4.
5.
Login with Host Account
Go to Host >> Module Definitions
Click on the Install New Module from the module action menu.
Browse the installation file (Private Assembly).
Click on Install New Module button.
Copyright 2002-2009 invenmanager.com
Page 3 of 73
Event Calendar and Registration Module User Guide
Repeat the above five steps for ALL six (6) sub modules came with the package.
After each instllation, you should check and make sure there is no error during the installation process.
Once you finished installation, the following nine (9) modules should be added to your module list:
1.
2.
3.
4.
5.
6.
7.
8.
9.
Events Calendar
Events Calendar Attendance
Events Calendar Flash Calendar
Events Calendar Payment
Events Calendar Promo Codes
Events Calendar Reg Detail
Events Calendar Quick Add
Events Calendar Satellite
Events Calendar Search
IMPORTANT:
1.
2.
3.
This module works with DotnetNuke (DNN) Framwwork only.
If you purchased the source code version, you should ONLY install the PA (Private Assembly) to your
website.
The source codes can be compiled in a standalone project, it requires Visual Studio 2008
For DNN 4.7, 4.8, 4.9, 5.0, 5.1, 5.2 Users, or if you are experiencing “Telerik.Web.UI.dll” file missing error:
There is one more file needs to be downloaded if you are running DNN 4.7, 4.8, 4.9, 5.0, 5.1, 5.2. If you are running
DNN 5.2.3 and above, you do not need the following file:
This file can be downloaded from www.invenmanager.com Download page (You need to login first)
Telerik.Web.UI.zip
1.
2.
Download Telerik.Web.UI.zip from http://www.invenmanager.com/Download.aspx
Unzip Telerik.Web.UI.zip and upload Telerik.Web.UI.dll to your website bin folder.
Copyright 2002-2009 invenmanager.com
Page 4 of 73
Event Calendar and Registration Module User Guide
Once you installed the package, the following nine (9) modules will be available from the module list.
1.
Events Calendar Main Module
This is the main module renders a calendar view, list view and daily view of events.
Copyright 2002-2009 invenmanager.com
Page 5 of 73
Event Calendar and Registration Module User Guide
2.
Satellite Module
This is a module to render a list of events base on view options. This is usually used at another page such as your
website landing page to highlight some of your events, from where the main module is linked.
3.
Flash Calendar Module
This is an additional module which allows events highlighted in a Flash calendar, the detail button will link to the
main module.
Sample flash calendar
This flash calendar sample was customized by Accuraty Solutions
4.
Quick Add Event Module
5.
Events Calendar Payment Module
This module is a special module created to process payments for event registration. You can place this module on a
different page. If your site supports SSL (Secured web page), you can configure this page to use SSL.
Once you added this module to a page, you need to configure the main module to direct to this page for payment.
Copyright 2002-2009 invenmanager.com
Page 6 of 73
Event Calendar and Registration Module User Guide
6.
Events Calendar Search Module
This module allows you to search for events across all calendars on the portal.
7.
Events Calendar Promo Codes Module
This is the module you can use to create Promo Codes to be used offset payments during event registration.
Copyright 2002-2009 invenmanager.com
Page 7 of 73
Event Calendar and Registration Module User Guide
8.
Events Calendar Reg Detail Module
This is a very flexible module that can be placed on any of your page, by passing a parameter “regid”, it can display the
detail information of that registration record. One typical way to use this module is to create a page, have this module
added, setup so that user will return to this page after successful registration, the user will see his registration detail to be
displayed on this page nicely according to the display template.
9.
Events Calendar Attendance Module
This is the module for you to mark attendance: Attended, Absent, or Tardy. Print name tags, as well as sending out
emails base on their attendance status.
Copyright 2002-2009 invenmanager.com
Page 8 of 73
Event Calendar and Registration Module User Guide
License Activation
The module does not require activation if you are running on http://localhost. You can have access to full functionalities
with up to 10 events, after that, you need to activate the module.
About the License
Once you purchased the module, the license code will be emailed to you immediately, please check your email inbox
and junk mail folder used when you purchase the module.
If you do not receive the license code after two hours, you can email to [email protected] to request a license
code by providing Invoice number.
The difference licenses are listed below. One DNN Installation means one DotnetNuke database, one instance of
DotnetNuke, one IP address, but you can run multiple portals on this instance.
Event Calendar & Registration
Standard Edition
Enterprise Edition
Enterprise + Source
DNN Installation
(One DNN Database Installation on one IP)
1
20
100
Developer Environment Installation
Localhost only
20
100
Main Calendar Module
Flash Calendar Module
Satellite Module
Quick Add Module
Unlimited Email Support
Unlimited Forum Support
Private Assembly (PA)
Priority Support (Include Telephone)
Source Code
Compatibility
DNN 4.7 and above
Event Calendar
Does not support Event Registration feature.
Event Calendar & Registration
Full functionalities
IMPORTANT
The Standard Edition does not support Load Balancing, clustering, or multi IP addresses environment, for
such multi IP address environment, minimum requirement is Enterprise Edition.
Copyright 2002-2009 invenmanager.com
Page 9 of 73
Event Calendar and Registration Module User Guide
Activate the License
1.
2.
Once you installed the module to your portal, you can activate it from the "License" page, it is available from the
Module menu.
You need to login as Host Account to your portal to see the License menu.
To activate the license, enter the license code you received in email, and click on Activate button.
If you have problem with activation, please check and make sure the following:
1.
2.
3.
You need Internet access on the web server to activate the license.
You need write permission to the website "bin" folder, the activation process will write a license file.
For Standard Edition license, please only activate it on production server, you can only activate it once. You do not
need to activate it if you are running as Localhost.
To check your license and activation status, or to manually activate license, click here to visit self-service page.
If you still have problem activate license online, please send the following data to [email protected], and then
we will send you a license file. You must include the following data:
•
•
Your activation code, or your invoice number
The encrypted server data. (You can find it at the License page)
Copyright 2002-2009 invenmanager.com
Page 10 of 73
Event Calendar and Registration Module User Guide
General Features
There are many features provided by the main calendar, the picture below shows a typical calendar view.
Category and Sub
Calendar Selection
Copyright 2002-2009 invenmanager.com
View
Selection
Page 11 of 73
Event Calendar and Registration Module User Guide
Click
for Events Calendar List View
Click
for Events Calendar Day View
Copyright 2002-2009 invenmanager.com
Page 12 of 73
Event Calendar and Registration Module User Guide
Main Calendar Module
The main calendar module is the core module offers many features for your event management and registration.
The default view is the calendar view where all the event titles are displayed in the respective cells for the day. It allows
you filter events by Category, by Sub Calendar, as well as by Month. You can also search for event.
Note:
The search function will search for the period configured to display events in List View.
The main calendar view also allows users to preview the event detail in a pop up balloon. The template to display the
pop up balloon and the title view in the calendar can be changed easily at the Settings page. Refer to the Settings
section for more detail.
Copyright 2002-2009 invenmanager.com
Page 13 of 73
Event Calendar and Registration Module User Guide
Manage Categories
Events can be linked with multiple categories or single category base on the option set at the Settings page. You can
specify the User Roles that can view each category of events.
Only events viewable by the current user will be displayed in the calendar view and list view.
Copyright 2002-2009 invenmanager.com
Page 14 of 73
Event Calendar and Registration Module User Guide
Manage Venues
You can store Venue information in the database and a View Event Detail page is also available to display the venue
information, such as direction, Google Map and so on can be displayed in the Venue Description.
Once the venue is stored in database, you can select the venue from the drop down list instead of keying in manually.
And the surfer will be able to click on
to view more information about the venue.
The template for the link to Venue detail can be changed at the Settings page.
Copyright 2002-2009 invenmanager.com
Page 15 of 73
Event Calendar and Registration Module User Guide
Manage Optional Items
Additional optional items can be provided for the event registration process. If Optional Items are available, these will
appear when an event is created.
They are further linked to each event, if the optional items are not applicable to a particular event, you can uncheck them
so they will not appear in the registration page for that event.
Copyright 2002-2009 invenmanager.com
Page 16 of 73
Event Calendar and Registration Module User Guide
Create New Event and Edit Event
Creating a new event is very easy. Click on the
action menu.
sign form the calendar view, or Add New Event from the module
Input the information according to the on screen instruction, and please take note of the two options:
1.
2.
Category
Optional Items
Category
It allows you to link an event to one or more categories, for which is linked with role based permissions. (Refer to
Manage Categories).
There is an option to set whether allow multiple categories or not under the Settings page. If this is set, the check box for
all categories will be displayed when you create new event. If multiple categories is turned off, a dropdown list is
displayed instead.
Custom Properties
You can add Custom Properties to the Edit event form. Refer to Custom Properties section for more detail.
In order to use the Custom Property for event form, set the category to 1.
Copyright 2002-2009 invenmanager.com
Page 17 of 73
Event Calendar and Registration Module User Guide
Copyright 2002-2009 invenmanager.com
Page 18 of 73
Event Calendar and Registration Module User Guide
Optional Items
This is an additional feature to allow users customize their own optional items to be chosen when user register for an
event.
The items available are configurable at the Manage Optional Items page. If an event is linked with optional items, then
user will be able to select the optional items when register for this event.
Optional Items example: Translation, Catering, Vegetarian, and so on.
Copyright 2002-2009 invenmanager.com
Page 19 of 73
Event Calendar and Registration Module User Guide
You can also select an image to display for the event, and two attachment files.
Copyright 2002-2009 invenmanager.com
Page 20 of 73
Event Calendar and Registration Module User Guide
This module also allows user to input recurring events. One Time Event is selected by default.
If you allow users to register for this event, the checkbox for Allow Registration should be selected.
If you request users to login before they can register for an event, Only for Members should be checked.
You can also specify a Registration Start Date and End Date, relative to the event start date. After which registration is
not allowed. By default, the event start date is the registration end date if nothing is specified.
The module also accepts payments for paid events; you can specify different options with different price for user
registration. For example, you can specify Members $50, Public $100 for an event.
Another option is to add user who registered for the event to a particular role, upon registration or payment.
Add User to This Role: You can add the attendee to a user role (Or create a new user account if the attendee’s email
is not found). To configure the roles that can be added, go to Main Settings >> Permission Section. In order to create
attendee as a new user, you need to set the option at Main Settions >> General Section.
Note:
If accept payment settings are provided at the Settings page, user will be re-directed to the Payment page. The system
supports the many payment gateways, user also can choose to pay offline.
Copyright 2002-2009 invenmanager.com
Page 21 of 73
Event Calendar and Registration Module User Guide
You also have the option to broadcast the event information to selected group of users. If a role of users is checked or
Additional emails are provided, the emails will be sending when you update the event.
The default email message can be set the Settings page.
Event Notification: Event notifications are NOT saved. If the subject and email message are provided, and “Send
Notifications To” are selected, the emais will be send IMMEDIATELY when you create/update the event
The picture below shows a typical list view of events. Click
to Edit the event, if it is a recurring event, you can also
click on
to edit one particular occurrence. There are many links you can add to the template, the default template
provides the following links in the item template:
1.
2.
3.
4.
Register
This is a link to register for the event, only available when the event is set to allow online registration.
MoreP
This is a link to the event detail page.
Export.
A link to export the event to VCS file which can be used for programs such as Microsoft Outlook.
Return
Return to the normal view of the page.
At the Event Detail page, you can also add an email reminder to be sent.
Copyright 2002-2009 invenmanager.com
Page 22 of 73
Event Calendar and Registration Module User Guide
Save/Update Event
Once the data for the new event is filled, you have the following option:
•
Update & Return
If the current user is able to approve event, click on “Update & Return” will save the event data and then redirected to the
main calendar page.
If the current user is NOT able to approve event, click on “Update & Return” will save the event data and then redirected
to the “My Events” page. And the event will be submitted for approval, depends on the configuration at “Manage Email
Configuration” settings, an email may be sent to the appropriate user to approve this event.
To configure whether a user can Approve an event or not, go to Main Settings >> Permission Section.
•
Update & Edit Other Info
Click on “Update & Return” will save the event data and remain at the same page, and the following link will be displayed
to edit other information about the event: Edit Related Events, Edit Promo Codes, and Edit Bundled Items
Edit Related Events
The “Edit Related Events” link will be displayed once you click on “Update & Edit Other Info” when creating new event
and it will also be displayed when you Edit an existing event.
You can add and remove related event via the screen as shown below. You can add token [RELATEDEVENTS] to the
event template to show a list of links to related events.
Copyright 2002-2009 invenmanager.com
Page 23 of 73
Event Calendar and Registration Module User Guide
Edit Promo Codes
The “Edit Promo Codes” link will be displayed once you click on “Update & Edit Other Info” when creating new event and
it will also be displayed when you Edit an existing event.
You can edit Promo Codes in two ways.
1.
Click on “Edit Promo Codes” at the Edit Events page.
This way, the promo code created can only be used by this particular event.
2.
Use the “Events Calendar Promo Codes” module. (Create a new page, add the “Events Calendar Promo Codes”
module to the page)
This way, you can create promo code can be used by any event.
Module:
Promo Code Name:
Description:
Issued Quantity:
Valid Period:
Event Item ID:
Discount:
Max Discount Amount:
Minimum Price:
The promo code can be used for this Event Calendar module.
The code name to be used. (Mandatory field)
A short description about the promo code.
How many times this promo code can be used, this will be used to check validity of the promo
code by comparing with the number of times being redeemed
Specify the valid period for this promo code.
If this is specified, the promo code can only be used for that event. If the code is to be used
for any event in that module, enter -1.
Two types of discount mode are supported: By percentage, and by dollar amount. The
discount applies to the total amount that includes event price, cost for additional items and
any bundled items.
A maximum discount amount can be specified, if the discount is by percentage.
For example, the code is for 50% discount, and max discount amount is $30.
When this code is used to pay for $40 in total, the discount will be 50%, which is $20.
When this code is used to pay for $100 in total, the discount will be 50% but capped by a max
of $30, so the discount will be $30.
You can set a minimum price for this promo code to be valid. For example, the minimum price
for the promo code is $50. So, the promo code can only be used to any purchase that is more
than $50.
You can Add/Edit/Delete the promo codes, Redeemded means the number of times the code is used, and the promo
code is stored together with the Payment information.
Copyright 2002-2009 invenmanager.com
Page 24 of 73
Event Calendar and Registration Module User Guide
Edit Bundles Items
The “Edit Bundled Item” link will be displayed once you click on “Update & Edit Other Info” when creating new event and
it will also be displayed when you Edit an existing event.
The bundled items will be displayed at the registration form if the event is not a free event. For free bundled items, enter
$0. The bundled items will be automatically created when you copy an event.
The bundled items will appear in the registration form as shown below:
Copyright 2002-2009 invenmanager.com
Page 25 of 73
Event Calendar and Registration Module User Guide
Main Settings
Many options are available under the Main Settings page to allow you to customize the looks and behavior of the module.
•
•
•
•
•
•
•
•
•
•
•
•
•
•
•
•
•
•
Event Time Zone:
This is use particularly for Export events to desktop, in order to synchronize the time, you will
need to set the time zone according to your own locale.
Day Light Saving Time Adjustment:
During the Day Light Savings, or BST in British, you can adjust the timing in
order to synchronize the event time with your Outlook.
Also Display Events for Modules:
Sub-Calendars, this module allow you display events from other modules
as well (Linked Modules). User can select the sub calendar to view respective events.
Display Sub-Calendar Selector:
Whether or not display the drop down list to allow user to select which subcalendar to display events. If this is not checked, all events from all of the sub-calendars (linked modules) will be
displayed.
Default to List View: Calendar view is displayed by default and you can choose to display List View.
Allow filter events by categories:
If this is set, a dropdown list will be shown to filter by categories.
First day of the week:
The first day of the week in the Calendar view.
Check Event Conflicts:
Turn on this to check conflicts with other events when you create/update event.
Display events in other month: If this is checked, in April 2008 calendar view, some events in March, May 2008
displayed in April 2008 calendar will be visible as well.
Allow Detail View:
If this is not checked, full content will be shown in list view. (base on template)
Event Time Interval:
It supports 30min and 15min time interval for events.
Display “My Registration” link: This will allow users to view their registration details, otherwise, only Editors can
view.
Allow Registered Users to Post Events:
If this is checked, registered users can post events and edit their
own events
Popup Window for Event Detail:
If this is checked, event detail will be displayed in a pop up window instead
of redirect to another page in the same window.
Events description length in list view: In list view, you can limit the length of the events description to be displayed,
user can view the full content at the detail view.
Title length in calendar view: Max length of the Title to be displayed in the calendar view
Title length in tool tip:
Max length of the Title to be displayed in the calendar view tool tip balloon.
Events description length in tool tip: Max length of the description to be displayed in the calendar view tool tip
balloon
Copyright 2002-2009 invenmanager.com
Page 26 of 73
Event Calendar and Registration Module User Guide
•
•
•
Allow RSS: This is option to display a RSS link at the top of the calendar
Allow Comments & Rating:
Turn on this to allow comments and rating feature to be shown on the event detail
page.
Check Venue Availability:
Select a Facility Booking module instance to check the Venue availability, and to
prevent conflict for the venue. For more information on Facility Booking module, go to www.invenmanager.com.
Event Registration Settings
This section allows you change the settings related to the event registration.
Redirection Tab after Registration:
After a successful registration for the event, the user is linked to this page.
This is useful when you have an acknowledgement page or something like that.
Additional Fees:
Now you can specify an Additional Fee on top of the total events fees.
Accept Online Payment: If this is not ticked, online payment page will not be shown when user register for an event.
The three different type of payment mode has to be enabled in order to have the option.
Send Reminder Email:
Whether to send reminder email or not.
Send Email to User upon Registration:
An acknowledgement email is sent to the user upon registration.
Upon Registration, Send Duplicate Email To: This is self explanatory.
One Registration per User per Event:
This is an optional check to control the same user can only register for the
same event once.
PayPal Account:
The PayPal account used to receive payment.
PayPal URL:
Use sandbox for testing purpose.
Authorize.NET Login:
The account login ID.
Transaction Key:
The unique key given by Authorize.NET.
Is Test Mode:
To indicate Authorize.NET is in test mode or not.
Copyright 2002-2009 invenmanager.com
Page 27 of 73
Event Calendar and Registration Module User Guide
Note: For Samport payment gateway Hosted version, if you need to update the payment status from Samport site
after a completed transaction, you need to configure the Response URL at the Settings page to the following:
Approved:
http://www.yourwebsite.com/desktopmodules/eventscalendar/samportaccept.aspx?OrderNo=*&InvoiceId=!&AuthNo=#&
ResponseCode=$
Denied:
http://www.yourwebsite.com/desktopmodules/eventscalendar/samportaccept.aspx?OrderNo=*&InvoiceId=!&AuthNo=#&
ResponseCode=$
Please note you need to change www.yourwebsite.com to your own domain.
Copyright 2002-2009 invenmanager.com
Page 28 of 73
Event Calendar and Registration Module User Guide
Email Reminder
This section allows you configure the template for the email notification. All tokens for the Events Calendar can be used.
(Please refer to the Annex A for available tokens).
For users, ONLY three tokens can be used:
[User:DisplayName]
[User:FirstName]
[User:LastName]
Enable Event Reminders:
Enable Event Reminders for Anonymous:
Tick this to allow users to add reminders for future events.
By default, only registered users can add event reminders, tick this option
to allow anonymous user to add event reminders too.
IMPORTANT:
For Event Reminders, only the following tokens can be used:
[TITLE], [EVENTDATE], [READMORELINK], [Portal:PortalName]
Permission Settings
This section set the user roles that can approve, submit events. Events posted by users not under authorized event
approval roles, requires approval before the event is published.
The last section defines the roles that can be subscribed when a user registers an event. The roles will be listed at the
Add User Upon section when you enter an event.
Auto Create user for Attendees: If this is turned on, when someone registers for event, if the attendee’s email specified is
not found in the user database, a new user will be created. In order to create a new user for the attendee, you need to
add a user role (such as, Registered Users) to be created upon event registration/or event payment, under the
Registration section when you create an event.
Copyright 2002-2009 invenmanager.com
Page 29 of 73
Event Calendar and Registration Module User Guide
Additional Messages
Under this section, you can set the optional messages to be displayed at the Event Registration page and the Payment
page. As well as the Terms & Conditions that user must agree before they can proceed to register for the event.
The screen below shows a Terms & Conditions is displayed and user must agree. These will be displayed if you have
provided terms and condition at the Settigns page, and checked the option “User must agree”.
Copyright 2002-2009 invenmanager.com
Page 30 of 73
Event Calendar and Registration Module User Guide
Flash Calendar Settings
This allows you to define what to show for the falsh calendar module. Once the setting is saved, and only when you
update or create a new event, the XML file is updated and the flash file is refreshed.
You can choose to display the following type of events:
•
•
•
Show all events
Show only featured events
Show selected categories of events
Copyright 2002-2009 invenmanager.com
Page 31 of 73
Event Calendar and Registration Module User Guide
Other Settings
This option is for user to choose to not to load the jQuery and Beauty Tips scripts if the website is already loading it from
other modules:
The scripts used by v3.0 are following versions:
1.
2.
jQuery 1.3.2
Beauty Tips 0.95
Copyright 2002-2009 invenmanager.com
Page 32 of 73
Event Calendar and Registration Module User Guide
View Options
Many settings under View Options can be changed to control how to module behaves.
General Settings
Under General Settings, many settings can be configured to change the looks and feel, and data to be displayed in
different views.
Theme Settings
This section allows you to set the Theme for your calendar. The package comes with firve themes:
1.
2.
3.
4.
5.
Default (Blue) theme
Red theme
Green theme
Purple theme
Yellow theme
Each theme pack comes with a set of icons to be displayed on the Calendar view tool bar, and a Stylesheet CSS file.
You can change the CSS and click
to save it.
Copyright 2002-2009 invenmanager.com
Page 33 of 73
Event Calendar and Registration Module User Guide
Calendar View Template
You can completely customize the display in the calendar view as well as the tool tip balloon. Tokens are fully supported
such as the one provided by default is displayed below. Refer to Annex A for more details on how to use Token Replace.
You can click on the “Click here for token reference” for a list of tokens available for the template.
You can also click on “Load Default” to restore the default template comes with the package.
The default templates are stored in the resource file,
at /desktopmodules/eventscalendar/App_LocalResources/Template.ascx.resx
List View Template
This allows you to completely customize the List View template with Tokens.
Note:
If a Skin is selected to display the event detail, then only the event detail will be displayed in that skin and rest of the
content on the page will not be displayed.
If no skin is provided, the event detail is displayed inline with the module. This means the event detail is displayed where
the Calendar view is displayed, and other content on the page (if any) will still be displayed. (This is the default setting)
You will notice a parameter is passed to the page: vw=2
Copyright 2002-2009 invenmanager.com
Page 34 of 73
Event Calendar and Registration Module User Guide
You can also click on “Load Default” to restore the default template comes with the package.
The default templates are stored in the resource file,
at /desktopmodules/eventscalendar/App_LocalResources/Template.ascx.resx
Detail View Template Settings
This section allows you change the settings related to the detail view of the events.
You can also click on “Load Default” to restore the default template comes with the package.
The default templates are stored in the resource file,
Copyright 2002-2009 invenmanager.com
Page 35 of 73
Event Calendar and Registration Module User Guide
at /desktopmodules/eventscalendar/App_LocalResources/Template.ascx.resx
Venue View Template Settings
This section allows you change the settings related to the venue view of the events. This is used when you click on the
Venue name from the list view, a pop up window will show the venue detail using this template.
You can also click on “Load Default” to restore the default template comes with the package.
The default templates are stored in the resource file, at
/desktopmodules/eventscalendar/App_LocalResources/Template.ascx.resx
Copyright 2002-2009 invenmanager.com
Page 36 of 73
Event Calendar and Registration Module User Guide
Maintenance
Three functions for event maintenance are provided.
•
Purge Events
You can purge events that is before the date specified.
•
Export Events
Allows you to export all events from the date range specified to Excel format.
•
Import from DNN Events Module
Allows you to import events from Default DNN Events, this is only compatible with DNN Events 05.00.01, if you
are not running this version, you should upgrade to this version first before import.
Visit www.dotnetnuke.com to download the DNN Event 05.00.01 installation pack.
•
Import from Excel File
You can import from Excel file to create events quickly from existing data. Click on Download Sample link to get a
sample file for data format.
•
Import / Export from Google Calendar
In order to import/export from Google Calendar, google account and password are required, and correct time zone
should be selected for Google Calendar, this will be used to convert to ECR module’s time zone setting.
To configure time zone, go to Main Settings >> General Section.
Copyright 2002-2009 invenmanager.com
Page 37 of 73
Event Calendar and Registration Module User Guide
Event Approval
Go to “My Events” page to check event listing, and approve events. Click on the link
from the tool bar.
Click
button at the module tool bar after login as an authorized user, you can see the list of events. You can choose
to see “Show All My Events” or “Show Not Approved Events”. You can Delete, Edit, or Approve events here.
Copyright 2002-2009 invenmanager.com
Page 38 of 73
Event Calendar and Registration Module User Guide
Manage Email Notifications
This is to configure all email notifications setting and templates. You can now fully control how, when and what email to
be sent to the attendees/ or user who registered the event.
Send Email From:
All notification email will be sent from this address.
Email Type:
Send email as Html or Text
Send email upon event registration: Turn on this to send email when someone registers an event, however, if the email
notification template is empty, no email will be sent.
Also send duplicate email to event owner:
Click this, the email notification will be sent as CC to event owner’s
email
Send email upon successful online payment for paid event:
Turn on this, to send email when attendee pays online
Send email if user clicks on Make Offline Payment: Turn on this, an email will be sent to user when he choose to
make offline payment, you can include instructions in the email for offline payment.
Send email upon manually receiving payment:
Send email when admin user clicks on “Payment Received” icon
at Registration Manager.
Send email if registration status is changed:
Send email when admin user changes the registration status at
Registration Manager.
Send approval notification for unapproved new events:
Turn on this, an email will be send to event approvers, to
approve event when a new event is created.
Send to this email address:
Specify an email to receive notification for event approval
Send to all users under roles can approve events:
Turn on this, emails will be sent to all users under Roles
that can approve events, when an new event is created
that requires approval.
Email Templates:
The email template must be configured for each type of notification.
VERY IMPORTANT:
If you are not receiving emails for registration, please select the email template, and make sure it is not
empty.
If the template is empty, even it is configured to send email, the email will not be sent.
Copyright 2002-2009 invenmanager.com
Page 39 of 73
Event Calendar and Registration Module User Guide
Event Registration
If an event is set to allow registration, user can click on Register link to the Event Registration page as shown below.
1.
Type of Fees
This will appear only when you have specified a fee for the event.
2.
Options
This is available when optional items are linked to the event for user selection.
3.
You can also define Custom Properties for the registration form. Refer to the last section for more detail.
You can tick on “Remember this attendee” to save the attendee data, so that you can re-use it next time when you
register for other events. The system also allows you to Add Another Attendee, all the data available is for that attendee
only. Once you finished, click on Register button.
If Accept Online Payment is enabled at the Settings page and if the event is not free (a type of fee is provided), the
Payment page will be displayed after the Event Registration page.
Copyright 2002-2009 invenmanager.com
Page 40 of 73
Event Calendar and Registration Module User Guide
Copyright 2002-2009 invenmanager.com
Page 41 of 73
Event Calendar and Registration Module User Guide
Registration Manager
from the main calendar module to access the Registration Manager. It offers two different views to
User can click
two types of users:
1.
Normal users who is allowed to register events
They can view their registration details of the past and future event registration, make amendments if necessary.
2.
Users with Editor permission for the module
They can view all the events registered, send mass mail to event participants.
The Attendee View can be configured from the Design Report page.
From the Registration Manager, admin user is allowed to send bulk mail to event attendees from the mass mail facility
provided. All attendees displayed from the filtering criteria will receive the emails.
You can enter attendee’s name to filter for registration data.
Copyright 2002-2009 invenmanager.com
Page 42 of 73
Event Calendar and Registration Module User Guide
You can also design the report by displaying only useful data to your event administrators, they can export report in
Excel and in HTML format.
Click on Design Report to configure the report.
Copyright 2002-2009 invenmanager.com
Page 43 of 73
Event Calendar and Registration Module User Guide
Bulk Registration
Another feature offered by this module is to allow users to register for more than one event at one time, called “Bulk
Registration”
The link to Bulk Registration is only available from the module action menu. If you want users to access to this page, you
should expose the link to users manually. One way is to display the link using Custom Tex on the Tool Bar at the
Settings page.
Copyright 2002-2009 invenmanager.com
Page 44 of 73
Event Calendar and Registration Module User Guide
Events Calendar Satellite Module
The greatness of this module comes in with the flexibility offered by the magic Satellite Module.
This is a separate module extension to allow you to display a list of events in a different format at a different page (for
example, home page) and then link to the Events Calendar page for details. This is very useful if you want to highlight
upcoming events to your visitors at home page. It is fully template based, so you can display it any way you want.
Below are some sample displays of the module:
Copyright 2002-2009 invenmanager.com
Page 45 of 73
Event Calendar and Registration Module User Guide
Copyright 2002-2009 invenmanager.com
Page 46 of 73
Event Calendar and Registration Module User Guide
View Options
Under the View Options of the Satellite Module, you can change the looks and behavior.
•
•
•
•
•
•
•
•
•
•
Display Events for This Module:
Show Events:
Select which Events Calendar module to link to this Satellite Module
You can set to one of the following:
a. Show featured events only
b. Show all events
c. Show selected categories only
Display Events Starting From This Date:
You can specify a date from which the events will be shown. If
nothing is provided, it will display events starting fro today.
Specify the Period To Display Events. Display events from the date specified for the period specified.
Max Number of Events to Display:
The Max event count to display in this module.
Display Small Calendar:
If this is ticked, a small calendar with dates highlighted if events exist on the
day. The behavior of this small calendar also can be configured to either link to Main Calendar page (when clicked)
or show events at the bottom of the small calendar.
Only Display Category List and Link to Main Calendar: If this is ticked, this module will only render a list of events
and link to the main calendar, as shown in the next picture.
Display Category Drop Down List:
Tick this to display the Category filter drop down list.
Link to Main Calendar Day View:
If this is ticked, when you click on a day on the small calendar, it will take
you to the main calendar day view of that particular day, instead of displaying a list of events at the bottom of the
small calendar. (This is only in effect when small calendar is displayed)
View Templates.
This is the same as the List View Template. Please refer to Annex A for available tokens.
Copyright 2002-2009 invenmanager.com
Page 47 of 73
Event Calendar and Registration Module User Guide
If the “Only Display Category List and Link to Main Calendar” option is ticked, the Satellite module will display like this:
Click on the link to view events in that category in the main calendar.
From the View Options, you are allowed to set a style sheet for the display, similar to the Main Settings to configure for
the main calendar.
Copyright 2002-2009 invenmanager.com
Page 48 of 73
Event Calendar and Registration Module User Guide
Events Calendar Flash Calendar
Another separate module comes in the package is the Flash Calendar which highlight the events in a Flash format, and
link to the event detail page.
The flash file reads an XML file which is generated by the Events Calendar main module. In order to have it generated,
the option for Generate XML for flash calendar at the Main Settings should be checked, and an xml file will be
generated each time an event is posted or deleted.
The path of the XML is at:
[PortalRootDirectory]/eventscalendar[ModuleID].xml
For example:
/portals/0/eventscalendar862.xml (where 862 is the ModuleID of the main Event Calendar module)
The xml file is used by the Flash module to read the events and display it.
Note:
Currently the design of the Flash Calendar can only display one event per day, this is due to the design constraint. If
you want to display all events for a day, the falsh calendar may not be a desirable solution for you.
Copyright 2002-2009 invenmanager.com
Page 49 of 73
Event Calendar and Registration Module User Guide
View Options
The Flash Calendar is very flexible you can configure many settings from the View Options page.
The first thing you need to select an XML file to display events, which is generated by the main calendar module as
described in previous page.
You can also set the size, display color, the Detail button colors. The default size is 800 x 180 px. If you adjust the size, it
should maintain the aspect ratio. It means if you reduce the width by 10%, you should also adjust the height by 10%.
You need to select a background file for the flash calendar, the size of this file should be 800 x 800px. You can visit this
page to get free background templates: http://www.invenmanager.com/tabid/728/Default.aspx
When the Flash Calendar is first loaded on the page, before user click on any particular day, a default flash file will be
played. You are allowed to load any flash file, this is flexible because you may want to highlight certain events in this
flash to display on your home page.
All you need to do is to create a small flash file with size of 600 x 180px. Again, you can visit this page to get free flash
templates: http://www.invenmanager.com/tabid/728/Default.aspx
Copyright 2002-2009 invenmanager.com
Page 50 of 73
Event Calendar and Registration Module User Guide
Sample Flash Calendar are shown below:
This flash calendar sample was customized by Accuraty Solutions
Copyright 2002-2009 invenmanager.com
Page 51 of 73
Event Calendar and Registration Module User Guide
Events Calendar Reg Detail
This is a separate module that to be added at a page, by passing in a parameter: “regid”, it will display the event
registration information base on the template configured for that module.
An example to use this module is placing it on the Redirection page upon event registration. Under Main Settings, you
can configure the page to redirect for successful registration, offline payment, successful payment and failed
payment.
Once you place the Reg Detail module on the redirection page, it will be pass a parameter like this:
http://www.yourdomain.com/tabid/100/redirectionpage.aspx?tabid=xxx
And this page will show the registration detail, so you can use it to display things like: (by changing the template)
•
•
•
•
Instruction after event registration
Offline payment instructions
Invoice for successful payment
Instructions to pay after failed payment
Click on View Options to configure the template as shown below.
One example of the Reg Detail module is shown below, this is using the default template.
Copyright 2002-2009 invenmanager.com
Page 52 of 73
Event Calendar and Registration Module User Guide
Copyright 2002-2009 invenmanager.com
Page 53 of 73
Event Calendar and Registration Module User Guide
Events Calendar Payment Module
This is an optional module that can be added to a separate page for payment processing.
By default, the module will use the same page (same as the main calendar page) to process payment, because the
payment module is already built in the main calendar module. But if you do so, the default payment page will use the
Admin skin instead of the normal skin.
So, you can use the Payment module in a different page, it can be a different skin. You also can use this this module in a
secured page for credit card processing (SSL page).
After you created the payment page, you must configure the Main Settings at the main calendar module to link to the
payment page as shown below:
Copyright 2002-2009 invenmanager.com
Page 54 of 73
Event Calendar and Registration Module User Guide
Events Calendar Quick Add
Use this module to add event quickly by providing basic data. You need to configure the module to link to one of the main
calendar module first.
View options for the quick add module.
Events Calendar Promo Codes
Use this module to manage Promo Codes, refer to the page 24 for more detail.
Events Calendar Search Module
The search module allows search by date, category, as well as any of the custom properties. You can configure the
search options at the View Options page for this module.
Copyright 2002-2009 invenmanager.com
Page 55 of 73
Event Calendar and Registration Module User Guide
Events Calendar Attendance
With this module, you can do the following:
•
•
•
•
•
Mark Attendance, change status to Attended, Absent, or Tardy
Print Attendance Report
Print Name Tags (Template Based)
Send Bulk Email Base on Attendance Status
Export Report in Excel
Copyright 2002-2009 invenmanager.com
Page 56 of 73
Event Calendar and Registration Module User Guide
Advanced Custom Properties
This module works with Custom Properies, and it is compatible with Custom Properties 1.1.3, this is a separate module
that needs to be installed separately.
The PA (Private Assembly) file is all you need and it comes in the package, so you should install this module before you
install or upgrade the Event Calendar & Registration module.
VERY IMPORTANT:
There are TWO (2) installation files come in the package:
1.
2.
Custom Properties
Event Calendar & Registrations
You should install the Custom Properties module first, before you upgrade or install the main module.
To access the settings, click on “Manage Custom Properties” from the module menu.
Overview
The custom properties can be used for Events data, as well as for Registration data. When you create a custom property,
if you specify the category to 1, it is for Events data, set Category to 2 for registration data. As shown below:
IMPORTANT:
When you create a custom property, differentiate the field for Event, and Registration by the category:
1.
2.
If the custom property is to be used for Event data, then Category = 1
If the custom property is to be used for Registration data, then Category = 2
Copyright 2002-2009 invenmanager.com
Page 57 of 73
Event Calendar and Registration Module User Guide
Create/Edit Custom Property
To create a new custom property, click on Add. You can specify the data length, Stylesheet, display name and so on to
be used for this Text field. And you can choose whether it is a single line or multi line text box.
NOTE:
You can choose to share this property with other modules, if this is ticked, this property becomes visible to other Event
Calendar modules on the same portal. If this is uncheckd, then this custom property will be use for this module only.
For List field type, you can specify an option for the list items, specify one item per line.
Copyright 2002-2009 invenmanager.com
Page 58 of 73
Event Calendar and Registration Module User Guide
You can also create a user list type.
And a file-upload type custom property:
NOTE:
For List type of Custom Properties, a value|text pair can be entered, such as
|Select a country
US|United States
UK|United Kingdom
CA|Canada
AU|Australia
In this case US, UK and AU are values, the right side is text and will be shown in the dropdown list. Please refer to token
replace section on how to render values and text for list type of custom properties.
Copyright 2002-2009 invenmanager.com
Page 59 of 73
Event Calendar and Registration Module User Guide
Enter Data for Custom Property
Once you added your Custom properties, they will appear at the Event or Registration data input screen as shown below:
Copyright 2002-2009 invenmanager.com
Page 60 of 73
Event Calendar and Registration Module User Guide
Render Custom Property Data
After you or your users entered data for the custom property you created, you can use the token in your template to
render the data for the custom property.
The token names to be used are displayed in the list as shown below.
Please refer to last section of the Annex A: Token Replace section for more detail.
Copyright 2002-2009 invenmanager.com
Page 61 of 73
Event Calendar and Registration Module User Guide
Annex A: Tokens Replace Reference
This module supports token replace class. This is very powerful because users are able to completely customize their
own different view from the available data.
Token Replace allows the following notations:
[Object :Property]
[Object :Property|Format]
[Object :Property|Format|IfEmpyReplacement]
The output can be formatted using a format string. You can use the usual Date and Time Format Strings for date values
or Numeric Format Strings for any numeric value. String values are handled using String.Format.
Example:
[User:Lastname|Dear Mr./Mrs . {0}]
[Date:Now|dddd]
[Date:Now|MM/dd/yyyy]
will render:
will render:
will render:
Dear Mr./Mrs. Walker
Monday
09/22/2008
The “Format” string can be followed by an additional “IfEmptyReplacement”, which will be returned when is requested
property is not found or not set.
Example:
[User:Firstname|Hi {0}|Hello Guest]
Example:
[STARTDATE|HH]
will render the hour of the event start date in 24 hour format.
The following Tokens can be used for the Template at the Settings page.
[EDIT]
This will render an edit pencil, if, and only if, the logged on user had edit rights for the
module. You MUST add this token to the Item Template (and alternate item template
if you are using that), in order to be able to edit items
[ITEMID]
This will render the item id of the event
[MODULEID]
This will render the module id of the module the event belongs to
[CREATEDBYUSERNAME]
This will display the display name of the user who created the event.
[CREATEDBYUSER]
This will display the UserID of the user who created the event.
[CREATEDDATE]
This will show the item creation date, in localized long date format.
[PICTURE]
This will display the image provided for the event. A complete image tag will be
rendered. Example: <img src="/portals/0/images/sample.gif">
[PICTURESRC]
This will display the image provided for the event. Only the image raw source will be
rendered. For example: "~/portals/0/images/sample.gif"
[READMORE]
This will render the "more..." text with hyperlink to the event detail page.
[READMORELINK]
This will render the raw hyperlink to the event detail page. Example to use this tag
<a href="[READMORELINK]" target="_blank" class="yourclass">Your Text</a>
[REGISTER]
This will render "Register" text with hyperlink to Events Registration page. This will be
displayed when the event is set to allow Registration.
[REGISTERLINK]
This will render the raw hyperlink to Events Registration page. Example to use this
tag:
<a href="[REGISTERLINK]" target="_blank" class="yourclass">Your Text</a>
[EXPORTTODESKTOP]
This will render the text and hyperlink to allow user to export the event to a cvs
calendar file to their desktop such as Outlook Calendar.
[RETURN]
This will render a hyper link back to the Events Calendar page.
Copyright 2002-2009 invenmanager.com
Page 62 of 73
Event Calendar and Registration Module User Guide
[RETURNLINK]
This will render a raw hyper link back to the Events Calendar page.
[VENUE]
This will render the event venue.
[EVENTDATE]
This will show the event date and time, in localized long date format.
Example: 25 March 2008 13:30 – 15:00. For All-day event, only date is displayed.
You can apply token format to this token.
[STARTTIME]
This will render the event start time, in localized short time string format. If it is AllDay-Event, nothing will be displayed. Example: 15:30.
[ENDTIME]
This will render the event end time, in localized short time string format. If it is AllDay-Event, nothing will be displayed. Example: 15:30.
[STARTDATE]
This will render the event start date. You can use custom formatting for such tokens,
such as [STARTDATE|MM/dd/yyyy], will render 09/18/2008
[ENDDATE]
This will render the event end date. You can use custom formatting for such tokens,
such as [ENDDATE|MM/dd/yyyy], will render 09/18/2008
[TITLE]
This will display the event title.
[DESCRIPTION]
This will render the description of the event. If a text length limit is set at the Settings
page, then the content may be trimmed to the max length specified at the Settings
page. This is usually useful for a list view, to show a short description instead of the
entire content.
[FULL DESCRIPTION]
This is the same as [DESCRIPTION], except it renders the complete description of
the event. It is usually used in the Detail Template.
[ATTACHMENTURL]
This will show the attachment with hyperlink to the document.
[ATTACHMENTURL2]
This will show the second attachment with hyperlink to the document
[ALLOWREGISTRATION]
This will show whether this event allow registration or not, in Yes or No format.
[CATEGORY]
This will render the Category ID for this event.
[CATEGORYNAME]
Render all the categories the current event belongs to.
[FEES]
Renders the fees for that event. Empty if it is a free event.
[VENUEDETAILLINK]
Renders the URL to display the venue detail.
[EMAIL]
Renders the email associated with this event.
[REGSTARTDATE]
Renders the date from which the registration for the event is opened. Nothing if there
is no such date is specified.
[REGENDDATE]
Renders the date from which the registration for the event is closed.
[CUSTOM1]
Renders the value for the custom field 1
[CUSTOM2]
Renders the value for the custom field 2
[CUSTOM3]
Renders the value for the custom field 3
[CUSTOM4]
Renders the value for the custom field 4
[CUSTOM5]
Renders the value for the custom field 5
[NUMBEROFPARTICIPANTS]
Renders the number of participants registered for the event, if a user registers the
event and choose 5 attendees, 5 participants will be added for calculation.
[MAXREGISTRATION]
The maximum participants allowed for this event, if 0 is specified, then no limit.
[AVAILABLESEATS]
Renders the number of seats available, this is equivalent to
[MAXREGISTRATION] – [NUMBEROFPARTICIPANTS]
[RECURRINGIMAGE]
This renders
[CATEGORYCOLOR1]
Add this token to render the first category detected for the event, based on the color
code saved for that category. This is used usually when single category is used.
Copyright 2002-2009 invenmanager.com
image for recurring event only.
Page 63 of 73
Event Calendar and Registration Module User Guide
Sample for the Calendar View, event link template:
<a style="background=[CATEGORYCOLOR]
href="[READMORELINK]">[TITLE]</a>
!important;"
class="EventListItem"
[DAYVIEWLINK]
Renders the link to the day view of the event start date.
[GOOGLEMAPLINK]
Renders the Google maps link to the event venue.
[CALENDARSTARTDATE]
This renders the event start date as a small calendar in which the month is displayed
on top of the date. You can format the display using the stylesheet.
[MAPLINK]
If the map link for the venue is provided at the Manage Venue page, then the map url
will be displayed, otherwise, it renders the Google maps link to the event venue.
[TABID]
It renders the current TabID on which the event calendar resides.
[TABMODULEID]
It renders the TabModuleID of the current event calendar module.
[REGONCEPERUSER]
It renders in a native Boolean format for whether this event is configured to allow
Registration Per User or not.
[FEATURED]
Render true or false base on whether the event is featured or not.
You can use this token this way:
[FEATURED|<img src=”/portals/0/featured.gif”>|]
A image is displayed for featured event, nothing for normal events.
[ATTENDEES]
Render a list of attendees registered for the event.
[NEWEVENTFLAG]
Render an image for new event published within 7 days (by default).
Change the days this way: [NEWEVENTFLAG|x]
For example, to display new event image for 10 days: [NEWEVENTFLAG|10]
[FEATUREDFLAG]
Render a image for featured event only.
[EVENTFULLMESSAGE]
Render this message (specified when entering event info) when the event is full,
nothing if event is not fully registered. Specify an ifempty message to this token this
way, example: [EVENTFULLMESSAGE|{0}|This event is still available]
[CATEGORYLINKS]
This will render the category names of the event, with link to filter by that category.
The default format is: <a href="{1}">{0}</a>
You can change the format by using the token:
[CATEGORYLINKS|<a target=”_blank” href=""{1}"">{0}</a>]
[RELATEDEVENTS]
This will render a list of links of related event of current event.
[CUSTOMxxx]
where xxx is
property name
the
custom
This renders the value of the custom fields entered for the event.
The format to render custom properties will be [CUSTOMPROPERTYNAME]
For example, if you created a custom property named as BirthDate, the format to
display this will be [CUSTOMBIRTHDATE]
[CUSTOMxxx|text]
[CUSTOMxxx|value]
The list type of custom properties supports a value/text pair. For example, you have a
Custom Property named: Country of Birth, and the value entered are:
Only apply to List type of
custom properties.
|Select a country
US|United States
UK|United Kingdom
CA|Canada
AU|Australia
You will see each line is a value|text pair, the dropdown list will display the text but
the value to be captured can be either value or the text by using the parameters
shown on the left.
In this case, US, UK, AU are values, and the right side is text. For example, if
US|United States option is selected from the drop down list,
For token [CUSTOMCITYOFBIRTH|value], “US” will be rendered.
For token [CUSTOMCITYOFBIRTH|text], “United States” will be rendered.
For token [CUSTOMCITYOFBIRTH], “US|United States” will be rendered.
Copyright 2002-2009 invenmanager.com
Page 64 of 73
Event Calendar and Registration Module User Guide
You can format the text the way you want it, for example, [STARTTIME:hh] will render the hour only.
Copyright 2002-2009 invenmanager.com
Page 65 of 73
Event Calendar and Registration Module User Guide
By default, TokenReplace recognizes the following Object names as valid source for values. These are general
information about your portal and current user. A list of tokens available for this module is also listed below.
Object
Class / Data source
Default Content
“Host”
System.Collection.Hashtable
Secure Hostsettings
“Portal”
DotNetNuke.Entities.Portals.PortalSettings
current PortalSettings
“Tab”
DotNetNuke.Entities.Tabs.TabInfo
current TabInfo
“Module”
DotNetNuke.Entities.Modules.ModuleInfo
Nothing
“Culture”
System.Globalization.CultureInfo
currrent Culture
“User”
DotNetNuke.Entities.Users.UserInfo
current User
“Profile”
DotNetNuke.Entities.Profile
current User.Profile
“Membership”
DotNetNuke.Entities.Users.Membership
current User.Membership
“Date”, “DateTime”,
“Time”
System.DateTime
current DateTime
“Ticks”
System.Int64 (Long)
current DateTime in ticks
“Row”, “Field”
System.Data.DataRow
Nothing
“Custom”*
System.Collections.ArrayList
Nothing
Copyright 2002-2009 invenmanager.com
Page 66 of 73
Event Calendar and Registration Module User Guide
Annex B. Tokens Replace Reference
1.
Error 1001
Time Out During Installation.
Reason:
•
Time Out error during installation of the package due to connection time out.
Resolution:
•
DotNetNuke 5.x has been very problematic for installing this module. The reason for this is a security check
placed on sql files before they are executed, we hope this can be addressed soon by the DNN core team. If you
have an account connecting to SQL with low privileges, this may take some time and cause your installation to
timeout. Follow the step below to install:
•
•
Just place the module PA (.zip package) in /Install/Module folder of your website
And then go to your site with '/install/install.aspx?mode=installresources' added on the end, and this will install
all modules found under /Install/Module/ that are zipped up.
Example address to go to after .zip upload: http://www.domain.com/install/install.aspx?mode=installresources
After the install, the .zip will be removed from the /Install/Module folder
2.
Error 1002
Could not load file or assembly 'Telerik.Web.UI' or one of its dependencies. The system cannot find the file specified.
Reason:
•
•
•
You are running v4.0 on DNN 4.7, 4.8, 4.9, 5.0, 5.1, or 5.2
V4.0 used a third party control: Telerik.Web.UI.dll
This file was included in DNN 5.2.3 and above, but not included in earlier version of DNN framework.
Resolution:
•
•
•
Login to www.invenmanager.com
Download Telerik.Web.UI.zip from http://www.invenmanager.com/Download.aspx (you need to login to
download this file)
Unzip Telerik.Web.UI.zip and upload Telerik.Web.UI.dll to your website bin folder.
Copyright 2002-2009 invenmanager.com
Page 67 of 73
Event Calendar and Registration Module User Guide
Appendix: Version Log
DONE: 20100102 v4.0
=====================================================================
1. Enh: to retrieve user address info (more fields) for reg form
2. Enh: Event Attendance module
3. Fix: Page title event date wrong for recurring event
4. Enh: Reminder supports 3, 4 and 8 weeks
5. Fix: RSVP not working without smart-thinker
6. Enh: Import & export using Excel
7. Fix: if an user is deleted, the event created by him not editable
8. Fix: if no categories created, satellite module does not show events
9. Enh: Payflow Link payment gateway integration
10. Enh: Email notification is sent after successful payments
11. Enh: Search text with space result error.
12. Enh: Do not display event time when edit All day event
13. Enh: Specify a "there are no events" message (HTML template) in the satellite module, which would be displayed,
when no events.
14. Enh: Store template using text file to store it more than 2000 characters
15. Enh: do not display venue at the Registration page if no venue
16. Fix: user see categories not defined for that module from other modules. OK
17. Enh: Venue popup: added [COUNTRYNAME] token, enhanced the default template
18. Enh: Display categories in drop down with color
19. Enh: Auto register attendee as a user for the portal upon registration
20. Enh: Satellite module to display past events or future events
21. Enh: Print template based name tag
22. Enh: Mark attendance
23. Fix: Flash calendar appears on top of menu wmode=transparent
24. Enh: Edit email template with HTML editor/or Text editor
25. Enh: Option to check event time conflict
26. Enh: Moderated user enter events, goes to My events
27. Enh: Support .NET Ajax with partial rendering, improved user experience
28. Enh: Added Weekly view
29. Enh: New module: Reg Detail, to display Event registration detail after enrollment or payment
30. Enh: New feature for Related Events
31. Enh: New token: [ATTENDEES] to display a list of attendees
32. Enh: New token: [RELATEDEVENTS] to display related events
33. Enh: Use telerik calendar control for better user experience
34. Enh: Re-Compiled components into different projects, easier to install to remote server
35. Enh: Registration form/Payment form use CSS to control table layout
36. Enh: Registration manager allow filter by attendee name, email with enhanced view
37. Enh: Buldled items with price
38. Enh: Promo codes for any events, or for single event
39. Enh: Allow comments and rating
40. Enh: Integration with Google Calendar
41. Enh: Integration with Facility Booking module
DONE: 20090829 v3.1
=====================================================================
1. Fix: Event reminder with invalid URI
2. Fix: Members only registration redirect does not work
3. Fix: [SEATSAVAILABLE] token not accurate
4. Fix: Event date on Payment page for recurring event is wrong. always display the first instance date
5. Fix: If the admin user edit registration detail, the email is changed and the registration no longer belongs to the original
user.
6. Fix: When register, if max attendees exceeded, no msg is displayed. Same when the user already registered the event.
7. Enh: At Registration Manager, only list the registration data, click to view details, the report now only export Attendees
data.
8. Fix: RSS event detail always use Ctl=, should change it according to the detail view settings.
9. Enh: Allow payment from Registration Manager
10. Fix: Registration is cancelled not counted in the number of participants, consider not registered.
11. Enh: A separate page for Display settings, and templates, only need Edit permission.
12. Enh: Reg Manager shows event time in listing
13. Enh: Use friendly URL
14. Fix: After authorize.net, and other credit card payment, redirect to the correct page instead of staying on the payment
page.
Copyright 2002-2009 invenmanager.com
Page 68 of 73
Event Calendar and Registration Module User Guide
15. Fix: Export to Excel error if not using default portalid, use portal root folder instead.
16. Enh: The ability to make any custom property lists to act as filters to search by
17. Enh: "Approved" check box when enter event, approval user has option to set it to Approved, or Not Approved.
18. Fix: [STARTDATE|dd/MMM/yyyy] to [ENDDATE|dd/MMM/yyyy] in email token does not work.
19. Enh: One more field ShowMapLink for event data: Display Map Link check box (for online event no location)
20. Enh: One more field PublishDate for event data.
21. Enh: Import events from Excel file
22. Enh: Overview and Attendee view (new) at Registration Manager, allow sorting
23. Fix: Custom properties export should be encoded.
24. Enh: A separate Search module, by address, custom properties and so on.
25. Enh: Do not Export excel in root directory, it use a folder named: "ecr-moduleid"
26. Enh: New payment gateway integration: Ogone (Europe)
27. Enh: CreatedByUserName token does not work (need to add a new field)
28. Enh: New payment gateway: Samport (Sweden) non-hosted
29. Enh: New token for [COUNTRYNAME] for venue detail
30. Enh: New token [CATEGORYNAME1] to render first category name of the event
31. Enh: Always show full day event on the top of the list view (for same day event)
32. Enh: New token [FEATURED] for event data
33. Fix: When sharing sub-calendars, all categories should be shown for both calendars, not just the main calendar
categories.
34. Enh: New token [ATTENDEES] to render all registered attendees for the event.
35. Enh: Registration Form pull data from profile
36. Enh: Satellite module to check category permission.
37. Enh: Added the following tokens for Registration class: [ADDRESS] [COMMENTS] [COMPANY]
38. Enh: Quick event, add venue information
39. Enh: Allow RSVP, and display it on event detail page
40. Fix: When import content from export portal template, it should use the new portalid, not the original one.
41. Enh: Integrate with Smart-Thinker, link attendee list to profile page
42. Enh: Description should be optional, no longer mandatory field
43. Enh: Notify From, should default to the current user email.
44. Enh: Paging for stellite module
45. Enh: Integrate with Smart Thinker
46. Enh: Update Story-Feed when adding, RSVP event
47. Fix: Do not allow normal user view un-approved events
48. Enh: Edit Permission to click to save venue (not open to all user)
49. Enh: Do not require activation for localhost environment
50. Enh: Samport integration with Hosted version
51. Enh: Sorting of Sub Calendar list in ascending order
52. Enh: Sorting of Category list in ascending order
53. Enh: Added [NEWEVENTFLAG] token
54. Enh: Added [FEATUREDFLAG] token
55. Enh: Added [EVENTFULLMESSAGE] token
56. Enh: Allow configuration of description length to export XML
57. Enh: Option to send registration email to event owner
58. Enh: For paid event, only after payments, the confirmation email should be send out.
59. Enh: Reg manager, RSS link to event detail use vw=3 instead of Ctl
60. Enh: Added [CATEGORYLINKS] token, to render a list of category links for the event.
Version 3.0 July 2009
=====================================================================
1. Fix: Title length not working in pop up window
2. Popup events language locale set
2. Do no load the CSS more than once, do not load default CSS
3. Fix: When a module is deleted, categories for the module should be deleted.
4. Fixed: Currency not displayed in correct format
5. Fixed: jQuery conflict in DNN 4.x with skins using DNN Menus
6. [FEES] token accepts separator in format provider. such as [FEES|<br/>]
7. Not conflict with default DNN events
8. Redirect upon successful payment, registration exit without payment
9. Added new Beanstream payment gateway.
10. Registration Manager: Export to include the IsPaid column
11. New [MAPURL] token
12. Fix: day view, 11:30~11:45pm more than one event cannot show.
13. Quick Add Module, add option for time interval
14. Setting do not include JQuery scripts
15. Setting do not include BeautyTips scripts.
16. More fields for event data: TabID, TabModuleID, RegOncePerUser,
Copyright 2002-2009 invenmanager.com
Page 69 of 73
Event Calendar and Registration Module User Guide
17. Registration Once Per user can be controlled for each event
18. A seperate Payment page, with a new module, supports SSL
19. Registration view use normal skin
20. Each attendee linked with custom properties
21. Added new token for Registration detail: [STATUS]
22. Two more fields for reg detail
- Status (Pending, Confirmed, Cancelled)
- StatusBy
- StatusDate
- RegisteredBy (username)
23. One more field for Event data
- ModeratedRegistration
24.
25.
26.
27.
28.
29.
30.
31.
32.
33.
34.
35.
36.
37.
38.
39.
40.
When confirm/cancel event, send notification email
Fix: URL in email no domain name?
Registration manager: Filter by user
Fees type control view permission by user roles
Import from Default DNN events
Toolbar at the top using <div>, do not use <table>
Sorting (asc/desc) for list view and satellite module
Quick Add module is now using the css configured for the calendar module
Added Category List module: General(3), Special(5), link to main calendar
Allow user to load default template
Show one day's event only for Satellite view
Default picture to use for Flash Calendar if no picture is provided.
Theme management, More stylesheets: Blue, Green, Red, Purple, Yellow
Flash Calendar enhancement
ICS file export for MS Office 2003
Fix: IE8 jQuery popup does not render background.
Renamed: popup.aspx to popupevent.aspx, compatible with Aspnet Storefront.
Version 2.5.5 April 2009
=====================================================================
1. Added Eway as payment gateway.
2. format for [EventDate] token
3. Email for each event
4. Change token [IMAGESOURCE] to [PICTURE], [RAWIMAGE] to [PICTURESRC]
5. display events reminders at the Edit event page.
6. Featured Events
7. Add ModuleID for category, defult to -1, so can share category id or not.
8. Venue data add: Country, Zipcode, City, and so on.
9. Custom properties
10. Zero payment skip payment page
11. Allow registration for multiple participants and provide details
12. Allow hiding standard fields for event data
13. Allow hiding buttons on top
14. Registration report optional items to display names instead of numbers
15. save attendee profile
16. login relative URL
17. Change tooltip js using Jquery.
18. roles can edit event
19. List view period
a. Show events from 1st day of the selected month
b. Only show future events
b. Settings for period of events to show in list view
20. Re-designed .ics file export
21. Configure roles those can be added
22. Default value for new event
1. default to all day event
2. default to allow only members to register
3. always sent notification emails to: roles + additional emails
Copyright 2002-2009 invenmanager.com
Page 70 of 73
Event Calendar and Registration Module User Guide
23. RSS setttings
1. RSS for Featured events
2. RSS by Category
3. RSS for max number of events
4. RSS for events of next x month
24. Flash calendar Settings
1. Show only featured events
2. Show the following categories of event
3. Show events for a period of x month from current date
4. Show past events for a period of x month
25. Satellite Module: option with category selection, display featured.
26. Venue pop up using Jquery javascripts
27. New token: [DAYVIEWLINK], [GOOGLEMAPLINK], [CALENDARSTARTDATE]
28. Redesign default template using Div instead of tables
29. option to remove the additioanl fields in Registration form, company,
comments, address
30. Custom properties portal independent
31. When send email upon registration, include registration detail + event
detail
32. Reporting on event registration data, include custom fields
33. Offline payment set to be Paid manually
34. Allow multiple attendees or not for event
35. Control registration opening time to time level
Copyright 2002-2009 invenmanager.com
Page 71 of 73
Event Calendar and Registration Module User Guide
Version 2.4.2 Jan 2009
=====================================================================
1. End Date, Start Date open for registration
2. Use stylesheet for header
3. Custom Fields for event detail, event registration
4. Tokens for: Number of Attendees, Max Registration, Available Seats
5. Count the number of attendees if they choose more thatn 1 attendees.
6. Save registration options
7. Events Approval
8. Export event participiant list
9. <table> tag chop off if limit number of chars for descriptions.
10. Quick Add Event
11. Add DNN role upon registration & payment
12. Add token [ATTACHMENTURLLINK]
13. Bug: Day view display all events
14. Events Reminder with Email notification Template
15. Add token [CATEGORYCOLOR] to display color coding
Version 2.1.9 Aug 2008
=====================================================================
Time format in drop down, dispay dynamically for 12/24 hour format.
Export To Outlook: Location is not there
4. More than 1 attachment
5. Add a field for enquiry email
2. Edit single event in a recurring event series
3. Display detail page in custom skins.
Option for Day Light Saving
1. Payment by Authorize.NET
a. Settings options:
Pay by Authorize.Net?
PayPal?
Offline?
Authorize.NET info:
Login ID
Trans Code
Response URL
Allow anonymous users to register event
1. Category with permission
3. Booking of multiple events
Different event detail template for users who
Option to resctrict only one booking for each
2. Option to allow multiple category
Allow groups to be given editor access to one
getting editor access to all categories or to
Add new token: [CATEGORYNAME]
2. Custom Links on the top
1. Booking optional items
3. Bulk booking confirmation page
Single Day's View
5 min interval
registered for an event
event
particular category without
the entire module
Version 2.1 June 2008
=====================================================================
1. Calendar view no pop up for details
2. Able to support friendly URL and No Friendly URL environment
3. Support 30 min or 15 min time interval
4. Export / Import Events
5. Copy Event
6. Send notification upon event creation or update
7. Event Notifications Upon Registration
8. View My Registration, to display payment information
9. Integrate with PayPal for payments of events
Copyright 2002-2009 invenmanager.com
Page 72 of 73
Event Calendar and Registration Module User Guide
10. Flash Calendar module
11. Export events to Excel
12. Purge events
13. Display events from Sub calendar(s) for satellite module
14. Able to support multiple day's event
15. Time zone settings
16. New Tokens: [STARTDATE] [STARTTIME] [ENDDATE] [ENDTIME] [EVENTDATE]
[EVENTDETAILLINK]
16. Display events from Sub calendar(s) for main module
17. Support Multi Categories
Template for day view in Calendar view
DNN Search
Venue Management, able to display more information such as Google map, etc.
Copyright 2002-2009 invenmanager.com
Page 73 of 73