1
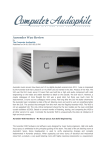
W20 User Guide
New features and improvements are continually developed and implemented through upgrades via the
Internet. The online version of the User Guide with details of the latest upgrades can be found at
www.aurender.com
12 Fl. Ace High-End Tower 8, 84 Gasan Digital 1-ro, Geumchoen-gu, Seoul 153-797, Korea
Tel: +82-8668-7516 Fax: +82 31 728 8537
1
Table of Contents
Page
Instructions
3
Box Contents
3
Positioning
3
Front Panel
4
Rear Panel
4
Quick Start
5
1. Connections
5
2. iPad* App Installation and Set Up
7
3. Selecting the Aurender Music Server
7
4. Enter Passcode
7
5. Manually Checking for Upgrades
8
6. Setting Time and Language to iPad settings
8
7. Scan all files using the Scanner menu.
8
8. Copying Files to the Aurender
9
9. Dual-Wire Mode
10
10. Word Clock Mode
10
Aurender iPad* Application Features
11
Technical Specifications
14
Warranty
The warranty period for Aurender Reference Music Servers is two years including parts and labor. The warranty is
non-transferable and excludes damage due to (i) normal wear and tear, (ii) abuse, misuse, or neglect, (iii) repair,
attempted repair, or any modifications by anyone not authorized by TVLogic or its distributors. After inspection,
TVLogic will at its discretion repair, adjust or replace the product free of charge. Users are responsible for shipping the
products to TVLogic or an authorized service center, and TVLogic will pay for return shipping provided the repair is
under warranty. Aurender Reference Music Servers are automatically registered when first logged onto the Internet.
Only the serial number, date and IP address are recorded for warranty purposes. For any technical support issues,
please email [email protected]
Other Needed Equipment
An iPad, a wireless router for the iPad, a digital-analog converter or amplifier with digital inputs, and digital cables are
needed in order to conveniently use Aurender Reference Music Servers/
The iPad is the user interface for Aurender Reference Music Servers and a wireless router to communicate with the
iPad. An Internet connection is strongly recommended in order to receive free software upgrades and for remote
service support in case any emergencies should arise. The digital output of the Aurender should be connected to a
digital-to-analog converter or to the digital audio input of an amplifier. Proper digital cables should always be used
when making digital connections (AES/EBU, Coaxial, BNC, Optical, USB, LAN). For the most convenience in
transferring files, connect a PC or Mac to the Aurender, preferably via a router to the Ethernet port (LAN) provided on
the rear panel.
2
Instructions
Read the instructions carefully before setting up the Aurender Music Server.
1.
2.
3.
4.
5.
6.
7.
8.
9.
10.
Be careful not to drop the device to avoid internal damage.
Do not disassemble the device.
Keep magnetic materials away from the Aurender Music Server to prevent data damage.
Do not expose device to oil, dust, water, high humidity, or smoke.
Keep ventilation openings free from obstruction.
When cleaning, use only a soft cloth. Keep out of contact with water or other liquids.
All servicing must be performed by a qualified technician, or the warranty will be voided.
Unplug power cord during severe lightning or when unused for a long period of time.
Unplug the device from the outlet only after completely turning off the unit.
Always turn the power off before connecting or disconnecting any cables.
Please note that hard drives can break down. It is important to back up your music collection periodically to
a separate memory device. In the event of drive failure, TVLogic is not responsible for any loss of data.
Drive manufacturers will only replace faulty drives under warranty and do not compensate to any loss of
data.
Warning - Before connecting audio cables, first check to see that all devices are grounded using
grounded plugs and sockets. All devices should be turned off, before connecting any audio or digital
cables.
Box Contents
Aurender Music Server
AC Power Cord
Optional Dongle (to connect dCS and Constellation products)
Positioning
1.
2.
3.
4.
5.
Place on a flat, horizontal and stable surface.
Keep away from heat sources, such as radiators.
Do not stack other products on top..
Allow space around the device for ventilation.
Do not place inside an enclosed cabinet.
dCS and Constellation are trademarks of their respective companies
3
Front Panel
1. On/Off – In default mode, the power button will turn the Aurender on and off completely. The
button light will stop blinking when fully turned on or off. In standby mode, the Aurender will go
into standby (sleep) mode and turn on instantly. To switch to Standby mode, go to the Server tab
in Settings of the iPad application. Scroll down to the bottom and turn on the “Use Standby”
button.
2. Display Menu - Press to cycle through 4 display options: Song Information, Blue Level Meter,
Brown Level Meter, and Playlist Menu. During power on and off, “Aurender” and the model
number “W20” will be displayed.
3. Play/Pause - Press to start or stop playback for songs in Queue.
4. Play Next - Press to skip to the next track for songs in Queue.
5. Play Previous - Press to skip to the previous track for songs in Queue.
Rear Panel
1.
2.
3.
4.
5.
AC Power Switch - Press top to turn on AC power. Press bottom to turn off.
AC Power Socket – To connect the AC power cord to a power source/outlet.
Dedicated proprietary USB Audio Class 2.0 Output – To connect to asynchronous USB DACs.
AES/EBU XLR Output – To connect to a XLR input of digital-to-analog converters.
AES/EBU XLR Output – To connect to a XLR input of digital-to-analog converters.
W20 models have 2 AES/EBU XLR outputs for dual-wire operation.
6. Optical (SPDIF) Output – To connect to an optical input of digital-to-analog converters.
7. Coaxial RCA (SPDIF) Output - To connect to a coaxial input of digital-to-analog converters.
8. Coaxial BNC (SPDIF) Output - To connect to a BNC input of digital-to-analog converters.
9. Coaxial BNC Word Clock Input – To connect to word clocks.
10. USB Ports - Both ports can also be used to copy files from USB memory devices. Both ports can also
be connected to dCS* systems by using the optional USB dongle. Connecting the RS232 control
cable will enable automatic clock selection between the Aurender W20 and the dCS Master Clock.
These are data ports and should not be used as audio outputs.
11. Gigabit Ethernet port - To connect to networks and Network Attached Storage (NAS) devices.
*dCS is a trademark of Data Conversion Systems, Ltd.
4
Quick Start
1. Connections
Connect the AC power cord to the AC socket on the rear panel (2) and power main using grounded
sockets and plugs. Do not turn on the power.
Connect the Ethernet port on the rear panel (7) to the router using an Ethernet (LAN) cable. The router
should be connected to the Internet and a computer, in order to receive updates and conveniently
transfer files.
Select one of the digital outputs (AES/EBU, optical, coaxial, BNC, USB) on the rear panel (3, 4, 5, 6)
and connect it to a DA converter or an amplifier with a digital input.
If you are connecting the dCS Paganini DAC and Master Clock, dCS Vivaldi DAC, Constellation preamplifier, or MSB DAC to the Aurender W20, please refer to the following diagrams.
dCS Paganini and Scarlatti Master Clocks may also be connected through the USB ports for automatic
frequency selection.
dCS Vivaldi System (USB upsampling to DSD)
dCS Vivaldi System (Dual AES/EBU to DAC)
5
dCS Vivaldi DAC and Master Clock
dCS Scarlatti System (USB upsampling supported)
MSB Technology DAC
6
Constellation Pre-amplifier
* dCS, Paganini, Vivaldi, Constellation, MSB and Pro lS2 are trademarks of their respective companies
2. iPad Application Installation and Set Up
Using the iPad, go to the App Store and type Aurender in the search window. Install the Aurender iPad
application. The Aurender supports WAV, FLAC, Apple Lossless (ALAC) , AIFF, APE and other major
formats.
3. Selecting the Aurender Music Server
Open the Aurender application and the Aurender Music Server will be shown on the Server menu. The
Aurender Music Server must be turned on and connected to the iPad via a wireless router.
Select the Aurender Music Server by tapping its name. If no server is listed, tap Add Server at the
bottom of the window and a window will appear asking for the IP address. The IP address can be found
by pressing the Display Mode button on the front panel (top left) and keeping it depressed until the front
display changes. Release the button. Find the IP address and enter. To return the display to the normal
mode, press the Display Mode button again.
4. Enter Passcode
When the Aurender Music Server is first turned on, a Passcode needs to be entered onto the iPad App.
Please enter the Passcode shown on the Aurender front display.
7
5. Manually Checking for Upgrades
Go to Upgrade tab and check for the newest version of the music server system software and upgrade to
the newest version, if needed. After upgrading, the Aurender will reboot automatically. At this time, the
iPad application needs to be closed and restarted in order to be upgraded also.
6. Setting Time and Language to iPad settings
Time and Language can be set by using the menu at the bottom of the Server tab.
Aurender’s time and language should be set to the iPad time and language settings.
7. Scan all files using the Scanner menu.
Scanning will continue in the background, even when songs are selected and played. Please note that it
can take hours to scan large libraries. After scanning is done, a pop up window will appear stating that
the database is being downloaded. If the download fails to finish or gets stuck, please move closer to the
wireless router and press Update song database. The time to download the database varies according to
song database size and wireless connection speed between the wireless router and the iPad. It can be a
few seconds or a few minutes.
Note: When new files are added, the Aurender needs to scan the HDD and make a new database.
When the song database is updated after scanning, the iPad needs to download the database in order
for the newly added songs to appear on the Aurender iPad App.
8
8. Copying Files to the Aurender
There are two ways to copy files to the Aurender’s HDD.
1. Use the Ethernet connection to copy files to the Aurender using a PC or Mac.
2. Connect a USB memory to the USB port on the rear panel.
Note: After song files are copied to Aurender, new songs will appear, only after the files are scanned and
the song database transferred to the iPad application. Files will be scanned automatically one minute after
additions or changes to the files.
PC Users
1. Press the Windows icon + R on your keyboard (START -> RUN). The following menu will pop up.
2. Type in two back slashes (\\) and the IP address of the Aurender. (For example: \\192.168.1.171). The
Aurender IP address can be found in NAS under SETTINGS on the iPad application.
3. Click OK and a window will appear with folders labeled ‘hdd1’ and ‘hdd2’. Click on a folder.
4. A popup window will ask for a Username and Password. They can be found in NAS under SETTINGS in
the iPad application.
5. Drag and drop files in to hdd1 or in its sub-folders.
6. Sub-folders may be created, renamed, or deleted. To add a sub-folder, right click on the white space
and go to New -> Folder.
Note: Importing large libraries can take a very long time Importing files in batches is advised.
Mac Users
1. Locate the Finder menu bar at the top of your desktop.
2. Click GO -> CONNECT TO SERVER from the navigation bar.
9
3. Type in ‘smb://’ followed by your Aurender’s IP address. (For example: smb://192.168.1.171) The IP
address can be found under Conductor SETTINGS -> NAS.
4. Click Connect and a window will appear with folders labeled ‘hdd1’ and ‘hdd2’. Open a folder.
5. A popup window will ask for a Username and Password. They can be found in the iPad application under
SETTINGS -> NAS.
Note: If the Aurender is connected through a Gigabit network, the transfer speed will be roughly 50MB/sec.
It could take 5-6 hours to copy 1TB of files. We recommend copying files in batches. The Aurender is able
to play back music and copy files simultaneously
Copying from USB Memory Devices
Insert a USB memory device already loaded with songs into USB port on the rear panel. The front display
will show ‘USB Copying’. When all files have been copied, the display will blink ‘USB Copying Done’. If the
folder names are the same as the categories in the Aurender second row (All, Classic, Jazz, Pop, Local),
then the files will go into the respective folders. If the folder names are not the same, then the files will go
into Etc.
9. Dual-Wire Mode
To toggle Dual-Wire mode on and off, go to Settings of the iPad App. Turning on Dual-Wire mode will
send signals through both AES/EBU outputs. If the Aurender is mistakenly set for Dual-Wire mode and
used with a single AES/EBU output, the Aurender will display a sampling rate one-half that of the original
rate.
10. Word Clock Mode
Word Clock is automatically turned on when a word clock signal is detected on the BNC input. When
Word Clock mode is on, the SPDIF output will synch with the clock signal coming in from the BNC
connector.
For 44.1, 88.2 and 176.4 kHz sampling rate music, 44.1, 88.2 and 176.4 kHz word clock or a 22.5792
MHz master clock signal are valid.
For 48, 96 and 192 kHz sampling rate music. 48, 96 and 192 kHz word clock or a 24.576 MHz master
clock signal are valid.
10
Aurender iPad App
1. Browser Buttons - The top row buttons categorize songs according to the metadata of the the song file.
Tap Song, Artist, Album, Genre, Composer, or Conductor to browse through songs according to the file
meta tags. Tap the Folder button to browse by folders. The second row buttons will show the contents of
the folders on the Aurender hard disk drive. Excluding ALL and MISC, the other five second row buttons
have the same names as the folders on the internal hard drives. Up to five folders may be named for
each hard drive. The button names may be changed by renaming the folder and enclosing it with square
brackets. For example, [My Songs]. To see the five buttons for the other hard drive, swipe the second
row buttons to the left or right.
2. Aurender Hard Drive. Excluding the “All” and “Misc” buttons, the other buttons are named according to
the folder name. The folder names may be changed by the user by changing the folder name and
enclosing it with square brackets - [foldername].
3. Smart Search Window – Type in artists, albums, genres, composers, conductors or file names and the
search results will appear as you type. To search numbers, an asterix(*) or a question mark(?) needs to
be added after the number you are searching for in order to get a valid search result.
4. Settings Icon - Press to open Settings menu.
5. Quick Scroll Bar - For faster navigation, tap a number or letter to jump to content starting with that
number or letter.
6. Contents Window - Scroll through content by flicking up or down. For faster navigation, use the quick
scroll bar on the right hand side. Just tap and scroll to jump to content starting with that number or letter.
7. Queue Window - Press any song in the contents window to add it to the queue. If you want to play a
song immediately, add it to a playlist, or find similar songs, long press the song in the contents window
and pop-up menu with these options will appear. Expand the Queue window by flicking the contents
window to the right. There will be a Consume button on the bottom. Consume On will delete songs from
the queue as they are played. To clear all songs from the queue except for the currently playing song,
long press the CLEAR button on the bottom and a “Clear all except for currently playing song” will
appear.
8. Edit Playlist Window – Press the Edit Playlist bar to expand. To edit playlists, press the blue arrow next
to the playlist name.
9. Song Information Window – To expand, flick the contents window to the right.
11
Playback Functions
Queue –To add songs to the queue, tap a song in the Contents Window and it will be added to the queue.
The selected song will be marked with a small arrow. Subsequently selected songs will be added to
the end of the queue. For the full queue view, flick the Contents window to the right. This will also
reveal an Edit button. To return the Song Contents window to original size, flick the screen to the left.
Instant Play - To instantly play a song, tap on the left hand margin of the song you want to play. An arrow
will appear next to the song title. The selected song will appear below the song that was last played.
Deleting songs from queue - Lightly flick the song title to the left or right, then tap
Clearing the queue - Tap
at the bottom of the queue. All songs will be deleted except for the song
that is currently playing. To completely empty the queue, pause the current song, then tap
tap
once or
twice.
Editing the queue - Swipe the contents-view pane to the right for the full queue view and tap edit. To
rearrange the order of play, locate the 3 horizontal stripes to the right of the song title. Touch and hold the
stripes and drag up or down.
Playback Controls
Other playback options - For more options, touch and hold the title of a song in the Contents window and
a blue pop-up screen will appear with Play Now, Add to Next, Replace Queue and Add to End menus.
Play Now- Selected songs are added to the queue to be played right now.
Add to Next – Selected songs are added to the queue to be played after the current song
Replace Queue – Clears current queue and replaces queue with selected songs
Add to End – Selected songs are added to the end of the queue.
The touch and hold function also works for specific artist, album, genre, composer, conductor, index bar, or
even categories. 500 is the maximum number of songs possible in a queue or playlist. Only the first 500
songs will be added, if the selection contains more than 500 songs.
Saving Playlists
Once you have added one or more songs to the queue, tap
in the playlist and. then tap the “save” button.
at the bottom of the queue window. Type
Viewing Playlists
To see playlists, tap
queue and start playing.
on the bottom of the screen. Tap a playlist and the songs will appear in the
12
Editing Playlists
Tap
at the bottom of the screen. Then, tap
next to the title of the playlist you wish to edit. A
Playlist window will open. When the Edit Playlist window is open, songs selected from the Contents window
will be added to the Edit Playlist window, not the queue window, so that adding, rearranging, or deleting of
songs in the playlist can be done without interrupting playback of the current queue. In the Edit Playlist
window, playlists can be rearranged, deleted or added to. To rearrange songs:
From your playlist, tap
. Touch and hold
next to the title of the song, then drag and drop.
Deleting Songs - Flick the song title to the left or right, then tap “Delete”
Saving Changes - Save changes by tapping “Save” at the bottom of the queue
Renaming Playlists - To rename a playlist, type in a new name and tap “Save”
Expanding Queue Window - Tap the Queue bar to expand the Queue window
Opening Playlist Window - Tap the Edit Playlist bar twice to expand the Edit Playlist window
Deleting Playlists - To delete a playlist, tap “Playlist” at the bottom of the queue, flick the playlist name to
the left or right and then tap “Delete”
Album Cover View
To see a close-up of album covers, tap the album icon just below the playback controls. Covers are usually
downloaded from an online database by your CD ripping software. Users may also scan front and back
covers and see them on the iPad application. Flick right or left to view the front and back covers.
Adding Scanned Album Photos - Scan CD album cover artwork (1600×1600 is recommended) and name
the files “front.jpg” for front cover and “back.jpg” for back cover image. Copy these two files to the folder
where the album songs are located. Aurender searches for album covers in three ways. First, it searches
for the front.jpg file. If there is none, then it searches for the folder,jpg file. If there is none, then it will search
for the album cover according to song meta-tag information.
Album Cover View Functions - Tap in the Album Cover to see viewing options.
Album Track List and Queue - To view the track list, tap
selected from here will be sent to the end of the queue.
Toggle between the track list and queue by tapping
note that Queue cannot be edited while in cover view.
on the lower right part of the screen. Songs
on the bottom of the screen. Please
Return to Album Cover - To return to the album cover, tap the album icon on the bottom right of the screen.
Exit Album Cover View
To exit and go back to the Contents window, tap the arrow on the bottom left of the screen.
13
Technical Specifications
W20 Music Player
Compatible Formats
DSD (DSF, DFF), WAV, FLAC, AIFF, ALAC, M4A, APE and others
User Software
Aurender iPad® App
Solid-State Drive
1x 240GB
Hard Disk Drives
2 x 3TB
SPDIF Clocking
FPGA-based All Digital Phase Locked Loop
Audio Clock
Digital Audio Outputs
OCXO
1 coaxial, 1 optical, 2 AES/EBU, 1 BNC, 1 dedicated USB Audio Class 2.0
Digital I/O
1 Gigabit LAN, 2 x USB 2.0
Word Clock Input
BNC
Protection Feature
Un-interruptible Power Supply
Audio Power Supply
LiFePO4 (LFP) Battery Power Supply
CPU Power Supply
Fanless 100W SMPS
CPU Board
Proprietary Aurender Board
Main Memory
4GB
HDD Isolation
Floating bracket suspension and machined aluminum enclosure
Finish
Silver or Black
Dimensions
430mm x 106mm x 370mm
Weight
19kgs.
Specifications are subject to change without notice.
*iPad and Apple are trademarks of Apple Inc.
For more information, please visit our website at
www.aurender.com
14