1
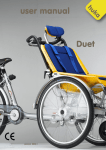
User manual Pendel FD V 2012.1 INDEX Pg. 1. Introduction 1 2. Product description 2.1 Warning 2.2 Safety and driving behavior 2.3 Delivery 2 2 3 3 3. Control panel 3.1 Dashboard 3.2 Handlebar and ignition lock 4 4 5 4. Entering 6 5. Driving 7 6. Parking 7 7. Adjusting the wheelchair securing system 8 8. The battery indicator 9 9. Battery use 9.1 overall 9.2 Charging the batteries 10 10 10 10. Security systems 11 11. Possible interferences and solutions 11.1 Self test by means of the indicator 11.2 Interference examination frame work 12 12 13 12. Transport 14 13. Maintenance 14 14. Technical information 15 15. Addition Chain tension 16 Guarantee Huka BV gives two years of guarantee on the Pendel. Your supplier will carry out this guarantee. The guarantee does not apply to damage or faults of the Pendel caused by wrong or improper use. The evaluation of it is the privilege of Huka or a representative to be appointed by Huka. N.B. This guarantee does not apply to components susceptible to wear. Huka BV Huka is a Dutch company that manufactures appliances for the handicapped. If you have any queries about our products or their applications please contact your dealer or Huka BV: Huka BV Munsterstraat 13 7575 ED Oldenzaal The Netherlands Tel: +31 (0)541 572 472 Fax: +31 (0)541 520 415 mail: [email protected] web: www.huka.nl Modifications Huka reserves the right to make modifications to the product described in this users manual without incurring liability. Safety CE This product meets the requirements for the European guideline 93/42/EWG on medical products. TUV In the interest of maximum safety the Pendel was approved by the Rheinisch-Westfälischen TÜV, Germany. RDW EU-Homologation as 45 km/h vehicle Oldenzaal, February 2009 A patent is granted for the electric wheelchair scooter PENDEL, nr. 0526933 @ Texts, blueprints, drawings and designs are protected by copyright. 1.INTRODUCTION Dear user, To enjoy your PENDEL to the fullest, it is important that you carefully read this manual first. In the text you will find boxes that contain additional points of interest and warnings. It is recommended to skip these boxes at first, in order to reduce the complexity of the instructions. When you understand how the PENDEL functions, read the text once more, and this time, include the points of interest and warnings. This is an additional point of interest or This is a warning In general Your Huka Pendel is a quality product. Every component of your Huka Pendel has been tested and checked extensively. The finishing of the frame and the mounted components are of high quality. There are some things that require attention from time to time. This small manual provides instructions for maintenance that you possible can do yourself and provides information about activities of your (Huka) dealer. 1 2. PRODUCT DESCRIPTION 2.1 Warning Please read this manual carefully before using the vehicle. The PENDEL wheelchair scooter is a vehicle that is meant for the transportation of one person, seated in his/her wheelchair. The total loading capacity is 125 kilo. Therefore, only hand powered wheelchairs are suitable, or wheelchairs with a light assist motor system. Only wheelchairs with the 2 large wheels at the back, and with a wheel size 22”, 24´´ or 26´´ can be used, because the automatic securing system can be adjusted according to these wheel sizes. The PENDEL is designed for road traffic, a moped third-party insurance is compulsory. The PENDEL is only suitable for use on paved roads. Besides adequate understanding of traffic, the user needs to have sufficient hand-functioning in order to operate the handlebars and brakes. Never drive faster downhill than the maximum speed of 25 km/h, otherwise irreparable damage is inflicted on the driving regulator!! Frame number: Can be found on the steering head 2 2.2 Safety and driving behaviour Before you take delivery of your new ready-to-drive Pendel your dealer will have checked all components himself and, if necessary, will have adjusted these. If it is the first time that you are using a Pendel this will be somewhat uneasy. Never get tempted into to much enthusiastic behavior on the roadway or riding on and off pavements Your Pendel can sustain visible or invisible damage, which involves additional risks. 2.3 Delivery The PENDEL wheelchair scooter should be delivered completely, including: Battery charger Manual of the PENDEL Manual of the battery charger Manual of the mileage indicator Certificate of guarantee When delivering the PENDEL, your distributor needs to adjust the following things: Height and distance of the handlebars. The fixation points, against which the wheelchair is secured, need to be adjusted according to the size of your wheelchair. (see 8. Adjusting the wheelchair securing system). If required, the performances of the driving regulator can be adjusted, for example: Reducing the maximum speed Adjust the “turtle-speed” Adjust the reverse-speed Adjust the breaking efficiency of the motor 3 3. CONTROL PANEL 3.1 The dashboard 12 11 1 10 0 2 9 3 Fig. 1: Dashboard Survey 1. Speed indicator / Mileage recorder. 2. Switch “reverse” with indicator. 3. Switch “turtle-speed” with indicator. 4. Switch “up”. 5. Switch “lights”. 6. Switch “hazard warning lights”. 7. Battery indicator. 8. Warning light of direction indicator right. 9. High/low- warning light. 10. On/off- warning light. 11. Warning light of direction indicator left. 12. Dashboard lights 4 4 5 8 6 7 Fig. 2: Speed indicator / Mileage recorder On the display of the mileage recorder you can observe the speed. While driving, the recorder changes successively between “total distance” and “daily distance”. After standing still for 6 hours the daily distance will automatically reset to zero. 3.2 Handlebar and ignition lock Hydraulic rear brake Parking brake Parking brake Safety switch Dashboard Throttle Front brake Raw switch Ignition key Horn switch Down lever Handelbar adjuster bolt Charger plug Fig. 3: Handlebar and ignition lock 5 4. ENTERING Push the deflation switch backwards: the PENDEL lowers itself on the ground. Lower the PENDEL entirely onto the ground! Now you can enter the PENDEL. Once you entered the PENDEL the wheelchair will not roll back. The threshold prevents this. Do not yet put the wheelchair in parking! Turn the two fixation points in front of the wheels of the wheelchair, until these touch the sides of the tires. ( see 8: Adjusting the wheelchair securing system). Close the deflation switch again. Then you hear a hissing sound during the lifting process, and the vehicle does not lift, this means that you left the deflation switch open! Turn on the ignition lock and, then push the “up” switch: the PENDEL lifts itself in approximately 30 seconds. While lifting, the back will close and the wheels of the wheelchair are clamped in. Hold the up-switch until the compressor stops automatically. Make sure that the fixation points are appropriately adjusted. Make sure that nothing can get trapped between moving parts during the lifting process. If something goes wrong during the lifting process, lower the PENDEL entirely and try again. Now put your own wheelchair in parking. If the PENDEL sinks below its driving level after the lifting process, for example as a result of adding weight or an interference, the driving regulator will be turned off. In this case, lower the PENDLE entirely and try again. 6 5. DRIVING Turn on the safety switch on the left handlebar (ON). The on/off indicator on the dashboard has to light up. By firmly squeezing the left brake handle, the parking safety will be released. You are now able to drive. Because the PENDEL is protected against sudden movement of the vehicle, the throttle has to be “closed” entirely at first. If not, the PENDEL will not react to any acceleration and the indicator light in the dashboard will start to blink. In this case you should “close” the throttle tightly and turn the safety switch off and on again. You are now able to drive. Use the “turtle-speed” in pedestrian areas etc. for a safer driving behavior. Do not push or pull wheelchairs and/or bikes. Do not use the PENDEL as a luggage carrier. Never drive faster downhill than the maximum speed of 25 km/h. This can inflict irreparable damage on the driving regulator!! 6. PARKING Put the PENDEL in parking by means of the parking safety on the left brake handle. Lower the PENDEL entirely with the deflation switch. Close the deflation switch again. Do not lower the PENDEL in a puddle or in mud. Lower the PENDEL onto a flat surface. Make sure there are no obstacles under the PENDEL.. Turn the fixation points outward as far as possible. Release your wheelchair and carefully exit the PENDEL. From the side you can operate the up-switch. Push the up-switch to lift the PENDEL and take the key from the ignition. 7 7. ADJUSTING THE WHEELCHAIR SECURING SYSTEM To make sure that the wheelchair will be firmly clamped into the PENDEL, the fixation points have to be appropriately adjusted according to the size of the wheels of the wheelchair and the width of the wheel chair: First of all, make sure that the tires of the wheelchair have the right tire pressure. Lower the PENDEL. Enter the PENDEL with the wheelchair and loosen the bolts (1). Turn the fixation point in front of the tire of the wheelchair, and slide the fixation point into a position about one centimeter away from the tire (2). Subsequently, tighten the bolt firmly again. Repeat the procedure for the other fixation point. After lifting the PENDEL, the fixation points have to push slightly into the tire of each wheel of the wheelchair. Fig. 4: Wheelchair securing system (1) Bolt, (2) Fixation point Fixation points that are adjusted too weak will result in movement of the wheelchair during driving. Fixation points that are adjusted too tight will hinder the closure of the ramp, and thus make driving impossible. The compressor will continue pumping in vain. 8 8. THE BATTERY INDICATOR The distance you can drive with the PENDEL is primarily dependent on the extent to which the batteries are charged at that moment. The battery indicator on the dashboard indicates this level. 100% charged Range empty ± 60 km 30 km 0 km By experience you will learn how far you are still able to drive according to each battery level. The indicated range is a guideline. In advantageous circumstances you will even be able to drive 60 kilometers. On the other hand, fierce head wind or a long climb will reduce the range of action. The speed indicator is also a very good battery indicator. If you are driving 25 km/h , this means that the batteries are fully charged. If the maximum speed drops to 18 km/h (on a flat road), the batteries are almost entirely empty. To give an impression: Lifting the PENDEL once will reduce the range of action with 100 meters. This can, thus, be neglected! Using the lights continuously reduces the range with 2,5 km. A fierce head wind will cost about 30% of the total range. A strong climb could very well use twice the energy. However, this loss of energy is regained by going downhill. In general, driving in the mountains will result in a 30 to 50% decrease in the range of action. The ageing of the batteries, as well as a low outside temperature, will reduce the range of action. If the LED on the right blinks, you will only be able to drive a few kilometers more. The PENDEL is protected against heavy discharging. Prematurely, the speed will be automatically reduced. The mileage recorder also has a daily distance-function that can be used to check the distance that has been driven. 9 9. BATTERY USE 9.1 Overall The batteries of the PENDEL are so-called maintenance free traction batteries. The following points are important: • Prevent short circuiting of the positive and negative poles of the battery. Therefore, never place metal objects, like tools, on the battery. • Never use an open flame near batteries because an inflammable gas can result from charging batteries. • Heavy discharging of the batteries is not allowed. The PENDEL is protected against this because the speed will be reduced prematurely. • Even if the PENDEL is not in use for a long period of time, for example during winter, the batteries need to be charged regularly (1x every 4 weeks), because batteries discharge themselves slowly. • Since only a well charged battery can resist low temperatures, charging batteries is particularly important when it is freezing. • A possible deposit on the battery poles and connectors should be removed and rubbed with acid free Vaseline. 9.2 Charging the batteries To charge the batteries, you need to perform the following actions: 1. Remove the key from the ignition lock. 2. Position the battery charger in such a way that it can ventilate sufficiently. 3. Place the plug of the battery charger in the socket of the PENDEL, located in the front of the interior. 4. After placing the 220 volt plug of the battery charger into a 220 volt socket , you can turn on the battery charger. The charging process is automatic. (see also the manual of the battery charger). When the batteries are charged, you need to perform the following actions. 5. Remove the plug of the battery charger from the socket of the PENDEL. The PENDEL is now ready to drive! Never use another battery charger. Even if the PENDEL is not in use for a long period of time, you have to charge regularly. It will do no harm if the battery charger is turned on longer than necessary. Always finish the entire charging process, so even until post-charging! 10 10. SECURITY SYSTEMS To make the use of the PENDEL as safe as possible, a few security systems are built-in. 1- If the throttle is not entirely closed, the regulator will block itself after ignition. The on/off indicator on the dashboard will start to blink. 2- If the PENDEL is not lifted to its driving level, the regulator will remain switched off. The control light that indicates lifting will remain switched on. 3- If the plug of the charger is still plugged in the socket, the regulator will remain switched off. Neither the on/off indicator nor the high/low indicator lights up. 4- The regulator reduces the speed before the batteries are too heavily discharged (the battery indicator’s right LED will have started to blink). 5- If, for whatever reason, too much power is demanded from the motor, the regulator will reduce the electricity input. If an interference or overload occurs in the lighting circuit ed., one of the safety fuses positioned behind the screen will blow. 6- Rear light right Rear light left 3 Amp. 3 Amp. Head ight Horn 3 Amp. 1 Amp. PCB Compressor 10 Amp. 30 Amp. Main fuse Between the 2 batteries, a main fuse of 200 Amp. is installed 11 11. POSSIBLE INTERFERENCES AND SOLUTIONS 11.1 Self test by means of the indicator The regulator also controls a few of its functions itself. If the indicator blinks, the following faults can be identified. Number of times the indicator blinks: ON: No faults OFF: Interference in the driving regulator 1x: Programmed settings incorrect 2x: Incorrect start-up throttle not closed 3x: Short circuit in the motor 4x: Relay problem 5x Not used 6x: Fault in the throttle 7x: Too high or too low battery voltage 8x: Over temperature 9x: Throttle not closed 12 11.2 Interference examination frame work INTERFERENCFE POSSIBLE CAUSE ACTION main fuse died replace fuse on the left under the al. mounting plate contact your dealer charge battery main fuse dead replace fuse, on the left under the al mounting plate off off off off off off off PENDEL does not lift on off off on on on on on on on on or height-control broke or fuse of the PCB has blown relay is clicking > broken compressor fuse relay is not clicking > relay is broken compressor is turning> deflation switch open 7xblink on on battery is dead off off off off off off off off off off off on on off on on off on on off on main fuse dead or safety switch on the throttle is turned off or fuse of the PCB has blown fault in the driving regulator no click > main relay is broken or no click > PCB is broken brake lights light up > brake switch turned on 2xblink off on Throttle is open 7xblink off on charge battery on on on battery is dead PENDEL is not lifted to driving level on off on particular fuse has blown replace the fuse in the fuse box battery charger is broken, or no voltage charge plug is not correctly placed in the socket consult the manual of the PENDEL charger PENDEL is lifted but does not drive Lighting, direction indicator or horn do not work PENDEL does not charge none of the LED’s light up red LED lights up 13 replace the fuse in the fuse box replace the fuse in the fuse box replace compressor’s relay close the deflation switch (next to the ignition lock) turn the safety switch ON replace the fuse in the fuse box contact your dealer replace main relay Replace PCB push brake handle back, or replace switch turn safety switch off, close throttle, turn back on lower entirely, lift again Place the plug in the socket once more 12. TRANSPORTATION In case an interference occurs, you will always be able to exit the PENDEL by lowering the vehicle and driving out. Before moving the PENDEL, put it in neutral first by switching off the ignition. Of course, the hand brake should be switched off as well. Never lift the PENDEL by the ramp when this ramp is lowered! In case the PENDEL does not lift, you can press the service switch which operates the compressor directly. Keep in mind that you have to determine yourself whether the PENDEL is lifted sufficiently. You will find the service switch on the right of the front fork on the frame, reachable through the hole of the front fork. 13. MAINTENANCE Normal maintenance of the PENDEL is limited to the following aspects:: 1) Maintenance of the bodywork: The plastic parts of the bodywork can be cleaned by using soap and a wet cloth. Do not use a garden hose or a high pressure spraying pistol. 2) Maintenance of the power system: If the chain is too loose, please contact your distributor. Attention: always turn off the ignition lock and take out the key before working on the PENDEL!! 3) Maintenance of the tires: In order to prevent unnecessary wear of the tires, as well as gaining the largest possible range of action, it is important to maintain the right tire pressure. - front = 2,5 bar - back = 2,5 bar 4) Maintenance of the pneumatic system: An air dryer is incorporated in the pneumatic system. This prevents the collection of moisture in the tubing. In case of intensive use, drain the collected water once every 3 months. 14 14. TECHNICAL INFORMATION Chassis Bodywork Motor Driving system Suspension Batteries Battery charger Speed regulator Brakes Wheels/tires Speed Range of action Climbing power Turning circle Dimensions Weight Maximum wheelchair width Maximum loading capacity Steel tube construction Entirely made of plastic 1 permanent magnet motor, 24 Volt, 1200 Watt. Front wheel drive Front: telescope suspension, one-sided Back: independent pneumatic suspension Maintenance free; 2x 12 Volt 100 Amp/h Electronic functioning, 24 Volt 12 Ampere, 8 hour full charging process Electronic speed regulator: 4-quadrant, programmable remote control connection Built-in security systems: - soft start - sudden movement security - short circuit security - overload security regaining of brake energy 3x drum brake, hydraulic rear brake Front: 10" x 2.10 Back: 12" x 3.00 0 till 25 kilometers per hour, reverse 40% 60 kilometers under normal conditions 17% 3,9 meters Width: 1,00 meters (108 with broadened PENDEL) Length 1,76 meters Height 1,15 meters Wheelbase:1,20 meters Ground clearance: 15 centimeters (Including batteries) 160 kg. 72 centimeters (80 cm with broadened PENDEL) 125 kilo 15 15. Addition chain tension Tensioning of a chain • Unscrew M10 bolts (pos 1) • Unscrew Nut M6 bolt (pos 2). • Tighten bolt M6 so that the chain will be on tension again (pos 3) • Tighten nut M6 (this ensures the position of M6 bolt (pos 2) • Tighten M10 bolts again strongly (pos 3) 1 1 1 2 3 16 Uw dealer: Huka BV P.O. Box 194, 7570 AD Oldenzaal Tel.: +31 (0)541 572 472 . e-mail: [email protected] www.huka.nl