1
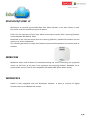
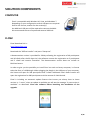
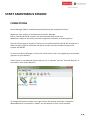
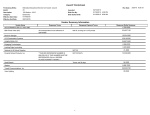
USER GUIDE
Alliance Solution
Flow!
USER GUIDE V 1.4
March 2012
2/45
Table of Contents
INTRODUCTION...................................................................................................................... 4
FLOW! ............................................................................................................................................................................................ 4
STUDENT RESPONSE SYSTEMS ...................................................................................................................................................... 4
EDUCLOUD/FLOW! LP .................................................................................................................................................................... 5
MOBIVIEW ..................................................................................................................................................................................... 5
WORKSPACE .................................................................................................................................................................................. 5
SOLUTION COMPONENTS ...................................................................................................... 6
COMPUTER .................................................................................................................................................................................... 6
FLOW! ............................................................................................................................................................................................ 6
CPS/PRS .......................................................................................................................................................................................... 7
VPADS ............................................................................................................................................................................................ 7
EDUCLOUD ..................................................................................................................................................................................... 7
OPTIONS ............................................................................................................................................................................................................. 8
START ANONYMOUS SESSION ............................................................................................... 9
CONNECTIONS ............................................................................................................................................................................... 9
ENTER THE CHANNEL # ................................................................................................................................................................. 10
ASK IMPROMPTU QUESTION ....................................................................................................................................................... 11
THE QUESTION WINDOWS ........................................................................................................................................................................... 12
SESSION RESULTS ................................................................................................................ 19
SESSION ....................................................................................................................................................................................... 19
QUESTION ..................................................................................................................................................................................... 20
SAVE RESULTS ............................................................................................................................................................................... 21
EDIT A QUESTION ................................................................................................................ 23
ADD-INS ....................................................................................................................................................................................... 23
FLOW QUESTION EDITOR .............................................................................................................................................................................. 24
MANAGE PARTICIPANTS ..................................................................................................... 27
REGISTRATION PROCESS .............................................................................................................................................................. 27
CLASS IMPORTATION ..................................................................................................................................................................................... 29
FLOW! MENU ...................................................................................................................... 37
CONTACTS ........................................................................................................................... 43
3/45
INTRODUCTION
FLOW!
We would like to thank you for purchasing FLOW!
Flow! Alliance Solution is the result of the merge of eInstruction®’s experience in Student
Response Systems (SRS) with EduClick’s expertise in secured cloud computing and data
management. This first exclusive co-development is meant to offer teachers an easy
assessment experience.
FLOW! has been designed with this in mind. Leveraging the degree of involvement of the
students, it provides a unique experience that embraces multiple contents, response
systems, instant feedbacks and result analysis.
STUDENT RESPONSE SYSTEMS
CPS/PRS
Compatible with CPS PULSE, CPS SPARK and CPS IR.
Compatible with Interwrite Crickets and PRS RF.
VPADS
Virtual Response Systems, vPads, are available for smartphones; tablet PCs (IOS, Android) as
well as computers Windows, Mac and Linux.
4/45
EDUCLOUD/FLOW! LP
EduCloud is an external secured data base that allows teachers to list their classes, to save
the results, and to view different types of reports.
Flow! LP is an extension of Flow! that allows secure data transfer with a Learning Platform
such as Moodle, Blackboard, Sakai.
Download in one click the classes from the Learning Platform; Upload with another one the
results in its online Gradebook!
This solution guarantees a simple and constant communication between the teacher and its
students.
MOBIVIEW
MobiView allows total freedom of movement during the lesson controlling the projected
screen, no size limit, at any time, from anywhere and receiving student’s feedbacks on its
private touch screen. Flow! is also compatible with Mobi KWIK (know what I know).
WORKSPACE
FLOW! is fully integrated with the Workspace software. It opens a universe of digital
contents that can be adapted and shared.
5/45
SOLUTION COMPONENTS
COMPUTER
Flow! is compatible with Windows XP, Vista, and Windows 7.
Depending on your configuration several USB ports are required:
One for the license, another for the receiver(s).
An additional USB port will be required to connect the Mobi.
We recommend the use of a powered external USB hub.
FLOW!
Flow! download link is:
http://getmyflow.com
Download the “Offline installer” and press “Setup.exe”.
A demonstration version is provided for 30 days allowing the registration of 40 participants
and 40 vPads, after the 30 days trial, the software narrows the registration to 5 participants
and 5 vPads and remains functional. The demonstration version does not include an
EduCloud access.
In order to give you the possibility to install Flow! on each and every computer, its license
takes the form of a USB dongle. When plugging the dongle in the USB port of your computer,
the license will open for 900 participants and 5 vPads. Additional Flow! vPads licenses will
open the registration for 900 participants and the amount of vPad desired.
Flow! is including an automatic update feature that insures you always have its latest
version. In “+ more”, when an update is available you will see the message “A new version is
available” to download. Close the software before launching the installation of the
upgrade.
6/45
SOLUTION COMPONENTS
CPS/PRS
CPS Pulse: True/False; Multiple choice; Multiple answer; Short text; Numeric. (RF)
CPS SPARK: True/False, Multiple choice. (RF)
CPS IR: True/False, Multiple choice. (IR)
Cricket: True/False, Multiple choice.
PRS RF: True/False, Multiple choice, Multiple answer, Short text, Numeric (RF)
VPADS
vPads download link is:
http://getmyflow.com
vPads are designed in a way that if a direct connection between the vPad and the instructor’s
computer is detected, vPads will automatically switch to local network communication
allowing the internet bandwidth of your institution to remain available.
Java 6+ is required for vPad computers as well as a Wi-Fi connection.
EDUCLOUD
EduCloud platform link is:
http://cloud.vbote.com
Flow! license includes 5 EduCloud accesses.
When Flow! is licensed, you will see appearing in the “Online connection settings” an
invitation code that you can write in the EduCloud registration window.
An Internet connection is needed. Flow! can work without EduCloud.
7/45
SOLUTION COMPONENTS
OPTIONS
FLOW! LP
Bring the Learning Platform in the classroom! Download your classes from your server, and
upload the results in the Gradebook.
(Requires a valid Flow! LP license and the integration of the EPS module in the platform –
service included – Available for Moodle, Blackboard, WebCT, Sakai.)
MOBIVIEW
With a total freedom of movement in the classroom, you are able to view, instantly through
the Mobi screen, who has responded what and decide whether or not you wish to engage
one particular student, providing formative assessment.
Connect the MobiView to the Device Manager by plugging its RF Receiver.
WORKSPACE
Workspace LE download link is:
http://www.einstruction.pl/LEregister_eu.php
It is a simple software for the creation and sharing of multimedia lessons.
8/45
START ANONYMOUS SESSION
CONNECTIONS
Device Manager (DM) is installed automatically during the installation of Flow!
Make sure your receiver is connected to the Device Manager.
CPS RF, CPS IR and PRS RF receivers can be connected at the same time.
MobiView is optional: the device must be recognized in DM prior to launching Flow!
There are three types of receivers: The first one is Infra-Red (IR) for CPS IR, the second one is
Radio Frequency (RF) for CPS Pulse and Spark, and the third one is Radio Frequency for
Crickets and PRS RF.
To access the Device Manager, click on the “eInstruction Tools” icon appearing at the bottom
right part of your desktop.
If the receiver is not detected (Green check on it), in “Options” you can “Discover Devices” to
run another scan of the USB ports.
To change the channel number, do a right click on the receiver and select “Properties”.
When MobiView is connected, a “Mobi” icon will appear in Flow!’s main window.
9/45
START ANONYMOUS SESSION
Click on the Flow! icon to launch the software.
SHOW/HIDE APPLICATION
Click on the minimize button at the top right corner of the main window to hide the
application. You will see the following icon appearing:
To move the icon around, maintain the left click. Click on it to maximize the application.
ENTER THE CHANNEL #
Registering anonymous participants is very easy. Just press the Power on button on the
Response System, enter your channel number (Here 44). Press “Ask new question.”
NB:
- You cannot ask a question if no participants are registered.
- CPS IR does not require to Power on as well as a channel #.
- It is recommended to use a different channel number
for each RF Receiver.
10/45
ASK IMPROMPTU QUESTION
An impromptu question is a question asked from the desktop, without necessarily previous
preparation.
Flow! supports the following question types: True/False; Multiple choice; Multiple Answers,
Short text and Numeric with 6 propositions from A to F or 1 to 6.
Select your question type and set its parameters. The correct answer can be edited latter.
“Penalty” represents the percentage
of points taken off from the original
value. When the correct answer is
“B”, the value of the question is 5 and
the penalty is set to 50%, if the
response is “A”, “C” or “D” the score
will be -2.5.
“Allow partial credit” will give one
half of the total value if only one
answer is correct. For example if the
correct answer is “A” and “B” with a
value of 5, if “A” is sent, the score
will be 2.5.
11/45
THE QUESTION WINDOWS
Regardless of the format, Flow! takes a screenshot of the question and stores it in its
“Session results”(page 19). The screenshots are included in the different exportation types.
When time is over, the
question doesn’t stop! If
you select “Back to the
question”, the timer will
continue with negative
figures.
The question window shows the Title, the Type, and the timer (Time can be added).
The percentage of collected answers is displayed.
To identify the remaining answers, click on “Response grid”.
RESPONSE GRID
The remaining answer is displayed yellow while the green one is collected.
12/45
QUESTION STATISTICS
When you select “Question statistics”, the question window opens displaying the collected
answers in different charts (page 14).
EDIT
Click “Edit question” to set the correct answer.
13/45
QUESTION STATISTICS
ALLOW CHANGE ANSWER
Select “Allow change answers” to enable participants to change their answer.
This option can be enabled and disabled at any time.
In “Question statistics”, select “Show right answer” to reveal the correct answer.
14/45
THE CHARTS - MOBIVIEW
When the MobiView is connected, while Bars display the class results anonymously, you can
see who as responded what and decide whether or not you would like to engage a particular
student.
The MobiView window indicates the Student Id, the Student First Name and Last Name, the
response given, and show if its correct or not. In “Options” you can order reports by “Student
Id” or by “Student surname”.
15/45
THE CHARTS - BARS AND HISTOGRAM
With “Multiple answers” questions, the “Bars” chart shows the response given while the
“Histogram” shows its distribution. In this example the right answer is “AC”.
16/45
THE CHARTS - PER STUDENT
To see who has responded what from Flow!, select the “Answer per student “chart type.
Note that you can export this particular question statistics in Excel, PDF or Word.
17/45
QUESTION STATISTICS
When the question ends, the “Question statistics” window appears with two extra choices.
You are able to “Ask again” the question (the results of the previous one will be erased) or to
“Discard question” if you do not want the results to be included in the session.
The question statistics window always displays the last chart selected.
You are able to unselect “Show results when question ends” from the “options”.
18/45
SESSION RESULTS
PER SESSION
Press “Session results”, the session results windows will appear. You can choose between
two ways of reviewing the results: by “Session” and by “Question”.
In the “Session” view, you can export the session summary in Excel, PDF and Word.
The “Grading options” allow you to set your maximum and minimum grade.
19/45
SESSION RESULTS
PER QUESTION
The “Question” view is a list of the session questions and its corresponding answers. In this
window you can order the different questions, edit and delete them, view where it was
taken from by clicking on the image.
Note that the question displayed will always be the last one.
At the end of the session, the MobiView will display the final score.
20/45
SESSION RESULTS
SAVE RESULTS
Results can be saved during the session or at the end of it. Press “Save results” and choose
your exportation format:
EXCEL
The Excel report is a full and editable report that includes screen shots of each question. In
the page menu you can find: “Details answers”, “Detailed grades” and a “Summary.”
Microsoft Excel needs to be installed.
HTML
For sharing purpose, the HTML option is provided. You can review the same information as
Excel: Question Screenshot, Detailed grades, Detailed answers and a Summary.
EDUCLOUD LMS LATTER
If no Internet connection is available at the moment of saving your results, you are able to
save the results in an EduCloud file format (.esd) which you can upload in EduCloud
whenever you want.
Select “Save results”, “Save to file for LMS/EduCloud
The session results can be exported in a file for EduCloud only if the class was brought from
EduCloud.
21/45
SESSION RESULTS
SAVE RESULTS
EDUCLOUD
To save results in EduCloud, a valid EduCloud account is needed. (page 30).
You are able to save the session results in EduCloud only if your class has been loaded from
EduCloud.
Press “Save results” and “Save to LMS/EduCloud” to directly send them.
The following reports are available: “Class roster”, Session questions”, Session grades”,
Student answers”, Student overview”, “Class overview”.
FLOW! LP
Flow! LP is an option that allows to load the class from the LMS and send the results in its
online Gradebook. Press Save results and “Save to LMS/EduCloud”
This option requires a valid Flow! LP license as well as the EPS module inside the LMS.
FLOW! LESSON
Save results as a Flow! lesson allows to save the results in a special file format that you can
load into Flow!
Ones the lesson is loaded, you are able to start the lesson and collect the answers in a SelfPaced mode. In the “Session results”, press “Save results” and “Export question as Flow!
lesson”. (Page 38)
SEND TO VPADS
If “Send to vPads” is selected, each vPad will receive its final grade together with the class
average.
22/45
EDIT A QUESTION
ADD-INS: POWERPOINT
PowerPoint Add-in installs itself automatically during Flow!’s installation process.
An Add-is installed in the Add-in tab of PowerPoint.
Flow!’s PPT Add-in location is:
Start / Programs / eInstruction Alliance Solution / Addins / Install Flow! PowerPoint Addin.
Flow! can read questions previously created in PowerPoint with Response.
If you use Flow! PPT Add-in, the Response PPT Add-in and the Smart technologies PPT Add-In
have to be removed.
To remove Response PowerPoint Add-in, go to Start / Programs / eInstruction / Response /
Unregister PowerPoint Add-In.
In “More Options” you will be able to customize each of the slides by selecting
“Automatically start question”, “Finish current question when time is over” or “Advance slide
on question end”.
Press “save” to save the question in the slide, the following image will appear:
Switch to slideshow mode to launch the question. Double Click on the question mark and
start collecting answers.
The updates of the PPT Add-in are included in the package sent through Flow!’s automatic
update feature.
Switching to slideshow mode does not automatically launch Flow!
Flow! must be started before launching PowerPoint slideshow mode.
The question will only launch if at least one participant is registered.
The charts of the Question statistics windows as well as the Total and Right Answers can be
dragged and dropped on a PowerPoint page (Outside of the slideshow mode and of a text
zone).
23/45
EDIT A QUESTION
ADD-INS: WORKSPACE
Workspace Add-in location is
Start/Programs/eInstruction Alliance Solution/Addins/Setup Workspace Addin
Click on it and launch Workspace.
Flow! Workspace Add-in is located in the tool named “Student Response System Functions”
available in the tool bar:
Create a blank page selecting the “Create Blank Page” tool and write down your question.
Select its question type with “Create Question”.
Press “Ok”. The image
will appear.
You can also drag and drop question banks from ExamView.
Launch the question by selecting “Ask Question”.
Double Click on the question mark and start collecting answers.
It is possible to launch Flow! from Workspace by selecting “Ask Question”.
When Flow! is started while Workspace is open an error message will appear. Click OK.
The question will only launch if participants are registered.
To re-launch the question, use the tools “Previous and Next Page.”
The “Total and Right Answers” can be dragged and dropped on a Workspace Blank Page.
Use the “Split sentence into words” feature of the “Text” tool to play with the collect
answers.
24/45
EDIT A QUESTION
FLOW! QUESTION EDITOR
In “+more” / “Flow! question editor”, you will find a new
way of generating questions, an “Advanced Button” that
can be pasted in a large number of formats.
Set up your question and customize its appearance,
select “Generated question” and paste it. You can paste
as many questions as you want on one page.
Close the “Question editor” and CTRL-click on the Flow!
button to launch the question.
Note that you can disable the CTRL-click function of
Microsoft Word through “File” / ”Options” / ”Advanced”
/ disable ”Use CTRL + click to follow hyperlink”.
In the Full Screen view mode of Word and Excel click
ones on the icon to start the question.
The compatible formats are Microsoft Word and Excel,
Open Office Suite, PDF, Flash, SCORM and Html. With
Open Impress, the “include text” option will be
necessary.
If you click on the Flow! button while the question editor
is open, it will load the parameters of the question for
you to re-edit.
With Microsoft Word and Excel, in “+ more”/”Options”/”General options”, select “Disable
Microsoft Office security warning for Flow! questions.”
Press “Change” to choose the type of the content that you would like to send to the vPads
(next page)
25/45
EDIT A QUESTION
FLOW! QUESTION EDITOR
Flow! Question Editor allows you to choose the type of the content that you would like to
send to the vPads. Default setting will take a screenshot of your desktop and send it to the
vPads. You are able to send additionally “Custom text” as well as “Internet content” in the
form of an image, a video, a YouTube video and a web page.
Flow! generates questions in multiple formats to promote access and sharing of pedagogical
contents.
26/45
MANAGE PARTICIPANTS
REGISTRATION PROCESS
The registration process is the action of validating the participation of a student from its list.
The “Manage participants” window is made of two windows. The first one on the left shows
the imported class list (page 28), the second one on the right shows the participants that
have registered, that is to say that have actually entered the class.
Flow! is a flexible software and different registration options are possible:
In the case where your class roster includes Student Id but no Device Id, the channel #
will have to be entered and Flow! will automatically jump to the Student Id column.
If Device Id is included, the response system will automatically register (page 28).
If the Student Id of the list matches the Student Id of the response system, the
registration will proceed. If the Student Id doesn’t match, press “Enable Self-register”
to enable students to manually enter their Student Id in the response window (“Q:”)
of the response system.
If the Student Id doesn’t match, use “Assisted registry”. It will enable the student to
press any key (then “Enter”) when he sees his name appearing (instead of having to
enter his full Student Id). “Assisted registry” can help you create a full roster including
Device Id at the beginning of the year.
27/45
MANAGE PARTICIPANTS
REGISTRATION PROCESS
STUDENT ID
The Student Id is the administrative number of the student.
It is usually a 6 to 9 digit number.
For numbered CPS Classpacks, the Student Id can be the sticker number.
With CPS PULSE, it is possible to save the Student Id in its menu.
Menu/Student Id/SId.
Use the “Alpha/Numeric” switch button.
DEVICE ID
The Device Id is the number behind the Response System, the “Serial #”.
For example “30423EE” with CPS Pulse.
In the “Manage Participants” window, if no Device Id is entered, Flow! looks for the Student
Id, the channel number will have to be entered (Here 44).
In the case where a class was imported from EduCloud without Device Id, you can
automatically upload them by clicking on the “Cloud” button.
Next time you bring your class from EduCloud it will include the Device Ids, Flow! will prepare
the first auto-connection displaying the “Preparing CPS device” message. We advise to wait
until the message ends before powering on the response systems.
28/45
MANAGE PARTICIPANTS
CLASS IMPORTATION
FILL MANUALLY
One way of registering your participants is to fill manually the fields “Student Id” and “First
name” (“Last name” and “Device Id” is optional). Click on .csv exportation button to save the
class:
The .csv exportation needs at least one entry to work.
You can also create the template manually respecting the order:
Column A = STUDENT_Id / B= FIRST_NAME / C = LAST_NAME / D = DEVICE_Id (optional)
29/45
MANAGE PARTICIPANTS
CLASS IMPORTATION
IMPORT FROM A CSV
To register participants from a .csv file, you need to load a .csv file in the form of a Flow!
template.
You can generate this template easily by clicking on the .csv exportation button
in
the “Manage Participants” window.
Example: Save the file as “My Template #1”.csv
Open “My Template #1.csv” in Excel or Open Calc and populate it with your 12th Grade
Class. Save the file as “My 12th Grade Class” .csv
IMPORT FROM AN EDUCLOUD / LMS FILE
If no Internet connection is available at the moment of importing your class, you can
previously export a class in the EduCloud file format and import it directly at the moment of
teaching.
30/45
IMPORT FROM EDUCLOUD
To import your class from EduCloud, you first need a valid EduCloud account (page 31).
Once your account is created, enter your “User name” and “Password” and select “Connect”.
In “Manage participants”, “Load roster”, “Connect to LMS/EduCloud”, select your class then press “Get
roster”. Your class will be automatically loaded in the “Class roster” list.
31/45
IMPORT FROM EDUCLOUD
Registering participants from EduCloud requires an Internet connection.
If there is no Internet connection, import a .csv or an EduCloud/LMS file (page 29).
Start by setting your online connection in “+more” / “Options”/”Online connection setting”.
When the software is licensed, an invitation code will appear as shown above.
You can create up to 5 teacher accesses per license.
Click on the URL: http://cloud.vbote.com
32/45
IMPORT FROM EDUCLOUD
Select “Please click here to create a new user account” and populate the registration form.
Enter the invitation code in the form of XXXX-XXXX-XXXX conserving the dashes.
33/45
IMPORT FROM EDUCLOUD
To add a class and import its students in EduCloud, in the main window, select “Add roster”,
enter its information (Here “Geography #1”), and press “Save”.
34/45
IMPORT FROM EDUCLOUD
ADD STUDENTS MANUALLY
Select “Add student”, the Student information window appears.
In the “Student information” window, no Device Id is required (page 27).
35/45
IMPORT FROM EDUCLOUD
“IMPORT STUDENTS” FROM A .CSV FILE
To import a list of students into EduCloud, you need to previously generate a .csv file in the
form of a Flow! template (page 29)
Select your “Geography #1” class and click on “Import student”.
In the “Upload students” window, select “My 12th Grade Class”.csv
Press “Save”. Your class is imported.
36/45
FLOW! MENU
Click on “+more” to access the menu. You can also right click on the main interface.
FLOW! QUESTION EDITOR
Edit question is a large variety of formats (page 23).
37/45
FLOW! MENU
LOAD FLOW! LESSON
This option allows you to re-ask the questions selected in your lesson in a second step,
in a Self-Paced mode.
At the end of your session, in the “Session results” you can “Save results” and select “Export
questions as Flow! lesson”.
Enter your “Lesson name”, the “Author” and the “Max time. Select “Save lesson” to save all
the questions of your lesson in a special format “.fll”
Import your lesson through the “Load Flow! lesson” menu. A preview of the lesson will
appear. Press “Stat lesson” to start your lesson. The top percentage bar gives you the
percentage of the questions that have been answered while the bottom one shows the
percentage of participants that have completed the test. Note that you can also load directly
a PowerPoint with questions from Response and from Flow!
38/45
FLOW! MENU
OPTIONS
ONLINE CONNECTION SETTINGS
Connect Flow! to EduCloud, you can also connect it to Moodle, Blackboard, Web CT and
Sakai with the Flow! LP option. Set you EduCloud account page 32.
VPAD SETTINGS
The “vPad Settings” window allows you to announce your session on the local network. You
are able to customize it by choosing the “Session icon” and the “Session name”. A password
can be put into place by selecting “require session password”.
The “Question options” allows you to determine the size of the image you would like to send
to the vPads. This setting is meant to adapt the vPad feedback to the type and number of
vPads you have. A “Small” size is suitable for small Smartphones and large lecture halls. A
“Large” size is best suited for large tablet PCs and a “normal” class size.
The overall experience is depending mostly on the quality of the network and of the vPads.
We strongly recommend you make some tests before going to class!
Ones the parameters are saved; you will see the session name and icon appearing on the
welcome window of the vPad. Join the session by entering your Student Id and selecting the
session.
39/45
FLOW! MENU
OPTIONS
GENERAL OPTIONS
From this window, it is possible to “Hide Student id” column, “Show results when question
ends” “Disable Microsoft Office security warnings for Flow! question, Order the reports by
“Student id” or by “Student surname” and “Show help on start.
DETECT DEVICES
“Detect devices” is used in the cases where the Radio Frequency receiver is removed.
When reinserting the USB RF receiver “Detect devices” will rescan the USB ports to pick up
the channel. This process is automatically launched when starting Flow! Note that this
function only detects hardware devices. Restart Flow! to refresh the latest selected WIFI
network.
40/45
FLOW! MENU
LICENSE INFORMATION
The license information window shows you which license is linked to the software.
Flow! is open for a period of 30 days for 40 participants and 40 vPads.
At the end on this period, it drops to 5 participants and 5 vPads and does NOT block itself.
The license of the Flow! takes the form of a USB key that behaves like a dongle.
For this reason, Flow! can be installed anywhere is the school.
When the USB key is inserted into the USB port, a green check appears.
Up to 900 participants can connect and always 5 vPads.
Licenses with additional vPads can be purchased to enable more vPads to register.
41/45
FLOW! MENU
FLOW! IS ALREADY UPDATED
Flow! updates are free, when one is available, the “Flow! is already updated message” will
convert into “Flow! is available for update”. Download the “Setup” file and close Flow! prior
to launching the installation.
ABOUT FLOW!
We recommend you to update the software when “Flow! is available for update”. The about
Flow! windows will indicate the current version for support purposes.
HELP & SUPPORT
Help & Support will display this user guide.
EXIT
Press “Exit” to exit Flow! Be careful, Flow! doesn’t save the session automatically.
42/45
CONTACTS
We are committed to providing you with full satisfaction.
We are reachable at:
eInstruction EMEA
26-36 rue Alfred Nobel
93600 Aulnay Sous Bois - FRANCE
Telephone: +33 1 58 31 10 60
Email: [email protected]
THANK YOU!
43/45
44/45
45/45