1
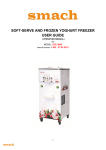
BATCH FREEZER
USER GUIDE
(OPERATING MANUAL)
for
MODEL: SUDE 100
Manual Number: V 000 - 17.04.2012
1
1.TABLE OF CONTENTS
1. Table of Contents
2. Contact Details & Help Desk
3. Congratulations And Thank You
4. Electrical Connection Notice
5. Warnings and Precautions
6. Proper use and Safety Notices
7. Operating Procedure
8. Clearance Parameters
9. Control buttons
10. Beater assembly
11. Dispensing cover assembly
12. Beater-machine assembly
13. Dispensing cover-machine assembly
14. Making ice cream
15. Dispensing the ice cream
16. Cleaning and sanitizing the machine
17. Bacteria growth table
18. Possible failures and solutions
2
2.CONTACT DETAILS & HELP DESK
Smach Gıda Makine San.Tic.A.Ş
ADDRESS AND CONTACT DETAILS
Smach Gıda Makine San.Tic.A.Ş
Guzelyurt Mah.5762 Sok.No 5/A
Orta Olcekli San.Bol.
Manisa/TURKEY
Tel: +90 236 233 39 29
Fax: +90 236 236 12 59
E-Mail: [email protected]
When calling Smach have the following information ready:
1. Freezer Serial Number: Found on body panel
Write down the serial number in this box
2. This Model Number: MODEL SUDE 100/500
3. A brief description of the problem
3
3.CONGRATULATIONS AND THANK YOU!
Congratulations ― and thank you for acquiring a Ice Cream Machine manufactured
especially in Turkey by Smach Gıda Makine A.Ş.
If you encounter a problem with the Smach Ice Cream Machine please contact your local
Service Technician
Please familiarize yourself with the machine by taking some time to study this User Guide.
If you get to know this little ice-cream factory, it has the potential of making good profit.
Notice and no warrantee: These pages are provided as a service and informational purpose only,
and on the assumption that the recipient of the machine and the operator of the machine is
competent to perform the required tasks, including, but not limited to operation and/or repair of
power equipment, for which the information is provided, and that person is knowledgeable and
mindful of proper safety precautions. Neither Smach, nor any of their respective employees make
any claims about the suitability or fitness of the information contained herein which is provided
strictly on an "as-is" basis, without any express or implied warranty, guarantee, assurance of
quality, conformity of specifications, reliability, functionality, or suitability. In no event shall Smach
and/or its employees be held liable, whether in contract or tort, to any party for any direct, indirect,
punitive, or consequential damages, including, but not limited to lost profits and business
interruption, arising out of any errors, typographical or otherwise, inaccuracies, omissions, or
delays arising out of or pertaining to the use, reliance on, or inability to use any type of information,
part, or good, even if notified in advance about the possibility of such action. Information in this
manual is subject to change without notice. All rights reserved.
4
4.ELECTRICAL CONNECTION NOTICE
1. Please make sure that the power supply conforms to the electrical data label (Rating
Plate).
2. Check the data label (Rating Plate) for the required circuit breaker amperage. Only plug
into an electrical wall socket that complies with the required amperage of the machine
3. Machine should be installed according to the local authority electrical code/regulations it
is used in, as well as to other work health and safety requirements. If you are not sure,
please contact your local authority for details.
4.
― this symbol indicates the presence of electric shock hazards. Inside the
enclosures of the machine there are electrical shock hazards, therefore, do not remove
any panels if you are not a qualified technician of an authorized service provider.
5. WARNING: To avoid risk of injury from electric shock, if you are not a qualified and duly
authorised service technician, do not open the enclosure panels on the sides and back of
the machine
6. The power supply must be properly grounded to prevent electrical shock. Check with a
qualified installer for compliance.
5. WARNINGS & PRECAUTIONS
Keep your Freezer clean and tidy! When it needs repairing, work with an authorized
Smach service agent.
The service technician or installer must be a suitably qualified and authorized person and
must amongst other things ensure the following:
1. That the Freezer is properly grounded (earthed).
2. The fuse must be 220-240V, 50 Hz 16 Amp.
3. Never open the panels to reach inside the Freezer body. (Only by authorized technicians).
4. Do not clean the machine with high-pressure water.
5. Technical maintenance must be done by authorized technicians.
6. Only use food-grade lubricant when changing or replacing the O-rings on the pistons.
NOTICE: Smach Gıda Makine A.Ş will not take any responsibility if the users do not follow all the instructions
as described in this User Guide.
5
6. PROPER USE OF THE BATCH FREEZER
When properly used and cared for the Machine will provide a consistent quality Ice
Cream. Like all equipment used to manufacture food products it will require daily cleaning
and regular maintenance. A specified amount of care and attention is required including
but not limited to everything prescribed in this manual.
SAFETY NOTICES
Smach is concerned about the safety of the person/s using the machine. Therefore please
take note and abide by amongst others, the following WARNINGS:
The weight of the Machine is no less than 105 kg. Moving it must only be
done by persons who are trained and qualified to move a weight of at least
105 kg in the shape and size of the machine.
A potential risk exists if the User Guide instructions and other safety
precautions are not strictly followed.
Do NOT allow untrained personnel to operate the Batch Freezer.
Do not use the Machine before studying this User Guide. Failure to follow this
instruction may result in equipment damage, poor performance, health
hazards or personal injury.
Do not allow anyone to attempt any repairs to the Machine unless the main
power supply to it has been disconnected from the power supply point.
Do NOT insert or remove the beater from the freezing barrel while the
Machine is connected to the power supply. First isolate the power supply.
Do NOT remove the hopper lid unless you are filling or re-filling the hopper
with the mix
Do NOT switch ON the Machine at the wall socket switch when the following
has not yet been done: (a) the beater is inserted properly (b) the barrel head
is fitted correctly and the four nuts screwed on correctly and tightly, and (c)
the barrel is flooded with Mix
When removing, replacing or cleaning the removable parts do so with caution
because the beater blades have sharp edges that can easily cause injury.
Always follow local authority food safety and other health codes.
Always follow in-store operating and food hygiene safety and other health
codes.
6
7. OPERATING PROCEDURE
1. Always wash your hands with soap and potable water before assembling the machine.
(Preferably use new paper towels to dry your hands)
2. Only use the removable parts after they have been washed sanitized and air-dried.
3. Fit the beater assembly only when the Machine is powered off.
4. Follow all the instructions of this manual and the operating procedures of the store
owner, and at all times follow recognised in-store hygiene procedures, in particular those
in respect of dairy products.
5. Repairs must be done by the persons who are authorized by Smach, if not, any product
failure warrantee will become invalid and void.
8. CLEARANCE PARAMETERS
This Machine is air-cooled and must have a clearance of at least 50cm between the back
side and any other object behind it. There must be a clearance of at least 50cm between
the sides of the freezer and any adjacent object. If not, the freezer will not work properly.
Position the machine for easy accessibility for cleaning, servicing and maintenance. A
clean environment is also essential for the proper performance of the freezer.
Attention: The freezer must not be exposed to direct sunlight. If it stands in direct sunlight
the performance will decrease. As the air temperature increases the performance
decreases. This is true for all refrigeration equipment.
Cool air is the best friend of the machine!
7
It just hates HOT air !!!!
9. CONTROL BUTTONS
Buttons:
1. STOP: When pressed machine stops, nothing works
2. CLEAN: When pressed only beater works, it rotates the
water and clean the cylinder
3. PRODUCTION: When pressed both beater and cooling start
working, machine makes the ice cream according to desired
consistency
4. DISPENSE: When pressed both beater and cooling are still
working, beater speed increases to push the ice cream towards
to cover. Use this button when the buzzer whistles (production
is ready).
8
10. BEATER ASSEMBLY
Beater Seal
Scraper
Blades
Springs
Beater Shaft
1.
Set the spring to the shaft and both push and rotate
the spring to clockwise so it will go over the shaft
easily
2.
Fit the seal seals (lubricated of front and bach
surfaces with food grade gress) and blades
Scraper blades have chamfers They
MUST be at the seal side of shaft
9
11. DISPENSING COVER ASSEMBLY
Handle Nut
Draw Cover
Spring
Handle
Dispensing Cover
Bush
Motion Pin
1.
Assemble the handle, draw cover (with its lubricated
(food grade gress)o-ring) and spring as seen in the
picture
2.
Fit the assemled parts to the dispensing cover
10
3.
Tighten the handle with the nut
4.
Place the bush and motion pin as seen in the
picture
12. BEATER-MACHINE ASSEMBLY
1.
Make the blades springy by two hands and
press them the to place inside of the cylinder
11
13. DISPENSING COVER-MACHINE ASSEMBLY
Fit the cover o ring and place the
dispensing cover to the machine by
aligning motion pin to the machine
bush
machine bush
cover o-ring
14. MAKING ICE CREAM
1.
Close the dispensing cover an tight it with the
handle nuts
Also tight the handle nut
handle nut
hopper
cover
Remove the hopper cover and charge the ice
cream mix the the hopper (the bottom line of
the hopper is the maximum mix capacity of
cooling cylinder, so do not charge any mix
above this line)
2.
12
hopper
3.
Close the hopper cover and set the desired
time and pres "production"button
15. DISPENSING THE ICE CREAM
When the ice cream is ready, buzzer sounds.
after buzzer sounds you can dispense the ice
cream. press dispense button on the screen
and then rotate the draw cover to
counterclockwise to get out the ice cream
13
16. CLEANING and SANITIZING THE MACHINE
When you want to wash the machine, be sure
everything is closed. then charge the water from the
hopper and then pres clean button. after seconds
open the draw cover and remove wase water . after
that open the dispensing cover and clean and
saniteze all the parts.
Firstly, set the Freezer to the “CLEAN” mode and wait 3 minutes.
Fill the hopper with cold water and allow the machine to run for 2-3 minutes before
draining the water into the bucket.
3. Refill the hopper with warm water and Sanitizer as per the sanitizer manufacturer’s
instructions.
4. Allow the machine to run for approximately 5 minutes before draining the liquid into
the bucket.
5. Repeat step 4 until the water runs clear.
6. Set the control button to STOP mode and then switch off the power at the wall socket
and unplug the power cable.
7. Undo and remove the screws of the Dispense cover.
8. Remove and disassemble the parts.
9. Wash and sanitize all parts as per your local requirements and allow the parts to airdry. Do not use any chemicals other than the approved Sanitizer during the cleaning
process.
10. Assemble all the parts, ensuring the O-rings and their groves are properly lubricated.
11. Start by lubricating the harmonica-shaped Beater Shaft seal and slip it onto the
beater shaft:
a. Place the beater into the barrel and turn it slowly until it locks into position.
b. Lubricate the smaller O-rings, slip them onto the piston and place the piston
into the dispense head.
c. Lubricate the large O-ring and place into the back of the dispense head.
12. Place the Dispense cover back onto the machine and tighten the screws
1.
2.
For optimal machine-performance, the condenser must be cleaned from dust and dirt
regularly by an authorized technician.
Notice: During cleaning and maintenance, follow all instructions given in this User Guide, otherwise, Smach
Gıda Makine A.Ş will not take any responsibility of unwanted results.
14
17. BACTERIA GROWTH TABLE:
E. coli multiplication under varying temperature conditions
Time
Number of organisms at 5ºC
generation time = 3 hours
Number of organisms at 20ºC
generation time = 1 hours
Number of organisms at 37ºC
generation time = 20 min
0 time
1
1
1
1 hour
1
2
8
2 hours
1
4
64
3 hours
2
8
512
4 hours
2
16
4,096
5 hours
2
32
32,768
6 hours
4
64
262,144
7 hours
4
128
2,097,152
8 hours
4
256
17,000,000
9 hours
8
512
130,000,000
10 hours
8
1,024
1,100,000,000
15
18. POSSIBLE FAILURES AND SOLUTIONS
Attention: DO NOT ALLOW ANY TECHNICAL MAINTENANCE OR REPAIRS BEFORE
DISCONNECTING THE FREEZER FROM THE POWER SUPPLY.
If the solutions listed below in the Trouble Shooting guide do not resolve your operational
problems, call an authorized service agent for further assistance.
TROUBLESHOOTING GUIDE
PROBLEM
1
Compressor starts, then
stops after a few seconds.
3
Machine works, but no
product comes from the
Dispense Cover.
5
6
SOLUTION
No electricity//power
Check if plugged in and switch on at wall
socket
Control button mode is wrong
Set the control button "Production"
No air circulation
Check the clearances around the machine
and ensure that it is at least 50cm.
Over refrigiration
Use less time to run the production
The beater is rotating
counterclockwise
Call Smach
Low refrigiration
Use more time to run the production
Dispense Cover O-ring is
missing
Drain the machine and add O-rings
Dispense cover bolts are not
tightened sufficiently or are
tightened unevenly
Tighten Disphense cover screws evenly
and properly
Buzzer is defective
Call Smach
Machine does not run
2
4
CAUSE
Machine runs, but Product
is too soft
Mix leaks from the
Dispense Cover
Buzzer does not sound
16