1
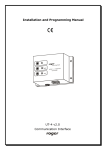
Installation and Programming Manual
UT-4 v2.0
Communication Interface
UT-4 v2.0 Rev. A EN.
2006-02-15
_________________________________________________________________________________________
1.
Introduction
UT-4 interface enables communication with devices equipped with serial port trough a computer
network. Interface is equipped with serial port which can be configured to RS232, RS422 or RS485
and connected to 100BaseT Ethernet computer network. UT-4 is identified in computer network by
its IP address assigned during installation process and factory pre-programmed MAC number. The
main component of the interface is the Digi Connect ME network module manufactured by Digi
Corp. All Digi software tools dedicated to this module may be also directly used for UT-4 interface.
More information about Digi Connect ME can be found on: www.digi.com.
2.
Limitations of using interface
In most cases utilizing UT-4 interface successfully replaces using physical serial ports, however in
some (rare) circumstances it may cause problems with communication or
in extreme situations completely disable it. The main reason for the problems with using
UT-4 are time conditions which exist during sending data packets trough the computer network.
These problems may occur especially when communication is realized trough VPN network. Large
time delays during data transfer may occur in this type of network. In result it may disable proper
data exchange between PC and remote device or control system equipped with serial port.
Sometimes the UT-4 can be reconfigured and adopted for specific circumstances. The Digi Connect
ME represents high level of advanced technology nevertheless in some situations communication
with remotely located device (or system) through UT-4 will not be satisfactory because of specific
characteristic of a serial protocol.
Note: To avoid potential problems, it’s recommended to perform series of tests in individual
installation before purchasing a device.
3.
Controlling data flow in RS485
The control of data flow in RS485 interface is realized on a time base. Normally, when UT-4 is not
receiving any data from a the host device (PC), the RS485 operates in receiving mode – in this
state all data coming from the RS485 serial interface is immediately converted to TCP data frames
and forwarded to PC computer. With the first byte of data send from PC to a serial port UT-4
immediately switches to transmission mode and all data coming from the host PC is transmitted
over RS485. The UT-4 remains in transmission mode till moment when PC stops sending data to
serial port, return from transmission to receiving mode occurs automatically after ~1.5 ms from
the moment of last transmitted bit of data. The flow control method described above is compatible
with specification of RACS communication protocol, however in case when UT-4 configured for
RS485 and is intended for communication with other devices or systems this method might not be
successful.
4.
Using UT-4 interface in RACS
RACS software package was specially adopted for operation with access network connected to PC
through computer network. There is a special option Communication port timeout which is
available in Network properties window of PR Master program:
___________________________________________________________________________
Strona 2
UT-4 v2.0 Rev. A EN.
2006-02-15
_________________________________________________________________________________________
This parameter enables you to adopt the PR Master program for specific conditions of particular
TCP connection. It’s recommended to set parameter to the highest value of time delay which is
expected in communication between PC and remotely located access control system. Remember
not to exaggerate with setting the value because it may cause in some situations unnecessary
communication slowdown. Practically, it’s assumed that Communication port timeout which is
set for the remote access network connected through LAN or WAN should be defined to value
approximately two times higher than average time of TCP packet round-trip. To estimate the
round-trip time enter PING [IP Address] –t in CMD console.
It works by sending ICMP “echo request” packets to the target UT-4 interface and listening for
replies (ICMP “echo response” packets). Ping additionally provides estimates of the round-trip time
and packet loss rate between host and UT-4. Test should be carried out in time not shorter than 1
minute when network is highly loaded. In case the round-trip time exceeds 200-300ms, it’s highly
probable that in this case problems with communication between remote access control system and
PC computer will occur. You should turn to your network administrator regarding this issue and ask
for some action which could reduce delays in computer network.
___________________________________________________________________________
Strona 3
UT-4 v2.0 Rev. A EN.
2006-02-15
_________________________________________________________________________________________
Note: It’s strongly recommended not to use a UT-4 interface for management of PRxx1 access
controllers (e.g. PR301, PR201 and PR311). When during transmission of settings to those types of
controllers the communication will be broken the only way to restore controller’s operation is to
perform Memory Reset procedure. The Memory Reset requires intervention inside device’s
casing which might be very inconvenient when access controller is located in remote locations. This
threat doesn’t concern the PRxx2 series access controllers, those devices employs transactional
method for transmission of settings. This method guarantee that in case of transmission failure
controller will automatically restore its previous configuration settings and operator will be allowed
to repeat transmission to controller without visiting remote location where controller is installed.
5.
Purpose of this document
This document describes installation process and configuration of the UT-4 interface for a Virtual
Serial Port. This document is not intended to describe in details all potentials configuration of Digi
Connect ME network module in details. In case when UT-4 have to be used in other configuration
you must refer to full documentation of Digi Connect ME module available on manufacturer’s web
site or refer to documentation and software delivered with device.
Note: Because the Digi Connect ME network module is constantly improved and enhanced, we
recommend to get the most actual version of firmware and documentation direct from Digi Corp.
web site.
6.
Installation
Installation process consist of electrical connection and software installation on PC as well.
Connection method according to appropriate communication standard is demonstrated on pictures
attached to this manual. Below, you may find a list of installation steps which guide you trough
configuration of UT-4 as a virtual serial port in various operating systems.
7.
Installation in MS Windows XP and 2K
Installation is carried out by Digi Device Setup Wizard.
1. Before installation, check the following issues:
•
•
•
Interface is connected and powered up
You know the MAC address of individual UT-4. This number is written on the white label
placed on a Digi Connect ME module (to see this label you must disassembly a plastic
cover of UT-4). The MAC number is helpful to identify the UT-4 in case you have more
then one UT-4 assigned to the same IP number. The factory new UT-4s have the same IP
number so the MAC address might be necessary.
Make sure that you do not have any firewall software running on the computer. Firewall
software will prevent the setup wizard from discovering the device on your local network.
2. Start Digi Device Setup Wizard
___________________________________________________________________________
Strona 4
UT-4 v2.0 Rev. A EN.
2006-02-15
_________________________________________________________________________________________
3. Click Next > to continue
4. The following window with listed UT-4 interfaces will appear:
___________________________________________________________________________
Strona 5
UT-4 v2.0 Rev. A EN.
2006-02-15
_________________________________________________________________________________________
5. Select device which you want to configure. To identify your interface you may use MAC address.
Click Refresh to rediscover procedure.
List displays information about IP, MAC address, device name and firmware version.
6. Click Next > to continue, the following window will appear:
___________________________________________________________________________
Strona 6
UT-4 v2.0 Rev. A EN.
2006-02-15
_________________________________________________________________________________________
7. To configure network settings, make selections on this page:
•
Obtain IP Address settings automatically using DHCP - this option requires a
•
Use the following IP settings
DHCP server to assign network settings. The UT-4 is shiped with the DHCP client feature
enabled. So if your site has a DHCP server, choose this setting and your UT-4 will request
network settings from the server.
8. The second selection requires that you gather network setting information from your network
administrator and then input it on this wizard page. The IP address and subnet mask are
required, other fields are optional.
9. Click Next > to continue, the following window will appear:
___________________________________________________________________________
Strona 7
UT-4 v2.0 Rev. A EN.
2006-02-15
_________________________________________________________________________________________
10. Select RealPort (COM Port Redirection) option from Scenario List. With the RealPort
technology you will obtain a new virtual COM port in you computer. This new COM port can be used
by various application as it was a real serial port like COM1, all data send/receive to/from this
virtual COM port will be in fact redirected to UT-4 Digi module.
11. Click Next > to continue, the following window will appear:
___________________________________________________________________________
Strona 8
UT-4 v2.0 Rev. A EN.
2006-02-15
_________________________________________________________________________________________
12. Check option: Install Digi RealPort on this computer and click Next > to proceed to
the next step.
___________________________________________________________________________
Strona 9
UT-4 v2.0 Rev. A EN.
2006-02-15
_________________________________________________________________________________________
13. Verify the device and port configurations. If you are satisfied with the configurations, click
Next > to apply them to the device. Otherwise, if you would like to change any of the
configurations, click < Back.
14. You can save configuration report. To do this click here.
15. To transfer configuration settings to the device, click Next >.
___________________________________________________________________________
Strona 10
UT-4 v2.0 Rev. A EN.
2006-02-15
_________________________________________________________________________________________
Do not cancel this operation, after the installation the following window will appear:
___________________________________________________________________________
Strona 11
UT-4 v2.0 Rev. A EN.
2006-02-15
_________________________________________________________________________________________
16. Configuration has been successfully transmitted to the device. Click Finish to close this wizard.
After the installation a new serial port will appear in Device Manager. This port can be used on the
same rules as it was a real one.
8.
Installation on MS Windows 9x/ME
1. Open Start -> Settings -> Control Panel
2. Locate and run the control panel named Add New Hardware
3. Windows indicates that it will next search for new Plug and Play devices, which may take a few
moments. Choose Next > to continue
4. If Windows finds any new Plug and Play devices for which it has installation files, it will install
them and will complete the Add New Hardware Wizard. If this happens, rerun
the Add New Hardware Wizard. Otherwise, Windows may find some devices for which it doesn't
have installation files and will list them now.
___________________________________________________________________________
Strona 12
UT-4 v2.0 Rev. A EN.
2006-02-15
_________________________________________________________________________________________
5. Click No, the device isn't in the list. Choose Next > to continue. (This dialog does not
appear in Windows Me.)
6. Windows displays a list of hardware categories. Select Other devices and choose Next > to
continue.
___________________________________________________________________________
Strona 13
UT-4 v2.0 Rev. A EN.
2006-02-15
_________________________________________________________________________________________
7. Windows will display a list of known hardware in the category previously selected. Don't select
any device from the list. Instead, choose Have Disk… to point Windows to the location of the
installation files.
8. Enter the path to the Digi driver file and click OK.
(The newest version of software, drivers and firmware can be downloaded from site:
www.digi.com)
___________________________________________________________________________
Strona 14
UT-4 v2.0 Rev. A EN.
2006-02-15
_________________________________________________________________________________________
9. Windows now searches the indicated directory for installation files and displays a list of devices it
can install. Select Digi Connect ME on the list, and choose Next >, the following window will
appear.
10. Choose Finish to continue the installation. The following window will appear:
___________________________________________________________________________
Strona 15
UT-4 v2.0 Rev. A EN.
2006-02-15
_________________________________________________________________________________________
10. Enter IP Address and TCP port.
11. Click OK to finish installation.
After the installation a new serial port in Windows Device Manager will appear. This port can be
used on the same rules as it was the real one.
9.
Reconfiguration
Whenever required the current Digi module settings can be changed. You can either do it using
dedicated software or directly from your internet browser. To access UT-4 from web browser enter
IP address defined during configuration in address field and log. When the internet browser connect
with Digi module it will ask you for username and password, enter following:
•
•
Username: root
Password: dbps
Note: Reconfiguration of a Digi device requires professional knowledge of network technology and
Digi module. The information presented in this manual are not intended for detailed setup of Digi
network module.
10. Uninstallation
To remove virtual serial port from the system follow these steps:
•
•
click Start -> Control Panel -> System
select Hardware tab -> click on Device Manager
___________________________________________________________________________
Strona 16
UT-4 v2.0 Rev. A EN.
2006-02-15
_________________________________________________________________________________________
•
•
expand Multi-Port Serial Adapters
click right-mouse on port which you want to remove (Standard Realport Device) and select
Uninstall
Note: VSP ports exist also in LPT and COM ports category. Remember: don’t remove them from
there. They’ll be automatically removed after uninstallation of Multi-Port Serial Adapters.
Technical Specification
Power supply :
10.0 ...15VDC
Input current :
average 75mA, max. 150mA
Serial interface
RS232, lines: RXD, TXD, RTS, CTS, GND
RS422, lines: TXA, TXB, RXA, RXB
RS485, lines: A and B
Ethernet standard
10/100Base-T Ethernet
Range of ambient temperature:
:
0..55°C
Relative humidity :
10..90%
Dimensions (W x L x H) :
100 X 68 X 35
Weight :
Approx. 110g
___________________________________________________________________________
Strona 17
RACS
Mode
Power
TXD
Serial Interface Selection
RXD
RS232
UT-4 v2.0 Digi
Digi
RS485
NetModule
RACS
Mode
RACS
Mode
RS422
CTS RXD RTS TXD
SHLD GND +12V GND
TXB RXB TXA RXA
Connection to serial device
or
RACS communication bus
RACS
Mode
100BaseT Ethernet
Computer Network
Note: The flow control (switching of the RS485 interface between transmitting and receiving) is provided by a
time method. Normally, as a default, the RS485 interface operates in "receive" mode, all data which comes to
RS485 lines is immediately retransmitted through TCP to host device (PC). With the first byte of data which is
transmitted by host to UT-4, the RS485 interface automatically switches to "transmit" mode and remains in
this mode as long as host continues sending of data. The UT-4 swicthes automatically the RS485 to "receive"
mode after 1.5ms from the moment when last bit was transmitted by host unit (PC) to the UT-4.
UT-4 v2.0 Digi
UT-4 v2.0 Digi
UT-4 v2.0 Digi
UT-4 v2.0 Digi
CTS RXD RTS TXD
SHLD GND +12V GND
TXB RXB TXA RXA
CTS RXD RTS TXD
SHLD GND +12V GND
TXB RXB TXA RXA
CTS RXD RTS TXD
SHLD GND +12V GND
TXB RXB TXA RXA
CTS RXD RTS TXD
SHLD GND +12V GND
TXB RXB TXA RXA
Connection
to
RS232
Connection
to
RS485
Connection
to R A C S
Note: The connection of CTS and RTS
lines to CPR-32SE network controller is
optional and is available for CPR
firmware versions 31 and higher.
Computer Network (100/10BaseT Ethernet)
UT-4
RACS
Signal
Ground
Shield
TXA
RXA
RXB
TXB
RTS
A
B
CTS
Shield
A
B
Signal
Ground
TXD
Shield
RXD
RTS
CTS
12VDC
12VDC
12VDC
12VDC
Connection
to
RS422
Computer Network (100/10BaseT Ethernet)
UT-4
UT-4
RACS communication bus
Device with serial port
CPR
Control Panel
RS485
or
RS232
PC computer
RS485
RS485
or
RS232
RACS
Access
Controller
Device with serial port
Access
Controller
Communication between RACS system
and managing computer.
Configuration and wiring of the UT-4 v2.0 Digi
Communication between two serial devices
(e.g. Between CPR and PRxxx controller)
cdr183