1
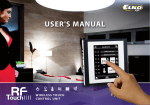
C z USER'S MANUAL S K E N R O P L H U R U WIRELESS TOUCH CO N T R O L U N I T RF Touch user manual We want to thank you for your purchase of the RF Touch control unit, which is an element of wireless RF Control system. RF Touch allows: you to control many devices trough touch screen - heating control - dimming lights - switching of electrical appliances and equipment - blinds - a combination of detectors - function timers - Group control of electrical equipment everything with clear visualization wireless communication without the need for cabling 2 RF Touch user manual Contents: Before you start ....................... 3 Overview of wireless devices ... 4 Characteristics of RF Touch ..... 6 Settings Control - Default setting ......................... 12 - Menu(creating and naming) ... 13 - Programming ........................... 15 - Assign a new receivers ....... 16 - Temperature regulation .......... 25 - Switching ................................. 28 - Dimming .................................. 31 - Blinds ....................................... 32 - Assigned receiver ............... 17 - Detectors ............................ 20 - Quick Control ..................... 22 - Display ..................................... 23 - Detectors ................................. 34 - Quick control............................ 35 Technical specifications ........... 7 Installation of RF-Touch W ....... 8 RF Touch Installation-B ............ 9 Description of Control icons .... 10 Basic Steps ............................... 11 - Other ........................................ 23 E N What to do if ............................ 36 Installation Form ..................... 38 Before you start The instruction manual is intended for installation and use of the equipment. Instructions are always included in the product packaging. Installation and connection can only make personnel with appropriate qualifications, in compliance with all applicable laws, who are perfectly familiar with this instructions and functions. Trouble free function is also dependent on transportation, storage and handling. In case of any signs of damage, deformation, malfunction or missing parts, do not install this product and return it to the seller. Product and its parts must be at the end of its lifetime handled as electronic waste. Before installation, make sure that all wires, connected parts or terminals are not live. During the installation and maintenance is necessary to follow safety regulations, standards, guidelines and special provisions for working with electrical equipment. 3 Overview of wireless RF Control devices RF Control system All actuators of the RF Control System can be controlled by wireless central unit and all transmitters of the system simultaneously. CENTRAL WIRELESS UNIT CONTROLLER RF Touch-W RF Touch-B RF Pilot for surface mounting 100 - 230V AC or adapter (external) 12 V DC for mounting in the installation box 100 - 230V AC remote controller, colours: white, anthracite TRANSMITTERS BLIND ACTUATORS RF KEY RFWB-20/G RFWB-40/G RFJA-12B/230V 4-channel remote controller - key pendant 2-channel wireless switch in the design LOGUS90 4-channel Wireless switch in the design LOGUS90 blind actuator 2 x 8A switching relay protection 230V AC RFIM-20B RFIM-40B RFSG-1M RFJA-12B/24V DC universal transmitter module under the switch or button wall box installation universal transmitter module under the switch or button wall box installation Transmitting module 1-module 230 V AC blind actuator contactless switching 12-24V DC RFSTI-11B RFSTI-11/G RFTI-10B RFTC-10/G wireless switching actuator with temperature sensor in design to installation box, 230V AC wireless switching actuator with temperature sensor with manual control buttons directly on the unit, 230V AC wireless temperature sensor 1 x CR 2477 3V battery digital temperature controller 2 x 1.5V AAA batteries TEMPERATURE ACTUATOR 4 Overview of wireless RF Control devices SWITCHING ACTUATORS RFSA-11B RFSA-61B RFSA-62B RFSA-61M RFSA-66M single channel single function switching actuator 1 x switching contact 16 A 230V AC single channel multifunction switching actuator 1 x switching contact 16A 230V AC 2 channel multifunction switching actuator 2 x 8A switching contact 6 functions 230V AC single channel Multifunction switching actuator 1x changeover contact 16 A 6 functions 230V AC six-channel Multifunction switching actuator 3 x 8 AND NO 3 x changeover contact 8A 6 functions 230V AC E N DIMMING ACTUATORS RFDA-11B RFDA-71B single function dimming actuator 1 light scene, function OFF, 230V AC multifunctional dimming actuator 7 functions, AC 230V / 250V Angle antenna Angle Antenna for plastic switchboards supplied as standard for RFSA-61M, FSA-66M, RFSG-1M for metal switchboard can be ordered for RFSA-61M, RFSA-66M, RFSG-1M ANALOGUE ACTUATOR DETECTORS RFDAC-71B Dimmable ballast Thermo-control actuator with analog output 0 (1) - 10 V 1 x switch contact 16 A 7 functions, 230V AC for dimming of fluorescent lamps supplied on request with the product RFDAC-71B of heating valves supplied on request with the product RFDAC-71B JA-80P JA-81M JA-82M 5 Characteristics of RF Touch Control Unit of the wireless system RF Control - RF Touch provides intelligent control of the RF units. It can be used for: Central control of all units from one place Complete overview (visualization) of the current status of units (appliances / equipment) Features: sends command to temperature, switching, dimming and shutter actuators accepts commands from the transmitters, actuators, temperature sensors and detectors processing programs for heating and regulation Design: RF Touch-B fits in the round installation box with a supply voltage of 100 - 230 V AC RF Touch-W for surface mounting with power supply from the back side: 100 - 230 V AC or from the side (via jack): 12 V DC 3.5 inch color touch screen - no mechanical buttons RF Touch frames in the base plastic (white, black) or luxurious design Logus90 (glass, metal) Color of the interframes - white, ivory, ice, mother of pearl, aluminum, silver Colors of the boxes (only for RF touch-W) - white, ivory, dark gray, light gray Backup time in case of power failure is 48 hours 40 actuators and 30 OASIS detectors can be assigned to each RF Touch unit RF Touch can be combined with units of RF Control marked as Oasis & Touch Compatible 6 Technical specifications Technical parameters RF Touch-B RF Touch-W Display Type: Resolution: 320 x 240 pixels / 262,144 colors 3:4 52.5 x 70 mm active (white LED) resistive 4-wire 3.5” Control: Touch sensitive from the back side 100 - 230 V AC from the side 12 DC * 100 - 230 V AC Frequency: Operating temperature: E N 0 ... +50°C Storage temperature: - 20 ... +70°C Protection: IP 20 III. Pollution degree: 2 arbitrary Installation: installatin a box wall box installation Dimensions: 94 x 94 x 12 mm 94 x 94 x 24 mm 127 g 175 g max. 5 W Weight **: A1 - A2 Standards: Control Minimal range RF Touch – actuator: max. 2.5 mm2 / 1.5 mm2 with socket Operating position: Voltage / specific current: Range up to: Max. cross section of wires: Overvoltage category: Power supply Power supply connector: push-in screwless terminal push-in or jack 2.1 mm Operating conditions Display: Power consumption: RF Touch-W Connection Visible area: Touch screen: RF Touch-B color TFT LCD Aspect ratio: Backlight: Technical parameters EN 60730-1 * adapter is included for RF Touch-W 100 m ** weight with plastic frame 1m 868 MHz 7 RF Touch-W POWER SUPPLY OVER TERMINALS POWER SUPPLY OVER ADAPTER A1 100 - 230V AC A2 FITTING ON THE SURFACE adapter included with RFTouch-W 8 RF Touch-B POWER SUPPLY OVER TERMINALS FITTING TO THE INSTALLATION BOX A2 AC 230V A1 E N 9 Description of Control Icons Basic Main menu Temperature regulation settings Switching back to the home screen Dimming switch ON dimming step back Blinds switch OFF light inclination Detectors impuls light declination Quick kontrol button scroll up scroll down confirm . dot abc letters no/not selected A/a small/capital letters _ edit/remove a/1 name/adressof the actor(s) OK delete temperature C space switch - the letters / numbers confirm erase previous switch ON switch OFF Switching time function - delayed switch on - delayed switch off Keyboard yes/selected add 10 Dimming RF Touch version Information and number of assigned units Setup Menu OK Heating 0-10V regulation OK confirm Blinds rise blinds lower blinds Basic Steps for Successful Programming 1st Step – Placing of the RF Touch and RF units 2nd Step - Fill Installation Form Keep in mind that the radio signal range of RF installation depends ON building construction, materials and placing of all units. - device name that you want to manage (to create a menu) - the names of units (for the correct classification of the group, for example: RFSA-61B)- addresses of units (to identify the actuator, for example: 577515) Installation form can be found at the end of this manual. Transmission of radio-frequency signals through various materials. Name Wooden structures with plasterboard plates E N E.g. RFSA-61B standard glass 80-90 % 80-95 % brick wall reinforced concrete 60-90 % 20-60 % Adress E.g. 577515 metal plates 3nd Step - Set menus (create names) 0-10 % Create a list of names of the controlled device in the Settings / Menu (create name). 4rd Step – Programming Programming of the RF units with RF Touch is carried out in the Settings / Programming menu. 11 SETUP fig. 1 Initial setup When the RF Touch is switched on for the first time, you will be automatically redirected to the display calibration screen. Touch screen can be controlled by the light touch (of about0.5-1s) in the desired location. On the screen (Fig. 1) then appears cross in each corner of the screen, which need to be pressed twice. This will calibrate the device. The display then shows the RF logo icon and then touch icon signalizing scanning of the actuators. fig. 2 Content of the main screen date time (touch in the upper right corner of the display will switch between analog - digital clocks (Figure 2 - Figure 3) display at the bottom of the screen is customable, eg: heating mode, a often used device ... Touch the clock area to enter the Main menu. If you want to get to the main menu from sleep mode, you need to touch the screen anywhere. Language Main Menu / Settings The settings menu can be opened by touch in the Selection of required Upper right corner screen on the symboland Language - Figure 6. insertion of password (it´s setting from production – 1111)Save setting by pressing (fig. 4-6),which you can change everywhen. fig. 4 fig. 2 fig. 5 fig. 6 Date and time Settings (Fig.7-8): Date and Time automatic transition between winter / summer time (for time Zone GTM +01:00) Format settings hours (12h / 24h mode) To save Settings press 12 fig. 3 fig. 7 fig. 8 SETUP Menu (create name) Menu (create name) is used to add, edit or remove the names of the controlled device. In this menu (Figure 1) you need to first create your own device names for the sections you want to control. Creating names is important for successful programming of the RF Touch. For each actuator, which is involved in the installation you have to create unique name. The content of this menu is not set at the factory. E N Menu (create name) / Add Press theAdd icon (Fig. 2) to show a selection of sections (Fig. 3): Temperature regulativ Dimming Blinds Switching Control Choose the section where you want to add the device name and type your own text (max. 20 characters). Detectors Speed Example 1: If you want to control the blinds - Place the name to the section of the blinds (Fig.3-5). Example 2: If you want to control a group of blinds together, first create all the blinds names in the blinds section and then create new name for group control in Quick control section. fig. 1 fig. 2 fig. 3 fig. 4 fig. 5 Note: Actuator RFTI-10B can be connected with two temperature sensors. For each sensor, you can create your own name. 13 SETUP Menu (create name) / Edit Menu (create name) / Remove Edit button is used to change or modify the name in the created menu. Remove button can delete unit name. Press the Edit icon (Fig.1), a menu appears, select the section in which you want to edit created name (Fig. 2). Mark selected name by touching it (Fig. 3) and then edit with displayed keyboard. Press to confirm (Fig. 4). The modified name is stored. fig. 1 Pressto confirm the selection (Fig. 8). Selected name will be deleted from menu. fig. 5 fig. 2 fig. 6 fig. 3 fig. 7 fig. 4 14 Press the Remove icon (Fig. 5) following menu appears, select the section from which you want to remove the name (Fig. 6). Pick the device you want to delete by touching it.(Fig. 7) . fig. 8 SETUP Programming Programming is used to assign or remove the actuators / detectors to menu you created. The Programming Menu can be entered by entering a password (default - 1111). Actuators are divided into sections for which they are intended. According to the actuator's type you have to select appropriate section - see table (eg programming actuator RFSTI-11B - find it in the Temperature regulation section). RF Control actuators divisions Temperature regulation Switching Dimming Blinds Detectors RFSTI-11B/G RFSA-11B RFDA-11B RFJA-12B/230V JA-81M / 82M RFTI-10B INx RFSA-6x* RFDA-71B RFJA-12B/24V DC JA-80P RFTI-10B OUTxx RFDAC-71B RFDAC-71B E N RFTC-10/G fig. 1 fig. 3 x internal sensor external sensor * RFSA-61B, RFSA-62B,RFSA-61M and RFSA-66M xx 15 SETUP Programming / Assign new It is used to assign a name to the actuator in the menu. In the required section (heating, dimming ...) select Assign new (Fig. 1). A list of selected sections actuators will be shown. (Fig. 2). Select the name of the actuator which you want to associate with the RF Touch. Enter the address of actuator you want to assign( Figure 3) as indicated on the actuator. Confirm with . menu you created, select the name to which the actuator will be assigned (Fig. 4). From the - Only one name can be assigned for each actuator. - When programming, actuator must be connected with the installation. Communication test (Fig. 6) is used to detect and display the current status of the RF signal between the RF Touch and programmed actuator. - Press Start (Fig. 7) to initiate the test, the current status of the signal is displayed in percentage. - Press Return to Programming to get back to main menu of programming. fig. 1 fig. 2 fig. 3 fig. 4 fig. 5 fig. 6 Programming / Temperature regulation / Assign New / RFTI-10B and RFTC-10/G These two units are temperature sensors, communication test is not executed during programming. Note: The actuator RFTI-10B is able to be connected with two temperature sensors, each sensor may have its own name. Address of the actuator is the same for both sensors. 16 fig. 7 SETUP Programming / Associated Receivers It serves to control or remove the actuator from the name of the menu you created. In the selected section (Figure 1 - Temperature regulation, dimming ...) select Assigned receivers (Fig. 2) a list of names specified in this section will be shown(Fig. 3). Touching on the name you will assign it to the actuator (Fig. 4). By pressingarrows you can check the name and address assigned to the actuator (Fig. 4, 5). By touching the name or address of the actuator you can remove the actuator (Fig. 7) or carry out communication test (Fig. 8). E N fig. 1 fig. 2 fig. 3 fig. 4 fig. 7 fig. 5 fig. 6 fig. 8 17 SETUP Programming / Temperature regulation / Assigned receivers / RFTI-10B and RFTC-10/G Function Assigned receivers in Temperature reg. - RFTI-10B and RFTC-10/G are used to pair or remove temperature units from the actuator. In the Temperature regulation section, press the screen to select Assigned receivers; the list of names assigned in this section will be displayed Press the name to display the assigned actuator. Select the name to which the RFTI-10B or RFTI-10/G is assigned (Fig. 1-3). Use arrows to check the name and address of the assigned actuator (Fig. 4-5). Touch the name or address of the actuator to display the menu (Fig. 6): Remove Pair with... Paired with... Programming / Temperature regulation / Assigned receivers / RFTI-10B and RFTC-10/G / Remove Serves to cancel the link between the temperature unit and the name from the menu Temperature regulation. fig. 1 fig. 2 fig. 3 fig. 4 fig. 6 fig. 5 18 SETUP Programming / Temperature regulation / Assigned receivers / RFTI-10B and RFTC-10/G / Pair with... Serves to combine the RFTI-10B or RFTC-10/G temperature unit with the RFSA-61M or RFSA-61B or RFDAC-71B multifunction actuator, where the temperature unit measures the current temperature and the multifunction actuator switches on the Temperature regulation based on the measured temperature. The multifunction actuator switches based on the set temperatures in the RF Touch. Note: the attached actuator RFTI-10B can be used in two ways: E N For temperature measurement (without pairing with a switching actuator) When paired with the multifunction switching actuator it can switch heating equipment on the basis of the measured temperature. Programming / Temperature regulation / Assigned receivers / RFTI-10B and RFTC-10/G / Paired with... Shows multifunction switching actuator, which is paired with a temperature actuator. By touching the name of the actuator you can remove a paired actuator. Note: Battery indication on the display (Fig. 1) informs of low battery in one of the temperature units. Press the battery to display the unit name. Use arrows to switch between the name and the address of the unit (Fig. 2-3). fig. 1 fig. 2 fig. 3 19 SETUP Programming / Detectors Section detectors (Fig. 1) is intended for assign or remove OASIS detectors to menu. Select Assign detector (Fig. 2). The list of detectors will be shown. Select the detector you want assign to the RF Touch unit (Fig. 3). RF Unit Touch will enable search (Fig. 4) searching icon is shown (the shortest distance to assign a detector is 1.5m). RF Touch will recognize new detector when batteries are inserted into the detector. Confirm the assignment by dressing (Fig. 5). Choose a name to which the detector will be assigned (Fig. 6). Each detector may be assigned only to one name. Pressing arrows can display the name or address associated with the detector (Fig. 7, 8). When you touch on the name or address of the detector following options appear (Fig. 9): Remove… Pair with ... Paired with ... fig. 1 fig. 2 fig. 3 fig. 5 fig. 8 fig. 6 fig. 4 fig. 7 fig. 9 20 SETUP fig. 1 Programming / Detectors / Remove Used for deleting link between the detector and the name given in the detector menu (Fig. 1). Note: Two state JA-81M and JA-82M can be used in two ways: information about the status (open / close) - eg window is open(without pairing with a switching actuator) pairing with the multifunction switching actuator, which responds to the detector status (open / close) - eg light is switched on when you open the door. Single state detectors (JA-80P) must always be paired with multi-function actuator. E N fig. 2 Programming / Detectors / Pair with ... Paired detector can be paired with the multifunction switching actuator from switching menu, (eg, motion detector with entrance light, Fig. 2-3). One detector can be paired with up to 30 multifunction switching actuators. If the detector is paired with a switching actuator function of delayed off feature is automatically activated. When detector switch on, actuator switches connected device for preset time (2s - 60min). Time delay can be set in the main Menu / Control of the paired actuators (see page 26). The above method can be used to assign additional detectors. The RF Touch can be programmed with up to 30 detectors. Note: The minimum distance between the detector and RF Touch is 1.5 meters. fig. 3 fig. 4 fig. 5 Programming / Detectors / Paired with ... This menu will lists switching actuators, which are paired with the detectors. By touching the name you can remove paired actuator (Fig. 4-5). 21 SETUP Programming / Quick Control Quick control is used for creating a group command, where one-touch control multiple actuators. For each name of group command you can assign a combination of up to 20 different actors. Note: Quick control can be set only when all actuators are programmed in different sections of switching, dimming and blind control. In the Quick Menu control(Fig. 1)choose name from list for the group command (Fig.2). Select Assign new (Fig. 3) it will show group of units (switching, dimming and blind control). Select the section you want to assign for desired command name (Fig. 4). You can create a menu for your device names created in the desired section. Select the name (Fig. 5) and further define the function (Fig. 6). The unit will returns to display groups of units (switching, dimming and blind - fig.7), where you can continue with programming. When you select assigned receiver (Fig. 8) you can go to the menu to remove (Fig. 10) or change the device name fig. 1 fig. 2 fig. 3 fig. 4 fig. 5 fig. 8 fig. 9 fig. 10 fig. 6 fig. 7 Note: The Remove function removes a group command name from the RF Touch unit memory. The actuators will remain in the memory. 22 SETUP fig. 1 Setup / Display (fig. 1-2) Background: select the type of screen background color (black, blue, green, purple). Screensaver: the desired brightness (25%, 50%, 75%, 100%) will be activated after preset time since the last touch (15s, 30s, 1min, 3min). Sleep mode: set the time after which RF Touch screen unit goes to sleep - the screen goes dark (0min, 10min, 15min, 20min). Calibrating the display: cross appear in every corner of the screen, which need to be pressed twice. Calibration will be performed. Display calibration can also be started by resetting the unit or disconnecting the supply voltage from the unit; after connecting again, the RF Touch logo will appear on the display - hold the logo for more than 3s to activate calibration – touch logo longer than 3 seconds and calibration will be activated. After calibration, the display shows Home screen. Setup / Others (fig. 3-4) fig. 2 E N Change Password: Changes the password for Setup menu. Enter password - Figure 5 (default password 1111) will start the the screen to select a new password - where you type and confirm new password. Touchto save the new password (Fig. 6). Reset the device: To reset the password use 1234 (Fig. 7). This password cannot be changed. Password, and confirmation YES (Fig. 8) to return the RF Touch unit to the factory settings. RF Touch restarts without entering the password confirmation OK. (Settings remain unchanged) fig. 3 fig. 4 fig. 5 fig. 6 fig. 7 fig. 8 23 SETUP fig. 1 Setup / Others (fig. 1) Keyboard lock: activation serves to prevent accidental or unwanted control of RF Touch (Fig. 2). For unlocking locked Home screen press the lock icon twice (Figure 3). View menu: you can set to display only those sections that you want to see in the main menu. (eg: only Dimming, Switching and Detectors - fig.4-5). If you select all the default sections , you will only see menu that you created without division into sections - Figure 6, this view is useful if you programmed max. 7 actuators). Temperature regulation: (Fig. 7) displayed units (° C / ° F). settings for Hysteresis heating: upper and lower margins in a range of 0.5 - 5°C (image 8), set Offset (fix inaccuracies in temperature measurements) in the range from -5 to +5 °C, Selection of function for temperature control: Heating / Cooling Main screen: possibility to personalize Home screen (Figure 9 -10). Left (1st choice), middle (2nd choice) and right field (3rd choice) is used to set the most common controled devices directly from the Home screen. fig. 2 fig. 4 Note: Offset is set directly on the RFTC-10/G unit. fig. 9 fig. 7 fig. 5 fig. 3 fig. 6 24 fig. 8 fig. 10 CONTROL / TEMPERATURE REGULATION fig. 1 Control / Temperature regulation Temperature regulation Menu (Fig.1) is designed for setting controls over heating equipment. Touch the heating you enter the menu of additional circuits (image 2). Standard modeEconomic modeParty modeAnti-freezing mode These modes offer a preset temperature, which you can adjust as you need for individual heated rooms (circuits). By activation of Standard, Economic, Party or Anti-freezing mode, the Temperature Regulation adjusts the set temperature. By touching one of the icons, you activate the chosen mode for the selected room (heating circuit). fig. 2 The Anti-freeze mode is designed to maintain the minimum required temperature in a range of 5 - 15°C. AUTO E N Heating program can be used to set the heating regime for the whole week. Holiday mode is used for temporary interruption of the heating program or other heating mode. Note: Setting Units ° C / ° F and hysteresis for heating is done in the Settings / Other / Heating Temperature regulation / Changing heating modes to Economy,Normal and Party modes To edit the mode, first select the settings button (image 3), then the relevant mode to modify (Fig. 4) - Standard, Economic, Party or Anti-freezing mode. The current temperature and the set temperature for Switching on the selected mode is displayed at theicon. Touch Settings icon (Fig. 5) for adjusting the temperature. Arrows/can set the desired temperature (longer pressed arrow will accelerate changing of numbers) Touch to save the set temperature (Fig. 6). fig. 3 fig. 4 fig. 5 fig. 6 25 CONTROL / TEMPERATURE REGULATION Temperature regulation / Heating program By touching the Setting, you go into editing mode of a certain heating circuit or program (Fig. 1). ChoseHeating Program for which you can set the time program and temperature (Fig. 2). Touch-hour time interval (or minutes) to indicate the information you want to change (Fig. 3). Arrows/set time for switching - On and Off . Arrows can adjust desired temperature. Note: longer push of arrows will accelerate changing of figures. Touch of Sun-Sat activate the heating program for desired day of the week.- active for the day,- disabled for the day. Confirmation of the selected program - . If you want to set additional heating program to continue with programming. Note: For one day you can create up to 5 heating programs. Times of programs may not overlap (Fig. 5). Setting of program until midnight and over midnight - see page 37. Daily overview (Fig. 4) – arrowswill choose between selected time program or temperature (Figure 5-6). To remove single time schedule mark time / temperature bar and (Fig. 6) then press basket symbol - bin icon . If you not choose any heating program bar you will delete all programmed schedules for given day. Weekly overview (Figure 7-8) - touch the basket symbolto erase all programmed heating programs. fig. 1 fig. 4 fig. 7 fig. 2 fig. 5 fig. 3 26 fig. 8 fig. 6 CONTROL / TEMPERATURE REGULATION Temperature regulation / holiday mode Holiday mode is used for temporary interruption of the heating program. Touch holiday mode (Fig. 1) to open Switch ON screen where you set the date, month and year when your holiday mode should start. Confirm with (Fig. 2). Switch Off screen appears where you set the day month and year for the end of holiday mode. Confirm with . If you touch Overview icon(Fig. 3) you can check list of holiday programs. Note: Up to 5 Holiday modes can be assigned up to 5 time intervals. Times of programs may not overlap. During the holiday Economy mode is active. Individual deletion of Holiday Mode is selected by touching bar belonging to the program(Fig. 4), then touch the bin icon and program will be erased. If you do not mark any bar you can touch the bin icon E N to remove all holiday arrangements. fig. 1 fig. 2 fig. 3 The precedence of the heating modes fig. 4 Holiday mode Heating program Default mode Economy mode Mormal mode Party mode Note: The required temperature can be set manually on the RF Touch unit. The adjustment after activation is valid until the first subsequent change of the Heating programme or the Vacation mode. The required temperature may be set manually on the RFTC-10/G unit. This adjustment is valid until the subsequent change of the heating programme in RF Touch. 27 CONTROL / SWITCHING Main menu / Switching Switching menu is for all the devices you want to switch. Touch Switching (Fig. 1) displays the names of your choice created in menu. Red / Green LED indicates contact status: green -ON, red switched - off. Touch the desired name (Fig. 2) to show basic functions: switch on switch off. Switching / Function Press the Next functions button (Fig. 3) will show a selection of switching functions (Fig. 4). Other functions can be used only in combination with multifunction switch actuators - RFSA-61B, RFSA-62B, RFSA-61M and RFSA-66M. Impulse –first touchswitch on, second one to switch off. Button – It is on as long as long you are holding button . Delayed switch on - touchwill begin to count preset time, after which the actuator switch on. Delayed switch off -touchwill start to count preset time after which the actuator will switch off. In the section Time settings all times for Delay on and Delay off can be set. Time delay can be set in the range from 2 to 60 minutes. Touch-hour time interval (or minutes) to indicate the information you want then change it (Fig. 5) with Arrows/. Note: longer press of arrows will accelerate shifting of figures. Confirm time setting by pressing fig. 1 fig. 2 fig. 3 fig. 4 fig. 5 28 CONTROL / SWITCHING Main menu / Switch on / RFDAC-71B Upon selecting the Switching on menu to which the RFDAC-71B actuator is assigned, the basic function are displayed: Switch on Switch off . Press shortly the arrob/ at the Regulation icon to set the desired value (Fig. 3). Touch to perform the command. E N fig. 1 fig. 2 fig. 3 Note: For efficient regulation of Temperature regulation, it is recommended to pair the RFDAC-71B actor with the RFTC-10/G or RFTI-10B temperature unit. 29 CONTROL / SWITCHING Switching / Weekly Program Weekly program provides weekly settings for the automatic mode switching. Touch Weekly program icon (Fig. 1), setup menu will appear. Touch-hour time interval (or minutes) to mark information you want to change. Arrows/will set the time of switch On and switch Off. Note: longer press of arrow is accelerate shift of figures. Touch the Sun-Sat icon will activate the program on a given day of the week (Fig. 2). - active for the day, - disabled for the day. To confirm of selected programs touch . If you want to configure other Switching program continue programming. Note: For one day you can create up to 5 switching programs. Programs must not overleap. Setting of program until midnight and over midnight - see page 37. Daily / Weekly Overview shows the daily / weekly overview of switching programs. To delete a program in the Daily overview (Fig. 3) indicate bar you want to delete (Fig. 4) at then press the bin icon to delete it. If you not select any of programed bars and press bin icon you will remove all schedules in the day. Weekly overview (Figure 5-6) touch the bin icon to clear all programs. fig. 1a fig. 3 fig. 5 fig. 2 fig. 1b 30 fig. 4 fig. 6 CONTROL / DIMMING Main menu / Dimming Dimming Menu is for all the lights where you want to control the brightness (load R L, C - 250V). Touch-Dimming (Fig. 1)to display a selection of names you created in menu (Fig. 2). Red / Green LED indicates contact status: green- On red -Off. Dimming/Functions Touch the desired name to displays basic functions: switch on switch off. A short touch on the arrows/beside icon Dimmingwill set the desired brightness (Fig. 3). Touchto confirm. In the case displayed icon- level has been set by other controler (Fig. 4). Further functions (Fig. 5) can be used only in combination with multifunctional dimming actuators - RFDA-71B and analog actuator RFDAC-71B. E N Smooth start - touchwill start smooth start-up for preset time. Smooth stop – touchwill start smooth run down for preset time. In the Setting you can set time for smooth start and smooth stop. Time can be set from 2s to 30 minutes. Touch the time interval hours (or minutes) to indicate the information you want to change (Fig. 6). Arrows/will set time. Confirm setting by pressing. Note: longer press of arrows will accelerate shifting of figures. fig. 1 fig. 3 fig. 5 fig. 6 fig. 2 fig. 4 31 CONTROL / BLINDS Main Menu / Blinds Blinds Menu is designed to control all shutters, blinds, awnings, gates and garage doors that have a built-end switch. Touch the Louvre (Fig. 1)to display selection of names you created in menu (Fig. 2). Red / Green LED indicates device status: green- closed blinds red – open blinds. Blinds / Functions Touch the desired description / name of the device to display features: Open First you need to measure time "t" which your device needs to fully open / close. Close Touch open iconfor more than 3 seconds to put (Fig. 3) device into the end position. Then touch close iconlonger than 3 seconds to retract indicate the device while in motion, measure time "t" - a period during which the equipment is in motion. Under Settings you touch on a time interval of hours (minutes) mark information you want to change. Arrows/set measured by time "t " + 2s Pulling into the field and the same time and in the fieldof load (Fig. 4). Confirm the time by pressing . Note: longer pressing the arrow is accelerated shift to the figures. A short touch on Up/ Down can control the devices in the desired direction. Touch longer than 3 devices place the desired end position. fig. 1 fig. 2 fig. 3 fig. 4 t+2s 32 CONTROL / BLINDS Blinds / Weekly program Weekly program can adjust automatic weekly mode. Touch Weekly program icon (Fig. 1), setup menu will appear. Touch-hour time interval (or minutes) to mark information you want to change. Arrows/will set the time of switch Onand switch Off . Note: longer press of arrow is accelerate shift of figures. Touch the Sun-Sat icon will activate the program on a given day of the week (Fig. 2).- active for the day,- disabled for the day. Confirmation of the selected program - you want to set additional blinds program to continue with programming. E N Note: For one day you can create up to 5 blinds programs. Programs must not overleap (Fig. 5). Setting of program until midnight and over midnight - see page 37. Daily / Weekly Overview shows the daily / weekly overview of switching programs. To delete a program in the Daily overview (Fig. 3) indicate bar you want to delete (Fig. 4) at then press the bin icon to delete it. If you not select any of programed bars and press bin icon , you will remove all schedules in the day. Weekly overview (Figure 5-6) touch the bin iconto clear all programs. fig. 1 fig. 3 Note: Setting the Inversion func- fig. 5 tion: touch / in the Weekly programme to set the initial movement of the roll-up blinds (Fig. 7). fig. 2 fig. 4 fig. 6 fig. 7 33 CONTROL / DETECTORS Main Menu / Detectors fig. 1 fig. 2 The menu Detectors is used for the visualisation and switching of devices using detectors. By touching the option Detectors (Fig. 1) you will display the list of names on the detector menu that you have created (Fig. 2). Double State Detectors Double state detectors (JA-81M - doors; JA-82M - windows) feature state visualisation: Green – Off state Red - On state. JA-81M and JA-82M detectors may be used in two ways: Information regarding the state (On/Off ) - e.g. open window (without pairing with the switching actuator) Pairing with the multifunctional switching actuator (On/ Off ) - e.g. light switched on when door opened. By touching the name of the detector you will display the name of the switching devices with which the detector is paired. By pressing the name of the switching device you will display the selection (Fig. 4): On state (neutral): Off state (alarm): Switch off - switched off without delay. Delayed run out – switches off after the time period set in the switching settings. Switch on - switches on without delay. Delayed onset – switches on after the time period set in the switching settings. fig. 3 fig. 4 Confirm by pressing (Fig. 4). Note: The time delay is set for the paired actuator. Single State Detectors Single state motion detectors JA-80P do not feature state visualization and they are designed for pairing with the multifunctional switching actuator. By touching the name of the detector you will display the name of the switching actuator with which the detector is paired. Note: The function of Delayed Switch Off is automatically allocated to the detector. The time delay is set for the paired actuator. 34 CONTROL / QUICK CONTROL Main Menu / Quick control Quick control menu serves to the group control of devices. Touch Quick kontrol to display the name selection of your custom menu (Fig. 2). Touch the name to display the following options (Fig. 3): Activate - displays set scenes. Deactivate - the OFF function will be executed on all active actuators. fig. 1 fig. 2 E N fig. 3 35 What to do when ... RF Touch Unit Warnings Warning is displayed in case of incorrect or incomplete entry. Warning 36 Procedure Up to 40 rooms may be defined. no more than 40 device names may be entered Saving failed. repeat entry Delete failed. repeat entry No unit allocated. allocate the requested actuator Two time programmes overlap within a single day. enter new settings No time programme available within a single day. no other programme can be entered No day selected. enter new settings Switch on time may not exceed the switch off time. enter new settings Unit already allocated to the room. Select another room. only one actuator can be allocated to one name of device (outside Quick Control) This room has already been defined in the group. enter a new name The address has already been selected in the unit list. Choose another address. enter correct information The address information must be complete. enter correct information xxx displayed instead of temperature. actuator not programmed, actuator/sensor defect, communication failure Up to 40 units may be defined. no more than 40 units may be entered The switch on date must be different from the switch off date. enter new settings The switch on date must not exceed the switch off date. enter new settings All 5 programmes are engaged. no other programme can be entered What to do when ... RF Touch Unit Warnings Warning Procedure No unit allocated to the room. allocate actuator This group has already been allocated. enter new settings Display incomplete - control impossible. calibrate the device (disconnect the power supply, after reconnecting hold the logo RF Touch, finish the calibration by touching twice the cross signs that appear in each corner of the screen) EPROM memory error! contact the manufacturer RTC circuit error! contact the manufacturer AT45 circuit error! contact the manufacturer Setting of program until midnight and over midnight - at the time of 00:00 there isn´t any action on the actuator. - setting of time over midnight : set the required "switch ON" time and set the required "switch OFF" time on 00:00, next day set the switch ON" time on 00:00 and set the required "switch OFF" time. E N - setting of time until midnight: set the required "switch ON" time and set the required "switch OFF" time on 23:59 Have you lost the password? please ask the manufacturer for information about further steps General Information With consideration to the transmission of the RF signal ensure that RF components are suitably located in the building where the device is to be installed. The RF Control system must only be installed in indoor areas. The device has not been designed for outdoor use or use in moist environment, it must not be installed in metal distribution boxes and plastic distribution boxes with metal doors as this would prevent the transmission of the radio frequency signal. RF Control is not recommended for the control of devices providing for vital life functions or for the control of risk devices such as pumps, electrical heaters without heat regulators, lifts, pulleys etc. - radio frequency transmission could be hampered with an obstacle, interfered with, the transmitter battery may become depleted etc. thus disabling the remote control. Not suitable for use in industrial environment. Do not expose to extreme temperature changes. In case of extreme temperature changes allow approx. 2 hours prior to installation for the RF Touch to adjust to the temperature of the installation location. This will prevent condensation of moisture in the device and the occurrence of a potential short circuit. Keep flammable materials away from the device. The graphic indication of the contact / device status (red/green LED) is only for information and may be influenced by the amount of processed information or the combination of more RF Touch and RF Pilot control units. Safety functions in RFSTI-11B and RFSTI-11G actuators: the actuators disconnect the output in case of an accidental communication failure exceeding 25 minutes. 37 Installation Form Serial no.: 1. 2. 3. 4. 5. 6. 7. 8. 9. 10. 11. 12. 13. 14. 15. 16. 17. 18. 19. 20. 38 Description / Name of the controlled device Actuator name Actuator address Installation Form Serial no.: Description / Name of the controlled device Actuator name Actuator address 21. 22. 23. 24. 25. 26. E N 27. 28. 29. 30. 31. 32. 33. 34. 35. 36. 37. 38. 39. 40 39 ELKO EP, s.r.o. Palackého 493 | 769 01 Holešov | Všetuly,CZ, tel.: +420 573 514 211 | fax: +420 573 514 227 [email protected] | www.elkoep.com rev.0