1
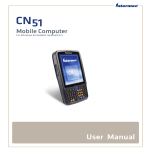
CN51
Mobile Computer
with Android™
User Manual
Intermec by Honeywell
6001 36th Ave.W.
Everett, WA 98203
U.S.A.
www.intermec.com
The information contained herein is provided solely for the purpose of allowing customers to
operate and service Intermec-manufactured equipment and is not to be released, reproduced, or
used for any other purpose without written permission of Intermec by Honeywell.
Information and specifications contained in this document are subject to change without prior
notice and do not represent a commitment on the part of Intermec by Honeywell.
The word Intermec and the Intermec logo are either trademarks or registered trademarks of
Intermec Technologies Corporation.
© 2014 Intermec by Honeywell. All rights reserved.
For patent information, please refer to www.hsmpats.com.
Android, Google, and other marks are trademarks of Google Inc.
Bluetooth is a trademark of Bluetooth SIG, Inc., U.S.A.
Wi-Fi is a registered certification mark of the Wi-Fi Alliance.
This product includes software developed by the OpenSSL Project for use in the OpenSSL Toolkit
(www.openssl.org).
This product includes cryptographic software written by Eric Young ([email protected]).
This product uses Regex++, Index software during its operational phases. The owner of Regex++
has granted use of the software to anyone provided such use is accompanied by the following
copyright and permission notice:
Regex++, Index. (Version 3.31, 16th Dec 2001)
Copyright © 1998-2001 Dr John Maddock
Permission to use, copy, modify, distribute and sell this software and its documentation for any
purpose is hereby granted without fee, provided that the above copyright notice appear in all
copies and that both that copyright notice and this permission notice appear in supporting
documentation. Dr John Maddock makes no representations about the suitability of this software
for any purpose. It is provided “as is” without express or implied warranty.
ii
CN51 Mobile Computer User Manual
Document Change Record
This page records changes to this document. The document
was originally released as Revision 001.
Version
Number
Date
Description of Change
002
3/2014
Revised to support Android 4.2.2.
CN51 Mobile Computer User Manual
iii
iv
CN51 Mobile Computer User Manual
Contents
Contents
Before You Begin. . . . . . . . . . . . . . . . . . . . . . . . . . . . . . . . . . . . . . . . . . . . . . . . . . . . . . . . . . . . . . . . . xi
Safety Information . . . . . . . . . . . . . . . . . . . . . . . . . . . . . . . . . . . . . . . . . . . . . . . . . . . . . . . xi
Global Services and Support . . . . . . . . . . . . . . . . . . . . . . . . . . . . . . . . . . . . . . . . . . . . . . xi
Warranty Information. . . . . . . . . . . . . . . . . . . . . . . . . . . . . . . . . . . . . . . . . . . . xi
Web Support . . . . . . . . . . . . . . . . . . . . . . . . . . . . . . . . . . . . . . . . . . . . . . . . . . . . xii
Send Feedback. . . . . . . . . . . . . . . . . . . . . . . . . . . . . . . . . . . . . . . . . . . . . . . . . . . xii
Telephone Support . . . . . . . . . . . . . . . . . . . . . . . . . . . . . . . . . . . . . . . . . . . . . . xii
Who Should Read This Manual . . . . . . . . . . . . . . . . . . . . . . . . . . . . . . . . . . . . . . . . . . . xii
Related Documents . . . . . . . . . . . . . . . . . . . . . . . . . . . . . . . . . . . . . . . . . . . . . . . . . . . . . . xii
Patent Information . . . . . . . . . . . . . . . . . . . . . . . . . . . . . . . . . . . . . . . . . . . . . . . . . . . . . xiii
1 About the Computer Features . . . . . . . . . . . . . . . . . . . . . . . . . . . . . . 1
About the CN51 Mobile Computer . . . . . . . . . . . . . . . . . . . . . . . . . . . . . . . . . . . . . . . . . . . . . . . . . 2
About the Battery . . . . . . . . . . . . . . . . . . . . . . . . . . . . . . . . . . . . . . . . . . . . . . . . . . . . . . . . . . . . . . . . . 4
Charge the Battery . . . . . . . . . . . . . . . . . . . . . . . . . . . . . . . . . . . . . . . . . . . . . . . . . . . . . . . . 4
Change the Battery. . . . . . . . . . . . . . . . . . . . . . . . . . . . . . . . . . . . . . . . . . . . . . . . . . . . . . . . 5
About Battery Status . . . . . . . . . . . . . . . . . . . . . . . . . . . . . . . . . . . . . . . . . . . . . . . . . . . . . . 7
Check the Battery Level. . . . . . . . . . . . . . . . . . . . . . . . . . . . . . . . . . . . . . . . . . . . . . . . . . . . 8
Check the Battery Status . . . . . . . . . . . . . . . . . . . . . . . . . . . . . . . . . . . . . . . . . . . . . . . . . . 9
About Battery Life and Conservation . . . . . . . . . . . . . . . . . . . . . . . . . . . . . . . . . . . . . . . 9
Enable Airplane Mode . . . . . . . . . . . . . . . . . . . . . . . . . . . . . . . . . . . . . . . . . . . . . . . . . . . . 10
Quickly Enable or Disable Airplane Mode . . . . . . . . . . . . . . . . . . . . . . . . . . . . . . . . . . 11
About the Status LEDs . . . . . . . . . . . . . . . . . . . . . . . . . . . . . . . . . . . . . . . . . . . . . . . . . . . . . . . . . . . 12
About the Keypad . . . . . . . . . . . . . . . . . . . . . . . . . . . . . . . . . . . . . . . . . . . . . . . . . . . . . . . . . . . . . . . . 14
About the Color-Coded Keys . . . . . . . . . . . . . . . . . . . . . . . . . . . . . . . . . . . . . . . . . . . . . . 15
How to Capitalize Characters on the QWERTY Keypad . . . . . . . . . . . . . . . . . . . . . 15
How to Capitalize Characters on the Numeric Keypad . . . . . . . . . . . . . . . . . . . . . . 16
About the Power Button . . . . . . . . . . . . . . . . . . . . . . . . . . . . . . . . . . . . . . . . . . . . . . . . . . 16
About the Screen Backlight . . . . . . . . . . . . . . . . . . . . . . . . . . . . . . . . . . . . . . . . . . . . . . . . . . . . . . . 17
Configure the Screen Backlight Brightness . . . . . . . . . . . . . . . . . . . . . . . . . . . . . . . . . 17
About the Audio Features. . . . . . . . . . . . . . . . . . . . . . . . . . . . . . . . . . . . . . . . . . . . . . . . . . . . . . . . . 18
Adjust the Ringtone and Notification Volume . . . . . . . . . . . . . . . . . . . . . . . . . . . . . . 18
Enable Vibrate Mode . . . . . . . . . . . . . . . . . . . . . . . . . . . . . . . . . . . . . . . . . . . . . . . . . . . . . 19
Audio Settings . . . . . . . . . . . . . . . . . . . . . . . . . . . . . . . . . . . . . . . . . . . . . . . . . . . . . . . . . . . 20
Insert a MicroSD Card . . . . . . . . . . . . . . . . . . . . . . . . . . . . . . . . . . . . . . . . . . . . . . . . . . . . . . . . . . . 21
CN51 Mobile Computer User Manual
v
Contents
How to Transfer Files. . . . . . . . . . . . . . . . . . . . . . . . . . . . . . . . . . . . . . . . . . . . . . . . . . . . . . . . . . . . . 23
Configure the USB Connection for PTP. . . . . . . . . . . . . . . . . . . . . . . . . . . . . . . . . . . . 23
CN51 Accessories . . . . . . . . . . . . . . . . . . . . . . . . . . . . . . . . . . . . . . . . . . . . . . . . . . . . . . . . . . . . . . . . 24
2 About the User Interface and Intermec Applications
. . . . . . . . . 27
About the User Interface. . . . . . . . . . . . . . . . . . . . . . . . . . . . . . . . . . . . . . . . . . . . . . . . . . . . . . . . . . 28
About the Home Screen . . . . . . . . . . . . . . . . . . . . . . . . . . . . . . . . . . . . . . . . . . . . . . . . . . 28
View Notifications . . . . . . . . . . . . . . . . . . . . . . . . . . . . . . . . . . . . . . . . . . . . . . . 29
Customize the Home Screen . . . . . . . . . . . . . . . . . . . . . . . . . . . . . . . . . . . . . . 30
Customize the Favorites Tray . . . . . . . . . . . . . . . . . . . . . . . . . . . . . . . . . . . . . 30
Use Google™ Search . . . . . . . . . . . . . . . . . . . . . . . . . . . . . . . . . . . . . . . . . . . . . . . . . . . . . 31
About Screen Gestures . . . . . . . . . . . . . . . . . . . . . . . . . . . . . . . . . . . . . . . . . . . . . . . . . . . 31
Set the Time Zone. . . . . . . . . . . . . . . . . . . . . . . . . . . . . . . . . . . . . . . . . . . . . . . . . . . . . . . . . . . . . . . . 32
Manage Notifications . . . . . . . . . . . . . . . . . . . . . . . . . . . . . . . . . . . . . . . . . . . . . . . . . . . . . . . . . . . . 32
About Intermec Applications . . . . . . . . . . . . . . . . . . . . . . . . . . . . . . . . . . . . . . . . . . . . . . . . . . . . . 33
Intermec Apps on the Computer . . . . . . . . . . . . . . . . . . . . . . . . . . . . . . . . . . . . . . . . . . 33
3 Use the Scanner . . . . . . . . . . . . . . . . . . . . . . . . . . . . . . . . . . . . . . . . 35
About the Scanner . . . . . . . . . . . . . . . . . . . . . . . . . . . . . . . . . . . . . . . . . . . . . . . . . . . . . . . . . . . . . . . 36
Disable the Scanner . . . . . . . . . . . . . . . . . . . . . . . . . . . . . . . . . . . . . . . . . . . . . . . . . . . . . . 36
Disable the Virtual Wedge . . . . . . . . . . . . . . . . . . . . . . . . . . . . . . . . . . . . . . . . . . . . . . . . 37
Enable Symbology Decoding. . . . . . . . . . . . . . . . . . . . . . . . . . . . . . . . . . . . . . . . . . . . . . . . . . . . . . 38
Scan Bar Codes . . . . . . . . . . . . . . . . . . . . . . . . . . . . . . . . . . . . . . . . . . . . . . . . . . . . . . . . . . . . . . . . . . 39
Enable Access to URLs in Bar Codes . . . . . . . . . . . . . . . . . . . . . . . . . . . . . . . . . . . . . . . 40
Enable Scanner Control from Web Applications . . . . . . . . . . . . . . . . . . . . 41
Use the Scan Demo App . . . . . . . . . . . . . . . . . . . . . . . . . . . . . . . . . . . . . . . . . . 41
How to Configure the Scanner . . . . . . . . . . . . . . . . . . . . . . . . . . . . . . . . . . . . . . . . . . . . . . . . . . . . 42
Configure Symbology Decoding Options . . . . . . . . . . . . . . . . . . . . . . . . . . . . . . . . . . 42
Australia Post Settings . . . . . . . . . . . . . . . . . . . . . . . . . . . . . . . . . . . . . . . . . . . 44
Aztec Settings . . . . . . . . . . . . . . . . . . . . . . . . . . . . . . . . . . . . . . . . . . . . . . . . . . . 44
BPO Settings . . . . . . . . . . . . . . . . . . . . . . . . . . . . . . . . . . . . . . . . . . . . . . . . . . . . 45
Canada Post Settings. . . . . . . . . . . . . . . . . . . . . . . . . . . . . . . . . . . . . . . . . . . . . 45
Codabar Settings . . . . . . . . . . . . . . . . . . . . . . . . . . . . . . . . . . . . . . . . . . . . . . . . 46
Codablock A Settings . . . . . . . . . . . . . . . . . . . . . . . . . . . . . . . . . . . . . . . . . . . . 47
Codablock F Settings. . . . . . . . . . . . . . . . . . . . . . . . . . . . . . . . . . . . . . . . . . . . . 48
vi
CN51 Mobile Computer User Manual
Contents
Code 11 Settings . . . . . . . . . . . . . . . . . . . . . . . . . . . . . . . . . . . . . . . . . . . . . . . . . 48
Code 39 Settings . . . . . . . . . . . . . . . . . . . . . . . . . . . . . . . . . . . . . . . . . . . . . . . . . 49
Code 93 Settings . . . . . . . . . . . . . . . . . . . . . . . . . . . . . . . . . . . . . . . . . . . . . . . . . 51
Code 128/GS1-128 Settings. . . . . . . . . . . . . . . . . . . . . . . . . . . . . . . . . . . . . . . 52
Datamatrix Settings. . . . . . . . . . . . . . . . . . . . . . . . . . . . . . . . . . . . . . . . . . . . . . 53
Dutch Post Settings . . . . . . . . . . . . . . . . . . . . . . . . . . . . . . . . . . . . . . . . . . . . . . 54
EAN/UPC Settings . . . . . . . . . . . . . . . . . . . . . . . . . . . . . . . . . . . . . . . . . . . . . . . 54
GS1 Composite Settings. . . . . . . . . . . . . . . . . . . . . . . . . . . . . . . . . . . . . . . . . . 57
GS1 DataBar Expanded Settings . . . . . . . . . . . . . . . . . . . . . . . . . . . . . . . . . . 58
GS1 DataBar Limited Settings . . . . . . . . . . . . . . . . . . . . . . . . . . . . . . . . . . . . 59
GS1 DataBar Omni-Directional Settings . . . . . . . . . . . . . . . . . . . . . . . . . . . 59
Han Xin Settings . . . . . . . . . . . . . . . . . . . . . . . . . . . . . . . . . . . . . . . . . . . . . . . . 60
Infomail Settings . . . . . . . . . . . . . . . . . . . . . . . . . . . . . . . . . . . . . . . . . . . . . . . . 60
Intelligent Mail Settings . . . . . . . . . . . . . . . . . . . . . . . . . . . . . . . . . . . . . . . . . . 61
Interleaved 2 of 5 Settings . . . . . . . . . . . . . . . . . . . . . . . . . . . . . . . . . . . . . . . . 61
Japan Post Settings. . . . . . . . . . . . . . . . . . . . . . . . . . . . . . . . . . . . . . . . . . . . . . . 62
Matrix 2 of 5 Settings . . . . . . . . . . . . . . . . . . . . . . . . . . . . . . . . . . . . . . . . . . . . 63
Maxicode Settings . . . . . . . . . . . . . . . . . . . . . . . . . . . . . . . . . . . . . . . . . . . . . . . 64
Micro PDF417 Settings. . . . . . . . . . . . . . . . . . . . . . . . . . . . . . . . . . . . . . . . . . . 64
MSI Settings . . . . . . . . . . . . . . . . . . . . . . . . . . . . . . . . . . . . . . . . . . . . . . . . . . . . 65
PDF417 Settings . . . . . . . . . . . . . . . . . . . . . . . . . . . . . . . . . . . . . . . . . . . . . . . . . 66
Planet Settings. . . . . . . . . . . . . . . . . . . . . . . . . . . . . . . . . . . . . . . . . . . . . . . . . . . 67
Plessey Settings . . . . . . . . . . . . . . . . . . . . . . . . . . . . . . . . . . . . . . . . . . . . . . . . . . 67
Postnet Settings . . . . . . . . . . . . . . . . . . . . . . . . . . . . . . . . . . . . . . . . . . . . . . . . . 68
QR Code Settings . . . . . . . . . . . . . . . . . . . . . . . . . . . . . . . . . . . . . . . . . . . . . . . . 69
Standard 2 of 5 Settings . . . . . . . . . . . . . . . . . . . . . . . . . . . . . . . . . . . . . . . . . . 70
Sweden Post Settings. . . . . . . . . . . . . . . . . . . . . . . . . . . . . . . . . . . . . . . . . . . . . 71
Telepen Settings . . . . . . . . . . . . . . . . . . . . . . . . . . . . . . . . . . . . . . . . . . . . . . . . . 71
TLC 39 Settings . . . . . . . . . . . . . . . . . . . . . . . . . . . . . . . . . . . . . . . . . . . . . . . . . 72
Configure the Scanner Decode Security Settings . . . . . . . . . . . . . . . . . . . . . . . . . . . . . . . . . . . . 73
Decode Security Settings . . . . . . . . . . . . . . . . . . . . . . . . . . . . . . . . . . . . . . . . . . . . . . . . . 74
Set a Preamble, Postamble, or Symbology Identifier . . . . . . . . . . . . . . . . . . . . . . . . . . . . . . . . . 75
Set the Scanner Trigger or Aimer Mode . . . . . . . . . . . . . . . . . . . . . . . . . . . . . . . . . . . . . . . . . . . . 76
Scanner Settings . . . . . . . . . . . . . . . . . . . . . . . . . . . . . . . . . . . . . . . . . . . . . . . . . . . . . . . . . 76
4 Use the Phone . . . . . . . . . . . . . . . . . . . . . . . . . . . . . . . . . . . . . . . . . 79
About the Phone . . . . . . . . . . . . . . . . . . . . . . . . . . . . . . . . . . . . . . . . . . . . . . . . . . . . . . . . . . . . . . . . . 80
Activate the UMTS Phone . . . . . . . . . . . . . . . . . . . . . . . . . . . . . . . . . . . . . . . . . . . . . . . . 81
Activate the CDMA Phone . . . . . . . . . . . . . . . . . . . . . . . . . . . . . . . . . . . . . . . . . . . . . . . . 83
Make a Phone Call . . . . . . . . . . . . . . . . . . . . . . . . . . . . . . . . . . . . . . . . . . . . . . . . . . . . . . . . . . . . . . . 84
CN51 Mobile Computer User Manual
vii
Contents
Answer the Phone . . . . . . . . . . . . . . . . . . . . . . . . . . . . . . . . . . . . . . . . . . . . . . . . . . . . . . . . . . . . . . . . 85
Send a Call to Voicemail . . . . . . . . . . . . . . . . . . . . . . . . . . . . . . . . . . . . . . . . . . . . . . . . . . 85
Switch Apps During a Phone Call . . . . . . . . . . . . . . . . . . . . . . . . . . . . . . . . . . . . . . . . . . . . . . . . . 85
Check Your Voicemail . . . . . . . . . . . . . . . . . . . . . . . . . . . . . . . . . . . . . . . . . . . . . . . . . . . . . . . . . . . . 86
Set Your Voicemail Number. . . . . . . . . . . . . . . . . . . . . . . . . . . . . . . . . . . . . . . . . . . . . . . 86
Change Voicemail Settings. . . . . . . . . . . . . . . . . . . . . . . . . . . . . . . . . . . . . . . . . . . . . . . . 86
Make an Emergency Phone Call . . . . . . . . . . . . . . . . . . . . . . . . . . . . . . . . . . . . . . . . . . . . . . . . . . . 87
Switch Between Network Carriers . . . . . . . . . . . . . . . . . . . . . . . . . . . . . . . . . . . . . . . . . . . . . . . . . 87
About Internet Calling . . . . . . . . . . . . . . . . . . . . . . . . . . . . . . . . . . . . . . . . . . . . . . . . . . . . . . . . . . . 88
Set Up Internet Calling . . . . . . . . . . . . . . . . . . . . . . . . . . . . . . . . . . . . . . . . . . . . . . . . . . . 88
Add Contacts for Internet Calling . . . . . . . . . . . . . . . . . . . . . . . . . . . . . . . . . . . . . . . . . 88
Configure Phone Settings. . . . . . . . . . . . . . . . . . . . . . . . . . . . . . . . . . . . . . . . . . . . . . . . . . . . . . . . . 89
Phone Settings. . . . . . . . . . . . . . . . . . . . . . . . . . . . . . . . . . . . . . . . . . . . . . . . . . . . . . . . . . . 89
5 Use the Camera
. . . . . . . . . . . . . . . . . . . . . . . . . . . . . . . . . . . . . . . . 91
About the Color Camera. . . . . . . . . . . . . . . . . . . . . . . . . . . . . . . . . . . . . . . . . . . . . . . . . . . . . . . . . . 92
Take a Picture . . . . . . . . . . . . . . . . . . . . . . . . . . . . . . . . . . . . . . . . . . . . . . . . . . . . . . . . . . . . . . . . . . . 92
Change Camera Settings for Taking Pictures . . . . . . . . . . . . . . . . . . . . . . . . . . . . . . . 92
Record a Video. . . . . . . . . . . . . . . . . . . . . . . . . . . . . . . . . . . . . . . . . . . . . . . . . . . . . . . . . . . . . . . . . . . 94
Change Video Settings . . . . . . . . . . . . . . . . . . . . . . . . . . . . . . . . . . . . . . . . . . . . . . . . . . . 94
6 Configure the Computer . . . . . . . . . . . . . . . . . . . . . . . . . . . . . . . . . 95
How to Configure the Computer . . . . . . . . . . . . . . . . . . . . . . . . . . . . . . . . . . . . . . . . . . . . . . . . . . 96
Start the Settings App . . . . . . . . . . . . . . . . . . . . . . . . . . . . . . . . . . . . . . . . . . . . . . . . . . . . 96
About the Structure of the Settings App . . . . . . . . . . . . . . . . . . . . . . . . . . . . . . . . . . . 96
About Network Communications . . . . . . . . . . . . . . . . . . . . . . . . . . . . . . . . . . . . . . . . . . . . . . . . . 99
Connect to a Wi-Fi Network . . . . . . . . . . . . . . . . . . . . . . . . . . . . . . . . . . . . . . . . . . . . . . 99
Configure Proxy Settings for a Wi-Fi Network . . . . . . . . . . . . . . . . . . . . .101
Disable Wi-Fi Notifications . . . . . . . . . . . . . . . . . . . . . . . . . . . . . . . . . . . . . .102
Connect to an Ethernet Network . . . . . . . . . . . . . . . . . . . . . . . . . . . . . . . . . . . . . . . . .102
viii
CN51 Mobile Computer User Manual
Contents
How to Connect to Virtual Private Networks . . . . . . . . . . . . . . . . . . . . . . . . . . . . . .103
Add a VPN . . . . . . . . . . . . . . . . . . . . . . . . . . . . . . . . . . . . . . . . . . . . . . . . . . . . .103
Connect to a VPN . . . . . . . . . . . . . . . . . . . . . . . . . . . . . . . . . . . . . . . . . . . . . . .103
Edit VPN Information. . . . . . . . . . . . . . . . . . . . . . . . . . . . . . . . . . . . . . . . . . .104
About Wireless Security . . . . . . . . . . . . . . . . . . . . . . . . . . . . . . . . . . . . . . . . . . . . . . . . . . . . . . . . .104
Configure Wireless Security. . . . . . . . . . . . . . . . . . . . . . . . . . . . . . . . . . . . . . . . . . . . . .105
About Certificates . . . . . . . . . . . . . . . . . . . . . . . . . . . . . . . . . . . . . . . . . . . . . . . . . . . . . .105
Load a Certificate . . . . . . . . . . . . . . . . . . . . . . . . . . . . . . . . . . . . . . . . . . . . . . .105
Disable or Remove Certificates . . . . . . . . . . . . . . . . . . . . . . . . . . . . . . . . . . .106
About Bluetooth Communications . . . . . . . . . . . . . . . . . . . . . . . . . . . . . . . . . . . . . . . . . . . . . . .106
Connect a Bluetooth Device . . . . . . . . . . . . . . . . . . . . . . . . . . . . . . . . . . . . . . . . . . . . .107
Configure Bluetooth Settings . . . . . . . . . . . . . . . . . . . . . . . . . . . . . . . . . . . . . . . . . . . .108
Rename or Disconnect a Paired Device. . . . . . . . . . . . . . . . . . . . . . . . . . . . . . . . . . . .109
View a List of Received Files. . . . . . . . . . . . . . . . . . . . . . . . . . . . . . . . . . . . . . . . . . . . . .109
About Serial and USB Communications . . . . . . . . . . . . . . . . . . . . . . . . . . . . . . . . . . . . . . . . . .109
How to Share Your Mobile Data Connection . . . . . . . . . . . . . . . . . . . . . . . . . . . . . . . . . . . . . .110
Share the Data Connection Through USB. . . . . . . . . . . . . . . . . . . . . . . . . . . . . . . . .110
Share the Data Connection Through Bluetooth . . . . . . . . . . . . . . . . . . . . . . . . . . .110
Share the Data Connection as a Portable Hotspot . . . . . . . . . . . . . . . . . . . . . . . . .111
7 Manage the Computer . . . . . . . . . . . . . . . . . . . . . . . . . . . . . . . . . . 113
How to Transfer Files. . . . . . . . . . . . . . . . . . . . . . . . . . . . . . . . . . . . . . . . . . . . . . . . . . . . . . . . . . . .114
Connect to a PC through USB . . . . . . . . . . . . . . . . . . . . . . . . . . . . . . . . . . . . . . . . . . . . . . . . . . .114
Configure the USB Connection for PTP. . . . . . . . . . . . . . . . . . . . . . . . . . . . . . . . . . .114
How to Develop and Install Applications. . . . . . . . . . . . . . . . . . . . . . . . . . . . . . . . . . . . . . . . . .115
Download the Intermec SDKs for Android . . . . . . . . . . . . . . . . . . . . . . . . . . . . . . . .116
Install the Intermec CN51 SDK Add-on with the SDK Manager. . . . . . . . . . . . .116
How to Set Up the Mobile Computer for App Development . . . . . . . . . . . . . . . .119
Enable Developer Options . . . . . . . . . . . . . . . . . . . . . . . . . . . . . . . . . . . . . . . . . . . . . . .119
How to Update the System Software . . . . . . . . . . . . . . . . . . . . . . . . . . . . . . . . . . . . . . . . . . . . . .120
Update Computers Using a Device Management System . . . . . . . . . . . . . . . . . . .120
Update the System Software . . . . . . . . . . . . . . . . . . . . . . . . . . . . . . . . . . . . . . . . . . . . .120
CN51 Mobile Computer User Manual
ix
Contents
8 Troubleshoot and Maintain the Computer . . . . . . . . . . . . . . . . . 123
About Troubleshooting the Computer . . . . . . . . . . . . . . . . . . . . . . . . . . . . . . . . . . . . . . . . . . . .124
Wi-Fi Connection Problems. . . . . . . . . . . . . . . . . . . . . . . . . . . . . . . . . . . . . . . . . . . . . .124
802.1x Security Problems . . . . . . . . . . . . . . . . . . . . . . . . . . . . . . . . . . . . . . . . . . . . . . . .125
Problems Reading Bar Codes. . . . . . . . . . . . . . . . . . . . . . . . . . . . . . . . . . . . . . . . . . . . .127
Problems Using the Computer . . . . . . . . . . . . . . . . . . . . . . . . . . . . . . . . . . . . . . . . . . .129
Call Product Support. . . . . . . . . . . . . . . . . . . . . . . . . . . . . . . . . . . . . . . . . . . . . . . . . . . . . . . . . . . .130
Locate the Build Version and Configuration String Using the Settings App . .130
Locate the Configuration String in the Battery Compartment . . . . . . . . . . . . . .131
Reset the Computer . . . . . . . . . . . . . . . . . . . . . . . . . . . . . . . . . . . . . . . . . . . . . . . . . . . . . . . . . . . . .132
Perform a Factory Data Reset . . . . . . . . . . . . . . . . . . . . . . . . . . . . . . . . . . . . . . . . . . . . . . . . . . . .132
Clean the Computer. . . . . . . . . . . . . . . . . . . . . . . . . . . . . . . . . . . . . . . . . . . . . . . . . . . . . . . . . . . . .133
A Specifications . . . . . . . . . . . . . . . . . . . . . . . . . . . . . . . . . . . . . . . . 135
Physical and Environmental Specifications . . . . . . . . . . . . . . . . . . . . . . . . . . . . . . . . . . . . . . . .136
EA31 Extended Reading Range. . . . . . . . . . . . . . . . . . . . . . . . . . . . . . . . . . . . . . . . . . .138
EA31 Minimum Reading Distances. . . . . . . . . . . . . . . . . . . . . . . . . . . . . . . . . . . . . . .139
EA31 Typical Reading Distances . . . . . . . . . . . . . . . . . . . . . . . . . . . . . . . . . . . . . . . . .140
EA30 Extended Reading Range. . . . . . . . . . . . . . . . . . . . . . . . . . . . . . . . . . . . . . . . . . .142
EA30 Minimum Reading Distances. . . . . . . . . . . . . . . . . . . . . . . . . . . . . . . . . . . . . . .143
EA30 Typical Reading Distances . . . . . . . . . . . . . . . . . . . . . . . . . . . . . . . . . . . . . . . . .144
B Default Settings . . . . . . . . . . . . . . . . . . . . . . . . . . . . . . . . . . . . . . . 147
Wireless and Network Settings . . . . . . . . . . . . . . . . . . . . . . . . . . . . . . . . . . . . . . . . . . . . . . . . . . .148
Scanner Settings . . . . . . . . . . . . . . . . . . . . . . . . . . . . . . . . . . . . . . . . . . . . . . . . . . . . . . . . . . . . . . . .148
Device Settings . . . . . . . . . . . . . . . . . . . . . . . . . . . . . . . . . . . . . . . . . . . . . . . . . . . . . . . . . . . . . . . . .151
Personal Settings. . . . . . . . . . . . . . . . . . . . . . . . . . . . . . . . . . . . . . . . . . . . . . . . . . . . . . . . . . . . . . . .152
System Settings . . . . . . . . . . . . . . . . . . . . . . . . . . . . . . . . . . . . . . . . . . . . . . . . . . . . . . . . . . . . . . . . .153
x
CN51 Mobile Computer User Manual
Before You Begin
Before You Begin
This section provides you with safety information, technical support
information, and sources for additional product information.
Safety Information
Your safety is extremely important. Read and follow all warnings and
cautions in this document before handling and operating Intermec
equipment. You can be seriously injured, and equipment and data can
be damaged if you do not follow the safety warnings and cautions.
This section explains how to identify and understand dangers,
warnings, cautions, and notes that are in this document. You may also
see icons that tell you when to follow ESD procedures and when to
take special precautions for handling optical parts.
Caution: A caution alerts you to an operating procedure, practice,
condition, or statement that must be strictly observed to prevent
equipment damage or destruction, or corruption or loss of data.
Note: Notes either provide extra information about a topic or contain
special instructions for handling a particular condition or set of
circumstances.
Global Services and Support
Warranty Information
To understand the warranty for your Intermec product, visit the
Intermec website at www.intermec.com and click Support >
Returns and Repairs > Warranty.
Disclaimer of warranties: The sample code included in this document
is presented for reference only. The code does not necessarily
represent complete, tested programs. The code is provided “as is with
all faults.” All warranties are expressly disclaimed, including the
implied warranties of merchantability and fitness for a particular
purpose.
CN51 Mobile Computer User Manual
xi
Before You Begin
Web Support
Visit the Intermec website at www.intermec.com to download our
current manuals (in PDF).
Visit the Intermec technical knowledge base (Knowledge Central) at
www.intermec.com and click Support > Knowledge Central to
review technical information or to request technical support for your
Intermec product.
Send Feedback
Your feedback is crucial to the continual improvement of our
documentation. To provide feedback about this manual, please
contact the Intermec Technical Communications department directly
at [email protected].
Telephone Support
In the U.S.A. and Canada, call 1-800-755-5505.
Outside the U.S.A. and Canada, contact your local Intermec
representative. To search for your local representative, from the
Intermec website, click About Us > Contact Us.
Who Should Read This Manual
This user manual is for the person who is responsible for installing,
configuring, and maintaining the CN51.
This document provides you with information about the features of
the CN51, and how to install, configure, operate, maintain, and
troubleshoot it.
Before you work with the CN51, you should be familiar with your
network and general networking terms, such as IP address.
Related Documents
The Intermec website at www.intermec.com contains our documents
(as .pdf files) that you can download for free.
To download documents
1 Visit the Intermec website at www.intermec.com.
2 Click the Products tab.
xii
CN51 Mobile Computer User Manual
Before You Begin
3 Using the Products menu, navigate to your product page. For
example, to find the CN51 computer product page, click
Computers > Handheld Computers > CN51.
4 Click the Manuals tab.
If your product does not have its own product page, click Support >
Manuals. Use the Product Category, the Product Family, and
Product to find your documentation.
Patent Information
For patent information, refer to www.hsmpats.com.
CN51 Mobile Computer User Manual
xiii
Before You Begin
xiv
CN51 Mobile Computer User Manual
1
About the Computer Features
This chapter introduces the CN51 Mobile Computer with
Android™ 4.2 operating system. Use this chapter to learn about
basic computer features and functions, as well as the available
accessories for it.
1
Chapter 1 — About the Computer Features
About the CN51 Mobile Computer
The Intermec CN51 Mobile Computer is the class-leading mid-range
rugged mobile computer that empowers mobile workers with the
resources to satisfy and delight customers efficiently today and earn
new business tomorrow.
The CN51 is available with the following features:
•
•
•
•
•
•
•
•
•
•
•
•
•
•
2
Android™ 4.2 operating system
1.5 GHz dual-core multi-engine processor with extended battery
life
1 GB DRAM, 16 GB flash memory
Large, outdoor-viewable WVGA display with full-size keypad
Resistive touch panel display
Bluetooth radio
UMTS/HSPA+/CDMA or UMTS/HSPA+ WAN radio options;
both options support voice and data
IEEE 802.11a/b/g/n on computers without a cellular radio, IEEE
802.11b/g/n on computers with a cellular radio
Customer-accessible microSD slot for removable memory cards
(up to 32 GB)
High-performance EA30 or EA31 area imager options, for scanning
bar codes and capturing signatures
HTML5 support
Integrated GPS receiver (with WAN radio option)
Accelerometer that can automatically sense the angle of the
computer and rotate the display between portrait and landscape
5-megapixel color camera
CN51 Mobile Computer User Manual
Chapter 1 — About the Computer Features
4QFBLFS
3FBEZUP8PSL-&%
(PPESFBE-&%
4DBOCVUUPO
/PUJGJDBUJPO-&%
1PXFSCVUUPO
7PMVNFCVUUPOT
#BUUFSZTUBUVT-&%
.JDSPQIPOF
CN51 Front View
$BNFSB
#BUUFSZ
SFMFBTFUBC
*NBHFS
4JEFTDBO
CVUUPO
CN51 Back View
CN51 Mobile Computer User Manual
3
Chapter 1 — About the Computer Features
About the Battery
The CN51 uses a Model 1015AB01 battery as its main power source.
The battery has a 14.4 Watt hour capacity. Several factors determine
the life of your battery, such as display brightness, display timeout,
input devices, extreme temperatures, and your usage.
Fully charge the battery before you use the CN51. When you change
the battery, the computer automatically goes into a power-off state
and then cold boots.
Caution: The battery used in this device may present a fire or
chemical burn hazard if it is mistreated. Do not disassemble it,
heat it above 100 °C (212 °F) or incinerate it. Dispose of used
batteries promptly. Keep away from children.
Contact your Intermec representative for replacement batteries.
Charge the Battery
Make sure you fully charge the battery (Model 1015AB01) before you
use your CN51. You can charge the battery before or after you install it
in the CN51. A fully discharged battery charges in approximately 6
hours.
Insert the battery into a quad battery charger, a single dock, or a
multidock, or attach external power to the CN51 with the battery
installed.
The battery is fully charged when the battery status LED shows a
steady green.
•
Use these Intermec accessories to charge the CN51 batteries:
•
•
•
•
•
•
4
Quad Battery Charger (Model AC21)
Charge-Only Multidock (Model AD23)
Ethernet Multidock (Model AD24)
Single Dock (Model AD27)
Vehicle Power Adapter (Model AE36)
AC Power Adapter (Model AE37)
CN51 Mobile Computer User Manual
Chapter 1 — About the Computer Features
Change the Battery
When the battery in the CN51 has a low charge, replace it with a
charged battery to maintain your network connections.
Note: When you remove a battery from the computer, Intermec
recommends that you install a charged battery within 90 seconds to
maintain your network connections.
1 Save all your files and close all open applications.
2 Press and hold the Power button. This screen appears:
3 Tap Battery Swap. The computer briefly shows a status message
and the LEDs turn on. When the LEDs turn off, continue with the
next step.
If the computer is in a dock, you must remove it from the dock
before you can select Battery Swap.
CN51 Mobile Computer User Manual
5
Chapter 1 — About the Computer Features
4 If necessary, disconnect the handstrap from the top of the
computer.
5 Push forward on the battery release tab until the battery releases,
and then lift the battery away from the computer.
6 Insert the bottom end of a fully charged battery into the computer,
and press down on the top end of the battery until it clicks into
place.
7 If necessary, reattach the handstrap.
6
CN51 Mobile Computer User Manual
Chapter 1 — About the Computer Features
About Battery Status
Use the battery icon at the top of the screen to view the power status of
the battery.
Battery Status Icons
Icon
Status
Battery charge is at 100%.
Battery charge is at 50%.
Battery is critically low. You need to replace the battery now.
Computer is connected to external power and the battery is
charging.
Note: appears if there is a battery error. Install another battery. If
the problem persists, call Intermec Product Support.
The Battery status LED below the computer screen indicates the
charging status of the battery.
#BUUFSZ
TUBUVT-&%
CN51 Mobile Computer User Manual
7
Chapter 1 — About the Computer Features
Battery LED States
LED State
Description
Steady green
The computer is connected to a charger and the
battery is more than 95% charged.
Steady red
The computer is connected to a charger and the
battery is less than 95% charged.
Blinking red
The battery is very low. The computer will soon go
into Suspend mode. Charge or replace the battery.
Amber
There is a battery error. The battery is not charging
because it is missing, faulty, or outside the allowable
charging temperature range. If it is outside the
charging temperature range, charging will resume
when the battery temperature returns to the
acceptable range of 0 °C to 45 °C (32 °F to 113 °F).
Off
The battery is not critically low, and the CN51 is not
connected to an external power source.
Check the Battery Level
Besides using the charge icons, you can get the battery level status from
the Settings app.
1 Start the Settings app.
2 Tap Battery. The current battery status and percentage level appear
at the top of the screen. The list shows the battery usage for
individual apps and services.
For more details, touch a graph. In the details screen for some apps,
you can adjust settings that affect power usage.
Note: If you turn off certain apps, the computer may not work
correctly.
8
CN51 Mobile Computer User Manual
Chapter 1 — About the Computer Features
Check the Battery Status
Use the BatteryInfo app to check the battery status, including health,
voltage, temperature, and other useful statistics.
Note: The BatteryInfo app provides statistics for the standard
1015AB01 battery. Other compatible batteries do not support
statistics.
•
In the All Apps screen, tap BatteryInfo
.
About Battery Life and Conservation
Batteries that are stored outside the computer for long periods of time
slowly discharge. Intermec recommends storing the battery in a
charger to maintain battery performance.
Battery Conservation Tips
When You Want To:
Do This to Save Battery Power:
Connect the computer to an external
Use the computer and the low
battery status icon appears or the power source. Press and hold the Power
button, and then select Battery Swap
battery light turns on.
from the menu. After the computer turns
off, remove the battery and insert a fully
charged battery.
CN51 Mobile Computer User Manual
9
Chapter 1 — About the Computer Features
Battery Conservation Tips (Continued)
When You Want To:
Do This to Save Battery Power:
Stop using the computer for 5
minutes or longer.
Make sure that the low battery status icon
is not on the screen and the battery status
LED is not on. Press the Power button to
suspend the computer.
Store the computer for more than • If you are storing the computer for a
a day.
few days, like over the weekend, install
a charged battery or connect the
computer to a power source.
• If you are storing the computer for
longer, remove and charge the battery,
and then store both the battery and
computer in a cool location.
• If you store the battery for several
months, recharge the battery to keep it
at peak performance.
Store the battery outside the
computer.
Store the battery in a charger.
Enable Airplane Mode
If you do not need to connect to any wireless networks, you can enable
Airplane mode to turn off all the radios and save battery power.
1 Start the Settings app.
2 In the Wireless & Networks section, tap More.
3 Select Airplane mode to enable the mode.
If Airplane mode is already enabled, tap it to disable the mode.
10
CN51 Mobile Computer User Manual
Chapter 1 — About the Computer Features
Quickly Enable or Disable Airplane Mode
You can quickly enable or disable Airplane Mode by holding the Power
button and selecting Airplane mode from the popup menu.
1 Press and hold the Power button. This screen appears and shows
the current state of Airplane mode:
2 Tap Airplane mode to enable or disable the mode.
CN51 Mobile Computer User Manual
11
Chapter 1 — About the Computer Features
About the Status LEDs
The status LEDs turn on, turn off, or blink to indicate a specific
activity on your computer.
Main Status LED Descriptions
Callout LED
Color
Description
1
Notification
Orange
Android OS notification.
2
Good Read
Green
Good read of a bar code.
Blinking
red
Bad read of a bar code.
Blinking
green
The data collection engine is
processing or starting up.
Steady
green
The computer is connected to a
charger and the battery is more
than 95% charged.
3
Battery status
Steady red The computer is connected to a
charger and the battery is charging.
Blinking
red
12
The battery is very low, and the
computer will go into Suspend
mode soon. Charge or replace the
battery.
CN51 Mobile Computer User Manual
Chapter 1 — About the Computer Features
Main Status LED Descriptions (Continued)
Callout LED
Color
Description
Amber
There is a battery error. The battery
is not charging because it is
missing, faulty, or outside the
allowable charging temperature
range. If it is outside the charging
temperature range, charging will
resume when the battery
temperature returns to the
acceptable range of 0 °C to 45 °C
(32 °F to 113 °F).
Off
The computer is not on external
power and the battery is operating
normally.
Orange and Green Key Status LED
Callout
LED
Color
4
Orange and Green
key status
Orange
The Orange key is enabled.
Green
The Green key is enabled.
CN51 Mobile Computer User Manual
13
Chapter 1 — About the Computer Features
About the Keypad
The CN51 comes with either a numeric keypad or a QWERTY keypad:
•
•
The numeric keypad is for applications that require mainly
numeric data. This keypad also lets you enter special characters,
including the alphabet, by pressing color-coded key sequences.
The QWERTY keypad is designed for applications that require
primarily alphabetic data. This keypad also lets you enter special
characters by pressing color-coded key sequences.
CN51 Numeric Keypad
CN51 QWERTY Keypad
14
CN51 Mobile Computer User Manual
Chapter 1 — About the Computer Features
About the Color-Coded Keys
Note: The CN51 with QWERTY keypad does not have a green key.
Use the orange key and the green key to access additional
characters, symbols, and functions printed on the keypad overlay.
After you understand how to use the color-coded keys and key
sequences, you can access all of the additional features printed on the
keypad overlay.
Press the Green or Orange key twice to lock it. When the key is locked,
the LED turns on. Press the key once to unlock it.
How to Use the Color-Coded Keys
You Want To
Press
Example
Use an orange
character or
function printed
above a key.
(LED turns on), and then
the key with the character or
function printed above it
(LED stays on).
On the alphanumeric
keypad, press , then
press M to type the
number 9.
Use a green
character or
function printed
above a key.
(LED turns on), and then
the key with the character or
function printed above it
(LED stays on).
On the numeric keypad,
press , then press 3
twice to type the letter
“e”.
Unlock the green or
orange key.
or
once.
Press
or
once to
unlock the key. The LED
turns off.
How to Capitalize Characters on the QWERTY Keypad
If your CN51 has the QWERTY keypad, you can capitalize characters
individually, or you can type all capital letters by enabling Caps Lock:
•
•
•
To capitalize a single character, press the Shift key, and then the
character.
To enable Caps Lock, press and then press the Shift key.
When Caps Lock is enabled, press and then press the Shift key
to disable Caps Lock.
CN51 Mobile Computer User Manual
15
Chapter 1 — About the Computer Features
How to Capitalize Characters on the Numeric Keypad
If your CN51 has the numeric keypad, you can capitalize characters
individually, or you can type all capital letters by enabling Caps Lock:
•
•
•
To capitalize a single character, press the key, and then the 1 key.
Select the key with the letter you want to capitalize. Press 1 again to
return to lowercase letters.
To enable Caps Lock, press and then press 1.
To disable Caps Lock, press 1 again.
About the Power Button
Press the Power button quickly to suspend the computer, or to resume
where you left off when you last suspended the computer. When you
suspend the computer this way, the phone can still receive incoming
calls.
To select a power mode, press and hold the Power button, and select a
power mode from the list that appears:
•
•
16
Power off: Turns the computer off, including the phone. The
computer will not receive incoming calls.
Reset: Performs a system reset. The computer restarts after a reset,
and you may lose data in open apps. All your settings are saved
during a reset.
CN51 Mobile Computer User Manual
Chapter 1 — About the Computer Features
Battery Swap: Turns power off to the computer but saves your
settings while you install a charged battery. When you press Power
after installing the charged battery, the computer resumes where
you left off prior to entering battery swap mode.
• Airplane mode: Enables Airplane mode, which turns off power to
all the radios but saves your settings.
You can also enable or disable the speaker and switch to Vibrate mode:
•
•
•
•
Tap
Tap
Tap
to disable the speaker.
for Vibrate mode. The speaker is disabled.
to enable the speaker and turn off Vibrate mode.
About the Screen Backlight
The display has an ambient light sensor that automatically adjusts the
backlight intensity to conserve power and ensure the display is
readable. You can set the backlight intensity level as needed for your
environment.
Configure the Screen Backlight Brightness
You configure the screen backlight brightness in the Settings app.
1 Start the Settings app and tap Display > Brightness.
2 Select the Automatic brightness check box to use the ambient
light sensor to automatically adjust the brightness for your work
environment. Or, adjust the slider to set the brightness level.
3 Tap OK.
CN51 Mobile Computer User Manual
17
Chapter 1 — About the Computer Features
About the Audio Features
Your mobile computer has a speaker, a microphone, and several
software tools for configuring the volume of sounds.
Adjust the Ringtone and Notification Volume
You can quickly adjust the volume of ringtone and notification sounds
by using the side volume buttons.
Note: This method only affects the volume of ringtone and
notification sounds. To change the volume for other sounds, in the
Settings app tap Sound > Volumes.
1 Press one of the right side buttons. The Volume slider appears.
2 Press the right side buttons or adjust the slider to change the
volume.
18
CN51 Mobile Computer User Manual
Chapter 1 — About the Computer Features
Enable Vibrate Mode
You can switch to Vibrate mode and disable the speaker if necessary for
your working environment.
1 Press and hold the Power button. The power options screen
appears:
2 Tap
to turn on Vibrate mode.
To disable Vibrate mode, tap
if you want to leave the speaker
disabled, or tap
to enable audio through the speaker.
CN51 Mobile Computer User Manual
19
Chapter 1 — About the Computer Features
Audio Settings
This section describes the audio and sound settings you can configure
in the Settings app. To change audio settings, start the Settings app
and tap Sound.
Audio and Sound Settings
Setting
Description
Volumes
Use the sliders to set the volume for:
• music, video, games, and other media
• ringtone and notifications. You can
also use the side volume buttons to
change the volume.
• alarms
20
Phone ringtone
Select a ringtone.
Vibrate when ringing
Select to enable vibrate mode when the
phone is ringing.
Default notification
Select a notification sound.
Dial pad touch tones
Select to enable audio tones when you use
the phone keypad.
Touch sounds
Select to enable audio sounds when you
use the touch screen.
Screen lock sound
Select to enable an audio tone when the
screen is locked.
Vibrate on touch
Select to enable vibrate mode when you
touch the screen.
CN51 Mobile Computer User Manual
Chapter 1 — About the Computer Features
Insert a MicroSD Card
You can use a micro Secure Digital (SD) card to increase file storage
capacity or to install software. The CN51 supports an optional
microSD™ card (up to 32 GB maximum capacity). The card slot is
located in the battery compartment.
1 Remove the battery and open the card access door in the battery
compartment.
2 Slide the SIM card holder to the left to unlatch it, and lift the
holder to open it and access the microSD card holder.
3 Slide the microSD card holder towards the top of the CN51 to
unlatch it, and lift the holder to open it.
CN51 Mobile Computer User Manual
21
Chapter 1 — About the Computer Features
4 Place the microSD card in the holder with the contacts facing away
from the holder.
5 Close and latch the microSD card holder.
6 Close and latch the SIM card holder, and close the card access door
until it snaps shut.
7 Install the battery and turn on the computer.
To verify that the card is installed correctly, start the Settings app
and tap Storage. Look in the SD card section for more
information.
If you have a file browsing app, you should now be able to navigate
to the microSD card and view the contents of the card.
22
CN51 Mobile Computer User Manual
Chapter 1 — About the Computer Features
How to Transfer Files
To transfer files you need to physically connect the mobile computer
to your desktop PC through a USB connection. When the computer is
connected through USB, you can browse to it and drag-and-drop to
move files back and forth to a Windows PC. If you are transferring files
to and from a Mac, use the Android File Transfer application (available
from www.android.com/filetransfer).
By default, the computer connects using MTP (Media Transfer
Protocol). If you are transferring mainly camera images, you can
configure the connection to use PTP (Picture Transfer Protocol). If
your Windows PC does not support MTP, you may be able to transfer
files using PTP instead.
Configure the USB Connection for PTP
By default, the CN51 connects through USB using MTP (Media
Transfer Protocol), supported by Windows 7 and later. If you are
transferring mainly camera images, you can configure the connection
to use PTP (Picture Transfer Protocol). If your computer does not
support MTP, you may be able to transfer files using PTP instead.
Note: PTP is supported by Windows XP and later. Your Windows XP
computer may also support MTP if it also supports Microsoft Media
Player 10.
1 Start the Settings app and tap Storage.
2 Tap .
3 Tap USB computer connection and then select Camera (PTP).
CN51 Mobile Computer User Manual
23
Chapter 1 — About the Computer Features
CN51 Accessories
The CN51 ships with a battery. All other accessories are sold and
ordered separately. For help, contact your local sales representative.
CN51 Accessory Descriptions
Accessory
Description
CN51 AC Power Adapter (Model The CN51 AC Power Adapter provides a
AE37)
connection for external AC power to the
CN51. To use this adapter, you need to
purchase a country-specific power cord.
CN51 Battery (Model 1015AB01) The battery provides power to the CN51.
Keep a spare battery pack on hand for
longer shifts.
24
CN51 Charge-Only Multidock
(Model AD23)
Use the charge-only multidock to hold up
to four CN51s with batteries installed,
charge batteries, and provide power to the
computers.
FlexDock: DX4 Quad Dock
Use the DX4 Quad Dock to charge up to
4 computers and batteries
simultaneously. The Quad Dock is
available in Ethernet and charge-only
versions.
CN51 Ethernet Multidock
(Model AD24)
Use the multidock to hold up to four
CN51s with the batteries installed. The
multidock charges the batteries and
provides power and Ethernet connections
to each computer.
CN51 Replacement Handstrap
Use a replacement handstrap to replace a
worn-out or lost handstrap.
CN51 Magnetic Stripe Reader
(Model AR9)
This accessory snaps on to the CN51 and
provides magnetic stripe reading
capabilities.
CN51 Quad Charger (Model
AC21)
Use the quad battery charger to charge up
to four batteries.
CN51 RS-232 Adapter
This accessory snaps on to the CN51 and
provides serial connectivity.
CN51 Mobile Computer User Manual
Chapter 1 — About the Computer Features
CN51 Accessory Descriptions (Continued)
Accessory
Description
CN51 Single Dock (Model AD27) Use the single dock to hold a CN51 with
its battery installed, charge a spare
battery pack, charge the main battery
pack, and provide power to the mobile
computer. The dock has USB host and
client connectors. Optional adapters are
available to convert the USB host to
Ethernet or to a landline modem.
Ethernet Adapter (Model
1004UA01)
Use this Ethernet adapter with the Model
AD27 Single Dock to connect the CN51
to your Ethernet network.
Modem Adapter (Model
1004UA02)
Use this modem adapter with the Model
AD27 Single Dock to connect the CN51
to a landline modem.
CN51 Tethered Stylus
Replacement
Use a replacement stylus to replace a lost
or broken stylus.
CN51 Vehicle Docks (AV6, AV9)
Use the vehicle docks to hold and charge
the CN51 while using it on a vehicle.
CN51 Vehicle Power Adapter
(Model AE36)
Use the vehicle power adapter to charge
the battery installed in the CN51 from
your vehicle.
CN51 Mobile Computer User Manual
25
Chapter 1 — About the Computer Features
26
CN51 Mobile Computer User Manual
2
About the User Interface and Intermec
Applications
Use this chapter to learn about the Android user interface and
how to interact with the screen. You can also use this chapter
to learn about the Intermec applications on your computer, as
well as additional applications you can download.
27
Chapter 2 — About the User Interface and Intermec Applications
About the User Interface
The Android 4.2 operating system provides a touch-friendly and easy
to navigate user interface.
About the Home Screen
When you turn on the mobile computer, the Home screen is the first
screen that appears after language provisioning is complete.
Home Screen Icons and Navigation
28
Item
Description
1
Status and system icons. Status icons to the left tell you when an app
has sent notifications, such as an arriving message or a meeting
notice. System icons to the right display the current wireless and
network connection state and battery level.
2
Favorites tray. App icons in the tray are visible on every Home screen.
The All Apps icon is always in the center of the Favorites tray.
CN51 Mobile Computer User Manual
Chapter 2 — About the User Interface and Intermec Applications
Home Screen Icons and Navigation (Continued)
Item
Description
3
Navigation buttons:
- Back button. Tap to return to the previous screen, even if that
screen was in a different app.
- Home button. Tap to return to the Home screen. If there are
multiple Home screens, tap to return to the center Home screen.
- Recent Apps button. Tap to return to the previous screen,
even if it was in a different app.
View Notifications
•
Swipe down from the top of the screen. The notifications shade
includes a list of events.
To close the shade, swipe up from the bottom of the screen, or tap
the Back or Home buttons.
CN51 Mobile Computer User Manual
29
Chapter 2 — About the User Interface and Intermec Applications
Customize the Home Screen
You can add application icons to any Home screen to access them
more easily.
1 Touch
. The All Apps screen appears.
2 To add an app icon to a Home screen, touch and hold the icon for
the app, and then slide your finger to place the icon on one of the
Home screens.
To add a widget icon to a Home screen, touch WIDGETS at the
top of the screen, touch and hold the icon for the widget, and then
slide your finger to place the widget icon on one of the Home
screens.
3 To remove an app or widget from the Home screen, touch and hold
the icon and slide it over Remove at the top of the screen.
Customize the Favorites Tray
You can add application icons to the Favorites tray to access them
more easily.
1 Touch
. The All Apps screen appears.
2 Touch and hold an icon in the Favorites tray, and slide it over
Remove at the top of the scrteen.
3 To add an app icon to the Favorites tray, touch and hold the icon
for the app, and then slide your finger to place the icon in the
Favorites tray.
To add a Widget icon to the Favorites tray, touch WIDGETS at the
top of the All Apps screen, touch and hold the icon for the widget,
and then slide your finger to place the icon in the Favorites tray.
30
CN51 Mobile Computer User Manual
Chapter 2 — About the User Interface and Intermec Applications
Use Google™ Search
Use the Google Search field at the top of the Home screen to help you
find anything you need on the computer or on the web.
1 At the top of any Home screen, touch Google to type your search
term. As you type, suggestions from Google web search appear
below the Search box, and results from the computer (such as apps
or contacts) appear below the web search results.
2 Tap a suggestion to search for it immediately, or touch its arrow
just to add the term to the search field without starting to search.
About Screen Gestures
Use your fingers or the stylus to manipulate icons, buttons, menus, the
onscreen keyboard, and other items on the screen.
To select or activate something, tap it.
To type something, such as a name or password, touch where you
want to type. A keyboard appears that lets you type into the field.
Other common gestures include:
•
•
•
•
•
•
•
Touch and hold: Touch and hold an item by touching it and lifting
your finger until an action occurs.
Drag: Touch and hold an item for a moment. Without lifting your
finger, move your finger on the screen until you reach the target
position. For example, you can drag to reposition shortcuts on the
Home screen.
Swipe or slide: Quickly move your finger across the screen, without
pausing when you first touch. For example, you can slide a Home
screen left or right to view the other Home screens.
Double-tap: Tap quickly twice on a webpage, map, or other screen
to zoom in. Double-tap again to zoom out.
Pinch: In some apps, you can zoom in and out by placing two
fingers on the screen at once and pinching them together (to zoom
out) or spreading them apart (to zoom in).
CN51 Mobile Computer User Manual
31
Chapter 2 — About the User Interface and Intermec Applications
Set the Time Zone
The CN51 gets the current date and time from its network connection.
You can manually set the time zone for your location.
1 Start the Settings app.
2 Tap Date & time.
3 Clear the check box for Automatic time zone.
4 Tap Select time zone and select the time zone for your location.
Manage Notifications
When an app sends a notification to the computer, you can act on it in
several ways.
1 When notification icons appear, swipe your finger down from the
top of the screen to see the notifications.
2 To respond to a notification, touch it. The appropriate app opens
for your response.
To dismiss a notification, swipe it sideways.
To dismiss all notifications, tap the X in the top right corner.
Note: Most apps that send notifications have notification settings you
can change. When the list of notifications is open, tap
to open the
Settings app.
32
CN51 Mobile Computer User Manual
Chapter 2 — About the User Interface and Intermec Applications
About Intermec Applications
Intermec provides several useful applications to help you configure,
troubleshoot, and connect your computer to other devices and
networks. You can also download additional applications from the
Intermec website to help you use all of the features of your computer.
Intermec Apps on the Computer
Intermec apps help you configure, troubleshoot, and connect your
computer to other devices and networks.
Icon
App
Description
BatteryInfo
Use the BatteryInfo app to view battery status,
including charge level, health, voltage, current
draw, temperature, and other data. Supported
when you use the standard 1015AB01 battery
in the CN51.
Carrier Selection
(Flexible Network Radio only) Use the Carrier
Selection app to quickly change your network
carrier.
Scan Demo
Use the Scan Demo app to read bar codes and
verify your symbology decode settings.
CN51 Mobile Computer User Manual
33
Chapter 2 — About the User Interface and Intermec Applications
34
CN51 Mobile Computer User Manual
3
Use the Scanner
This section describes how to use and configure the scanner to
scan bar codes.
35
Chapter 3 — Use the Scanner
About the Scanner
The internal scanner can read 1D and 2D bar code symbologies,
composite symbologies, and postal codes.
Disable the Scanner
The scanner is enabled by default. You can disable the scanner from
the Settings app. When the scanner is disabled:
you cannot make changes to scanner or symbology decode settings,
and your current settings are saved.
• pressing the Scan button (or triggering the scanner through
software) has no effect.
When you enable the scanner, your settings and all triggering methods
are restored.
•
Note: Disabling the scanner also disables symbology decoding.
1 Start the Settings app.
2 Tap Scanners.
36
CN51 Mobile Computer User Manual
Chapter 3 — Use the Scanner
3 Slide the Internal Scanner switch off to disable the scanner.
To enable the scanner, slide the switch on.
Disable the Virtual Wedge
When the scanner reads bar code data, the virtual wedge sends the data
to an application as keyboard input. By default, the virtual wedge is
enabled. You can disable the virtual wedge from the Settings app.
1 Start the Settings app.
2 Tap Scanners.
3 Slide the Virtual Wedge switch off.
To enable the virtual wedge, slide the switch on.
CN51 Mobile Computer User Manual
37
Chapter 3 — Use the Scanner
Enable Symbology Decoding
Before you start reading bar codes, use the Settings app to enable
decoding for only the bar code symbologies you need to read.
1 Start the Settings app.
2 In the Intermec section, tap Scanners > Internal Scanners >
Symbologies.
By default, decoding is enabled for these symbologies:
•
Code 128 and GS1-128
•
Code 39
•
Datamatrix
•
UPC-A, UPC-E, EAN-8, and UPC-E1
• PDF417
3 To enable decoding for a symbology type, slide the switch on.
To disable decoding, slide the switch off.
38
CN51 Mobile Computer User Manual
Chapter 3 — Use the Scanner
Scan Bar Codes
All of the scanners have an aiming beam to help you correctly frame
bar codes and they support omni-directional (360°) scanning.
Note: Before you start scanning bar codes, use the Settings app to
enable only the bar code symbologies that you need.
1 Point the scanner window at the bar code and hold the computer
steady a few inches from the label.
2 Press the Scan button or pull the scan handle trigger. The
illumination beam, laser pointer, or frame appear.
4DBOCVUUPO
CN51 Mobile Computer User Manual
39
Chapter 3 — Use the Scanner
For near or close-in scanning distances of 30 cm (11.8 in) or less,
use the laser pointer as a guide and aim slightly to the right of the
center of the bar code. Make sure the illumination beam covers the
bar code you are trying to decode.
For standard and long range scanning distances of 30 cm (11.8 in)
or more, use the laser pointer as a guide and aim toward the middle
of the bar code. Make sure that the illumination beam covers the
bar code you are trying to decode.
When the scanner successfully reads a bar code label, you hear a
high beep, and the Good Read LED turns on briefly.
3 Release the Scan button or trigger.
Enable Access to URLs in Bar Codes
By default, scanning a bar code that contains URL information
automatically opens the corresponding webpage in the Browser app.
You can disable this feature in the Settings app.
1 Start the Settings app.
2 Tap Scanners > Security.
3 Clear the check box for Open URLs by Scanning.
40
CN51 Mobile Computer User Manual
Chapter 3 — Use the Scanner
Enable Scanner Control from Web Applications
By default, web applications cannot control the scanner. You can
enable scanner control from web applications in the Settings app.
1 Start the Settings app.
2 Tap Scanners > Security.
3 Select Web access.
Use the Scan Demo App
Use the Scan Demo app to read bar codes, or to test your symbology
decode settings.
1 In the All Apps screen, tap Scan Demo
.
2 Aim the scanner window at the bar code and press Scan, or pull the
scan handle trigger.
When the scanner successfully scans the bar code, you hear a high
beep, and the Good Read LED turns on briefly. A list of bar code
information appears.
3 To clear all scanned bar code information, tap and select Clear
All.
CN51 Mobile Computer User Manual
41
Chapter 3 — Use the Scanner
4 To enable or disable decoding for specific symbologies:
a Tap and select Settings.
b Tap 1D, 2D, or Postal to locate the specific symbology.
c
Tap the symbology name to enable decoding for that
symbology, or to clear the check box and disable decoding.
How to Configure the Scanner
You use the Settings app to view and configure all settings for the
scanner, including symbology decoding options, triggering modes,
and decode security.
Configure Symbology Decoding Options
You use the Settings app to configure symbology decoding options for
the scanner.
1 Start the Settings app and tap Scanners > Internal Scanner >
Symbologies.
2 (Optional) To restore all default settings for symbology decoding,
tap and select Restore defaults.
42
CN51 Mobile Computer User Manual
Chapter 3 — Use the Scanner
3 To enable decoding of a specific symbology, slide the switch on, or
to disable decoding, slide the switch off.
If there is no switch:
a Tap the symbology name. The menu for that symbology
appears. This example shows the menu for EAN/UPC:
b Find the symbology name in the list, and slide the switch on or
off to enable or disable decoding as necessary.
c
Tap the Back button to return to the Symbologies list.
4 For more decoding options, in the Symbologies list tap the
symbology name. The menu for that symbology appears.
5 Tap an option to change the settings. Changes are automatically
saved.
CN51 Mobile Computer User Manual
43
Chapter 3 — Use the Scanner
Australia Post Settings
This section lists all configurable settings for decoding the Australia
Post symbology.
Australia Post Settings and Descriptions
Setting
Description
User defined symbology ID
Sets the symbology ID for Australia Post.
Range is 1 to 4 ASCII characters. \xFF is
not supported.
Default is P3.
Code mark
A one-character code mark that serves as
an identifier for Australia Post. Default is
*.
Aztec Settings
This section lists all configurable settings for decoding the Aztec
symbology.
Aztec Settings and Descriptions
44
Setting
Description
Structured append mode
Enables or disables Aztec structure
append mode. Default is disabled.
Runes
Enables or disables Aztec Runes, which
are special Aztec symbols. Default is
disabled.
GS1-128 emulation
Enables or disables GS1-128 emulation.
Default is disabled.
User defined symbology ID
Sets the symbology ID for Aztec. Range is
1 to 4 ASCII characters. \xFF is not
supported.
Default is D3.
Code mark
A one-character code mark that serves as
an identifier for Aztec. Default is *.
CN51 Mobile Computer User Manual
Chapter 3 — Use the Scanner
BPO Settings
This section lists all configurable settings for decoding the BPO
symbology.
BPO Settings and Descriptions
Setting
Description
Transmit check digit
Enables or disables sending the check
digit as part of the bar code data. Default
is enabled.
User defined symbology ID
Sets the symbology ID for BPO. Range is
1 to 4 ASCII characters. \xFF is not
supported.
Default is P2.
Code mark
A one-character code mark that serves as
an identifier for BPO. Default is *.
Canada Post Settings
This section lists all configurable settings for decoding the Canada
Post symbology.
Canada Post Settings and Descriptions
Setting
Description
User defined symbology ID
Sets the symbology ID for BPO. Range is
1 to 4 ASCII characters. \xFF is not
supported.
Default is P6.
Code mark
A one-character code mark that serves as
an identifier for BPO.
Default is *.
CN51 Mobile Computer User Manual
45
Chapter 3 — Use the Scanner
Codabar Settings
This section lists all configurable settings for decoding the Codabar
symbology.
Codabar Settings and Descriptions
Setting
Description
Start/Stop transmit
Enables or disables a special bar code character that
provides the scanner with start and stop reading
instructions as well as a scanning direction
indicator. Options include:
•
•
•
•
•
Disable (default)
a,b,c,d
A,B,C,D
a,b,c,d/t,n,*,e
DC1,DC2,DC3,DC4
CLSI library system
Enables or disables the CLSI library system. Default
is disabled.
Verify check digit
Enables or disables the optional check digit for a
higher level of security. Default is disabled.
Transmit check digit
Enables or disables transmission of the check digit
as part of the bar code data. Default is disabled.
Concatentation
Enables or disables concatentation of Codabar bar
codes. Options include:
• Disable (default)
• Transmit concatenation only: Scanner sends only
concatenated bar code data.
• Transmit concatenation or single: Scanner sends
all bar code data.
Concatentation mode Sets the concatenation mode. Options include:
• No restriction (default)
• 2nd code = 1st code start
• ABC
46
User defined
symbology ID
Sets the symbology ID for Codabar. Range is 1 to 4
ASCII characters. \xFF is not supported.
Default is B7.
Code mark
A one-character code mark that serves as an
identifier for BPO. Default is D.
CN51 Mobile Computer User Manual
Chapter 3 — Use the Scanner
Codabar Length Mode Settings and Descriptions
Setting
Description
Mode
Sets the length mode for Codabar decoding.
Options include:
• Length 1 minimum (default)
• Lengths 1,2,3 fixed
• Length 1 minimum, length 2 maximum
Length 1
Restricts the length of the bar code that the scanner
will read. Range is 0 to 255. Default is 6.
Length 2
Restricts the length of the bar code that the scanner
will read. Range is 0 to 255. Default is 0.
Length 3
Restricts the length of the bar code that the scanner
will read. Range is 0 to 255. Default is 0.
Codablock A Settings
This section lists all configurable settings for decoding the Codablock
A symbology.
Codablock A Settings and Descriptions
Setting
Description
User defined symbology ID
Sets the symbology ID for Codablock A.
Range is 1 to 4 ASCII characters. \xFF is
not supported.
Default is K0.
Code mark
A one-character code mark that serves as
an identifier for Codablock A.
Default is *.
CN51 Mobile Computer User Manual
47
Chapter 3 — Use the Scanner
Codablock F Settings
This section lists all configurable settings for decoding the Codablock
F symbology.
Codablock F Settings and Descriptions
Setting
Description
User defined symbology ID
Sets the symbology ID for Codablock F.
Range is 1 to 4 ASCII characters. \xFF is
not supported.
Default is K1.
Code mark
A one-character code mark that serves as
an identifier for Codablock F.
Default is *.
Code 11 Settings
This section lists all configurable settings for decoding the Code 11
symbology.
Code 11 Settings and Descriptions
48
Setting
Description
Verify check digit
Sets the check digit to 1 or 2 digits.
Default is 2.
Transmit check digit
Enables or disables transmission of the
check digit as part of the bar code data.
Default is enabled.
User defined symbology ID
Sets the symbology ID for Code 11. Range
is 1 to 4 ASCII characters. \xFF is not
supported.
Default is C1.
Code mark
A one-character code mark that serves as
an identifier for Code 11.
Default is *.
CN51 Mobile Computer User Manual
Chapter 3 — Use the Scanner
Code 11 Length Mode Settings and Descriptions
Setting
Description
Length Mode
Sets the length mode for decoding. Options include:
• Length 1 minimum (default)
• Lengths 1,2,3 fixed
• Length 1 minimum, length 2 maximum
Length 1
Restricts the length of the bar code that the scanner
will read. Range is 0 to 255. Default is 4.
Length 2
Restricts the length of the bar code that the scanner
will read. Range is 0 to 255. Default is 0.
Length 3
Restricts the length of the bar code that the scanner
will read. Range is 0 to 255. Default is 0.
Code 39 Settings
This topic lists all settings for decoding the Code 39 symbology.
Code 39 Settings and Descriptions
Setting
Description
Full ASCII conversion Enables or disables full ASCII conversion. Default is
disabled.
Start/stop
transmission
Enables or disables a special bar code character that
provides the scanner with start and stop reading
instructions as well as a scanning direction
indicator. Default is disabled.
Start character
Sets the start character to $ only, *only, or both $
and *. Default is *.
Verify check digit
Sets the check digit for a higher level of security. The
check character is positioned between the final data
character and the stop character. Options include:
•
•
•
•
•
•
CN51 Mobile Computer User Manual
Disable (default)
Modulo 43
French CIP
Italian CPI
HIBC
AIAG
49
Chapter 3 — Use the Scanner
Code 39 Settings and Descriptions (Continued)
Setting
Description
Reading range
Sets the reading range. Options include:
• Normal
• Extended (default)
Reading tolerance
Sets the quality of the bar code that the scanner
reads. Options include:
• High (default): Makes it easier to scan low quality
bar codes.
• Medium
• Low: Bar codes must be high quality to be read.
Transmit check digit
Enables or disables sending the check digit as part of
the bar code data. Default is disabled.
Unconventional Code Enables or disables decoding of Unconventional
39
Code 39, including bar codes with a large
intercharacter gap or a large narrow and wide
element ratio. Default is disabled.
Code 39 User defined Sets the symbology ID for Code 39. Range is 1 to 4
symbology ID
ASCII characters. \xFF is not supported.
Default is B1.
Code 39 Code mark
A one-character code mark that serves as an
identifier for Code 39. Default is *.
Code 39 Length Mode Settings and Descriptions
Setting
Description
Length Mode
Sets the length mode for decoding. Options include:
• Length 1 minimum (default)
• Lengths 1,2,3 fixed
• Length 1 minimum, length 2 maximum
50
Length 1
Restricts the length of the bar code that the scanner
will read. Range is 0 to 255. Default is 0.
Length 2
Restricts the length of the bar code that the scanner
will read. Range is 0 to 255. Default is 0.
Length 3
Restricts the length of the bar code that the scanner
will read. Range is 0 to 255. Default is 0.
CN51 Mobile Computer User Manual
Chapter 3 — Use the Scanner
Code 93 Settings
This section lists all configurable settings for decoding the Code 93
symbology.
Code 93 Settings and Descriptions
Setting
Description
User defined symbology ID
Sets the symbology ID for Code 93. Range
is 1 to 4 ASCII characters. \xFF is not
supported.
Default is B6.
Code mark
A one-character code mark that serves as
an identifier for Code 93.
Default is D.
Code 93 Length Mode Settings and Descriptions
Setting
Description
Length Mode
Sets the length mode for decoding. Options include:
• Length 1 minimum (default)
• Lengths 1,2,3 fixed
• Length 1 minimum, length 2 maximum
Length 1
Restricts the length of the bar code that the scanner
will read. Range is 0 to 255. Default is 1.
Length 2
Restricts the length of the bar code that the scanner
will read. Range is 0 to 255. Default is 0.
Length 3
Restricts the length of the bar code that the scanner
will read. Range is 0 to 255. Default is 0.
CN51 Mobile Computer User Manual
51
Chapter 3 — Use the Scanner
Code 128/GS1-128 Settings
This section lists all settings for decoding the Code 128/GS1-128
symbology.
Code 128/GS1-128 Settings and Descriptions
Setting
Description
Code 128
Enables or disables decoding of Code 128. Default is
enabled.
GS1-128
Enables or disables decoding of GS1-128. Default is
enabled.
ISBT 128
Enables or disables decoding of ISBT 128. Default is
disabled.
GS1-128 identifier
Enables or disables the GS1-128 Application
Identifier (AI). The AI is a prefix code identifying the
meaning and format of the data that follows it.
Default is enabled.
Unconventional
GS1-128
Enables or disables decoding of Unconventional
GS1-128, a GS1-128 variant with two FNC1
characters at the beginning. Default is enabled.
ISBT concatentation
transmission
Enables or disables concatenated bar codes, allowing
two bar codes to be read as if they were a single bar
code. Options include:
• Disable (default)
• Concatenated code
• Concatenated or single codes
Verify check digit
Sets the check digit for a higher level of security. The
check character is positioned between the final data
character and the stop character. Options include:
• Disable (default)
• French CIP
Reading tolerance
Sets the quality of the bar code that the scanner
reads. Options include:
• High (default): Makes it easier to scan low quality
bar codes.
• Medium
• Low: Bar codes must be high quality to be read.
GTIN compliant
52
Enables or disables GTIN compliance. Default is
disabled.
CN51 Mobile Computer User Manual
Chapter 3 — Use the Scanner
Code 128/GS1-128 Settings and Descriptions (Continued)
Setting
Description
Length Mode
Sets the length mode for decoding. Options include:
• Length 1 minimum (default)
• Lengths 1,2,3 fixed
• Length 1 minimum, length 2 maximum
Length 1
Restricts the length of the bar code that the scanner
will read. Range is 0 to 255. Default is 0.
Length 2
Restricts the length of the bar code that the scanner
will read. Range is 0 to 255. Default is 0.
Length 3
Restricts the length of the bar code that the scanner
will read. Range is 0 to 255. Default is 0.
Code 128 User defined Sets the symbology ID for Code 128. Range is 1 to 4
symbology ID
ASCII characters. \xFF is not supported.
Default is B3.
Code 128 Code mark
A one-character code mark that serves as an
identifier for Code 128. Default is D.
GS1-128 User defined Sets the symbology ID for GS1-128. Range is 1 to 4
symbology ID
ASCII characters. \xFF is not supported.
Default is C9.
GS1-128 Code mark
A one-character code mark that serves as an
identifier for GS1-128. Default is D.
Datamatrix Settings
This section lists the configurable settings for decoding the
Datamatrix symbology.
Datamatrix Settings and Descriptions
Setting
Description
Mirrored labels
Enables or disables reading mirrored
labels. Default is disabled.
User defined symbology ID
Sets the symbology ID for Datamatrix.
Range is 1 to 4 ASCII characters. \xFF is
not supported.
Default is D0.
Code mark
A one-character code mark that serves as
an identifier for Datamatrix. Default is *.
CN51 Mobile Computer User Manual
53
Chapter 3 — Use the Scanner
Dutch Post Settings
This section lists all configurable settings for decoding the Dutch Post
symbology.
Dutch Post Settings and Descriptions
Setting
Description
User defined symbology ID
Sets the symbology ID for Dutch Post.
Range is 1 to 4 ASCII characters. \xFF is
not supported.
Default is P4.
Code mark
A one-character code mark that serves as
an identifier for Dutch Post.
Default is *.
EAN/UPC Settings
This section lists the configurable settings for decoding the EAN/UPC
symbology.
EAN/UPC Settings and Descriptions
Setting
Description
UPC-A
Enables or disables UPC-A decoding. Default is
enabled.
UPC-E
Enables or disables UPC-E decoding. Default is
enabled.
EAN-8
Enables or disables EAN-8 decoding. Default is
enabled.
EAN-13
Enables or disables EAN-13 decoding. Default is
enabled.
UPC-E1
Enables or disables UPC-E1 decoding. Default is
disabled.
Add-on digits
Sets whether or not add-on digits must be present in
the bar code. Options include:
• Transmit if found (default): The scanner reads all
bar codes.
• Controlled by add-on digits: The scanner reads
the bar code only if add-on digits are present.
54
CN51 Mobile Computer User Manual
Chapter 3 — Use the Scanner
EAN/UPC Settings and Descriptions (Continued)
Setting
Description
Add-on 2 digits active Enables or disables transmission of the two-digit
add-on (when present). Default is disabled.
Add-on 5 digits active Enables or disables transmission of the five-digit
add-on (when present). Default is disabled.
Add-on security
Value that increases the odds that the scanner will
read add-on digits encoded in the bar code. Range is
0 to 100.
Default is 10. Setting this parameter to 100 (the
highest value) does not guarantee that the imager
will read the add-on digits.
Reading range
Sets the reading range. Options include:
• Normal
• Extended (default)
Transmit UPC-A as
EAN-13
Enables or disables transmission of UPC-A as
EAN-13. Default is disabled.
Transmit UPC-E as
UPC-A
Enables or disables transmission of UPC-E as
UPC-A. Default is disabled.
Transmit EAN-8 as
EAN-13
Enables or disables transmission of EAN-8 as
EAN-13. Default is disabled.
GTIN compliant
Enables or disables GTIN compliance. Default is
disabled.
UPC-A
UPC-A Options
Setting
Description
Number system
transmission
Enables or disables transmission of the UPC-A
number system character. Default is enabled.
Check digit
Enables or disables reading the check digit. Default
is enabled.
User defined
symbology ID
Sets the symbology ID for UPC-A. Range is 1 to 4
ASCII characters. \xFF is not supported.
Default is A0.
Code mark
A one-character code mark that serves as an
identifier for UPC-A. Default is A.
CN51 Mobile Computer User Manual
55
Chapter 3 — Use the Scanner
UPC-E Options
Setting
Description
Number system
transmission
Enables or disables transmission of the UPC-E
number system character. Default is enabled.
Check digit
Enables or disables reading the check digit. Default
is enabled.
User defined
symbology ID
Sets the symbology ID for UPC-E. Range is 1 to 4
ASCII characters. \xFF is not supported.
Default is E0.
Code mark
A one-character code mark that serves as an
identifier for UPC-E. Default is E.
EAN-8 Options
Setting
Description
Check digit
Enables or disables reading the check digit. Default
is enabled.
User defined
symbology ID
Sets the symbology ID for EAN-8. Range is 1 to 4
ASCII characters. \xFF is not supported.
Default is FF.
Code mark
A one-character code mark that serves as an
identifier for EAN-8. Default is N.
EAN-13 Options
56
Setting
Description
Check digit
Enables or disables reading the check digit. Default
is enabled.
ISBN conversion
Enables or disables conversion of EAN-13 data to
ISBN format. Default is disabled.
ISMN conversion
Enables or disables conversion of EAN-13 data to
ISMN format. Default is disabled.
ISSN conversion
Enables or disables conversion of EAN-13 data to
ISSN format. Default is disabled.
CN51 Mobile Computer User Manual
Chapter 3 — Use the Scanner
EAN-13 Options (Continued)
Setting
Description
User defined
symbology ID
Sets the symbology ID for EAN-13. Range is 1 to 4
ASCII characters. \xFF is not supported.
Default is F.
Code mark
A one-character code mark that serves as an
identifier for EAN-13. Default is F.
GS1 Composite Settings
This section lists all configurable settings for decoding the GS1
Composite symbology.
GS1 Composite Settings and Descriptions
Setting
Description
GS1-128 emulation
Enables or disables transmission of data
encoded in the Composite symbol as if
the data were encoded in one or more
GS1 Composite/GS1-128 symbols.
Default is disabled.
Linear only transmit mode
Enables or disables transmission of only
the linear portion of the GS1 composite
bar code.
Default is disabled.
EAN/UPC comp message decode Determines how to decode the two parts
of the GS1 Composite bar code. Options
include:
• Never linked
• Always linked
• Auto-discriminate
Unconventional GS1 Composite Enables or disables decoding of
Unconventional GS1 Composite.
Default is disabled.
CN51 Mobile Computer User Manual
57
Chapter 3 — Use the Scanner
GS1 Composite A/B Settings and Descriptions
Setting
Description
User defined symbology ID
Sets the symbology ID. Range is 1 to 4
ASCII characters. \xFF is not supported.
Default is G0.
Code mark
A one-character code mark that serves as
an identifier.
Default is *.
GS1 Composite C Settings and Descriptions
Setting
Description
User defined symbology ID
Sets the symbology ID. Range is 1 to 4
ASCII characters. \xFF is not supported.
Default is G1.
Code mark
A one-character code mark that serves as
an identifier.
Default is *.
GS1 DataBar Expanded Settings
This section lists all configurable settings for decoding the GS1
DataBar Expanded symbology.
GS1 DataBar Expanded Settings and Descriptions
58
Setting
Description
User defined symbology ID
Sets the symbology ID for GS1 DataBar
Expanded. Range is 1 to 4 ASCII
characters. \xFF is not supported.
Default is C5.
Code mark
A one-character code mark that serves as
an identifier for GS1 DataBar Expanded.
Default is *.
CN51 Mobile Computer User Manual
Chapter 3 — Use the Scanner
GS1 DataBar Limited Settings
This section lists all configurable settings for decoding the GS1
DataBar Limited symbology.
GS1 DataBar Limited Settings and Descriptions
Setting
Description
User defined symbology ID
Sets the symbology ID for GS1 DataBar
Limited. Range is 1 to 4 ASCII characters.
\xFF is not supported.
Default is C4.
Code mark
A one-character code mark that serves as
an identifier for GS1 DataBar Limited.
Default is *.
GS1 DataBar Omni-Directional Settings
This section lists all configurable settings for decoding the GS1
DataBar Omni-Directional symbology.
GS1 DataBar Omni-Directional Settings and Descriptions
Setting
Description
User defined symbology ID
Sets the symbology ID for GS1 DataBar
Omni-Directional. Range is 1 to 4 ASCII
characters. \xFF is not supported.
Default is C3.
Code mark
A one-character code mark that serves as
an identifier for GS1 DataBar
Omni-Directional.
Default is *.
CN51 Mobile Computer User Manual
59
Chapter 3 — Use the Scanner
Han Xin Settings
This topic lists all configurable settings for decoding the Han Xin
symbology.
Han Xin Settings and Descriptions
Setting
Description
User defined symbology ID
Sets the symbology ID for Han Xin.
Range is 1 to 4 ASCII characters. \xFF is
not supported.
Default is D4.
Code mark
A one-character code mark that serves as
an identifier for Han Xin.
Default is *.
Infomail Settings
This section lists all configurable settings for decoding the Infomail
symbology.
Infomail Settings and Descriptions
60
Setting
Description
User defined symbology ID
Sets the symbology ID for Infomail.
Range is 1 to 4 ASCII characters. \xFF is
not supported.
Default is P8.
Code mark
A one-character code mark that serves as
an identifier for Infomail.
Default is *.
CN51 Mobile Computer User Manual
Chapter 3 — Use the Scanner
Intelligent Mail Settings
This section lists all configurable settings for decoding the Intelligent
Mail symbology.
Intelligent Mail Settings and Descriptions
Setting
Description
User defined symbology ID
Sets the symbology ID for Intelligent
Mail. Range is 1 to 4 ASCII characters.
\xFF is not supported.
Default is PA.
Code mark
A one-character code mark that serves as
an identifier for Intelligent Mail.
Default is *.
Interleaved 2 of 5 Settings
This section lists all configurable settings for decoding the Interleaved
2 of 5 symbology.
Interleaved 2 of 5 Settings and Descriptions
Setting
Description
Verify check digit
Enables or disables the optional check digit for a
higher level of security. Default is disabled.
Transmit check digit
Enables or disables transmission of the check digit
as part of the bar code data. Default is disabled.
Reading range
Sets the reading range. Options include:
• Normal
• Extended (default)
Reading tolerance
Sets the quality of the bar code that the scanner
reads. Options include:
• High (default): Makes it easier to scan low
quality bar codes.
• Medium
• Low: Bar codes must be high quality to be read.
User defined symbology Sets the symbology ID for Interleaved 2 of 5. Range
ID
is 1 to 4 ASCII characters. \xFF is not supported.
Default is B2.
CN51 Mobile Computer User Manual
61
Chapter 3 — Use the Scanner
Interleaved 2 of 5 Settings and Descriptions (Continued)
Setting
Description
Code mark
A one-character code mark that serves as an
identifier for Interleaved 2 of 5.
Default is I.
Interleaved 2 of 5 Length Mode Settings and Descriptions
Setting
Description
Mode
Sets the length mode for Interleaved 2 of 5 decoding. Options
include:
• Length 1 minimum (default)
• Lengths 1,2,3 fixed
• Length 1 minimum, length 2 maximum
Length 1
Restricts the length of the bar code that the scanner will read.
Range is 0 to 255. Default is 6.
Length 2
Restricts the length of the bar code that the scanner will read.
Range is 0 to 255. Default is 0.
Length 3
Restricts the length of the bar code that the scanner will read.
Range is 0 to 255. Default is 0.
Japan Post Settings
This section lists all the configurable settings for decoding the Japan
Post symbology.
Japan Post Settings and Descriptions
62
Setting
Description
Transmit check digit
Enables or disables transmission of the
check digit as part of the bar code data.
Default is disabled.
User defined symbology ID
Sets the symbology ID for Japan Post.
Range is 1 to 4 ASCII characters. \xFF is
not supported.
Default is P5.
CN51 Mobile Computer User Manual
Chapter 3 — Use the Scanner
Japan Post Settings and Descriptions (Continued)
Setting
Description
Code mark
A one-character code mark that serves as
an identifier for Japan Post.
Default is *.
Matrix 2 of 5 Settings
This section lists all the configurable settings for decoding the Matrix
2 of 5 symbology.
Matrix 2 of 5 Settings and Descriptions
Settings
Descriptions
Start/Stop
Enables or disables a special bar code
character that provides the scanner with
start and stop reading instructions.
Options include:
• Regular (default)
• ChinaPost
User defined symbology ID
Sets the symbology ID for Matrix 2 of 5.
Range is 1 to 4 ASCII characters. \xFF is
not supported.
Default is B4.
Code mark
A one-character code mark that serves as
an identifier for Matrix 2 of 5.
Default is D.
Matrix 2 of 5 Length Mode Settings and Descriptions
Setting
Description
Mode
Sets the length mode for Matrix 2 of 5 decoding.
Options include:
• Length 1 minimum (default)
• Lengths 1,2,3 fixed
• Length 1 minimum, length 2 maximum
Length 1
CN51 Mobile Computer User Manual
Restricts the length of the bar code that the scanner
will read. Range is 0 to 255. Default is 6.
63
Chapter 3 — Use the Scanner
Matrix 2 of 5 Length Mode Settings and Descriptions (Continued)
Setting
Description
Length 2
Restricts the length of the bar code that the scanner
will read. Range is 0 to 255. Default is 0.
Length 3
Restricts the length of the bar code that the scanner
will read. Range is 0 to 255. Default is 0.
Maxicode Settings
This section lists all configurable settings for decoding the Maxicode
symbology.
Maxicode Settings and Descriptions
Setting
Description
Mode 0
Enables or disables Mode 0 for Maxicode.
Default is disabled.
User defined symbology ID
Sets the symbology ID for Maxicode.
Range is 1 to 4 ASCII characters. \xFF is
not supported.
Default is D2.
Code mark
A one-character code mark that serves as
an identifier for Dutch Post.
Default is *.
Micro PDF417 Settings
This section lists all configurable settings for decoding the Micro
PDF417 symbology.
Micro PDF417 Settings and Descriptions
64
Setting
Description
Code 128 emulation
Enables or disables Code 128 emulation
for Micro PDF417.
Default is disabled.
User defined symbology ID
Sets the symbology ID for Micro PDF417.
Range is 1 to 4 ASCII characters. \xFF is
not supported.
Default is C7.
CN51 Mobile Computer User Manual
Chapter 3 — Use the Scanner
Micro PDF417 Settings and Descriptions (Continued)
Setting
Description
Code mark
A one-character code mark that serves as
an identifier for Micro PDF417.
Default is *.
MSI Settings
This section lists all configurable settings for decoding the MSI
symbology.
MSI Settings and Descriptions
Setting
Description
Verify check digit
Sets the check digit type. Options
include:
• Modulo 10
• Double Modulo 10 (default)
Transmit check digit
Enables or disables transmission of the
check digit as part of the bar code data.
Default is disabled.
User defined symbology ID
Sets the symbology ID for MSI. Range is 1
to 4 ASCII characters. \xFF is not
supported.
Default is B8.
Code mark
A one-character code mark that serves as
an identifier for MSI.
Default is D.
MSI Length Mode Settings and Descriptions
Setting
Description
Mode
Sets the length mode for MSI decoding. Options
include:
• Length 1 minimum (default)
• Lengths 1,2,3 fixed
• Length 1 minimum, length 2 maximum
CN51 Mobile Computer User Manual
65
Chapter 3 — Use the Scanner
MSI Length Mode Settings and Descriptions (Continued)
Setting
Description
Length 1
Restricts the length of the bar code that the scanner
will read. Range is 0 to 255. Default is 6.
Length 2
Restricts the length of the bar code that the scanner
will read. Range is 0 to 255. Default is 0.
Length 3
Restricts the length of the bar code that the scanner
will read. Range is 0 to 255. Default is 0.
PDF417 Settings
This section lists all configurable settings for decoding the PDF417
symbology.
PDF417 Settings and Descriptions
Setting
Description
PDF with data length ID = 0
Enables or disables Irregular PDF to read
bar codes with symbol length descriptor
set to 0.
Default is disabled.
User defined symbology ID
Sets the symbology ID for PDF417. Range
is 1 to 4 ASCII characters. \xFF is not
supported.
Default is C7.
Code mark
A one-character code mark that serves as
an identifier for PDF417.
Default is *.
Macro PDF417 Setting and Description
66
Setting
Description
Transmit control header
Enables or disables transmission of the
control header for Macro PDF417.
Default is disabled.
CN51 Mobile Computer User Manual
Chapter 3 — Use the Scanner
Planet Settings
This section lists all configurable settings for decoding the Planet
symbology.
Planet Settings and Descriptions
Setting
Description
Transmit check digit
Enables or disables check digit
transmission.
Default is enabled.
User defined symbology ID
Sets the symbology ID for Planet. Range
is 1 to 4 ASCII characters. \xFF is not
supported.
Default is P1.
Code mark
A one-character code mark that serves as
an identifier for Planet.
Default is *.
Plessey Settings
This section lists all configurable settings for decoding the Plessey
symbology.
Plessey Settings and Descriptions
Setting
Description
Transmit check digit
Enables or disables check digit
transmission.
Default is disabled.
Unconventional stop
Enables or disables decoding of Plessey
bar codes that include variations (thicker
or thinner bars) of the standard stop.
Default is disabled.
User defined symbology ID
Sets the symbology ID for Plessey. Range
is 1 to 4 ASCII characters. \xFF is not
supported.
Default is C2.
CN51 Mobile Computer User Manual
67
Chapter 3 — Use the Scanner
Plessey Settings and Descriptions (Continued)
Setting
Description
Code mark
A one-character code mark that serves as
an identifier for Plessey.
Default is D.
Plessey Length Mode Settings and Descriptions
Setting
Description
Mode
Sets the length mode for Plessey decoding. Options
include:
• Length 1 minimum (default)
• Lengths 1,2,3 fixed
• Length 1 minimum, length 2 maximum
Length 1
Restricts the length of the bar code that the scanner
will read. Range is 0 to 255. Default is 0.
Length 2
Restricts the length of the bar code that the scanner
will read. Range is 0 to 255. Default is 0.
Length 3
Restricts the length of the bar code that the scanner
will read. Range is 0 to 255. Default is 0.
Postnet Settings
This section lists all configurable settings for decoding the Postnet
symbology.
Postnet Settings and Descriptions
68
Setting
Description
Transmit check digit
Enables or disables check digit
transmission.
Default is enabled.
User defined symbology ID
Sets the symbology ID for Postnet. Range
is 1 to 4 ASCII characters. \xFF is not
supported.
Default is P0.
CN51 Mobile Computer User Manual
Chapter 3 — Use the Scanner
Postnet Settings and Descriptions (Continued)
Setting
Description
Code mark
A one-character code mark that serves as
an identifier for Postnet.
Default is *.
QR Code Settings
This section lists all configurable settings for decoding the QR Code
symbology.
QR Code Settings and Descriptions
Setting
Description
Reverse video
Sets the video mode for decoding QR
Code. Options include:
• Normal (default): Decodes black bar
codes printed on a white background
• Inverse: Decodes white bar codes
printed on a black background
• Automatic: Decodes all QR Codes
User defined symbology ID
Sets the symbology ID for QR Code.
Range is 1 to 4 ASCII characters. \xFF is
not supported.
Default is D1.
Code mark
A one-character code mark that serves as
an identifier for QR Code.
Default is *.
CN51 Mobile Computer User Manual
69
Chapter 3 — Use the Scanner
Standard 2 of 5 Settings
This section lists all configurable settings for decoding the Standard 2
of 5 symbology.
Standard 2 of 5 Settings and Descriptions
Setting
Description
Format
Sets the number of start/stop bars to use
for decoding Standard 2 of 5. Options
include:
• Identicon, 6 s/s bars (default)
• Comp Identics, 4 s/s bars
Verify check digit
Enables or disables the optional check
digit for a higher level of security.
Options include:
• Disable (default)
• Modulo 10
Transmit check digit
Enables or disables transmission of the
check digit as part of the data in a bar
code.
Default is disabled.
User defined symbology ID
Sets the symbology ID for Standard 2 of
5. Range is 1 to 4 ASCII characters. \xFF is
not supported.
Default is B5.
Code mark
A one-character code mark that serves as
an identifier for Standard 2 of 5.
Default is D.
Standard 2 of 5 Length Mode Settings and Descriptions
Setting
Description
Mode
Sets the length mode for Standard 2 of 5 decoding.
Options include:
• Length 1 minimum (default)
• Lengths 1,2,3 fixed
• Length 1 minimum, length 2 maximum
70
CN51 Mobile Computer User Manual
Chapter 3 — Use the Scanner
Standard 2 of 5 Length Mode Settings and Descriptions (Continued)
Setting
Description
Length 1
Restricts the length of the bar code that the scanner
will read. Range is 0 to 255. Default is 6.
Length 2
Restricts the length of the bar code that the scanner
will read. Range is 0 to 255. Default is 0.
Length 3
Restricts the length of the bar code that the scanner
will read. Range is 0 to 255. Default is 0.
Sweden Post Settings
This section lists all configurable settings for decoding the Sweden
Post symbology.
Sweden Post Settings and Descriptions
Setting
Description
User defined symbology ID
Sets the symbology ID for Sweden Post.
Range is 1 to 4 ASCII characters. \xFF is
not supported.
Default is P7.
Code mark
A one-character code mark that serves as
an identifier for Sweden Post.
Default is *.
Telepen Settings
This section lists all the configurable settings for decoding the Telepen
symbology.
Telepen Settings and Descriptions
Setting
Description
Format
Sets the format. Options include:
• ASCII (default)
• Numeric: Must be an even number of
digits
CN51 Mobile Computer User Manual
71
Chapter 3 — Use the Scanner
Telepen Settings and Descriptions (Continued)
Setting
Description
User defined symbology ID
Sets the symbology ID for Telepen. Range
is 1 to 4 ASCII characters. \xFF is not
supported.
Default is C6.
Code mark
A one-character code mark that serves as
an identifier for telepen.
Default is *.
Telepen Length Mode Settings and Descriptions
Setting
Description
Mode
Sets the length mode for Telepen decoding. Options
include:
• Length 1 minimum (default)
• Lengths 1,2,3 fixed
• Length 1 minimum, length 2 maximum
Length 1
Restricts the length of the bar code that the scanner
will read. Range is 0 to 255. Default is 0.
Length 2
Restricts the length of the bar code that the scanner
will read. Range is 0 to 255. Default is 0.
Length 3
Restricts the length of the bar code that the scanner
will read. Range is 0 to 255. Default is 0.
TLC 39 Settings
This section lists all the configurable settings for decoding the TLC 39
symbology.
TLC 39 Settings and Descriptions
72
Setting
Description
Linear only transmit mode
Enables or disables linear only transmit
mode. When enabled, the computer only
transmits the linear part of the bar code.
Default is disabled.
CN51 Mobile Computer User Manual
Chapter 3 — Use the Scanner
TLC 39 Settings and Descriptions (Continued)
Setting
Description
ECI Security
Sets the security level used when reading
TLC 39 bar codes if EDI has been found
and Code 39 is enabled. The higher the
value, the more secure the decoding, but
higher values can interfere with decode
speed. Range is 0 to 64.
Default is 10.
User defined symbology ID
Sets the symbology ID for TLC 39. Range
is 1 to 4 ASCII characters. \xFF is not
supported.
Default is H0.
Code mark
A one-character code mark that serves as
an identifier for TLC 39.
Default is *.
Configure the Scanner Decode Security Settings
You use the Settings app to set options for decode security. These
settings ensure that the computer decodes bar codes correctly and
securely.
1 Start the Settings app and tap Scanners > Internal Scanner >
Decode Security.
2 Tap a setting in the list to change it. Your changes are
automatically saved.
CN51 Mobile Computer User Manual
73
Chapter 3 — Use the Scanner
Decode Security Settings
This section lists the configurable decode security settings for the
scanner.
Decode Security Settings
74
Setting
Description
Consecutive data
validation
To increase decode security, you can set the
number of times that the scanner automatically
reads a bar code to ensure a valid read. Range is 0
to 10 scans.
Default is 0.
Identical consecutive
codes timeout
If you are scanning bar codes with identical data,
this value sets the amount of time in milliseconds
before a second bar code read is invalidated.
Range is 0 to 2550.
Default is 1000.
Different consecutive
codes timeout
If you are scanning bar codes with different data,
this value sets the amount of time in milliseconds
before a second bar code read is invalidated.
Range is 0 to 2550.
Default is 0.
Center decoding
Enables or disables center decoding. When
enabled, the scanner reads only the bar code
located in the aiming beam. Use this feature to
read bar codes positioned close together.
Default is disabled.
Center decoding
tolerance
Allows you to aim the scanner close to the bar
code you want to read, instead of requiring you to
place the aiming beam directly on the bar code.
Range is 0 (scanner must be positioned on the bar
code to read it) to 100 (scanner must be
positioned beside the bar code to read it).
Default is 0.
CN51 Mobile Computer User Manual
Chapter 3 — Use the Scanner
Set a Preamble, Postamble, or Symbology
Identifier
You use the Settings app to set the preamble, postamble, and
symbology identifier type for decoding.
•
•
Preamble and postamble strings are applied to all successful reads.
If you enable the code mark or user-defined symbology identifier,
you need to specify the string in the decode settings for that
symbology.
1 Start the Settings app and tap Scanners > Internal Scanner >
Symbology Options.
2 Tap Preamble or Postamble, use the onscreen keypad to type the
preamble or postamble string, and tap OK when you are done.
To set the symbology identifier type, in the Symbology Options
list tap Symbology identifier and select an option in the list. Your
changes are automatically saved.
CN51 Mobile Computer User Manual
75
Chapter 3 — Use the Scanner
Set the Scanner Trigger or Aimer Mode
You use the Settings app to set the trigger and aimer modes for the
scanner. You can also select how the imager behaves after a good read.
1 Start the Settings app and tap Scanners > Internal Scanner >
Scanner Settings. Hardware triggering is enabled by default.
2 Tap a setting in the list to change it. Your changes are
automatically saved.
Scanner Settings
This section lists the configurable trigger and aimer mode settings.
Note: For these settings, pressing the Scan button on the computer is
the same as pulling the trigger on the scan handle accessory.
Trigger and Aimer Mode Settings
Setting
Description
Hardware Enables or disables the scanner (or an external scanning device)
trigger
without affecting communication to the computer. When
disabled, nothing happens when you press the Scan button. For
tethered scanners, the laser or imager beam may turn on, but no
data is read.
Default is enabled.
76
CN51 Mobile Computer User Manual
Chapter 3 — Use the Scanner
Trigger and Aimer Mode Settings (Continued)
Setting
Description
Trigger
mode
Sets the behavior of the scanner when you press the Scan button:
• Level (default): The scanner turns on and stays on until you
release the Scan button.
• Pulse: The scanner turns on and stays on until the end of the
trigger timeout.
• Flashing: The scanner turns on and stays on while looking for
a bar code to read. At the end of the trigger timeout, the beam
starts flashing. When the scanner reads a bar code, it restarts
the trigger timeout. If you press the Scan button again, the
scanner turns off.
• Autostand: Switches between Level and Flashing modes. The
first time you press the Scan button, the scanner turns on in
Flashing mode. To switch to Level mode, press the Scan
button again.
• Toggle: The scanner turns on and stays on, and does not read
a bar code until you release the Scan button.
Aimer
mode
Enables or disables the aimer activation feature. Options include:
• Typical aimer
• One pull aim and read
• One pull aim, second pull read
Turn off Defines how the scanner operates when you press Scan to read a
bar code. Options include:
after
good read
• Disable/Auto-trigger: Press Scan once to scan a series of bar
codes. When you release the Scan button, the scanner turns
off. To scan the same bar code more than once, you must
release the button, read a different bar code before trying a
second read, or wait until the identical consecutive timeout is
over.
• Enable/One-shot: You must press Scan each time you want to
read a bar code. After the read, the scanner turns off.
CN51 Mobile Computer User Manual
77
Chapter 3 — Use the Scanner
78
CN51 Mobile Computer User Manual
4
Use the Phone
You can use the phone feature to make and receive telephone
calls, as well as transmit data through cellular wide-area
networks (WANs).
79
Chapter 4 — Use the Phone
About the Phone
Phone features on the computer include a speaker and a microphone.
You can also use a Bluetooth headset or hands-free kit. The phone
feature is enabled by default.
The WAN radio in your computer determines the supported network
types:
•
•
If your computer includes the UMTS/HSPA+ WAN radio, you can
connect to UMTS networks.
If your computer includes the Flexible Network Radio, you can
connect to CDMA or UMTS networks in all regions that support
these technologies. The Flexible Network Radio is a
software-defined radio (SDR) that can be configured for CDMA or
UMTS depending on your wireless communication needs.
Intermec supports these CDMA network carriers:
•
Sprint (United States only)
•
Verizon (United States only)
For other carriers, contact Intermec Product Support.
After you turn on the phone and activate service with your wireless
carrier, you can customize the phone features and network settings in
the Wireless & Networks section of the Settings app.
Note: Both WAN radios support Network Information and Time
Zone (NITZ) messages to automatically set the system time.
80
CN51 Mobile Computer User Manual
Chapter 4 — Use the Phone
Activate the UMTS Phone
Activating the UMTS phone on your CN51 is done the same way
whether your computer has the Flexible Network Radio or the
UMTS/HSPA+WAN radio.
You use a SIM card to activate the UMTS phone on the CN51. You can
purchase the SIM card from your network provider.
1 Press
to turn off the CN51.
2 Disconnect the handstrap from the top of the computer.
3 Push forward on the battery release tab until the battery releases,
and then lift the battery away from the computer.
CN51 Mobile Computer User Manual
81
Chapter 4 — Use the Phone
4 Open the card access door and slide the SIM card holder to the left
to open it.
5 Place the SIM card in the holder.
82
CN51 Mobile Computer User Manual
Chapter 4 — Use the Phone
6 Close the SIM card holder and slide it to the right to secure it, and
then close the card access door.
7 Insert the battery and press down until it clicks in place.
8 Reconnect the handstrap.
9 Press
to turn on the CN51.The phone is now ready to use.
Activate the CDMA Phone
To activate the CDMA phone in your mobile computer, you need to
contact your wireless carrier and set up an account.
You also need to provide the carrier with the Mobile Equipment
Identifier (MEID) for the computer. You can find the MEID:
• on a label located in the battery compartment.
• on the outside of the computer shipping box.
Note: For the CDMA phone, settings are permanently stored in the
WAN radio after activation. CDMA settings persist through a factory
data reset.
CN51 Mobile Computer User Manual
83
Chapter 4 — Use the Phone
The activation process is slightly different for each CDMA carrier.
Your carrier sales contact and an Intermec representative can guide
you through the process. In general, you activate the CDMA phone as
follows:
1 Contact your wireless provider and give the provider the MEID for
the computer.
2 If your carrier is Sprint, reboot the computer. As soon as the Sprint
network detects your phone, Hands-Free Activation (HFA) begins,
and a series of notification messages appear. When activation is
complete, a completion message appears and the WAN radio
reboots. The phone is ready to use.
If your carrier is Verizon, tap , enter *228 on the phone keypad,
and tap . After a short wait, a message appears, confirming either
success or failure of the activation. After successful activation, the
phone is ready to use.
Make a Phone Call
Once the phone is activated, you can make a phone call.
1 On the Home or All Apps screen, tap
.
If the Phone app opens to a list of numbers instead of the keypad,
swipe left or touch
to return to the keypad.
2 Touch the keys to enter the number, and then touch
keypad to dial.
3 To end a call in progress, tap
84
below the
.
CN51 Mobile Computer User Manual
Chapter 4 — Use the Phone
Answer the Phone
When you receive a phone call, the Incoming Call screen opens,
showing the caller ID. All incoming calls are recorded in the Call log. If
you miss a call, you receive a notification.
•
When a call arrives, touch the white phone icon and slide over one
of the icons:
To answer the call:
To send the call to voicemail:
To send a message from a list of default text messages:
Send a Call to Voicemail
When you receive an incoming call, you can send the call to voicemail
instead of answering it.
•
When a call arrives, touch the white Phone icon and slide over
to send the call to voicemail.
Switch Apps During a Phone Call
You can switch apps while a phone call is in progress. For example, you
can use the People app to look up contact information during your
call.
Note: If you have only a WAN connection, apps that need a data
connection may be unable to access online data while the phone call is
in progress. If simultaneous phone calls and data connections are not
possible due to provider limitations, voice calls receive priority. Check
with your provider for more information.
•
During a phone call, tap another app icon on the Home or All Apps
screen to run that application. The green Phone icon appears in the
Status bar while the call is underway.
CN51 Mobile Computer User Manual
85
Chapter 4 — Use the Phone
Check Your Voicemail
When you have a new voicemail message, the voicemail icon appears at
the top left of the screen.
Note: Consult your service provider for more information on setting
up your voicemail account.
1 Swipe down from the top of the screen to view your notifications.
The voicemail notification shows the number of unread messages
and a number to dial.
2 Touch New voicemail. The phone dials the number. Follow the
instructions to retrieve your messages.
Set Your Voicemail Number
To access your voicemail, you must set your voicemail number in the
Phone app.
Note: Verizon customers do not need to follow this procedure.
1 Tap
.
2 Tap and then tap Settings. A list of call settings appears.
3 Tap Voicemail > Setup > Voicemail number.
4 If you are a Sprint customer, delete “*86” from the entry field and
enter your voicemail number.
If you are an AT&T customer, enter your voicemail number.
5 Tap OK.
Change Voicemail Settings
1 Tap
on a Home or All Apps screen.
2 Tap and then tap Settings.
3 Tap the voicemail setting you want to change.
86
CN51 Mobile Computer User Manual
Chapter 4 — Use the Phone
Make an Emergency Phone Call
You can use the phone to make an emergency phone call, even if the
SIM card is missing from your UMTS phone or if you do not have a
valid CDMA account. In either case, the phone shows that you have no
service. However, if you dial certain emergency numbers (such as 112,
911, 000, 08, 118, 119, or 999) the call will go through.
Switch Between Network Carriers
If your computer includes the Flexible Network Radio, you can easily
add carriers and switch between them as needed.
1 In the All Apps screen, tap Carrier Selection.
2 Select a different carrier from the Please select a carrier list.
CN51 Mobile Computer User Manual
87
Chapter 4 — Use the Phone
About Internet Calling
You can configure the phone to place calls over a Wi-Fi network
connection, instead of through your mobile network. The computer
must be connected to a Wi-Fi network before you can make calls this
way.
Note: Support for this feature depends on your network provider.
Set Up Internet Calling
Before you can use the phone for Internet calling, you must configure
SIP (Session Initiation Protocol) accounts.
1 Tap
.
2 Tap and then tap Settings. The Call settings menu appears.
3 In the Internet Call Settings section, tap Use Internet calling and
select an option from the list.
4 In the Internet Call Settings section, tap Accounts.
5 To receive incoming calls through Internet calling, select Receive
incoming calls.
6 To add an account, tap Add Account and enter the required
information in the SIP account details list.
7 Tap Save.
Add Contacts for Internet Calling
After you set up Internet calling, add SIP addresses for the contacts you
want to call using this method.
1 Tap Contacts
.
2 Tap the phone number you want to call using Internet calling. The
contact information appears.
3 Tap and then tap Edit.
4 Scroll to the bottom of the screen and tap Add another field.
88
CN51 Mobile Computer User Manual
Chapter 4 — Use the Phone
5 In the list that appears, tap Internet call.
6 Tap Done.
Configure Phone Settings
You can customize settings for the phone, including the ringtone,
voicemail options, keypad tones, internet call settings, and other
options.
1 Tap
.
2 Tap and then tap Settings. The Call settings menu appears.
3 Change phone settings as necessary.
Phone Settings
This section lists all the configurable phone settings. Some features
may not be available depending on your network carrier.
Ringtone Settings and Descriptions
Setting
Description
Phone ringtone
Sound that plays when a call is received.
Vibrate when ringing
When enabled, the computer vibrates
when a call is received.
Other Call Settings and Descriptions
Setting
Description
Voicemail
Voicemail account settings. Options
include:
•
•
•
•
Dial pad touch tones
CN51 Mobile Computer User Manual
Service
Setup: Voicemail number
Ringtone
Vibrate: Enables vibration when a call
is sent to voicemail.
Enables or disables sound that plays
when you press keys on the phone
keypad.
89
Chapter 4 — Use the Phone
Other Call Settings and Descriptions (Continued)
Setting
Description
Quick responses
Edit the default text messages you can
send to a caller.
Fixed Dialing Numbers
Enable or disable Fixed Dialing Numbers,
which limits outgoing calls to only a
specific list of phone numbers. Options
include:
• Enable FDN: Default is disabled.
• Change PIN2: Create or edit the PIN
required to access the list of FDNs.
• FDN list: List of FDNs.
Call forwarding
Set options for call forwarding,
including:
• Always forward (default is disabled).
• Forward when busy (default is
disabled).
• Forward when unanswered (default is
disabled).
• Forward when unreachable (default is
disabled).
Additional settings
Set Caller ID and call waiting options.
Internet Call Settings and Descriptions
90
Setting
Description
Accounts
Enables or disables reception of incoming
calls through the Internet. Enabling this
feature reduces battery life.
SIP Accounts
Lists the available SIP accounts.
CN51 Mobile Computer User Manual
5
Use the Camera
Learn to use the color camera to take pictures and record
videos.
91
Chapter 5 — Use the Camera
About the Color Camera
The computer includes a 5.0-megapixel camera for taking pictures and
videos. The camera and flash are located on the back of the computer.
You can view photos and videos in the Gallery app
.
Take a Picture
1 In the All Apps screen, tap Camera
.
2 Using the screen as a viewfinder, move the computer until you see
the image you want to take a picture of.
3 Tap the screen to set the focus. By default, the camera senses the
lighting in the environment and turns the torch on if needed.
(Optional) To zoom in or out, drag the slider at the bottom of the
viewfinder.
4 Press Enter or the shutter button . The camera takes a picture
and a thumbnail image of the picture appears in the corner of the
screen.
•
To view the picture, tap the thumbnail image.
•
To return to the Camera app, swipe the thumbnail image to the
right.
Change Camera Settings for Taking Pictures
You can change the camera settings for best results when taking
pictures.
1 In the All Apps screen, tap Camera
2 Tap
92
.
.
CN51 Mobile Computer User Manual
Chapter 5 — Use the Camera
3 Tap to change basic camera settings:
•
Store Location: Enable this feature to save location data for
each picture.
•
Picture size: Sets the maximum size (in pixels or as a screen size)
of each image. Default is 5 MP.
•
Metering modes: Sets how the camera measures the brightness
of the subject based on a specific region of the image, and
adjusts the exposure accordingly. Default is Center.
•
Self-Timer: Sets the amount of time the camera waits to take
the picture after you press the . Default is Off (self-timer is
disabled).
Multi shot: Sets the number of pictures the camera takes when
you press the shutter button. Default is Off (Multi shot is
disabled, and the camera takes only one picture at a time).
4 (Optional) To select a Scene, tap SCN. Scenes are preconfigured
sets of values for white balance and flash that are optimized for
specific environments:
•
•
Auto
•
Action
•
Night
•
Sunset
• Party
5 To set the exposure, tap
is 0.
and select a value from the list. Default
6 To set the white balance, tap
Default is Auto.
7 To set the flash mode, tap
Default is Auto.
CN51 Mobile Computer User Manual
and select a value from the list.
and select an option from the list.
93
Chapter 5 — Use the Camera
Record a Video
This section explains how to record video with the camera in the
computer.
1 In the All Apps screen, tap Camera
2 Tap
.
.
3 Tap
to begin recording video. To zoom in or out, drag the slider
at the bottom of the viewfinder.
4 When you are done recording, tap
.
Change Video Settings
You can change the camera settings for best results when recording
video.
1 In the All Apps screen, tap Camera
2 Tap
.
.
3 Tap to enable or disable location data. To enable Store Location,
slide the switch on. When Store Location is enabled, location data
is saved with the file.
4 Tap the current video quality setting (1080p, 720p, or 480p) to
change the video quality. Default is 720p.
5 To change the time lapse interval between images in the video, tap
. Default is Off (no time lapse between images).
6 To change the background effects, tap
from the list.
7 To set the white balance, tap
Default is Auto.
8 To set the flash mode, tap
Default is Auto.
94
and select an option
and select a value from the list.
and select an option from the list.
CN51 Mobile Computer User Manual
6
Configure the Computer
Use this chapter to learn about the available methods for
configuring your computer . You can also use this chapter to
learn how to configure network communications and wireless
security.
95
Chapter 6 — Configure the Computer
How to Configure the Computer
You can configure many parameters on the computer such as the bar
code symbologies it decodes, or the network settings. The values you
set for these parameters determine how the computer operates.
You configure the computer using the Settings app.
Start the Settings App
The Settings app is located in the All Apps menu.
•
Tap All Apps > Settings.
About the Structure of the Settings App
Use this section to learn about the structure of the Settings app so you
can find parameters quickly.
Wireless & Networks
96
Setting
Description
Wi-Fi
Turns the Wi-Fi radio on and off. When Wi-Fi is turned on,
tap the bar to see a list of Wi-Fi networks.
Bluetooth
Turns the Bluetooth radio on and off. When Bluetooth is
turned on, tap the bar to see a list of Bluetooth devices in
range.
CN51 Mobile Computer User Manual
Chapter 6 — Configure the Computer
Wireless & Networks (Continued)
Setting
Description
Data usage
Displays a list of phone data usage for the current data
usage cycle. Tap the Data usage cycle list to select another
date range.
More
Airplane mode: Turns airplane mode on and off.
VPN: Sets the password parameters for a virtual private
network (VPN).
Tethering & portable hotspot: Allows you to use the
computer as a portable Wi-Fi hotspot and enables
Bluetooth or USB tethering.
Mobile networks: Includes settings for mobile networks,
including enabling data access and roaming over mobile
networks, selecting access points and network operators, or
selecting only 2G networks (to save battery life).
Intermec
Setting
Description
Scanners
Internal Scanner: All settings for the scanner, including
bar code symbology decode options, trigger modes, and
security.
Virtual Wedge: Enables or disables the virtual wedge,
which sends bar code data to an application as keyboard
input.
Security: Enables or disables the ability to launch a website
when you scan a bar code containing URL data. Also
enables or disables scanner control from web applications.
Bug Reporter
Enables automatic error reports.
Contact Intermec Product Support before you enable Bug
Reporter. Because error reports may include screenshots or
other large files, automatic error reporting increases your
data usage. Do not enable reporting through your mobile
network unless specifically instructed to do so by Intermec
personnel.
CN51 Mobile Computer User Manual
97
Chapter 6 — Configure the Computer
Device
Setting
Description
Sound
Settings for the phone and notification sounds, including
tones and volume.
Display
Settings for the display brightness, wallpaper, sleep timeout,
font size, and screen auto-rotation.
Storage
Shows the remaining amount of storage.
Battery
Shows battery usage data and the current battery state.
Apps
Lists downloaded and running apps.
Personal
Setting
Description
Location services
Turns location services (Google and GPS satellite
data) on and off.
Security
Sets screen lock and administrator privileges.
Language & input
Selects the active language and default keyboard.
Sets auto-typing features such as capitalization and
punctuation. Adjusts the pointer speed for an
external mouse or trackpad.
Backup & reset
Restores factory default settings.
Accounts
Setting
Description
Add account
Adds a Corporate or Email account to this computer.
System
Setting
98
Description
Date & time
Configures all date and time settings.
Accessibility
Sets accessibility levels, such as larger display text
and enabling text-to-speech output.
Developer options
Enables developer-specific options such as USB
debugging and SD card protection.
CN51 Mobile Computer User Manual
Chapter 6 — Configure the Computer
System (Continued)
Setting
Description
About phone
Lists device-specific settings including the phone
number, operating system version, and build
number.
About Network Communications
You can use the mobile computer in your wireless or wired data
collection network. You can connect your computer using:
•
•
•
•
802.11 radio communications.
Ethernet communications.
Bluetooth communications.
USB and serial communications.
Connect to a Wi-Fi Network
The CN51 has an 802.11 radio to transfer data using wireless
communications. Before you connect to a Wi-Fi network, you need to
know about your network security protocol and its required
credentials.
By default, the 802.11 radio is disabled.
1 Start the Settings app and slide the Wi-Fi switch on.
CN51 Mobile Computer User Manual
99
Chapter 6 — Configure the Computer
2 When the switch turns blue, tap Wi-Fi. A list of discovered
networks appears.
3 To quickly connect to a network through Wi-Fi Protected Access
(WPS), tap . To search for a network not in the list, tap
and
type the network name.
100
CN51 Mobile Computer User Manual
Chapter 6 — Configure the Computer
4 Tap a network name in the list to view details:
If the network is secured, a list of required information appears
(such as a certificate name, a password, or other credentials). To
connect to the secured network, enter the required information
and tap Connect.
To leave a connected network, tap Forget. For example, you could
choose to forget a network you no longer use.
To close the network details screen, tap Cancel.
Configure Proxy Settings for a Wi-Fi Network
If you need to connect to network resources through a proxy server,
you can configure settings for the proxy server for each Wi-Fi network
you add. By default, the Wi-Fi networks you add are not configured to
connect through a proxy server.
Note: Proxy settings apply only to the Wi-Fi network you modify. You
must change proxy settings for each network requiring a proxy server.
1 Open the Settings app and tap Wi-Fi. The list of available Wi-Fi
networks appears.
2 Tap and hold the network name and then tap Modify network. A
list of network settings appears.
CN51 Mobile Computer User Manual
101
Chapter 6 — Configure the Computer
3 At the bottom of the list of network settings, select Show
advanced options.
4 If the network has no proxy settings, tap None in the Proxy
Settings list, and then tap Manual in that list.
5 Enter the proxy settings for the network.
6 Tap Save.
Disable Wi-Fi Notifications
By default, when Wi-Fi is enabled, you receive notifications in the
Status bar when the computer discovers a wireless network. You can
disable these notifications.
1 Start the Settings app.
2 Tap and hold Wi-Fi.
3 Tap and then tap Advanced. The Advanced Wi-Fi menu appears.
4 Clear the Network notification check box to disable notifications.
Connect to an Ethernet Network
To connect the conputer to an Ethernet network, you need an Ethernet
dock.
1 Make sure the dock is connected to your Ethernet network.
2 Place the computer in the dock.
3 Start the Settings app and make sure Ethernet is enabled (Ethernet
is enabled by default).
To enable Ethernet, slide the Ethernet switch on. When the switch
turns blue, Ethernet is enabled.
4 Tap Ethernet. The Ethernet list shows the name of the current
Ethernet connection. By default, the computer assumes a DHCP
connection, and that your network has assigned an IP address
automatically. If DHCP is working, the Ethernet dock should
indicate that communication with the network is occurring.
102
CN51 Mobile Computer User Manual
Chapter 6 — Configure the Computer
5 (Optional) To assign a static IP address, tap the connection name
(for example, eth0). The IP settings dialog box appears.
a Tap DHCP and then select Static from the list.
b Enter the required network information and then tap Apply.
How to Connect to Virtual Private Networks
The computer supports connecting to virtual private networks
(VPNs). This section describes how to add and connect to VPNs.
To configure VPN access, you must obtain details from your network
administrator. You view and change VPN settings in the Settings app.
Note: Before you can access VPNs, you must set a screen lock method.
Add a VPN
Before you can connect to a VPN, you must add VPN information.
Note: Before you can add or connect to a VPN, you must set a screen
lock method.
1 Start the Settings app.
2 In the Wireless & Networks section, tap More.
3 Tap VPN.
4 Tap Add VPN Profile.
5 Enter information for the VPN.
6 Tap Save. The VPN name appears in the VPN list.
Connect to a VPN
1 Start the Settings app.
2 In the Wireless & Networks section, tap More.
3 Tap VPN.
4 Tap the name of the VPN in the list, and enter any necessary
credentials when prompted.
CN51 Mobile Computer User Manual
103
Chapter 6 — Configure the Computer
5 Tap Connect. The computer connects to the VPN, and a Status
icon and notification appear.
To disconnect from the VPN, tap the notification.
Edit VPN Information
1 Start the Settings app.
2 In the Wireless & Networks section, tap More.
3 Tap VPN.
4 Tap and hold the name of the VPN you want to edit, and select Edit
network from the list.
5 Edit VPN settings as necessary.
6 When you are done, tap Save.
About Wireless Security
The computer provides these security solutions for your wireless
network:
• Wi-Fi Protected Access 2 (WPA2™)
• Wi-Fi Protected Access (WPA)
• 802.1x
• LEAP
• WEP
Intermec recommends WPA2 security with PSK (Personal) or 802.1x
(Enterprise) key management.
Before you set security, you need to enable the radio, set the date, and
set the SSID on your computer. To use 802.1x security, you need to
load a root certificate on your computer. To use transport layer
security (TLS) with 802.1x security, you also need to load a user
certificate.
104
CN51 Mobile Computer User Manual
Chapter 6 — Configure the Computer
Configure Wireless Security
Use the Settings app to access and configure all wireless security
settings.
About Certificates
You can use digital certificates to identify the computer for network
access or authentication to servers. To use a certificate to identify your
device, you must install it in the trusted credential storage on the
computer.
Android supports DER-encoded X.509 certificates saved in files with a
.crt or .cer file extension. To install a valid certificate with a .der or
other extension, you must change the extension to .crt or .cer to install
it.
Android also supports X.509 certificates saved in PKCS#12 key store
files with a .p12 or .pfx entension. To install a valid key store file with
another extension, you must change the extension to .p12 or .pfx to
install it. When you install a certificate from a PKCS#12 key store,
Android also installs any accompanying private key or certificate
authority certificates.
Load a Certificate
To use a certificate, you must install it in the trusted credential storage
on the computer.
1 Copy the certificate or key store from your PC to a microSD card.
2 Install the microSD card in the computer and turn the computer
on.
3 Start the Settings app and tap Security > Install from SD card.
4 Tap the name of the certificate or key store to install it. If
prompted, enter the key store password and tap OK.
5 Enter a name for the certificate and tap OK.
Note: Apps such as Email and Browser that support certificates allow
you to install certificates directly from within the app. For more
information, see the Help that comes with the app.
CN51 Mobile Computer User Manual
105
Chapter 6 — Configure the Computer
Disable or Remove Certificates
If a certificate is compromised, or your organization chooses not to
trust it, you can disable or remove it.
1 Start the Settings app and tap Security > Trusted credentials.
The trusted credentials screen has two tabs:
•
System shows CA certificates that are installed in the ROM.
• User shows CA certificates you have installed yourself.
2 Tap the name of the certificate to disable or remove. The certificate
details screen appears.
3 Scroll to the bottom of the details screen and tap Disable (for
System certificates) or Remove (for User certificates).
Note: If necessary, you can enable a disabled System certificate from
this location. If you remove a User certificate, you must install it again
to enable it.
4 Tap OK.
About Bluetooth Communications
The CN51 is Bluetooth-enabled, which lets you connect to other
Bluetooth devices.
You need to turn on the Bluetooth radio before you can discover and
connect to Bluetooth devices. By default, the radio is turned off.
The Bluetooth radio maintains its current state through a system
reset. If you perform a factory data reset, you must recreate pairings to
devices.
System bar icons indicate Bluetooth status.
106
CN51 Mobile Computer User Manual
Chapter 6 — Configure the Computer
Connect a Bluetooth Device
To connect to a Bluetooth device, you must enable Bluetooth and then
select the device from a list of discovered devices.
1 Start the Settings app.
2 If Bluetooth is off, slide the Bluetooth switch on.
3 Tap Bluetooth. A list of available Bluetooth devices appears.
4 (Optional) If the device you want does not appear in the list, make
sure the device is turned on and discoverable, and tap Search for
devices.
CN51 Mobile Computer User Manual
107
Chapter 6 — Configure the Computer
5 Tap a device in the list to select it. If a pairing request message
appears, enter the device PIN and tap OK. When the device is
paired with the computer, the device name appears in Paired
Devices at the top of the list.
6 To disconnect a paired device, tap the Quick Settings icon
to the device name and then tap Unpair.
next
Configure Bluetooth Settings
You configure Bluetooth settings in the Settings app.
1 Start the Settings app and tap Bluetooth.
2 Tap the Menu icon
108
and select a setting from the menu:
•
Tap Rename phone to change the computer device name. Type
the new name and then tap Rename.
•
Tap Visibility timeout to set the amount of time that the
computer is visible to other Bluetooth devices. By default, the
timeout is set to 2 minutes. You can select 5 minutes, one hour,
or no timeout. Setting a shorter timeout value preserves battery
life.
CN51 Mobile Computer User Manual
Chapter 6 — Configure the Computer
Rename or Disconnect a Paired Device
You can rename or disconnect a paired Bluetooth device from the
Settings app.
1 Open the Settings app and tap Bluetooth.
2 Tap the Settings icon
in the Paired Devices list.
3 To rename the device, tap Rename, type the new name, and then
tap OK.
To disconnect the device, tap Unpair.
View a List of Received Files
You can view a list of files received through the computer’s Bluetooth
connections with other devices.
1 Start the Settings app.
2 Tap Bluetooth and then tap the Menu icon
.
3 Tap Show received files. A list of files received through the
Bluetooth connection appears.
About Serial and USB Communications
You can use these accessories to transmit data to and receive data from
another device through serial or USB communications:
• AV10 vehicle dock
• AA21 RS-232 adapter
• AD27 single dock
• Desktop USB adapter
• USB snap-on adapter
• RS-232 DEX adapter
For information on these accessories, contact your local sales
representative.
CN51 Mobile Computer User Manual
109
Chapter 6 — Configure the Computer
How to Share Your Mobile Data Connection
You can share the mobile data connection through USB tethering or
Bluetooth tethering. You can also use the computer as a Wi-Fi hotspot
to share the connection with other devices.
Share the Data Connection Through USB
After you connect the computer to another device through USB, you
can share the data connection through USB tethering.
1 Connect the mobile computer to another device through a USB
dock, cable, or other connection.
2 Start the Settings app.
3 In the Wireless & networks section, tap More and then tap
Tethering & portable hotspot.
4 Tap USB tethering. The device is now sharing the computer data
connection.
To stop sharing the connection, disconnect the USB cable, or clear
the check box for USB tethering.
Share the Data Connection Through Bluetooth
If your device is Bluetooth-capable, you can configure the computer to
share its mobile data connection with the device through Bluetooth.
1 Start the Settings app.
2 In the Wireless & networks section, tap More and then tap
Tethering & portable hotspot.
3 Tap Bluetooth tethering. You should now be able to pair your
device with the computer to share the data connection.
To stop sharing the data connection, clear the check box for
Bluetooth tethering.
110
CN51 Mobile Computer User Manual
Chapter 6 — Configure the Computer
Share the Data Connection as a Portable Hotspot
You can configure the computer to act as a portable Wi-Fi hotspot for
up to eight other devices.
1 Start the Settings app.
2 In the Wireless & networks section, tap More and then tap
Tethering & portable hotspot.
3 To share the data connection as a Wi-Fi hotspot, tap Portable
Wi-Fi hotspot. The computer begins to broadcast its network
name (SSID) so you can connect to it with up to eight other devices.
To restrict access to the computer when you are using it as a Wi-Fi
hotspot, tap Set up Wi-Fi hotspot to select the security protocol
and set up a password. When other devices try to connect to the
hotspot, users are prompted to enter the password before the
devices are allowed to connect. Or, to remove secure access, select
Open from the Security list.
4 Touch Save.
CN51 Mobile Computer User Manual
111
Chapter 6 — Configure the Computer
112
CN51 Mobile Computer User Manual
7
Manage the Computer
Use this chapter to learn how to remotely update, configure,
and monitor your Intermec computers. You will also find
information on installing and developing software
applications as well as how to upgrade the system software.
113
Chapter 7 — Manage the Computer
How to Transfer Files
To transfer files you need to physically connect the mobile computer
to your desktop PC through a USB connection. When the computer is
connected through USB, you can browse to it and drag-and-drop to
move files back and forth to a Windows PC. If you are transferring files
to and from a Mac, use the Android File Transfer application (available
from www.android.com/filetransfer).
By default, the computer connects using MTP (Media Transfer
Protocol). If you are transferring mainly camera images, you can
configure the connection to use PTP (Picture Transfer Protocol). If
your Windows PC does not support MTP, you may be able to transfer
files using PTP instead.
Connect to a PC through USB
You can use a USB cable and dock to connect the computer to a
Windows PC to transfer files in both directions. If you are using USB
tethering, you must turn tethering off before you can transfer files
through USB.
1 Place the computer in a USB dock.
2 Connect the dock to your Windows PC. The mobile computer is
mounted as a drive, and you can copy files in either direction as
needed.
3 When you are done transferring files, disconnect the CN51.
Configure the USB Connection for PTP
By default, the CN51 connects through USB using MTP (Media
Transfer Protocol), supported by Windows 7 and later. If you are
transferring mainly camera images, you can configure the connection
to use PTP (Picture Transfer Protocol). If your computer does not
support MTP, you may be able to transfer files using PTP instead.
Note: PTP is supported by Windows XP and later. Your Windows XP
computer may also support MTP if it also supports Microsoft Media
Player 10.
114
CN51 Mobile Computer User Manual
Chapter 7 — Manage the Computer
1 Start the Settings app and tap Storage.
2 Tap .
3 Tap USB computer connection and then select Camera (PTP).
How to Develop and Install Applications
You need the Android SDK, the Intermec SDK Addon, and Intermec
SDKs for Android to develop applications for the CN51 running
Android.
To download and install the Android SDK, visit
developer.android.com/sdk/index.html. After you install the
Android SDK, you use SDK Manager to download and install the
Intermec SDK Addon.
Use the Intermec SDKs for Android to develop applications for the
computer. The SDKs can be downloaded from the Intermec website at
www.intermec.com/idl.
The SDKs are libraries of Java components grouped by functionality.
Intermec SDKs for Android include:
Data Collection: Provides functionality for using the imager in
your application.
• Printing: Provides text-based report printing functionality for your
application.
After you develop applications, you can install the apps using:
•
• ScanNGo bar codes.
• management applications.
• web installs.
• ADB push to the device.
For more information on developing and installing applications, see
developer.android.com.
CN51 Mobile Computer User Manual
115
Chapter 7 — Manage the Computer
Download the Intermec SDKs for Android
You can download the Intermec SDKs for Android from the Intermec
website.
Note: To ensure you install the most recent version of the SDK, and
for easy version control, Intermec recommends you download and
install the SDKs using the Android SDK Manager.
1 Go to www.intermec.com.
2 Select Support > Downloads.
3 In the Product Category list, select Software and Tools.
4 In the Product Family list, select Developer Library.
5 In the Product list, select SDKs for Android and then click
Submit.
6 Click the SDK name and follow the prompts to download the SDK.
You need to log in to download software.
Install the Intermec CN51 SDK Add-on with the SDK Manager
You use the Android SDK Manager to download and install the
Intermec CN51 SDK add-on software on your development PC. You
must install the Android SDK to use the SDK Manager. For more
information, visit developer.android.com.
Note: If you already downloaded the Intermec SDKs for Android from
the Downloads page at www.intermec.com, unzip the package to a
location on your development PC. However, to ensure you install the
most recent version of the package, and for easy version control,
Intermec recommends you install the package as described in this
procedure.
1 On your development PC, start Android SDK Manager.
2 Click Tools > Manage Add-on Sites and then click the
User-Defined Sites tab.
3 Click New.
4 Enter this text:
http://sdk.android.intermec.com:60093/sdk/addon.xml
116
CN51 Mobile Computer User Manual
Chapter 7 — Manage the Computer
5 Click OK and then click Close. The Intermec CN51 SDK add-on is
added to the list of items for Android 4.2.2 (API17).
6 In the Android 4.2.2 section, select the packages you want to install,
including Intermec CN51 (API17).
CN51 Mobile Computer User Manual
117
Chapter 7 — Manage the Computer
7 In the Extras section, select Intermec USB Driver.
(Optional) If you plan to use the Intermec SDKs for Android, select
Intermec Data Collection SDK and Intermec Print SDK.
8 Click Install x packages, whhere x is the number of packages you
selected in the previous step.
9 In the Choose Packages to Install dialog box, click Accept
License and then click Install. The packages are downloaded to
your development PC.
10 In the Android SDK folder on your development PC, browse to
extras\intermec\usb_driver and double-click
CN51_Windows_Drivers_1.xx.xx.xxxx.exe, where 1.xx.xx.xxxx is
the latest version number of the software. The Intermec USB driver
is installed on your development PC.
118
CN51 Mobile Computer User Manual
Chapter 7 — Manage the Computer
11 From the command line, browse to the tools directory in the
Android SDK directory and run this command:
android update adb
This command updates the Android Debug Bridge with the correct
vendor ID.
How to Set Up the Mobile Computer for App Development
There are a few tasks you need to accomplish to set up the mobile
computer for debugging and development work:
Declare your app as debuggable in your Android Manifest.
In the Settings app, you need to enable developer options and USB
debugging on the computer.
• Set up your development PC to detect your device.
If you plan to use the Android Debug Bridge utility, you need a driver
provided by Intermec. The driver is included with the Intermec SDK
add-on.
•
•
For more information on setting up your computer for app
development, go to: developer.android.com/tools/device.html.
Enable Developer Options
You can enable a variety of options intended to help develop
applications quickly, including USB debugging, capturing bug
reports, or showing CPU usage on the screen. For more information on
the developer options, see developer.android.com.
1 Start the Settings app.
2 In the System section, tap Developer options.
3 Slide the Developer options switch on and enable the options you
need.
CN51 Mobile Computer User Manual
119
Chapter 7 — Manage the Computer
How to Update the System Software
You can use these methods to update the system software on the
computer:
•
•
You can update individual computers, or multiple computers at
the same time, using a device management system. For help, see the
documentation for your device management system.
You can update individual computers by copying the software
update file to the internal storage (or an installed microSD card) on
each computer. Then you can manually start the system update
from the Settings app.
Update Computers Using a Device Management System
You can update multiple computers at the same time using a device
management system. Several mobile device management sytems
support the CN51 running Android, including Honeywell Remote
MasterMind, Intermec Skynax, and other third-party solutions.
Contact these suppliers for information about obtaining their agent or
client software for use with the CN51.
Update the System Software
You can update the system software by copying the update file to the
computer internal storage or to an installed microSD card. Then you
can manually start the system update from the Settings app.
Note: Do not unzip the software update file after you download the
file.
1 Go to www.intermec.com and click Support > Downloads.
2 In the Or Locate Product section:
a Select Computers in the Product Category list.
b Select Handheld Computers in the Product Family list.
c
Select CN51 Mobile Computer in the Product list.
3 Click Submit. A list of downloads for the CN51 appears.
120
CN51 Mobile Computer User Manual
Chapter 7 — Manage the Computer
4 Locate the Android software update file and click the file name to
download the file to your PC. You need to log in to download
software.
5 Copy the software update file to the internal storage or to an
installed microSD card on the CN51. Or, you can copy the file to a
microSD card and then install the card in the computer.
6 Start the Settings app and tap About phone > System updates.
7 Tap the file name and then tap OK. The update begins and may
take several minutes. When the update is complete, the computer
restarts.
CN51 Mobile Computer User Manual
121
Chapter 7 — Manage the Computer
122
CN51 Mobile Computer User Manual
8
Troubleshoot and Maintain the Computer
Use this chapter to find answers to any problems you may
encounter while using the computer. You will also find
information on routine maintenance.
123
Chapter 8 — Troubleshoot and Maintain the Computer
About Troubleshooting the Computer
These troubleshooting tables may help you fix some common
problems you may experience with your computer. These tables group
solutions for the Wi-Fi connection, 802.1x security, the scanner, and
general operation of the computer.
Note: If you send the computer in for service, it is your responsibility
to save the computer data and its configuration. Intermec is only
responsible for ensuring that the hardware matches the original
configuration when repairing or replacing the computer.
Wi-Fi Connection Problems
Use this section to find possible solutions to Wi-Fi connection
problems.
Wi-Fi Connection Problems and Possible Solutions
124
Problem
Possible Solution
When you turn on the, mobile
computer after it was
suspended for 10 to 15 minutes
or longer, the mobile computer
can no longer send or receive
messages over the network.
The host may have deactivated or lost the
current terminal emulation session. In a
TCP/IP direct connect network, turn off the
“Keep Alive” message from host to maintain
the TCP session while the computer is
suspended.
The computer is connected to
the network, and you move to a
new site to collect data. Now,
your mobile computer is not
connected to the network.
Move closer to an access point or to a
different location to reestablish
communications until you reconnect with
the network. Any data collected while out of
range is transmitted over the network.
The mobile computer appears
to be connected to the network,
but you cannot establish a
terminal emulation session
with the host computer.
Move closer to an access point or to a
different location to reestablish
communications until you reconnect with
the network. Any data collected while out of
range is transmitted over the network.
The mobile computer appears
to be connected to the network,
but the host computer is not
receiving any information from
the mobile computer.
There may be a problem with the
connection between the access point and
the host computer. Check with network
administrator or use your access point
user’s manual.
CN51 Mobile Computer User Manual
Chapter 8 — Troubleshoot and Maintain the Computer
802.1x Security Problems
Use this section to find possible solutions to 802.1x security problems.
802.1x Security Problems and Possible Solutions
Problem
Possible Solution
Make sure the mobile computer IP address, host
The mobile computer
IP address, subnet mask, and default router are
indicates that it is
authenticated, but it does configured for the network.
not communicate with the
host.
The mobile computer does • The mobile computer may not be
not appear to be
communicating with the access point. Make
authenticating and a
sure the mobile computer network name
network connection icon
matches the access point network name
does not appear on the
(SSID).
toolbar.
• The access point may not be communicating
with the server. Ensure the access point is
turned on, properly configured, and has
802.1x security enabled.
A network connection icon • The mobile computer may not be
appears in the toolbar, but
communicating with the intended access
then disappears.
point. Make sure that the network name
matches the access point network name. The
default network name is “INTERMEC.”
• The access point may not be communicating
with the server. Ensure the access point is
turned on, properly configured, and has
802.1x security enabled.
You are setting up multiple When you change the SSID, the WEP key values
access points in a network are not saved. Configure the WEP key values
with different SSIDs, and and save your changes.
the connection fails.
CN51 Mobile Computer User Manual
125
Chapter 8 — Troubleshoot and Maintain the Computer
802.1x Security Problems and Possible Solutions (Continued)
Problem
Possible Solution
The mobile computer
indicates it is not
authenticated.
Make sure that:
• the User Name and Password parameters on
the mobile computer match the user name
and password on the authentication server.
You may need to configure the password on
both the mobile computer and the
authentication server.
• on your authentication server, the user and
group are allowed and the group policy is
allowed to log into the server. For help, see
the documentation that shipped with your
authentication server software.
• the IP address and secret key for the access
point match the IP address and secret key on
the authentication server. You may need to
configure the IP address and secret key on
both your access point and authentication
server.
• the authentication server software is running
on the server PC.
You clean boot the mobile When you clean boot the computer, the date
computer and this message and time are not saved. Configure the date and
time and save your changes.
appears, “The server
certificate has expired or
your system date is
incorrect.”
126
CN51 Mobile Computer User Manual
Chapter 8 — Troubleshoot and Maintain the Computer
Problems Reading Bar Codes
You can troubleshoot problems that prevent you from reading bar
codes, such as the appropriate symbology not being enabled. Before
you call Intermec Product Support, look for your problem in the next
table, and try the possible solutions.
Problems Reading Bar Codes
Problem
Possible Solution
You cannot see the illumination • You may be too far away from the bar
code label. Try moving closer to the
beam or frame from the scanner
bar code label and scan it again.
when you press the Scan button
and aim the scanner at a bar code • You may be reading the bar code label
label.
“straight on.” Change the reading
angle and try again.
When you release the Scan
button or scan handle trigger, the
Good Read LED does not turn
off.
CN51 Mobile Computer User Manual
If you configure the computer to use
continuous/edge triggering, the Good
Read LED stays on. If you configure the
computer for level triggering and the
Good Read LED stays on, there may be a
problem. Press the Scan button or pull
the trigger again without scanning a bar
code label. If the LED is still on, contact
Intermec.
127
Chapter 8 — Troubleshoot and Maintain the Computer
Problems Reading Bar Codes (Continued)
Problem
Possible Solution
The scanner cannot read the bar • Position the scanner beam so that it
code.
crosses the entire bar code label in one
pass. Try to vary the scanning angle.
• Check the quality of the bar code label.
Scan a bar code label that you know
scans properly. Compare the quality of
the two bar code labels. You may need
to replace the label that you cannot
scan.
• Make sure the bar code symbology is
enabled and configured correctly.
Start the Settings app and check the
scanner settings to verify that
decoding is enabled for the symbology
you are using.
• Make sure the computer application is
expecting input from a bar code. You
may need to type this information
instead.
The scanner cannot read the bar
code quickly, or the scanning
beam seems to be faint or
obscured.
The scanner window may be dirty. Clean
the window with a solution of mild soap
and water. Wipe dry. Do not allow
abrasive material to touch the window.
You read a valid bar code label to
enter data for your application.
The data decoded by the scan
module does not match the data
encoded in the bar code label.
The computer may have decoded the bar
code label in another symbology. Scan the
bar code label again. Make sure you scan
the entire label.
The input device attached to the Set the Scanner Model command to the
computer does not work well or specific attached input device. Enable
read bar code labels very quickly. only the bar code symbologies being used.
128
CN51 Mobile Computer User Manual
Chapter 8 — Troubleshoot and Maintain the Computer
Problems Using the Computer
You can troubleshoot general problems while using the computer.
Before you call Intermec Product Support, look for your problem in
the next table, and try the possible solutions.
Problems Using the Computer
Problem
Possible Solution
You press the Power button and The battery may be completely drained.
nothing happens.
Replace or charge the battery and then
restart the computer.
The computer screen appears to
be locked up, and you cannot
enter data.
• Press the Power button to suspend the
computer, and then press Power again
to turn the screen back on.
• Reset the computer by selecting Reset
from the power options screen.
• Remove the battery and place it in a
charge dock to make sure it is charged,
and then replace it in the computer.
• Remove the battery and replace it with
a fully charged battery.
• Press and hold the Power button for at
least 15 seconds to completely turn off
the computer, and then press Power
again to turn the computer back on.
If none of these solutions is successful,
you need to contact Intermec Product
Support.
You cannot type a character on The orange or green modifier key may be
the keypad, or you can only type locked. Unlock the key and try again.
uppercase or lowercase letters.
CN51 Mobile Computer User Manual
129
Chapter 8 — Troubleshoot and Maintain the Computer
Call Product Support
If you are having trouble using your computer, you can:
use the troubleshooting tables in this manual to find your problem
and possible solutions.
• visit the Intermec technical knowledge base, Knowledge Central at
intermec.custhelp.com.
If you still need help, you can call Intermec Product Support at:
•
1-800-755-5505
Before you call Product Support, have this information ready:
Configuration number (CN) and serial number (SN), printed on a
label inside the battery compartment.
• Operating system version
• Power management settings
• Wireless security settings
Most information is available in the Settings app.
•
Locate the Build Version and Configuration String Using the
Settings App
Before you call Product Support, you should have the Android build
version and computer configuration string handy for reference. You
can find this information in the Settings app.
Note: If the computer is locked up and you cannot start the Settings
app, you can find the configuration string (beginning with the
characters “CN51”) on the label on the access door inside the battery
compartment.
1 Start the Settings app and tap About phone. The Android build
version is located at the bottom of this list of information.
2 Tap Status. The computer configuration string is located at the
bottom of this list.
130
CN51 Mobile Computer User Manual
Chapter 8 — Troubleshoot and Maintain the Computer
Locate the Configuration String in the Battery Compartment
If the computer is locked up and you cannot start the Settings app, you
can find the configuration string on the label on the access door inside
the battery compartment.
1 Press and hold the Power button.
2 Tap Battery swap. The computer briefly shows a status message
and the LEDs turn on. When the LEDs turn off, continue with the
next step.
If the computer is in a dock, you must remove it from the dock
before you can select Battery swap.
3 If necessary, disconnect the handstrap from the top of the
computer.
4 Push forward on the battery release tab until the battery releases,
and then lift the battery away from the computer.
The configuration string (beginning with the characters “CN51”) is
located in the center of the label on the access door in the battery
compartment.
$POGJHVSBUJPO
MBCFM
CN51 Mobile Computer User Manual
131
Chapter 8 — Troubleshoot and Maintain the Computer
Reset the Computer
If the computer or an application seems to be locked up, you can try
resetting the computer to restore the operating system. You may lose
data in open apps when you reset the computer. All your settings are
saved during a reset.
1 Press and hold the Power button. This screen appears:
2 Tap Reset. The computer restarts.
Perform a Factory Data Reset
Caution: Performing a factory data reset completely erases all
data, files, and downloaded apps from the computer memory.
Back up your data and files before proceeding.
You can perform a factory data reset, which restores all default settings
on the computer and erases all data, files, and downloaded apps.
1 Start the Settings app and tap Backup & reset > Factory data
reset.
132
CN51 Mobile Computer User Manual
Chapter 8 — Troubleshoot and Maintain the Computer
2 Tap Reset phone. A confirming message appears, reminding you
that you cannot reverse this action.
3 Tap Erase everything. The computer restarts and all user data,
files, and downloaded apps are erased.
Clean the Computer
To keep the computer in good working order, you may need to clean
the scanner window, color camera window, and the touch screen.
Clean the windows and the touch screen as often as needed for the
environment in which you are using the computer. To clean the
computer, use one of these recommended cleaning agents:
• Acetic acid, 10% in water
• Ethyl alcohol, 10% in water
• Mild soap solutions
• 5% to no more than 10% bleach or sodium hypochlorite with water
Caution: There are no user-serviceable parts inside the computer.
Opening the computer will void the warranty and may cause
damage to the internal components.
Note: Intermec recommends that you leave the battery installed when
you clean the computer as described. Leaving the battery installed
helps prevent fluids from entering the computer through the SIM card
and microSD card connectors.
1 Press the Power button to suspend the computer.
2 Dip a clean cloth towel in the cleaning agent and wring out the
excess.
3 Wipe off the scanner window, camera lens, and flash area. Do not
allow any abrasive material to touch these surfaces.
4 Wipe dry.
5 Let the computer completely air dry before using again.
CN51 Mobile Computer User Manual
133
Chapter 8 — Troubleshoot and Maintain the Computer
134
CN51 Mobile Computer User Manual
A
Specifications
135
Appendix A — Specifications
Physical and Environmental Specifications
This section lists the physical and environmental specifications for the
computer.
Physical Dimensions
Length:
16.5 cm (6.5 in)
Width (at widest part):
7.6 cm (3.0 in)
Depth (at grip):
3.2 cm (1.25 in)
Weight (with battery):
350 g (12.3 oz)
Tumble and Drop Specifications
Tumble Specification:
1,000 (0.5 m) tumbles per IEC 60068-2-32
specification.
Drop Specification:
Multiple 1.5 m (5 ft) drops to concrete at
ambient temperature, multiple 1.2 m (4
ft) drops to concrete across the operating
temperature range per MIL-STD 810G.
Power and Electrical Specifications
Operating battery:
Rechargeable lithium-ion battery
Backup battery:
Supercap supplies 1.5 minutes of bridge
time while replacing the main battery.
Electrical rating:
4,65 V, 3 A
Temperature and Humidity Specifications
136
Operating temperature:
-10 °C to 50 °C (14 °F to 122 °F)
Storage temperature:
-20 °C to 60 °C (-4 °F to 140 °F).
For maximum battery life store at 23 °C
(73 °F) at 50% charge.
Charging temperature:
0 °C to 45 °C (32 °F to 113 °F).
20 °C to 25 °C (68 °F to 77 °F) will
provide extended battery life.
Relative humidity (operating):
5% to 95% non-condensing
Environmental rating:
IP54, Category 1
CN51 Mobile Computer User Manual
Appendix A — Specifications
Screen Specifications
•
•
•
•
•
480 x 800 pixels
10.16 cm (4.0 in) transmissive WVGA display
LCD capable of both portrait and landscape operation
LED backlight
Ambient light sensor
Keypad Options
• Alphanumeric keypad
• Numeric keypad
Bar Code Symbologies
•
•
•
•
•
•
•
•
•
•
•
•
•
•
•
•
•
•
Australia Post*
Aztec*
BPO (British Post 4-state)*
Canada Post
Codabar
Codablock A
Codablock F
Code 11
Code 39
Code 93
Code 128/GS1-128
DataMatrix*
Dutch Post*
EAN/UPC
GS1 Composite*
GS1 DataBar Expanded
GS1 DataBar Limited
GS1 DataBar Omni-Directional
CN51 Mobile Computer User Manual
•
•
•
•
•
•
•
•
•
•
•
•
•
•
•
•
•
•
HanXin
Infomail
Intelligent Mail
Interleaved 2 of 5
JapanPost*
Matrix 2 of 5
Maxicode*
Micro PDF417
MSI
PDF417*
Planet*
Plessey
Postnet*
QR Code*
Standard 2 of 5
SwedenPost
Telepen
TLC 39
137
Appendix A — Specifications
EA31 Extended Reading Range
These typical reading distances are measured in an office environment
(250 lux) for the EA31 standard model with Extended Reading Range
activated. Extended Reading Range is enabled by default.
JO
NNNJMT
&"/61$
NNNJMT
NNNJMT
DN
EA31 Extended Reading Range
EA31 Extended Reading Range Activated
Symbology
Density
Minimum Distance Maximum Distance
Code 39
0.125 mm/5 mils 4.50 cm/1.77 in
0.50 mm/20 mils 6.00 cm/2.36 in
12.50 cm/4.92 in
1 mm/40 mils
EAN/UPC 100% 0.33 mm/13 mils 4.50 cm/1.77 in
138
22.50 cm/8.86 in
64.00 cm/25.20 in
97.50 cm/38.39 in
41 cm/16.14 in
CN51 Mobile Computer User Manual
Appendix A — Specifications
EA31 Minimum Reading Distances
Minimum reading distances are measured in the dark (0 lux).
JO
%BUB.BUSJYNJMT
1%'NJMT
NNNJMT
&"/61$
NNNJMT
NNNJMT
DN
EA31 Minimum Reading Distances
EA31 Minimum Reading Distances
Symbology
Density
Minimum
Distance
Maximum Distance
Code 39
0.10 mm/4 mils
0.13 mm/5 mils
0.20 mm/8 mils
0.25 mm/10 mils
0.50 mm/20 mils
1 mm/40 mils
8 cm/3.15 in
7 cm/2.76 in
4 cm/1.57 in
3.8 cm/1.5 in
7 cm/2.76 in
13.5 cm/5.31 in
10 cm/3.94 in
13 cm/5.12 in
20 cm/7.87 in
24.5 cm/9.65 in
45 cm/17.72 in
71.5 cm/28.15 in
EAN/UPC 100% 0.33 mm/13 mils 5 cm/1.97 in
CN51 Mobile Computer User Manual
29.5 cm/11.61 in
139
Appendix A — Specifications
EA31 Minimum Reading Distances (Continued)
Minimum
Distance
Symbology
Density
Maximum Distance
DataMatrix
0.18 mm/7 mils 7 cm/2.76 in
0.25 mm/10 mils 5 cm/1.97 in
0.38 mm/15 mils 5.2 cm/2.05 in
14 cm/5.51 in
20 cm/7.87 in
29.5 cm/11.61 in
PDF417
0.17 mm/6.6 mils 5.8 cm/2.28 in
0.25 mm/10 mils 4 cm/1.57 in
0.38 mm/15 mils 4.9 cm/1.93 in
17.5 cm/6.89 in
26.5 cm/10.43 in
37 cm/14.57 in
EA31 Typical Reading Distances
Minimum reading distances are measured in the dark (0 lux).
JO
%BUB.BUSJYNJMT
1%'NJMT
NNNJMT
&"/61$
NNNJMT
NNNJMT
DN
EA31 Typical Reading Distances
140
CN51 Mobile Computer User Manual
Appendix A — Specifications
EA31 Typical Reading Distances
Symbology
Density
Minimum
Distance
Maximum Distance
Code 39
0.10 mm/4 mils
0.13 mm/5 mils
0.20 mm/8 mils
0.25 mm/10 mils
0.50 mm/20 mils
1 mm/40 mils
7.5 cm/2.95 in
6.5 cm/2.56 in
4 cm/1.57 in
3.5 cm/1.38 in
6.5 cm/2.56 in
12.5 cm/4.92 in
10.5 cm/4.13 in
13.5 cm/5.31 in
21 cm/8.27 in
25.5 cm/10 in
49 cm/19.29 in
90 cm/35.43 in
EAN/UPC 100% 0.33 mm/13 mils 4.5 cm/1.77 in
30.5 cm/12.01 in
DataMatrix
0.18 mm/7 mils 6.5 cm/2.56 in
0.25 mm/10 mils 4.5 cm/1.77 in
0.38 mm/15 mils 4.7 cm/1.85 in
15 cm/5.91 in
21 cm/8.27 in
31 cm/12.20 in
PDF417
0.17 mm/6.6 mils 5 cm/1.97 in
0.25 mm/10 mils 3.7 cm/1.46 in
0.38 mm/15 mils 4.5 cm/1.77 in
18.2 cm/7.17 in
27.5 cm/10.83 in
40 cm/15.75 in
CN51 Mobile Computer User Manual
141
Appendix A — Specifications
EA30 Extended Reading Range
These typical reading distances are measured in an office environment
(250 lux) for the EA30 standard model with Extended Reading Range
activated. Extended Reading Range is enabled by default.
JO
NNNJMT
&"/61$
NNNJMT
NNNJMT
DN
EA30 Extended Reading Range Activated
EA30 Extended Reading Range Activated
Symbology
Density
Minimum Distance Maximum Distance
Code 39
0.125 mm/5 mils 64.50 cm/2.56 in
0.50 mm/20 mils 7.00 cm/2.76 in
14.50 cm/5.71 in
1 mm/40 mils
EAN/UPC 100% 0.33 mm/13 mils 6 cm/2.36 in
142
24.50 cm/9.65 in
62.50 cm/24.61 in
97.50 cm/38.39 in
40 cm/15.75 in
CN51 Mobile Computer User Manual
Appendix A — Specifications
EA30 Minimum Reading Distances
Minimum reading distances are measured in the dark (0 lux).
JO
%BUB.BUSJYNJMT
1%'NJMT
NNNJMT
&"/61$
NNNJMT
NNNJMT
DN
EA30 Minimum Reading Distances
EA30 Minimum Reading Distances
Symbology
Density
Minimum
Distance
Maximum Distance
Code 39
0.10 mm/4 mils
0.13 mm/5 mils
0.50 mm/20 mils
1 mm/40 mils
9.5 cm/3.74 in
8 cm/3.15 in
7 cm/2.76 in
9.5 cm/3.74 in
10.5 cm/4.13 in
14 cm/5.51 in
45 cm/17.72 in
62 cm/24.41 in
EAN/UPC 100% 0.33 mm/13 mils 6 cm/2.36 in
DataMatrix
CN51 Mobile Computer User Manual
0.18 mm/7 mils 8 cm/3.15 in
0.25 mm/10 mils 6.5 cm/2.56 in
0.38 mm/15 mils 5.5 cm/2.17 in
31.5 cm/12.4 in
15.5 cm/6.1 in
21.5 cm/8.46 in
31.5 cm/12.4 in
143
Appendix A — Specifications
EA30 Minimum Reading Distances (Continued)
Minimum
Distance
Symbology
Density
Maximum Distance
PDF417
0.25 mm/10 mils 5.5 cm/2.17 in
0.38 mm/15 mils 7 cm/2.76 in
25 cm/9.84 in
34 cm/13.39 in
EA30 Typical Reading Distances
Minimum reading distances are measured in the dark (0 lux).
JO
%BUB.BUSJYNJMT
1%'NJMT
NNNJMT
&"/61$
NNNJMT
NNNJMT
DN
EA30 Typical Reading Distances
144
CN51 Mobile Computer User Manual
Appendix A — Specifications
EA30 Typical Reading Distances
Symbology
Density
Minimum
Distance
Maximum Distance
Code 39
0.10 mm/4 mils
0.13 mm/5 mils
0.50 mm/20 mils
1 mm/40 mils
9.5 cm/3.74 in
8 cm/3.15 in
6.5 cm/2.56 in
9.5 cm/3.74 in
11.5 cm/4.53 in
14.5 cm/5.71 in
50 cm/19.69 in
75 cm/29.53 in
EAN/UPC 100% 0.33 mm/13 mils 6 cm/2.36 in
34 cm/13.39 in
DataMatrix
0.18 mm/7 mils 7.5 cm/2.95 in
0.25 mm/10 mils 6 cm/2.36 in
0.38 mm/15 mils 5.5 cm/2.17 in
16.5 cm/6.5 in
23 cm/9.06 in
34.5 cm/13.58 in
PDF417
0.25 mm/10 mils 5.5 cm/2.17 in6.5
0.38 mm/15 mils cm/2.56 in
26 cm/10.24 in
37 cm/14.57 in
CN51 Mobile Computer User Manual
145
Appendix A — Specifications
146
CN51 Mobile Computer User Manual
B
Default Settings
147
Appendix B — Default Settings
Wireless and Network Settings
This section lists all default wireless and network settings for the
conputer.
Wireless & Network Settings
Wireless & Network Settings
Default
Wi-Fi
Off
Bluetooth
Off
Ethernet
On
eth0
DHCP
Airplane mode
Disable
Portable Wi-Fi hotspot
Disable
Set up Wi-Fi hotspot
• Network SSID: AndroidAP
• Security: WPA2 PSK
• Password: e61d78d7c877
Bluetooth tethering
Disable
Mobile network settings
• Data enabled: Enable
• Data Roaming: Disable
• Use only 2G networks: Disable
Scanner Settings
This section lists all default settings for the internal scanner.
Scanner Settings
148
Setting
Default
Internal Scanner
On
Virtual Wedge
On
Security
• Open URLs by Scanning: Enable
• Web access: Disable
CN51 Mobile Computer User Manual
Appendix B — Default Settings
Internal Scanner - Symbologies
Symbologies
Default Value
Australian Post
Off
Aztec
Off
BPO
Off
CanadaPost
Off
Codabar
Off
Codablock A
Off
Codablock F
Off
Code 11
Off
Code 39
On
Code 93
Off
Code 128
On
DataMatrix
On
DutchPost
Off
EAN-8
On
EAN-13
On
GS1 Composite
Off
GS1 DataBar Expanded
Off
GS1 DataBar Limited
Off
GS1 DataBar Omni-Directional
Off
GS1-128
On
Han Xin
Off
Infomail
Off
Intelligent Mail
Off
Interleaved 2 of 5
Off
ISBT 128
Off
JapanPost
Off
Matrix 2 of 5
Off
Maxicode
Off
Micro PDF417
Off
MSI
Off
PDF417
On
CN51 Mobile Computer User Manual
149
Appendix B — Default Settings
Internal Scanner - Symbologies (Continued)
Symbologies
Default Value
Planet
Off
Plessey
Off
Postnet
Off
QR Code
Off
Standard 2 of 5
Off
SwedenPost
Off
Telepen
Off
TLC 39
Off
UPC-A
On
UPC-E
On
UPC-E1
Off
Internal Scanner - Symbology Options
Symbology Option
Default
Preamble
None
Postamble
None
Symbology identifier
Disable
Internal Scanner - Scanner Settings
Scanner Settings
150
Default
Hardware trigger
Enable
Trigger mode
Level
Aimer mode
Typical aimer
Turn off after good read
Enable/One-shot
Trigger timeout (s)
2
Aiming duration (ms)
500
Retrigger delay (ms)
0
CN51 Mobile Computer User Manual
Appendix B — Default Settings
Internal Scanner - Decode Security Settings
Decode Security Settings
Default
Consecutive data validation
0
Identical consecutive codes
timeout
0
Different consecutive codes
timeout
0
Center decoding
Disable
Center decoding tolerance
0
Device Settings
This section lists all default settings for computer-specific features
such as sounds, battery management, or display settings.
Sound Settings
Sound Settings
Default
Volumes
• Music, video, games, & other media:
About 80% of full volume
• Ringtone & notifications: About 80%
of full volume
• Alarms: 100% of full volume
Phone ringtone
Flutey phone
Vibrate when ringing
Disable
Default notification
Pixie dust
Dial pad touch tones
Enable
Touch sounds
Enable
Screen lock sound
Enable
Vibrate on touch
Enable
Display Settings
Display Settings
Default
Brightness
Automatic brightness: Enabled
CN51 Mobile Computer User Manual
151
Appendix B — Default Settings
Display Settings (Continued)
Display Settings
Default
Wallpaper
Soundwave
Auto-rotate screen
Enable
Sleep
After 1 minute of inactivity
Font size
Normal
Personal Settings
This section lists default personal settings, including security features
and language choices.
Personal Settings
Personal Settings
Default
Location services
•
•
•
•
•
•
•
Security
Language & input
152
Google’s location service: Disable
GPS satellites: Disable
Screen lock: Slide
Make passwords visible: Enable
Unknown sources: Disable
Spell checker: Enable
Default keyboard: English (US) Android keyboard (AOSP)
• Pico TTS settings: English (United
States), Normal speech rate
• Mouse/trackpad pointer speed:
Medium
CN51 Mobile Computer User Manual
Appendix B — Default Settings
System Settings
This section lists default system settings, including accessibility and
developer options.
Date & Time Settings
Date & Time Settings
Default
Automatic date & time
Enable
Automatic time zone
Enable
Use 24-hour format
Disable
Choose date format
Regional
Accessibility Settings
Accessibility Settings
Default
Large text
Disable
Power button ends call
Disable
Auto-rotate screen
Enable
Speak passwords
Disable
Text-to-speech output
• Language: English (United States)
• Speech rate: Normal
Touch & hold delay
Short
Enhance web accessibility
Not allowed
Developer Options
Developer Options
Default
Developer options
Off
Desktop backup password
None specified
Stay awake
Disable
Protect SD card
Disable
USB debugging
Disable
Allow mock locations
Disable
Select debug app
None specified
CN51 Mobile Computer User Manual
153
Appendix B — Default Settings
Developer Options (Continued)
Developer Options
Default
Show touches
Disable
Pointer location
Disable
Show layout bounds
Disable
Show GPU view updates
Disable
Show surface updates
Disable
Window animation scale
Animation scale 1x
Transition animation scale
Animation scale 1x
Animator duration scale
Animation scale 1x
Disable HW overlays
Disable
Force GPU rendering
Disable
Strict mode enabled
Disable
Show CPU usage
Disable
Profile GPU rendering
Disable
Enable traces
None specified
Don’t keep activities
Disable
Background process limit
Standard limit
Show all ANRs
Disable
Note: All developer options are turned off by default. The options
listed are enabled only when developer options are turned on. For
more information, go to developer.android.com.
154
CN51 Mobile Computer User Manual
by Honeywell
6001 36th Avenue West
Everett, Washington 98203
U.S.A.
tel 425.348.2600
fax 425.355.9551
www.intermec.com
© 2014 Intermec by Honeywell
All rights reserved.
CN51 Mobile Computer User Manual
*935-078-002*
P/N 935-078-002