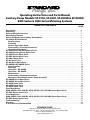
1
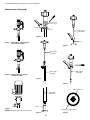
Operating Instructions and Parts Manual
Sanitary Pump Models: SP-8100, SP-8200, SP-800SR & SP-800DD
8300 Series & 8500 Series Metering Systems
TABLE OF CONTENTS
Description . . . . . . . . . . . . . . . . . . . . . . . . . . . . . . . . . . . . . . . . . . . . . . . . . . . .
Unpacking . . . . . . . . . . . . . . . . . . . . . . . . . . . . . . . . . . . . . . . . . . . . . . . . . . . . .
General Safety Information . . . . . . . . . . . . . . . . . . . . . . . . . . . . . . . . . . . . . . . .
Motor Specifications . . . . . . . . . . . . . . . . . . . . . . . . . . . . . . . . . . . . . . . . . . . . .
Use Of Air Motors In Hazardous Atmospheres . . . . . . . . . . . . . . . . . . . . . . . . .
SP-8100 & SP-8200 Series
Specifications . . . . . . . . . . . . . . . . . . . . . . . . . . . . . . . . . . . . . . . . . . . . . . . .
Assembly . . . . . . . . . . . . . . . . . . . . . . . . . . . . . . . . . . . . . . . . . . . . . . . . . . .
General Operation Guide . . . . . . . . . . . . . . . . . . . . . . . . . . . . . . . . . . . . . . .
Disassembly / Cleaning Procedures . . . . . . . . . . . . . . . . . . . . . . . . . . . . . .
Grounding Procedures . . . . . . . . . . . . . . . . . . . . . . . . . . . . . . . . . . . . . . . . .
SP-8100 Ultra Flow Series Spare Parts . . . . . . . . . . . . . . . . . . . . . . . . . . . . . . .
SP-8200 Sanitary Series Spare Parts . . . . . . . . . . . . . . . . . . . . . . . . . . . . . . . .
SP-280P Series Spare Parts . . . . . . . . . . . . . . . . . . . . . . . . . . . . . . . . . . . . . . .
SP-ENC Series Spare Parts . . . . . . . . . . . . . . . . . . . . . . . . . . . . . . . . . . . . . . . .
SP-400-2 Spare Parts . . . . . . . . . . . . . . . . . . . . . . . . . . . . . . . . . . . . . . . . . . . .
SP-A1 Spare Parts . . . . . . . . . . . . . . . . . . . . . . . . . . . . . . . . . . . . . . . . . . . . . . .
SP-A2 Series Spare Parts . . . . . . . . . . . . . . . . . . . . . . . . . . . . . . . . . . . . . . . . .
SP-800SR & SP-800DD Series . . . . . . . . . . . . . . . . . . . . . . . . . . . . . . . . . . . . . .
Specifications . . . . . . . . . . . . . . . . . . . . . . . . . . . . . . . . . . . . . . . . . . . . . . . .
Assembly . . . . . . . . . . . . . . . . . . . . . . . . . . . . . . . . . . . . . . . . . . . . . . . . . . .
Operation – SP-800SR . . . . . . . . . . . . . . . . . . . . . . . . . . . . . . . . . . . . . . . . .
Operation – SP-800DD . . . . . . . . . . . . . . . . . . . . . . . . . . . . . . . . . . . . . . . . .
Maintenance . . . . . . . . . . . . . . . . . . . . . . . . . . . . . . . . . . . . . . . . . . . . . . . . .
Disassembly / Cleaning Procedures . . . . . . . . . . . . . . . . . . . . . . . . . . . . . .
Mechanical Seal Replacement / Pump Assembly . . . . . . . . . . . . . . . . . . . .
SP-800SR Series Spare Parts . . . . . . . . . . . . . . . . . . . . . . . . . . . . . . . . . . . . . .
SP-800DD Series Spare Parts . . . . . . . . . . . . . . . . . . . . . . . . . . . . . . . . . . . . . .
SP-A4FP Spare Parts . . . . . . . . . . . . . . . . . . . . . . . . . . . . . . . . . . . . . . . . . . . .
SP-A6FP Spare Parts . . . . . . . . . . . . . . . . . . . . . . . . . . . . . . . . . . . . . . . . . . . .
SP-A8FP Spare Parts . . . . . . . . . . . . . . . . . . . . . . . . . . . . . . . . . . . . . . . . . . . .
Ultra Mass Series . . . . . . . . . . . . . . . . . . . . . . . . . . . . . . . . . . . . . . . . . . . . . . .
8500, 8500BL, 8501, 8501BL, 8513, 8513BL, 8514, 8514BL Series Spare Parts
SP-ENC Series Spare Parts . . . . . . . . . . . . . . . . . . . . . . . . . . . . . . . . . . . . . . . .
Ultra Mag Series . . . . . . . . . . . . . . . . . . . . . . . . . . . . . . . . . . . . . . . . . . . . . . . .
8300, 8300BL, 8301, 8301BL, 8313, 8313BL, 8314, 8314BL Series Spare Parts
SP-ENC Series Spare Parts . . . . . . . . . . . . . . . . . . . . . . . . . . . . . . . . . . . . . . . .
Troubleshooting . . . . . . . . . . . . . . . . . . . . . . . . . . . . . . . . . . . . . . . . . . . . . . . .
Warranty . . . . . . . . . . . . . . . . . . . . . . . . . . . . . . . . . . . . . . . . . . . . . . . . . . . . . .
3-A Certificate of Authorization . . . . . . . . . . . . . . . . . . . . . . . . . . . . . . . . . . . .
STANDARD PUMP
PAGE
.
.
.
.
.
.
.
.
.
.
.
.
.
.
.
.
.
.
.
.
.
.
.
.
.
.
.
.
.
.
.
.
.
.
.
.
.
.
.
.
.
.
.
.
.
.
.
.
.
.
.
.
.
.
.
.
.
.
.
.
.
.
.
.
.
.
.
.
.
.
2
2
2
2
3
.
.
.
.
.
.
.
.
.
.
.
.
.
.
.
.
.
.
.
.
.
.
.
.
.
.
.
.
.
.
.
.
.
.
.
.
.
.
.
.
.
.
.
.
.
.
.
.
.
.
.
.
.
.
.
.
.
.
.
.
.
.
.
.
.
.
.
.
.
.
.
.
.
.
.
.
.
.
.
.
.
.
.
.
.
.
.
.
.
.
.
.
.
.
.
.
.
.
.
.
.
.
.
.
.
.
.
.
.
.
.
.
.
.
.
.
.
.
.
.
.
.
.
.
.
.
.
.
.
.
.
.
.
.
.
.
.
.
.
.
.
.
.
.
.
.
.
.
.
.
.
.
.
.
.
.
.
.
.
.
.
.
.
.
.
.
.
.
.
.
.
.
.
.
.
.
.
.
.
.
.
.
.
.
.
.
.
.
.
.
.
.
.
.
.
.
.
.
.
.
.
.
.
.
.
.
.
.
.
.
.
.
.
.
.
.
.
.
.
.
.
.
.
.
.
.
.
.
.
.
.
.
.
.
.
.
.
.
.
.
.
.
.
.
.
.
.
.
.
.
.
.
.
.
.
.
.
.
.
.
.
.
.
.
.
.
.
.
.
.
.
.
.
.
.
.
.
.
.
.
.
.
.
.
.
.
.
.
.
.
.
.
.
.
.
.
.
.
.
.
.
.
.
.
.
.
.
.
.
.
.
.
.
.
.
.
.
.
.
.
.
.
.
.
.
.
.
.
.
.
.
.
.
.
.
.
.
.
.
.
.
.
.
.
.
.
.
.
.
.
.
.
.
.
.
.
.
.
.
.
.
.
.
.
.
.
.
.
.
.
.
.
.
.
.
.
.
.
.
.
.
.
.
.
.
.
.
.
.
.
.
.
.
.
.
.
.
.
.
.
.
.
.
.
.
.
.
.
.
.
.
.
.
.
.
.
.
.
.
.
.
.
.
.
.
.
.
.
.
.
.
.
.
.
.
.
.
.
.
.
.
.
.
.
.
.
.
.
.
.
.
.
.
.
.
.
.
.
.
.
.
.
.
.
.
.
.
.
.
.
.
.
.
.
.
.
3
3
4
4
5
6
7
8
9
10
11
12
13
13
13
13
14
14
14
14
16
17
18
19
20
21
22
23
24
25
26
27
28
29
1540 University Drive, Auburn, Georgia 30011 USA
TOLL FREE 866–558–8611 • Phone 770–307–1003 • Fax 770–307–1009
e-mail: [email protected]
www.standardpump.com
Standard Pump Operating Instructions and Parts Manual
Standard Pump
Sanitary Pump Models: SP-8100, SP-8200, SP800SR & SP-800DD
Description
Standard’s Drum Pumps are designed to transfer a variety of materials from 55 gallon drums and tanks. Standard Pump offers
several different pumps, each designed for specific applications. Before operating, please confirm that the pump’s materials of
construction are suitable for the application.
Unpacking
Cartons should be handled with care to avoid damage from dropping, etc. After unpacking, inspect carefully for any damage that
may have occurred during transit. Check for loose, damaged or missing parts.
General Safety Information
The responsibility for safe assembly, installation, and operation ultimately rests with the operator. Read and understand ALL
safety precautions and operating instructions before operation. Careless pump operation can result in serious injury.
1. Before operating the pump, read and understand these operating instructions.
2. The operator should wear suitable protective clothing including the following: face mask, safety shield or goggles, gloves,
apron, and safety shoes.
3. Before operating, verify the materials being pumped are compatible with the pump’s “wetted components.”
4. All Federal, State, and local safety codes should be followed.
5. Verify that the motor voltage corresponds to proper electrical supply.
6. Before plugging motor into power supply, make sure the motor switch is in the OFF position.
7. Before operation, confirm all pump connections are properly tightened.
8. First pump clean water in order to familiarize yourself with the pump’s operation, flow rate, discharge pressure and motor
speed.
9. Before starting the pump, confirm the discharge hose is securely fastened to the receiving vessel in order to prevent splashing.
10. Never leave pump unattended during operation.
11. Do not submerge the motor in any liquid.
12. When finished using the pump, flush the pump by pumping water or an appropriate cleaning solution. Do not use flammable
or combustible cleaning solutions.
13. Never carry the motor by the power cord.
Model
Voltage
Amps Watts
HP Phase Enclosure Variable Explosion
Air Consumption
Speed
Proof
Recommended
Line Size In (mm)
SP-280P Series 115-230V
5-8.5
825
1
1
ODP (IP44)
Y
N
N/A
SP-ENC Series
115-230V
5-8.5
825
1
1
TEFC (IP54)
Y
N
N/A
SP-400-2
230V
5
550
0.75
1
EXP
N
Y
N/A
SP-A2 Series
N/A
N/A
560
0.75
N/A
N/A
Y
Y 28 CFM (13,2 L/sec) @ 90 PSI (6,2 Bar)
SP-A1
N/A
N/A
370
0.5
N/A
N/A
Y
Y 22 CFM (10,4 L/sec) @ 90 PSI (6,2 Bar)
SP-502
190/380-230/460V
2-4.2
0,56 KW 0.75
3
TEFC (IP54)
N
N
N/A
SP-504
190/380-230/460V
2-4.2
0,56 KW 0.75
3
Washdown
N
N
N/A
SP-508
190/380-230/460V
1.8-2.8 0,56 KW 0.75
3
Encapsulated
N
N
N/A
SP-512
190/380-230/460V
2.1-4.6 0,75 KW
1
3
TEFC (IP54)
N
N
N/A
SP-514
190/380-230/460V
2.1-4.6 0,75 KW
1
3
Washdown
N
N
N/A
SP-518
190/380-230/460V
2.6-5.6 0,75 KW
1
3
Encapsulated
N
N
N/A
SP-522
190/380-230/460V
2.9-6.4
1,1 KW
1.5
3
TEFC (IP54)
N
N
N/A
SP-524
190/380-230/460V
2.9-6.4
1,1 KW
1.5
3
Washdown
N
N
N/A
SP-528
190/380-230/460V
4.2-8.8
1,1 KW
1.5
3
Encapsulated
N
N
N/A
SP-A4FP
N/A
N/A
1,5 KW
2
N/A
N/A
Y
Y 80 CFM (37 L/sec) @100 PSI (7 Bar)
SP-A6FP
N/A
N/A
3,0 KW
4
N/A
N/A
Y
Y 130 CFM (65 L/sec) @100 PSI (7 Bar)
SP-A8FP
N/A
N/A
3,7 KW
5
N/A
N/A
Y
Y 170 CFM (80 L/sec) @100 PSI (7 Bar)
N/A
N/A
N/A
.25" (6,3) or greater
.125" (3,2) or greater
N/A
N/A
N/A
N/A
N/A
N/A
N/A
N/A
N/A
.25" (6,3) or greater
.5" (12,7) or greater
.5" (12,7) or greater
The speed control switch should not be used as the main ON/OFF switch. Using the speed control switch in this manner causes excessive wear to the potentiometer and triac and may result in premature failure. The use of the speed
control switch does not cut power to the motor and inadvertent activation could result in injury or death if the motor
is activated when not properly attended and secured. (Only applies to SP-280P and SP-ENC Series)
2
Standard Pump Operating Instructions and Parts Manual
Use Of Air Motors In Hazardous Atmospheres
At the present time, there are no known standards governing the operation of air motors in hazardous atmospheres. However,
there are several points regarding the safety of air motors.
First of all, an air motor is not a source of electric sparks. However, it is possible that an article which is not part of the air motor
(e.g., wrenches, hammers, etc.) could create a spark by sharply impacting a cast iron or aluminum case or the steel shaft of the
air motor. (Note that electric motor enclosures for both class I and II hazardous locations can be made of “...iron, steel, copper,
bronze, or aluminum...” (UL 674, Electric Motors and Generators – Hazardous Locations, June 23, 1989; paragraph 4.2, page 6).
Second, an air motor housing is not designed to contain an internal explosion as is an explosion-proof electric motor. The only
possible internal source of ignition in an air motor is a contact between the station housing components and the rotating
elements that might create a spark. The likelihood of this occurring is reduced by the fact that the contact must be made at
precisely the same time as a flammable or explosive gas is introduced into the air motor in a sufficient quantity to achieve
a flammable or explosive mixture while overcoming the positive pressure of the driving gas. In other words, although highly
improbable, an internal explosion in an air motor is possible.
Finally, an air motor is designed to be operated by compressed air, the expansion of which in normal operation creates a cooling
effect. As a result, the temperature of the air motor will not exceed the height of the temperatures of the surrounding
atmosphere or the air delivered to the inlet.
We do not guarantee the safety of every application, but to ensure the safe operation of an air motor in your application, always
follow the product direction and consult with a qualified engineer.
(Source: Gast Manufacturing, Air Motors Handbook, page 2)
Note: This statement is only applicable in North America.
SP-8100 & SP-8200 SERIES
Specifications
Models SP-8100 & SP-8200
Maximum Liquid Temperature . . . . . . . . . . . . . . . . . . . . . . . . . . . . . . . . . 175º F (79º C)
Pump Type . . . . . . . . . . . . . . . . . . . . . . . . . . . . . . . . . . . . . . . . . . . . . . . . . . . Centrifugal
Pump Speed . . . . . . . . . . . . . . . . . . . . . . . . . . . . . . . . . . . . . . . . . . . . . . . . . 10,000 RPM
Max. Flow Rate . . . . . . . . . . . . . SP-8100 . . . . . . . . . . . . . . . . . . . . . . 32 GPM (121 LPM)
SP-8200 . . . . . . . . . . . . . . . . . . . . . . . 15 GPM (57 LPM)
Max. Discharge Pressure . . . . . SP-8100 . . . . . . . . . . . . . . . . . . . . . . . . . 16 psi (1,1 bar)
SP-8200 . . . . . . . . . . . . . . . . . . . . . . . . . 32 psi (2,2 bar)
Wetted Materials . . . . . . . . . . . . . . . . . . . . . . . . . . . . . . . . . . . . . SS 316, Buna & Teflon
Immersion Length . . . . . . . . . . . . . . . 47" (1200 mm) & 39" (1000 mm) (55 Gal. Drum)
Discharge Port . . . . . . . . . . . . . . . 1.25" (32 mm) Hose Barb & 1.5" (38 mm) Tri-Clamp
Note: Flow rates are based on water. As viscosity increases, the flow rate will decrease.
Assembly
1.Remove the pump and motor from packaging.
2.Inspect all contents for damage.
3.Couple the motor to the pump tube by using the Hex Nut (see Figure 3, page 4).
4.It is recommended to thoroughly clean and sanitize models SP-8100 & SP-8200 before operation.
Do not use these pumps for the transfer of flammable or combustible products or in an environment where
flammable or combustible fumes are present unless used in conjunction with an Explosion Proof Motor.
Please contact the factory or authorized distributor with any questions regarding this matter.
3
Standard Pump Operating Instructions and Parts Manual
General Operation Guide (SP-8100 & SP-8200)
1.Once the pump is fully assembled and all connections are securely fastened, insert the pump into the drum or tank.
2.It is recommended to attach a suitable hose or pipe to the pump discharge.
3.If you opt to use a hose, fasten the hose to the hose barb with a suitable hose clamp that exceeds the pump discharge pressure.
Make sure the hose meets the pump discharge pressure requirements (SP-8100 = 16 psi (1,1 bar)) /
(SP-8200 = 32 psi (2,2 bar). It is recommended to use a hose that is rated 4 x the pump discharge pressure.
Ex: 32 x 4 = 128 psi (9 bar).
4.Turn the motor switch to the “ON” position.
5.After use, clean the pump and store vertically.
Disassembly / Cleaning Procedures (SP-8100 & SP-8200)
1.In order to clean a majority of the residue from the pump tube, immerse the pump into a 55 Gallon Drum of water or a nonflammable, food safe cleaning agent. Allow the pump to circulate the water for 3 minutes.
2.For a more thorough cleaning remove the motor from the pump tube by loosening the hex nut (see Figure 3).
3.Remove the pump foot (see Figure 1).
4.While holding the drive shaft with pliers (Factory suggests Grip-Locks to avoid scarring shafts) remove the impeller
(see Figure 4).
5.Remove the Pump Housing (see Figure 2).
6.Remove the connection flange (P/N: 8102) by turning clockwise. Pull straight up separating the connection flange and drive
shaft from the inner / outer tube assembly (P/N: 8104 or P/N: 8105).
7.Use a non-flammable, food safe cleaning agent to manually clean remainder of pump tube.
When replacing the drive shaft in the bearing unit (P/N1038) during reassembly, make sure the drive shaft is
inserted through the spacer in between the bearings inside the bearing unit. Failure to do so could cause the
bearing unit to prematurely fail.
Pump Foot
Figure 3
Figure 2
Figure 1
NOTE: Remove pump housing by
turning clockwise.
NOTE: Remove pump foot by
turning clockwise.
4
Figure 4
NOTE: Use grip lock pliers to hold
shaft while removing impeller.
Standard Pump Operating Instructions and Parts Manual
Grounding Procedures
TRANSFERRING OF FLAMMABLES OR USE IN HAZARDOUS DUTY
Bonding is an electrical connection between a primary metal vessel and a metal receiving vessel. See schematic.
Grounding is an electrical connection between a metal vessel, pump, motor and a constant ground; i.e. a metal rod driven into
the earth.
Bonding and grounding are required when pumping flammable materials or in hazardous duty environments. Failure to bond
and ground properly can cause a discharge of static electricity resulting in fire, injury or death. Follow NFPA 77 and 30 procedures at all times. If in doubt, do not start pump! Be sure bonding and grounding wires are secure before starting operation.
(Ground and bond wires must have less than one ohm resistance for safe usage. Check continuity before starting). Always check
with a safety engineer when any question arises and periodically check safety procedures with a safety engineer
Motor: SP-400-2
Pump Tube: SP-8100, SP-8200 or SP-800SR Series
Solvent resistant safety
hose with wire ground
Ground Wire
Bond Wire
Metal Drum
Rod
Earth Ground
Air Line
Motor: SP-A1 or SP-A2
Pump Tube: SP-8100 or SP-8200 Series
Solvent resistant safety
hose with wire ground
Ground Wire
Bond Wire
Metal Drum
Rod
Earth Ground
5
Standard Pump Operating Instructions and Parts Manual
SP-8100 ULTRA FLOW SERIES PARTS
ITEM
DESCRIPTION
NUMBER
PART
NUMBER
1
Pump coupling
1004
2
Bearing unit assembled — 2 each
1038
Viton shielded bearings, spacer,
snap ring, bearing can
3
Snap ring
8208
4
Hex nut
8842
5
Connection Flange
8102
6
Drive shaft
39" (1000 mm)
2028
47" (1200 mm)
2029
7
TFE guide sleeve
39" (1000 mm) /47" (1200 mm)
8106
8
Tri-clamp
833
9
O-ring, buna
836
10
Hose barb
11
1.25" (32 mm)
834
1.50" (38 mm)
835
Inner/outer tube assembly
39" (1000 mm)
8104
47" (1200 mm)
8105
12
Pump housing with Teflon bushing
8107
13
TFE impeller
2706
14
O-ring, buna, 2 per set
8103
15
Pump foot
8108
16
V-Seal – TFE
4000
When pumping flammable or combustible liquids, this pump must be used in conjunction with an explosion proof motor.
6
Standard Pump Operating Instructions and Parts Manual
SP-8200 SANITARY SERIES PARTS
ITEM
DESCRIPTION
NUMBER
PART
NUMBER
1
Pump coupling
1004
2
Bearing unit assembled — 2 each
1038
Viton shielded bearings, spacer,
snap ring, bearing can
3
Snap ring
8208
4
Hex nut
8842
5
Connection Flange
8102
6
Drive shaft
39" (1000 mm)
2028
47" (1200 mm)
2029
7
TFE guide sleeve
39" (1000 mm) /47" (1200 mm)
8106
8
Tri-clamp
833
9
O-ring, buna
836
10
Hose barb
11
1.25" (32 mm)
834
1.50" (38 mm)
835
Inner/outer tube assembly
39" (1000 mm)
8104
47" (1200 mm)
8105
12
Pump housing with Teflon bushing
8107
13
High head impeller
4608HH
14
O- ring, buna, 2 per set
8103
15
Pump foot
8108HH
16
V-Seal - TFE
4000
When pumping flammable or combustible liquids, this pump must be used in conjunction with an explosion proof motor.
7
Standard Pump Operating Instructions and Parts Manual
SP-280P SERIES MOTOR SPARE PARTS
ITEM
DESCRIPTION
NUMBER
1
2
2A
3
4
5
6
7
8
9A
9B
10
11
12
13
14
15
16
17
18
19
20
21
22
23
24
25
26
27
28
29
30
31
32
PART
NUMBER
Motor cover
Switch housing
Switch housing for variable speed,
includes potentiometer
110-120V
220-240V
8000
8001
Switch cover
Lock washer
Lower housing
Wave washer
Ball bearing
Screw for plastic housing
Screw for 110-120V
Screw for 220-240V
Ground screw
Gasket
Low voltage release (for 220-240V)
Earthing lead
Lead
Screw
Ball bearing
Motor coupling
Power cord w/strain relief & plug 110-120V
220-240V
Hexagon nut
Armature
110-120V
220-240V
Stator
110-120V
220-240V
Guide disc
Rod connector
Pressure spring
Brush holder
Carbon brush
110-120V
220-240V
Motor housing, plastic
Star washer
Fan
Overload switch,
8.5 amp 110-120V
5 amp 220-240V low voltage release
EMI Filter
Repair kit 110-120V
(includes PN’s 8333 & (2) 8509)
Repair kit 220-240V
(includes PN’s 8333 & (2) 8703)
8002
8071
8100
8125
8126
8130P
8131
8131LVR
8162
8167
8167LVR
8183
8185
8220
8331
8333
SP-280P open motor should not be used to pump flammables.
8
8004
8005
8360
8705
8448
8502
8701
8503
8702
8504
8506
8507
8508
8509
8703
8510P
8511
8512
8611
8704LVR
8003
9055
9056
Standard Pump Operating Instructions and Parts Manual
SP-ENC SERIES MOTOR SPARE PARTS
ITEM
DESCRIPTION
NUMBER
1
2
3
4
5
6
7
8
9
9A
10
11
12
13
14
15
16A
16B
17
18
19
20
21
22
23
24
25
26
27
28
29
30
31
32
33
PART
NUMBER
Motor cover
Screw
Armature
110-120V
220-240V
Stator
110-120V
220-240V
Guide disc
Motor housing
Bearing cover
Fan
Switch housing
Switch housing for variable speed,
includes potentiometer 110-120V
220-240V
Switch cover
Lock washer
Lower housing
Wave washer
Ball bearing
Screw
Screw for 110-120V
Screw for 220-240V
Ground screw
Gasket
Low voltage release (for 220-240V)
Earthing lead
Lead
Screw
Ball bearing
Motor coupling
Power cord w/strain relief & plug
110-120V
220-240V
Hexagon nut
Rod connector
Brush holder
Carbon brush 110-120V
220-240V
Star washer
Overload switch,
8.5 amp 110-120V
5 amp 220-240V low voltage release
EMI Filter
Repair kit 110-120V
(includes PN’s 8333 & (2) 8509)
Repair kit 220-240V
(includes PN’s 8333 & (2) 8703)
SP-ENC open motor should not be used to pump flammables.
9
3000
3130
3502
3701
3503
3702
3504
3510
3511
3512
8001
8004
8005
8002
8071
8100
8125
8126
8130
8131
8131LVR
8162
8167
8167LVR
8185
8183
8220
8331
8333
8360
8705
8448
3703
8508
8509
8703
8511
8611
8704LVR
8003
9055
9056
Standard Pump Operating Instructions and Parts Manual
SP-400-2 SERIES EXPLOSION PROOF MOTOR SPARE PARTS
28
ITEM
DESCRIPTION
NUMBER
PART
NUMBER
1
17
4
29
10
26
24
19
2
15
27
5
25
13
3
Wave washer (2 required)
5050
4
Glass sleeve
5137
5
Motor housing
5007
6
Lower housing
5006
7
Motor coupling
8333
8
Stator
220-240V
5002
220-240V
5001
Switch housing
5008
11
Cord without plug
8705-EXP
12
Strain relief
5046-1
13
Handle
5005
14
Pass through (4 required)
5036
15
Switch
8704LVR
16
On / Off knob
5017
17
17
Fan
5020
22
18
Switch handle screw (4 required)
5045
19
Switch housing screw (4 required)
5044
20
Brush holder
8508
21
Rod connector (2 required)
5015-04
22
Ball bearing (2 required)
5053
23
Carbon brush 220V (2 required)
8703
24
Switch bracket
5011
25
Switch actuator
5009
26
Switch bracket screw (2 required)
5015-01
27
Switch actuator pin
5016
28
Fan cover screw (4 required)
5015-02
29
Motor bolt (4 required)
5018-01
30
Insulator screw (2 required)
5138
20
23
9
12
11
5004
Armature
22
14
5013
Bearing cover
9
3
16
Fan cover
2
10
21
23
18
1
8
3
30
6
7
10
Standard Pump Operating Instructions and Parts Manual
SP-A1 SERIES MOTOR SPARE PARTS
DESCRIPTION
ITEM NUMBER
PART NUMBER
1
Muffler
SAF350
2*
Gasket
SAC229
3
Dead end cap
SAC228A
4*
Bearing (2 required)
SAG549
5
Dead end plate
SAC617
6*
Gasket (2 required)
SAC527
7
Body
SAE899
8
Drive end plate
SAC616
9*
Shaft seal
SAC190A
10*
Vane (4 required)
SAE893
11
Dowel pin (4 required)
SD324A
12
Impeller
SAE896
13
Repair kit*
SK285
Includes item numbers 2, 4, 6, 9 and 10
14
9007
A1 adapter
11
Standard Pump Operating Instructions and Parts Manual
SP-A2 SERIES MOTOR SPARE PARTS
ITEM NUMBER
1
4
5
6
7
8
9
10
11
12
13
14
15
DESCRIPTION
Housing assembly
Inlet bushing (with Screen)
Trigger assembly
Regulator assembly
Muffler kit
Rear-end plate assembly
Cylinder
Vanes (set of 4)
Rotor
Front-end plate, assembly
Motor lock-nut
Motor coupling
Adaptor
12
PART NUMBER
317A-A40
317A-3B
317A-A93
317A-A249
317A-AMK1
317A-A12
317A-3
317A-42-4
317A-53
317A-A11
317A-27
8333
9014
Standard Pump Operating Instructions and Parts Manual
SP-800SR & SP-800DD SERIES
Specifications
Models SP-800SR & SP-800DD
Maximum Liquid Temperature . . . . . . . . . . . . . . . . . . . . . . . . . Teflon Stator 300º F (149º C)
Food Grade Buna Stator 175º F (79º C)
Pump Type . . . . . . . . . . . . . . . . . . . . . . . . . . . . . Progressive Cavity (Positive Displacement)
Pump Speed . . . . . . . . . . . . . . . . . . . . . . . . . . . . . . . . . . . . . . . . . . . . . . . . . . . . . . . . 900 RPM
Max. Flow Rate . . . . . . . . . . . . . . 751 & 752 . . . . . . . . . . . . . . . . . . . . . . . . . 7 GPM (27 LPM)
1851 . . . . . . . . . . . . . . . . . . . . . . . . . . . 12 GPM (45 LPM)
Max. Discharge Pressure . . . . . . 751 & 1851 . . . . . . . . . . . . . . . . . . . . . . . . . . 87 psi (6 bar)
752 . . . . . . . . . . . . . . . . . . . . . . . . . . . . . . 174 psi (12 bar)
Immersion Length . . . . . . . . . . . . . . . . . . . 27" (700 mm), 39" (1000 mm) & 47" (1200 mm)
Wetted Materials . . . . . . . . . . . . . . . . . . . . . . . . . . . . . . . . . . . SS 316, Teflon or White Buna
Discharge Port . . . . . . . . . . . . . . . . . . . . . . . . . . . . . . . . . 1.5" (38 mm) Hose Barb Tri-Clamp
(Optional 1.25" (32 mm) Hose Barb)
Max. Viscosity . . . . . . . . . . . . . . . 751 & 752 . . . . . . . . . . . . . . . . . . . . . . 100,000 cps (mPAS)
1851 . . . . . . . . . . . . . . . . . . . . . . . . . . . 10,000 cps (mPAS)
Max. Solid Size . . . . . . . . . . . . . . . . . . . . . . . . . . . . . . . . . . . . . . . . . . . . . . . . . . .25" (6 mm)
Notes
1.Pump stator elastomer (Teflon & Buna) may vary performance.
2.Performance is based on using a 900 RPM motor. Reducing motor speed will decrease pump performance.
Do not increase motor speed above 900 RPM.
3. The SP-800SR Series pump is equipped with a gear reduction unit which reduces the speed of the pump to between 750 and 900 RPM
Therefore, the motor speed must not exceed 16,000 RPM’s in order to achieve the proper operating RPM’s of the pump.
4. Performance will vary depending on whether the product being pumped is newtonian (viscosity remains constant regardless of shear)
or non-newtonian (viscosity does not remain constant with shearing).
5. Flow rates based on water. As viscosity increases, the flow rate will decrease.
The SP-800SR Series Pump is recommended for intermittent duty use only. (ie., 30 minute intervals with a 10
minute cooling off period). For continuous duty applications, Standard Pump recommends using the SP-800DD
Series Pump.
The SP-800SR and SP-800DD series pumps are positive displacement pumps and should never be operated
against shut-off elements such as nozzles, valves, etc. Failure to comply may result in excessive pressure build
resulting in serious injury and pump damage.
The SP-800SR and SP-800DD series pumps should not be run dry. Running the pump dry will result in serious
damage to the mechanical seal and stator of the pump.
When using an SP-A4FP, SP-A6FP or SP-A8FP Series motor, Standard Pump recommends the use of a Fliter
Lubricator Regulator (FLR) in order to ensure a moisture free supply of air to the motor.
Assembly
1.Remove the pump and motor from packaging.
2.Inspect all contents for damages.
3.For SP-800SR series models, couple the electric motor to the pump using the hex nut (see figure 1, page 15).
4.For SP-800DD series models, bolt electric or pneumatic motor to the pump using the hardware provided by the manufacturer
(see figure 3, page 15).
5.It is recommended to thoroughly clean and sanitize SP-800SR and SP-800DD series pumps before operation.
Do not use these pumps for the transfer of flammable or combustible products or in an environment where
flammable or combustible fumes are present unless used in conjunction with an Explosion Proof Motor. Please
contact the factory or authorized distributor with any questions regarding this matter.
Operation – SP-800SR Series
Do not operate the SP-800SR-1851 series pump on viscosities greater than 10,000 cps (mPAS). Do not operate
the SP-800SR-751 or SP-800SR-752 series pumps on viscosities greater than 25,000 cps (mPAS). Failure to
comply will result in premature pump failure.
1.Once the pump is fully assembled and all connections are fastened, insert the pump into the drum or tank.
2.First pump clean water in order to familiarize yourself with the pump’s operation, flow rate, discharge pressure and motor speed.
3.It is recommended to attach a suitable hose or pipe to the pump discharge.
Make sure the hose meets the pump discharge pressure requirements (SP-800-751 or SP-800-1851= 87 psi
(6 bar)) / (SP-800-752= 174 psi (12,1 bar). It is recommended to use a hose that is rated 4 x the pump discharge
pressure. Ex: 87 x 4= 348 psi (24,3 bar).
4.If you opt to use a hose, fasten the hose to the hose barb with a suitable hose clamp that exceeds the pump discharge pressure.
5.Make sure the speed control knob on the motor is turned to the MIN position (completely counterclockwise) Continued On Next Page
13
Standard Pump Operating Instructions and Parts Manual
6.Turn the motor switch to the ON position.
7.Slowly throttle the motor up by turning the speed control knob clockwise.
Do not use these pumps for the transfer of flammable or combustible products or in an environment where
flammable or combustible fumes are present unless used in conjunction with an Explosion Proof Motor. Please
contact the factory or authorized distributor with any questions regarding this matter.
Operation – SP-800DD Series
Do not operate the SP-800DD-1851 series pump on viscosities greater than 10,000 cps (mPAS). Do not operate
the SP-800DD-751 or SP-800DD-752 series pumps on viscosities greater than 100,000 cps (mPAS). Failure to
comply will result in premature pump failure.
1.Make sure the motor is wired for the proper voltage. Use the wiring diagram on the motor nameplate.
Make sure motor and plug are wired to insure clockwise rotation. Use arrow on pump to verify proper
direction. If the pump is wired to rotate counterclockwise, internal components will disassemble.
When using an SP-800DD pump in conjunction with an air motor (SP-A4FP, SP-A6FP or SP-A8FP), make sure the
air line is connected to the air inlet hole on the left side of the motor as you face the motor. This will insure
that the motor turns in a clockwise direction. Use the pump arrow to verify proper direction. If the pump rotates counterclockwise, the internal components will disassemble.
2.Once the pump is fully assembled and all connections are fastened, insert the pump into the drum or tank. Pump can be
suspended from hoisting system using a pump hanger (P/N: 8430).
P/N: 8430
3.It is recommended to attach a suitable hose or pipe to the pump discharge.
4. If you opt to use a hose, fasten the hose to the hose barb with a suitable hose clamp that exceeds the pump
discharge pressure.
Make sure the hose meets the pump discharge pressure requirements (SP-800-751 or SP-8001851=87 psi (6 bar)) / (SP-800-752=174 psi (12,1 bar)). It is recommended to use a hose that is
rated 4 x the pump discharge pressure. Ex: 87 x 4= 348 psi (24,3 bar).
Maintenance
DISASSEMBLY / CLEANING PROCEDURES (SP-800SR & SP-800DD)
1.Remove motor from pump tube. For models SP-800SR: loosen Hex Nut in clockwise rotation (see Figure 2, page 15). For models
SP-800DD: loosen (4) bolts that attach the pump to the motor (see Figure 3, page 15).
2.Loosen set screw on side of Hex Nut (see Figure 4, page 15).
3.Place a screwdriver (or similarly shaped object) in the mechanical seal inspection port (see Figure 4, page 15).
4.Use a large wrench to loosen the Hex Nut while simultaneously holding the screwdriver in the seal inspection port (see Figure 4, page 15).
5.Once the Hex Nut is loosened, remove the outer tube from the drive shaft assembly (see Figure 5, page 15).
6.Remove the stator from the pump tube body by turning clockwise (see Figure 6, page 15).
7.Hold the drive shaft in a fixed position and loosen the rotor (counterclockwise) located at the bottom of the drive shaft (see Figure 7, page 15).
8.Insert a small screwdriver (or similar object) through the small hole on the shaft located inside the mechanical seal inspection
port (see Figure 8, page 15).
9.While holding the small shaft still, loosen (counterclockwise) the pump drive shaft with large wrench. (see Figure 8, page 15).
MECHANICAL SEAL REPLACEMENT/ PUMP ASSEMBLY (SP-800SR & SP-800DD)
1.Follow steps 1-9 under the Disassembly / Cleaning Procedures from above.
2.The mechanical seal will be exposed in the lower portion of the mechanical seal bushing (see Figure 9, page 15).
3.Remove damaged seal and replace with a new mechanical seal. Use a suitable lubricant on the seals O-rings.
4.Reinstall mechanical seal bushing into bearing housing.
5.Thread drive shaft onto bearing housing shaft (see Figure 8, page 15).
6.Thread rotor onto drive shaft item (see Figure 7, page 15).
7.Thread stator can onto pump body (see Figure 6, page 15).
8.Apply a suitable Lubricant on rotor.
9.Once Bearing Housing, drive shaft, and rotor are securely threaded together, insert this assembly into the pump body (see Figure 5, page 15).
10.Tighten the Hex Nut on the pump body to the Bearing housing. Use screwdriver (or similarly shaped object) in the mechanical
seal inspection port (see Figure 4, page 15).
11.Use a large wrench to loosen the Hex Nut while simultaneously holding the screwdriver in the seal inspection port
(see Figure 4, page 15).
12.Reattach motor and resume operation. (SP-800SR: see Figure 1, page 15); (SP-800DD: see Figure 3, page 15).
14
Standard Pump Operating Instructions and Parts Manual
Maintenance (Continued)
Mechanical Seal
Inspection Port
Hex Nut
Set Screw
Drive Shaft
Assembly
Figure 4
Rotor
Figure 1 – Attach Motor by Turning Hex
Nut Counterclockwise
Figure 7
Drive Shaft
Assembly
Drive Shaft
Assembly
Outer Tube
Assembly
Figure 2 – Remove Motor by Turning
Hex Nut Clockwise
Figure 5
Figure 8
Mechanical Seal
Outer Tube
Assembly
Stator
Figure 3
Mechanical Seal Bushing
NOTE: Remove 4 bolts from motor housing.
Figure 9
Figure 6
15
Standard Pump Operating Instructions and Parts Manual
SP-800SR SERIES SPARE PARTS
ITEM
DESCRIPTION
NUMBER
1
2
3
4
5
19
6
18
7
11
17
15
16
8
20
13
10
9
12
14
PART
NUMBER
1
Pump Coupling
1004
2
Hex Nut
8842
3
Snap Ring
8208
4
Gear Reduction Unit
701
5
Mechanical Seal Bushing
702
6
Mechanical Seal, SIC
703
7
Gasket PTFE
735
8
Drive Shaft, SS316
Pump Sizes - SP-751-27,SP-752-27,SP-1851-27
704
Pump Sizes - SP-1851-39
705
Pump Sizes - SP-751-39,SP-752-39,SP-1851-47
706
Pump Sizes - SP-751-47,SP-752-47
707
9
Rotor
Size 751
708
Size 752
709
Size 1851
710
10 Gasket PTFE
731
11 Outer Tube Assembly
Pump Sizes - SP-751-27, SP-752-27, SP-1851-27
800
Pump Sizes - SP-1851-39
801
Pump Sizes - SP-751-39, SP-752-39, SP-1851-47
802
Pump Sizes - SP-751-47, SP-752-47
803
12 Stator - BUNA*, FOOD GRADE
Size 751
816
Size 752
817
Size 1851
818
Stator - PTFE (stator insert only)
Size 751
822
Size 752
823
Size 1851
824
13 Stator Tube**
Size 751
874
Size 752
875
Size 1851
876
14 Stator Tube For Bag Liners
BUNA*
Size 751
816BL
Size 752
817BL
Size 1851
818BL
PTFE**
Size 751
874BL
Size 752
875BL
Size 1851
876BL
15 Tri-Clamp
16 Hose Barb 1.25" (32 mm)
1.50" (38 mm)
17 O-Ring - BUNA
18 Gasket - BUNA
PTFE
19 Set Screw
20 SS Ring
*Includes Stator & Stator Tube. ** Does not include Stator #12 (TFE stator only).
16
833
834
835
836
737
738
757
0016
Standard Pump Operating Instructions and Parts Manual
SP-800DD SERIES SPARE PARTS
ITEM #
26
30
27
31
OR
32
2
1
11
13
12
5
4
7
8
9
8
10
14
33
15
29
16
19
23
24
25
17
28
18
34
22
21
20
DESCRIPTION
PART#
1 Flange Sizes
SP-502, SP-504 & SP-508 models
761
SP-512, SP-514 & SP-518 models
760
(requires (2) flanges)
SP-522, SP-524 & SP-528 models
760
(requires (2) flanges)
SP-A4FP model
760
SP-A6FP & SP-A8FP models
762
2 Motor Coupling
SP-502, SP-504, SP-508
& SP-A8FP models- 24mm
740
SP-A4FP model - 14mm
744
SP-A6FP model - 19mm
747
SP-512, SP-514, SP-518, SP-522,
SP-524, SP-528 models- 28mm
746
3 Coupling Key -- Not Shown
SP-A4FP model- 5mm X 20mm
840
SP-A6FP model- 6mm X 20mm
841
SP-A8FP model- 8mm X 20mm
842
SP-502, SP-504, SP-508, SP-512,
SP-514, SP-518, SP-522, SP-524,
SP-528 models- 8mm X 30mm
844
4 Coupling Insert
745
5 Pump Coupling - 24mm
740
6 Key- Pump Coupling-8 mm X 25 (not shown)
844
7 Bearing Shaft
750
8 Bearing
751
9 Bearing Spacer
752
10 Bearing Clip
753
11 Washer (4 required)
755
12 Bolt (4 required)
756
13 Bearing Housing, Aluminum
754
14 Mechanical Seal Bushing
702
15 Mechanical Seal, SIC
703
16 Gasket - PTFE
735
17 Drive Shaft
Pump Sizes - SP-751-27, SP-752-27, SP-1851-27
704
Pump Sizes - SP-1851-39
705
Pump Sizes - SP-751-39, SP-752-39, SP-1851-47
706
Pump Sizes - SP-751-47, SP-752-47
707
18 Rotor Size 751
708
Size 752
709
Size 1851
710
19 Outer Tube Assembly
Pump Sizes - SP-751-27, SP-752-27, SP-1851-27
800
Pump Sizes - SP-1851-39
801
Pump Sizes - SP-751-39, SP-752-39, SP-1851-47
802
Pump Sizes - SP-751-47, SP-752-47
803
20 Stator - BUNA*, FOOD GRADE
Size 751
816
Size 752
817
Size 1851
818
PTFE Size 751 (stator insert only)
822
Size 752 (stator insert only)
823
Size 1851 (stator insert only)
824
21 Stator Tube**
Size 751
874
Size 752
875
Size 1851
876
22 Stator Tube For Bag Liners
BUNA*Size 751
816BL
Size 752
817BL
Size 1851
818BL
PTFE**Size 751
874BL
Size 752
875BL
Size 1851
876BL
23 Tri-Clamp
833
24 Hose Barb 1.25 (32 mm)
834
1.50 (38 mm)
835
25 BUNA O-Ring (Sanitary)
836
26 Motor
27 DD Series Motor Switch
570
28 Gasket - PTFE
731
29 Gasket - BUNA
737
PTFE
738
30 Switch Cover
571
31 Strain Relief
572
32 Power Cord 16 ft (5 m)
8708
33 Set Screw
757
34 SS Ring
0016
*Includes Stator & Stator Tube.** Does not include Stator #20 (TFE stator only).
17
Standard Pump Operating Instructions and Parts Manual
SP-A4FP SERIES SPARE PARTS
14
12
11
2
10
13
9
8
5
6
7
4
3
2
1
5
Body styles may differ,
depending on specific models.
ITEM
DESCRIPTION
QUANTITY
NUMBER
Service kit – only service kits are
available for parts replacement
* Denotes parts included in the Service Kit
1*
2*
3
4
5*
6*
7*
8
9*
10
11*
12
13
14*
Shaft seal
Bearing, dead end
drive
End plate, drive
Rotor assembly
Vane
Push pin
Vane, spring
Body
Shims
End plate, dead
End cap, gasket
End cap, dead
Muffler assembly
Muffler felt
18
PART
NUMBER
1
K206C
1
1
1
1
1
4
4
2
1
2
1
1
1
1
1
B2328
AB519
AA299J
AK425A
AM455C
AM410M
B330
AB622M
AA46
AM307D
AC980
AC983
Body styles may differ, depending
on specific models .
Standard Pump Operating Instructions and Parts Manual
SP-A6FP SERIES SPARE PARTS
5
14
17
13
7
16
12
15
11
10
9
5
8
4
3
7
6
ITEM
DESCRIPTION
QUANTITY
NUMBER
Service kit – only service kits are
available for parts replacement
PART
NUMBER
1
K281A
1
1
1
1
4
1
2
1
1
1
2
4
4
1
1
1
1
1
1
AC998
AK423
AC989
AC894B
AB162C
AK424
AD641
AD665D
AK422
AD648E
AD655A
AD692
AD691
AD651
AB519
AD644
AD643
AC990
AC993
* Denotes parts included in the Service Kit
1
2*
3*
4*
5
6
7*
8
9
10
11*
12*
13*
14
15*
16*
17
*
End cap, drive end
Shaft seal
O-ring
Bearing, drive end
Dowel pin
End plate, drive
Body gasket
Body
Key
Rotor assembly
Push pin
Vane, spring
Vane
End plate, dead
Bearing, dead end
End cap, gasket
End cap, dead end
Muffler assembly
Felt
19
2
1
Standard Pump Operating Instructions and Parts Manual
SP-A8FP SERIES SPARE PARTS
ITEM
DESCRIPTION
QUANTITY
NUMBER
Service kit – only service kits are
available for parts replacement
PART
NUMBER
1
K282A
1
1
1
1
4
2
2
1
1
1
2
4
4
1
1
1
1
1
1
AC988
AK420
AC989
AB927
AB162
AK421
AC888
AC878G
AK668
AC986D
AC879
AC817
AC816
AC964
AC894B
AC837
AC836
AC990
AC993
* Denotes parts included in the Service Kit
1
2*
3*
4*
5
6
7*
8
9
10
11*
12*
13*
14
15*
16*
17
*
End cap, drive end
Shaft seal
O-ring
Bearing, drive end
Dowel pin
End plate, drive
Body gasket
Body
Key
Rotor assembly
Push pin
Vane, spring
Vane
End plate, dead
Bearing, dead end
End cap, gasket
End cap, dead end
Muffler assembly
Felt
20
Standard Pump Operating Instructions and Parts Manual
ULTRA MASS SERIES
Specifications
Models 8500, 8500BL, 8501, 8501BL, 8513, 8513BL, 8514, 8514BL
Maximum Liquid Temperature . . . . . . . . . . . . . . . . . . . . . . . . . . . . . . . . 250º F (121º C)
Pump Type . . . . . . . . . . . . . . . . . . . . . . . . . Progressive Cavity (Positive Displacement)
Pump Speed . . . . . . . . . . . . . . . . . . . . . . . . . . . . . . . . . . . . . . . . . . . . . . . . . . . . 900 RPM
Metering Principle . . . . . . . . . . . . . . . . . . . . . . . . . . . . . Coriolis Mass Flow Technology
Max. Flow Rate . . . . . . . . . . . . . 8500, 8500BL, 8501, 8501BL . . . . . 8 GPM (30,2 LPM)
8513, 8513BL, 8514, 8514BL . . . . . 3 GPM (11,3 LPM)
Max. Discharge Pressure . . . . . 8500, 8500BL, 8501, 8501BL . . . . . . . . . 43 psi (3 bar)
8513, 8513BL, 8514, 8514BL . . . . . . . . . 87 psi (6 bar)
Immersion Length . . . . . . . . . . . . . . . . . . . . . . . . . . . . . . . . . . . . . . . . . 39" (1000 mm)
Wetted Materials . . . . . . . . . . . . . . . . . . . . . . . . . . . . . . . . . . . . . . . . . . . . SS 316, Teflon
Discharge Port . . . . . . . . . . . . . . . . . . . . . . . . . . . . . 1.5" (38 mm) Hose Barb Tri-Clamp
(Optional 1.25" (32 mm) Hose Barb)
Max. Viscosity . . . . . . . . . . . . . . 8500, 8500BL, 8501, 8501BL . . . . . 10,000 cps (mPAS)
8513, 8513BL, 8514, 8514BL . . . . . 25,000 cps (mPAS)
Max. Solid Size . . . . . . . . . . . . . . . . . . . . . . . . . . . . . . . . . . . . . . . . . . . . . . . .25" (6 mm)
Notes
1. Performance will vary depending on whether the product being pumped is newtonian (viscosity remains
constant regardless of shear) or non-newtonian (viscosity does not remain constant with shearing).
2. Flow rates based on water. As viscosity increases, the flow rate will decrease.
The Ultra Mass Batch Control System is a positive displacement pump system and should never be operated
against shut-off elements such as nozzles, valves, etc. Failure to comply may result in excessive pressure build
resulting in serious injury and pump damage.
The Ultra Mass Batch Control System should not be run dry. Running the pump dry will result in serious
damage to the mechanical seal and stator of the pump.
Assembly
1. Remove the pump, motor, and Ultra Mass meter from packaging.
2. Inspect all contents for damages.
3. Couple the electric motor to the pump using the hex nut (see figure 1, page 15).
4. Attach the Ultra Mass meter to the pump discharge using the supplied tri-clamp fitting.
5. Attach the check valve (p/n:384510V) to the Ultra Mass meter using the supplied tri-clamp fitting.
6. Attach the hose barb to the check valve using the supplied tri-clamp fitting.
7. It is recommended to thoroughly clean and sanitize the Ultra Mass Batch Control System before use.
Do not use the Ultra Mass Batch Control System for the transfer of flammable or combustible products or in an
environment where flammable or combustible fumes are present. Failure to comply may result in serious
injury or death.
Operation – Ultra Mass Series
1. Please refer to the Operation – SP-800SR Series portion of these operating instructions on page 13 for the pump and motor
potion of this system.
2. For information regarding the calibration and operation of the Ultra Mass Meter, please refer to the factory operating
instructions included in this package.
Maintenance
Please refer to page 14 of these operating instructions for information on disassembly, cleaning, and maintenance of this system.
21
Standard Pump Operating Instructions and Parts Manual
8500, 8500BL, 8501, 8501BL, 8513, 8513BL,8514, 8514BL
SPARE PARTS
ITEM
DESCRIPTION
UMBER
N
1
2
3
4
5
19
6
18
7
11
8
21
9
14
13
10
12
1
Pump Coupling
2
Hex Nut
3
Snap Ring
4
Gear Reduction Unit
5
Mechanical Seal Bushing
6
Mechanical Seal, SIC
7
Gasket – PTFE
8
Drive Shaft, SS316
Pump Size – SP-1851-39
Pump Size – SP-752-39
9
Rotor
Size 1851
Size 752
10
Gasket – PTFE
11
Outer Tube Assembly
Pump Size – SP-1851-39
Pump Size – SP-752-39
12
Stator – PTFE Size 1851
Size 752
13
Stator Tube Size 1851
Size 752
14
Stator Tube For Bag Liner
Size 1851
Size 752
15
Tri-Clamp
16
Hose Barb
1.50" (38 mm)
17
O-Ring – BUNA
18
Gasket – PTFE
19
Set Screw
20
Batch Control Meter 21
SS Ring
22
Check Valve
000
15
22
1004
8842
8208
701
702
703
735
705
706
710
709
731
801
802
824
823
876
875
876BL
875BL
833
835
836
738
757
83E25AFTAAAAA
0016
384510V
20
17
17
PART
NUMBER
15
22
17
15
16
Standard Pump Operating Instructions and Parts Manual
SP-ENC SERIES MOTOR SPARE PARTS
ITEM
DESCRIPTION
NUMBER
1
2
3
Motor cover
Screw
Armature
110-120V
220-240V
Stator
110-120V
220-240V
Guide disc
Motor housing
Bearing cover
Fan
Switch housing for variable speed,
includes potentiometer 110-120V
220-240V
Switch cover
Lock washer
Lower housing
Wave washer
Ball bearing
Screw
Screw for 110-120V
Screw for 220-240V
Ground screw
Gasket
Low voltage release (for 220-240V)
Earthing lead
Lead
Screw
Ball bearing
Motor coupling
Power cord w/strain relief & plug
110-120V
220-240V
Hexagon nut
Rod connector
Brush holder
Carbon brush 110-120V
220-240V
Star washer
Overload switch,
8.5 amp 110-120V
5 amp 220-240V low voltage release
EMI Filter
Repair kit 110-120V
(includes PN’s 8333 & (2) 8509)
Repair kit 220-240V
(includes PN’s 8333 & (2) 8703)
4
5
6
7
8
9
10
11
12
13
14
15
16A
16B
17
18
19
20
21
22
23
24
25
26
27
28
29
30
31
32
33
SP-ENC open motor should not be used to pump flammables.
23
PART
NUMBER
3000
3130
3502
3701
3503
3702
3504
3510
3511
3512
8004
8005
8002
8071
8100
8125
8126
8130
8131
8131LVR
8162
8167
8167LVR
8183
8185
8220
8331
8333
8360
8705
8448
3703
8508
8509
8703
8511
8611
8704LVR
8003
9055
9056
Standard Pump Operating Instructions and Parts Manual
ULTRA MAG SERIES
Specifications
Models 8300, 8300BL, 8301, 8301BL, 8313, 8313BL, 8314, 8314BL
Maximum Liquid Temperature . . . . . . . . . . . . . . . . . . . . . . . . . . . . . . . . . 200º F (93º C)
Pump Type . . . . . . . . . . . . . . . . . . . . . . . . . Progressive Cavity (Positive Displacement)
Pump Speed . . . . . . . . . . . . . . . . . . . . . . . . . . . . . . . . . . . . . . . . . . . . . . . . . . . . 900 RPM
Metering Principle . . . . . . . . . . . . . . . . . . . . . . . . . . . . . . . . . . . . . . . . . . Full Bore Mag
Max. Flow Rate . . . . . . . . . . . . . 8300, 8300BL, 8301, 8301BL . . . . . . 10 GPM (38 LPM)
8313, 8313BL, 8314, 8314BL . . . . . 3 GPM (11,3 LPM)
Max. Discharge Pressure . . . . . 8300, 8300BL, 8301, 8301BL . . . . . . . . . 43 psi (3 bar)
8313, 8313BL, 8314, 8314BL . . . . . . . . . 87 psi (6 bar)
Immersion Length . . . . . . . . . . . . . . . . . . . . . . . . . . . . . . . . . . . . . . . . . 39" (1000 mm)
Wetted Materials . . . . . . . . . . . . . . . . . . . . . . . . . . . . . . . . . . . . . . . . . . . . SS 316, Teflon
Discharge Port . . . . . . . . . . . . . . . . . . . . . . . . . . . . . 1.5" (38 mm) Hose Barb Tri-Clamp
(Optional 1.25" (32 mm) Hose Barb)
Max. Viscosity . . . . . . . . . . . . . . 8300, 8300BL, 8301, 8301BL . . . . . 10,000 cps (mPAS)
8313, 8313BL, 8314, 8314BL . . . . . 25,000 cps (mPAS)
Conductivity . . . . . . . . . . . . . . . . . . . . . . . . . . . . . . . Requires 5 micro-seamans (µS/Cm)
Max. Solid Size . . . . . . . . . . . . . . . . . . . . . . . . . . . . . . . . . . . . . . . . . . . . . . . .25" (6 mm)
Notes
1. Performance will vary depending on whether the product being pumped is newtonian (viscosity remains
constant regardless of shear) or non-newtonian (viscosity does not remain constant with shearing).
2. Flow rates based on water. As viscosity increases, the flow rate will decrease.
The Ultra Mag Batch Control System is a positive displacement pump system and should never be operated
against shut-off elements such as nozzles, valves, etc. Failure to comply may result in excessive pressure build
resulting in serious injury and pump damage.
The Ultra Mag Batch Control System should not be run dry. Running the pump dry will result in serious
damage to the mechanical seal and stator of the pump.
Assembly
1. Remove the pump, motor, and Ultra Mag meter from packaging.
2. Inspect all contents for damages.
3. Couple the electric motor to the pump using the hex nut (see figure 1, page 15).
4. Attach the Ultra Mag meter to the pump discharge using the supplied tri-clamp fitting.
5. Attach the check valve (p/n: 384510V) to the Ultra Mag meter using the supplied tri-clamp fitting.
6. Attach the hose barb to the check valve using the supplied tri-clamp fitting.
7. It is recommended to thoroughly clean and sanitize the Ultra Mag Batch Control System before use.
Do not use the Ultra Mag Batch Control System for the transfer of flammable or combustible products or in an
environment where flammable or combustible fumes are present. Failure to comply may result in serious
injury or death.
Operation – Ultra Mag Series
1. Please refer to the Operation-SP-800SR series portion of these operating instructions on page 13 for the pump and motor
potion of this system.
2. For information regarding the calibration and operation of the Ultra Mag Meter, please refer to the factory operating
instructions included in this package.
Maintenance
Please refer to page 14 of these operating instructions for information on disassembly, cleaning, and maintenance of this system.
24
Standard Pump Operating Instructions and Parts Manual
8300, 8300BL, 8301, 8301BL, 8313, 8313BL, 8314, 8314BL
SPARE PARTS
ITEM
DESCRIPTION
UMBER
N
1
2
3
4
5
19
6
18
7
11
8
21
13
10
12
9
14
PART
NUMBER
1004
8842
8208
701
702
703
735
1
Pump Coupling
2
Hex Nut
3
Snap Ring
4
Gear Reduction Unit
5
Mechanical Seal Bushing
6
Mechanical Seal, SIC
7
Gasket – PTFE
8
Drive Shaft, SS316
Pump Size – SP-1851-39
Pump Size – SP-752-39
9
Rotor
Size 1851
Size 752
10
Gasket – PTFE
11
Outer Tube Assembly
Pump Size – SP-1851-39
Pump Size – SP-752-39
12
Stator – PTFE Size 1851
Size 752
13
Stator Tube Size 1851
Size 752
14
Stator Tube For Bag Liner
Size 1851
Size 752
15
Tri-Clamp
16
Hose Barb
1.50" (38 mm)
17
O-Ring – BUNA
18
Gasket – PTFE
19
Set Screw
20
21
Batch Control Meter SS Ring
22
Check Valve
705
706
710
709
731
801
802
824
823
876
875
876BL
875BL
833
835
836
738
757
800us51g47
0016
384510V
20
15
17
17
25
15
22
16
17
15
Standard Pump Operating Instructions and Parts Manual
SP-ENC SERIES MOTOR SPARE PARTS
ITEM
DESCRIPTION
NUMBER
1
2
3
4
5
6
7
8
9
10
11
12
13
14
15
16A
16B
17
18
19
20
21
22
23
24
25
26
27
28
29
30
31
32
33
Motor cover
Screw
Armature
110-120V
220-240V
Stator
110-120V
220-240V
Guide disc
Motor housing
Bearing cover
Fan
Switch housing for variable speed,
includes potentiometer 110-120V
220-240V
Switch cover
Lock washer
Lower housing
Wave washer
Ball bearing
Screw
Screw for 110-120V
Screw for 220-240V
Ground screw
Gasket
Low voltage release (for 220-240V)
Earthing lead
Lead
Screw
Ball bearing
Motor coupling
Power cord w/strain relief & plug
110-120V
220-240V
Hexagon nut
Rod connector
Brush holder
Carbon brush 110-120V
220-240V
Star washer
Overload switch,
8.5 amp 110-120V
5 amp 220-240V low voltage release
EMI filter
(includes PN’s 8333 & (2) 8509)
Repair kit 220-240V
(includes PN’s 8333 & (2) 8703)
SP-ENC open motor should not be used to pump flammables.
26
PART
NUMBER
3000
3130
3502
3701
3503
3702
3504
3510
3511
3512
8004
8005
8002
8071
8100
8125
8126
8130
8131
8131LVR
8162
8167
8167LVR
8183
8185
8220
8331
8333
8360
8705
8448
3703
8508
8509
8703
8511
8611
8704LVR
8003
9055
9056
Standard Pump Operating Instructions and Parts Manual
Troubleshooting
Troubleshooting Chart
Symptom
Possible Cause(s)
Corrective Action
Pump will not operate
1. No power
1. Confirm power cord is properly
plugged into the outlet
2. Speed Control is turned down
2. Turn knob located on handle
clockwise
Replace seal (see Maintenance section)
Pump is leaking around seal
Seal is bad
Pump is pumping material
slowly
Pump is Powered ON but
nothing is being discharged
Material is to viscous
Pump is turning counterclockwise
27
Confirm viscosity doesn’t exceed pump
capabilities
Motor or plug is wired backwards
Standard Pump Operating Instructions and Parts Manual
WARRANTY
Declarations
Declaration of Conformity
When this unit is used as a stand alone unit it complies with:
Machinery Directive 98/37/EC EN60204,
EN60335-2-41, EN60335-1, Low Voltage Directive 73/23/Eec
EN61010-1, EMC Directive 89/336/Eec EN55014, EN 550104,
EN50081-1, EN50082-1
Declaration of Incorporation When this pump unit is to be installed into machine
or is to be assembled with other machines for
installations, it must not be put into service until
the relevant machinery has been declared in
conformity with Machine Directive 98/37/EC
EN60204, EN60335-2-41, EN60335-1.
Responsible person: Donald M. Murphy, President, Standard Pump, Inc.
1540 University Drive, Auburn, Georgia 30011
Ph: 001-770-307-1003 Fax: 001-770-307-1009
e-mail: [email protected]
www.standardpump.com
Three year limited warranty
Standard Pump, Inc. warrants, subject to the conditions below, through either Standard Pump, Inc., it’s subsidiaries,
or its authorized distributors, to repair or replace free of charge, including labor, any part of this equipment which
fails within three years of delivery of the product to the end user. Such failure must have occurred because of defect
in material or workmanship and not as a result of operation of the equipment other than in accordance with the
instructions given in this material. Specific exceptions include:
• Consumable items such as motor brushes, bearings, couplings and impellers. (Motor brushes typically have a life
span of approximately 700 hours. This will vary with the manner in which the motor is used)
Conditions of exceptions include:
• Equipment must be returned by prepaid carriage to Standard Pump, Inc., its subsidiary or authorized distributor.
• All repairs, modifications must have been made by or with express written permission by Standard Pump, Inc., it’s subsidiary or authorized distributor.
• Equipment which have been abused, misused, or subject to malicious or accidental damage or electrical surge are excluded.
Warranties purporting to be on behalf of Standard Pump, Inc. made by any person, including representatives of
Standard Pump, Inc, its subsidiaries, or its distributors, which do not fall within the terms of this warranty shall not
be binding upon Standard Pump, Inc. unless expressly approved in writing by a Director or Manager of Standard
Pump, Inc. Information for returning pumps Equipment which has been contaminated with, or exposed to, bodily
fluids, toxic chemicals or any other substance hazardous to health must be decontaminated before it is returned to
Standard Pump, Inc, or its distributor. A returned goods authorization number (RGA #) issued by Standard Pump, Inc.,
its subsidiary or authorized distributor, must be included with the returned equipment. The RGA # is required if the
equipment has been used. If the equipment has been used, the fluids that have been in contact with the pump and
the cleaning procedure must be specified along with a statement that the equipment has been decontaminated.
STANDARD PUMP
1540 University Drive, Auburn, Georgia 30011 USA
TOLL FREE 1-866-558-8611 • Phone 770–307–1003 • Fax 770–307–1009
e-mail: [email protected]
www.standardpump.com
28
Standard Pump Operating Instructions and Parts Manual
®
Initially Issued: 7/27/2004
Authorization No.: 1338
This Is To Certify That
Standard Pump, Inc
1540 University Drive, Auburn, Georgia 30011
Is hereby authorized to continue to apply the 3-A Symbol to the models of equipment,
conforming to 3-A Sanitary Standards for:
Centrifugal and Positive Rotary Pumps, Number: 02-09, set forth below:
Model Designations: Progressive Cavity Drum Transfer Pumps - SP-800 Series
(See Attached)
Valid through: December 31, 2010
Timothy R. Rugh_______________________
Executive Director, 3-A Sanitary Standards, Inc.
*****
The issuance of this authorization for the use of the 3-A Symbol is based upon the voluntary certification, by the applicant for it, that the equipment listed above complies fully
with the 3-A Sanitary Standards designated. Legal responsibility for compliance is solely
that of the holder of this Certificate of Authorization, and 3-A Sanitary Standards, Inc.
does not warrant that the holder of an authorization at all times complies with the provisions of the said 3-A Sanitary Standards. This in no way affects the responsibility of 3-A
Sanitary Standards, Inc. to take appropriate action is cases in which evidence of nonconformance has been established.
29