1
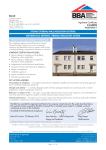
Facade Systems
Installation Manual
Introduction
Section 1 Preparing the substrate
01 Cleaning the substrate
This installation manual is a comprehensive guide to using ROCKWOOL® Facade systems; our
complete external wall insulation solution. The following systems are covered by this manual:
The surface should be thoroughly checked and prepared before any
work commences. Walls should be stable, dry and free from dirt,
dust, old peeling paint and other contaminants as these will reduce
the adhesion of the board adhesive. The ideal method is to wash the
entire wall using a pressure washer or mechanically (e.g. using a
wire brush). If required, the facade should receive an application of
ROCKWOOL Fungicidal Wash.
n REDArt™
Silicone
n REDArt™ Silicone +
n REDArt™ Dash
n REDArt™ Brick Effect
n REDArt™ Granite
n ROCKSHIELD®
n ECOROCK®
n Dashshield
n Brick Effect Render
02 Evaluating the substrate
Contents
The substrate must be inspected to identify potential problem
areas such as (but not limited to) existing loose coatings or uneven
surfaces. Where existing render coatings are present these should
be checked for loose or blown areas via a hammer test. All identified
areas must be removed and made level using a suitable levelling
mortar, i.e. ROCKWOOL Anti-Crack Render.
Preparing the substrate............................................................................................................... 3
Installing the insulation............................................................................................................... 5
Base Coat and Reinforcing Mesh . .............................................................................................. 9
Finishes
REDArt Silicone, REDArt Silicone +, ROCKSHIELD®, ECOROCK® ........................................ 11
REDArt Dash, Dashshield............................................................................................................ 13
REDArt Brick Effect, Brick Effect Render................................................................................... 14
It is recommended that render coatings are removed around window
and door jambs to expose the substrate and allow a secure bond. If
present, old paint should be checked for stability by running a sharp
tool across its surface and applying and removing adhesive tape. If
the paint comes off in whole areas it should be completely removed
and thoroughly cleaned until the substrate is exposed.
Please ensure that you have an up-to-date specification from ROCKWOOL before undertaking any
installation of our systems.
All installation instructions should be read in conjunction with the relevant product technical
data sheets and system certifications.
Interested?
For further information, contact the systems solutions team.
Email: [email protected]
Phone: 01656 868 445
2
03 Levelling the substrate
ROCKWOOL Facade Systems will accommodate local deviations in the substrate of +/- 5mm. If needed, the
substrate can be levelled by using a suitable levelling mortar, or thicker insulation boards. Remember that when
levelling, longer mechanical fixings may be required to ensure the correct embedment depth is achieved.
3
Section 2 Installing the insulation
04 Starter track installation
06 Preparation of board adhesive
Weather conditions must be closely monitored during the
application of the base coat. The following adhesives are used in
conjunction with Rockwool systems:
n ROCKWOOL Board Adhesive: mixed with 6 litres of cool, clean
water
n ROCKWOOL TC Mortar: mixed with 5.8 litres of cool, clean water
n ROCKWOOL Universal Mortar: mixed with 5.8 litres of cool, clean
water
n ROCKWOOL Insulation Board Adhesive mixed with 5.5 litres of
cool, clean water.
Starter tracks should be fixed prior to installing the insulation
boards. Starter tracks must not be fitted below the DPC line and
must be a minimum of 150mm above ground level (unless specified
otherwise). Starter tracks are to be fitted using ROCKWOOL Base
Profile Fixing Screws at maximum 300mm centres. Packers should
be used on uneven substrates. Adjoining lengths must be connected
using ROCKWOOL Base Profile Connection Clips and levelled using a
spirit level.
At internal and external corners, the starter track should be cut and
mitred ensuring the front drip section is not broken.
The adhesive should be mixed using a slow rotation paddle mixer
and be properly prepared before installing the insulation board. After
achieving a homogenous mix, free from lumps, leave for 5 minutes
and then mix again. Once prepared it should be used within 2 hours,
mixing every 30 minutes. Additional water must NOT be added to
the mortar once mixed.
05 External fixtures and other preparation works
Treated timber pattress blocks must be installed at the fixing points
for all external fixtures including (but not limited to) washing lines,
down pipes, and satellite dishes.
Window sills must be extended to ensure that they over sail the
ROCKWOOL Facade system by a minimum of 35mm.
Boiler flues must be extended in accordance with current regulations
by certified operatives.
Any electrical cables that are to be hidden behind the insulation must
be tested to ensure they will still perform effectively after the insulation
slab has been installed.
07 Applying board adhesive to insulation
The insulation surface must be cleaned of dust and loose material.
a. Dual density slab 1200 x 600mm
Ensure the board adhesive is applied to the rear face / softer side of
the insulation. The outer face / harder side is labelled ‘This Side Up’.
The board adhesive can be applied in two ways:
n If no levelling is required, the adhesive should be applied using
a full comb method. Apply the board adhesive to the insulation
using a 10/12 notched trowel. Leave ridges in the board adhesive
and ensure the slab face is fully covered. It is important to ensure
the mortar is pressed into the insulation to improve adhesion.
n If localised levelling is required, the adhesive should be applied
using the ribbon and dab method. It should be noted that when
using the ribbon method, the maximum that can be added to the
back of the board is 15mm. Any more than this and the specified
fixing will not achieve the correct embedment depth. Apply a
tight scratch coat to the perimeter of the insulation and also at
the locations of the dabs to improve adhesion. Apply the board
adhesive to the tight coat; place a band of adhesive 50mm wide
to the perimeter and a minimum of 3 additional dabs across the
centre. A minimum of 40% of the board face must be covered.
Adhesive applied to the perimeter of the board must be applied
in a uniform manner to ensure it does not extend into the board
joints when fixed to the wall.
b. Facade Lamella 1000 x 200mm
Apply the board adhesive to the insulation using a 10/12 notched
trowel. Leave ridges in the board adhesive and ensure the face of
the lamella is fully covered. It is important to ensure the mortar is
pressed into the insulation to improve adhesion.
4
5
08 Fixing the insulation
10 Checking the level of the insulation boards
Please note that during stages 8 and 9, the surface of the insulation
should be checked for plumb, level and flushness using a long
spirit level.
Once the board adhesive has been applied, the insulation should be
attached to the substrate at the required location. Push into place
and adjust by tapping with a flat trowel. The board should be tightly
butt jointed to ensure no gaps are left. Any mortar that squeezes
through the board joint should be removed to prevent cold bridging
and potential cracking of the finished render.
DO NOT attempt to correct the position of the insulation after
it has been installed for a few minutes as this will break the
adhesive bond.
Install the insulation from the starter track and then work up the
building Facade. Board joints should be installed with vertical
staggered joints (brick bond). Board joints at corners should be
staggered in a break bond format.
DO NOT install boards less than 200mm in diameter width
or height.
11 Sealing tape
ROCKWOOL Sealing Tape must be installed at all junctions of the
insulation and building components, i.e. window frames, door
frames, window sills, etc.
Sealing tape should also to be installed around all punctures through
the system, such as boiler flues, pattresses, air brick extenders, etc.
09 Fixing insulation around openings
At window and door openings the insulation should be cut to ensure
that there is no vertical or horizontal board joint at the corner of
the opening. The insulation board should be a minimum distance of
200mm from the corner of the opening to the insulation edge.
Where the opening is to receive insulation to the reveal / jamb, the
main insulation should over sail the reveal insulation.
6
12 Infilling gaps between insulation boards
Gaps between insulation boards larger than 2mm should be filled
using strips of insulation. Filling of the joints with mortar is not
acceptable as this may cause cold bridging and cracking of the
finish render.
7
Section 3 Base Coat and Reinforcing Mesh
13 Mechanical fixing
14 Preparation of base coat
Masonry
Holes should be drilled through the insulation into the substrate
using the correct type of drill for the substrate. The embedment
depth of the fixing is stated in the project specification. When drilling
always drill 10mm deeper to ensure debris does not interfere with
the fixing. Holes should be drilled in the pattern stated in the project
specification. When using the 5 hole fixing pattern, these holes
should be drilled 100 - 150mm diagonally inwards from the corners
of the insulation boards.
The fixing should be carefully inserted into the hole with the centre
board hammered or screwed in (dependent on fixing). The fixing head
should be flush with the insulation. Do not overdrive fixings as this
indents the insulation. If a fixing is overdriven by more than 5mm,
it is deemed unsuitable and should be removed and a new fixing
installed adjacent to it.
Sheathing boards
The fixing is in two parts using a separate screw and washer. The
screw length must be the insulation thickness + sheathing board
thickness + 10mm. Insert the screw into the washer and drive it
carefully into the sheathing board. The fixing head should be flush
with the insulation. Fixings should not be overdriven as this will cause
indentation of the insulation. Where this has occurred, and the fixing
has been overdriven by more than 5mm, it is deemed to be unsuitable
and should be removed and a new fixing installed adjacent to it.
Please ensure the correct base coat is being used for the specified
render finish.
Rockwool systems utilise the following base coat mortars:
n ROCKWOOL FS1 Mortar mixed with 5.5 litres of cool, clean water
n ROCKWOOL FS2 Mortar mixed with 5.0 litres of cool, clean water
n ROCKWOOL TC Mortar, mixed with 5.0 litres of cool, clean water
n ROCKWOOL Universal Mortar mixed with 5.8 litres of cool,
clean water
n ROCKWOOL Bedding Mortar, mixed with 4.0 - 5.0 litres of cool,
clean water
Base coats should be properly prepared by thoroughly mixing a full
bag with clean, cool water using a slow rotation drill with a suitable
mixer. After achieving a homogenous mix, free from lumps, leave
for 5 minutes and then mix again. Once prepared it should be used
within 2 hours, mixing every 30 minutes. Additional water must NOT
be added to the mortar once mixed.
The base coat should not be applied within 48 hours of fixing the
insulation boards.
15 Corner beads and stress patches
Stress patches
Stress patches must be a minimum size of 250mm x 500mm
and installed at all corners of openings at 45°C. These should be
installed with a thin layer of base coat ensuring the base coat is
trowelled into the insulation surface.
Stress patches must also be installed over any pattress blocks and
at the point of any penetration through the system. These must be a
minimum of 100mm larger than the feature and installed at 45°C.
Corner beads and other associated products
Corner beads should be installed using small dabs of base coat to
all external corners of insulation slab. Adjust to ensure a good line
and level. Other beads and trims, such as expansion joints, should be
installed at the same time.
When installing beads with no integral mesh it is advisable to run a
150mm strip of mesh over the leg to ensure correct coverage of the
main reinforcing mesh is achieved.
8
9
Section 4 Finishes
REDArt™ Silicone, REDArt™ Silicone +, ROCKSHIELD®, ECOROCK®
16 Checking the level of the insulation boards installing base coat and reinforcement mesh
17 Applying priming coat
ROCKWOOL Facade Systems utilise the following primers:
The temperature must not be below 5°C on a falling thermometer
or below 3°C on a rising thermometer (ensuring it rises above 5°C).
There must be no risk of frost within 48 hours of application.
REDArt Silicone Primer
ROCKWOOL Masonry Sealer
n ECOROCK Primer
n
n
There are two methods of applying the base coat and reinforcement
mesh. The surface of the insulation must be free from dust and
loose particles.
The surface of the base coat must be primed prior to the application
of the finish coat to ensure optimum adhesion. Where coloured
renders are used, the priming coat must be coloured to match. The
priming coat must be used.
Reinforcing mesh
This must be applied whilst the base coat is still wet as detailed
below. ROCKWOOL Universal Mesh must be installed evenly over
the surface ensuring there are no waves or bumps. The reinforcing
mesh should not be installed directly on to the surface of the
insulation.
ROCKWOOL Universal Mesh has two red bands that follow the first
100mm of either side of the mesh. The reinforcing mesh must have
a minimum 100mm overlap at all vertical and horizontal joints and
must cover the complete Facade, including reveals at openings.
Method 1, single coat
The base coat is applied using a flat trowel at a depth of
approximately 5mm ensuring it is pressed into the insulation
surface to improve adhesion. Using a 10/12 notched trowel, create
ridges in the base coat removing any excess material. Gently press
the reinforcing mesh into the base coat to secure its position. Whilst
still wet, with a flat trowel draw the base coat through the mesh
to ensure it is fully covered. The base coat should have a finished
thickness of 5 to 6mm, be left smooth and level with no trowel
lines and with the reinforcing mesh in the outer third. Do not use a
sponge float.
Method 2, two coats
The base coat is applied using a flat trowel at a depth of
approximately 5mm ensuring it is pressed into the insulation surface
to improve adhesion. Using a 10/12 notched trowel, create ridges
in the base coat removing any excess material. Gently press the
reinforcing mesh into the base coat to secure its position. After
the first coat has set (typically 24 to 48 hours) apply a second tight
coat ensuring the mesh is fully covered. The base coat should have
a finished thickness of 6 to 8mm, be left smooth and level with no
trowel lines and with the reinforcing mesh in the outer third. Do not
use a sponge float.
Leave the base coat to cure for a minimum of 48 hours prior to
application of the priming coats (this may need extending in adverse
weather). The primer can be applied using a brush or roller. It must
be uniform and applied to the complete area. The primer must not
be diluted as this deteriorates the bonding properties
18 Preparation of top coat
Leave the priming coat to dry for a minimum of 24 hours prior to
the application of the REDArt Silicone, REDArt Silicone +,
ROCKSHIELD Silcoplast or ECOROCK Finish Render. It is important
that the scaffold is cleaned and all site dust and rubbish is
removed.
Each elevation must be finished using material from the same
production batch to ensure consistency of colour. Where different
production batches are to be used, the material should be mixed
together in a large tub.
Gently mix each tub using a slow rotational mixer to disperse the
aggregate.
A tight 1mm layer of base coat MUST NOT be applied to the finished
base to remove minor deviations as this will debond during curing.
10
11
Section 4 Finishes
REDArt™ Dash and Dashshield
19 Application of top coat
20 Preparation of dashing mortar
Weather conditions must be closely monitored during the application
of the dashing mortar. ROCKWOOL Dash Receiver should be properly
prepared by thoroughly mixing a full bag of the specified colour with
4.5 to 5 litres of clean, cool water using a slow rotation drill with a
suitable mixer. After achieving a homogenous mix, free from lumps,
leave for 5 minutes and then mix again. Once prepared it should be
used within 1 hour, mixing every 30 minutes.
Additional water must NOT be added to the mortar once mixed.
Weather conditions must be closely monitored as the top coat cures
through the evaporation of moisture. The temperature must not
be below 5°C on a falling thermometer or below 3°C on a rising
thermometer (ensuring it rises above 5°C). There must be no risk of
frost within 48 hours of application. The finish coat must be suitably
protected against rain, strong winds and high exposure to the sun.
Apply the ROCKWOOL top coat to the wall at a thickness equal to the
grain size using either a steel trowel or plastic float. It is important
that all operatives use the same trowel type. Ensure adequate
coverage of the base coat is achieved and any excess material is
removed. In order to avoid any visible lines, a sufficient number of
operatives must be used to ensure that a wet on wet application is
achieved with no breaks during the application.
21 Preparation of spar dashing aggregate
Texture the top coat using a plastic float while the top coat is still
wet. Ensuring constant and consistent pressure is applied, rub the
float over the surface in a circular motion. During this process,
excess material from the top coat will be removed. This must not be
reused. Once a consistent and acceptable finish has been achieved,
lightly rub the float over the surface in a figure of eight to remove
any lines.
Bags of spar dashing aggregate should be opened and emptied into a
large self-draining tub. Wash the aggregate with cool, clean water to
remove any dirt and dust and allow to dry.
22 Installing dashing mortar
Weather conditions must be closely monitored during the application
of the dashing mortar. The temperature must not be below 5°C
on a falling thermometer or below 3°C on a rising thermometer
(ensuring it rises above 5°C). There must be no risk of frost within
48 hours of application.
Install ROCKWOOL Dash Receiver using a metal trowel to a thickness
of 8mm with a level finish.
23 Installing spar dash aggregate
Apply the aggregate to the ROCKWOOL Dash Receiver using a
hawking trowel to the agreed coverage. For best results, flick the
wrist with the trowel parallel to the render at the time the aggregate
is released.
Aggregate that falls and does not stick can be reused providing it is
cleaned as set out in section 21.
12
13
Section 4 Finishes
REDArt Brick Effect and Brick Effect Render
24 Preparation of brick effect base coat
27 Installing brick effect finish coat
Weather conditions must be closely monitored during the application
of the dashing mortar. ROCKWOOL Brick Effect Base Coat should
be properly prepared by thoroughly mixing a full bag of the specified
base coat with 4.4 to 5 litres of clean, cool water using a slow rotation
drill with a suitable mixer. After achieving a homogenous mix, free
from lumps, leave for 5 minutes and then mix again. Once prepared it
should be used within 1 hour, mixing every 30 minutes.
Weather conditions must be closely monitored during the application
of the base coat. The temperature must not be below 5°C on a falling
thermometer or below 3°C on a rising thermometer (ensuring it
rises above 5°C). There must be no risk of frost within 48 hours of
application.
Apply ROCKWOOL Brick Effect Finish onto the stiffened ROCKWOOL
Brick Effect Base Coat using a metal trowel to a thickness of 3 to
5mm with a level finish. Once applied, create texture using a brush or
roller to achieve the desired effect.
Additional water must NOT be added to the mortar once mixed.
Once it has hardened it should be raked out to create the agreed
brick effect pattern ensuring that no more than 1mm of the
ROCKWOOL Brick Effect Base Coat is removed during this process.
25 Installing brick effect base coat
Weather conditions must be closely monitored during the application
of the base coat. The temperature must not be below 5°C on a falling
thermometer or below 3°C on a rising thermometer (ensuring it
rises above 5°C). There must be no risk of frost within 48 hours of
application.
Install ROCKWOOL Brick Effect Base Coat using a metal trowel to
a thickness of 6 to 8mm with a level finish. Allow to stiffen before
the application of the ROCKWOOL Brick Effect Finish. It must not be
allowed to set prior to the application of the finish coat.
Interested?
For further information, contact the systems solutions team.
Email: [email protected]
Phone: 01656 868 445
Visit www.rockwool.co.uk to view the complete range of products and services.
More information
ROCKWOOL Limited reserves the right to alter or amend the specification of products without notice as our policy is one of
constant improvement. ROCKWOOL is not liable for anything that may arise during installation of external wall insulation
whilst following the instructions outlined in this guide.
26 Preparation of brick effect finish coat
ROCKWOOL Brick Effect Finish should be properly prepared by
thoroughly mixing a full bag of the specified finish coat with 4.4 to
5 litres of clean, cool water using a slow rotation drill with a suitable
mixer. After achieving a homogenous mix, free from lumps, leave
for 5 minutes and then mix again. Once prepared it should be used
within 1 hour, mixing every 30 minutes.
Additional water must NOT be added to the mortar once mixed.
14
15
Rockwool Limited
Pencoed
Bridgend
CF35 6NY
[email protected]
www.rockwool.co.uk
16