1
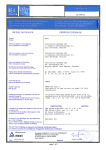
Original user manual Body Drum 1. Declaration of Conformity EU Declaration of Conformity Manufacturer: Jasopels Production A/S Tel. +45 76 94 35 00 Address: Fabriksvej 19 DK-7441 Bording Machine: Self-emptying Body Drum Type: 20-0000 Jasopels Production A/S declares that this product is in accordance with the following EU directives: 89/336 EEC 98/37 EEC Furthermore, we declare that the following harmonized standards have been applied: EN 60204-1 EN 983 Place and date: Frederikshavn, July 1, 2005 Name: CEO Janne Jensen User Manual Self-emptying Body Drum Ver. 1.2.0 Jasopels ♦ Knivholtvej 9 ♦ 9900 Frederikshavn Sales: tel. +45 9842 0566 ♦ fax +45 9843 8000 ♦ Service: tel. +45 9843 9966 Page 2 of 20 2. Table of contents 1. Declaration of Conformity ......................................................................... 2 2. Table of contents ...................................................................................... 3 3. Preface ..................................................................................................... 4 4. Symbol explanation .................................................................................. 5 5. Introduction of the machine ...................................................................... 6 6. Start-up .................................................................................................... 7 7. Operation ................................................................................................. 9 8. Maintenance ........................................................................................... 11 9. Technical data ........................................................................................ 12 10. Circuit and airflow diagram ..................................................................... 13 11. Spare parts list ....................................................................................... 16 12. Troubleshooting .................................................................................... 18 13. Conveyor belt ........................................................................................ 19 User Manual Self-emptying Body Drum Ver. 1.2.0 Jasopels ♦ Knivholtvej 9 ♦ 9900 Frederikshavn Sales: tel. +45 9842 0566 ♦ fax +45 9843 8000 ♦ Service: tel. +45 9843 9966 Page 3 of 20 3. Preface This User Manual is an important part of your new machine. Read the manual thoroughly and use it as a reference book. This manual contains important and the correct use of the machine. The manual should be stored with the machine. It is important that the user manual is supplied with the machine upon resale and lending. The user of the machine must make sure that the operator, service personnel and others who have access to the machine have been instructed in the correct use and handling of the machine. Refer to this user manual for further information. information about User Manual Self-emptying Body Drum Ver. 1.2.0 Jasopels ♦ Knivholtvej 9 ♦ 9900 Frederikshavn Sales: tel. +45 9842 0566 ♦ fax +45 9843 8000 ♦ Service: tel. +45 9843 9966 Page 4 of 20 safety 4. Symbol explanation Please read this user manual and follow the included instructions. In order to emphasize certain information, the following expressions are used: Note! A triangle containing an exclamation mark is a symbol that warns you of important instructions or information concerning this machine. Danger! A triangle containing a flash of lightning is a symbol that warns you of “High Voltage”. User Manual Self-emptying Body Drum Ver. 1.2.0 Jasopels ♦ Knivholtvej 9 ♦ 9900 Frederikshavn Sales: tel. +45 9842 0566 ♦ fax +45 9843 8000 ♦ Service: tel. +45 9843 9966 Page 5 of 20 5. Introduction of the machine The BS Teknik Self-Emptying Body Drum has been designed for tumbling mink. Thanks to the drum’s large capacity it is possible to tumble up to 100 males or 140 females (though no more than 280 kg) at a time. The drum’s self-emptying feature has made the operator’s working environment considerably better. Before it was necessary for the operator to work in a dusty environment, as the mink had to be manually removed from the drum. The drum’s construction includes an automatic control unit, which makes the machine particularly easy to operate. After mink and sawdust have been put into the drum, the operator sets the tumbling time on the control panel and presses START. When the tumbling process is finished, the mink are automatically removed from the drum at its end. After this the drum stops and is ready for the next batch. The automatic control system has also made it possible to remove the mink from the drum in several smaller batches. Note! The user of the machine must make sure that the operator, service personnel and others who have access to the machine have been instructed in the correct use and handling of the machine. Refer to this user manual for further information. The machine may only be used for the purpose it has been designed for. If any problems should occur with the machine or its operation, they must not be fixed before the machine is properly switched off, unless a correction can be made via the machine’s control buttons. The user manual should always be kept available for the operator. User Manual Self-emptying Body Drum Ver. 1.2.0 Jasopels ♦ Knivholtvej 9 ♦ 9900 Frederikshavn Sales: tel. +45 9842 0566 ♦ fax +45 9843 8000 ♦ Service: tel. +45 9843 9966 Page 6 of 20 6. Start-up Before start-up the machine must be placed on a firm and level floor. The machine must not wobble. In order to reduce the amount of wasted sawdust, it is recommended to position the emptying end of the drum about 5 cm higher than the drum’s back end. DANGER! In order to avoid crushing accidents by the back handles and the trailing wheel, the machine needs to be placed in such a way that there is no access to the back side of the drum (it could e.g. be placed against a wall). If this is not possible, you can purchase an extra screen for the wheel from your dealer. The manufacturer has equipped the machine with a 5-pin 16 A CEE plug at the end of the power supply cable which is to be connected to an outlet with 3P+N+PE. A compressed air filter with a quick release coupling has been installed on the drum’s stand, where the compressor’s tube is connected. It is important to make sure that the drum’s direction of rotation is correct. To do that close the loading lid and activate the START button. The lid should now move upwards. If this – contrary to your expectations – is not the case, stop the drum immediately by pressing the STOP button. Interchange the two phases located on the thermo relay (fig. 5.5) and repeat the test. DANGER! Always disconnect the machine’s compressed air and power supply before maintenance, cleaning and other services are performed on the machine. User Manual Self-emptying Body Drum Ver. 1.2.0 Jasopels ♦ Knivholtvej 9 ♦ 9900 Frederikshavn Sales: tel. +45 9842 0566 ♦ fax +45 9843 8000 ♦ Service: tel. +45 9843 9966 Page 7 of 20 The Body Drum is now ready to be used. It is recommended to put up a net table or possibly a BS body conveyor belt at the emptying end of the drum, where the mink are unloaded. The wide range of Jasopels’ products includes a specially designed net table as well as an automatic conveyor belt that are well suited for this drum. In order to avoid potential damage to the control unit’s micro controls and the rest of the machine’s electrical system due to thunderstorms, it is recommended to disconnect the machine from its electrical power source whenever it is not being used. User Manual Self-emptying Body Drum Ver. 1.2.0 Jasopels ♦ Knivholtvej 9 ♦ 9900 Frederikshavn Sales: tel. +45 9842 0566 ♦ fax +45 9843 8000 ♦ Service: tel. +45 9843 9966 Page 8 of 20 7. Operation Start by filling the drum with mink and sawdust. The proportions should be about 50 kg of sawdust for 100 males or 140 females. During normal operation there is no need to change the sawdust in the drum. However, it does need to be refilled regularly as waste of small amounts of sawdust should be expected at the emptying end and some of the sawdust will leave the drum with the animals as well. Close the lid and make sure that the locking mountings are in the locked position. Set the tumbling time on the timer switch (fig. 1). There are 9 steps to choose from between 3 and 24 minutes. Choosing position 9 will extend the tumbling time to one hour. 1. Tumbling time. Determines how long the drum is to keep running. Scale x 3 mins. Step 9 = 1 hour. Machine type plate 3. Empty/Step Press it for less than 2 seconds to empty the drum for 10 seconds and have it keep running (the conveyor belt is activated). Press it for over 2 seconds to empty the remaining content of the drum and stop the drum in its starting position. 2. Stop Emergency stop, stops the drum immediately. Fig. 1 4. Start If the button is pressed for 3 seconds, the drum will be emptied. Remember! The lid must always be closed before you push the START button! Press the green START button (fig. 1) to start the tumbling process. The body drum will now start the tumbling process and it will keep running for the set amount of time. After that the mink will be automatically removed from the drum at the end of the drum and the drum will stop. If you wish to empty the drum before the set time is up, you can do so by pressing the yellow EMPTY button (fig. 1) for more than 2 seconds. The drum will be emptied and it will stop in its starting position. User Manual Self-emptying Body Drum Ver. 1.2.0 Jasopels ♦ Knivholtvej 9 ♦ 9900 Frederikshavn Sales: tel. +45 9842 0566 ♦ fax +45 9843 8000 ♦ Service: tel. +45 9843 9966 Page 9 of 20 You can stop the tumbling process at any time by pressing the red STOP button (fig. 1). EMERGENCY STOP. If you do not wish to empty the drum completely at once, press the EMPTY button for less than 2 seconds. This will cause the machine to empty the drum for 10 seconds and resume the tumbling process after that. If you wan another batch removed from the drum, press the EMPTY button for less than 2 seconds again. If you press the EMPTY button for over 2 seconds, whatever amount of mink is left in the drum will be removed from it as described above. When sawdust is to be removed from the drum, the drum’s lid has to be removed. This is done by opening the lid completely and pushing it out of its hinges. After that start the drum and let it run for several minutes. The sawdust will now fall out of the drum, on the floor underneath of the drum. User Manual Self-emptying Body Drum Ver. 1.2.0 Jasopels ♦ Knivholtvej 9 ♦ 9900 Frederikshavn Sales: tel. +45 9842 0566 ♦ fax +45 9843 8000 ♦ Service: tel. +45 9843 9966 Page 10 of 20 8. Maintenance DANGER! Always disconnect the machine’s power supply before maintenance, cleaning and other services are performed on the machine. The compressed air filter’s water separator can be emptied by pressing the button under the glass until the glass is empty. The water separator can also empty itself if the air pressure tube on the quick release coupling is removed. DANGER! If you need to do maintenance work inside the drum, the power cable MUST be removed from the wall outlet before you start. User Manual Self-emptying Body Drum Ver. 1.2.0 Jasopels ♦ Knivholtvej 9 ♦ 9900 Frederikshavn Sales: tel. +45 9842 0566 ♦ fax +45 9843 8000 ♦ Service: tel. +45 9843 9966 Page 11 of 20 9. Technical data Electrical connection 3 x 400 V+N+PE 5-pin CEE plug Power consumption 3,7 A Air connection Quick release coupling Compressed air consumption Max. 8 bar 2 l/min Dimensions Height: Length: Width: 182 cm 230 cm 124 cm User Manual Self-emptying Body Drum Ver. 1.2.0 Jasopels ♦ Knivholtvej 9 ♦ 9900 Frederikshavn Sales: tel. +45 9842 0566 ♦ fax +45 9843 8000 ♦ Service: tel. +45 9843 9966 Page 12 of 20 10. Circuit and airflow diagram User Manual Self-emptying Body Drum Ver. 1.2.0 Jasopels ♦ Knivholtvej 9 ♦ 9900 Frederikshavn Sales: tel. +45 9842 0566 ♦ fax +45 9843 8000 ♦ Service: tel. +45 9843 9966 Page 13 of 20 User Manual Self-emptying Body Drum Ver. 1.2.0 Jasopels ♦ Knivholtvej 9 ♦ 9900 Frederikshavn Sales: tel. +45 9842 0566 ♦ fax +45 9843 8000 ♦ Service: tel. +45 9843 9966 Page 14 of 20 User Manual Self-emptying Body Drum Ver. 1.2.0 Jasopels ♦ Knivholtvej 9 ♦ 9900 Frederikshavn Sales: tel. +45 9842 0566 ♦ fax +45 9843 8000 ♦ Service: tel. +45 9843 9966 Page 15 of 20 11. Spare parts list Fig. 2 Fig. no. 2.1 2.2 2.2 2.2 2.3 2.4 2.5 BS number 5912-31025150 5926-22819100 5926-22819033 5926-14300320 5923-14002220 5914-32001510 5150-00201050 Spare part number 1260,25,150 PC 28 19 HS10255 ETA cabinet B300*A300*D150 IPCT1814 pnp Filter 1/4 100 Ø 200 m.6204 bearings Name Cylinder Fibox box bottom 28*19*10 Fibox lid with hinge and screw ST3-315- BS – KRTR Inductive sensing device Ø18 PNP NO Compressed air filter Trailing wheel for drum Fig. 3 Fig. no. 3.1 3.2 3.3 3.4 3.5 BS number Spare part number 5912-31032300 5150-00201050 5935-13874020035 5931-10150205 5150-00201060 1260,32,300 Ø 200 m.6204 bearings LPC 87-40-200-Ø24-Ø35 ST 90 SC 2 1.5 KW 2800 Ø 200 / Ø20 Name Cylinder Trailing wheel for drum Right angle gear unit Motor Travel wheel User Manual Self-emptying Body Drum Ver. 1.2.0 Jasopels ♦ Knivholtvej 9 ♦ 9900 Frederikshavn Sales: tel. +45 9842 0566 ♦ fax +45 9843 8000 ♦ Service: tel. +45 9843 9966 Page 16 of 20 Fig. 4 Fig. no. 4.1 4.2 4.3 4.4 BS number Spare part number 5924-74011020 5924-74011010 5924-60209010 5924-74011030 BET01 B3M B3T10 Name B&J plug element 1 NC B&J coupling element Timer (version with 4 wires) B&J plug element 1 NO Fig. 5 Fig. no. 5.1 5.2 5.3 5.4 5.5 BS number 5921-14000110 5925-14020030 5911-5023051225 5911-5023051262 5925-34022070 Spare part number 1761-L16BWA K2-12A01-230V MB 58,220/50-60 Hz coil M 2 pilot NC U12/16e 4,0 A 1,1-1,5kw Name Micro controller 1761-L16BWA B&J contactor K2-12A01-230V Coil Pilot valve B&J Thermo Overload Relay 2,7-4,0 A User Manual Self-emptying Body Drum Ver. 1.2.0 Jasopels ♦ Knivholtvej 9 ♦ 9900 Frederikshavn Sales: tel. +45 9842 0566 ♦ fax +45 9843 8000 ♦ Service: tel. +45 9843 9966 Page 17 of 20 12. Troubleshooting This chapter is a description of some problems that might occur and that can be fixed right away by the operator. In the case of problems that cannot be fixed by the operator it is recommended to contact the Jasopels Service Department for further assistance. DANGER! Always disconnect the machine’s power and air supply before maintenance, cleaning and other services are performed on the machine. 12.1 The belts are making a howling noise When the belts become too dry, they can begin to make a noise when the drum is running. Moisten the belts with water or rub stearine on the drum’s belt ring. 12.2 The drum does not stop As described in chapter 7, the drum is supposed to stop in its starting position when the tumbling time is up and the drum has been emptied. It is the inductive sensing device (shown in fig. 2.3) together with the sensing plate at the top of the drum that determines the lid’s position when the drum stops. When the switch (fig. 1.1) is set to 9, the tumbling time is set to one hour. If the sensing plate is missing, the drum will not stop after the emptying process is completed. If the inductive sensing device is damaged or incorrectly adjusted so the distance between it and the sensing plate is too big, the drum will not stop. On the sensor there are two nuts that need to be adjusted so that the distance between the sensing plate and the end of the sensor is about 3-4 mm. The sensor is adjusted correctly if the little light at the end of the sensor’s wire blinks every time the sensing plate passes the sensor. If the end of the sensor has been deformed after having been too close to the drum, it can be defective. In this case you will not see the light at the end of the sensor blink when the sensing plate passes. User Manual Self-emptying Body Drum Ver. 1.2.0 Jasopels ♦ Knivholtvej 9 ♦ 9900 Frederikshavn Sales: tel. +45 9842 0566 ♦ fax +45 9843 8000 ♦ Service: tel. +45 9843 9966 Page 18 of 20 12.3 The drum does not get emptied If only a few animals come out when the drum is supposed to be emptied, it may mean that the unloading grates have not been lifted. Make sure that the compressor’s pressure is at least 8 bar. There may be a leak in the air tube between the control box and the air cylinder inside the body drum. DANGER! If you need to do maintenance work inside the drum, the power cable MUST be removed from the wall outlet before you start. 13. Conveyor belt The BS Teknik Self-emptying Body Drum can be combined with a conveyor belt, the purpose of which is to optimize the capacity of the slicing machine / skinning robot. This increase in capacity can be achieved by having a mink ready at all times for the operators of the mentioned machines. The conveyor belt and body drum can be placed end-to-end or perpendicularly to each other. The conveyor belt must be placed in such a way that one of the raised shields is placed under the body drum’s unloading grate. To connect the conveyor belt to the body drum connect the 4-pin CEE extension plug from the drum with the 4-pin plug by the motor protection of the conveyor belt. The conveyor belt’s 5-pin CEE plug needs to be connected with the tap that has been installed underneath of the body drum’s control box. CEE plug for sensing cable 5-pin CEE plug from drum to conveyor belt User Manual Self-emptying Body Drum Ver. 1.2.0 Jasopels ♦ Knivholtvej 9 ♦ 9900 Frederikshavn Sales: tel. +45 9842 0566 ♦ fax +45 9843 8000 ♦ Service: tel. +45 9843 9966 Page 19 of 20 13.1 How to operate the conveyor belt When the conveyor belt has been set up and connected with the body drum, the system is ready to be used. The conveyor belt can be controlled from the body drum in the following way: when the drum begins to unload, the belt will start running in small steps in order to load all of the belt’s length with mink. When the photosensor’s beam of light at the end of the belt is interrupted, the belt stops. After that the automatic control unit makes sure that the belt is started/stopped as the mink are removed. When the last mink has been removed, the conveyor belt will run for about 10 seconds without stopping. After that it will stop and will then be ready to run again. If the photosensor’s beam of light is interrupted during the emptying phase, the conveyor belt will switch from running in small steps to running without stopping until the beam of light is interrupted again. This will cause the mink to be transported to the operator quicker. A safety bow has been installed at the end of the conveyor belt. Applying pressure on the bow causes the belt to stop immediately. The restart procedure is described below. 3. Empty/Step Press it for less than 2 seconds to empty the drum for 10 seconds and have it keep running (the conveyor belt is activated). Press it for over 2 seconds to empty the remaining content of the drum; the conveyor belt starts and the drum stops in its starting position. Machine type plate 1. Tumbling time Determines how long the drum is to keep running. Scale x 3 mins. Step 9 = 1 hour. 2. Stop Emergency stop, stops the drum and the conveyor belt immediately. 4. Start Press it for a short time to start the drum. Press it for more than 2 seconds to start the belt if the safety bow has been activated. Fig. 2 When the drum is not running and you only want the conveyor belt to start: Press the EMPTY button and keep it pressed. Press START for a short time and release the EMPTY/STEP button after that. User Manual Self-emptying Body Drum Ver. 1.2.0 Jasopels ♦ Knivholtvej 9 ♦ 9900 Frederikshavn Sales: tel. +45 9842 0566 ♦ fax +45 9843 8000 ♦ Service: tel. +45 9843 9966 Page 20 of 20