1
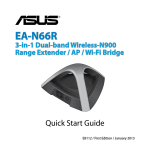
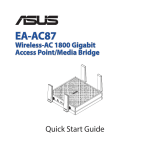
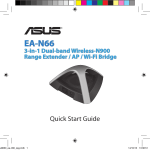
®
EA-N66
3-in-1 Dual-band Wireless-N900
Range Extender / AP / Wi-Fi Bridge
Quick Start Guide
English................................................................................................................................. 3
French.................................................................................................................................. 10
Spanish................................................................................................................................ 17
Portuguese........................................................................................................................ 24
NAE8660 / Third Edition / Sept. 2013
Package contents
EA-N66
Network cable
Power adapter
Quick Start Guide
English
NOTE: If any of the items is damaged or missing, contact your retailer.
Mounting options
Out of the box, ASUS EA-N66 is designed to sit on a raised flat surface like a file
cabinet or book shelf. The unit may also be converted for mounting to a wall or
ceiling.
1.Look on the underside for the mounting hook.
2.Mark an upper hole in a flat surface.
3.Tighten one screw until only 1/4’’ is showing.
4.Latch the hook of your EA-N66 onto the screw.
NOTES:
• Re-adjust the screw if you cannot latch EA-N66 onto the screw or if it is too
loose.
• The screw is not included in the EA-N66 package contents.
A quick look
4
3
5
English
1
2
6
1) Ethernet port
2) DC In port
3)
LED indicator
OFF: No power or physical connection
Blinking slowly: Establishing connection
Solid light: Excellent connection
Flickering light: Weak connection
Blinking fast intermittently: Establishing WPS connection
4) Air vent
5) Mounting hole
6) WPS button
7) Reset button
7
Getting started
a.Insert your EA-N66’s power adapter to the
DC-In port and plug it to a power outlet.
b.Using the bundled network cable, connect
your computer to your EA-N66’s LAN port.
EA-N66’s LED blinks slowly indicating that it
is booting up and establishing connection.
c. In your web browser, key in
www.asusrouter.com. Key in admin as the
default username and password to log
into EA-N66’s web graphical user interface
(Web GUI).
d.From EA-N66’s Web GUI, select your preferred operation mode.
e.Follow the onscreen instructions to complete the wireless connection setup.
f. Check if EA-N66’s LED indicator turns a solid
light, which indicates that EA-N66 has successfully connected to the wireless network.
English
Setting up your EA-N66
b
Wall Power Outlet
a
See the setup tutorial video at
http://youtu.be/MseyzQVjaPY
NOTE: You can use the WPS function to connect your EA-N66 as an Ethernet
adapter to your wireless network without logging into its Web GUI. For more
details, refer to the next section Using WPS.
Using WPS
English
The WPS (Wi-Fi Protected Setup) button allows
you to connect to a secured and protected
network with a simple click.
a.Insert your EA-N66’s power adapter to the
DC-In port and plug it to a power outlet.
b.Press the WPS button on your EA-N66 and
on your router until the power LEDs of these
devices blink fast and intermittently, which
indicates that EA-N66 is establishing connecSee the WPS tutorial video at
tion with your router or wireless network.
http://youtu.be/uUB1zie6ty4
c. Wait until EA-N66’s power LED turns a solid
light, which indicates that it has successfully
established connection with your wireless
network.
d.Using the bundled network cable, connect your HD media player, Internet TV,
set top box, or other Ethernet-enabled device, to your EA-N66’s LAN port.
e.You can now start doing Internet or network related activities such as media
streaming, Internet surfing, and others.
IMPORTANT: If your EA-N66’s LED indicator turns into a flickering light, which
indicates a weak connection, move your EA-N66 closer to your router.
NOTE: Use ASUSWRT (the router’s Web GUI) to configure the wireless pairing.
Operation modes
ASUS EA-N66 provides three operation modes: Ethernet Adapter, Access Point
(AP), and Repeater.
English
NOTE: Please follow the GUI Setup Wizard for these modes.
Ethernet Adapter mode
By default, EA-N66 is set to the Ethernet
Adapter mode. In this mode, you can connect any Ethernet-enabled device to your
wireless home network via the
wireless router. This mode is perfect for
home theater devices such as Internet TV,
TiVo, and Blu-ray player.
Internet TV
ADSL/
Cable
modem
IMPORTANT:
•For the best wireless performance, place EA-N66 at a distance of more than 1.5
meters away from the parent Access Point (AP).
•You can adjust the transmission power of EA-N66 from its web interface.
Frequently Asked Questions
Q1: I cannot access the web GUI to configure the EA-N66 settings.
English
• Close all running web browsers and launch again.
• Follow the steps below to configure your computer settings based on its
operating system.
Windows 7
A. Disable the proxy server, if enabled.
1.Click Start > Internet Explorer to launch the web
browser.
2.Click Tools > Internet options > Connections tab >
LAN settings.
3.From the Local Area Network (LAN) Settings screen,
untick Use a proxy server for your LAN.
4.Click OK when done.
B. Set the TCP/IP settings to automatically obtain an
IP address.
1.Click Start > Control Panel > Network and Internet
> Network and Sharing Center > Manage network
connections.
2.Select Internet Protocol Version 4 (TCP/IPv4), then
click Properties.
3.Tick Obtain an IP address automatically.
4.Click OK when done.
Mac 10.5.8
A. Disable the proxy server, if enabled.
English
1.From the menu bar, click Safari >
Preferences... > Advanced tab.
2.Click Change Settings... in the Proxies field.
3.From the list of protocols, deselect FTP Proxy
and Web Proxy (HTTP).
4.Click OK when done.
B. Set the TCP/IP settings to automatically
obtain an IP address.
1.Click the Apple icon
> System Preferences > Network.
2.Select Ethernet and select Using DHCP in
the Configure field.
3.Click Apply when done.
Q2: W
hen I set my EA-N66 to Repeater Mode, should I use the same
SSID with my parent AP?
•We recommend that you use a different SSID for your EA-N66 so you can
choose the one with the best signal strength (between your EA-N66 and your
parent AP).
Contenu de la boîte
EA-N66
Câble réseau Adaptateur secteur
Guide de démarrage rapide
Français
REMARQUE : Contactez votre revendeur si l’un des éléments est manquant ou
endommagé.
Options de montage
L’ASUS EA-N66 a été conçu pour être placé sur une surface plane comme un bureau ou un classeur. Toutefois, l’appareil peut être fixé sur un mur ou un plafond.
1.Localisez l’ouverture de fixation murale située sous l’appareil.
2.Percez un trou sur un mur ou au plafond.
3.Placez-y une vis et serrez-la jusqu’à ce qu’un quart de la vis dépasse du trou.
4.Placez l’ouverture de fixation du EA-N66 sur la vis.
REMARQUES :
•Ajustez la position de la vis si la fixation de l'EA-N66 n'est pas stable.
•La vis n'est pas incluse dans la boîte de votre EA-N66.
10
Aperçu rapide
4
5
Français
3
1
2
6
7
1) Port Ethernet
2) Prise d’alimentation (CC)
3)
Voyant lumineux
Éteint : aucune alimentation ou connexion physique
Clignotement lent : connexion en cours
Allumé : connexion excellente
Scintillant: connexion de mauvaise qualité
Clignotement rapide intermittent: connexion WPS en cours
4) Fentes de ventilation
5) Ouverture pour fixation murale
6) Bouton WPS
7) Bouton de réinitialisation
11
Mise en route
Configurer votre EA-N66
Français
a.Utilisez l’adaptateur secteur pour relier
l’EA-N66 à une prise électrique.
b.Utilisez le câble réseau fourni pour relier
votre ordinateur au port réseau de l’EAN66. Le voyant lumineux de votre EA-N66
b
a
clignote lentement pour indiquer que la
connexion est en cours.
c. Dans la barre d’adresse de votre navigateur Internet, entrez www.asusrouter.com.
Entrez admin comme nom d’utilisateur
et mot de passe par défaut de connexion à
l’interface de gestion de votre EA-N66.
d.Dans l’interface de gestion, sélectionnez l’un
des modes de fonctionnement disponibles.
e.Suivez les instructions apparaissant à l’écran
pour terminer la configuration de votre connexion sans fil.
f. Vérifiez que le voyant lumineux de l’EA-N66 est
allumé, indiquant que la connexion au réseau Consultez la vidéo d’aide sur
http://youtu.be/MseyzQVjaPY
sans fil a été établie.
Wall Power Outlet
REMARQUE: vous pouvez utiliser la fonctionnalité WPS pour connecter votre
EA-N66 comme adaptateur Ethernet à votre réseau sans fil sans avoir à passer
par l’interface de gestion de l’appareil. Pour plus de détails, consultez la section
Utiliser la fonctionnalité WPS.
12
Le bouton WPS (Wi-Fi Protected Setup) vous
permet d’établir une connexion sans fil sécurisée.
a.Reliez une extrémité de l’adaptateur secteur
de à la prise d’alimentation de votre EA-N66
et l’autre extrémité à une prise électrique.
b.Appuyez sur le bouton WPS de votre EA-N66
et de votre routeur jusqu’à ce que les voyants lumineux de ces appareils clignotent
See the WPS tutorial video at
rapidement et de manière intermittente,
http://youtu.be/uUB1zie6ty4
pour indiquer que l’EA-N66 tente d’établir
une connexion au routeur ou au réseau sans
fil.
c. Patientez le temps que le voyant lumineux de votre EAN-66 s’arrête de clignoter. Ceci indique que la connexion au réseau sans fil a été établie.
d.Utilisez le câble réseau fourni pour relier votre EA-N66 à un appareil doté d’une
prise Ethernet.
e.Vous pouvez maintenant profiter de votre connexion pour surfer sur Internet et
prendre part à d’autres activités réseau.
IMPORTANT: si le voyant lumineux de votre EA-N66 scintille, indiquant une
mauvaise qualité de connexion sans fil, rapprochez l’EA-N66 de votre routeur.
REMARQUE: Utilisez l’interface ASUSWRT (interface de gestion du routeur) pour
configurer le jumelage sans fil.
13
Français
Utiliser la fonctionnalité WPS
Modes de fonctionnement
L’ASUS EA-N66 offre trois modes de fonctionnement : Adaptateur Ethernet,
Point d’accès et Répéteur.
Français
REMARQUE : suivez les étapes fournies lors de l’exécution de l’assistant de
configuration pour configurer l’un de ces modes.
Mode Adaptateur Ethernet
Ceci est le mode de fonctionnement par
défaut de votre EA-N66. Sous ce mode,
vous pouvez connecter n’importe quel
dispositif doté d’une prise réseau Ethernet
à votre réseau sans fil domestique via votre
routeur sans fil. Ce mode est idéal pour les
équipements de divertissement comme
les téléviseurs Internet TV ou les lecteurs
Blu-ray.
TV Internet
Modem
ADSL/
Câble
IMPORTANT :
•Pour optimiser la réception du signal sans fil, placez l'EA-N66 à une distance de
plus d’un mètre et demi de son point d’accès.
•Vous pouvez régler la puissance de transmission de l’EA-N66 à partir de son
interface de configuration.
14
FAQ
Q : Je ne parviens pas à accéder au Gestionnaire de configuration
Web pour régler les paramètres de mon EA-N66.
Français
• Redémarrez votre explorateur Internet.
• Suivez les étapes suivantes pour configurer votre ordinateur en fonction du
système d’exploitation utilisé.
Windows 7
A. Désactivez le serveur proxy si celui-ci est activé.
1.Cliquez sur Démarrer > Internet Explorer pour lancer
le navigateur.
2.Cliquez sur Outils > Options Internet > onglet
Connexions > Paramètres réseau.
3.À partir de l’écran Paramètres du réseau local,
décochez l’option Utiliser un serveur proxy pour
votre réseau local.
4.Cliquez sur OK une fois terminé.
B. Configurez les paramètres TCP/IP pour l’obtention
automatique d’une adresse IP.
1.Cliquez sur Démarrer > Panneau de configuration
> Réseau et Internet > Centre réseau et partage >
Gérer les connexions réseau.
2.Sélectionnez Protocole Internet version 4 (TCP/
IPv4), puis cliquez sur Propriétés.
3.Cochez l’option Obtenir une adresse IP
automatiquement.
4.Cliquez sur OK une fois terminé.
15
Mac 10.5.8
A. Désactivez le serveur proxy si celui-ci est
activé.
Français
1.Dans la barre des menus, cliquez sur Safari >
Préférences... > onglet Avancées.
2.Cliquez sur Modifier les réglages... dans le
champ Proxies.
3.Dans la liste des protocoles, décochez les
options Proxy FTP et Proxy web sécurisé
(HTTPS).
4.Cliquez sur OK une fois terminé.
B. Configurez les paramètres TCP/IP pour l’
obtention automatique d’une adresse IP.
1.Cliquez sur la Pomme
> Préférences
Système > Réseau.
2.Sélectionnez Ethernet puis Via DHCP dans
le champ Configurer.
3.Cliquez sur Appliquer une fois terminé.
Q2 : Est-il nécessaire d’utiliser le même SSID et paramètres de
chiffrement pour mon EA-N66 et le point d’accès parent ?
•Lorsque votre EA-N66 fonctionne en mode répéteur, celui-ci doit utiliser un
SSID et une méthode de chiffrement identiques à ceux utilisés par le point
d’accès. Ceci permet d’aider à étendre la portée du signal sans fil.
16
Contenido del paquete
Adaptador de alimentación
Guía de inicio rápido
NOTA: Si cualquiera de los artículos falta o está dañado, póngase en contacto con
ASUS para realizar preguntas técnicas u obtener soporte técnico.
Opciones de montaje
El EA-N66 ASUS ha sido diseñado para ser emplazado sobre una superficie plana,
como un archivador o una estantería. El equipo también puede anclarse en una
pared o techo.
1.Mire en la parte inferior para ver el gancho de montaje.
2.Marque los dos orificios superiores en una pared o superficie elevada.
3.Apriete un tornillo hasta que solo quede visible 1/4’’ de su longitud.
4.Eche el gancho de su EA-N66 en el tornillo.
NOTAS:
•Reajuste el tornillo si no puede asegurar su EA-N66 en dicho tornillo o si queda
demasiado suelto.
•El tornillo no se incluye en el contenido del paquete de su EA-N66.
17
Español
EA-N66 Cable de red
Un vistazo rápido
4
3
5
Español
1
2
6
7
1) Puerto Ethernet
2) Puerto de alimentación (entrada de DC)
3)
Indicador LED
Desligado: Sem energia ou conexão física
Piscando lentamente: conexão
Luz sólida: Conexão excelente
Luz intermitente: conexión débil
Parpadeo rápido de forma intermitente: establecimiento de conexión WPS
4) Ranuras de ventilación
5) Orificio para instalación en pared
6) Botón WPS
7) Botón Restablecer
18
Procedimientos iniciales
a.Inserte el adaptador de alimentación
de su EA-N66 en el puerto Entrada de
CC y enchúfelo a una toma de corriente
eléctrica.
b.Mediante el cable de red incluido, conecte
b
a
el equipo al puerto LAN de su EA-N66. El
LED de su EA-N66 parpadeará lentamente,
lo que indica que está arrancando y
estableciendo la conexión.
c. En el explorador Web browser, escriba
www.asusrouter.com. Escriba admin como
el nombre de usuario y la contraseña
predeterminados para iniciar sesión en la
interfaz gráfica de usuario (GUI Web) de su
EA-N66.
d.En la GUI Web de su EA-N66, seleccione el
modo de funcionamiento que prefiera.
e.Siga las instrucciones que aparezcan en la
pantalla para completar la configuración de
Consulte el vídeo del tutorial en
la conexión inalámbrica.
http://youtu.be/MseyzQVjaPY
f. Compruebe si el indicador LED de su EA-N66
se ilumina permanentemente, lo que indica que su EA-N66 se ha conectado
correctamente a la red inalámbrica.
Wall Power Outlet
NOTA: puede utilizar la función WPS para conectar su EA-N66 como adaptador
Ethernet a la red inalámbrica sin iniciar sesión en su GUI Web. Para obtener más
detalles, consulte la siguiente sección: Utilizar la funcionalidad WPS.
19
Español
Configurar su EA-N66
Utilizar la funcionalidad WPS
Español
El botón WPS (Wi-Fi Protected Setup, es
decir, Configuración protegida Wi-Fi) permite
conectarse a una red segura y protegida con
un simple clic.
a.Inserte el adaptador de CA de su EA-N66 en
el puerto Entrada de CC y enchúfelo a una
toma de corriente eléctrica.
b.Presione el botón WPS de su EA-N66 y del
enrutador hasta que los LED de alimentación
Consulte el vídeo del tutorial en
de estos dispositivos parpadeen rápida e
http://youtu.be/uUB1zie6ty4
intermitentemente, lo que indica que su
EA-N66 está estableciendo conexión con el
enrutador o la red inalámbrica.
c. Espere hasta que el LED de alimentación de su EA-N66 se ilumine
permanentemente, lo que indica que ha establecido conexión correctamente
con la red inalámbrica.
d.Mediante el cable de red incluido, conecte el reproductor multimedia HD, el
televisor con Internet, el descodificador u otro dispositivo Ethernet al puerto
LAN de su EA-N66.
e.Ahora puede comenzar a realizar actividades relacionadas con Internet o la red,
como por ejemplo transmitir por secuencias contenido multimedia, navegar
por Internet, etc.
IMPORTANTE: si el indicador LED de su EA-N66 parpadeará, lo que indica que la
conexión es débil, acérquelo al enrutador.
NOTA: Utilice ASUSWRT (la interfaz gráfica del usuario Web del enrutador) para
configurar la asociación inalámbrica.
20
Modos de funcionamiento
Español
ASUS EA-N66 ofrece tres modos de funcionamiento: Ethernet Adapter,
(Adaptador de Ethernet), Access Point (AP) (Punto de acceso (PA)) y Repeater
(Repetidor).
NOTA: siga las instrucciones del Asistente para la instalación GUI para estos
modos.
Modo Adaptador Etherne
De forma predeterminada, su EA-N66 se
establece en el modo Adaptador Ethernet.
En este modo, puede conectar cualquier
dispositivo con funcionalidad Ethernet
a su red doméstica inalámbrica a través
del enrutador inalámbrico. Este modo es
perfecto para dispositivos de cine en casa
como por ejemplo TV a través de Internet,
TiVo y reproductores Blu-ray.
TV a través de
Internet
Módem
ADSL o de
cable
IMPORTANTE:
•Para obtener el mejor rendimiento inalámbrico, coloque el dispositivo EA-N66 a
una distancia superior a 1,5 m del punto de acceso (PA) principal.
•Puede ajustar la potencia de transmisión del dispositivo EA-N66 desde su
interfaz Web.
21
Solución de problemas
P1: No puedo acceder a la interfaz GUI web para configurar los
parámetros del router inalámbrico.
Español
• Cierre todos los exploradores web en ejecución e inicie de nuevo uno de ellos.
• Siga los pasos descritos a continuación para configurar el equipo según el sistema
operativo instalado.
Windows 7
A.Deshabilite el servidor proxy si se encuentra
habilitado.
1. Haga clic en Start (Inicio) > Internet Explorer para iniciar
el explorador web.
2. Haga clic en Tools (Herramientas) > Internet
options (Opciones de Internet) > ficha Connections
(Conexiones) > LAN settings (Configuración de LAN).
3.En la pantalla Local Area Network (LAN) Settings
(Configuración de la red de área local (LAN)), desactive
la opción Use a proxy server for your LAN (Usar un
servidor proxy para la LAN).
4. Haga clic en OK (Aceptar) cuando haya terminado.
B.Establezca la configuración TCP/IP del equipo para que
reciba una dirección IP automáticamente.
1. Haga clic en Start (Inicio) > Control Panel (Panel de
control) > Network and Internet (Red e Internet) >
Network and Sharing Center (Centro de redes y de
recursos compartidos) > Manage network connections
(Administrar conexiones de red).
2. Seleccione Internet Protocol Version 4 (TCP/IPv4)
(Protocolo de Internet versión 4 (TCP/IPv4)) y haga clic
en Properties (Propiedades).
3. Active la opción Obtain an IP address automatically
(Obtener una dirección IP automáticamente).
4. Haga clic en OK (Aceptar) cuando haya terminado.
22
Español
Mac 10.5.8
A.Deshabilite el servidor proxy si se
encuentra habilitado.
1.En la barra de menús, haga clic en Safari
> Preferences... (Preferencias...) > ficha
Advanced (Avanzado).
2. En el campo Proxies, haga clic en Change
Settings... (Cambiar ajustes...).
3. En la lista de protocolos, anule la selección de
los elementos FTP Proxy (Proxy de FTP) y Web
Proxy (HTTP) (Proxy de web (HTTP).
4. Haga clic en OK (Aceptar) cuando haya
terminado.
B.Establezca la configuración TCP/IP del
equipo para que reciba una dirección IP
automáticamente.
1. Haga clic en el icono de Apple > System
Preferences (Preferencias del Sistema) >
Network (Red).
2. Seleccione Ethernet y, a continuación, Using
DHCP (Usar DHCP) en el campo Configure
(Configurar).
3. Haga clic en Apply (Aplicar) cuando haya
terminado.
P2: Cuando establezco mi EA-N66 en el modo Repetidor, ¿debo
utilizar el mismo SSID con mi PA principal?
•Es recomendable utilizar un SSID diferente del de su EA-N66 de forma que
pueda elegir el que tenga la mejor intensidad de señal (entre su EA-N66 y el
PA principal).
23
Conteúdo da embalagem
EA-N66
Cabo de rede
Transformador
Guia de consulta rápida
Português
NOTA: Caso algum item esteja danificado ou em falta, contacte o seu revendedor.
Opções de montagem
O EA-N66 da ASUS foi concebido para estar numa superfície plana e elevada,
como um arquivo de ficheiros ou uma estante de livros. A unidade também pode
ser convertida para montagem numa parede ou tecto.
1.Localize na parte inferior o gancho de instalação.
2. Marque dois orifícios superiores numa parede ou numa superfície plana e
elevada.
3.Aperte um parafuso até ficarem apenas 5 milímetros à mostra.
4.Fixe o gancho do EA-N66 no parafuso.
NOTAS:
•Reajuste o parafuso caso não consiga fixar o EA-N66 ou se o parafuso estiver
demasiado desapertado.
•O parafuso não está incluído na embalagem do EA-N66.
24
Visão geral
4
5
Português
3
1
2
6
7
1) Ethernet port
2) Porta de alimentação (Entrada DC)
3)
Indicador LED
Desligado: Sem energia ou sem ligação física
Intermitente lento: ligação
Estático: Ligação excelente
Flickering light: Ligação fraca
A piscar rapidamente: A estabelecer ligação WPS
4) Entrada de ar
5) Orifícios para montagem na parede
6) Botão WPS
7) Botão de reposição
25
Começar a utilizar
Instalar o EA-N66
Português
a.Ligue o transformador do EA-N66 à porta
de entrada DC e a uma tomada eléctrica.
b.Utilizando o cabo de rede fornecido, ligue
o seu computador à porta LAN do EA-N66.
O LED EA-N66 pisca lentamente indicando
que está a arrancar e a estabelecer ligação.
c. No seu navegador Web, introduza o
endereço www.asusrouter.com. Introduza
admin como nome do utilizador e palavrapasse predefinidos para iniciar sessão na
interface gráfica do utilizador do EA-N66
(Interface Web).
d.Na Interface Web do EA-N66, seleccione o
modo de funcionamento preferido.
e.Siga as instruções no ecrã para concluir a
configuração da ligação sem fios.
f. Verifique se o indicador LED do EA-N66
fica estático, o que indica que o EA-N66 se
encontra ligado à rede sem fios.
b
Wall Power Outlet
a
Veja o vídeo tutorial em
http://youtu.be/MseyzQVjaPY
NOTA: Pode utilizar a função WPS para ligar o EA-N66 como adaptador de
Ethernet à sua rede sem fios sem iniciar sessão na Interface Web. Para mais
detalhes, consulte a secção seguinte Utilizar WPS.
26
O botão WPS (Wi-Fi Protected Setup) permite
ligar a uma rede segura e protegida através de
um simples clique
a.Ligue o transformador AC do EA-N66 à porta
de entrada DC e a uma tomada eléctrica.
b.Prima o botão WPS no EA-N66 e no router
até que os LED de energia dos dispositivos
pisquem rapidamente, o que indica que o
EA-N66 está a estabelecer ligação com o
eja o vídeo tutorial da função
router ou com a rede sem fios.
WPS em
c. Aguarde que o LED de energia do EA-N66
http://youtu.be/uUB1zie6ty4
fique estático, o que indica que o mesmo se
encontra ligado à rede sem fios.
d.Utilizando o cabo de rede fornecido, ligue um leitor multimédia HD, Internet TV,
descodificador ou outro dispositivo com Ethernet à porta LAN do EA-N66.
e.Pode começar a realizar actividades relacionadas com a Internet ou com a rede,
tais como, navegar na Internet e outras.
IMPORTANTE: Se o indicador LED do EA-N66 começar a cintilar, o que indica uma
ligação fraca, aproxime o EA-N66 do seu router.
NOTA: Utilize o ASUSWRT (a interface Web do router) para configurar o
emparelhamento sem fios.
27
Português
Utilizar WPS
Modos de funcionamento
Português
O ASUS EA-N66 oferece três modos de funcionamento. Ethernet Adapter
(Adaptador Ethernet), Access Point (Ponto de Acesso) (AP), e Repeater
(Repetidor).
NOTA: Siga as instruções do Assistente de Configuração GUI para mudar para
estes modos.
Modo de Adaptador Ethernet
Por predefinição, o EA-N66 está
configurado para o modo de
Adaptador Ethernet. Neste modo, poderá
ligar qualquer dispositivo com ligação
Ethernet à sua rede sem fios doméstica
através do router sem fios. Este modo é
perfeito para dispositivos de cinema em
casa, como por exemplo uma TV com
Internet, TiVo, e um leitor de Blu-ray.
TV com
Internet
Modem
ADSL/Cabo
IMPORTANTE:
•Para um melhor desempenho da rede sem fios, coloque o EA-N66 a uma
distância superior a 1,5 metros do Ponto de Acesso (PA).
•Pode ajustar a potência de transmissão do EA-N66 a partir da sua interface Web.
28
Resolução de problemas
• Feche todas os navegadores Web que estejam a ser executados e execute
novamente.
• Siga os passos indicados abaixo para configurar as definições do computador de acordo
com o seu sistema operativo.
Windows 7
A.Desactive o servidor proxy, caso esteja activado.
1. Clique em Start (Iniciar) > Internet Explorer para executar
o navegador Web.
2. Clique em Tools (Ferramentas) > Internet options
(Opções da Internet) > separador Connections
(Ligações) > LAN settings (Definições de LAN).
3.No ecrã Definições de rede local (LAN), desmarque a
opção Use a proxy server for your LAN (Utilizar um
servidor proxy para a rede local).
4. Clique em OK quando terminar.
B.Configurar as definições de TCP/IP para obter
automaticamente um endereço IP.
1. Clique em Start (Iniciar) > Control Panel (Painel de
Controlo) > Network and Internet (Rede e Internet) >
Network and Sharing Center (Centro de Rede e Partilha)
> Manage network connections (Gerir Ligações de
rede).
2. Seleccione Internet Protocol Version 4 (TCP/IPv4)
(Internet Protocol versão 4 (TCP/IPv4)) e depois clique
em Properties (Propriedades).
3. Marque a opção Obtain an IP address automatically
(Obter um endereço IP automaticamente).
4. Clique em OK quando terminar.
29
Português
P1: Não consigo aceder à interface Web para configurar as
definições do router sem fios.
Mac 10.5.8
Português
A.Desactive o servidor proxy, caso esteja
activado.
1.Na barra menu barra de menus, clique em Safari
> Preferences... (Preferências...) > separador
Advanced (Avançada).
2. Clique em Change Settings... (Alterar
definições...) no campo Proxies.
3. Na lista de protocolos, desarque FTP Proxy
(Proxy FTP) e Web Proxy (HTTPS) (Proxy web
(HTTPS)).
4. Clique em OK quando terminar.
B.Configurar as definições de TCP/IP para
obter automaticamente um endereço IP.
1. Clique no ícone Apple
> System Preferences
(Preferências do Sistema) > Network (Rede).
2. Seleccione Ethernet e seleccione Using DHCP
(Usar DHCP) no campo Configure (Configurar).
3. Clique em Apply(Aplicar) quando terminar.
P2: Quando configuro o EA-N66 para o Modo Repetidor, devo
utilizar o mesmo SSID do meu Ponto de Acesso?
•Recomendamos que utilize um SSID diferente para o EA-N66 para que possa
escolher o que tenha o melhor sinal (o EA-N66 ou o Ponto de Acesso).
30
SUPPORT HOTLINE
USA/ CANADA
Hotline Number: 1-812-282-2787
Language: English
Availability: Mon. to Fri.
8:30-12:00am EST
(5:30am-9:00pm PST)
Sat. to Sun.
9:00am-6:00pm EST
(6:00am-3:00pm PST)
BRAZIL
Hotline Number: 4003 0988
(Capital) / 0800 880 0988 (demais
localidades)
Language: Portuguese
Availability: Mon. to Fri.
9:00am-18:00
Manufacturer
ASUSTeK Computer Inc.
Tel: +886-2-2894-3447
Address: No. 150, LI-TE RD., PEITOU, TAIPEI 112, TAIWAN
Authorised representative in Europe
ASUS Computer GmbH
Address: HARKORT STR. 21-23, 40880 RATINGEN, GERMANY
Authorised distributors in Turkey
BOGAZICI BIL GISAYAR SAN. VE TIC. A.S.
Tel: +90 212 3311000
Address: AYAZAGA MAH. KEMERBURGAZ CAD. NO.10 AYAZAGA/ISTANBUL
CIZGI Elektronik San. Tic. Ltd. Sti.
Tel: +90 212 3567070Address: CEMAL SURURI CD. HALIM MERIC IS MERKEZI
No: 15/C D:5-6 34394 MECIDIYEKOY/ ISTANBUL
KOYUNCU ELEKTRONiK BiLGi iSLEM SiST. SAN. VE DIS TIC. A.S.
Tel: +90 216 5288888
Address: E MEK MAH.ORDU CAD. NO:18, SARIGAZi, SANCAKTEPE ISTANBUL
EEE Yönetmeliğine Uygundur.
ASUS Recycling/Takeback Services
ASUS recycling and takeback programs come from our commitment to the highest standards for protecting our environment. We believe in providing solutions
for you to be able to responsibly recycle our products, batteries, other components, as well as the packaging materials. Please go to
http://csr.asus.com/english/Takeback.htm for the detailed recycling information
in different regions.
REACH
Complying with the REACH (Registration, Evaluation, Authorisation, and Restriction of Chemicals) regulatory framework, we published the chemical substances
in our products at ASUS REACH website at http://csr.asus.com/english/REACH.htm
Federal Communications Commission Statement
This device complies with Part 15 of the FCC Rules. Operation is subject to the
following two conditions:
• This device may not cause harmful interference.
• This device must accept any interference received, including interference that
may cause undesired operation.
This equipment has been tested and found to comply with the limits for a class
B digital device, pursuant to part 15 of the FCC Rules. These limits are designed
to provide reasonable protection against harmful interference in a residential
installation.
This equipment generates, uses and can radiate radio frequency energy and, if
not installed and used in accordance with the instructions, may cause harmful interference to radio communications. However, there is no guarantee that
interference will not occur in a particular installation. If this equipment does cause
harmful interference to radio or television reception, which can be determined
by turning the equipment off and on, the user is encouraged to try to correct the
interference by one or more of the following measures:
• Reorient or relocate the receiving antenna.
• Increase the separation between the equipment and receiver.
• Connect the equipment into an outlet on a circuit different from that to which
the receiver is connected.
• Consult the dealer or an experienced radio/TV technician for help.
WARNING: Any changes or modifications not expressly approved by the party
responsible for compliance could void the user’s authority to operate the equipment.Prohibition of Co-locationThis device and its antenna(s) must not be co-located or operating in conjunction with any other antenna or transmitter.
Prohibition of Co-location
This device and its antenna(s) must not be co-located or operating in conjunction
with any other antenna or transmitter.
IMPORTANT NOTE:
Radiation Exposure Statement: This equipment complies with FCC radiation
exposure limits set forth for an uncontrolled environment. End users must follow
the specific operating instructions for satisfying RF exposure compliance. To
maintain compliance with FCC exposure compliance requirement, please follow
operation instruction as documented in this manual.
Declaration of Conformity for R&TTE directive 1999/5/EC
Essential requirements – Article 3
Protection requirements for health and safety – Article 3.1a
Testing for electric safety according to EN 60950-1 has been conducted. These are
considered relevant and sufficient.
Protection requirements for electromagnetic compatibility – Article 3.1b
Testing for electromagnetic compatibility according to EN 301 489-1 and EN 301
489-17 has been conducted. These are considered relevant and sufficient.
Effective use of the radio spectrum – Article 3.2
Testing for radio test suites according to EN 300 328- 2 has been conducted. These
are considered relevant and sufficient.
CE Mark Warning
This is a Class B product, in a domestic environment, this product may cause radio
interference, in which case the user may be required to take adequate measures.
Operation Channels: CH1~11 for N. America; Ch1~14 for Japan; CH1~13 for
Europe (ETSI)
IC Warning
This device complies with Industry Canada licence-exempt RSS standard(s).
Operation is subject to the following two conditions: (1) this device may not cause
interference, and () this device must accept any interference, including interference that may cause undesired operation of the device.”
Le présent appareil est conforme aux CNR d’Industrie Canada applicables aux appareils radio exempts de licence. L’exploitation est autorisée aux deux conditions
suivantes : (1) l’appareil ne doit pas produire de brouillage, et (2) l’utilisateur de
l’appareil doit accepter tout brouillage radioélectrique subi, même si le brouillage
est susceptible d’en compromettre le fonctionnement.”
Industry Canada Statement
This device complies with RSS-210 of the industry Canada Rules. Operation is
subject to the following two conditions:
• This device may not cause harmful interference.
• This device must accept any interference received, including interference that
may cause undesired operation.
IMPORTANT NOTE:
Radiation Exposure Statement: This equipment complies with IC radiation exposure limits set forth for an uncontrolled environment. End users must follow the
specific operating instructions for satisfying RF exposure compliance. To maintain
compliance with IC RF exposure compliance requirement, please follow operation
instruction as documented in this manual.
NCC 警語
經型式認證合格之低功率射頻電機,非經許可,公司、商號或使用者均不得擅
自變更頻率、加大功率或變更原設計之特性及功能。
低功率射頻電機之使用不得影響飛航安全及干擾合法通信;經發現有干擾現象
時,應立即停用,並改善至無干擾時方得繼續使用。
前項合法通信,指依電信法規定作業之無線電通信。
低功率射頻電機須忍受合法通信或工業、科學及醫療用電波輻射性電機設備
之干擾。
Safety Warning
SAFE TEMP: This wireless router should be only used in environments with ambient temperatures between 50C (410F) and 400C (1040F).
DO NOT expose to or use near liquids, rain, or moisture. DO NOT use during
electrical storms.