1
8. Removing the stop.
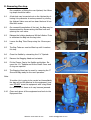
On completion of fitting the new Hydrant, the following steps should be taken.
8.1
A leak test may be carried out on the Hydrant by allowing it to pressurise to mains pressure by closing
the Hydrant Valve once air has been bled and it has
filled with water
8.2
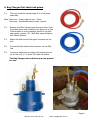
On successful completion of the test, the Bag may be
depressurised by disconnecting the Blue hose and
opening the vent valve.
8.3
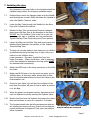
Release the holding bands and lift the Inflation Tube
to withdraw the Bag into the bag tube.
8.4
Loosen the Bag Tube Clamp using the 12mm spanner.
8.5
The Bag Tube can now be lifted up until it reaches
it’s stop.
8.6
Close the Saddle by reinserting the 1½“ Spatula.
8.7
Remove the Bagging Head and set aside.
8.8
Fit the Closure Cap to the Saddle and tighten. Remove the 1½” Spatula and fit the Plastic Cover and
O-rings as required.
8.9
The Bagging Head can be reset by removing the 3”
Shoe and Bag ready for the next operation.
Note.
If another job is going to be carried out immediately
the bag can be left attached to the equipment, however DO NOT store the equipment with a bag fitted
for more than 24 hours or it may become jammed.
8.10
Clean and return all the equipment and tools to the
Equipment Box.
Page 8
Website: www.wask-uk.com
email: [email protected]