1
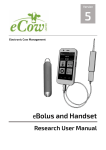
eCow pH Bolus
User Guide
page 1 of 18
Table of Contents
1.Introduction.......................................................................................................................3
eCow pH Bolus............................................................................................................................ 3
eCow Handset............................................................................................................................. 3
Client Software............................................................................................................................ 4
2.Getting Started..................................................................................................................5
Using the Handset....................................................................................................................... 5
Connecting to WiFi...........................................................................................................................5
Hathor...............................................................................................................................................6
Setting the Date and Time................................................................................................................6
Setting the radio Time Window....................................................................................................7
3.System Operation.............................................................................................................8
Bolus Deployment........................................................................................................................ 8
Downloading and Uploading Data................................................................................................8
Using Hathor to Download................................................................................................................9
Cow Handling...................................................................................................................................9
Troubleshooting Downloads...........................................................................................................10
Uploading Data...............................................................................................................................11
4.Viewing the Data..............................................................................................................11
Getting to Grips with Client........................................................................................................ 12
The Farm and Bolus Selection Box................................................................................................12
The Analysis and Events Box.........................................................................................................12
The Graph Section.........................................................................................................................13
The Graphs................................................................................................................................ 14
Temperature Summary...................................................................................................................14
pH Summary...................................................................................................................................14
Daily pH profile...............................................................................................................................15
Importing Data........................................................................................................................... 15
From saved files on your computer................................................................................................15
From the Web Server.....................................................................................................................15
From the Handset...........................................................................................................................16
Exporting Data........................................................................................................................... 16
Save PNG.......................................................................................................................................16
Printing............................................................................................................................................16
To PDF............................................................................................................................................17
5.Warranty...........................................................................................................................18
Use inside other Animals................................................................................................................18
Dry Sensor......................................................................................................................................18
Accidental Damage of the Handset................................................................................................18
Overheating the Device..................................................................................................................18
Immersing the sensor in very hot water.........................................................................................18
Returns...........................................................................................................................................18
page 2 of 18
1. Introduction
eCow pH Bolus
The eCow pH bolus is the market leader for longevity, size and stability of results in the
area of dairy cow rumen monitoring.
The pH and temperature sensors reside in the
punctured metal end cap. The bolus is uniquely
weighted such that it stands upright in the rumen,
thereby allowing for full immersion of the sensors
and improved data readings.
At the top of the bolus there is a metal loop. This is
included for the convenience of our research
customers, allowing for easy retrieval of the bolus.
eCow
farmBolusTM
The inner workings of the bolus are securely
encased in resin to protect them from the rumen
liquor inside the cow. By default the bolus logs pH
and temperature in 15 minute intervals which
allows for 28 days of data to be stored on the bolus.
Thanks to years of research and innovation the eCow bolus has a
lifespan of 5 – 6 months of continuous use when used correctly.
eCow Handset
Downloading data from the bolus is very simple with the use of our
bespoke software. The device consists of a Samsung SII phone
and antenna which plugs in to the bottom of the phone.
A data download typically takes between 1 to 3 minutes and once
completed the data is automatically uploaded to the eCow servers
where it is checked, analysed and made available to view through
our new client software.
The handset may also be used to change bolus settings such as
radio on time and calibration values.
eCow
Handset
page 3 of 18
Client Software
The eCow client software gives you easy access to your data. Available for Windows and
Mac this software allows you to import data you have stored locally or login to view
uploaded and archived data. Shown above is the raw pH data, however you can also view
temperature and the cow's average daily pH profile.
page 4 of 18
2. Getting Started
You will receive your boluses in our customised protective
packaging. There will be a small amount of water in the
bottom of this box, this is to keep the sensor head hydrated.
As such it is recommended that you keep this box upright. If
you need to store the boluses please keep them in this box.
By default the boluses are shipped with a 24 hour radio on
time window, unless you specify otherwise when you order.
To maximise battery life it is recommended that you change
this to a shorter time window to match when you will typically
be performing downloads (more detail to follow).
Using the Handset
Your handset will be shipped ready for use, but will be off to conserve battery. To turn the
handset on. apply pressure to the top right of the black case (as shown) until the you see
the Samsung Galaxy logo.
Connecting to WiFi
For full functionality the handset requires an
internet connection.
Starting at the home screen (Press the home
button at the bottom centre):
1. Tap “Settings”
2. Tap “Wi-Fi”
Press here to
turn device on
3. You should now see a list of available
networks. If not, ensure that WiFi is
turned on (slide the switch at the top
right of the Wi-Fi page).
4. Select your network and enter your
network passphrase when prompted
Your handset should now be connected to the
internet.
page 5 of 18
Hathor
To start the download software (named
Hathor), plug the micro usb wire that protrudes
from the bottom into the socket at the bottom of
the phone.
Upon plugging the wire in you will be see the
Hathor main page. At the top of this page there
is a scrolling list of all the Boluses installed on
the phone and underneath this there are 4
buttons.
•
The down arrow is the download button.
Pressing this button will start a download from
the bolus highlighted at the top of the screen
(Note: the boluses must be above 32°C for a
download to be possible).
•
The set of scales is the calibration button.
Pressing this will take you to the bolus
calibration screen.
•
The gear is the configuration button. This
button brings up the configuration screen.
•
The graph axes represent the data viewer.
Pressing this takes you to the data viewer
function which allows you to preview your
downloaded data on the phone.
The first step to take upon receipt of new boluses
is to reconfigure the time window (unless you
requested a specific time window when ordering).
Before doing this it is important to ensure that the
handset has the correct time settings
Setting the Date and Time
The handset will download the local date and time settings from the internet if it is able to
page 6 of 18
find them. If it cannot find them then you may input them manually by following these
steps:
1. Press the home button to return to the home screen.
2. Tap “Settings”.
3. Scroll to the bottom of the list and tap “Date and Time” (fourth up from the bottom).
4. By default the phone will have the “Automatic date and time” option ticked.
Underneath this option it displays what it thinks the correct date and time are. If the
displayed date and time are correct then proceed no further, if not go on to step 5.
5. Untick the Automatic date and time box by tapping the tick.
6. Tap on Set date and Set time and change them to the correct values for your
region.
Setting the radio Time Window
This is an important step in ensuring the long battery life of the bolus. The time window
defines the period in which you will be able to communicate with the bolus during the day.
All boluses are shipped with a 24hr time window by default. A time window of 9am – 5pm
is typical with our existing nutritionist customers and this means that they are able to
download from the boluses at any time within the hours of 9am to 5pm. With an 8 hour
time window you can expect about 6 months battery life.
When outside of the time window it is not possible to communicate with the bolus at all.
This means that it is crucial you do not accidentally set the wrong time window. For
example, if one were to set a time window of 2am – 4am it would only be possible to
reconfigure a more feasible time window between these hours.
As previously mentioned, the boluses automatically shut down when under 32°C.
Therefore to communicate new configuration data to the boluses they must first be
warmed. To achieve this:
1. Place your boluses into the storage box in which
they were shipped. Then place this into an empty
bucket
2. Fill the bucket with boiling water up to the fill line
on the bolus storage box.
3. Wait for 5 – 10 minutes for the boluses to warm up
Warning – Never immerse an unprotected bolus in
boiling water. The extreme temperature change will
cause the glass of the pH sensor to crack, rendering the
bolus useless.
Alternatively, you may use your cows as a heat source
and change the Time windows whilst the boluses are in the cows. Please not that the
page 7 of 18
boluses will take up to an hour to warm up after being placed in a cow.
Once the boluses have warmed, to set the time window:
1. Press the configuration button.
2. You will now see a list of all the boluses installed on your handset. Tick the boxes
next to the bolus numbers you wish to configure.
3. Tap “OK”.
4. Tapping “Set Time Window Start Time” will bring up the time selection box. Swipe
the time values up or down until they reach your desired time then tap “Set”.
5. Tapping “Set Time Window Duration” brings up a list of possible time window
durations. Select your desired duration then tap “OK”.
6. Tap “Set” at the bottom left of the screen to send these new settings to the bolus
and wait for the handset to say it has completed the process.
3. System Operation
Once the time windows have been configured your boluses are ready to be deployed and
to start collecting data.
Bolus Deployment
The eCow pH bolus is deployed in the same manner as any other standard bolus. That is,
orally with the use of a balling gun (available on the eCow store). Bolus deployment should
be performed by someone with experience, a vet for example.
Once the bolus has been properly inserted it will take a few hours to settle into its resting
place in the reticulum.
eCow does not warrant or encourage the use of its bolus in any animal other than cows.
Downloading and Uploading Data
Boluses must be downloaded from at least once every 28 days to prevent data loss. If left
for longer than 28 days the bolus will overwrite the older values to accommodate the new
data.
The following sections will first describe how to download data from a software point of
view, then how best to handle the cow when downloading and finally an overview of the
upload process.
page 8 of 18
Using Hathor to Download
To make the software download from the bolus:
1. Plug the antenna into the bottom of the handset,
this will start the Hathor software
2. Choose the bolus you wish to download from by
scrolling to its number.
3. Tap the download button.
4. The software will now attempt to establish a
connection with the bolus.
5. Once a connection has been established, the
handset will begin downloading data.
6. Once the download is complete the handset will
set the time and date settings on the bolus to
ensure accuracy.
Please ensure you maintain proximity to the cow even
once the progress bar has reached 100% to allow the
handset to set the bolus time.
Cow Handling
The practicalities of getting close enough to the cow to perform a full download may
slightly complicate the process. Although methods used can vary from cow to cow due to
differing temperaments, the fundamentals remain the same. What follows are some
suggestions for successful downloading:
•
If possible, do the download when the cows are being fed and are locked in yokes.
This eliminates the possibility of them walking away.
•
Depending on the type of parlour used it may be easier to perform the downloads
during milking.
•
It is usually best to perform the download on the cow's left hand side, standing near
the front of the cow placing the antenna close to the left armpit of the cow.
•
Best results are achieved by holding the handset between 1 and 2 metres from the
cow.
•
Some users report better downloads with the handset near the ground angled
upwards towards the cow (for safety reasons this should only be done when the
cow is restrained).
page 9 of 18
•
Downloading may take longer when the cow is laying down due to the bolus being
engulfed by the stomach contents. However, standing the cow up may stress her
and cause her to walk away. As such it is usually best to leave the cow undisturbed
during downloads
Downloading is made easier when the cow is locked in a yoke. Here, a student performs a
download using a handset positioned by the cow's left point of elbow.
Troubleshooting Downloads
I can't get the handset to connect to the bolus, what should I do?
A) Has the cow calved recently? After calving the rumen expands to refill the space left
by the calf which causes a lot of internal movement. Users have reported not being
able to connect to the bolus for a couple of days after calving. Wait for 3 to 5 days
after calving to perform the next download and you should be able to connect.
B) Check that the antenna is correctly plugged into the handset, as it may have been
knocked loose. To do this, exit Hathor by pressing the back button (located to the
right of the home button at the bottom of the handset) 3 times until you reach the
home screen. Unplug the antenna and then plug it back in, firmly but also gently,
and the Hathor software will restart automatically. Retry the download.
C) Try repositioning the handset antenna. The left hand-side rule mentioned above is
not universal and best positioning will vary from cow to cow. Remember, closer is
not always better. There is a sweet spot between 1 and 2 meters from the cow in
page 10 of 18
which signal strength will be the strongest.
The download has frozen halfway through
A) This is most likely due to a sudden loss of signal during the download. Cancel the
download by pressing the back button (to the left of the home button) and start
again. To prevent this from happening, ensure you maintain proximity to the cow.
Uploading Data
When you unplug the antenna after having downloaded
new data the software will ask you whether you would
like to upload the data now or postpone the upload. This
feature was included since, at most farms, there will be
no internet connection around the cows.
On the screen shown to the right, selecting OK will cause
the handset to try an upload immediately – only do this if
you know you have a reliable internet connection. Once
you have pressed OK you will see a progress bar for the
upload to the server followed by a message telling you it
is uploading to an email address as well.
Selecting postpone will postpone the data upload until the
phone is next connected to WiFi, at which time it will
perform the upload automatically.
By default the data is sent to our eCow server and an
eCow email address. This is for the purpose of archiving
and analysis so the results may be presented to you
through the Client Software. It is, however, possible to
change where the data is being sent to. For example if you wanted a copy of the raw data
sent to your personal email this would be possible.
If you request the raw data to be sent to your own email address you will receive a .csv
(comma separated values) file. This is the format in which the handset downloads data
from the bolus and is simply a large list containing all the readings along with relevant
timestamps.
4. Viewing the Data
The eCow Client software (named HathorHB Client) has been designed to allow you easy
access to your data. With it you can either download your results from our web server or
import them directly from the handset. In order to run the Client software you must have a
recent version of the Java Runtime Environment, which may be obtained from here.
All versions of the client software are supplied with install instructions, please refer to them
page 11 of 18
to get the software up and running.
Getting to Grips with Client
When you open the Client software you will see that it may be divided into roughly 3 main
sections. These are:
The Farm and Bolus Selection Box
This is at the bottom left of your screen. Once you have imported
data from your handset or server you will be able to choose what
Farm and what Bolus data you wish to view. If you only have access
to data from one farm then the Farm list may not be necessary for
you.
Selecting a Bolus from the bolus list will display that bolus's data on
the graph.
The Analysis and Events Box
This section has two tabs at the top, one marked Analysis and another marked Events. By
default the software opens with the analysis tab selected. In this view you can change
between different types of graphs and analysis. To switch between pH, temperature or
daily pH profile mean, click the circle beside your desired graph on the left.
Groups may also be created here, this is useful for grouping together certain cows who
may all be on the same type of feed or housed in the same place. To create a group, click
the button with a cow and a plus on in. Once you have created a group you can select it
from the group drop down menu to view only those cows.
Towards the right you have the Daily Mean graph which shows a plot of the pH averaged
over each successive 24 hour period in the data you are viewing.
page 12 of 18
Selecting the Events Diary tab brings up the events view. In this view you can add and
remove events to be plotted on your data graphs. This can be used to add events such as
calving or illness to a graph which can help identify anomalous pH or temperature
readings.
The Graph Section
This is the section in which you will see your data displayed. Starting at the top, you have
the Graph title which is shown as “Bolus c, Cow c (Farm f)” in this is example. On the
graph there is a red line which indicates the acidosis threshold (pH 5.8, below which the
cow may be at risk of acidosis). In the bottom left there are two boxes which show how
many hours the cow has spent underneath pH 5.8 as well as a percentage of time spent
under the threshold.
Towards the bottom right there are the options to change between Day, Week and All data
views. Finally on the bottom right you have the buttons, Show Events and Reset Zoom.
Pressing the show events button toggles weather the events are shown on the graph and
pressing Reset Zoom returns you to the full overview of the data.
page 13 of 18
The Graphs
There are three different graphs available for each bolus; pH
Summary, Temperature Summary and the Daily pH profile. To switch
between these graphs use the buttons shown to the right (These are
in the analysis tab of the Analysis and Events Box).
Temperature Summary
The Temperature Summary graph plots the temperature of your cow's rumen over a date
range that may be customised. The graph shown above is from a typical cow over a period
of a week. The sharp dips visible are the drops in temperature when a cow takes a drink, a
typical cow may have anywhere between 3 and 7 drinks per day. Noticeable increases in
temperature or lack of drinking events may signal an infection – consult your vet.
pH Summary
The pH summary graph is a very powerful diagnostic tool. Shown above is a pH summary
graph for a cow fed each morning, this is seen as a peak in pH, which then falls after
eating. The patterns seen in the pH summary graphs will vary depending on diet, regularity
of feeding and the general health of the cows.
The red line on this graph is dubbed the “acidosis threshold” and is at pH 5.8. Beneath this
threshold a cow is at an increased risk of falling sick with acidosis. To assess the acidosis
risk check the amount of time your cow has spent under pH 5.8, which is given towards
the bottom left of the graph in hours and as a percentage.
page 14 of 18
Please note that the threshold value of pH 5.8 is
given as an indicator only. Having a cow with a
rumen pH that is below 5.8 does not necessarily mean that she has acidosis.
Daily pH profile
The Daily pH profile is useful for analysing pH patterns over a long period of time. Each
blue line represents 24hrs of data and the red line represents the average of all the blue
lines. The graph shown above represents about 80 days of data, you can see that the
cows are fed at roughly 6am every day.
Importing Data
From saved files on your computer
The software enables you to view particular data files of interest that you may have saved
on your computer. To do this:
1. Click File > Open Data File
2. Navigate to the file of interest (this must be a file
downloaded from an eCow bolus).
3. Select this file and click Open.
From the Web Server
1. Click File > Connect to Server
2. This will bring up the Client Login box. Please use
the username and password supplied to you by
eCow to connect.
3. Once connected you will be able to select Farms from the drop down farm list.
4. After selecting a farm the software will take a few moments to download the
page 15 of 18
required data.
5. You will now see a list of boluses in the bolus selection box. Click on a bolus
number to see the data plotted on the graph.
From the Handset
1. Plug your handset into your computer using the included USB cable
2. Click the Start icon and then click Computer.
3. You should see the Handset listed under the heading “Portable Devices” as a “GTI9100”. Double click this icon, then double click on phone on the following screen.
4. In this next screen you will see a number of folders, locate the one named “eCow”
5. Copy and paste the eCow folder to somewhere appropriate on your computer
(perhaps create a new folder dedicated to eCow data).
6. Go back to the Hathor Client software and click File > Import Bolus Data.
7. Navigate to where you saved the eCow folder. Double click eCow, then double click
Bolus.
8. You should now see a file called “bolusID.dat”. Select this and then click the Open
button.
9. The software will now import all the data for viewing.
Exporting Data
The Client software offers two easy methods of exporting your data to share with others.
Save PNG
A PNG (Portable Network Graphics) is a picture file that can be used for a wide range of
applications. It is an easy way to export your eCow graphs in a format that can be used in
presentations, documents and emails. To export a PNG:
1. Click File > Save PNG.
2. Choose a suitable name and location for your file.
3. Click Save
Printing
To print your graph:
1. Click File > Print
2. This will bring up the Page Setup dialogue. It is recommended you leave the
orientation in Landscape mode as portrait makes the graphs look squashed.
page 16 of 18
3. Click OK to bring up the Printer options.
4. Select the correct printer from the drop down list and click OK to start printing.
To PDF
To export a graph to pdf you will need to download and install the free tool Bullzip PDF
Printer. Once you have that installed, follow these steps:
1. Click File > Print
2. Click OK
3. Click on the drop down list of printers and
select Bullzip PDF Printer
4. You will then see a screen where you can
name your file and choose where to save it.
Once you are satified with the name and location, click Save.
page 17 of 18
5. Warranty
All eCow products come with a 30 day no quibble warranty covering manufacturing faults.
The warranty does not cover fair wear and tear or accidental damage.
If an eCow product appears to have broken down outside the 30 day warranty please
contact eCow for advice.
Use inside other Animals
The warranty only covers use inside cows, use of the bolus inside any non-bovine animal
will invalidate your warranty. The bolus should only be inserted into an animal by a trained
technician; no liability is accepted for incorrect usage. Please ensure the animal technician
has undertaken the correct training and certification process.
Dry Sensor
Do not let the sensor dry out; this is not fair wear and tear. The bolus should be kept in its
six pack until used. The sensor should always be immersed in liquid of near neutral pH;
tap water will do. The eCow boluses should be left in the plastic box in which they are
shipped for periods of storage. They must be stored with the sensor head pointing
downwards. Storing the boluses incorrectly invalidates the warranty.
Accidental Damage of the Handset
The handset must be treated with care. Whilst it is protected with by its large black cover it
will not survive being manhandled and dropped on a regular basis. If the handset breaks
down due to accidental or water damage this is not covered by the warranty.
Overheating the Device
Long periods of time spent over 45°C will damage the device's internal electronics.
Similarly at temperatures above 30°C the device will deplete battery at an accelerated
rate. For storing the boluses the recommended temperature range is between 5°C and
25°C.
Immersing the sensor in very hot water
As previously mentioned, immersing the sensor in boiling or near boiling water will break
the sensor. This is not covered by the warranty
Returns
To make a warranty claim please phone eCow to receive further instructions.
page 18 of 18