1
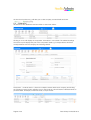
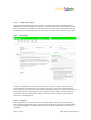
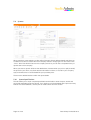
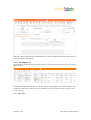
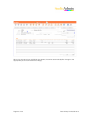
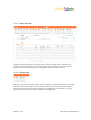
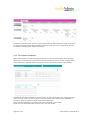
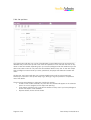
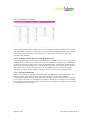
5
Features of StudioAdmin
5.1
Menu options
5.2
Button Bar
Throughout the database main navigation is done using the button bar as shown below. This is
split into two parts. There are navigation forward and back buttons and home button in the
coloured strip across the top where the place name is also shown.
The level below those buttons is consistence throughout the database, however the function
does change according to which area of the database you are working within e.g. if in the
companies section of the database clicking ‘new’ will create a new company record.
The ‘List’ button toggles to a ‘detail’ button when you switch between the two views. Delete,
Search and Print buttons do exactly as the name suggests, the search options will be reviewed
in more detail later in this guide. The ‘Show all’ button refers to showing all the records, this
option can only be used after a search or when a button that selects a specific group of records
to display e.g. performing a find. Clicking ‘Show all’ will bring all records back into view after
viewing a selected few.
You can also use the FileMaker Status bar across the very top of the screen to move through
records by clicking on the book pages.
Those are the basic buttons that apply throughout StudioAdmin, other buttons will be clearly
labelled and all buttons have a cancel option, so don’t be afraid to click on an option to try it.
One final point is that there are arrows pointing at things, clicking the arrow will take you to view
Page 7 of 39
Data Artistry Limited © 2010