1
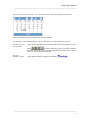
ClientTrade Collections
____________________________________________________________________________
TradeFlow Collections User’s Guide
v0.1
____________________________________________________________________________
i
ClientTrade Collections
____________________________________________________________________________
Table of Contents
1. INTRODUCTION TO COLLECTIONS ............................................................................................... 3
1.1
1.2
WHAT IS COLLECTIONS?................................................................................................................... 3
THE FEATURES OF COLLECTIONS ...................................................................................................... 3
2. USING THE GRID SCREEN ................................................................................................................. 5
2.1 TRANSACTIONS GRID SCREEN ............................................................................................................... 5
2.2 PROFILES GRID SCREEN ........................................................................................................................ 6
2.3 PHRASES GRID SCREEN ......................................................................................................................... 8
2.4 SECURE MESSAGES GRID SCREEN ......................................................................................................... 9
3. SETTING UP THE PHRASES ............................................................................................................. 10
3.1 CREATING THE TABLES OF STANDARD PHRASES ................................................................................. 10
4. COLLECTION TRANSACTIONS ...................................................................................................... 12
4.1.01 Part 2, Direct Collection – Issue, Field Descriptions........................................................... 13
4.1.02 Part 3, Direct Collection – Issue, Field Descriptions........................................................... 15
4.1.03 Approval and Release of a Collections Letter ...................................................................... 18
4.1.04 Reject a Transaction As a Second Approver......................................................................... 19
4.2 EDITING A COLLECTIONS TRANSACTION ........................................................................................ 22
5. AMENDMENTS..................................................................................................................................... 23
5.1
5.2
5.3
CREATING AN AMENDMENT............................................................................................................ 23
VIEWING AN AMENDMENT .............................................................................................................. 24
APPROVAL AND RELEASE OF AN AMENDMENT ............................................................................... 24
6. PAYMENTS............................................................................................................................................ 25
DISCREPANCY NOTE ................................................................................................................................. 26
CORRESPONDENCE .................................................................................................................................... 26
RESPOND TO DISCREPANCY ...................................................................................................................... 26
7. REPORTS ............................................................................................................................................... 27
7.1
7.2
7.3
7.4
SORTING AND FILTERING DATA ...................................................................................................... 27
SORTING AND FILTERING DATA ...................................................................................................... 28
REPORT STYLES .............................................................................................................................. 31
PRINTING A REPORT ........................................................................................................................ 31
8. TEMPLATES ......................................................................................................................................... 32
8.1
8.2
8.3
GENERATING A TEMPLATE.............................................................................................................. 32
CREATING A TRANSACTION FROM A TEMPLATE ............................................................................. 34
CREATING A TRANSACTION FROM ANOTHER TRANSACTION .......................................................... 35
9. COMMUNICATING WITH THE BANK ........................................................................................... 36
9.1 SECURE MESSAGE........................................................................................................................... 36
9.1.01 Creating Messages .................................................................................................................... 36
9.1.02 Viewing Secure Messages.......................................................................................................... 38
10. REMITTANCE LETTER ................................................................................................................... 39
____________________________________________________________________________
ii
ClientTrade Collections
____________________________________________________________________________
1. Introduction to Collections
1.1 What is Collections?
Collections is an online, secure application that enables you to electronically generate a
Collections transaction.
1.2 The Features of Collections
•
Fill out a transaction application online and transmit it to the
bank.
•
Simplify the application process by using a previously
released transaction that is similar to the new one, or use a
template created from a previously released transaction.
•
Access transaction payment information downloaded from
the bank.
•
Generate detailed reports for company managers,
accountants, and auditors.
•
Easily communicate with the bank using communication
software built into the system.
•
While generating a transaction, Collections will validate
those fields that must be SWIFT compliant to ensure that
they adhere to SWIFT rules.
Features available in all grid screens:
Search Feature
press Ctrl-F to open a screen where you can type in whatever you
want the system to search for. The system searches from the
highlighted item down to the end of the list of items in the grid.
Highlight the first item in the grid to search the entire list.
Sort Columns
click on a column heading in the grid screen and the data in the
screen is sorted in ascending (or descending) order of the column.
Click the column heading again to display the items in reverse order.
Pop-up Menu
right click anywhere in any grid screen and display the Functions
menu
View a Line Item
double click on any item in the grid screen and it will open.
Filter Data in Grid
you can filter the data displayed in the grid screen using columns that
glass when you point to the column heading.
display a view
Click on the glass and the filter window opens. See below.
____________________________________________________________________________
3
ClientTrade Collections
____________________________________________________________________________
Populate Date fields with calendar – you can enter the date into a date field using the calendar icon.
Click the calendar icon next to any date field to open the calendar.
Use the arrows in the calendar heading to select a month and a year. Then click the day you want.
Pull-Down Lists for
Selected Fields
Fields that have pull-down lists are filled in with your selection from the list. The
above these fields allow you to View, Delete, and Edit
buttons
the profile of the field selection. The last button opens the profile screen so you can
add a new selection to the pull-down list.
Recognize
Mandatory Fields
Fields marked with blue rectangles are mandatory.
____________________________________________________________________________
4
ClientTrade Collections
____________________________________________________________________________
2. Using the Grid Screen
When you select Applications and then Collections the first
screen you see is Collections transaction screen, hereinafter
referred to as the Transaction Grid Screen. See Figure 2.1.
Figure 2.1 - The TransactionsGrid Screen
2.1 Transactions Grid Screen
The Transactions Grid screen is the default screen after logging on. In the Management menu,
selecting Profiles will open the Profiles Grid Screen; selecting Phrases will open the Phrases Grid
Screen, and selecting Secure Messages will open the Secure Messages Grid Screen.
In the Transaction Grid screen, first select transaction type
Outgoing collection.
Next, select the user: own to list only your transactions or all to list
the transactions of all the users in your organization. (Note that you
may be restricted to only your own transactions, depending on how
this screen was set up by the administrator.)
Next, select the status by which you want transactions to be listed:
all, in process, pending approval, released, cancelled &
rejected or templates.
Highlight any transaction and click Functions > View to see it, or
Functions > Print to print it, if needed you can then send it via email.
____________________________________________________________________________
5
ClientTrade Collections
____________________________________________________________________________
2.2 Profiles Grid Screen
At the top of the Grid screen, click Management > Profiles. The
Profiles Grid screen is displayed. See Figure 2.2.
Figure 2.2 - The Profiles Grid screen.
In the Profiles Grid screen, your profile is listed.
Highlight your profile and click on Functions > View to see it.
Highlight your profile and click Functions >Edit.
The dialog box that opens will enable you to change your
password. See Figure 2.3.
Only the system administrator can change the other information in
your profile.
____________________________________________________________________________
6
ClientTrade Collections
____________________________________________________________________________
Figure 2.3 – Profile
•
•
•
•
•
You can change your password in the User Profile screen.
To change your password, enter the new one in the Password field.
Enter it again in the Confirmation field.
Click OK.
Only the system administrator can change the other information contained in your profile.
You can change your password in the User Profile screen.
To change your password, enter the new one in the Password field.
Enter it again in the Confirmation field.
Click OK.
Only the system administrator can change the other information
contained in your profile.
____________________________________________________________________________
7
ClientTrade Collections
____________________________________________________________________________
2.3 Phrases Grid Screen
To the left of the Grid screen, click on Management > Phrases.
The Phrases Grid screen is displayed. See Figure 2.4.
REJECT
REJECT
ACCEPTANCE
Figure 2.4 - The Phrases Grid screen.
Select one of the phrases in the grid and click Functions then
View to see it.
Clicking Functions then Delete will delete the selected table
from the grid.
Click Functions then Edit to make changes to the standard
phrase of the selected table.
____________________________________________________________________________
8
ClientTrade Collections
____________________________________________________________________________
2.4 Secure Messages Grid Screen
At the top of the Grid screen, click on Management > Secure Messages. The
Secure Messages Grid screen is displayed. See Figure 2.5.
Figure 2.5 - The Secure Messages Grid Screen
The Secure Messages Grid screen lists Secure Messages that
are in process (not yet sent to the bank), sent to the bank, and
Secure Messages received from the bank.
You can list Secure Messages according to status by clicking
the appropriate radio button (all means list all Secure
Messages regardless of status).
View any Secure Message by selecting it and clicking on
Functions > View.
Only Secure Messages that are in process can be edited. Select
the in-process message you want to edit and click on
Functions > Edit. A window opens enabling you to edit the
Subject and the body of the message in the Mail Text area.
To delete a message, select the message in the Secure Mail
Grid screen and click Functions > Delete.
You can reply only to a message with the status received.
Click Functions > Reply and a composition window opens
where you can compose your message.
Select an in-process message to send and click Functions >
Send. A message window opens stating that the message was
successfully sent. Periodically check the Secure Message Grid
screen for a reply from the bank.
To print a message, select it and click Functions > Print.
You can also e-mail the print out to a third party.
Secure messages statuses: in process, readyToSend, sent,
Received.
____________________________________________________________________________
9
ClientTrade Collections
____________________________________________________________________________
3. Setting Up the Phrases
3.1 Creating the Tables of Standard Phrases
After logging into the system with your user ID and password
the first screen to open is Collection, hereinafter referred to as
the Grid screen.
At the top of the Grid screen, click on Management >
Secured Messages > Phrases. The Phrases Grid screen
opens. See figure 3.1.
REJECT
REJECT
ACCEPTANCE
Figure 3.1 - The Phrases Grid Screen
The purpose is to provide standard phrases that can be inserted into the transaction document. This
eliminates typing the same text over and over for each transaction.
Create as many phrases as you need, giving each a short name
and description that will enable you to easily identify them.
To create a table:
Click on Functions > New and the Protest Instructions
standard phrase text box screen opens. See Figure 3.2.
____________________________________________________________________________
10
ClientTrade Collections
____________________________________________________________________________
Name
Description to be displayed in the Grid Screen
Free Form text
Figure 3.2 - The Protest Instruction Standard Phrases Screen
Provide a short name and description to later identify the
standard phrase or text that you compose in the text box.
Click Save when you are finished.
In the Phrases Grid screen, select a table and click on
Functions >View to see it.
To make a change to a table, select it in the Phrases Grid
screen and click on Functions > Edit. All three fields are
accessible for editing.
____________________________________________________________________________
11
ClientTrade Collections
____________________________________________________________________________
4. Collection Transactions
You can view Incoming and create Outgoing (both Direct and Outgoing) collection transactions. For
outgoing transactions select the Outgoing radio button under Transaction Types in the Transaction
Workflow screen.
Buyer’s Bank
Mandatory field. Name and address of the party who will pay as a result of
receiving the draft. Scroll through the pull-down list or click on > Add New
button above the field to create a new Payer.
Figure 4.4 – Buyer’s Bank Profile Create Box
Seller’s Reference Number
Mandatory field. Reference number of the transaction as
assigned by the seller.
Buyer’s Bank Reference Number
Reference number of the transaction as assigned by the
buyer’s bank.
Buyer
Name and address of the buyer. Use buttons above to View,
Delete, Edit and Add New to create a profile
Buyer’s Reference Number
Reference number of the transaction as assigned by the
buyer.
____________________________________________________________________________
12
ClientTrade Collections
____________________________________________________________________________
4.1.01 Part 2, Direct Collection – Issue, Field Descriptions
At the bottom of the Direct Collection – Issue screen are three tabs: Part one, Part two,
and Part three. Verify that Part 2 is selected. See figure 4.5.
Fill in the fields in Part two of the Direct Collection –
Issue screen.
Fields that have pull-down lists are filled in by selections from
the lists.
Figure 4.5 - Financial Details Screen
Amount
Currency
Sight
Term
Protest Instructions
Settlement
Instructions
Payment Terms
Enter the amount of the direct collection.
Scroll through the pull-down list and select the currency for the amount of this
direct collection.
Click this radio button for a Sight direct collection.
Click this radio button for a Term direct collection.
Instructions for non-payment or non-acceptance of collections.
The settlement instructions are for the specific currency of the amount in part 2.
Therefore if the currency for the amount in part 2 is U.S. dollars then the
instructions will concern US dollars. The bank controls these instructions.
Will be D/P (documents against payment) for Sight direct collection or D/A
____________________________________________________________________________
13
ClientTrade Collections
____________________________________________________________________________
Maturity Date
Tenor Days
Interest Rate
Interest Details
Interest From Date
Interest To Date
Credit Proceeds to
Account
Currency
(documents against acceptance) for Time direct collection.
The maturity date of the draft.
The Tenor Days field is enabled when the Time radio button is selected. Fill in
the number of days used to calculate the maturity date.
Rate of interest in percent.
Click this button to open the Interest Details text box.
Date from which interest is to be calculated.
Date to which interest is to be calculated.
Account to be credited with payment from the payer. Use buttons above to view,
delete, edit and Add/New account.
Currency with which payment is being made. The field Currency will default
after selecting from field Credit Proceeds to Account.
____________________________________________________________________________
14
ClientTrade Collections
____________________________________________________________________________
4.1.02 Part 3, Direct Collection – Issue, Field Descriptions
At the bottom of the Direct Collection – Issue screen are three tabs: Part one, Part two,
and Part three. Verify that Part 3 is selected. See figure 4.6.
Figure 4.6 - The direct collection Issue Screen. Part Three
Shipment From / Shipment
To
Use buttons above and select the locations from / to which the goods are
to be shipped. If a specific location is not listed then click the Add/New
button above the field and fill in a short name for the desired location and
a description in the Ship From or To Places text box:
____________________________________________________________________________
15
ClientTrade Collections
____________________________________________________________________________
4.7 - Ship Places Text Box.
Country of Discharge
Short Merchandise Description
Documents
Select the country of final destination from the pull-down list.
Enter a short description of the merchandise.
This section of Part 3 lists the documents associated with the transaction.
Click New and open screen Document for Direct Collection. From the
pull-down list select the document type. Click in the Originals and
Copies fields and type in the number of each.
To edit the number of copies, number of originals, or the type of
document, select the document in the Transactions Grid screen and click
Edit.
Agent’s Commission
Discount
To delete a document from the list, select it in the Transactions Grid
screen and click Remove.
Additional information regarding the agent’s commission.
Instruction to discount a draft if it is accepted
Click the Functions > Save button to save the document. The
following message appears:
____________________________________________________________________________
16
ClientTrade Collections
____________________________________________________________________________
Figure 4.9 – Approved Transaction
Click OK and the transaction will be listed in the Transactions Grid screen with
a status of in process.
The document is now listed in the Transactions Grid screen
with a status of in process.
The document is now ready to go through the approval and
release cycle. See paragraph 4.1.04.
____________________________________________________________________________
17
ClientTrade Collections
____________________________________________________________________________
4.1.03 Approval and Release of a Collections Letter
Once a transaction document is completed it must be approved before it can be
emailed to the bank.
In the Transactions Grid screen, highlight the transaction you
want to approve and click Functions > Approve option.
The Check Password screen opens.
Click OK and the following screen opens.
Figure 4.11 – Transaction Approved
Click OK and the transaction status changes from in process to approved.
After the transaction has been fully approved it cannot be
edited or deleted. Changes can only be made with an
amendment.
After the document has been approved, it is automatically sent
to the bank. The transaction is then assigned a transaction
number by your back office and released.
____________________________________________________________________________
18
ClientTrade Collections
____________________________________________________________________________
4.1.04 Reject a Transaction As a Second Approver
If you are authorised as a second approver then you can select a transaction that
needs a second approver and has a status of pending and either approve it or
reject it. If you reject it you can write the reason in a text box that opens during
processing.
In the Transactions Grid screen, highlight the pending
transaction you want to approve/reject and click Functions >
Approve.
Click either OK or Reject.
If you click OK then a message box will display stating that
first level approval has been done.
The transaction will be listed in the grid screen with the status
of Approved.
____________________________________________________________________________
19
ClientTrade Collections
____________________________________________________________________________
If you click Reject then a text box will open in which you can
enter the reason for the rejection.
Click OK and the Rejection message appears.
The message will be available for the first approver to see in
the Comments text box accessible within the transaction
screens. The transaction status will be listed as Rejected in the
grid screen.
The first approver accesses ClientTrade and selects the
Rejected transaction in the Transaction Grid screen and opens
it. The approver then performs the following steps:
•
Clicks the Comments button and reads the reason for
the rejection.
•
Exits the transaction, verifies that the transaction is
selected, and selects menu option Functions >
Change to In Process. The transaction now appears
in the grid screen with the status of In Process.
•
Opens the In Process transaction and makes the
necessary changes / corrections as directed in the
comments by the second approver.
____________________________________________________________________________
20
ClientTrade Collections
____________________________________________________________________________
•
Approves the transaction which now has a status of
Pending.
•
The second approver accesses the Pending transaction, verifies that it is
now error free and fully approves it. The transaction now has the status
Approved.
____________________________________________________________________________
21
ClientTrade Collections
____________________________________________________________________________
4.2
Editing a Collections Transaction
You can edit a transaction with a status of in process. (To
change a transaction that has been released requires an
amendment.)
After logging into the system with your user ID and password
the first screen to open is the Transaction Grid screen.
Under the heading Status select radio button in process.
Under Created by drop down menu select own or all for all
users.
Locate and highlight the transaction in process transaction
grid you want to edit.
Figure 4.12 - The Transaction Grid Screen
Click on Functions > Edit/Amend option. The transaction
opens in the Collection – Issue - In Process screen.
Go through the document as you did at issue time and edit the
fields that need to be changed. Click Save when you are done.
The transaction status remains in process.
____________________________________________________________________________
22
ClientTrade Collections
____________________________________________________________________________
5. Amendments
5.1 Creating an Amendment
Once a transaction has been approved (or is pending approval) it cannot be edited. To make a change, the
transaction must be released and then an amendment generated.
In the Grid screen, ensure that the Transactions Types tab is selected so that the Transactions Grid screen
is open. At the top of the screen, under the heading Transactions, select from the status options either
released, or all for all status.
From the Created By options, select either Own for transactions you generated or All for transactions
generated by all users.
Highlight the released transaction you want to amend. See Figure 5.1.
Figure 5.1 - The Transactions Grid Screen
Click the Functions > Edit/Amend option and the transaction opens. See Figure 5.2.
____________________________________________________________________________
23
ClientTrade Collections
____________________________________________________________________________
Figure 5.2 - Amending a Direct Collection
The system assigns a sequence number to each amendment beginning with the number 1. When the
transaction screen opens after clicking Edit/Amend in the Grid screen, the next amendment sequence
number is automatically displayed in the Seq. No. field.
Make changes to fields in the same manner you generated the fields at issue time.
After the amendment fields have been changed click Save.
5.2 Viewing an Amendment
Use the Previous button to view the sequence number previous to the current one displayed. For example,
by clicking Previous in the screen shown in Figure 5.2 transaction, sequence number 1 will be displayed.
Click Previous again and the original issue transaction will be displayed.
In a similar manner use the Next button to view the next amendment sequence number.
With each sequence number the titles of the fields that have been changed are displayed in a different color.
Fields changed in sequence number 1 may have titles displayed in yellow while fields changed in sequence
number 2 may have titles displayed in red.
5.3 Approval and Release of an Amendment
An amendment must go through the same steps as the amendment issue: in process, (pending approval if
applicable), approved, sent to bank, and partially released or released.
____________________________________________________________________________
24
ClientTrade Collections
____________________________________________________________________________
6. Payments
The bank downloads information concerning payment, which you can access with Import.
Under Status in the Transactions Grid screen select the released drop-down to list all of the released and
partially released transactions. (Be sure and select own if you only want your transactions listed or select
all for released transactions from all users.) Select a transaction.
Select Payment Info from the Functions menu and the payments history screen opens for the selected
transaction. See Figure 6.1.
Figure 6.1 Payment Screen
There are three buttons along the bottom of the screen: Discrepancy Notes, Correspondence and
Respond to Discrepancy.
____________________________________________________________________________
25
ClientTrade Collections
____________________________________________________________________________
Discrepancy Note
Click the Discrepancy Notes button to view any discrepancies as reported by the bank. You can send a
message to the bank to comment on the discrepancies.
Correspondence
Click the Correspondence button to view any correspondence (letters) downloaded from the bank.
Respond to Discrepancy
Click the Respond to Discrepancy button if discrepancies have been advised and you wish to respond
acceptance or rejection directly.
____________________________________________________________________________
26
ClientTrade Collections
____________________________________________________________________________
7. Reports
There are five reports the system can generate for you. They are:
•
Collection Status Report
•
Collection Payment Report
•
Collection Amendment Report
•
Collection Issuance Report
•
Consolidated Activity Report
Each report is in a matrix format with rows and columns. You customize the way information is presented
in each report by filtering and sorting the data
7.1 Sorting and Filtering Data
In the Grid screen, click Functions > Reports. The Report Subsystem window opens.
See Figure 7.1.
Figure 7.1 - The Report Subsystem window
•
•
•
•
•
Select the type of report you want to generate.
Choose the filter type you want to use.
Choose how you want to sort the filtered data in the Choose Sort Type pull-down list.
Select the style of the report.
Click Preview to view the report with the selected sort and filter
settings.
____________________________________________________________________________
27
ClientTrade Collections
____________________________________________________________________________
Each report is in a matrix format with rows and columns. You customise the way information is presented
in each report by filtering and sorting the data.
7.2 Sorting and Filtering Data
In the Grid screen, click Functions > Reports. The Report Subsystem window opens.
See Figure 7.1.
Figure 7.1 - The Report Subsystem window
•
•
Select the type of report you want to generate.
Choose the filter type you want to use.
After choosing a filter type, a window opens in which you fill in a range for that filter.
Date Filter:
Enter the from/to
transaction dates in the appropriate
fields.
Only transactions within this range
of dates will appear in the report.
The day and month are each two digits
and the year is four digits.
____________________________________________________________________________
28
ClientTrade Collections
____________________________________________________________________________
Trn Filter:
Enter a range of
issuing bank reference numbers. Only
transactions with reference numbers
within this range will appear in the
report.
Amount Filter: Enter a range of
transaction amounts. Only transactions
with amounts within this range will
appear in the report.
•
•
•
Choose how you want to sort the filtered data in the Choose Sort Type pull-down list.
Select the style of the report.
Click Preview to view the report with the selected sort and filter
settings.
All reports can be filtered with the three filters shown in the field drop-down list.
Date Filter:
Enter the from/to transaction dates in the appropriate fields using
the popup calendar. Click the down arrow in the filter field to
access the calendar. Only transactions within this range of dates
will appear in the report.
Trn new Filter:
Enter a range of issuing bank reference numbers. Only
transactions with reference numbers within this range will appear
in the report.
Amount Filter:
Enter a range of transaction amounts. Only transactions with
amounts within this range will appear in the report.
____________________________________________________________________________
29
ClientTrade Collections
____________________________________________________________________________
Following is a summary of the filter and sort types for the four report types:
Report
Filter Type
Sort Type
Status Report
Date
Transaction Number
Amount
Transaction Number
Payment Report
Date
Transaction Number
Amount
Transaction Number
Date
Amount
Amendment Report
Date
Transaction Number
Amount
Transaction Number
Date
Amount
Issuance Report
Date
Transaction Number
Amount
Transaction Number
Date
Amount
Consolidated Activity
Report
Date
Transaction Number
Amount
Transaction Number
Date
Amount
The following is an example of a report.
____________________________________________________________________________
30
ClientTrade Collections
____________________________________________________________________________
7.3 Report Styles
From the pull-down list of the Style of Report field you can
elect to have your report in a PDF format or in Microsoft
Excel.
Both present data in the same matrix format and you can print
from the Adobe screen and the Excel screen. You can also
email the report from both screens.
7.4 Printing a Report
The Preview button in the Report Subsystem takes you to the Filter screen
where you set the filter parameters. From this screen the report opens in either
Adobe or Excel from which you can print and email the document. (See Figure
7.1.)
____________________________________________________________________________
31
ClientTrade Collections
____________________________________________________________________________
8. Templates
8.1 Generating a Template
You can use a released transaction to make a template in order to avoid retyping field entries.
In the Transaction Grid screen, select the released transaction
you want to use to generate a template. See Figure 8.1.
Figure 8.1 - Selecting a Transaction to Make a Template
The transaction selected must be a released transaction.
Click Functions then View and open the transaction.
In the transaction screen, click Save As. See Figure 8.2.
____________________________________________________________________________
32
ClientTrade Collections
____________________________________________________________________________
Figure 8.2 - Saving a Transaction as a Template
•
•
•
Use the Save As button to save a transaction as a template.
The Save As button is only enabled when viewing transactions that are released.
Click Save As to assign a template name. See Figure 8.3.
Figure 8.3 - Assign a Template Name.
____________________________________________________________________________
33
ClientTrade Collections
____________________________________________________________________________
After clicking Save As, the Enter Template Name screen opens.
Type in a template name and click OK.
A message box opens telling you that the document has been
saved as a template. See Figure 8.4.
Figure 8.4 - The message box that opens after a document has been saved as a template.
After clicking OK in the message box, the Transaction Grid
screen opens.
Select templates under Status and look for the template name
you assigned.
8.2 Creating a Transaction From a Template
To create a transaction from a template, first show a list of templates in the Transactions Grid screen.
Select templates under Status in the Transactions Grid screen.
Select the template you want to use and click on Functions >
Create Similar.
After clicking Create Similar, the template opens. Fill in the
Own Ref No. field and any other field that differs from the
original transaction from which the template was generated.
Save the document and approve it.
Use the same template as many times as you need it.
____________________________________________________________________________
34
ClientTrade Collections
____________________________________________________________________________
8.3 Creating a Transaction From another Transaction
To create a transaction from another transaction, first show a list of transactions in the Transactions Grid
screen.
Select the transaction you want to use to create another
transaction.
Click on Functions > Create Similar.
In the transaction screens that follow, fill in fields as you
would if you were using a template.
Save the document and approve it.
____________________________________________________________________________
35
ClientTrade Collections
____________________________________________________________________________
9. Communicating with the Bank
Communicate with the bank with the communication software that is built into the system.
9.1 Secure Message
9.1.01 Creating Messages
Messages can be created and sent for transactions with the status of released and partially released.
In the Transactions Grid screen, select the released or
partially released transaction you want to generate a message
for. See Figure 9.1. Click Functions > Create Message See
Figure 9.2.
Figure 9.1 - Selecting a Released or Partially Released Transaction For Secure Message
The Create Message button is only enabled for transactions that are released or partially
released.
____________________________________________________________________________
36
ClientTrade Collections
____________________________________________________________________________
Figure 9.2 - Messages In-Process
Note that the two transactions reference numbers are already filled in.
Fill in the subject field and write the message in the Mail Text box.
Fill in the Subject field and write your message in the
Message Text box.
Click Save. The email composition window closes.
The Message Grid screen opens.
In the Message Grid screen, verify that the message you just
created is highlighted. Note that the status of email that has
been saved and not sent is in process.
Click Functions > Send. A message box opens saying
message was sent. See Figure 9.3.
Figure 9.3 - The message box informing the user that the Message has been sent.
____________________________________________________________________________
37
ClientTrade Collections
____________________________________________________________________________
9.1.02 Viewing Secure Messages
By selecting Secure Messages in the Management menu in the Grid screen the Secure Message Grid
screen opens. Under Status at the top of the screen are options to list email messages:
All:
in process:
sent to bank:
received:
All messages regardless of status.
Messages saved but not sent to the bank.
Messages that have been sent to the bank.
Messages that have been received from the bank.
Use the drop down list in field By Transaction to list messages for a specific transaction. Selecting All at
the top of the drop down list results in listing messages for all transactions.
To see a Secure Message, select it in the Secure Messages
Grid screen and click Functions > View.
____________________________________________________________________________
38
ClientTrade Collections
____________________________________________________________________________
10. Remittance Letter
You can generate a remittance letter to accompany the documents needed to meet the
terms and conditions of the collection letter.
In the Transactions Grid screen, select the transaction for which you want to
generate a remittance letter.
Click button Remittance Ltr. to open the remittance letter window. See Figure 10.1.
Figure 10.1 - The Collections Remittance Letter
____________________________________________________________________________
39