1
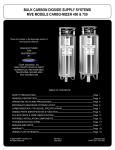
Installation Instructions
and User Guide
!! ! ! ! !!! ! !! ! ! !! ! ! ! ! ! ! !! ! !
! ! ! ! ! ! Shower
! ! ! ! Pumps
! !! !
! ! ! ! ! ! ! ! ! Please
! ! ! keep this booklet for future reference
Installer, when you have read these
instructions, please ensure you leave
them with the user.
Bristan Group Limited
Birch Coppice Business Park
Dordon
Tamworth
Staffordshire
B78 1SG
UK
A Masco Company
Web: www.bristan.com
Tel: 0844 701 6273
Fax: 0844 701 6275
E-mail: [email protected]
! !! ! ! ! ! ! ! ! ! ! ! ! !! ! ! ! ! ! !! ! ! ! ! ! ! ! ! ! ! ! ! ! ! ! ! ! ! ! ! ! ! !
!! ! ! ! !!! !!! ! ! ! ! ! ! ! ! ! ! ! ! ! ! ! ! ! ! ! ! ! ! ! ! !
!! ! ! ! ! ! ! !! ! ! ! ! !! ! ! ! ! ! ! ! ! ! ! ! ! ! ! !! ! ! ! !
! ! ! ! ! ! !! ! ! ! ! ! ! ! ! ! !!
404-0172E
! !! ! ! ! ! ! ! ! ! ! ! ! !! ! ! ! ! ! !! ! ! !! ! ! ! ! ! ! ! ! ! ! ! ! ! ! ! ! ! ! !
!! ! ! ! !!! !!! ! ! ! ! ! ! ! ! ! ! ! ! ! ! ! ! ! ! ! ! ! ! ! ! ! !! ! ! ! ! ! ! !! ! ! ! ! !! ! ! !
! ! ! ! ! ! ! ! ! ! ! !! ! ! ! ! ! ! ! ! ! ! !! ! ! ! ! ! ! ! ! ! !!
Contents
Guarantee
Important safety information
..................................................
2
Product features
...............................................................
........ 3
Electrical requirements
.............................................................
4
Water requirements
...............................................................
.. 5
Installation
...............................................................
.................6
Guarantee
Service Policy
Thank you for purchasing a Bristan product. This product has
been designed, manufactured and tested, in the U.K., to the
highest standards.
Guarantee: 2 Years - Parts
1 Year - Labour (Subject to Registration).
This guarantee applies to products purchased within the
United Kingdom or Republic of Ireland, but does not apply to
products used commercially.
Replacement Parts Policy
Fitting your pump
...............................................................
...... 7
This is provided that:
Negative head option
..............................................................
8
Commissioning - testing the system .............................. 9
1. The guarantee registration card is completed and returned
within ten days complete with a copy of proof of purchase.
Proof of purchase is required for any servicing requirements.
Troubleshooting
...............................................................
.........10
2. The product is installed and operated in accordance with
our instructions and has not been misused or damaged.
Spare parts
...............................................................
.................11
This in no way affects your statutory rights as a consumer.
Guarantee...............................................................
..................14
Service policy
...............................................................
.............14
IMPORTANT:
In the event of product or component malfunction, DO NOT
tamper with or remove the product from site. Telephone the
Customer Services Department and be prepared with the date
of purchase, model number and a clear description of the
complaint.
Our service staff are fully qualified to advise on correct
installation procedures and will be able to diagnose whether
the fault will require a replacement part or a visit from a
Bristan engineer.
If required, a service call will be booked and either yourself or
an appointed representative (who should be a person of 18
years or over) must be present during the visit.
All site visits to product within the guarantee period will
be carried out free of any parts or labour charges provided
the conditions of the guarantee have been adhered to (the
second year guarantee is parts only).
The information on the Guarantee card helps Bristan to
process any claims and contact you about your product and
its maintenance if required. The registration of your personal
details is purely for Bristan use and the remaining information
helps us to make products for the future.
All site visits to product out of guarantee will be subject to
charges for parts and labour. Charges will also be levied on
cancelled appointments, unless advised to
Should a complaint arise, products are guaranteed against
faulty workmanship and materials for a period of 12 months
from the date of purchase, when in domestic use (second
year guarantee is parts only). For your guarantee to be valid,
your shower must be installed by a competent person, in
accordance with the instruction manual.
Bristan at least 24 hours in advance of the agreed date and
time.
Should a product be discontinued, spare parts stocks will be
maintained, but in the event of a part becoming unavailable
Bristan reserve the right to supply a substitute of equal
quality.
Bristan will repair or replace (at our option), free of charge,
any faulty components during the guarantee period, provided
it has been maintained and operated in accordance with our
instructions, and has not been misused or damaged.
For spare parts, please contact Customer Services or via
Bristan website.
Modifcation or repair of this product by person(s) not
authorised by Bristan will invalidate this guarantee.
Customer Service:
Tel: 0844 701 6273 • Fax: 0844 701 6275
E-mail: [email protected]
This guarantee does not affect your statutory rights.
Please Note:
In line with our policy of continued product development, the
specifcations may be varied and the product design altered.
We reserve the right to depart from the details given in this
manual without prior notice.
1
14
Important Safety Information
Spare Parts - Singlespeed Water Pump 50
Singlespeed Water Pump 50 (HY PUMP50 SS)
• Please read these instructions thoroughly and retain for future use.
• All products manufactured and supplied by Bristan are safe provided
1
they are installed, used correctly and receive regular maintenance in
accordance with these instructions.
1
• If you are in any doubt what so ever about your ability to
install this product safely you must employ the services of an
experienced qualified plumber.
10
• Do not operate the pump unit if you suspect it is frozen. Do not site
the pump unit where it might be subjected to freezing conditions.
2
• Do not operate the pump unit if the showerhead or spray hose has
been damaged or is blocked.
7
• Do not block the flow of water from the showerhead, by placing it
9
(smothering it) on your hand or any other part of your body or foreign
object.
8
• Do not operate the pump if the water stops flowing during use or if
the water is leaking from the shower unit itself.
General Safety
6
4
2
• Always switch off the power at the consumer unit and remove the
correct circuit fuse before making any electrical connections or if you
have to remove the cover of an installed unit.
• If the pump unit is fitted in a hard water area, a scale inhibitor may
have to be fitted and the filter cleaned regularly. For more advice on
obtaining a scale inhibitor, visit local merchant or DIY store.
WARNING: THIS APPLIANCE IS NOT TO BE TOUCHED OR HANDLED
OR HANDLED BY CHILDREN, THE INFIRM OR INDIVIDUALS WITH A
PHYSICAL OR MENTAL DISABILITY.
5
3
4
PLEASE NOTE:
THE DUTY RATING OF THIS PUMP IS 15min ON / 60min OFF.
No.
Part No.
Description
01
SP-035-0050
Flexible Hose (Outlet)
No.Of
02
SP-035-0051
Flexible Hose (Intlet)
2
03
SP-035-0041
Inlet Filter
1
04
SP-088-0004
Inlet Plate
1
05
SP-320-0044
Inlet Plate `O` Ring
1
06
SP-088-0108-LH Reed Switch Assembly (LH)
1
07
SP-088-0108-RH Reed Switch Assembly (RH)
1
2
08
(ITEM NOT SUPPLIED)
Flex
-
09
(ITEM NOT SUPPLIED)
Printed Circuit Board
-
10
SP-088-0016
Blanking Cap
1
BEAB (British Electrotechnical Approvals Board) approval of safety.
13
2
Product Features
Spare Parts - Varispeed SI Water Pump 50
Varispeed SI Water Pump 50 (HY PUMP50 VSI)
1
Duraspeed Water Pump 50
1
Duraspeed Water Pump 70
2
1
9
Varispeed Water Pump 50
1. Outlet Connector
7
2. Inlet Connector
!
! !
! !
3. Boost Control
2
!
!
!
!
!
3
8
6
Varispeed SI Water Pump 50
1. Outlet Connector
2
2. Inlet Connector
1
3. Boost Control
2
!
!
!
!
!
3
5
4
3
Singlespeed Water Pump 50
1. Outlet Connector
2. Inlet Connector
1
2
3
No. Of
No.
Part No.
Description
01
SP-035-0050
Flexible Hose (Outlet)
1
02
SP-035-0051
Flexible Hose (Intlet)
1
03
SP-035-0041
Inlet Filter
1
04
SP-088-0004
Inlet Plate
1
05
SP-320-0044
Inlet Plate `O` Ring
1
06
SP-088-0108-LH
Reed Switch Assembly
1
07
SP-088-0502
Flex
1
08
SP-088-0501
Printed Circuit Board
1
09
SP-088-0013
Flow control Knob
1
12
Spare Parts - Duraspeed 50/70 & Varispeed 50
Electrical Requirements
Duraspeed Water Pump 50 (HY PUMP50)
Duraspeed Water Pump 70 (HY PUMP70)
This appliance MUST be earthed!
1
Varispeed Water Pump 50 (HY PUMP50 V)
The Electrical Installation and Circuit Protection of this shower must
comply with I.E.E. Wiring Regulations and should be checked by a
qualifed electrician prior to use.
1
Please note: You must switch off the power at the consumer unit and
remove the correct circuit fuse before making any electrical connection.
10
The pump must only be connected to a 230-240V ac supply, fused at
3 amps, via a double pole isolator with a contact separation of at least
3mm.
2
!
! !
! !
7
It is recommended that your installation is protected by a 30mA
residual current device (RCD).
The isolating switch can be a ceiling mounted pull cord switch within
the bathroom or wall mounted in an adjacent room.
9
In domestic installations you must ensure that the electrical supply and
existing fuse board are adequately rated.
8
Do not turn on the electrical supply unit until the plumbing has been
completed.
6
Connections
All pumps are supplied with a ftted fex.
3
The colour of the wires in the cable used for the fnal connection of this
appliance may not correspond with the coloured markings identifying
the terminals in your fex outlet; connection at the appliance and the
fex outlet should proceed as follows.
2
The wire that is coloured blue must connected to the terminal that is
marked with the letter N, or coloured black.
The wire that is coloured brown must connected to the terminal that is
marked with the letter L, or coloured red.
5
The wire that is coloured green/yellow must connected to the terminal
that is marked with the letter E, or the earth symbol
, or coloured
green.
4
3
The flex fitted to the pumps can only be replaced by Bristan, Part no.
SP-088-0502.
Duraspeed Water Pump 50 (HY PUMP50)
Duraspeed Water Pump 70 (HY PUMP70)
IMPORTANT: When replacing the flex ensure that the control box
Cover is replaced without damaging the new cables. The cable
Grommet should be used where the cable enters the box.
Varispeed Water Pump 50 (HY PUMP50 V)
No.
Part No.
Description
No.Of
No.
Part No.
Description
01
SP-035-0050
Flexible Hose (Outlet)
1
01
SP-035-0050
Flexible Hose (Outlet)
02
SP-035-0051
Flexible Hose (Intlet)
1
02
SP-035-0051
Flexible Hose (Intlet)
1
03
SP-035-0041
Inlet Filter
1
03
SP-035-0041
Inlet Filter
1
04
SP-088-0004-YW
Inlet Plate
1
04
SP-088-0004
Inlet Plate
1
05
SP-320-0044
Inlet Plate `O` Ring
1
05
SP-320-0044
Inlet Plate `O` Ring
1
06
SP-088-0108-PL-LH Reed Switch Assembly (LH)
1
06
SP-088-0108-LH
Reed Switch Assembly (LH)
1
07
SP-088-0108-PL-RH Reed Switch Assembly (RH)
1
07
SP-088-0108-RH
Reed Switch Assembly (RH)
1
08
SP-088-0502
Flex
1
08
SP-088-0502
Flex
1
09
SP-088-0501
Printed Circuit Board
1
09
SP-088-0501
Printed Circuit Board
1
10
SP-088-0013
Flow control Knob
1
10
SP-088-0013
Flow control Knob
1
11
No.Of
1
4
Troubleshooting
Water Requirements
Cold Water
Tank
230mm Minimum
Under no circumstances must the pump be connected to a mains
water supply.
Fused Spur
The installation must comply with all Water Authority and Building
By-laws and Regulations.
If the pump is to be installed in a hard water area, we recommend
that an in-line scale reducer is ftted. Please refer to your supplier for
advice.
The pump must not be installed in an area subject to freezing
conditions.
Do not use if you suspect the pump is frozen, this will damage the
pump unit.
We recommend a minimum 112litres (25 gallon) cold water storage
tank.
Do not use jointing compounds.
Warning:Before carrying out general repairs or testing the
pump, ensure that the electricity supply is turned off at the mains
and the correct circuit fuse is removed.
1m min
Hot
Water
Cylinder
Mixer
Mains
Water
Supply
Symptom
Likely Cause
Action/Remedy
No electricity supply.
Check fuse and electricity supply.
Flow switch not operating.
Check water flow from showerhead.
May require Negative Head switch.
Pump noisy - "squealing"
Possible aeration.
Check pump installed in accordance with
instruction book regarding siting, system
connections and water temperature.
Pump noisy - "rumbling"
Worn motor brushes.
Replace unit. Check correct installation.
Poor water flow/pressure
(Thermostatic shower mixer).
Possible aeration.
Check pump installed in accordance with
instruction book regarding siting, system
connections and water temperature.
Water supply to/from pump.
Check inlet filters. Check for kinked flexible
hoses.
Possible aeration.
Check pump installed in accordance with
instruction book regarding siting, system
connections and water temperature.
Fluctuating shower temperature
Possible aeration.
(Manual shower mixer).
Check pump installed in accordance with
instruction book regarding siting, system
connections and water temperature.
Poor performance
To completely remove all air from the
plumbing system, stop and start the pump
consecutively 5 times, 30 seconds on, 30
seconds off.
Pump will not start
Pump
Typical Twin Pump Shower Installation
Cold Water
Tank
Before proceeding with the installation of this unit, it is essential to
check that the handset and all pipework will be a minimum of 230mm
(9’’) below the water level in the cold water storage tank.
230mm Minimum
1m Min
Fused Spur
If your installation does not allow this, you will require a negative head
switch. Contact your supplier or Bristan Customer Services. If you have
not sourced your negative head switch from Bristan, please contact
Bristan Customer Service for a connection block. Please refer to page 8
for details of negative head installation.
Mixer
Hot
Water
Cylinder
Mains
Water
Supply
Poor water flow/pressure
(Manual shower mixer).
Pump
Typical Single Pump Shower Installation
Cold Water
Tank
230mm Minimum
Varispeed SI Water Pump 50
1m Min
If you are installing a Varispeed SI, where only a gravity feed is
available on the hot supply, the pump can be used to boost the gravity
hot supply only.
All storage capacities and pipe connections (as shown) should be
followed.
The outlet feed from the pump should then run to the mixer valve
or tap position, ensuring that the minimum head of 230mm to the
handset can be achieved.
UNDER NO CIRCUMSTANCES MUST ANY OF THE PUMPS
BE CONNECTED TO THE MAINS WATER SUPPLY.
Fused Spur
Hot
Water
Cylinder
Air in system
Mixer
Pump
Mains
Water
Supply
Boost of Gravity Hot only
KEY
Hot Water
Mixed Water
5
Cold Water
Isolating Valves
10
Commissioning - Testing the System
Installation
Commissioning - All pumps
Turn on the water supplies and allow the system to fill -
Duraspeed Water Pump 50/70
Varispeed Water Pump 50
Singlespeed Water Pump 50
DO NOT SWITCH ON ELECTRICITY
IMPORTANT
All Bristan pumps utilise quality ceramic seals. To prevent damage it is
essential that water is allowed to fow through both pump chambers to
purge out any airpockets prior to the unit being switched on.
Turn on mixer valve, without the ftted handset allow the water to fow
through the hose under gravity in the full hot and cold position for 1
minute. This is to ensure no foreign matter is left in the pipes and the
system is purged of air.
At this point we recommend checking the flters for debris, which
should be cleaned if required, thus ensuring the best long term
performance from the pump.
NOTE; Remember to isolate the water supply before removing the
hoses to check the flters.
Switch on the electricity supply to the pump.
Turn on the mixer valve (pump should start) and operate at full flow
for a further minute or until all remaining air is purged from the
system.
NOTE: For negative head installation, operate the starting switch for
long enough for the air to purge from the fow switches.
Turn off mixer valve and attach handset to hose. The commissioning
procedure is now complete.
NOTE: All of the pumps apart from Singlespeed incorporate a variable
speed control, which should be set to suit the users requirements and
to achieve optimum performance through the handset. Turn the control
anti-clockwise to increase and clockwise to decrease the output.
Do not use excessive force. We recommend the pump runs at the
minimum speed necessary to give satisfactory performance (normally
10-12 litres of water per minute). Running the pump at too high an
output can waste hot water and increase noise from the pump motor
and contravene the UK water regulations.
NOTE: AIR IN THE SYSTEM - To completely remove all air from
the plumbing system, stop and start the pump consecutively 5
times, 30 seconds on, 30 seconds off.
Warning: This appliance is not intended for use by
persons (including) children with reduced physical, sensory or
mental capabilites, or lack of experience and knowledge, unless
they have been given supervision or instruction concerning use of
the appliance by a person responsible for their safety.
Twin booster pumps are best installed in the airing cupboard with
separate hot and cold water supplies running to the pump. For correct
operation of the shower pumps, both hot and cold water supplies to
the unit must be gravity fed, at nominally equal pressures; cold water
from a cold water storage tank and hot water from a hot water storage
cylinder fed from a cold water storage tank.
Varispeed SI Water Pump 50
Single booster pumps are best installed after the mixing valve with
blended hot and cold water running to the pump and then to the
handset position. With a recessed installation, the outlet from the
mixer valve can be fed to the inlet of a single ended pump, and the
pump outlet connected to the shower hose, normally via a shower
hose union elbow.
Important:
Please be aware of the following when planning your installation:
All plumbing should be completed before any electrical connections are
undertaken.
The pump must be positioned in a dry area i.e. in a linen/airing
cupboard, as close to the base of the hot cylinder as possible, ideally
pushing water not pulling. The pump will work most efificiently when
Fitted close to the hot water cylinder.
The pump must not be mounted in the loft, as this leaves it vulnerable
to freezing, and air locks.
The pump should be in a well-ventilated position and not covered
with towels, clothes, etc. and accessible for future servicing and
maintenance.
The pump can be connected to a combination cylinder system
providing it has a cold water storage capacity of 112 litres. When
connecting pipework avoid using elbows. Sweep or formed bends will
ensure optimum performance.
The minimum inlet size is 15mm for all pipework to and from the
pump. Do not solder within 300mm of the pump, or expose parts to
excessive heat.
Cold water
Inlet
51mm
Do not run the pump dry.
Make your connection into the hot water supply pipe from the cylinder,
ensuring that it is in the vertical pipe (below the expansion pipe tee).
A minimum of 1 metre below the base of the cold water storage tank
and the top of the hot water cylinder must be achieved. See diagrams
on page 6.If this is not possible, a direct connection must be made
from the hot water cylinder with an Essex Flange with a dip tube.
Non restrictive full bore isolating valves (accessible for ease of
maintenance on hot and cold supplies to the pump) must be ftted
e.g. gate valve. In normal circumstances the temperature of the
stored water must not exceed 65°C.A stored water temperature of
60°C is considered sufficient to meet all normal requirements and will
minimise limescale in hard water areas.
Important the booster pump and all connecting pipework must be
earthed.
9
Hot Water
Outlet
6
Essex Flange
Hot water
Cylinder
Position of Essex Flange
Fitting your Pump
Negative Head Option
Installation Procedure
Important
Do not connect brass or copperfittings directly on to the pump threads.
Use only the hoses supplied with the pump.
Isolate appropriate water and electrical supplies. For the benefit of the
user and for any future servicing please ft full bore isolating valves
1/2 metre from the pump on the inlet pipework.
Twin pumps only: The cold water supply should be taken directly from
the cold storage tank, and must be positioned 60mm below the cold
feed connection to the hot water cylinder.
60mm
To Hot Water
Cylinder
Connect the fexible connectors supplied to the inlet and outlet ports
of the pump. Ensure that the adaptors ftted to the inlets have filters in
position.
Cold Water
Negative
Tank
Head
Water
Level
1m min.
Fused
Spur
Procedure
Mains Water
Supply
Proceed with speciifc installation details as appropriate to the pump
being installed.
Flexible connectors should not be bent. Where possible keep all
flexible connectors vertical.
To Pump
Where the shower handset or pipework from the pump to the shower,
is less than 230mm below the water level in the cold water tank, or
in cases where it is above the water level, there will be no natural
flow to lift the flow switches and start the pump. A negative head kit
will be required to manually start the pump. Bristan Customer Services
can supply a negative head kit, part no. 564-1000. If Bristan have not
supplied your negative head switch, please contact Bristan Customer
Services for a special connection block.
For chrome
plated pipes
remove the
frst 25mm of
plating
NOTE: These are designed to effect a leakproof seal with the mimimum
of tightening. Hand tight is sufficient, the elbow fexible connectors
should be on the inlets. Ensure not to kink the flexible hoses.
IMPORTANT: Ensure that the control box cover can be replaced
without damaging the new cable. A cable grommet should be
used where the cable enters the box.
Mixer
Hot
Water
Cylinder
Instructions: Fit the electric pull cord switch adjacent to the showering
area. Using1.0mm² twin and earth cable (not supplied), connect the
earth wire to the earth terminal (using a suitable length of green/
yellow sleeving) and the remaining two wires to the L1 and L2 in the
pullcord switch. Run the cable to the pump and then connect the earth
wire (using a suitable length of green/yellow sleeving) to the earth
terminal and the remaining two wires to the connection block on FS1
or FS2. Connect to only FS1 or FS2 not both. Ensure that the original
Flow switch wires are reterminated in the new connection block.
Water Tank Detail
Cord-pull switch
Pump
Twin - Pump Negative Head Installation
FS1 Connection Block
FS2 Connection Block
Push ft
connector
Either end inlet can be used for hot or cold. (Twin pumps only)
Connec fitted fex into the fused spur outlet, in accordance with the
`Electrics` chapter.
!
!
Pipe Connection
Earth Terminal Block
Collett
Either by hand or using a coin, rotate boost control fully anti-clockwise,
to maximum mark. (Excludes Singlespeed Water Pump 50 model only)
PCB Connection Blocks
WARNING: Do not ft fuse or switch on mains electrical supply at this
point.
Pipe Removal
Inlet Pipe Filters
7
! ! !
! ! !
IMPORTANT: The integral fttings on the hose are of a push ft type. All
burrs and rough edges must be removed from the end of the pipe. In
the case of a chrome plated pipe, the first 25mm of plating should
be roughened or removed. Should it be necessary to remove the pipe
after installation, push down the collet and pull pipe. Make sure water
supply is isolated before attempting this operation.
8