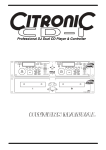
Download CD-4 Owners Manual
Transcript
Citronic User Handbook
Table of Contents
TABLE OF CONTENTS ...........................................2
ABOUT CITRONIC...................................................3
IMPORTANT SAFETY INFORMATION...................4
WARNINGS:.............................................................4
CAUTIONARY NOTES:...............................................4
IMPORTANT INFORMATION:.......................................4
LINE VOLTAGE SELECTION .......................................4
YOUR SERIAL NUMBER ............................................4
US & CANADIAN MODELS ONLY ...............................4
Caution ..............................................................4
SAFETY INSTRUCTIONS........................................5
INSTALLATION NOTES & USE..............................6
CONNECTIONS .....................................................11
ANTI SHOCK MEMORY .................................11
MATCHING THE BEATS PER MINUTE................12
BEAT MATCHING USING PITCH BEND ..............12
CD-3 Professional Anti-Shock Dual CD Player
Page 2 of 14
Citronic User Handbook
ABOUT CITRONIC
Thank you for choosing Citronic and the CD-3 Anti-Shock
dual CD player and controller. You have joined a
discerning group of DJ’s and operators who value design
integrity, quality and state of the art facilities.
Established in Melksham, Wiltshire in 1972, Citronic
occupies prestigious purpose built factory headquarters.
The award winning product range covers professional
audio mixers, amplifiers and signal processing.
Each unit is manufactured to the highest possible
standards and all have an enviable reputation for
reliability and value for money – the noted hallmark of
Citronic products.
Substantial investment has been made in high
technology CAD systems, manufacturing control and
testing techniques. This sophisticated computerisation
coupled with an extensive research and development
program, enables the company to offer an exceptional
degree of manufacturing excellence and quality
assurance.
Citronic has always listened carefully to the customer and
places tremendous emphasis on market research. This
ensures that the exacting requirements of the DJ are
complimented without compromise, throughout the entire
product range. This unique approach, coupled with a
strong input from a highly qualified engineering team,
ensures that Citronic maintains its position as a
respected leader, in the industry’s development.
Citronic has a distribution network throughout Europe,
Asia and the Americas.
Enjoy your new purchase.
WARNING
In order to obtain the best service from the unit we
STRONGLY recommend that you read this manual
before you apply any power.
CD-3 Professional Anti-Shock Dual CD Player
Page 3 of 14
Citronic User Handbook
Line Voltage Selection
(For Multiple Voltage Model Only)
Important Safety Information
•
The desired voltage may be set with the voltage
selector switch on the rear panel, using a
screwdriver.
To prevent fire or shock hazard, do not expose this
appliance to rain or moisture.
•
Do not twist the voltage selector switch with
excessive force as this may cause damage.
To reduce the risk of electric shock, do not remove the
cover (or back). There are no serviceable parts inside.
Always refer servicing to qualified service personnel.
•
If the voltage selector switch does not move
smoothly, please contact a qualified service person.
Warnings:
Cautionary Notes:
•
•
Handle the power supply cord carefully. Do not
damage or deform the power supply cord. If it is
damaged or deformed, it may cause electric shock or
malfunction when used. When removing from wall
outlet, be sure to remove by holding the plug
attachment and not by pulling the cord.
In order to prevent electric shock, do not open the
top cover. If a problem occurs, contact your dealer.
•
Do not place metal objects or spill liquid inside the
CD player. Electric shock or malfunction may result.
•
Any use of the controls, or any adjustment, or the
performance of any procedure other than those
specified herein may result in hazardous radiation
exposure.
•
The compact disc player should not be opened or
repaired by anyone except properly qualified service
personnel.
•
Double insulated - when servicing, use only identical
replacement parts.
Your Serial Number
Please, record and retain serial number of your CD-3
shown on the rating label.
My Serial Number Is : _______________________
US & Canadian Models Only
Caution
To prevent electric shock do not use this (polarized) plug
with an extension cord, receptacle or other outlet unless
the blades can be fully inserted to prevent blade
exposure.
Important Information:
•
The lightning flash with arrowhead symbol, within an
equilateral triangle, is intended to alert the user to the
presence of un-insulated "dangerous voltage" within
the product's enclosure that may be of sufficient
magnitude to constitute a risk of electric shock to
persons.
•
The exclamation point within an equilateral triangle is
intended to alert the user to the presence of
important operating and maintenance (servicing)
instructions in the literature accompanying the
appliance.
•
This CD player uses a semiconductor-based laser.
To allow you to enjoy music in a stable manner, it is
recommended to operate the appliance between
41°f-95°f (5°c-35°c).
•
This unit may cause interference to radio and
television reception.
CD-3 Professional Anti-Shock Dual CD Player
Page 4 of 14
Citronic User Handbook
Safety Instructions
All the safety and operating instructions should be read
before the appliance is operated.
1. Retain Instructions - The safety and operating
instructions should be retained for future reference.
2. Heed Warnings - All warnings on the appliance and
in the operating instructions should be adhered to.
3. Follow Instructions - All operating and use
instructions should be followed.
4. Water and Moisture - The appliance should not be
used near water - for example, near a bathtub,
washbowl, kitchen sink, laundry tub, in a wet
basement, or near a swimming pool, and the like.
5. Carts and Stands - The appliance
should be used only with a cart or stand
that is recommended by the
manufacturer. An appliance and cart
combination should be moved with
care. Quick stops, excessive force, and
uneven surfaces may cause the appliance and cart
combination to overturn.
6. Wall or Ceiling Mounting - The appliance should be
mounted to a wall or ceiling only as recommended by
the manufacturer.
7. Ventilation - The appliance should be situated so that
its location or position does not interfere with its
proper ventilation. For example, the appliance should
not be situated on a bed, sofa, rug, or similar surface
that may block the ventilation openings; or, placed in
a built - in installation, such as a bookcase or cabinet
that may impede the flow of air through the
ventilation openings.
8. Heat - The appliance should be situated away from
heat sources such as radiators, heat registers,
stoves, or other appliances (including amplifiers) that
produce heat.
9. Power Sources - The appliance should be connected
to a power supply only of the type described in the
operating instructions or as marked on the appliance.
10. Grounding or Polarization - Precautions should be
taken so that the grounding or polarization means of
an appliance is not defeated.
11. Power - Cord Protection - Power - supply cords
should be routed so that they are not likely to be
walked on or pinched by items placed upon or
against them, paying particular attention to the cord
in correspondence of plugs, convenience
receptacles, and the point where they exit from the
appliance.
CD-3 Professional Anti-Shock Dual CD Player
12. Cleaning - The appliance should be cleaned only as
recommended by the manufacturer. Clean by wiping
with a cloth slightly damp with water. Avoid getting
water inside the appliance.
13. Disconnect power cord before servicing.
14. Replace critical components only with factory parts or
recommended equivalents.
15. For AC line powered units - Before returning repaired
unit to user, use an ohm - meter to measure from
both AC plug blades to all exposed metallic parts.
The resistance should be more than 100,000 ohms.
16. Non - use Periods - The power cord of the appliance
should be unplugged from the outlet when left
unused for a long period of time.
17. Object and Liquid Entry - Care should be taken so
that objects do not fall and liquids are not spilled into
the enclosure through openings.
18. Damage Requiring Service - The appliance should
be serviced by qualified service personnel when;
•
The power supply cord or the plug has been
damaged; or
•
Objects have fallen, or liquid has been spilled
into the appliance; or
•
The appliance has been exposed to rain; or
•
The appliance does not appear to operate
Normally or exhibits a marked change in
performance; or
•
The appliance has been dropped, or the
enclosure damaged.
19. Servicing - The user should not attempt any service
to the appliance beyond that described in the
operating instructions. All other servicing should be
referred to qualified service personnel.
20. Ventilation - The appliance should be situated so that
the location or position does not interfere with its
proper ventilation. For example, the appliance should
not be situated on a bed, sofa, rug, or similar surface
that may block the ventilation openings; or, placed in
a built - in installation, such as a bookcase or cabinet
that may impede the flow of air through the
ventilation openings.
21. Cleaning - The appliance should be cleaned only as
recommended by the manufacturer.
22. Nonuse Periods - The power cord of the appliance
should be unplugged from the outlet when left
unused for a long period of time.
Page 5 of 14
Citronic User Handbook
Installation Notes & Use
•
Do not obstruct the ventilation holes. (For units with
ventilation holes)
•
Allow for sufficient heat dispersion when installed on
a rack.
•
Do not drop foreign objects into the unit.
•
Handle the power cord carefully.
•
Do not let insecticides, benzene, and thinner come in
contact with the set.
•
Hold the plug when unplugging the cord.
•
Never disassemble or modify the set in any way.
•
Keep the appliance free from moisture, water, and
dust.
•
•
Unplug the power cord when not using the appliance
for long periods of time.
For 220 volt use in USA, USA nema style 220 volt
plug. For other countries, use proper plug for the
local outlet.
CD-3 Professional Anti-Shock Dual CD Player
Page 6 of 14
Citronic User Handbook
DESCRIPTION OF THE FUNCTIONS
Function of the Main Unit:
1. POWER (Power Switch)
Press the power switch to turn the unit on. To switch
the POWER off press the POWER switch again.
2. DISC TRAY
The disc is placed on this tray. Pressing the disc tray
open/close buttons e will open or close the tray.
3. OPEN/CLOSE (Disc Tray Open/Close Button)
Press to load or eject the disc. Each press will open
or close the disc tray d.
5. LINE OUT (Output Jacks)
The audio from each CD player is output from these
jacks. Connect to the line input of the mixer.
6. CONNECTOR PORTS
The 8-pin socket permits the connection of the main
unit to the control unit.
7. DIGITAL OUT
The digital from each CD player is output from these
jacks. Connect to the line input of the D/A Amplifier.
The remote control is also quipped with similar
buttons.
NOTE: Tray will not open unless stop or pause button
has been push first.
4. AC INPUT
Connecting this power cord into an AC wall outlet with
the proper AC voltage.
CD-3 Professional Anti-Shock Dual CD Player
Page 7 of 14
Citronic User Handbook
Function of the Control Unit
1. UNIT-1 Control Operation Panel
This operation panel remotely controls the main unit
1.
2. UNIT-2 Control Operation Panel
This operation panel remotely controls the main unit
2.
3. OPEN/CLOSE (Disc Tray Open/Close
Button)
7. PITCH BEND (+/-)
When each of the two CD players is playing a CD,
the pitch" bend function allows the position of the
bass beats to be matched after the pitch has been
adjusted. The pitch will automatically rise (+12%)
when pitch bend " + " button is" pressed (Pitch LED
blinks) and return to the original pitch when it is
released. The pitch will drop (-12%) while the pitch
bend " - " button is pressed (Pitch LED blinks). By
changing the pitch in this way the positioning of the
beats can be matched.
Press to load or eject the disc. Each press will open
or close the disc tray.
8. SEARCH (JOG)
NOTE: Tray cannot be opened during playing.
This contains two functions:
4. L.C.D
These liquid crystal displays (L.C.D) indicate the
track numbers, time (minutes, seconds, frames)."
5. PLAY/PAUSE
* Speed. Control
Rotating this dial in play mode will change playback
speed accordingly. Rotate clockwise, the player speed
increases;" rotate counter-clockwise, the speed
decreases."
* Searching
Each press of this button causes the operation to
change between PLAY and PAUSE modes.
6. PITCH
This button changes the play speed.
Rotating this dial in Pause mode, the player will
forward or " backward to the desired point for start.
The searching speed changed according to the dialing
speed. lt can be carried out by 1 frame increment.
Press PITCH button (the PITCH LED is lit) to enable
the PITCH CONTROL. The pitch can be changed up
to ± 12% by moving the sliding bar up and down.
NOTE: The pitch will not be changed if the PITCH
LED is off.
CD-3 Professional Anti-Shock Dual CD Player
Page 8 of 14
Citronic User Handbook
9. SCAN (SHUTTLE)
This is used to select the scanning direction and
speed. When the shuttle is turned forward, the
player speeds up; in contrast," the playback slows
down when it is turned reverse.
10.TIME/OUTRO (TIME/STOP Button)
This button switches the time display between each
Elapsed playing time, Remaining time, and Total
remaining time; it" also switches on and off the
OUTRO function. When the display shows OUTRO,
the player only plays the last 30" seconds of each
track.
NOTE: pressing this buttons for three seconds will
automatically stop the playing unit.
11.TRACK SKIP
This button selects a specific track to be played.
+10: Press this button to forward 10 tracks
12.CONT./SINGLE (CONT./SINGLE Button)
Press this button to switch between the 4 modes: SINGLE,
CONTINUE, SINGLE RELAY AND CONTINUE RELAY.
In SINGLE and CONTINUE mode the selected mode
is indicated on the LCD.
13.START/CUE FUNCTION
Press this button to memorize the exact start point
for REPEAT playback mode. This function is used in
conjunction with the END/EXIT button. The
START/CUE button is also used to alter the CUE
point, which is automatically set to the start of the
music. If a new cue point is desired then follow the
instructions below:
a) Put the unit in to PAUSE mode.
b) Using the JOG/SHUTTLE dials find the new
desired start point.
c) Now press the START/CUE button followed by the
large red CUE button to enter the new cue point.
14.END/EXIT
After a start point has been memorized using the
START/CUE button, a finish point needs to be
terminated using the END/EXIT button. Once
pressed the player will repeat the section of music
between the start & end set points.
To cancel this repeat function, simply press the
END/EXIT button once more.
NOTE: When REPEAT is in use and play is paused,
pressing START button will change START
point without deleting the end point.
In SINGLE Relay and CONTINUE Relay modes, the
display" indicator (AUTO CUE/SINGLE, or
CONTINUE) is flashing."
Mode 1: Single/Auto Cue
Play 1 track on any unit then pause at the beginning
of the next track. This means the 2 units can work
independent of each other.
Mode 2: Continue
Play the tracks one after each other on any unit then
stop. This means the 2 units can work independent
of each other.
Mode 3: Single Relay
Play 1 track on the 1st unit, pause it, then play cued
track on" the 2nd unit and so on. This means after
the playing side get to the end, it will pause, and the
other side will start playing."
Mode 4: Continue Relay
Play one complete CD on one unit, it will stop and
then play" the CD on the second unit. This means
after the playing side get to the end of disc, it will
stop, and the other side will start" playing.
Note: CONTINUE RELAY can work only while one
unit is in " play " mode and the other one is in " stop "
mode.
CD-3 Professional Anti-Shock Dual CD Player
Page 9 of 14
Citronic User Handbook
15.RELAY
To relay the music between unit 1 and unit 2. It can
be performed in Single /Auto Cue mode as well as
in Continue mode.
(1) In Single /Auto Cue mode
One track of each unit performed alternately under
the condition as below.
z Both the time displays show "single auto cue".
z One unit in PLAY mode, and the other one in
PAUSE mode.
After the playing side get to the end, it will PAUSE,
and the " other side will start playing; pressing the
button to pause the playing side will start the other
side to play.
(2) In Continue mode
One disc of each unit performed alternately under
the condition as below:
z Both the time displays show "continue".
z One unit in PLAY mode, and the other one in
STOP mode.
After the playing side gets to the end disc, it will
STOP, and the other side will start Playing.
Note:
1. Relay can work when one unit is on "play" mode
and the" other one on "stop" mode. If on search or
pause mode" relay cannot work.
2. It will go direct to "single/auto cue" mode for both
units when power on.
16.CUE
The CUE function allows the CD to be played from
a setup point any number of times.
Press the PLAY/PAUSE button to pause a playing
song, then press the CUE button to set up a
position where the play can be returned after the
CUE is hit again.
The CUE LED will stop flashing from the time the
CUE button is pressed.
17.CONNECTOR PORTS
The 8-pin termination permits the connection of the
control unit to the main unit.
CD-3 Professional Anti-Shock Dual CD Player
Page 10 of 14
Citronic User Handbook
Connections
A typical connection with a mixer is illustrated below. Please use it for reference.
- Connect the connection cords to the line inputs of your mixer.
-The connection cords and the remote control connection cable are supplied with the main unit.
-Be sure to use the remote control connection cable, which has been supplied. Use of another cable type might
cause
Damage
ANTI SHOCK MEMORY
This CD Player is equipped with an anti-shock memory, wish memorize 10 seconds of music before reading, to be not in case of
shock.
Warning: This system can't work in case of repetitive shocks or vibrations and if the memory is not completely charged.
CD-3 Professional Anti-Shock Dual CD Player
Page 11 of 14
Citronic User Handbook
MATCHING THE BEATS PER MINUTE
Match the pitch by monitoring the music of both UNIT 1 and UNIT 2 by ear. When the tempo of the music of the
selected CD player is slow compared to the tempo of the other player, move the slider to the + side and match the
tempo. When fast, move to the - side.
The following description is for the case of matching the pitch of UNIT 2 to the pitch of the music being played on
UNIT 1.
UNIT 1 is playing.
CONTINUE
AUTO CUE
SINGLE
Press PLAY/PAUSE to start UNIT 2.
CONTINUE
AUTO CUE
ANTI
PITCH
SINGLE
PITCH
SHOCK
REMAIN
Both CD players are playing discs.
REMAIN
LOOP
LOOP
OUTRO
OUTRO
Listen to UNIT 2 in your headphones.
When UNIT 2 is slow
When UNIT 2 is fast compared
compared to UNIT 1
to UNIT 1
Beat Matching Using Pitch Bend
A description of the procedure for matching the beat of UNIT 1 and UNIT 2 using the PITCH BEND stick is given
below.
This description is for the case of matching the beat of UNIT 2 to the beat of the music being played on UNIT 1.
(This procedure can be done on either Unit).
After Matching the BPM's
CONTINUE
AUTO CUE
SINGLE
ANTI
PITCH
REMAIN
SHOCK
CONTINUE
AUTO CUE
SINGLE
BPM’s (Beat Per Minute) are the
PITCH
REMAIN
LOOP
LOOP
OUTRO
OUTRO
same, however the bass beats
are not matched.
When UNIT 2 is ahead.
CD-3 Professional Anti-Shock Dual CD Player
When UNIT 2 is behind.
Page 12 of 14
Citronic User Handbook
BEFORE SWITCHING OFF THE POWER
When you have finished using the CD player, before switching off the power be sure that the disc tray has been
closed with the OPEN/CLOSE button.
POWER OFF
POWER OFF
8
Do not switch off the power when the
disc holder is open.
Switch off the power after the disc
holder has been closed with the
OPEN/CLOSE button.
POWER OFF
POWER OFF
TROUBLESHOOTING GUIDE
If difficulties arise with your compact disc player, locate the apparent problem in the left-hand column of the table and follow the
corrective action suggested in the right-hand column.
1. Is the compact disc player properly connected to the amplifier?
2. Is the amplifier set for the proper operation?
3. Have the operating instructions for the compact disc player been followed?
Symptom
Possible Cause
Corrective Action
The power fails to switch on
when the POWER switch is set
Poor power plug connection at the AC outlet.
Insert the power plug firmly into the AC outlet.
The disc is loaded upside down.
Reload the disc with the label side up.
The disc is too dirty.
Clean the disc.
to ON
Disc play does not start
Improper output cable connections.
No sound
Improper amplifier operation.
Sound skips
Hum
The CD player is subject to vibrations or
physical shock.
Loose cable connections.
CD-3 Professional Anti-Shock Dual CD Player
Connect the output cable properly.
Make sure that the amplifier controls are set
properly.
Change the installation location.
Firmly connect all audio plugs.
Page 13 of 14
Citronic User Handbook
Citronic Limited
Halifax Road
Bowerhill
Melksham
Wiltshire
England
SN12 6UB
Tel: +44 (0)1225 705600
Fax: +44 (0)1225 709639
Email: [email protected]
Web: www.citronic.com
CD-3 Professional Anti-Shock Dual CD Player
Page 14 of 14


