1
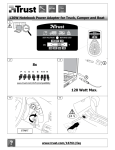
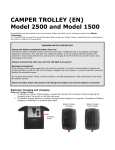
CAMPER TROLLEY
1
CAMPER TROLLEY
GB
Congratulations on the purchase of your new Camper Trolley, and thank you for choosing a product
from Mover Technology.
We hope this product will bring you many years of satisfaction.
It is important that you read this manual thoroughly
before using your Camper Trolley.
Technical Data:
Battery voltage:
Battery type:
Battery Capacity:
Battery operating capacity:
Battery charger:
Battery remote control:
Max. load stress:
Speed unloaded:
Speed loaded:
Motor:
Safety function:
Solar cell:
Hauling capacity:
Caterpillar tracks:
Weight:
14.4 V.
Lithium
6,400 mAh
Approx. 30 min. operation
230 V – 14.4 V. Capacity 1.0 A.
1 pce AA - 9.0 V.
500 kg.
Approx. 9 m./min.
Approx. 8 m./min.
2 pce 14.4 V planetary gear motors.
3 min. Auto shut-off.
18.0 V 1.17 W.
Trailers up to 1500 kg.
2 pce with terrain rubber profiles.
36.38 lb.
Contents of transport crate:
On unpacking the Camper Trolley, check that all parts are in the crate.
In case of missing content: Contact your dealer.
Operating Manual:
1 pce
Camper Trolley:
1 pce
Charger, 230 V 1.0 A:
1 pce
Remote control:
1 pce
Transportation bag:
1 pce
+ Suspension hardware, composed of the following parts:
Cotter ring:
1 pce
Stabilization pipe:
2 pce
Suspension fitting:
2 pce
Extension tube for fitting
1 pce
+ Screws and nuts for suspension fitting.
The EC Declaration of Conformity is available via the manufacturer.
Mover-technology ApS
Ved Stranden 1
9560 Hadsund – DK
10
Mounting the suspension fitting:
If there is a plastic cover over the side member system on the camping trailer, it can be helpful to
remove it while mounting the suspension fitting.
Extension tube for mounting fitting.
➞
A 1 Lover. Largest tube➞
B Fitting. Left
➞
B Fitting. Right
Extension tube for
➞ mounting fitting.
➞
A 2 Øverst. Mindste rør
➞ Tårn
When mounting the suspension fitting from the Camper Trolley onto the camping trailer, start by
gliding the 2 stabilization tubes A1 and A2 together and placing them up inside the side members.
Next screw on the right and left fitting loosely (right and left are seen from the ball catch on the tow
bar).
Extension tube:
In case of larger distances between side members, place the extension tube inside the smallest
stabilisation tube.
The illustration below shows the placement of the suspension fitting mounted on the side members.
Finally, slide the entire suspension fitting as far back on the side members as possible to put
maximum weight on the Camper Trolley. Do not push the suspension fitting so far back that
mounting and dismounting the Camper Trolley becomes difficult.
11
The following illustration shows the optimal placement of the suspension fitting on the camping
trailer.
Next, push the stabilization pipes as far from each other as possible, towards the sides of the side
members. Tighten the right and left fittings so that the bent underside of the fittings is positioned
precisely against the outer side of the side members. Make sure that the bolts are tightened to the
maximum extent.
Clamp bolt on stabilization pipe:
Once the suspension fitting is adjusted and fastened to the side members, tighten the clamp bolt
into the side of the smallest stabilization pipe.
If the camping trailer’s bearers are extremely narrow, and the stabilization pipes cannot be pressed
far enough together upon mounting, shorten the stabilization pipes using a hacksaw. There must be
minimum 10-15 cm inner overlap of the stabilization pipes. It makes no difference if you remove the
clamping bolt after shortening the stabilization pipes.
Mounting of Camper Trolley:
k l
å
h
b
l
j
h jd
å
When mounting the Camper Trolley on the suspension fitting, adjust the height of the suspension
fitting using the nose wheel.
The suspension fitting mounted on the Camper Trolley fits into a slit on the underside of the
mounting fitting on the left side seen from the ball catch and can be pushed into place in this slit.
After pushing the Camper Trolley into the slit in the mounting fitting, attach the factory-provided
cotter ring, which locks the Camper Trolley in place. You are now ready to tow your camping trailer.
After attaching the Camper Trolley to the cotter, raise the support wheel to its highest position, and
release the hand brake. This shifts the weight of the camping trailer onto the Camper Trolley.
12
Safety and operation:
Note that the Camper Trolley may not have proper gripping if the load it is bearing is insufficient.
To ensure optimal transfer of the Camper Trolley’s power to the surface it is to operate on, make
sure that the Camper Trolley always moves forward, that is, in the direction of the antenna.
Operating Camper Trolley on slanting surfaces may shift and decrease the pressure on the Camper
Trolley, resulting in poor contact with the terrain. Also be aware that too little weight on the Camper
Trolley will result in poor towing results.
In order for Camper Trolley to function optimally, the ball thrust must be at least 75-85 kg. This
much thrust creates about 120-150 kg of pressure on the Camper Trolley, provided that the suspension fitting is placed as far back as possible on the camping trailer’s side members.
The Camper Trolley is designed for moving camping trailers weighing up to approx. 1500 kg. On
hard, even surfaces, however, the Camper Trolley can also tow heavier trailers.
When you use Camper Trolley on slanted surfaces, inclines or over curbs and in bumpy terrain, it is
important that you back the camping trailer up − if necessary, one wheel at a time. Optionally, use
a wedge. This increases the pressure on the Camper Trolley, because part of the camping trailer’s
weight shifts onto the Camper Trolley.
When descending slopes in the terrain, it is very important that the camping trailer moves forward
with the Camper Trolley in front. Here the Camper Trolley must “back up” with the antenna opposite the manoeuvring direction. This is important, as the Camper Trolley might otherwise tip over
forward.
If towing down very steep inclines, be aware that the hand brake may have to be used during operation if the Camper Trolley is unable to hold the trailer.
Use precaution when using the Camper Trolley to tow on wet, oily or steep surfaces, where the
caterpillar tracks cannot adequately grip the surface.
Also: Familiarize yourself with the operating manual, and practice manoeuvring the camping trailer
on a flat surface before attempting to manoeuvre it on inclines. We recommend testing your Camper
Trolley at home – also without a camping trailer – so you can experience the different manoeuvring
options before starting your holiday.
Children:
Note that children under age 3 should not play with any plastic bags or small parts from the Camper
Trolley, as there is a risk of suffocation.
Children should not tow the camping trailer with the remote control.
13
Operation:
The photograph below shows the front of the Camper Trolley, where the start/stop button and operating/battery status indicators are located.
Driftslys = Operating status
Markeringslys (battery low) = Battery status
Start/Stop = Start/Stop
Start:
To start the Camper Trolley, press and hold the start button down for approx. 2 seconds. This activates a green blinking light, indicating that the Camper Trolley is ready for use. Note, however, that
the Camper Trolley shuts off automatically after 3 minutes if the remote control is not activated within
that period.
Stop:
If you do not want to wait 3 minutes until the Camper Trolley shuts off automatically, press the start
button to disconnect the power manually.
Battery LED:
If you see a red blinking light in the battery status LED while operating the Camper Trolley, this is an
indication that the battery capacity is low. When this happens there is only enough battery capacity
for about 5-8 minutes of operation before the Camper Trolley automatically shuts down to protect
the battery.
Batteries:
It is very important to charge the Camper Trolley before using it for the first time. The lithium bat
tery must be completely charged before first use, to ensure high performance and long life. The
first charge may take 6-8 hours. After 4-5 charges, the battery is up to 100% capacity.
Charging via solar cell:
Charging time depends on sunlight and the remaining battery capacity. For normal maneuvering,
the solar cell is able to keep the battery charged if the Camper Trolley is placed in sunlight during
daylight hours.
Important information
If the Camper Trolley goes unused for more than two months, it is highly recommended that you operate the Camper Trolley for 10 minutes and then charge the battery for a couple of hours, in order to
maintain maximum battery life and performance. Remember to dispose of the batteries in a manner
that respects the environment. Do not throw them away with ordinary household waste.
Winter storage:
Store the Camper Trolley in a dry, frost-free environment. Do not cover the solar cell if you wish to
charge the battery.
14
Battery charging:
Ladestik = Charging outlet
Charging outlet:
Connect the charger to the Camper Trolley by placing the charging plug in the outlet on the lid of
the back plate.
Charging function:
The battery charger displays a constant red light while charging is in progress. Completion of battery charging is indicated by a constant green light.
Remote control:
Use both hands on the remote control, and hold it horizontally during use, as shown in the image
below.
Operation:
To move forward, in the same direction as the antenna, press the upper left control button.
To move backward, press the bottom left control button.
To turn, press the forward or backward button while pressing one of the turn buttons on the right
side of the remote control to turn right or left. The Camper Trolley will only turn if you first hold the
forward or backward button, followed by a turn button. The turn function is amplified when you hold
one of the turn buttons down for over 1 - 1.5 seconds. This makes the turning caterpillar track turn
opposite the operating direction.
15
Emergency stop:
In connection with towing that gets out of control, you can block both caterpillar tracks
electronically to stop the Camper Trolley immediately by pressing and holding down the middle red
button.
Change of batteries in remote control:
When the sender signal from the remote control becomes too weak – this is the case when you
need to stand very close to the Camper Trolley before it reacts – it is time to replace the batteries in
the remote control. To do this: Loosen the 4 screws on the back of the remote control and remove
the panel. Next replace the 9.0 V battery. Remember to dispose of the batteries in a manner that
respects the environment – do not dispose of them with ordinary household waste.
After use:
When you are finished towing the camping trailer and you want to disconnect the Camper Trolley,
pull the parking brake and adjust the nose wheel so that the trailer is slightly elevated. This takes
the weight off the Camper Trolley. Next remove the cotter and use the remote control to move the
Camper Trolley out of the lock fitting (or pull it out manually).
After dismounting:
Put the Camper Trolley in the factory delivered transport box/bag, either in the car or in the sun for
charging.
After use:
Remember to store the Camper Trolley in a frost-free environment and to operate it at least every
other month.
Cleaning:
If you have used the Camper Trolley in wet or filthy conditions, you can clean it in the following
manner:
Remove pebbles, clay, grass and the like from the belts. Then give it a gentle cleaning using a small
amount of clean water and a brush or cloth. Do not use soap/cleansing agents or a high-pressure
cleaner.
Remember:
Never leave the Camper Trolley mounted to the camping trailer while towing the trailer behind a car.
It is important that you always dismount the Camper Trolley after use and place it in the storage
box/bag provided. If the storage box/bag should become damaged, discard it. A new plastic storage box/bag may be obtained from your Camper Trolley distributor.
Guarantee:
This product is covered by warranty in accordance with relevant EU legislation. In case of any claim
regarding this product, please contact the distributor and provide information about: the cause of
the error or defect and the date of purchase. Include the invoice / proof of purchase.
Mover Technology
Ved Stranden 1
DK-9560 Hadsund
www.mover-technology.com
www.camper-trolley.com
16