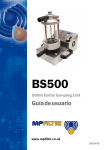
Download BS110/User Guide
Transcript
BS110
110ml Bottle Sampling Unit
User Guide
www.mpfiltri.co.uk
200.050-EN
Covers Model Numbers
BS110
SAFETY WARNING
Hydraulic systems contain dangerous fluids at high pressures and
temperatures. Installation, servicing and adjustment is only to be
performed by qualified personnel.
Do not tamper with this device.
Document Revision 6.1
Contents
1
Precautions
5
•Internal Cleaning
2
Scope of Supply
6
3
Introduction
7
4
Procedure
8
•De-aeration •Operating with Particle Analyser
5
Sample Bottle Cleaning Procedure
11
6
Information
12
•Warranty •Spare Product / Part Numbers
7
Fault Finding
•Flushing Fluids
13
Document Revision 6.1
1 Precautions
1.1 Internal Cleaning
DO NOT clean the Bottle Sampler with Acetone or similar solvents
that are not compatible with the seals. The recommended cleaning fluid for internal flushing is listed on the website: www.mpfiltri.co.uk
Precautions
5
2 Scope of Supply
Each standard Bottle Sampler supplied consists of the following:•
•
•
•
•
•
•
•
•
•
•
•
1 x BS110 particle counter accessories bag, containing:1 x 110ml Bottle Sampler
1 x Pressure cap
1 x Vacuum cap
1 x Test hose x 0.6m long
1 x Waste bottle
1 x 12V DC power supply (for a combined code when ordering,
an extra power supply is included in case) with UK, EU and US
heads.
1 x Hand pump and 10m hose
1 x BS110 User guide
2 x Paper roll
3 x 100ml bottles
1 x Pack of disposable dip tubes
Figure 1
6
Scope of Supply
3 Introduction
The Bottle Sampler is an aid to accurate contamination monitoring
suitable for laboratory applications utilising mineral oil as the operating fluid, (other options may be available, please contact your
local sales office).
The Bottle Sampling Unit has the optional facility to de-aerate the
fluid sample, prior to testing with the analyser, by applying a vacuum
to the chamber holding the sample bottle.
Two different types of cap are supplied with the Bottle Sampler:
•
•
Vacuum cap - a blank cap, used when de-aerating the fluid.
Pressure cap - used when delivering a fluid sample to the analyser.
This cap incorporates an anti-vacuum valve.
The Bottle Sampler is designed to accept 100ml and 110ml bottles.
Due to the limited fluid volume available and the requirement of a 3
minute flush period prior to a sample test, the moisture sensor test
should not be performed utilising the bottle sampling method.
Introduction
7
4 Procedure
Refer to key drawing on page 6.
1. Draw off a sample of oil (80 ml. minimum) from the system into
the bottle provided. If this is impractical then use the hand pump,
clean bottle and hose provided to draw off a sample of fluid.
Note: Please ensure that the pump and hose are cleaned with an
appropriate filtered solvent (i.e. petroleum ether) prior to the sample
being taken.
Sample bottles and associated products are to be cleaned in accordance with the instructions on page 11.
Important! Do NOT use acetone.
2. Insert waste fluid hose into the waste bottle provided.
3. Connect waste fluid hose to analyser (waste connector).
4. Connect the 12V DC supply to bottle sampler, using power adaptor
supplied.
4.1 De-aeration
For full compliance please refer to standard BS11500:2008
5. Agitate sample for minimum 60 seconds.
6. Place the sample bottle into the bottle sampler.
8
Procedure
7. Fit the vacuum cap to the bottle sampler.
8. Turn knob to select vacuum (note: the intermediate position between
vacuum and sample performs no function)
9. Switch ON the bottle sampling unit and leave running for several
minutes, until all air bubbles have been removed from the fluid sample.
10. Switch OFF the bottle sampler - this automatically vents the chamber to atmosphere.
Always switch off the bottle sampling unit before turning the vacuum/ sampling knob.
4.2 Operating with Particle Analyser
11. Fit a new disposable tube into the pressure cap, and fit the cap to the
bottle sampler.
12. Connect test hose (0.6m) to bottle sampling connection.
13. Connect test hose to particle analyser.
14. Switch ON the particle analyser.
15. Select Triple or Bottle Sampling option.
16. Enter test details, for more information refer to the particle analyser
user guide.
17. Rotate selector knob to Sample position.
18. Switch ON the bottle sampler.
Procedure
9
19. Flush the analyser for a minimum of 10 seconds.
20. Start the test.
The Bottle Sampling Test is a three test analysis, as described in the
analyser user guide.
21. Upon test completion, after the emptying cycle is completed, switch
OFF the bottle sampler - this automatically vents the pressurised
chamber to atmosphere.
22. Switch OFF the particle analyser.
10
Procedure
5 Sample Bottle Cleaning
Procedure
For optimum results the bottle sampling procedure should only be
taken when the procedure for qualifying and controlling methods for
sampling containers and products conform to ISO 3372.
However, the following routine may be utilised, if the above routine
cannot be completed:
•
•
•
•
Half fill the sampling bottle with the fluid to be analysed.
Re-cap the bottle and shake vigorously for 30 seconds.
Dispose of the fluid (in accordance with current COSHH legislation).
Repeat the above procedure another two times.
When bottle is filled, fourth time, this is the sample that will be
analysed.
Sample Bottle Cleaning Procedure
11
6 Information
6.1 Warranty
The BS110 is guaranteed for 12 months upon receipt of the Bottle Sampler, subject to it being used for the purpose intended and
operated in accordance with this User Guide.
6.2 Spare Product / Part Numbers
Please see website for details:
www.mpfiltri.co.uk
6.3 Flushing Fluids
DO NOT USE ACETONE
For information about the items on this page please see the website:
www.mpfiltri.co.uk
12
Information
7 Fault Finding
FAULT
CHECK
Unexpected results
obtained from sample
Check that the test hose has been fully
connected at both the bottle sampler and
the particle analyser ends.
Confirm that there is a free flow of fluid
to the particle analyser, by operating the
flush valve and observing fluid passing
to waste.
Bottle sampler not
reaching required
pressure.
Fault Finding
Re-oil o-ring in top of bottle sampler chamber.
Check valve in pressure cap is still able
to move around, if not flush with air or
Isopropyl Alcohol.
13
14
Fault Finding
Produced by MP Filtri UK
Revision 6.1
As a policy of continual improvement, MP Filtri UK reserve the right to
alter specifications without prior notice.
Except as permitted by such licence, no part of this publication may be
reproduced, stored in retrieval system or transmitted, in any form or any
means, electronic, mechanical, recording, or otherwise, without prior written permission of MP Filtri UK.


